
Overview
This is my new and improved guide for LEGO Indiana Jones: The Original Adventures! In an effort to make my guides more helpful and engaging, I have decided to rework them! I would appreciate any feedback you guys have about this new format, so be sure to leave a comment or shoot me a direct message!In this guide you will find:-A rundown of Gameplay Basics-A tour of Barnett College-How to beat each level in Story Mode-The locations of all 10 Treasure Chests and the Red Parcel in each level in Free Play Mode-Walkthroughs for all three Bonus levels, including how to unlock them-Full lists of Characters, Minikit Models and Extras-A full list of Cheat CodesThese guides have always been and will always be free. However, working on these guides takes considerable time and effort. If you like the guide, feel free to show your appreciation with a Steam Award! I appreciate all the points and support you guys have given me!
Gameplay Basics – The Whip
Indiana Jones is famous for his whip, and in this game he can use it to do a variety of things.
Pressing the “special” button will cause Indy to crack his whip. If he hits an enemy, he will grab their weapon if they have one. If they do not have a weapon, he will stun them. If Indy hits Marion, Willie or Elsa, he will pull them in for a kiss!
If an object has a blue triangle over it, Indy can use his whip to grab it. Press the “special” button to grab the object. This is often used to grab an object that is out of reach, either because it is in a hazardous area or because it is on another ledge.
Gameplay Basics – Combat
Indy has many enemies, and you’ll be fighting lots of them as you play through the levels. Combat in this game is relatively simple, but I figured I’d share some interesting things here. Your partner can actually be helpful in combat, as they can stun enemies for you.
Pretty much all characters in the game have melee attacks, requiring you to get up close and personal with your attackers. Melee attacks come in three-hit combos, with each punch or kick doing one hit of damage. If you press the attack button at the same time that an enemy is going to attack you, some characters will perform a special move that either instantly defeats them (such as Indy or the Enemy Boxer) or stuns them temporarily (such as Short Round or Mola Ram).
Some characters are equipped with ranged weapons such as guns and bazookas. These can be used to take out enemies from a distance. In many instances, you can find ranged weapons in the environment, either lying around or dropped by enemies. You can pick up these weapons and use them. However, they have a limited supply of ammo, so make your shots count.
Some characters are armed with spears. While spears can be used as melee weapons, they can also be thrown at enemies. Press the special button while an enemy has blue triangles around them to throw your spear at them. This can also be done with swords.
Swords and shovels are unique melee weapons in that they can deflect bullets. Swing your sword or shovel before a bullet hits you to deflect it away from you. Unfortunately, you cannot send the bullets straight back to the attacker.
Wrenches can also be used in combat, although they are essentially useless as you attack rather slowly with them.
Lastly, pretty much any object in the environment that has a blue triangle over it can be picked up and thrown at enemies to damage them. This includes, torches, bottles and chairs.
Gameplay Basics – Phobias
Indy is famous for his fear of snakes, and like him, other characters have phobias. When a character approaches something that they are afraid of, they cower in fear. They will walk very slowly and be unable to jump or interact with anything in the environment. You can make a character stop cowering by either defeating the animals that they are afraid of, or by lighting a fire to scare the animals away. This doesn’t come up very often, but it is important to know how to deal with it.
Gameplay Basics – Collectables
To get 100%, you gotta collect everything. There are lots of things to collect, so it’s important to know what you are looking for! You can check your overall collectable progress by standing in front of each movie’s billboard.
Studs

True Adventurer
Collecting studs is essential if you want to reach True Adventurer status. Collecting studs in a level will reveal a stud bar in the top center of the screen. As you collect studs, the stud bar will gradually turn yellow. Once you fill the stud bar, you will achieve True Adventurer status, which will provide you with an extra 25,000 studs upon completion of the level. Once you achieve True Adventurer in a level, you cannot lose it. Even if you lose all the studs in a level after achieving True Adventurer, you will not lose it.
Treasure Chests
Red Parcels

Gameplay Basics – Game Modes
This game has plenty of levels for you to play, with 18 story levels and 3 bonus levels. There are several different game modes you can play, which I’ll describe here. I also describe how I structure the walkthroughs for each game mode.
The first time you play a story level, you will be playing Story Mode. As you might expect, you will be playing through the story of whatever movie you select. You will only have access to the characters that the game gives you. Generally, your exploration is limited due to the characters you have, meaning you’ll have to come back in Free Play Mode to unlock the collectables you couldn’t collect in Story Mode. After completing a level in Story Mode, you can select the Replay Story option to replay the level in Story Mode.
At the top of my Story Mode walkthroughs, I list the enemies you’ll encounter and any bosses you will fight. I also list both your starting characters and any characters that are added as you progress. Finally, I list the True Adventurer total for that level. Each level is split up into parts, which I sometimes call areas. Each part is a distinct area of the level, separated from other areas by a screen wipe (it will be very obvious when you enter a new area). Below each part, I explain what to do in that part to progress in the level. I do not include the locations of any collectables, even if you can collect them in the story. At the end of the walkthrough, I list any characters you unlocked. If you need to purchase these characters, I have also included their cost in studs.
After completing a level in Story Mode, you will be able to play it in Free Play Mode. In Free Play Mode, you can select a character from all the ones you’ve unlocked to take into the level. The game will then give you a selection of other characters to cover all of the abilities you have unlocked. In Free Play Mode, your goal is to find all of the collectables. At any point in Free Play Mode, you can save and exit to return to the College without having to complete the level.
My Free Play Mode walkthroughs are also divided into parts, as I believe this makes them easier to navigate. At the top of the walkthrough will be a list of the abilities you’ll need to collect all of the collectables in that level. Free Play Mode walkthroughs contain the locations of all 10 Treasure Chests and the Red Parcel, even if they can be collected in Story Mode. Screenshots are also included to add clarity to the walkthrough. At the end of the walkthrough, I have listed the Minikit Model and the Red Parcel you can unlock (and its cost) by collecting the Treasure Chests and Red Parcel.
Gameplay Basics – Character Abilities
As you play through the levels, you will notice many things that you can do. However, not all characters will be able to do them! This is because each character has certain abilities, and in order to collect all the Treasure Chests and Red Parcels, you’ll need to make use of their abilities to unlock new areas of the levels to explore.
Here is a quick rundown of all the abilities characters can have. For detailed information on who has these abilities, see the “Characters” sections towards the bottom of this guide.
Dig

Explosive

High Jump
Mechanic
Scholar

Scream

Small

Soldier

Sword

Thuggee

Whip

Tour of Barnett College
As it is the main hub of the game, it is important to know your way around Barnett College. There are many things you can do here, so let’s take a tour!


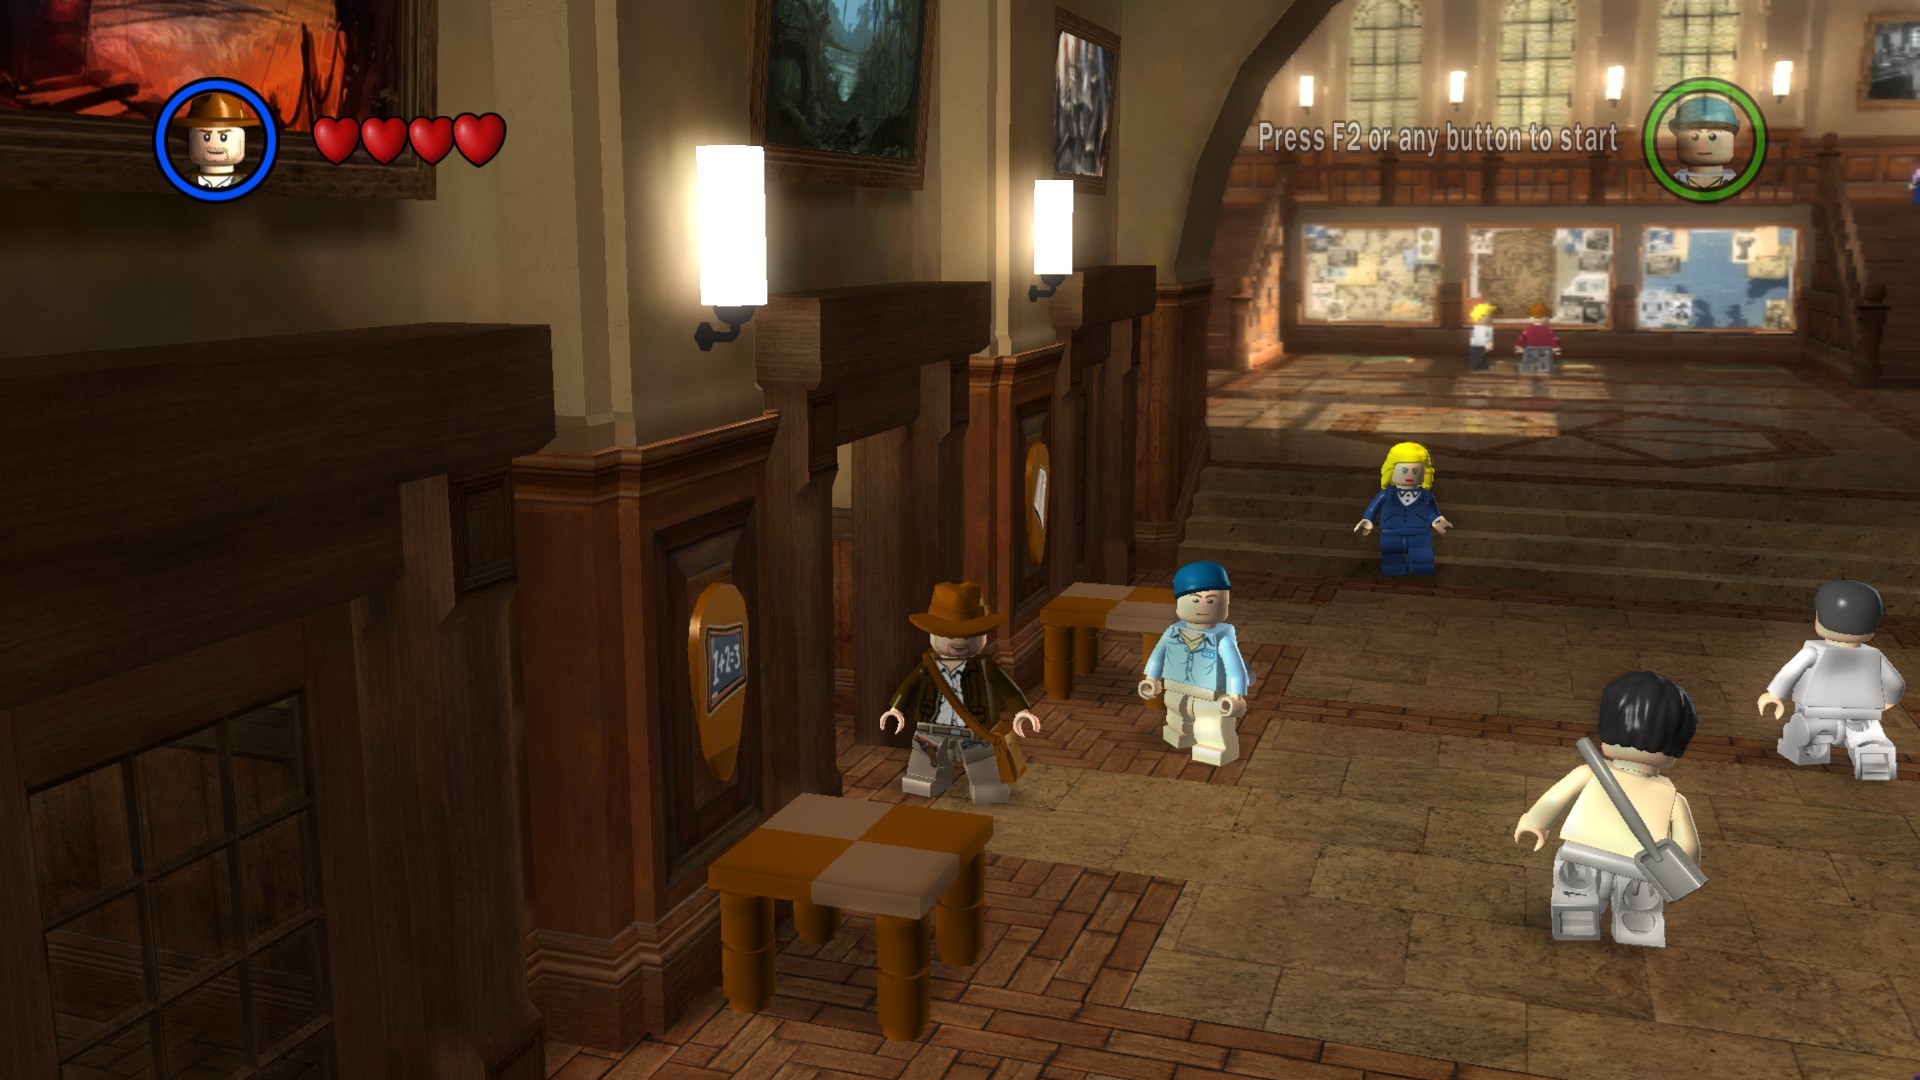


An important thing to note is that when you create a new game, you will immediately be placed into The Lost Temple. While you can quit to Barnett College without completing that level, you will have to complete it before you’re able to play through The Temple of Doom or The Last Crusade.
The Lost Temple – Story Mode
Enemies: Spider, Crocodile, Large Insect, Hovitos Tribesman
Starting Characters: Indiana Jones, Satipo
Added Characters: Jock
True Adventurer: 30,000
Part 1 – Jungle
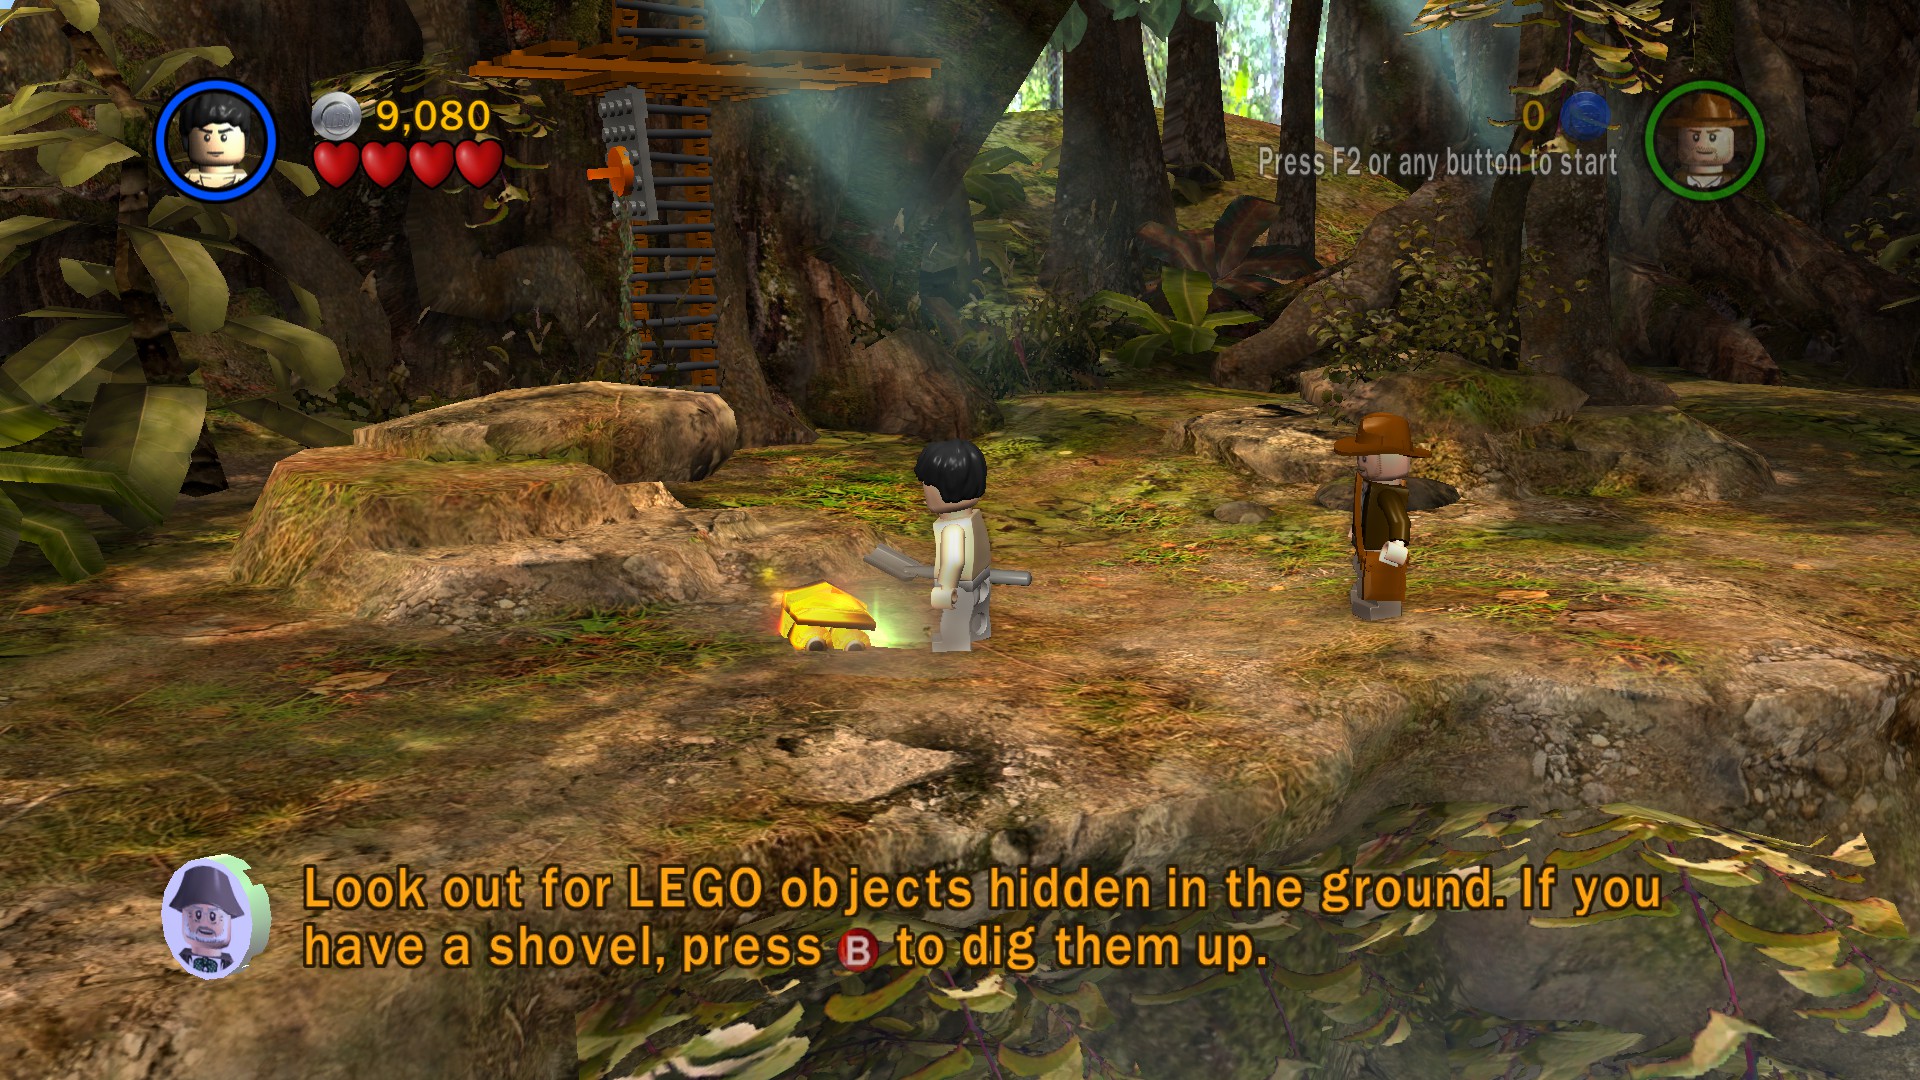
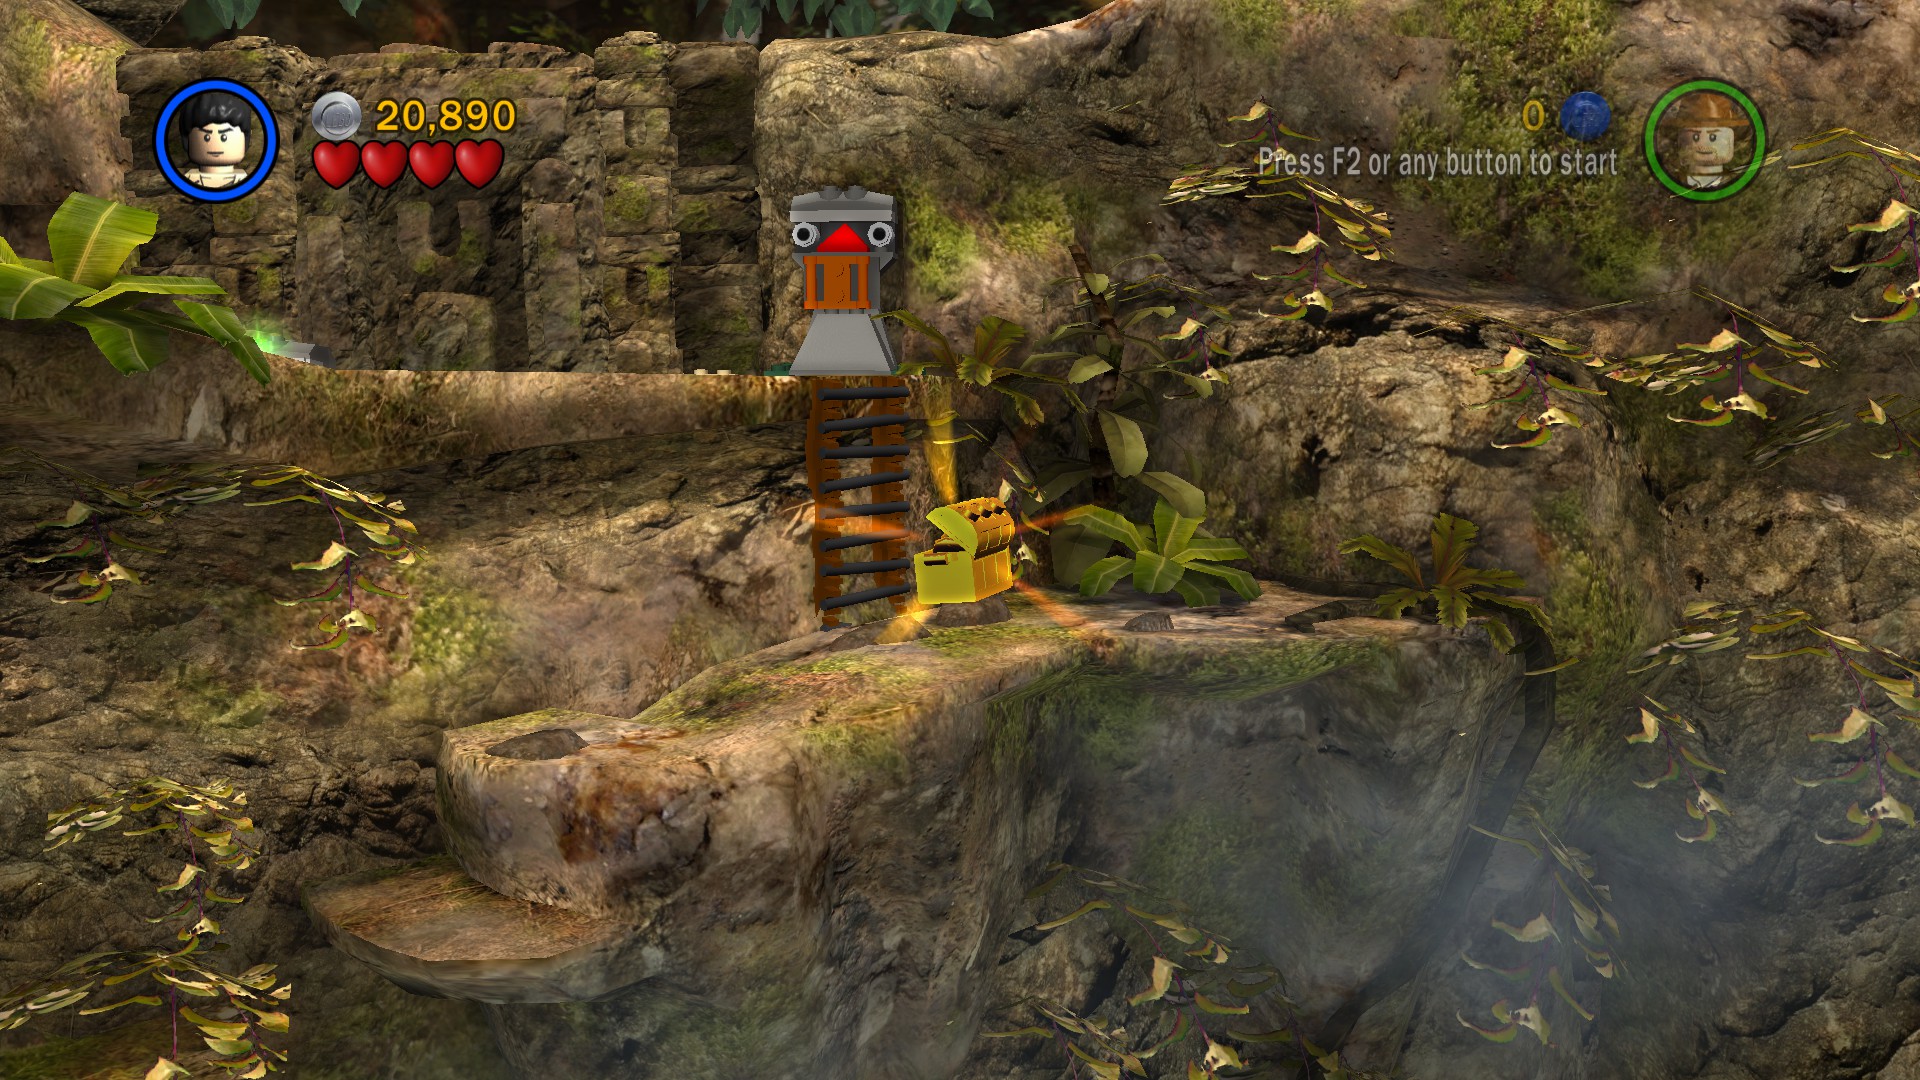
Well, our friends didn’t last long did they? Looks like it’s up to you and Satipo to reach the temple. Head to the right and hop onto the vine to grab onto it. Hop across the gap, then continue to the right. Watch out for the button on the ground, as stepping on it will launch an arrow at you. Punch the stone face if you want to rotate it. This will make the button safe to step on (it will even spit out a silver stud!). Use the whip pad on the right to swing across the gap. Destroy the structure next to the whip pad to release the vine, allowing Satipo to join you. Next to the whip pad, you’ll find some LEGO pieces in the ground. Dig them up, then pick up the object. Carry it to the right and place it on the green panel to create a bridge. Cross it and continue to the right. Watch out for the large button on the ground, as stepping on it will activate a spear trap. Continue to the right and you’ll find the path blocked by a stone wall. On the right side of it is a statue. Push it along the tiles to reveal a button. Step on it to partially lower the wall. In front of the wall, you’ll find some LEGO pieces in the ground. Dig them up, then pick up the object and place it on the statue on the left. Push it into the wall to reveal a button, then step on it to lower the wall, revealing an opening. Continue to the right.
Part 2 – Waterfall
Here you’ll find yourself by some water. You need to cross the water to the other side. Be careful not to fall in the water, as the crocodiles would love to take a bite out of you. Instead, build the LEGO pieces into a raft, then hop in. Satipo can use his shovel to paddle the raft to the right. Hop onto the dock and continue up the path. Watch out for the small hexagonal panels on the ground. Stepping too close to them will reveal a spear. You can actually pick them up if you want and use them to defend yourselves against the large insects that appear to attack you. When you’re ready to move on, grab onto one of the vines. Your partner will grab onto the other one, revealing an opening. Head inside.
Part 3 – Temple Interior
Grab onto the bar on the left, then climb up the ladder. Hop onto the platform on the right, then use the whip pad to swing across the gap. Pick up the box and place it on the green button in the center. This will lower the spears on the center platform below you. Satipo will drop back down. You need to lower the spears so Satipo can cross the platforms. Step on the button on the left to lower the spears on the platform on the left. Once Satipo is on the center platform, step on the button on the right to lower the spears so Satipo can cross. Once Satipo is across the gap, he will turn the key. This will lower all of the spears, so drop back down and hop across the platforms to the right. Continue to the right and use the whip pad to reveal LEGO pieces. Build them into a ladder, then climb up and grab onto the vine. Swing and hop onto the ledge on the right, then continue. Cross the bridge (watch out for the planks that fall) and you’ll find another closed door with panels in front of it. You’ll notice that some of the panels are a darker shade than the others. Hop onto the darker panels and they’ll raise up, allowing you to cross the panels safely (step on the light panels and you’ll get hit with darts). Once you step on all four dark panels, the door will open. Continue along the path and through the opening at the end.
Part 4 – Idol Room
A hint will flash onscreen telling you that you need to find a key for the mechanism. Fortunately, one is right nearby. Grab the vine to your left to reveal the key, then pick it up and place it in the slot. Turn the key to move the platforms around, creating a path to the idol in the center. Head towards the idol to trigger a cutscene.
Uh oh. Time to get out of here! You’ll notice a door opening up in the background. The platforms will also start moving around, and they will eventually stop moving and begin moving the other way. Hop across the platforms to reach the opening, then head inside. If you fall, simply head to the left and climb up the ladder.
Part 5 – Collapsing Temple
Head to the right and double jump to dive forward. You should grab the vine, so use it to swing across the gap. Continue to the right and you’ll notice a falling statue. These will chase you as you proceed to the right, so watch out! If you need to, you can take shelter in the alcoves to let them pass. Continue to the right and grab the vine, then use it to swing across the gap. You’ll notice the path ahead blocked by boards. To clear the path, grab one of the hanging vines. Your partner will grab the other. This will extend a platform to your left, catching one of the falling statues and sending it crashing through the boards. Head through the opening.
Part 6 – Boulder Chase
Not much to say here, just run. Watch out for the pits and try not to get caught on the plants. Once you reach the end (or get crushed by the boulder) a cutscene will play.
Part 7 – Start the plane, Jock!
With Satipo revealed as a traitor, we now have Jock in the group. Head down the hill to the left and you’ll see the plane. Unfortunately, it’s broken, so you’ll need to repair it. You will be hounded by waves of Hovitos tribesman, so dispatch them as necessary. Some will drop weapons (either spears or crossbows) that you can pick up if you want. When you’re ready to repair the plane, look near it to find two green panels. We’ll need to find two boxes to place on the panels. The first box is just to the right of the panels. To find the second box, head to the left side of the plane and you’ll find it out in the water. Use the whip pad to grab it, then place it on one of the panels. Once both boxes have been placed on the panels, build the LEGO pieces onto the plane. It will still be smoking, so hop onto the boxes and onto the top of the plane. Use Jock and his wrench to repair the plane, completing the level.
Unlocked Characters: Indiana Jones, Satipo, Jock, Hovitos Tribesman (18,000), Barranca (18,000), Belloq (Jungle) (50,000), Jungle Guide (18,000)
The Lost Temple – Free Play Mode
Required Abilities: Dig, Explosive, Scholar, Scream, Thuggee
Part 1 – Jungle
Treasure Chest 1

Treasure Chest 2


Part 2 – Waterfall
Treasure Chest 3

Treasure Chest 4


Part 3 – Temple Interior
Treasure Chest 5

Part 4 – Idol Room
Treasure Chest 6


Secret Character – C-3PO


Part 5 – Collapsing Temple
Red Parcel


Treasure Chest 7

Part 6 – Boulder Chase
Treasure Chest 8

Part 7 – Start the plane, Jock!
Treasure Chest 9


Treasure Chest 10

Minikit Model: Giant Hovitos Idol
Red Parcel Extra: Fast Fix (30,000)
Into the Mountains – Story Mode
Enemies: Sherpa Brawler, Sherpa Gunner, Enemy Guard (Mountains)
Boss: Major Toht, Sherpa Gunner
Starting Characters: Indiana Jones, Marion
True Adventurer: 35,000

Part 1 – Marion’s Bar
Time to leave the bar. Head to the right and you’ll find flower symbols on the floor. High jump onto the bar to knock the key to the ground. Pick it up and place it in the slot, then turn it to open the door.
Uh oh. Toht has come for the medallion, and we need to fight him off. Unfortunately, every time you walk up to him, he will run away. To damage him, grab a chair or bottle and throw it at him. Take him down three hearts and he will come and fight you himself. Smack him one more time to trigger a cutscene.
After the cutscene, you’ll be fighting a Sherpa with a machine gun. Like Toht, you need to damage him by throwing chairs and bottles at him. Once he’s down to one heart, he will hop down and fight you, so smack him to take out his final heart. Once he’s defeated, Toht will appear again. Throw stuff at him to take out two hearts. He will then chase after you, so smack him one more time to defeat him.
Part 2 – Mountain Village
Head to the right and you’ll find a bunch of silver posts. Grab a nearby torch, then walk near the dynamite to light it. It will explode, destroying the silver posts and revealing LEGO pieces. Build them into a platform, then pick it up and carry it to the right. Place it in the slot. Now we need to repair that generator. Destroy the box to the left to reveal a wrench, then pick it up and use it to repair the generator. This will start the platform moving, so ride it up and grab the bar. Shimmy to the right, then use the whip pad to swing across the gap. Build the LEGO pieces onto the bridge, then push it to the left, allowing Marion to join you. Head to the right and high jump onto the ledge, then push the barrel off the edge to reveal LEGO pieces. Build them into dynamite, then head back to the left. Grab a torch, then head back right. Walk near the dynamite to light it, causing it to explode and clear the path. Continue to the right.
Part 3 – Mountain Pass
Head to the right and use the whip pad to swing across the gap. Destroy the barrel to reveal LEGO pieces, then build them into a bar, allowing Marion to join you. Continue to the right and high jump onto the ledge, then turn the key to open the doors. Destroy the statue on the right to reveal LEGO pieces. Build them into a bar, then hop onto it. Hop onto the upper ledge, then push the statue to the left off the ledge to reveal LEGO pieces. Build them into a platform, then pick it up and carry it to the right. Place it in the slot, then repair the generator (if you need a wrench, you can find one by destroying the left statue). This will start the platform moving, so catch a ride up to the ledge. Continue to the right, hopping across the gaps. Eventually, the ice will collapse under you and you’ll fall down. Hop up the bars, then continue to the right and into the temple.
Part 4 – Temple
Head to the right and you’ll see a large statue. Push it to the far left side of the tiles. You’ll notice a sort of shelf looking object in front of you. Destroy it to reveal a shovel, then head to the right. You’ll find a spot you can dig in the snow, so do so to reveal a key. Pick it up, then place it in the slot on the left. Turn it to lower the rope to your left, then grab on and climb up. Grab onto the bar on the right, then continue to the right across the bars and ledges. Hop on top of the statue, then switch to your partner. Push the statue all the way to the right and you partner will hop onto a large button. Switch to them, then build the LEGO pieces into a rope, allowing your partner to join you. Step on the button with your partner to raise up some bars, allowing you to continue to the right. Hop onto the bar and shimmy to the right, then drop down onto the circular platform. Grab onto the rope, then hop to the right and head up the stairs.
Part 5 – Mountain Street
Head to the right and you’ll notice a large silver box. We’ll need a bazooka to destroy it. Fortunately, we can find one nearby. Head back left and hop onto the alpaca, then ride it onto the orange button. This will start the nearby platform moving, so catch a ride to the upper ledge, where you’ll find a bazooka. Grab it, then drop down and head back right. Destroy the silver box to reveal LEGO pieces. Build them into a rotary handle, then turn it to raise up the bridge. Cross the bridge, then shoot the silver truck until it explodes, revealing an open gate. Head through the opening to complete the level.
Unlocked Characters: Marion, Major Toht (50,000), Colonel Dietrich (50,000), Enemy Guard (Mountains) (30,000), Bazooka Trooper (Raiders) (30,000), Sherpa Brawler (18,000), Sherpa Gunner (25,000)
Into the Mountains – Free Play Mode
Required Abilities: Dig, Explosive, High Jump, Mechanic, Scream, Small, Soldier, Whip
Part 1 – Marion’s Bar
Treasure Chest 1

Treasure Chest 2


Part 2 – Mountain Village
Treasure Chest 3


Red Parcel


Treasure Chest 4


Treasure Chest 5

Part 3 – Mountain Pass
Treasure Chest 6

Treasure Chest 7

Secret Character – Luke Skywalker

Part 4 – Temple
Treasure Chest 8


Into the Mountains – Free Play Mode cont.
Part 5 – Mountain Street
Treasure Chest 9


Treasure Chest 10
Minikit Model: Nepalese Altar
Red Parcel Extra: Super Slap (25,000)
City of Danger – Story Mode
Enemies: Bandit Swordsman, Masked Bandit, Enemy Soldier (Desert), Enemy Officer, Bazooka Trooper (Raiders)
Starting Characters: Indiana Jones (Desert), Marion (Cairo)
True Adventurer: 50,000

Part 1 – Monkey Business
Grab a banana from the box and toss it to the monkey. The monkey will toss you the wrench, so use it to repair the machine on the left. This will start the platform moving, so ride it onto the upper ledge. Head through the opening.
Part 2 – Market
Head down the stairs and to the right. You’ll see the way out of here, but the gate is locked by some bars. We’ll need to find two keys to retract the bars. Head back to the left and you’ll see a monkey on the ledge above you. Grab a banana from the market stall on the left, then toss it to the monkey to receive the shovel. Destroy the objects to the left of the lever to reveal LEGO pieces, then build them onto the ladder. Dig up the lever next to it, then pull it to raise up the ladder. Climb up to reach the upper ledge, then bounce to the left to reach the ledge with the key. Pick it up, then head right and place it in one of the slots. Turn it to retract one bar, then head to the right into the alcove. Push the cart to the left, then high jump onto the awning. Bounce onto the top of the cart, then grab the rope to raise up a platform. Hop onto it, then onto the ledge with the key. Pick it up and place it in the other slot, then turn it to retract the other bar, opening the gate. Head through the opening.
Part 3 – Street Corner
Head to the right and you’ll see a large cart. Destroy the box to the right of it to reveal LEGO pieces. Build them into a handle, then pull the cart to the right, revealing an alleyway. Head inside.
Part 4 – Alleyway
Head down the path and up the steps. You’ll find a monkey on a ledge, so use the whip pad to tear down the small fence. This will allow you to throw him a banana, so grab one from the box on the right. He’ll give you some dynamite, so throw it at the silver barrel to destroy it. This will lower the ladder, allowing you to climb up. Climb onto the ledge, then head through the archway.
Part 5 – Rooftops
Head down the path towards the glass dome. Push the handle to the right to reveal steps, then walk up them. Push the ball to the right and it will knock over a board, creating a bridge. Continue to the right down the path. Be careful crossing the boards, as they’ll collapse if you stand on them too long. At the end of the path you’ll find a monkey. Grab a banana from the box and toss it at him to receive a key. Place it in the slot, then turn it to extend a bridge. Head across, then look to the left and you’ll see two green panels. We need to find two boxes. Grab a banana from the box on the left, then toss it at the monkey in the background to receive a wrench. Use it to repair the generator on the left. This will retract the awning, revealing the first box. Pick it up and place it on one of the green panels, then head to the right. Use the whip pad to swing across the gap, then destroy the large gate to reveal LEGO pieces. Build them into a bridge, then pick up the box and walk back to the left. Place it on the other green panel. When both boxes are on the green panels, build the LEGO pieces into a prybar. Grab onto the bar to pry open the hatch, then drop down inside.
Part 6 – Military Base
Head to the right and you’ll find a bunch of enemy soldiers walking around. Find an officer and defeat him, causing him to drop his hat. Put it on and use the Soldier panel on the right to open the door. Head inside and you’ll find a broken down truck. Build the LEGO pieces in front of it onto the truck. It will then start smoking. Destroy the nearby trashcans to reveal a wrench, then pick it up and use it to repair the truck. Once the truck is fixed, hop in and drive through the gate. Continue to the right and drive through the next gate. Head through the archway to complete the level.
Unlocked Characters: Indiana Jones (Desert), Marion (Cairo), Masked Bandit (18,000), Bandit Swordsman (25,000), Enemy Soldier (Desert) (18,000), Enemy Officer (30,000), Monkey Man (27,500)
City of Danger – Free Play Mode
Required Abilities: Explosive, Scholar, Scream, Small, Soldier, Whip
Part 2 – Market
Treasure Chest 1

Treasure Chest 2

Treasure Chest 3


Part 3 – Street Corner
Treasure Chest 4


Treasure Chest 5


Treasure Chest 6


Part 4 – Alleyway
Treasure Chest 7


Part 5 – Rooftops
Treasure Chest 8

Treasure Chest 9


City of Danger – Free Play Mode cont.
Part 6 – Military Base
Treasure Chest 10

Secret Character – Chewbacca


Red Parcel


Minikit Model: Monkey Statue
Red Parcel Extra: Treasure x2 (1,000,000)
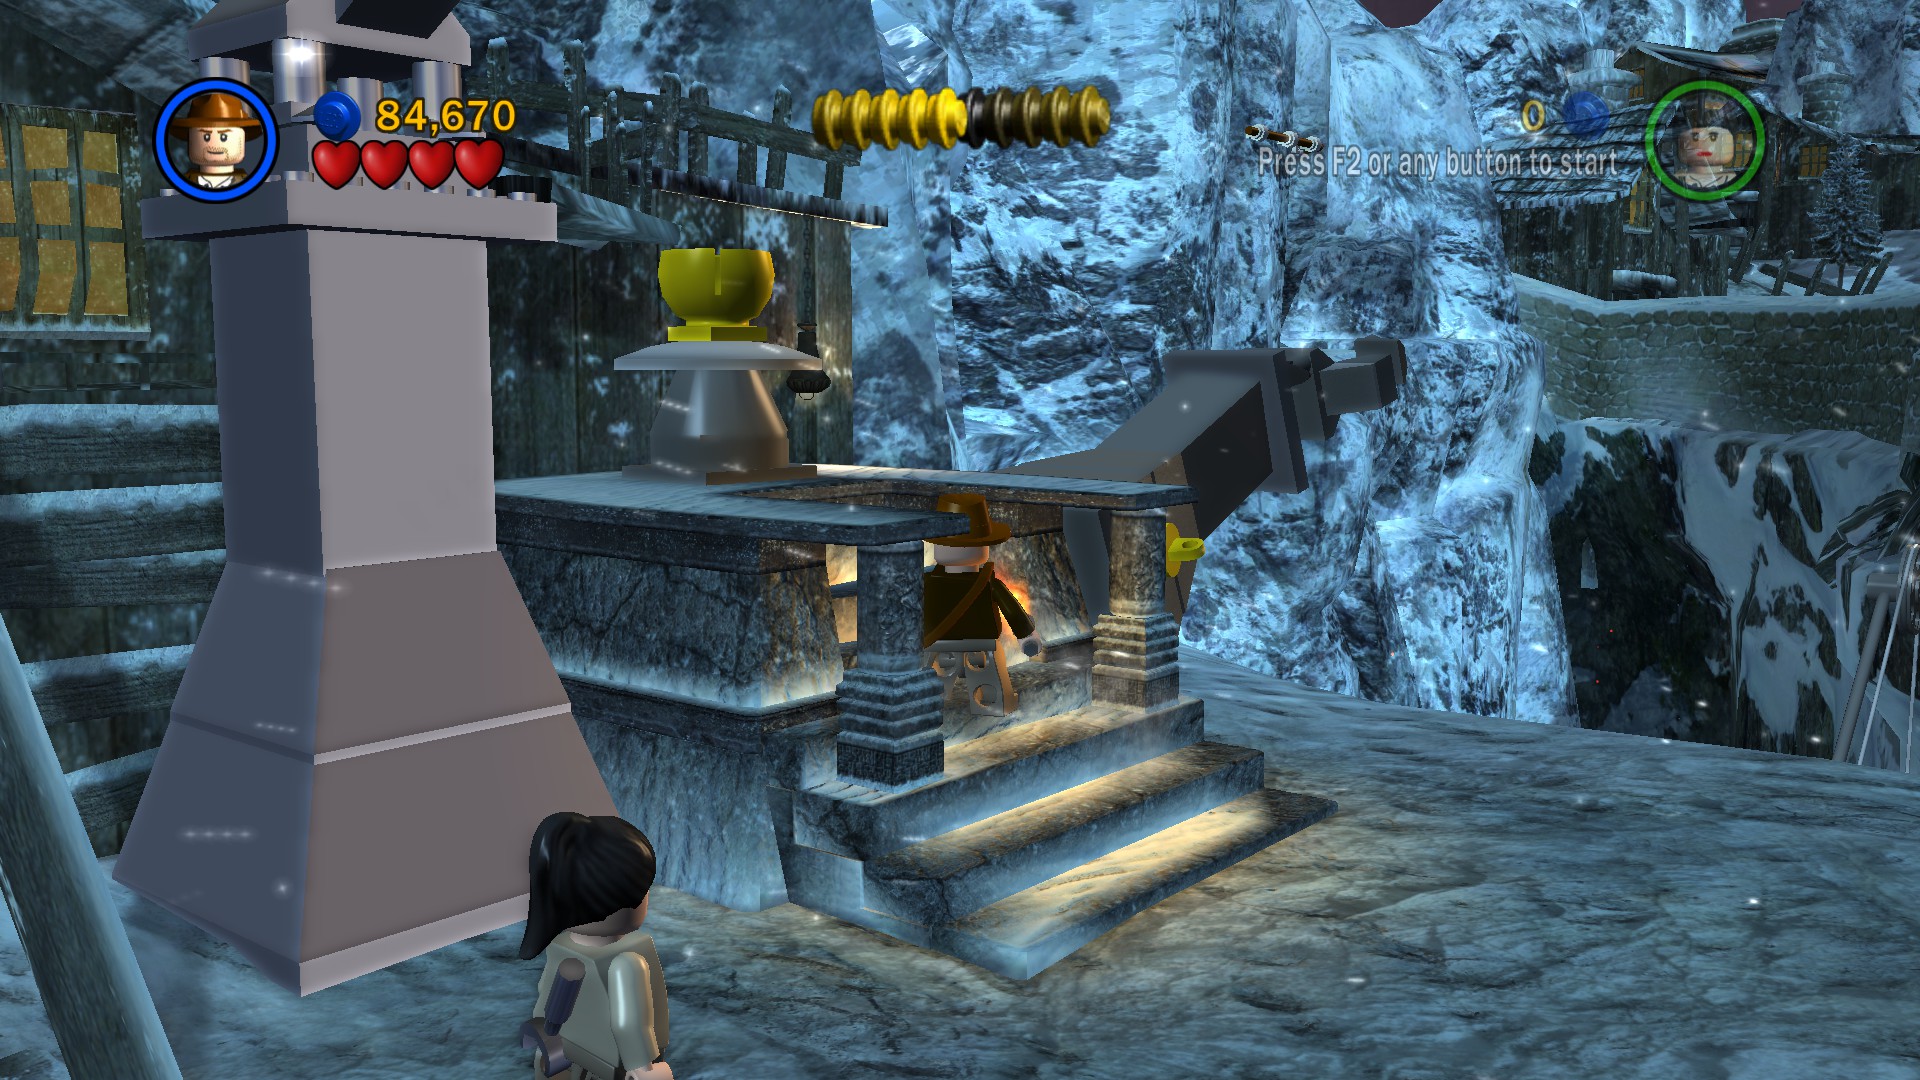
The Well of Souls – Story Mode
Enemies: Snake, Beetle
Boss: Large Snake
Starting Characters: Indiana Jones, Sallah (Desert)
Added Characters: Marion (Evening Dress)
True Adventurer: 57,000

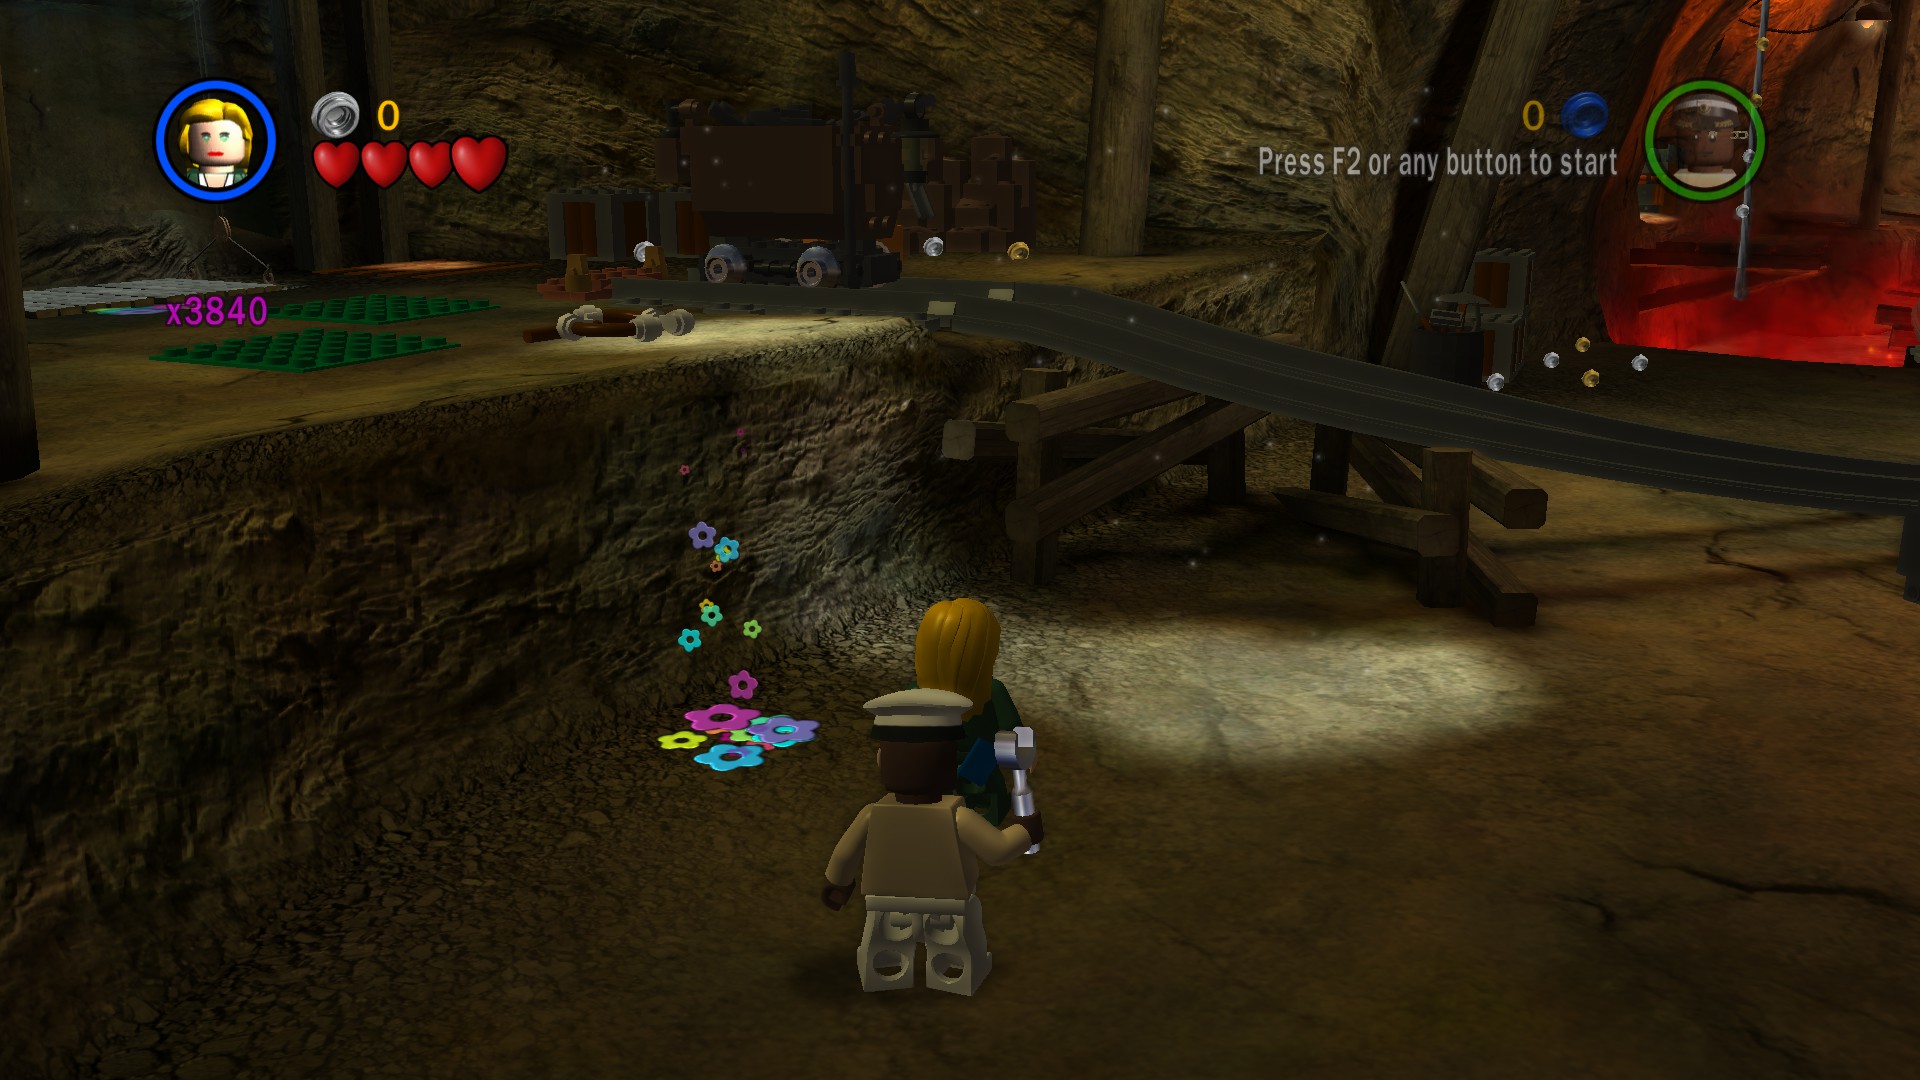
Part 1 – Why’d it have to be snakes?
The platform you are standing on is surrounded by snakes, so be careful not to fall in. Use the whip pad to extend a platform. Indy will cower in fear, so hop onto the platform as Sallah. Push the statues along the tiles to reveal LEGO pieces and a torch. Build the LEGO pieces into a fire, then use the torch to light it. This will scare the snakes away, allowing Indy to join you. Step on one of the buttons and your partner will step on the other, opening the door. Head inside.
Part 2 – Passageway
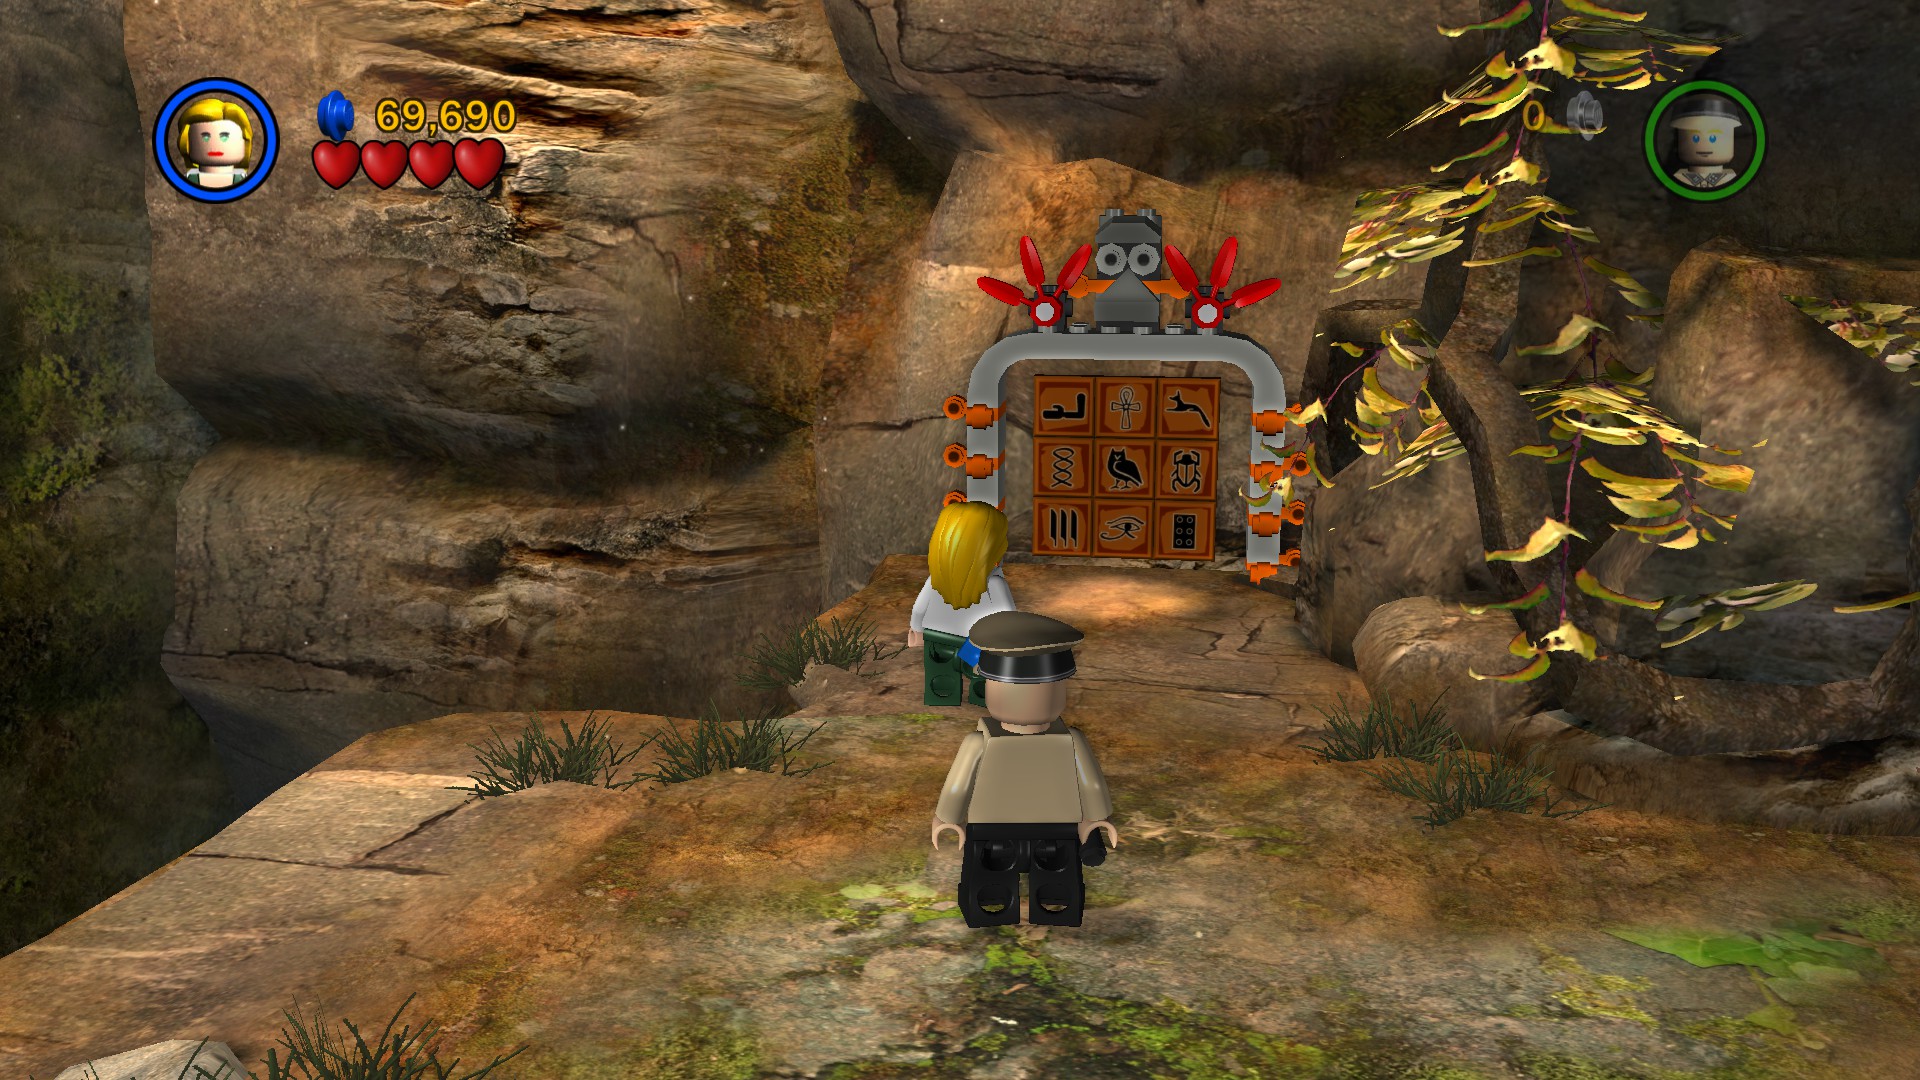
Continue down the path, watching out for the buttons (as they’ll activate spear traps). At the end of the path you’ll find a hieroglyph puzzle. Destroy the urn on the left to reveal a book, then pick it up use it to solve the hieroglyph puzzle. This will open the door. Head inside.
Part 3 – Sphinx
Walk towards the stairs in the back and they will turn into a ramp, preventing you from walking up. The key will also slide down the ramp, so pick it up and place it in the slot on the right. Turn it to reveal a stone wall, then smash it to reveal some LEGO pieces. Build it into the head of a statue, then pick it up and carry it to the left. Place it on the slot to restore the stairs, allowing you to walk up. Head up the stairs and you’ll find a sphinx. We need to place two jewels in its eyes. Grab the jewel on the left, then stand on the platform on the left to be raised up. Place the jewel in the sphinx’s eye, then drop back down. Grab the platform on the sphinx’s right paw, then place it on the green panel. To get the other jewel, we have some work to do.
Head back down the stairs. You’ll notice there are four pillars in the room. Push the handle on the bottom left pillar so the platform on it faces towards the top left pillar. Head to the right and pick up the handle, then place it in the slot on the top right pillar. Pull it so the platform on the pillar is facing to the left. With the pillars in place, head to the bottom left pillar and have Indy climb up the rope. Hop onto the bottom left pillar, then hop across the gap to the top left pillar. Switch to Sallah and pull the handle on the top left pillar so the platform faces to the right. This will reveal a whip pad, so use it to swing onto the top right pillar. Switch to Sallah and push the handle on the top right pillar so the platform faces the bottom right pillar, then switch back to Indy. Hop onto the bottom right pillar, where you’ll find the other jewel. Pick it up and carry it up the stairs, then step on the platform on the right to be raised up. Place the jewel in the sphinx’s eye. Once both jewels are in position, the door will open. Head inside.
Part 4 – Ark Chamber
There are three yellow orbs we need to get in position. First, smash the rock wall on the left to reveal a platform. Pick it up, then carry it to the right and place it on the green panel. This will allow you to place an orb in the center slot. The first orb is just chilling in the left side of the room. Pick it up and place it in a slot, then head to the left. You’ll see another orb buried in the sand, so dig it up and place it in another slot. Head to the right and you’ll find a book buried in the sand. Dig it up, then use it to solve the hieroglyph puzzle. This will reveal some bars to the right. Hop up them and onto the ledge, then use your whip to grab the final orb. Place it in the final slot to reveal the Ark of the Covenant. Walk up to it.
Part 1 – Why’d it have to be snakes?
We’re back in the first area, but this time with Marion. Head to the left and you’ll find flower symbols. Hop onto the nearby platform as Indy, then switch to Marion. High jump onto the rope to raise up the platform, turning it into a whip pad. Switch to Indy and use the whip pad to swing across the gap, causing the statue to collapse through the wall. Cross the gap on the statue and head through the opening.
Part 5 – Antechamber
Head to the right and grab the bar, then shimmy to the right. Drop down onto the small ledge, then grab the vine and swing across the gap. Continue to the right and use the whip pad to swing across the gap. Smash up the cobwebs to find a shovel, then pick it up. Head left and dig up a lever, then pull it to extend a bridge, allowing Marion to join you. Grab onto one of the ropes and your partner will grab the other, opening the door. Head through the opening.
Part 6 – Hieroglyph Room
In the center of the area you’ll find some tiles. Build the LEGO pieces onto the pillar, then push it into the slot in the top left corner. Head to the right side of the room and you’ll see a gear. Pick it up and place it in the slot on the left, then head back to the right. Dig up the gear buried in the sand, then pick it up and place it in the slot on the left. With both gears in place, head back to the right and smash the urns to reveal a stone wall. Destroy it to reveal a key. Pick it up and place it in the slot, then turn it to raise the platform next to you. With everything in place, hop on top of the pillar you built earlier, then onto the nearby ledge. Hop across the ledges to the right, then step on one of the buttons. Your partner will step on the other, opening the door. Head inside.
Part 7 – Crypt
Head down the hall and through the opening at the end.
Part 8 – Escaping the Well
Head to the right. There are two ways to cross, and you’ll have to take both paths anyway. Start by using the whip pad to swing across the gap. Grab the shovel, then dig up the LEGO pieces buried in the sand. Build them into bars, then hop up and onto the ledge with the whip pad. Use it to lower the bridge, then cross to the right. Grab the key, then drop down onto the ledge on the right. Place the key in the slot, then switch to Marion. Head back left and high jump onto the ledge, where you’ll find another key. Pick it up and place it in the other slot, then turn it. Your partner will turn the other key, revealing a large snake. To damage it, grab torches and throw them at it. Once the snake is defeated, it will leave LEGO pieces behind. Build them into a lift, then ride it onto the ledge. Push the block out of the wall to complete this long level.
Unlocked Characters: Sallah (Desert), Marion (Evening Dress), Indiana Jones (Desert Disguise) (27,500), Belloq (50,000), Enemy Officer (Desert) (30,000), Bandit (15,000)
The Well of Souls – Free Play Mode
Required Abilities: Explosive, High Jump, Scholar, Sword, Whip
Part 1 – Why’d it have to be snakes?
Treasure Chest 1

Part 2 – Passageway
Treasure Chest 2


Treasure Chest 3


Part 3 – Sphinx
Treasure Chest 4


Treasure Chest 5

Part 5 – Antechamber
Treasure Chest 6

Treasure Chest 7


Part 6 – Hieroglyph Room
Treasure Chest 8


The Well of Souls – Free Play Mode cont.
Part 7 – Crypt
Treasure Chest 9


Part 8 – Escaping the Well
Treasure Chest 10


Red Parcel


Minikit Model: Anubis Statue
Red Parcel Extra: Fast Dig (50,000)
Pursuing the Ark – Story Mode
Enemies: Enemy Soldier (Desert), Enemy Officer (Desert)
Boss: Enemy Boxer
Starting Characters: Indiana Jones (Desert), Marion (Evening Dress)
Added Characters: Sallah (Desert)
True Adventurer: 47,000

Part 1 – Dig Site
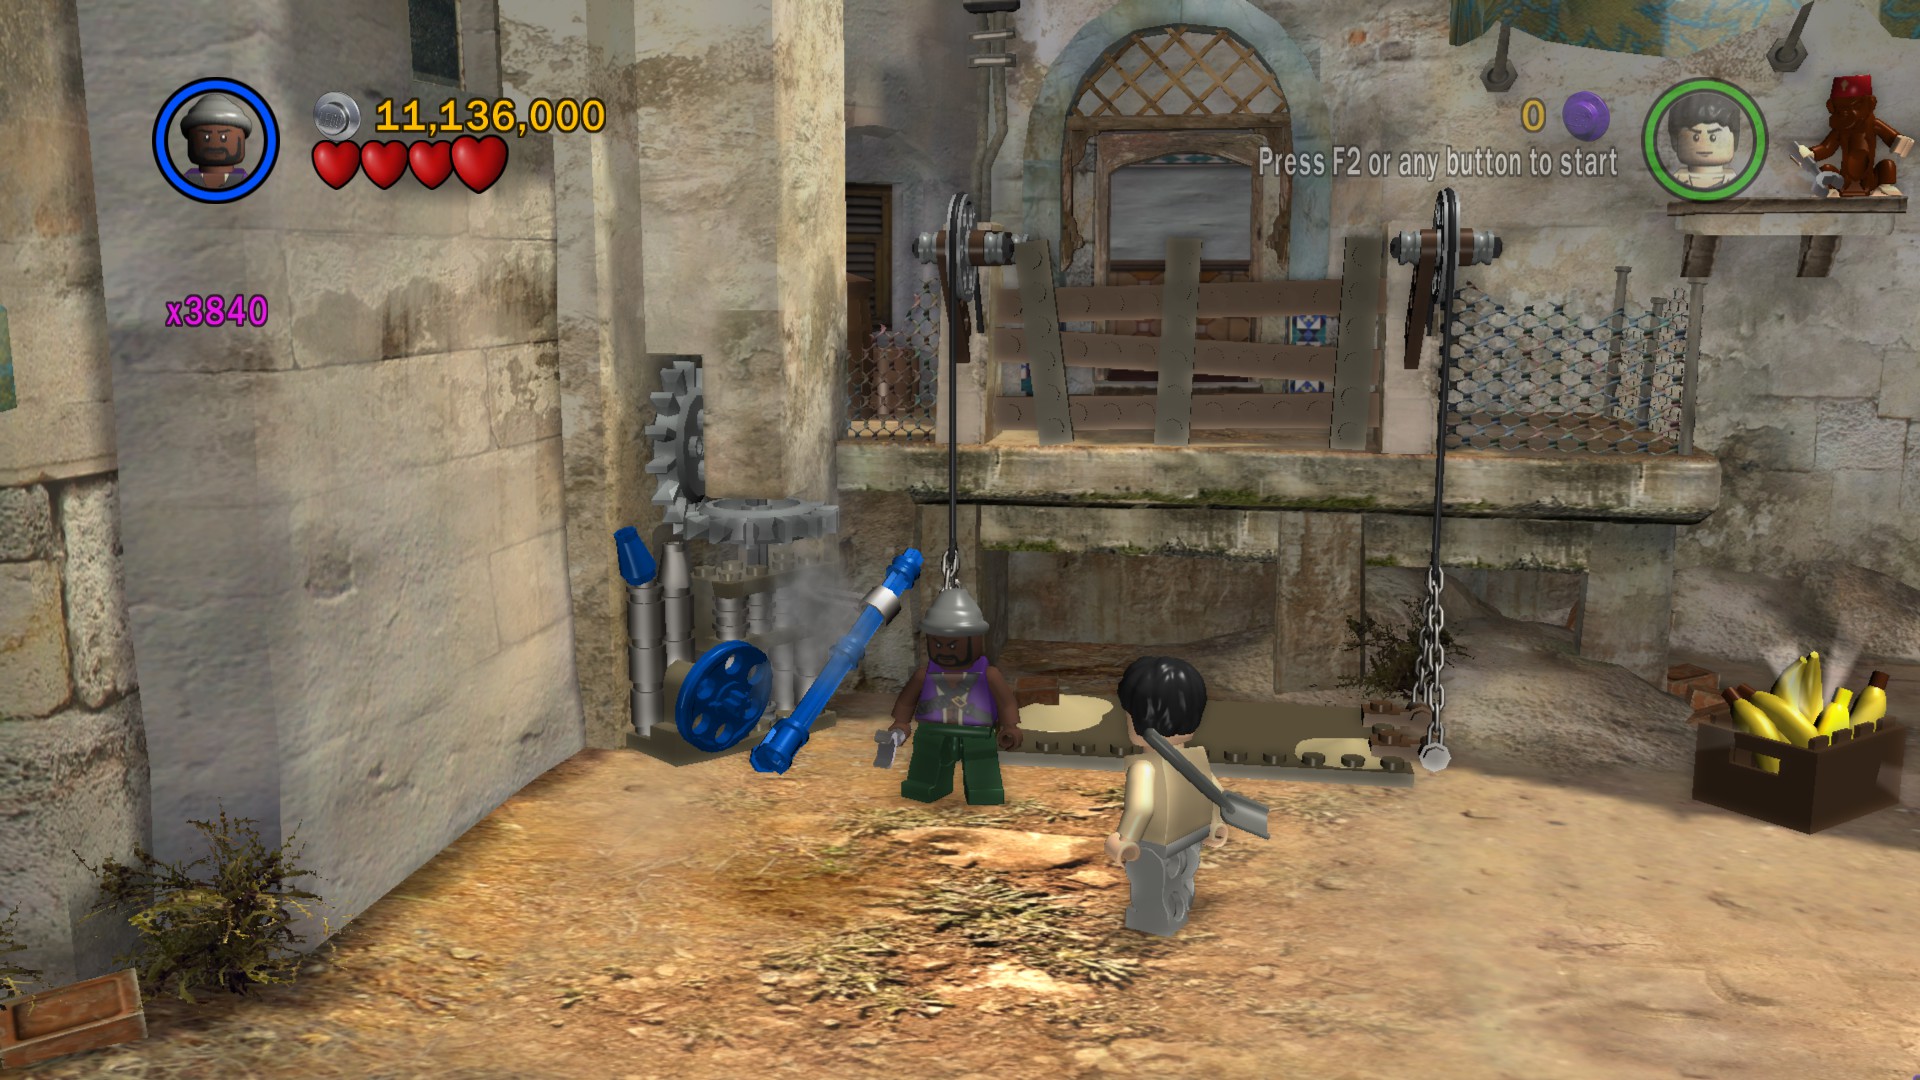
Alright. Our goal is to get onto the ledge on the top right. Start by looking to the right. You’ll see a blue box, so pick it up and place it on one of the green panels. Use the whip pad on the right side of the crane to lower a ladder, then climb up to find the second box. Pick it up and place it on the other green panel. Once both boxes have been placed on the green panels, build the LEGO pieces onto the crane. Hop into the crane, then use it to pick up the large object on the left. Move it to the right, then place it on the orange panel. This will raise up a platform, allowing you to reach the upper ledge. Don’t hop up just yet, as we still have more work to do on the ground. Head to the right and you’ll see a platform on wheels. The track under it is incomplete, so we’ll need to find three pieces to repair it. The first can be found right nearby. Pick it up and place it on the tracks. Head to the right and you’ll find a mine cart. Push it to the right to send it crashing through the boards, revealing LEGO pieces. Build them into part of the track, then pick it up and carry it to the left. Place it on the track, then destroy the barrel to the left of the tracks to reveal a shovel. Pick it up, then head back to the right. You’ll find some LEGO pieces buried in the sand in the bottom right corner, so dig them up and build them into the last piece of the track. Pick it up and carry it to the left, then place it on the track. With the track repaired, head back left and hop up the platforms to reach the upper ledge. Head to the right, then hop on top of the platform. Switch to your partner, then push it to the right along the tracks. Switch back to your partner and hop onto the ledge, then build the LEGO pieces into a rope, allowing your partner to join you. Head right and grab one of the ropes. Your partner will grab the other one, lowering the platform. Continue to the right and head up the stairs.
Part 2 – Enemy Camp
Your way ahead is through that gate on the right. It’s guarded by a Soldier panel, so defeat an enemy officer and pick up his hat. Use the Soldier panel to open the gate, then continue up the path. The gate on the right is locked, so we’ll need to unlock it. We need to find two boxes to place on the green panels. The first can be found to the right of the gate. Build the LEGO pieces into a box, then pick it up and place it on one of the panels. The second box is a bit more complicated. Head to the left and you’ll see a car. Next to the car is a chest buried in the sand. Dig it up (you can find a shovel by destroying the barrel on the left side of the area) then smack to chest to open it, revealing a key. Pick it up, then head to the right. Hop onto the ledge to the right of the tents, then grab the rope above you. This will reveal LEGO pieces, so build them into a key. Turn it to move the rope next to you to the right. Once you’ve moved the rope to the right, stop turning the key. The rope will then slowly move back left, so quickly grab onto it and hop onto the next platform on the right. Place the key in the slot, then turn it to move the rope to the right. The rope will stay in place, so hop onto it and onto the next platform. Pull the lever to lower the box to the ground, then drop down and pick it up. Place it in the other slot to open the gate, then continue to the right.
Part 3 – The Flying Wing
Looks like this boxer wants to pick a fight. If you step into the circle by the plane, he will chase after you and attack you. You can’t damage him by normal means, so it’s best to avoid him. Stay outside the circle and he won’t come after you. To damage him, grab the anvil on the left. Walk into the circle while carrying it and the boxer will punch it, damaging himself. A truck will then come driving through the area, dropping off enemy soldiers. Hop in the plane and fire at the truck to destroy it, revealing LEGO pieces. Build them into another anvil, then pick it up and walk into the circle. The boxer will punch it, damaging himself. Another truck will appear, so repeat the process to take out the boxer’s last heart.
Part 4 – Truck Chase
We’re after the Ark, and we’ve got Sallah with us now. This section is pretty simple; you’ll be hopping across trucks and hijacking them. Hop onto the truck that drives up next to you, then defeat the enemies that appear. After they’re defeated, the driver will hop out. Defeat the driver, then hop in the truck. Hold the “jump” button and you’ll drive forward. You’ll then hop out of the truck and be faced with more enemies. Repeat this process of defeating enemies and hijacking trucks until you reach Belloq’s car. Ram it to complete the level.
Unlocked Characters: Enemy Boxer (25,000), Captain Katanga (18,000), First Mate (12,500)
Pursuing the Ark – Free Play Mode
Required Abilities: Dig, Explosive, High Jump, Scholar, Scream, Small
Part 1 – Dig Site
Red Parcel


Treasure Chest 1


Treasure Chest 2

Treasure Chest 3

Part 2 – Enemy Camp
Treasure Chest 4

Treasure Chest 5


Treasure Chest 6


Treasure Chest 7


Part 3 – The Flying Wing
Treasure Chest 8

Treasure Chest 9


Part 4 – Truck Chase
Treasure Chest 10

Minikit Model: Sphinx
Red Parcel Extra: Fast Build (40,000)
Opening the Ark – Story Mode
Enemies: Enemy Soldier (Desert), Enemy Officer
Boss: Belloq (Robes)
Starting Characters: Indiana Jones (Army Disguise), Marion (Night Gown)
True Adventurer: 40,000

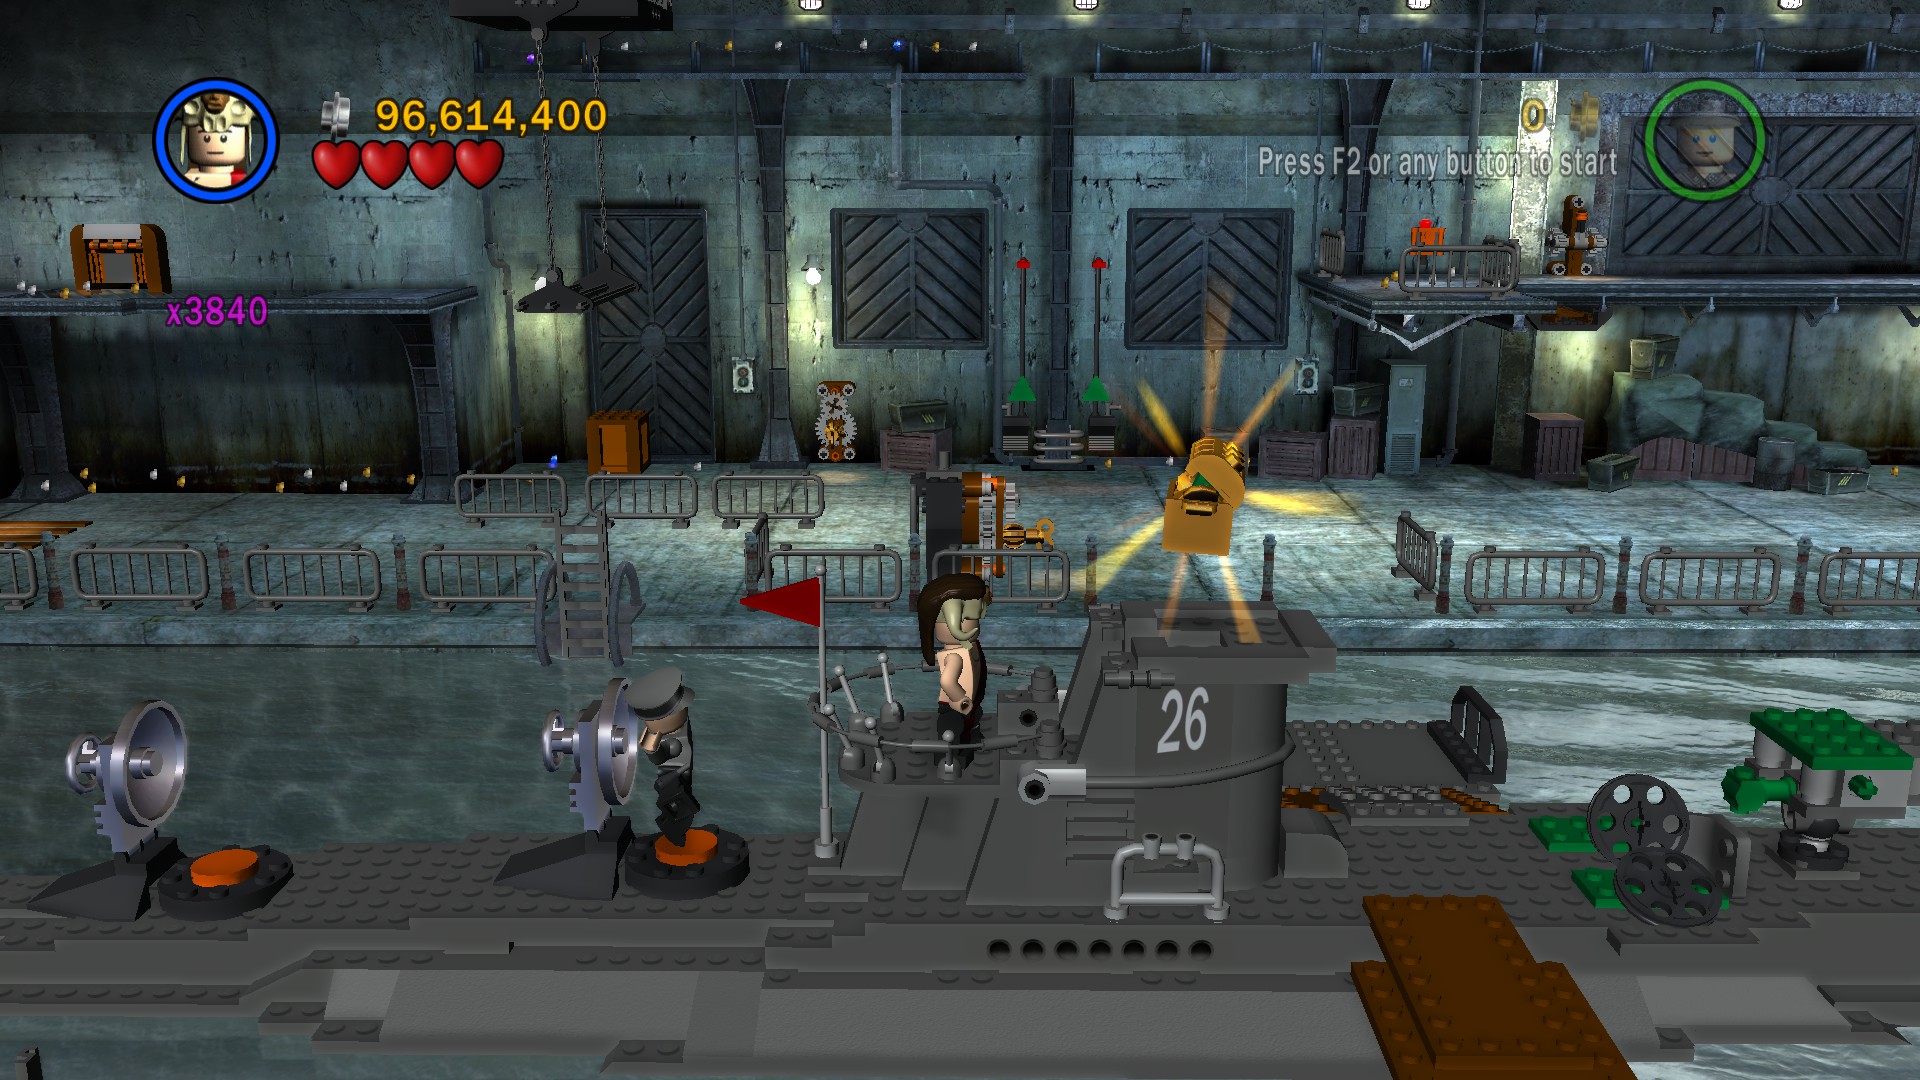
Part 1 – U-Boat Hangar
Head to the right and you’ll see a small box. Pick it up and place it on one of the green panels on the U-Boat. We need to find the other box. Swim across to the ledge in the back, then head to the left. Use the whip pad to lower the ladder, then climb up onto the ledge. Hop onto the platform on the right, then switch to your partner. Turn the key to move the platform to the right, then switch to your partner. Hop onto the next ledge, then pull the handle to lower a ladder, allowing your partner to join you. Pull one of the levers and your partner will pull the other one, revealing a hidden room. Inside, you’ll find the second box. Pick it up and drop back down, then head to the left. Your partner will turn the key, revealing a platform. Hop onto it and you’ll be carried back to the U-Boat. Place the box on the other green panel, then build the LEGO pieces into a bubble cannon. Hop in and two rotary handles will appear. Shoot the green sides with the bubble cannon until the green arrows have reached the top. This will raise up a ladder, so climb up and head to the right on the ledge. Head out the window.
Part 2 – Island Base
Head to the right and you’ll find a silver gate. The way ahead is behind it, so we’ll need to find a way to destroy it. Use the whip pad nearby to reveal LEGO pieces. Build them into a bar, then hop up onto the next ledge. Use the whip pad to swing across the gap, then build the LEGO pieces into a bar, allowing Marion to join you. Head to the right and grab the wrench on the roof, then drop down. You’ll find a broken truck, so use the wrench to repair it. Hop in and drive it to the left, crashing through the gate. Drive up to the ledge to the left of the silver gate, then hop onto it. You need to match the symbol on the left. Pressing the buttons will turn parts of the panel white. You need to make a “4” shape. Push the object on the tiles onto the button, then pick up the basket and place it on another button. Step on one of the buttons and your partner will step on the other. Once you match the pattern, the door below you will open, revealing bazookas. Pick one up and use it to destroy the silver gate, then continue down the path.
Part 3 – Opening Ceremony
We need to reach Belloq on the upper ledge. Head to the left and you’ll see a green panel. Pick up the large object near it, then place it on the green panel to reveal flower symbols. Hop on top of the object, then high jump onto the bar. Hop onto the ledge, then hop to the right to reach Belloq. Hit him to take out a heart. He will then flee to the right. Drop down and head to the right, then build the LEGO pieces into a platform. Climb up the nearby ladder and your partner will grab the rope, raising up the platform. Hop across the platforms to the left to reach Belloq, then hit him again to take out another heart. He will then flee to a ledge in the back. Hop onto a rock ledge on the right, then grab the rope. Climb up and hop onto the bars, then shimmy to the left. Use the whip pad to lower a platform, then hop up the ledges to reach Belloq. Hit him to take out another heart. He will then retreat to the ground. Drop down and smack him some more to take out his last two hearts, completing the level.
Unlocked Characters: Indiana Jones (Army Disguise), Marion (Night Gown), Belloq (Robes) (50,000), Enemy Guard (18,000)
Opening the Ark – Free Play Mode
Required Abilities: Dig, Explosive, Scholar, Small, Soldier
Part 1 – U-Boat Hangar
Treasure Chest 1


Treasure Chest 2

Treasure Chest 3


Treasure Chest 4

Part 2 – Island Base
Treasure Chest 5


Treasure Chest 6

Treasure Chest 7

Red Parcel


Part 3 – Opening Ceremony
Treasure Chest 8


Treasure Chest 9

Treasure Chest 10

Minikit Model: Ark of the Covenant
Red Parcel Extra: Artifact Detector (250,000)
Shanghai Showdown – Story Mode
Enemies: Shanghai Hoodlum
Starting Characters: Indiana Jones (Dinner Suit), Willie
Added Characters: Indiana Jones, Short Round
True Adventurer: 52,000

Part 1 – Club Obi-Wan
Indy is sick, and we need to get that antidote. The antidote is being held by the gangsters on the upper ledges. Fortunately, they like diamonds. There is a diamond on the table near you, so grab it and head to the left. Toss the diamond at the gangster with the diamond symbol over his head. He will then toss the diamond to another gangster on the right. Head to the right and you’ll find another diamond behind glass. Use Willie’s scream to break the glass, then pick up the diamond and toss it to the gangster. He will then toss the antidote back to the left, so head back to the left and you’ll find two buttons on the ground. Step on one and your partner will step on the other, revealing another diamond. Pick it up and toss it to the gangster, who will then toss the antidote back to the right. We just need to find one more diamond. In the center of the dance floor you’ll find some flower symbols underneath a rope. High jump up to the rope to grab it, releasing the balloons. Walk through the balloons to destroy them, revealing the final diamond. Pick it up and toss it to the final gangster to trigger a cutscene.
After the cutscene, Kao Kan will appear and start shooting. If you try punching him, you won’t do anything. You’ll need to find another way out of here. Head to the left to find a large dragon head. Step on one of the nearby buttons and your partner will step on the other. This will open the mouth, revealing a sword. Pick it up and toss it at one of the gongs to break the rope, lowering it to the floor. Hop in and ride it up the ramp towards Kao Kan and through the silver window behind him.
Part 2 – Shanghai Streets
Indy has changed into his leather jacket, and we’ve got Short Round as well. Looks like the car is broken. We need to find two bundles of parts to place on the green panels next to the car. Look to the right of the car and you’ll find a bunch of boxes and tables. Destroy them to reveal a travel chute, then crawl through it to reach the upper ledge. Hop up and grab the bar, then shimmy to the right. Grab the rope and bounce up the awnings to reach the next ledge, where you’ll find the first object. Pick it up and place it on one of the green panels, then head to the left. Grab onto the rope and climb up (you’ll have to do this as either Indy or Short Round), then head along the ledge to the right. You’ll be prompted to switch to Willie, so do so and high jump up to the rope. This will lower the platform for Indy, so switch back to him and continue down the ledge. Switch to Willie again and high jump up to the next rope, then switch back to Indy and cross onto the next ledge, where you’ll find the other pieces. Pick up the object and place it on the other green panel. Once both objects have been placed on the panels, build the LEGO pieces onto the car. Unfortunately, it will still be broken. Fortunately, a garage will open up on the left. Head left and into the garage to find a wrench. Pick it up, then head back to the car and repair it. Once the car is fixed, hop in and drive through the boarded up gate behind you.
Part 3 – Nice try, Lao Che!
You’ll find your ride out of here parked in the hangar. Unfortunately, the main propeller is missing. To repair it, we’ll once again need to find two boxes of parts. For the first, head to the right of the hangar to find flower symbols. High jump onto the ledge, then push the box along the tiles and off the edge. It will then explode, revealing LEGO pieces. Build them into a travel chute, then crawl through it to reach the upper ledge. Grab onto the bar and hop onto the next ledge, then destroy the boxes to reveal the first set of pieces. Pick it up and place it on one of the green panels, then head to the left. You’ll find a bunch of boxes. Hop up the boxes, then grab the bar. Hop onto the ledge, then carefully dive jump across the gap. Your goal is to grab onto the bar in the back. Grab onto the bar and hop onto the ledge, then head right. Use the whip pad to swing across the gap, where you’ll find the second box of pieces. Pick it up and place it on the other green panel. Once both boxes have been placed on the green panels, build the LEGO pieces into the propeller. Now we need to start the other two propellers. Head to the left and you’ll find a forklift. Hop in as Willie or Short Round and Indy will hop onto the platform. Drive the forklift over to the whip pads by the plane, then press the “special” button to raise Indy up. Switch to Indy and use the whip pad to start one of the propellors. Do the same for the other propeller to complete the level.
Unlocked Characters: Indiana Jones (Dinner Suit), Willie, Short Round, Kao Kan (25,000), Wu Han (20,000), Lao Che (19,000), Chen (18,000), Dancing Girl (27,500)
Shanghai Showdown – Free Play Mode
Required Abilities: Dig, Explosive, High Jump, Scholar, Small, Soldier, Sword, Thuggee
Part 1 – Club Obi-Wan
Treasure Chest 1

Treasure Chest 2


Part 2 – Shanghai Streets
Treasure Chest 3


Treasure Chest 4


Treasure Chest 5


Treasure Chest 6


Treasure Chest 7

Part 3 – Nice try, Lao Che!
Treasure Chest 8

Treasure Chest 9

Treasure Chest 10


Red Parcel

Minikit Model: Jade Dragon
Red Parcel Extra: Treasure x4 (2,000,000)
Pankot Secrets – Story Mode
Enemies: Spider, Snake, Crocodile, Large Insect, Pankot Assassin, Pankot Guard
Starting Characters: Indiana Jones, Willie (Evening Dress), Short Round
True Adventurer: 60,000

Part 1 – Jungle
Head to the left and you’ll find some mud. You won’t be able to cross it on your own, so hop on an elephant and head left through the mud. Destroy the brown object holding the vine to release it, allowing your partners to join you. Head to the left and you’ll find some snakes. Indy will cower when he approaches them, so defeat them as either Willie or Short Round (or walk over them with an elephant). Continue to the left and you’ll find a raised bridge. To lower it, you’ll need to place two boxes on the green panels by the bridge. The first box can be found on the right. Take an elephant through the mud, then pick up the box and carry it back to a green panel. The second box can be found on the left. Look to the left and you’ll find flower symbols. High jump onto the bar, then shimmy to the left. Drop down and build the LEGO pieces into a handle, then pull it to raise up a bridge. This will allow you to grab the box and place it on the other green panel. Once both boxes have been placed on the green panels, build the LEGO pieces into a whip pad. Use it to lower the bridge, then cross it and continue to the left. You’ll be attacked by a swarm of spiders. Willie has a fear of insects, so she will be useless in fighting them. Once the spiders are taken care of, it’s time to continue on to the palace.
Use the whip pad on the right to swing across the gap, then grab the shovel. Swing back across the gap and dig up a key by the whip pad, then swing back across the gap. Place the key in the slot, then turn it to raise up the barrier, allowing you to continue down the path. Your path ahead is blocked by another barrier. You’ll see a monkey on a ledge to the left holding a key. You need to toss him a banana to get the key. You can find a banana back down the path. On the left side of the large mud pit after the bridge, you’ll find a bunch of bananas. Use your whip to grab one, then head back to the monkey. Toss the monkey the banana to receive the key, then place it in the slot. Turn it to raise the barrier, allowing you to continue up the path. Hop in an elephant and ride it up to the palace gate. Place the elephant on the orange panel to lower it down, raising the gate. Step on one of the buttons on the right side of the gate and your partners will step on the other two, opening the doors. Head inside.
Part 2 – Palace Corridor
Looks like something is going on here! We need to get the door on the left open. To do so, look on the table and you’ll find an object with a bunch of notches on it. Pick it up and place it in the slot on the left. Now you just need the key. To find it, head to the right and use the whip pad underneath the bell to ring it. The key will fall out of the bell, so pick it up and place it in the slot. Turn it to raise up a panel to the right, revealing a lever. Pull it to open the door, then continue to the left into the hallway. Head all the way down the hallway, then head into the room on the right.
Part 3 – Indy’s Bedroom
You’ll find a book inside a glass case. Use Willie’s scream to shatter the glass, then grab the book. Head back into the hallway.
Part 2 – Palace Corridor
Push the tree along the tiles to slide the cabinet aside, revealing a hieroglyph puzzle. Use the character with the book to solve it, revealing an opening. Head inside.
Part 4 – Willie’s Bedroom
Head to the right and you’ll find a bed. Push it to the right along the tiles, then hop on top of it, using the small stool as a boost. Dive onto the platform on the right, then use the whip pad to swing across the gap. Pull the lever to reveal LEGO pieces, then drop down and head to the right. Build them onto the statue, then pull it away from the wall to reveal a secret opening. Head inside.
Part 5 – Secret Passageway
Head down the path, then hop onto the vine. Use it to swing across the gap, then continue down the path and through the opening at the end.
Part 6 – Temple Entrance
Head to the right and pull the lever to reveal a ladder. Climb up, then use the whip pad to swing across the gap. Grab onto the vine on the right, then switch to Short Round. Build the LEGO pieces on the right side of the bottom level into a travel chute, then crawl through it to reach another ledge. Grab onto the other vine to raise up a rock wall, then hop onto it. If you fall off, you can always hop up the bars to reach the top. Continue into the next room, where you’ll find a pit filled with bugs. Use the whip pad to swing across the gap, then grab a torch. While carrying a torch, you can walk around in the bug pit unharmed. Walk across the pit while carrying the torch and use it to escort Willie and Short Round across. Step on one of the buttons and your partners will step on the others, opening the door. Continue on down the path and through the opening at the end.
Part 7 – Spike Trap
Use the whip pad to open the door. Or not. Yikes. Spikes are coming from the ceiling, and you will be crushed and impaled if you don’t act fast! Two skeletons have appeared, so destroy them to reveal boxes. Pick them up and place them on the slots to reveal LEGO pieces. Once both boxes have been placed on the slots, build the LEGO pieces into a pillar. This will support the roof and prevent you from being crushed, as well as open the door on the right. Head through the opening to complete the level.
Unlocked Characters: Willie (Evening Dress), Maharajah (40,000), Pankot Assassin (25,000), Pankot Guard (18,000), Village Elder (15,000), Village Dignitary (15,000), Willie (Dinner Suit) (15,000), Willie (Pajamas) (15,000), Chatter Lal (40,000)
Pankot Secrets – Free Play Mode
Required Abilities: Dig, High Jump, Thuggee, Whip
Part 1 – Jungle
Treasure Chest 1

Treasure Chest 2


Treasure Chest 3


Part 2 – Palace Corridor
Red Parcel


Treasure Chest 4


Part 3 – Indy’s Bedroom
Treasure Chest 5


Part 4 – Willie’s Bedroom
Treasure Chest 6

Part 5 – Secret Passageway
Treasure Chest 7

Part 6 – Temple Entrance
Treasure Chest 8

Treasure Chest 9


Treasure Chest 10

Minikit Model: Ivory Elephant
Red Parcel Extra: Poo Treasure (70,000)
The Temple of Kali – Story Mode
Enemies: Thuggee, Thuggee Acolyte
Boss: Chatter Lal (Thuggee)
Starting Characters: Indiana Jones, Short Round
Added Characters: Indiana Jones (Kali)
True Adventurer: 50,000

Part 1 – The Temple of Doom
Drop down and head to the right. Our way ahead is to the right, but we can’t get up to that ledge where the Thuggee is. We need to find two boxes to place on the green panels. To find the first, head to the left, where you’ll find a partially completed bridge. Use the whip pad to swing across the gap, then grab a torch from the wall. Place it in one of the slots next to the bridge, then grab another torch. Place it in the other slot, raising up the bridge and allowing Short Round to join you. Crawl through the travel chute, then pull the lever to raise up the travel chute. Crawl back through it to reach the ledge with the box. Pick it up and carry it back to the right, then place it on one of the green panels. Now for the second box. Drop down onto the ledge below you and you’ll find the box on the left. Unfortunately, we have no way to get it up to the green panels. Head to the right and you’ll find some LEGO pieces. Build them into a small ladder, then climb up onto the ledge. Push the object off the edge to reveal LEGO pieces, then build them into part of a rotary handle. Pick it up and carry it to the left, then place it in the slot to complete the rotary handle. Pick up the box and hop onto the circular panel on top of the skull. Switch to your partner and turn the rotary handle to raise it up. Switch to your partner and carry the box to the right, then place it on the green panel.
Once both boxes have been placed on the panels, build the LEGO pieces onto the structure next to you. Hop up the bars on the left to reach the top, then continue to the right. Grab the rope and hop carefully across the platforms. Eventually, you’ll come across rotating pillars. You’ll need to hop on the bars so you can make it to the ledge on the other side. You can ride all the way around the pillars, so take your time and be careful. Once you reach the opposite ledge, pull one of the levers and your partner will pull the other one. This will raise the gate, so head inside.
Part 2 – Fortune and Glory
Willie is currently chilling in her cage above the lava, so we need to rescue her. Head to the left and you’ll find some boards. Destroy the boards in the top left corner to reveal a mechanism. Turn the key to move the statue out of the alcove. Head to the left and you’ll see a ladder. Climb up and the ledge will collapse, so use the whip pad to swing across the gap. Head to the right and hop on top of the statue you extended earlier, then onto the next ledge. Pull the lever to raise up Willie’s cage. One more lever to go. Head to the right and you’ll see a travel chute on the upper ledge. Destroy the object underneath it to reveal another travel chute. Before crawling through it, head back to the left to find LEGO pieces. Build them onto the statue, then push it along the tiles into the slot. Pull the statue on the left out along the tiles. With both statues in place, head back to the right and crawl through the travel chute. Head left and hop across the ledges and statues to reach the other lever. Pull it to raise Willie’s cage. Chatter Lal will then appear. Punch him to take out two hearts. He will then start jumping around, preventing you from landing a punch on him. Defeat a Thuggee Acolyte (the white-painted ones) and they will drop their hat. Put it on and you will be able to activate the Kali statues. Use one of the Kali statues to send fire shooting up through a panel. Walk up to Chatter Lal to force him to jump onto the panel, damaging him. Punch him to take out two more hearts, then activate another Kali statue. Force him to jump onto the flaming panel to defeat him, ending the level.
Unlocked Characters: Indiana Jones (Kali), Chatter Lal (Thuggee) (40,000), Thuggee Acolyte (30,000), Thuggee (18,000)
The Temple of Kali – Free Play Mode
Required Abilities: Dig, Explosive, High Jump, Mechanic, Scholar, Thuggee
Part 1 – The Temple of Doom
Treasure Chest 1

Treasure Chest 2

Treasure Chest 3


Treasure Chest 4

Treasure Chest 5

Treasure Chest 6

Part 2 – Fortune and Glory
Red Parcel


Treasure Chest 7


Treasure Chest 8


Treasure Chest 9


Treasure Chest 10

Minikit Model: Jewel Eyed Skull
Red Parcel Extra: Super Scream (80,000)
Free the Slaves – Story Mode
Enemies: Thuggee
Boss: Thuggee Slave Driver
Starting Characters: Indiana Jones (Kali), Willie (Ceremony)
Added Characters: Short Round
True Adventurer: 65,000

Part 1 – Mine Shaft Entrance
Head to the left and you’ll see flower symbols. High jump onto the ledge, then build the LEGO pieces into a bar, allowing Indy to join you. We need to find two boxes to place on the panels. The first is on the right side of the ledge. To reach the second, use the whip pad on the right to raise up a platform. High jump onto it, then onto the next ledge, where you’ll find the second box. Pick it up and place it on the green panel. Once both boxes have been placed on the green panels, build the LEGO pieces onto the mine cart. This will lift up the cart, sending it down the tracks and through the barrier at the end. Drop back down and continue along the path, then hop onto the rope and onto the next platform. Hop onto the bars, then hop to the right. Continue down the path and through the opening.
Part 2 – Passageway
Head to the right and hop onto the platform. Turn the key to lower the cage, rescuing the child. He will then crawl through the travel chute and pull the lever, opening the door on the right. Head through the opening.
Part 3 – Lava Chamber
Head to the right, then use the whip pad to swing across the gap. Destroy the box to reveal an engine component, then pick it up and place it on the green panel. Turn the key to move the cart across the gap, then use the whip pad to swing back across. Pick up the object and head to the right. Place it near the green panel, then hop onto the first platform. Use your whip to grab the object, then place it on the right side of the platform. Set it down, then hop onto the next platform and use your whip to grab it. You’ll do this to bring the component across the platforms. Once you’re across the platforms, place the component in the machine. Unfortunately, it will still be broken, so we’ll need to find a wrench. To find one, destroy the barrel of tools underneath the whip pad on the left ledge. Use the wrench to repair the machine, powering up a lift. Before riding it, head to the right side of the room and smash the objects to find a shovel. Pick it up and use it to dig up the area in the water, revealing a key. Pick it up and place it in the slot, then turn it to raise up the whip pad on the right. With the whip pad raised, you can now head to the left and ride the lift onto the ledge. Use the whip pad to swing across the gap, then destroy the front of the cage to rescue the slave. He will crawl through the travel chute and pull the lever, opening the door. Continue into the next room, then grab a stick of dynamite on the right. Throw it at the silver rubble to destroy it, revealing an opening. Head inside.
Part 4 – Mine
Head to the right and you’ll see a small boarded-up tunnel. Destroy the boards to reveal a handle. Pick it up and carry it to the left, then place it in the slot. Pull it to create platforms, then hop up. You’ll see a large cage with slave children inside. Dig up the area to the left of the Kali statue (if you need a shovel, you can find one by destroying the objects in front of the cage) to reveal a handle. Pick it up and place it in the slot by the cage, then pull it to open the cage, freeing the slaves. One of them will crawl through the travel chute on the right, pulling the lever. This will raise up some platforms, so continue to the right and hop across them. Destroy the rubble in the tunnel entrance, then head through the opening.
Part 5 – Overseer Battle
Time to fight the Thuggee Slave Driver. Hit him to take out two hearts. A cutscene will then play, with the Maharajah hitting him with a potion. This will restore his hearts. You can keep punching him to damage him, but the Maharajah will just keep healing him. Looks like we’ll need to find another way to damage him. Grab a stick of dynamite underneath the Maharajah, then throw it at the silver wall to free Short Round. Switch to him and crawl through the travel chute, then punch the Maharajah. He will then flee to the right. Destroy the small trash can to reveal a wrench. Pick it up, then use it to repair the lift on the right. Hop on, then hop across the moving platforms to the right. Punch the Maharajah again and he will flee to the right. To reach him, switch to one of your partners and head to the left. Push the large green cart all the way to the right. This will create a platform, allowing Short Round to hop across onto the ledge with the Maharajah. Smack him one more time to free him from his trance. The slave driver will then jump onto the conveyor belt. To damage him, simply wait for him to pick up a boulder. Pick up a stick of dynamite and throw it at him to damage him. The dynamite seems to be very picky about when it damages him. I find it easiest to throw it at him right as he picks up the boulder, as this seems to damage him every time. Hit him three times to defeat him, ending the level.
Unlocked Characters: Willie (Ceremony), Slave Child (3,000), Thuggee Slave Driver (18,000)
Free the Slaves – Free Play Mode
Required Abilities: Dig, Explosive, High Jump, Mechanic, Small, Soldier, Thuggee, Whip
Part 1 – Mine Shaft Entrance
Treasure Chest 1

Treasure Chest 2

Part 2 – Passageway
Treasure Chest 3


Part 3 – Lava Chamber
Red Parcel


Treasure Chest 4

Treasure Chest 5


Part 4 – Mine
Secret Character – Princess Leia


Treasure Chest 6

Treasure Chest 7

Treasure Chest 8


Part 5 – Overseer Battle
Treasure Chest 9

Treasure Chest 10


Minikit Model: Dinosaur Fossil
Red Parcel Extra: Character Treasure (100,000)
Escape the Mines – Story Mode
Enemies: Thuggee
Starting Characters: Indiana Jones (Kali), Willie (Ceremony), Short Round
True Adventurer: 120,000

Part 1 – Mine Shaft Entrance
There’s a lot we have to do here, so let’s get started! Start by heading to the right, where you’ll find a lever. Pull it to reveal a stick of dynamite. Pick it up and throw it at the silver rubble to the right to reveal LEGO pieces. Build them onto the mine cart, which will then start smoking. Head left along the track to find a wrench. Pick it up and use it to repair the mine cart. Now you need to push the mine cart to the left, but first you need to repair the track. Destroy the small boxes by where the wrench was to reveal LEGO pieces. Build them onto the track, then head to the left. You’ll find part of the track laying on the ground. Pick it up and carry it back to the right, then place it on the track to repair it. Head back to the right and push the mine cart all the way to the end of the track. Now to raise it up. Head to the far left and you’ll find a wooden platform. Hop on it as Indy, then switch to your partner and turn the key. This will raise the platform up, so switch back to Indy and hop onto the platform with the whip pad. Use it to swing across the gap, then walk to the end of the ledge and pull the lever. This will lower the ladder. Hop onto the orange platform and your partners will join you. This will raise up the mine cart. Once the platform is locked in place, head to the right and hop onto the ledge, then climb the small ladder to reach the ledge with the mine cart. Push it along the tracks.
Part 2 – The First Mine Shaft
Your goal in this area is to hit three switches. Hitting a switch will turn a light green. Once all three lights are green, you will proceed to the next area. If you take too long, the lights can turn back to red, so you’ll need to be decently quick. The first switch is in the center of the two tracks. The second is on the left side of Indy’s track. The third is on the right side of Short Round’s track.
Part 3 – The Second Mine Shaft
The idea in this area is the same as the first, only now you have five switches to hit. This area can seem rather confusing, so let me explain. In addition to the switches with the lights, there is another switch that you can hit to change the path you take. There are two of these switches, and they can be found on the side of the tracks right before the large lava pit. Hitting the switch that is up will cause you to take the path on that side. You’ll need to take both paths to hit all of the lights, meaning you’ll need to do two loops of the track to hit all of the light switches.. There is also a section of the area that has four different tracks. Each time you go through this area, you can determine which path you take simply by leaning your cart to one side or the other. Three of the switches are on the left side of Indy’s track, and the other two are on the right side of Short Round’s track. Look on the sides of the track and you’ll see some signs with Roman numerals. These count down to a light, so look for these if you are having trouble finding the switches. Hit all of the lights and you’ll head down the next mine shaft, completing the level.
Escape the Mines – Free Play Mode
Required Abilities: Dig, High Jump, Scholar, Small, Thuggee
Part 1 – Mine Shaft Entrance
Treasure Chest 1

Treasure Chest 2

Treasure Chest 3

Treasure Chest 4


Red Parcel


Part 2 – The First Mine Shaft
Treasure Chest 5

Treasure Chest 6


Treasure Chest 7


Part 3 – The Second Mine Shaft
Treasure Chest 8

Treasure Chest 9


Treasure Chest 10


Minikit Model: Pankot Diamond
Red Parcel Extra: Treasure x6 (3,000,000)
Battle on the Bridge – Story Mode
Enemies: Thuggee, Thuggee Acolyte
Boss: Mola Ram
Starting Characters: Indiana Jones (Kali), Willie (Ceremony), Short Round
True Adventurer: 80,000

Part 1 – Water!
Run! Avoid the water, as if it catches you, you will automatically enter the next area. Either reach the end of the tunnel or get swept away to reach the next area.
Part 2 – Cliffside
Indy is separated from Willie and Short Round, and you both need to climb up the cliffside. Let’s start with Indy. Use the whip pad to swing across the gap, then grab the vine. Climb up, then dive to land on the ledge on the left. Switch to Short Round and climb the vine on the left. Jump onto the ledge, then crawl through the travel chute to reach the alcove behind the spears. Grab the key, then crawl back through the travel chute and place it in the slot. Turn the key to extend a platform, allowing Indy to join you. Use the whip pad to reveal LEGO pieces, then build them into bars. Hop up them and onto the ledge, then climb the vine to scale the cliff. Continue along the path.
Part 3 – Clifftop
Head to the right and you’ll find three Kali statues. You need to activate each of the Kali statues to reveal an object, which you can then carry and place into the slot on the right. You’ll be occasionally attacked by a group of Thuggees, so make sure to pick up the hats they leave behind so you can use the Kali statues. High jump onto the ledge on the left to reach the first Kali statue, then use it to reveal a green object. Pick it up and place it in the slot on the right. For the next Kali statue, use the whip pad to lower a ladder. Climb up to reach the Kali statue, then use it to reveal a blue object. Pick it up and place it in the slot on the right. Grab the shovel to the left of the exit, then use it to dig up a box. Destroy it to reveal LEGO pieces, then build them into a travel chute. Crawl through it to reach the final Kali statue, then use it to reveal a red object. Pick it up and place it in the slot on the right. Once all three objects are in the slots, the door will open. Head through the opening.
Part 4 – Rocky Plateau
Head to the right, carefully hopping across the pillars. Use the whip pad to lower a ramp, then hop back across the rocks to the left. Continue to the right up the ramp, then shimmy across the bars. Continue to the right, then use the whip pad to swing across the gap. Destroy the rock to loosen one of the chains, then swing back across the gap. Continue to the right to find a travel chute, then crawl through it. Destroy the rock to loosen the other chain, lowering the bridge. Crawl back through the travel chute, then hop onto the bridge and continue up the path. The path ahead is blocked by a door. High jump onto the rope on the left side of it to retract one of the bars, then switch to Short Round. Head to the right and you’ll find a bunch of bushes. Destroy them to reveal a travel chute, then crawl through it to reach the upper ledge. Hop across the bars to reach the other rope, retracting the other bar. Switch to Indy and step on the skull panel in the ground to open the door. Head through the opening.
Part 5 – No! What are you doing?!
Time to face Mola Ram. This fight is actually pretty simple. Defeat the Thuggees that appear and Mola Ram will come to fight you. After smacking him a few times, he will take control of you, so switch to your partner and hit him to take out a heart. He will then jump away and another wave of Thuggees will appear. You’ll notice that one of them has a sword. Once you defeat the Thuggees, pick up the sword and throw it at one of the four ropes holding the bridge up. Mola Ram will then hop down, allowing you to damage him again. Repeat this process to destroy all four ropes, completing the level.
Unlocked Characters: Mola Ram (50,000), British Officer (25,000), British Soldier (18,000), British Commander (30,000)
Battle on the Bridge – Free Play Mode
Required Abilities: Dig, Explosive, Scholar, Small, Sword
Part 1 – Water!
Treasure Chest 1

Treasure Chest 2

Part 2 – Cliffside
Treasure Chest 3

Treasure Chest 4

Part 3 – Clifftop
Treasure Chest 5


Treasure Chest 6

Treasure Chest 7


Treasure Chest 8

Part 4 – Rocky Plateau
Treasure Chest 9

Treasure Chest 10


Red Parcel


Minikit Model: Ceremonial Headdress
Red Parcel Extra: Regenerate Hearts (150,000)
The Hunt for Sir Richard – Story Mode
Enemies: Brotherhood of the Cruciform Sword
Boss: Kazim
Starting Characters: Indiana Jones (Professor), Elsa, Brody
True Adventurer: 50,000

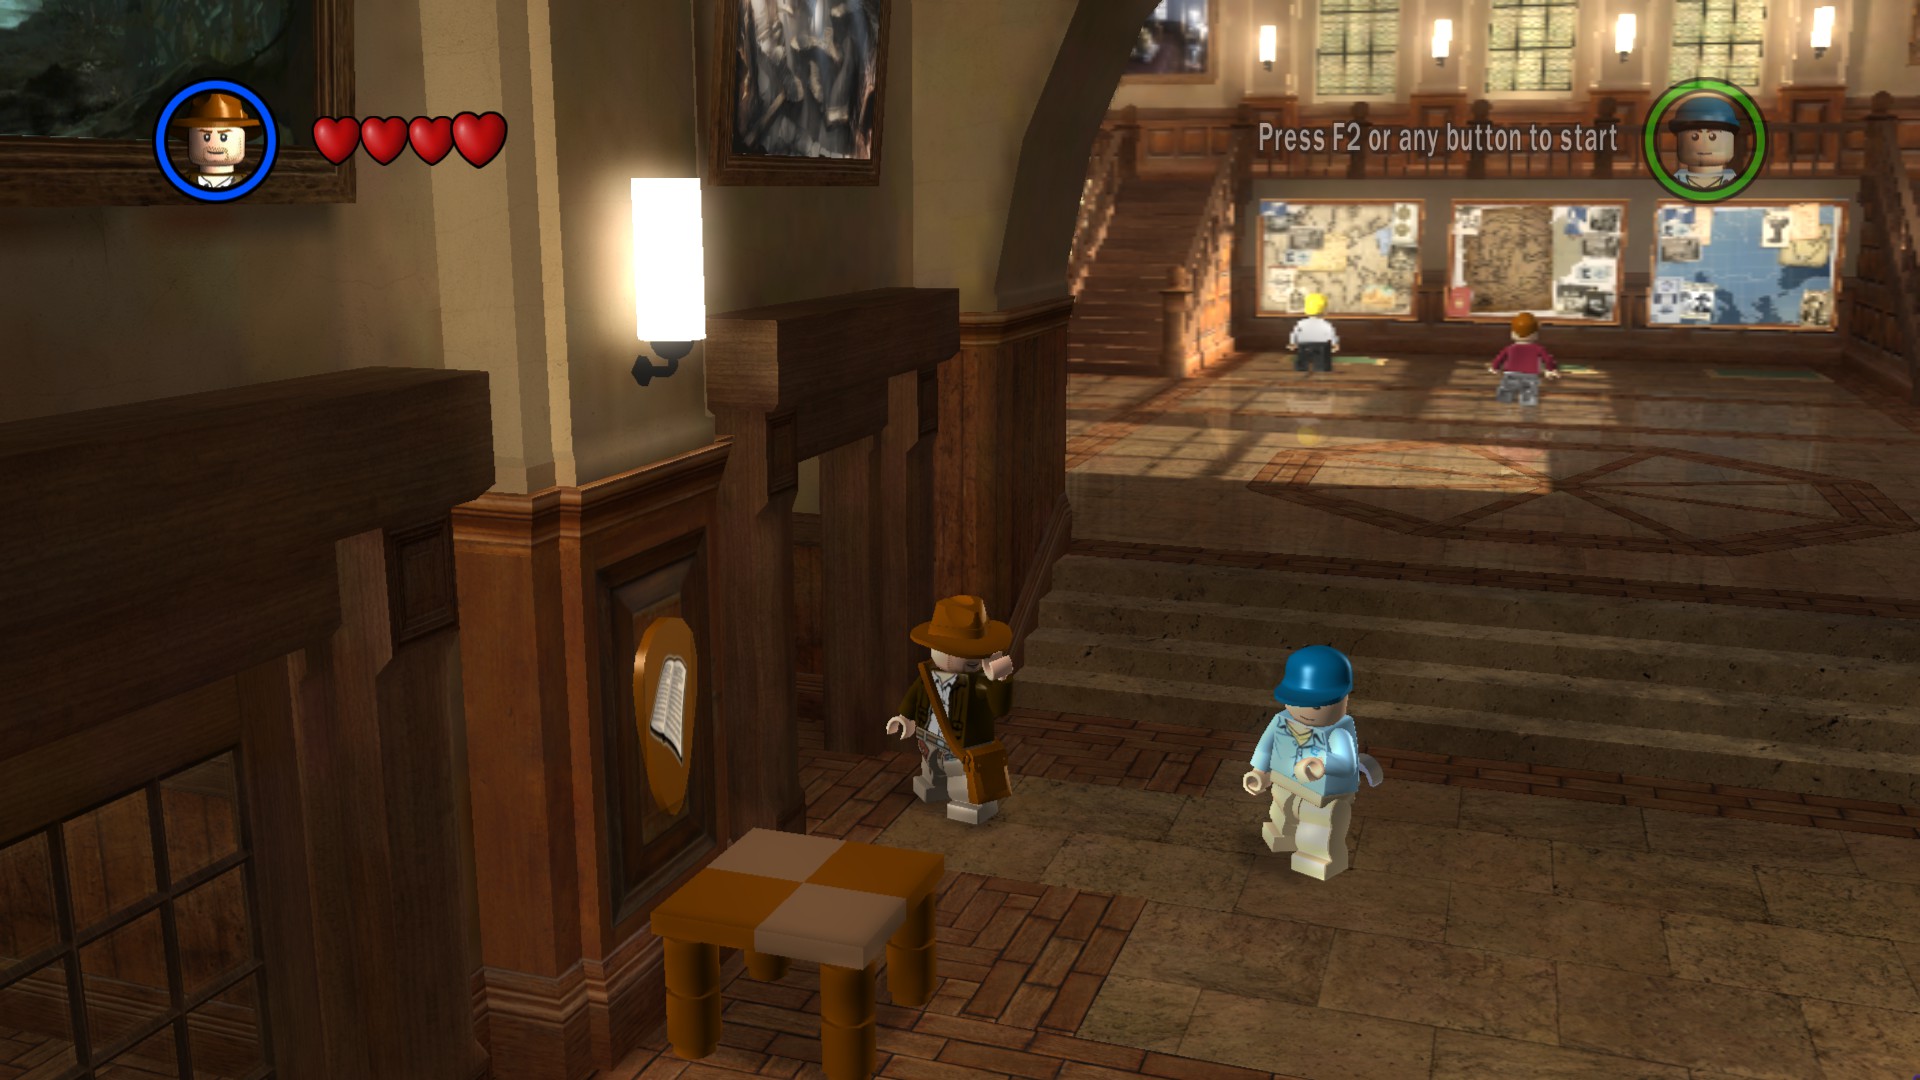
Part 1 – Ah, Venice!
We need to get to the library, which is on the other side of the canal. Head to the right and pull the lever next to the building. This will extend the awning. Head to the right and pull the next lever to extend those awnings. With both levers pulled, head back to the left and you’ll find flower symbols. High jump onto the rope, then jump onto the ledge on the right. Bounce on the awning and onto the next ledge. Hop across the gap onto the next ledge, then head to the right. Hop across the awnings to the right and you’ll see a key. Bounce over to the ledge with it, then pick it up. Drop down and place the key in the slot by the water, then turn it to raise up a whip pad. Use it to swing across the gap. We need to find a way to raise the bridge so Elsa and Brody can join us. Fortunately, there is a key nearby. Look just to the right of the bridge and you’ll see a key in the background. Destroy the bars around it, then pick it up and place it in the slot. Turn it to raise the bridge, then continue to the right. You’ll find the library, so solve the hieroglyph puzzle to open the door. Head inside.
Part 2 – Library
There are four green panels in the center of this area. We need to find four boxes to place on them. Head to the left and you’ll find a bookshelf. Destroy the books on the shelf to reveal a lever. Pull it to reveal a box. Pick it up, then place it on one of the green panels. Build the LEGO pieces, then look at the stained glass window on the back wall. You’ll find another box underneath it, so pick it up and place it on one of the panels. Build the LEGO pieces, then head to the back left, where you’ll find a whip pad. Use it to reveal a rotary handle, then turn it to create a spiral staircase. Head up the stairs, then solve the hieroglyph puzzle to open the safe, revealing the third box. Pick it up and place it on one of the panels, then build the LEGO pieces. One more box to go. Head to the right and build the LEGO pieces onto the ladder. Push it to the right, then climb up onto the ledge with the final box. Pick it up and place it on the last panel, then build the LEGO pieces. Once the X is built, a bar will appear on the wall above you. Climb back up the spiral staircase on the left, then head to the right. Grab the rope and hop onto the ledge, then shimmy across the bar to reach the next ledge. Hop onto it and head right to reach the upper level, then use the whip pad to swing onto the chandelier. This will create an opening in the floor. Drop down inside.
Part 3 – Catacombs
Brody is standing guard in the library, so we’re down to just Indy and Elsa now. You can build the LEGO pieces onto the ladder to allow you to return to the library if you want. For now though, head to the right. Attack the coffin to the left of the archway to reveal a shovel. Pick it up, then use it to dig up the object in the water. Pick up the box and place it on the green panel, then build the LEGO pieces into a fan. Grab onto the orange handle on the left and pull to reveal a pillar. Then hop onto the bar and use it to reach the top. Step on the large button to power the fan, revealing a hieroglyph puzzle. Solve it to destroy the wall, then continue down the path. There are rats walking around in the water. Elsa is afraid of rats, so we’ll need to get rid of them. Dive across the gap (you’ll die if you walk into the rats) and grab a torch, then jump next to the ball-shaped objects on either side of the water to light them. This will scare the rats away, allowing Elsa to cross. High jump onto the rope to remove the spears around the lever, then switch to Indy and pull it to open the door. Head inside.
Part 4 – Hidden Passageway
Head to the right and cross one of two ways. You can either use the whip pad to swing across the gap, or high jump onto the ledge and shimmy across the bar to the right. Once you’re across, high jump onto the rope to raise up some platforms. Switch to Indy and hop up, then use your whip to destroy the spiderweb. This will reveal a latch, so use the whip pad to raise up some platforms on the right. Head to the right and pull one of the levers. Your partner will pull the other one, revealing an opening. Head inside.
Part 5 – The Tomb of Sir Richard
Our target is the coffin behind the spears in the back. To reach it, push the coffin to the right along the tiles. This will reveal flower symbols on it. Hop onto the coffin, then high jump onto the ledge. Push the box off of the ledge, then push it into one of the slots in the floor. With that box in place, head to the left and use the whip pad to lower the other box down. Push it into the other slot. You’ll notice that the tops of the boxes have a button on them. Step on one and your partner will step on the other, revealing another coffin and lowering the spears around Sir Richard’s coffin. Push the tan coffin back against the wall, then hop on top of it and up to Sir Richard’s coffin.
Part 6 – Speedboat Chase
Head to the right and you’ll find Kazim. Hit him to take out two hearts and he will hop into a boat. Hop into a boat, then chase after him. Ram him to take out his hearts. Once his boat is down to one heart, he’ll head towards the island in the center. Ride over to the island, then hop out and fight him some more. Take out two more hearts and he will hop back in a boat. Get in a boat and ram him again. When his boat is down to one heart, he will drive over to the propeller on the right. Drive over to him, then hop out and smack him to take out his last two hearts, ending the level.
Unlocked Characters: Indiana Jones (Professor), Elsa, Brody, Kazim (30,000)
The Hunt for Sir Richard – Free Play Mode
Required Abilities: Dig, Explosive, High Jump, Mechanic, Scream, Small, Soldier, Sword, Thuggee, Whip
Part 1 – Ah, Venice!
Treasure Chest 1

Treasure Chest 2


Red Parcel


Treasure Chest 3


Part 2 – Library
Treasure Chest 4

Treasure Chest 5


The Hunt for Sir Richard – Free Play Mode cont.
Part 3 – Catacombs
Treasure Chest 6


Part 4 – Hidden Passageway
Treasure Chest 6 cont.

Treasure Chest 7


Part 5 – The Tomb of Sir Richard
Treasure Chest 8


Part 6 – Speedboat Chase
Treasure Chest 9


Treasure Chest 10


Minikit Model: Crusader Shield
Red Parcel Extra: Parcel Detector (125,000)
Castle Rescue – Story Mode
Enemies: Enemy Soldier (Crusade), Enemy Officer, Bazooka Trooper (Crusade)
Boss: Enemy Radio Operator
Starting Characters: Indiana Jones, Elsa
Added Characters: Henry Jones
True Adventurer: 35,000

Part 1 – Castle Entrance
Grab a sword from a nearby suit of armor, then toss it at the rope on the right to raise the gate. Head through the opening.
Part 2 – Castle Hallway
Run down this hallway as fast as you can, as there is a bazooka trooper here who will constantly be shooting at you. Take him out quickly and you’ll avoid a lot of frustration. Once the enemies are taken care of, push the table on the tiles to the right. Hop on top of it, then onto the ledge on the right. Use the whip pad to open the window, then hop onto the bar and out the window.
Part 3 – Castle Exterior
Use the whip pad to swing across the gap, then build the LEGO pieces into a bridge, allowing Elsa to join you. Head down the ledge and you’ll find some flower symbols. High jump onto the ledge, then destroy the gargoyle to reveal LEGO pieces. Build them into a rotary handle, then turn it to rotate the crane. Use the whip pad to swing across the gap.
Part 4 – Burning Library
Well that didn’t go as planned. Head to the right and destroy the chairs and boxes to reveal LEGO pieces. Build them into a ladder, then climb up onto the shelf. Head to the left and drop down, then grab onto the rope. This will reveal a large knight statue. Destroy it to reveal a large disc. Pick it up and carry it to the left, then place it in the slot. Destroy the large lamp to reveal LEGO pieces, then build them onto the other suit of armor. It will raise up the disc, creating a platform. Pull the orange handle to raise up the other disc. Quickly climb the rope and hop to the left across the platforms, then continue left on top of the shelves. Drop down and you’ll find the fireplace, which is our way out of here. Push the bookshelf to the left of the fireplace into the wall, revealing a hieroglyph puzzle, then solve it to turn the table into a rotary handle. Turn it to rotate the fireplace, then head through the opening.
Part 5 – Listening Post
We need to break the glass on the right to proceed. There are three speakers on the right, two with green panels. Destroy the typewriter near them to reveal LEGO pieces, then build them onto the center speaker. Now we need to find two small discs. The first can be found by destroying the typewriter next to the glass, and the second can be found by destroying the typewriters by the fireplace. Pick up the discs and place them in the slots. With the speakers ready, turn the key to turn them on, breaking the glass. Continue to the right.
Part 6 – Castle Rooftop
Time for a little scuffle with a radio operator. He has a key that we need, so walk up to him and hit him to take out two hearts. He will then flee up the stairs, so follow him. Hit him to take out two more hearts, causing him to flee once more to the right. Catch up to him and take out his last two hearts to defeat him. He will drop the key, so pick it up. Head back to the left and down the stairs, then place the key in the slot. Turn it to sound the alarm. This will cause some enemies to appear. One of them is an officer, and he will drop his hat when you defeat him. You can call an infinite number of officers by turning the key, so don’t worry if you miss a hat. Grab his hat, then head back up the stairs and to the left. Use the Soldier panel to open the gate, then head inside the alcove. Pull the levers to reveal a box of bazookas. Grab one, then head to the right side of the upper level. You’ll find some silver tanks, so destroy them to knock over the tower. Walk across it and over the gap, then continue to the right. Use the Soldier panel to open the door, then head inside.
Part 7 – Dead End
Simply push the chair to the left to reveal a secret staircase. Walk down it to complete the level.
Unlocked Characters: Henry Jones, Enemy Butler (15,000), Enemy Radio Operator (25,000), Bazooka Trooper (Crusade) (30,000)
Castle Rescue – Free Play Mode
Required Abilities: Explosive, High Jump, Scholar, Small, Thuggee
Part 1 – Castle Entrance
Treasure Chest 1

Part 2 – Castle Hallway
Treasure Chest 1 cont.


Treasure Chest 2


Red Parcel


Treasure Chest 3

Part 3 – Castle Exterior
Treasure Chest 4


Part 4 – Burning Library
Treasure Chest 5


Treasure Chest 6

Part 6 – Castle Rooftop
Treasure Chest 7

Treasure Chest 8

Treasure Chest 9

Part 7 – Dead End
Treasure Chest 10


Minikit Model: Suit of Armour
Red Parcel Extra: Disarm Enemies (100,000)
Motorcycle Escape – Story Mode
Enemies: Enemy Guard, Enemy Soldier, Enemy Officer, Bazooka Trooper (Crusade)
Starting Characters: Indiana Jones, Henry Jones
True Adventurer: 90,000

Part 1 – Garage
We need to get two motorcycles ready. Start by pulling the lever by the conveyor belt. This will reveal a box. Pick it up and place it on one of the green panels. Head to the right and you’ll find a crane. Destroy the boxes by it to reveal LEGO pieces. Build them into a rotary handle, then turn it to lower the box to the ground. Pick it up and place it on the other green panel. Once both boxes have been placed on the green panels, build the LEGO pieces into the first motorcycle. Unfortunately, it will start smoking. We’ll need to find a wrench to repair it. Start punching the cabinets to the right of the conveyor belt to reveal one, then use it to fix the motorcycle. One down, one to go. Destroy the box to the right of the conveyor belt to reveal LEGO pieces. Build them onto the lever, then pull it to lower the other motorcycle down. Hop on one motorcycle and your partner will hop into the other. Drive onto one of the orange buttons on the left and your partner will drive onto the other, opening the gate. Continue to the left.
Part 2 – Country Roads
Drive to the right, watching out for the mud pits. You’ll eventually reach a ramp, so drive over it and continue to the right. Watch out the falling boulders! You’ll eventually reach a checkpoint, with your path being blocked. You’ll notice waves of enemy soldiers will appear, with one of them being an officer. Defeat the officer and pick up his hat, then use the Soldier panel to raise the gate. Continue to the right and you’ll notice a key. Turn it to raise up the ramp, then ride over it and continue to the right. Watch out for the red mines on the path, as they’ll damage you. Continue along the road and you’ll find another checkpoint. If you still have your hat from earlier, use the Soldier panel to raise the gate. Don’t worry if you’ve lost your hat, as more enemies will appear on motorcycles, including an officer. Once the gate is up, continue to the right.
Part 3 – Farm
Head to the right and you’ll find a small shed. Pull one of the levers and your partner will pull the other, opening the shed and revealing some enemies. One of them is an officer, so pick up his hat and head to the right. Use the Soldier panel to open the shed next to you. There is a shovel inside, so grab it and head back to the left. You’ll find a spot you can dig next to the barn, so do so to dig up a trampoline. Use it to bounce onto the bar, then drop down onto the ledge on the left. Head inside the barn.
Part 4 – Barn
Use the whip pad to swing across the gap, then destroy the boxes to reveal a small box. Pick it up, then drop down and carry it to the right. Place it on the green panel to reveal LEGO pieces, then build them into a rotary handle. Turn it to open the cage, then grab the bazooka inside. Climb the ladder to reach the upper ledge, then head back outside.
Part 3 – Farm
Head all the way to the right and you’ll see some silver objects. Destroy them to reveal LEGO pieces, then build them into a handle. Pull it to raise up the bridge, then get back in the motorcycles and drive back to the right. Drive onto one button and your partner will drive onto the other, opening the gate. Head through the opening.
Part 5 – Back Roads
Continue along the road. There are two paths for you to take, but they both lead to the same place, so take whichever path you want. Head through the tunnel at the end.
Part 6 – An Explosive Encounter
I hope you like blowing up, cause you’re going to be doing a lot of it. Defeat the three waves of enemy soldiers that appear and a garage will open on the right. Inside is a box of bazookas, so grab one and use it to destroy the silver turrets shooting at you. Each turret will take four hits to destroy, so you’ll need to get a new bazooka for each one. At this point, bazooka troopers will also appear to annoy you, so stay clear of them to avoid going boom. Once all three turrets are toast, the gate will open, so head on through to complete the level.
Unlocked Characters: Indiana Jones (Officer) (18,500), Elsa (Officer) (15,000)
Motorcycle Escape – Free Play Mode
Required Abilities: Explosive, High Jump, Mechanic, Scream
Part 1 – Garage
Treasure Chest 1


Treasure Chest 2


Part 2 – Country Roads
Treasure Chest 3


Treasure Chest 4

Treasure Chest 5

Part 3 – Farm
Treasure Chest 6

Treasure Chest 7


Red Parcel


Part 4 – Barn
Treasure Chest 8


Part 6 – An Explosive Encounter
Treasure Chest 9

Treasure Chest 10


Minikit Model: Gilt Framed Portrait
Red Parcel Extra: Treasure x8 (4,000,000)
Trouble in the Sky – Story Mode
Enemies: Enemy Officer, Enemy Pilot, Enemy Guard
Boss: Colonel Vogel
Starting Characters: Indiana Jones, Henry Jones
True Adventurer: 80,000

Part 1 – No Ticket!
Vogel and some enemies will be marching around, but they won’t do anything until you throw some punches, so use this time to explore. When you’re ready, start punching. Vogel will pull a lever on the right, revealing a ledge. He will hop onto it and start throwing chairs at you. Pick up a bottle from one of the tables and throw it at Vogel to damage him. Hit him with bottles to take out four hearts. He will then jump down to fight you properly, so smack him to take out his last two hearts.
Part 2 – Farmland
Well, we’ve crashed. Our way ahead is to the right past that gate. Unfortunately, that lever is missing a piece. Head back to the left and start punching the plane to reveal a box. Pick it up and place it on the green panel on the left to reveal LEGO pieces. Build them into a fan, then ride the air current up and over the fence on the left. Use the whip panel on the right to open the gate, then continue to the left. Use the whip pad to lower the ladder, then climb up. Grab onto the bar, then shimmy to the right. Drop down onto the next building, then smash the clock to reveal a gear. Pick it up and carry it to the right, then place it in the lever. Pull the lever to open the gate, then continue to the right. At this point, bombs will occasionally fall from the sky. The bombs fall in random places, so try to avoid them. Enemy pilots will parachute in after the bombs to hassle you, so watch out for them (especially since one of them might have a bazooka!). Continue to the right and you’ll find a barn. To the left of it is an outhouse. Destroy the door and you’ll find a shovel inside. Pick it up and use it to dig up the object in front of the barn. This will reveal a platform and a rope. Your partner will hop onto the platform, so grab the rope to raise them up. Switch to them and head to the right. Grab the rope and swing onto the platform, then quickly hop to the right over the wall. The platform will collapse shortly after you land on it, so it’s important to be quick. If you fail to make it over the wall, simply rebuild the platform and try again. Once you’re over the wall, head through the archway in the back of the orchard.
Part 3 – Countryside
Head to the right and you’ll find a car. Unfortunately, it needs a lot of repairs, so let’s get to work! Build the nearby LEGO pieces onto it, then destroy the nearby cart to reveal a steering wheel. Pick it up and place it in the car. The car will then start smoking, so we’ll need a wrench to repair it. You’ll see an archway in the back leading to a small courtyard. Destroy the tractors on either side of the arch to reveal objects. Pick them up and place them in the slots in the right side of the courtyard. There is another tractor in the courtyard, so destroy it to reveal the final object. Once all three objects are in the slot, step on the button to power the generator. This will raise up a ladder, allowing you to climb up to the ledge with the wrench. Grab the wrench and head back to the car, then repair it and hop inside. Drive to the right and you’ll find that the bridge is down. Use the whip pad to swing across the gap, then destroy the pile of wood to reveal LEGO pieces. Build them onto the bridge, then head back to the left and hop in the car. Drive across the bridge and through the silver gate.
Part 4 – Beach
Head down the road and you’ll reach a path. Head down it and you’ll scare off a flock of birds. They will fly into the other plane pursuing you, damaging it. We need to find and scare off two more flocks of birds. For the first, head to the right and you’ll find a ladder. Hop up onto the ledge with it, then grab the bar on the right. Hop up the bars to the right and drop down onto the ledge. Grab the vine on the right, then grab onto the next bar. Drop onto the next platform, then grab the bar on the right. Shimmy to the right and hop onto the final platform, where you’ll find a flock of birds. Walk up them to scare them off, then drop all the way down to the beach. We’ll need a shovel for the next flock of birds. If you don’t have yours from earlier, you can find another one in front of one of the huts along the beach. Head back to the left and dig up a treasure chest, then destroy it to reveal a key. Pick it up and place it in the slot, then turn it to create steps. Hop up them and continue to the left, then head to the ship in the background. Hop onto the bar and onto the ship’s deck, then hop up the ledges on the left to find the last flock of birds. Scare them off to crash the plane, completing the level.
Unlocked Characters: Colonel Vogel (50,000), Enemy Pilot (25,000)
Trouble in the Sky – Free Play Mode
Required Abilities: Dig, Explosive, Scholar, Scream, Small, Whip
Part 1 – No Ticket!
Treasure Chest 1

Part 2 – Farmland
Treasure Chest 2


Treasure Chest 3


Red Parcel


Part 3 – Countryside
Treasure Chest 4


Treasure Chest 5


Treasure Chest 6


Part 4 – Beach
Treasure Chest 7

Treasure Chest 8

Treasure Chest 9


Treasure Chest 10


Minikit Model: Eagle Statue
Red Parcel Extra: Treasure Magnet (100,000)
Desert Ambush – Story Mode
Enemies: Enemy Soldier (Desert)
Boss: Tank, Colonel Vogel
Starting Characters: Indiana Jones, Sallah (Fez)
True Adventurer: 100,000

Part 1 – Canyon of the Crescent Moon
Head to the right and you’ll find three green panels. We need to find three boxes. Head to the left and destroy the tires on the truck. This will cause the front to explode, revealing LEGO pieces. Build them into a box, then pick it up and place it on one of the green panels. Head to the far right and you’ll find a horse. Hop on the horse, then jump off. You’ll be bucked high in the air, so land on the ledge nearby with the second box. Pick it up and place it on one of the green panels. Look towards the background and you’ll see a boarded up tunnel. Destroy the boards to reveal the opening, then head inside.
Part 2 – Cave
Head to the right and dig up some LEGO pieces. Build them onto the machine to power the lift, raising it up. Ride it up to the ledge, then head to the left. Climb the small ladder, then head through the opening.
Part 1 – Canyon of the Crescent Moon
You’ll find yourself on a ledge with the final box. Pick it up, then drop down and place it on the final green panel. Once all of the boxes are on the green panels, build the LEGO pieces into a small vehicle. Hop in and drive it to the left, then drive through the barrier and into the canyon.
Part 3 – Canyon Ambush
Vogel is in his tank, firing bazookas at you. Eventually, he will head inside the tank and drive around a bit. He’ll then pop back out and start shooting at you again. To damage the tank, you need to build three mines that he’ll drive over. On the right side of the area, you’ll notice two groups of silver cylinders. Stand near them so Vogel fires his bazooka at them, destroying them. They will leave LEGO pieces behind, so build them into two mines. When Vogel drives near them, they will explode, damaging the tank. For the final mine, head to the left and you’ll find some LEGO pieces. Build them into a ladder, then climb up onto the ledge. Head to the right and cross the boards (be careful, as they’ll collapse when you step on them), then push the box off the edge. Drop down and build the LEGO pieces into the final mine. Once Vogel drives over all three mines, he will flee to the right. Follow him through the opening.
Part 4 – Cliffside
Vogel is still firing his bazooka at you, so be careful. Hop on a horse, then jump off to get bucked onto the ledge in the back. Head to the right and cross the boards (be careful, as they’ll collapse when you step on them). Head to the right and Vogel will drive through the boulders, allowing you to continue down the canyon.
Part 5 – Tank Battle
This fight is simple enough. Defeat the three truckloads of enemies that appear and Vogel will hop out of the tank. Smack him to take out three hearts and he will retreat back inside. More enemies will appear, so repeat this process two more times to defeat Vogel, ending the level.
Unlocked Characters: Sallah (Fez), Kazim (Desert) (30,000), Elsa (Desert) (15,000)
Desert Ambush – Free Play Mode
Required Abilities: Dig, Explosive, High Jump, Scholar, Small, Thuggee, Whip
Part 1 – Canyon of the Crescent Moon
Treasure Chest 1


Secret Character – R2-D2


Treasure Chest 2


Treasure Chest 3


Part 2 – Cave
Treasure Chest 4


Treasure Chest 5


Desert Ambush – Free Play Mode cont.
Part 3 – Canyon Ambush
Treasure Chest 6


Red Parcel


Treasure Chest 7


Treasure Chest 8


Part 4 – Cliffside
Treasure Chest 9

Treasure Chest 10


Minikit Model: Ancient Amphora
Red Parcel Extra: Treasure x10 (5,000,000)
Temple of the Grail – Story Mode
Enemies: Enemy Soldier (Desert), Grail Knight
Starting Characters: Indiana Jones, Henry Jones, Sallah (Fez), Brody
True Adventurer: 80,000

Part 1 – Temple Exterior
Those enemy soldiers will keep spilling out of the trucks, so destroy the brown poles holding up the backs of the trucks to close them. That will cut off the enemies, allowing you some peace. Head to the right side of the temple and you’ll see an object buried in the sand. Dig it up, then smash it to reveal some LEGO pieces. Build them into a ladder, then climb up and grab onto the bar above you. Hop up the bars, then grab the rope and hop onto the ledge on the left. Solve the hieroglyph puzzle to raise up the center of the roof, allowing you to continue to the left. Head left and solve the next hieroglyph puzzle to reveal two levers. Drop down and pull one of the levers. Your partner will pull the other, opening the door. Head inside.
Part 2 – Temple Entrance
Head to the right and you’ll see the door out of here. On the right side is a colored column. We need to find the missing pieces so the left side matches the right. Look to the right of the lion statues and you’ll see a small object. Destroy it to reveal a patch of dirt you can dig up. Dig up a red block, then carry it to the left and place it in the pillar. Now for the blue block. Grab a torch and head to the right, then place it in the sconce on the left. This will activate the hieroglyph puzzle, so solve it to reveal the blue block. Pick it up and place it in the pillar to open the door. Head inside.
Part 3 – Breath of God
We’re down to just Indy and Sallah. Indy has his father’s grail diary, and as such, can solve hieroglyph puzzles. Solve the puzzle nearby to activate the saws and spears. Carefully proceed to the right, then cross the bridge (watching out for the parts that fall). Continue to the right and you’ll find a place to dig, so do so to reveal a basket. Destroy it to reveal LEGO pieces, then build them into bars. Carefully hop across the bars to the left, then drop down onto the ledge. Use the whip pad to lower the bridge, then head across. Dig in the dirt to reveal an object, then destroy it to reveal LEGO pieces. Build them into a handle, then push it to move the bridge across the gap. Cross the bridge, then head up and to the right. Turn the rotary handle to slowly retract the spears below you, then head back down and to the right. Pick up the handle, then carry it back left. Place it in the slot, then push it to the left to open the door. Head inside.
Part 4 – Word of God
Head to the right and grab the vine, then swing across the gap. Solve the hieroglyph puzzle to reveal an alcove, then use the whip pad to pull the jewel box towards you. Pick it up and place it in the slot, revealing a key. Pick it up, then place it in the slot. Turn the key and your partner will turn the other, raising up a bridge. Cross it, then hop across the gap on the bars. You’ll find another door with colored pillars. To open it, we’ll need to find the blue block. Head to the right and use the whip pad to swing across the gap, then build the LEGO pieces into a rope, allowing Sallah to join you. Continue to the right and you’ll find a snake pit. Use Sallah to leap over the snakes, then grab the torch from the wall. Use it to light the fire in the snake pit, allowing Indy to join you. Head up the path and use the whip pad to lower the spears. Pick up the blue block and carry it to the left, then place it on the cart. Pull the lever to move it across the gap, then head back left. Pick up the block and place it in the pillar to open the door. Inside you’ll find a series of platforms with letters on them. You’ll need to spell the name of God: IEHOVAH. Hop on the blocks with the flashing green letters to open the door at the end. Head inside.
Part 5 – Path of God
Head to the right and you’ll notice a gap with studs across it. It might look like there’s nothing there, but you can walk right across the gap. Cross the first two gaps, then use the whip pad to lower the bridge. Cross it, then grab the box and carry it back to the left. Place it on the green panel to reveal LEGO pieces, then build them into a rotary handle. Turn it to raise up the invisible bridge, then cross it. Head through the opening and you’ll find the final bridge. Walk across it like you did the others, then head through the opening at the end.
Part 6 – Grail Chamber
The knight wants a piece of you, so smack him a few times to tire him out, allowing you to look for the Grail in peace. Remember, the Grail is a simple wooden cup. To find it, head to the left and solve the hieroglyph puzzle. This will open the door, so head inside. Use the whip pad to swing across the gap, where you’ll find the Holy Grail on the right (remember it’s the brown one). Pick it up and swing back across the gap, then head over to the pool of Holy Water. Interact with it to complete the level.
Unlocked Characters: Donovan (50,000), Grail Knight (100,000)
Temple of the Grail – Free Play Mode
Required Abilities: Dig, Explosive, Mechanic, Scholar, Small, Sword, Thuggee, Whip
Part 1 – Temple Exterior
Red Parcel


Treasure Chest 1


Part 2 – Temple Entrance
Treasure Chest 2


Part 3 – Breath of God
Treasure Chest 3


Treasure Chest 4

Treasure Chest 5

Part 4 – Word of God
Treasure Chest 6


Treasure Chest 7


Part 5 – Path of God
Treasure Chest 8

Treasure Chest 9

Treasure Chest 10


Minikit Model: Fake Holy Grail
Red Parcel Extra: Invincibility (1,000,000)
Unlocking the Bonus Missions
Required Abilities: Dig, Explosive, High Jump, Scholar, Scream, Small, Thuggee
There are three bonus missions in this game, and before you can play them, you’ll have to collect some Treasure Chests and solve a puzzle in Indy’s Office.
The first part of unlocking the bonus missions is completing Minikit Models. You’ll notice that your completed Minikit Models will be shining a light towards the center of the Artifact Room. The first three Minikit Models you complete will shine a blue light, the next six will shine a yellow light, and the final nine will shine a red light. These lights are based on the order in which you complete the Minikit Models. The first three you complete, no matter which ones they are, will have a blue light. The same goes for the yellow and red lights.
Once you complete three Minikit Models, you will be able to play Ancient City. If you walk up to the corresponding circle however, you’ll notice it’s blocked by a grate. To open it, you’ll need to head to Indy’s Office.


You only have to do this once. Once you’ve opened the grates, they will stay open. Characters will be walking in and out of Indy’s Office, so don’t walk out until you have the key. Otherwise, the puzzle will reset. If you need a different ability, wait until a character with that ability walks into the room, don’t go running around looking for them.
Ancient City
This bonus level can be unlocked after completing 3 minikit models. It is your standard collect 1 million studs level. While you are timed, there is no time limit.
There are many things you can do to collect 1 million studs. The most basic things you can do are simple: shoot and build everything you can. There are lots of plants and rocks lying around for you to destroy. There are a few Bandits walking around that you can defeat. There are also more “complicated” things you can do for studs. I’ll explain those below.
Build a flying machine


Reveal a terracotta army


Launch the rocket cart


Open a red gate

Reveal the Grail Temple


Build a LEGO mosaic

Build an “O”


Reveal a UFO


Ride a rickshaw

Build a dinosaur fossil


Build an “E”


Build a “G”


Ancient City cont.
Use the whip pad

Enter a hidden room


Repair the sphinx


Destroy the sphinx

Drive on the race track


Once you collect 1 million studs, the level will end and your best time will be recorded. Unfortunately, you don’t get to keep these 1 million studs. If you have done everything on this list and still don’t have 1 million studs, run around and make sure you have defeated the enemies and shot and destroyed everything. I usually miss destroying a rock or a plant somewhere.
Young Indy
This bonus level can be unlocked by completing 9 Minikit Models. Once you have completed 9, hop into the left hole to play this level.

Enemies: Grave Robber
Starting Characters: Young Indy, Boy Scout
Part 1 – Cave
Head to the right and hop onto the rope, then continue to the right. The path ahead is blocked by a closed door, and we’ll need to find a key to continue. Head back to the left and you’ll find a snake pit. Indy has not yet developed his phobia of snakes, so use him to hop across the gap and grab the shovel. Head back to the left and use the rope to cross the gap. You’ll find a blue object buried in the dirt. Dig it up to reveal a clown sculpture, which will collapse the ground around you and reveal the key. Pick it up and carry it back to the right, then place it in the slot. Turn it to open the door, then continue to the right. Carefully hop across the rock platforms, then hop up the bars and exit the cave.
Part 2 – Horse Escape
Head to the right and you’ll find two green panels. We need to reveal two boxes to place on them. Head to the left and destroy the small cart to reveal one box. Pick it up and place it on one of the panels. The other box is buried in the dirt to the left of the horse pen (there is a shovel in front of the pen if you need one). Once both boxes are on the green panels, build the LEGO pieces into a lever. Grab the rope that appears to reveal a key. Pick it up and place it in the slot, then turn it to open the pen. Head inside.
Part 3 – Circus Train
Head to the right and hop onto the next train car. Destroy the large pile of boxes, then hop onto the bar to reach the giraffe car. Climb down the ladder, then head to the right on the ledge. Continue to the right and hop across the next few cars. You’ll eventually find yourself on a train car with lots of boxes on it. Destroy the boxes to reveal LEGO pieces, then build them into tiles. Push the box to the left to create an opening, then drop inside.
Part 4 – Train Interior
Indy has his snake phobia now, so grab a torch and climb onto the board. Walk across and it will break, so continue on (the torch will give you the courage to pass through the snakes). There is a lion in the next room. Indy will grab a whip, so use it to whip the lion a few times. Once the lion has had enough, the door will open. Head into the next room, where you’ll find a green panel in the floor. You need to find three boxes. Destroy all of the objects in the room to find the boxes, then place them on the green panel. Build the LEGO pieces into a magic box, completing the level.
Unlocked Characters: Young Indy, Boy Scout, Fedora (25,000)
Warehouse
To unlock this Bonus Mission, you’ll need to have completed all 18 Minikit Models. This will open the hole on the right, allowing you to drop inside and play this mission.
This area is actually quite large, and there is a lot you can do. In this area, you can build racetracks if you want by placing the colored boxes on the green panels. There are various objects laying around, such as hoops and ramps, that you can place as well. However, this doesn’t give you any studs, and that’s what you’re here for after all!

Characters
There are a grand total of 83 characters (not including the 2 custom characters) that you can play as in this game. I have listed them all below in the order that they appear on the character selection screen. Next to each character I list their weapon and abilities. I also list how to unlock them and any other interesting things about them.

Indiana Jones

Abilities: Whip
How To Unlock: Complete The Lost Temple

Indy has a phobia of snakes
Satipo

Abilities: Dig
How To Unlock: Complete The Lost Temple

Jock

Abilities: Mechanic
How To Unlock: Complete The Last Temple

Marion

Abilities: High Jump
How To Unlock: Complete Into the Mountains

Indiana Jones (Desert)

Abilities: Whip
How To Unlock: Complete City of Danger

Indy has a phobia of snakes
Marion (Cairo)

Abilities: High Jump
How To Unlock: Complete City of Danger

Sallah (Desert)

Abilities: Dig
How To Unlock: Complete The Well of Souls

Marion (Evening Dress)

Abilities: High Jump
How To Unlock: Complete The Well of Souls

Indiana Jones (Army Disguise)

Abilities: Soldier, Whip
How To Unlock: Complete Opening the Ark

Indy has a phobia of snakes
Marion (Night Gown)

Abilities: High Jump
How To Unlock: Complete Opening the Ark

Indiana Jones (Dinner Suit)

Abilities: Whip
How To Unlock: Complete Shanghai Showdown

Indy has a phobia of snakes
Willie

Abilities: High Jump, Scream
How To Unlock: Complete Shanghai Showdown

Willie has a phobia of insects
Short Round

Abilities: Small
How To Unlock: Complete Shanghai Showdown

Willie (Evening Dress)

Abilities: High Jump, Scream
How To Unlock: Complete Pankot Secrets

Willie has a phobia of insects
Indiana Jones (Kali)

Abilities: Whip
How To Unlock: Complete The Temple of Kali

Indy has a phobia of snakes
Willie (Ceremony)

Abilities: High Jump, Scream
How To Unlock: Complete Free the Slaves

Willie has a phobia of insects
Indiana Jones (Professor)

Abilities: Whip
How To Unlock: Complete The Hunt for Sir Richard

Indy has a phobia of snakes
Elsa

Abilities: High Jump, Scholar
How To Unlock: Complete The Hunt for Sir Richard

Elsa has a phobia of rats
Brody

Abilities: Scholar
How To Unlock: Complete The Hunt for Sir Richard

Henry Jones

Abilities: Scholar
How To Unlock: Complete Castle Rescue

Henry has a phobia of rats
Sallah (Fez)

Abilities: Dig
How To Unlock: Complete Desert Ambush

Young Indy

Abilities: Whip
How To Unlock: Complete Young Indy

Indy has a phobia of snakes
Boy Scout

Abilities: None
How To Unlock: Complete Young Indy

The Boy Scout has a phobia of snakes
Hovitos Tribesman

Abilities: None
How To Unlock: Complete The Lost Temple, then purchase in the Library

Barranca

Abilities: None
How To Unlock: Complete The Lost Temple, then purchase in the Library

Belloq (Jungle)

Abilities: Scholar
How To Unlock: Complete The Lost Temple, then purchase in the Library

Characters cont.
Jungle Guide

Abilities: None
How To Unlock: Complete The Lost Temple, then purchase in the Library

Major Toht

Abilities: Soldier
How To Unlock: Complete Into the Mountains, then purchase in the Library

Colonel Dietrich

Abilities: Soldier
How To Unlock: Complete Into the Mountains, then purchase in the Library

Enemy Guard (Mountains)

Abilities: Soldier
How To Unlock: Complete Into the Mountains, then purchase in the Library

Bazooka Trooper (Raiders)

Abilities: Explosive, Soldier
How To Unlock: Complete Into the Mountains, then purchase in the Library

Sherpa Brawler

Abilities: None
How To Unlock: Complete Into the Mountains, then purchase in the Library

Sherpa Gunner

Abilities: None
How To Unlock: Complete Into the Mountains, then purchase in the Library

Masked Bandit

Abilities: None
How To Unlock: Complete City of Danger, then purchase in the Library

Bandit Swordsman

Abilities: Sword
How To Unlock: Complete City of Danger, then purchase in the Library

Enemy Soldier (Desert)

Abilities: Soldier
How To Unlock: Complete City of Danger, then purchase in the Library

Enemy Officer

Abilities: Explosive, Soldier
How To Unlock: Complete City of Danger, then purchase in the Library

Monkey Man

Abilities: None
How To Unlock: Complete City of Danger, then purchase in the Library

Indiana Jones (Desert Disguise)

Abilities: Whip
How To Unlock: Complete The Well of Souls, then purchase in the Library

Belloq

Abilities: Scholar
How To Unlock: Complete The Well of Souls, then purchase in the Library

Enemy Officer (Desert)

Abilities: Explosive, Soldier
How To Unlock: Complete The Well of Souls, then purchase in the Library

Bandit

Abilities: Dig
How To Unlock: Complete The Well of Souls, then purchase in the Library

Enemy Boxer

Abilities: None
How To Unlock: Complete Pursuing the Ark, then purchase in the Library

Despite being an enemy character, the Boxer cannot use Soldier panels
Captain Katanga

Abilities: Mechanic
How To Unlock: Complete Pursuing the Ark, then purchase in the Library

First Mate

Abilities: Mechanic
How To Unlock: Complete Pursuing the Ark, then purchase in the Library

Belloq (Robes)

Abilities: None
How To Unlock: Complete Opening the Ark, then purchase in the Library

While changing into his robes, Belloq must have forgotten his book, as this version of the character cannot solve hieroglyph puzzles
Enemy Guard

Abilities: Soldier
How To Unlock: Complete Opening the Ark, then purchase in the Library

Kao Kan

Abilities: None
How To Unlock: Complete Shanghai Showdown, then purchase in the Library

Wu Han

Abilities: None
How To Unlock: Complete Shanghai Showdown, then purchase in the Library

Lao Che

Abilities: None
How To Unlock: Complete Shanghai Showdown, then purchase in the Library

Chen

Abilities: None
How To Unlock: Complete Shanghai Showdown, then purchase in the Library

Characters cont.
Dancing Girl

Abilities: High Jump
How To Unlock: Complete Shanghai Showdown, then purchase in the Library

Maharajah

Abilities: Small, Thuggee
How To Unlock: Complete Pankot Secrets, then purchase in the Library

Pankot Assassin

Abilities: Sword
How To Unlock: Complete Pankot Secrets, then purchase in the Library

Pankot Guard

Abilities: None
How To Unlock: Complete Pankot Secrets, then purchase in the Library

Village Elder

Abilities: None
How To Unlock: Complete Pankot Secrets, then purchase in the Library

Village Dignitary

Abilities: None
How To Unlock: Complete Pankot Secrets, then purchase in the Library

Willie (Dinner Suit)

Abilities: High Jump, Scream
How To Unlock: Complete Pankot Secrets, then purchase in the Library

Willie has a phobia of insects
Willie (Pajamas)

Abilities: High Jump, Scream
How To Unlock: Complete Pankot Secrets, then purchase in the Library

Willie has a phobia of insects
Chatter Lal

Abilities: Thuggee
How To Unlock: Complete Pankot Secrets, then purchase in the Library

Chatter Lal (Thuggee)

Abilities: Thuggee
How To Unlock: Complete The Temple of Kali, then purchase in the Library

Thuggee Acolyte

Abilities: Thuggee
How To Unlock: Complete The Temple of Kali, then purchase in the Library

Thuggee

Abilities: Sword, Thuggee
How To Unlock: Complete The Temple of Kali, then purchase in the Library

Slave Child

Abilities: Small
How To Unlock: Complete Free the Slaves, then purchase in the Library

Thuggee Slave Driver

Abilities: Thuggee
How To Unlock: Complete Free the Slaves, then purchase in the Library

Mola Ram

Abilities: Thuggee
How To Unlock: Complete Battle on the Bridge, then purchase in the Library

British Officer

Abilities: None
How To Unlock: Complete Battle on the Bridge, then purchase in the Library

British Soldier

Abilities: None
How To Unlock: Complete Battle on the Bridge, then purchase in the Library

British Commander

Abilities: None
How To Unlock: Complete Battle on the Bridge, then purchase in the Library

Kazim

Abilities: None
How To Unlock: Complete The Hunt for Sir Richard, then purchase in the Library

Enemy Butler

Abilities: None
How To Unlock: Complete Castle Rescue, then purchase in the Library

Despite being an enemy character, the Butler cannot open Soldier panels
Enemy Radio Operator

Abilities: Soldier
How To Unlock: Complete Castle Rescue, then purchase in the Library

Bazooka Trooper (Crusade)

Abilities: Explosive, Soldier
How To Unlock: Complete Castle Rescue, then purchase in the Library

Indiana Jones (Officer)

Abilities: Whip
How To Unlock: Complete Motorcycle Escape, then purchase in the Library

Despite wearing an officer’s uniform, this version of Indy cannot use Soldier panels. He still has his phobia of snakes though.
Elsa (Officer)

Abilities: High Jump, Scholar
How To Unlock: Complete Motorcycle Escape, then purchase in the Library

Despite wearing an officer’s uniform, this version of Elsa cannot use Soldier panels. She still has her phobia of rats though.
Colonel Vogel

Abilities: Soldier
How To Unlock: Complete Trouble in the Sky, then purchase in the Library

Characters cont.
Enemy Pilot

Abilities: Soldier
How To Unlock: Complete Trouble in the Sky, then purchase in the Library

Kazim (Desert)

Abilities: None
How To Unlock: Complete Desert Ambush, then purchase in the Library

Elsa (Desert)

Abilities: High Jump, Scholar
How To Unlock: Complete Desert Ambush, then purchase in the Library

Elsa has a phobia of rats
Donovan

Abilities: Scholar
How To Unlock: Complete Temple of the Grail, then purchase in the Library

Grail Knight

Abilities: Sword
How To Unlock: Complete Temple of the Grail, then purchase in the Library

Fedora

Abilities: None
How To Unlock: Complete Young Indy, then purchase in the Library

Han Solo

Abilities: None
How To Unlock: Find all 5 Secret Characters, then purchase in the Library

The 5 Secret Characters are:
C-3PO (The Lost Temple)
Luke Skywalker (Into the Mountains)
Chewbacca (City of Danger)
Princess Leia (Free the Slaves)
R2-D2 (Desert Ambush)
For information on how to find each of the Secret Characters, see each level’s Free Play Mode walkthrough
Secret Characters
While playing certain modes and levels with Secret Characters turned on, you will have access to several new characters. You can only play as these characters in the levels/modes they are available in, and you cannot bring them into the College or any other levels/modes. Similar to the Characters section, I will list their weapons/abilities if they have any, as well as the levels/modes you can play them in.
Santa

Abilities: None
Levels Available: Into the Mountains
Shanghai Hoodlum 1
Weapon: Machine Gun, Melee
Abilities: None
Levels Available: Shanghai Showdown


Shanghai Hoodlum 2
Weapon: Machine Gun, Melee
Abilities: None
Levels Available: Shanghai Showdown


Dancing Girl 2
Weapon: Melee
Abilities: High Jump
Levels Available: Shanghai Showdown


Grave Robber 1
Weapon: Pistol, Melee
Abilities: None
Levels Available: Young Indy


Grave Robber 2
Weapon: Pistol, Melee
Abilities: None
Levels Available: Young Indy


Minikit Models
There are a total of 18 Minikit Models in the game. Completing these will allow you to unlock the three bonus missions. Your Minikit Models can be viewed in the Artifact Room.


Red Parcel Extras
There are a total of 25 Extras available in this game. The first is unlocked automatically, and there are 6 more for purchase in the Mail Room. The other 18 you’ll have to unlock by collecting the Red Parcels in the Story levels. Below I’ve listed each Extra in the order they appear in the menu. I have also listed what they do, and how to unlock them.
Adaptive Difficulty
How To Unlock: Create a new game
What It Does: This Extra is always on by default. With Adaptive Difficulty on, you will lose different amounts of studs depending on how often you die. If you die a lot, you will only lose 1,000 studs. If you don’t die very often, you’ll lose 4,000 studs. With Adaptive Difficulty off, you’ll lose 2,000 studs every time you die, regardless of how often it is.
Secret Characters

What It Does: While playing in Free Play Mode, if you have this turned on you may receive extra characters to play as. These characters are only playable in the levels you receive them in and cannot be played in the College. See the “Secret Characters” section for more info.
Fertilizer

What It Does: While riding an animal, press the “special” button and the animal will poop!
Disguises

What It Does: This gives all characters fake noses and moustaches.
Silhouettes

What It Does: This will turn all characters into black silhouettes of themselves.
Beep Beep

What It Does: Press the “attack” button while in a vehicle without weapons and it will honk its horn!
Ice Rink

What It Does: This will make the floor super slippery, and it will take longer for your characters to change direction.
Fast Fix

What It Does: Increases the speed at which you repair broken objects.
Super Slap

What It Does: Doubles the damage of all melee attacks.
Treasure x2

What It Does: Multiplies the value of all studs you collect by 2. This stacks with other stud multiplier extras.
Fast Dig

What It Does: Increases the speed at which you dig up buried objects.
Fast Build

What It Does: Increases the speed at which you build LEGO pieces.
Artifact Detector

What It Does: Arrows will point to the final location of Treasure Chests. These arrows will not tell you how to collect the Treasure Chests.
Treasure x4

What It Does: Multiplies the value of all studs you collect by 4. This stacks with other stud multiplier extras.
Poo Treasure

What It Does: If you have this Extra active, hop on an animal and press the “special” button to make the animal poop studs! This only works if you also have the Fertilizer extra active.
Super Scream

What It Does: This causes Willie’s scream to damage enemies! Screaming near an enemy will do one hit of damage to them.
Character Treasure

What It Does: Defeated characters will drop a small amount of studs (around 250).
Treasure x6

What It Does: Multiplies the value of all studs you collect by 6. This stacks with other stud multiplier extras.
Regenerate Hearts

What It Does: If you are missing any hearts, you will passively regenerate them
Parcel Detector

What It Does: An arrow will point to the final location of the Red Parcel. This will not show you how to find the Parcel or reveal the location of the mailbox.
Disarm Enemies

What It Does: This will make enemies unable to shoot you. This doesn’t make them any less dangerous, as they can still hit you and throw things at you.
Treasure x8

What It Does: Multiplies the value of all studs you collect by 8. This stacks with other stud multiplier extras.
Treasure Magnet

What It Does: This increases the range at which you can pick up studs. This only really works on studs that have “settled” on the ground, not ones that are still bouncing.
Treasure x10

What It Does: Multiplies the value of all studs you collect by 10. This stacks with other stud multiplier extras.
Invincibility

What It Does: This makes you immune to damage from all sources.
100% Completion Bonus

Cheat Codes
This is a list of the Cheat Codes available to use in the game. As mentioned in the “Tour of Barnett College” section, these Cheat Codes can be entered in the Classroom. Inputting a Cheat Code for a Character will unlock it for purchase. Inputting a Cheat Code for an Extra unlocks it automatically (you won’t have to pay studs for it).
I have personally checked all of these codes and I can vouch for their authenticity. If you have any other Cheat Codes that you wish to share, please message me and I will check them. If they work, I will add them to this list and give credit to you.
Extras
Artifact Detector – VIKED7
Beep Beep – VNF59Q
Character Treasure – VIES2R
Disarm Enemies – VKRNS9
Disguises – 4ID1N6
Fast Build – V83SLO
Fast Dig – 378RS6
Fast Fix – FJ59WS
Fertilizer – B1GW1F
Ice Rink – 33GM7J
Invincibility – B83EA1
Parcel Detector – VUT673
Poo Treasure – WWQ1SA
Regenerate Hearts – MDLP69
Secret Characters – 3X44AA
Silhouettes – 3HE85H
Super Scream – VN3R7S
Super Slap – 0P1TA5
Treasure x2 – VM4TS9
Treasure x4 – VLWEN3
Treasure x6 – V84RYS
Treasure x8 – A72E1M
Treasure x10 – VI3PS8
Treasure Magnet – H86LA2
Characters
Barranca – 04EM94
Belloq (Desert) – CHN3YU
Belloq (Jungle) – TDR197
Belloq (Robes) – VEO29L
Enemy Boxer – 8246RB
British Commander – B73EUA
British Officer – VJ5TI9
British Trooper – DJ5I2W
Captain Katanga – VJ3TT3
Chattar Lal – ENW936
Chen – 3NK48T
Colonel Dietrich – 2K9RKS
Colonel Vogel – 8EAL4H
Dancing Girl – C7EJ21
Bandit- 12N68W
Enemy Officer (Desert) – 2MK45O
Masked Bandit – N48SF0
Monkey Man – 3RF6YJ
Enemy Soldier (Desert) – 4NSU7Q
Bandit Swordsman – 1MK4RT
Donovan – 3NFTU8
Elsa (Desert) – JSNRT9
Elsa (Officer) – VMJ5US
Enemy Bazooka Trooper (Raiders) – S93Y5R
Enemy Butler – VJ48W3
Enemy Radio Operator – 1MF94R
Enemy Guard – VJ7R51
Enemy Guard (Mountains) – YR47WM
Enemy Officer – 572E61
Enemy Pilot – B84ELP
Fedora – V75YSP
First Mate – 0GIN24
Grail Knight – NE6THI
Hovitos Tribesman – H0V1SS
Indiana Jones (Officer) – VJ85OS
Indiana Jones (Desert Disguise) – 4J8S4M
Jungle Guide – 24PF34
Kao Kan – WMO46L
Kazim (Desert) – 3M29TJ
Kazim (Venice) – NRH23J
Lao Che – 2NK479
Maharaja – NFK5N2
Major Toht – 13NS01
Mola Ram – FJUR31
Pankot Assassin – 2NKT72
Pankot Guard – VN28RH
Village Dignitary – KD48TN
Village Elder – 4682E1
Sherpa Brawler – VJ37W
Sherpa Gunner – ND762W
Slave Child – 0E3ENW
Thuggee – VM683E
Chattar Lal (Thuggee) – CNH4RY
Thuggee Priest – T2R3F9
Thuggee Slave Driver – VBS7GW
Willie – VK93R7
Willie (Pajamas) – MEN4IP
Wu Han – 3NSLT8