
Overview
This is my new and improved guide for LEGO Star Wars: The Complete Saga! In an effort to make my guides more helpful and engaging, I have decided to rework them! This is my first guide with this new format and I am very happy with how it turned out! I would appreciate any feedback you guys have about this new format, so be sure to leave a comment or shoot me a direct message!In this guide you will find: -A rundown of Gameplay Basics -A tour of the Cantina -How to beat each level in Story Mode -The locations of all 10 Canisters and the Red Power Brick in each level in Free Play Mode -The locations of all 10 Blue Canisters in each level in Challenge Mode -Tips and tricks for all six Super Stories, Character Bonuses and Minikit Bonuses -Walkthroughs for all six Cantina Bonus levels -Walkthroughs for all 20 Bounty Hunter missions -Full lists of Characters, Vehicles, Minikit Models and Extras -A full list of Cheat CodesThese guides have always been and will always be free. However, working on these guides takes considerable time and effort. If you like the guide, feel free to show your appreciation with a Steam Award! I appreciate all the points and support you guys have given me!
Gameplay Basics – Lightsaber Combat
You’ll be spending most of your time in the Prequel Trilogy controlling various Jedi, so it is important to know the basics of lightsaber combat. Spamming the attack button is honestly a pretty effective way to get through the game, as the combat isn’t too challenging. However, there are some “fancy” moves that can help you out at various stages of the game.
As mentioned earlier, just spamming the attack button will perform a three hit combo. Each character has two different combos and will rotate between them. Each lightsaber hit deals one point of damage. Some enemies (like Battle Droid Commanders, Droidekas, or Imperial Officers) will take multiple lightsaber hits to defeat.
You can deflect lightsaber attacks simply by holding down the attack button. You can also deflect blaster bolts that are shot at you. Bolts will be automatically deflected as you swing your lightsaber. However, there will be instances where you will have to deflect bolts back at the person who shot them. To do this, press the attack button right as the bolt is about to hit you. This will send the bolt back at the attacker. This is a good way to take out enemies like Clones and Geonosians, who like to back away from you as you approach them. Simply holding the attack button will deflect the bolts, but not back at the attacker.
Gameplay Basics – Force Powers
In addition to lightsabers, Jedi and Sith have a variety of different Force powers in the game. Aside from being able to manipulate objects in the environment, you can also use the Force on various enemies to assist in your combat.


Gameplay Basics – Blaster Combat
You will be spending much of the Original Trilogy playing as a character with a blaster, so it is important to know how to use it. Blaster combat is much more simple than lightsaber combat, so there isn’t much to discuss here. However, I believe it is still important to know the basics.
As you might expect, firing your blaster will send blasts at enemies. Each blaster bolt will do one hit of damage (with some exceptions), with some enemies required multiple hits to defeat. Droidekas cannot be damaged by blaster bolts while their shields are up, so you’ll have to use other methods to defeat them (such as blasting them when they turn into wheel form). Blaster characters will not be able to damage bosses that use lightsabers, except when that boss is using Force Lightning on your partner.
Press the attack button right when a blaster bolt is about to hit you to dodge it. This does not work for every blaster character (most of the generic enemies do not have a dodge).
Lastly, most blaster characters have melee attacks for close quarters battles. Simply walk up to an enemy and press the attack button to punch, kick or slap them. Similar to lightsaber attacks, these melee attacks come in three hit combos. Each of those melee attacks does one hit of damage.
Gameplay Basics – Collectables
To get 100%, you gotta collect everything. There are lots of things to collect, so it’s important to know what you are looking for! You can check your overall collectable progress by standing in front of the door to an Episode room or level.
Studs

True Jedi
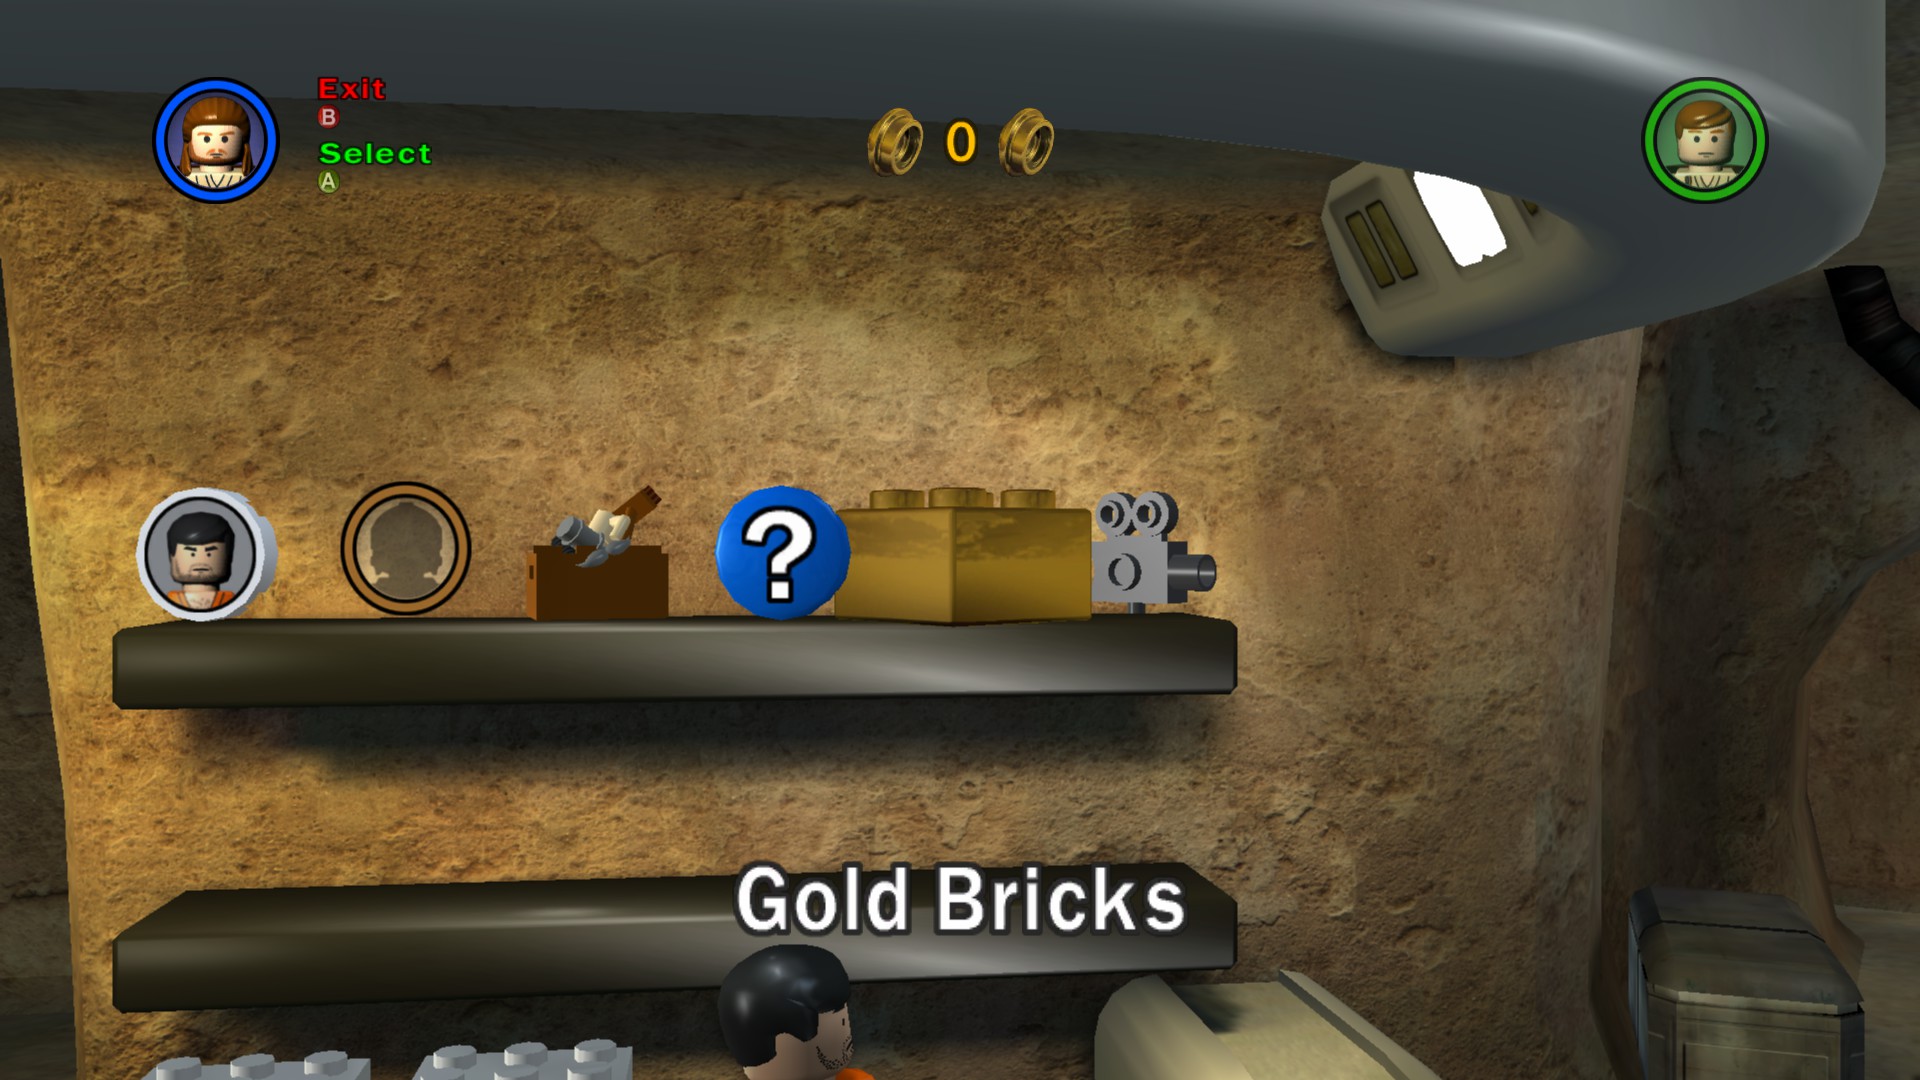
Gold Bricks
You can earn Gold Bricks by
- Completing a level in Story Mode (36 total)
- Achieving True Jedi status in a level (36 total)
- Collecting all 10 Canisters in a level (36 total)
- Completing a Character or Minikit Bonus (12 total)
- Completing one of the Cantina Bonus Missions (6 total)
- Completing the Bounty Hunter Missions (20 total)
- Purchasing them from the Bar (14 total)
Canisters
Blue Canisters
Red Power Bricks

Power Ups
When you collect a Power Up, the effects of the following Extras will be applied:
- Super Lightsabers
- Super Blasters
- Super Slap
- Super Jedi Slam
- Fast Force
- Fast Build
- Deflect Bolts
- Invincibility
- Stud Magnet
- Tractor Beam (if in a vehicle)
- Score x2 (this will apply to whatever your current stud multiplier is, meaning you can have a max of x7680!)
Gameplay Basics – Game Modes
This game has plenty of levels for you to play, with 36 story levels and 18 bonus levels. There are several different game modes you can play, which I’ll describe here. I also describe how I structure the walkthroughs for each game mode.
The first time you play a story level, you will be playing Story Mode. As you might expect, you will be playing through the story of whatever episode you select. You will only have access to the characters that the game gives you. Generally, your exploration is limited due to the characters you have, meaning you’ll have to come back in Free Play Mode to unlock the collectables you couldn’t collect in Story Mode. After completing a level in Story Mode, you can select the Replay Story option to replay the level in Story Mode.
At the top of my Story Mode walkthroughs, I put the opening crawl to give you some context on what the premise of the level is. I then list the enemies you’ll encounter and any bosses you will fight. I also list both your starting characters and any characters that are added as you progress. Finally, I list the True Jedi total for that level. Each level is split up into parts, which I sometimes call areas. Each part is a distinct area of the level, separated from other areas by a screen wipe (it will be very obvious when you enter a new area). Some levels have lots of parts, while some only have one. Below each part, I explain what to do in that part to progress in the level. I do not include the locations of any collectables, even if you can collect them in the story. At the end of the walkthrough, I list any characters you unlocked. If you need to purchase these characters, I have also included their cost in studs.
After completing a level in Story Mode, you will be able to play it in Free Play Mode. In Free Play Mode, you can select a character from all the ones you’ve unlocked to take into the level. The game will then give you a selection of other characters to cover all of the abilities you have unlocked. In Free Play Mode, your goal is to find all of the collectables. At any point in Free Play Mode, you can save and exit to return to the Cantina without having to complete the level.
My Free Play Mode walkthroughs are also divided into parts, as I believe this makes them easier to navigate. At the top of the walkthrough will be a list of the abilities you’ll need to collect all of the collectables in that level. Free Play Mode walkthroughs contain the locations of all 10 Canisters and the Red Power Brick, even if they can be collected in Story Mode. Screenshots are also included to add clarity to the walkthrough. At the end of the walkthrough, I have listed the Minikit Model and the Red Power Brick Extra you can unlock (and its cost) by collecting the Canisters and Red Brick.
Finally, you’ll have Challenge Mode. This game mode was introduced in the PSP version of LEGO Star Wars II (thanks to Poleon for the correction) and hasn’t been used since appearing in this game. You can play Challenge Mode after beating a level in Story Mode. In Challenge Mode, you will be given 20 minutes to find 10 hidden Blue Canisters. These are usually in different places then the white Canisters, and they are always out in the open. You will not have to do anything to make a Blue Canister appear out of thin air. As soon as you collect the final Blue Canister, the level will end and your best time will be recorded. When you complete a level in Challenge Mode, you will get studs for the time left on the clock (and a 50,000 bonus if it was your first time beating that level’s Challenge Mode). You will not have access to any Extras in this mode, and you won’t be able to collect any studs or other collectables.
My Challenge Mode walkthroughs are set up exactly the same as my Free Play Mode walkthroughs. A list of required abilities is at the top, and the locations of the Blue Canisters are split up by parts, with screenshots to accompany them.
Gameplay Basics – Bonus Levels
In addition to the Story levels, this game has several bonus levels you can play. I’ll describe each of them below.
After completing all six Story levels in an episode, you’ll gain access to that episode’s bonus door. Heading inside this door, you will be able to play Super Story and the Character/Minikit Bonus for that episode.
Super Story tasks you with completing all 6 Story levels in less than one hour. This is simple enough, but you are also tasked with collecting at least 100,000 studs. You need to complete both of these objectives to successfully complete Super Story. You’ll want to find a balance between speed and stud collection. In each Super Story walkthrough, I give my advice for how to approach each level. Completing Super Story will not give you a Gold Brick, but it will contribute to your overall completion percentage. If you don’t have 100% but aren’t sure what else to do, check to see if you’ve completed Super Story. You won’t have extras in Super Story, so you won’t get stud multipliers to make it easier.
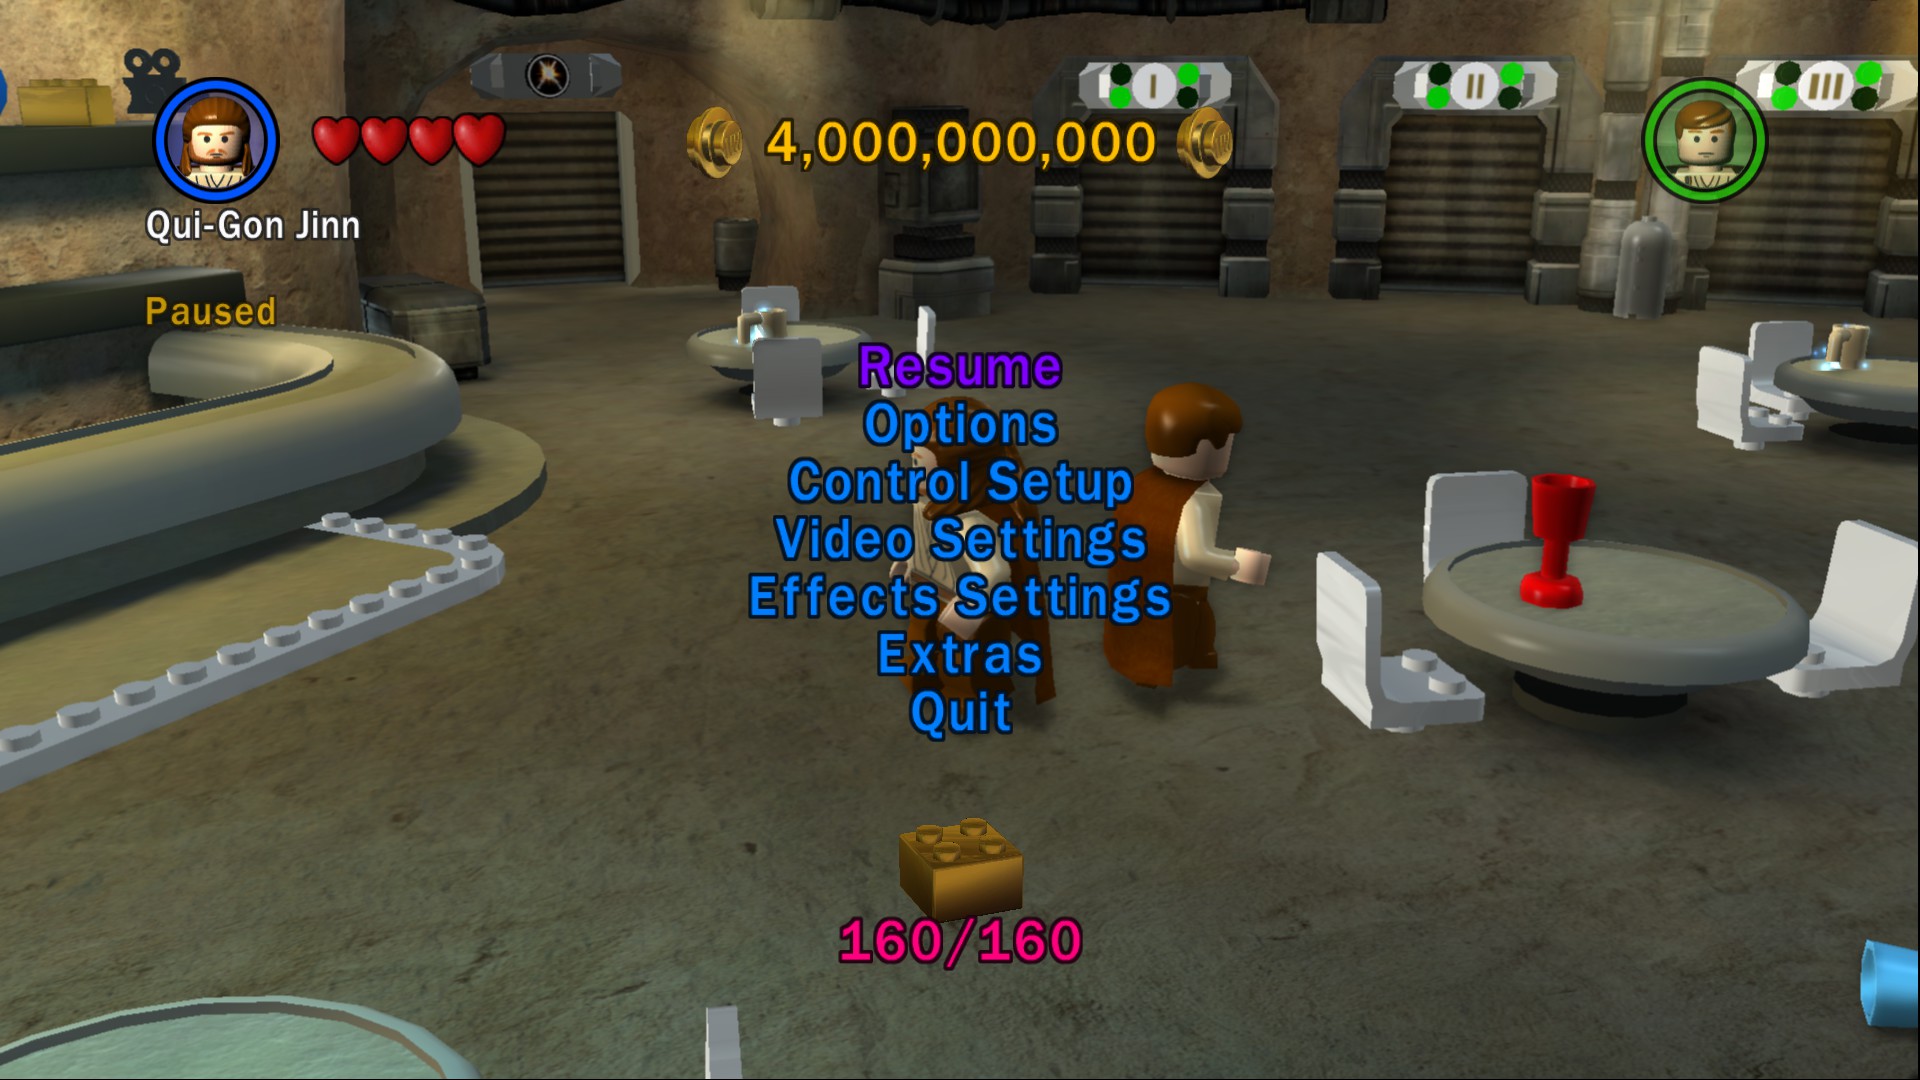
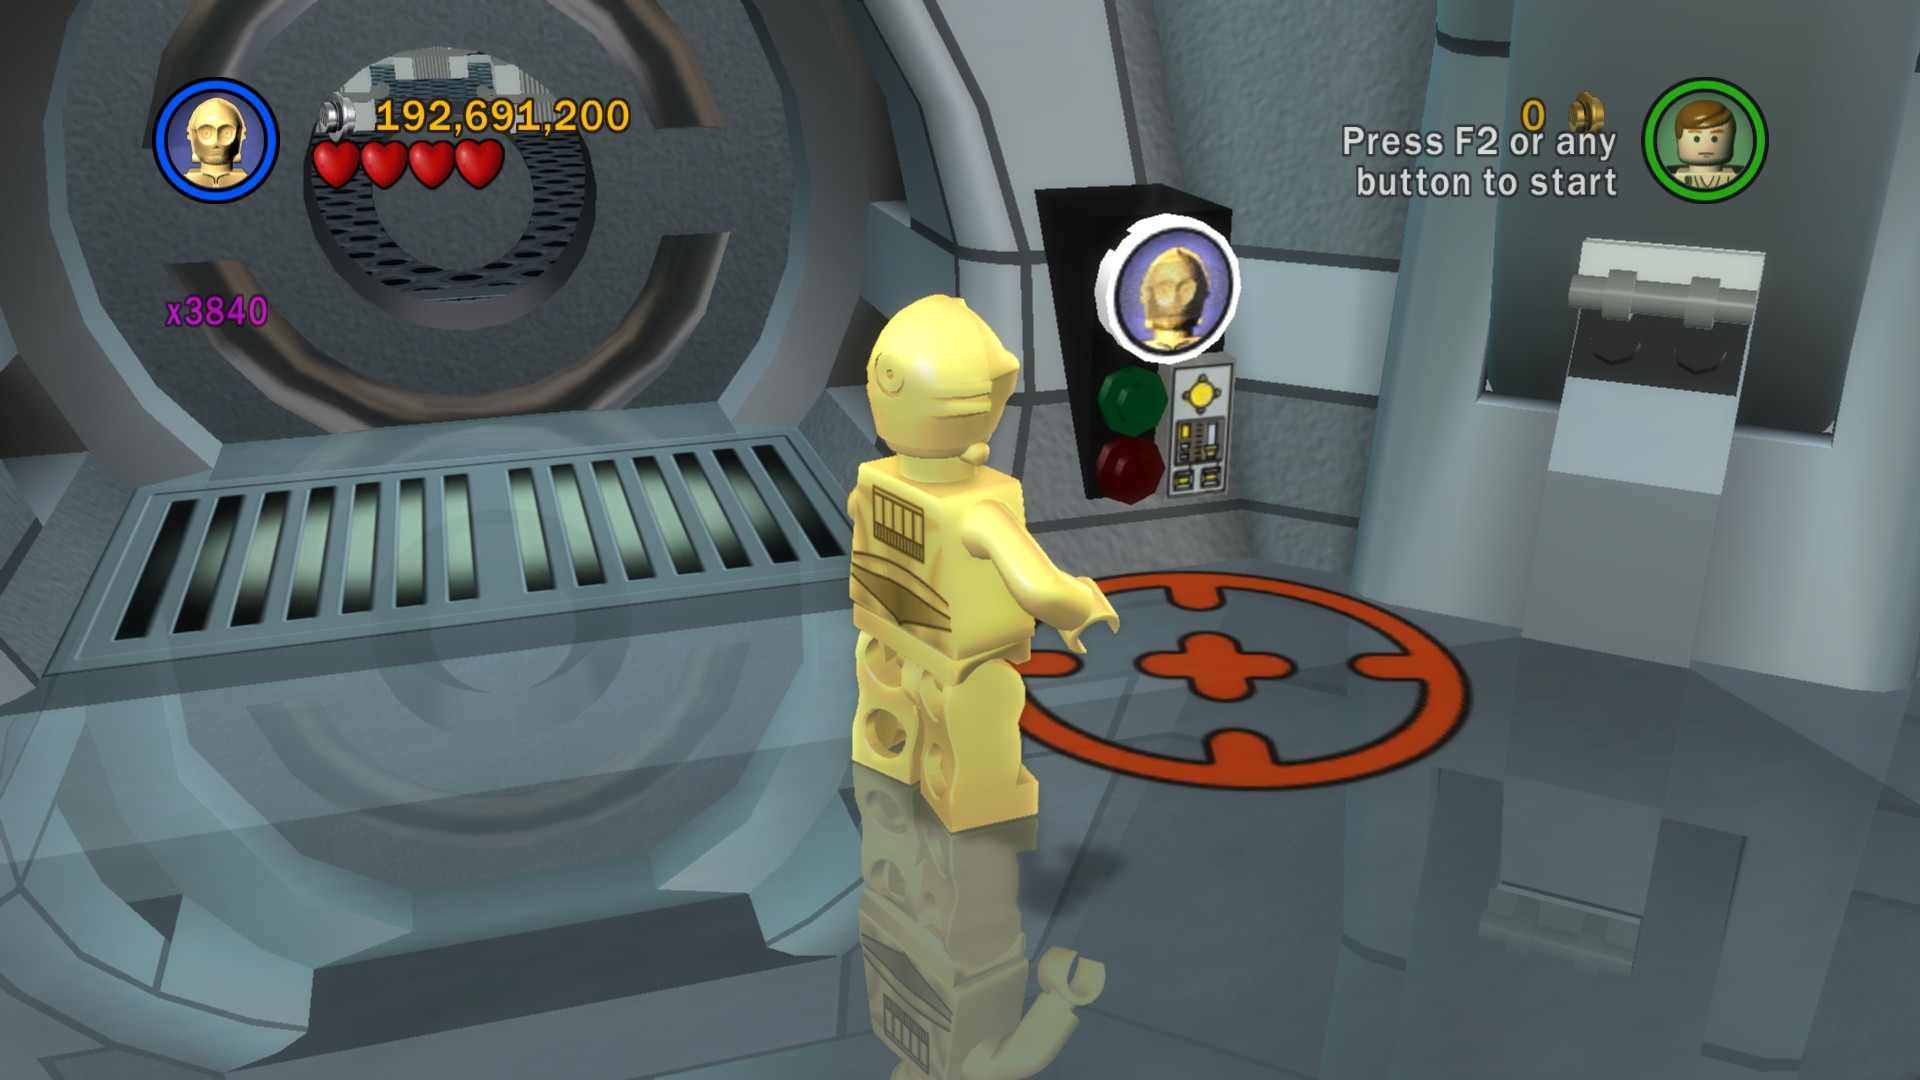
Character Bonus levels place you in an environment with a character of your choice (and a party of others). Your goal is to collect 1 million studs within 5 minutes. If you fail to collect 1 million studs in five minutes, you will not receive the Gold Brick. In these walkthroughs, I give you general tips on how to quickly boost your stud total. You will have access to all Extras, except stud related ones. That includes the multipliers, Stud Magnet, Character Studs and Poo Money.
Minikit Bonuses are identical to Character Bonuses, except you will be using vehicles you build by collecting Canisters. You will not be able to play Minikit Bonus levels until you complete at least one Minikit Model (it doesn’t have to be from the same episode).
There are also 6 cantina bonus levels, which can be accessed by heading through the door with the “?” over it. You can access these missions by collecting Gold Bricks. Once you have enough Gold Bricks, you will be able to build the door to each Bonus Mission.
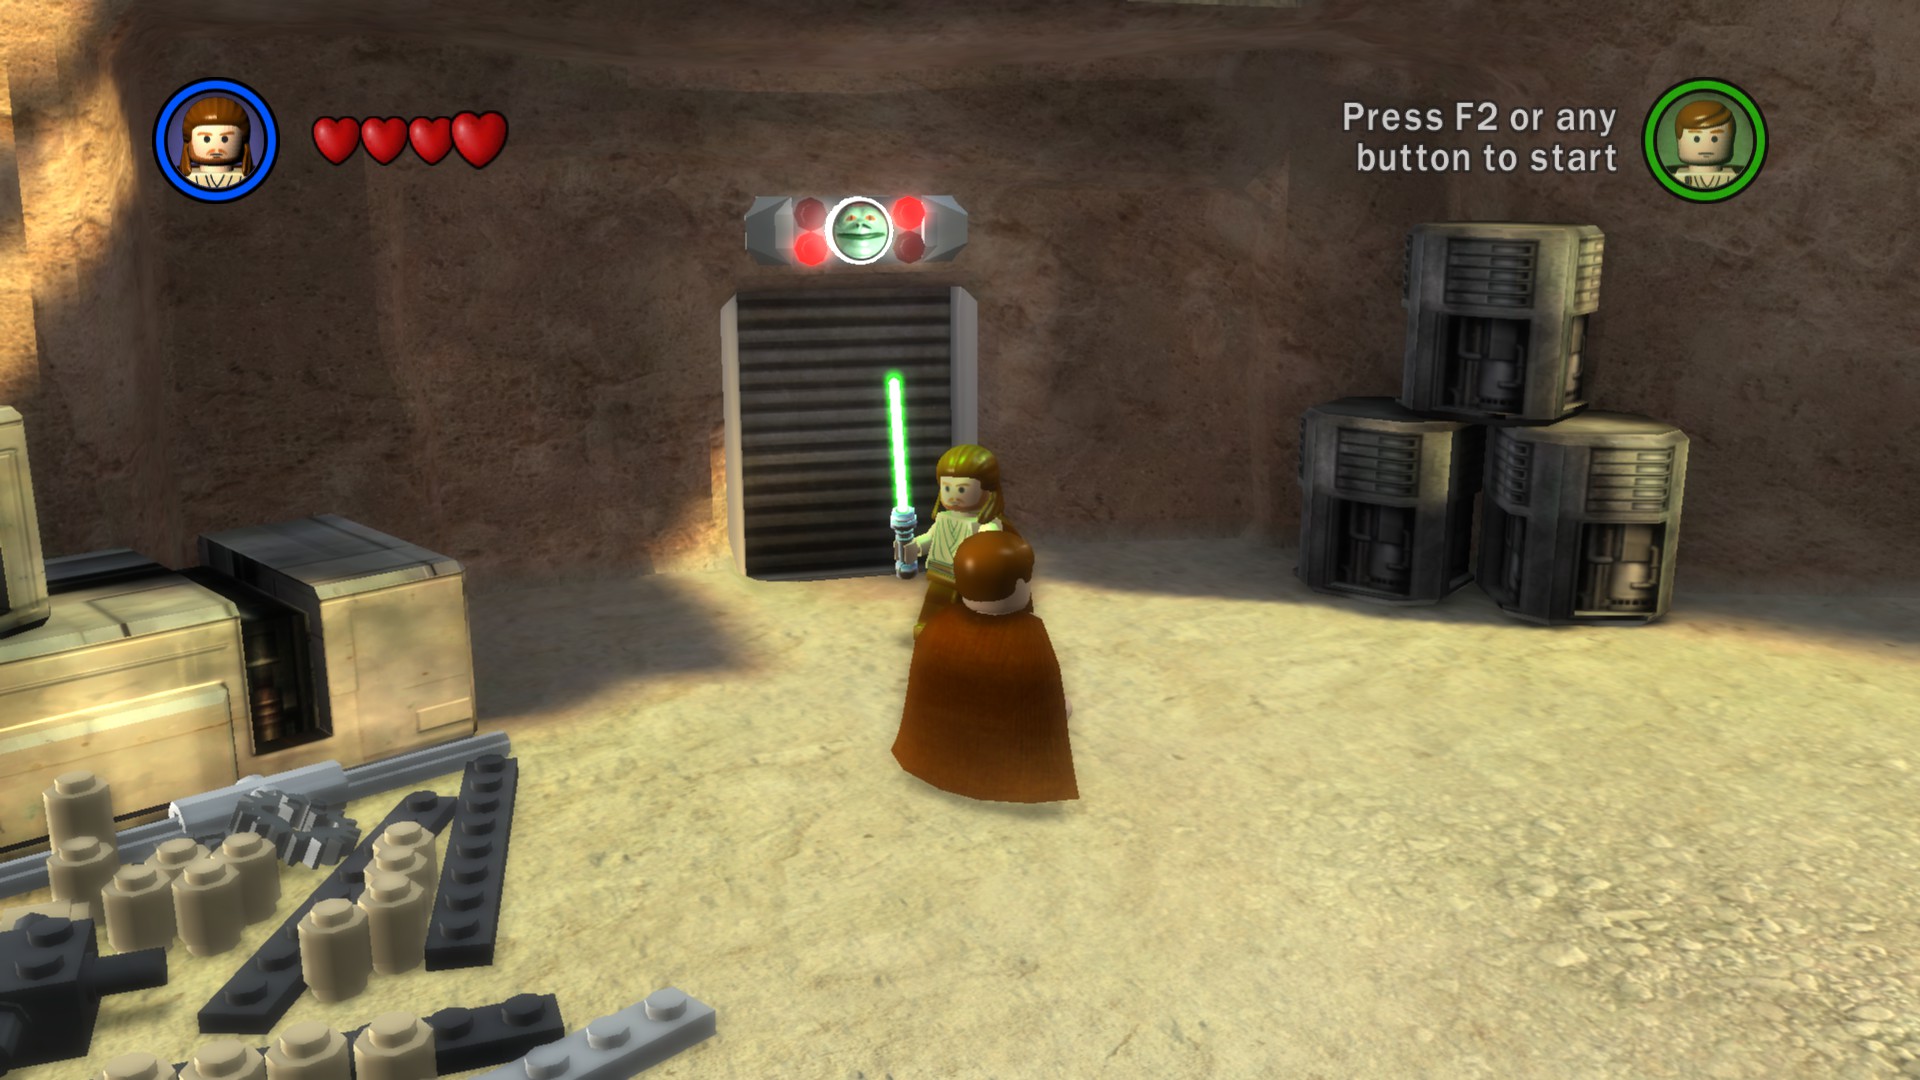
Finally, you have the Bounty Hunter Missions. These can be unlocked by purchasing Greedo, Bossk, Boba Fett, Dengar, IG-88 and 4-LOM. Head into the door in the Courtyard with Jabba’s face on it and you’ll find Jabba. Walk up to him to select your target. Each Bounty Hunter Mission will give you 3 minutes to find your target. Once you find your target, touch them to complete the mission. You will not have access to Extras in these missions, and you cannot collect studs or other collectables. Successfully capturing your target will net you a Gold Brick.
Gameplay Basics – Character Abilities
As you play through the levels, you will notice many things that you can do. However, not all characters will be able to do them! This is because each character has certain abilities, and in order to collect all the Canisters and Red Power Bricks, you’ll need to make use of their abilities to unlock new areas of the levels to explore.
Here is a quick rundown of all the abilities characters can have. For detailed information on who has these abilities, see the “Characters” sections towards the bottom of this guide.
Astromech

Bounty Hunter
Double Jump
Force

Grapple

High Jump

Hover

Imperial

Protocol

Sharp Shoot
Gameplay Basics – Character Abilities cont.
Sith Force
Small

Thermal Detonator

Gameplay Basics – Vehicle Abilities
Similar to characters, vehicles also have abilities that will help you collect hidden items in Free Play. Unlike the characters however, there aren’t many abilities that vehicles can have. For a list of which vehicles have these abilities, see the “Vehicles” section towards the end of this guide.
TIE

Tow Cable

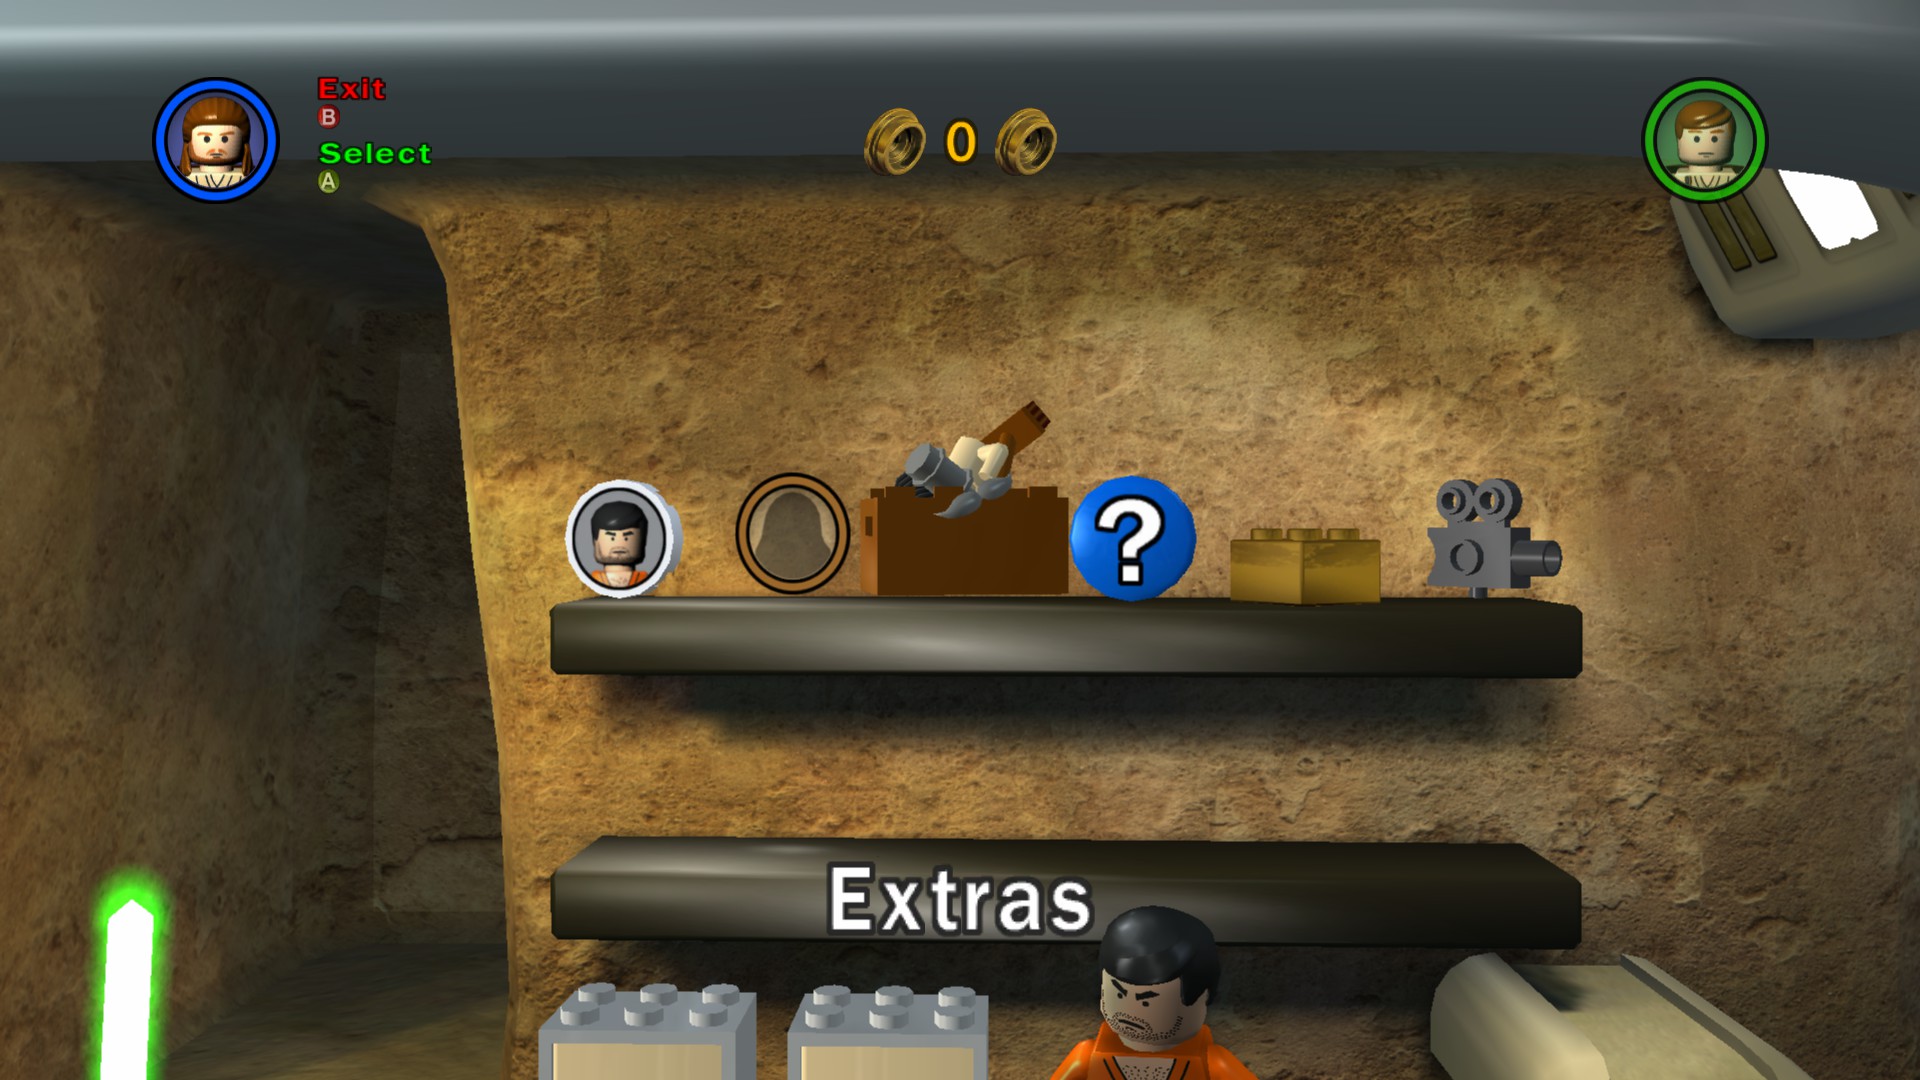
Tour of Chalmun’s Cantina
When you begin a new game, you’ll start off here in Chalmun’s Cantina in Mos Eisley. Before hopping into the story, it’s a good idea to familiarize yourself with your surroundings, so let’s take a tour! While exploring all that the Cantina has to offer, we just might unlock a super secret character!


Now that we’ve checked out all that the Bar has to offer, let’s head outside for a bit to see what’s out there! Head through the door to the left of the bar to reach a small courtyard.


That’s everything to do in the Courtyard, so let’s head back inside! Head through the door on the left side of the Courtyard to enter the Cantina, then head to the right.
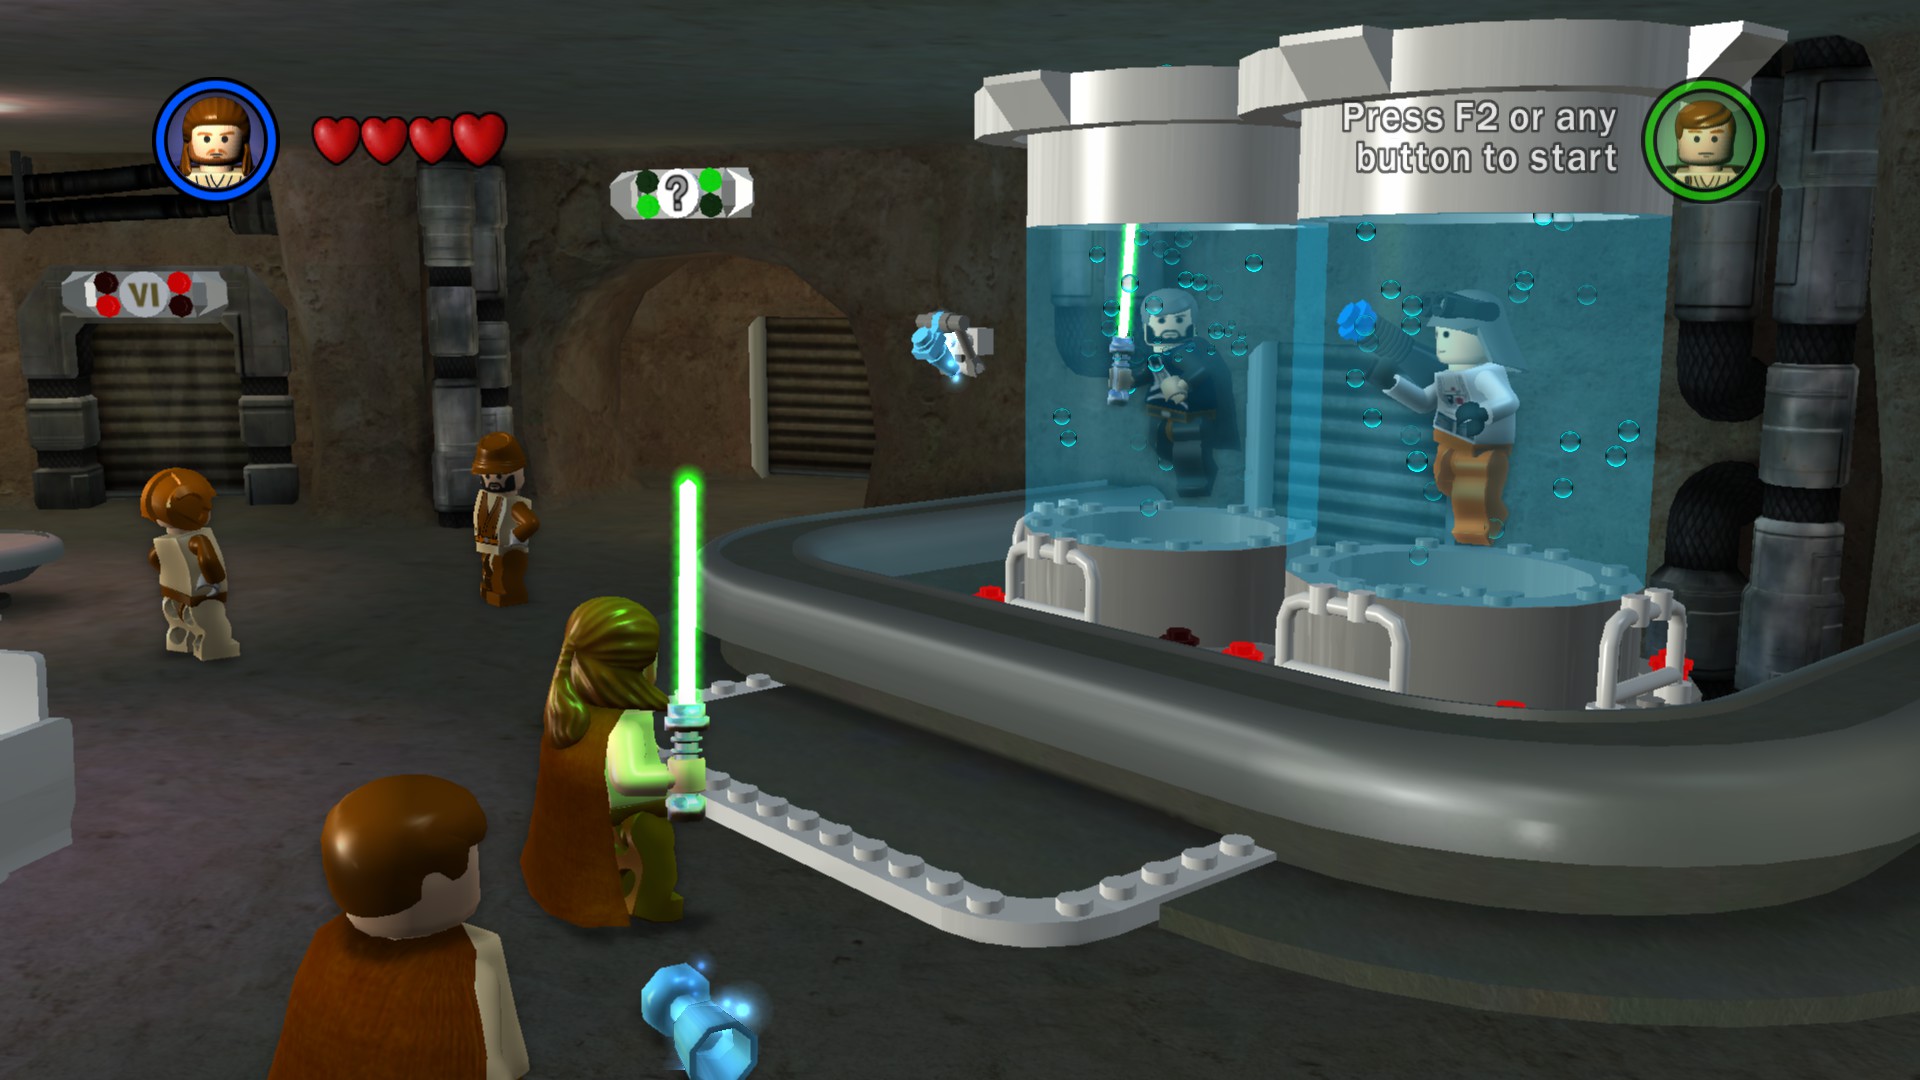
Now let’s head to the back of the Cantina, where you’ll find a number of doors.

Tour of Chalmun’s Cantina cont.

The final stop on our Cantina tour is back in the main room.

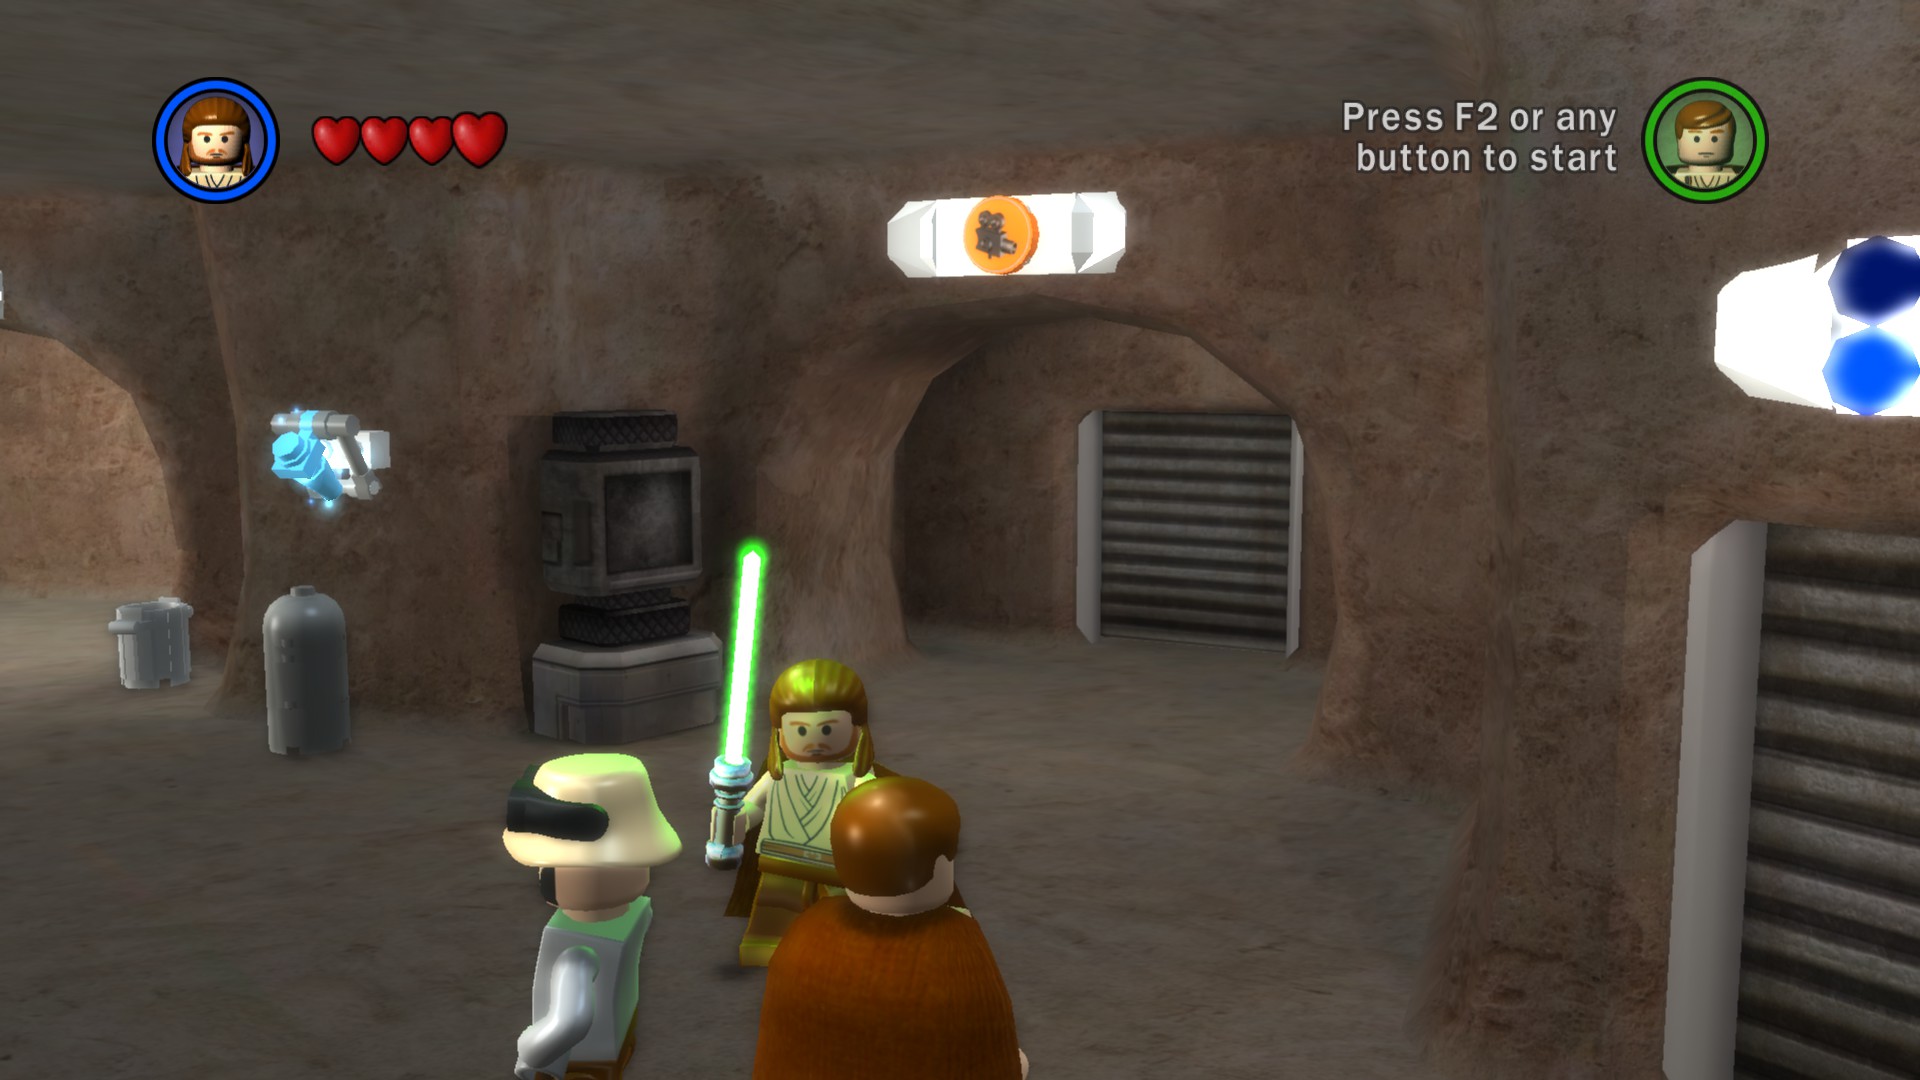

Negotiations – Story Mode
Turmoil has engulfed the Galactic Republic! With a blockade of deadly battleships, the Trade Federation has stopped all shipping to the small planet of Naboo.
The Supreme Chancellor has secretly dispatched Jedi Knights Qui-Gon Jinn and Obi-Wan Kenobi to settle the conflict…
Enemies: Battle Droid (Security), Battle Droid, Battle Droid (Commander), Droideka
Starting Characters: Qui-Gon Jinn, Obi-Wan Kenobi
Added Characters: TC-14
True Jedi: 31,000

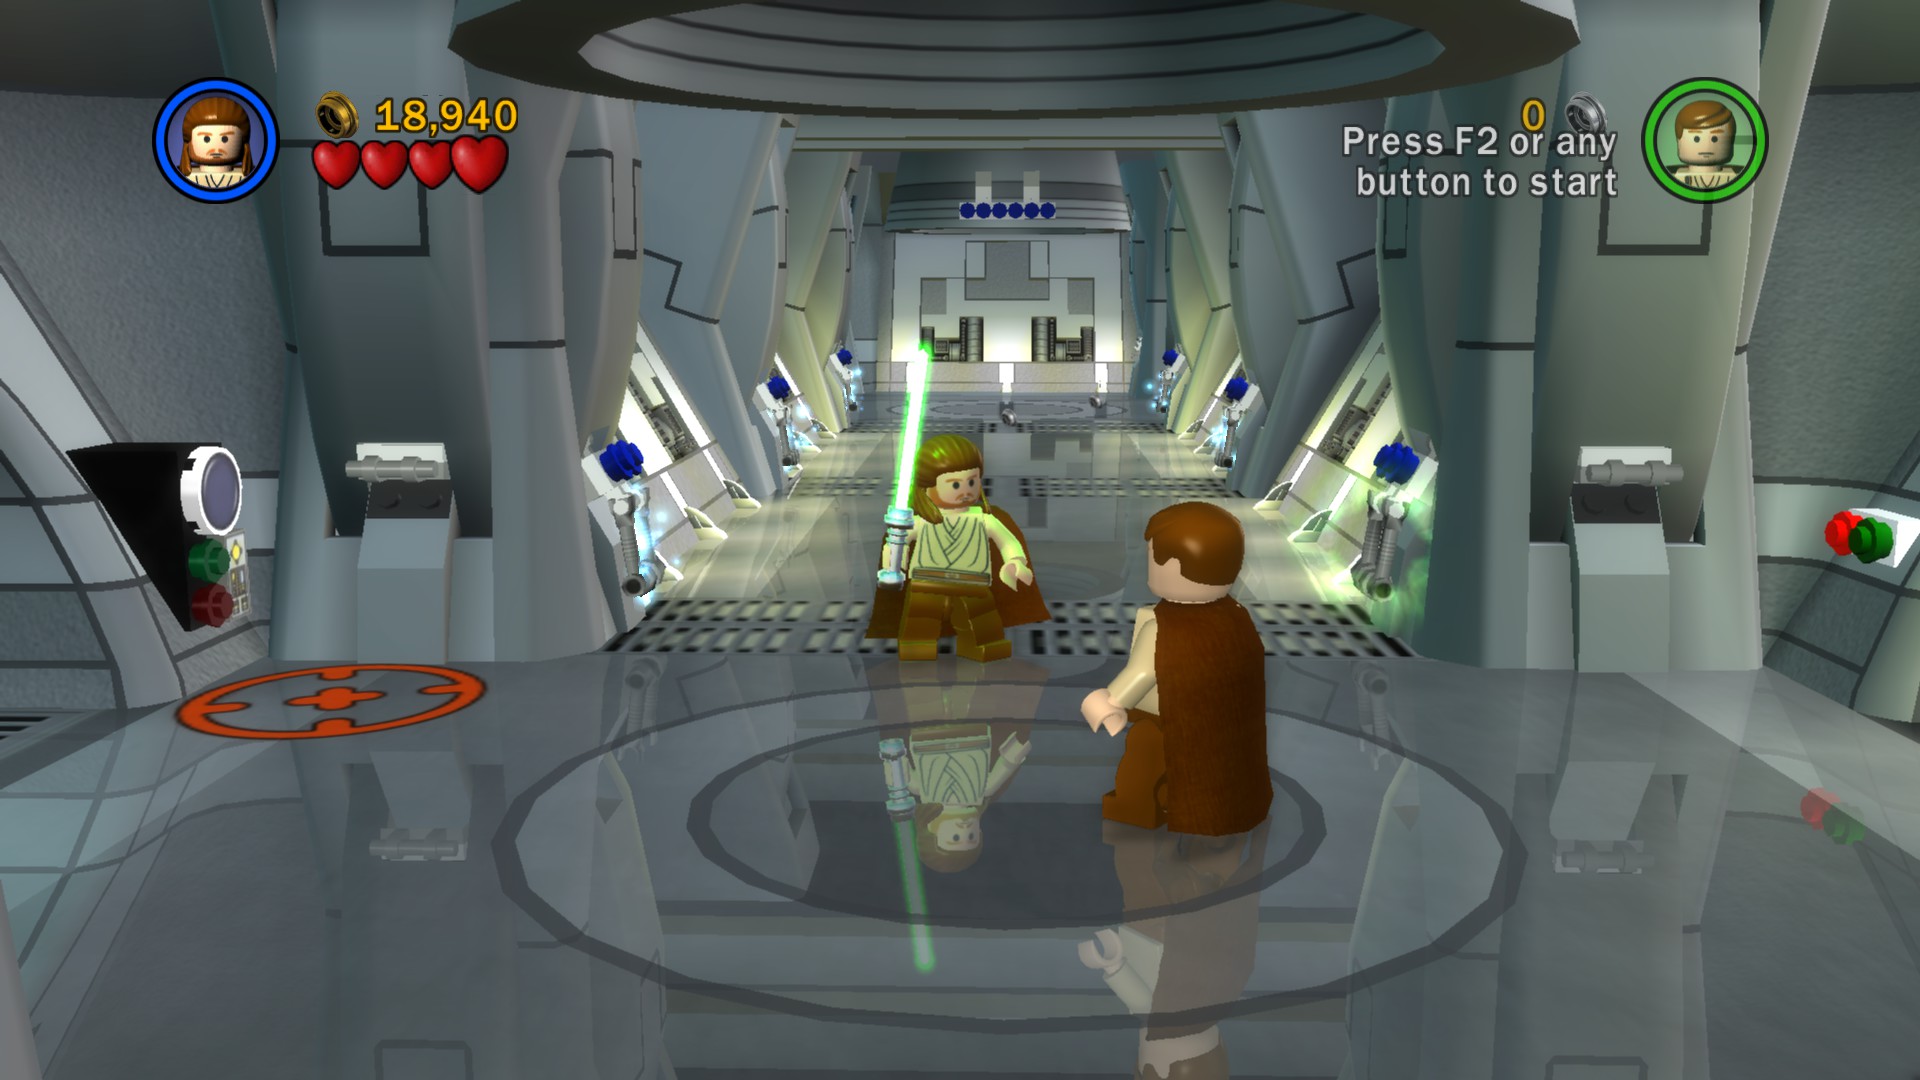
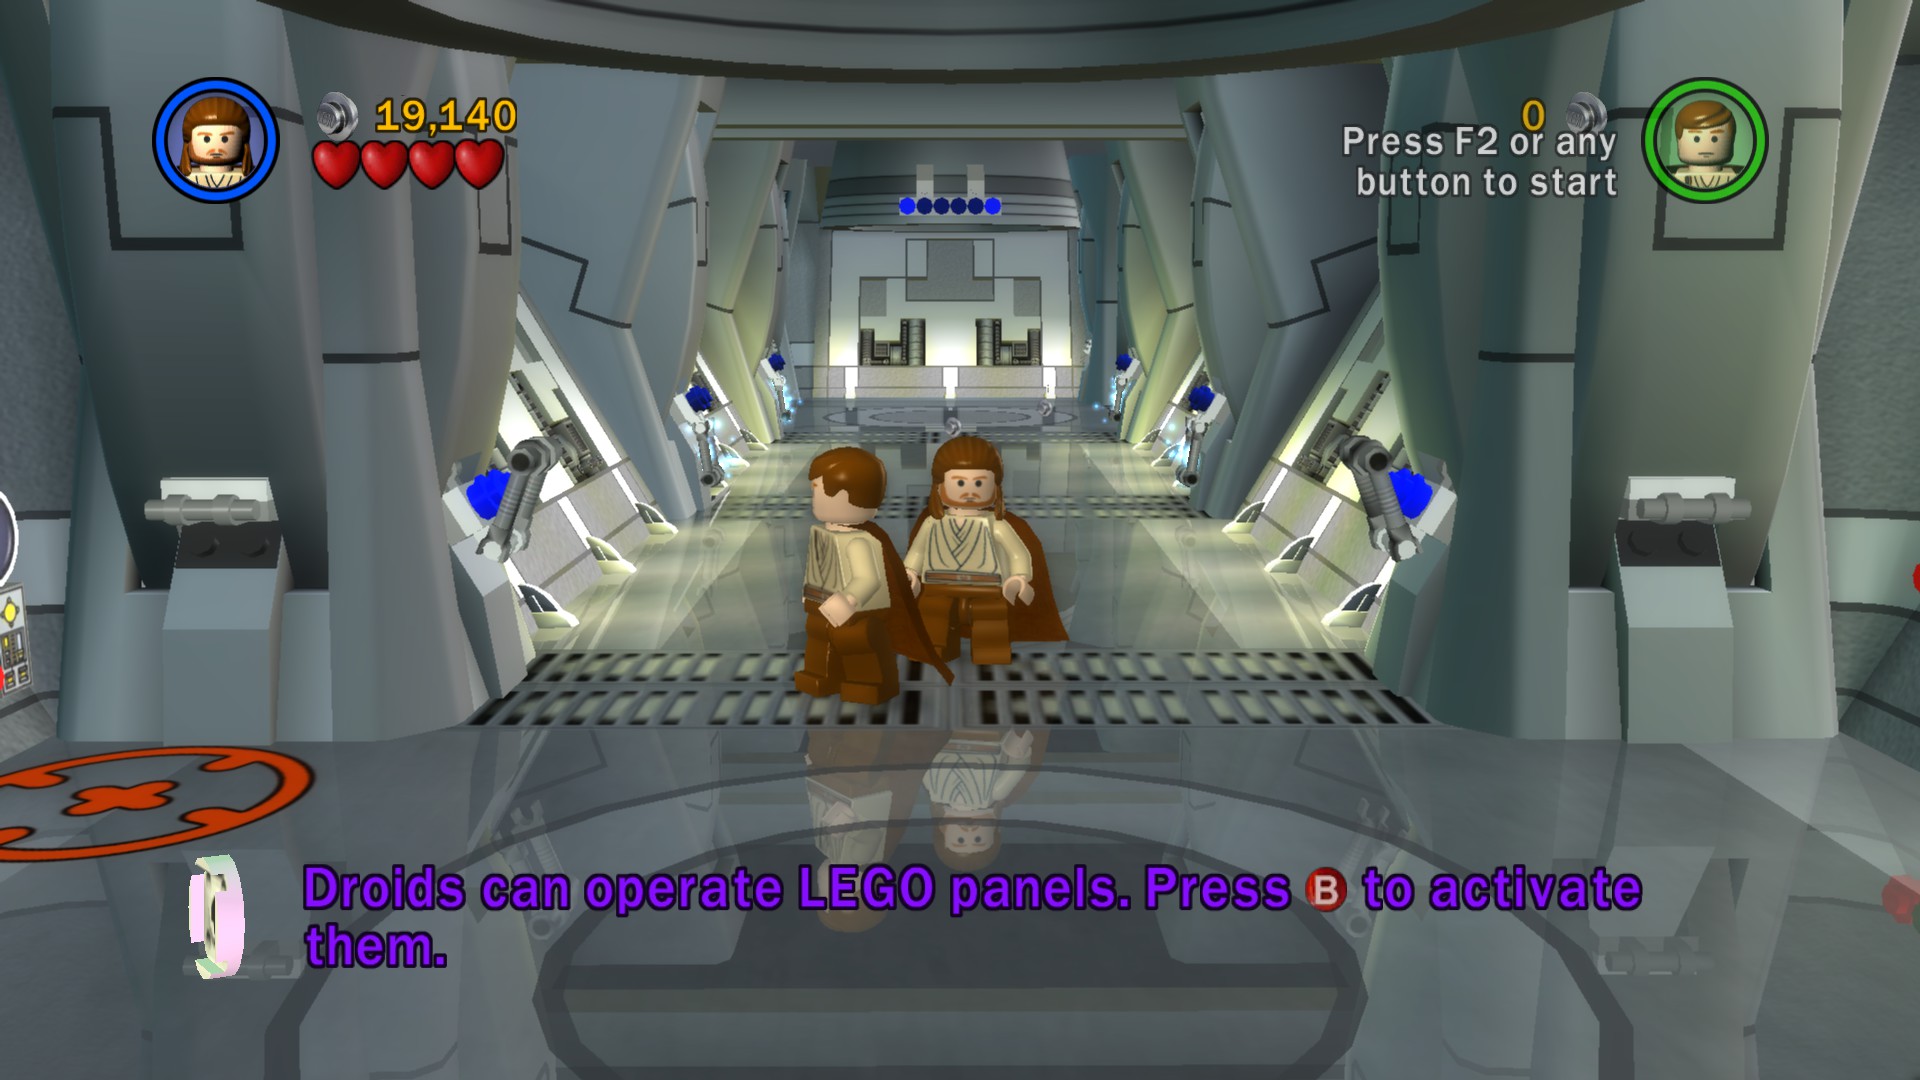
Part 1 – Federation Ship Hallways
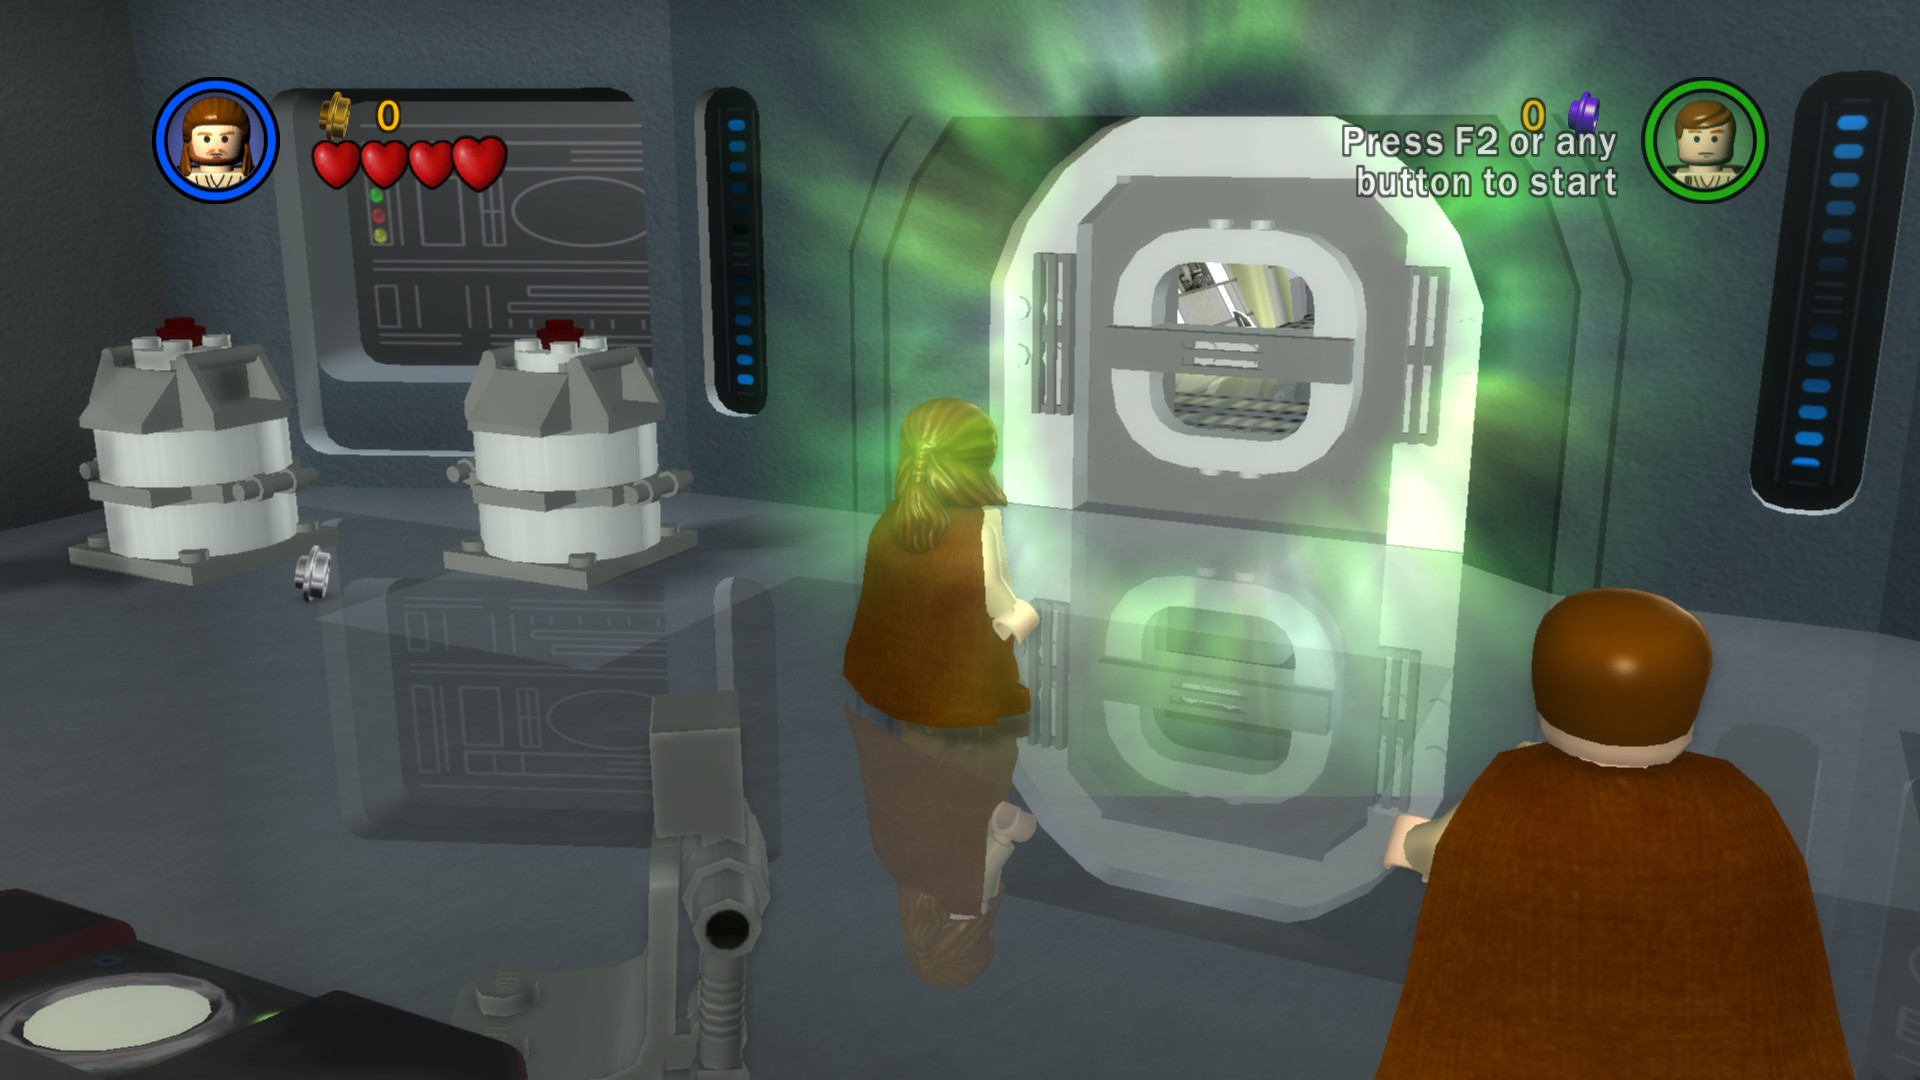
So much for the negotiations! We gotta get out of here. To do so, use the Force on the door to the right. This will alert the battle droids to your presence, so dispose of them and continue down the hallway. You’ll come upon another group of four droids. Two will attack you (so make quick work of them) and two will run down the hallway. Continue down the hallway after them and defeat the remaining droids. At the end of the hallway you’ll find TC-14, the protocol droid who you saw in the cutscene earlier. She will be added to your party. TC-14 can use Protocol panels, so have her use the one to the right of where she is standing to open the door. Continue into the room and you’ll find a locked door. It seems like you’re trapped in here! To open the door, Force the panel to the left of the locked door to reveal LEGO pieces. Build them into a Protocol panel, then use it to open the door. Continue on, then head to the left to see the entrance to the ventilation system. Force the grate out of the way to reveal an opening, then head inside.
Part 2 – Federation Ship Hangar
Jump down off of the ledge you’re on and you’ll find yourself in the hangar. Dispatch the droids, then head to the right and you’ll run into even more. The Power-Up sitting out in the open can come in handy if you are having trouble taking out the droids. Once the droids are scrap, head towards the shield in the back of the room. Two Droidekas will then appear. Defeat them, then Force the pieces on the side of the shield to create platforms. Use them to hop up and over the fence. Step on the buttons to disable the shield, allowing TC-14 to join you. This will summon one last wave of droids, so defeat them and use the Protocol panel to open the back of the MTT. Head inside to complete the level.
Unlocked Characters: TC-14, Battle Droid (6,500), Battle Droid (Security) (8,500), Battle Droid (Commander) (10,000), Droideka (40,000)
Negotiations – Free Play Mode
Required Abilities: Astromech, Double Jump, Force, High Jump, Hover, Protocol, Small
Part 1 – Federation Ship Hallways
Canister 1


Canister 2

Canister 3

Canister 4


Canister 5


Canister 6


Canister 7


Canister 8

Negotiations – Free Play Mode cont.
Part 2 – Federation Ship Hangar
Canister 9

Red Power Brick


Canister 10


Minikit Model: Republic Cruiser
Red Power Brick Extra: Super Gonk (100,000)
Negotiations – Challenge Mode
Required Abilities: Astromech, Double Jump, Force, High Jump, Hover, Protocol
Part 1 – Federation Ship Hallways
Blue Canister 1

Blue Canister 2


Blue Canister 3


Blue Canister 4


Blue Canister 5


Blue Canister 6

Part 2 – Federation Ship Hangar
Blue Canister 7

Blue Canister 8


Blue Canister 9

Blue Canister 10

Invasion of Naboo – Story Mode
The Trade Federation has launched a full-scale attack on the peaceful world of Naboo.
Hiding aboard the landing craft, Qui-Gon Jinn and Obi-Wan Kenobi have secretly hitched a ride with the invasion force. Now they must make contact with local forces – before it is too late…
Enemies: Battle Droid
Starting Characters: Qui-Gon Jinn, Obi-Wan Kenobi
Added Characters: Jar Jar Binks
True Jedi: 44,000

Part 1 – Naboo Forest
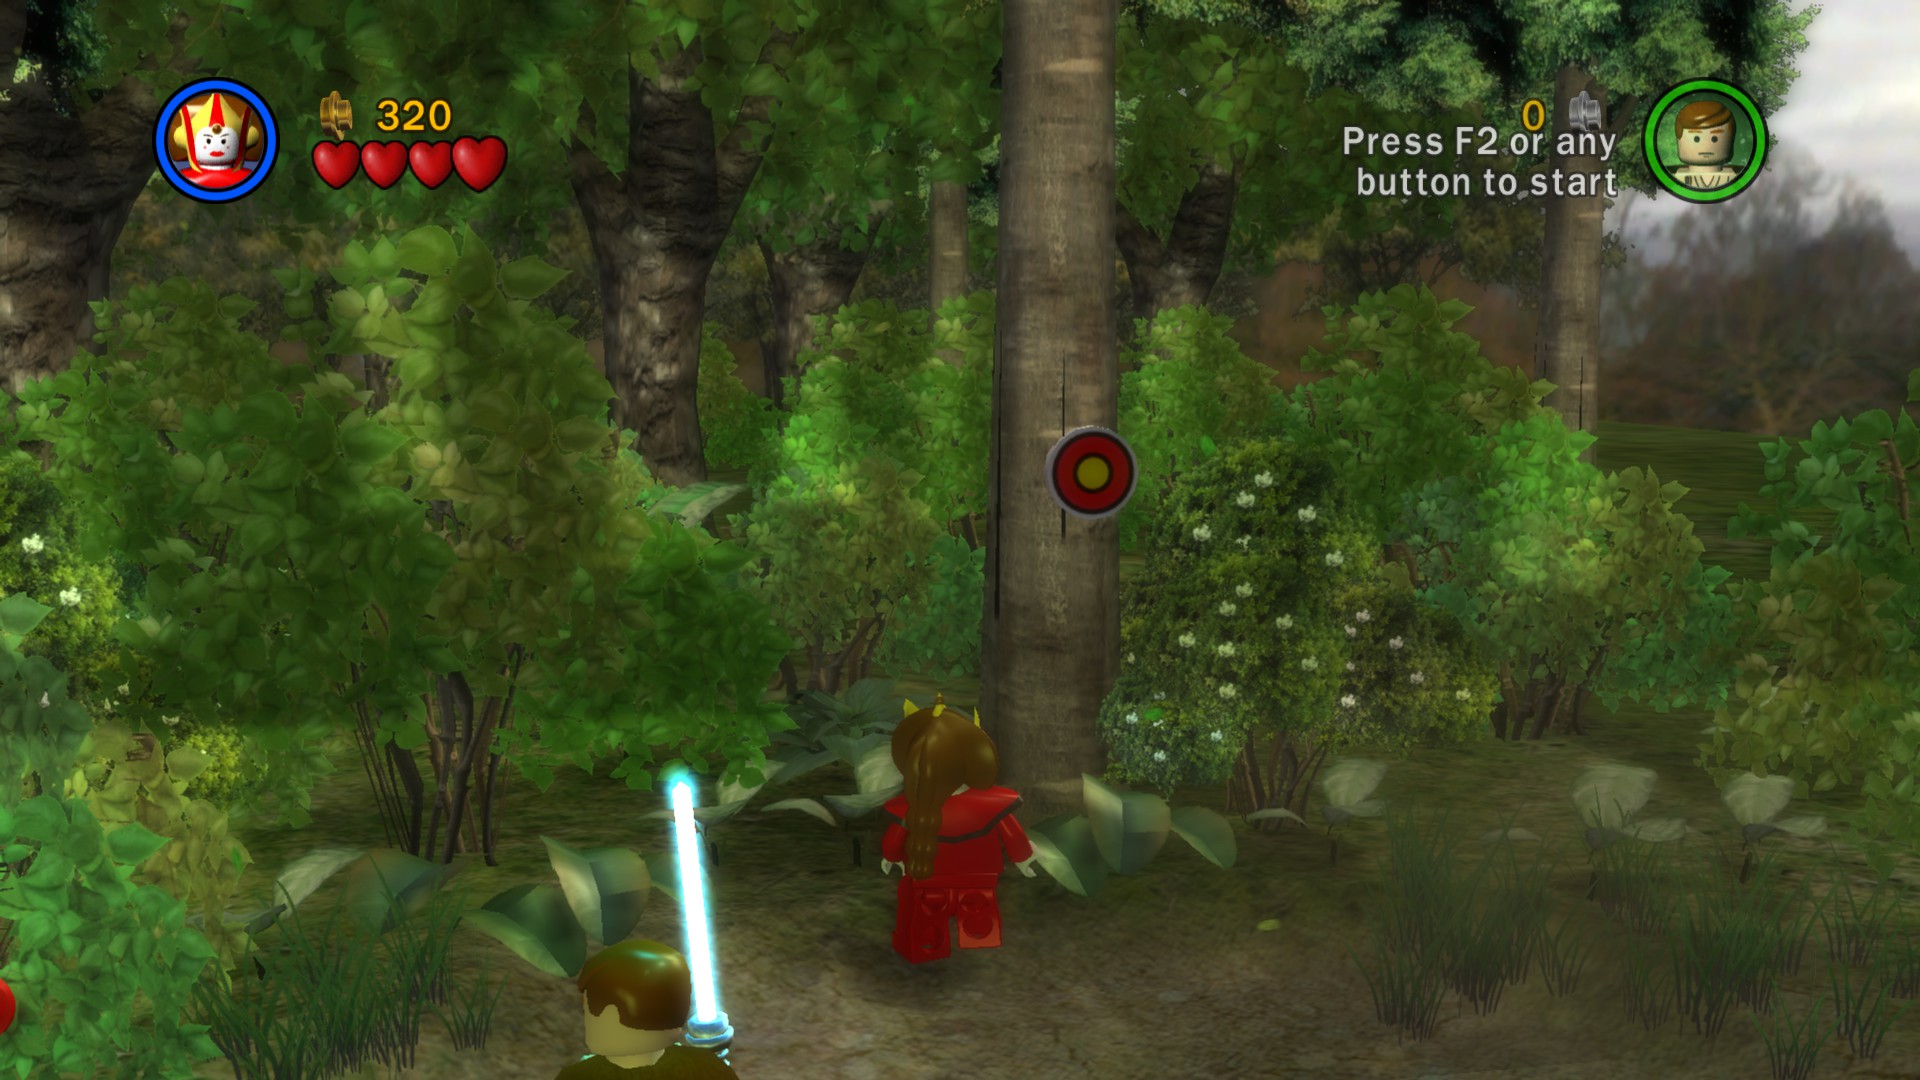
As you head down the path, you will notice droids and Gungans moving across your path. If one of those droids gets close to you, it will stop and engage you, so be careful. Head down the path and you’ll find a tree blocking the way ahead. Force it to clear the path, then continue along. The path will then be blocked by a broken down MTT. Force the cylinder on the side of it a few times to detonate it, destroying the MTT and clearing the path. Continue along the path and head towards the stairs to trigger a cutscene.
After the cutscene, Jar Jar will be added to the party. Head up the stairs and through the opening.
Part 2 – Forest Ruins
Head to the right and you’ll find a mosaic of Jar Jar. Force it to create a platform, allowing you to hop across the gap. Continue to the right and you’ll find a very tall rock. The Jedi can’t jump high enough to get on top, but Jar Jar can. Use his high jump to land on top of the rock. This will lower it, allowing Qui-Gon and Obi-Wan to join you. This will also reveal a lever, so Force it to lower a platform above you. Jump onto it, then onto the top of the next rock. High jump onto the next two rocks to lower them for the Jedi, then continue to the right. You’ll see some LEGO pieces high above you. Force them into a platform, then hop on it and onto the next ledge. Head to the right and through the archway.
Part 3 – Naboo Swamps
Head to the right and you’ll see some LEGO pieces on the wall. Force them to lower a ramp, allowing you to continue to the right. Head up the ramp and go all the way to the right. You’ll see some studs leading up to a ledge. High jump onto the ledge, then head to the right. You’ll end up on a rock. Stand on the rock to lower it, revealing an opening. Head through it.
Part 4 – Otoh Gunga Approach
Simply head along the path and into the water to complete the level.
Unlocked Characters: Jar Jar Binks, Captain Tarpals (17,500), Boss Nass (15,000)
Invasion of Naboo – Free Play Mode
Required Abilities: Bounty Hunter, Double Jump, Force, High Jump, Sharp Shoot
Part 1 – Naboo Forest
Canister 1


Canister 2


Canister 3


Canister 4


Canister 5


Part 2 – Forest Ruins
Red Power Brick


Canister 6

Part 3 – Naboo Swamps
Canister 7


Canister 8

Canister 9

Part 4 – Otoh Gunga Approach
Canister 10


Minikit Model: Gungan Bongo
Red Power Brick Extra: Poo Money (100,000)
Invasion of Naboo – Challenge Mode
Required Abilities: Force, High Jump, Thermal Detonator
Part 1 – Naboo Forest
Blue Canister 1


Blue Canister 2

Blue Canister 3

Part 2 – Forest Ruins
Blue Canister 4

Blue Canister 5

Blue Canister 6

Part 3 – Naboo Swamps
Blue Canister 7


Blue Canister 8


Blue Canister 9

Part 4 – Otoh Gunga Approach
Blue Canister 10

Escape from Naboo – Story Mode
The Gungan ruler Boss Nass has refused to help the people of Naboo. Qui-Gon Jinn and Obi-Wan Kenobi have left his underwater city for the royal palace in Theed.
As Trade Federation battle droids seize control of the Naboo capital city, Queen Amidala and Captain Panaka, her loyal protector, are powerless to repel the invasion….
Enemies: Battle Droid, Battle Droid (Commander)
Starting Characters: Queen Amidala, Captain Panaka
Added Characters: Qui-Gon Jinn, Obi-Wan Kenobi
True Jedi: 48,000

Part 1 – Palace Courtyard
It appears that the Jedi have business elsewhere, so it’s just you and Panaka for now. Head to the back corner by the droids, then use the grapple point to grapple up onto the ledge. Continue to the right, then use the grapple point to reach the next ledge. Head to the right and you’ll find a flowerbed at the end of the ledge. Destroy it to reveal a grapple point, then use it to reach the next ledge. Destroy the tan node to reveal another grapple point, then use it to reach the final ledge. Head to the right and through the opening.
Part 2 – Garden Path
Simply head down the path and through the opening at the end.
Part 3 – Garden Terrace
Head to the right and you’ll find a bunch of windows. Shoot them to destroy them, allowing you to hop out onto the balcony. Head to the right and you’ll see a closed gate. On the right side of the gate is a target. Shoot the target to open the gate, then head inside.
Part 4 – Gated Courtyard
Head to the left and destroy the green dome to reveal an opening. Drop down and you’ll be reunited with Qui-Gon and Obi-Wan. Continue to the right and you’ll find a large gate. On each side of the gate are platforms with nodes on top. Destroy the nodes and the platforms will start moving up and down. Hop on a platform and shoot the two targets. Do the same on the other platform. Shoot all four targets and the gate will open. Head through the opening.
Part 5 – Hangar Rooftop
Head to the right and you’ll find three domes. Each of the domes has a button on top of it. Step on the button on the center dome to retract the covering on one of the small domes on the right. Head to the right to reach the dome and you’ll notice that it’s got green lights surrounding it. This is the entrance to the hangar. Destroy the covering, then drop down inside to complete the level.
Unlocked Characters: Queen Amidala, Captain Panaka, Royal Guard (10,000), Padme (20,000)
Escape from Naboo – Free Play Mode
Required Abilities: Double Jump, Force, Grapple, High Jump, Hover, Sith Force, Small, Thermal Detonator
Part 1 – Palace Courtyard
Canister 1


Red Power Brick


Canister 2


Part 2 – Garden Path
Canister 3

Part 3 – Garden Terrace
Canister 4


Canister 5


Escape from Naboo – Free Play Mode cont.
Part 4 – Gated Courtyard
Canister 6


Canister 7


Canister 8


Part 5 – Hangar Roof
Canister 9


Canister 10


Minikit Model: Royal Starship
Red Power Brick Extra: Walkie talkie Disable (5,000)
Escape from Naboo – Challenge Mode
Required Abilities: Grapple, High Jump, Hover, Small, Thermal Detonator
Part 1 – Palace Courtyard
Blue Canister 1


Blue Canister 2

Blue Canister 3

Part 3 – Garden Terrace
Blue Canister 4


Blue Canister 5


Part 4 – Gated Courtyard
Blue Canister 6

Blue Canister 7


Blue Canister 8

Part 5 – Hangar Rooftop
Blue Canister 9

Blue Canister 10

Mos Espa Pod Race – Story Mode
Queen Amidala and her Jedi protectors have fled Naboo, heading for Coruscant. They plan to inform the Galactic Senate of the Trade Federation invasion.
However, the Royal Starship’s hyperdrive is damaged in the escape, and they have been forced to land on the remote planet of Tatooine for repairs….
Starting Vehicles: Anakin’s Pod
True Jedi: 45,000

Part 1 – The First Lap
The whole point of this race is to beat Sebulba to the end, but you can’t actually pass Sebulba until the third lap. This allows you to take the time during the first two laps to learn where the speed boosts and hazards are. Watch out for the Tusken Raiders in the canyon, as they’ll be shooting at you.
Part 2 – The Second Lap
A short distance into the lap, Sebulba will crash poor Mawhonic’s pod. This will cause a rock column to fall down, so be careful when passing underneath it. When you approach the canyon, a rock slide will occur, so watch out for the rocks as they’ll damage you.
Part 3 – The Third Lap
Now let’s get down to business. It actually isn’t too hard to pass Sebulba. Just make sure you hit as many of the speed boosts as possible and you’ll be fine. If you fail to pass Sebulba, you’ll just restart the lap until you beat him. The rocks will still be in the canyon, although they won’t be moving so they’re a bit easier to pass. Win the Boonta Eve Classic to complete the level.
Unlocked Characters: Watto (16,000), Pit Droid (4,000)
Unlocked Vehicles: Anakin’s Pod, Sebulba’s Pod (20,000)
Mos Espa Pod Race – Free Play Mode
Required Abilities: TIE
Part 1 – The First Lap
Red Power Brick

Canister 1


Canister 2

Canister 3

Canister 4

Canister 5

Canister 6

Canister 7

Canister 8

Part 2 – The Second Lap
Canister 9

Part 3 – The Third Lap
Canister 10

Minikit Model: Sebulba’s Pod
Red Power Brick Extra: Power brick detector (125,000)
Mos Espa Pod Race – Challenge Mode
Required Abilities: TIE
Part 1 – The First Lap
Blue Canister 1

Blue Canister 2

Blue Canister 3

Blue Canister 4


Blue Canister 5

Blue Canister 6

Blue Canister 7

Blue Canister 8

Blue Canister 9

Part 3 – The Third Lap
Blue Canister 10

Retake Theed Palace – Story Mode
On Coruscant, Queen Amidala has found the Galactic Senate corrupted by Trade Federation influence, and mired in bureaucracy.
Frustrated, she has returned home to Naboo. Together with Qui-Gon Jinn, Obi-Wan Kenobi, Captain Panaka, R2-D2 and the young podracer from Tatooine, Anakin Skywalker, Queen Amidala now plans to infiltrate the Royal Palace and capture the evil Trade Federation Viceroy….
Enemies: Battle Droid, Battle Droid (Commander), Droideka, Battle Droid (Security)
Starting Characters: Qui-Gon Jinn, Obi-Wan Kenobi, Captain Panaka, Padme (Battle), Anakin Skywalker (Boy), R2-D2
True Jedi: 60,000

Part 1 – Courtyard Battle
Head to the right into the courtyard and the battle will begin! If you want, you can Force the speeder by your starting point to fix it, allowing you to hop in and shoot up the place. Once all the droids are scrap, Force the LEGO pieces in the corner to create a ramp, allowing you to reach the upper ledge. Head over to the door and use the Astromech panel to open it. Head inside.
Part 2 – Entering the Palace
Head to the right and you’ll find the path cut off by a large hole. You’ll need to create a way for everyone to cross. Anakin can crawl through the travel chute and R2 can hover across the gap, but everyone else is in trouble. Force the grapple point into position, allowing Padme and Panaka to cross the gap. Force the LEGO pieces into a platform, allowing Qui-Gon and Obi-Wan to cross. Cross the gap using whatever method you prefer, then continue to the right. Step on one of the buttons and your partners will step on the others, opening the door and revealing a squad of battle droids. Defeat them and continue down the hallway. You’ll find a locked door in the next room. Destroy the statue to the left of it to reveal LEGO pieces, then build them into an Astromech panel. Use it to open the door, then head outside.
Part 3 – Fountain Courtyard
Continue along the path and up the stairs. You’ll find yourself in a courtyard. Our objective is to get to the upper level. To do so, head to the back right corner, where you’ll find some LEGO pieces. Force them into stairs, then walk up them. Head to the left on the upper ledge, then Force the LEGO pieces to create a bridge. Cross it to the left, then continue to the left along the ledge. You’ll find your path blocked by a gate. Destroy the flowerbed to the left of the gate to reveal a button. Step on it to reveal a travel chute. Before crawling through it, Force the large box across the gap to destroy it. This will clear the path for Anakin. Have Anakin crawl through the travel chute, then head to the right. Crawl through the next travel chute to reach the upper ledge, then step on the button to open the gate. With the gate open, return to the main ledge and head through the opening.
Part 4 – Scaling the Palace
The goal in this area is once again to reach the upper ledge. To do so, we need to create a means for everyone to get there. There is a travel chute against the back wall that Anakin can use. Head to the right and you’ll find some LEGO pieces. Force them into a platform. This will allow R2 to ride up and hover to the ledge. Destroy the nearby flowerbed to reveal a grapple point for Padme and Panaka. To get the Jedi up there, head back to the left. You’ll find two boxes against the wall. Hop on one of them and your partner will hop on the other. Force the box your partner is standing on and they will do the same to you, allowing you to reach the upper ledge. Head to the right and Force up the panel to create a platform, then hop on it and continue to the right. Step on a button and your partners will step on the others, opening the door. Head inside.
Part 5 – Dining Room
Head to the left and you’ll see a staircase in the back. Head over to it and walk up the stairs, then destroy the statue in front of you to reveal a button. Step on it to open the door, then head down the hall and through the door on the right.
Part 6 – Theed Palace Hangar
Head down the hall and you’ll enter the hangar. There are six pilots being held captive by droids. We’ll need to rescue all of them. Start by heading to the far left. You’ll find some grey boxes on the floor. Force the large one first, then the small ones. You’ll create a tower, so hop up it and onto the platform with the first pilot. Destroy the droid to free him. Drop down and head back to the right. You’ll see three grey nodes to the left of the entrance to the hangar. Destroy them to reveal a grapple point, then grapple up. Hop to the right across the platforms to reach the second pilot. Once he’s rescued, drop back down and head to the right, where you’ll see two more pilots on the ground. Destroy the droids around them to rescue them. Two more to go. To find them, look back to the left. You’ll see two small boxes. Hop on one and your partner will hop on the other. Force the box your partner is standing on and they’ll do the same to you, lifting you up to the ledge. You’ll find the remaining two pilots here. Once all of the pilots are free, an Astromech panel will appear at the far right side of the hangar. Use it to open the hangar, completing the level.
Unlocked Characters: Padme (Battle), Anakin Skywalker (Boy)
You will also unlock R2-D2 if you haven’t already
Retake Theed Palace – Free Play Mode
Required Abilities: Double Jump, Force, Grapple, High Jump, Hover, Sith Force, Small, Thermal Detonator
Part 1 – Courtyard Battle
Canister 1


Canister 2

Part 2 – Entering the Palace
Canister 3


Canister 4


Part 3 – Fountain Courtyard
Canister 5


Canister 6


Part 4 – Scaling the Palace
Canister 7


Part 5 – Dining Room
Red Power Brick


Canister 8


Retake Theed Palace – Free Play Mode cont.
Part 6 – Theed Palace Hangar
Canister 9


Canister 10


Minikit Model: Naboo Starfighter
Red Power Brick Extra: Super slap (5,000)
Retake Theed Palace – Challenge Mode
Required Abilities: Double Jump, Force, Grapple, High Jump, Hover, Sith Force, Small
Part 1 – Courtyard Battle
Blue Canister 1


Blue Canister 2


Part 2 – Entering the Palace
Blue Canister 3


Blue Canister 4


Part 3 – Fountain Courtyard
Blue Canister 5


Blue Canister 6


Blue Canister 7

Part 4 – Scaling the Palace
Blue Canister 8


Part 5 – Dining Room
Blue Canister 9

Part 6 – Theed Palace Hangar
Blue Canister 10

Darth Maul – Story Mode
The Trade Federation army has been neutralized by Anakin Skywalker, but the battle continues in the Royal Palace.
Qui-Gon Jinn and Obi-Wan Kenobi have one more enemy to face….
Enemies: Battle Droid, Battle Droid (Commander), Droideka
Boss: Darth Maul
Starting Characters: Qui-Gon Jinn, Obi-Wan Kenobi
True Jedi: 31,000

Part 1 – Theed Palace Hangar
You’ll see Maul across the gap, with no way to reach him. You’ll notice some dotted lines on the ground that form a semi-circle. Stand inside it and the droids will fire at you. Time your deflections to send the blasts back at the droids, destroying them. Once all four droids are destroyed, Maul will start to throw things at you. Force them back at him to take out one heart. Four more droids will then appear. Repeat this process two more times to take out Maul’s hearts. He will then flee, lowering the bridge pieces to the ground. Force them to reconstruct the bridge, then cross it and follow Maul through the door.
Part 2 – Catwalk Pursuit
You’ll see Maul just standing there, so give chase! Hop up the platforms after Maul. Eventually, you’ll reach a gap you can’t hop across. Force the panel in the wall to extend it, allowing you to reach the next platform. Hop across, then Force another panel to extend it. Hop across the platforms, then continue to the right through the opening.
Part 3 – Palace Generators
Hop across the platforms to reach Maul. He will flee again, revealing two Battle Droid Commanders. Fight your way through the insane amount of droids they summon and defeat them. Once both Commanders are destroyed, destroy the remaining battle droids. This will reveal two platforms with droidekas on them. Destroy the droidekas (I find deflecting their bolts to be the easiest and safest way to destroy them) to clear the platforms. Hop onto one of them and step on the button. Your partner will step on the other button, raising up a platform. Hop onto it and continue your pursuit of Maul.
Part 4 – Force Fields
This is pretty simple. Force one of the levers and your partner will Force the other, shutting off the force field. Continue this process to shut off all the force fields, allowing you to enter the final room.
Part 5 – Duel of the Fates
Finally, Maul has decided he wants to fight. Duel him to take off six hearts. He will then jump to a platform and start to Force things at you. Force them back at him and he will jump to another platform. Force the objects that he throws back him and he will hop off the platform. Duel him to take out his last remaining hearts, completing the level.
Unlocked Characters: Darth Maul (60,000)
Darth Maul – Free Play Mode
Required Abilities: Double Jump, Force, Grapple, High Jump, Imperial, Sith Force, Thermal Detonator
Part 1 – Theed Palace Hangar
Canister 1


Canister 2

Red Power Brick


Canister 3

Part 2 – Catwalk Pursuit
Canister 4

Canister 5


Part 3 – Palace Generators
Canister 6

Canister 7

Part 5 – Duel of the Fates
Canister 8

Canister 9

Canister 10

Minikit Model: Sith Infiltrator
Red Power Brick Extra: Force grapple leap (15,000)
Darth Maul – Challenge Mode
Required Abilities: Force, Grapple, High Jump, Imperial, Thermal Detonator
Part 1 – Theed Palace Hangar
Blue Canister 1

Blue Canister 2


Blue Canister 3


Part 2 – Catwalk Pursuit
Blue Canister 4

Blue Canister 5


Part 3 – Palace Generators
Blue Canister 6

Blue Canister 7

Blue Canister 8

Part 4 – Force Fields
Blue Canister 9

Part 5 – Duel of the Fates
Blue Canister 10
Episode I Super Story
With short levels and plenty of studs, The Phantom Menace is a nice introduction to how Super Story works. Many of these levels take around 5 minutes to complete, meaning that this Super Story can be completed in under 30 minutes. Don’t stress too much during this Super Story, as you’ll barely have to try during it.
Below I break down each level in terms of stud collection, time to complete, what to look out for, etc.
Negotiations: A nice short level, this level can be completed in around 3 minutes if you just focus on getting into the MTT at the end. However, there are also plenty of studs to collect here as well. Head into the first door on the right and Force the machine inside to receive a bunch of blues. Take advantage of the Power Ups in the hallway by Forcing the panels, as you’ll quickly rake in studs.
Invasion of Naboo: Another short level, there are also plenty of studs in this level. Lots of blues are just lying in the open. Destroy the tree once you Force it up to reveal a bunch, and there are plenty of blues in the forest ruins.
Escape from Naboo: While not as short as the previous two levels, this level isn’t that long either. Just run and shoot and you’ll grab more studs than you’d think. Focus on just getting to the end of each area and you’ll be halfway through this Super Story before you know it.
Mos Espa Pod Race: This is the only level that you can’t really rush through, so use that time to collect as many studs as you can. The True Jedi for this level is 45,000, so you should be collecting at least that amount. If you don’t pass 100,000 in this level, you’ll want to make sure you’re close to it.
Retake Theed Palace: This is the longest level in the Phantom Menace, which isn’t saying much. Focus on completing your objective in each area and you’ll be fine. Run around and keep shooting with your blaster to dispatch the droids quickly. Make sure your stud total is close to 100,000 if it isn’t already.
Darth Maul: This level is surprisingly quick. During the duel with Maul, simply downstab a bunch (jump then attack) to defeat him quickly. Take advantage of the Power Ups on the ledges in the generator room if you are short on studs.
Episode I Character Bonus – Theed Palace
As the Republic struggles to deal with the Trade Federation threat, and the evil Sith plan to destroy the Jedi, daily life goes on across the galaxy.
In Theed Palace on Naboo, intrepid adventurers compete to collect one million LEGO Studs in the fastest time possible.
It’s the desperate, ruthless life of a world in turmoil….
This Character Bonus can be tricky if you struggle to find Power Ups. Some of the plants and tan nodes will drop them, so take advantage of them when you find them. There are plenty of ledges and courtyards to explore, so do so to look for new sources of Power Ups. I recommend finding two sources of Power Ups, and then just going back and forth between them. The droids don’t offer that many studs, except the Droidekas. Use a thermal detonator to destroy them quickly (just be careful not to get caught in the blast).
If you fail to complete this level within 5 minutes, you will not receive the Gold Brick. You will not get to keep the studs you collect in this level.
Episode I Minikit Bonus – Tatooine
As the Republic struggles to deal with the Trade Federation threat, and the evil Sith plan to destroy the Jedi, daily life goes on across the galaxy.
In the Pod racing arena on Tatooine, intrepid adventurers compete to collect one million LEGO Studs in the fastest time possible.
It’s the desperate, ruthless life of a world in turmoil….
This Minikit Bonus is pretty simple. The area isn’t that big, meaning lots of rocks and poles are clustered together. Stud collection is a breeze, with lots of objects being lined up nice and straight for you to destroy. Destroy the torpedo targets on the white structures to destroy them, revealing guaranteed Power Ups. Some of the rocks and poles will give Power Ups as well.
If you fail to complete this level within 5 minutes, you will not receive the Gold Brick. You will not get to keep the studs you collect in this level.
Bounty Hunter Pursuit – Story Mode
The Galactic Republic plunges ever deeper into crisis. Count Dooku leads a Separatist movement which threatens the future of the Republic.
On the glittering city-planet of Coruscant, Obi-Wan Kenobi and Anakin Skywalker guard Senator Padme Amidala as mysterious assassins move against her….
Boss: Zam’s Airspeeder
Starting Vehicles: Anakin’s Speeder
True Jedi: 35,000

Part 1 – Coruscant Skies
This level is really quite simple. All you have to do to move forward is, quite literally, go forward. Pursue Zam through the twists and turns of the skies. Zam will be represented on your screen with a flashing green arrow, so simply follow it around. Follow Zam into the tunnel to reach the next area.
Part 2 – The First Trap
Come on Anakin! Well you’re stuck between some power couplings, so you better destroy them. Fly through the two white lights to reveal a torpedo generator. Pick up some torpedoes and use them to destroy the six yellow generators by the power coupling. Doing so will shut it off, allowing you to continue your pursuit of Zam.
Part 3 – Anakin’s Shortcut
Similar to the first part of this level, you are once again free to pursue Zam. Continue to follow the flashing green arrow and make your way through the tunnel.
Part 4 – The Second Trap
How did this happen? We’re smarter than this! Time to free ourselves once again. Fly over the white lights (there are more of them this time) to reveal a torpedo generator. Take out the turrets, then use the torpedoes to destroy the twelve yellow generators. As soon as you destroy the final generator, you will automatically enter the next area.
Part 5 – Speeder Showdown
Finally we’ve caught up to Zam. Time to end this! Simply shoot her a bunch of times to deplete her hearts and complete the level.
Unlocked Characters: Zam Wesell (27,500), Dexter Jettster (10,000)
Unlocked Vehicles: Anakin’s Speeder, Zam’s Airspeeder (24,000)
Bounty Hunter Pursuit – Free Play Mode
Required Abilities: TIE
Part 1 – Coruscant Skies
Canister 1


Canister 2

Canister 3


Canister 4

Canister 5


Part 2 – The First Trap
Canister 6


Part 3 – Anakin’s Shortcut
Canister 3 cont.


Bounty Hunter Pursuit – Free Play Mode cont.
Canister 7


Red Power Brick


Canister 8

Canister 9

Part 4 – The Second Trap
Canister 10


Minikit Model: Zam’s Airspeeder
Red Power Brick Extra: Stud Magnet (100,000)
Bounty Hunter Pursuit – Challenge Mode
Required Abilities: TIE
Part 1 – Coruscant Skies
Blue Canister 1

Blue Canister 2

Blue Canister 3

Blue Canister 4

Part 2 – The First Trap
Blue Canister 5

Part 3 – Anakin’s Shortcut
Blue Canister 6

Blue Canister 7

Blue Canister 8

Blue Canister 9

Part 4 – The Second Trap
Blue Canister 10

Discovery on Kamino – Story Mode
As Separatist activity continues to destabilize the galaxy, Obi-Wan Kenobi investigates the attempted assassination of Senator Padme Amidala.
With his astromech droid R4-P17, the Jedi Knight tracks the source of a poisoned dart to the remote world of Kamino….
Enemies: Security Drone
Boss: Jango Fett
Starting Characters: Obi-Wan Kenobi (Jedi Master), R4-P17
True Jedi: 50,000

Part 1 – Landing Pad
Looks like some lightning has destroyed one of the nodes. Head over to it and Force it back together. This will extend a bridge back to the right. Follow the Kaminoan to the right and head inside.
Part 2 – Circular Hallway
Head to the right, then follow Taun We through the doorway.
Part 3 – Creation Lab
Head down the hall and you’ll find a series of buttons on the floor in a square shape. Quickly step on all of the buttons and an object will rise out of the center panel. Force it to trigger a cutscene.
After the cutscene, the doors to the hallways will be lifted. Follow Taun We down the hall on the left, then use the Astromech panel to open the door. Head inside.
Part 4 – Apartment Hallway
Head down the hall and into the room on the right to meet Jango Fett.
Part 5 – Jango’s Apartment
At last, the bounty hunter we’ve been looking for! Jango will run out of the room, leaving some security drones behind. Defeat all of them to open the door back out into the hallway. Head out into the hall.
Part 4 – Apartment Hallway
Head down the hallway and you’ll see Jango protected by a shield. Two turrets on the ceiling will begin firing at you. Time your deflections to send the bolts back at them. Destroy both turrets and the shield will go down. Chase after Jango Fett.
Part 6 – Kamino Apartment
You’ll see Jango on the right. Head into the opening after him.
Part 7 – Catwalks
Jango has put some bombs on the path, so watch out for those. The trick is to get close enough to detonate them, then back away before you’re damaged by the explosion. Each bomb will destroy part of the catwalk, so you’ll have to jump over the gaps. Pursue Jango to the right and he will turn and head towards the door in the back. He will hover across the gap and head up the elevator. To follow him, step on the button to extend part of a bridge. Have R4 hover across the gap and step on the other button to complete the bridge, allowing Obi-Wan to cross. Force the LEGO pieces on the left to move them out of the way, revealing an Astromech panel. Use it to open the door, then head inside.
Part 8 – Landing Pad Approach
This guy doesn’t stop running does he? Head down the hall and you’ll be harassed by security drones. Use the Astromech panels to close the hatches, cutting off the waves of drones. This will allow you to operate in peace. Head down to the door and Force the LEGO pieces to the left of it to reveal an Astromech panel. Use it to open the door, then head onto the landing pad.
Part 9 – Slave I Landing Pad
Finally, time for a fight! The Slave I will take off and Jango will run to the center of the landing pad. Follow him and his hearts will appear. To damage Jango, simply deflect his blasts back at him. After you take three hearts off him, he will jetpack up in the air. The Slave I will also start firing at you. You can run around to avoid the laserfire, but if it becomes too annoying, you can use any of the Astromech panels on the landing pad to start up a turret. The turret will distract the Slave I for a bit, allowing you to focus on Jango. When you get him down to four hearts, he will start to launch rockets at you. Simply Force them back at him to damage him. When he’s down to one heart, the Slave I will stop firing and Jango will return to the ground and run around. Catch up to him and damage him to complete the level.
Unlocked Characters: Obi-Wan Kenobi (Jedi Master), R4-P17, Clone (13,000), Lama Su (9,000), Taun We (9,000)
Discovery on Kamino – Free Play Mode
Required Abilities: Bounty Hunter, Double Jump, Force, Grapple, High Jump, Hover, Imperial, Protocol, Sharp Shoot, Sith Force, Small
Part 1 – Landing Pad
Canister 1

Canister 2

Part 3 – Creation Lab
Canister 3


Canister 4


Canister 5


Part 4 – Apartment Hallway
Red Power Brick


Part 5 – Jango’s Apartment
Canister 6


Part 6 – Kamino Apartment
Canister 7

Part 7 – Catwalks
Canister 8


Canister 9


Part 8 – Landing Pad Approach
Canister 10


Minikit Model: Jedi Starfighter
Red Power Brick Extra: Disarm troopers (100,000)
Discovery on Kamino – Challenge Mode
Required Abilities: Astromech, Bounty Hunter, Double Jump, Force, Grapple, High Jump, Imperial, Sharp Shoot, Sith Force, Small
Part 1 – Landing Pad
Blue Canister 1

Part 2 – Circular Hallway
Blue Canister 2

Part 3 – Creation Lab
Blue Canister 3

Blue Canister 4


Blue Canister 5


Part 4 – Apartment Hallway
Blue Canister 6

Blue Canister 7


Part 7 – Catwalks
Blue Canister 8


Blue Canister 9

Part 8 – Landing Pad Approach
Blue Canister 10


Droid Factory – Story Mode
Obi-Wan Kenobi has tracked the bounty hunter Jango Fett to the planet of Geonosis. This rocky world, known for its droid production factories, forms the base of operations for the Separatist movement.
While Anakin Skywalker guards Senator Padme Amidala, Obi-Wan lands his Jedi Starfighter on the planet’s surface….
Enemies: Geonosian, Droideka, Battle Droid (Geonosis), Battle Droid (Commander)
Starting Characters: Anakin Skywalker (Padawan), Padme (Geonosis)
Added Characters: R2-D2, C-3PO
True Jedi: 40,000

Part 1 – Factory Entrance
Head down the hallway and you’ll be ambushed by Geonosians. Defeat all of them to open the door at the end, allowing you to proceed into the factory.
Part 2 – Machines Making Machines
Drop down from the ledge you’re standing on and you’ll find yourself on the assembly line. Head to the right and you’ll find a press. You can either quickly run underneath it when it lifts up, or you can walk around it on the square panels. Be careful though, as they will collapse shortly after you land on them. Continue to the right past the droideka and you’ll find another assembly line. Head to the right on it and you’ll find R2-D2. You can head back to the left and use the Astromech panel to shut down the assembly line if you want, but it’s not required. Continue to the right and Force the fan on the far right to lower it to the ground. Ride the air current up onto the ledge, then head through the door.
Part 3 – Buckets and Bolts
Head to the right and grapple onto the ledge, then shoot the target to reveal a bucket. Hop onto the bucket and onto the next ledge, then grapple up. Shoot the next target to move the bucket. When the bucket returns, hop in it and ride it to the right. It will then dump you onto a ledge. Destroy the bombs to reveal a target, then Force it onto the wall. Shoot it to lower the bucket to the right. Hop on it and ride it up to the ledge, then hop on. Head to the right, then drop down onto the lower ledge. Head to the right and you’ll see a moving bucket. Hop on it and ride it to the next ledge, then hop off onto it. Cross the gap (either by grappling, double jumping or hovering) and destroy the bombs to reveal an Astromech panel. Use it to open the door, then head inside.
Part 4 – Lava Pool
We’ve found 3PO, but we need to get him across the gap. Look to the right in the lava and you’ll see a platform. Force the gear to rotate it towards you, allowing 3PO to get on. Force the gear two more times to rotate the platform to the right. Look to the right and you’ll see another platform in the lava. Force the gear to rotate the second platform, allowing 3PO to get on, then Force the gear two more times to rotate it to the right. This will allow 3PO to reach the opposite ledge. Use the Protocol panel to open the door, then head inside.
Part 5 – Factory Catacombs
Head to the right and you’ll be ambushed by Geonosians. Take them out and continue to the right, where you’ll find the path blocked by lava. Grapple up onto the nearby ledge, then shoot the tan pillar to reveal LEGO pieces below you. Drop down and Force them into a platform, then hover over to it as R2. Hover across the gap, then use the Astromech panel to extend a bridge, allowing everyone else to join you. Continue to the right and dispose of the droidekas, then use the Protocol panel to open the door. Head inside.
Part 6 – Rescuing Obi-Wan
Use the Astromech panel on the right to reveal a bomb. Force it to the right, then destroy it to shut off the force field. Continue to the right and defeat the enemies guarding Obi-Wan, then Force each of the restraints to free him. Nothing can possibly go wrong!
Unlocked Characters: Anakin Skywalker (Padawan), Padme (Geonosis), Geonosian (20,000), Battle Droid (Geonosis) (8,500)
You will also unlock R2-D2 and C-3PO if you haven’t already
Droid Factory – Free Play Mode
Required Abilities: Astromech, Force, Grapple, High Jump, Imperial, Sharp Shoot, Small
Part 1 – Factory Entrance
Canister 1

Canister 2

Part 2 – Machines Making Machines
Canister 3

Canister 4


Part 3 – Buckets and Bolts
Canister 5

Canister 6


Part 4 – Lava Pool
Canister 7

Part 5 – Factory Catacombs
Red Power Brick


Canister 8


Canister 9

Part 6 – Rescuing Obi-Wan
Canister 10


Minikit Model: Droideka
Red Power Brick Extra: Character studs (100,000)
Droid Factory – Challenge Mode
Required Abilities: Astromech, Double Jump, Force, Grapple, Hover, Imperial, Sharp Shoot
Part 1 – Factory Entrance
Blue Canister 1

Part 2 – Machines Making Machines
Blue Canister 2


Blue Canister 3

Blue Canister 4


Part 3 – Buckets and Bolts
Blue Canister 5


Blue Canister 6

Part 4 – Lava Pool
Blue Canister 7

Part 5 – Factory Catacombs
Blue Canister 8


Blue Canister 9


Blue Canister 10

Jedi Battle – Story Mode
In their attempt to rescue Obi-Wan Kenobi on the planet Geonosis, Anakin Skywalker and Padme Amidala have been captured by Jango Fett.
Obi-Wan has sent a distress signal to the Jedi Council. But hopes of rescue seem remote, as the evil Separatist leader Count Dooku oversees their execution….
Enemies: Geonosian, Battle Droid (Security), Droideka, Super Battle Droid, Battle Droid (Geonosis)
Boss: Jango Fett
Starting Characters: Mace Windu, R2-D2
Added Characters: Padme (Clawed), Anakin Skywalker (Padawan), Obi-Wan Kenobi (Jedi Master)
True Jedi: 8,000

Part 1 – Petranaki Arena
Your goal here is to free Padme, Anakin and Obi-Wan. Defeat the enemies marked on the screen, then Force them down to add them to your party. To free Padme, defeat the two droidekas and four security battle droids. Force her down to add her to your party. Head to the right to find Anakin. To free him, defeat two droidekas and four super battle droids. Force him down to add him to your party. Continue to the right to find Obi-Wan. To free him, defeat four droidekas and two super battle droids. Force him down to free him. Once Padme, Anakin and Obi-Wan are free, waves of enemies will appear for you to destroy. The first wave consists of six security battle droids. The second wave consists of three security battle droids and three super battle droids. After the second wave is defeated, Jango Fett will jetpack down. To damage him, deflect his blasts at him and Force the rockets back at him. You can also just blast him with Padme. Take out Jango’s hearts to complete the level.
Unlocked Characters: Mace Windu, Padme (Clawed), Super Battle Droid (25,000), Jango Fett (70,000), Boba Fett (Boy) (5,500), Luminara (28,000), Ki-Adi Mundi (30,000), Kit Fisto (35,000), Shaak Ti (36,000), Aayla Secura (37,000), Plo Koon (39,000)
Jedi Battle – Free Play Mode
Required Abilities: Double Jump, Force, Grapple, High Jump, Imperial, Sith Force, Small, Thermal Detonator
Part 1 – Petranaki Arena
Canister 1


Canister 2

Canister 3

Canister 4

Canister 5

Red Power Brick


Canister 6


Canister 7


Canister 8

Canister 9


Canister 10

Minikit Model: Republic Gunship
Red Power Brick Extra: Perfect deflect (20,000)
Jedi Battle – Challenge Mode
Required Abilities: Double Jump, Force, Grapple, High Jump, Imperial
Part 1 – Petranaki Arena
Blue Canister 1

Blue Canister 2

Blue Canister 3

Blue Canister 4

Blue Canister 5

Blue Canister 6

Blue Canister 7


Blue Canister 8

Blue Canister 9

Blue Canister 10

Gunship Cavalry – Story Mode
The Grand Army of the Republic has been called into action. Led by Mace Windu and Yoda, the new Clone forces clash with the Separatist droid armies on the planet Geonosis.
Obi-Wan Kenobi and Anakin Skywalker engage with the enemy, as they pursue Count Dooku in their Republic attack gunship….
Enemies: Hailfire Droid, Spider Droid
Starting Vehicles: Republic Gunship
True Jedi: 30,000

Part 1 – Geonosis Canyons
Your goal in this first area is to get through that force field at the end of the path. The force field is being powered by two generators. You need to take a bomb from the bomb dispenser on the left and drag it into the generators to destroy them. Watch out for the lasers that will occasionally power on, as they will damage you. Once the first force field is down, continue along through the canyons. You’ll find the path blocked by another force field, so tow bombs into the generators to destroy them. Once the second force field is down, fly through the opening.
Part 2 – Federation Ship
Your goal in this area is to prevent the Federation ship from launching. There are four shielded sections that are flanked by generators. When the generators around a shield have been destroyed, the shield will be lowered and you can destroy the blue nodes. Tow bombs into the generators to destroy them, exposing the blue nodes. Destroy all of the blue nodes to complete the level.
Unlocked Vehicles: Republic Gunship
Gunship Cavalry – Free Play Mode
Required Abilities: TIE, Tow Cable
Part 1 – Geonosis Canyons
Canister 1

Canister 2

Canister 3


Canister 4

Red Power Brick

Canister 5

Part 2 – Federation Ship
Canister 6

Canister 7

Canister 8

Canister 9

Canister 10

Minikit Model: AT-TE
Red Power Brick Extra: Exploding blaster bolts (20,000)
Gunship Cavalry – Challenge Mode
Required Abilities: TIE, Tow Cable
Part 1 – Geonosis Canyons
Blue Canister 1

Blue Canister 2

Blue Canister 3

Blue Canister 4


Blue Canister 5

Blue Canister 6

Blue Canister 7

Part 2 – Federation Ship
Blue Canister 8

Blue Canister 9

Blue Canister 10

Count Dooku – Story Mode
As the battle rages between the Clone forces of the Republic and the Separatist droid army, the Separatist leader Count Dooku flees to his secret hangar.
Obi-Wan Kenobi and Anakin Skywalker follow closely behind, prepared for a final showdown with the Sith Lord….
Enemies: Battle Droid (Geonosis), Geonosian
Boss: Count Dooku
Starting Characters: Obi-Wan Kenobi (Jedi Master), Anakin Skywalker (Padawan)
Added Characters: Yoda
True Jedi: 10,000

Part 1 – Hangar Entrance
Head to the right and Dooku will run into the hangar. Follow him inside and through the door on the left. He will then flee through the door, closing it behind him. To open it, head to the right and step on the button on the floor. This will extend a platform. Your partner will hop onto the platform (make sure you stay on the button on the ground) and step on the button, revealing another platform. Hop onto the platform and step on the button. Your partner will then hop onto the next platform and step on the button. This will keep all of the platforms extended, allowing you to hop up to the left. Hop onto the upper ledge and Force one of the levers. Your partner will Force the other, opening the door below you. Drop down and head through the opening.
Part 2 – Duel with Dooku
Duel Dooku to take out three hearts. He will then Force you away from him and start Forcing containers at you. If you try to approach Dooku, you’ll get pushed away, so instead Force the containers back at him. Hit him with three containers to trigger a cutscene.
After the cutscene, Anakin will be taken out of the picture. However, Yoda has shown up to have some fun! Duel Dooku to take out three more hearts. He will then use Force lightning on you. When you are being shocked, switch to your partner and run up to Dooku for a free hit. If you are too slow getting to Dooku, your partner will take damage and you’ll have to wait a few seconds to try again. Hit Dooku three times this way, then duel him to take out his last four hearts, completing the level.
After completing this level, you will unlock Yoda if you haven’t already
Count Dooku – Free Play Mode
Required Abilities: Double Jump, Force, Grapple, High Jump, Hover, Sharp Shoot, Small, Thermal Detonator
Part 1 – Hangar Entrance
Canister 1

Canister 2

Canister 3


Canister 4


Canister 5

Canister 6

Part 2 – Duel with Dooku
Canister 7

Canister 8


Canister 9

Red Power Brick


Canister 10

Minikit Model: Solar Sailor
Red Power Brick Extra: Force pull (12,000)
Count Dooku – Challenge Mode
Required Abilities: Force, Grapple, High Jump, Small, Thermal Detonator
Part 1 – Hangar Entrance
Blue Canister 1


Blue Canister 2

Blue Canister 3

Blue Canister 4


Blue Canister 5

Part 2 – Duel with Dooku
Blue Canister 6


Blue Canister 7

Blue Canister 8

Blue Canister 9

Blue Canister 10

Episode II Super Story
Much like The Phantom Menace, this Super Story is nice and quick. However, this Super Story is a bit more difficult because studs can be hard to come by. You should still have no problem getting over 100,000, it’s just that you’ll have to try a bit harder than in other Super Stories. Like The Phantom Menace, this Super Story can be completed in less than 30 minutes.
Below I break down each level in terms of stud collection, time to complete, what to look out for, etc.
Bounty Hunter Pursuit: Don’t even bother with studs in this level. Collecting the studs from the signs is difficult at best, and you are better off using the time to breeze through the level. Any studs you collect from this level are going to be from the generators you destroy.
Discovery on Kamino: This level is your best source of studs. Lots of blues are just lying out in the open, and if you Force and destroy the white containers, you’ll get even more. This level also doesn’t take too long to complete, but I suggest taking some time to boost your stud total.
Droid Factory: This level is your last real place to get lots of studs. The last three levels don’t offer much in the way of studs, so use the time you have to boost your stud total. Take advantage of the Power Ups to get your stud total up to 100,000.
Jedi Battle: There are not a lot of studs in this level, and there won’t be lots of studs in the levels after this, so make sure you’re close to 100,000 studs. Each of the bombs will reveal a Power Up when destroyed, so use those to make short work of the enemies guarding each pillar.
Gunship Cavalry: This level is actually a decent source of studs. Destroying the blue nodes will reveal a Power Up and plenty of studs. Try to destroy the blue nodes while you have a Power Up active to make the most of the studs. If you don’t have 100,000 studs yet, make sure you’re close.
Count Dooku: This level won’t be a good source of studs, so make sure you’re close to 100,000 if you aren’t already. Constantly downstab (jump then attack) Dooku to quickly take out his hearts.There is a Power Up in the room before the boss fight that you can use to get your stud total up if you need to.
Episode II Character Bonus – Geonosis
As the Republic struggles to deal with the Trade Federation threat, and the evil Sith plan to destroy the Jedi, daily life goes on across the galaxy.
In the droid factory on Geonosis, intrepid adventurers compete to collect one million LEGO Studs in the fastest time possible.
It’s the desperate, ruthless life of a world in turmoil….
This area is actually quite large, so take advantage of that by stepping on the buttons to extend bridges to new areas. Some of the silver objects and bombs will drop Power Ups, so use those to your advantage. Be careful and avoid shooting randomly, as you can destroy objects before you can get to them to collect the studs. Catch a ride on one of the buckets and you’ll collect a whole bunch of purple studs (even better if you have a Power Up!).
If you fail to complete this level within 5 minutes, you will not receive the Gold Brick. You will not get to keep the studs you collect in this level.
Episode II Minikit Bonus – Coruscant
As the Republic struggles to deal with the Trade Federation threat, and the evil Sith plan to destroy the Jedi, daily life goes on across the galaxy.
On the city planet Coruscant, intrepid adventurers compete to collect one million LEGO Studs in the fastest time possible.
It’s the desperate, ruthless life of a world in turmoil….
There are lots of nodes, signs and other objects for you to destroy. Hit the torpedo targets on the white structures to destroy them, revealing a Power Up. Some of the objects you can destroy will also reveal Power Ups. Lots of objects are clustered together, making stud collection a breeze. You shouldn’t have too many problems with this Minikit Bonus.
If you fail to complete this level within 5 minutes, you will not receive the Gold Brick. You will not get to keep the studs you collect in this level.
Battle Over Coruscant – Story Mode
The Republic is crumbling under a Separatist assault led by Count Dooku and General Grievous. In a stunning move, Separatist forces have swept into Coruscant and kidnapped Supreme Chancellor Palpatine.
As the Droid Army attempts to flee with their hostage, Obi-Wan Kenobi and Anakin Skywalker lead a desperate mission to rescue the Chancellor….
Enemies: Vulture Droid, Droid Trifighter
Starting Vehicles: Jedi Starfighter (Yellow)
True Jedi: 75,000

Part 1 – The Battle of Coruscant
This level is pretty simple. You are on rails, meaning that you can only move around the screen, as the game will move you forward on its own. Fly around shooting down as many enemies as you can. Eventually, you’ll fly towards a Separatist ship blocking your path. There are five large red targets on the ship. Shoot them all to destroy the ship, allowing you to continue on. Keep flying and shooting. Eventually, you’ll fly towards the bridge of a Separatist ship. Shoot the two red targets to destroy it, allowing you to proceed. Continue flying and eventually you’ll fly towards a hangar on a Republic cruiser. Shoot the targets on the sides of it to open it, allowing you to fly through it. Continue flying until you reach the Invisible Hand. Shoot the targets on the sides of the force field to lower it, then fly inside to complete the level.
Unlocked Vehicles: Jedi Starfighter (Yellow), Jedi Starfighter (Red), Droid Trifighter (28,000), Vulture Droid (30,000), Clone Arcfighter (33,000)
Battle Over Coruscant – Free Play Mode
Part 1 – The Battle of Coruscant
Canister 1

Canister 2

Canister 3

Canister 4

Canister 5

Canister 6

Canister 7

Canister 8

Red Power Brick

Canister 9

Canister 10

Minikit Model: Drop Ship
Red Power Brick Extra: Vehicle smart bomb (15,000)
Battle Over Coruscant – Challenge Mode
This Challenge Mode is slightly different from the others. If you don’t collect all 10 Blue Canisters before the end of the level, you will not fail the Challenge. Instead, you will repeat the level until you collect all of the Blue Canisters or you run out of time.
Part 1 – The Battle of Coruscant
Blue Canister 1

Blue Canister 2

Blue Canister 3

Blue Canister 4

Blue Canister 5

Blue Canister 6

Blue Canister 7

Blue Canister 8

Blue Canister 9

Blue Canister 10

Chancellor in Peril – Story Mode
High above the planet Coruscant, a deadly battle rages between the Separatist forces and the Army of the Republic.
On the Separatist flagship, Count Dooku and General Grievous hold Chancellor Palpatine captive. Crashing their Jedi Starfighters into the main hangar, Obi-Wan Kenobi and Anakin Skywalker are surrounded by hostile droid forces….
Enemies: Battle Droid (Security), Battle Droid, Battle Droid (Commander), Droideka, Super Battle Droid, Grievous’ Bodyguard
Boss: Count Dooku
Starting Characters: Obi-Wan Kenobi (Episode III), Anakin Skywalker (Jedi)
Added Characters: R2-D2, Chancellor Palpatine
True Jedi: 60,000

Part 1 – Invisible Hand Hangar
You’ll see Grievous down the hall, so follow him. He’ll retreat and leave behind a squad of droids. Dispatch them, then Force the door to destroy it. Head through the opening.
Part 2 – Invisible Hand Corridor
Head down the path and drop down. Defeat the droids down here, then continue to the right. You’ll notice some LEGO pieces on the wall. Force them to create platforms, then hop up them to reach the upper ledge. Force either of the yellow grates to reveal an opening, then head inside.
Part 3 – Vent Access
Head down the path and defeat all of the droids. Once all the droids are scrap, R2 will appear out of an elevator. Use the Astromech panel on the right to open the elevator, revealing a bomb. Force it to the right, then Force it again to destroy it. This will knock down a panel, allowing you to head up and through the opening.
Part 4 – Ventilation Room
Head to the right and Force the LEGO pieces on the wall to create a platform. Hop on it and onto the ledge above you, then Force the lever to start an air current flowing. Ride it to the upper ledge, then use the Astromech panel to open the door. Head inside.
Part 5 – Do it!
We’ve found the Chancellor, but Dooku is here! Duel him to take out a heart. He will then hit you with Force lightning. Switch to your partner and get a free hit on Dooku. If you are too slow, your partner will be damaged and you’ll have to wait for him to use Force lightning again. He will then jump up to the ledge, so head up the stairs after him. Duel him to take out a heart, then switch to your partner when he uses Force lightning. He will then jump back down. Follow him, then repeat the process to take out his last two hearts.
After the cutscene, Chancellor Palpatine will be added to the party. Head up the stairs and through the open door. You’ll be in a room with a bunch of elevators. Head through the door directly in front of you.
Part 6 – Elevator Shaft
Yes, that is an elevator chasing you. Run down the path. Be careful to avoid the air vents, as they’ll slam you into the ceiling. If you die before you reach the end of the path, you’ll have to start this section over. Once you reach the end, you can use the Astromech panel to retract the elevator so you can explore. When you’re ready, head through the opening.
Part 7 – Sideways Corridor
Head down the path. Eventually, your path will be blocked by some gas. Force the yellow valve to shut off the gas, then continue to the right. You’ll find more gas blocking your path. Head through as R2 (if any other characters touch the gas, they will die), then use the Astromech panel to shut off the gas. Destroy the panel in the wall to create a ramp, allowing R2 to continue to the right. Continue to the right and use the Astromech panel to open the door. Head inside.
Part 8 – Invisible Hand Bridge
Head down the path and into the bridge. Force one of the blue levers and your partner will Force the other one, completing the level.
Unlocked Characters: Obi-Wan Kenobi (Episode III), Anakin Skywalker (Jedi), Chancellor Palpatine, Count Dooku (100,000), Grievous’ Bodyguard (42,000)
You will also unlock R2-D2 if you haven’t already
Chancellor in Peril – Free Play Mode
Required Abilities: Astromech, Force, Grapple, Protocol, Small, Thermal Detonator
Part 1 – Invisible Hand Hangar
Canister 1


Part 2 – Invisible Hand Corridor
Canister 2

Part 3 – Vent Access
Canister 3

Canister 4

Part 4 – Ventilation Room
Canister 5

Canister 6


Part 5 – Do it!
Canister 7

Part 6 – Elevator Shaft
Red Power Brick


Part 7 – Sideways Corridor
Canister 8


Part 8 – Invisible Hand Bridge
Canister 9

Canister 10

Minikit Model: Emergency Ship
Red Power Brick Extra: Super astromech (10,000)
Chancellor in Peril – Challenge Mode
Required Abilities: Astromech, Double Jump, Grapple, Protocol
Part 1 – Invisible Hand Hangar
Blue Canister 1

Blue Canister 2


Part 2 – Invisible Hand Corridor
Blue Canister 3


Part 3 – Vent Access
Blue Canister 4

Part 4 – Ventilation Room
Blue Canister 5

Blue Canister 6

Part 5 – Do it!
Blue Canister 7

Blue Canister 8

Part 7 – Sideways Corridor
Blue Canister 9

Part 8 – Invisible Hand Bridge
Blue Canister 10

General Grievous – Story Mode
Obi-Wan Kenobi and Anakin Skywalker have saved Chancellor Palpatine. But his captor, General Grievous, has escaped.
The Jedi Council assigns Obi-Wan Kenobi the task of hunting down Grievous, who is hiding on the sinkhole world of Utapau….
Boss: General Grievous
Starting Characters: Obi-Wan Kenobi (Episode III), Commander Cody
True Jedi: 3,500

Part 1 – Landing Pad
This level is just one big boss fight against General Grievous. Duel Grievous to take out one heart. He will then jump to the left. Have Cody shoot the two bombs near him to damage him, causing him to jump back to the landing pad. Duel him to take out two more hearts. He will then jump onto another ledge. To reach him, Force the LEGO pieces on the left side of the landing pad into a bridge. Cross it, then double jump or grapple onto the ledge on the right. Continue to the right, then Force the LEGO pieces into a platform. Hop onto it as Cody and shoot the bomb on the ledge next to Grievous (you may have to jump and shoot a few times before you hit the bomb). This will damage Grievous, who will then jump back to the landing pad. Return to the landing pad and duel Grievous to take out two more hearts. He will then jump onto another ledge. Return to the ledge you were on before, then Force the LEGO pieces into platforms. Hop up them and onto the ledge, then destroy the panel on the left to reveal a bomb. Force it out of the alcove and across the gap, then shoot it to damage Grievous. He will then retreat to the landing pad. Return to the landing pad and duel Grievous to take out his last two hearts, ending the level.
Unlocked Characters: Commander Cody, General Grievous (70,000)
General Grievous – Free Play Mode
Required Abilities: Double Jump, Force, High Jump, Hover, Thermal Detonator
Part 1 – Landing Pad
Canister 1

Canister 2


Canister 3


Canister 4

Canister 5

Canister 6

Canister 7
Canister 8

Canister 9

Canister 10


Red Power Brick


Minikit Model: Jedi Starfighter (Episode III)
Red Power Brick Extra: Super Jedi slam (11,000)
General Grievous – Challenge Mode
Required Abilities: Double Jump, Force, High Jump, Hover, Thermal Detonator
Part 1 – Landing Pad
Blue Canister 1

Blue Canister 2

Blue Canister 3


Blue Canister 4

Blue Canister 5

Blue Canister 6

Blue Canister 7

Blue Canister 8

Blue Canister 9


Blue Canister 10

Defense of Kashyyyk – Story Mode
Obi-Wan Kenobi has taken care of General Grievous, but the Clone Wars continue. Across the galaxy, Jedi Knights lead the Army of the Republic into battle against Separatist forces.
Jedi Master Yoda fights on the Wookiee planet of Kashyyyk. But the Sith Lord Darth Sidious is about to reveal himself, and draw a new darkness over the galaxy….
Enemies: Clone (Episode III), Battle Droid, Battle Droid (Commander), Clone (Episode III, Swamp), Clone (Episode III, Walker)
Starting Characters: Yoda, Chewbacca
True Jedi: 65,000

Part 1 – Kachirho Village
Head to the right and you’ll notice a bridge. To lower it, Force the two panels on the sides of it. Once the bridge is lowered, continue to the right and into the group of clone troopers.
After the cutscene, Order 66 will be issued, and the clones are now after you. Once the clones are taken care of, Force the piles of LEGO pieces on the left into the panels. Force the panels to lower the bridge, then continue down the path. As you head down the path, you’ll be shown three Wookiees that have been captured by clones. We’ll need to free them all. Start by heading towards the big tree. Use the grapple point to reach the platform, then hop across to the platform on the left. Grapple up the grapple points to reach the first Wookiee. Defeat the clone troopers to free him, then drop down and head to the left. Head down the bridge to the right and you’ll see a Wookiee up ahead on the path. Before you rescue him however, continue to the right. Destroy the tan boxes, then Force the node to create a grapple point. Grapple up onto the ledge and defeat the clones to rescue the second Wookiee. Drop down and head back to the left, then head down the path and rescue the final Wookiee. Once all three Wookiees are rescued, head to the left and step on one of the buttons. Your partner will step on the other one, lowering the bridge. Continue down the path.
Part 2 – Kachirho Beach
This is a nice big area. You can fight the enemies here if you want, but your real objective is on the far left side of the beach. There are some LEGO pieces in the sand. Force them into a bridge, then Force one of the small plants on the left to reveal a grapple point. Grapple up onto the ledge, then stand on the bridge and shoot the two targets. This will lower the gate, allowing you to continue.
Part 3 – Swamp
This area has two Battle Droid Commanders calling in lots and lots of droids. You can hop up the ledges and take out the Commanders if you want, but all you really have to do is head down the path and through the opening in the rocks at the end.
Part 4 – Forest Path
Head to the right and continue down the path. At the end of the path, you’ll find a clone in an AT-RT. You can’t use a mind trick to force him out, so you’ll have to attack the walker to kick out the clone. Once the walker is taken care of, Force the plants on the left side near the rock wall to reveal some hidden platforms. Hop up the platforms and onto the rock ledge, then head to the left. Watch out for the boulders rolling down the slope. You can Force or shoot the boulders to destroy them, or just carefully walk around them. Hop up the platforms at the end of the ledge, then head back to the right. At the top of the slope you’ll find some LEGO pieces. Force them into platforms, then hop up them and step on one of the buttons. Your partner will step on the other, opening the gate. Continue down the path, where you’ll find another AT-RT. Take it out, then head to the left, where you’ll find Yoda’s escape pod. Force the four nodes around the hole, then destroy each of them to reveal the escape pod. Force the escape pod to complete the level.
Unlocked Characters: Wookiee (16,000), Clone (Episode III) (10,000), Clone (Episode III, Pilot) (11,000), Clone (Episode III, Swamp) (12,000), Clone (Episode III, Walker) (12,000)
You will also unlock Yoda and Chewbacca if you haven’t already
Defense of Kashyyyk – Free Play Mode
Required Abilities: Double Jump, Force, Grapple, High Jump, Hover, Sith Force, Thermal Detonator
Part 1 – Kachirho Village
Red Power Brick


Canister 1


Canister 2

Part 2 – Kachirho Beach
Canister 3

Canister 4


Canister 5


Part 3 – Swamp
Canister 6

Canister 7


Part 4 – Forest Path
Canister 8


Canister 9

Canister 10

Minikit Model: Wookiee Cat
Red Power Brick Extra: Super thermal detonator (25,000)
Defense of Kashyyyk – Challenge Mode
Required Abilities: Double Jump, Grapple, High Jump, Hover
Part 1 – Kachirho Village
Blue Canister 1


Blue Canister 2

Blue Canister 3

Blue Canister 4

Part 2 – Kachirho Beach
Blue Canister 5

Blue Canister 6

Part 3 – Swamp
Blue Canister 7

Part 4 – Forest Path
Blue Canister 8

Blue Canister 9

Blue Canister 10

Ruin of the Jedi – Story Mode
Palpatine has issued Order 66, turning the Clone Army against the Jedi. Across the galaxy, clones have gunned down their Jedi generals.
Yoda and Obi-Wan Kenobi have survived, and head for the Jedi Temple on Coruscant. They hope to find some answers to this shocking turn of events within the Jedi Archives….
Enemies: Disguised Clone, Clone (Episode III)
Starting Characters: Obi-Wan Kenobi (Episode III), Yoda
True Jedi: 35,000

Part 1 – Temple Exterior
Head to the right and you’ll see the entrance to the temple. Head up the stairs and Force the doors to move them out of the way, allowing you to head inside the temple.
Part 2 – Temple Ruins
Head down the path and you’ll see a red pillar on the left. Force it to create steps, then hop up them to reach the upper ledge. Continue to the right and drop down to the ledge below you. Continue to the right and you’ll find the entrance to the archives. Force the two red pillars to reveal gears. Force one and your partner will Force the other, opening the door. Head inside.
Part 3 – The Jedi Archives
Head down the path, defeating the waves of clones that appear. When you enter the clearing at the end, you’ll notice the door to the records room blocked by a weird crane of sorts. To move it, head into each of the alcoves on the right. Force the platforms to extend them, then hop up and Force each of the levers (in the center alcove, you’ll have to step on the button on the platform above the lever to lower the force field). This will send power to the center of the room. Once all three levers have been Forced, the crane arm will move, allowing you to enter the records room.
Part 4 – Records Room
Simply head to the right and Force the camera reel to complete the level.
Unlocked Characters: Mace Windu (Episode III) (38,000), Disguised Clone (12,000)
Ruin of the Jedi – Free Play Mode
Required Abilities: Double Jump, Force, Grapple, High Jump, Hover, Imperial, Protocol, Sith Force, Thermal Detonator
Part 1 – Temple Exterior
Canister 1

Canister 2


Canister 3


Part 2 – Temple Ruins
Canister 4


Canister 5


Canister 6


Part 3 – Jedi Archives
Canister 7

Canister 8

Canister 9


Red Power Brick


Ruin of the Jedi – Free Play Mode cont.
Part 4 – Records Room
Canister 10


Minikit Model: ARC Fighter
Red Power Brick Extra: Deflect Bolts (150,000)
Ruin of the Jedi – Challenge Mode
Required Abilities: Double Jump, Force, Grapple, High Jump, Imperial, Protocol
Part 1 – Temple Exterior
Blue Canister 1

Blue Canister 2

Blue Canister 3


Part 2 – Temple Ruins
Blue Canister 4

Blue Canister 5


Blue Canister 6


Part 3 – Jedi Archives
Blue Canister 7

Blue Canister 8


Blue Canister 9


Part 4 – Records Room
Blue Canister 10

Darth Vader – Story Mode
Anakin Skywalker, once the young Podracing champion of Tatooine, Padawan to Obi-Wan Kenobi and hero of the Clone Wars, has finally given in to his secret emotions and fallen to the Dark Side.
His wife Padme rushes to the volcanic world of Mustafar, hoping to turn Anakin back from his dark path. She has no idea that Anakin’s former master Obi-Wan is hiding aboard her ship….
Boss: Anakin Skywalker (Jedi)
Starting Characters: Obi-Wan Kenobi (Episode III), Anakin Skywalker (Jedi)
True Jedi: 25,000

Part 1 – Collapsing Hallway
As soon as you start this level, you will be placed in danger. The floor in the hallway is collapsing, so run towards the camera and avoid the lava. Eventually, you will have to hop across the gaps, so do so carefully. If you die, you’ll have to restart this section. Try to space out your double jumps so you cover more distance with each leap.
Part 2 – Control Room
You’ll notice a timer in the center of the screen. This tells you how much time you have before the entire room explodes. If you’re still in the room when it explodes, you will die and have to restart the area. You can Force the pillars lying around to add 20 seconds to the timer. To exit the room, head to the right. You’ll find some collapsed pillars in front of a door. Force them out of the way, then Force one of the orange clasps. Your partner will Force the other, opening the door. Head outside.
Part 3 – Collapsing Ledge
The ledge you are standing on will begin to collapse, so make your way quickly to the right. If you die, you’ll have to restart this area. Destroy the yellow pillars to reveal buttons, then step on one. Your partner will step on the other, lowering the panel to the right. Continue to the right and there will be an explosion. You will be damaged if you continue to the right, so Force the yellow valve on the wall. This will power up a force field, allowing your partner to Force the other valve. This will make it safe for you to continue. Force one of the red things on the right and your partner will Force the other, then Force the panel to raise up a platform. Hop onto it.
Part 4 – Lava River
Carefully hop across the ledges, then hop across the platforms in the lava. If you die, you’ll have to restart this area. Your goal is to get to the large pillar in the back. Once you reach it, hop up the ledges. The pillar will collapse, so hop from it onto the rock platform in the back.
Part 5 – Battle of the Heroes
This is fun. The fight itself is pretty simple. Duel Anakin to take out his hearts. As you fight, pieces of the platform will fall off, so watch out and try not to fall into the lava. If you can force Anakin to fall into he lava, he will take damage before he leaps back onto the rock. Take out all of Anakin’s hearts to complete the level.
Darth Vader – Free Play Mode
Required Abilities: Astromech, Double Jump, Force, Hover
Part 1 – Collapsing Hallway
Canister 1

Part 2 – Control Room
Canister 2

Red Power Brick


Canister 3

Canister 4

Canister 5
Part 3 – Collapsing Ledge
Canister 6

Canister 7

Part 4 – Lava River
Canister 8

Canister 9

Canister 10


Minikit Model: V wing
Red Power Brick Extra: Dark Side (25,000)
Darth Vader – Challenge Mode
Required Abilities: Astromech, Hover
Part 1 – Collapsing Hallway
Blue Canister 1

Part 2 – Control Room
Blue Canister 2


Blue Canister 3

Blue Canister 4

Part 3 – Collapsing Ledge
Blue Canister 5

Blue Canister 6

Part 4 – Lava River
Blue Canister 7

Blue Canister 8

Blue Canister 9

Blue Canister 10


Episode III Super Story
Much like the other Super Stories of the Prequel Trilogy, the Super Story for Revenge of the Sith is quite easy. You won’t have to search for studs after the first level, so you can focus on quickly competing each level. This Super Story can easily be completed in less than 30 minutes.
Below I break down each level in terms of stud collection, time to complete, what to look out for, etc.
Battle Over Coruscant: This level makes this Super Story a piece of cake. There is no way to speed up this level, so take your time and collect studs. True Jedi in this level is 70,000, so you should be getting at least that amount. Destroy the Canisters (you can’t collect them in Super Story, but you can get the blue stud) and shoot the turrets on the Republic cruisers a bunch to get your studs up. It is entirely possible to get over 100,000 studs in this level, so make that your goal.
Chancellor in Peril: You should be close to your stud total by now, so just focus on completing the level. Downstab Dooku (jump then attack) to quickly take out his hearts. If you want some more studs, head to the left on the ledge in Part 2 to find a droideka guarding a room. Defeat the droideka and head inside, then Force the machine. It will spit out around 10,000 studs. If you weren’t at 100,000 studs when you started this level, you should be after this level.
General Grievous: True Jedi in this level is only 3,500, so don’t even bother with stud collection here. Just focus on defeating Grievous. Much like Dooku, downstab him to quickly take out his hearts.
Defense of Kashyyyk: This level is only as long as you make it. Remember, in the beach and swamp you don’t have to deal with the enemies. Focus on completing your objective in each area and you’ll be fine. It can be frustrating trying to Force the escape pod, so make sure you defeat each wave as they appear so you aren’t constantly bothered by clones.
Ruin of the Jedi: This level is pretty short. Yoda is good for taking out clones, as he will leap to them as they slowly back away. There aren’t a lot of easy studs to collect, but at this point, you shouldn’t be worried about studs.
Darth Vader: There are a surprisingly good amount of studs in this level, mostly due to the abundance of Power Ups. Take advantage of them. Focus on not dying in each area, and downstab Anakin like crazy to defeat him.
Episode III Character Bonus – Mustafar
As the Republic struggles to deal with the Trade Federation threat, and the evil Sith plan to destroy the Jedi, daily life goes on across the galaxy.
On the volcanic Mustafar system in the Outer Rim, intrepid adventurers compete to collect one million LEGO Studs in the fastest time possible.
It’s the desperate, ruthless life of a world in turmoil….
There are lots of little rock platforms scattered throughout this area, and they each have lots of boxes on them. Destroy the silver objects and some of the boxes to reveal Power Ups, which really make this Character Bonus a breeze. Since this area is so tightly packed, go crazy when you have a Power Up, as you’ll draw in lots of studs from your surroundings.
If you fail to complete this level within 5 minutes, you will not receive the Gold Brick. You will not get to keep the studs you collect in this level.
Episode III Minikit Bonus – Kashyyyk
As the Republic struggles to deal with the Trade Federation threat, and the evil Sith plan to destroy the Jedi, daily life goes on across the galaxy.
On the Wookiee homeworld of Kashyyyk, intrepid adventurers compete to collect one million LEGO Studs in the fastest time possible.
It’s the desperate, ruthless life of a world in turmoil….
This area is rather small, with lots of plants and boxes dotting the beaches and forests. Destroy the torpedo targets on the white structures to reveal Power Ups. You can also get Power Ups by destroying certain boxes and plants. Since everything is rather clustered together, take advantage of the Power Ups to draw in as many studs as you can.
If you fail to complete this level within 5 minutes, you will not receive the Gold Brick. You will not get to keep the studs you collect in this level.
Secret Plans – Story Mode
It is a period of civil war. Rebel spaceships, striking from a hidden base, have won their first victory against the evil Galactic Empire.
During the battle, Rebel spies managed to steal secret plans to the Empire’s ultimate weapon, the Death Star, an armored space station with enough power to destroy an entire planet.
Pursued by the Empire’s sinister agents, Princess Leia races home aboard her starship, custodian of the stolen plans that can save her people and restore freedom to the galaxy….
Enemies: Stormtrooper, Imperial Officer, Beach Trooper, Imperial Shuttle Pilot
Starting Characters: Princess Leia, Captain Antilles
Added Characters: C-3PO, R2-D2, Rebel Friend
True Jedi: 28,000

Part 1 – Securing the Plans
We’ve got the plans, now we just need to get them to R2. Build the two piles of LEGO pieces into computer panels. This will send power to the door in front of you, opening it. Continue on down the hallway, then pull one of the levers. Your partner will pull the other one, opening the door into the hallway. You’ll notice some rebel troopers running left down the hallway, so follow them. The door at the end of the hallway will be breached by stormtroopers, so dispatch them. Defeat two more waves of stormtroopers and the smoke in the doorway will clear. Your rebel friends will run inside, so follow them.
Part 2 – Learning to Grapple
Head to the right side of the room to find a grapple point. Use it to grapple onto the first ledge, then follow it around to the left. Use the next grapple point to reach the final ledge. Head back to the right and you’ll find two piles of LEGO pieces. Build them into generators. This will extend the bridge across the gap. Cross the bridge and head through the door at the end.
Part 3 – Evading Vader
Uh oh. Looks like we took a wrong turn. If you try to run past Vader he will Force you back, so looks like we’ll have to scare him off. Pull one or both sets of levers to drop off a bomb or two next to Vader. Shoot a bomb five times to detonate it (you don’t have to detonate both, just one), spooking Vader and causing him to run away. Head down the hallway and enter the next hallway, then take a left. Continue down the hallway and head through the door at the end.
Part 4 – The Droids We’re Looking For
We gotta get through that door. To open it, we need to move two boxes. Each box is on a set of tiles, with a slot in the floor at some point on the tiles. Push each box into the slot. This will open the door, revealing three stormtroopers. Dispose of them, then walk up to C-3PO to add him to your party. Use the Protocol panel to lower the shield, then walk up to R2 to start a cutscene.
After the cutscene, Princess Leia will no longer be in the party, but you’ll have R2-D2. Continue down the hallway and use the Astromech panel to open the door. Head inside.
Part 5 – A Friend in Need
As you enter this room, you’ll see a poor soul trapped in an endless battle with two stormtroopers. If you try to shoot at them, you won’t harm them, so we need to find another way to dispose of them. Thankfully, there is a crane nearby. Hop in and use it to pick up the two stormtroopers and drop them into the smoke. After defeating the stormtroopers, your new friend will pull the lever on the right side of the room. This will lower the platforms to the right, creating a bridge for you to cross and adding Rebel Friend to your party. You’ll notice how C-3PO crosses the bridge on his own. Wait for him to stop moving, then hop in the crane and pick him up. Carry him over the gap and drop him in front of the Protocol panel by the door. With C-3PO in place, you can now hop out of the crane and cross the bridge. Hop across the gap (be careful, it’s wider than it looks), then use the Protocol panel to open the door. Head inside.
Part 6 – Escaping the Tantive IV
When you enter this hallway, you’ll observe some rebel troopers being escorted by stormtroopers. Take out the stormtroopers, then defeat the incoming waves of troopers. You’ll know you’re close to the end when the Beach Trooper appears. Once the waves are defeated, the smoke will clear and you can continue down the hallway. Build the LEGO pieces into a bridge, allowing C-3PO to cross the gap. Continue down the hallway and take a right. Continue down the hallway and build the next pile of LEGO pieces into another bridge for C-3PO, then continue to the escape pods. The pod on the right is where you need to go, but the Protocol panel to open it is covered up. To uncover it, use each of the Astromech panels by the other two escape pods to open them up. Head inside and pull the levers. Once both levers are pulled, the Protocol panel will be revealed. Use it to open the escape pod, then head inside and use the Astromech panel to complete the level.
Unlocked Characters: Princess Leia, Captain Antilles, Rebel Friend, Rebel Trooper (10,000), Stormtrooper (10,000), Imperial Shuttle Pilot (25,000)
You will also unlock C-3PO and R2-D2 if you haven’t already
Secret Plans – Free Play Mode
Required Abilities: Bounty Hunter, Double Jump, Force, Imperial, Protocol, Sith Force, Thermal Detonator
Part 1 – Securing the Plans
Canister 1


Part 2 – Learning to Grapple
Canister 2


Canister 3


Part 3 – Evading Vader
Canister 4


Red Power Brick


Canister 5


Part 4 – The Droids We’re Looking For
Canister 6


Canister 7

Secret Plans – Free Play Mode cont.
Part 5 – A Friend In Need
Canister 8


Part 6 – Escaping the Tantive IV
Canister 9


Canister 10

Minikit Model: Star Destroyer
Red Power Brick Extra: Super blasters (15,000)
Secret Plans – Challenge Mode
Required Abilities: Bounty Hunter, Grapple, Hover, Protocol, Thermal Detonator
Part 1 – Securing the Plans
Blue Canister 1

Blue Canister 2

Blue Canister 3

Part 2 – Learning to Grapple
Blue Canister 4


Part 3 – Evading Vader
Blue Canister 5

Blue Canister 6


Blue Canister 7


Part 4 – The Droids We’re Looking For
Blue Canister 8

Part 5 – A Friend in Need
Blue Canister 9

Part 6 – Escaping the Tantive IV
Blue Canister 10

Through the Jundland Wastes – Story Mode
Darth Vader searches in vain for the secret Rebel plans on Princess Leia’s starship. The droid R2-D2 has escaped with the Death Star blueprints to the planet Tatooine below.
But R2-D2, along with his companion C-3PO, has been captured by Jawas, small scavenger creatures who trade in mechanical scrap.
Young Luke Skywalker, unaware of the great destiny which lies before him, is looking for droids to help with work on his uncle’s moisture farm. As he approaches the Jawas’ Sandcrawler, his life is about to change forever….
Enemies: Tusken Raider, Jawa, Sandtrooper
Starting Characters: Luke Skywalker (Tatooine), Ben Kenobi
Added Characters: R2-D2, C-3PO
True Jedi: 60,000

Part 1 – The Jundland Wastes
The sand people will be back, and in greater numbers, so let’s hurry and get out of here. Head to the right and you’ll see two sand people shooting at you from a ledge. Destroy the pile of red-and-orange rubble on the left to lower a rock. Hop on top of the rock, then hop onto the ledge the sand people were on. Continue down the path and you’ll reach a sandy slope. If you try to walk up this slope you’ll just slide down. To reach the top, use the Force on the escape pod on the left side of the slope to create a ramp. Walk up the ramp and continue towards the canyon.
Part 2 – Sandcrawler Approach
Head to the right and you’ll notice a pile of LEGO pieces. Build them into a box, then push it along the tiles towards the sand people. Hop on top of the box, then hop across the rock platforms to safely cross the quick sand. Continue up the path towards the sandcrawler. Build the LEGO pieces into a grapple point, but before you use it, Force the two grey boxes into position. Force the orange panel on the side of the sandcrawler to lower it, then use the grapple point to land on the platform. Pull the lever to reveal a grapple point, as well as extend a platform. This will allow Ben to join you on the platform. Force the next platform on the sandcrawler down, then either grapple or double jump onto it. Pull the lever to start a moving platform. Hop on and ride it to the roof of the sandcrawler, then pull the levers to lower the vacuum tube at the base of the sandcrawler. Jump back down, then head towards the vacuum tube to be sucked into the sandcrawler.
Part 3 – Rescuing R2-D2
Time to get the droids back from the Jawas. Head to the right down the hallway. The hallway will turn to the left, and at the end you’ll find a locked door. There are five red lights above the door that we need to turn green. To do so, destroy the orange ladders on the right side of the hallway. This will reveal yellow valves. Force each of the valves on the right side of the hallway to turn the lights green, opening the door. Continue into the next room, where you’ll find R2-D2 trapped behind bars. To free him, pull the lever on the right side of the room to reveal a box. Push the box into the space in the tile in front of R2’s cage. This will destroy the bars trapping R2, adding him to your party. Use the Astromech panel to open the elevator door, then head inside.
Part 4 – Sandcrawler Interior
We got R2. Now to get 3PO. The way ahead is behind that gate, but the levers to open it are gone. Step on each set of four buttons in quick succession to reveal the levers, then pull them to open the gate.
Part 5 – Saving C-3PO
The first thing I recommend doing is killing all the Jawas. They will attack your droids with their ion weapons and stun them temporarily, which can be annoying if you’re trying to use a droid panel. Anyway, to rescue C-3PO, turn the rotary handle until the vacuum tube is over his cage. Use the Astromech panel on the left to power up the tube, sucking C-3PO out of his cage and adding him to your party. Use the Protocol panel on the left to open the door, then continue into the next room. Force the four supports (you can also shoot them if you prefer) to lower the back of the sandcrawler, allowing you to escape back into Jundland.
Part 6 – Return to Jundland
Head to the right and you’ll come across a big puddle of quicksand. In order to get past it, you need 3PO to power up the moisture vaporators to drain the quicksand. The problem is, that vaporator is elevated and 3PO can’t get up there. We need to make a path for him. Begin by using the Protocol panel on the first vaporator on the right. This will drain the quicksand in the small puddle, allowing 3PO to reach the back corner. Build the LEGO pieces into a ramp, allowing 3PO to reach the final vaporator. Use the Protocol panel on it to drain the large puddle of quicksand, allowing you to continue up the path to a small canyon. Hop up the rock platforms on the left, then Force the Krayt Dragon bones into a bridge, allowing you to cross the canyon. Cross the bridge, then continue along the path. You’ll run into another patch of quicksand, with a vaporator out in the center. To reach it, hop up the ledges on the right and push the object off the edge. Force the LEGO pieces that appear to create a bridge. Walk across it and use the Protocol panel to drain the quicksand, allowing you to continue along the path towards Ben’s house.
Part 7 – Ben’s House
Ben’s house is just across the gap, which is of course filled with quicksand. Build the LEGO pieces onto the landspeeder, then hop in and ride it across the gap. Unfortunately, you will once again have to create a path for 3PO, so build the LEGO pieces on the other side of the quicksand gap into a lever. Pull it to raise a bridge, allowing the rest of your party to join you. As you head to Ben’s house, you’ll be attacked by a squad of sandtroopers. Once they’re defeated, step on the buttons in front of Ben’s house to extend the lever. Pull it to open the door, then head inside to complete this level.
Unlocked Characters: Luke Skywalker (Tatooine), Ben Kenobi, Tusken Raider (23,000), Jawa (24,000)
Through the Jundland Wastes – Free Play Mode
Required Abilities: Double Jump, Force, Grapple, Hover, Sith Force, Small, Thermal Detonator
Part 1 – The Jundland Wastes
Red Power Brick


Canister 1


Canister 2


Canister 3


Part 2 – Sandcrawler Approach
Canister 4


Part 3 – Rescuing R2-D2
Canister 5

Part 4 – Sandcrawler Interior
Canister 6


Through the Jundland Wastes – Free Play Mode cont.
Part 6 – Return to Jundland
Canister 7

Canister 8


Canister 9


Part 7 – Ben’s House
Canister 10

Minikit Model: Sandcrawler
Red Power Brick Extra: Fast Force (40,000)
Through the Jundland Wastes – Challenge Mode
Required Abilities: Double Jump, Force, Grapple, Hover, Protocol, Sith Force, Thermal Detonator
Part 1 – The Jundland Wastes
Blue Canister 1

Blue Canister 2


Blue Canister 3


Part 2 – Sandcrawler Approach
Blue Canister 4

Blue Canister 5

Part 3 – Rescuing R2-D2
Blue Canister 6


Part 4 – Sandcrawler Interior
Blue Canister 7

Part 6 – Return to Jundland
Blue Canister 8


Blue Canister 9


Part 7 – Ben’s House
Blue Canister 10

Mos Eisley Spaceport – Story Mode
In search of a pilot who can take them to the distant planet of Alderaan, Luke Skywalker and old Ben Kenobi journey by landspeeder to Mos Eisley Spaceport.
Here, among the most dangerous and reckless elements of Tatooine society, they hope to find someone brave or foolhardy enough to help in their quest to deliver R2-D2’s secret message to the Rebel Alliance. But Imperial forces are everywhere….
Enemies: Sandtrooper, Imperial Security Droid, AT-ST
Boss: Imperial Spy
Starting Characters: Luke Skywalker (Tatooine), Ben Kenobi, R2-D2, C-3PO
Added Characters: Han Solo, Chewbacca; Luke Skywalker (Tatooine), Ben Kenobi, R2-D2, C-3PO
True Jedi: 60,000

Part 1 – Mos Eisley Streets
This is a massive area, so take some time to explore it. You will occasionally be hounded by sandtroopers that appear, so stay on your toes and listen for changes in the music that indicate a squad is about to attack. There are also several Mos Eisley residents walking about. Just like in the Cantina, if you kill one, they all start shooting, so stay cautious. Your goal is to get through the door at the end of the street, which is guarded by a squad of sandtroopers. The sandtroopers will keep appearing, so don’t worry about defeating them. You will notice a large tan staircase to the right of the gate. Force it into a ramp, allowing C-3PO to reach the upper ledge. Once on the upper ledge, head back to the left, then use the Protocol panel to raise the gate, allowing you to continue.
Part 2 – Walker Warfare
Head to the left and continue down the street. You’ll notice your path blocked by some weird rubble. To destroy it, we need some serious firepower. Thankfully, hidden throughout this area are the parts for an AT-ST! Let’s work our way up. Destroy the two large trashcans to the right of the rubble to reveal the LEGO pieces for the feet. Once those are built, you can Force them into position. The pieces for the left leg can be seen sticking out of the sand in front of the rubble. Force them up and out of the sand, then Force them again to place them on the walker. Use the Astomech panel to the left of the rubble (hover to give yourself a boost up onto the ledge) to reveal the pieces for the right leg. Force them out of the room, then Force them onto the walker. Build the LEGO pieces out in the open into a support structure, then Force it onto the walker. Now for the head. Head to the right and destroy the small grey container in front of the Protocol panel. This will reveal LEGO pieces. Build them into a ramp, allowing 3PO to reach the Protocol panel next to the door. Use the Protocol panel to open the door, revealing LEGO pieces. Build them into the head, then Force it onto the walker. Unfortunately, a sandtrooper has decided to steal our ride. Either shoot the walker a bunch of times to force him out, or have Ben use a Jedi mind trick on the walker. Defeat the hijacker, then hop in the walker yourself. Destroy the rubble, then proceed down the streets. You will encounter a large force of enemy sandtroopers, security droids, and even an AT-ST. It is easier to defeat the enemies if you hop out of your AT-ST, but be careful, as that leaves it vulnerable to hijacking. Once every single enemy has been defeated, the door at the end of the street will open. Head inside.
Part 3 – We Don’t Serve Their Kind!
We’re now inside the cantina, and to open the door into the cantina proper you need to step on the four buttons. Unfortunately, those security cameras will prevent your droids from entering. Have Luke shoot all four cameras, allowing your droids to continue. Step on the buttons to open the door, then head inside.
Part 4 – Chalmun’s Cantina
After that legendary cutscene, you’ll find yourself in control of Han and Chewie. Have fun and start a bar fight if you want. When you’re ready to go, head to the right and through the door with the arrow pointing at it.
Part 5 – Cantina Back Alley
Use the grapple point to the right of the door to reach the next ledge. You’ll notice the Imperial Spy fleeing. While you might be tempted to follow him, build the LEGO pieces into a grapple point and use it to reach the next ledge. Head through the opening in the wall.
Part 6 – Mos Eisley Alleyway
Head to the left along the ledge, then use the grapple point to swing across the gap. You’ll notice the Imperial Spy in the background running towards that large door. Instead of pursuing him, pull the lever to your right to reveal a box. Push it along the tiles and off the ledge. Now you can chase the spy, who will run through the doors and lock them behind him. Time to blow those doors down. Head back to the box you pushed off the ledge earlier, then push it all the way to the end of the tiles. If at any point you fall down and need to get back up to the ledge with the lever, simply head back down the street and to the right. You’ll see a grapple point on the ground. Use it to reach the first ledge, then head to the right to return to the previous area, where you can grapple back up and head back to the ledge with the lever. Once the box is locked in place, shoot it to destroy the doors. If you (or a sandtrooper) shoot the box before it’s locked into place, it will explode and you’ll have to grab a new one. Continue through the doors after the spy.
Part 7 – Dewback Stables
As soon as you enter this area, you’ll see the spy magically make his way to the upper ledge on the left. You need to follow him, but first deal with the large squad of sandtroopers. Once they’re all taken care of, hop on one of the Dewbacks and walk over to the ledge on the left. Jump off the Dewback and use the boost to reach the upper ledge. Once on the ledge, head down the stairs and into the hangar.
Part 8 – Docking Bay 94
You are now reunited with Luke, Ben and the droids. Head towards the Falcon and you will be stopped by the spy, who will call down a wave of sandtroopers. Defeat the first wave and the spy will call in a second wave. Once that wave is also defeated, the spy will call in a third wave. However, he will also now appear on the ground level. He won’t attack you, but he will be vulnerable to attack for a brief window before retreating to the other side of the hangar. He will repeat this process until he is killed, and the sandtroopers will keep on coming as long as the spy is alive. Once you defeat the spy, defeat the remaining sandtroopers and the ramp to the Falcon will lower. Head inside to complete this level.
Unlocked Characters: Han Solo, Sandtrooper (14,000), Greedo (60,000), Imperial Spy (13,500)
You will also unlock Chewbacca if you haven’t already
Mos Eisley Spaceport – Free Play Mode
Required Abilities: Astromech, Bounty Hunter, Double Jump, Force, Grapple, Hover, Imperial, Sith Force, Small, Thermal Detonator
Part 1 – Mos Eisley Streets
Canister 1


Canister 2


Canister 3


Red Power Brick


Part 2 – Walker Warfare
Canister 4


Canister 5

Canister 6


Part 4 – Chalmun’s Cantina
Canister 7

Part 5 – Cantina Back Alley
Canister 8

Mos Eisley Spaceport – Free Play Mode cont.
Part 6 – Mos Eisley Alleyway
Canister 8 cont.


Canister 9


Part 7 – Dewback Stables
Canister 8 cont.


Canister 10


Minikit Model: Land Speeder
Red Power Brick Extra: Super lightsabers (40,000)
Mos Eisley Spaceport – Challenge Mode
Required Abilities: AStromech, Bounty Hunter, Double Jump, Imperial (not required but helpful)
Part 1 – Mos Eisley Streets
Blue Canister 1

Blue Canister 2

Part 2 – Walker Warfare
Blue Canister 3


Blue Canister 4

Part 4 – Chalmun’s Cantina
Blue Canister 5

Part 6 – Mos Eisley Alleyway
Blue Canister 6


Blue Canister 7

Part 7 – Dewback Stables
Blue Canister 8

Blue Canister 9


Part 8 – Docking Bay 94
Blue Canister 10

Rescue the Princess – Story Mode
Imprisoned in the Death Star, Princess Leia still refuses to reveal the location of the Rebel Base to the evil Darth Vader.
Meanwhile, Luke Skywalker and Obi-Wan Kenobi have commissioned Han Solo to take them to Leia’s home planet of Alderaan. Escaping from Imperial forces on Tatooine, they make the jump through hyperspace.
But Alderaan has disappeared, its population a victim of Darth Vader’s impatience – and in its place, they find only the deadly shadow of the Death Star….
Enemies: Stormtrooper, Imperial Officer, TIE Fighter Pilot, Death Star Trooper, Beach Trooper, Imperial Shuttle Pilot
Starting Characters: Han Solo (Stormtrooper), Luke Skywalker (Stormtrooper), Chewbacca, Ben Kenobi, R2-D2, C-3PO
True Jedi: 60,000

Part 1 – Death Star Infiltration
Here we are on the Death Star! We have a decent sized party here, but that will soon change. For now, head to the right, where you’ll find your path blocked by a door. Force it into a TIE Fighter model, clearing the way forward. Head down the hallway, where you’ll be attacked by two stormtroopers. At the end of the hallway, you’ll find a locked door. That Imperial panel will open it, but we don’t have an Imperial character in our party. Thankfully there is a Hat Machine on the wall to the left. Most non-droid characters can use these, and this particular hat machine gives out stormtrooper helmets. Use the Hat Machine to give someone a stormtrooper helmet (it doesn’t have to be Luke or Han), then use the Imperial panel to open the door. Keep in mind that you will lose your helmet if you get shot, so be extra cautious while wearing one. If you lose your helmet, you can get it back by returning to a Hat Machine. Also while wearing a helmet, enemies will not attack you unless you attack them, so use this to your advantage. Head inside, where you’ll find another locked door. To open this door, build the LEGO pieces on the right of the door into computer panels and an Astromech panel. Use it.
After the cutscene, your party will be reduced to just Luke, Han and Chewie. Ben has gone off to shut down the tractor beam, and the droids are in hiding. The door to the left has now been opened, so head through it.
Part 2 – Splitting Up
Even though Ben is literally running right down the hallway in front of them, of course the stormtroopers will only focus on you. Battle your way down the hallway and you’ll come to a gap you can’t cross. Take a left and head through the door.
Part 3 – Tractor Beam Control
Continue down the hallway. Eventually, you will reach a more open area with two elevators spitting stormtroopers at you. Shoot the cameras to destroy them (they take 4 hits to destroy, and are easier to hit by jumping and shooting), then continue to the left, where you’ll find Old Ben bogged down by enemy fire. Shoot across the gap to take out the enemies. As thanks, Ben will Force together a bridge for you, allowing you to continue to the left. As you continue, you’ll see a grappling hook on the left side of the path. This will keep sending TIE Pilots in to battle you, so destroy it to cut them off. Shoot the large boxes in the path to set off an explosion, clearing the path. Continue down the hall and clear the enemies, then backtrack a short distance to the Hat Machine. Grab a stormtrooper helmet, as you’ll need it in the next area. I recommend giving everyone in your party a helmet. That way if you lose yours, you might be able to use someone else’s without having to backtrack. Head back down to the end of the path and through the door on the right.
Part 4 – TIE Pilot Ambush
Head to the right and use the Imperial panel to open the door. Head into the next room. I recommend shooting the grappling hook to prevent the TIE Pilot’s from shooting your helmet off before you can use the panel.
Part 5 – Ledges and Bridges
Head across the bridge, then build the LEGO pieces onto the rotary handle. Turn it to move the bridge to the right. Cross it to reach the ledge, then use the grapple point to reach the next ledge. While there is a Hat Machine here, I would suggest using it later. For now, grapple up again, then hop across the short gap to reach the ledge where the two stormtroopers are. Continue to the right and drop down onto the ledge with the door, then head inside the room.
Part 6 – Data Center
In order to leave this room, you need to head through the door on the left. Build the LEGO pieces next to it into an Imperial panel, then use it to open the door. I recommend coming into this room first and clearing out the enemies before heading back into the previous area to grab a helmet. Once the door is open, head through it and continue down the hallway. You might think you need to use the Imperial panel, but you don’t. You actually need to head into the far elevator. Simply head inside to travel to the detention block.
Part 7 – Detention Block AA23
We’ve almost found the Princess! Take out the enemies here, as well as the cameras above the two elevators. If you want, you can head into the elevators to reach an area where you can hop in turrets and shoot down TIE Fighters. Shoot down 10 to receive a nice stud reward (20,000). You don’t need to do this, but it is fun. Back in the main area, build the two piles of LEGO pieces into computer consoles, which will power up the levers. Pull them to open the door into the cell block. Walk down the hallway and pull the levers on the far right cell to open it. Head inside to find the Princess. Step on the buttons to lower the electrical field around her, ending the level.
Unlocked Characters: Han Solo (Stormtrooper), Luke Skywalker (Stormtrooper), Beach Trooper (20,000), Death Star Trooper (19,000), TIE Fighter Pilot (21,000), Imperial Officer (28,000), Grand Moff Tarkin (38,000)
Rescue the Princess – Free Play Mode
Required Abilities: Astromech, Double Jump, Force, Grapple, Hover, Protocol, Sith Force, Small
Part 1 – Death Star Infiltration
Canister 1


Canister 2

Part 2 – Splitting Up
Canister 3


Canister 4


Canister 5


Canister 6


Part 3 – Tractor Beam Control
Red Power Brick


Part 5 – Ledges and Bridges
Canister 7

Part 6 – Data Center
Canister 8


Canister 9


Part 7 – Detention Block AA23
Canister 10


Minikit Model: Millenium Falcon
Red Power Brick Extra: Tractor beam (15,000)
Rescue the Princess – Challenge Mode
Required Abilities: Astromech, Double Jump, Force, Hover, Protocol
Part 1 – Death Star Infiltration
Blue Canister 1


Blue Canister 2

Part 2 – Splitting Up
Blue Canister 3


Blue Canister 4


Part 3 – Tractor Beam Control
Blue Canister 5

Blue Canister 6


Blue Canister 7

Part 6 – Data Center
Blue Canister 8

Blue Canister 9

Part 7 – Detention Block AA23
Blue Canister 10

Death Star Escape – Story Mode
Luke Skywalker, Han Solo and Chewbacca have rescued Princess Leia from the clutches of Darth Vader and his Imperial forces – but must now find a way out of the Death Star.
Aided by the droid R2-D2, who can interface remotely with the Death Star control systems, they battle their way to the Millennium Falcon.
Meanwhile, the Jedi Knight Obi-Wan Kenobi moves closer to his final destiny….
Enemies: Stormtrooper, Imperial Officer, TIE Fighter Pilot, Death Star Trooper
Starting Characters: Han Solo, Luke Skywalker (Tatooine), Chewbacca, Princess Leia
Added Characters: R2-D2, C-3PO
True Jedi: 45,000

Part 1 – The Trash Compactor
With the droids having saved us, it’s time to leave the compactor. Build the LEGO pieces into a platform, then hop on and pull the lever to open the door. Exit the trash compactor and continue down the hallway through the door. You’ll notice a Hat Machine on the left side of the hallway. Ignore it for now and continue down the hallway, defeating the enemies as you go. Head through the opening into the next room.
Part 2 – Small Hangar
The first thing I recommend doing here is jumping down and defeating the squad of stormtroopers in this room. After doing so, you can focus on getting out of here. The way out is that door in the back with the Imperial panel next to it. Unfortunately, there is no way to access it. Let’s fix that. Begin by heading to the left on the ground floor. You’ll notice a rotary handle and some yellow-and-grey stripes. Push the tall object on the left onto the red button by the rotary handle. This will allow you to turn the rotary handle, so do so to raise up the platform. Now head back to the right and grapple back onto the ledge. Pull the lever three times to place the grapple point in position, then use it to swing across the gap and land on the platform you raised. Hop onto the ledge, then pull the lever to reveal a box. Push it to the end of the tiles and off the ledge. This will destroy the panel in the floor, allowing you to hop on the small speeder. Hop in and ride the speeder over the five red buttons on the floor in quick succession. This will extend a panel under the door. Head back to the first area and use the Hat Machine to grab a helmet, then head back here and grapple across the gap to reach the Imperial panel. Use it to open the door. Head inside.
Part 3 – Death Star Hallway
Head to the right down the hallway. You’ll find a locked door. Build the LEGO pieces onto the wall, powering up the lever. Pull it to power the lever, then pull it to open the door. Pull the next set of levers to open the next door. Push the box along the tiles into the slot on the wall to power up the final lever. Pull it to open the door. Continue down the hallway.
Part 4 – Helmet Hijinks
Head to the right and pull the levers to start a platform moving. Hop on it and use it to cross the gap, then continue to the right. There are a series of platforms here, and you need to get to the top one. To do so, use the grapple point to reach the first ledge. Pull the lever to drop some LEGO pieces onto the ground floor. Drop back down and build the LEGO pieces onto the generator. This will start raising and lowering the lift. Hop on and ride it up. The exit to this area is on the upper level, where you’ll find an Imperial panel. There is a Hat Machine on one of the ledges on the left if you need a helmet. The problem in this area is the fact that the stormtroopers will constantly be harassing you, meaning that getting to the Imperial panel with a helmet on can be difficult. However, there will be periods where you will not be harassed by enemies. use this window to reach the panel. Once you get to the Imperial panel, use it to open the door. Head on inside.
Part 5 – Small Hallway
Head down the hallway and through the door at the end.
Part 6 – Grappling Fun
Looks like we took a wrong turn. Build the LEGO pieces into a grapple point, then use it to swing across the gap. Through the door on this ledge, you’ll find a Hat Machine if you need a helmet. Build the LEGO pieces into a grapple point, then use it to swing across the gap. Use the Imperial panel to open the door, then head inside.
Part 7 – Bait and Switch
What is that? Just a lone stormtrooper? Let’s get him! He will run through a blast door, which will then shut behind him. Shoot the panel on the right of the door to open it, then continue pursuing the stormtrooper. He will run behind another closed blast door, so shoot the next panel to open the door. He will then run behind another door, so shoot the wall panel to open that door and you’ll find, well, way more than one stormtrooper. Defeat the large horde of enemies, then build the LEGO pieces in the back of the room into a door. Building this can be difficult, as the stormtroopers will keep coming. You can pull the levers on the side of the room to temporarily shut the doors and give you some peace. Once you build the door, shoot it to reveal an opening in the wall. Continue down the hallway.
Part 8 – Ben’s Sacrifice
Well we’re in the hangar, where the Millenium Falcon is trapped under a shield. You’ll notice a panel above the Falcon with four red lights. You need to turn them all green. The first order of business is to rescue the droids. They can be found on the right side of the hangar. Build the pile of LEGO pieces into a handle, then push it to reveal the droids, adding them to your party. With R2 and 3PO, you can now work on freeing the Falcon. On the right side of the Falcon is an Astromech panel. Use it to turn one of the lights green. This will also unleash a new wave of stormtroopers (turning each light green will send another wave in). To the right of the Astromech panel is a blue box. Push it to the right to reveal LEGO pieces. Build them into a grapple point, then use it to reach the upper ledge. Pull the lever to turn another light green. Head back to the left side of the hangar and use the Astromech panel to reveal a small speeder. Just like in Part 2, hop in and drive it over the five buttons in front of the Falcon in quick succession to turn another light green. For the final light, pull the lever to the left of the Falcon to destroy the vent, releasing steam. Head into the steam as 3PO to be boosted onto the ledge, where you can use the Protocol panel to turn the final light green. Once the Falcon is out of the shield, defeat the remaining stormtroopers to lower the Falcon’s boarding ramp. Head inside to complete the level.
Death Star Escape – Free Play Mode
Required Abilities: Bounty Hunter, Double Jump, Force, Protocol, Sith Force, Small, Thermal Detonator
Part 1 – The Trash Compactor
Red Power Brick


Canister 1


Part 2 – Small Hangar
Canister 2

Part 3 – Death Star Hallway
Canister 3


Canister 4


Part 4 – Helmet Hijinks
Canister 5


Part 7 – Bait and Switch
Canister 6

Canister 7


Canister 8


Part 8 – Ben’s Sacrifice
Canister 9

Canister 10

Minikit Model: Y-wing
Red Power Brick Extra: Invincibility (1,000,000)
Death Star Escape – Challenge Mode
Required Abilities: Grapple, Protocol
Part 1 – The Trash Compactor
Blue Canister 1

Blue Canister 2


Part 2 – Small Hangar
Blue Canister 3

Part 3 – Death Star Hallway
Blue Canister 4

Part 4 – Helmet Hijinks
Blue Canister 5

Part 5 – Small Hallway
Blue Canister 6

Part 6 – Grappling Fun
Blue Canister 7

Part 7 – Bait and Switch
Blue Canister 8

Blue Canister 9

Part 8 – Ben’s Sacrifice
Blue Canister 10

Rebel Attack – Story Mode
With the Death Star plans in their hands at last, the Rebel Alliance plans a desperate assault on the Imperial space station.
But a hidden homing beacon attached to the Millennium Falcon has led Darth Vader to the Rebel’s secret base on the moon of Yavin IV.
The moon will soon be in the range of the mighty Death Star’s superlaser. Now, a small band of fearless pilots bear with them the hopes of an entire galaxy….
Enemies: TIE Fighter
Starting Vehicles: X-wing
True Jedi: 30,000

Part 1 – Death Star Assault
You can’t fly around too much because you are boxed in by a shield. Flying close to the shield will reveal a torpedo target. Grab a torpedo from the nearby torpedo generator, then use it to destroy the target. This will lower the shield, allowing you to fly into the larger clearing. Head into the clearing and you’ll notice your path is once again blocked by a shield. There are a bunch of red lines leading away from the shield. Follow the lines and you’ll reveal four torpedo targets. Grab torpedoes and destroy the targets to lower the shield, then blast your way through the barrier and continue on.
Part 2 – Death Star Surface
This part is the same as the first, just in a larger area. Follow the red lines away from the shield to find 8 torpedo targets. Destroy them to lower the shield, then shoot and destroy the barrier, allowing you to continue.
Part 3 – Death Star Turrets
This section is identical to the previous two. Destroy the torpedo targets to lower the shield, then destroy the barrier. Fly towards the trench to begin your trench run!
Part 4 – The Trench Run
After the cutscene, you’ll find yourself being chased by Vader and two TIEs. If you turn around and fire on the escorts, you can actually score hits on them and eventually destroy them. You can’t destroy Vader though. You’ll be given one torpedo as you enter the trench, so avoid the fire from the TIE Fighters until you reach the end of the trench. Once you reach the end of the trench, a cutscene will play.
After the cutscene, you’ll find yourself at the exhaust port. Before you can destroy it, you need to destroy the defenses. There are 12 turrets that will appear when you fly close to them. Expose and destroy the turrets and the final torpedo target will appear. If you need a torpedo, a generator can be found at the beginning of the trench. Destroy the torpedo target to destroy the Death Star and complete the level.
Unlocked Vehicles: X-wing, Y-wing, TIE Fighter (35,000), TIE Interceptor (40,000), TIE Fighter (Darth Vader) (50,000)
Rebel Attack – Free Play Mode
Required Abilities: TIE, Tow Cable
Part 1 – Death Star Assault
Canister 1


Canister 2


Canister 3

Part 2 – Death Star Surface
Canister 4


Canister 5

Canister 6

Canister 7


Part 3 – Death Star Turrets
Canister 8

Canister 9

Part 4 – The Trench Run
Canister 10

Red Power Brick

Minikit Model: TIE Advanced
Red Power Brick Extra: Score x2 (1,250,000)
Rebel Attack – Challenge Mode
Required Abilities: TIE
Part 1 – Death Star Assault
Blue Canister 1

Blue Canister 2

Blue Canister 3

Blue Canister 4

Part 2 – Death Star Surface
Blue Canister 5

Blue Canister 6


Blue Canister 7

Part 3 – Death Star Turrets
Blue Canister 8

Part 4 – The Trench Run
Blue Canister 9

Blue Canister 10

Episode IV Super Story
The Super Story for A New Hope is the easiest of the Original Trilogy. While considerably more difficult than the Super Stories for the Prequel Trilogy, you can still relax while playing through the movie that started it all. There are plenty of studs to collect, and the levels aren’t as long as in Episodes V and VI. Enjoy the fun while it lasts, as it only gets harder from here.
Below I break down each level in terms of stud collection, time to complete, what to look out for, etc.
Secret Plans: This level has some good opportunities for stud collection even if you just run and shoot. Some of the walls and boxes hide Power Ups, so use those to collect more studs and cut through the squads of stormtroopers. Be quick and efficient with your crane usage and remember that enemies will ignore you if you’re a droid. This level should give you a nice amount of studs, allowing you to focus on breezing through the other levels.
Through the Jundland Wastes: This level might seem super long, but it really isn’t that bad. If you focus on completing your objectives and don’t explore, you can complete this level in less than 10 minutes. Make sure to defeat the Jawas, as they will stun your droids and slow you down.
Mos Eisley Spaceport: Much like the previous level, this level seems longer than it is, mostly due to the amount of exploring you can do. Most of the areas in this level can be completed in less than a minute, especially when you get control of Han and Chewie and just focus on chasing down the spy. If you can’t get through the door to the Cantina, remember to back track and you’ll usually find that one last enemy. The Falcon’s ramp will not lower until all the stormtroopers are defeated, so don’t ignore them.
Rescue the Princess: The helmets can make this level either a breeze or a nightmare. Be cautious with the helmets and you shouldn’t have to worry. If you are having trouble with the helmets, either give your party members helmets or just defeat all the enemies before putting on a helmet. There are lots of studs on the Death Star, especially in the hallways, so take advantage of that to improve your stud total if you want.
Death Star Escape: Much like the previous level, helmets are the key to a good run. Be careful with your helmets and you will be able to breeze through the areas. If you are having trouble keeping your helmet on, either give multiple party members helmets or just defeat all the enemies before putting on a helmet. Part 4 (Helmet Hijinks) is a big stinker in Super Story. The Power Up in the room with the door you have to assemble (in Part 7 – Bait and Switch) is very helpful, as you can build the door with Fast Build and you can get shot without stopping your building. Riding over the five buttons in the speeders can also slow you down if you aren’t careful with lining it up. You shouldn’t be too strapped for time before starting this level, but if you’ve been taking your time, you will want to start hurrying up now. Remember that the Falcon’s ramp will only lower when all the stormtroopers are defeated, so you can’t ignore the enemies in the hangar.
Rebel Attack: This level makes the Super Story a breeze. By the time you get to this level, you should have around 20-30 minutes to work with before you hit the 1 hour mark. Take advantage of this time to get your stud total to over 100,000 if you haven’t already. Even if you’ve already hit your mark, collect studs anyways, as you get to keep what you collect. Flying around guns blazing will actually net you a pretty good amount of studs, so cause chaos as you focus on destroying the torpedo targets. Even if you are strapped for time, this level doesn’t take long to complete. How you play this level really depends on how much time you have left to work with.
Episode IV Character Bonus – Mos Eisley
While the Rebel Alliance struggles heroically with the oppressive Empire, and Luke Skywalker moves closer to his epic destiny, daily life goes on across the galaxy.
In the sprawling alleyways of Mos Eisley, intrepid adventurers compete to collect one million LEGO Studs in the fastest time possible.
It’s the desperate, ruthless life of a world in turmoil….
I personally find this to be one of the easier Character Bonuses. There are plenty of large silver moisture vaporators for you to destroy, and most of them will spit out Power Ups. Take advantage of the Power Ups to quickly rack up your stud total. There are plenty of enemies to defeat, and since the streets are so compact, the studs won’t bounce around too much, making collection a breeze.
If you fail to complete this level within 5 minutes, you will not receive the Gold Brick. You will not get to keep the studs you collect in this level.
Episode IV Minikit Bonus – Death Star
While the Rebel Alliance struggles heroically with the oppressive Empire, and Luke Skywalker moves closer to his epic destiny, daily life goes on across the galaxy.
On the deadly surface of the Death Star, intrepid adventurers compete to collect one million LEGO Studs in the fastest time possible.
It’s the desperate, ruthless life of a world in turmoil….
There are plenty of torpedo targets on the surface of the Death Star for you to destroy. Destroying the white tower things will give you Power Ups, although they can sometimes be difficult to collect. Destroying some of the smaller satellites will also reveal Power Ups occasionally. There is also a large object you can destroy by hitting the four torpedo targets surrounding it, which will give you a lot of studs. Watch out for the TIEs who will constantly be bugging you.
If you fail to complete this level within 5 minutes, you will not receive the Gold Brick. You will not get to keep the studs you collect in this level.
Hoth Battle – Story Mode
It is a dark time for the Rebellion. Although the Death Star has been destroyed, Imperial troops have driven them from their hidden base and pursued them across the galaxy.
Evading the dreaded Imperial Starfleet, a group of freedom fighters led by Luke Skywalker has established a new secret base on the remote ice world of Hoth.
The evil lord Darth Vader, obsessed with finding young Skywalker, has dispatched thousands of remote probes into the far reaches of space….
Enemies: AT-ST, Imperial Probe Droid, Imperial Speeder Bike, AT-AT
Starting Vehicles: Snowspeeder
True Jedi: 25,000

Part 1 – Hoth Snow Fields
Your goal in this area is to enter the cave with the very subtle red arrow pointed at it. The only problem is, it’s sealed. To unseal it, grab a bomb from one of the two dispensers in the area. Latch onto it with your tow cable and drag it all the way to the cave entrance. Watch out for the probe droids. When you are dragging a bomb, they will sometimes latch onto it, slowing you down. Simply turn around and shoot them to unhook them from the bomb. Launch the bomb at the barrier to destroy it, then head inside the cave.
Part 2 – Walker Assault
There are two AT-ATs in this area, and we need to take them out. We’ll need bombs to do that, but one of the AT-ATs is spamming fire at the bomb dispenser. As soon as you take a bomb, the AT-AT will shoot it and detonate it. To fix this, latch onto the legs of the first walker and fly laps around it until it falls. Grab a bomb and tow it into the AT-AT to destroy it. That is how you take out the AT-ATs. Latch onto the legs, fly around them, bomb them when they fall. If you take to long to bomb them, they will stand back up and you’ll have to topple them again. Take out the second AT-AT to melt the piles of snow, revealing a barrier. Tow a bomb into it to destroy it, then do the same for the next large barrier (be careful dragging the bomb up the narrow slope). After both barriers are clear, you can continue through the archway.
Part 3 – Imperial Onslaught
In this section, you will be faced with four waves of enemies. Defeat each wave to send in the next one. The first wave consists of 11 Imperial Probe Droids. The second wave consists of 11 AT-STs. The third wave consists of 2 AT-ATs. The final wave consists of 1 AT-AT, 4 Probe Droids, and 6 AT-STs. Defeat all the enemies to complete the level.
Unlocked Vehicles: Snowspeeder
Hoth Battle – Free Play Mode
Required Abilities: TIE, Tow Cable
Part 1 – Hoth Snow Fields
Canister 1


Canister 2


Canister 3

Canister 4

Part 2 – Walker Assault
Canister 5

Canister 6


Canister 7

Red Power Brick

Canister 8

Part 3 – Imperial Onslaught
Canister 9

Canister 10

Minikit Model: AT-AT
Red Power Brick Extra: Self destruct (25,000)
Hoth Battle – Challenge Mode
Required Abilities: TIE, Tow Cable
Part 1 – Hoth Snow Fields
Blue Canister 1


Blue Canister 2


Blue Canister 3

Part 2 – Walker Assault
Blue Canister 4


Blue Canister 5


Blue Canister 6

Blue Canister 7

Blue Canister 8

Part 3 – Imperial Onslaught
Blue Canister 9

Blue Canister 10

Escape from Echo Base – Story Mode
Imperial forces have mounted a relentless assault on the Rebel base on Hoth. The Rebel fighters have held out bravely, but the enemy is overwhelming.
In the Echo Base command center, carved deep into the ice of the frozen planet, Han Solo and Princess Leia monitor the evacuation of Rebel personnel.
But as Stormtroopers breach the outer defenses, they must quickly find an escape route for themselves….
Enemies: Snowtrooper
Starting Characters: Han Solo (Hoth), Princess Leia (Hoth)
Added Characters: C-3PO, Chewbacca
True Jedi: 40,000

Part 1 – Echo Base Command Center
Time to get outta here. Head to the right towards the door. As you approach, there will be a rockslide, blocking off the door. Fortunately, some LEGO pieces have appeared as well. Build them into a bomb, which will detonate and destroy the rubble, allowing you to continue down the hallway. Head down the hall and you’ll find another door completely covered in ice. Build the LEGO pieces into a heater, then shoot it a few times to power it up, melting the ice and opening the door. Head inside.
Part 2 – Echo Base Cafeteria
Head to the right and you’ll find two snowtroopers warming themselves on the heater. Push the heater along the tiles and onto the red panel. This will melt the ice on the door, opening it. Continue down the hallway and you’ll run into a bunch of snowtroopers. One of them will be on an E-web blaster, which you can shoot to destroy. The way ahead is blocked by a Protocol panel, and the path on the left is blocked off by snow, so head to the right and you’ll find a bunch of boxes. Shoot them all to reveal a door, then head inside.
Part 3 – Circular Track
In this room you’ll find a cart on a track. Build the LEGO pieces onto the cart and it will start moving around the track. Turn the rotary handle to switch the track. When the cart hits the junction, it will head back out into the hallway and destroy the ice and snow blocking the path to the left. Head back out the door.
Part 2 – Echo Base Cafeteria
Head to the left down the previously blocked hallway and you’ll find 3PO. Now that we can use the Protocol panel, it’s time to uncover it. Rebuild the E-web blaster, then hop in and shoot at the blue barrier to destroy it. Watch out, as rebuilding the blaster will send in a new squad of snowtroopers! Use the Protocol panel to open the door, then head inside.
Part 4 – Tiled Hangar
The goal in this area is to get through the door on the right, which is unfortunately blocked off by a blue barrier. Head to the right and defeat the snowtroopers and destroy the E-webs. Once the troopers are toast, rebuild one of the E-webs and use it to destroy the blue barrier. This will reveal some LEGO pieces, which you can build into a Protocol panel. Unfortunately, the panel is on a ledge, which 3PO can’t reach. We need to find a way to get him up here. Head back to the center of the hangar and destroy the two grey boxes to reveal LEGO pieces. Build them into a snowmobile. Now, you need to get 3PO onto the back of the snowmobile. Push the boxes on the tiles into the slots. This will power up the fans in the floor. Hop in the snowmobile and drive up close to one of the fans. 3PO will go into the fan, where he will be boosted up and hopefully land on the back of the snowmobile. Once he’s on the back of the snowmobile, drive over to the ledge and press the “special” button (the same button you use to Force and grapple) to launch him onto the ledge. He can now use the Protocol panel to open the door, so do so. Once the door is open, continue down the hallway, watching out for the falling platforms. Build the LEGO pieces at the end of the hallway into a bomb, which will explode and clear the rubble. Head through the door.
Part 5 – Slippery Slope
Head to the left and up the slope. Your goal is to open the door at the base of the slope, and to do that you need to hit each of the buttons. Slide down and hit as many buttons as you can. You don’t need to hit all five at the same time. You can take as long as you need, as the buttons won’t become un-pressed. Once all the buttons have been pressed, the door will open. Head inside.
Part 6 – Medical Bay
Destroy the grey boxes to reveal four buttons. You need to step on all four to open the door. Since there are only three of you, push one of the boxes onto a button, then step on another button. Your partners will step on the other two, opening the door. Head down the hallway, then through the door at the end.
Part 7 – Hangar
Chewie has been added to the group, just in time to escape this place. The Millenium Falcon is here, guarded by two E-web turrets. Destroy them, then rebuild one. Hop in and use it to destroy the two shield generators. This will give you access to the Falcon, but we’ll need to make repairs before we can take off. Build the LEGO pieces on the ground onto the docking ramp. There are more LEGO pieces on top of the Falcon, but we have no way to reach them. Fortunately, there are some Tauntauns nearby. Head to the right and pull the levers to open the garage, revealing two boxes. Push them across the hangar and into the slots in front of the Tauntauns. This will open up the garage, allowing you to hop onto a Tauntaun. Ride over to the Falcon, then hop off. Build the LEGO pieces into a turret. Once both repairs are made, the ramp will open, so head inside to complete this level.
Unlocked Characters: Han Solo (Hoth), Princess Leia (Hoth), Han Solo (Hood) (20,000), Rebel Trooper (Hoth) (16,000), Rebel Pilot (15,000), Snowtrooper (16,000), Luke Skywalker (Hoth) (14,000)
You will also unlock C-3PO and Chewbacca if you haven’t already
Escape from Echo Base – Free Play Mode
Required Abilities: Astromech, Double Jump, Force, Grapple, Protocol, Sith Force, Small, Thermal Detonator
Part 1 – Echo Base Command Center
Canister 1


Part 2 – Echo Base Cafeteria
Canister 2


Part 3 – Circular Track
Canister 3

Part 4 – Tiled Hangar
Canister 4


Canister 5

Canister 6


Canister 7


Part 6 – Medical Bay
Canister 8


Canister 9


Escape from Echo Base – Free Play Mode cont.
Red Power Brick


Canister 10

Minikit Model: Snowspeeder
Red Power Brick Extra: Fast build (30,000)
Escape from Echo Base – Challenge Mode
Required Abilities: Astromech, Protocol, Sith Force, Thermal Detonator
Part 1 – Echo Base Command Center
Blue Canister 1


Part 3 – Circular Track
Blue Canister 2

Part 2 – Echo Base Cafeteria
Blue Canister 3

Part 4 – Tiled Hangar
Blue Canister 4

Blue Canister 5


Part 5 – Slippery Slope
Blue Canister 6

Part 6 – Medical Bay
Blue Canister 7


Blue Canister 8


Blue Canister 9


Part 7 – Hangar
Blue Canister 10

Falcon Flight – Story Mode
Led by the evil Darth Vader, Imperial forces have overrun the Rebel base on the ice planet of Hoth.
Having bravely stalled the enemy advance, Luke Skywalker has made his escape by X-wing fighter.
And as the last Rebel transports lift off from the planet, Han Solo in the Millennium Falcon engages the Imperial ships above….
Enemies: TIE Fighter, TIE Interceptor, TIE Bomber
Starting Vehicles: Millenium Falcon
True Jedi: 30,000

Part 1 – Rebel Rescue
Looks like some of the rebel transports got caught by Star Destroyers. We’ve got to help them out! Each of the Star Destroyers has four turrets on it. Destroy all of the turrets and you’ll rescue the transports.
Part 2 – The Asteroid Field
Your goal is to continue through the asteroid field. Unfortunately, your path will be blocked off by some rubble. There are four torpedo targets on the rubble that you need to destroy, but there are no torpedo generators in the area. You’ll have to find some torpedoes. To do so, destroy the small asteroids littered throughout the area. Most of them will reveal torpedoes when they are destroyed. The asteroids will respawn, so you don’t have to worry about using your torpedoes wisely. Once all four targets are destroyed, the path will be cleared, so continue on.
Part 3 – Asteroid Surface
This area is much the same as the first. The path ahead is blocked by rubble, so get torpedoes from the asteroids and use them to destroy the four torpedo targets. Once the path is cleared, continue onto the surface of the asteroid. You’ll find your path once again blocked by rubble, so destroy the four torpedo targets to clear the path. With the path clear, continue into the asteroid field.
Part 4 – On the Attack
Your path back to the Star Destroyers is blocked by one massive asteroid, so grab torpedoes from the smaller asteroids and use them to destroy the targets. Once all six torpedo targets have been destroyed, the asteroid will explode. Head towards the Star Destroyers to complete the level.
Unlocked Vehicles: TIE Bomber (60,000), Imperial Shuttle (25,000)
You will also unlock the Millenium Falcon if you haven’t already
Falcon Flight – Free Play Mode
Required Abilities: TIE, Tow Cable
Part 1 – Rebel Rescue
Red Power Brick

Canister 1

Part 2 – The Asteroid Field
Canister 2


Canister 3

Canister 4

Part 3 – Asteroid Surface
Canister 5

Canister 6


Canister 7

Canister 8

Canister 9


Part 4 – On the Attack
Canister 10


Minikit Model: TIE Fighter
Red Power Brick Extra: Score x4 (2,500,000)
Falcon Flight – Challenge Mode
Part 1 – Rebel Rescue
Blue Canister 1

Part 2 – The Asteroid Field
Blue Canister 2

Blue Canister 3

Blue Canister 4

Blue Canister 5

Part 3 – Asteroid Surface
Blue Canister 6

Blue Canister 7

Blue Canister 8

Part 4 – On the Attack
Blue Canister 9

Blue Canister 10

Dagobah – Story Mode
Han Solo and Princess Leia have finally evaded the Imperial fleet in the Millennium Falcon, and are on their way to Cloud City – secretly followed by the bounty hunter Boba Fett.
Meanwhile, following instructions relayed to him by the spectral form of Obi-Wan Kenobi, Luke Skywalker has piloted his X-wing to the forgotten planet of Dagobah.
Accompanied by his trusty droid R2-D2, Luke heads towards the murky swamp world in search of his destiny….
Enemies: Bat, Snake
Boss: Darth Vader
Starting Characters: Luke Skywalker (Pilot), R2-D2
Added Characters: Luke Skywalker (Dagobah), Yoda
True Jedi: 52,000

Part 1 – Dagobah Swamps
We’ve crashed on Dagobah, and are now searching for Yoda. Watch out for the water. It may look friendly and inviting, but Luke will die as soon as he touches it. R2 however, will be just fine. Build the LEGO pieces into two ramps, allowing R2 to join you on the upper ledge, then continue down the path. You’ll find yourself in a swamp. R2 can pass through the water to reach the other side, but not Luke. You’ll have to find another way to cross. Destroy the green plant on the far right to reveal a grapple point, then use it to swing across the gap. Continue to the left and you’ll reach a gap. Have R2 hover across the gap, then use the Astromech panel to raise a bridge, allowing Luke to join you. Blast your way through the plants, then continue to the left.
Part 2 – Yoda’s Hut
You can see Yoda’s hut in the distance, so to reach it, build the LEGO pieces into a button. Step on it to reveal another button above the water. Hover over to it, then step on it to reveal another button behind you. Step on it to reveal another button ahead of you. Hover over to it and step on it to reveal another button behind you. Step on it to reveal another platform in front of you, allowing you to hop onto the opposite shore. Approach Yoda’s hut to trigger a cutscene.
Part 3 – Training Grounds
You are now in the training grounds, and you have Luke in his Dagobah outfit (complete with lightsaber). Luke is currently learning about the Force, so he cannot use it by himself. In order to use the Force, he’ll need Yoda to hop onto his back. Simply walk up to Yoda and hit the “tag” button (the button you use to switch characters) and he’ll hop onto Luke’s back. You can now Force and destroy all of the plants in the area to reveal three piles of LEGO pieces. Force them into the water to create a bridge, then cross it. You’ll find another set of buttons to the right, so hop on the first button to reveal another, you know the drill. Step on the buttons to cross the water and you’ll find the gate out of here. The Astromech panel to open the gate is high up on a platform. To reach it, Force both of the mushroom things on the right to lower them down. Get onto the top of the one on the right as R2, then wait for it to raise up. Hover over to the mushroom on the left, then wait for it to raise up as well. Once it’s raised up, you can hover over to the left and land on the platform with the Astromech panel. Use it to open the gate, then head inside.
Part 2 – Yoda’s Hut
It doesn’t look like it, but we’re actually in the same area we were in before. If you head towards the screen, you’ll head back down the path and reach Yoda’s Hut. As soon as you enter this area, Luke will Force a rock. He can now use the Force by himself, and you can also play as Yoda if you wish. Head to the left and you’ll find a tree. Force the LEGO pieces out of the water to reveal a tractor, then Force the trailer to create a ramp. This will allow R2 to reach the first platform, where he can hover to the left to cross the gap. Do so, then use the Astromech panel to raise up a platform, allowing Luke and Yoda to join you. Continue to the left and destroy the barrier, then head inside the cave.
Part 4 – The Cave
Time to face the power of the Dark Side. Head down the slope and hop on the first platform with the button. Step on the button to lower the platform, then hop onto the next button. This will lower the platforms and create bridges, allowing your partners to join you. Cross the bridge onto the next ledge, then hop onto the platform with the button. This will lower the platform and reveal more bridges, allowing you to cross to the next ledge. Cross the bridge and continue to the right, carefully hopping across the ledges. Eventually you’ll be back on solid ground, so head up the slope and you’ll come face to face with Darth Vader. Or rather, an apparition of Vader. Duel him to take out two hearts. He will then retreat onto the ledge on the left. Hop on one of the boxes and your partner will hop on the other. Force the box your partner is on to raise them up. They will do the same to you, allowing you to reach the upper ledge. Hop off and duel Vader to take out two more hearts. He will then retreat to the ledge on the right. Drop back down and head to the right, then build the LEGO pieces into a box. Force all three boxes into position, then hop up them to reach the ledge. Duel Vader to take out two more hearts. He will then retreat back to ground level. Drop back down and take out his last two hearts. This will open the gate in the back of the area. Head on through.
Part 5 – Crashed X-wing
Head to the right and you’ll find the LEGO pieces for a rotary handle underneath some plants. Force them to destroy them, then build the LEGO pieces into a rotary handle. Turn it to raise up a bridge, allowing you to cross the gap. Force the LEGO pieces into a ramp, then continue on. Head to the left and you’ll find two black boxes. Hop on one and your partner will hop on the other. Force the box your partner is on and they will do the same to you, lifting you up onto the ledge. Hop onto the ledge and push the box along the tiles and off the edge. This will reveal some LEGO pieces below. Drop down and build them into an Astromech panel, then use it to destroy the barrier. You’ll find Luke’s X-wing sunk into the swamp. You need to Force it out. If you Force it as Luke, you’ll be unable to lift it out of the swamp. Force it as Yoda to lift it out of the swamp, completing the level.
Unlocked Characters: Luke Skywalker (Pilot), Luke Skywalker (Dagobah)
You will also unlock R2-D2 and Yoda if you haven’t already
Dagobah – Free Play Mode
Required Abilities: Double Jump, Force, Grapple, Hover, Sith Force, Small, Thermal Detonator
Part 1 – Dagobah Swamps
Canister 1


Red Power Brick


Canister 2


Part 2 – Yoda’s Hut
Canister 3


Canister 4


Canister 5

Part 3 – Training Grounds
Canister 6


Part 4 – The Cave
Canister 7


Canister 8


Canister 9


Dagobah – Free Play Mode cont.
Part 5 – Crashed X-wing
Canister 10


Minikit Model: X-wing
Red Power Brick Extra: Regenerate Hearts (150,000)
Dagobah – Challenge Mode
Required Abilities: Astromech, Double Jump, Force, Hover, Sith Force
Part 1 – Dagobah Swamps
Blue Canister 1


Blue Canister 2

Part 2 – Yoda’s Hut
Blue Canister 3

Blue Canister 4


Part 3 – Training Grounds
Blue Canister 5


Part 4 – The Cave
Blue Canister 6


Blue Canister 7


Blue Canister 8

Part 5 – Crashed X-wing
Blue Canister 9

Blue Canister 10

Cloud City Trap – Story Mode
Barely a few weeks into his Jedi training with Yoda, Luke Skywalker has had a vision of his friends captured by Darth Vader.
Against Yoda’s advice, the impetuous young Jedi sets his X-wing fighter on a course for Cloud City.
Here he hopes to find Han Solo and Princess Leia – little guessing in his haste that he himself is the true target of Vader’s trap….
Enemies: Stormtrooper
Boss: Darth Vader
Starting Characters: Luke Skywalker (Bespin), R2-D2
True Jedi: 14,000

Part 1 – Landing Pad
Well, we’re here to rescue Han and Leia. Nothing can go wrong! We’ve got to get to that door on the right. Force part of your X-wing to create a platform, but you still can’t make it to the other side. Have R2 hover over to the ledge on the left and use the Astromech panel. This will extend another platform, allowing Luke to reach the door. Hop across the gap and build the LEGO pieces into an Astromech panel. Use it to open the door, then head inside.
Part 2 – Freezing Chamber Approach
The door on the right is blocked off by a blue barrier. To destroy it, we’ll need a turret. Use the Astromech panel to open the door, revealing a large box. Push it along the tiles into the red slot, then destroy the white object on the left to reveal LEGO pieces. Build them into a turret, then Force it onto the slot. Hop in the turret and use it to destroy the blue barrier, opening the door. Continue down the hallway and use the Astromech panel to open the door, then head inside.
Part 3 – Carbonite Freezing Chamber
Head to the right and down the stairs. Vader will then appear! Duel him to take out two hearts. He will then jump onto one of the grey panels around the area. If you try to approach him, he will jump to a different panel. When he is standing on a panel, use the Astromech panel to activate the carbonite jets, temporarily freezing Vader in place. This will give you a free hit, so use it to take another heart off Vader. He will then attack you again. Repeat this process two more times to take out his health. He will then retreat through the door on the right. Some LEGO pieces will also drop. Build them into a crane, then hop in and use it to pick up R2. Drop him off across the gap to the right (don’t try to hover across the gap, you won’t make it). He will then use the Astromech panel, extending a platform that allows you to double jump across the gap. Before crossing, head back to the left and grab a stormtrooper helmet from the Hat Machine. Head back to the left and cross the gap, then use the Imperial panel to open the door. Head inside.
Part 4 – Pursuing Vader
Head to the right and Force the LEGO pieces into a fan. Before riding the current to the top ledge, continue to the right and use the Astromech panel. This will start a platform moving above you. Ride the air current to the upper ledge, then catch a ride on the moving platform. Hop off onto the ledge with Vader, who will then hop away. Step on the grey platform to the left of you. This will lower it (you have to stay on it to lower it), allowing R2 to hover over to you. Once R2 is with you, Force the fan to the right, then ride the air current up onto the ledge. Use the Astromech panel to start the platform moving, then ride it up to the ledge. Head inside the door.
Part 5 – Maintenance Room
Time for another fight with Vader. Duel him to take out two hearts. He will then jump onto a platform above you. Force the triangles on the left to create a ramp, allowing R2 to reach the upper ledge. Use the Astromech panel to activate the carbonite jets, forcing Vader back to the ground. Duel him again to take out two hearts. He will again retreat. Build the LEGO pieces on the right into a generator and rotary handle. R2 will then head over to the lift. Turn the rotary handle to raise him up, allowing him to use the Astromech panel to force Vader back down. Repeat this process one more time to take out Vader’s hearts. He will then retreat through the door on the right. Follow him.
Part 6 – The Window
Head to the right and you’ll see Vader across the gap. There will be two Stormtroopers shooting at you. You can deflect the blasts at them, but they’ll keep coming. You need to cut off the supply. Hover across the gap and use the Astromech panels to shut the hatches. Some objects will then appear. Vader will begin Forcing them at Luke. Hover back across the gap and switch to Luke. When Vader Forces something at you, Force it back to hit him. He will then hop over and duel you, so take out two hearts. He will then hop back and more stormtroopers will appear. Repeat this process two more times and he will retreat through the window. Force the LEGO pieces that he leaves behind into a platform, allowing you to double jump across the gap. Pursue Vader through the window.
Part 7 – Family Reunion
Time to finish this! Take two hearts off Vader and he will hop to the next platform. Force the LEGO pieces on the wall into a ramp, allowing you to reach the next platform. Take another two hearts off and he will retreat to the right. Hover to the right, then use the Astromech panel to raise up the platform, allowing you to reach Vader. Follow Vader and take out his last six hearts to complete the level.
Unlocked Characters: Luke Skywalker (Bespin)
Cloud City Trap – Free Play Mode
Required Abilities: Bounty Hunter, Double Jump, Hover, Imperial, Sith Force, Small, Thermal Detonator
Part 1 – Landing Pad
Red Power Brick

Canister 1

Part 2 – Freezing Chamber Approach
Canister 2

Part 3 – Carbonite Freezing Chamber
Canister 3


Part 4 – Pursuing Vader
Canister 4

Canister 5

Part 5 – Maintenance Room
Canister 6

Part 6 – The Window
Canister 7

Part 7 – Family Reunion
Canister 8

Canister 9

Canister 10

Minikit Model: Cloud Car
Red Power Brick Extra: Score x6 (5,000,000)
Cloud City Trap – Challenge Mode
Part 1 – Landing Pad
Blue Canister 1

Part 2 – Freezing Chamber Approach
Blue Canister 2

Part 3 – Carbonite Freezing Chamber
Blue Canister 3

Part 4 – Pursuing Vader
Blue Canister 4

Blue Canister 5

Part 5 – Maintenance Room
Blue Canister 6

Part 6 – The Window
Blue Canister 7

Blue Canister 8

Part 7 – Family Reunion
Blue Canister 9

Blue Canister 10

Betrayal over Bespin – Story Mode
Escaping from the Rebel defeat on Hoth, Han Solo has sought sanctuary on Cloud City, high above the planet Bespin.
His old friend Lando Calrissian is now Baron-Administrator of this self-governing colony, and Han hopes for a warm welcome.
But in this time of galactic upheaval, nothing is as it seems….
Enemies: Stormtrooper, Imperial Officer, Beach Trooper
Boss: Boba Fett
Starting Characters: Lando Calrissian, Chewbacca, Princess Leia (Bespin)
Added Characters: R2-D2, C-3PO
True Jedi: 34,000

Part 1 – Bounty Hunter Pursuit
If we hurry, we might be able to save Han! Head down the hallway after Boba Fett. He will then pull a lever, turning the staircase into a ramp. Destroy the white panel on the left to reveal another lever, then pull it to turn the ramp back into stairs. Head up the stairs and into the next room. You’ll see Boba Fett enter the room on the right, so follow him. You will now have a little shootout. You’ll need to shoot him once to shut off his jetpack, then shoot him again to damage him. He will then get back up on his jetpack. After you take him down to one heart, he will flee, so follow him out of the room. He will then use the Bounty Hunter panel to open the door, so follow him. Head to the left down the hallway and follow Boba Fett all the way to the landing pad.
After the cutscene, you’ll have R2 added to the party. Head back inside. Head down the hallway and you’ll find it blocked by gas. R2 can pass through without a problem, but everyone else will die as soon as they touch it. Use the Astromech panel to shut off the gas, then continue down the hallway. Use the Astromech panel at the end to open the door, then head inside, where you’ll find some of 3PO’s pieces. The Ugnaughts in here will stun R2 if they get a chance, so defeat them to spare you the trouble. Destroy the objects in the room to clear the space by the tiles, then push the generator into the slot. This will power up the lever, so pull it to reveal more of C-3PO’s pieces. Destroy the purple object by the conveyor belt to reveal his head. Once all the pieces are revealed, build them into C-3PO, adding him to your party. Head back out of the room, then use the Protocol panel on the left to open the door. Head inside and continue down the hallway. Grab a stormtrooper helmet from the Hat Machine, then continue left down the hallway. Use the Imperial panel in the elevator on the right to go up.
Part 2 – Cloud City Exterior
Head forward and you will be faced with a horde of enemy stormtroopers. Defeat the enemies that appear and some LEGO pieces will fall from the sky. Build them into a grapple point, then use it to cross the gap. Hop in the crane and use it to carry R2 and 3PO across the gap. Use the grapple point to reach the upper ledge, then build the LEGO pieces into a lever. Pull it to lower the elevator, allowing R2 and 3PO to join you. Continue to the right and you’ll find a little conveyor belt. Running through the red light will start the belt moving. This will trap 3PO, as he isn’t fast enough to continue, so step on the button to shut off the conveyor belt. Continue to the right and you’ll find a grey object in the path. Lando, Leia and Chewie can hop over it, and R2 can hover around it by following the studs. 3PO however, is trapped. Leave him for now, we’ll come back for him. Hover across the next gap, then use the Astromech panel to extend a bridge, allowing Lando, Leia and Chewie to join you. Grapple up onto the ledge, then head to the left and shoot the object on the wall. This will destroy the grey object in the path, allowing 3PO to continue to the right. Destroy the blue box by the Protocol panel, then push the orange boxes out of the way so 3PO can pass. Use the Protocol panel to open the door. Head inside and continue down the hallway into the next room. The way ahead is blocked by gas, so head through it as R2 and use the Astromech panel to shut it off. Continue down the hall into the next room.
Part 3 – Landing Pad Control Room
There are two levers here for you to pull, but they’re shut off at the moment. Step on each pair of buttons in the room to power a lever. Once both are powered up, pull them to raise the bridge to the Falcon. Once that’s done, head back down the hallway.
Part 2 – Cloud City Exterior
Head back down the hall and into the room. Head to the left to find the door to the landing pad. Use the Astromech panel to open it, then head outside.
Part 4 – Falcon Fight
Head towards the Falcon and you’ll be attacked by a whole host of stormtroopers. Defeat the waves that come at you. Once all the enemies are defeated, the ramp to the Falcon will open. Head inside to complete the level.
Unlocked Characters: Lando Calrissian, Princess Leia (Bespin), Lobot (11,000), Ugnaught (36,000), Bespin Guard (15,000), Princess Leia (Prisoner) (22,000)
Betrayal over Bespin – Free Play Mode
Required Abilities: Astromech, Bounty Hunter, Double Jump, Force, Hover, Protocol, Sith Force
Part 1 – Bounty Hunter Pursuit
Canister 1

Canister 2


Canister 3


Canister 4


Red Power Brick

Canister 5


Canister 6


Part 2 – Cloud City Exterior
Canister 7

Canister 8

Canister 2 cont.

Canister 9


Part 4 – Falcon Fight
Canister 10

Minikit Model: Slave I
Red Power Brick Extra: Minikit detector (250,000)
Betrayal over Bespin – Challenge Mode
Required Abilities: Double Jump, Grapple, Hover, Protocol
Part 1 – Bounty Hunter Pursuit
Blue Canister 1

Blue Canister 2

Blue Canister 3

Blue Canister 4

Blue Canister 5

Part 2 – Cloud City Exterior
Blue Canister 6

Blue Canister 7

Blue Canister 8


Blue Canister 9

Part 4 – Falcon Fight
Blue Canister 10

Episode V Super Story
While not as difficult as the Super Story for Return of the Jedi, this Super Story is more difficult than the one for A New Hope. While the levels are about as long as the ones in A New Hope, none of these levels are particularly good for stud collection. Because of this, you will actually have to make an effort to get above 100,000 studs, although this isn’t too difficult.
Below I break down each level in terms of stud collection, time to complete, what to look out for, etc.
Hoth Battle: This level can actually be rather short, depending on how fast you are at taking down AT-ATs. Remember that you’ll need to tow bombs into them after toppling them to destroy them. Focus on destroying the barriers and you’ll progress quickly to the end. There aren’t that many studs in this level, but if you do find a Power Up, use it to your advantage.
Escape from Echo Base: This level is about average length, but it also doesn’t have many great opportunities for studs. You can use the Protocol panel on the left side of the Medical Bay to open the door to a Double Score Zone, but there aren’t that many studs to collect in that area anyway. If you see any blues lying around, make sure to grab them.
Falcon Flight: Torpedoes, torpedoes, torpedoes. You’ll learn to hate them after this level. The asteroids don’t give out too many studs, so focus on grabbing torpedoes and using them to destroy the targets. If you are in need of studs, destroying the two torpedo targets on the surface of the asteroid will net you a nice amount. Before completing this level, try to be at around 50,000 studs.
Dagobah: Remember that until you exit the training grounds, Luke can’t Force objects without Yoda’s help. You can progress pretty quickly through this level, just watch out for the bats. They’re more dangerous than they look. Just run through the cave and make sure to downstab (jump then attack) Vader to quickly defeat him. Remember that Luke can’t Force the X-wing out of the water at the end. If you see any blue studs lying about, be sure to collect them.
Cloud City Trap: This level isn’t actually that long, but boy does it feel like it. Since this level is essentially one long boss fight against Vader, just downstab him constantly. Don’t worry too much about studs here, as there aren’t that many to begin with.
Betrayal over Bespin: This level is also relatively quick. Take advantage of the Power Ups and wall panels to get your stud total over 100,000 if it isn’t already. Watch out for Boba Fett firing at you, as his blasts will take 2 hearts off you instead of 1. The enemies will ignore you if you’re playing as a droid, so take advantage of that if you’re pressed for time and don’t want to deal with the stormtroopers.
Episode V Character Bonus – Bespin
While the Rebel Alliance struggles heroically with the oppressive Empire, and Luke Skywalker moves closer to his epic destiny, daily life goes on across the galaxy.
In the dangerous corridors of Cloud City, intrepid adventurers compete to collect one million LEGO Studs in the fastest time possible.
It’s the desperate, ruthless life of a world in turmoil….
This is one of the harder character bonuses, usually taking me around 2-3 minutes to complete. This area is very spread out, so shooting around wildly actually hurts you here, as you will often destroy things before you can get to them and collect their studs. Also, for some reason I have a hard time destroying the little fences with a blaster character, as the shots always seem to hit the wrong spots. Anyway, destroy the boxes and silver objects for the occasional Power Up. The Imperial Officers will also drop purple studs when defeated, so if you see any, focus on defeating them.
If you fail to complete this level within 5 minutes, you will not receive the Gold Brick. You will not get to keep the studs you collect in this level.
Episode V Minikit Bonus – Hoth
While the Rebel Alliance struggles heroically with the oppressive Empire, and Luke Skywalker moves closer to his epic destiny, daily life goes on across the galaxy.
On the frozen planet Hoth, intrepid adventurers compete to collect one million LEGO Studs in the fastest time possible.
It’s the desperate, ruthless life of a world in turmoil….
This minikit bonus is really easy. Destroy the brown trees and torpedo targets to reveal Power Ups. There are a lot of brown trees around the area, so you should never run out of Power Ups. There is a bomb dispenser that you can use to get bombs to tow into the barriers. While the barriers give out an insane amount of studs, I wouldn’t bother with destroying them. The only exception to this is if you have the Droideka minikit (collect all Canisters in Droid Factory) and the Self destruct extra (found in Hoth Battle). This allows you to detonate the Droideka by the barriers, destroying them instantly. If you don’t have them, don’t worry, as the trees will give you plenty of studs.
If you fail to complete this level within 5 minutes, you will not receive the Gold Brick. You will not get to keep the studs you collect in this level.
Jabba’s Palace – Story Mode
Luke Skywalker has returned to his home planet of Tatooine in an attempt to rescue his friend Han Solo from the clutches of the vile gangster Jabba the Hutt.
Little does Luke know that the Galactic Empire has secretly begun construction on a new armored space station even more powerful than the first dreaded Death Star.
When complete, this ultimate weapon will spell certain doom for the small band of Rebels struggling to restore freedom to the galaxy….
Enemies: Gamorrean Guard
Boss: Rancor
Starting Characters: Princess Leia (Boushh), Chewbacca
Added Characters: Luke Skywalker (Jedi), C-3PO, R2-D2, Han Solo (Skiff)
True Jedi: 43,000

Part 1 – Entering the Palace
Time to infiltrate the palace! Walk up to the gate and you will see three gold studs floating in front of it. Collect each of the studs (build the LEGO pieces into a platform to collect the center one) and a camera droid will appear and start shooting at you. Destroy each of the camera droids (each takes 4 hits) to open the gate. Continue inside the palace, where you will be pestered by Gamorrean Guards. Pull the levers to close off the tubes that they slide out of. This will cut them off, allowing you to continue in peace. The gate ahead is shut, but there is a Bounty Hunter panel to the left of it. Thankfully, we came impersonating a bounty hunter, but we’re missing the final piece. Head through the door on the left and you’ll find a Hat Machine. This Hat Machine gives out Boushh’s helmet. This helmett not only makes you a Bounty Hunter, it also gives you thermal detonators! Be careful, as losing the hat will take away these special privileges. Head back to the gate and use the Bounty Hunter panel to raise it, then continue up the stairs. Head into this next room and you’ll meet up with Luke, adding him to your party. Build the LEGO pieces by the door into a Bounty Hunter panel, then use it to open the door. Head into the next room.
Part 2 – Droid Processing
First thing I recommend doing is heading to the left and taking care of the Gamorrean tube. Once they’re taken care of, head to the right side of the room, where you’ll find a weird LEGO object. Destroy it to reveal LEGO pieces, then build them into a panel. Chewie will automatically hop on, so Force the platform up to send him up and over the ledge into the room with the levers. The gate will raise up once Chewie’s inside, so pull the levers to raise the gate in front of the silver objects. Destroy them to clear the path (if you need another hat, there is a Hat Machine by the start of this area), then continue into the next room. Head to the right and you’ll find another shut gate. It’s being held shut by the two clamps on the side of it, so destroy the orange objects to release the clamps. This will open the gate, so continue down the path. Watch out for the grey tiles on the floor, as they will fall into the abyss below when you step on them (and take you down with them if you aren’t fast enough!). Continue down the stairs and you’ll reach the room where R2 and 3PO are being kept. We need to free them to leave this room. On the left side of the room are some LEGO pieces attached to the wall. Force them off to create a pile of LEGO pieces, then build them into a platform. Next, pull the levers on the right side of the room to reveal two sets of LEGO pieces. Build them into buttons. These buttons will allow you to control the platform you built earlier. Move the platform next to each of the droid cages. This will allow you to double jump from the platform to the inside of the cage, where your weight will lower the droids to the ground. Once both droids are free, use the Protocol and Astromech panels to open the door. Head up the stairs, then use the Astromech panel to open the door.
Part 3 – Palace Basement
Our goal in this area is to get to the door in the upper left. First things first, head to the right and pull the lever to shut off the Gamorrean tube. With that taken care of, you need to get onto the ledges. To do that, push the three pillars into the slots to the left of the Gamorrean tube. The tallest pillar goes on the left. With the three pillars in place, Force each of them to create a ramp. Walk up the ramp, then destroy the nodes to reveal LEGO pieces. Build them into a small platform, then Force it into place. Force the LEGO pieces on the opposite wall to complete the bridge, then cross. I suggest pulling the lever to shut off the other Gamorrean tube, finally giving you some peace. Hover across the gap to the left, then use the Astromech panel to extend a bridge. Cross it and continue to the gate, then destroy the nodes to reveal LEGO pieces. Build them into a Protocol panel, then use it to open the door. Head through.
Part 4 – Throne Room Entrance
Head down the stairs and you will be faced with a bunch of Gamorrean Guards. The way to Jabba’s throne room is sealed behind a gate. To open the gate, you need to defeat all of the Gamorreans. There are two Gamorrean tubes in this area, so pull the levers to shut them both. Once all the Gamorreans are goners, the gate will open. Grab a helmet from the Hat Machine on the right if you need it, then head into the throne room.
Part 5 – Jabba’s Throne Room
Simply head over to Han’s carbonite block and use the Bounty Hunter panel.
Part 6 – The Pit
Well that didn’t go as planned. You’ve got the whole party minus Leia, however, Han has been added in her place. We need to take out the Rancor (who is named Pateesa). In order to damage him (yes, it’s a him), you need to distract him. And what better way to distract a rancor than with some tasty Gamorreans. There are two panels in the pit, a Protocol panel on the left and an Astromech panel on the right. Using a panel (it doesn’t matter which one you use) will call in a Gamorrean. The rancor will pick it up and eat it while standing next to a box. Shoot the box to take out a heart. First, the rancor will stand by the box on the left, then the box on the right. Call in a third Gamorrean and the rancor will stand under the gate. Pull the levers to shut the gate on the rancor, killing him and ending the level.
Unlocked Characters: Princess Leia (Boushh), Luke Skywalker (Jedi), Han Solo (Skiff), Gamorrean Guard (40,000), Bib Fortuna (16,000), Palace Guard (14,000), Bossk (75,000)
You will also unlock Chewbacca, C-3PO, and R2-D2 if you haven’t already
Jabba’s Palace – Free Play Mode
Required Abilities: Astromech, Double Jump, Grapple, Hover, Imperial, Protocol, Sith Force, Small, Thermal Detonator
Part 1 – Entering the Palace
Canister 1


Canister 2


Canister 3


Red Power Brick


Canister 4


Part 2 – Droid Processing
Canister 5


Canister 6

Canister 7


Part 3 – Palace Basement
Canister 8


Jabba’s Palace – Free Play Mode cont.
Part 5 – Jabba’s Throne Room
Canister 9


Part 6 – The Pit
Canister 10


Minikit Model: Desert Skiff
Red Power Brick Extra: Super zapper (14,000)
Jabba’s Palace – Challenge Mode
Required Abilities: Force, Grapple, Sith Force, Small
Part 1 – Entering the Palace
Blue Canister 1


Blue Canister 2

Blue Canister 3

Blue Canister 4


Part 2 – Droid Processing
Blue Canister 5


Blue Canister 6

Blue Canister 7

Part 3 – Palace Basement
Blue Canister 8

Part 5 – Jabba’s Throne Room
Blue Canister 9

Part 6 – The Pit
Blue Canister 10

The Great Pit of Carkoon – Story Mode
Work continues on the new Death Star, and the future of the galaxy appears increasingly bleak. On Tatooine, Luke Skywalker is in the grip of Jabba the Hutt, along with Han Solo, Chewbacca, and Princess Leia.
Jabba takes his prisoners across the Tatooine dunes to the Great Pit of Carkoon, where he plans to feed them to the fearsome Sarlacc beast.
But, even with backup from Boba Fett, Jabba has severely underestimated the powers of a Jedi….
Enemies: Skiff Guard, Gamorrean Guard
Boss: Boba Fett
Starting Characters: Lando (Palace Guard), Luke Skywalker (Jedi)
Added Characters: Han Solo (Skiff), Chewbacca, R2-D2, C-3PO, Princess Leia (Slave)
True Jedi: 50,000

Part 1 – Skiff Hopping
We need to get in the barge, but first we need to meet up with Han and Chewie. Head to the right and you’ll notice a pile of LEGO pieces. Build them into a lever, then pull it to extend a bridge to the next skiff. Cross it and continue to the right, where you’ll find Han and Chewie. Force the pile of LEGO pieces on the right side of the skiff to create two levers, then pull them to extend a bridge to the next skiff. Cross the bridge onto the skiff, where you’ll find Boba Fett. You will need to hit him once to shut off his jetpack, then hit him again to take out a heart. Once his health is gone, a cutscene will play.
After the cutscene, there will be an explosion on a nearby skiff, causing it to slowly float over to you. Hop onto it, then head towards the barge. Force the LEGO pieces on the side of the barge into a platform, then carefully hop onto it. Hop onto the barge, then continue to the left. Unfortunately, the path ahead is blocked. You need to reveal three platforms. Pull the nearby lever to extend one of the platforms. Head back to the right and Force the second large panel to destroy it, revealing a lever. Pull it to raise another platform. To raise the final platform, Force the small panel to the right of the first lever. This will raise it up. Quickly double jump onto it, then onto the ledge on the left. Push the box off the edge of the ledge to reveal LEGO pieces, then build them into a grapple point. Use it to grapple up to the ledge, then head inside the alcove and head to the right to reach the third lever. Pull it to extend the final platform. Drop down and continue to the left, hopping over the platforms. You are now at the entrance to the barge, but to enter you’ll need to match the code. Force the two panels to reveal a color code. You need to match the panel on the right with the panel on the left. Force the middle square so it turns yellow, then turn the rotary handle to turn the bottom square blue. Once the code is matched, the door will open. Head inside.
Part 2 – Weapons Storage
The droids are in the next room, which is sealed off by bars. To get to them, destroy the bombs lying around to reveal LEGO pieces. Build them into a set of turrets, then hop in one and use it to destroy the bars (and the enemies who will come attack you!). Once the bars are clear, you can enter the main room and reunite with R2 and 3PO. Build the LEGO pieces on the left side of the room into a Protocol panel. However, you can’t use it yet. Force the object on the right side of the room to create part of a generator, then destroy the bomb on the left to reveal LEGO pieces. Force them onto the generator. This will power up the Protocol panel, so use it to start that platform moving. Ride it up into the next area.
Part 3 – Party Suite
Head to the right and you’ll enter another room. You can’t open that door ahead of us until you create an awesome party, so get to it!. Begin by Forcing the LEGO pieces on the left to create a table. Build the LEGO pieces in the left corner into a speaker. Destroy the orange wall panels on the right, allowing you to Force the pieces for a disco ball off the wall. This will reveal a grapple point, so grapple up onto the ledge and push the box off, revealing the LEGO pieces for another speaker. Build the LEGO pieces on the top ledge, which will allow you to Force the disco ball into position. With everything in place, the floor will open up to reveal a series of lights. Two lights will be on at a time. Step on one of the lights and your partner will step on the other. This will cause another set of lights to turn on. Repeat this process to step on all of the lights. If you are too slow, the lights will reset, so be quick! Once all the lights have been turned green, the door will open and a sweet party will start. Stay and rock out if you want, and when you’re ready, continue through the door and up the stairs.
Part 4 – Barge Main Deck
After the cutscene, you’ll find yourself on the deck of the barge, with Leia having been added to the party. With Jabba dead, it’s time to destroy the barge! Head to the right and you’ll see two large rotating targets. That is what you need to shoot to destroy the barge. The top target can be uncovered by using the Protocol panel to destroy the cage. The bottom target is a bit more complicated. On the right side of the cage is a small box. Push it to the left to get it into position. Head back to the left and you’ll notice a path leading to the left side of the cage. Shoot the blue panel at the start of the path to reveal another box. Push it all the way along the path to the cage. Once both boxes are in place, the cage will explode, exposing the second target. Once both targets have been exposed, continue to the right. You don’t have the firepower to destroy the now exposed targets, but the deck turret does! Build the LEGO pieces into a partial staircase, then look to the right of the bottom target. You’ll see two boxes. Destroy them to reveal a hatch, then destroy it to reveal an opening. Drop down inside and follow the path to pop out by a lever. Pull it to raise the blue gate, then head to the right and shoot the other blue panel to destroy it. This will allow you to push the object out of the alcove. Push the object next to the stairs you built and it will raise itself up. Force it to complete the stairs, then walk up to the next level. You’ll find the turret on the right, but with no way to reach it. You’ll notice four ladder-like objects on the right side of the deck. Each of them is held down by a clasp. Destroy the clasps, then Force the ladders to create a ramp. Walk up it to the turret.
Part 5 – Turret
Use the Astromech panel to charge up the turret, then hop inside. Shoot the two targets to destroy the barge and end the level. You do have a limited number of shots in the turret before it runs out of charge. If you run out, simply use the Astromech panel again to recharge it.
Unlocked Characters: Lando (Palace Guard), Princess Leia (Slave), Skiff Guard (12,000), Boba Fett (100,000)
The Great Pit of Carkoon – Free Play Mode
Required Abilities: Astromech, Double Jump, Force, Grapple, Hover, Protocol, Sith Force, Small, Thermal Detonator
Part 1 – Skiff Hopping
Canister 1


Canister 2

Canister 3


Canister 4


Canister 5


Part 2 – Weapons Storage
Canister 6


Part 3 – Party Suite
Canister 7


The Great Pit of Carkoon – Free Play Mode cont.
Part 4 – Barge Main Deck
Canister 8


Canister 9


Red Power Brick


Canister 10

Minikit Model: Sail Barge
Red Power Brick Extra: Bounty hunter rockets (20,000)
The Great Pit of Carkoon – Challenge Mode
Required Abilities: Grapple, Hover (not required but helpful), Sith Force, Thermal Detonator
Part 1 – Skiff Hopping
Blue Canister 1

Blue Canister 2

Blue Canister 3


Blue Canister 4


Part 2 – Weapons Storage
Blue Canister 5

Part 3 – Party Suite
Blue Canister 6


Blue Canister 7

Part 4 – Barge Main Deck
Blue Canister 8

Blue Canister 9

Blue Canister 10

Speeder Showdown – Story Mode
The Rebel Alliance has learned of the new Death Star, and launches a daring plan to destroy this evil weapon before its construction can be completed.
The Rebel fleet is readied for an assault, and a small strike unit lands on the nearby forest moon of Endor.
Led by Luke Skywalker and Han Solo, their mission is to destroy the shield generator which protects the deadly Imperial space station….
Enemies: Scout Trooper, Stormtrooper
Starting Characters: Princess Leia (Endor), Luke Skywalker (Endor)
True Jedi: 55,000

Part 1 – Endor Forest
We need to get into that clearing. Start by destroy the plants in front of you to reveal LEGO pieces. Force them into a platform, then stand on it as Leia. Luke will Force you up, so hop over the log. Destroy the plant to reveal LEGO pieces, then build them into a grapple point. Grapple onto the ledge, then head back and hop onto the wooden platform. This will raise up some platforms, allowing Luke to join you. Force the wood into a ramp, then walk up and over the log into the clearing.
Part 2 – Landing Pad Shield
Head to the right and two scout troopers on speeder bikes will appear. Hop on the bikes and you will start rocketing through the forest.
Part 3 – Speeder Path
Your objective is to take out the two speeder bikes. Get behind them and shoot them down. Sometimes they will do a loop and get behind you. When this happens, simply hit the “jump” button (make sure your directional input is forward or you’ll just do a roll) and you’ll do a loop and get back behind them. Once you do so, you will stop and land in a clearing.
Part 4 – First Shield Generator
Your objective in these clearings is to destroy the large rotating white structure. To do so you need an AT-ST. Fortunately, one is provided for you. Either shoot or mind trick the driver out of the AT-ST, then use it to destroy the white structure. This will destroy one of the nodes on the shield protecting the landing pad. Once the structure is destroyed, hop back in your speeder.
Part 3 – Speeder Path
Just like the last time, you need to destroy some speeder bikes. This time, there are three. Once they’re toast, you’ll stop in another clearing.
Part 5 – Second Shield Generator
The idea in this clearing is the same: destroy the white structure. However, there is not an AT-ST here. You’ll have to build it yourself. Head to the left and destroy the plants to reveal the feet, then head towards the screen to find a wooden box. Force it against the ledge, then double jump onto it. Force the other box into position, allowing Leia to join you. Build the LEGO pieces into a grapple point, then grapple up and pull the lever. This will drop the rest of the pieces for an AT-ST. Drop back down and Force it together, then hop in and destroy the white structure. Once that’s toast, hop back in your speeder.
Part 3 – Speeder Path
By now you know the drill. Destroy four speeder bikes to stop in the next clearing.
Part 6 – Third Shield Generator
This area has provided the AT-ST, so kick the driver out and destroy the white structure. Hop back in your speeder.
Part 3 – Speeder Path
One more to go. Destroy 5 speeders and you’ll stop in a clearing.
Part 2 – Bunker Shield
You are now back where you started, but there is no AT-ST for you. You’ll have to build another one. Head towards the screen to find a small bridge. Cross it, then destroy the plants to reveal the feet for the walker and LEGO pieces. Build the LEGO pieces into a rotary handle, then turn it to lower the cage around the walker parts. Force together the AT-ST, then use it to shoot the two hanging cages. This will reveal some LEGO pieces, so Force them into a bridge. This will allow the AT-ST to reach the main area. Head over to the white structure and destroy it. With all the structures destroyed, the shield on the right side of the area will now be lowered. Continue past it towards the landing pad.
Part 7 – Landing Pad Exterior
Head towards the bunker. On the right side are two levers. Pull them to lower the elevator, then head inside.
Part 8 – Landing Pad Catwalk
Simply head to the left and step into the elevator at the end.
Part 9 – Landing Pad
There will be an AT-AT firing randomly, so be careful. There are also grapple hooks that are calling in stormtroopers. Destroy them to cut off the reinforcements, which will give you some peace apart from the walker. Pull the four levers to lower the shields around the rotating disks. Once all four shields are down, step on the white panel on the top part of the landing pad to be launched into the AT-AT. This will put you in control of it, so slowly rotate around and destroy the four dishes. Once all four are destroyed, hop out of the AT-AT. Two levers will then appear. Pull them to end this long level.
Unlocked Characters: Princess Leia (Endor), Luke Skywalker (Endor)
Speeder Showdown – Free Play Mode
Required Abilities: Double Jump, Force, Grapple, Hover, Imperial, Sith Force, Small, Thermal Detonator
Part 3 – Speeder Path
Canister 1

Canister 2


Canister 3


Canister 4

Canister 5


Canister 6

Part 4 – First Shield Generator
Canister 7


Part 5 – Second Shield Generator
Canister 8


Part 6 – Third Shield Generator
Canister 9


Part 7 – Landing Pad Exterior
Red Power Brick

Part 8 – Landing Pad Catwalk
Canister 10


Minikit Model: TIE Bomber
Red Power Brick Extra: Score x8 (10,000,000)
Speeder Showdown – Challenge Mode
Required Abilities: Grapple
Part 1 – Endor Forest
Blue Canister 1

Part 2 – Landing Pad Shield
Blue Canister 2

Part 3 – Speeder Path
Blue Canister 3

Blue Canister 4

Blue Canister 5

Blue Canister 6

Part 4 – First Shield Generator
Blue Canister 7

Part 5 – Second Shield Generator
Blue Canister 8

Part 6 – Third Shield Generator
Blue Canister 9

Part 7 – Landing Pad Exterior
Blue Canister 10

The Battle of Endor – Story Mode
As the Rebel fleet draws closer to the Death Star, Luke Skywalker has turned himself over to Imperial forces and heads to the Death Star for a final confrontation with Darth Vader. The commando team led by Han Solo makes its way towards the Imperial shield generator on Endor.
But the Rebel forces are lured into a trap. Although it appears incomplete, the Death Star is already fully functional.
And a deadly surprise lies in wait for the intrepid Rebel strike team….
Enemies: Stormtrooper, Scout Trooper, Imperial Officer
Starting Characters: Han Solo (Endor), Princess Leia (Endor), Chewbacca, C-3PO, R2-D2, Wicket
True Jedi: 90,000

Part 1 – Bright Tree Village
With the Ewoks having accepted us into the tribe, we can now make our way to the shield generator. Head to the right and you’ll find a travel chute. Have Wicket crawl through it, then build the two piles of LEGO pieces into gears. This will raise up the bridge, allowing the rest of the party to join you. Continue to the right and you’ll find your path cut off again. Destroy the boards in front of the Protocol panel, then use it to reveal some LEGO pieces. Build them into a grapple point, then use it to grapple up onto the ledge. Pull the lever to raise the bridge, allowing you to continue. Drop down and continue to the right, then head down the stairs.
Part 2 – Forest Descent
Head to the right and you’ll find a large lift. This will bring us down to the forest floor, but first you have to power it up. There are also four grappling hooks here bringing in stormtroopers and scout troopers, so destroy those to give you some peace. With the enemies taken care of, destroy all of the objects on the tiles. Build the LEGO pieces into a generator, then push it into the slot on the left side of the tiles. Once the generator is in place, crawl through the travel chute and pull the lever. This will lower the hook, carrying the generator to the top ledge. Push it into the slot to raise up the lift. Step on one of the buttons and your partners will step on the others, lowering you to the forest floor.
Part 3 – Forest Floor
Head to the right and you’ll see a travel chute that is too high up to reach. To fix that, destroy the plants to the left of it to reveal LEGO pieces. Build them into a rotary handle, then turn it to raise the platform under the travel chute. With the platform in place, hop on it and crawl through the travel chute. Step on the button to reveal a grapple point. Stay on the button and one of your partners will grapple up and pull the lever, lowering the gate and raising the ramp. Continue up the ramp to the right, then cross the small stream. You’ll run into another clearing with two gates at the end. To lower them, destroy the tan panel in between the two gates to reveal LEGO pieces. Build them into a Protocol panel, then use it to lower the first set of gates. Step on one of the buttons and your partners will stand on the other. Head to the right set of gates and build the LEGO pieces into a ramp. This will allow the droids to access the two buttons. Head to the left set of gates and crawl through the travel chute. Pull the lever to drop a box, revealing LEGO pieces. Build them into a grapple point, allowing Han, Leia and Chewie to reach the buttons. Step on one of the buttons (Han, Leia, Chewie and Wicket on the left; R2 and 3PO on the right) and your partners will stand on the other. Stepping on all six buttons will lower the gates. Continue to the right into the forest.
Part 4 – Bunker Battle
Head to the right and you’ll find your path blocked by a large barrier. Hop in the catapult and fire a few rocks at the barrier to destroy it, then continue along the path. You’ll be attacked by an AT-ST, so force the driver out and hijack the walker. Use it to destroy the barrier farther down the path, allowing you to continue into the clearing in front of the bunker. Stay in the AT-ST and use it to destroy the barriers to the left of the bunker. Hop out of the AT-ST and onto the first platform, then step on the button to reveal a grapple point. Stay on the button and your partner will grapple up onto the ledge and pull the lever, revealing LEGO pieces. Build them into a grapple point, then use it to reach the platform. Use the next grapple point to reach the top of the bunker. Destroy the hatches to reveal LEGO pieces, then build them into tiles. Push the object off the roof of the bunker to reveal LEGO pieces. Drop down and build them into an Astromech panel. Unfortunately, R2 can’t get up here yet. Drop down off the ledge the bunker is on, then build the LEGO pieces into a ramp, allowing R2 to reach the panel. Use the Astromech panel to open the door, then head inside.
Part 5 – Bunker Interior
Head to the right and down the slope. Shoot the panel on the door a few times to open it, then head into the main room. The objective here is to shut off the shield so we can plant bombs in the reactor. Pull the lever on the left. This will shut off one of the power sources. There are three more to shut off. Shoot the panel on the door on the left a few times to open it, then head inside. You need to get 3PO onto the upper ledge, and to do it you’ll need to construct a ramp. Step on the button on the left to extend one platform. Destroy the wall panels to the left of the TIE Interceptor model you can build to reveal another button. Step on it to extend the second platform. Destroy the grey node to the right of the TIE Interceptor model you can build to reveal another button. Step on it to extend the third platform. Once all three platforms are extended, hop up them to reach the upper ledge. Destroy the wall panels to reveal a small generator. Push it into the slot on the left to turn the platforms into a ramp, allowing 3PO to reach the upper ledge. Use the Protocol panel to lower the shields around the purple lever, then pull it to shut off another power source. Head back into the main room, then head to the right. Shoot the panel on the door a few times to open it, then continue into the room. Use the Astromech panel to power a lift. Catch a ride onto the upper ledge, then head left. Hover across the gap to reach another ledge, then use the Astromech panel to reveal LEGO pieces. Build them into a travel chute, then use it to reach the room with the lever. Pull it to shut off one of the power sources. Crawl back through the travel chute, then ride the lift back up to the ledge. Hop across the gap to the right, then build the LEGO pieces into a small bridge, allowing 3PO to cross. Use the Protocol panel to lower the shield around the lever, then pull it to shut off the final power source. Once all four power sources have been destroyed, two levers will appear in the main room. Pull them to shut off the shields, then head inside the reactor and build the four piles of LEGO pieces into bombs to complete the level.
Unlocked Characters: Han Solo (Endor), Wicket, Ewok (34,000)
The Battle of Endor – Free Play Mode
Required Abilities: Double Jump, Force, Grapple, Hover, Protocol, Sith Force, Small, Thermal Detonator
Part 1 – Bright Tree Village
Canister 1


Canister 2


Canister 3


Part 3 – Forest Floor
Canister 4


Canister 5


Canister 6


Part 4 – Bunker Battle
Canister 7


Canister 8


The Battle of Endor – Free Play Mode cont.
Part 5 – Bunker Interior
Red Power Brick


Canister 9


Canister 10

Minikit Model: AT-ST
Red Power Brick Extra: Super Ewok catapult (25,000)
The Battle of Endor – Challenge Mode
Required Abilities: Force, Grapple
Part 1 – Bright Tree Village
Blue Canister 1


Blue Canister 2

Blue Canister 3

Part 2 – Forest Descent
Blue Canister 4

Part 3 – Forest Floor
Blue Canister 5


Blue Canister 6

Part 4 – Bunker Battle
Blue Canister 7

Blue Canister 8

Blue Canister 9

Part 5 – Bunker Interior
Blue Canister 10

Jedi Destiny – Story Mode
As the battle between Imperial and Rebel forces rages around the second Death Star, Luke Skywalker confronts Darth Vader – his father, once Anakin Skywalker.
From boy slave on Tatooine, to hero of the Clone Wars, to Sith Lord feared throughout the galaxy, Anakin Skywalker’s path has been dark indeed.
In front of Emperor Palpatine, his villainous master, Vader must now face his son, and reclaim his fate….
Enemies: Imperial Guard
Boss: The Emperor
Starting Characters: Luke Skywalker (Jedi), Darth Vader
True Jedi: 35,000

Part 1 – The Emperor’s Throne Room
This entire level is one long boss fight against The Emperor. You’ll start off by dueling him as normal. Take him down four hearts and he’ll hit you with Force Lightning. At this point, switch to your partner and walk up to Palpatine to score a free hit. If you wait too long, your partner will be damaged and you’ll have to wait for him to use Force Lightning again. Once he’s down five hearts, he’ll hop away and flee to the left. Some Imperial Guards will be sent in, so dispose of them (they take 5 hits to defeat, or you can just Force Choke them with Vader) and head down the steps away from the throne. Some LEGO pieces will be knocked down. Build them into a part of a fan, then Sith Force the LEGO pieces on the wall to reveal more LEGO pieces. Build them into part of the fan. Sith Force the part with the blade and Luke will Force the other, creating a fan. Ride the current onto the catwalk, then continue to the left. Approach the panels and Palpatine will electrocute them. Every few seconds, a path will appear of unelectrocuted panels. Quickly cross the panels when it is safe to do so. Keep track of the panels that are always safe, as you can’t cross the panels in one go. Once you make it to Palpatine, he will stop electrocuting the panels and jump to the center. Duel him to take out one heart, then switch to your partner when he uses Force Lightning to take out another. Repeat this process to take out four more hearts.
He will then leap off the platform and retreat again. Drop down and head to the center of the area, then continue to the left. You’ll find Palpatine again, so duel him some more to take out two more hearts. He will then jump up to the upper ledge. Some LEGO pieces will appear near the lift on the left. Build them into a generator, then Force one set of lights. Your partner will Force the other, lifting you both up to the ledge. Hop onto the ledge and make sure your partner joins you. Hop across the gap and duel Palpatine to take out another heart. Hop back to the left and take out another heart. He will then jump back down. Drop down and duel him to take out two more hearts. He will retreat again, so head back to the center of the room. Head to the left and you’ll find him. Take out his last heart to end the level.
Unlocked Characters: Imperial Guard (45,000), The Emperor (275,000)
You will also unlock Darth Vader if you haven’t already
Jedi Destiny – Free Play Mode
Required Abilities: Astromech, Bounty Hunter, Double Jump, Force, Grapple, Hover, Imperial, Protocol, Sith Force, Small, Thermal Detonator
Part 1 – The Emperor’s Throne Room
Red Power Brick


Canister 1

Canister 2

Canister 3


Canister 4


Canister 5


Canister 6


Canister 7


Jedi Destiny – Free Play Mode cont.
Canister 8


Canister 9


Canister 10


Minikit Model: Imperial Shuttle
Red Power Brick Extra: Score x10 (20,000,000)
Jedi Destiny – Challenge Mode
Required Abilities: Bounty Hunter, Double Jump, Force, Grapple, Imperial, Sith Force, Small, Thermal Detonator
I recommend dueling Palpatine as you progress through collecting the Blue Canisters. One of the Blue Canisters requires you to be at a certain stage in the boss fight, and it can be annoying to backtrack.
Part 1 – The Emperor’s Throne Room
Blue Canister 1

Blue Canister 2

Blue Canister 3

Blue Canister 4

Blue Canister 5

Blue Canister 6

Blue Canister 7


Blue Canister 8

Blue Canister 9


Blue Canister 10

Into the Death Star – Story Mode
With help from the Ewoks, the Rebels have finally managed to destroy the Death Star shield generator on Endor.
In the sky above, the Rebel fleet has come under intense fire from Imperial craft and the Death Star itself. Many ships have been destroyed.
But General Lando Calrissian is now able to lead the final assault on the Empire’s ultimate weapon, and pilot the Millennium Falcon deep into its dark heart….
Enemies: TIE Fighter, TIE Interceptor, TIE Bomber
Starting Vehicles: Millenium Falcon
True Jedi: 35,000

Part 1 – Star Destroyer Attack
There are four Star Destroyers that you need to destroy. To do so, you need to destroy the two torpedo targets on them. There are TIE Bombers flying around with torpedoes. Destroy the TIE Bombers and steal their torpedoes, then use them to destroy the torpedo targets on the Star Destroyers. Destroy all eight torpedo targets to trigger a cutscene.
Part 2 – Death Star Interior
You are now inside the Death Star. Fly down the path and you’ll eventually find your path blocked by a shield. Grab torpedoes from the generator back up the path and use them to destroy the four torpedo targets. Once the shield is down, continue on.
Part 3 – Reactor Approach
Head down the path and you’ll once again find your path blocked. This time there will be two turrets that shoot missiles at you. Use torpedoes to destroy them. Once both are destroyed, the shield will deactivate, allowing you to enter the reactor.
Part 4 – Reactor
There are several tubes feeding power to the reactor. Fly up to each of the panels on the wall and they will open up. Shoot each of them to destroy them, but be careful, as flying too close will stun you for a few seconds. Once all of the panels are destroyed, the reactor will be exposed. Shoot it to reveal the core, then use a torpedo to destroy it. There will be torpedoes launched out of the core every few seconds if you need one. Once the torpedo target is destroyed, exit the reactor.
Part 5 – Death Star Escape
All you have do is avoid the fire. Just keep flying straight ahead and spamming your weapons to clear the path ahead. There are three separate “areas” of this, but they are all pretty much the same. Clear the three areas to end the level.
Unlocked Characters: Admiral Ackbar (33,000)
You will also unlock the Millenium Falcon if you haven’t already
Into the Death Star – Free Play Mode
Required Abilities: TIE
Part 1 – Star Destroyer Attack
Canister 1

Canister 2

Part 2 – Death Star Interior
Canister 3


Canister 4

Part 3 – Reactor Approach
Canister 5

Canister 6

Part 4 – Reactor
Canister 7

Red Power Brick


Part 5 – Death Star Escape
Canister 8

Canister 9

Canister 10

Minikit Model: TIE Interceptor
Red Power Brick Extra: Infinite torpedoes (25,000)
Into the Death Star – Challenge Mode
Part 1 – Star Destroyer Attack
Blue Canister 1

Blue Canister 2

Part 2 – Death Star Interior
Blue Canister 3

Blue Canister 4

Part 3 – Reactor Approach
Blue Canister 5

Blue Canister 6

Part 4 – Reactor
Blue Canister 7

Part 5 – Death Star Escape
Blue Canister 8

Blue Canister 9

Blue Canister 10

Episode VI Super Story
This is the most difficult Super Story. Return of the Jedi has some long levels, with some taking around 10 minutes to complete even if you’re rushing through the whole thing. The first four levels are what you need to focus on rushing through, as it usually take me around 40 minutes to complete them all. Don’t focus on studs too much, as there are plenty for you to collect without trying. If you can complete this Super Story, you are truly a Super Story master!
Below I break down each level in terms of stud collection, time to complete, what to look out for, etc.
Jabba’s Palace: This level is decently long, usually taking me between 8-10 minutes to complete. Don’t worry about collecting studs, but take advantage of the Power Ups where available to increase your stud total. Don’t worry about closing the Gamorrean tubes, unless they are getting annoying and keep knocking off your helmet. Focus on the objective and don’t make unnecessary detours and you’ll be fine.
The Great Pit of Carkoon: This level is about the same length as the previous, so just focus on completing the objective. Playing as a blaster character and spamming your fire at the various parts of the skiff and barge is a great way to make some extra studs. Opening the way into the barge can be annoying, as it takes forever to Force the panels up. Try to position yourself behind your partners so they take the blaster fire for you, allowing you to Force the panels in peace.
Speeder Showdown: This is the longest level in Return of the Jedi. Even when rushing through it, it will still take at least 10 minutes to complete. Don’t worry about studs and focus on destroying the speeders and white structures as fast as you can. Once you get in the AT-STs, just start firing at the structures and ignore the stormtroopers. On the landing pad, you can find a Power Up by destroying one of the fences by the AT-AT, which can really boost your stud total. However, your main focus should be completing this level.
The Battle of Endor: This is about as long as the previous level, so don’t stall too much. Just keep shooting and you will destroy lots of plants and collect a few studs in the process. Once you hop in the AT-ST, just march straight up to the bunker and focus on opening the way inside. There is lots of exploring to do in this level, but unfortunately you don’t have the time. After completing this level, you will only have about 10-20 minutes to work with.
Jedi Destiny: Finally, a short level. Make short work of the duel by constantly down stabbing (jump then attack) Palpatine. Force Choke the Imperial guards, or just ignore them if you can. If you still need studs, there are plenty of blues lying around if you have the time to collect them. Make sure you have at least 75,000 studs before completing this level.
Into the Death Star: This level is another short one, and a good source of studs. The first section can be annoying, as I swear there are fewer TIE Bombers with torpedoes flying around. Focus on destroying each of the torpedo targets to progress to the next area. While flying out the Death Star, just spam your weapons and you’ll collect 25,000+ studs, although by that point, you should already be over your total.
Episode VI Character Bonus – Endor
While the Rebel Alliance struggles heroically with the oppressive Empire, and Luke Skywalker moves closer to his epic destiny, daily life goes on across the galaxy.
In the battle-torn forest of Endor, intrepid adventurers compete to collect one million LEGO Studs in the fastest time possible.
It’s the desperate, ruthless life of a world in turmoil….
This Character Bonus is rather easy. There are lots of enemies to defeat for studs (with lots of the officers dropping purple studs). You can destroy the silver objects for Power Ups, as well as the blue nodes (which are a lot more plentiful). Thermal detonators are great for clearing large groups of enemies if you get overwhelmed (just try not to get caught in the blast). Build the LEGO pieces into gears to raise up the bridges, giving you access to new platforms to devastate.
If you fail to complete this level within 5 minutes, you will not receive the Gold Brick. You will not get to keep the studs you collect in this level.
Episode VI Minikit Bonus – Endor
While the Rebel Alliance struggles heroically with the oppressive Empire, and Luke Skywalker moves closer to his epic destiny, daily life goes on across the galaxy.
In the battle-torn forest of Endor, intrepid adventurers compete to collect one million LEGO Studs in the fastest time possible.
It’s the desperate, ruthless life of a world in turmoil….
This Minikit Bonus is pretty easy. There are several small patches of forest in this area, and each is filled with plants to destroy. Destroy the white structures with a torpedo to reveal a Power Up, which you can use to really rack up that stud total. Once you have devastated one section of forest, continue on to the next. There will be plenty of AT-ATs and AT-STs bothering you, so make sure to destroy them for studs as well.
If you fail to complete this level within 5 minutes, you will not receive the Gold Brick. You will not get to keep the studs you collect in this level.
Pod Race (Original)
Queen Amidala and her Jedi protectors have fled Naboo, heading for Coruscant. They plan to inform the Galactic Senate of the Trade Federation invasion.
However, the Royal Starship’s hyperdrive is damaged in the escape, and they have been forced to land on the remote planet of Tatooine for repairs….
This Bonus level can be played after collecting 10 Gold Bricks. This level is the version of Mos Espa Pod Race from the original LEGO Star Wars: The Videogame. This level is dramatically different from the Story version in this game. Allow me to explain.
The basic premise is this: you need to beat a certain Podracer to the end of each section. Each lap is divided into three sections. The first is from the starting line to the end of the crystal cave. The second is from the Tusken canyon to the start of the straightaway. The third is the straightaway that leads to the finish line. If you do not beat the designated podracer (who will be marked with a green arrow) to the end of the section, you “die” and have to retry that section. There will be a countdown on the screen that tells you how long you have to reach the checkpoint (it counts down from 10). If you lose your hearts, you die and have to restart the section. For this reason, if you start a section with 1 or 2 hearts, I recommend deliberately crashing so you can try with full health.
Unlike the Story version of Mos Espa Pod Race, you will have to accelerate manually. Otherwise, you’ll move at a snail’s pace. Hold the “jump” button to accelerate and never slow down. Speed boosts are your friend here, as you pretty much need to nail every single one (especially in the final section of each lap) to pass a section.
If you have to retry a section, you will still have to view the cutscene(s) that pertain to each section. You will probably not have a lot of studs (if you have any at all) when you complete this level. Completing this level before playing the Mos Espa Pod Race Story level will not unlock Anakin’s Pod or Sebulba’s Pod.
I’ll give you a quick rundown of what to expect in each lap below.
Lap 1: The first section is rather straightforward. Hitting the service ramp provides a good boost. There are some tight turns in the cave, but don’t worry about them and just fly on through. Your first pass through the Tusken canyon is rather easy, just make sure to avoid the blasterfire, as the Tuskens seem more accurate in this version than in the Story version. During the home stretch, watch out for the bombs conveniently placed next to the speed boosts.
Lap 2: The first section of this lap sees the death of Mawhonic. Try to avoid the falling rock, as it can kill you. Note that if you keep having to retry this section (as I did for some reason), you’ll have to see Mawhonic die again and again. The Tusken canyon will have a nice rock slide, and colliding with a rock will give you instant death. I find it easiest to avoid this by hugging the left side of the canyon, as the rocks don’t really make it to that side. The third section is the same as in the first lap.
Lap 3: Since there was a massive explosion in the previous lap, this lap sees you taking a detour. The rocks are still in the Tusken canyon, and although they’re not moving this time, they are still deadly. Colliding with a rock will kill you, so focus on finding a path through the rocks. I usually hug the left, but there is a relatively clear path through the center too. As you enter the final home stretch, you’ll see a quick cutscene of Anakin and Sebulba. You gotta beat Sebulba to the end, a task which is made harder by the bombs he is throwing at you. Don’t follow directly behind him, as you’ll get bombed. Watch out for the rolling bombs and beat Sebulba to the end to complete the level.
Anakin’s Flight
As the battle for Naboo rages on the planet’s surface, a desperate assault has been launched on the Trade Federation battleships above.
Anakin Skywalker finds himself at the controls of an N-1 Starfighter, heading for the Droid Control Ship….
This Bonus level requires 30 Gold Bricks to unlock. This was intended to be a level in the original LEGO Star Wars: The Videogame, but was scrapped. In this level, you take control of Anakin piloting a Naboo Starfighter as you attempt to destroy the Trade Federation droid control ship.

Enemies: Vulture Droid, MTT, AAT
Starting Vehicles: Naboo Starfighter
Part 1 – Flagship Exterior
Uh oh. Didn’t think you would end up here did ya Anakin? Better help out then. To destroy the ship we need to reach the reactor, which is inside. The way inside is currently blocked by a hatch. Scattered along the length of the battleship are four torpedo targets. Grab torpedoes from the generator and use them to destroy the targets. Once all four targets are destroyed, the hatch to the interior of the ship will be opened. Fly inside.
Part 2 – Reactor Approach
You are now inside the Trade Federation Flagship, and you gotta reach the core. Fly down the path and you will eventually reach a hanger. The door out of here is shut. To open it, shoot the red target on the left and use a torpedo to destroy the target on the right. You can find torpedoes by destroying some of the MTTs and AATs shooting at you. Once that door is open, continue down the path to reach another hangar. This time there are four targets to destroy: two by the door and one on each side of the room. Shoot the two red targets and torpedo the two purple targets to open the door. Continue flying down the path to enter the reactor.
Part 3 – The Reactor
Now that we’ve reached the reactor, time to destroy it. Shoot the two red targets on the walls to lower the shield around the reactor. This will allow you to destroy the three torpedo targets. There is a torpedo generator on the right side of this area. Once the three torpedo targets are destroyed, the reactor core will be exposed. There are 10 small blue domes for you to destroy. Sometimes the shield will extend outward and rotate around. During this time you will be unable to target the cores. When the shield goes down, destroy as many cores as you can until the shield appears again. Destroy all the cores to complete the level.
Unlocked Vehicles: Naboo Starfighter
Gunship Cavalry (Original)
The Grand Army of the Republic has been called into action. Led by Mace Windu and Yoda, the new Clone forces clash with the Separatist droid armies on the planet Geonosis.
Obi-Wan Kenobi and Anakin Skywalker engage with the enemy, as they pursue Count Dooku in their Republic attack gunship….
This Bonus level can be played after collecting 10 Gold Bricks. This level is the version of Gunship Cavalry from the original LEGO Star Wars: The Videogame. This level is dramatically different from the Story version in this game. Allow me to explain.
The big difference is that you are on rails. This means that the camera will slowly pan to the right, restricting your range of motion to what is visible on the screen. You also can’t rotate your ship in any way, as you are always facing the top right corner. Because of this, try not to let enemies behind you, as you can’t shoot back to destroy them, while they can shoot at you.
The studs and hearts from the objects/enemies you destroy will automatically come to you, so you don’t have to worry about that. However, if you lose your hearts, you will have to restart from the last checkpoint. The first area has one checkpoint (after the first shield you deactivate) and dying in the second area will just restart that section.
The first section sees you moving through the canyons of Geonosis, blasting Hailfire and Spider Droids. Be careful not to fly into the large holes or lasers. I suggest keeping your gunship close to the center of the screen so you can see your surroundings. Eventually, you will come across a ray shield. Instead of bombing the generators like you do in the Story level, here you can simply shoot them. Destroy the two blue generators to lower the shield. Passing through the first shield will trigger the checkpoint, and dying at any point after this will respawn you here. Continue flying through the canyons and lower the next shield. Fly through it.
This next section is also really different from the Story level. The basic premise is the same, you have to destroy the 12 blue generators to prevent the ship from taking off. The difference is there are no bombs, and you have a time limit (I believe it is 1 minute). You’ll have to fly around and shoot (not bomb) the laser things to lower the shields around the generators. Destroy all 12 within the time limit to complete the level.
Completing this level before the Story version of Gunship Cavalry will not unlock the Republic Gunship.
A New Hope
It is a period of civil war. Rebel spaceships, striking from a hidden base, have won their first victory against the evil Galactic Empire.
Princess Leia Organa now has the blueprints for the Empire’s new weapon, the Death Star. But her ship is intercepted and boarded by Darth Vader and his Stormtroopers….
This level requires 20 Gold Bricks to unlock. This level was a bonus level in the original LEGO Star Wars: The Videogame, and served as a teaser for LEGO Star Wars II: The Original Trilogy. This level sees you playing through the beginning scene of A New Hope through the eyes of the Imperials.

Enemies: Rebel Trooper
Starting Characters: Darth Vader, Stormtrooper
Added Characters: C-3PO
You are onboard the Tantive IV looking for Princess Leia. Head forward and you’ll find your path blocked by a Protocol panel. We need to find a droid to open it. Head to the left and through the door at the end of the hallway. You’ll find C-3PO in this room, trapped inside some weird container. He is surrounded by buttons. Destroy the covering on each button, then step on each button in quick succession to raise the container, adding 3PO to your party. Head back out of the room and down the hallway, then use the Protocol panel to open the door. Before continuing through the door, you can go down the hallway on the right where you can spell “LEGO” by Forcing blocks (like you do in LEGO City, although, interestingly, the “G” is made differently) Continue on, then use the next Protocol panel to open the door. Continue along through the ship and you’ll come upon another fork in the road. You need to go to the right, but if you go to the left you can enter a bonus room. Here, you can Force the three piles of LEGO pieces to create a motor. Force it and you’ll power the fans in the corners of the room, allowing you to ride the air current and collect some blue studs. The motor doesn’t last long however, so you’ll need to re-Force it if you want to collect all the studs. Head down the hallway on the right and destroy the canisters at the end to reveal a Protocol panel. Use it to open the door. Approach the Princess to complete the level.
Completing this level will unlock both C-3PO and Darth Vader if you haven’t already unlocked them.
LEGO City
In an infinite universe, all things are possible.
The epic struggle of the Skywalker family sends turmoil throughout the Force.
And in ANOTHER galaxy far, far away, though, echoes of this drama live on, and a new world awakens….
This bonus level can be unlocked after collecting 10 Gold Bricks. This was a bonus level in the original LEGO Star Wars: The Videogame. It is your standard collect 1 million studs level. While you are timed, there is no time limit.
There are many things you can do to collect 1 million studs. The most basic things you can do are simple: shoot, build and Force everything you can. There are several citizens walking around that can be defeated. There are piles of seeds you can build into the ground. There are windows and doors to Force. There are also more “complicated” things you can do for studs. I’ll explain those below.
Build an AT-ST


Restore power to the lights

Build and ride a tractor


Destroy a house

Turn the merry-go-round


Build a Wookiee Ornithopter


Reveal some hidden flowers


Build and ride a milk truck


Ride a Tauntaun

Force the windows and doors

LEGO City cont.
Build a miniature house


Reveal a hidden house

Build and ride an ATV


Release some prisoners

Spell “LEGO”


Once you collect 1 million studs, the level will end and your best time will be recorded. Unfortunately, you don’t get to keep these 1 million studs. If you have done everything on this list and still don’t have 1 million studs, run around and make sure you have defeated the enemies and shot and destroyed everything. I usually miss destroying a door or a plant somewhere. The GNK droids can also be destroyed with a perfect lightsaber combo.
New Town
In an infinite universe, all things are possible.
The epic struggle of the Skywalker family sends turmoil throughout the Force.
And in ANOTHER galaxy far, far away, though, echoes of this drama live on, and a new world awakens….
This bonus level can be unlocked after collecting 50 Gold Bricks. It is your standard collect 1 million studs level. While you are timed, there is no time limit.
There are many things you can do to collect 1 million studs. The most basic things you can do are simple: shoot, build and Force everything you can. There are several citizens walking around that can be defeated. There are piles of seeds you can build into the ground. There are windows and doors to Force. There are also more “complicated” things you can do for studs. I’ll explain those below.
Reveal 19 flowers


Repair the steeple

Destroy a house

Send the merry-go-round into space


Take a boat out on the water


Take out the ducks

Build a milk truck


Force a hidden trophy


Build a tractor


Restore the power


Rescue a cat


Ride a Tauntaun

Ride a rollercoaster


Reveal a hidden house

New Town cont.
Build a miniature house

Build an ATV

Shoot hoops

Spell LEGO


Once you collect 1 million studs, the level will end and your best time will be recorded. Unfortunately, you don’t get to keep these 1 million studs. If you have done everything on this list and still don’t have 1 million studs, run around and make sure you have defeated the enemies and shot and destroyed everything. I usually miss destroying a door or a plant somewhere. The GNK droids can also be destroyed with a perfect lightsaber combo.
Bounty Hunter Mission 1 – Qui-Gon Jinn
The vile gangster Jabba the Hutt plans to kidnap leading figures across the galaxy, threatening to hand them over to Imperial forces unless a ransom is paid.
A band of vicious Bounty Hunters has come together to execute Jabba’s scheme.
Their first target: the Jedi Qui-Gon Jinn, currently engaged in a secret mission above the planet Naboo.
Level: Negotiations


Bounty Hunter Mission 2 – Queen Amidala
The vile gangster Jabba the Hutt plans to kidnap leading figures across the galaxy, threatening to hand them over to Imperial forces unless a ransom is paid.
Now the royal leader of Naboo has become a target of the Hutt’s evil ambition.
A band of vicious Bounty Hunters has come together to execute Jabba’s scheme, and capture Queen Amidala.
Level: Escape from Naboo


Bounty Hunter Mission 3 – Jar Jar Binks
The vile gangster Jabba the Hutt plans to kidnap leading figures across the galaxy, threatening to hand them over to Imperial forces unless a ransom is paid.
For once, though, Jabba’s information is faulty.
On the planet Naboo, he has sent his Bounty Hunters to find and capture the utterly inconsequential Gungan, Jar Jar Binks.
Level: Invasion of Naboo


Bounty Hunter Mission 4 – Mace Windu
The vile gangster Jabba the Hutt plans to kidnap leading figures across the galaxy, threatening to hand them over to Imperial forces unless a ransom is paid.
Even the noble Jedi have become targets of the Hutt’s evil ambition.
A band of vicious Bounty Hunters has come together to execute Jabba’s scheme. Their next target: Mace Windu, currently on Geonosis…
Level: Droid Factory


Bounty Hunter Mission 5 – Kit Fisto
The vile gangster Jabba the Hutt plans to kidnap leading figures across the galaxy, threatening to hand them over to Imperial forces unless a ransom is paid.
Even the noble Jedi have become targets of the Hutt’s evil ambition.
A band of vicious Bounty Hunters has come together to execute Jabba’s scheme. Their next target: Kit Fisto, currently on Kamino….
Level: Discovery on Kamino

Bounty Hunter Mission 6 – Luminara
The vile gangster Jabba the Hutt plans to kidnap leading figures across the galaxy, threatening to hand them over to Imperial forces unless a ransom is paid.
Even the noble Jedi have become targets of the Hutt’s evil ambition.
A band of vicious Bounty Hunters has come together to execute Jabba’s scheme. Their next target: Luminara Unduli, in the Geonosian battle arena…
Level: Jedi Battle

Bounty Hunter Mission 7 – Ki-Adi Mundi
The vile gangster Jabba the Hutt plans to kidnap leading figures across the galaxy, threatening to hand them over to Imperial forces unless a ransom is paid.
Even the noble Jedi have become targets of the Hutt’s evil ambition.
A band of vicious Bounty Hunters has come together to execute Jabba’s scheme. Their next target: Ki-Adi Mundi, commanding a Republic Attack Cruiser….
Level: Chancellor in Peril


Bounty Hunter Mission 8 – Rebel Trooper
The vile gangster Jabba the Hutt plans to kidnap leading figures across the galaxy, threatening to hand them over to Imperial forces unless a ransom is paid.
The greedy mercenaries know no limits in their pursuit of bounty.
On the planet Kashyyyk, they will even pursue a lone Rebel Trooper far away from home.
Level: Defense of Kashyyyk


Bounty Hunter Mission 9 – Shaak Ti
The vile gangster Jabba the Hutt plans to kidnap leading figures across the galaxy, threatening to hand them over to Imperial forces unless a ransom is paid.
Even the noble Jedi have become targets of the Hutt’s evil ambition.
A band of vicious Bounty Hunters has come together to execute Jabba’s scheme. Their next target: Shaak Ti, in the Jedi Temple…
Level: Ruin of the Jedi


Bounty Hunter Mission 10 – Commander Cody
The vile gangster Jabba the Hutt plans to kidnap leading figures across the galaxy, threatening to hand them over to Imperial forces unless a ransom is paid.
A band of vicious Bounty Hunters has come together to execute Jabba’s scheme.
On the planet Utapau, Commander Cody’s high status in the Republic military will make him a valuable prize…
Level: General Grievous


Bounty Hunter Mission 11 – R2-D2
The vile gangster Jabba the Hutt plans to kidnap leading figures across the galaxy, threatening to hand them over to Imperial forces unless a ransom is paid.
Naturally, the evil Hutt intends to take the ransom money, trade his prisoners to the Imperials regardless, and pocket a double bounty.
A band of vicious Bounty Hunters has come together to execute Jabba’s scheme. Their first target, R2-D2, a lowly droid made valuable by the secret information he contains high above Tatooine on the Rebel Blockade Runner….
Level: Secret Plans


Bounty Hunter Mission 12 – Obi-Wan Kenobi
The vile gangster Jabba the Hutt plans to kidnap leading figures across the galaxy, threatening to hand them over to Imperial forces unless a ransom is paid.
Naturally, the evil Hutt intends to take the ransom money, trade his prisoners to the Imperials regardless, and pocket a double bounty.
A band of vicious Bounty Hunters has come together to execute Jabba’s scheme. Their next target: the legendary Jedi Knight Obi-Wan Kenobi, now an old man hidden somewhere on the planet Tatooine….
Level: Through the Jundland Wastes


Bounty Hunter Mission 13 – Chewbacca
The vile gangster Jabba the Hutt plans to kidnap leading figures across the galaxy, threatening to hand them over to Imperial forces unless a ransom is paid.
Naturally, the evil Hutt intends to take the ransom money, trade his prisoners to the Imperials regardless, and pocket a double bounty.
A band of vicious Bounty Hunters has come together to execute Jabba’s scheme. Their next target: the courageous Wookiee Chewbacca, last seen in the shady alleys of Mos Eisley Spaceport…
Level: Mos Eisley Spaceport


Bounty Hunter Mission 14 – Princess Leia
The vile gangster Jabba the Hutt plans to kidnap leading figures across the galaxy, threatening to hand them over to Imperial forces unless a ransom is paid.
Naturally, the evil Hutt intends to take the ransom money, trade his prisoners to the Imperials regardless, and pocket a double bounty.
A band of vicious Bounty Hunters has come together to execute Jabba’s scheme. Their next target: the Alderaan Senator Princess Leia, currently a guest of Darth Vader on the mighty Death Star battle station….
Level: Rescue the Princess


Bounty Hunter Mission 15 – Admiral Ackbar
The vile gangster Jabba the Hutt plans to kidnap leading figures across the galaxy, threatening to hand them over to Imperial forces unless a ransom is paid.
Naturally, the evil Hutt intends to take the ransom money, trade his prisoners to the Imperials regardless, and pocket a double bounty.
A band of vicious Bounty Hunters has come together to execute Jabba’s scheme. Their next target: the Rebel Commander Admiral Ackbar, stationed on the Rebel base of Hoth….
Level: Escape from Echo Base


Bounty Hunter Mission 16 – Yoda
The vile gangster Jabba the Hutt plans to kidnap leading figures across the galaxy, threatening to hand them over to Imperial forces unless a ransom is paid.
Naturally, the evil Hutt intends to take the ransom money, trade his prisoners to the Imperials regardless, and pocket a double bounty.
A band of vicious Bounty Hunters has come together to execute Jabba’s scheme. Their next target: Yoda, a Jedi Master forced into hiding when the Republic collapsed, recently spotted on the forest moon of Endor….
Level: The Battle of Endor


Bounty Hunter Mission 17 – C-3PO
The vile gangster Jabba the Hutt plans to kidnap leading figures across the galaxy, threatening to hand them over to Imperial forces unless a ransom is paid.
Naturally, the evil Hutt intends to take the ransom money, trade his prisoners to the Imperials regardless, and pocket a double bounty.
A band of vicious Bounty Hunters has come together to execute Jabba’s scheme. Their next target: a humble protocol droid whose knowledge of Rebel personnel makes him a valuable asset – C-3PO, last seen in Cloud City….
Level: Betrayal over Bespin


Bounty Hunter Mission 18 – Lando Calrissian
The vile gangster Jabba the Hutt plans to kidnap leading figures across the galaxy, threatening to hand them over to Imperial forces unless a ransom is paid.
Naturally, the evil Hutt intends to take the ransom money, trade his prisoners to the Imperials regardless, and pocket a double bounty.
A band of vicious Bounty Hunters has come together to execute Jabba’s scheme. Their next target: Lando Calrissian, the Baron-Administrator of Cloud City, with known Rebel sympathies….
Level: Betrayal over Bespin


Bounty Hunter Mission 19 – Luke Skywalker
The vile gangster Jabba the Hutt plans to kidnap leading figures across the galaxy, threatening to hand them over to Imperial forces unless a ransom is paid.
Naturally, the evil Hutt intends to take the ransom money, trade his prisoners to the Imperials regardless, and pocket a double bounty.
A band of vicious Bounty Hunters has come together to execute Jabba’s scheme. Their next target: Luke Skywalker, the great Jedi hero of the Alliance, last seen in the shady alleys of Mos Eisley Spaceport….
Level: Mos Eisley Spaceport


Bounty Hunter Mission 20 – Han Solo
The vile gangster Jabba the Hutt plans to kidnap leading figures across the galaxy, threatening to hand them over to Imperial forces unless a ransom is paid.
Naturally, the evil Hutt intends to take the ransom money, trade his prisoners to the Imperials regardless, and pocket a double bounty.
A band of vicious Bounty Hunters has come together to execute Jabba’s scheme. Their final target: Han Solo, a former smuggler turned Alliance hero, stationed on the Rebel base of Hoth….
Level: Escape from Echo Base


Characters
There are a grand total of 126 characters (not including the 2 custom characters) that you can play as in this game. I have listed them all below in the order that they appear on the character selection screen. Next to each character I list their weapon and abilities. I also list how to unlock them and any other interesting things about them. I have also linked each character to their Wookiepedia page. If you would like to learn more about a character, simply click on their name to be taken to Wookiepedia.

Qui-Gon Jinn[starwars.fandom.com]
Weapon: Lightsaber
Abilities: Double Jump, Force
How To Unlock: Create a new game


Obi-Wan Kenobi[starwars.fandom.com]
Weapon: Lightsaber
Abilities: Double Jump, Force
How To Unlock: Create a new game


TC-14[starwars.fandom.com]
Weapon: None
Abilities: Protocol
How To Unlock: Complete Negotiations


Being a droid, TC-14 will not be targeted by enemies
Jar Jar Binks[starwars.fandom.com]
Weapon: None
Abilities: High Jump
How To Unlock: Complete Invasion of Naboo


Queen Amidala[starwars.fandom.com]
Weapon: Blaster, Melee
Abilities: Grapple, Sharp Shoot
How To Unlock: Complete Escape from Naboo


Captain Panaka[starwars.fandom.com]
Weapon: Blaster, Melee
Abilities: Grapple, Sharp Shoot
How To Unlock: Complete Escape from Naboo


Padme (Battle)[starwars.fandom.com]
Weapon: Blaster, Melee
Abilities: Grapple, Sharp Shoot
How To Unlock: Complete Retake Theed Palace


R2-D2[starwars.fandom.com]
Weapon: Zapper
Abilities: Astromech, Hover
How To Unlock: Complete either Retake Theed Palace, Droid Factory, Chancellor in Peril, Secret Plans, Dagobah, or Jabba’s Palace


Being a droid, R2-D2 will not be targeted by enemies
Anakin Skywalker (Boy)[starwars.fandom.com]
Weapon: None
Abilities: Small
How To Unlock: Complete Retake Theed Palace


Obi-Wan Kenobi (Jedi Master)[starwars.fandom.com]
Weapon: Lightsaber
Abilities: Double Jump, Force
How To Unlock: Complete Discovery on Kamino


R4-P17[starwars.fandom.com]
Weapon: Zapper
Abilities: Astromech, Hover
How To Unlock: Complete Discovery on Kamino


Being a droid, R4-P17 will not be targeted by enemies
Anakin Skywalker (Padawan)[starwars.fandom.com]
Weapon: Lightsaber
Abilities: Double Jump, Force
How To Unlock: Complete Droid Factory


One of the things I like about this character is that his lightsaber color changes in the story like it does in Episode II. He will have a blue lightsaber in Droid Factory and a green lightsaber Jedi Battle and Count Dooku. When you play as him in any other mode however, his lightsaber will be blue.
Padme (Geonosis)[starwars.fandom.com]
Weapon: Blaster, Melee
Abilities: Grapple, Sharp Shoot
How To Unlock: Complete Droid Factory


C-3PO[starwars.fandom.com]
Weapon: None
Abilities: Protocol
How To Unlock: Complete either Droid Factory, Secret Plans, Escape from Echo Base or Jabba’s Palace


Being a droid, C-3PO will not be targeted by enemies
Mace Windu[starwars.fandom.com]
Weapon: Lightsaber
Abilities: Double Jump, Force
How To Unlock: Complete Jedi Battle


Padme (Clawed)[starwars.fandom.com]
Weapon: Blaster, Melee
Abilities: Grapple, Sharp Shoot
How To Unlock: Complete Jedi Battle


Yoda[starwars.fandom.com]
Weapon: Lightsaber
Abilities: Double Jump, Force
How To Unlock: Complete either Jedi Battle, Defense of Kashyyyk or Dagobah


Despite being small, Yoda cannot crawl through travel chutes. He also will move at a snail’s pace when his lightsaber is not ignited, so I suggest you keep it ignited at all times.
Obi-Wan Kenobi (Episode III)[starwars.fandom.com]
Weapon: Lightsaber
Abilities: Double Jump, Force
How To Unlock: Complete Chancellor in Peril


Anakin Skywalker (Jedi)[starwars.fandom.com]
Weapon: Lightsaber
Abilities: Double Jump, Force
How To Unlock: Complete Chancellor in Peril


Characters cont.
Chancellor Palpatine[starwars.fandom.com]
Weapon: None
Abilities: None
How To Unlock: Complete Chancellor in Peril


Commander Cody[starwars.fandom.com]
Weapon: Blaster
Abilities: Grapple, Imperial, Sharp Shoot
How To Unlock: Complete General Grievous


Chewbacca[starwars.fandom.com]
Weapon: Bowcaster, Melee
Abilities: Grapple, Sharp Shoot
How To Unlock: Complete either Defense of Kashyyyk, Mos Eisley Spaceport, Escape from Echo Base or Jabba’s Palace


If you melee attack a trooper, Chewbacca will rip their arms off, instantly defeating them! This also works for troopers that normally take two hits to defeat!
Princess Leia[starwars.fandom.com]
Weapon: Blaster, Melee
Abilities: Grapple, Sharp Shoot
How To Unlock: Complete Secret Plans


Captain Antilles[starwars.fandom.com]
Weapon: Blaster, Melee
Abilities: Grapple, Sharp Shoot
How To Unlock: Complete Secret Plans


Rebel Friend[starwars.fandom.com]
Weapon: Blaster, Melee
Abilities: Grapple, Sharp Shoot
How To Unlock: Complete Secret Plans


Luke Skywalker (Tatooine)[starwars.fandom.com]
Weapon: Blaster, Melee
Abilities: Grapple, Sharp Shoot
How To Unlock: Complete Through the Jundland Wastes


Ben Kenobi[starwars.fandom.com]
Weapon: Lightsaber
Abilities: Double Jump, Force
How To Unlock: Complete Through the Jundland Wastes


Han Solo[starwars.fandom.com]
Weapon: Blaster, Melee
Abilities: Grapple, Sharp Shoot
How To Unlock: Complete Mos Eisley Spaceport


Han Solo (Stormtrooper)[starwars.fandom.com]
Weapon: Blaster, Melee
Abilities: Grapple, Sharp Shoot
How To Unlock: Complete Rescue the Princess


Luke Skywalker (Stormtrooper)[starwars.fandom.com]
Weapon: Blaster, Melee
Abilities: Grapple, Sharp Shoot
How To Unlock: Complete Rescue the Princess


Han Solo (Hoth)[starwars.fandom.com]
Weapon: Blaster, Melee
Abilities: Grapple, Sharp Shoot
How To Unlock: Complete Escape from Echo Base


Princess Leia (Hoth)[starwars.fandom.com]
Weapon: Blaster, Melee
Abilities: Grapple, Sharp Shoot
How To Unlock: Complete Escape from Echo Base


Luke Skywalker (Pilot)[starwars.fandom.com]
Weapon: Blaster, Melee
Abilities: Grapple, Sharp Shoot
How To Unlock: Complete Dagobah


Luke Skywalker (Dagobah)[starwars.fandom.com]
Weapon: Lightsaber
Abilities: Double Jump, Force
How To Unlock: Complete Dagobah


Luke Skywalker (Bespin)[starwars.fandom.com]
Weapon: Lightsaber
Abilities: Double Jump, Force
How To Unlock: Complete Cloud City Trap


Lando Calrissian[starwars.fandom.com]
Weapon: Blaster, Melee
Abilities: Grapple, Sharp Shoot
How To Unlock: Complete Betrayal over Bespin


Walk up to Leia and press the “attack” button and you will stop and kiss her hand!
Princess Leia (Bespin)[starwars.fandom.com]
Weapon: Blaster, Melee
Abilities: Grapple, Sharp Shoot
How To Unlock: Complete Betrayal over Bespin


Luke Skywalker (Jedi)[starwars.fandom.com]
Weapon: Lightsaber
Abilities: Double Jump, Force
How To Unlock: Complete Jabba’s Palace


Princess Leia (Boushh)[starwars.fandom.com]
Weapon: Blaster, Melee
Abilities: Grapple, Sharp Shoot
How To Unlock: Complete Jabba’s Palace


Lando (Palace Guard)[starwars.fandom.com]
Weapon: Blaster, Melee
Abilities: Grapple, Sharp Shoot
How To Unlock: Complete The Great Pit of Carkoon


Characters cont.
Han Solo (Skiff)[starwars.fandom.com]
Weapon: Blaster, Melee
Abilities: Grapple, Sharp Shoot
How To Unlock: Complete Jabba’s Palace


Princess Leia (Slave)[starwars.fandom.com]
Weapon: Blaster, Melee
Abilities: Grapple, Sharp Shoot
How To Unlock: Complete The Great Pit of Carkoon


Hold down the “special” button and Leia will perform a dance!
Princess Leia (Endor)[starwars.fandom.com]
Weapon: Blaster, Melee
Abilities: Grapple, Sharp Shoot
How To Unlock: Complete Speeder Showdown


Luke Skywalker (Endor)[starwars.fandom.com]
Weapon: Lightsaber
Abilities: Double Jump, Force
How To Unlock: Complete Speeder Showdown


Han Solo (Endor)[starwars.fandom.com]
Weapon: Blaster, Melee
Abilities: Grapple, Sharp Shoot
How To Unlock: Complete The Battle of Endor


Wicket[starwars.fandom.com]
Weapon: Slingshot
Abilities: Sharp Shoot, Small
How To Unlock: Complete The Battle of Endor


Darth Vader[starwars.fandom.com]
Weapon: Lightsaber
Abilities: Double Jump, Imperial, Sith Force
How To Unlock: Complete either Jedi Destiny or A New Hope (the bonus level)


Gonk Droid[starwars.fandom.com]
Weapon: None
Abilities: None
How To Unlock: Create a new game, then purchase at the Bar


Being a droid, the Gonk Droid will not be targeted by enemies
PK Droid[starwars.fandom.com]
Weapon: None
Abilities: None
How To Unlock: Create a new game, then purchase at the Bar


Being a droid, the PK Droid will not be targeted by enemies
Battle Droid[starwars.fandom.com]
Weapon: Blaster
Abilities: Sharp Shoot
How To Unlock: Complete Negotiations, then purchase at the Bar


Battle Droid (Security)[starwars.fandom.com]
Weapon: Blaster
Abilities: Sharp Shoot
How To Unlock: Complete Negotiations, then purchase at the Bar


Battle Droid (Commander)[starwars.fandom.com]
Weapon: Blaster
Abilities: Sharp Shoot
How To Unlock: Complete Negotiations, then purchase at the Bar


Press the “special” button and you’ll pull out your walkie talkie and talk into it
Droideka[starwars.fandom.com]
Weapon: Blasters
Abilities: Sharp Shoot
How To Unlock: Complete Negotiations, then purchase at the Bar
Captain Tarpals[starwars.fandom.com]
Weapon: Spear
Abilities: High Jump
How To Unlock: Complete Invasion of Naboo, then purchase at the Bar


Captain Tarpals can deflect blasts using his shield. Hold the “attack” button to deflect blasts. However, you can’t deflect them back at attackers.
Boss Nass[starwars.fandom.com]
Weapon: None
Abilities: None
How To Unlock: Complete Invasion of Naboo, then purchase at the Bar


Royal Guard[starwars.fandom.com]
Weapon: Blaster
Abilities: Grapple, Sharp Shoot
How To Unlock: Complete Escape from Naboo, then purchase at the Bar


Padme[starwars.fandom.com]
Weapon: Blaster, Melee
Abilities: Grapple, Sharp Shoot
How To Unlock: Complete Escape from Naboo, then purchase at the Bar


Watto[starwars.fandom.com]
Weapon: Zapper
Abilities: Hover
How To Unlock: Complete Mos Espa Pod Race, then purchase at the Bar


Watto is a Toydarian, and as such, can hover for an infinite amount of time.
Pit Droid[starwars.fandom.com]
Weapon: None
Abilities: None
How To Unlock: Complete Mos Espa Pod Race, then purchase at the Bar


Darth Maul[starwars.fandom.com]
Weapon: Lightsaber
Abilities: Double Jump, Sith Force
How To Unlock: Complete Darth Maul, then purchase at the Bar


Zam Wesell[starwars.fandom.com]
Weapon: Blaster, Melee
Abilities: Bounty Hunter, Grapple, Sharp Shoot, Thermal Detonator
How To Unlock: Complete Bounty Hunter Pursuit, then purchase at the Bar


Characters cont.
Dexter Jettster[starwars.fandom.com]
Weapon: None
Abilities: None
How To Unlock: Complete Bounty Hunter Pursuit, then purchase at the Bar


Clone[starwars.fandom.com]
Weapon: Blaster
Abilities: Grapple, Imperial, Sharp Shoot
How To Unlock: Complete Discovery on Kamino, then purchase at the Bar


Lama Su[starwars.fandom.com]
Weapon: None
Abilities: None
How To Unlock: Complete Discovery on Kamino, then purchase at the Bar


Taun We[starwars.fandom.com]
Weapon: None
Abilities: None
How To Unlock: Complete Discovery on Kamino, then purchase at the Bar


Geonosian[starwars.fandom.com]
Weapon: Blaster
Abilities: Hover, Sharp Shoot
How To Unlock: Complete Droid Factory, then purchase at the Bar


Geonosians can hover for an infinite amount of time
Battle Droid (Geonosis)[starwars.fandom.com]
Weapon: Blaster
Abilities: Sharp Shoot
How To Unlock: Complete Droid Factory, then purchase at the Bar


Super Battle Droid[starwars.fandom.com]
Weapon: Blaster
Abilities: Sharp Shoot
How To Unlock: Complete Jedi Battle, then purchase at the Bar


Jango Fett[starwars.fandom.com]
Weapon: Blaster, Melee
Abilities: Bounty Hunter, Grapple, Hover, Sharp Shoot, Thermal Detonator
How To Unlock: Complete Jedi Battle, then purchase at the Bar


Boba Fett (Boy)[starwars.fandom.com]
Weapon: None
Abilities: Small
How To Unlock: Complete Jedi Battle, then purchase at the Bar


Luminara[starwars.fandom.com]
Weapon: Lightsaber
Abilities: Double Jump, Force
How To Unlock: Complete Jedi Battle, then purchase at the Bar


Ki-Adi Mundi[starwars.fandom.com]
Weapon: Lightsaber
Abilities: Double Jump, Force
How To Unlock: Complete Jedi Battle, then purchase at the Bar


Kit Fisto[starwars.fandom.com]
Weapon: Lightsaber
Abilities: Double Jump, Force
How To Unlock: Complete Jedi Battle, then purchase at the Bar


Shaak Ti[starwars.fandom.com]
Weapon: Lightsaber
Abilities: Double Jump, Force
How To Unlock: Complete Jedi Battle, then purchase at the Bar


Aayla Secura[starwars.fandom.com]
Weapon: Lightsaber
Abilities: Double Jump, Force
How To Unlock: Complete Jedi Battle, then purchase at the Bar


Plo Koon[starwars.fandom.com]
Weapon: Lightsaber
Abilities: Double Jump, Force
How To Unlock: Complete Jedi Battle, then purchase at the Bar


Count Dooku[starwars.fandom.com]
Weapon: Lightsaber
Abilities: Double Jump, Sith Force
How To Unlock: Complete Chancellor in Peril, then purchase at the Bar


Grievous’ Bodyguard[starwars.fandom.com]
Weapon: Electrostaff
Abilities: High Jump
How To Unlock: Complete Chancellor in Peril, then purchase at the Bar
You can use your electrostaff to deflect blaster bolts. However, you can’t deflect bolts back at attackers


General Grievous[starwars.fandom.com]
Weapon: Lightsabers
Abilities: High Jump
How To Unlock: Complete General Grievous, then purchase at the Bar


Wookiee[starwars.fandom.com]
Weapon: Bowcaster, Melee
Abilities: Grapple, Sharp Shoot
How To Unlock: Complete Defense of Kashyyyk, then purchase at the Bar


If you use a melee attack on a trooper, the Wookiee will rip their arms off!
Clone (Episode III)[starwars.fandom.com]
Weapon: Blaster
Abilities: Grapple, Imperial, Sharp Shooter
How To Unlock: Complete Defense of Kashyyyk, then purchase at the Bar


Clone (Episode III, Pilot)[starwars.fandom.com]
Weapon: Blaster
Abilities: Grapple, Imperial, Sharp Shoot
How To Unlock: Complete Defense of Kashyyyk, then purchase at the Bar


Clone (Episode III, Swamp)[starwars.fandom.com]
Weapon: Blaster
Abilities: Grapple, Imperial, Sharp Shoot
How To Unlock: Complete Defense of Kashyyyk, then purchase at the Bar


Characters cont.
Clone (Episode III, Walker)[starwars.fandom.com]
Weapon: Blaster
Abilities: Grapple, Imperial, Sharp Shoot
How To Unlock: Complete Defense of Kashyyyk, then purchase at the Bar


Mace Windu (Episode III)[starwars.fandom.com]
Weapon: Lightsaber
Abilities: Double Jump, Force
How To Unlock: Complete Ruin of the Jedi, then purchase at the Bar


Disguised Clone[starwars.fandom.com]
Weapon: Blaster
Abilities: Grapple, Imperial, Sharp Shoot
How To Unlock: Complete Ruin of the Jedi, then purchase at the Bar


Rebel Trooper[starwars.fandom.com]
Weapon: Blaster, Melee
Abilities: Grapple, Sharp Shoot
How To Unlock: Complete Secret Plans, then purchase at the Bar


Stormtrooper[starwars.fandom.com]
Weapon: Blaster
Abilities: Grapple, Imperial, Sharp Shoot
How To Unlock: Complete Secret Plans, then purchase at the Bar


Imperial Shuttle Pilot[starwars.fandom.com]
Weapon: Blaster, Melee
Abilities: Grapple, Imperial, Sharp Shoot
How To Unlock: Complete Secret Plans, then purchase at the Bar


Tusken Raider[starwars.fandom.com]
Weapon: Blaster, Melee
Abilities: Grapple, Sharp Shoot
How To Unlock: Complete Through the Jundland Wastes, then purchase at the Bar


Jawa[starwars.fandom.com]
Weapon: Zapper
Abilities: Small
How To Unlock: Complete Through the Jundland Wastes, then purchase at the Bar


Sandtrooper[starwars.fandom.com]
Weapon: Blaster
Abilities: Grapple, Imperial, Sharp Shoot
How To Unlock: Complete Mos Eisley Spaceport, then purchase at the Bar


Greedo[starwars.fandom.com]
Weapon: Blaster, Melee
Abilities: Bounty Hunter, Grapple, Sharp Shoot, Thermal Detonator
How To Unlock: Complete Mos Eisley Spaceport, then purchase at the Bar


Imperial Spy[starwars.fandom.com]
Weapon: None
Abilities: None
How To Unlock: Complete Mos Eisley Spaceport, then purchase at the Bar


Press the “special” button and you’ll pull out your walkie talkie and talk into it
Beach Trooper[starwars.fandom.com]
Weapon: Blaster
Abilities: Grapple, Imperial, Sharp Shoot
How To Unlock: Complete Rescue the Princess, then purchase at the Bar


Death Star Trooper[starwars.fandom.com]
Weapon: Blaster
Abilities: Grapple, Imperial, Sharp Shoot
How To Unlock: Complete Rescue the Princess, then purchase at the Bar


TIE Fighter Pilot[starwars.fandom.com]
Weapon: Blaster
Abilities: Grapple, Imperial, Sharp Shoot
How To Unlock: Complete Rescue the Princess, then purchase at the Bar


Imperial Officer[starwars.fandom.com]
Weapon: Blaster, Melee
Abilities: Grapple, Imperial, Sharp Shoot
How To Unlock: Complete Rescue the Princess, then purchase at the Bar


Grand Moff Tarkin[starwars.fandom.com]
Weapon: Blaster, Melee
Abilities: Grapple, Imperial, Sharp Shooter
How To Unlock: Complete Rescue the Princess, then purchase at the Bar


Han Solo (Hood)[starwars.fandom.com]
Weapon: Blaster, Melee
Abilities: Grapple, Sharp Shoot
How To Unlock: Complete Escape from Echo Base, then purchase at the Bar


Rebel Trooper (Hoth)[starwars.fandom.com]
Weapon: Blaster, Melee
Abilities: Grapple, Sharp Shoot
How To Unlock: Complete Escape from Echo Base, then purchase at the Bar


Rebel Pilot[starwars.fandom.com]
Weapon: Blaster, Melee
Abilities: Grapple, Sharp Shoot
How To Unlock: Complete Escape from Echo Base, then purchase at the Bar


Snowtrooper[starwars.fandom.com]
Weapon: Blaster
Abilities: Grapple, Imperial, Sharp Shoot
How To Unlock: Complete Escape from Echo Base, then purchase at the Bar


Luke Skywalker (Hoth)[starwars.fandom.com]
Weapon: Blaster, Melee
Abilities: Grapple, Sharp Shoot
How To Unlock: Complete Escape from Echo Base, then purchase at the Bar


Lobot[starwars.fandom.com]
Weapon: Melee
Abilities: None
How To Unlock: Complete Betrayal over Bespin, then purchase at the Bar


Characters cont.
Ugnaught[starwars.fandom.com]
Weapon: Zapper
Abilities: Small
How To Unlock: Complete Betrayal over Bespin, then purchase at the Bar


Bespin Guard[starwars.fandom.com]
Weapon: Blaster, Melee
Abilities: Grapple, Sharp Shoot
How To Unlock: Complete Betrayal over Bespin, then purchase at the Bar


Princess Leia (Prisoner)[starwars.fandom.com]
Weapon: Blaster, Melee
Abilities: Grapple, Sharp Shoot
How To Unlock: Complete Betrayal over Bespin, then purchase at the Bar


Gamorrean Guard[starwars.fandom.com]
Weapon: Axe
Abilities: None
How To Unlock: Complete Jabba’s Palace, then purchase at the Bar


The Gamorrean Guard can deflect blaster bolts with his axe, but only when standing still. Unfortunately, he can’t send bolts back at attackers
Bib Fortuna[starwars.fandom.com]
Weapon: Melee
Abilities: Bounty Hunter
How To Unlock: Complete Jabba’s Palace, then purchase at the Bar


Palace Guard[starwars.fandom.com]
Weapon: Blaster
Abilities: Grapple, Sharp Shoot
How To Unlock: Complete Jabba’s Palace, then purchase at the Bar


Bossk[starwars.fandom.com]
Weapon: Blaster, Melee
Abilities: Bounty Hunter, Grapple, Sharp Shoot, Thermal Detonator
How To Unlock: Complete Jabba’s Palace, then purchase at the Bar


Skiff Guard[starwars.fandom.com]
Weapon: Blaster
Abilities: Grapple, Sharp Shoot
How To Unlock: Complete The Great Pit of Carkoon, then purchase at the Bar


Boba Fett[starwars.fandom.com]
Weapon: Blaster, Melee
Abilities: Bounty Hunter, Grapple, Hover, Sharp Shoot, Thermal Detonator
How To Unlock: Complete The Great Pit of Carkoon, then purchase at the Bar


Boba Fett has an extremely powerful blaster. Each bolt does two hits of damage to enemies!
Ewok[starwars.fandom.com]
Weapon: Slingshot
Abilities: Sharp Shoot, Small
How To Unlock: Complete The Battle of Endor, then purchase at the Bar


Imperial Guard[starwars.fandom.com]
Weapon: Force Pike
Abilities: Imperial
How To Unlock: Complete Jedi Destiny, then purchase at the Bar


Imperial Guards can deflect blasts with their weapon. However, they cannot deflect bolts back at attackers
The Emperor[starwars.fandom.com]
Weapon: Lightsaber
Abilities: Double Jump, Imperial, Sith Force
How To Unlock: Complete Jedi Destiny, then purchase at the Bar


Admiral Ackbar[starwars.fandom.com]
Weapon: Blaster
Abilities: Double Jump, Grapple, Sharp Shoot
How To Unlock: Complete Into the Death Star, then purchase at the Bar


Ackbar doesn’t have a traditional double jump. His dive roll is very high, so he can reach some higher ledges that other blaster characters cannot
Characters cont.
IG-88[starwars.fandom.com]
Weapon: Blaster, Melee
Abilities: Astromech, Bounty Hunter, Grapple, Protocol, Sharp Shoot, Thermal Detonator
How To Unlock: Complete all Story levels, then purchase at the Bar


Dengar[starwars.fandom.com]
Weapon: Blaster, Melee
Abilities: Bounty Hunter, Grapple, Sharp Shoot, Thermal Detonator
How To Unlock: Complete all Story levels, then purchase at the Bar


4-LOM[starwars.fandom.com]
Weapon: Blaster, Melee
Abilities: Astromech, Bounty Hunter, Grapple, Protocol, Sharp Shoot, Thermal Detonator
How To Unlock: Complete all Story levels, then purchase at the Bar


4-LOM has an extremely powerful blaster. Each bolt does two hits of damage to enemies!
Ben Kenobi (Ghost)[starwars.fandom.com]
Weapon: Lightsaber
Abilities: Double Jump, Force
How To Unlock: Complete all Story levels, then purchase at the Bar


Being a ghost, Ben Kenobi will not be targeted by enemies!
Anakin Skywalker (Ghost)[starwars.fandom.com]
Weapon: Lightsaber
Abilities: Double Jump, Force
How To Unlock: Complete all Story levels, then purchase at the Bar


Being a ghost, Anakin will not be targeted by enemies!
Yoda (Ghost)[starwars.fandom.com]
Weapon: Lightsaber
Abilities: Double Jump, Force
How To Unlock: Complete all Story levels, then purchase at the Bar


Being a ghost, Yoda will not be targeted by enemies! He also moves at a snail’s pace if his lightsaber is not ignited.
R2-Q5[starwars.fandom.com]
Weapon: Zapper
Abilities: Astromech, Hover
How To Unlock: Complete all Story levels, then purchase at the Bar


Being a droid, R2-Q5 will not be targeted by enemies
Indiana Jones[indianajones.fandom.com]
Weapon: Gun, Melee
Abilities: Grapple, Sharp Shoot
How To Unlock: Watch the trailer for LEGO Indiana Jones: The Original Adventures (see the Tour of Chalmun’s Cantina section)


Extra Toggle Characters
While playing certain modes and levels with Extra Toggle turned on, you will have access to several new characters. You can only play as these characters in the levels/modes they are available in, and you cannot bring them into the Cantina or any other levels/modes. Similar to the Characters section, I will list their weapons/abilities if they have any, as well as the levels/modes you can play them in. I have also provided links to a character’s Wookieepedia page if applicable.
Rancor[starwars.fandom.com]

Abilities: None
Levels Available: Episode I Minikit Bonus
Wampa[starwars.fandom.com]

Abilities: None
Levels Available: Episode V Minikit Bonus
Skeleton
Weapon: Melee
Abilities: None
Levels Available: Jedi Battle, Ruin of the Jedi, Through the Jundland Wastes, Rescue the Princess, Escape from Echo Base, Dagobah, The Great Pit of Carkoon, The Battle of Endor, Jedi Destiny


Buzz Droid[starwars.fandom.com]
Weapon: Melee
Abilities: None
Levels Available: Battle over Coruscant, Chancellor in Peril, General Grievous, Episode III Character Bonus


Training Remote[starwars.fandom.com]
Weapon: Blaster (does no damage)
Abilities: None
Levels Available: Ruin of the Jedi


Rebel Engineer
Weapon: Blaster, Melee
Abilities: Grapple, Sharp Shoot
Levels Available: Secret Plans, Escape from Echo Base, A New Hope


Droid 1[starwars.fandom.com]
Weapon: Blaster
Abilities: Sharp Shoot
Levels Available: Through the Jundland Wastes, Mos Eisley Spaceport, Episode IV Character Bonus


Droid 2[starwars.fandom.com]
Weapon: Blaster
Abilities: Sharp Shoot
Levels Available: Through the Jundland Wastes, Mos Eisley Spaceport, Episode IV Character Bonus


Droid 3[starwars.fandom.com]
Weapon: Blaster
Abilities: Sharp Shoot
Levels Available: Through the Jundland Wastes, Mos Eisley Spaceport, Episode IV Character Bonus


Droid 4[starwars.fandom.com]
Weapon: Blaster
Abilities: Sharp Shoot
Levels Available: Through the Jundland Wastes, Mos Eisley Spaceport, Episode IV Character Bonus


Womp Rat[starwars.fandom.com]
Weapon: None
Abilities: None
Levels Available: Through the Jundland Wastes, Mos Eisley Spaceport, Jabba’s Palace, The Battle of Endor, Episode IV Character Bonus, LEGO City, New Town


Mouse Droid[starwars.fandom.com]
Weapon: None
Abilities: None
Levels Available: Rescue the Princess, Death Star Escape, Jedi Destiny


Imperial Engineer
Weapon: Blaster
Abilities: Grapple, Imperial, Sharp Shoot
Levels Available: Rescue the Princess, Death Star Escape, The Battle of Endor, Jedi Destiny, Episode VI Character Bonus


AT-AT Driver[starwars.fandom.com]
Weapon: Blaster
Abilities: Grapple, Imperial, Sharp Shoot
Levels Available: Escape from Echo Base, Speeder Showdown


Han Solo (frozen in carbonite)[starwars.fandom.com]
Weapon: None
Abilities: None
Levels Available: Cloud City Trap, Betrayal over Bespin, Jabba’s Palace, Episode V Character Bonus


Scout Trooper[starwars.fandom.com]
Weapon: Blaster
Abilities: Grapple, Imperial, Sharp Shoot
Levels Available: Speeder Showdown, The Battle of Endor


Vehicles
There are a grand total of 21 vehicles that you can play as in this game. I have listed them all below in the order that they appear on the vehicle selection screen. Next to each vehicle I list their abilities. I also list how to unlock them and any other interesting things about them. I have also linked each vehicle to their Wookiepedia page. If you would like to learn more about a vehicle, simply click on their name to be taken to Wookiepedia.

Anakin’s Pod[starwars.fandom.com]

How To Unlock: Complete Mos Espa Pod Race
Naboo Starfighter[starwars.fandom.com]

How To Unlock: Complete Anakin’s Flight
Anakin’s Speeder[starwars.fandom.com]

How To Unlock: Complete Bounty Hunter Pursuit
Republic Gunship[starwars.fandom.com]

How To Unlock: Complete Gunship Cavalry
Jedi Starfighter (Yellow)[starwars.fandom.com]

How To Unlock: Complete Battle over Coruscant
Jedi Starfighter (Red)[starwars.fandom.com]

How To Unlock: Complete Battle over Coruscant
X-wing[starwars.fandom.com]

How To Unlock: Complete Rebel Attack
Y-wing[starwars.fandom.com]

How To Unlock: Complete Rebel Attack
Since Y-wings are bombers, they are capable of holding up to 5 torpedoes at once
Snowspeeder[starwars.fandom.com]

How To Unlock: Complete Hoth Battle
Millenium Falcon[starwars.fandom.com]

How To Unlock: Complete either Falcon Flight or Into the Death Star
Sebulba’s Pod[starwars.fandom.com]
 Abilities: None
How To Unlock: Complete Mos Espa Pod Race, then purchase at the Bar
Zam’s Airspeeder[starwars.fandom.com]

How To Unlock: Complete Bounty Hunter Pursuit, then purchase at the Bar
Droid Trifighter[starwars.fandom.com]

How To Unlock: Complete Battle over Coruscant, then purchase at the Bar
Vulture Droid[starwars.fandom.com]

How To Unlock: Complete Battle over Coruscant, then purchase at the Bar
Clone Arcfighter[starwars.fandom.com]

How To Unlock: Complete Battle over Coruscant, then purchase at the Bar
TIE Fighter[starwars.fandom.com]

How To Unlock: Complete Rebel Attack, then purchase at the Bar
TIE Interceptor[starwars.fandom.com]

How To Unlock: Complete Rebel Attack, then purchase at the Bar
TIE Fighter (Darth Vader)[starwars.fandom.com]

How To Unlock: Complete Rebel Attack, then purchase at the Bar
TIE Bomber[starwars.fandom.com]

How To Unlock: Complete Falcon Flight, then purchase at the Bar
Since this is a bomber, this ship can hold up to 5 torpedoes at once
Imperial Shuttle[starwars.fandom.com]

How To Unlock: Complete Into the Death Star, then purchase at the Bar
Slave 1[starwars.fandom.com]

How To Unlock: Complete all Minikit Models
Minikit Models
There are a total of 36 minikit models in the game. Completing a minikit model will unlock it for use in the Minikit Bonuses. You cannot play a Minikit Bonus until you have at least 1 completed Minikit Model. You can also view the Minikit Models in the Courtyard.


Red Power Brick Extras
There are a total of 45 Extras available in this game. The first is unlocked automatically, and there are 8 more for purchase at the Bar. The other 36 you’ll have to unlock by collecting the Red Power Bricks in the Story levels. Below I’ve listed each Extra in the order they appear in the menu. I have also listed what they do, and how to unlock them.
Adaptive Difficulty
How To Unlock: Create a new game
What It Does: This Extra is always on by default. With Adaptive Difficulty on, you will lose different amounts of studs depending on how often you die. If you die a lot, you will only lose 1,000 studs. If you don’t die very often, you’ll lose 4,000 studs. With Adaptive Difficulty off, you’ll lose 2,000 studs every time you die, regardless of how often it is.
Extra Toggle

What It Does: While playing certain levels in Free Play Mode, you will have a few extra characters available to play as. Check out the “Extra Toggle Characters” section for more info.
Fertilizer

What It Does: While riding animals (such as a Bantha or Dewback), press the “special” button and the animal will poop!
Disguises

What It Does: This will give all characters a fake nose and mustache
Daisy chains

What It Does: This turns the grappling wire into a chain of flowers
Chewbacca carrying C-3PO

What It Does: This simply makes Chewbacca look like he did in Cloud City in The Empire Strikes Back, with 3PO’s parts on his back
Tow Death Star

What It Does: This turns all of the bombs you tow into mini Death Stars.
Silhouettes

What It Does: This turns all characters into black silhouettes
Beep Beep

What It Does: Pressing the “attack” button in any vehicle without weapons will cause it to honk its horn!
Super Gonk

What It Does: Gonk droids are normally very slow walkers. With this Extra active, they’ll be turned into speed demons and are now able to jump
Poo Money

What It Does: If you have this Extra active, hop on an animal and press the “special” button to make the animal poop studs! This only works if you also have the Fertilizer extra active.
Walkie talkie disable

What It Does: Press the “special” button while controlling a character with a walkie talkie (Battle Droid (Commander) or Imperial Spy) to use it. This will shut down all nearby droids temporarily!
Power Brick detector

What It Does: While playing a level, an arrow will be pointing towards the location of the Power Brick. This will not tell you how to collect it. It only shows you where it will appear.
Super slap

What It Does: This doubles the power of melee attacks, causing them to do two hits of damage.
Force grapple leap

What It Does: This allows Jedi and Sith characters to use grapple points.
Stud Magnet

What It Does: This increases the range at which you can pick up studs. This only really works on studs that have “settled” on the ground, not ones that are still bouncing.
Disarm troopers

What It Does: This turns the weapons of all non-droid enemies into carrots, making them unable to shoot at you! Be careful, as this also affects you and your characters. If you want to play as a Clone Trooper but have this extra turned on, you will also have a carrot as a weapon.
Character studs

What It Does: When enemies are defeated, they will drop a small amount of studs.
Perfect deflect

What It Does: With this turned on, any blaster bolts you deflect will be sent straight back to the attacker.
Exploding blaster bolts

What It Does: This causes blaster bolts to explode when they hit something. This makes them capable of destroying silver objects, but they will sometimes still bounce off them. If you are controlling a vehicle, this extra enables you to destroy torpedo targets or things that you would normally need to tow a bomb into. I recommend keeping this turned off unless you have Invincibility, as the explosions will damage you too.
Force pull

What It Does: When using the Force on a droid, you will pull it towards you, instantly destroying it.
Vehicle smart bomb

What It Does: While playing as a vehicle, hold down the “special” button. After a few seconds, all enemies on the screen will explode!
Red Power Brick Extras cont.
Super astromech

What It Does: Zapping a droid will stun it, as well as up to four other nearby droids. If you have the “Super Zapper” Extra active, it will negate the effect of this Extra.
Super Jedi slam

What It Does: This increases the area of effect of the Jedi Slam, and causes it to pretty much instantly defeat everyone caught in it (except bosses).
Super thermal detonator

What It Does: This increases the area of effect of thermal detonators.
Deflect bolts

What It Does: This causes blaster bolts to simply bounce off of you, even if you don’t have a lightsaber or are not actively deflecting. If you have “Perfect deflect” active, they’ll be sent back at the attacker.
Dark Side

What It Does: This gives all Jedi the Sith Force ability. It also turns your lightsaber red (this color change will override the color change of “Super Lightsabers”).
Super blasters

What It Does: This doubles the power of all blaster bolts, causing them to do two hits of damage. This also works for Boba Fett and 4-LOM, who will now do four hits of damage with their blasters.
Fast Force

What It Does: This increases the speed at which you Force objects and enemies.
Super lightsabers

What It Does: This increases the power of lightsabers, causing them to do two hits of damage. It will also turn them purple (unless you also have Dark Side active).
Tractor beam

What It Does: When playing as a vehicle, enemies that fly close to you will be slowly pulled towards you and then destroyed. While they are caught in the tractor beam, enemies are unable to attack you.
Invincibility

What It Does: This makes you immune to damage from all sources.
Score x2

What It Does: Multiplies the value of all studs collected by two. This stacks with all other stud multipliers.
Self destruct

What It Does: Press the “special” button while controlling any droid character and they will explode! This allows them to destroy silver objects. Pressing the “special” button to activate an Astromech or Protocol panel will not cause an explosion.
Fast build

What It Does: This increases the speed at which you build LEGO pieces.
Score x4

What It Does: Multiplies the value of all studs collected by four. This stacks with all other stud multipliers.
Regenerate hearts

What It Does: If you have any hearts missing, you will slowly regenerate them.
Minikit detector

What It Does: Arrows will point you to the locations of Canisters in Story levels. This will not show you how to collect them, as the arrows only point to where the Canister will appear.
Score x6

What It Does: Multiplies the value of all studs collected by six. This stacks with all other stud multipliers.
Super zapper

What It Does: This actually turns the zapper into a useful weapon. It will destroy all droids in one shot, and can even be used to temporarily stun non-droid enemies.
Bounty hunter rockets

What It Does: Press the “tag” button as Boba or Jango Fett and you’ll launch a rocket, which will home in on enemies or silver objects.
Score x8

What It Does: Multiplies the value of all studs collected by eight. This stacks with all other stud multipliers.
Super Ewok catapult

What It Does: The image for this is misleading, as this actually causes the slingshots used by Wicket and the Ewok to fire proton torpedoes. This makes them capable of destroying silver objects.
Infinite torpedoes

What It Does: While playing as a vehicle, you will always have the maximum amount of torpedoes that it can carry.
Score x10

What It Does: Multiplies the value of all studs collected by ten. This stacks with all other stud multipliers.
100% Completion Bonus


Cheat Codes
This is a list of the Cheat Codes available to use in the game. As mentioned in the “Tour of Chalmun’s Cantina” section, these Cheat Codes can be entered in the “Enter Code” section of the Bar. Inputting a Cheat Code for a Character/Vehicle will unlock it for purchase. Inputting a Cheat Code for an Extra unlocks it automatically (you won’t have to pay studs for it).
I have personally checked all of these codes and I can vouch for their authenticity. If you have any other Cheat Codes that you wish to share, please message me and I will check them. If they work, I will add them to this list and give credit to you.
Characters
4-LOM – DVY683
Aayla Secura – ECU428
Admiral Ackbar – ACK646
Anakin Skywalker (Ghost) – HJI667
Battle Droid – AUJ261
Battle Droid (Commander) – KPF958
Battle Droid (Geonosis) – NJK995
Battle Droid (Security) – HWY633
Beach Trooper – BHH538
Ben Kenobi (Ghost) – BENGH8
Bespin Guard – CDT859
Bib Fortuna – MMN372
Boba Fett – BOBA00
Boba Fett (Boy) – GGF539
Boss Nass – HHY697
Bossk – HYR849
Captain Tarpals – QRN714
Clone – BDE289
Clone (Episode III) – VCT533
Clone (Episode III, Pilot) – XXD447
Clone (Episode III, Swamp) – QYD793
Clone (Episode III, Walker) – NBU753
Count Dooku – DDD748
Darth Maul – EUK421
Death Star Trooper – NJK912
Dengar – GAR945
Dexter Jettster – JJU782
Disguised Clone – CCH677
Droideka – XCT333
The Emperor – EMP666
Ewok – EWK785
Gamorrean Guard – NNM784
General Grievous – PMN576
Geonosian – HJY732
Grand Moff Tarkin – VYY985
Greedo – ZZR636
Grievous’ Bodyguard – JHU423
Han Solo (Hood) – KLA621
IG-88 – GIJ989
Imperial Guard – GUA850
Imperial Officer – KLP412
Imperial Shuttle Pilot – BKJ857
Imperial Spy – YZFR1K
Jango Fett – KLJ897
Jawa – NVU859
Ki-Adi Mundi – MUN486
Kit Fisto – TFI888
Lama Su – KLG412
Lobot – BVH785
Luke Skywalker (Hoth) – TTY463
Luminara – LUM521
Mace Windu (Episode 3) – JKD867
Padme – VBJ322
Palace Guard – PPP555
Pit Droid – RTD428
Plo Koon – PLK689
Princess Leia (Prisoner) – QQY843
R2-Q5 – EVILR2
Rebel Pilot – BKL123
Rebel Trooper – DHV940
Rebel Trooper (Hoth) – GHR673
Royal Guard – YUF634
Sandtrooper – CBR954
Shaak Ti – KIT766
Skiff Guard – BYU785
Snowtrooper – HVT573
Stormtrooper – NBN431
Super Battle Droid – HDD733
Taun We – PRX482
TIE Fighter Pilot – BBR334
Tusken Raider – YYR778
Ugnaught – CGF754
Watto – PLL967
Wookiee – BWK887
Yoda (Ghost) – VVV429
Zam Wesell – 584HJF
Vehicles
Clone Arcfighter – NNB674
Droid Trifighter – AAB123
Imperial Shuttle – HUT845
Sebulba’s Pod – THY432
TIE Bomber – HJH848
TIE Fighter – DBH897
TIE Fighter (Darth Vader) – BVNJ84
TIE Interceptor – INT729
Vulture Droid – BDC866
Zam’s Speeder – UUU875
Extras
Bounty Hunter Rockets – BKJ462
Character Studs – DHY782
Dark Side – DRK328
Deflect Bolts – BNL435
Disarm Troopers – HJU848
Disguise – BRJ437
Exploding Blaster Bolts – EXP912
Fast Build – KJU233
Fast Force – BYY492
Force Grapple Leap – CLZ738
Force Pull – PUL966
Infinite Torpedoes – NUJ866
Invincibility – HS9K44
Minikit Detector – FBM152
Perfect Deflect – PER894
Poo Money – PMN904
Power Brick Detector – FBM834
Regenerate Hearts – 528HBB
Score x2 – HBF899
Score x4 – DQY857
Score x6 – NMP499
Score x8 – XXY99G
Score x10 – VXZ123
Self Destruct – DRX444
Stud Magnet – VXZ193
Super Astromech – R2D222
Super Blasters – HHD647
Super Ewok Catapult – ERF893
Super Gonk – SPRGNK
Super Jedi Slam – SLM768
Super Lightsabers – GHL978
Super Slap – 294NMB
Super Thermal Detonator – THE931
Super Zapper – DFY111
Tractor Beam – 53NKH3
Vehicle Smart Bomb – SMA293
Walkie Talkie Disable – JKJ589