Overview
Breathing Fear is not a difficult game but doing the same over and over again because you can’t save is annoying. Therefore I present here a step by step guide to provide the necessary information to get all the endings.
1. Introduction
Breathing Fear is nice exploration game with not to much story. For the most part it is rather easy but there are some “tricky” parts needed to complete it. Some basic information can be found in the forum and video walkthroughs can be found on Youtube. I still wanted to make a simple guide for those who just wanted a short help if they encounter a problem.
I will start with a map of the house and the following outside area and will then explain step by step what you have to do. The map hereby is the basis of my explanations (see the numbers) so that we are on the same page as what rooms I mean.
As by the nature of this guide it is obviously full of spoilers. This begins with the maps already since they alter slightly during the game showing later secrets already present in them.
2. The Maps
The layout of the house and the surrounding area is not overly complicated but you have a very close view at it which makes navigating a bit annoying sometimes. However, the main purpose of those maps is to provide a common basis as how I refer to which rooms which will be needed in the Step by Step section. It can also be used to check where in the house the candles are placed. Additionally, I marked every item/action (I know of) which can be used to decrease your heart rate with green rectangles. The green number provided here gives you the amount by which it will decrease the heart rate. Also be aware that one or two of those need a set-up for them to be findable/doable (like light needed in the bathroom). As those maps are rather large you probably have to open them in a new browser tab or download them in order to view them in a suitable size.
A. The House – Frontside

B. The House – Backside

C. The Outside Area

3. Starting the exploration – Step by Step (1)
Some stuff like reading notes or using some of the items to decrease your heart rate can be done in any order you want. I will just listen in which order I did it. Also the usage of the heart rater decreasing items/actions should be adjusted to your actual value which can differ depending on how many scares you got and how high your rate is at the moment. However a large chain in the game has to be done in a specified order or it will not work. With this said let’s start:
Part 1 – Getting the Videotape
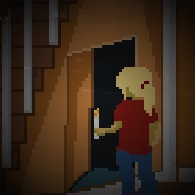
The game begins at the left side of the map near the treehouse (1). First we go to the entry hall (11). Here we can change into some casual clothings if you don’t like your beautiful orange prison suit. As far as I can tell it doesn’t influence the game in the slightest. Take the first door to the backside of the house and enter the aquarium room (26). Watch the fish and open the wardrobe on the right to pick up the key. Go upstairs to the kitchen (24), read the note at the fridge and take the matches out of the left cupboard. With those you can light the candles. They spent a place to rest while quickly recharging your batteries. Other then that their only purpose serves for an achievement. Use the door in the TV room (23) to get to the frontside and go right to the radio room (10). Read the note in the shelf and take the batteries out of the radio. Go upstairs to the cross room (6) and use the door to move to the backside, the computer room (19). Check the picture (showing the location of a hidden safe) in the commode of the clock room (18) and read the diary in the bed room (17). Change to the backside and use the ladder (5) to enter the attic (3). On the left take a quick look at the gramophone then move to the right trying to open the chest (it tells you that you need a tool for this) and take the batteries from the pile of stuff on the right. Now leave the house through the right (13). Do NOT open the hatch (16) for now and go to the shed (30). There you will find a tool. Go further to the boat house (32) and take the record from the left shelf. Then go further to the right until the cat is passing you. Now you can move back to the attic (3) use the record on the gramophone and open the chest on the right with your newly acquired tool. Check the insides to obtain the video tape.
Part 2 – Solving the computer password
Now that you have a video you want to watch it. But before this let’s go the cellar by opening the hatch (16). Go down and read the note on the right side of the room. In the generator room (15) you will find an empty canister behind the right device (only if you read the note on the fridge). Then check the fuel stand on the generator to see it is zero. Proceed to the furnace room (14) and check the furnace to notice the missing firewood. Now cross the lake with the boat (33) and inspect the barn (34). On the shelf, left side upper floor, you will find a recorder for your video tape while on the lower floor you can find firewood for the furnace. After that go further right and transfer the fuel from the car (35) into the empty canister. Lastly, check Rosetta’s grave (36) to find out the year of her birth and note it down or memorize it. With the now full canister start the generator (15), go the piano room (12), switch on the light and inspect the sofa to find the note (it will only be visible if the light is switched on). Then proceed to the TV and dining room (23). Drink the wine if you haven’t done so far and connect the recorder to the TV and watch the video. The shown hidden wall closet is located in the entry hallway (11). Inside you will find a plan of the house. Upon closer inspection you may notice that there is a door marked not found so far. Go to this location which would be upstairs right (7) and inspect the wall. With this new information you can now pick up the Sledge Hammer at the other side of the map in the barn (34). Then return to break down the wall. Enter the child’s room (20) and check the shelf on the right where you’ll find a picture of Rosetta together with her day of birth. This together with the year from the gravestone will form the password to the computer (19) which is our next location. Type in the password and read the e-mail left there.
4. Getting to the end – Step by Step (2)
Part 3 – Opening the safe
Because running around is fun you have to move to the other side of the map again to Rosetta’s Grave (36). Search the area to find the cellphone and read the message. Search the area a second time to find the case and inspect it so you know it uses a fingerprint scan. Then go to the treehouse (1). There you will find some glasses on the left (if you read the necessary note before) and batteries in the teddy bear (if you read the necessary note). After that check the garbage bin (2) and you will find now the key. Open the garage and enter. Go to the closet on the upper floor (21), open it and take the camera. If you haven’t opened the hatch to early you can now pat the still alive cat. Bring the camera to the computer to check what is on it. Depending on how long you took you may restart the generator. Use either the canister in the garage or the shed. But only pick up one and only do it if necessary since your inventory is limited. After watching the video on the camera go to the well (31) and check to notice it is to deep. You will find a rope in the barn (34) upper floor right side. Take it and return to the well. If you haven’t done so far you can now drink the beer in the boat house (32). Climb down the rope and inspect the dead woman’s body to find a key. This key can be used on the van in the garage (22) moving it to the outside. This van can also be used to leave the house and as such is the first ending of the game . The hitbox to trigger this is on the left side of the van. If you stand in the middle or right you will enter the garage instead. Slightly misplaced hitbox -_-. If you decided not to leave the house check the large metal door which is now visible. Now, go back to the radio room (10) and read the note there a second time. With the glasses you will see a hidden message (x left, y right, z left). Those numbers give you the amount of turns in the specific direction you have to do to open the safe. The safe itself is located behind the right picture in the TV and dining room (23) (only findable if you found the picture in the clock room). Use the combination from before, open the safe and take out the key card.
Part 4 – Towards the end
Now you can go down to the cellar “prison” room (29). On the left shelf you can find some tonic to reduce your heart rate. Go upstairs to the surveillance room (27) and check the monitors two times. You need to have seen the video with the secret entrance. After this use the ladder to go back to the garage and walk to the furnace room (14). Reveal the secret door and start the furnace what you haven’t done so far to get a reduction of 20 points of your heart rate which you will need in a few moments. Enter the laboratory (28) and check the dead scientist’s body. Read his diary entry and try to leave a room. You will have a hallucination and as a result your heart rate will keep increasing no matter what. So you have to be fast now. Move to the kitchen (24) and take the cleaver out of the right cupboard. Go back to the laboratory (28) and chop of one of the fingers of the scientist. With this in your inventory proceed to Rosetta’s Grave (36) and open the case. Drink the unknown liquid. From here on you are save from heart attacks. You can even run around without the flashlight. From this point onward you have some minimal decisions to make leading up to the other three endings. Return to the hatch (16) and notice the K.I.M car standing there. If you try to enter the house (13) you will be tasered and caught leading to the third ending of the game . If you refuse to being caught go down the hatch to the laboratory (28) open the door on the left and proceed to the garage. Outside you can still use the van. Doing this after the K.I.M. arrived at the scene it will trigger the second ending of the game with the K.I.M. chasing after you. All that is left is the last ending. Herefore you need to get to the safe a second time. If you enter the house from the left there should be no problem getting there undetected. Take out the gun. Now armed you can approach the K.I.M. researcher and kill them. Pick up the car key and the pass from their dead bodies and leave the house with the K.I.M. car. With this you have unlocked the last fourth ending of the game .
5. Final remarks
Congratulations, you have now seen every ending available in the game. And you can now think about which ending is the best. We never got told why the protagonist is a prisoner in the first place and in the fourth ending he slaughters a lot of people without any remorse so it is arguable if this is the best ending. Then again it seems that the methods of the researchers were at least questionable. So …. whatever.
If you find any mistakes or if you have questions just write a comment and I’ll try to get back at it as fast as possible. Other than that: Thanks for reading