![BTD6 COMPLETE guide to EVERYTHING [3.1], Now with Hidden Achievements! for Bloons TD 6](https://steamsolo.com/wp-content/uploads/2021/07/btd6-complete-guide-to-everything-3-1-now-with-hidden-achievements-bloons-td-6.jpg)
Overview
A guide to quite litterally everything in this game!No longer WIP
The one guide to end them all.
Update 4.0 is on the way!
Progress update: 40% of the way.
This guide contains quite literally everything to do with this game, whether it be gamemodes, strategies, towers, bloons, if it exists in BTD6, its in the guide.
Everything is Condensed and straight to the point, not bloated out with random opinions or pointless waffling, Facts and Statistics is what this guide is all about.
Contents:
1 (this list)
2 All of those Bloons
3 Bloon Properties Explained
4 Gamemodes & Daily challenges/races
5 Co-Op mode
6 Easter Eggs
7 Heroes (part 1,2 & 3)
10 Hero Tierlist
11 Monkey Knowledge
12 Primary Monkeys
14 Military Monkeys
16 Magic Monkeys
17 Alchemists
18 Support Towers
19 Primary monkey 5th tiers
20 Military monkey 5th tiers
21 Magic monkey 5th tiers (W.I.P)
22 Support monkey 5th tiers (W.I.P)
23 level 20 hero tower stats
24 5th tier Tierlist
25 Banana Farms
27 Temple Guide
28 C.H.I.M.P.S
29 Maps
30 Challenge editor
31 Additional Game Modes
32 Insta Monkeys and Powers
33 Final Notes and recommendations (For NK)
My discord, [link] for if you want to talk more about bloons 😀
All of those Bloons
Layer Health:1
RBE: 1
Speed: slow
Immunities: N/A
Potential Properties: Camo, Regrow
Breaks Into:N/A
Layer Health: 1
RBE: 2
Speed: slow
Immunities: N/A
Potential Properties: Camo, Regrow
Breaks Into:Red
Layer Health:1
RBE:3
Speed: medium
Immunities: N/A
Potential Properties: Camo, Regrow
Breaks Into:Blue

Layer Health:1
RBE: 4
Speed: fast
Immunities: N/A
Potential Properties: Camo, Regrow
Breaks Into:Green
Layer Health:1
RBE: 5
Speed: Lightning!
Immunities: N/A
Potential Properties: Camo, Regrow
Breaks Into:Yellow

Layer Health:1
RBE: 11
Speed: medium
Immunities: Explosives
Potential Properties: Camo, Regrow
Breaks Into:2*Pink

Layer Health:1
RBE: 11
Speed: Lightning!
Immunities: Magic and Fire
Potential Properties: Camo, Regrow
Breaks Into:2*Pink
Layer Health: 1
RBE: 11
Speed: fast
Immunities: Ice
Potential Properties: Camo, Regrow
Breaks Into:2*pink

Layer Health: 1(4)*
RBE: 23(26)*
Speed: Snail
Immunities: Sharp Objects
Potential Properties: Camo, Regrow
Breaks Into:2*black
*Increased RBE when fortified, +3
Layer Health: 1
RBE: 23
Speed: Medium
Immunities: Black & White Bloon Immunities
Potential Properties: Camo, Regrow
Breaks Into:White&Black
Layer Health: 1
RBE: 47
Speed: Fast
Immunities: N/A
Potential Properties: Camo, Regrow
Breaks Into:2*Zebra

Layer Health:10(20), 60(120) after round 80
RBE: 104(114), 68(128) after round 80
Speed: Fast
Immunities: N/A
Potential Properties: Camo, Regrow, Fortified, Super
Breaks Into:2*Rainbow (before round 80), Rainbow (After round 80)

Layer Health:200(400)
RBE: 616(856), 472(912) after round 80
Speed: Slow
Immunities: Moab Immunity
Potential Properties: Ramped, Fortified
Breaks Into:4*Ceramic
Layer Health:700(1400)
RBE: 3164(4824), 2588(5048) after round 80
Speed: Slow
Immunities: Moab Immunity
Potential Properties: Ramped, Fortified
Breaks Into:4*Moab

Layer Health:4000(8000)
RBE:16,656(27,296), 14,352(28,192) after round 80
Speed: Snail
Immunities: Moab Immunity
Potential Properties: Ramped, Fortified
Breaks Into:4*BFB
Layer Health:400(800)
RBE: 672(1312)
Speed: Fast
Immunities: All non-MOAB bloon immunities except purple, Moab Immunity
Potential Properties: Camo, Fortified, Ramped
Breaks Into:4*Ceramic(Camo and Regrow properties)
Layer Health:20,000(40,000)*
RBE:49,994(99,008)
Speed: Snail
Immunities: Moab Immunity, Status Resistance
Potential Properties: Ramped, Fortified
Breaks Into:2*ZOMG&3*DDT
*This bloon will have 25,000 health when first encountered on round 100 due to ramping

Bloon Properties Explained
Camo: Bloons cannot be seen by some towers, certain towers may gain the ability to see a camo bloon on their own, or require a X-2-X monkey village.
Lead: Sharp objects cannot pop lead bloons
Fortified: +3 health on a lead bloon, +10(60) health on a ceramic bloon or double health for a moab
Regrow: Regenerates the last layer lost every once in a while if undamaged, no MOABs have this property

Super: Exclusive to ceramics, increases health by 50(100) and causes each bloon inside to only degrade into one bloon.
Status Immunity: Exclusive to the B.A.D, this automatic property prevents the B.A.D from being afflicted by a wide range of debuffs, such as glue and freeze.
Moab bloons have a weaker version of this effect, smaller moabs having lesser effects.

White & Black: White provides immunity to ice, black provides immunity to explosions, these are found on black, white and zebra bloons.
Purple: Immune to fire and magic
Gamemodes & Daily Challenges
This section has 6 subsections:
> Easy
> Normal
> Hard
> Impoppable
> Daily Challenges
> Races
——————
Game modes
——————
Easy Modes
Easy: Towers are 15% cheaper and bloons are slower, 40 rounds
Primary Only: Beat easy difficulty with just primary monkeys and a hero.
Deflation: $20,000 to beat 60 rounds of easy mode, instead of the usual 40.
Medium Modes
Medium: Towers and bloons are normal, 60 rounds.
Reverse: Waves are sent backwards, bloons come from the exit and leak from the entrance
Millatary Only: A hero and military monkeys against medium difficulty
Apopalypse: Waves are randomised based on avaliable bloons and dont stop spawning in, still 60 rounds.
Hard Modes
Hard: towers cost 8% more, bloons move faster
Alternative Bloons Rounds: Bloons with special properties are sent much more often, 80 rounds, rounds 99 and 100 are much harder than normal.
Double HP MOABs: MOAB bloons will have twice as much health, fortified ones will have double their normal double.
Magic Monkeys Only: A hero and this time, magic monkeys vs hard mode.
Impoppable Modes
Half Cash: While not strictly an “impoppable” difficulty, everything costs twice as much, since cash earned is halved, banana farms are incredibly inefficient.
Impoppable: Towers cost 20% more and bloons move significantly faster than normal.
C.H.I.M.P.S: See the C.H.I.M.P.S section
Daily Challenges
Daily challenges offer an unusual reward, often a relevant insta-monkey and monkey money, for defeating a unique game mode on any map.
Modifiers can include:
> No selling
> No powers
> No continues
> Tower restrictions
> Hero restrictions
> Faster bloons OR slower bloons
> Stronger MOABS (weaker MOABS have appeared on rare occasion)
> Unique difficulties, such as easy C.H.I.M.P.S or Impoppable ABR
> All bloons get camo
> All bloons get regrow
> No Income
> New additions may arrive.
Daily challenges will also unlock a medal if the selected difficulty has not been defeated before. You must have at least one of the avaliable towers unlocked and the gamemode the challenge uses unlocked in order to play.
Note: due to a change in how daily challenges are selected, both normal and hard challenges are incredibly unreliable and dont tend to be as fun anymore, i would recomend only doing them for the achievement “perfect week”
The easiest daily challenges are normally on monday, and the hardest are typically the
“friday stinger” challenges (Advanced challenges)
Note: Advanced challenges are identical to daily challenges, but are more difficult.
Co-Op mode
While Co-Op mode does not bring many changes, they are significant. Here are the rule changes.
> Bloon Pops income is divided by the number of players and given to all players.
> Each individual player may have a 5th tier tower of the same type.
> Some things stack, but generally tower buffs do not.
> If a player leaves, towers are given to the remaining players randomly
Extra unlockables & Hidden Achievements
Currently known eastereggs, they have no effect on the game but provide visual changes:
Big Bloons
> Doubles the size of all bloons including moab class bloons, this does not make them easier to hit in most circumstances.
Unlock Condition: Earn 10 new medals with Pat Futsy as your hero, he must be placed before the game ends.
[link]Small Bloons
> Halves the size of bloons including moab class bloons, this does not make them harder to hit in most circumstances.
Unlock condition: in a single session place a bloon master alchemist and have it pop 1,000,000 bloons before round 100 with its shrinking effect. Note: you should not leave the game before the round 100 insta monkey pops up, leave afterwards and do not beat round 101, check the pop count of the alchemist to see if you have done this.
Reccomended map: Logs easy (farm for BMA -> Overclock -> Call to arms -> Homeland -> energiser -> Overclock tier 5), perma spike reccomended at the back with a 4-0-2 alchemist.
Tiny Towers
> You must play the opening line of the charlie in the chocolate factory umpa lumpa themesong to unlock this achievement, completing the map is not required.
> Select the candy falls map.
> Press the top right
> Press the door
> Press the waterfall
> Press the top left
> Press inbetween the bottom two bridges on the right side
> Press the bottom right
> Press the choccy wheel
> Press the bottom left
If the full themetune has played, the achievement will pop up.
Big Towers
Play 10 games with only large footprint towers
> Pat fusty (hero)
> Churchill (hero)
> Super monkey
> Heli pilot
> Banana farm
> Monkey village
Hidden Achievements
There are also a handful of achievements that do not provide extras but are not visible directly on the achievements list.
2 Towers Chimps: Beat chimps on any map using only 2 towers (Provides Monkey Knowledge)
Joshs constant: Any expert map on chimps mode using Perma spike (0-2-5)
Strangely adorable: Build a vengeful temple with level 20 Adora in range before upgrading
Mo heroes Mo problem: Complete and odyssey with no hero
Stubborn strategy: Win 100 times on maps with obstacles without removing them
Bill Greates: Accumulate 2,500,000 in co-op then send $500,000 to another player.
Hidden tower – Cave monkey
Have a mortar monkey shoot at the monkey on frozen over that is covered in ice, the cave monkey is placed in the bottom left corner of the map with 1 damage and a slight stun, it can also pop lead.
Heroes
Heroes are unique towers that upgrade themselves, gaining “XP” at the end of a round, when their XP bar fills, they become stronger.
Most start off as weak towers, and at level 20 are comparible to a 5th tier tower.
Currently there are 6 heroes to chose from
> Ezili
> Quincy
> Gwendolin
> Striker Jones
> Obyn Greenfoot
> Captain Churchil
> Benjamin
Note: the heroes will be ranked alongside 5th tier towers at the end of the guide.
Ezili
Cost: 600
Speciality: Moabs.

Ezili is a magic based tower, dealing small AOE explosions that apply a damage over time effect, these explosions will eventually remove special properties from bloons at higher levels, her damage is very high to MOAB class bloons, and she is very strong against DDT`s in particular.
[Ability 1 (level 3, Level 12)] Temporarily nullify the regrow property for all bloons. Upgrade: increased duration and reduced cooldown.
[Ability 2 (level 7, Level 16)] Place a totem that bolsters nearby towers and temporarily apply the ability to see camo. Upgrade: cost reduced by 90%, lasts 2.5x as long.
[Ability 3 (level 10, Level 20)] Place a hex on a MOAB that deals 10% of its health in damage every second, when the MOAB dies, it wont spawn anything, oddly, this can affect a B.A.D. Upgrade: Deals 50% more damage.

Quincy
Cost: 540
Speciality: before round 40, expert maps and chimps mode.
Quincy is a crossbow dart monkey that decided to swap the crossbow for an old fashioned longbow. Quincy is best before round 40, placed on round 1 with monkey knowledge. Unlocked by default and having wide coverage, Quincy is useful for starting in C.H.I.M.P.S or in general as an all round tower, he has no overall weakness or strength.
[Ability 1 (Level 3, Level 15)] Fire 3x as fast for a short duration, Upgrade: fire 4x as fast with a shorter cooldown.
[Ability 2 (Level 10, Level 18, Level 20)] Fire a ring of arrows that can hit a large number of bloons for low damage. Upgrade: deals 50% more damage, Upgrade 2: Now deals 100% more damage (vs base level), total 250%
Gwendolin
Cost: 900
Speciality: Lead bloons.

Gwendolin is the jack of all trades, proving a buff, covering immunities and dealing with tricky rounds with ease, her passive buff now has a limitation similar to the alchemist and i no longer recommend Gwen as a hero pick.
[Ability 1 (Level 3, Level 14, level 20*)] Fires a molotov at the track, it is slightly stronger than the wizard monkeys wall of fire, but has an unlimited pop cap. Upgrade: deals twice as much damage. *MK upgrade*: Molotov creates two walls of fire, dealing double damage. This is furtherly boosted by the homeland defense and call to arms (Monkey Village 4th&5th tier).
[Ability 2 (Level 10, Level 16, Level 20)] Burns all bloons on screen, popping ceramics completley before round 80 and dealing large ammounts of damage to all MOABS, this is excelent against DDT`s. Upgrade: deals more damage over a longer period, Upgrade 2: deals even more damage.
[Passive Buff (Level 4, Level 7, Level 17)] Allows monkeys to pop lead, and deals damage to nearby bloons. Upgrade: Much larger range of effect and buffing. Upgrade 2: Now adds +1 damage to all affected monkeys.
Striker Jones
Cost: 750
Speciality: Spamming bomb shooters.

Striker Jones is a quite strange hero, he provides the second best stall in the game, and is comparable to a super glue (5th tier glue gunner), as a tower he is incredibly poor, but he provides immense buffs for bomb shooters and mortar monkeys. It could be said, he is equally as good a hero as Gwendolin, depending on your strategy.
[Ability 1 (Level 3, Level 14, Level 15, Level 20*)] Fires a shell that can stun all bloons except the B.A.D. Upgrade: longer stun and can affect more bloons. Upgrade 2: shorter cooldown.
*MK upgrade*: Almost permanently stun a large amount of MOABs.
[Ability 2 (Level 10, Level 20)]
[Passive Buff #1 (Level 4, Level 7, Level 8, Level 18)] Increases attack speed of bombs and mortars by 10%, Upgrade: Mortars have a 10% larger explosion, Upgrade 2: Bomb shooters gain 5% more range and pop 25% more per shot max, Upgrade 3: doubles the effect of the initial buff.
[Passive Buff #2 (Level 9)] Black bloons can now be popped with explosives, this isnt 100% efficient, but it allows towers such as recursive cluster bomb shooters and shell shock mortars to become extremely deadly
Obyn Greenfoot
Cost: 650
Speciality: Spamming druids.

Obyn is a druid monkey hero, with a speciality of being able to do lots of things at once, similarly to Gwendolin, he has many uses, he slows bloons quite heavily at higher levels, and can act like a Perma-spike when placed at the end of the track, unfortunately this contradicts his other perks which is quite unfortunate. However you intend to use him, putting him with ninja monkeys or druids yields good results.
[Ability 1 (Level 3, Level 7, Level 16)] Creates a pile of brambles, these act like a Perma-spike pile and will pop 50/100/500 bloons depending on the ability level.
[Ability 2 (Level 10, Level 20)] Creates a much larger wall of trees, this acts similarly to the above, but will “absorb” 3000/5000 bloons.
[Passive Buffs (Level 2, Level 11, Level 18)] Passive 1: Increase the pierce of all nearby magic monkeys by 1. Passive 2: Increase the range of nearby monkeys by the same amount as a primary training monkey village and gives +3 pierce. Passive 3: Druids of wrath have a faster charge up time.
Captain Churchil
Cost: 2,000
Speciality: Two towers chimps, Grouped bloons.

A monkey in a tank with a big cannon, machine gun and MOAB assassin missile battery, what more could you ask for? Well this all sounds great, but Captain Churchil is BY FAR the most expensive hero, making him hard to deploy early on, and he levels up FAR too slowly to be of any use before the end of the game without buying levels, so much so, that you will be well into freeplay before he reaches maximum level, which kind of defeats the point of any hero.
[Ability 1 (Level 3, Level 13, Level 17)] Can temporarily pop black bloons, and deal +3 damage to ceramics and +4 damage to MOABs. Upgrade: now deal +6 damage to ceramics, +7 to moabs and +1 to everything. Upgrade 2: deal +8 damage to ceramics, +10 to moabs and +2 to everything else.
[Ability 2 (Level 10, Level 20)] Fires a volley of 10 rockets at 10 MOAB class bloons, dealing 100 damage per missile (total: 10,000 damage) Upgrade: Deal 250% more damage for a total of 25,000 damage.
Heroes (Page 2)
Benjamin
Cost: 1200
Speciality: Co-op, making money vanish in chimps mode.

Benjamin isn’t really a hero, lacking the ability to attack, all Benjamin exists for is to make money and he is good at that, thanks to a fix to his abilities he no longer causes you to lose huge amounts of money and is incredibly powerful in Co-op, to such extent that most Co-op games will use one or more Benjamins.
Income per round: 100/150/250/300/500/800
Upgrade Levels: 2, 8, 11, 15, 17
Skimming: provides $1($2) per bloon spawned in a round (upgrades at level 12) this can provide a good few hundred $`s per round on-top of income.
Passive Ability: Bloon trojan, prevent bloons spawning more bloons when popped. Does still cause a loss of money, but strong against round 40 and 50.
Adora
Cost: 1000
Speciality: Eating monkeys, popping grouped bloons and bending the rules of two towers chimps.

Adora is a complex hero, relying on a very particular 5th tier interaction with the monkey sub to be viable in chimps mode and generally falling into a strange category in terms of performance, being a heavyweight she is far too expensive to place on the starting round, even outside of chimps and she also levels up very slowly, like Churchill however once Adora gets going, she really gets going.
Abilities:
>Long arm of light: gain double pierce and range for 25% uptime.
Upgrade: Gain triple pierce, much faster projectile speed, and increase uptime to 33%
> Blood sacrifice: sacrifice a tower to gain 4x its value in hero upgrades, allows tower selling in C.H.I.M.P.S. Under the effect of energiser raise this to 6x.
> Provides a short attack speed bonus shortly after absorbing towers.
>Ball of light: Summons a laser that deals immense damage to bloons. (5140 total damage over 20 bloons, 771 single target damage)
Note: this ability is considered buff-able by the homeland defence which vastly increases its power, letting it one-shot a B.A.D
Upgrade: Pierce increased to 100, excess pierce now increases damage at a more efficient rate, deals more layers of damage and lasts twice as long. (128,700 total damage, 9,009 single target damage)
With homeland defence: (606,000 total damage, 21,210 single target damage)
Single target damage
Ball of light: 771
Improved ball of light: 9,009
Glue storm ball of light: 11,110
Homeland ball of light: 21,210
Glue&Homeland: 22,220
Super Brittle ball of light: 12,505
Brittle&Homeland: 25,206
Brittle&Cripple: 13,385
Brittle/Cripple/Homeland: 28,400 (Note: thanks to the sniper this oneshots the round 100 B.A.D)
Brittle/Cripple/Glue: 13,915
Brittle/Cripple/Glue/Homeland: 29,439
Brittle/Cripple/Glue/Homeland/Temple(4): 39,530
Sun God Adora (without temple buff): 11,154
Sun God Adora (with temple buff): 23,040
Sun God Adora (with full buffs): 61,560
Non single target damage with full buffs: 4,897,852
Overall thoughts: While this hero can be powerful outside of chimps mode, better heroes are available that also come with passive buffs, something which adora is lacking.
Pat Futsy
Cost: 800
Speciality: Stalling bloons.

Unquestionably the strangest hero in this roster, he has a tiny attack range with somewhat slow, AOE slap attacks, later on he gains the ability to stall moab class bloons, he also provides a massive buff in a tiny radius.
Support Upgrades:
> Level 5: Sometimes deal knockback to moab or weaker.
> Level 13: Attacks cause small stuns to all moabs and large stuns to all bloons hit.
> Level 17: This stun is now stronger against moabs.
Abilities:
> Rallying Roar: All towers within pats default range deal +1 layer of damage (25% uptime)
Upgrade (Level 14): Range is now equal to pats at maximum level, affected towers also deal +3 damage. Uptime increased to 33%.
> Big Squeeze: Pat futsy stops attacking and crushes a moab layer from the strongest nearby moab. Pat cannot attack during this time.
Upgrade (level 20): Can crush a fortified ZOMG layer or many weaker moab class bloons at the same time.
Overall thoughts: Pat Futsy is very versatile, popping lead bloons early on and providing a uniquely potent buff and stall all in a neat package. He is not a damaging hero and you should not expect him to solo things, but he does his job of being a support tower extremely well.
Heroes (Page 3)
Admiral Brickbell
Cost: 750
Speciality: Bringing a boat and making water towers stronger.

Brickbell is an unusual hero, unlike pat who has the option of being in water, Brickbell MUST be placed in water, making her a difficult hero to recommend, all of her abilities are centred around water based monkeys meaning you will need a large water source to make use of this hero.
Oddly, Brickbell is also one of the slowest in terms of xp, despite being a mid-weight hero her level up rate is one of the lowest of all the heroes and she does not reach level 20 even when placed on round 1, before 100.
Abilities:
[Level 3 (5, 8, 14 & 19)] Naval tactics:
Level 3: Provides a 60% fire rate increase with 20% uptime.
Level 5: Increases pierce by 2 and adds lead, black and purple popping ability to all affected towers.
Level 8: Towers can now pop camo during the ability
Level 14: Base uptime increased to 25%
Level 19: Ability works outside of Brickbell`s range
[Level 10 (13, 18 & 20)] Mega mine (50s)
Level 10: Deals 4,000 damage with 102 pierce
Level 13: Cooldown reduced to 42s
Level 18: Cooldown reduced to 30s
Level 20: Damage increased to 15,000

Cost: 850
Speciality: Nothing of note.
Etienne is an odd hero, the only outstanding quality of this hero is having long range, he is outperformed in every possible way by at least one other hero and like Adora, he lacks a powerful passive or buff to add support, but he also lacks the damage of DPS heroes like Churchill or Adora.
There really isn’t a use case for Etienne, the main reason for this is that he cannot be buffed by an alchemist like all of the other damage heroes, he also does not get buffed by things like overclock or call to arms in the same way (only base drones get buff), requiring a homeland defence just to keep up with other heroes as this can buff his UCAV.
Abilities
[Level 3 (6, 16)] Drone swarm:
Level 3: Gain 4 more drones with 25% uptime
Level 6: uptime increased to 40%
Level 16: uptime increased to 50%
[Level 10 (8, 13, 15, 17, 20)]
Level 8: UCAV provides camo but cannot shoot bloons.
Level 10: Surveillance drone gains combat ability with 25% uptime
Level 13: Uptime increased to 33%
Level 15: Uptime increased to 40% and damage doubled.
Level 17: Damage output doubled again.
Level 20: Ability is permanent, gains an overcharge that provides the UCAV a MIB effect and doubles damage. Uptime reduced back to 25%.
Hero Tier List
For chimps mode
S
#1: Pat futsy – Provides incredible stuns with a damage multiplying ability, a must have for any single lane or even converging map.
#2: Striker Jones – Also has incredible stuns, can refresh abilities and crank up damage at level 20 for all bomb and mortars, also allows explosives to hit black bloons which is incredibly strong.
#3: Brickbell – Take the best parts of both of the above, sadly limited to water but makes boats and subs ridiculously strong.
A
#4: Quincy – A must have for expert maps, very potent earlygame power allows you to save up for larger towers with less hastle.
#5: Etienne – Similar to Quincy but without the mid and late game dropoff, more expensive however.
#6: Obyn – A fall from grace, obyn now only works with druids and cannot be placed on start, while this is still good as druids are powerful, it is very inflexible.
C
#7 Adora – Requires a very specific interaction with the energiser to be viable, this oddly limits Adora to water maps like Brickbell, but she is vastly inferior in every possible way on water maps.
#8 Churchill – Xp growth is abhorrently slow and he costs far too much to be placed early on harder maps, further compounding his xp rate issues, like Adora he will also need an energiser to perform well, which also limits him to water maps, where Brickbell is even further apart.
#9 Ezili – Only really good at killing moabs and bloons with special properties, while this is nice most heroes are generalists and Ezili`s main selling point, her totem, cannot be used in chimps mode.
D
#10 Gwendolyn – Not particularly good at anything, her passive is very weak, only providing lead popping power for a limited number of shots, at a higher level it adds 1 damage, effectively making her a weaker alchemist with an ability to throw out a singular wall of fire.
F
#11 Benjamin – Incompatible with CHIMPS mode.
For co-op mode
Monkey Knowledge: What to do with it?
Monkey knowledge, its a weird system, often seen as quite confusing for first timers to the series, and this segment aims to explain what to go for first.
Unlocked at rank 30, monkey knowledge will be provided on most level ups, maxing out at rank 155.
But that leaves a burning question… what to get first?
The first big thing to grab is the free dart monkey, it basically adds $170 starting cash ($340 on half cash), and since you will already have dart monkey knowledge, they are quite powerful. Remember to get the crossbows over triple darts!

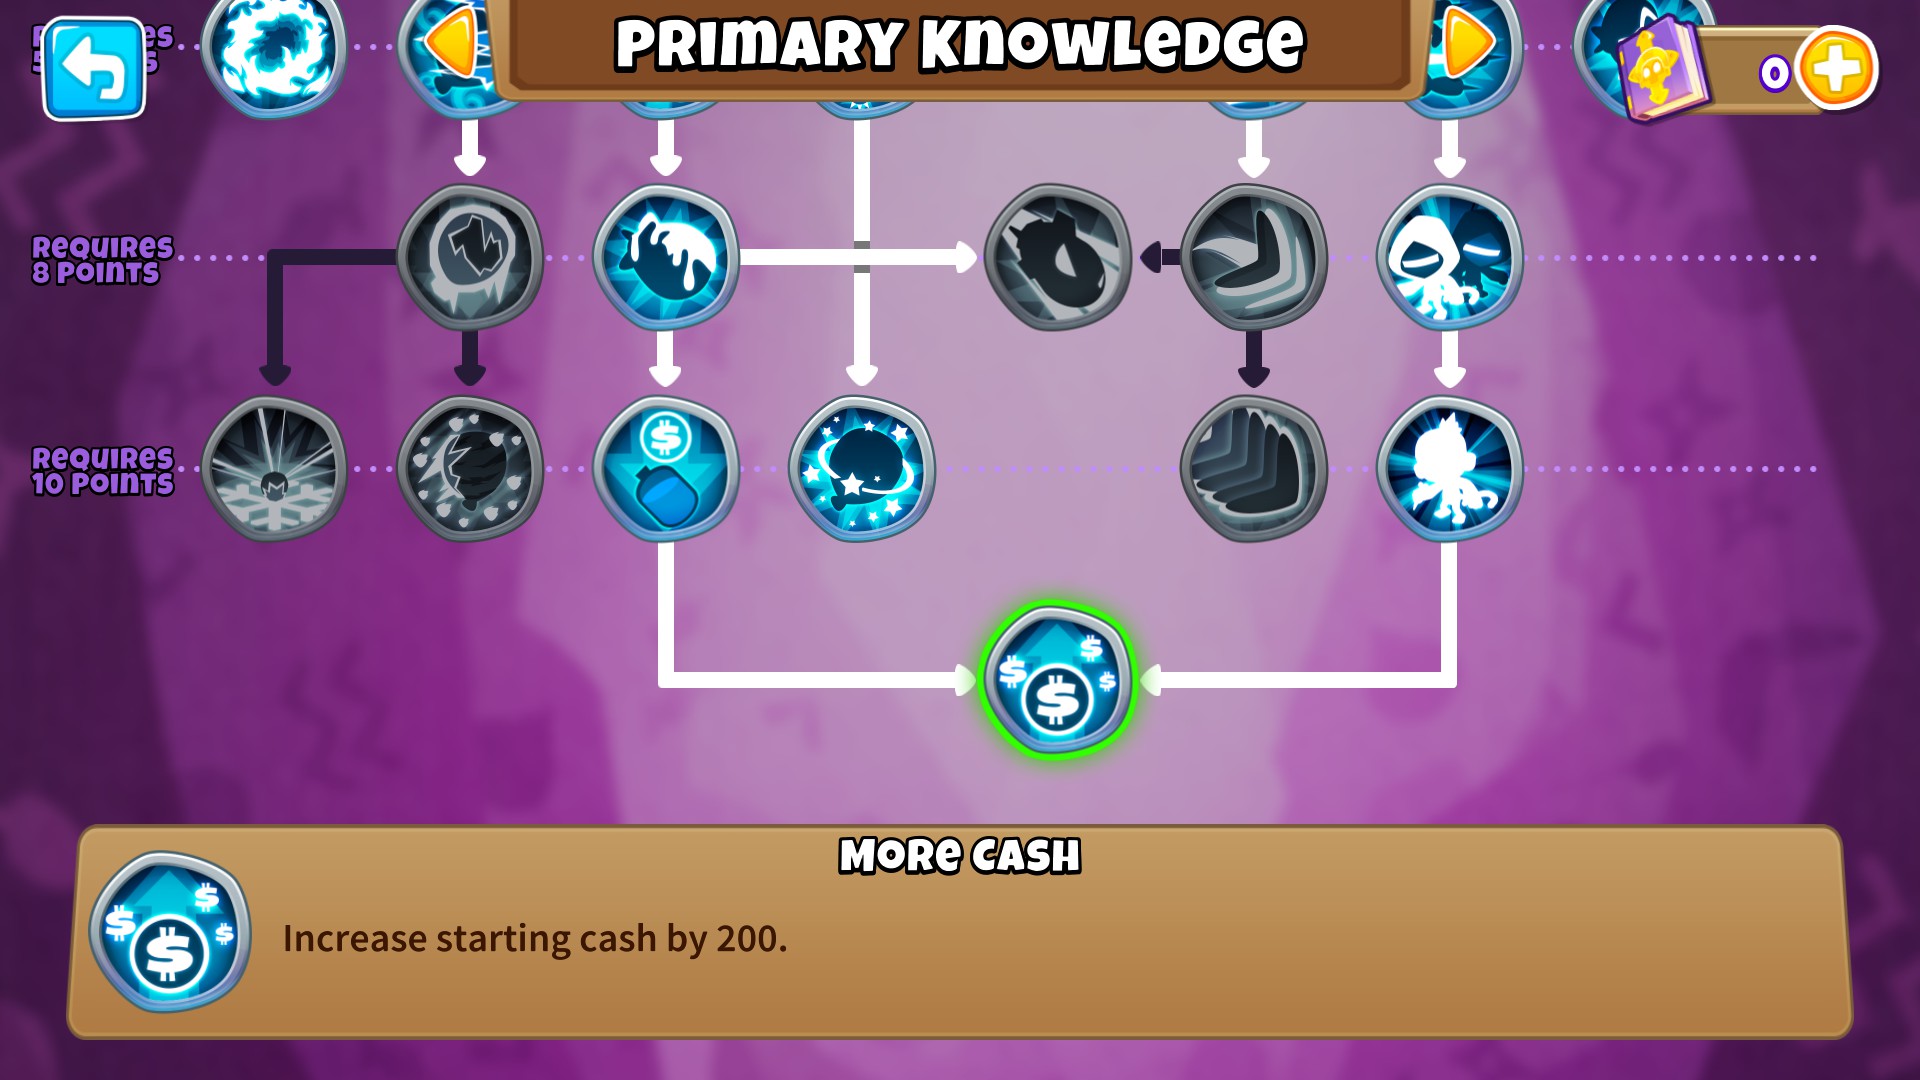
In order to make this efficient, since the second major perk is +200 starting cash, persue the dart monkey and glue gunner paths, both are required to get the +200 starting cash knowledge.
After obtaining all of this, the next upgrades really are all about those heroes, grab up the entire hero menu, don’t add anymore to the primary knowledge, most of the primary knowledge is fairly useless. The hero knowledge is fairly significant too, particularly that last upgrade.

Ok so if your back again, now you have all of those unlocked, what next? well if you’ve been playing all the level difficulties in order, you should now be starting to see alot of MOAB class bloons, and they are really annoying, but there’s a monkey knowledge for that!
Big bloon sabotage reduces all MOAB health by 10%, pretty nice one, reducing the health of a MOAB by 20, and BFB by 70, ZOMG by 400, DDT by 48* and B.A.D by 2500*
*Including ramping
The military line also includes a perk to reduce the cost of your first military monkey by half, this is one you will need for muddy puddles, as it allows you to start with a Heli pilot.
Monkey Knowledge Part 2 (Late Game)
Ok so you have alot of monkey knowledge now, perhaps you are considering grabbing those half cash and impoppable medals for some tricky tracks, well there’s monkey knowledge to help with both of those too.
The mana shield is a good overall perk to invest in, adding 25 max lives that slowly regenerate, sadly this is no longer active in impoppable, you may wish to skip this perk.

Ok, so if your back again, now you have all of the normal “essential” knowledge, its time to think about a few less useful but necessary upgrades, they focus around beating freeplay mode, which is “beaten” at round 200. Keep note, that you will want to play on easy difficulty, to ensure the bloons are as slow as possible, and by now, you should have all of the towers unlocked, so the rest below is purely optional, nothing here is essential.
This is the most important knowledge left on the grid for freeplay, without it, you wont beat freeplay!

How to use it? buy a X-5-X and X-X-5 super monkey, outside of the range of a 4th tier super monkey temple, and then buy the 5th tier temple, the anti bloon and legend of the night will be absorbed, and you will now have the only 6th tier tower in the game, the vengeful temple. remember to add sacrifices to the temple first, these will be covered later in the guide.
The last thing to consider, getting that sweet cash to buy the max temple, i mean it does cost more than $2,000,000 to get, nevermind all the rest of your essentials. Past this, the rest of the monkey knowledge is fair game, i would never recommend putting points into the powers tree, as most of the upgrades are useless.

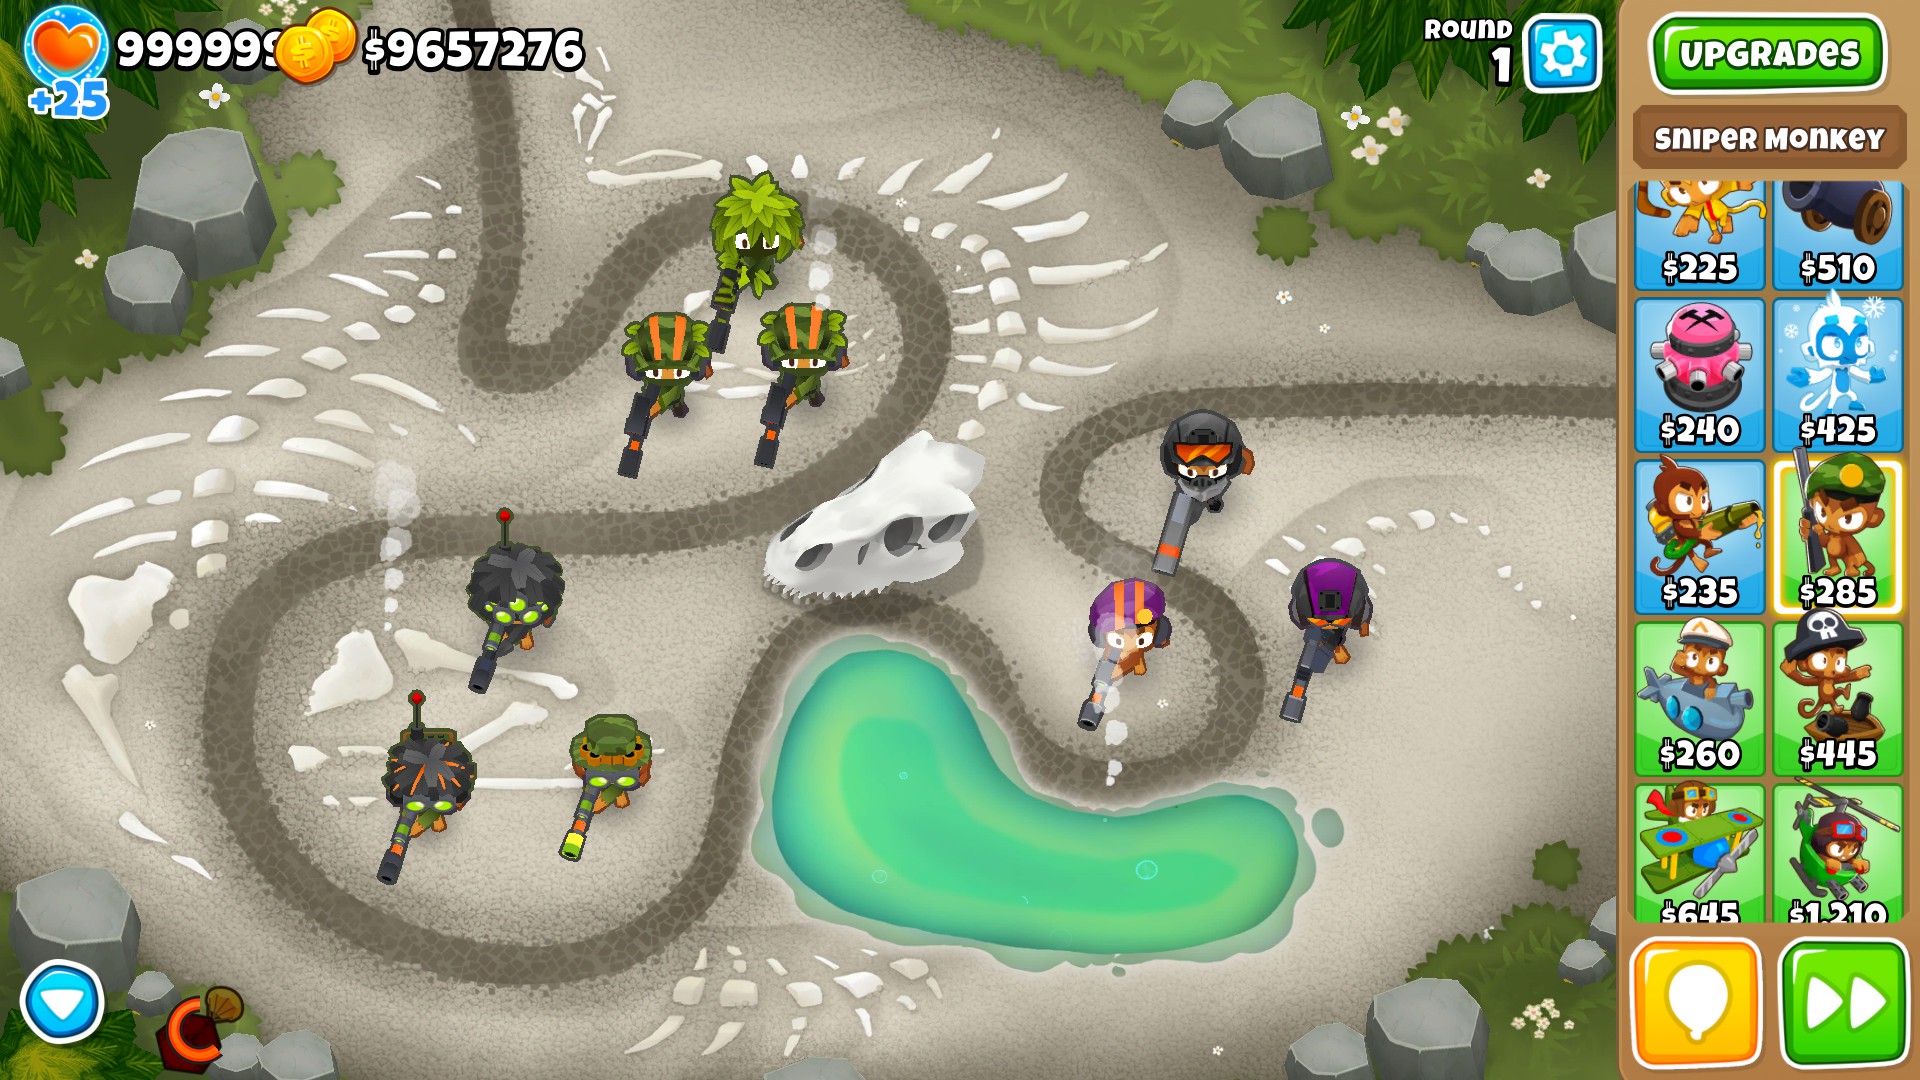
Primary Monkeys
Dart Monkey
Base stats:
> $200
> 2 pierce and 1 damage
> short/medium range
> 2 Pops per second
> Weaknesses: Lead, Frozen, Camo
$140 Sharp Shots: +1 pierce
$220 Razor Sharp Shots: +2 pierce
$300 Spike-o-pult: Rate of fire drastically reduced, pierce increased to 22, shots bounce off solid walls.
$1800 Juggernaught: Fires faster, has more range, +78 pierce, deal +2 damage to ceramics
$100 Quick shots: fires 15% faster.
$190 Very quick shots: fires 21.5% faster
$400 Triple Shot: fires three times as many darts
$8000 Super monkey fanclub: 30% uptime, transforms dart monkeys into super monkeys, they will retain upgrades such as quick shots and buffs such as alchemist brews Cannot transform crossbows or spike-o-pult pathed dart monkeys. Regular dart attack is made 25% faster.
$90 Long Range Darts: increases range
$200 Enhanced Eyesight: increased range and camo detection
$625 Crossbow: darts replaced by crossbow bolts, they gain +2 damage and +1 pierce, increases range.
$2000 Sharp Shooter: Deal 3 more damage, shots crit randomly between the 8th and 12th shot, dealing 50 damage instead.
Best Crosspath: 0-2-4, this deals alot of damage with alot of range and has few weaknesses.
Boomerang Monkey
Base stats:
> $325
> 4 pierce and 1 damage
> medium/long range
> 2.8 Pops per second
> Weaknesses: Lead, Frozen, Camo
$200 Improved rangs: +4 Pierce
$280 Glaives: +5 Pierce, fires 17.5% faster
$1300 Glaive Richochet: Gains +37 Pierce and bounce to nearby targets rather than fly in an arc.
$3000 M.O.A.R Glaives: Gains +50 Pierce, shots bounce further and faster, fires twice as fast.
$175 Faster Throwing: Throws 33% faster
$250 Faster Rangs: Projectile speed increased, Throws 25% faster.
$1600 Bionic Boomerang: Deal +1 Moab damage, Throws 285% faster.
$4000 Turbo Charge: Deal 1 more damage and throw 600% faster, 22% uptime.
$100 Long Range Rangs: Gain a large range bonus
$300 Red Hot Rangs: Deal 1 more damage, pops lead bloons.
$1300 Kylie Boomerang: +14 Pierce, throws in a straight line and can hit bloons twice.
$1800 Moab Press: Fires a special boomerang that deals enormous Moab damage to an almost unlimited number of Moabs, it also pushes Moabs and BFB`s back, slowing ZOMG`s and DDT`s
Best Crosspath: 0-2-4, this is mainly due to 0-2-5 being too expensive to afford in most games, the Moab knockback is not as good as sniper after its buff however the raw damage may make up for this in some uses.
Bomb Shooter
Base stats:
> $600
> 18 pierce and 1 damage
> long range
> 12 Pops per second
> Weaknesses: Black, Camo
$400 Bigger Bombs: Explosions twice as large and gain +6 pierce
$800 Heavy Bombs: Deal 1 more damage and gain +10 pierce
$1200 Really Big Bombs: Slightly larger explosion, gain +20 Pierce and frags gain +1 pierce
$3200 Bloon Impact: Deal 1 more damage, stuns regular bloons, can pop black bloons.
$250 Faster Reload: Shoots 25% faster
$400 Missile Launcher: Gains a slight increase in range, velocity increases significantly and shoots 17.5% faster
$900 Moab Mauler: Deals +15 damage to Moabs and +5 to ceramics
$3200 Moab Assassin: Ability deals 750 damage to a Moab class bloon that it can see and the resulting explosion deals +2 damage and has +82 pierce on-top of this. 30 second cooldown.
$200 Extra Range: A large increase in range
$300 Frag Bombs: Gain a small range increase and fire out 8 frags that deal 1 damage and have 1 pierce on each shot, can pop black bloons.
$800 Cluster Bombs: Main bomb replaced with a “cluster bomb” that has 10 pierce and explodes into 8 fragment bombs. All bombs affected by crosspathing.
$2800 Recursive Cluster: Every other shot fires a recursive bomb that splits into 8 cluster bombs that split into 8 fragment bombs!
Best Crosspath: 2-0-3, after the price nerf to the X-X-4 upgrade, it is best to deploy lots of these cluster bombs, they can deal up to 16 damage to 20 bloons at a time which is far better than the other crosspaths, avoid the bomb blitz 5th tier however*
Tack Shooter
Base stats:
> $280
> 1 pierce and 1 damage
> Very Low Range
> 5.7 Pops per second
> Weaknesses: Lead, Frozen, Camo
$150 Faster Shooting: Fires 33.3% faster
$300 Even Faster Shooting: Fires 66.7% faster
$600 Hot shots: Deals 1 more damage and pops lead
$4500 Ring of fire: Rather than shoots tacks, all bloons in range take 3 damage each time it pulses, pierce of 60. Can no longer pop purples.
$100 Long range tacks: Increases range a small amount
$225 Super range tacks: Increases range again by a small amount
$550 Blade Shooter: All tacks gain +5 pierce and are much larger.
$2700 Blade Malestorm: Unleashes a sprayed ring of blades with unlimited range and pierce. 20 second cooldown.
$100 More Tacks: Adds 2 tack shooting ports, ring of fire gets +10 pierce from this
$100 Even More Tacks: Adds 2 tack shooting ports, ring of fire gets +10 pierce from this
$450 Tack Sprayer: Rate of fire increased by 33.3%, adds 4 more ports
$2500 Overdrive: Rate of fire increased by 200%
Best crosspath: 2-5-0, the super malestorm remains the strongest tower in the game even after a year of updates and has even been buffed! what madness.
Ice Monkey
Base stats:
> $500
> 40 pierce and 1 damage
> Very Low Range
> 16.6 Pops per second
> Weaknesses: Lead, White, Camo, Frozen
$100 Permafrost: After being frozen, bloons are halved in speed.
$300 Metal Freeze: Attacks pop lead bloons, this also provides DDT popping to icicle impale.
$1500 Ice Shards: When a bloon frozen by this tower is popped, three fragments of ice are produced that pop three bloons each.
$3000 Embrittlement: Deal one more damage, bloons frozen take one more damage for 2s
$225 Enhanced Freeze: +33.3% attack rate, frozen bloons remain frozen for 2.2s up from 1.5s
$350 Deep Freeze: If a frozen bloon is popped the layer directly underneath will still be frozen, even if multiple layers are popped at once
$3200 Arctic Wind: Now affects up to 100 bloons at a time and halves the movement speed of bloons in its range, this stacks with permafrost. Land based towers can be placed on water within its range.
$3000 Snowstorm: Gain a large boost to range. Activated ability freezes all bloons and freezes moab class bloons for shorter durations, even shorter for higher tier Moabs. This ability will apply permafrost to all bloons hit.
$100 Larger Radius: Somewhat large range increase
$200 Re-Freeze: Freeze status affects can be re-applied to already frozen bloons, this also applies to other crosspaths, including embrittlement`s brittle and super brittles super brittle status effects.
$2000 Cryo Cannon: Rather than freeze in its range, the ice tower now acts like a regular tower, shooting snowballs with 30 pierce and 1 damage every second (faster with middle path) at bloons.
$2000 Icicles: Frozen bloons become an ice shard. (Note: this cannot pop lead without the top path)
Best crosspath: 5-X-X, there is an argument for both crosspaths here and it entirely depends on where the ice is placed and what map it is on, with poor coverage more range is better, for ideal placements the fire rate is better.
Primary Monkeys part 2
Glue Monkey
Base stats:
> $275
> 1 pierce and 50% slow Affects 3 layers for 11 seconds
> Long Range
> Weaknesses: Camo, Moab, B.A.D
$200 Glue Soak: Glue affects all layers except on Moabs.
$300 Corrosive Glue: Gains priority over moab glue and strong glue, deals 1 damage to glue bloons every 2.3 seconds. Can hit Moabs and B.A.D`s
$3300 Bloon Dissolver: deals damage every 0.55s
$7000 Bloon Liquefier: Deals damage every 0.1s
$100 Bigger Globs: +1 pierce
$1800 Glue Splatter: Gains AoE and +4 pierce
$3250 Glue Hose: fires 200% faster
$3500 Glue Strike: Applies glue to all targets on the map, including Moabs if the corrosive glue upgrade is purchased, this also regenerates stronger glues duration.
$120 Sticker Glue: Glue lasts 13 seconds longer, for a total of 24 seconds.
$400 Stronger Glue: Glue is twice as effective at slowing bloons
$3200 Moab Glue: Moabs get slowed by half the amount and duration of regular bloons.
$3000 Relentless Glue: When a glued target is popped, it drops the glue, this lasts for 5 seconds and applies the same glue effect to the next bloon.
Best crosspath: 2-5-0, Glue storm is the cheapest AOE debuffing tower and also one of the most helpful, it both increases damage and provides and incredible ceramic slowdown which is just as good as Moab glue. Make sure to place it next to primary expertise for more uptime.
Military Monkeys
Sniper monkey
> $350
> 2 damage
> unlimited range
> 1 Pops per second
> Stuns ceramic bloons with a monkey knowledge upgrade
> Weaknesses: Lead, Camo, Frozen
$350 Full metal jacket: +2 damage, pops all bloon types except Camo.
$1500 Large calibre: +3 damage.
$3000 Deadly precision: +13 damage with 15 more for ceramics, pops a ceramic bloon into no bloons before round 81.
$5000 Maim moab: +12 damage, stuns Moabs, Can stun BFB`s with faster firing, Zomgs and DDT`s require the highest upgrade in RoF.
$300 Night vision goggles: Can shoot Camo bloons, deals 2 more damage to them.
$450 Shrapnel shot: If a shot pops a bloon, releases 8 shrapnel fragments that deal 1 damage to two bloons at most.
$3200 Bouncing bullets: Now a pierce based tower, gains +3 pierce and can be affected by pierce buffs, bullets will bounce at nearby bloons.
$7200 Supply drop: up to twice a round calls in a cash crate worth $500-$999, 60 second cooldown.
$400 Fast firing: shoots 53% faster
$400 Even faster firing: shoots 66.7% faster
$3500 Semi-automatic: shoots 200% faster
$4750 Full auto rifle: shoots 100% faster
Best crosspath: 0-2-5, used to be a massive joke but now its one of the best towers in the whole game in terms of damage output for its price, remember to provide an alchemist!
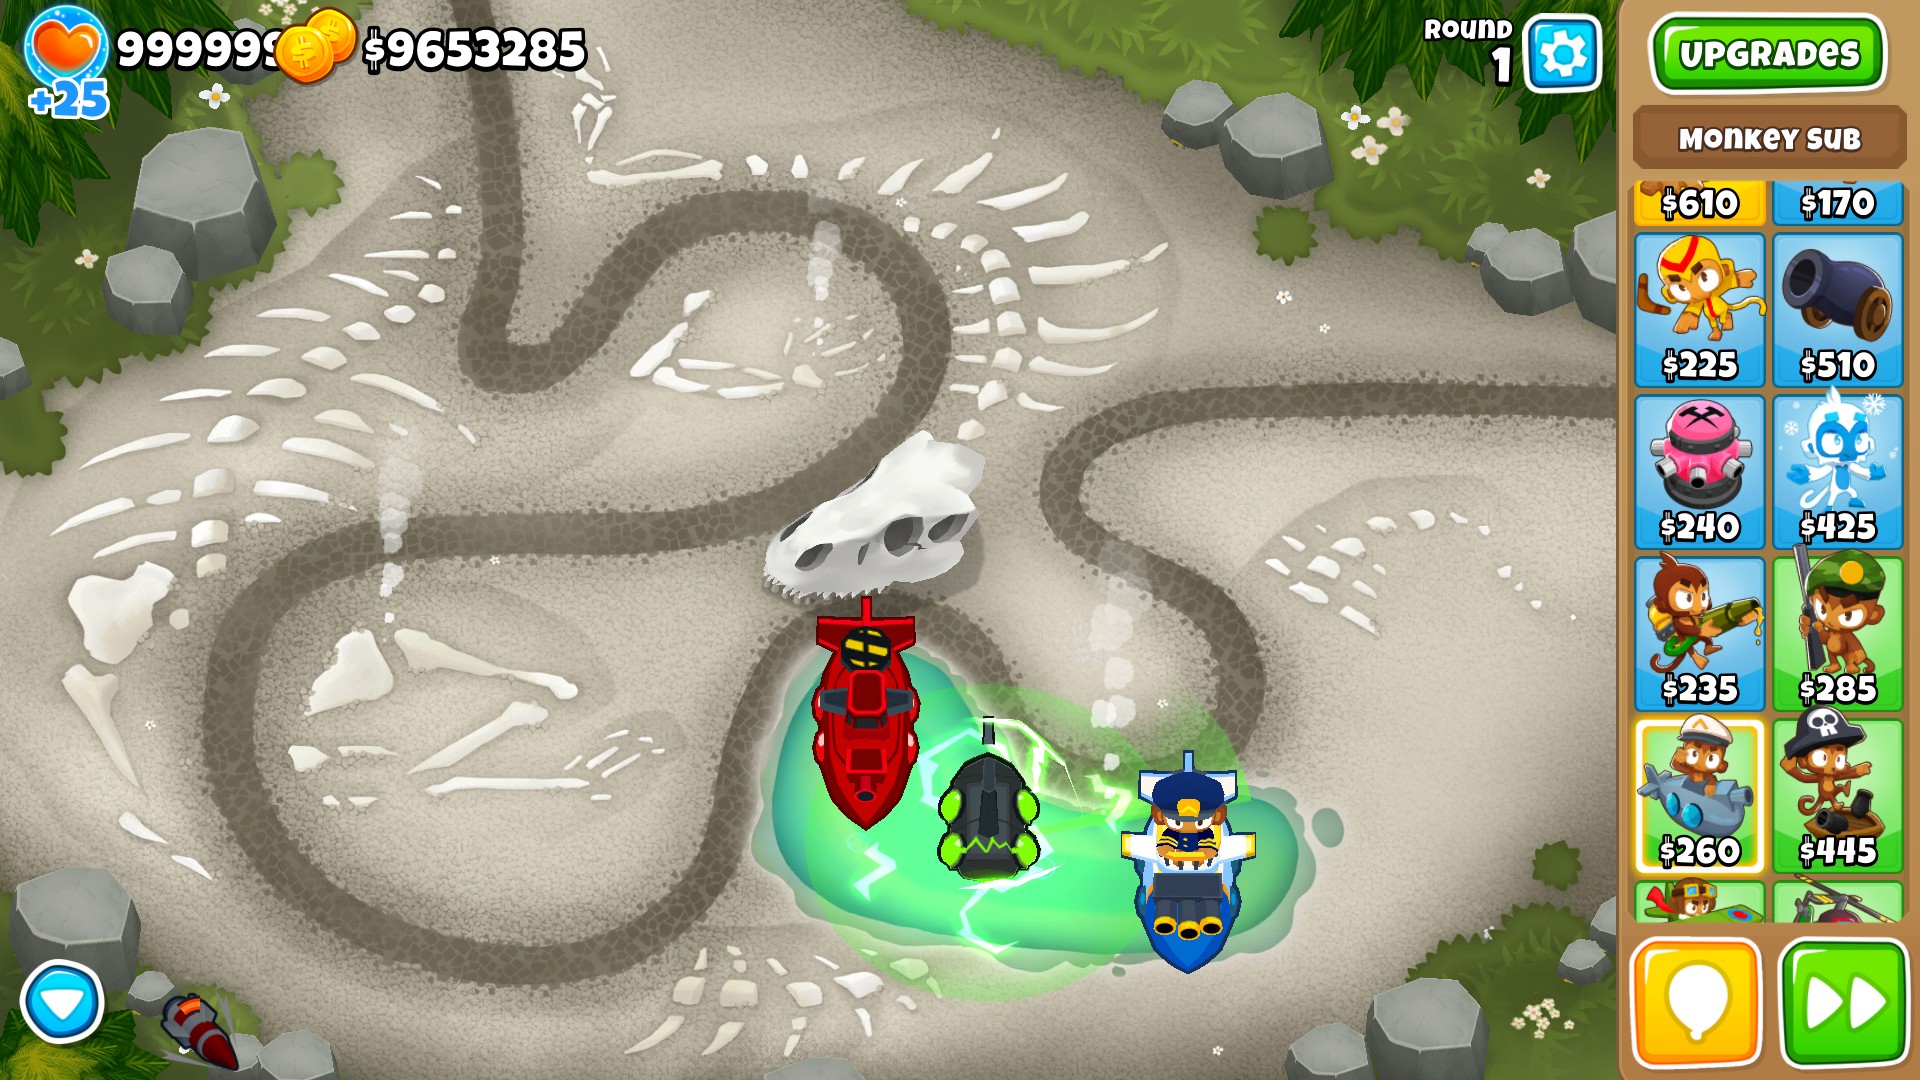
Monkey sub
> $350
> 1 damage, 2 pierce
> medium/long range
> 2.5 Pops per second
> Weaknesses: Lead, Camo, Frozen
$130 Longer range: a large increase in range
$500 Advanced intel: Can use the range of other towers to attack with, inheriting Camo detection if another tower can see Camo
$500 Submerge and support: Can be submerged to reveal camo
$2500 Bloontonium reactor: Submerge now deals light damage for up to 70 bloons and removes Camo from bloons faster.
$450 Barbed darts: +3 pierce
$300 Heat-tipped darts: can pop lead
$1500 Ballistic missile: fires missiles with unlimited range that deal 1 damage, have 100 pierce and deal 4 extra damage to Moabs and ceramics.
$13000 First Strike: Deals 10,000 damage to the strongest bloon on screen, the “fallout” explosion deals 350 damage to all bloons near that target. 60 second cooldown
$450 Twin guns: Doubles rate of fire
$1000 Airburst darts: Darts now split into 3 on impact (4 with knowledge), dealing 3 more damage to the target bloon and one more bloon (4 more with barbed darts).
$1100: Triple guns: Adds one more gun, increasing rate of fire by 50%
$3000 Armour piercing darts: +1 damage and +2 bonus damage to Moabs, airbursted darts specifically only get +1 damage but also gain 3 pierce.
Best crosspath: 5-0-2, The energiser is the most useful sub overall, however the X-X-5 is also a valid sub, with only the middle path having less use overall (and only for its ability, never 5th tier).
Monkey buccaneer
> $550
> 1 damage, 4 pierce
> Long range
> 4 Pops per second
> Weaknesses: Lead, Camo, Frozen

$350 Faster shooting: Fires 33.3% faster
$500 Double shot: Now fires two darts
$2950 Destroyer: Fires 400% faster
$7500 Aircraft Carrier: Retains attack from destroyer and gains three planes which perform bombing run style attacks on bloons, each dart deals 1 damage with 9 pierce and cannot pop lead or frozen, fires darts occasionally in a burst and rapidly forwards when bombing bloons.
$500 Grape shot: Fires a fan of 5 grapes at nearby bloons, this is also affected by attack speed bonuses.
$500 Hot shot: Grapes apply a burn effect to bloons and can pop leads
$900 Cannon ship: Gains a bomb shooter with 1 damage and 28 pierce and it is also a frag-bomb.
$4500 Monkey pirates: can target a Moab or BFB and instantly kill it, 60s cooldown.
$180 Long range: Gains a somewhat large range increase
$400 Crows nest: Pops camo bloons.
$2300 Merchantman: Generates $200 at the end of the round, this can be buffed by a trade empire or X-X-4 banana farms.
$5500 Favoured Trades: Generates $300 more per round and increases the sell price multiplier by 0.1x up to a maximum of 95% sell price.
Best crosspath: While this normally considers a CHIMPS crosspathing, the 0-2-5 is simply too strong to ignore, being the best income source in the game in terms of raw efficiency and being endlessly scaleable, limited only by water.
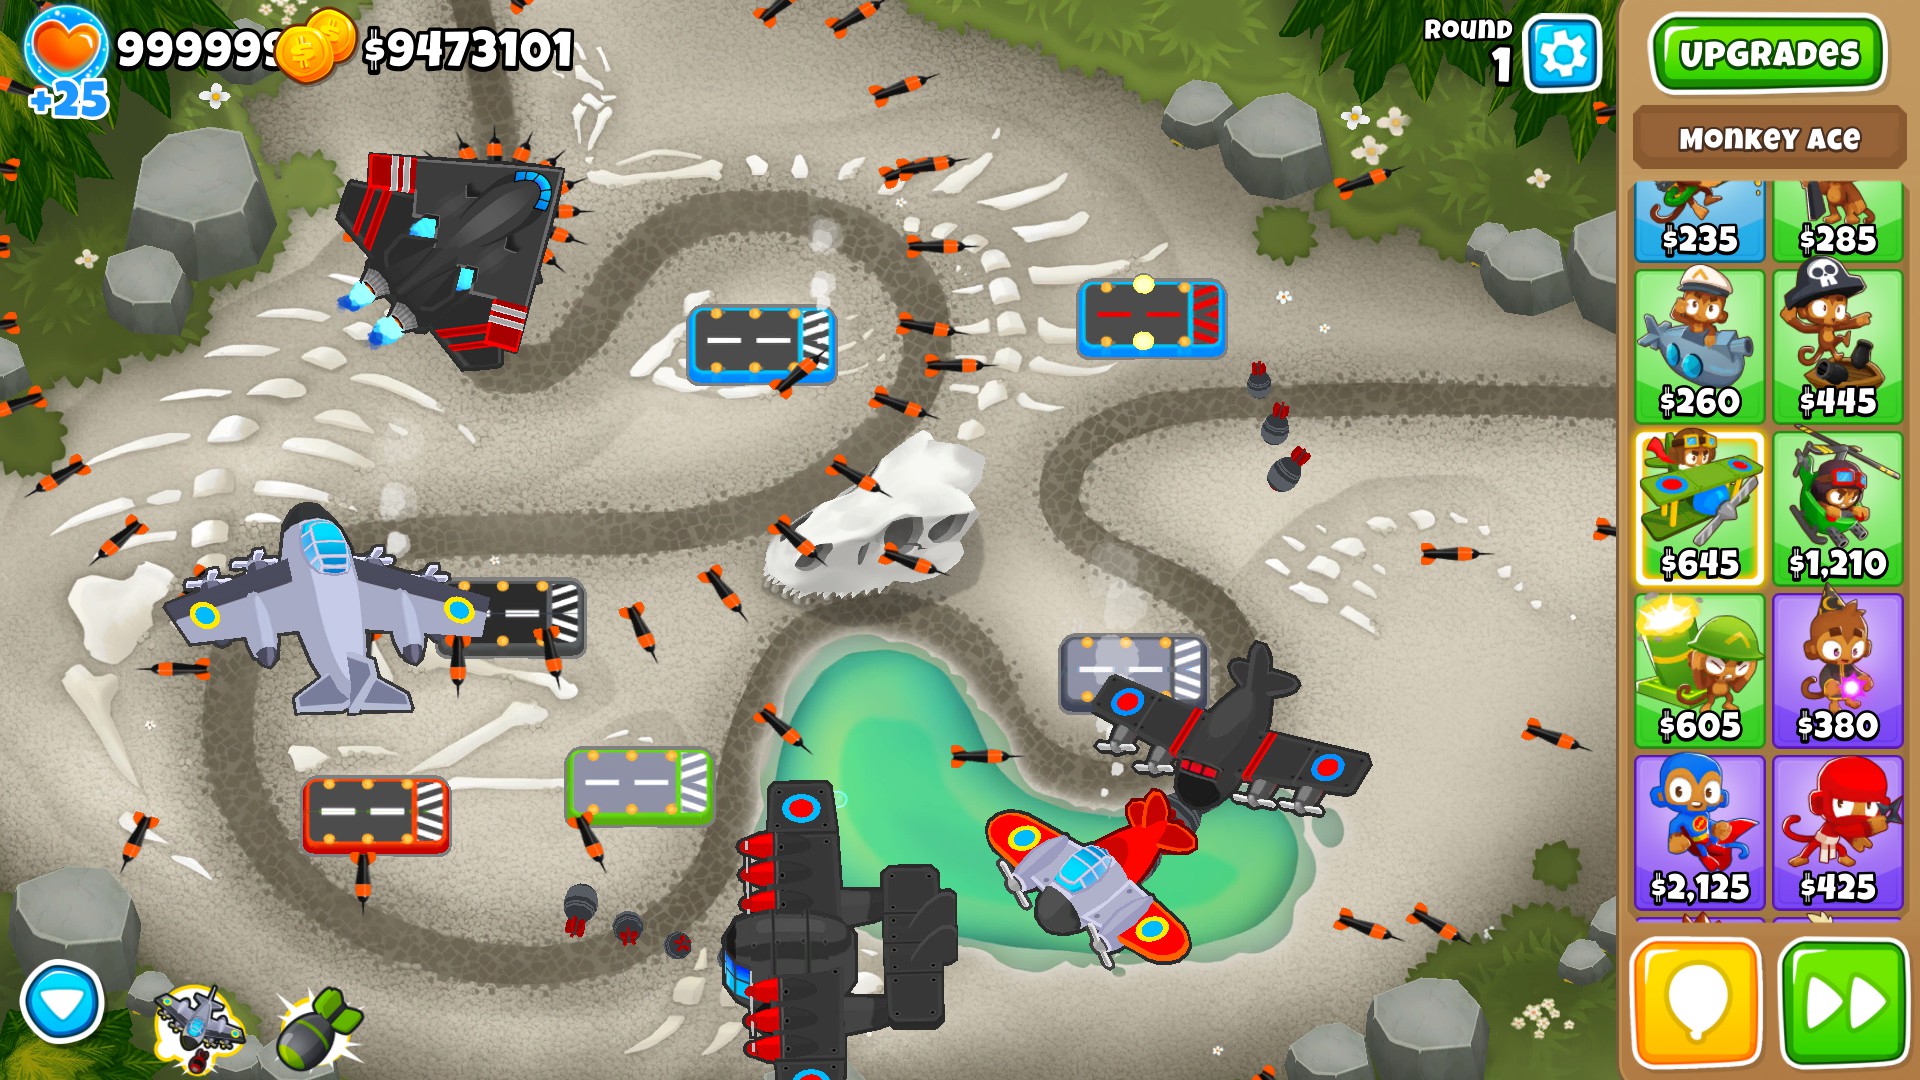
Monkey ace
> $800
> 1 damage*, 5 pierce, 8 projectiles
> unlimited range
> 20 Pops per second
> Weaknesses: Lead, Camo, Frozen
$650 Rapid fire: Attack speed increased by 66.7%
$650 Lots more darts: Gains 4 more ports, shooting 12 darts rather than 8
$1000 Fighter plane: Flies faster and launches pairs of missiles dealing 25 damage each at Moabs every 3s they are on screen.
$3000 Operation dart storm: Gains 4 more ports for a total of 16 darts per shot. Moab missiles fire twice as fast and base dart attack fires twice as fast. Will also double the rate pineapples drop.
$200 Exploding pineapple: Drops pineapples every 3 seconds that explode with 1 damage and 40 pierce
$350 Spy plane: can pop Camo
$900 Bomber ace: Replaces the pineapples with regular bombs that deal +2 damage, dropping 4 at a time. This upgrade loses the ability to drop bombs away from the path.
$14000 Ground Zero: Bombs now deal 7 more damage, gains the ability to drop a nuke that deals 700 damage to all bloons on screen.
$500 Sharper darts: Darts gain 3 pierce
$300 Centred path: Gains an option to fly in a large ring around the map, loses around 1/3rd attack speed.
$2200 Neva-miss targeting: Darts attempt to home on in bloons with quite a wide angled arc infront of them and move faster.
$24000 Spectre: Dart shooter replaced by a new weapon that rapidly fires bombs dealing 3 damage and 60 pierce per bomb and 1 damage with 30 pierce per dart.
Best crosspath: 5-0-1, thanks to the interaction between this ace and the carrier flagship, this ace can become swift death for all bloons, overcharge is recommended to get the most out of that combo.
Heli pilot
> $1500
> 2 damage, 3 pierce
> unlimited range
> 11 Pops per second
> Weaknesses: Lead, Camo, Frozen

$800 Quad darts: Now has 4 guns rather than 2 shooting two more darts
$500 Pursuit: automatically tracks bloons
$1750 Razor rotors: rotors rapidly pop bloons up to 10 at a time.
$19600 Apache dartship: Gains a machine-gun with 5 pierce darts and rockets in sets of 4 that pop 2 layers each and have 40 pierce.
$300 Bigger jets: flies much faster
$600 IFR: can pop camo
$3000 Downdraft: rapidly blows away nearby bloons in large volumes. Beware of the regrows.
$12000 Support Chinook: Gains a large amount of utility and better blowback.
> can re-deploy towers except temples and itself, 60s cooldown.
> Alternating crate boxes give $1000-$1999 cash and between 50 and 75 lives
$350 Faster firing: Fires 25% faster
$250 Faster darts: Darts travel much faster
$5000 Moab shove: Can push back a single Moab at a time, stalls a BFB and slows ZOMG and DDT`s
$10000 Comanche defence: every quarter of the map covered by bloons, summon another helicopter for the remainder of the round.
Best crosspath: 5-X-X, This heli packs a punch and can easily deal with all the bloons on its own with limited help, thanks to overcharge being added it is now much easier to step up into this 5th tier along with other cheaper superpowers like the elite defender.
Military monkeys part 2
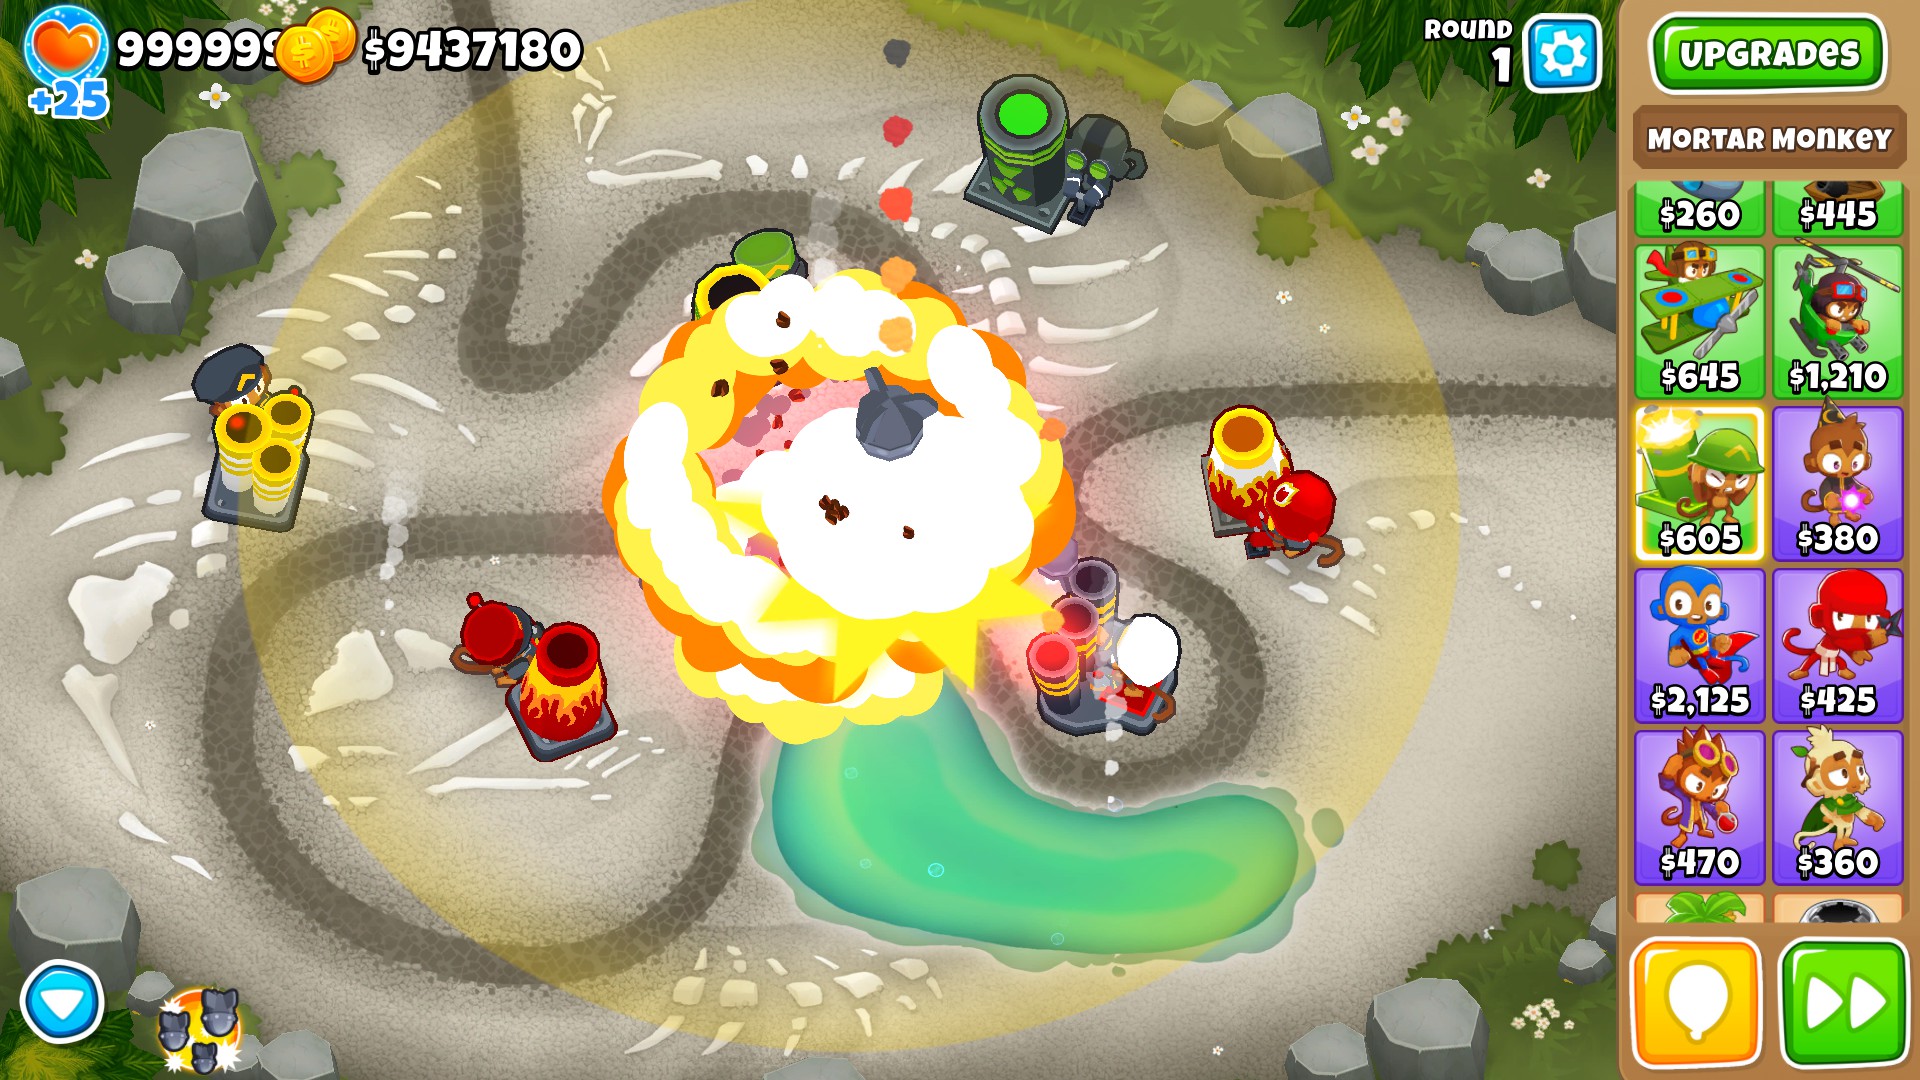
Mortar Monkey
> $750
> 1 damage, 40 pierce
> unlimited range
> 18 Pops per second
> Weaknesses: Black, Camo
$500 Bigger blast: Gain +5 pierce and a much larger AOE
$650 Bloon buster: Gains +1 damage
$1100 Shell shock: Gains a shockwave with 45 pierce that stuns bloons, if this is not used, it expands and instead deals 1 damage much further away
$8000 The biggest one: Deals 3 more damage and 40 pierce, explosions is significantly larger and so is the shockwave.
$300 Faster reload: increases reload by 46%
$500 Rapid reload: Increases reload speed by 43%
$900 Heavy shells: Gains a variety of buffs; can pop black bloons, deals one more damage to leads and moabs and three more to ceramics with more more to any fortified bloons.
$5500 Artillery battery: Gains +300% rate of fire
) note: this is 4x not 3x
$200 Increased accuracy: Reduces the dispersion of shells
$500 Burny stuff: applies a burn that deals 2 damage over 3 seconds, does not stack.
$700 Signal flare: Removes Camo when dealing damage to bloons only.
$11000 Shattering shells: Removes regrow and fortify from all BFB and lower. Can De-Camo DDT`s with a monkey knowledge.
Best crosspath: 0-2-4, The shattering shells make fortified moabs not so scary, this is good.
Dartling Gunner
> $950
> 1 damage, 1 pierce
> unlimited range
> 5 Pops per second
> Weaknesses: Camo, Lead
$300 Focused Firing: Halved spread
$900 Laser shock: Applies the static debuff which can stack, its damage depends on the upgrade. For the basic laser shock it deals 1 damage after 0.5s.
$4250 Laser cannon: Double projectile speed, +1 damage & +3 Pierce.
$11000 Plasma Accelerator: -1 damage, lose laser shock & +46 pierce and unlimited projectile speed, point of impact deals 1 more damage and 11 more moab damage and laser shock is retained, now dealing 6 damage over 3 seconds.
$250 Advanced Targeting: Can see camo
$950 Faster Barrel Spin: +50% rate of fire.
$5250 Hydra Rocket Pods: +5 pierce, explodes on the first hit then each second hit afterwards, explodes dealing 1 more damage with 2 pierce.
$4800 Rocket Storm: Fires a storm of rockets for 10s (1/3rd uptime), each wave of rockets has 10 rockets with 6 damage and 8 pierce. Number of rocket waves is 19 without buffs but can increase.
$150 Faster Swivel: Turns twice as fast
$1200 Powerful Darts: +2 pierce. +25 pierce for plasma accelerator.
$4000 Buckshot: Gains 1 pierce, 5 projectiles per shot and +3 damage. Halved range, quartered rate of fire.
$12000 Bloon Area Denial System: fire rate returns to normal, gains a new targeting option that puts one barrel on first, one last, one strong and one close.
Magic Monkeys
Magic Monkeys
Heroes: Obyn Greenfoot, Adora
Wizard Monkey
The wizard monkey offers a cheap, rapid firing and long range attack, the bottom path and X-2-X upgrades are some of the most cost effective options in the game, not only offering cheap camolead but incredible all round damage.
Base stats:
> $450
> 2 pierce and 1 damage with 1 projectile per second
> [Range amount]
> 2 Pops per second
> Weaknesses: Purple, camo, lead
Upgrades:
$150 Guided Magic: can shoot behind cover and becomes more accurate
$600 Arcane Blast: All shots now deal one more damage
$1,300 Arcane Mastery: Gain +4 pierce, [Range], +1 damage and and fires twice as fast
$10,000 Arcane Spike: Gains +2 damage, fires twice as fast and deals 10 more damage to moab class bloons, can pop leads.
$300 Fireball: fires a fireball with 1 damage and 16 pierce every 2.5s
$900 Wall of fire: places a wall of fire randomly in amongst its range dealing 1 damage with 20 pierce rapidly dealing damage, excellent value for money.
$3000 Dragons breath: spawns walls of fire more often giving 100% uptime, fires a stream of flames that have 4 pierce and 1 damage. Monkey knowledge upgrade: Projectiles are twice as fast
$4000 Summon Phoenix: summons a Phoenix giving a second dragons breath attack that is larger in size and deals 1 more damage with 1 more pierce. The Phoenix will gain buffs if the main tower is buffed. 1/3 uptime.
$300 Intense magic: +5 Pierce and faster projectiles
$300 Monkey sense: Can hit camo bloons
$1800 Shimmer: 200 pierce wave that removes camo from bloons but does not do damage.
$2800 Necromancer: Once bloons are popped within its range, it summons bloons that deal 1
2 damage and have 2 pierce
Best crosspath: 2-0-5, Prince of darkness is here to take bloon souls and throw them right back at more bloons, its very effective for the price.
Super Monkeys
Super monkeys are the pinnacle of monkeys, they deal the most damage, have the most static range (Excluding snipers) and have the most potent upgrades in the game, this does however come with an enormous price tag, you often wont use this past their third tier of upgrades, as the 4th and 5th tier upgrades on all paths are incredibly inefficient.
Base stats:
> $2700
> 1 pierce and 1 damage 17.5 projectiles per second (Approx)
> [Range amount]
> 17.5 Pops per second
> Weaknesses: Lead, camo
Upgrades:
$2,500 Laser blasts: +1 pierce
$4,500 Plasma blasts: +4 pierce and doubled rate of fire, pops lead, can no longer pop purple
$22,000 Sun Avatar: +18 pierce and 3x rate of fire Monkey knowledge upgrade: can now pop purple bloons
Temples: See Guide Section for temples ($100,000 and $500,000 base price)
$1,000 Long range: Gets more range
$1,400 Super range: Gets more range, +1 pierce Monkey Knowledge upgrade: gives even more range.
$9,000 Robo Monkey: Fire rate *2, +2 pierce, gains weird targeting.
$22,000 Tech Terror: +4 pierce, 700dmg infinite pierce AOE ability, pops lead, can no longer pop purple.
$3,000 Knockback: Potent stalling ability, can slow bloons or completley halt them, may cause regrow farms. Monkey knowledge upgrade: Can slow Moab class bloons more effectivley and provides more knockback power
$1,200 Ultravision: Small range bump and camo detection
$5,500 Dark Knight: +3 pierce, +2 damage to Moabs (Includes B.A.D)
$60,000 Dark Champion: +3 pierce, double rate of fire, +1 damage, +1 damage to Moabs, pops lead
Best crosspath: 3-2-0, This upgrade packs a punch, instantly tripling its number of projectiles and each one gets the full benefit of Obyn`s pierce buffs and an alchemists potions, this can quickly become a one monkey army with a side option of Pat for insane damage potential.
Ninja Monkey
Base stats:
> $450
> 2 pierce and 1 damage with 1.5 projectiles per second
> [Range amount]
> 2 Pops per second
> Weaknesses: Lead
$300 Monkey discipline: 50% attack rate bonus and [Range]
$350 Sharp Shurikens: adds 2 pierce
$750 Double shot: Doubled rate of fire as there are 2 projectiles per attack
$2750 Bloonjitsu: Fires 5 shurikens per attack, up from 2
$350 Distraction: Somewhat low chance to blowback bloons (around 10%, 20~% with knowledge)
$500 Counter espionage: Removes camo from hit bloons, this includes DDT`s if this monkey can pop lead bloons
$750 Shinobi tactics: Buffs the attack rate of nearby ninjas by 8%, this stacks up to 20 times.
$5000 Bloon sabotage: halves bloon speed for 15 seconds, 45 second cooldown.
$250 Homing shuriken: attacks are less likely to miss
$400 Caltrops: Drops caltrops with 3 pierce and 1 damage at 1/3rd of the normal attack speed
$2750 Flash bomb: Fires a flash bomb with 60 pierce that can pop lead bloons and stuns bloons for half of the time it takes to throw another flash bomb.
$4500 Sticky bombs: Lobs a fused sticky bomb at nearby Moab class bloons, it does 400 damage but only affects one moab at a time and has a considerable delay.
Best crosspath: 0-4-0, An ability that halves bloon speed for a reasonably long period of time? Yes.
Druid Monkey
Base stats:
> $425
> 1 pierce and 1 damage with 1.5*5 projectiles per second
> [Range amount]
> 7.5 Pops per second
> Weaknesses: Lead, Camo

$250 Hard thorns: Adds 1 pierce
$1000 Heart of thunder: Fires a lightning strand with 30 pierce and unlimited speed at half the rate
$2000 Druid of the storm: Fires a tornado with 30 pierce that blows back bloons
$6000 Ball lightning: Fires balls that fire lightning rapidly several times before expiring.
$250 Thorn swarm: Fires 3 more thorns per attack
$350 Heart of oak: all hit bloons lose the regen property
$950 Druid of the jungle: Slowly destroys the strongest non-moab bloon on screen, the bloon is stunned while affected
$5000 Jungles bounty: Gain $200+(150*farm in range) cash per usage
$100 Druidic reach: gains [range]
$300 Heart of vengance: permanently gains attack speed for each bloon lost, and a tiny bonus when first purchased.
$600 Druid of wrath: for each bloon popped without a short pause in bloons present, gain attack speed.
$2500 Poplust: Buffs other druids attack speed, stacking up to 5 times.
Best crosspath: 0-2-5, This will require Obyn to be effective though.
Alchemists
Alchemist
Base stats:
> $550
> 15 pierce and 1 damage with 0.5 projectiles per second
> Applies debuff (Acid), 2 layers of damage over 5 seconds
> [Range amount]
> 13.5 Pops per second
> Weaknesses: Camo

$250 Larger Potions: Increases pierce by 15
$350 Acidic Mixture Dip: Throws a buff, can buff one tower and provides it with the ability to pop lead and deal +1 damage to ceramic and moab bloons. Lasts for 15 shots.
$1250 Berserker Brew: Throws a second brew that can buff one tower at a time and gives them +25% attack speed, +1 damage and +2 pierce
$2500 Stronger Stimulant: Brew applies one more pierce (3 total), lasts twice as long and can effect up to 60 attacks before wearing off instead of 30. With faster throwing this can buff two towers at once provided their attack rate is not too high.
$250 Stronger Acid: Acid deals 4 damage instead of 2.
$475 Perishing Potions: Potions instantly pop fortified lead bloons, remove fortify from ceramics and deals +5 damage to moabs and +20 damage against fortified moabs. Potions last 5(10) attacks longer.
$3000 Unstable Concoction: applies unstable to moab class bloons, this causes an explosion with increasing damage based on bloon size. Damage is increased against fortified bloons.
Deals…
> 3 base damage
> +20(40) damage with 20 pierce for moabs
> +70(140) damage against BFB`s
> +400(800) damage against ZOMG`s
> +40(80) damage against DDT`s
> +2000(4000) damage against B.A.D`s
$4500 Transforming Tonic: Transforms alchemist into a crazy monkey with laser eyes, has 4 pierce, 1 damage and fires at 68 shots per second, 35% uptime.
$500 Faster Throwing: 25% faster potion, attack and acid pool speed. Can buff two towers at once with 4-0-1
$600 Acid Pool: Produces acid pools with 5 pierce that deal 1 damage and apply the current acid effects.
$1000 Lead to Gold: Lead bloons hit give $50
$2750 Rubber to Gold: Triple income for all affected bloons (including moabs), has diminishing returns when paired with other income boosts.
5th tier upgrades.
$60,000 Permanent Brew: Applies the effect of stronger stimulant (+1 damage, +3 pierce, +25% attack speed) and acidic mixture dip (+1 ceramic damage, +1 moab damage, pop lead) permanently.
$45,000 Total Transformation: 50% uptime instead of 35%, also effects up to 5 nearby monkeys which are lower than tier 4. Does not make the tower stronger.
$40,000 Bloon Master Alchemist: Throws a special tonic that instantly kills bloons, leaving behind a single red bloon. Affects…
> Up to 20 moabs
> 4 BFB`s
> 4 DDT`s (requires moab glue or sabotage)
> Or 2 ZOMG`s
Potions do not care if the bloon is fortified or not.
Support Towers
Heroes: Pat Fusty, Benjamin, Ezili
Spike factory
Base stats:
> $800
> 5/6* pierce and 1 damage with 1 projectiles per second
> Short/Medium range
> 5/6* Pops per second
> Weaknesses: Lead
*6 with a monkey knowledge upgrade
$600 Bigger stacks: has 5 more pierce
$800 White hot spikes: can pop lead bloons
$2000 Spiked Balls: deals
$12000 Spiked Mines: Mines explode to deal 5 damage and have 48 pierce, needs an MIB to be effective. Monkey knowledge upgrade Costs $1500 less
$700 Faster production: produces another half a pile per second
$900 Even faster production: now fires twice as fast overall
$2500 Moab Shredder Spikes: Deals +4 damage to Moab class bloons Monkey knowledge upgrade: Deals one more damage to Moabs
$5000 Spike Storm: Lays down 2000 spikes across the track, this is less effective on maps with multiple paths
$150 Long range spikes: Gains a large range increase
$400 Directed spikes: has regular targeting options
$1400 Long life spikes: Now fires caltrops that last for a long time and carry over a single round
$3500 Deadly spikes: spikes deal one more damage
Best crosspath: 0-2-5, A spike pile that can soak upwards of 25,000 bloons? sign me up!
Monkey Village
> $1175
> Medium Range
> Increases the range of nearby towers by a small amount

$400 Bigger radius: Affects a larger range
$1500 Jungle drums: All things within its range fire 15% faster
$800 Primary training: Primary monkeys gain +2 pierce and a large amount of range
$2500 Primary mentoring: Primary monkeys get their first upgrade free
$250 Grow blocker: stops regrow bloons from gaining layers within its range and briefly after leaving its range
$2000 Radar scanner: all monkeys in range can now pop camo bloons, this also affects the priamry expertise upgrade.
$7500 Monkey intelligence bureau: All monkeys within range can pop ANYTHING, there are some exceptions with Moab class bloons
$20000 Call to arms: Monkeys within range get +50% Rate of fire and pierce for 10 seconds
$500 Monkey business: Tier 1-3 upgrades within range are 10% cheaper
$500 Monkey commerce: +5% reduction and this upgrade will stack with a second village
$10000 Monkey town: all pops from towers within range will generate 50% more cash after multipliers
$3000 Monkey city: Get a free dart monkey each round and drastically increase the range of the village.
Best crosspath: N/A each path has a perfectly valid use and crosspathing downside so the choice is entirely based on what other towers you will be using.
Engineer
Base stats:
> $500
> 1 damage, 3 pierce
> Medium range
> 3 Pops per second
> Weaknesses: Lead, Frozen, Camo
$500 Sentry gun: deploys two sentries with low uptime on a third.
Sentry Stats
> 1 damage, 1 pierce
> Long Range
> 1 Pop per second
$400 Faster Engineering: Sentries increased to 3 with medium uptime on a fourth.
Sprockets: Engineer fires 225% faster, sentries fire 66.7% faster.
$2800 Sentry Expert: Deploys sentries based on whats on screen.
Boom Sentry Stats
> 1 damage, 30 pierce
> Long Range
> 20 Pop per second
> Appears when anything other than ceramics or black bloons are on screen, prioritised when leads appear if no black bloons are.
Cold Sentry Stats
> 1 damage, 15 pierce
> Applies freeze and permafrost, which will benefit from the permafrost monkey knowledge
> Long Range
> 10 Pops per second
> Appears when lead and black bloons are present but not if whites are.
Energy Sentry Stats
> 1 damage, 4 pierce
> Long Range
> 7 Pops per second
> Appears when white and black bloons are present, but no ceramics. Will never appear if purples are on screen.
Crushing Sentry Stats
> 1(2) damage, 22 pierce
> Long Range
> 17.6(35.2) Pops per second
> The default sentry and most common one, appears whenever ceramics are present.
$550 Larger Service Area: Massive increase in range
$200 Deconstruction: Nails deal one more damage to Moabs, this does not include sentries.
$800 Cleansing Foam: fires foam once every 2s that lasts until 10 bloons have passed over it. Expires after 8.5s. Bloons affected have camo and regrow properties removed, leads use up 2 of its pierce and are popped, fortified leads use up 5 pierce and are popped.
$13500 Overclock: +40% attack speed of a tower for:
> 133% duration if the total cost of the tower is less than $15K
> 100% duration if between $15001 and $40K
> 66% if higher than $40K
) Note: it is still more cost efficient to exhaust other buffs first before applying this one.
$450 Oversize Nails: increases pierce by 5 and can pop frozen bloons
$220 Pin: can stun bloons lower ranking than ceramics
$500 Double Gun: fires twice as fast
$3500 Bloon Trap: deploys a trap that absorbs up to 500 bloons before being full, it generates double cash outside of chimps mode, this cash amount decreases the longer the trap remains unclaimed. In chimps mode the trap does not generate bonus cash and will decrease to $0 when unclaimed.
> Interaction with top path: Sentries now pop camo.
) Note: the trap still does not detect camo by default
Best crosspath: 0-4-0, Makes various CHIMPS strategies possible on its own, a very powerful buff for late game.
Primary Monkey 5th tiers part 1
Dart Monkey
Ultra Juggernaut
Cost: 15000
Effect: Juggernaut balls are replaced with “ultra” spike balls that split into 12 smaller clones, they are released at half and full use of pierce or when hitting the map boundry, the main ball now has 300 pierce and deals 4 damage with 8 extra ceramic damage, the clone balls deal 1 damage with 5 extra ceramic damage and have only 100 pierce.
Best crosspath: 5-2-0
Rating: E+
Note: This tower is almost entirely useless, requiring an indoors area to use its bouncing shots and there are not currently many maps that feature such a layout.
Plasma monkey fan club
Cost: 50000 + 3800 for 19 dart monkeys.
Max cost: 83,000 for PMFC and 19 2-3-0 dart monkeys.
Effect: Can now transform 20 total monkeys instead of 10, transformed monkeys have the stats of a plasma monkey and can retain fire rate bonuses such as from the X2X crosspathing.
Best crosspath: 0-5-2
Rating: E
Note: This tower is far too expensive for its miniscule uptime and realistically needs another 5th tier (primary expertise) to even be viable to buy.
Crossbow master
Cost: 25000
Effect: Fires three times as fast, crits three times as often and has 10 pierce up from 3, it can also now pop lead bloons and has vastly more range. With monkey knowledge two of these can be placed at once.
Best crosspath: 2-0-5
Rating: D
Note: this tower lacks the damage output for its cost and its tiny projectiles perform poorly in the later game.
Boomerang Monkey
Glaive lord
Cost: 40000
Effect: Gains a ring of permanent orbiting glaives that deal 2 damage rapidly to anything near the glaive lord with an extra 5 ceramic and moab damage per hit. Each hit applies a stacking status that deals 150 damage as 10*15 to moab class bloons.
Best crosspath: 5-2-0
Rating: TBD
Note: The red hot rangs upgrade applies one extra damage per tick from the glaive orbit, the middle crosspath does not affect the glaive orbit. However for some reason this tower has been given a DoT effect (which i cant find mentioned anywhere) and this makes 5-2-0 better.
Perma charge
Cost: 35000
Effect: Always has the turbo charge effect and the active ability now increases damage instead. Gain +3 base damage and deal +1 damage and +8 moab and ceramic damage with 40% uptime.
Best crosspath: 2-5-0
Rating: E+
Note: A common trend with abilities is that they tend to be poor 5th tiers as their downtime leaves them highly vulnerable, with the perma charge it also has a cost efficiency concern.
Moab Domination
Cost: 60000
Effect: Gain +10 base damage, Gain an attack that deals 240 damage and has an explosion that deals an additional 100 + 120 damage over time as 40*3 to moab class bloons with 24 (43 with the 2-0-5 crosspath) pierce. Knockback dealt to moabs decreases as more moab class bloons are hit.
Best crosspath: 2-0-5
Rating: D+
Note: This tower falls into the “too expensive for chimps” category and its 4th tier version is not strong enough to carry it to the upgrade, the tower also struggles against super ceramics and DDTs
Bomb shooter
Bloon crush
Cost: 55000
Effect: Deal +9 base damage and gain the ability to stun moabs for the same duration as bloons, can stun up to 50 moabs at once, does not affect the B.A.D. Frags gain +1 pierce.
Best crosspath: 5-2-0
Rating: C+
Note: Again with the too expensive for chimps, but this time the bloon crush actually does a good job against moab class bloons and is only weak to super ceramics which can take up its pierce.
Moab Eliminator
Cost: 25000
Effect: Deal +69 moab damage, ability deals 3750 more damage and has a 3x faster recharge rate.
Best crosspath: 0-5-2
Rating: C
Note: the use case for this tower is incredibly niche and only tends to apply to maps without water where killing the B.A.D is too hard without a first strike and even then it is barely the best option. Pretty much its too much of one thing with nothing else and it is outclassed by the naval option.
Bomb blitz
Cost: 35000
Effect: Gain +4 base damage and a larger recursive explosion on every shot. If a bloon leaks deal 2000 damage to all bloons on screen provided you do not die from the leaked bloon.
Best crosspath: 0-2-5
Rating: F
Note: Since this ability cannot be used in impoppable or chimps modes, the tower is almost entirely useless, even in other modes getting a setup that can safely use this power is incredibly hard.
Primary Monkey 5th tiers part 2

Tack Shooter
Inferno ring
Cost: 50000
Effect: Double base range and 5x attack speed, gain +1 base damage and 6 Moab damage, increase pierce to 80 (base with either crosspath), bottom crosspaths also add 1 extra damage each. Gain a fireball attack that deals 750 damage with 150 damage over 3 seconds, fireballs explode after exhausting pierce to deal an additional 200 damage over 4 seconds to an additional 10 bloons (Plus any bonus pierce), the fireball has 1 pierce by default but this can increase. The fireball is shot every 4 seconds.
Best crosspath: 5-0-2
Rating: D
Note: An extremely expensive tower that relies too heavily on other expensive support towers to fully function as its synergies are with primary expertise (T5) and Perma-brew (T5)
Super Maelstorm
Cost: 15000
Effect: Gain +1 base damage, maelstorm shoots from twice the directions for three times as long, this ability retains all damage buffs and other modifiers. Ability scales with applied buffs.
Best crosspath: 2-5-0
Rating: SS (#2)
Note: The best 5th tier in the game in terms of value for money, super maelstorm can destroy an infinite density of bloons and deals enough damage to hurt large Moabs, combined with affordable buffs it can oneshot the B.A.D.
The Tack Zone
Cost: 24000
Effect: Fire twice as many tacks twice as far at twice the speed and gain 8 pierce.
Best crosspath: 2-0-5
Rating: SS (#1)
Note: While technically slightly worse than super maelstorm, it does not rely on ability use in order to achieve incredible power, this tower can beat any standard single lane map on C.H.I.M.P.S with relative ease compared to other options.
Ice Monkey
Super Brittle
Cost: 30000
effect: +3 base damage, +4 brittle damage bonus, can hit moabs and decamo DDTs, hit all bloon types and apply moab permafrost.
Best crosspath: 5-X-X
Rating: SS (#3)
Note: This tower can make other towers vastly more effective, as much as 5x for sun avatars or either of the two tack shooters above.
Absolute Zero
Cost: 26000
effect: Freeze all bloons regardless of type except the B.A.D, apply permafrost (1-5-0) and double the attack speed of all ice towers with 25% uptime. Passive attack now hits all types and can apply moab permafrost (1-5-0). Increases pierce by 200 and gain significant bonus range.
Best crosspath: 2-5-0
Rating: D+
Note: There is no reason to buy this over super brittle and the buff is laughably weak and far too short.
icicle impale
Cost: 30000
effect: Now hits Moab class bloons for 50 damage per hit and slows them down to a set speed regardless of ramping. Can now apply Moab permafrost (1-0-5)
Best crosspath: 0-2-5
Rating: A
Note: Deals a ton of damage and packages in a very strong stun that does not require any other towers to assist, a great option for the late game on many maps, even workshop.
Glue Gunner
The bloon solver
Cost: 22000
effect: Gain the effect of glue hose, raise pierce by 11 and a further 5 with the 5-2-0 crosspath ontop of the regular +5 (total 22 for 5-2-0 and 12 for 5-0-2), gain +2 ceramic damage and +2 Moab damage.
Best crosspath: 5-0-2
Rating: B+
Note: The solver is indeed a solution to bloon problems, however it relies on damage over time which makes it all but useless later on due to maps getting shorter, with no space for time the solver cant solve your bloon problems.
Glue Storm
Cost: 15000
Effect: Ability gets the additional effect of 0-0-2 glue which stacks with the 0-5-2 crosspath, all bloons glued take +1 damage, including from glue storm itself. Glue strike repeatedly re-applies glue from its ability and refreshes all active glue and ability overrides its own regular glue (X-5-0 only). 50% uptime, 55% with primary mentoring, vs new bloons. 100% uptime vs bloons (any crosspath) 80% uptime vs moabs and 90% with mentoring. 0-5-X crosspath loses the ability to hit Moab class bloons. Requires 2-5-0 to affect Moabs.
Best crosspath: 2-5-0. Always 2-5-0. Never 0-5-2.
Rating: S (#6)
Note: This buffing tower gets its shining ticket not from the power of its buff, but its price, you are never normally too late in to think about a glue storm to pick up on a little bit of missing damage.
Super Glue
Cost: 35000
Effect: Increase pierce by 5, deal 50 contact damage to moabs, lose the ability to pierce moabs (bug), increases slow on Moabs and DDTs to 100% (90% for bfb, 80% for ZOMG). Gain corrosive glue.
Best crosspath: 0-2-5
Rating: B+ (assuming the bug gets fixed), Temporary rating: E+
Note: Due to a nasty bug that not only seems to eat up the splattering effect of the crosspath, but also causes it to be unable to penetrate or spread glue behind bloons, the super glue will constantly be unable to apply glue to big quantities of moabs and in some cases can perform worse than the 0-2-4 or even 0-2-3 glue gunner.
Military Monkey 5th tiers
Sniper monkey
Cripple Moab
Cost: 40000
Effect: All stunned moabs take +5 damage, while it cannot stun the B.A.D it can apply the damage effect to it, base damage raised to 60 and moab damage bonus is applied before hits, Shrapnel damage (5-2-0) raised to 15.
Best Crosspath: 5-X-X
Rating: B
Note: For all intents and purposes, the super brittle does it much better, while this tower does come with a full stun, it lacks the ability to spread the bonus damage to many blimps which makes it less effective than the slow and mass spread of the super brittle, not to mention it is more expensive than brittle.
Elite Sniper
Cost: 21,200*
Effect: Cash crate income increased out of chimps from 500-750 -> 1500-2500, all snipers shoot an additional 35% faster, base attack speed increased by 90%.
Best Crosspath: X-5-X
Rating: F
Note: *The price of the 4th tier is included because it has no function in chimps other than adding lead popping*, This towers main attraction is both a large income increase and a sniper boost, making it similar to a trade empire, but with snipers, this does not work, atall. The buff conflicts the method of generating income (time) and is utterly useless in chimps due to its extortionate price.
Elite Defender
Cost: 14000
Effect: Increases base rate of fire by ?% and gain an additional bonus to fire rate equal to the % of the map covered by bloons. If a bloon leaks, get 4x fire rate for 15s
Best Crosspath: 0-2-5
Rating: S (#9)
Note:
Monkey sub
Energiser
Cost: 32000
Effect: Increase pierce to 1000 and increase damage by 2, the middle crosspath no longer does anything. The bottom crosspath increases rate of fire by 63%. Reduces water ability cooldowns of towers in range by 50% and the xp of heroes in range increases by 50%, all ability cooldowns are reduced by 20% (overridden by the 50% buff if applicable).
Best Crosspath: 5-0-2 since 5-2-0 does nothing (bug?).
Rating: S (#8)
Note: The energiser is a tool that can greatly enhance the power of slow gaining heroes, not only does it enhance their arsenal by reducing their ability cooldowns (and conversely increasing uptime) but it also synergies perfectly with Admiral Brickbell with awe inspiring effect.
Pre-emptive strike
Cost: 32000
Effect: Deal 750 damage to all Moab class bloons when they enter the map, 25% faster ability cooldown, 250% faster rate of fire for missile attack and increases missile damage to ceramics and Moabs by 5.
Best Crosspath: 2-5-0
Rating: A
Note: A great way to chip away at blimps as they walk in, allowing them to be gobbled up by the defence much easier, it also deals with DDT problems and serves as a method to kill the B.A.D making it a complete package to help the defence.
Sub Commander
Cost: 25000
Effect: increases the damage of all subs in range (whole map with MK) and pierce by a total of 1 damage and 4 pierce. Doubles the rate of fire of the sub itself. The overall buff produces a 233% for 2-0-4 subs.
Best Crosspath: 2-0-5
Rating: SS (#5)
Note: The sub commander falls under a very hard and fast rule. Is there water? If yes, the answer is always sub commander. If there is not water? Find something else.
Monkey Buccaneer
Carrier Flagship
Cost: 25000
Effect: Increases the rate of fire of any water based tower or monkey ace by 20%, Carrier aces upgraded and now deal 2 damage per dart, aim at bloons directly and are neutral damage type (pops anything), Moab missiles are fired in pairs and now deal 10 more damage (25 each).
Best Crosspath: 5-2-0
Rating: A
Note: The flagship is the cornerstone of a water based strategy, it provides the perfect spot for more alchemists to reach your towers or for stuns and even glue, where land may not be around, pair this with the stackable buff for a wide range of good towers and you cant go wrong with it. Just don’t expect the flagship to be the entire fleet.
Pirate Lord
Cost: 21000
Effect: One third lower cooldown for takedown ability, takedown ability can target up to 3 Moab class bloons and can now hit DDTs and ZOMGs, ZOMGs take up two of the three hooks. All moabs hit with the ability are destroyed for twice the cash (Outside of chimps).
Best Crosspath: 0-5-2
Rating: C+
Note: The pirate lords biggest downfall is one of its key points failing to work in chimps, it effectively is four monkey pirates, but you get the option to target ZOMGs.
Trade empire
Cost: 23000
Effect: Increases the damage of merchantmen and favoured trades main dart attacks by 2 and grapes by 1, all X-X-3 merchantmen or favoured trades gain +20 income per merchantman or favoured trades up to 20 for a maximum bonus of +400 per boat (8000/round total), base income increased by 400 for the trade empire itself.
Best Crosspath: 0-2-5
Rating: F (chimps) A+ (non chimps)
Note: This is one of a few towers with a slight space issue, the issue here is confounded by the lack of large water sources on most maps, preventing its effective use. On maps where it fits however, the trade empire can easily solve your money and bloon problems at the same time.
Monkey Ace
Sky Shredder
Cost: 40000
Effect: doubles the number of darts per shot and fire rate, increases damage by 2, ceramic damage by 2 and gains 3 pierce (8 total). Moab missiles now deal eight times more damage however the rate of fire is NOT increased for the missiles.
Best Crosspath: 5-0-1
Rating: B+
Note: This uncanny Ace has heaps of potential damage being sprayed in all the directions where the bloons probably are, but also might not be.
Tsar Bomba
Cost: 35000
Effect: 10% faster ability cooldown, increases nuke damage from 700 -> 3000. Nuke stuns all surviving non B.A.D blimps for 5s.
Best Crosspath: X-5-X
Rating: B
Note: Perhaps one of the most boring T5 upgrades in terms of effect, the tsar bomba can be a brute force tool to get rid of dense blimp waves.
Flying Fortress
Cost: 105000
Effect: 50% increased attack speed, gain two more spectre attacks and raise the damage of the bombs to 5 and darts to 4 from 3 and 2 respectively.
Best Crosspath:
Rating: F
Note: An incredibly bland 5th tier that is simply too expensive to have a purpose costing more than 130,000 all in (just on medium!).
Military Monkey 5th tiers part 2
Heli Pilot
Apache prime
Cost: 45000
Effect: Missiles gain 15 Moab damage, gain a sidewinder laser barrage that has 6 neutral type damage and 23 pierce per projectile and fires 50% faster than the missile attack. Main gun replaced with a plasma cutting beam that deals energy damage (blocked by purples) and can pop lead, this new main attack does 4 more damage and has 10 more pierce.
Best Crosspath: 5-X-X
Rating: A+
Note: The Apache prime is an all round Bloon wrecking machine with unlimited range, its only downfall is that like the other Helis and mortars, it struggles on maps with multiple lanes as it has to fly over to Bloons on the other lanes which can leave you forced to micro it instead.

Special Poperations
Cost: 30000
Effect: Crates contain twice as much money and lives, can now drop a marine with 75% uptime that does 6 damage and has 30 pierce with a full auto rifle (shoots darts not sniper bullets).
Best Crosspath: 2-5-0
Rating: E+
Note: The marine isn’t portable and has poor range, not to mention it does not even have full uptime, this 5th tier is simply outclassed in every way by either sniper, mortar or even top path Heli T5s and cant even take advantage of its enhanced crates in chimps mode.
Comanche Commander
Cost: 35000
Effect: Summons three permanent Comanches, they fire four darts per shot instead of three and their missile deals one more damage with 2 bonus moab damage on all attacks.
Best Crosspath: 2-0-5
Rating: D
Note: Due to the inability for the miniature Helis to receive any form of buff, this tower has no scalablility and requires an MIB just to pop DDTs.
Mortar Monkey
The biggest one
Cost: 28000
Effect: Blast radius doubled, increases base damage from 6->40 and shockwave gets +10 ceramic damage. Deals 41 damage to Moabs. Burny stuff damage increased to 15 and can stack once (25 damage per tick with 2 stacks)
Best Crosspath: 5-X-x
Rating: A+
Note: An incredibly simple yet effective 5th tier upgrade that deals with all of your super ceramic sized problems.
Pop and awe
Cost: 30000
Effect: Almost fully stun all Bloons, including Moabs with 10% uptime and deal 180 damage (9*20) over this duration to all Bloons on screen. main attack gains +9 ceramic damage, +3 fortified damage, +5 damage to all stunned bloons and +3 Moab damage.
Best Crosspath: 2-5-0
Rating: C+
Note: This tower has a highly overcomplicated damage spread, its raw damage is bested by the biggest one which also has a much larger blast radius and its ability lasts for a tiny duration of time which ruins its own self synergy with bonus damage to stunned bloons, relying on other towers to apply stun such as bloon crush.
Blooncineration
Cost: 45000
Effect: Creates a wall of fire on impact sites, can decamo and defortify DDTs, with the 2-0-5 crosspath the walls of fire deal double damage. Applies a burning effect to Moabs that deals 400 damage as 4*100 and is refreshed with each hit. Bloons take 5 damage per tick from the fire.
Best Crosspath: 0-2-5
Rating: D
Note: It is simply too expensive and does not offer enough of an upgrade over the 4th tier, being unable to defortify ZOMGs is a huge weak spot.
Dartling Gunner
Ray of Doom
Cost: 110000
Effect: Increase base damage to 5, increase base pierce to 1000. Stacking debuff now deals 15x damage, increase damage bonus to Moabs to 20.
Best Crosspath: 5-2-0
Rating: F
Note: For a tower of this pricepoint you really expect something special, the ray of doom is an utter disappointment failing to provide anything meaningful other than near unlimited pierce, it trades blows with the glaive lord which is nearly 3 times cheaper.
M.A.D
Cost: 65000
Effect: Halved rate of fire, damage increased to 3, now deals 750 bonus damage to Moabs (per hit), ability deals 10 damage per hit and has 14 bonus damage to Moabs. Projectile size drastically increased.
Best Crosspath: 2-5-0
Rating: C+
Note: The M.A.D is a one dimensional tower, it destroys all blimps and that’s literally it, it cant deal with ceramics on its own, but if you can solve that problem the M.A.D is an instant win upon purchase.
Bloon Exclusion Zone
Cost: 60000
Effect: doubles base damage from 4 to 8 and increases pierce from 4 to 6, also increase rate of fire by 50% and doubles the number of buckshots per shot (6 -> 12).
Best Crosspath: 0-2-5
Rating: E+
Note: The BEZ makes no sense from both a mathematical standpoint and practical standpoint, it costs 5.5x more than its 4th tier form and deals only 6x the damage with a 50% pierce increase, not only does this fail to remedy the issue with the tower (low pierce) but it also fails to increase in efficiency like other 5th tiers do making it terrible value for money while also being all round a terrible tower just like its prior upgrades due to the lack of pierce. Oh and to add salt to the wound, this tower cant even pop lead.
Magic Monkey 5th tiers (W.I.P)
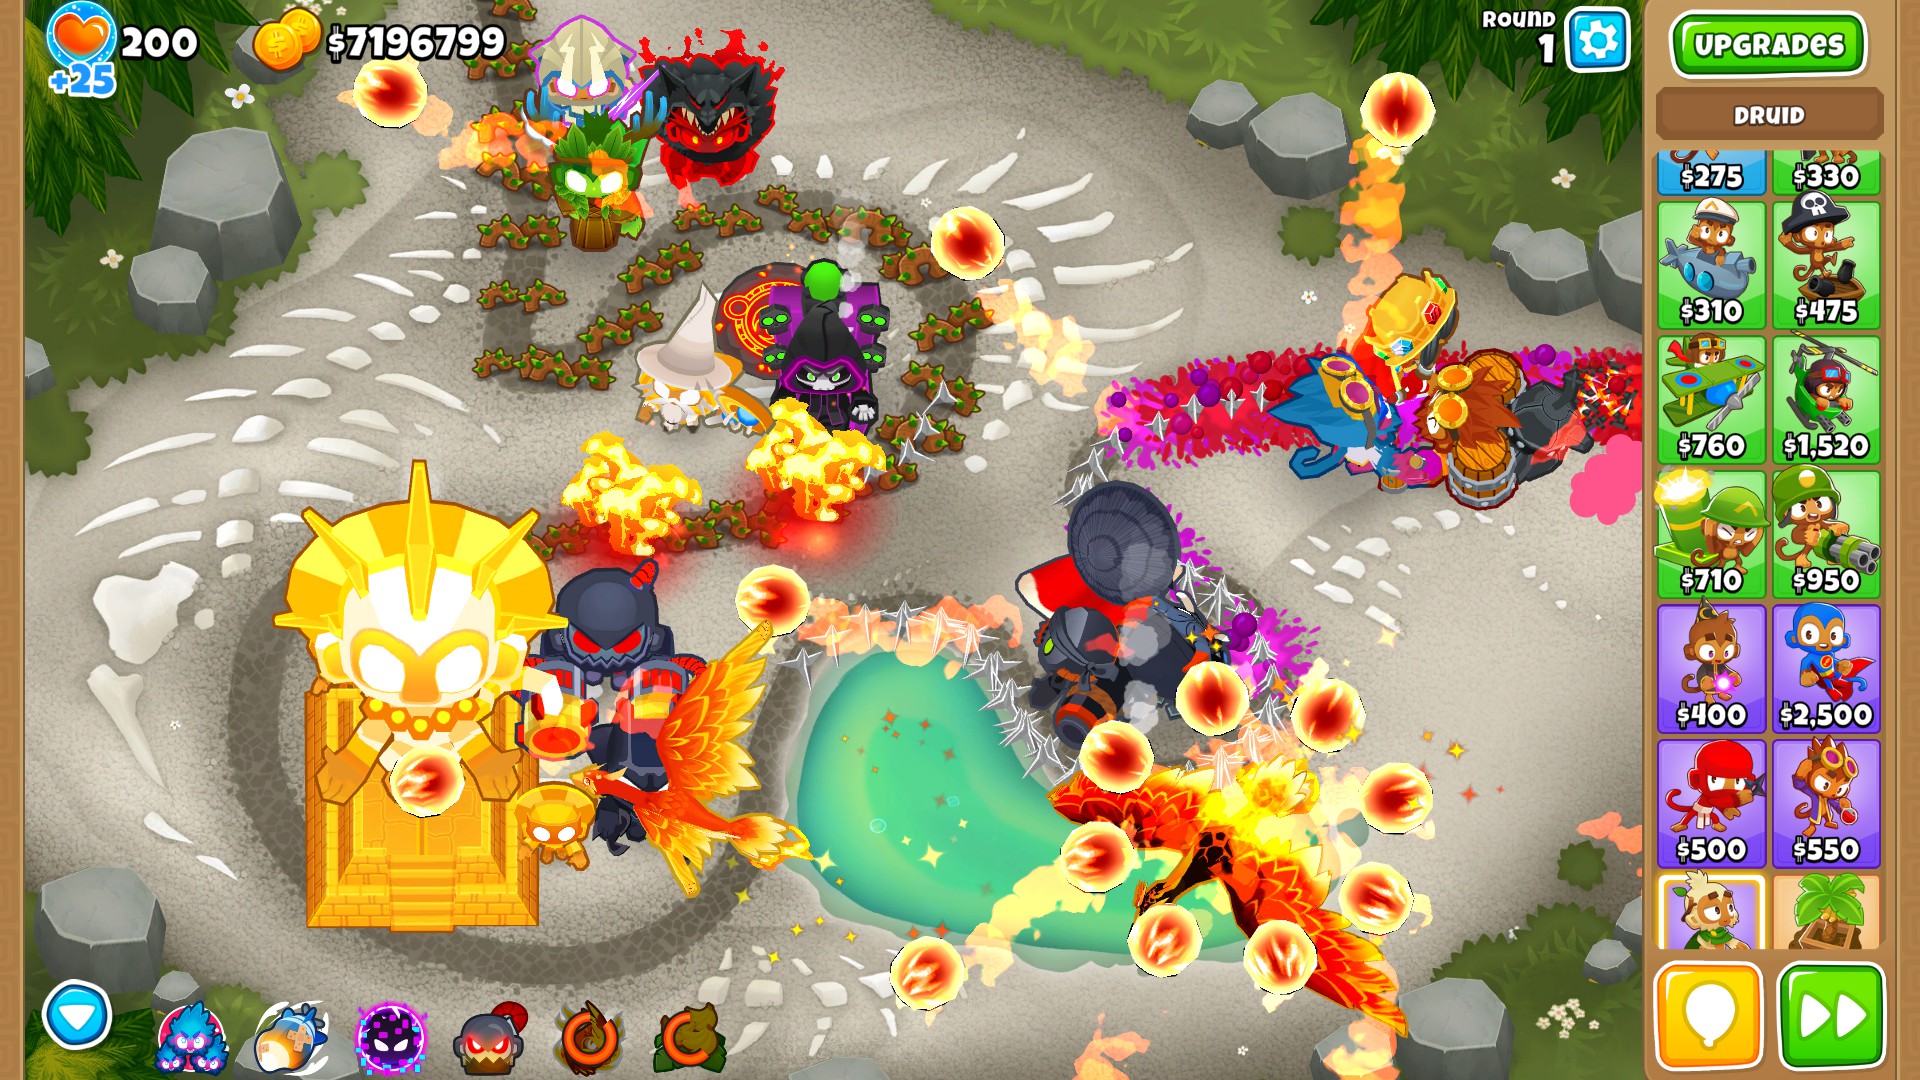
Magic Monkey 5th tiers part 2 (W.I.P)
Support towers 5th tiers (W.I.P)

Support towers 5th tiers part 2 (W.I.P)
Level 20 hero stats (W.I.P)
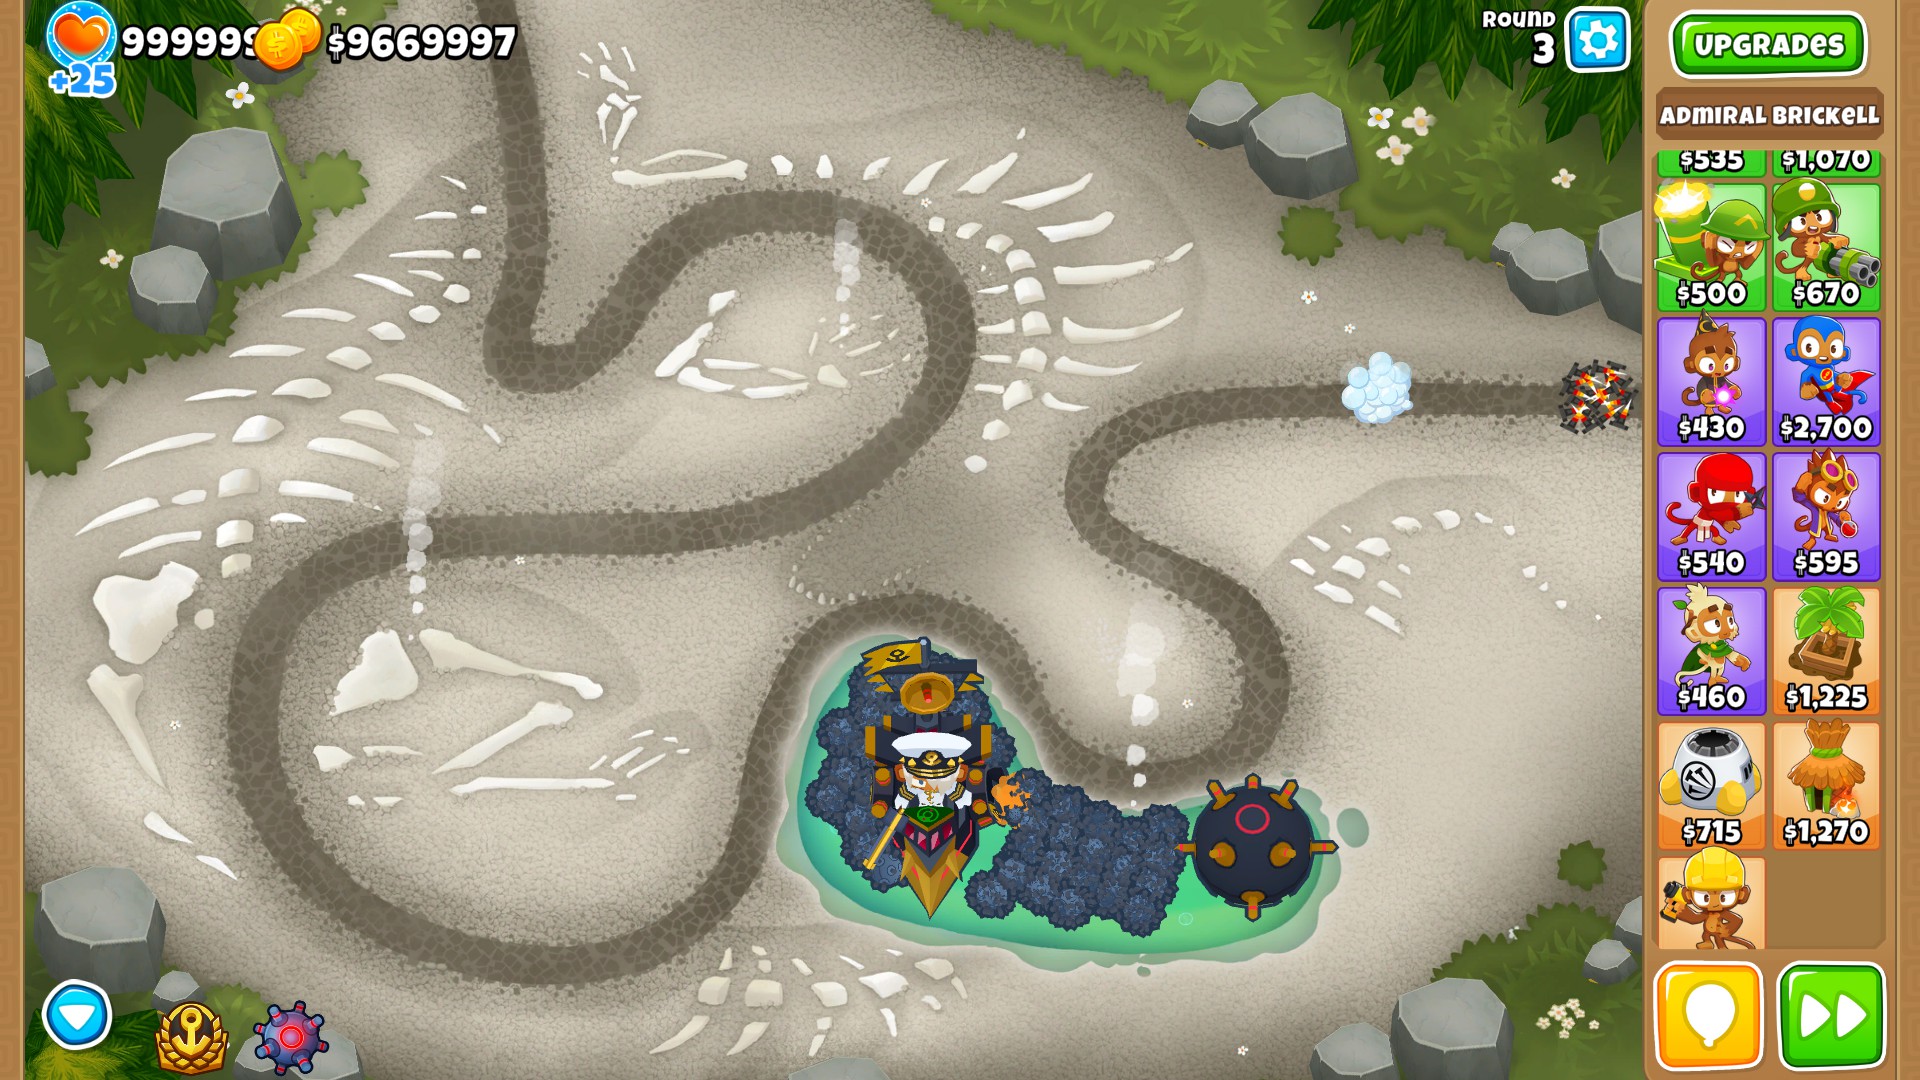
5th Tier Ranking
This ranking system assumes you are playing C.H.I.M.P.S, Vengeful temple would otherwise be #1 and ultraboost #2.
============================================================================
The restriction for the T5 Tierlist was that it was based upon the same restriction as the chimps strat guide, it must be easy to use and be able to beat at least 15 maps in chimps mode.
Since the “ultimate bloons master” achievement has been made much easier with a flood of new easy maps, its actually became quite hard to rank the “easiest to use” 5th tiers for this purpose as pretty much anything can work, so i have instead expanded to include some value for money and raw power considerations, the target is still one lane or convergence point placement though.
#1 Tack zone: The king of one lane solutions, pair it up with a village and pat and watch it eat anything that passes by, its cheap price and good 4th tier make it incredibly easy to use and it can go much further than other cheap 5th tiers on harder maps.
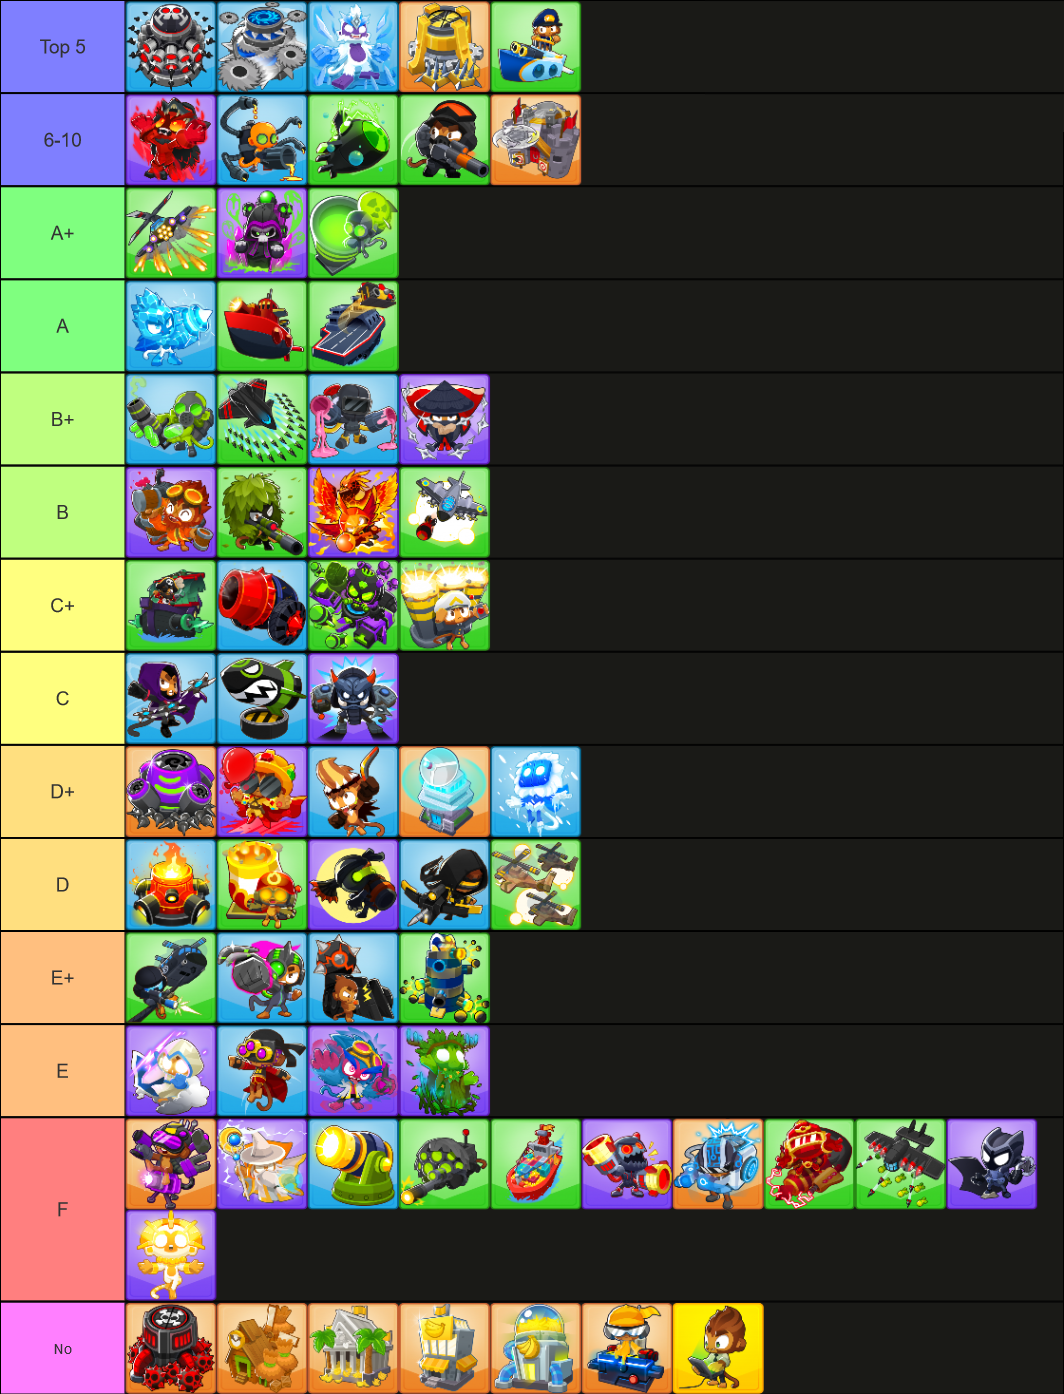
#2 Super malestorm: Press the button and watch the entire round disappear, super malestorm has infinite pierce with its ability and hits just as hard as tsar bomba when paired with pat futsy but for 1/4 of the price, its a bargin 5th tier and an essential for easy chimps runs with again a useful 4th tier buy in.
#3 Super brittle: The best of the three debuffs purely down to raw power, being able to apply a +5 debuff to a huge group of bloons unlike the Moab cripple which only hits a small handful at a time (assuming 5-2-0), this makes it pair excellently with anything that has lots of projectiles and even the bloon solver.
#4 Perma spike: Almost insulting not to put higher, perma spike would be very pointless on its own however, but when it comes to an insurance policy the perma spike wont let you down, make sure to give it an alchemist to pop lead and any unwanted leaks will be dealt with, it can even cover two lanes with smart targeting.
#5 Sub commander: The only reason this isn’t higher (and probably #1) is that not all maps have water, and a submarine isn’t very good on land, but when water is around, put one of these down, it eats through moabs with ease and is one of only a microscopic handful of towers that beats bloody puddles, so it has longevity as a repeated use chimps tower.
#6 Avatar of wrath: Again with odd reasons to be lower, the avatar requires very specific conditions to be effective but when met, it melts through bloons, its overall weakness being price and benefit being some of the best raw power available in chimps mode.
#7 Glue storm: Arguably a better debuff than super brittle when ceramics are a problem, this handy glue upgrade combines its crosspaths to become a 2-5-2 glue gunner, but its ability constantly covers everything in glue that also provides a +1 debuff which can help projectile spamming towers deal a ton more damage, just like the avatar above, the other good benefit is that it grabs ceramics and applies the very slow glue even when given the 2-5-0 crosspath (which is essential for debuffing Moabs).
#8 Energiser: The only thing that carries adora to any success in chimps and a great helping hand for brickbell, this handy sub upgrade provides a huge reduction in cooldown for water abilities and also reduces other ability cooldowns which adds value to the entire defence, its weaknesses being its lack of function on its own (requires abilities) and adora being well… not very good 🙂
#9 Elite defender: The solution to your early and midgame problems, the once called “dumbfender” now has better shrapnel and can lay waste to bloons and only drops off after round 80, by which point you can afford something better suited to super ceramics.
#10 Primary expertise: Because spamming bomb needed more help, this handy village can quite literally halve the cost of moab maulers (2-3-0) from its prior upgrade and its balista has both full map range and massive damage which also hits all bloon types, lastly if the discounting was not enough for you, it also boosts the pierce of other primary towers which is very helpful for the tack zone found at the top of the list.
Honourable mentions
Apache prime: The best heli upgrade, this expensive 5th tier can easily deal with the bloons on its own and has great use for the 2TC achievement.
Prince of darkness: Only really down here because of its… unusual interactions with converging points and two laned maps, this tower takes popped bloons and sends them back at the bloons doing ridiculous group damage for its price.
The biggest one: Dont like super ceramics? This tower solves your problem by both quickly destroying them but also stunning them.
Banana Farms
The mighty banana farm, It makes you money, lots of money, just don’t expect it to attack anything.
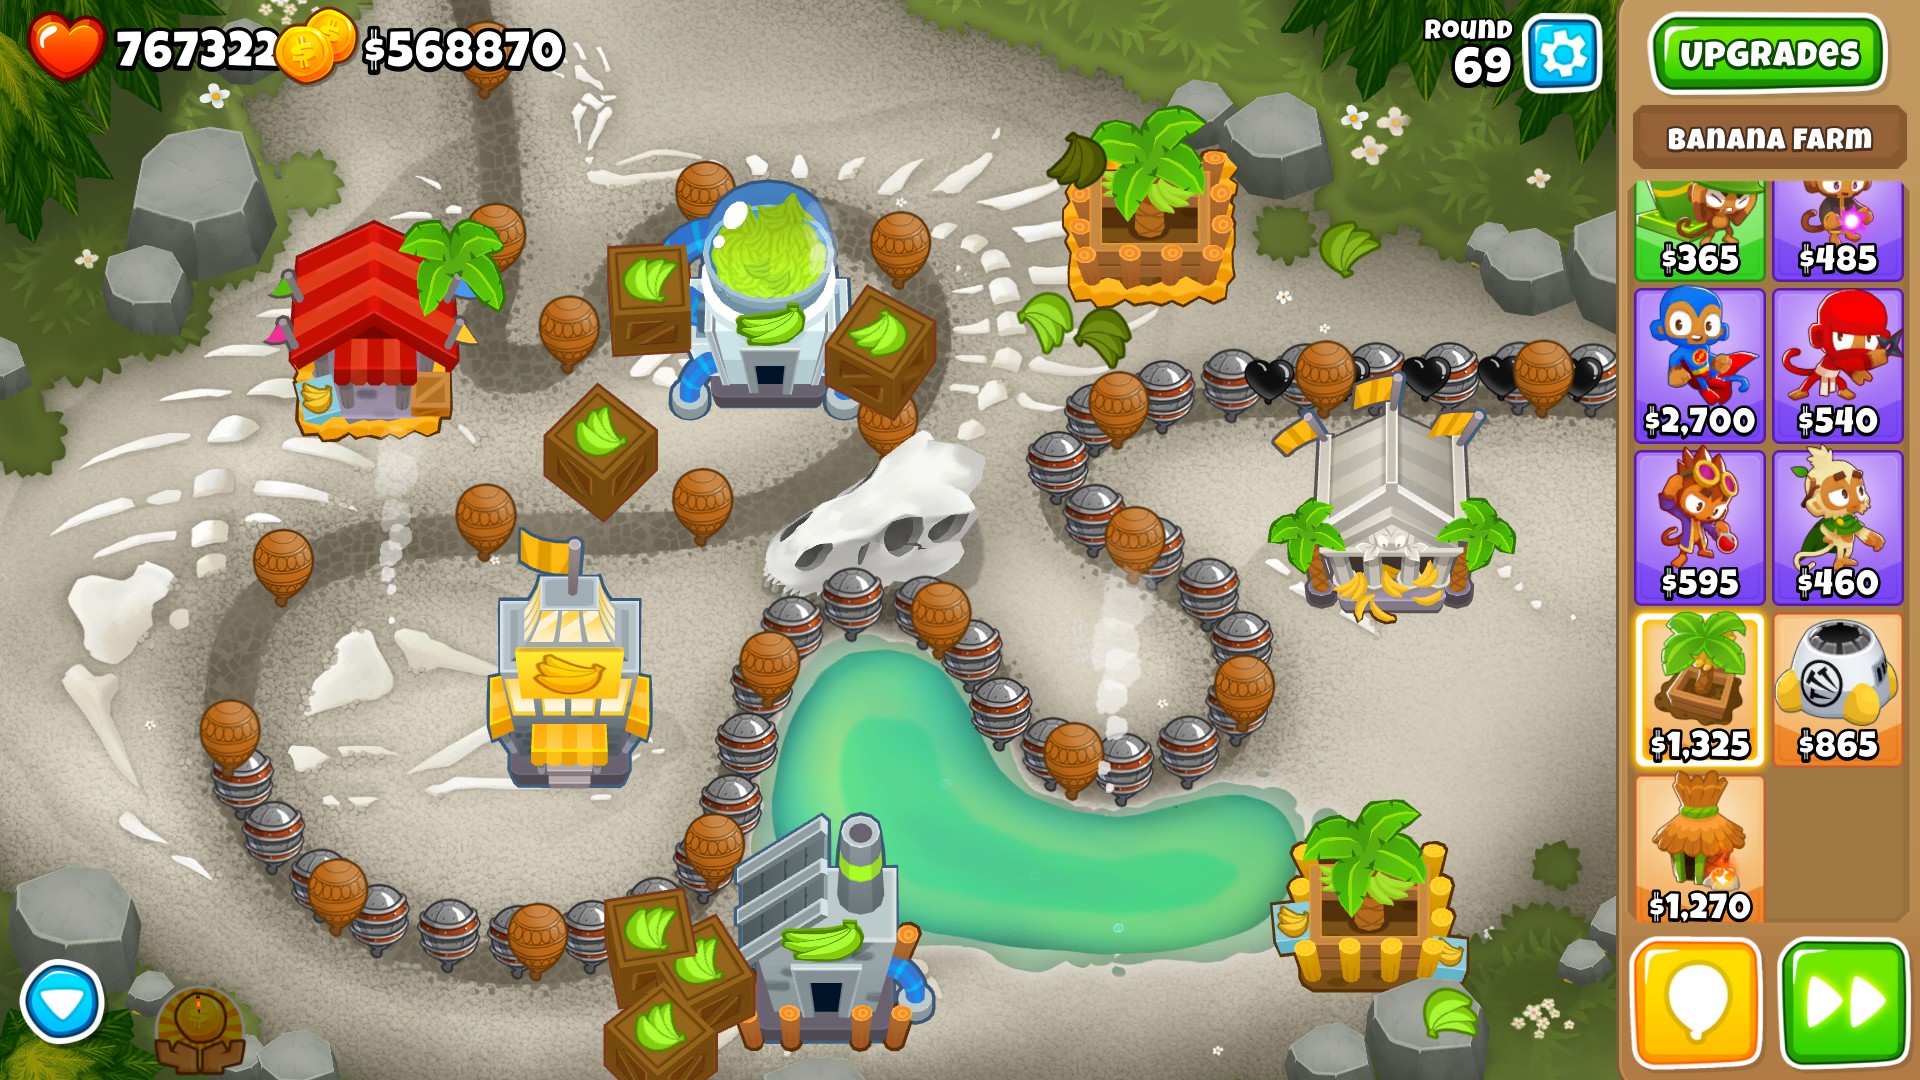
But what upgrades for your farm should be bought? well lets take a look. This is based on medium.
In the format [Type/Cost/Income/Efficiency/Rating] with additional bonuses in a 4th column
Efficiency is the time it takes (in rounds) to buy another identical farm.
The rating offers a quick way to see this, where farms of B or higher will be quite helpful.
Top Path
0-0-0 1125 80 14 D
1-0-0 1625 120 13.5 D
2-0-0 2225 160 13.9 D
3-0-0 5225 320 16.3 F
4-0-0 24225 1500 16.15 F
5-0-0 124225 6000 20.88 X
3-2-0 6325 416 15.2 F
4-2-0 25325 1950 12.98 C
5-2-0 125325 7800 16.07 F
4b-2-0* 25325 2435 10.40 B
*requires banana central
Middle Path
0-2-0 2225 104 21.39 X
1-2-0 2725 156 17.46 F
2-2-0 3325 208 15.98 F
2-3-0: 6625 666 9.94 B
2-4-0: 14125 770 18.33 F
2-5-0: 114125 10770<->30770 10.59<->3.71 B<->S
Bottom Path
2-0-3: 5575 400 13.93 D
0-2-3: 5575 416 13.40 D
0-2-4: 20575 1456 14.13 D
0-2-5: 80575 5456 14.77 D
Buccaneer
MM 0-0-3 3355 200 16.78 F
MM 0-0-3*b 3355 220 15.25 F
FT 0-0-4 8855 500 17.71 F
TE 0-0-5 31855 900 35.39 F
TE 0-0-5+0-0-3*10 65405 4900 13.35 D
TE 0-0-5+0-0-3*15 82180 8400 9.78 A
TE+20 98955 12900 7.67 S*
*this is the most efficient farming option
TE+20b 119,530 14756 8.10 S
Extra merchantment past 20 in a trade empire:
MM 0-0-3[20MMTE] 3355 600 5.59 S
Point at which central market buff is viable: 25 merchantmen
Monkeyopolis
Note: this tower now scales based on the mode it is used in, it will always have the same efficiency in any mode.
0-0-5/4-2-0: 45500 3600 12.63 C
2-0-5/4-2-0*4: 138375 14400 9.61 A
2-0-5/4-2-0*8: 239675 28800 8.32 S
Note: it is possible to exceed 8 however it is quite hard to do. Efficiency will slightly increase, this will not overtake the buccaneer as you can continue to add boats and type “b” modifiers past 30 which will also scale the efficiency.
Rating
S: 9 or less
A: 10 or less
B: 11.5 or less
C: 13 or less
D: 15 or less
F: 20 or less
X: 20+
Overall, the bottom path is superior to the top path, in both convenience and income efficiency, however the banana bank is still the best standard farm and the temporary income will not out perform a bank.
The highest efficiency option for mid game is the monkeyopolis, which has the highest income and efficiency of all farms, earning as much as 28.8K, it is more cost effective selling and improving than keeping more factories, as the income per absorbed factory is 3600 instead of 1950 for only $5000. Keep in mind the Actual efficiency of the monkeyopolis is higher, as it increases cash generation from bloon pops by 50% for towers in range.
For late game, a large monkeyopolis and banana central with plenty of factories will provide the best way to a vengeful temple, a vengeful temple costs far in excess of $1,000,000!
On water maps, the trade empire replaces the need to farm however basic merchantmen are extremely inefficient, use banks if possible (and IMF loans) to help push them along!
Banana farms part 2
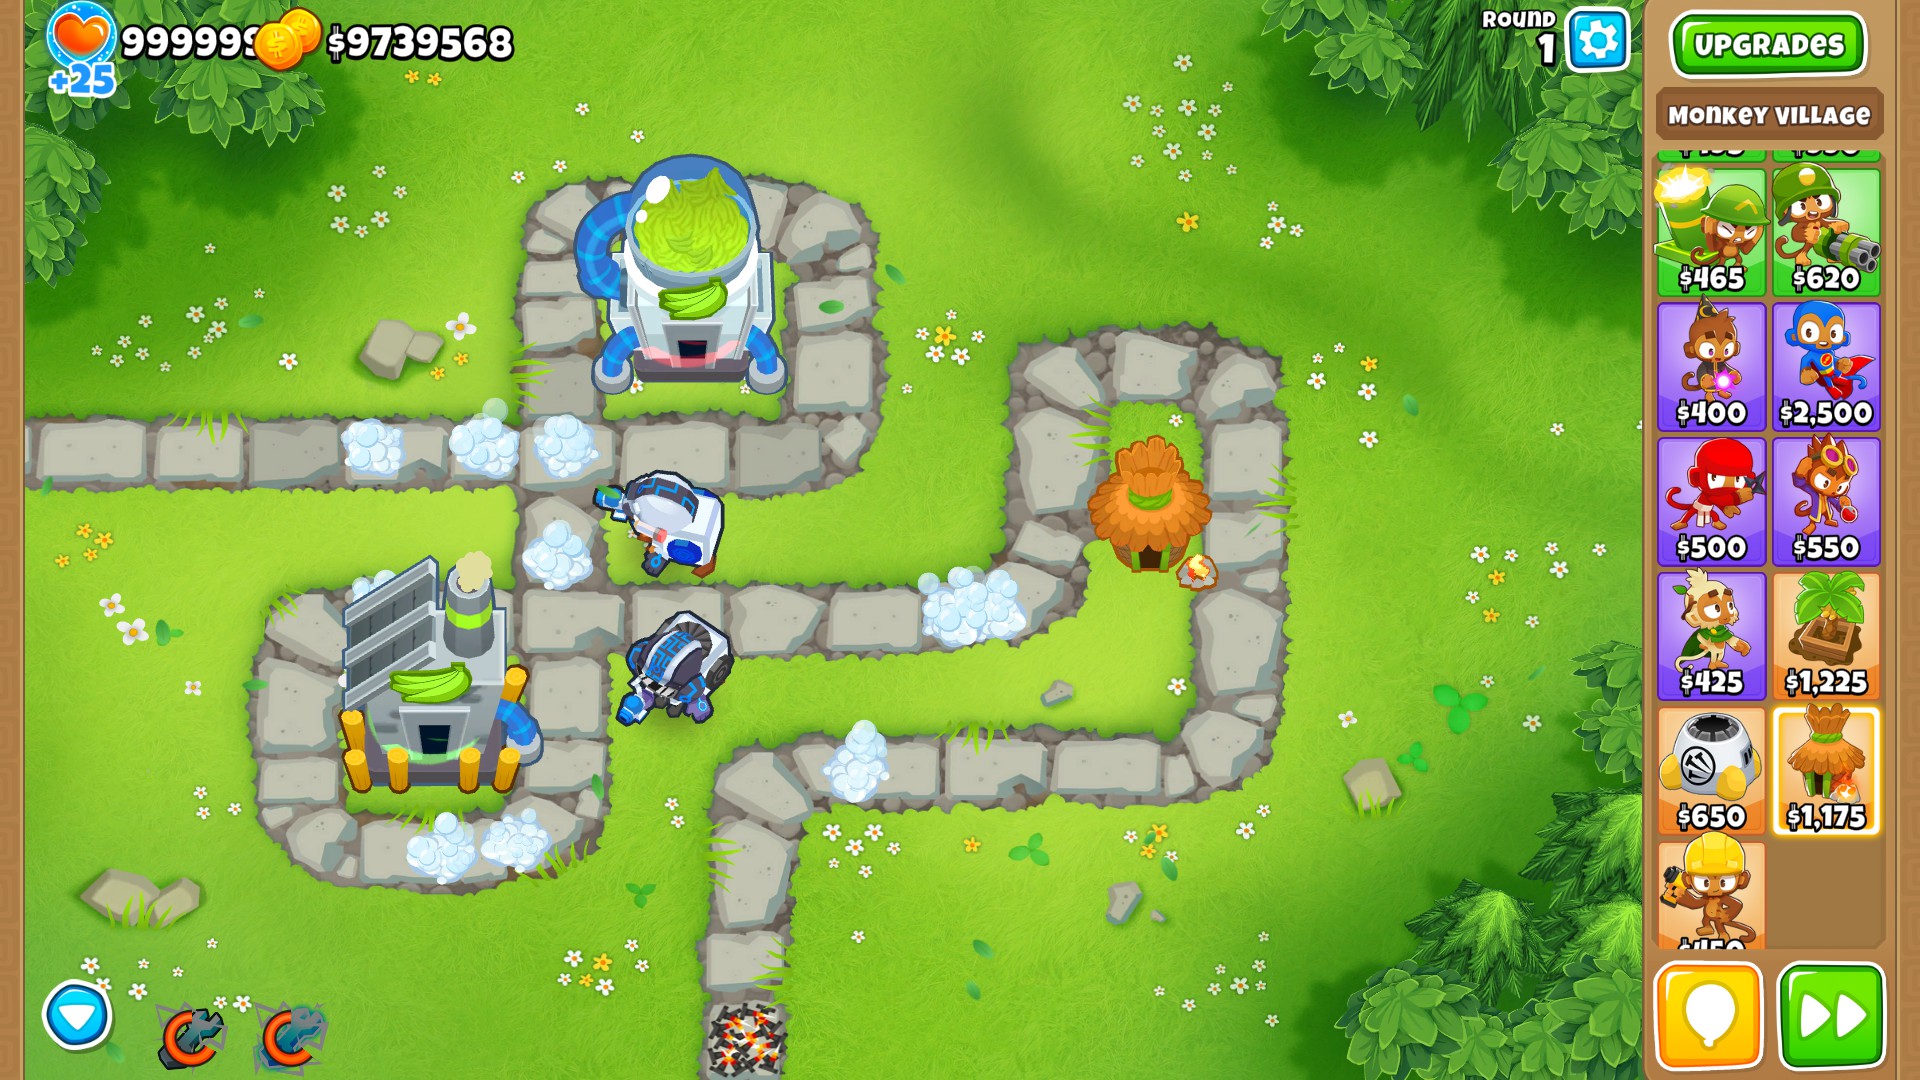
According to patch notes, overclock is supposed to work with farms. The patch notes stated overclock will apply a 66% increase in value to farms, however this not the case and the farms interact with overclock very strangely.
Overclock and Ultraboost stats
Overclock cost: 15,350
Ultraboost cost: 140,350
Actual Increase on farms in raw cash gain
Plantation 3-0-0: 68.75%
Plantation 3-2-0: 68.75% (Crosspaths don’t matter)
Factory: 80%
Banana Central: up to 80%
Bank: 75.16% (Rate of interest unaffected)
Marketplace: 68.75% / 70%
Central Market: 68.75% / 70%
Monkey Wallstreet: up to 18.35%
Monkeyopolis: Increases range, but not income. (Bugged)
Trade empire: Increases fire rate instead of cash.
Increase from Ultraboost vs top path
Factory: 80% passive, 220% active
Banana Central: 80% passive, 220% active
Percentage Efficiency of overclock vs buy price
Plantation: 28.33%
Factory: 132%
Banana Central: up to 653.16%
Bank: At least 32.43%
Marketplace: 25.42%
Central Market: 93.83%
Monkey Wall Street: up to 96.32%
Ultraboost efficiency vs high level farms
Factory: 39.7% Per farm
Factory (B): 49.57% Per farm
Banana Central: up to 194.48% active, 71.44% passive
With these metrics its quite clear that the overclock has wasted potential, it synergises best with factories which overall, are very bad farms due to their incredibly slow self repurchase time compared to banks with the deposit MK, or much cheaper marketplaces which can achieve growth faster with their lower buy in costs. Overclock also does not seem to work correctly with the monkeyopolis despite it producing banana crates, it is unknown if this is a balance decision (more likely) or a bug.
The Temple
The Temple!
This is the 4th and 5th teir upgrade found on top path super monkeys, extremely expensive and with misleading and innacurate information online your probably using them wrong!
Sacrifice $50000 of a tower type in order to gain one of the following bonuses…
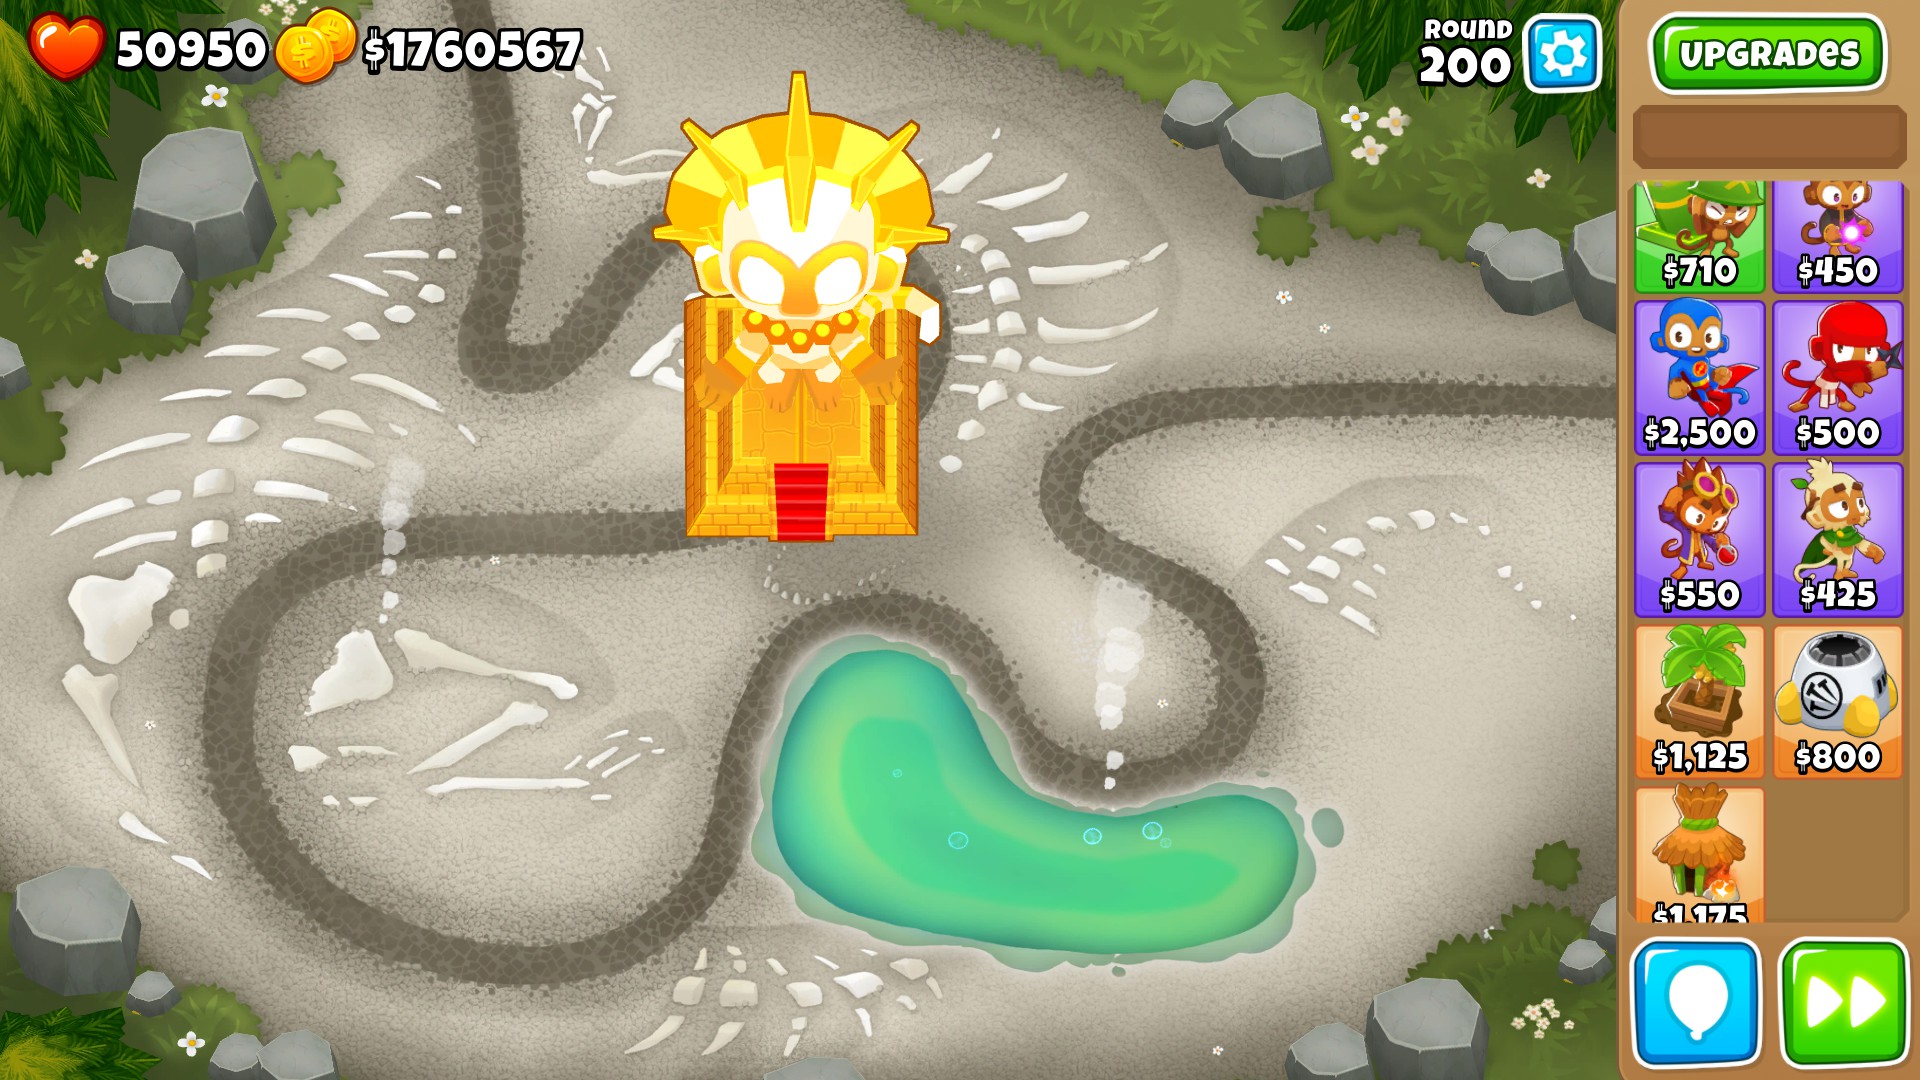
4th teir can accept 3 sacrifices
5th teir can accept 4 more, 7* with the There can only be one monkey knowledge upgrade
Military:
Level 1 ($25000) a single spectre will follow the temple, this will deal almost the same ammount of DPS as a spectre, but with higher peirce
Level 2 ($50000) Two spectres orbit the temple, comparible to a pair of 2-0-4 spectres, also gains an anti-moab missile with 200 damage and 75~ peirce
Level 3 ($50000*2) (This is bugged in sandbox) should spawn 4 spectres, dealing around as much damage as a flying fortress, moab missile fired more often
Level 4 (Vengeful level 3) almost unlimited peirce, each of the 4 spectres is equal to a flying fortress.
Note* this path increases the size and peirce of the temples main attack
Primary
Level 1 ($25000) Fires a high perice glaive and eight high peirce blades, none of these deal particularly high damage
Level 2 ($50000) Fires twice as many blades and glaives, of which deal alot more damage
Level 3 ($50000*2) fires even more blades that deal more damage, glaives have almost unlimited peirce and more of those too
Level 4 (Vengeful level 3) blades and glaives everywhere.
Note* all primary upgrades buff the basic attack of the temple
Magic
Level 1 ($25000) fires magic balls that deal alot of damage to ceramics and blowback bloons, fires a pulse that blows back moabs.
Level 2 ($50000) a pair of sun avatars come to help out, more potent knockback ability
Level 3 ($50000*2) Stronger knockback, more frequently with more helpers
Level 4 (Vengeful level 3) Vengeful avatars deal enourmous ammounts of damage
Note* on its own, this upgrade does not increase DPS
Support
Level 1 ($25000) Improved range, pops purple bloons and provides a buff:
> Large ranfe bump
> +1 damage
> +3 peirce
> 20% price reduction
Level 2 ($50000) Provides a large increase in the temples range, upgrades are 20% cheaper, native MIB effect for the temple and Provides a buff:
> Large range bump
> +2 damage
> +3 peirce
> 20% price reduction
Level 3 ($50000*2) The same as teir 2 (though camo detection is lost on a 5th teir temple with level 2 support), the buff increases to:
> +2 damage
> +4 peirce
> Large range bump
> 20% cost reduction
Level 4 ($50000*2 + $50000) With a teir 5 at level 3, the buff stacks with another teir 4 temple with level 2 support, for a total buff of…
> +4 damage
> +7 peirce
> Enourmous range bump
> 40% price reduction
> both temples will lose camo detection
Level 5 (Vengeful level 3) pops all bloon types, big range increase, buff increase is unknown
Support notes:
> Increases the power of all towers, and even the temple itself if the magic sacrifice is used
> can stack with a 5th and 4th teir version
Best temple combination
Toss out those hyped guides from this and that person, the best temple is:
4th teir: 4-2-0, [1-0-1-1]
5th teir: 5-2-0, [2-1-2-2]
6th teir (vengeful): 6-2-0, [3-3-3-2]
Despite how potent the buff provided is, a vengeful temple will still benefit more from the millitary sacrifice than the support bonus.
Getting the most out of your temple
Purchase the 6-2-0, [3-3-3-2] vengeful temple on the map logs using lots of banana farming
Buff it with…
Another 4-2-0 X-X-X-1 temple
A 5-0-2 Perma-Brew
Obyn or Pat Futsy (with energiser sub), Striker Bones is also a good option
A 2-5-0 village, and enough 1-4-0 villages to keep the ability active permanently
Do the same with sabo monkeys.
And snowstorms
Super brittle and glue storm will increase damage, Cripple Moab will help destroy B.A.D`s
All of those stalls, Moab domination, bloon crush, absolute zero (to reduce lurching), icicle impale, 0-5-2 glue storm (again for lurching), 0-2-5 superglue, 3 maim moabs and an elite sniper, legend of the night, master bomber, bloon master alchemist, superstorm, a perma spike pile (0-2-5) and super mines.
If you can get all of this, you should be able to beat freeplay!
C.H.I.M.P.S
C.H.I.M.P.S. is a mode that is new in BTD6; it is an acronym, short for “no Continues, Hearts lost, Income, Monkey knowledge, Powers, or Selling.” This makes it a tricky mode because one must beat a game of impoppable without any bonuses, and also bars things like Banana Farms and Monkey Town from giving you any more money.
C.H.I.M.P.S. is similar to a popular challenge from BTD5 called NAPSFRILLS, which stands for No Agents, Premiums, Specialties, Farming, Road Items, Lives Lost, or Selling.
============================================================================
Strategies
Note: all strategies listed here can beat 15 maps, this is the requirement to unlock the “ultimate bloon master” achievement.
[link]
Maps
Maps oh maps, their layout does not often evoke a change in strategy in the easy maps, but some of those later ones are really hard! Each map will have a screenshot of it.
Rated between 1 and 20 for difficulty, given how inaccurate the ingame tiering is, several maps have moved tiers.
Beginner Maps
Logs (1)

Candy Falls, Cubism & Lotus Island (2)


End of the road, Skates, Frozen Over & Tree Stump (3)


Maps part 2
Four Circles, Alpine run, Monkey meadow (4)

Intermediate Map
KartsNdarts, Downstream (6)

Hedge, Haunted, Spice islands (7)


Firing Range & Encrypted (8)
Moon Landing, Cornfield (9)


Another Brick & Bazaar (10)
Maps part 3
Advanced Maps
Rake, High finance, Chutes (11)

Peninsula, Off the coast (12)

Underground (13)
Spring Spring, Cargo (14)

Pats Pond & Mesa (15)

Expert Maps
Dark Castle & X Factor (16)

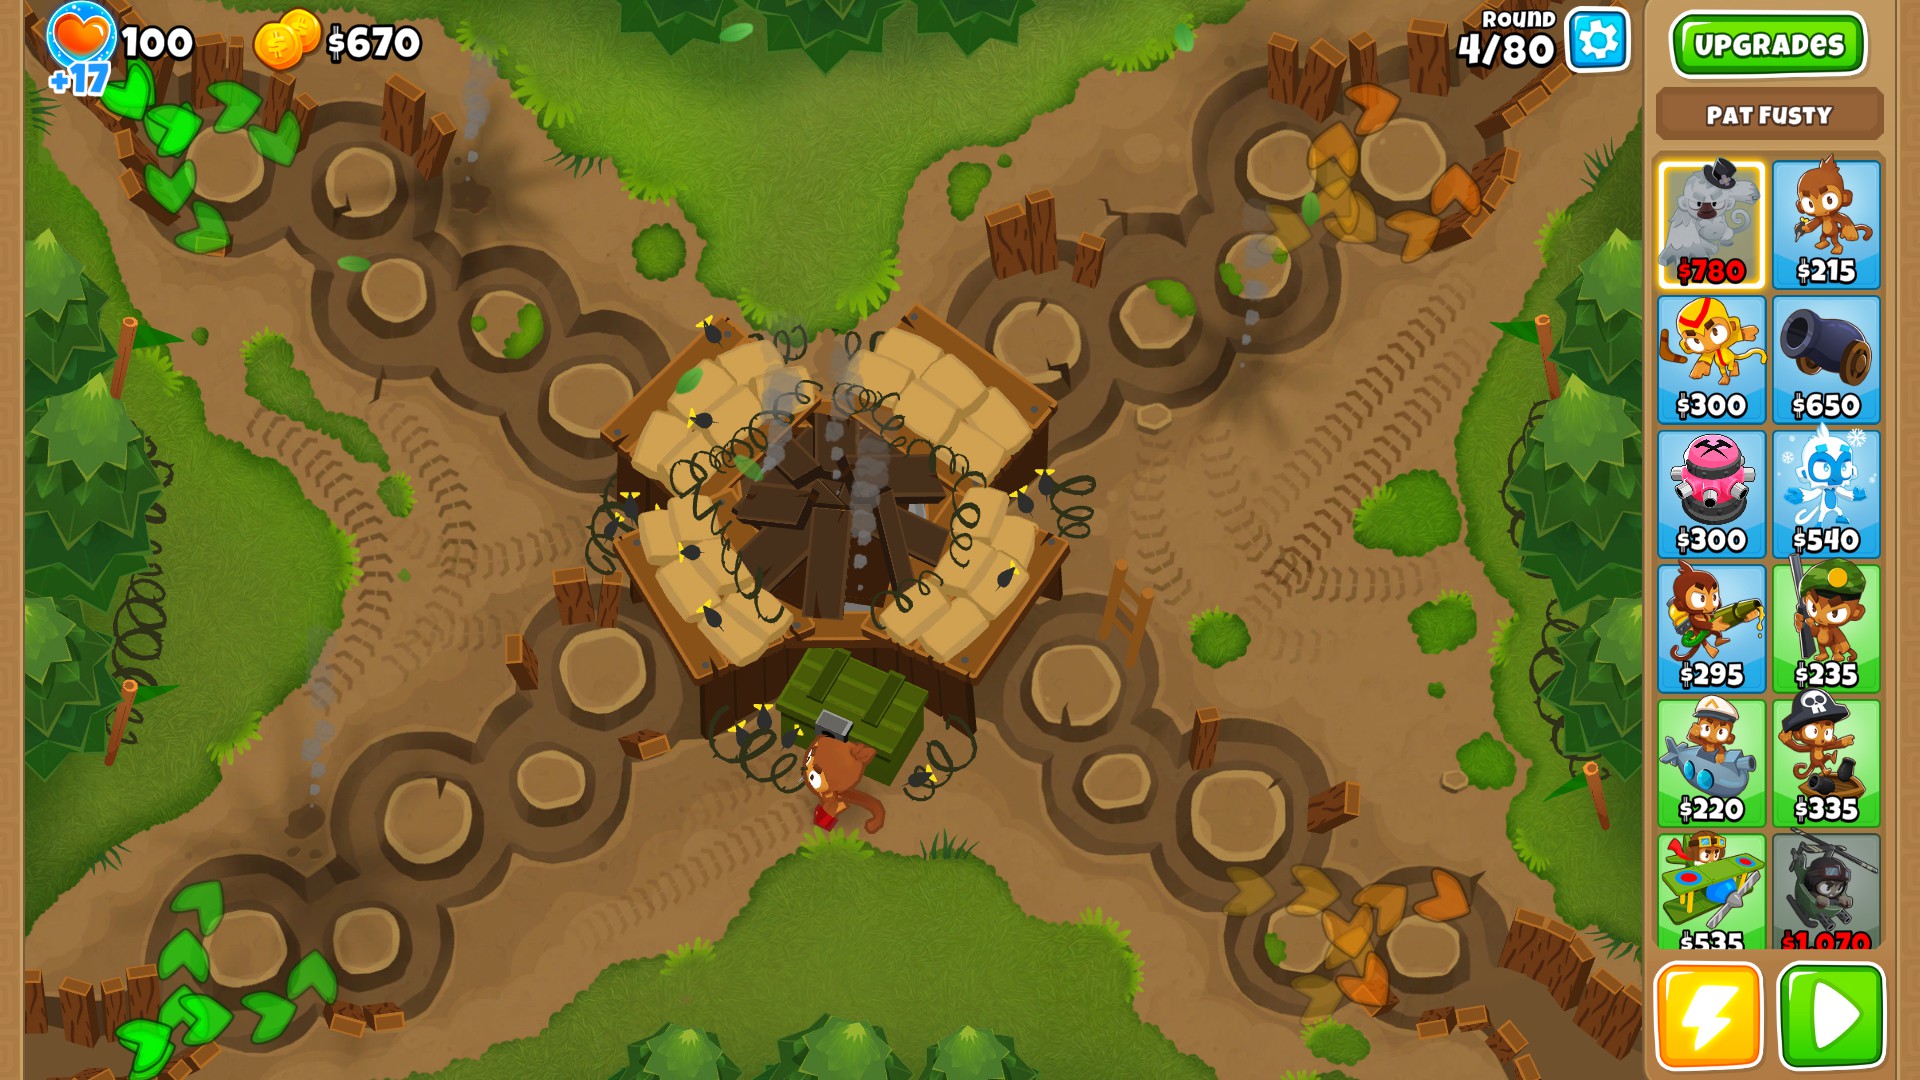
Spillway, Geared & Infernal (17)


Flooded valley & #Ouch (18)


Quad (19)

Muddy Puddles, Workshop, Bloody Puddles. (20)


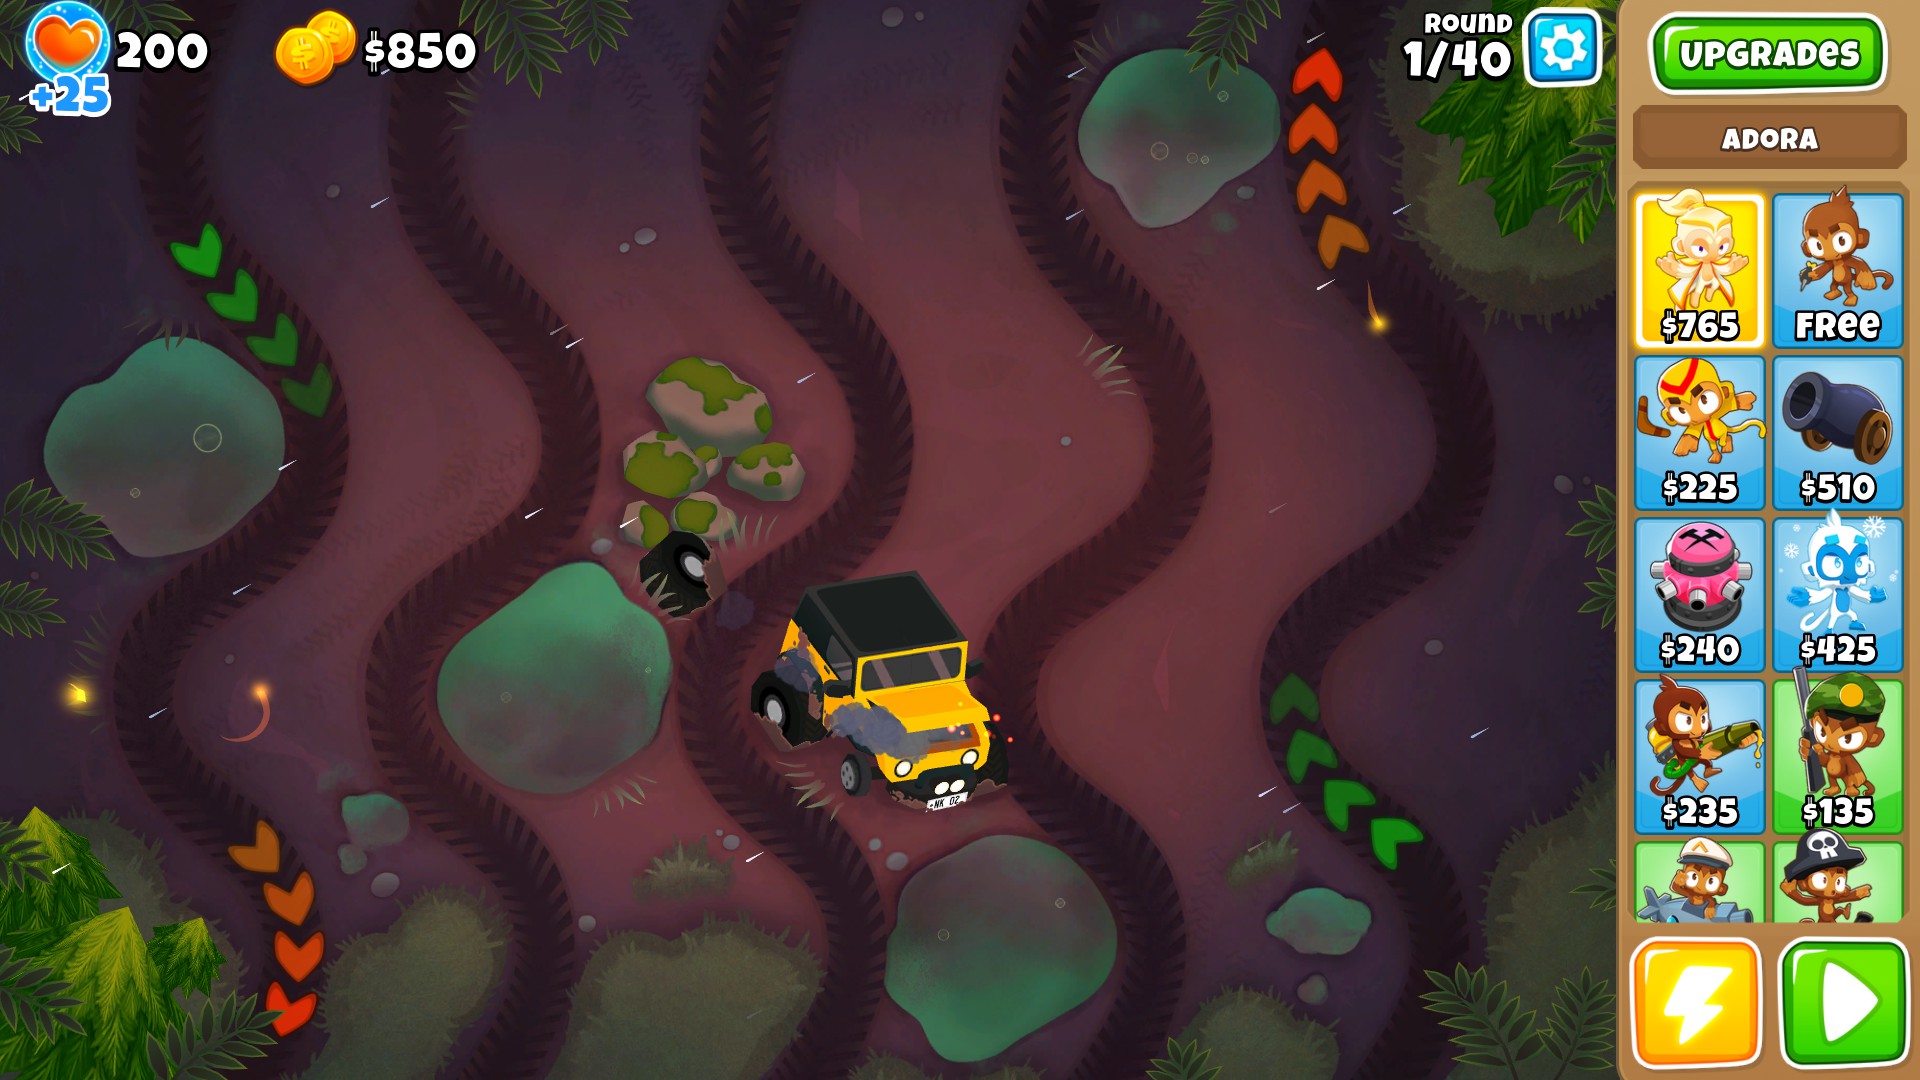
Challenge editor
The challenge editor is a tool that can be used to make challenges.

You can change the following properties:
> Bloon speed: 5% <-> 500% (100% default)
> Moab speed: 5% <-> 500% (100% default)
> Ceramic health: 10% <-> 2000% (100% default)
> Moab health: 5% <-> 2000% (100% default)
> Regrow rate: 100% <-> 1500% (100% default)*
* Regrow rate is bugged and cannot be set lower than 100% however icons for low Bloon regrow do exist ingame.
> All regrow? (Yes or no)
> All Camo? (Yes or no)
> Extreme (Odyssey only): Towers from the crew don’t carry over between maps and are lost.
Additionally the C.H.I.M.P.S modifies can be selected, continues, selling, monkey knowledge and powers can all be disabled.
Lives can be set from 1 – 9999999, the default depends on the difficulty
Starting cash can be set from 0* – 9999999, the default is 650.
* Starting cash is bugged and cannot be set to 0
Towers can be restricted in number (from 1-99), in availability (yes or no) and in upgrade paths (Anywhere from 0-0-0 to 5-5-5), heroes are either one set hero, no hero or a selectable hero.
A challenges start and end round can be specified, it cannot be higher than your all time highest round and can be 1-INF
All codes for challenges are 7 letters long rather than the 6 from co-op and all challenges must be completed before being shared.
An example of a challenge would be ZMHVKDV, this code can be entered in the challenge browser by copying and pasting it into the search box then pressing enter (mobile does it automatically)
Additional Game Modes
Odyssey Mode


An odyssey has:
3 maps on easy
4 maps on medium
5 maps on hard
You must load up a boat with the available towers, heroes and items and complete all 5 maps with the same towers each time, powers are single use and dont carry between maps.
Getting a game over will make you restart the current map, lost lives from previous maps are never restored.
Rewards:
15 trophies (easy)
25 trophies (medium)
50 trophies (hard)
All rewards will come with bonuses such as monkey money and insta monkeys. (Max tier 4).
Races

Also known as a waste of time and monkey money, i am here to say that this mode exists, and i am not writing a guide section for it until they are worth playing.
Insta Monkeys and Powers
———————
-Insta Monkeys-
———————
An Insta monkey is a single use version of a monkey, its sell value is 0 and it lasts until the end of the game. they are rewarded from:
> Races
> Daily challenges (Often low tiers)
> Odyssey
> On round 100 with Tier based on map category, Tier 0-4 with rewards being 0/1, 1/2 and so on.
An Insta monkey is not valued by its tier, but much rather its cost, and effect on its own, a good Insta is expensive ingame, and can solo for quite a while, things such as the sun god or apache are very good.
Insta monkeys are best seen as use for getting to round 100 in deflation, saving for a vengeful temple run, or providing a hand on a mode such as half cash if you find them difficult, or just try and collect them all!
5th tier insta monkeys have no source and only come from events with extremely unreliable and overwhelmingly low drop rates.
————
-Powers-
————
Powers do what they say on the tin, the give you a boost, get them from completing daily challenges.
Super monkey storm: Single use bomb blitz style ability with more damage.
Monkey boost: Single use homeland defence ability
Thrive: 25% more income for 2 rounds.
Time stop: Slows down everything, however towers shoot faster during this time compared to normal.
Cash drop: +2500$
Banana farmer: The classic farmer, and the only power many a player would use often.
Pontoon: A single spot of LAND to place ground towers on, good for those maps with lots of water
Road spikes: 5*20 bonus lives when placed at the end of the track, might have use for impoppable.
Glue trap: One time use blob of glue. Can gain the moab glue property with a monkey knowledge.
Moab Mine: Deals around 300 damage to a MOAB, can kill DDTs.
Camo Trap: removes camo from Bloons, cannot affect fortified DDTs.
Portable Lake: Water for those maps without water.
Tech bot: Automate ability usage, useful for a highest round run.
Energising Totem: Basically its an alchemist in the form of a power, 80MM + 10 for every 5 rounds after.
I strongly recommend against using your monkey money to buy powers, save it up for extra goes at the race event, hero skins, and monkey knowledge instead. You get free powers from daily challenges, odyssey and daily box anyway.
Final Notes and recommendations
This guide will be updated at some point in 2021 to add dartling and the new heroes.