Overview
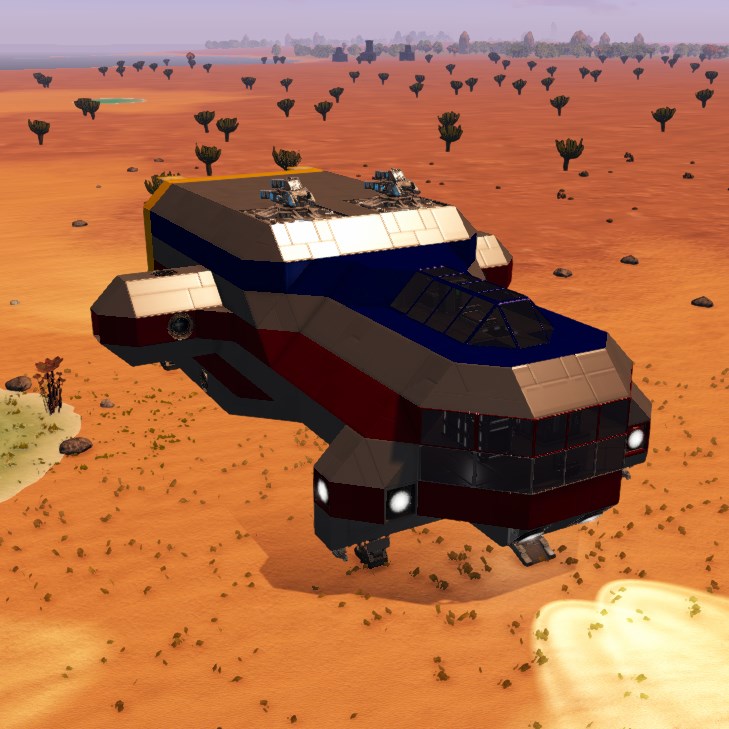
Want to build a CV (Capital Vessel) so you can have a flying base but aren’t sure how to start and don’t want to waste all your materails? Sure you could subscribe to a workshop blueprint for a small starter CV, but you want to do this yourself. Well, just read this. It’s not that hard especially with this walkthrough. I made this because the other guides I can find are out of date and/or not that good.I don’t consider myself an expert or a ship artist but I know enough to get the basic functions online and have done some testing. This will tell you what you need to know to get the functional skeleton of a difficult-for-NPCs-to-kill CV built. It’s up to you to make it look good on the outside and come up with a nice efficient layout on the inside.Version note: This is current as of A9 but some new A10 features like shields aren’t covered yet. What is covered is still valid though.
How to build a CV
There are two ways to do it. One is safer and less trouble but not so much in the survival mode spirit, and the other is really not much harder but keeps you in survival mode the whole time.
- Build the stuff you need, then fly into space and build your CV.
- Exit from your survival mode game, create a “scratchpad” creative mode game, go into that, build your CV there, and save the blueprint. Then go back to your survival mode game and build the blueprint with the factory.
I’m going to recommend that you just do this in survival mode the first time because it really isn’t that hard especially with a walkthrough like this.
Blueprint Option
If you do want to use this option, here’s what you need to know. As previously mentioned, start a creative mode game.
Hit H to bring up the item selection screen and select your items. You’ll also want a T2 multitool, a color and texture tool, fuel and oxygen.
Build as described below. Once done, point at the CV and hit Alt-O then save as a blueprint.
Other than that, it’s just a matter of going back to survival mode and obtaining the needed ore to build the blueprint.
Pure Survival Option
This is what I recommend and it isn’t that difficult. What you need:
- Build a base. If you haven’t built a base yet, that’s pretty much required so you can use the large constructor to build the blocks you need. So make sure you have your base going. Your base can be in space if you want.
- Build a SV (small vessel) first. You’ll need one to fly into orbit. You can build a CV on the ground, but it’s more difficult for various reasons. You could build yourself a column on a base and put the starter block on top of it, but it gets to be harder to add to the bottom and top (due to limited drone range). So I’m just recommending doing this in space where these headaches don’t exist. You’re going to want a SV anyway if you don’t already have one.
- Even the lowest tier required parts will require Cobalt, Neodymium, and Sathium. So either use your warp-capable SV to warp to a planet with these ores, or get them from POIs and deconstructing stuff (takes much longer usually). You may want some Erestum and Zascosium to build the T2 RCS and other stuff like the T2 repair bay or repair station but it’s not strictly required.
- You will absolutely need an EVA Boost to fly around in orbit by yourself. Without one you will freeze to death. If you don’t have one (typically you will have found one by now as loot) then fly to the trading station in orbit around the starter planet, or any trading station really, buy yourself a gold ingot, and craft one. Better yet, buy more gold ingots, craft several, and sell the extras to the traders to make some money. But what it comes down to is you need an EVA Boost equipped. Even if you use your drone while standing in the warm doorway of your ship, the drone range is too limited so you’ll need to move around and this will become more trouble than it’s worth without an EVA Boost.
- You’ll also need to be high enough level to unlock at least the most basic CV blocks, so make sure you have at least the lowest level fuel tanks, cockpit, RCS, thrusters, etc, unlocked. If you’re not high enough level or don’t have the unlock points yet then just set this aside for a while until you do. (Tip: kill wildlife with a HV and the wood harvester to get some easy and safe XP early on.)
Checklist of Required Parts
Once you’ve met those requirements, here’s an approximate inventory of what you need to craft before heading into orbit in your SV:

First make sure you build the CV versions of these blocks and not the SV versions or you will get to orbit and be disappointed when you can’t use them.
- Fuel: 40 Large Fuel Packs, 20 Fusion Cells, or 200 Small Fuel Packs minimum. This is enough to fill a 6000 capacity T3 fuel tank or equivalent. This is a decent safe amount of fuel.
- Oxygen: 32 O2 Bottles minimum, which is enough to fill four large O2 tanks (8000 capacity).
- CV Starter Block: obviously required and you only need one. In Alpha 8 it comes with a cockpit so no need to build one. In Alpha 9 you don’t get a cockpit with the starter block so build a cockpit.
- Steel Blocks L: I would build about 500 of them to start out. You don’t really need the Hardened Steel ones for your basic building block. Just start with minimum 400 but ideally 500 regular steel large blocks.
- Combat Steel Blocks L: Build about 120 of these, minimum 100. You need this many to cover a 3x4x1 area with two layers on four sides, one on the top, one on the bottom, and some in the edges. Then you want a few blocks to protect the cockpit and other stuff.
- CV COCKPIT: For Alpha 8 it is included in the starter block. For Alpha 9 it no longer comes on the starter block so build one in Alpha 9!
- T1 Large Generator: you can use two small ones for now if you want, but that will be too little power to operate the T2 repair bay which you will want to use as soon as you can. Only the smallest ships will be OK with one small generator so I’d recommend a miminum of two if not the large T1. You do not need the large T2! That’s a carrier/dreadnaught/titan-sized generator and it is BIG.
- Fuel Tank(s): Minimum 1 x T3 tank, 2 x T2, or 4 x T1 tanks. The T3 can hold 6000 fuel, and four voxels worth of the others can hold almost that much (you get slight capacity bonus with the T3).
- RCS: Build ONE T2 RCS if you can. These are very strong so one will be enough. If you can’t build the T2 version yet then build 2-3 of the regular T1 version.
- Thrusters: Recommended minimum is 16 Thruster S or 8 Thruster M. The Small ones will allow finer grained control of thrust and fuel consumption.
- O2 tanks: Mnimum 2 x Large O2 Tank, Recommended 4 x Large O2 Tank. These are pretty cheap and don’t use that much space.
- Oxygen station: this is pretty important especially if you lose O2 pressure due to damage so build one.
- Landing Gears: 4 should be enough.
- Regular unarmored doors: just make 10.
- Ventilators: minimum 2. I only use one in the example because the interior is small and is one big air-sharing area. But I say minimum 2 in case you start getting creative, 4 is probably the most you’ll need unless you start building very big or elaborate.
- Lights: again just make 10 or so.
- Windows L: up to you but I’m going to say minimum 20, 40 recommended, more if you want to build glassy stuff. Note that for PvE you don’t absolutely need armored windows as NPCs don’t seem to target your cockpit. You can live without windows but will need to use 3rd person view.
- Elevator Blocks: As usual, just build 10 of the cheap stuff like this. You may also want some stairs, but elevators are more space efficient.
- Ramps: Build two if you want to have ramps for HVs to drive into a hangar. Build a third one if you want a ramp to a door, or build the new Bording Ramp (Alpha 9).
- Cargo containers: however many you want but I’d say minimum 4. If using the new weight/volume limits you’ll probably want 4 controllers and 10 or more extenders.
- Wireless Connection (Alpha 9): For now just build one.
- Spotlights: Recommended minimum of 4.
- Warp Drive: You only need one and can only use one. Not strictly required right away but I’d highly recommend it because it’s big and thus more of a pain to add later.
- Warp drive tank: Only need one, can only use one.
- Ammo Box: Build one or (Alpha 9) an Ammo Container Controller and some extenders.
- Projectile Turrets: Almost optional but sort of like a base you really need something to shoot down drones that attack your ship while you’re away. I’d recommend a minimum of 2, but if you can build them I’d recommend 4 30mm cannons. NOTE that the only turrets that work on a planet are miniguns and cannons! So for now there is very little point in building anything else unless you’re doing PvP or plan to attack something in space. Drones don’t come after your ship the way they do with a base, but unless your ship is parked near friendly turrets it will be at risk of serious damage without some drone killing turrets.
- Sentry Guns: Optional, but I like to put 4+ on the underside in the corners to kill hostile wildlife in the landing zone. They’re not much good for killing anything but wildlife and hostile alien soldiers etc but it’s pretty nice to have a bunch of guns shooting if you happen to land near a squad of hostile creatures.
- Don’t forget your multi-charges because you will make changes.
- Emergency Oxygen Bottles of the sort you can just right click to consume. You should always have these on you in unbreathable environments.
- Color/texture tools: optional but you might want to bring these along.
That’s pretty much the minimum and the critical stuff. Other highly desirable things you are going to want:
- Large Constructor or Advanced Constructor: So useful that I should probably say it’s required.
- Cloning Chamber OR Medical Station (The medical station also functions as a cloning chamber so no need for both.) Another thing that is so useful as to almost seem required.
- Hangar door: optional, should only need 1 at most for your first ship. But you don’t absolutely need this because you can just dock an SV or HV on an open landing pad or “docking strip”.
- Repair Bay and Repair Console: These are very useful so definitely build one of each if you can. If not you can add them later. Note that you can only have one repair bay block on a ship or base.
- Armor Locker: Another almost requirement.
- Passenger Seats if you’re in multiplayer.
- Repair Station
- Fridge
- Food Prep (cook those steaks you find)
- Armored Doors (not usually necessary unless you’re replacing a combat armor block with a door).
- Gravity Generator (Not really that necessary honestly. I never use them. They just add more weight.)
- Sensors/Levers if you want to mess with that (make your ramp come down automatically etc.)
I didn’t include farming plots because it’s not worth the effort. Just build plots on a base and make emergency rations. A base with four 3×3 clusters of plots can make 4 survival rations per harvest faster than you need them, especially if you cook loot meat and eat loot food as you go.
I also left out decorative iterms and things like toilets that aren’t purely decorative but aren’t that useful. These things aren’t worth messing with unless you’re making a larger ship with more resources spent on cosmetics than utility.
So craft at least the minimum stuff and head to orbit with it.
Tip: Obtaining Structural Blocks
Keep in mind that in addition to mining, you can also salvage whole blocks from POIs and derelect ships. (If you haven’t done the missions yet, do those first to make sure you aren’t messing those up.)
Normally you can’t use the multitool on a hostile structure. BUT if you find the core and destroy it (shotgun, explosive charges, rocket launcher, etc.) then you will be able to salvage the blocks into components, but only into components even if you use the Retrieve Blocks mode of the multitool.
BUT if you place your own core on the base or ship after destroying the hostile core, and press P to change the faction to “Private” it will become your base/ship and now you can retrieve whole blocks. Make sure to remove your core last because as soon as you remove it the base goes back to “neutral” and you’re salvaging components again.
You can get hundreds or thousands of already constructed blocks this way including hardened steel and combat steel.
(Incidentally you can also claim and “renovate” an existing base/ship this way, not just tear it down.)
So if you don’t have the 400-500 blocks I recommend to start on a CV, and you don’t have the ingots, consider tearing down an enemy structure as previously described.
But don’t waste your time doing this without a T2 Multitool or an HV with a Multi-Turret. If you’re lacking the T2 multitool, buy it from the trade station. If you need money, visit the weapons dealer (he’s in the “conference room” on the Temperate starter planet station) figure out what he will buy that you can make, and make weapons to sell him. Also buy gold ingots from the mining trader and make EVA Boosts to sell to both the mining trader and the hardware trader. You’ll have tons of money to buy all the ingots from the mining guy and all the medical supplies from the medical guy in addition to any other tools/weapons you need.
ALSO once you get a minimal CV built, there is the Tool Turret you can put on it to use for salvaging derelect ships. So you may not want to spend too much time salvaging derelect ships until you get a minimal CV with a tool turret to help speed that up.
Summary:
- Find and destroy hostile core.
- Put down your own core anywhere on the structure (not a stater block, just a core).
- Press P and change the faction from “No Faction” to “Private”.
- Salvage complete blocks with “Retrieve Blocks” on the multitool/turret.
Symmetry Mode and Building Tips
Notice you can drag to place whole lines of blocks.
Dragging and holding down Ctrl will create a “plane” of blocks.
Use Symmetry mode when it makes sense to do so. This will speed things up and help you keep your ship symmetrical. To use it, hit N, click Symmetry Mode: YZ, then click on the centerline of the ship. (This will not place a block because you’re in “N” mode.) Hit N to close the window.
Notice (!) you can place the plane either between voxels or in the center of a voxel. If your ship is an odd number of blocks wide (like 9 or 11) you want it in the center of the center voxel strip.

Now everything you place will be reflected around that plane. Obviously you can also pick other planes to reflect around like XY or XZ.
With that said, there’s really no reason why your ship has to be symmetrical. You can make all the freaky asymetrical Star Wars type ships you want, it’s just a little faster to build your first ship doing it with symmetry mode.
Building the Armored Vault For Critical Systems
Take your SV to orbit with the building supplies. Move about 2000m away from the planet and away from asteroids and such.
Make sure your SV has Auto Brake turned on so it doesn’t float away on you. Make sure your EVA Boost is equipped. Make sure your oxygen is full and you have an O2 station with plenty of O2 in your SV. Make sure you have emergency oxygen in your inventory so you don’t have to choke your way back to your ship without dying when you lose track of your O2 bar.
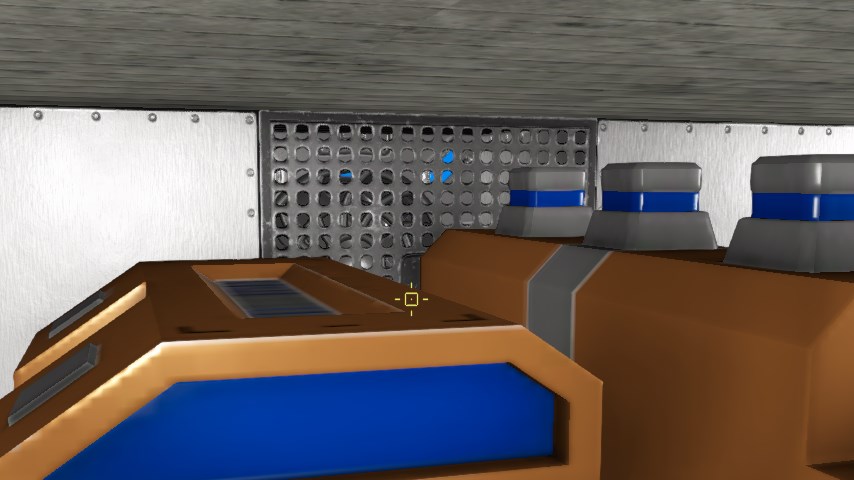
Then go for a spacewalk. Make your toolbar and/or connected toolbar look something like this:

Oh did I forget to mention the color and texture tools? Well don’t worry you can mess with that stuff later if you forgot them.
Move 50-100m away from your ship and place the starter block. Now strip it down with the multitool so it looks like this. Don’t remove the cockpit (which is only there in A8, otherwise you get a marker in A9 just like the HV etc starter) yet or you’ll risk losing track of which way is the front!
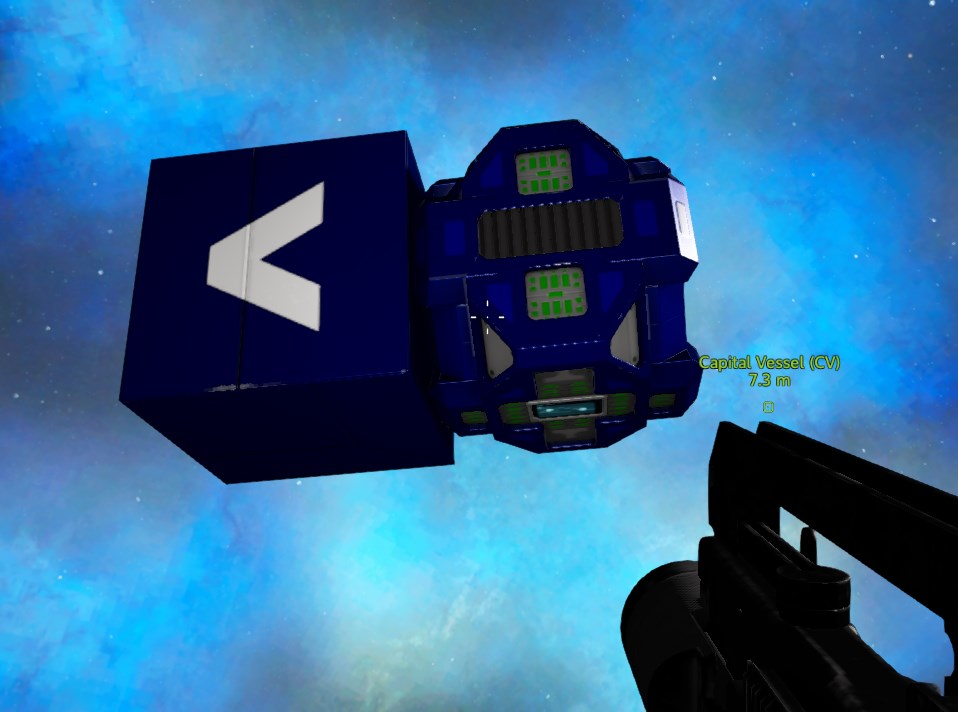
Once you’ve done that, try to pack the generator, fuel tank(s), RCS, and core into a 3x3x1 area like this:

If you built the T1 RCS then add the others here. If you build the T2 RCS then you might want to add the ammo box and some other block (I use the wireless connection here) like this:
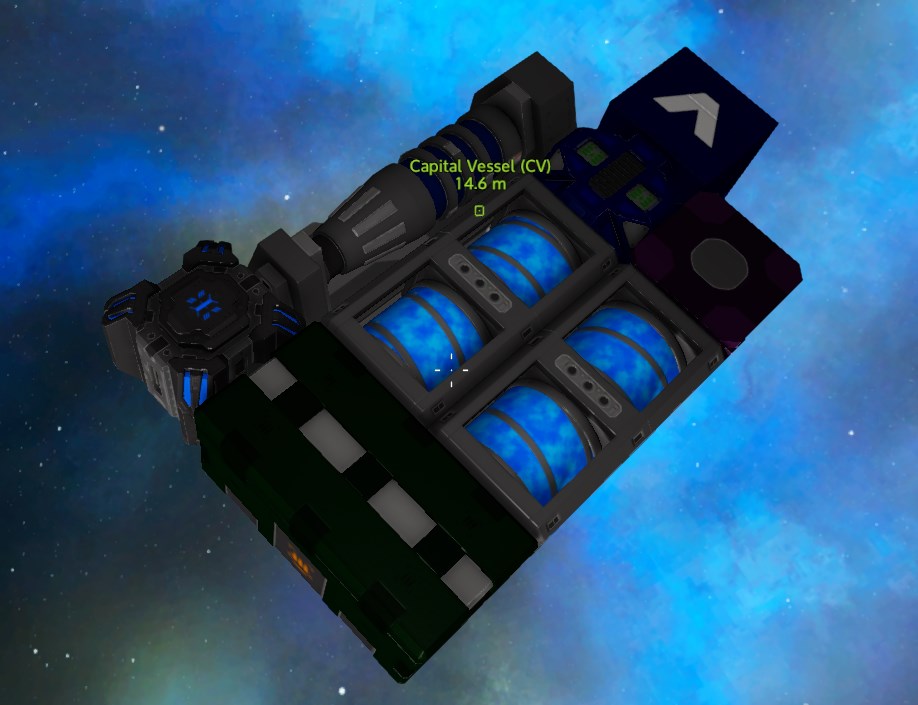
Anyway, now you want to cover each side of critical area with the combat armor blocks. Make it two layers thick on the sides, front, and back, and one layer thick on the top and bottom:
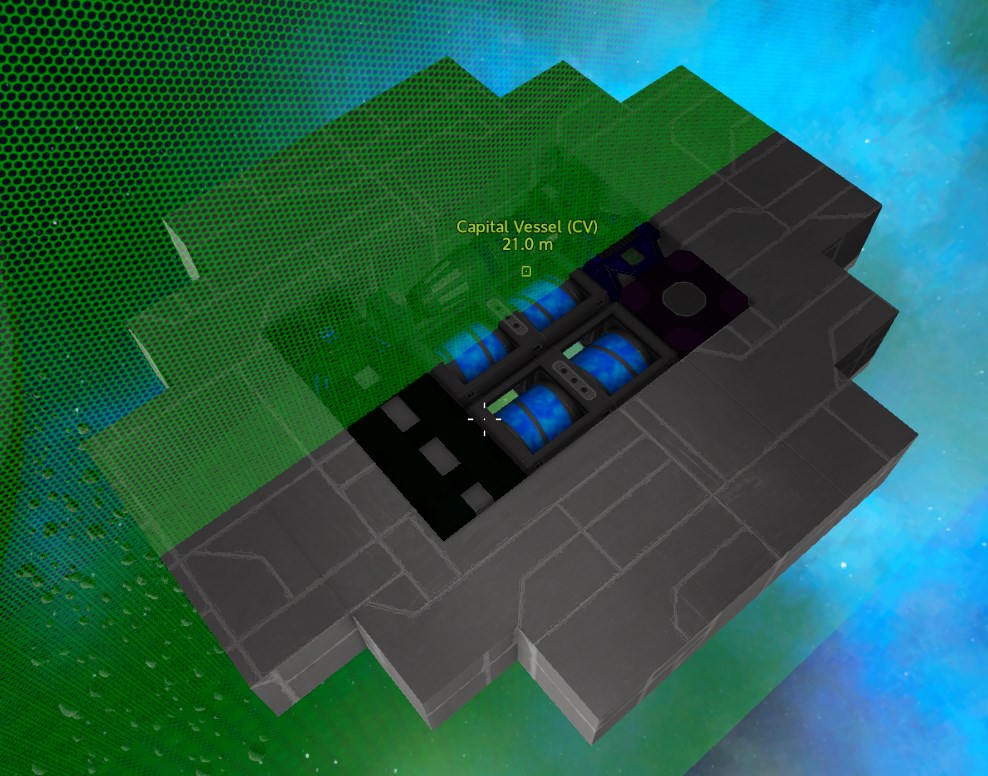
NPCs like to shoot at your generator so most enemy fire will be attracted to this bank vault. It’s almost impossible to pierce this in reasonable time with things like plasma, lasers, and miniguns. The only real danger is missile launchers, bombs, and artillery and even those will take some time to get through it. So this is quite safe.
Now add some extra along the edges so they have to shoot through two blocks to get to the generator even shooting at the edges:

Make a part sticking out in front to mark the intended front.
If you find yourself in some situation where you’re gettig bombed by bomber drones while landed on the ground, you may want to add an extra layer of armor to the top of the ship.
So now you have a very difficult to destroy secure vault section with critical things like the core, generator, fuel tank(s), and the RCS (which really could go elsewhere but you’ll probably have space here and it’s more important to protect the RCS than the thrusters).
Not strictly, but it’s not that expensive and will save you major trouble. The main point is to make it very difficult to shoot your small CV down until you get a better feel for things. If you see any blocks missing then you’ll know you would have gone down in that situation with only a single layer.
Some notes on how well this works: I took a ship with a core section built like this and 8 30mm cannons into a survival mode test game and took out 4 POIs with no repairs and they didn’t manage to destroy a single block of this section. I then went out into orbit and killed one of those “cluster drone” ships. Still no damage to this section. Thrusters all over the sides and front were destroyed, some turrets were almost gone, and other stuff was trashed, but the ship still flew and they never managed to get anywhere close to piercing the vault section. Note however that the enemies in this test didn’t have missiles or artillery which would have been more of a problem., but even then it would have taken something like 10+ shots to destroy the generator. So this is quite secure for casual mobile base type CV use.
Anyway, back to building.
Layout Planning
It helps to do some layout planning at this point. I’m going to show a relatively flat design here and I’m not going to use the sides but here’s the general idea and some possabilities:

For the rest of this I’m going to put the “work area” and cockpit in front of the vault, the warp drive on top of it, and a hangar in back. The sides will only have corridors going to the hangar.
Hull, Warp Drive, Oxygen, and Equipment
Ok so now get out your regular steel blocks. You won’t need to worry about the combat blocks anymore unless you see something special you want to protect that you might put valuables in or something. Most things can get shot up, the ship will fly, and you can repair or replace.
First I’m going to slap down the warp drive since that’s big, then put the warp tank in front of it and build the floor of the combination bridge and work area.

The Warp Drive is hot in both heat and radiation terms so I want some separation here between it and walkways. I could use Carbon Composite blocks here but it would be nice to have some protection for it.

I’ll stick two of the O2 tanks here with the O2 station and ventilator. I’ve placed the ventilator so that it will vetilate the warp drive area and bridge. This way I can use the ventilator to pressurize the back if I want.
Ideally you should try to keep things like this separated a bit so if they get hit and explode they don’t set off a chain reaction of explosions and destroyed equipment.

Since we’re trying to cut costs, I’ll put down the medic station, repair station, constructor, and containers here. Ideally we would have better protection for these containers but this is OK for now.

And the cockpit goes in front. I also use the new Boarding Ramp for a forward hatch.
Hangar and Back Section
In the back of the vault I create a 7×7 (on the inside) area and enclose it with the 7×5 hangar door.

I also put two more O2 tanks back there and the armor locker. There’s a little window to the warp drive but that’s only there so you can get a sense of where the warp drive is.
Because the warp drive and warp tank are not airtight blocks, if I remove this window then I’ll get the hangar pressurized with air without having to add another ventilator. But for now I’m not going to pressurize the hangar because it just increases the chances of losing pressure if the ship is damaged by enemy fire.
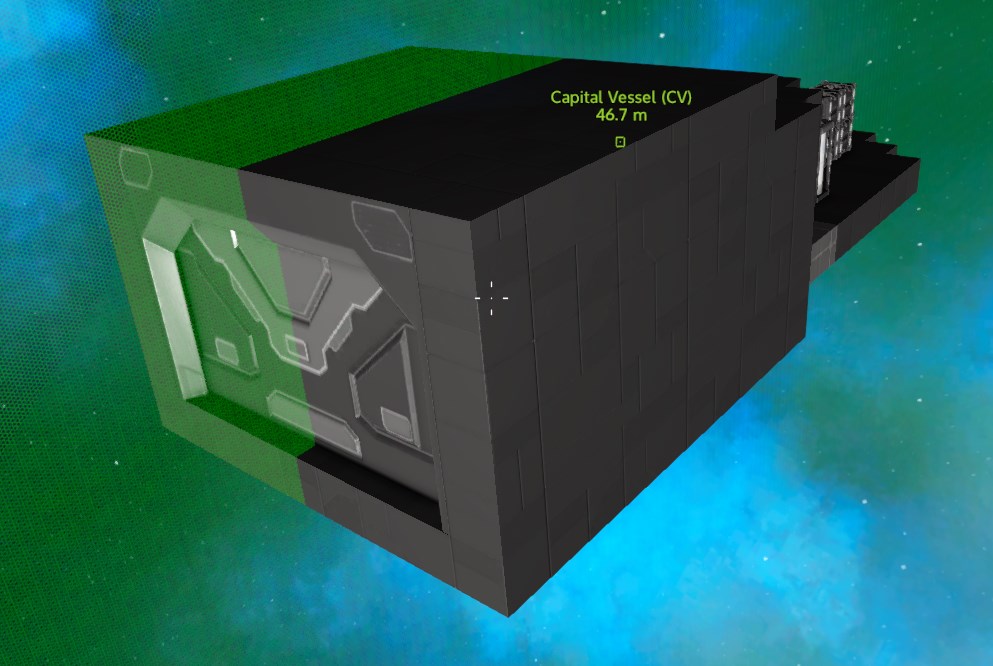
Sealing the Hull
The hangar is enclosed now so lets finish enclosing everything.
I’m just going to create a skeleton here and not try to finish the outside to make it look nice.
Enclose the corridors….

You might notice some space here where we could move some O2 tanks.
Maybe I should get really fancy and use some ramp wedges here…

I finish enclosing everything and put windows in front.

So that’s a blocky skeleton which can be fixed up to look better using different shaped blocks. But it’s now fully enclosed and sealed.
Quick tip about windows: Windows have a tinted side and a “clear” (less tinted) side. You can swap which side is which using the “rotate” function of the Multi-Tool (which does not literally rotate the whole block). Just remember you’re switching which side is tinted, not removing the tint completely. Usually you want the tint on the outside so it isn’t making it harder to see.
At this point you could add O2 and check out the pressurization but I usually wait until I get the thrusters added so I can just test everything at once.
Ventilators use a decent amount of power, so the more rooms you can pressurize with one ventilator the more power efficient your ship is. Therefore it’s a good idea to place them in a wall where they will ventilate two separate rooms.
Of course you can use non-airtight doors and make the whole ship one big pressure zone, and this is perfectly reasonable for small ships, but it means that when the hull is breached (which will happen at some point) you will lose more O2.
If you have space you can also make ventilation ducts which you may have already noticed in NPC POIs. These aren’t just cosmetic; they can allow one ventilator to potentially pressurize six different zones (though six may be hard to manage). For example:
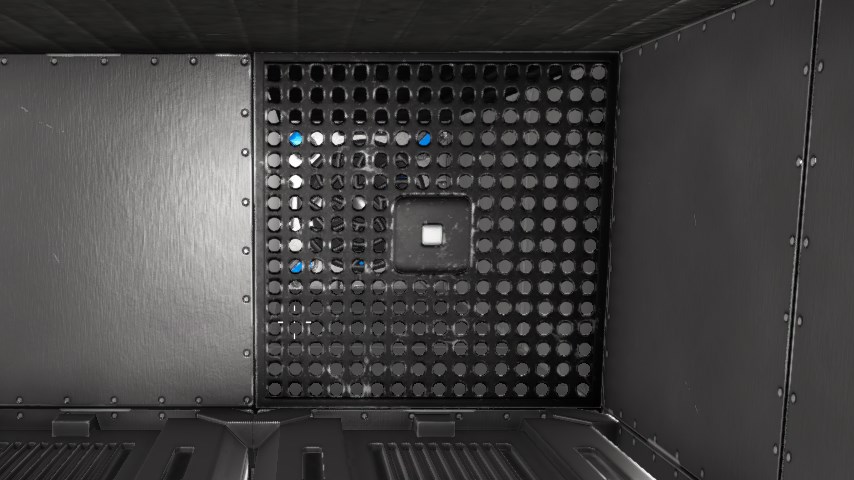
This one ventilator pressurizes these two rooms and it can possibly have tunnels going off in 4 other directions to pressurize four more. You can block off the ventilation ducts with these “walkway” panels (one of the hand rail types) or the non-airtight “shutter windows” that look like horizontal blinds. But really any non-airtight block can be used as a vent screen. (This example is actually from a base but it works the same way on ships.) The only problem is the extra space needed for the ducts but it makes sense for larger ships that are large anyway and are better off with different pressure zones so you don’t lose a whole massive ship full of O2.
Adding Thrusters
I’m going to take a simple approach and create a “pentathruster pod” of Thruster S on each side like this:
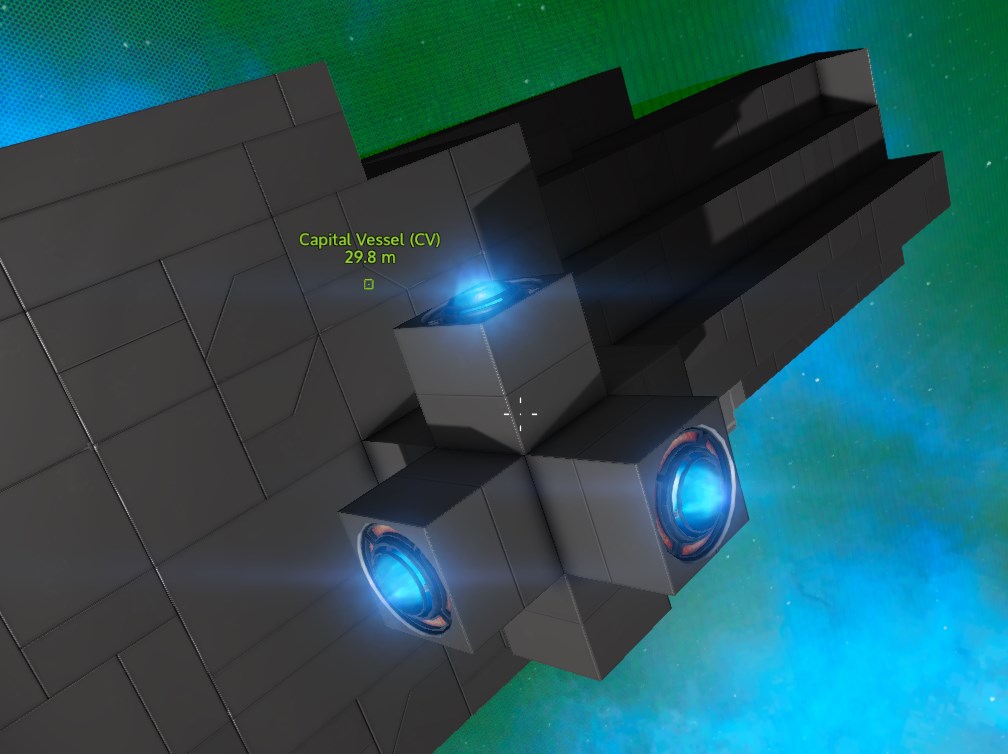
The drawback is that thrusters are in roughly the same place and can be targeted more easily, so this is really going to need armor around it. Even with armor this is a really bad idea since a single missile could take out all of these thrusters. (I did this mostly to limit the number of screenshots needed to show thrusters in all directions.) So it’s much better to distribute small thrusters all over the place where multiple thrusters need to be destroyed individually before you lose al thrust on one side.
But doing this in symmetry modes gives me 2 up, 2 down, 2 forward, 2 rear, and 1 on each side.
That’s not quite enough Thruster S especially on a planet with more than 1G of gravity, so I’m going to add two more on the bottom and an extra on each side using symmetry mode like this:

If all thrusters in one direction get destroyed then you won’t be able to stop moving in that direction or accelerate in the opposite direction without turning the ship. It’s not a complete disaster but it gets to be very inconvenient for maneuvering. Obviously at some point you’ll be unable to take off from the ground and if on a planet then gravity will cause the ship to fall to the ground.
Force due to 1G of gravity is 9.8 m/s^2 which you can just think of as 10 for these purposes. That only allows you to counteract 1G and stay in the air though. You need some extra to actually accelerate upwards, so 12 m/s^2 is usually considered the minimum for dealing with 1G.
You may think you only need this extra thrust in one direction, but your ship can end up rolling over if you get snagged on a tree or something close to the ground. If that happens then you’ll need more thrust on the side to right the ship again. If you don’t have that then you’ll have to make a thruster and run outside to fix this situation.
But what if you end up on a planet that’s 1.2Gs? Now you’re going to need 12m/s^2 just to stay in the air, and more to take off. So you’re really going to want 14+ m/s^2 in the bottom direction in case you run into this.
To start out you can just worry about having at least 12 m/s^2 in one direction like the bottom, then worry about improving the thrust on the sides later.
Right now we’re still adding weight to our ship so we’re not going to worry about checking the numbers in the physics panel just yet.
The more thruster power you have the faster you burn fuel! So it’s good to try to use Thruster S to get just enough acceleration to take off in all situations. If you have extra thrusters for faster acceleration then it’s a good idea to use signals to disable the extra ones that aren’t needed for flying and landing. Basically, create a “full power” signal that turns the extras off and on.
Turrets, Landing Gear, Boarding Ramp
Adding the turrets is pretty easy. I’m going to use retractable 30mm Cannons, 2 on the top and 2 on the bottom.


Now the landing gear. I’m using the new fully retracting type which automatically pops out when you reach the ground. The old type mostly retracts but not entirely.

And I’ll add some sentry guns (which need to be down close to the ground like this).

Those will come in handy when you land in the middle of a gang of 16 spiders or scorpions.
Now I notice that my boarding ramp isn’t going to reach all the way down to the level of the extended landing gear so I rework that with an elevator so it reaches down. The bridge looks a bit better this way too.
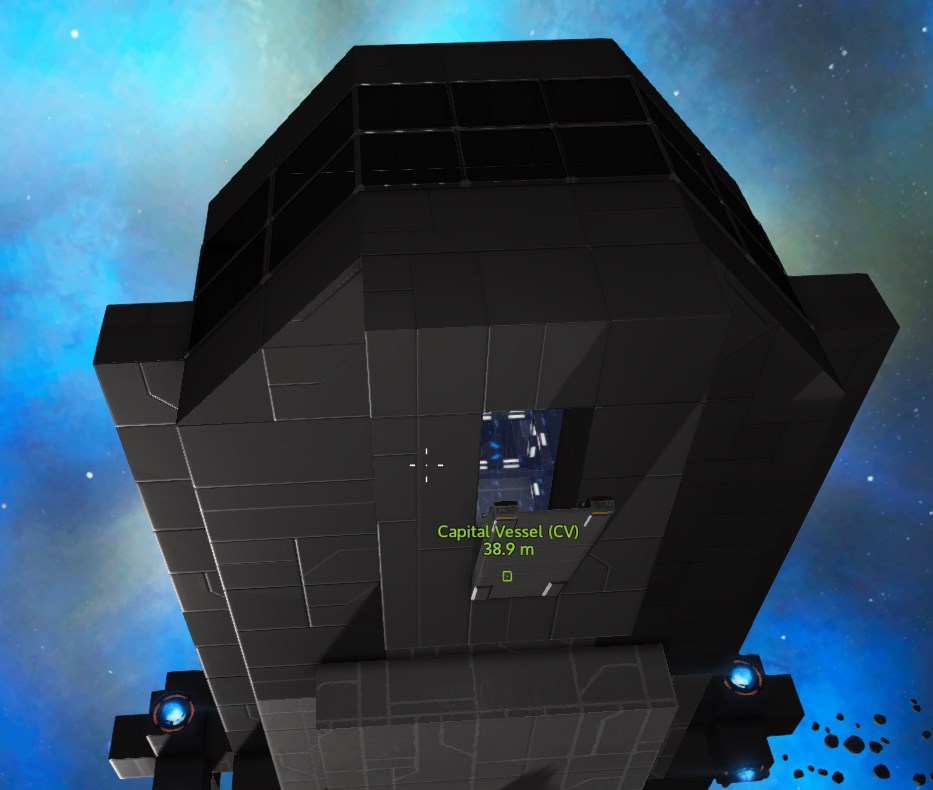

If you happen to be lucky enough to be able to install a T2 (or T1 for that matter) Repair Bay, now is a decent time if you haven’t done it already.

Now is also a good time to add some spotlights, interior lights, and other exterior lights.
Check Physics and Test Landing
If you haven’t already, add fuel and O2 then power it up. Once the thrusters are on, check the Statistics tab in the control panel.

That’s not too bad. Maybe it could use some fine tuning (we really need in excess of 12 m/s^2 in more than one direction to deal with more than 1G safely) but that’s OK for now. So lets take it in for a landing.


I forgot my ramps on the back and we might could use some more light back there. Ramps will make it easier to drive an HV into the hangar, though they could jump with hover boosters. (This CV is even small enough for them to jump on top of it using a hover booster.)
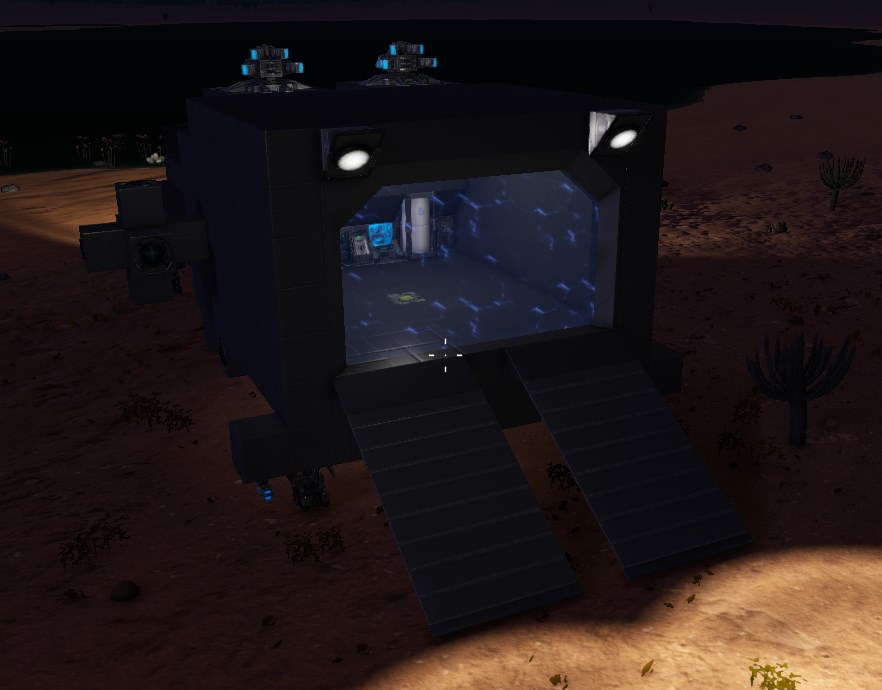
Similar to hangar doors, we don’t have exactly the sizes of ramp we want so this will have to do. HVs should have no problem with that gap in the middle.
Removing the T2 repair bay and console, the final cost is:

I could have avoided that Zascosium and Erestum by using T1 RCS rather than T2, and something else I used like the rapair station may have used some as well. Anyway, point is that E and Z are not strictly needed.
Here’s the BP.
[link]Signals and Control Panel Config
Once you get several types of tools and weapons added, you may want to set up the control panel to turn them on or off by category. You might also want an “eco mode” to turn off anything that isn’t needed (constructors, etc) when you leave your ship to explore.
That’s where the signals and shortcut switches come in handy.
There’s a whole seperate guide about this.
[link]
You probably won’t even need circuits for this but it’s worth knowing how to use the signal and shortcut switches in the control panel. So you can actually just skim the guide for the shortcut and signal switch config and leave the circuits for later.
Finishing and Expansion
So far I’ve just built this with cubes. That’s a reasonable approach when you just want to get the basic layout and skeleton figured out.
You could fly a cube ship around and in game mechanics terms it might actually be more sturdy than a nicer looking design (some of the smaller volume blocks have less hit points I think), but you want it to look nicer. So you want to use some different shaped blocks.
Here’s one possible way to finish this design up with basic sloped blocks, corners, and a few more windows. (I managed to create a tiny cabin up top with a bed, fridge, and food processor.) I applied a little paint but was too lazy to paint and texture the whole thing.
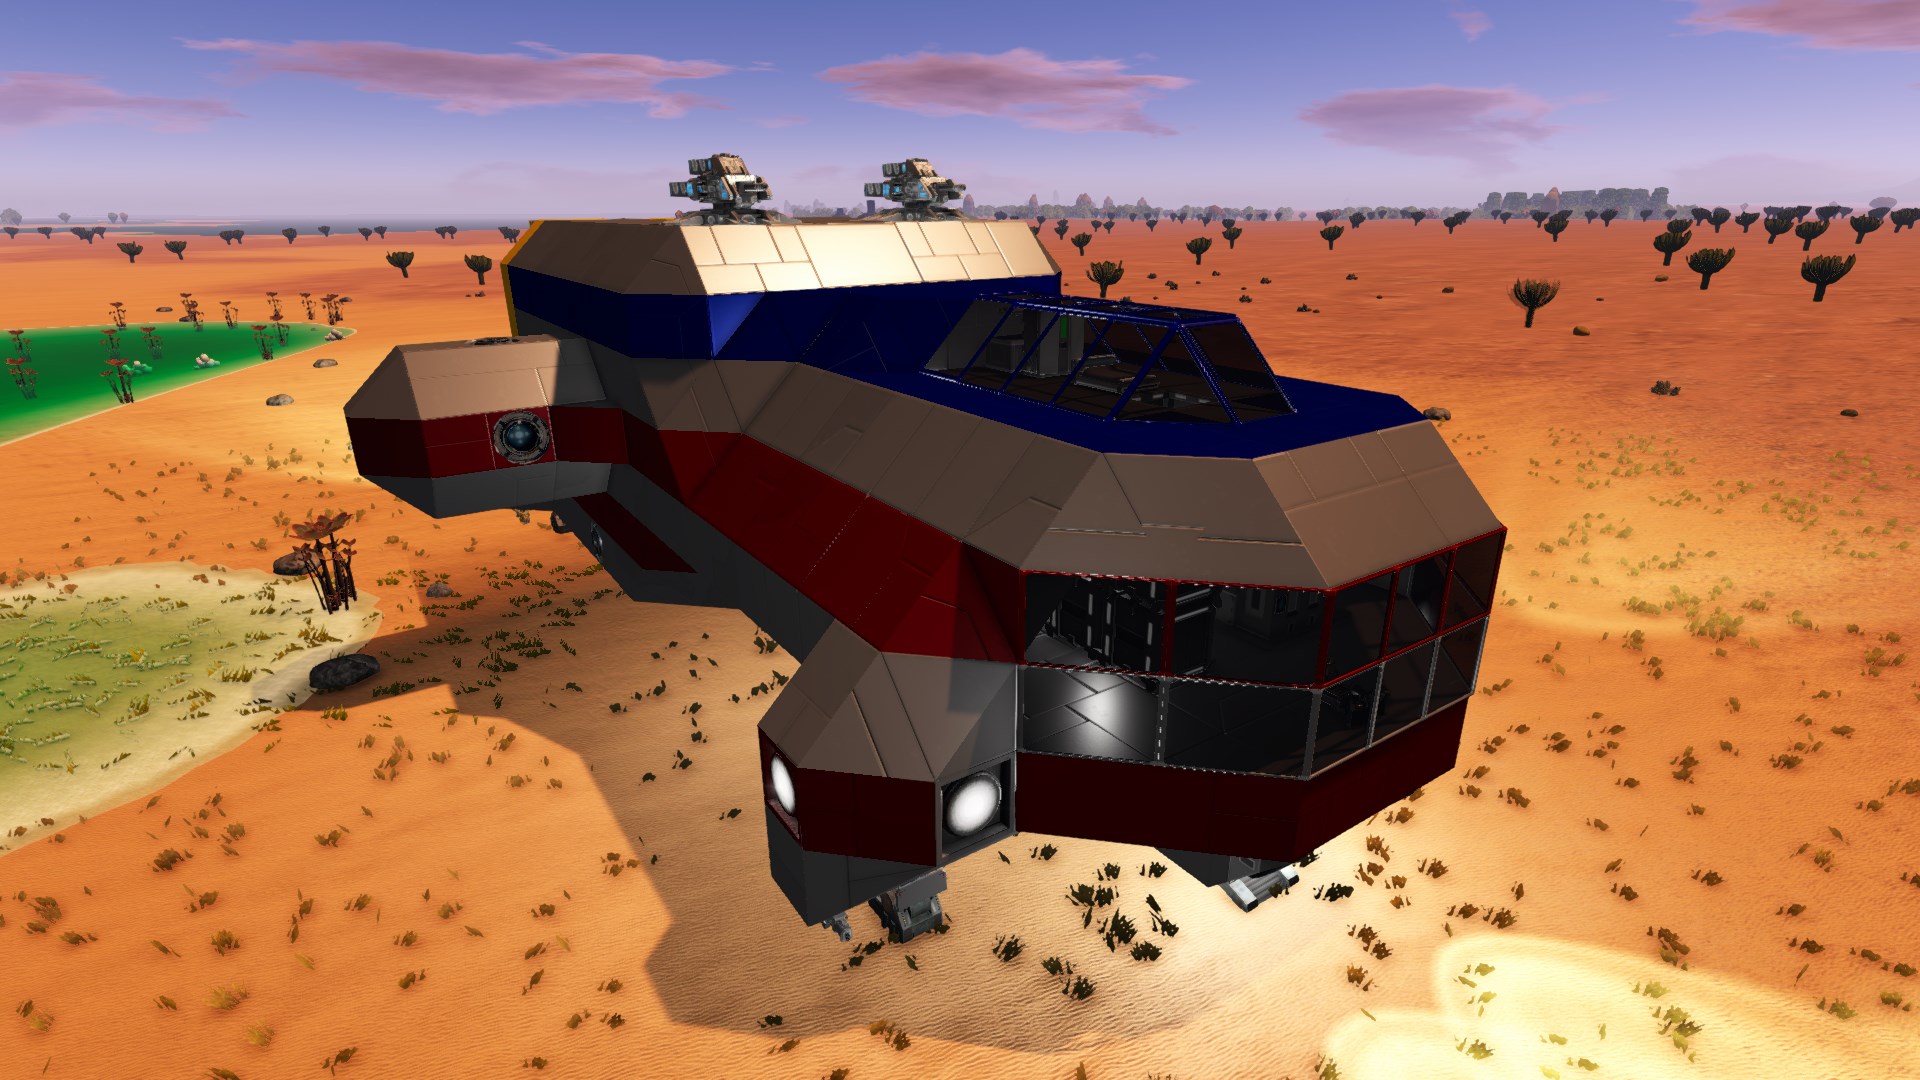
BTW it has gotten heavier now and will have to rely on the bottom thrusters to get to orbit even at 1G. (The others will move it around but only the bottom ones will counteract 1G, so it’s going to need some thrust upgrades.)
Its not unreasonable to expand these as you go to fit whatever your requirements are. Here are some ideas on how to expand on this base design to make space for more interior stuff or dock more ships.
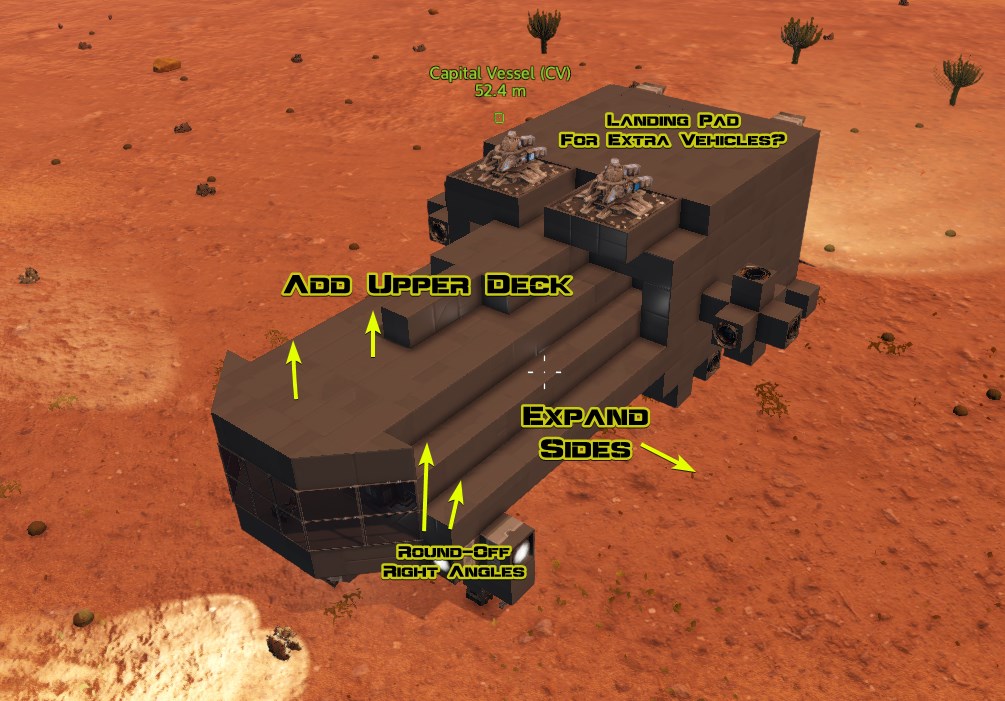
Just remember that the bigger it gets the more thrust it will need and thus the more fuel it will consume!
Hangarless Design
Here’s another design.

This is a simple flat top design with no hangar. Just dock on the flat top. Tool turret in front and two cannons on each side. I’m mostly using the new small engines which is good for power savings. I had to build this when I was having serious trouble getting Neodymium.
Here’s the top stripped away so you can see the layout:

You might notice all the O2 tanks are in one place which is bad. That means they’ll all get blown up as soon as one of them is destroyed. (Already happened to me once.)
Notice you can pack the cargo exteders in any space that isn’t needed at the moment.
This design is made flat with the vault being 4x3x1 with some space that’s kind of wasted at the moment. I need more armor on the sides (there is some on the outside you can’t see).

The bridge from outside:

Anyway, hopefully this should give you enough design ideas.
The flat top can be enclosed as a hangar later if desired or another “floor” can be added. In any case it’s easy to see how this layout can be built onto and extended pretty easily.
[link]Bottom, Rear, Front, and Side Docking
Remember that you don’t necessarily need a landing pad on the top of a ship, or a hangar.
You can also put a docking pad on the top of an HV or SV and dock to the underside of a ship. You can even put docking pads on the side or back of an HV or SV and dock to the front, rear, or sides of a CV.

If there’s not enough space under the ship you can hang booms off the sides or back and dock to the underside of those. Or you can just put a door on the side or back of a ship and dock the back or front of a HV or SV up next to the door.

Hangars have the advantage that they have climate control though. If you have a powered-down ship docked on the outside of a CV, the interior will take on the temperature of the external environment. Once you power it on the temperature will start heading towards 22C, but sometimes that can take a while in extreme environments.
So far I’ve only seen this be a problem on very hot lava planets where I may have to drink some water before the ship fially cools off.
Avoiding “Hotspots”
You may have noticed by now that equipment like generators produe heat around themselves.
Well, thrusters also do this and the warp drive and warp tank also produce radiation.
So now there’s another challenge when trying to make a compact CV. Hotspots aren’t that big of a deal as long as they’re in locations where you’re not likely to loiter around, and if they are not in plant-growing locations. Hotspots will kill plants!
But if you want to avoid them completely, make sure there are two blocks between thrusters and the warp stuff and any occupied areas or walkways. Either place walls or other “cool” equipment in the way to avoid surprise hyperthermia.
Using thrusters as walls is also a bad idea because NPCs shoot at them and they aren’t that durable so you’ll end up with more hull breaches that way.
Debugging Air Sealing Issues
There are two kinds of habitat concerns with structures in the game:
- Climate Control: This gives you 22C room temperature so you don’t die of hot or cold. To have climate control you just need an airtight block-enclosed area in a powered on structure with no openings to the outside, and no hot equipment nearby. Once you have that you’re considered to be “indoors” and you won’t freeze or overheat. But this doesn’t give you breathable atmosphere.
- “O2” or Breathable Atmosphere: This keeps you from using your suit oxygen, you can remove your helmet, and you can take off your armor to repair it or whatever. For this you need both a sealed area and an unblocked ventilator with an oxygen tank that has enough O2 to fill the volume.
It’s possible to end up with climate control without O2.
Some O2 “leaks” will break both, and some will only deprive you of O2.
Blocks are either “airtight: yes” or “airtight: no”. If a block is airtight then it will hold air within the entire voxel that it occupies. This last point is important because thin panels like windows may not behave exactly as you expect. Remember that even if something looks like a thin panel then it still occipies an entire voxel cube. That whole cube is “sealed” (it will contain oxygen but won’t allow the oxygen to pass through it.)
Conversely, some blocks that look like they ought to be airtight are not airtight. For example if you plug a hole in the wall with a mining drill then it will not seal the room because the mining drill is not airtight even if it looks that way.
So you place a ventilator and make sure the oxygen is turned on in the control panel, but you don’t see the O2 icon light up. What’s wrong?
First, use the debugging panel to show which voxels are occupied by airtight blocks. Press N, click “Debugging”, and enable “Show Airtight Blocks”.

Notice that the glass doors are not airtight, unlike the bulkhead-style doors.
The problem may be obvious now but if not then, in my experience, it’s always one of these things:
- You have a non-airtight block blocking another non-airtight block where you thought there was an airtight block, but in reality some block behind it is not airtight. So some non-airtight block is hiding the leak. Solution: remove all the equipment in the room and make sure the room is sealed before placing other blocks in front of walls.
- Something like a window or other thin panel is actually blocking the ventilator. Solution: check to make sure there’s not a solid green block in front of your ventilator or path to the ventilator. For example a narrow hallway of glass panels will block air if they arent placed with an empty path of voxels between them. In other words, don’t do this:
This issue becomes more of a problem when you’re trying to build a very compact ship, cramming lots of blocks into the smallest possible area.
- A less common problem is that your oxygen tanks are too small to hold enough oxygen to fill the volume of the rooms you have. For example you have one small oxygen tank and massive rooms. (Notice when you turn on the oxygen that it drops suddenly as it removes enough O2 to fill the empty room space.)
Care and Feeding of a CV: Some Advice
So that’s an example ship skeleton. I’m sure you can figure out the rest and manage to make something look better.
Plenty of ideas are possible as all of the submissions in the Workshop show. So get to it!
Some advice on using and not using a CV in the game:
Remember I said I tested it against some POIs? Well, don’t use this to attack POIs! In a real survival mode game this is often not cost effective though it kind of depends on how heavily armed they are. The only weapons that work are miniguns and cannons, and even with the ship not getting destroyed it’s going to take damage and cost more to repair than a hovertank or combat SV.
So don’t expect a CV to be any good for POI busting! It’s usually a waste even when it works unless maybe you build a crappy combat-only CV with tons of cannons on it that you probably wouldn’t want to use for exploring or anything else. And that would also usually be more expensive than a decent HV or SV.
The best use for a CV is as a mobile base. Take it to another planet, undock your SV and fly around looking for ore and stuff, then fly back and get your mining or hovertank HV and mine ore or take out some POIs. Then load up all the loot, take it back to the CV, and fly back to your base.
Warning! After losing a day or two of effort to save game corruption, I recommend backup saving every time before switching playfields! (A playfield is a “zone” like a planet, an orbit, or a moon. So when you climb to orbit you switch playfields to <planet> Orbit. When you warp you switch playfields, etc.) Basically just backup your game all the time because even if crashes seem kind of rare (I get one maybe every 20 hours) they can still involve data loss.
At your base, build a flat landing pad big enough to land your CV and put your repair bay there. You can use a repair bay to repair a CV even if it doesn’t “dock” with the base.
When you leave your CV sitting on a planet and fly off in another vehicle, shut everything down to save fuel but leave the turrets on. If you don’t have lots of turrets on the bottom already, add sentry guns to kill hostile wildlife and NPCs that wander toward the ship and of course have at least two cannons on top to kill any drones that wander along. The ship won’t usually take much damage in most situations with this level of defense.
Don’t use the CV to explore planets because they burn a LOT of fuel flying around planets having to fight gravity all the time. Pick a landing spot, land there, fly your scout SV around, and if theres some reason to move the CV later then move to the new location once you’ve found it.
If you need to fly the CV a long distance like > 2-3km on a planet, just fly to orbit and try to make most of the distance in orbit and drop back to the planet. It’s more fuel efficient to fly in orbit than on the planet, though harder to navigate.
Disable Auto Brake (press I) when you’re not trying to land or stop! For a CV, treat autobreak like a parking break. (Default key for autobreak is I.) Flying around without autobreak can save a lot of fuel, especially far enough out in space that there’s no drag and you can just accelerate and coast.
Disable unnecessary engines when you’re cruising and not in combat trying to run or outmaneuver etc. Use signals to create a “cruise mode” or something with extra engines disabled, if applicable. Cruise mode looks like 12m/s^2 thrust back and down, and less than that in other directions. This is enough to take off and land on most planets around 1G or less.
Combat Advice
As previously mentioned, most turrets, all forward-mounted weapons, and tools can’t be used on a planet. You’ll get an error message if you try to use them and nothing will happen.
Only miniguns and cannons work on planets so you need at least two of those in any combination on the top.
There are also sentry guns, but those are useless except for defense on the ground. They have a very limited ability to move up and down, so need to be either very low on the sides or on the bottom of the ship. These can be quite useful if your chosen landing location turns out to have 20 or so spiders, scorpions, or other stuff running around.
Notice that turrets have this problem where they can’t aim down very far and usually can’t aim up too far either. Sentry guns are even more limited. This is why your cannons need to be on the top and bottom, and you will need to position your ship for maximum field of fire.
To get a sense of the weapon arc, take manual control of one of the turrets and notice how much the gun can move and whether anything is obstructing it.
When you use a CV for combat, you really need to select targets for the turrets intelligently. Otherwise they’ll ignore the enemy turrets and keep shooting at the generator which may be impossible for them to destroy before your ship generator is destroyed.
Go into the control panel, autogroup everything, then click on the Turrets group.

Make sure targeting is set to only Turrets and Mounted weapons. This way your turrents will try to kill the enemy turrets first, thus reducing the damage that can be done to your ship. If you don’t select this then your ship will try to shoot the generator which is usually about as worthwhile as sitting there while you get killed.
Set the whole turret group to this at once with Apply To Group.
As previously mentioned, it’s not really cost effective to attack a POI with a CV. But if you do, just destroy the turrets on it first, then get out of your ship, then run in and destroy the core in person with your demolotion explosives or rocket launcher. This will take less time than waiting for the ship to do it, usually, and you’ll get more salvage.
If attacking an NPC CV with 30mm cannons or other weaker weapon capabiliteis, destroy the turrets first then destroy the thrusters. With the ship stopped you can run inside and do whatever. Unless you have more powerful weapons, this will probably be easier than destroying the generator, but remember you can use the more powerful weapons like the artillery gun in space and this is of course recommended to disable the enemy sooner thus avoiding more damage to your own ship. Remember you can also use forward-mounted weapons in space.
Mining Advice
CVs can be used to mine asteroids (but of course they can’t be used for mining on planets).
Asteroids are currently kind of difficult to find, but it’s worth being prepared if you should happen to stumble upon one because they contain a lot of ore.
Don’t bother with the mining drill turret. You can only control one at once. Only use that if you haven’t unlocked the mounted drills yet.
Instead, place several forward-mounted mining drills on your CV. Keep them turned off until you stumble upon as asteroid. Put them on your CV even if you’re not trying to build a mining CV. Even two works pretty well but you can use more. Just stick at least two on any CV because they don’t need much space, and they retract when shut off.
CV mining drills melt asteroids rather quickly, so you may want at least two harvest boxes just in case you find more than one asteroid. But one mining box should do if you’re not determined to mine all the crushed rock from the asteroid.
Conclusion
That’s everything I could think to mention.
If I forgot something or you have some ideas for people please post below in the comments section.

