Overview
A guide on how to build a diverging diamond interchange with vertically separated directions so that everything snaps to grid. The interchange works smoothly in Cities: Skylines without any mods.
What is a Diverging Diamond Interchange
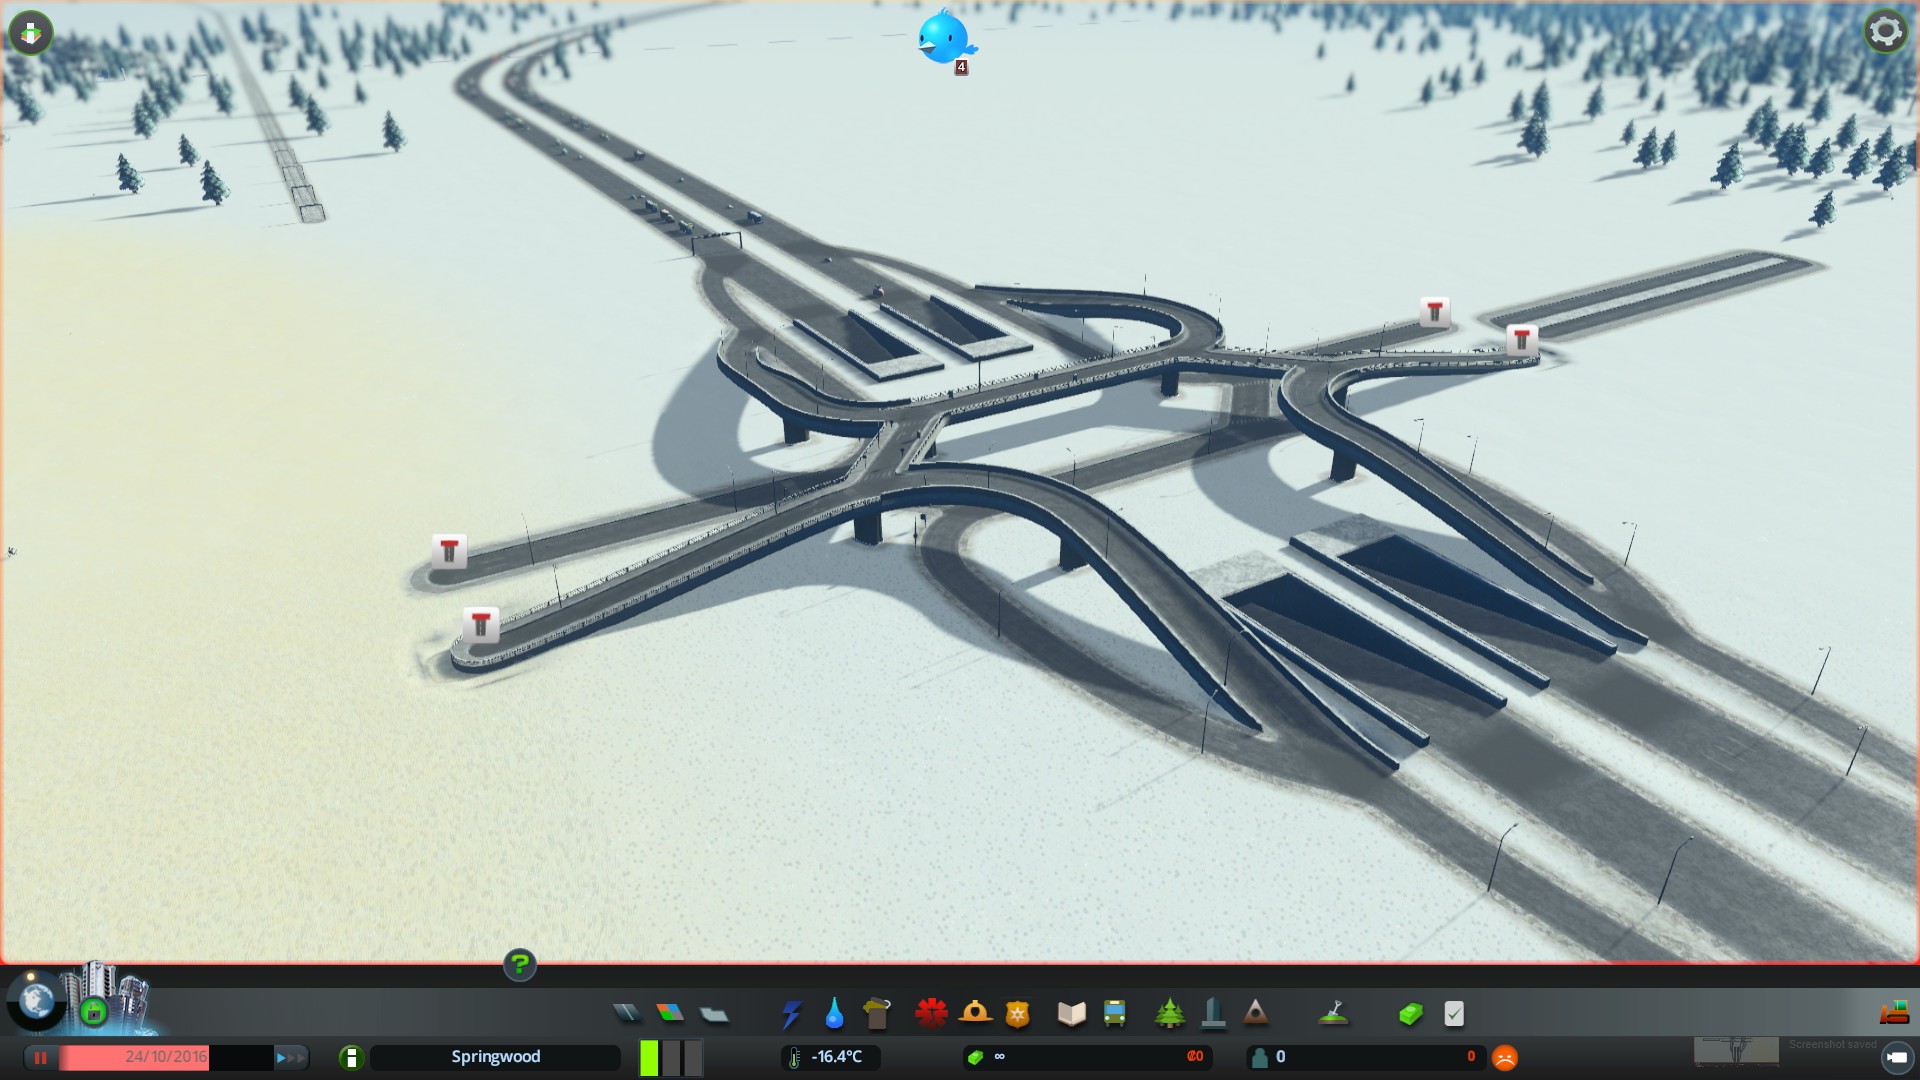
A Diverging Diamond Interchange (DDI) has traffic that crosses over to the opposite side of the road to allow access to ramps on both the left and right. Commonly crossing traffic is controlled by a traffic light, but this guide covers a variation where crossing traffic is separated vertically. This creates a compact interchange that flows well in Cities: Skylines without needing any mods.

This version of the DDI is designed so everything snaps to grid during building for quick, easy, and consistent construction.
The interchange uses two-lane one-way roads that are stacked vertically. This is less realistic, but more effective in Cities: Skylines.
Shown here is the lower half of the interchange, with dirt roads marking where the upper level ramps join. The basic structure is an inner ramp 3 tiles from the highway, that turns outward to meet the surface street, and and outer ramp 3 tiles farther out that turns inward to meet the surface street.

The only mod used in this guide is Precision Engineering. This is what shows the extra information such as distances and angles when building roads. It is not needed to build this interchange.
Building the Lower Half
To start a road has been laid perpendicular to the highway to mark the centre line of the surface street. The highway has then been removed to give space to work, and two roads have been placed to mark its location.

Construction is started on the lower level first. The diagonal crosses will be left until later because keeping the grid aligned makes construction easier.
The middle section is 10 tiles long centred between the two highways.

The end sections are 4 tiles ahead and 4 tiles over from the middle section. The only requirement on length for the end sections is the ramp to the upper level. Once these road sections are in place the temporary marker roads can be removed.


Using the Curve Road tool, curves are drawn to connect to the highway ramps. They are built using a two-lane road for its snap to grid ability and then converted into ramps.
The curves are:
3×3 from the middle section
4×4 from the end sections


Building the Upper Half
The upper section is built the same way, next to each of the lower sections.


Building the Ramps
The inner ramps are extended next. The upper level is brought down to ground level, and the inner ramps on the ground level are extended by the same amount. Again they are built with two-lane roads and then converted into ramps.


The outer ramps are connected using the Free-form Road tool by continuing straight ahead from the end of the curve and joining with the end of the inner ramp. These can be built directly as ramps. Note that if the inner ramp sections are longer than 10 tiles, a bit of a straight section will be needed on the lower ramp before they will connect.


The joined ramps are connected to the highway also using the Free-form Road tool. A two-lane road can be used for its snap to grid ability allowing for constant shapes with all four ramps.

Completing the Interchange
Once all the ramps are connected, all that is left is to connect the diagonal cross overs and tunnel the highway under the interchange.

Here is the completed interchange as an asset: Vertically Separated Diverging Diamond Interchange.