Overview
Did you ever Notice that 2 trains can’t pass each other in a junction-block? This guide gives you step by step example junctions, where trains can pass each other in junction block.
Introduction
Workers & Resources currently has a missing feature:
Rail-Junctions where trains can pass each other, without getting blocked.
 This could be prevented, if we were able to add a signal right there. But we can’t, as the rails are too close together. In this guide I will show you how you can easily build non-blocking rail-junctions that have such signals in between and are still pleasing to the eye.
Full length trains are 16 Cells long. So your rail network should also have segments of this size.
All T-Junctions are ~12 Cells wide. So it should be easy to fit them inside your exisisting network.
The junctions aren’t optimised for throughput. There is a lot of room for improvements, when waiting-lanes and bridges come into it.
The offical rail signal guide is a must beforehand:
[link]
If you understand german, I highly recommend visiting this guide as well:
[link]
2 -> 1 T-junction, 4 Rails wide
 This is a typical situation: You have your Mainline with one track for every direction and want to connect to a single rail industry connection.
 Start by adding a 3rd and 4th rail to your mainline. Later your trains will ride along those outer rails.

 Make sure the incoming rail can be linked to the closest mainline rail in both directions.
 Add a small helper rail. This will give a fix-point to align rails later on.

 Look at the green preview. It’s as far right as it can be before becoming red. And it looks distorted. For a nicer look move it about 4 snap-points to the left. It will look much more straight.
In the second pic I already build the right exit rail. Look at the helper rail: It’s yellow-ish. That means my red rail-builder is locked to it’s position. Which is also the start of the right exit-rail. Building the second rail connecting the bottom line (similar to the green preview in the left pic) is now very easy.
 I added the rails connecting the top line. You should have no trouble doing this. The rails for the junction are basically done. Now it’s time to clean up the inner rails and start signaling.

 First we align the outer rails to the same length. We simply add two signals to the inner rails. The 2nd signal will already snap to the first one. Next we draw the outer rails to the signals and have them aligned.

 Then merge the outer rails into the inner ones. A width of a little more than 3 cells is enough.
Do this on both ends.

 Now remove the inner rails and signal the junction the way it’s shown in the 2nd pic.
Your trains can now pass each other on the horizontal mainline without having to stop. A train branching out will of course still obstruct the mainline.
2 -> 1 T-junction, 3 Rails wide
Read the previous 2-> 1 T-Junction, 4 Cells wide section.
This is the same scenario as the previous junction, but we will use only a single additional rail instead of two.

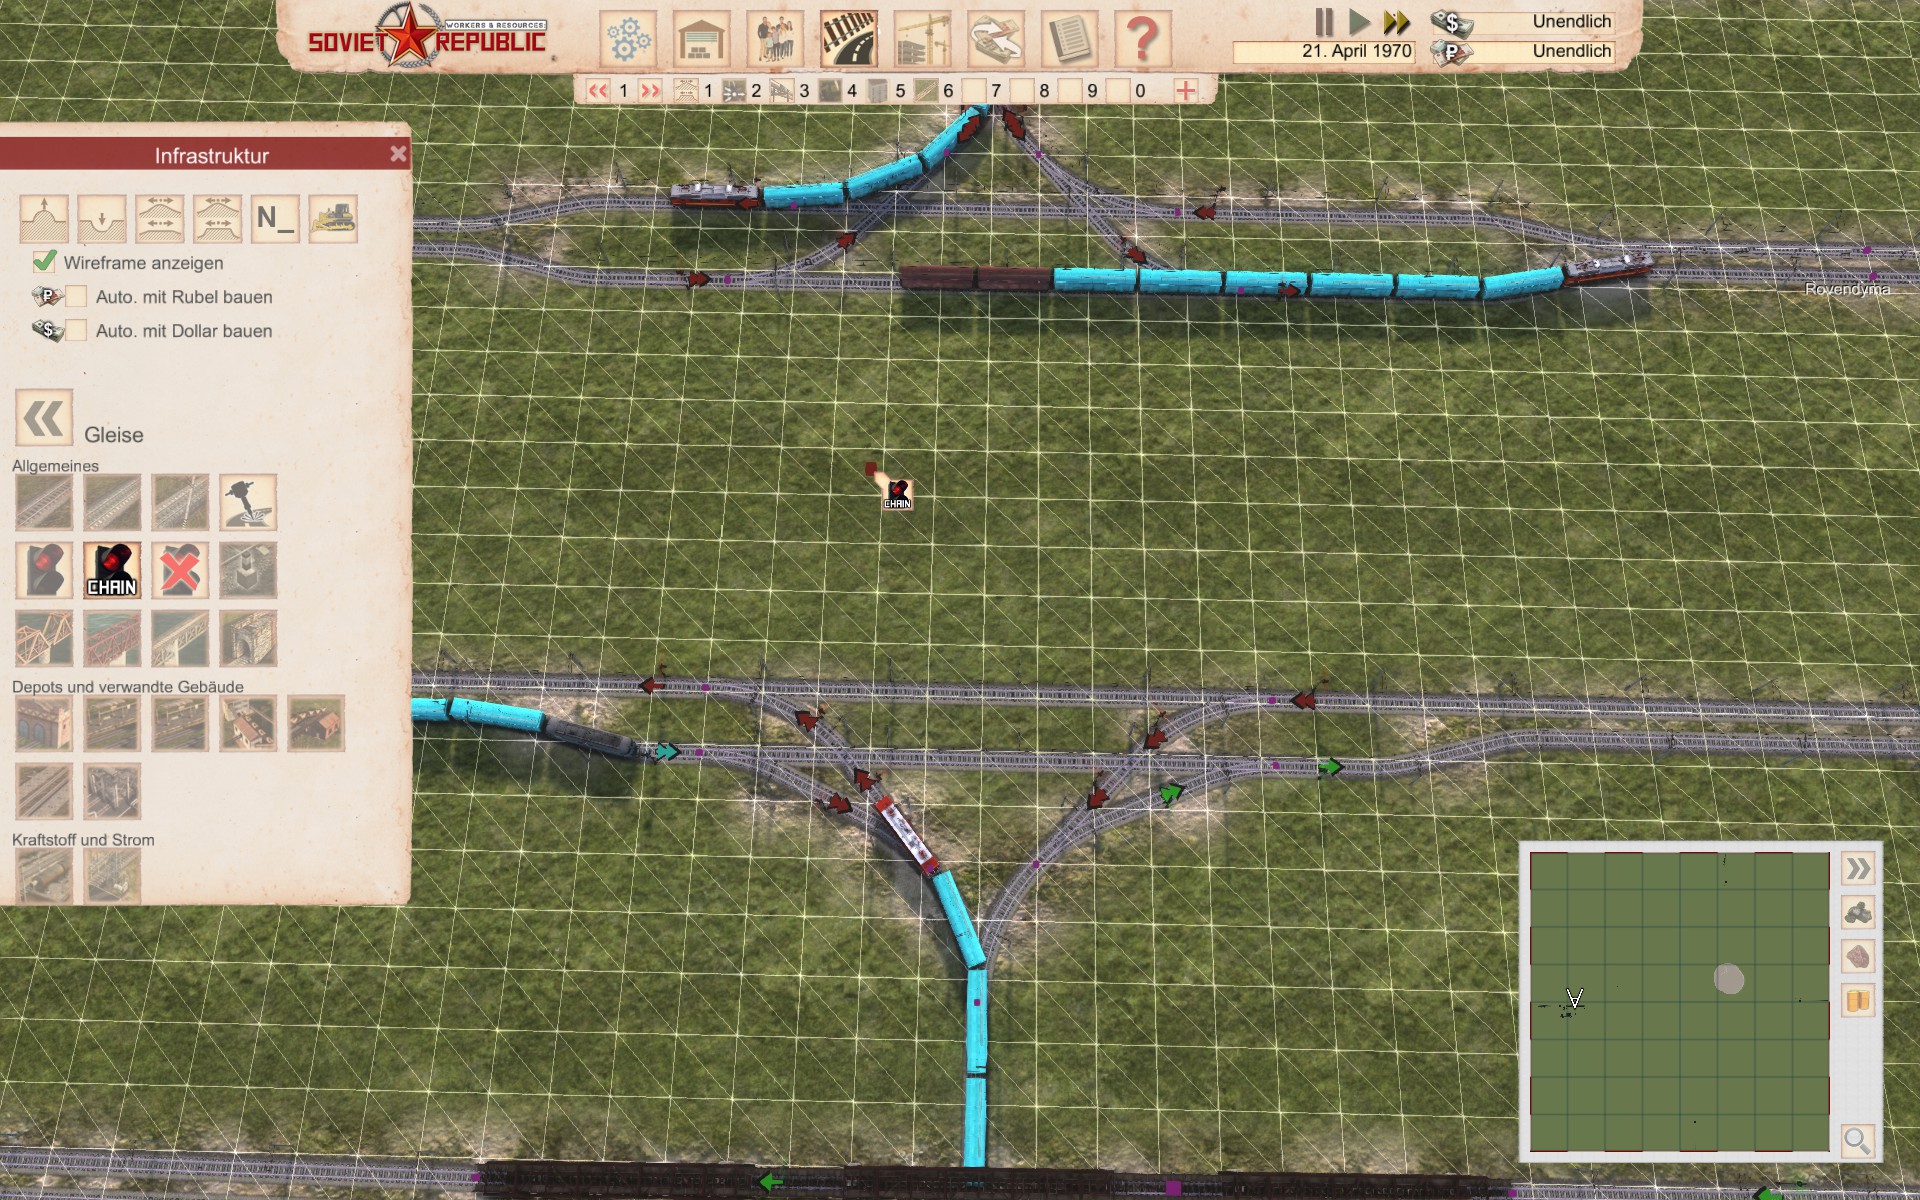
 The top rail was added, the lower ones are the original mainline. I used the two chainsignals to align the upper connection rails with the lower ones.

 In the 1st pic you can see I already started signaling and I’m about to remove the leftover top rail.
The 2nd shows how the upper rail is aligned with the inner rail and how it connects back to the mainline.

 Maybe you know it already, maybe you don’t: You can get rid of the purple markers by placing a signal on them and then removing the signal. Knowing how to remove unused markers can be very helpful in building narrow designs.

 Final 3 Cell Wide design and a comparision with the 4-Wide design.
At last some pictures of those junctions in action:


2 -> 2 T-Junction 3 Rails Wide
Our start


 Add a 3rd line above the mainline. Then extend the connecting rail until you can just fit a curve to the top rail of the mainline. Add a third rail, the same way you do with the helper rail in the previous junctions. And bring them to same length.

 Set out some signals showing where your trains will later go and start connecting the rails. Don’t worry, if it looks quite bad right now. It will get better later on. But don’t forget the 4th rail. It’s the helper rail that in the next steps will align your rails correctly.
 Once again make sure to be aligned with the helper rail(yellow-ish)

 Then continue to connect the rails end to end.

 Now it’s time to remove the ugly inner rails (and also some grass, if it disturbs you :D).

 Next up connect the 3rd rail on all 3 ends and remove the overhanging rails. Then continue with the last rails inside.

 There it is. All rails laid out. Only thing left to do is to add the signals as in the right pic.
And some Pics in action:


X Junctions
[link]
Has two X Junctions. A very basic blocking one and a non-blocking “X Junction Advanced”.
Here I will present a third 2-Lane high throughput design with crossing bridges, a raoundabout below and buffertracks for offbranching trains.

 The roundabout has to have a radius >5.5, to give a circumference > 16 (+ some working margin). This prevents long trains from getting stuck of themselves. The Bridges are 3 and 6 steps high.

After the merging junction I added a second blocksignal (left). This helps trains that had to break to wait less time.
Last but not least: Trains seem to prefer using the roundabout rather than the bridges. This could become a huge bottleneck. Therefore I suggest using waypoints to force trains across the bridge rather than the roundabout wherever possible.