Overview
A fully detailed STEP BY STEP guide on how to build the Satsuma. Every bolt, every part and more has been meticulously detailed and optimized for your project. This includes installing parts using the same size wrench as much as possible and installing parts in an order that makes sense.
INTRODUCTION
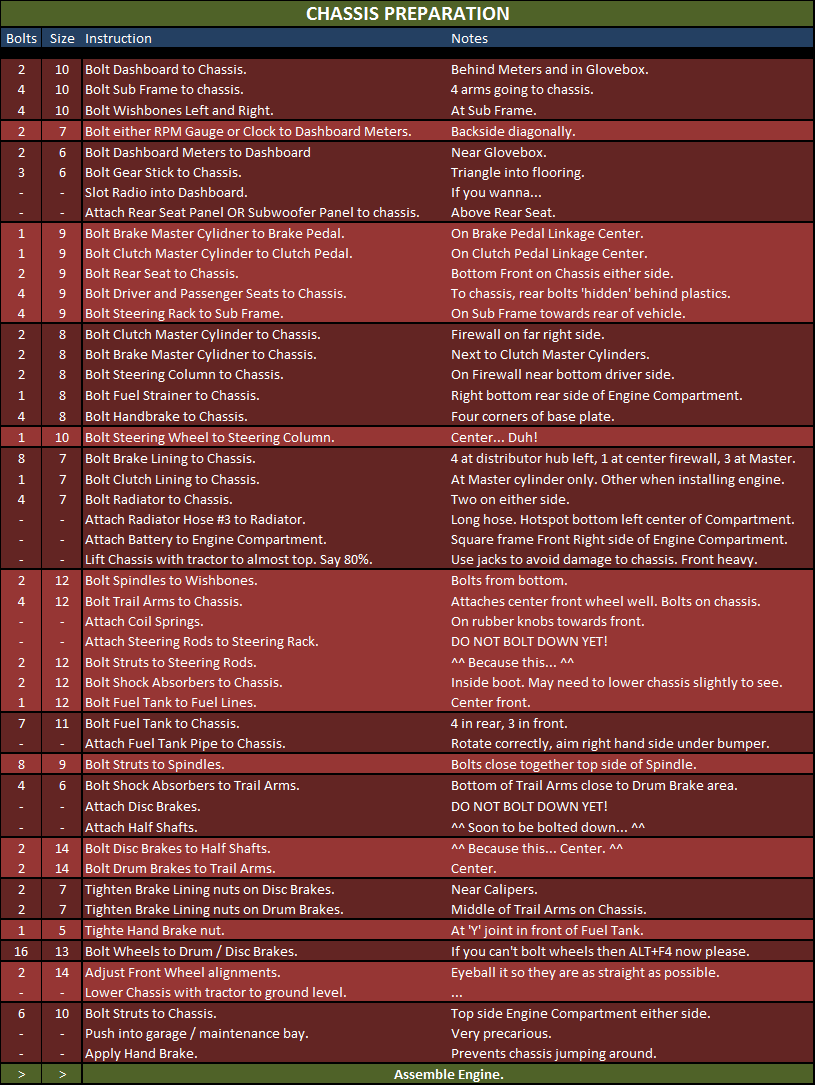
Most of the contents of this guide exists in the four images further down. I do not (at this current time) intend to explain the other details about building the car and all the features of the game.
However, the images may have a few inconsistencies in them. I am happy to accept input on that. For example, one might want to lift chassis right away rather than wait. It might make it easier to install stuff without denting the chassis.
But in short, here’s what you are going to be doing.
Throw the gas can into the van.
Drive the van to the woodshed and throw the diesel can into the van.
Drive the van to store and buy ALL the food and milk.
Also buy all DOT4 (Brake Fluid) and 2 of each Cooling Fluid and Motor Oil.
DO NOT forget to buy the Fan Belt!
Fill the van, diesel can and gasoline can with fuel.
Drive home and organize all your purchased stuff. No need to put food in fridge, you can leave everything in garage.
Turn on sauna.
Follow CASSIS PREPARATION as detailed in image below.
Eat/drink/piss as necessary.
Let exhaustion go red. Do not go to bed before 6 pm or it will be dark on Day 3.
Same as Day 2 but follow ENGINE ASSEMBLY.
If there’s time, also follow ENGINE INSTALLATION.
Do ENGINE INSTALLATION if not already done.
Then do BODYWORK.
If all went well you can drive to inspection and get your plates at this point.
All done! Play the game!
ALL STEPS
Click on images for full sizes. They were designed to be displayed on a 1920×1080 monitor to the side in full screen mode.


Here’s each part on their own if you’d rather do that.


