
Overview
This guide covers (quite a bit more than) the bare basics of how to make a car in Automation. This guide is intended for the layman or tycoon player who has never actually built a car/engine before, or is not a gearhead, and want to know the basics of where to start on their engineering journey, as a supplement to the in-game tooltips and tutorials. This guide will not cover asthetic (visual) design such as fixtures/morphing.
Introduction
Designing a car in Automation is relatively easy. Designing a car to cater to a specific market can be a tad more difficult however. When designing a car, it’s important to remember that everything affects everything. Changing the engine cam profile is one major vector, for example. This guide will try to cover each step of the way, and hopefully get you started on making cars that actually sell.
This guide is not intended to show you how to replicate a specific engine/car. Nor is it intended to be used as a guide to make a “realistic” car. Instead, we’ll show you how to actually make a functional engine/car, and talk about the little, less than obvious tricks of the car designer that can help fix any issues you may be running into.
Note: LC V3 Patch 7 includes good information presented in tooltips. It it highly suggested reading through the chart tooltips, as well as the item tooltips available by clicking on the item headers. This guide is supplemental, and really just intended to give pointers on how to do things.
Also: Any date I mentioned in this guide for part unlock is specifically for Sandbox purposes. You can accelerate unlock dates for different technology in the Light Campaign with R&D. This guide, except for the sections focused on it are specifically targeted towards the Sandbox mode, with some reference to the Light Campaign mixed in.
Choosing the Model
The model (chassis) of the car will determine quite a lot of the characteristics of the car, with most models supporting multiple trims (or body types) that can fit on the model chassis. Some chassis types for example can be used as a Coupe or a Van and everything in between. Some can only be used for a single trim. All models and trims have various stats as well, which are worth paying attention to.
Going from top left to bottom right in left/right reading order. Note, the UI has been overhauled, and the order has changed slightly, but the information presented is still the same.
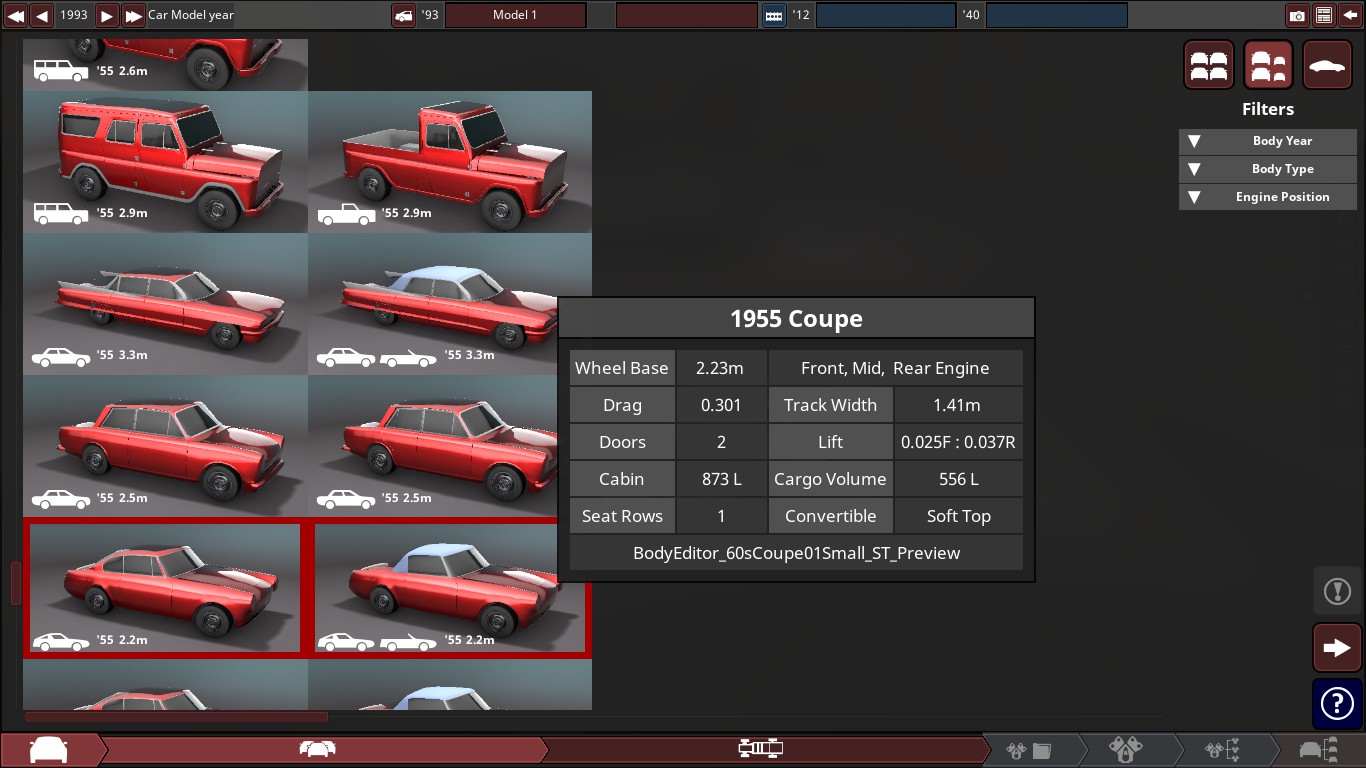
- Year and Body Trim: When the body is supposed to become commonly available to manufacture. Also defines the specific body type the car actually is. Different demographics prefer different types of car body. Most sports car buyers aren’t looking for a van or SUV for example. Older body types also lose value over time.
- Wheel Base: How far apart the front axle is from the rear axle. A higher number here generally means a bigger car. This number is always shown on the thumbnail of the car as well in you’re preferred system of measurement.
- Acceptable Engine Location: Should be simple. This determines if the engine is in the front, trunk (rear), or in the case of some cars, mounted under the passenger cabin rear (mid engine). Where the engine is mounted will have a major influence on how big the engine can be, depending on the model. This can be a major influence on the weight balance of the car, since the engine block is usually the heaviest part of the car.
- Drag: This is a number demonstrating on how much drag the unmodified body has. More drag makes the car overall less efficient at accelerating, maximum speed, and good fuel economy.
- Track Width: Distance between the wheels going across the car. Bigger means a bigger car. This assumes there’s no tire offset going on here either, as you can make the track width slightly longer by doing so.
- Doors: How many doors the car has, obviously. More doors usually make the car more practical. If the car has three or five doors, the back can most likely completely open, such as a hatchback or a wagon type car.
- Lift: How much lift the car generates at higher speed, assuming there is no undertray installed. Lift can be good, or bad depending on the target.
- Cabin Size: How much room there is in the passenger cabin with an unmodified body. More space usually means more comfort, and can be considered luxurious.
- Cargo Volume: How much the car can carry of things which aren’t people. This can usually be modified by the suspension type.
- Seat Rows: How many rows of seats the car can support. Generally single row cars are niche Coupes.
- Convertible (Potentially): Defines the type of top the convertible trim has. Soft tops are marginally worse than hard tops statistically, but also much cheaper and lighter than a hard top.
- Code(ish) Name: This is the name of the model of the car in the back end. This is usually irrelevant for players, but if you have a bug with the model of car, it’s easier for the devs to find and fix the issue if they know this instead of “the ’05 Coupe that might also be a van”.
Arranging the Body
Once you’ve selected your car model, and year, you will then have to setup the basic assembly on how the car is actually put together, such as what is the car actually made of. This step will also likely have a large influence on how well accepted the car is for the target market, as the panels, suspension, and engine placement are major portions of what makes a car appeal to a certain market. This cannot be changed. All trims are based off of this chassis. You can’t, for example, change the suspension type because it would suit the different body trim better.
The panels, or “upper shell” or “thing everyone sees” is what the actual car body is made of, from basic steel, to fancy carbon fiber. This can have a large impact on most of the metrics that the car has.
(In order of unlock date.)
Steel: Basic, raw pressed steel. Steel is a good choice for cheaper cars which are intended to be mass produced. Excepting the costs to actually get a factory large enough to have steel presses, this is one of the cheapest body panels to use, while also the heaviest. It’s relatively safe as well. It does corrode severely compared to other bodies however.
Aluminum: Full body aluminum. Aluminum is a shell which early in the game will prohibit mass production of the car initially. It’s relatively light compared to steel, very resistant to corrosion, and quite a bit expensive compared the other body types. It’s highly prestigious, and continues to be the highest prestige paneling throughout the entire game, until carbon fiber comes along. Limited production starts in ’82 and mass produced in ’09 with presses.
Fiberglass: Very light, and extremely cheap to tool a factory for, but can’t be mass produced without factory add-ons for quite a long time and the material itself is slightly expensive. Fiberglass is overall not a fantastic body type for cars which aren’t racecars, or cars with weak engines (thereby saving weight, making the engine practical), noise and extreme lack of safety being major contributors. Otherwise the benefit it can provide is significant. This panel type will actually cost prestiege, since it will make the car feel/sound like plastic. An option in ’55. Also able to be produced with limited production in ’70, using SMC.
Partial Aluminum: This is a steel bodied car, with certain parts made of aluminum. The benefits you get from this are some weight savings, and some extra corrosion resistance, with no cost to most statistics except a slightly higher material and tooling cost. An option in ’85.
Partial Carbon Fiber: An aluminum body, with the hood, bumpers and other trimmings replaced with carbon. Available in ’94, and requires two factory addons to maximize production efficiency in ’09, still capped to limited production.
Carbon Fiber: This supercar body only becomes available in ’93, and remains very difficult to mass produce. This is the lightest body type available, and also the most expensive. It’s usually only going to be affordable to the highest class of premium buyers, but if you want a car to go 0-60 MPH (or 0-100 KM/H) in record times, then this is the body to use. An option in ’94. Limited in ’05 with a carbon plant.
Treated Steel: Steel treated in chemical baths. Slightly lighter than regular steel, and slightly more corrosion resistant and a bit stronger. This comes at the cost of needing a steel treatment facility. It’s a choice in ’99.
The chassis is what the actual panels, and everything else are mounted to. This is a large factor in most fields.
- Ladder: This chassis is essentially a series of steel boxes welded together to make the chassis with the paneling built on top. This is a very simple, very heavy chassis to assemble. It’s actually not too bad for most types of heavy duty vehicles, but it’s usually a poor choice for smaller, sportier cars. This type of chassis is relatively unsafe, since the boxes the frame is made of tend to collapse in a crash. The chassis also can’t accept a rear, nor mid engine. Ladder frames are prone to twisting too. They are the only choice for mass production until the ’50s.
- Space Frame: Hand assembled pipes make up nearly the entirety of the frame of this body. Overall, slightly safer than a Ladder frame, but at no point can be mass assembled. This is usually okay in the earlier years for sportier cars or for super/hypercars which usually won’t have many buyers, until Monocoque comes along, and starts to compete with this type of chassis. Space Frames are designed to resist twisting motion, and work very well for sports cars, especially high end trims, even after Monocoque is out.
- Monocoque: A single stamped piece of chassis. This is a common body type, and is overall a very safe type of chassis as well. It’s lighter than a ladder frame, but needs steel presses in order to be used (with exceptions, usually special versions which avoid steel). Later down the line additional types of steel are available, and other material types become available even later down the line such as aluminum and carbon fiber. Monocoques have minor levels of twisting, but in general don’t twist as much as a ladder, and can be stiffened with high quality materials. An option in ’51.
- Light Truck Monocoque: This is a Monocoque front section with a Ladder rear. This type of chassis is usually used for Vans and Trucks, since a Ladder has higher carrying capacity. This allows for a relatively comfortable, and safe car with high carrying capacity, at the cost of mass versus a regular Monocoque. Unlike a straight ladder, you are able to use the MacPherson strut as well, since the front Monocoque allows for the struts to be properly mounted. An option in ’60.
- Semi Spaceframe: This chassis is made completely of aluminum. It’s a relatively expensive, but light option which is quite viable for sports cars, and supercars. This chassis is also highly corrosion resistant, and can be used on offroad vehicles if so desired. A choice in ’00.
Different chassis types can be made of different types of material. Most chassis types can only be made of steel and their improved variants.
- Steel: Basic steel. It can be used on the majority of chassis, and is relatively cheap but it rusts.
- Galvanized Steel: Steel, which has gone through galvanizing, or has had a layer of “sacrificial” zinc applied. It’s very similar to raw steel, but slightly more corrosion resistant. Relatively cheap as well, though you need a galvanization plant.
- Corrosion Resistant Steel: Stainless steel. Much more resistant to corrosion at the cost of higher material cost and more production units due to extra seals. This doesn’t require any extra add on facilities though. An option in ’60.
- Carbon Fiber: A very light carbon Monocoque body. Extremely expensive to put together, but works amazing for high end sports cars. Option in ’88. Limited in ’14 with a plant.
- AHS Steel: Advanced High Strength Steel. A special steel alloy, which is overall stronger, and stiffer than regular steel, making the car safer, slightly lighter, and generally better at the cost of the tooling required to make. A choice in ’95.
- Glued Aluminium: It’s possible to make a Monocoque chassis out of glued aluminum configuration which isn’t a Semi Spaceframe chassis. This involves some steel, with aluminum pieces welded or bolted to the steel. It’s extremely light, but very production intensive, and will take quite a bit of time to assemble. A choice in ’00.
- Light AHS Steel: A lighter variant of AHS steel intended to reduce overall mass. It’s available in 2001. It’s slightly less safe than the standard AHS alloy, but does save a bit of weight.
Choosing the Engine Orientation and Location
Choosing where the engine is mounted, and the direction it’s mounted in will have a major influence on how the car will perform, as mentioned earlier, the engine is usually the heaviest single piece of the car, and where it’s mounted can significantly change the characteristics of the rest of the car, such as how the brakes should be balanced, to how the car accelerates.
-
Front Longitudinal: The engine is placed in the front of the car, and the “front” is pointed towards the front of the car with the driveshaft and gearbox trailing back. This engine placement is required to use four wheel drive, and can use front or rear wheel drive. You can usually get the most out of the engine bay in this configuration, and it doesn’t intrude much into the driver’s cabin. It’s also safer to mount the engine in the front, since the engine block will protect the passengers in a front end crash. This also tends to shift the balance of the car forward a bit.
-
Front Transverse: The engine is still mounted in the front, but instead is rotated 90 degrees, in such a way that the engine is in line with the front axle of the car. This engine configuration is not initially available at the start of a campaign. This is used for front wheel drive, exclusively, until all wheel drive becomes a thing later. This engine doesn’t intrude into the passenger cabin space at all, but does restrict overall engine length, depending on the model of car. This setup is also slightly harder to maintain, since the front points towards the side of the car, making the belts harder to access, and in the case of some valve trains (namely Push Rods) the entire engine needs to be removed to replace the camshaft. In the case of V engines, it makes the cam facing the cabin hard to access. It is also exceptionally unusual to use a transverse Boxer too. This sets the entire weight of the engine on the front axle. Available in ’62.
-
Mid Longitudinal: Very few cars can fit a Mid Longitudinal engine. Usually this will only accept a boxer engine in cars where there is a wider mid zone engine bay. This tends to center the balance of the car quite a bit compared to most other engine configurations. It’s extremely hard to access the engine however, and this does jack up maintenance cost. This can only be driven in rear wheel drive, until all wheel comes along. Mid engine placement also tends to allow pushrod suspension (once invented) on both axles, which is usually very good for sports cars. A large majority of cars simply can’t fit this engine orientation however, even with the tiniest of engines. The screenshot above shows one example of what engine barely fits in a car not specifically designed for a mid engine (in this case, a minimum size I3).
-
Mid Transverse: Same mount location as a mid, long, but rotated in the same orientation as the axles. This is usually significantly more viable to fit into most cars, but the engines still need to be relatively small. This type of engine is also extremely hard to get to for maintenance, and jacks up maintenance cost significantly. Only supports rear wheel drive. This does offer a small benefit in that you can use the cargo area of the trunk, and bonnet, which can make for some decent utility vehicles when you aren’t aiming for a sports car, though this use is exceptionally unusual.
-
Rear Longitudinal: In this configuration, the engine is mounted in the back of the car, with the front pointed towards the rear, and the gearbox pointed at the driving compartment. This can only be driven rear wheel drive as well until all wheel becomes available. This type of engine is relatively easy to access, compared to a mid mounted engine. Some cars also have a relatively large trunk area, and can fit some very large engines. This tends to shift a lot of the weight of the car to the rear, which can be beneficial, or in some cases, extremely dangerous (I’ve had a 75-25 balanced car before, it was a deathtrap). Rear engined cars tend to require smaller than usual front tires in order to ensure they don’t oversteer, along with generally significantly larger rear tires to hold the weight of the engine. This can inadvertently make rear engine cars rather expensive since tire size almost always must be staggered. One notable advantage to this is that it is specifically used to give the most possible passenger area, and it offers some very good straight line acceleration ability.
Choosing the Suspension Type
All cars have a suspension which attaches the wheels to the rest of the car. The suspension is what separates the entire body of the car from the wheels, and that in turn allows cars to go over bumps in the road without flipping, or twisting the chassis (usually). There are a great deal of suspension systems available, and each performs differently. Different suspension types may also take up engine bay area.
-
Solid Axle Leaf: The cheapest (and oldest) of suspension designs. This is a dependent suspension, as a result you cannot camber (tilt in/out) the wheels using this suspension. The wheels are joined together with a solid axle (and usually a differential in between), hence the name and connected to the chassis with layered metal sheets, or leafs. Generally extremely uncomfortable, as the leaves pretty much only hold the axle to the car, but very useful for the weight carrying capacity it offers. This can actually work pretty well for the rear end of a higher capacity cargo vehicle, like a Truck, or SUV, and some family Wagons. Double Leaf can work well for extremely heavy utility Vans and trucks too. Cars using this suspension type up front ride higher than others as a result of the suspension having a rather high minimum height. Decent for going in a straight line, pretty bad otherwise for performance.
-
Solid Axle Coil: Similar to a leaf suspension, but slightly improved due to the presence of a coiled spring. This suspension is slightly more comfortable than a leaf design, and can still carry a large amount of cargo simultaneously. Quite flexible in terms of ride height when used in the rear, but forces a higher ride when used up front, since the engine has to go above the axle. Many US trucks still use a solid axle coil front combined with a leaf rear when they aren’t on wishbones. Not fantastic for performance, but still cheap. When used up front, this generally raises the minimum height significantly, since the engine needs to not hit the axle in the event of a bump. When used on the rear most axle however, it allows for a relatively low car, along with slightly above average wheelspin resistance for RWD cars.
-
MacPherson Strut: One of the first independent suspensions invented after Double Wishbones, so you can camber the wheels if you wanted for extra tire grip. Less carrying capacity than most other suspensions. Overall a bit more comfortable than the solid axles, and allows for a lower ride height. It is more expensive to produce than solid axles however. A decent choice for city cars. It can also work on cars where you need extra engine bay width. Compared to Double Wishbone suspension, struts don’t intrude into the bay at all. Reasonable for performance. Sometimes has issues with camber changes under acceleration, so while independent, it’s not perfect for hard driving.
-
Double Wishbone: One of the most comfortable to use suspensions. This can be mounted in either location of the car, usually without restriction. Double wishbones, being independent suspension allows for stupid amounts of camber to be applied to the wheels, going all the way up to 30 degree camber. A good choice for most non-utility oriented cars, but can even be viable in certain cases on heavier duty vehicles, like Wagons. Double wishbones do intrude into the engine bay slightly, and as a result, they require more space on the sides which can’t have engine. That can be particularly important with larger transverse mounts. High quality, and very good for sportier cars due to it’s very flexible design. In general a good suspension choice for any market.
-
Push Rod: A primarily sports car intended suspension available at the start of the ’90s as a variant of the Double Wishbone. This cannot be mounted where the engine is, so double pushrod suspensions are only possible on mid engine cars. This suspension cannot carry a car very high off the ground, and it’s relatively difficult to make. This suspension has a major advantage of shifting the weight off of the wheels and sides of the car, centering mass, making the car overall better at cornering.
Rear only suspensions below.
-
Semi Trailing Arm: This is an independent suspension. Each arm can pivot accordingly to match the ground driven over, and unlike a live (solid) axle, one tire moving won’t affect the other. This is a relatively cheap and well balanced suspension design. It is a decent option for most budget cars.
-
Torsion Beam: The torsion beam is a semi-independent suspension type that can only be used on front wheel drive cars. It cannot be used with any other type of drivetrain. It’s overall a fairly good all round suspension when compared to a solid axle, but pails in comparison to double wishbone, or even a semi trailing arm. This type of suspension actually relies on the suspension itself twisting the central arm when going over a bump. This keeps the rear tires on the ground, and only works when not powered. A decent choice for a budget car which needs tire camber as well as cargo capacity.
-
Multilink: An advanced suspension type, available only at the start of the ’90s. Better all around than a double wishbone for passenger comfort and racing sportiness at the cost of a more difficult to engineer and assemble system, since there are so many more parts to go with it. The suspension in game is just one of many hundreds of possible configurations that this suspension can be designed as.
Engine Stats
As with the car itself, the engine also has different stats that heavily influence the car itself.
- Performance Index: This is a stat that shows how much usable power you have. Going too far beyond the peak power of the engine will reduce this, as the power at that point can’t really be used. This stat has actually very little bearing on what makes an engine appeal to certain markets.
- Weight: This shows how heavy the engine is. A heavier engine needs to push itself, along with the rest of the car, so while a heavy engine generally delivers more power, this is usually slightly offset by the mass of the engine itself.
- Reliability: This is how reliable your engine is. A good reliability score changes over the years, trending towards more reliable over time for the same tech being used.
- Throttle Response: This is how quickly your engine reacts to changes in the throttle (the accelerator pedal). A higher value is generally better, with some exceptions.
- Smoothness: This is how smooth and comfortable your engine is in terms of physical movement/shake in the bay. A higher value means your car will be more comfortable. A smoother engine will also be more reliable as it’s not physically rattling itself apart.
- Loudness: This is how loud your engine is. A louder engine will be sportier, but less comfortable, up to a certain point, where the loudness actually hampers sportiness slightly.
- Required Cooling: This is how much much cooling/airflow your engine needs to stay reliable. This is important, an engine which needs more airflow will cause more aerodynamic drag.
- Service Costs: This is how expensive your engine is to maintain. Higher costs will make budget buyers less likely to buy your car, as they cannot afford to maintain it.
- Fuel Efficiency: This is how fuel efficient your engine is in the RPM range of around 1500 RPM to 2500 RPM. This is measuring the average thermal efficiency of the fuel in the range. While it’s a good ruler to see how efficient the engine is. This will have little bearing depending on what the engine is installed in, in regards to final fuel economy of the completed car.
- Octane: This is your engine’s octane, measured in either RON or AKI. Octane is a measure of how effectively you are using the fuel, as well as how resistant the fuel is to knocking. If you exceed the octane rating, the fuel will ignite prematurely, causing a “knock”. Knocking is bad.
- Emissions: This is how harming to the environment your engine is. This will always be through the roof with leaded gas. Currently there is no penalty for spewing smog.
- Material Costs: This is how much it costs in total to get the materials to build your engine before markup for sale.
- Production Units (PU): This is how many man hours it takes to produce your engine. Lower numbers here mean faster production times, and as a result, lower prices, as worker wage is a concern in how much you need to mark up the engine to break even.
- Engineering Time (ET): This is how many months it will take to engineer your engine. This will be important in the light campaign. A lower engineering time will mean your car will be engineered quicker and can be sold sooner. Engineering time can be brought down with familiarity of what you’re working with, such as if your car company has built an Inline 4 engine since the early ’50s, and you’re now in the late ’60s building a different family of I4s.
Choosing Your Engine Block and Material
As mentioned, repeatedly throughout this guide, the engine block is the core of the car, in multiple ways. Choosing the block is something that should be considered heavily each time you build a car, since each different block type has various benefits, and weaknesses. The block and heads cannot be changed, but the other components that connect to them can be changed per family to create variants of the same engine family.
Inline engines are relatively simple. Each piston is arranged in a line. This keeps the engines relatively cheap, but makes them comparatively much longer as more pistons are added. Inline engines generally take up very little space in an engine bay otherwise, since they tend to leave a lot of space off to their sides. Inline engines are quite common engines, and generally have easier access than other engine types.
V engines are generally used to save space in the engine bay while also still allowing for extra cylinders. Variants with lower numbers of pistons tend to be relatively less smooth than versions with more pistons. They are also generally a bit more complex than comparative piston count Inline engines. Their compactness makes them viable on quite a lot of cars, presuming they aren’t higher count piston engines.
Also known as Flat engines. Boxer engines are, in fact, flat, with pistons set across from each other at a full 180 degree angle. Boxers specifically have opposed action pistons, so the pistons matching the same cylinder will both be out, and in simultaneously. These engines are wide, in order to save on height, and as a result keep the center of gravity on the car lower. Boxers tend to be difficult to work around due to their width, and usually end up a bit more expensive than other configurations in most cases due to engineering the fit.
Due to laziness i’m combining these together. They basically do the same thing, fancier stuff is lighter.
- Cast Iron: Very heavy, very cheap, available from the beginning of the game. Requires an Iron Foundry to use, but such a foundry is also the cheapest of all three foundries.
- Aluminium: A lighter alternative to straight iron. This is more expensive and complex to manufacture, but the extra mass saved can make the difference in performance cars. Requires Aluminum Foundries to use. Aluminum blocks and heads will generally need to have iron cylinder liners to keep the aluminum from cracking. This makes them a good deal more complicated than Iron or AlSi engine components. Available as a head option in the ’50s and as a block option in the ’60s.
- AlSi: Aluminum silica alloy. Available in ’96 and can be produced out of Aluminum Foundries. A bit more complex and expensive to manufacture, but easier to engineer for, since, unlike Aluminium, AlSi doesn’t need iron inserts in the piston chamber.
- Magnesium: Only available after ’05, a magnesium block (and only block) is extremely expensive, and extremely light. Generally, it will only be used in supercars. Magnesium likes to react with basically everything so, as a result this type of block is massively labor intensive and difficult to engineer. This block requires the particularly expensive Magnesium Works factory add-on.
Inline Engines
-
Inline 3: The Inline 3 is a budget engine. Without forced induction via a turbocharger, or a very aggressive cam profile this engine is not capable of outputting very much power. When sized over one liter, or 1000 CC, the engine tends to rattle violently and that often tanks the reliability of the engine and comfort to drive the car mounting it unless a lot of quality is put into the bottom end. They’ll also usually come apart completely if sized over 2000 CC, even with 2020 tech and quality spam. Due to the small size of these types of engines, it is feasible to use just single barrel carburetors and single point fuel injection, making the engine even cheaper. It does tend to work for cars where high power isn’t required, such as City cars, and smaller Family cars. This engine is also pretty much the best economy engine due to the lack of so many components compared to other engines, which in turn reduces friction to slow the engine down. It will be obvious to buyers that you’re trying to be cheap though, and this engine is usually very bad for prestiege.
-
Inline 4: A slightly higher cost budget engine, with four cylinders instead of just three. This is a very common engine, with a higher fuel displacement than an I3, due to the extra cylinder, assuming the bore and stroke are the same. As a result of this higher displacement, and extra cylinder, you can get this engine up to around 3L or 3000 CC before you start to run into some issues with the bottom end. Each piston is run in pairs, and as a result the engine still isn’t very smooth since all pistons point up. A good choice for most cars which aren’t trying to be fancy, and aim to keep costs low.
-
Inline 5: Available starting in 1970. The Inline 5 is overall a relatively smooth, and slightly premium(ish) engine. This engine is noticeably long, and may have some trouble fitting into smaller engine bays. More displacement means higher power however, and this engine can be made fairly massive without running into significant smoothness issues. A good mid range engine for larger cars.
-
Inline 6: One of the longest engines in the game, short of the DLC V16. This engine is inherently smooth, as it essentially links together two I3 engines, and runs the pistons on opposite ends of each other at the same time, such as both outside pistons, both “middle” pistons, and then both of the inner pistons. This reduces any shake that would normally be present on other engine types, even at a high CC. Due to this smoothness, and overall larger size, this makes a very good engine for premium cars, such as convertibles, and other larger models while still being reasonably priced. The hard part is getting it to actually fit into the engine bay.
V Engines (60 Degree Bank)
-
V6: Essentially two I3 blocks stuck together onto a single crankshaft. This engine doesn’t become available until the ’60s. This engine has the displacement of an I6 in the length package of an I3 engine at the cost of some height, and the added complexity of needing two separate camshafts. You usually get some weight savings versus an I6. This block type also gets a small advantage in using smaller types of intake, as the pistons and valves are closer to the intake compared to an inline engine. This engine also tends to not run very smoothly, even when compared to an Inline 4. It’s a good alternative to the I6 when you need to save space, and a bit of mass, and has many practical applications in many car types.
-
V8: Similar to the V6, but with an additional cylinder per side. The V8 is the bigger brother of the V6, and offers more smoothness, and power compared to other engines of their relative displacement. They are very practical, if expensive engines, which can be used in a variety of cars. It generally is preferable to use a 90 degree V8 however if smoothness and reliability are priority. This engine also only becomes available in the ’60s, as 90 degree V8’s are more natural to run, and don’t require special firing orders and balancing shafts. However, some manufacturers may still wish to work with a familiar bank angle and choose to go with a 60 degree V8, usually if they’ve produced V12’s or V6’s in the past.
-
V12: Two I6 blocks combined. This engine is incredibly smooth to run, and is also usually incredibly expensive to tool, engineer for, and produce. However, they make for fantastic luxury, and sport/supercar engines. This is the highest scoring engine for prestiege that you can get without purchasing the V16 DLC, as well as the longest engine. In very many cases, a V12 is more than sufficient to get the job done when compared to a V16.
V Engines (90 Degree Bank)
-
V6: Similar to the 60 degree V6, but instead of a 60 degree angle, the pistons are aligned at a 90 degree angle from each other. This creates a very similar performing engine to the 60 degree alternative, at the cost of smoothness, and often some reliability in the engine. You will save space vertically at the cost of extra width, and more fill factor. The 90 degree V6 is not as naturally balanced as the 60 degree version, but may make engineering cheaper for companies which have routinely produced 90 degree engines, such as a V8 (which was relatively common on sports cars). This becomes available at the same time as the 60 degree V6 as well.
-
V8: The 90 degree V8 is in many ways similar to it’s 60 degree variant. However, due to it’s design, it can have two crank configurations. The first is “crossplane” (or the normal crank) where the crank has an arm at a 90 degree angle from the next arm. This is generally smooth, and leads to an “American” style V8 generally, with a bit of a “grumbly” engine sound for lack of a better term since the firing order is more staggered. The other crank is a “flatplane” where the crank has the arm alternating a full 180 degrees, and is essentially two Inline 4 engines on the crank. Flatplanes are more common to European V8s and have their own specific, more “angry” tone. A flatplane is generally more efficient with it’s exhaust, and can deliver slightly more mid range power (3k to 5k RPM) per cycle with a single exhaust as a result (they also sound terrifying with race intakes and straight pipe exhaust at high RPM too).
-
V10: A middle ground between the V8 and V12 which isn’t available until ’85. It’s a pretty prestigious and large engine, and it’s a good choice for luxury cars, as well as high end trucks. It has an extremely distinct sound to it as well.
-
V16 (DLC): For when you want the absolute most out of the car. The V16 is stupidly expensive in terms of materials and engineering. It’s extremely prestigious, being one of the smoothest engines available, as well as having the highest piston count. The V16 is basically always restricted to sports cars, as a result of it’s usually massive cost, and the sheer amount of power they are capable of producing.
Boxer Engines
-
Boxer 4: Boxer engines are pretty unique compared to most of the other engines noted above. Both sets of pistons are set across from each other and connect to a single crank. This makes for a very wide, very short engine. The Boxer 4 has four pistons, obviously, and it has a much lower center of mass, making it a good choice for sports cars. The Boxer 4 is also generally smoother than a same size Inline 4. Boxers tend to have trouble with single intake systems, since the pistons on each side are set so far apart from each other. The Boxer 4 can fit into nearly every car in the game in the Mid engine compartment longitudinally, if made small enough as they are the length of an Inline 2 (which isn’t a thing in Automation).
-
Boxer 6: Similar to the Boxer 4, with 6 pistons, clearly. The Boxer 6 is smoother than the Boxer 4 by a small margin, and has higher displacement. It can serve in place of a V6 engine in many cars where height may be an issue, and width isn’t, such as low bonnet sports cars.
Selecting the Head/Valve Type
Nearly all of the heads are available at the start of the game, they play a major role on how well the engine will perform, and at which point you might run into valve float (the point in which the valve doesn’t snap shut completely due to high engine RPM). All configurations shown here are two valve per cylinder on an Inline 4.
-
Push Rods (OHV): This valve system has a single camshaft mounted inside the engine block itself regardless of configuration which handles all of the valves by pushing a rocker with rods, hence pushrod, the valves above the pistons are sealed inside the block as well. It’s one of the cheapest types of head assembly, but it tends to have major issues with higher RPM engines since there are so many parts that handle the valves. As a result this type of head is usually best used in cars where high RPM isn’t necessarily required, such as trucks, and some city cars. Due to the way it works, it can’t be used with any of the fancier variable valve techs either. This valve system is extremely compact, and can allow for some large engines without eating into engine bay space too much.
-
Direct Acting Overhead Cam (OHC): Unlike a push rod head, the camshaft is located above the pistons, where it has it’s two valves placed directly over each piston. This allows for less friction in the system, allowing for higher RPM. When compared to a standard two valve Overhead Cam, this valve system is slightly more resistant to valve float since there is no reciprocating mass due to the rockers. This valve system is incredibly simple, and cheap to a degree. Direct Acting is the second smallest valve system available, though it will take up more forwards space than a pushrod due to extra belts.
-
Overhead Cam (SOHC): This head is similar to a direct acting cam, but the valves are offset to allow for smoother flow of fuel, and exhaust, in, and out of the system. Since it’s valves are not placed directly over the piston, it also allows for higher fuel efficiency due to cleaner spark ignition, and better fuel distribution. There is also the option to mount additional valves using this setup, which further increases efficiency as the flow is greater, and distribution is more even. Single Overhead Cam is larger than a direct acting since there’s more space required to use the rockers and additional valves.
-
Dual Ovehread Cam (DOHC): Unlike the other head setups, this valve system uses two separate camshafts, one to actuate the intake, and one to actuate the exhaust. This allows for significantly less friction on each cam allowing for further high RPM. It also more naturally allows for additional valves to be used, as well as smoother airflow. Dual Overhead Cam is the largest of valvetrains, and can take up a lot of engine bay area due to the fact that each bank will have two offset cams, plus larger belt assemblies to run both cams.
Variable Valve Lift (VVL), generally more known as VTEC becomes available in ’94. It allows you to set two separate cam profiles for high low end, and better high end efficiency, depending on which profile the engine will switch to. It can allow the engine to serve two genres at once effectively, though depending on the profiles, the swap can be a bit jarring. This tech is also quite expensive, especially on larger, more complex engines, as well as relatively heavy.
The Bottom End
The bottom end refers to the crankshaft, the conrod (connecting rod) and the piston itself. The bottom end can be made of various materials, and depending on the forces created by the engine, will require different components to keep the parts from breaking. Some components (usually the piston head) will also produce different results in terms of fuel efficiency, or engine smoothness.
- Cast Iron: The initial crank type. It’s overall relatively heavy compared to the other components, but the crank is usually the most solid piece of the engine for torque loading and RPM. The cast crank is the weakest type of crank, while also the cheapest.
- Forged: A forged crank is quite a bit tougher than a cast iron crank, as well as notably lighter. There is a rather high startup cost to use forged components however, since the engine factory needs to have a Forge Works add-on. Becomes available in ’56.
- Billet Steel: The highest grade crank. Made from milling a solid block of steel, instead of being pressed out of a forge or cast. This requires a C&C shop to fine tune the cranks being produced. They are the lightest, and toughest crank available, but not available until much later in the game. This supports a very high RPM and torque amount. Available starting in ’86.
- Cast: A simple cast conrod to connect the piston to the crank. Cheap and relatively weak, but works in most engines.
- Heavy Duty Cast: A more solid, and heavy conrod designed to handle high torque loads over high speeds. Generally you’d use this on low speed, high power engines, such as most high displacement engines.
- Heavy Duty Forged: A flat H shaped piece of forged steel serves as the conrod. This is overall better in many statistics than cast components, and serves as an actually lighter alternative to the standard cast conrod. Available in ’56.
- Lightweight Forged: A lighter version of the forged conrod, as a result it can take higher RPM stresses, at the cost of being just about as good as a heavy duty cast at handling torque. Available in ’67.
- Lightweight Titanium: The strongest conrod available, that comes with an immense price tag due to the rarity of titanium itself. In cars where cost is no object, these conrods allow for the highest possible of RPM speeds. They do require a C&C shop to produce however. Available in ’97.
- Cast: A simple cast iron or aluminum piston to provide compression to the engine. Very cheap, and not good at handling most types of stress.
- Heavy Duty Cast: A more densely cast piston ensuring that the piston won’t shatter under high torque load. This does come at the cost of the piston not being able to handle high speed stress, and is very bad in most somewhat high RPM engines.
- Forged: A forged aluminum piston, ensuring better overall performance when compared to cast pistons, able to take substantially more stress from torque, and speed. Forged pistons also reduce octane in game as an abstraction that it’s less likely for heat to gather in a “bubble” just above the piston, since the process makes a smoother surface. Available in ’56.
- Hypereutectic Cast: A cast piston made of an aluminum alloy (usually) with a special process in that the components are just barely melted before being cast into shape. These types of pistons are a bit tougher than the standard cast pistons for taking torque, and they help a bit to reduce fuel emissions since they come out a bit harder, and more resistant to expansion which leads to less oil burn/blowby. Also helps to run the engine a bit quieter. An option starting in the ’70s.
- Low Friction Cast: A lower friction and weight variant of the standard cast pistons. This harms the stresses the piston can take, making them more sensitive than just standard casts. However, it does make the engine slightly more fuel efficient, due to reducing the friction all around and as a result wastes less energy. Available in ’91.
- Lightweight Forged: A lighter variant of the standard forged piston. This piston type can take immense amounts of RPM stress, and is especially useful for sports cars where high engine RPM is required. Available in ’91.
You can set a specific variant size to be below the size of the base family model. Usually you’d want to do this to de-tune an engine you’ve already made. So, a sports model engine might want a slightly smaller bore size to squeeze as much out of the fuel as possible, and maybe reduce the stroke to get the engine to run smoother for example. That would make the engine more viable as a premium/convertible oriented engine, without having to produce an entirely new family of engine.
The Top End
The top end refers to the valves of the engine, and the camshaft which regulates the valves themselves. This section is where you determine who the engine is actually going to sell to, and how the engine is intended to perform, as it has major influences on the fuel economy of the car/engine, and it almost singlehandedley shapes the torque/power curve of the engine. Also, sliders!
Compression: The compression ratio is what determines how far up the shaft the piston will travel. High compression ratios make for overall better power output, as the fuel is detonating in a smaller space, giving more power overall for the same amount of fuel in the chamber. Setting the compression too high however will cause knocking due to the heat of the compression, severely reducing efficiency of each cycle as well as potentially damaging the engine.
Cam Profile: The cam profile largely dictates how the engine will be run. The cam dictates how much fuel/air gets into the engine for each cycle, as well as how long the exhaust is held open for. The cam profile is what determines how large the lobes on the camshaft are in regards to how long to hold the valves open (amongst other things like spring stiffness). A lower profile generally means higher low end power and fuel efficiency which is suitable for most family and utility purposes since less fuel is burned. Low cam profiles do generally increase knock chance since smaller amounts of fuel burn hotter than a more densely filled area. A higher cam profile tends to turn the engine into a very high power engine, with a nearly vertical torque curve, and is generally suited to cars where high RPM power is preferable over fuel economy and general engine smoothness, since it sucks in more fuel and blows out more air (sometimes simultaneously, which is why fuel economy goes down). High cams work well with high compression engines since the camming adds a lot of fuel per cycle which keeps the temperature relatively low compared to a lean burn. You generally tweak the cam profile to push the torque peak to one end or the other, where a high profile makes a peak at high RPM, and a low profile moves that peak to lower RPM. Generally, going below 20 cam profile actually may harm the performance of the engine at anything that isn’t idle speed though there are reasons to do so depending on the engine (such as extremely large utility focused engines). Going over 80 cam profile doesn’t offer much more power than where it is at 80, but it can reduce octane, which can be put somewhere else (such as compression or ignition timing to optimize power, or potentially a leaner fuel/air ratio).
VVL Profile: If you have installed VVL into the engine while selecting the block, this is where you’d set your second cam profile for the engine, which allows for hybrid function engines depending on where the engine is in their specified RPM range for each profile.
VVT: Variable Valve Timing allows for an adjustment to be done on when the valve opens and closes in the engine in accordance with engine speed. This is done through various means. Practically, this improves power across the entirety of the band, as well as fuel economy, and fuel emissions. You will especially notice the effects of VVT on very aggressively cammed engines, there will usually be a noticeable “dip” before the car “jumps on the cam” and actually increases in torque noticeably. With VVT, especially DOHC VVT on each cam, you should notice that the low end power is significantly higher, and there will be less of a bump in power, leading to a smoother, but still near vertical torque curve. Such as this example. (Don’t worry about the internals, this is just an example.) The effect applies to engines with low cam profiles too making for more power at the high end on cars with below usual cam profiles.
Aspiration
Currently there are only turbochargers available for use in Automation. They become available in ’75, and they effectively boost the power of the engine by applying extra pressure into the engine versus a naturally aspirated engine, which sucks air into the engine naturally through the intake (obviously).
Naturally aspirated engines tend to have rather “nromal” power curves, for lack of a better term. They’ll gradually go up in power as the throttle is depressed, and they usually handle fairly well in most RPM ranges when compared to using a turbo.
Turbochargers on the other hand use a compressor and turbine, powered by the exhaust of the engine to suck extra air into the intake, “boosting” the engine by adding extra pressurization to the piston chamber. They can be setup to provide boost at almost any range of the torque band. Generally smaller turbos work best to provide increased fuel efficiency at low RPM, since a smaller turbo is easier to spool up, but provides less boost. A large turbo can provide massive boosts to torque, once they spool up completely. This can create torque “mountains”, which while not necessarily easy, nor fun to drive lead to massive boosts in power at the peak of the boost.
Turbos, while they will work with Carbeurators, generally should not be used with them if it can be avoided. Turbochargers add pressure which carbeurators typically aren’t designed to handle, and as a result are restricted to providing a low level of boost before it starts to damage the reliability of the carburetor due to over-pressurization. Since the carb throttles air on it’s own, adding extra pressure usually will mess with how much fuel goes into the engine, and in the worst cases, break the throttle plate when the throttle is lifted at high pressure, or even worse, backfire the fuel into the carbeurator due to the pressure, possibly blowing the fuel system clean off the engine.

Here’s an example of how one engine will perform (a mid sized V8, with default bore and stroke) before, and after the addition of a moderate sized turbo.
Lastly, turbochargers as a result of how they work can also reduce the noise of the engine/exhaust, since the turbo spinning reduces the overall speed of the exhaust once it leaves the piston chamber.
Understanding the Turbo
Turbochargers in Automation seem to confuse a lot of people, and that’s okay, mostly because turbos sort of don’t make much sense right now in certain areas, at least until the forced induction overhaul.
Turbochargers have multiple components which go together to make an actual fully operational battlestation turbo.
At the moment of writing this, turbochargers are currently limited to only a single turbo perk bank of the engine, or in the case of an Inline engine, a singular turbocharger.
The only real component choice is the choice of bearing that the compressor and turbine itself uses to rotate on. A Journal Bearing is supposed to be less responsive in general, but in game, it only equates to a later spooling of the turbo. A Ball Bearing on the other hand spools up faster, and as a general rule, unless you want a cheap turbo, you usually shoot for the ball bearing.
The next item on the list is the intercooler, which is essentially a radiator for the air being sucked into the engine. The intercooler is used to cool down the air being sucked into the piston chamber that has been gathered by the compressor. Since the compressor and turbine tend to be hot, this is almost always required. Cool air takes up less space, and can fill the piston chamber easier, as well as the fact that cool air doesn’t preignite fuel in the same way hot air would.
Presets are general good starting points for what you want the turbo to do, and i’ll cover them more in detail later.
The compressor is what ultimately takes the ambient air, and compresses it to get it fed into the engine. Larger compressors are capable of delivering more air, and as a result pressure into the engine, but take longer to actually start gathering enough air for meaningful boost, their extra mass also makes it harder to spool. Smaller compressors are generally more limited, since they’re capped on how much they can intake, but they tend to deliver effective boost sooner since they can spool sooner.
The turbine is what gets spooled up by the waste exhaust of the engine, which in turn drives the compressor to do it’s job. A small turbine will generally spool rather quickly, but it can limit power, pretty severely at the top end, since it bottlenecks the exhaust. A large turbine is harder to push with exhaust, but generally doesn’t throttle the power of the engine as much as a small turbine would.
Turbochargers have what’s known as an AR ratio which determines how tight the run up to the actual turbine is. A lower AR ratio contracts the pipe leading up to the turbine, which in turn gives the turbine more pressure to spool faster, at the cost of restricting overall exhaust flow. A higher AR ratio is more open and free flowing, and as a result is more useful at high RPM, with high power.
Lastly there’s the max boost setting, which is where instead of just having runaway pressure boosting the engine till it explodes as RPM increases, the turbo instead vents any excess pressure, even if it’s capable of producing more. This is generally used to throttle boost, and as a result, knock.
Fuel Economy presets are typically used to just keep the engine using enough boost to cover normal pumping losses of energy at low speed, which generally is around .2 BAR (roughly 3 PSI) to .6 BAR (roughly 8.7 PSI). Since Automation measures fuel efficency at the ranges of 1500 to 2500 RPM, this generally means that the turbo will spool up quickly, and apply just enough boost to cover the losses of pumping, and not much else. Hence, they generally deliver next to no power.

Performance presets are generally middle of the line, good power producing turbochargers that tend to kick in at around 3000 RPM, but can also be boosting the engine at earlier points, potentially covering the fuel economy requirements.

Race presets are all about high end power. They generally have big, slow spooling turbos what deliver their best power near the peak of the engine RPM band. The image I have here isn’t a fantastic example, but still, not bad for a Pushrod I6.

- Turbochargers generally spool up faster with engines that produce more frequent exhaust pulses. Hence, a turbo running off of a I6 will generally spool up faster than an I5, I4, and I3 in order. Twin turbos on a V6 will spin up as fast as an I3, since each turbo has 3 pistons connected to it.
- There are no “hard and fast” rules for making the “optimal” turbocharger, since every engine is going to be different.
- Larger bore engines seem to deliver more effective exhaust pulses which will spool a turbo faster.
- More boost isn’t always better. Don’t, for example try to apply three atmospheres of pressure into the engine with the turbo, since you’ll have to sacrifice compression to do so, and as a result probably lose a lot of low end power.
- Turbo tech is limited to the year of ’85 currently. Ideally, better turbo tech would come later in game, such as faster spooling, but, no.
- Max turbo/compressor size is tied to the bore of the engine. Larger bore engines can have larger turbos, smaller bore engines cannot. This is apparently due to model clipping with the current exhaust headers.
- Turbochargers generally don’t like high cam profiles. Since high cam profiles can overlap valve openings, this in the best case limits exhaust leaving the chamber, since pressure is on both ends. In the worst case, this can lead to exhaust actually being sucked into the fuel intake. This is generally represented with higher knocking with high cam profiles and turbos.
- Airflow constriction will inevitably happen, especially on engines which can reach high RPM. Don’t be too concerned about it. In quite a lot of cases, airflow restriction is actually useful to fine tune peak power.
- A large majority of turbos have a compressor larger than the turbine. The compressor, ideally should not be throttling the power of the engine, unless it’s tuned for a lower end torque peak.
The Fuel System pt. 1
The fuel system itself is how the engine actually gets it’s air and fuel mixture in order to run the ignition cycles. There are two major types of fuel system, carburetors, and injection, each with multiple variants and configurations.
Carburetors work on a fairly simple principle of when the engine is running, the carburetor sucks in air against the fuel lines, similar to using a can of compressed air along the top edge a straw in a cup of water (try it). Since engines create a vacuum once the exhaust is vented out of the piston chamber, this creates pressure, which then tries to pull air into the intake fuel valve. The carburetor comes into play by restricting airflow with a throttle plate, and uses that high pressure airflow to add fuel into the mixture, letting the engine run. For better efficiency, and control of the airflow, some carbs have multiple “barrels” which can separately throttle their air intakes. For larger engines, some systems will require additional carburetors as well, since only so much air can get through the pipe(s) at once, plus your typical carburetor generally will have trouble getting the air/fuel mixture from itself to very distant intakes without losing some of the fuel along the intake due to condensation.
-
Single Barrel: An extremely simple carb setup. A single pipe, with a single barrel and throttle plate. It works well enough for smaller engines (your average gas operated power tool tends to use this scaled down a bit), and it’s cheap to make, but relatively inefficient. You typically will need extra carbs on anything bigger than an I3. This tends to be the most reliable fuel system as well due to it’s simplicity.
-
Single Barrel Eco: Pretty much the same as a single barrel carb, but with a control piston built into the carb. This creates a higher air pressure compared to a normal single barrel carb at all speeds, but it also can’t run as high of a fuel mixture without oversaturating since less air can get through. It is very economical for fuel use compared to a single barrel if you can get past the part where it’s probably strangling the engine a bit.
-
2 Barrel: A single intake with a second barrel to regulate airflow better, as only one plate is open, unless the throttle demands the second plate to be open as well. As a result it can take a slightly higher fuel mix when compared to a single barrel, and it generally delivers more power too. A bit more complex, and can reduce reliability slightly. Available in ’48.
-
DCOE: Basically two single barrel carbs straight piped into the piston chamber, unlike other variants where the air needs to make a turn to get into the intake valves. This makes them much more fuel inefficient across the board, but generally allows for higher power due to less air restriction even compared to a four barrel carb. Available in ’54. Alternative real world names for this system include Webber, or Sidedraft Carb.
-
4 Barrel: A carb with four independent throttle plates. This is a high quality version of the carburetor, since it has significantly more control over how much air/fuel gets into the engine. It is rather complicated to manufacture and maintain for a carb though. Available in ’59.
Fuel injection, unlike the carburetor, actually directly injects fuel into the intake or cylinder of the engine with a pump. Fuel injection is almost always more economical and provides more power than using a carburetor, but it is also vastly more complex to actually produce engines using injection, since the process usually involves sensors and instruments not usually used in a carbeurated engine. Systems with multiple configuration options will allow for separate air intake throttles, but will still inject fuel per cylinder in most cases (except for single point EFI).
-
Mechanical Fuel Injection: The first iteration of fuel injection available in ’64. This system uses mechanical sensors and timing to inject the fuel into either the intake valve itself, or directly inject into each cylinder. This typically used a high pressure fuel rail and pumps. This method is generally overall better than using most carbs for a lot of purposes, but it is also much more expensive in terms of cost, and engineering time. As a result, it’s generally only suited for early high end racing engines.
-
Single Point Electronic Fuel Injection: The first electronically monitored fuel injection system available in ’78. This system is generally better than a four barrel setup. It is required to use any stability controls that have been created that aren’t simple ABS. However, it struggles with longer engines, since as one would guess, the fuel is injected at a single point, typically near the air intake. It’s essentially a four barrel carburetor that has an ECU controlling the fuel addition instead of being totally dependent on airflow. This in effect can actually make this fuel system less effective than having multiple seperate carbeurators particularly on longer engines.
-
Multi Point Electronic Fuel Injection: Starting in ’82, multiple point fuel injection comes along. This is an electronically monitored fuel injection system, which can be configured to run in a single, twin (in the case of V engines) and per cylinder throttled fuel injection. This fuel system injects into the intake valve region of each piston instead of the intake of the engine, regardless of configuration. A very efficient fuel system, and offers a lot of power if setup for that purpose, while also able to be configured for low power economy work.
-
Direct Injection: Instead of injecting into the intake of the piston chamber, direct injection directly injects the fuel into the cylinders of the engine. This provides vastly more power and fuel efficiency at a much higher cost. This only becomes available in ’01 however. This fuel system is relatively finicky, and requires more constant maintenance than a standard Multipoint fuel system.
The Fuel System pt. 2
Due to character limits, this category has been split in two.
All fuel systems require an intake in order to get the air actually into the engine. What type of intake you use will have a large influence on the loudness of the engine, how much it costs to maintain, and in a specific case, how reliable the engine will be. (Note, these might get overhauled eventually.)
Standard: Regardless of what type of fuel system is used, this will be the cheapest option for the consumer, and it will keep maintenance costs relatively low. It’s also going to be very quiet. A standard intake is set close to the block of the engine, and with carbeurators, includes a metal cover, which forces all air through a small point. Injected engines also follow a similar principle of a restrictive intake. This keeps filters cheap, but it also reduces the airflow of the engine.
Performance: Brings up the price quite a bit to maintain, but you still have an air filter attached to the intake to keep dirt from flying in. This is valid for many demographics if they have some money to spare, and don’t mind a louder engine. The air intakes are set higher than where would be normal compared to a standard intake, which allows for better airflow at the cost of space. This makes the engine a bit more efficient and powerful overall at the cost of more frequent filter replacement, since the entire filter is exposed to air. On carburetors, this, along with a more distant intake, removes the metal cap which ordinarily funnels air into the system, leaving an open, but still filtered intake. This intake is rather loud compared to a standard intake.
Race: For when you don’t care if the engine works after the day you use it. Race intakes have absolutely no filtering at all, and will eat whatever dirt happens to get into the engine compartment. This makes race intakes usually exclusive to premium buyers, who don’t care at all about engine reliability, and have a lot of money to spare for repeated engine rebuilds. Race intakes usually use large scoops to collect air. Per cylinder configurations for fuel injection completely eliminate the air box which normally has a filter to clean out the air, twin and single intake configurations will still use a large, but unfiltered air box with rather large scoops. Carbeurators almost exclusively will end up with “trumpets” to scoop the air into the fuel system. This type of intake, although possibly misleading actually takes up more space than a performance intake. This intake is usually exceptionally loud.


I won’t cover all of the fuels here, as it’s a relatively simple choice. Higher quality fuels have higher octane, and that means you can do more with the same amount of gas, without it exploding prematurely. Leaded fuels will be banned at various dates within the game, as lead in the air is bad apparently. It’s important to also remember that fuel availability varies. If your engine can only run on Ultimate, you probably aren’t going to be selling the car anywhere other then the most developed of countries.
How much fuel relative to air is in the fuel mixture. A 14:1 fuel mixture ratio is a 14 air to 1 fuel particle (or mole) ratio. Running the engine on less fuel, or “leaning out” the mix is usually good for economical cars but can induce knocking if the ratio is too lean. Running richer mixtures generally delivers more power at the cost of fuel efficiency. All fuel systems also have a point in which they can’t handle more fuel in their naturally aspirated state, and that’s shown with the maximum AFR (air-fuel ratio). It’s okay to go a little bit above the maximum AFR, as it’s not going to do anything harmful other than waste fuel (it might shoot fire out of the exhaust too if there’s no catalytic converter). Going too far up however will outright prevent the fuel from igniting. It’s also worth mentioning that the specific ratios are a bit pointless, just know that richer fuel makes the engine use less octane, while leaner fuels is economical, but costs power and ups octane requirements.
At which point in the compression cycle should the spark plug fire? This will determine the peak power optimization point in the engine, since a higher speed engine should ideally have a spark to ignite the fuel before the piston reaches the top of it’s motion, while a lower speed engine might suit better with a slightly delayed spark. This is especially true for a carbeurated engine. Carbeurators generally haphazardly add fuel into the piston chamber, and don’t have an ECU to manage ignition timing, so the spark will always fire at the same point due to it being a mechanical trigger. This lack of specific timing allows for some additional torque curve shaping with carbeurated engines, for better or worse. Ignition timing is quite important on carbeurated engines as a result. On injected engines, the presence of the ECU, as well as controlled injection allows the computer to tweak spark firing on the fly. As a result, higher timing on injected engines allows for more advanced timing on each cylinder individually, increasing power and efficiency across the board. A higher ignition timing generally improves the throttle responsiveness of the engine, and fuel efficiency, as it will spark the explosion as the chamber is compressed more. A lower timing can be used to avoid knock.
This is the peak RPM the engine is allowed to achieve, and is the redline for the speed governor of the engine. Higher RPM means that you can spool up the crank even faster, but at the cost of reduced reliability due to the stress it inevitably causes. As mentioned earlier in the guide, it’s okay to not max out the RPM if the peak of the power curve is at a low RPM, as people will only use power they can drive with. The RPM limiter will also affect ultimate top speed the gearbox will allow for. A very high speed engine will have a minimum gearing top speed of roughly 200 km/h, while an extremely slow engine will have a top speed around 121 km/h maximum.
The Exhaust
The last step of actually assembling the engine would be the exhaust system. The exhaust is responsible for getting the waste products of the fuel ignition out of the engine. It’s also a large factor in reducing the noise actually generated by the engine with mufflers which reduce the sound of the exhaust pressure. Which type of header, or piece of exhaust that hooks up to the engine will also affect the overall performance of the engine, and how big of a pipe that comes after that can help run the engine a bit more efficiently due to harmoniously pulling out the exhaust.
-
Cast Log: This is a relatively lazy, but acceptable way to get exhaust out of the engine. It’s literally just a single pipe with holes stuck into it, hooked up to the exhaust. It’s almost always going to damage the efficiency of the engine, since the exhaust won’t move smoothly at all but it’s dirt cheap to slap on there. These were relatively common exhaust headers until the ’60s.
-
Short Cast: Instead of a single pipe, the cast is done in a way that the exhaust bends outwards of the engine for each piston chamber, and this overall provides better exhaust performance since the gas doesn’t have to make sudden turns. This is also currently the only exhaust type available to turbocharged engines. These are good general purpose exhaust headers for most cars. A large majority of more economy focused engines won’t need more than this.
-
Tubular: A lightweight, and overall bulkier exhaust header made of steel or aluminum. This type of header is very smooth, and is often required for high power engines. It takes some time to engineer versus a cast though. A good choice for performance cars.
-
Long Tubular: For when regular tubes aren’t enough. This contrary to it’s size is actually slightly lighter than regular tubular headers. The extra length is used to further encourage exhaust gas to leave the engine. Quite high end, and typically not needed, except for racing configurations generally.
-
Racing Tubular: For when you want your exhaust pipe to be a work of art. The racing tubular set is a very long and intricate series of pipes which are designed to scavenge every last particle of exhaust out of the engine, partially by making sure each pipe is the exact same length, regardless of bulk. This cannot be mass manufactured, needing to be hand built, and takes an extremely long time to engineer. The best possible exhaust header. These will only exist on hand made, super high end cars, such as Hypercars.
V series and Boxer engines can have either a single exhaust pipe, or two exhaust pipes, one for each side of their bank. Generally a single exhaust is going to be cheaper than a twin exhaust, since you don’t need to double produce the trailing components, such as the catalytic converter (usually the biggest cost, since cats need rare metals) and the mufflers. However, a dual exhaust is usually going to be much more efficient for scavenging exhaust, and getting more power out of the engine, with a few very specific exceptions. Most configurations have exhaust pulses which don’t line up properly to run together to a single pipe harmoniously. A flatplane V8, and a V12 can usually run well with a single exhaust pipe. Other engines are generally best with a dual exhaust. Dual exhaust is also able to make the engine quieter, due to the fact that both exhaust pipes can be smaller, and still release exhaust efficiently.
In ’99, there is an option to also add a feature called a bypass valve. Generally it’s only used on supercars for once they go over a certain RPM. It bypasses the mufflers and acts as though they don’t exist at the cost of however loud the engine would be without mufflers. This makes for a car which can have a quiet cruising drive, while still also having deafening exhaust noise for racing giving the car a bonus for a quiet engine when measured for comfort, and a loud engine bonus for racing.
Generally, you want the exhaust pipe to be able to either just barely be large enough for the throughput, or actually choke down in it a little bit. An exhaust which is too open will overall actually cost power. An exhaust which is too tight will strangle the engine, and cause a variety of issues, including knock in some cases if clamped down too tight. Choking down on the exhaust “just right” however can lead to a higher power and torque peak.
Catalytic converters aren’t actually necessary in the current build of the game, as there are no emission laws to worry about. However, a catalytic converter will usually significantly cut down on air pollution. They almost always will siphon off a little bit of power however, especially the earlier Two-Way. You can also sort of use the catalytic converter as another muffler should you so desire, with earlier variants being quieter, at the cost of a lot of power. Presumably, each nation will leverage taxes against highly polluting vehicles, so lack of a catalytic converter might actually make the car effectively more expensive versus otherwise over time.
Mufflers are used to reduce the audible noise an engine makes, and there are three variants (assuming we ignore “none” as a variant). It’s important to mention that the second muffler in the series is the muffler which will provide the most effective sound dampening. A straight through trailing a reverse flow for example won’t be as quiet as if the order was reversed.
-
Baffled: The basic muffler from the beginning of the game. It basically forces the exhaust through a series of nets to quiet down the exhaust. It’s light, cheap and offers a good middle ground between flow reduction and sound dampening.
-
Reverse Flow: A reverse flow muffler does what it says on the label, it reverses the flow of the exhaust back and forth through the muffler to reduce noise. It does it’s job very well, but is the most expensive muffler, and it does cut into exhaust flow quite a bit.
-
Straight Through: A straight pipe with holes cut into it, with some space inside for the gas to expand to the outer area of the muffler. It’s not very quiet, but it doesn’t restrict airflow much, and it will dampen the sound of the engine a bit.
Horsepower or Torque?
Kilrob, one of the devs did a fantastic YouTube video on the topic some time ago, so i’ll link the video here.
Warning: It starts with math.
Common Engine Design Warnings and Fixes
Engine design warnings are relatively easy to fix, fortunately. This section here will cover the warnings you’re likely going to run into. Keep in mind, you aren’t actually required to fix all of these issues if you don’t want to. If the engine fails as a result of the issue though (red warning), you won’t be able to use the engine in that configuration.
-
Engine Doesn’t Fit:
This means that the engine is simply too large physically to fit into the engine bay of the car in the orientation desired. You can try placing the engine in a different location/direction, or you can reduce the bore, which will bring physical size down. Some engines simply won’t fit in certain cars/configurations no matter what you do. This is NOT the same as a full engine bay.
-
Engine Bay Quite/Very Full:
This warning will show when the Fill Factor of the engine starts to reach 80% of the engine bay available space, and swap over to the very full warning once you hit +100% engine bay fill, though the engineering time cost starts at 40%. Automation just shows the engine itself in the engine bay, but your engineers will still have to figure out how to squeeze in the other necessary pieces like coolant tanks and batteries, a full bay makes this very difficult. Going over 200% means that the engineers will have to engineer the entire mount section around the engine, and that can get painfully expensive on anything that’s not a Hypercar. One of the most obvious, and easy fixes is to reduce the bore of the engine. Other fixes can include using a tighter valvetrain, a non performance or race intake and a smaller exhaust header. A cast log for example takes up almost no space compared to a tubular exhaust header. Turbochargers also take up quite a bit of space as well, since they need to be placed a bit away from the engine, and have their own sizing dimensions.
-
Engine Lacks Clearance To The/Is Very Close To The X Side Bay Wall:
This warning will show once you make the engine large enough to start to run against the outer edges of the engine bay walls. Depending on the engine arcitecture, and drive type this can happen on any side. The closer to 100% fill you get, the higher the engineering cost gets. Shrinking the bore is usually the only way to fix this, short of completely changing out the engine, or swapping the drive type as a whole to something that would use less space (such as front longitudinal RWD versus front longitudinal FWD).
-
Engine Is Knocking/Failed Due to Knock:
In this case, you are applying too much pressure to the fuel, or are not giving enough fuel relative to air for the fuel to not preignite with how you’ve set it up. Enriching the fuel mixture, reducing ignition timing, making a more aggressive (high) cam profile, and reducing compression can fix this. Making the bore smaller may help as well, but costs displacement. Turbochargers don’t operate well with high compression engines in most cases, and will usually cause significantly more knocking, since the pressure they generate is exacerbated by the piston compression as well. Lower boost or compression ratios will fix the issue in most cases if a turbo is used. Strangle can also be a cause. Generally if the intake is throttling power by 5% or more, it will increase octane emulating a lack of airflow and fuel into the pistons, and as a result the likelihood of knock. Same holds true for a too small exhaust pipe, or an exhaust header/manifold not able to keep up, as the hot exhaust will get stuck in the piston on the next ignition cycle since it can’t flow out.
-
X Experiences a High Torque Load/Fails Due to Torque:
Torque is a factor of power the engine can output, but it’s also a source of stress on the engine parts. Reducing power output, such as by running leaner fuel is one option to fix this. Running a lower cam profile is another option in some cases, but could actually make the issue worse. Opening the exhaust may help a bit, since a more open exhaust generally trades torque for power. Using higher quality parts, via slider, or swapping to forged/billet/heavy duty materials can help as well.
-
X Experiences a High RPM Strain/Fails Due to RPM:
RPM will affect parts similarly to torque. Higher quality parts are more resistant to RPM strains. Running the engine at a lower RPM peak is another obvious solution. Shortening the stroke will create components which don’t have to travel as far as quickly, and significantly reduces stress due to high RPM.
-
Engine Experiences Valve Float:
Increase the cam profile, use a different valve train, or reduce engine RPM. Valvetrains with more valves are more resistant to valve float. Reducing the size of the bore can help too, since the valves will be lighter and work with the springs better.
-
Engine is Underpowered/Very Underpowered for the Car’s Weight:
Simply make the car output more power. You could also lighten the car itself, but this is more difficult to do normally. Generally, a yellow warning here can be ignored for extreme budget cars with early I3/4 engines, however a red warning is basically undrivable. Ideally, you want to avoid this warning if you can though. A yellow warning will show up if the car has less than a .025 power to weight ratio, and red warnings will show if the car has a .01 power to weight ratio.
-
Fuel System Can’t Withstand Boost Pressure:
This will only apply for carbeurated engines running a turbocharger. Carburetors can’t handle a boost pressure of more than .7 Bar, or 10 PSI without issue.
-
Engine Is Running Too Rich/Cannot Start Due To Fuel Enrichment:
This means that you are dumping too much fuel into the engine relative to air, meaning that you aren’t actually getting a full burn out of the fuel. In certain rare cases, this is okay. However, generally you want to avoid running into this issue. Reducing fuel mix is one obvious fix. You can also use a turbocharger to boost the air going into the engine, but it will still waste a lot of fuel at low RPM until the turbo is spooled up.
There are a few other issues you may run into which can kill the engine before it can run, and the game won’t tell you why. This is usually related to specific engines and sizing.
1. Inline 3 and 4 engines (as well as flatplane V8s and V6s in both configurations) have a maximum size they’ll reach before the smoothness starts to drop too much. If the engine has 25 or less smoothness, then the internals will lose ability to handle stress due to the sheer imbalance of the engine while it runs. If the engine has 0 smoothness, then the engine will be incapable of running, at all, even if the components can normally still take stress. As bottom end tech becomes better, this goes away over time as standards improve and engines naturally become smoother.
2. Carb overpressure currently doesn’t show any warning if the carb dies due to the pressure caused by turbo boost. However, if the engine reliability hits 0 due to this pressure (or any other reason, really), then the engine will be incapable of running.
Archetypal Drivability Engines
There are a great deal of ways to make drivable engines in Automation. Ideally, a drivable engine should have a torque curve which goes up somewhat quickly, and then flattens out for quite some time until the torque eventually drops off, such as this example here.
This engine is a flatplane V8 2L Single Point Injected and naturally aspirated. This is tiny, and also likely to be rather expensive, however, the curve is just about perfect for making a drivable car, and the power isn’t insane, so the driver can keep control of the car. The fuel ratio is as lean as it gets, and the cam profile is a relatively low value of 23, which makes for this type of curve. The exhaust is also clamped down a little bit to make for that perfect low end torque curve. This engine is fitted into the front of a 1k kg car transversely, which leads to just slightly under a .05 power to weight ratio after the drivetrain loss of the automatic.

Archetypal Sportiness Engines
Sporty engines are relatively simple to go about designing, ideally, you want high end power, and a gradually increasing torque curve.
This is another V8 example, except this one is currently seated in a mammoth of a SUV, with a weight in excess of 2k kg. As a result, this engine is rather large, with a 5.9L displacement, as well as fitted with VVL, on top of forged components. The fuel system is a single intake Multi Point. This engine can fall into many categories, but it’s extremely expensive. The low end profile is set to 8, and the high end VVL profile is set to 50, which leads to decent power across the entirety of the band, with peak torque at 3.7k RPM.

Of course, we can’t leave out the V16. This engine is designed to fit into supercars, and as a result is rather small, and has an insanely aggressive cam profile maxed out at 100. Direct injection, throttle per cylinder, runs on premium gas, rich as the fuel system will allow, and has an open exhaust, with double reverse flow mufflers, with added bypass valves. Making a supercar engine is relatively easy, just max out basically everything (except the quality slider, though you can) and you’re good to go.
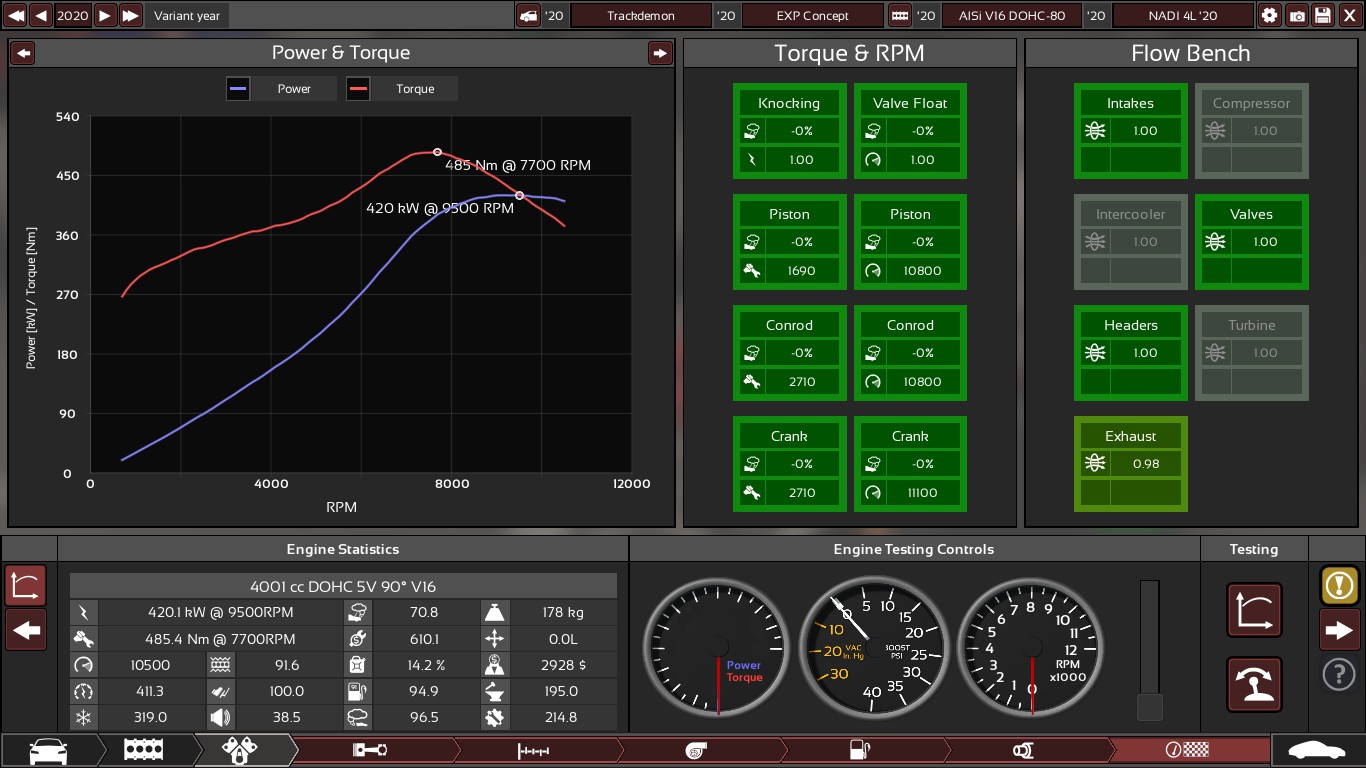
Archetypal Utility Engines
Utility engines are relatively simple, they need as much low end power as possible to move heavy loads effectively. High end power is basically irrelevant, so huge, low speed engines work well here.
This engine is a rather “american” (it means oversized) V10. The cam profile is set as low as a value of 5 to bring the peak torque as close as possible to idle speed, this enables the truck to move with a heavy load from a standing stop relatively easily. The engine is also running as lean as possible, using a twin four barrel carb which is probably a bit overtuned. However, it helps reduce the distance from the intake which in turn stops knock. While fuel injection may be reasonable here, it’s pretty expensive compared to a carb. Running the engine lean also fits into the general archetype of the standard utility crowd, which doesn’t want to pay out the nose for gas. The exhaust runs into a single clamped down pipe, with a standard three way cat, which shaves off a lot of cost on top of moving the peak torque back even further.

Archetypal Budget Engines
Making a budget engine seems to be rather hard for a lot of people. People like fancy features and all. If you’re shooting for a budget engine, stop that.
This is an extremely basic, barebones economy engine for a small family car. It’s a standard size (2L) inline 4. It’s got a slightly below normal camming of 33, and it’s running off of a single barrel ecocarb. It’s got short cast exhaust, and a single baffled muffler. The torque curve might be a bit disgusting, but it’s cheap, compared to pretty much every other example i’ve shown so far.

Archetypal Premium Engines
The whole point of a premium engine is that it’s big, doesn’t rattle much, and still has good power to come out of it. It doesn’t need to be sportscar tier, and in a lot of cases, sportscar camming is actually bad.
Looking at the torque curve here, you’ve probably noticed how similar it is to my drivability example above. That’s because premium engines, for optimum smoothness have low cam profiles. This engine in particular is a V12, with a single quad barrel carb, with a relatively high fuel enrichment at a 13.4 to 1 ratio to allow the carb to distribute the fuel so far. The engine is extremely smooth, and hooked up to a twin tubular exhaust, with dual reverse flow mufflers to quiet down the engine as much as possible.

Car Stats
Everything in Automation has stats, and usually an associated chart to go with it. You obviously want to aim for the highest stats possible, every time, right? Nope! Price in particular is a dealbreaker if it’s over what your target can afford. High stats usually mean high prices, amongst other things.
Each demographic (and each country’s population separately) cares for specific stats, more than others. A person buying a City car, to get them to work and back home, and maybe to the store, probably won’t care too much about the top speed of the car for example. While on the other hand, a Muscle car driver very much cares about that speed, and how quickly they can get there. The person buying the car for Offroading probably won’t care about either, and is more concerned whether or not their car will get stuck in the mud.
The key stats in this list are usually the core of what determines what market the car is intended to be sold to. These stats are an aggregation of all of the stats which are associated with the field, with a multiplier adjusted up, or down based on how well the car does, or doesn’t meet the required features to get a good score here.
- Drivability: Is a rough estimate on how easy the car is to drive for the average individual under reasonable conditions for everyday life.
- Sportiness: Is a rough estimate of how well the car performs when pushed to it’s limits, how well the car facilitates getting to that point, as well as how well the car “feels” to the driver while under race conditions.
- Prestiege: Is an estimate of how “fancy” the car is. Bigger cars, bigger, more complex engines and more exotic/expensive materials and interiors are a major player here.
- Comfort: Is the driver sitting on a brick, or a hand crafted seat designed for the lowest possible discomfort? This is a measure of how comfortable the car is to drive for long periods of time.
- Safety: Most people don’t want to die if the car stops as a result of something that isn’t the brakes. Safe cars are almost universally better than unsafe cars. In many cases, cars will be banned from sale and road use if too unsafe.
- Practicality: How easy is it to get in/out of the car? How easy is it to put stuff into it, or take stuff out of it. This is particularly important for quite a few demographics.
- Footprint: How big is the car? Can two of them fit in a lane? The footprint of a car matters widely for different demographics.
- Utility: How much stuff can you load the car down with? Does the car function well when fully loaded down, or do the brakes melt immediately when you try to stop the car?
- Offroad: Can the car be taken off roads, or is it purely a track car which explodes when even thinking about dirt/rocks?
- Fuel Economy: How far can you go from Point A to Point B with X amount of gas? This is extremely important for budget focused buyers.
Different demographics will have different desires for a variety of other statistics, such as engine size, and quite a few other factors. These will be covered later after we cover design of the car itself.
Car Design
Designing the car itself is a little bit complicated the first time you’ve done so. Both in terms of visuals (I don’t cover this, as i’m bad at it), and in terms of how you actually want the car to perform.
The very first step was selecting which type of chassis and suspension the car was using, and then you have your now (hopefully) completed engine. The last, and most important part is putting all of those features together into a trim. The trim is where everything you’ve done so far finally comes together.
Choosing the Trim
The trim determines what type of body the car has, and what the consumer interacts with almost entirely. I’m going to try and show as many trims as possible, and explain the markets that tend to buy them.
Your typical, usually small, typically four door car with some trunk space in the rear (or front if the engine is in the back). Most demographics don’t care either way about this car. For the demographics looking for Coupe like cars, they will be slightly unhappy with the Sedan, but they will settle for one in most cases. Generally, the only market that really cares to have this type of body are the premium markets in general, and the commuter market. As of 4.0 this encompasses more of the more “generic” car bodies which aren’t explicitly intended to be “sporty” even with fewer doors.

Similar to a sedan, but instead of four doors, the Coupe only has two. Some models still have room for rear seating, and some don’t. This type of car is sought after by quite a few markets, especially sport oriented audiences, since they tend to have less drag, and overall have a smaller space, which appeals to sport buyers. As of 4.0 coupes are mostly restricted to purpose built, “sporty” bodies.

The hatchback is similar in many ways to a Sedan and Coupe, in that they often share the same form factor. They can have 3 or 5 doors. The odd numbering on doors meaning that the back can open on the car, hence the term Hatchback. This is generally sought after by city car buyers, since it’s easier to load and unload cargo into the back for shorter trips.

The wagon is essentially an elongated sedan crossed with a hatchback. Due to their added space in the rear, they tend to appeal more to family oriented buyers, especially the family utility market.

Convertibles are usually Coupe model cars, with the option to collapse the roof back into the car. They are only sought after by people looking specifically for a convertible. They do tend to bring in more money though, since they are all about prestiege. A soft top convertible isn’t as good as a hard top however, and will incur a small penalty there. One quirk of ladder frame is that you don’t need to pay extra weight to reinforce the chassis on a Convertible. On any other chassis however, extra weight will go into reinforcing the frame.

Or, Sport Utility Vehicle. Sought after by the utility sport market, obviously. These are fully enclosed, and often large cars which are intended to cover all kinds of issues, like offroading, or hauling, and even towing.

Sought after by the Utility markets for their ability to pick up and haul a massive amount of stuff, as well as tow a few things here and there. I realize now that I mentioned the term truck a few times in the guide. This trim is what I meant. They don’t need to be taken offroad, but it’s better if they are able to.

Basically a big box with an engine on the front. Their entire focus is on cargo area of the car. The van offers the best possible cargo space of all trims. This is sought after by delivery companies, but often not much else.
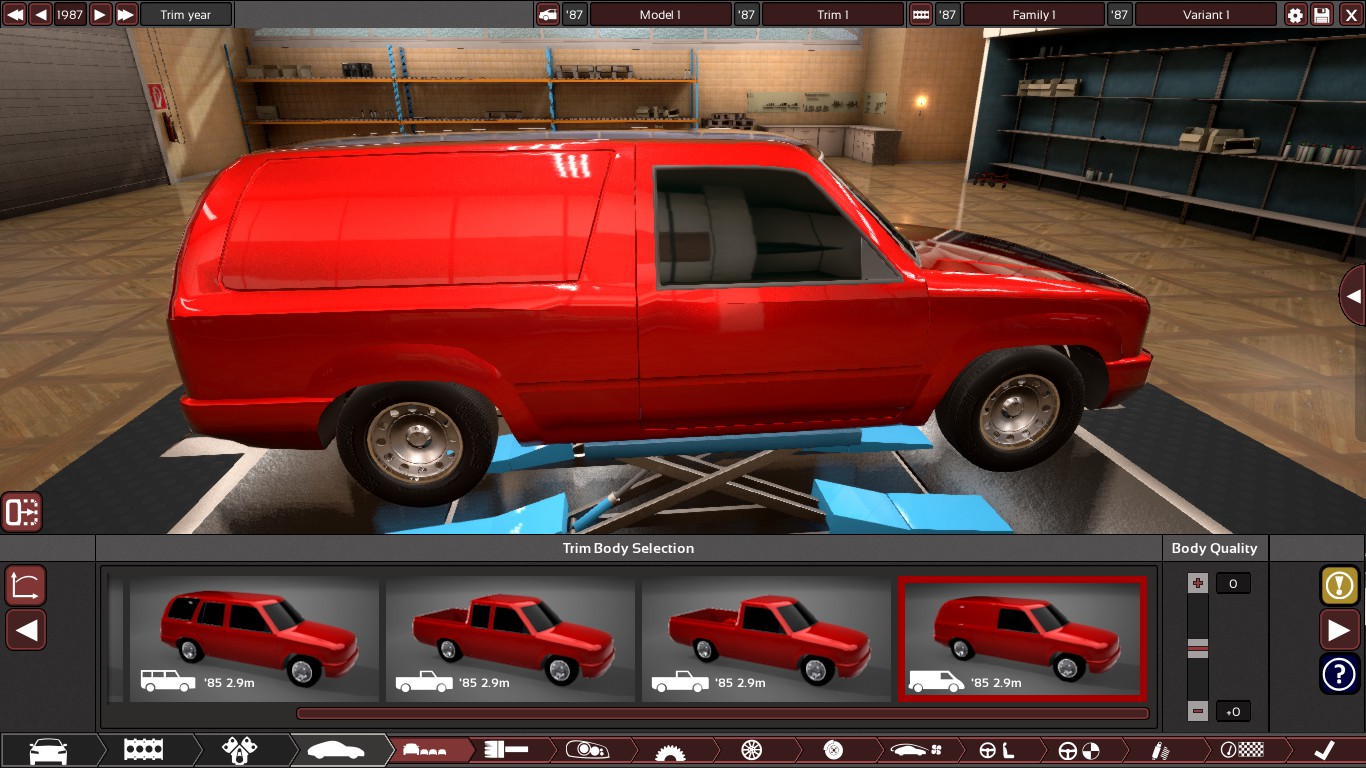
Basically a van converted into a large taxi. Sometimes referred to as minivans or a MPV (Multi-Purpose Vehicle). People movers use their large area to squeeze as many people into the car as possible. This is the car trim of choice for a Passenger Fleet car, and it also may carry over into the family car market if setup correctly.
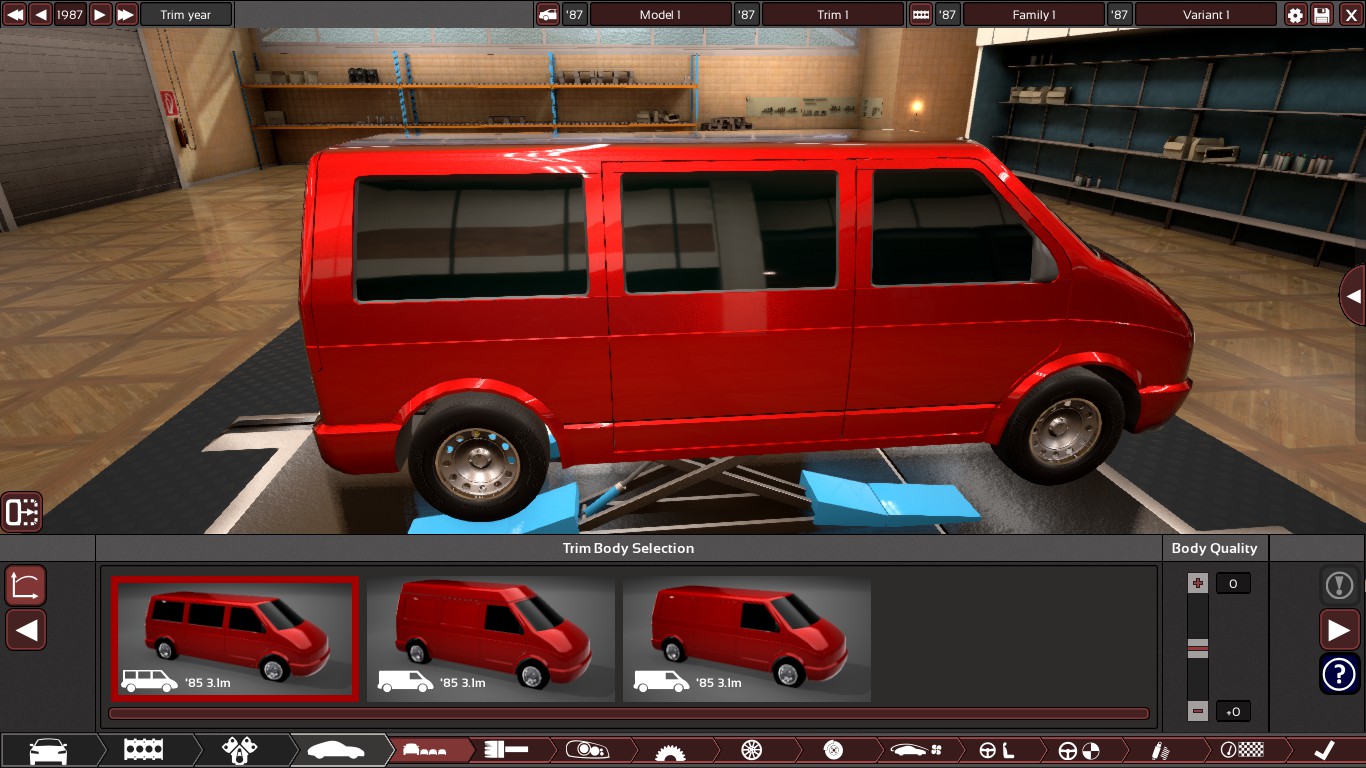
The Drivetrain
The drivetrain is what connects the engine to the wheels, and it’s what regulates the engine speeds. There are four drivetrains that you can use, though it’s quite likely that most options will be blocked out, depending on the engine placement, which I covered earlier a little bit. The drivetrain also includes the transmission, which is key to making a functional car that can actually accelerate reasonably, which will be covered in the next section. The drivetrain also has a differential, which allows the car to steer without actually bending the crank, and other metal bits that drive the wheels, since the outer wheel has to spin faster in a turn.
RWD: Rear wheel drive is very common on many cars. The rear axle is the only driver of the car. This gives the car an overall good performance figure all around at pretty much all speeds, and is good for most cars which don’t need the extra traction a 4×4 would provide. The typical front engine RWD engine arrangement places the engine in between the drivers compartment and the front axle. This keeps the weight relatively well balanced, but still leans towards the front of the car. If the engine is larger however, this configuration allows the engine to “spill over” the front axle offering the most possible usable space. Almost every single other drivetrain with the engine mounted behind the drivers compartment will have the engine and gearbox pointed towards the rear axle, so a rear RWD will have the transmission pointed at the driver, while a mid engine will point away from them.
FWD: Front wheel drive. Pretty much exclusive to front transverse engines, though a front longitudinal can do the job too. It’s overall considered to be a poor drivetrain choice, but one that saves money. At lower speed it can be considered to be more drivable than a RWD setup, since the car will more easily “go where you point it”. At higher speed, the car will likely start skidding due to understeer since the back wheels are trailing. The typical longitudinal layout places the gearbox just above the axle, with the engine generally seated in front of the axle. This shifts a lot of weight to the front of the car, which makes it very difficult to drive without power steering. This location will also significantly limit engine length, as it effectively eliminates the rear of the engine bay as a viable option. Transverse engines are placed along the axle directly, while this brings the weight balance back a bit, it’s still applying a lot of weight to the front axle of the car. Transverse FWD is useful in allowing wide engines in thin engine bays, or long engines in short engine bays. The only major issue which can be run into here, besides cheapness is torque steer, which can happen with extremely powerful engines for their size.
4×4: Common to utility trucks and SUV type cars. The 4×4 arrangement uses a special transfer case near the center of the car to drive both axles at the same speed. This is very good for offroad purposes, but it’s also heavy, and as a result siphons off effective power, on top of the added weight. The typical 4×4 engine needs to be set a bit higher than a typical RWD setup to allow for the transfer case to be able to run to the front wheels. The 4×4 is not a full time drivetrain option in Automation, hence, a 4×4 will largely share the same properties as a RWD car.
AWD: All wheel drive. With this setup, each wheel or axle is driven individually. This provides the most control over how the car drives, at a relatively high cost to actually engineer and put together. You can fine tune how the car drives itself, and how much power goes to each axle for relative weight. AWD tends to be shifted forwards slightly, and set higher than most other engines to allow for the extra differentials. AWD can be setup to apply pretty much any configuration, however, unlike a 4×4, there is no choice on where to distribute power. It will always drive in the configuration set. An option for Longitudinal engines in ’81 and an option for front transverse engines in ’90.


The Gearing
This section was originally part of the Drivetrain section, but I’ve run out of space and have split this category in two to add more detail for both sides. Essentially everything here is a type of gear.
The gearbox is where the torque your engine makes comes into play, as the gearbox uses that torque to apply the power the engine provides, as you likely saw in the video above on torque versus power. It does so by multiplying (usually at low speeds) or dividing (at high speeds) the torque the engine outputs using gears which have different ratios of teeth. This helps to regulate the speed of the crank in the engine itself, while also regulating the car’s speed, and allowing for much greater freedom in how fast a car can go.
- Manual: A manual gearbox is the classic “stick” gearbox, where the driver has to manually select which gear the car is driving in. This is (arguably) the best sporty gearbox, and it doesn’t have any parasitic drag to be noted. A manual will probably be used throughout the entire game for your sportier trims.
- Automatic: As would be expected, an automatic gearbox does the work of shifting for the driver. This variant does so via mechanical computer and hydraulics. It makes the car overall more drivable for the average user, but has a fairly significant parasitic loss on the power of the engine due to the way it works, and it as a result is notably inefficient with the fuel.
- Advanced Automatic: Similar to a regular automatic, but computer assisted. This helps reduce overall losses caused by the basic automatic transmission, and can be switched into different modes, making the transmission viable for some sports cars, though a manual would still be superior for sportiness specifically.
- Sequential: A computer operated transmission which is operated via buttons. This allows the driver to select the gear in a sequential order, and the computer handles the clutch and gear swapping for the driver. This can optionally also be used as an automatic making it a good all-round transmission choice which isn’t much more expensive than a manual.
- Dual Clutch: Very similar to a sequential, but with two systems built in. One computer handles even gears, and the other odd. Functions mainly as an automatic, but allows the driver to override the computer, if so desired. Nearly instant gear swap due to having two computerized clutches.
A gearbox can have anywhere from a lowly two gears, all the way up to nine in Automation. More gears overall provides for better acceleration versus fewer gears, as each gear has an optimal range for acceleration that the gear will provide for. More gears also gives the driver or car the ability to run the car at a lower RPM while still achieving the same speed, as a result saving on fuel. The only real issue with adding more gears is the expense that comes associated with it, the weight it costs, and the engineering time to make a more complex gearbox.
The top speed section is for how long the gears should be driven in, which is influenced significantly by the final drive gear ratio (which is the last gear to turn before the drivetrain turns), which this slider affects. A longer gearing allows for higher top speed. While a shorter gearing tends to lead to higher overall acceleration, assuming the driver can keep up with the shifts required for optimal acceleration. Top speed can also be used to create what’s known as an overdrive gear if it’s set high enough, where the engine doesn’t have enough power to push the car beyond the torque/power peak in the final gear. This lets the car keep it’s peak speed, while driving the engine at a lower RPM, and as a result saving fuel.
Spacing is how far apart the gear ratios are from each other. Higher spacing generally means more application of power sooner in the initial gear and faster acceleration while shorter spacing means each gear applies it’s power slightly longer at higher speed before needing to be switched to the next gear. Higher gear spacing, especially on cars with many gears is generally more comfortable for the driver to operate. Tighter spacing lets the driver keep the engine at peak power for longer, which is generally beneficial for sportiness.
Faster acceleration means faster 0-100 times, but it also means that the car may encounter wheelspin. Wheelspin can be partially fixed with the differential. It’s generally suggested to have one gear set to achieve 100 km/h for in game stats on the 0 to 100 times.
The speed limiter is used with electronically controlled fuel injection systems. Without setting a peak speed, the engine is not limited on how fast the car can go, and is instead limited on either the gearing, or the power of the engine itself. Adding a limited speed can be used to force the engine to run at a lower speed, for fuel economy reasons, as well as tire cost limiting. Tire cost goes up if the car can go faster.
The differential is what allows a car to turn without twisting the axle, since one wheel moves faster than the other in a turn.
- Open: The simplest as well as most common differential type. The open diff will apply the most power to the wheel which gives less resistance. This has the benefit of being rather cheap, but it will basically make the car useless on any road surface that’s wet, or muddy. It’s usually actively detrimental to getting a car unstuck, since the stuck driving axle will send (almost) all the power to the free spinning wheel.
- Manual Locker: Allows the driver to manually lock the axle together to ensure both connected wheels run at the same speed. This is generally unnecessary on most cars, and will be seen as simply an extra cost in some markets for a feature they don’t use, since it causes binding of the axle and diff in turns on pavement, which tends to ruin the diff. However, it’s extremely useful for offroad driving cars, as locking the axles prevents a car from getting stuck in mud as often, since the tires are locked together, and one tire should in theory be able to grip the surface, instead of just spinning the free wheel like an Open diff does.
- Automatic Locker: Available starting in the ’50s. The automatic locker is essentially the same as above, but the car automatically locks the wheels when traveling in a straight line, and disconnects them when turning. It can essentially function as a form of LSD (limited slip differential), except that there’s no slip at all. This provides a relatively high wheelspin reduction for cars that absolutely need it, such as muscle cars, but it’s usually detrimental to normal driving. Generally it will only be used on muscle cars, and the occasional utility van.
- Geared LSD: The first variant of LSD available in ’81. Unlike an open differential, this system tries to apply the most power to the wheel that gives the most resistance to turning. That in turn reduces wheelspin across the board, and usually makes the car easier to drive hard. This is a somewhat complicated and expensive piece to put together. It’s also not the most comfortable diff either, since the diff tends to be a bit more “forceful” during acceleration.
- Viscous LSD: Available in ’85, this LSD uses a special type of Silicon that heats up and hardens if the wheels aren’t spinning the same speed. That helps to partially lock the wheels together and reduces wheelspin. It’s relatively cheap compared to a geared setup, but not as efficient. It is a decent choice to reduce wheelspin on luxury cars however, since this diff generally wont be noticed unless it’s activated via a spinning tire.
- Electric LSD: Electronically controlled LSD using hydraulics and other fancy stuff to detect and reduce wheelspin. Very expensive to produce and engineer, but does the job exceptionally well. Rarely used.
The Tires pt. 1
The wheels are what make the car move, and also what make the car stop. They’re also notorious for mixing measurement systems because we’ve decided that it’s okay to do that apparently. The wheels and the suspension are key in how your car performs in almost all respects. The engine applies power to the wheels, the wheels move the car.
There are only two types of tire construction. Cross Ply (sometimes also called Bias Ply), and Radial tires.
The major difference between the two is that cross ply tires typically have their layers applied at a 60 degree angle relative to the rim. This gives them stiff sidewalls, and and as a result they are more accepting of weight for their size. Unfortunately however, they are difficult to make wide as a result of the way the ply is applied. They tend to have a poor grip amount for their width versus a radial of equal size. Cross ply tires tend to bring down the expectation of the driver in terms of steering performance, and can be more viable for making the car sporty or drivable. It is cheesey though.
Radial tires on the other hand are produced by running one band of the material across the entire tread of the tire, and another layer across the rim. This makes a tire which is easier to make a bit wider, but overall has weaker sidewalls, and can’t hold as much weight on them. The weakness of the sidewalls in Radial tires make them a poor choice for offroad cars until around the ’70s when the issue with radial side walling is fixed. Radials will be pretty expensive at the time of their introduction, but over time, they will likely surpass cross ply in terms of cheapness, especially at the upper limit of what the cross ply construction method can offer. A wide as it gets cross ply will usually end up quite a bit more expensive than the same size tire in a radial form.
-
Chunky Offroad: Essentially snow/mud tires. They’re usually a terrible choice on anything but specifically offroad cars. They also have the least grip of all the tires, making them overall bad at helping the car corner, or accelerate.
-
Hard Long Life: A hard rubber and construction and easy to produce tread make up this tire. It’s cheap, and since the rubber is hard, it helps with fuel economy. It’s also got a bit more of a weight capacity, since it’s built a bit sturdier. It’s not fantastic in terms of grip, but it works, and it can easily be driven.
-
Medium Compound: Middle of the road tire compound. Not too hard, not too soft. Great for most models of car, especially comfort focused cars, such as premium models.
-
Sports Compound: An even softer rubber makes up this tire type. It’s a bit more difficult to drive with, but it has quite a bit more grip, and it noticeably improves cornering. Pretty much the only choice for sports/muscle cars.
-
Semi Slicks: Basically race tires made legal for the road. Extremely soft, and rather expensive. This is the tire for when you absolutely need the highest grip and cornering possible, and don’t care about the cost, nor economics. A good tire choice for high performance sports cars, or track cars. These tires are extremely niche however, and can be detrimental to quite a lot of more common man focused trims.
Sizing of the tires is a major factor in how the car will handle, and can vary from situation to situation depending on how the weight is distributed across the car.
The key to understanding how your car will perform with different tires is determined by the chart in the above image.

Depending on who you want to sell the car to, you’ll want one of the two dots on the yellow line on the center graph there to be as close as possible to either the red, or blue line. Going below the blue line means that the car will understeer, or go wide in a turn. Keeping the drivability dot on the blue line implies that your car will be where most people would consider extremely drivable, but not very sporty. The red line is the target for the sportiness crowd, as they tend to like being able to drift a little bit. Going over the red line causes oversteer. Oversteer means that the back end swings wide, and the turn ends up going even tighter than intended, or even spinning out the car. If the chart shows the line actually going UP. Then you have what’s known as terminal oversteer. That means that at that point, the car will become literally undrivable, as the car will spin out at somewhat higher speeds. The sweet zone for steering is right in between the two.
If your car is understeering, you likely need to widen the front tires or narrow the rear. If your car is oversteering (or doing so terminally), you need bigger rear tires or smaller front tires. It’s a bit more complicated based on the individual car situation however. If you can match the wheel sizes though, you do tend to save quite a lot of money. You by no means are required to though.
Wheelspin is heavily influenced by the tires, as well as the gearing for the car. When a car suffers from wheelspin, it’s because the engine is outputting more power than the tires can actually grab onto the road with. Smaller tires are more susceptible to wheelspin, but they also generally accelerate the car faster for the same amount of applied power. Larger tires are less susceptible to wheelspin, but as a result of their added size, accelerate slightly slower. You can see the tire effects of wheelspin on the chart on the right in the above image. In the case of the car shown there, there is ample grip for the front tires to handle the power the engine will put into them. If you see the acceleration line (shown in yellow) following the tire grip line, you’re maxing out the grip the tire can provide, and encountering wheelspin. All wheel drive cars are less susceptible to wheelspin, and the chart gets more complicated for that specific case.
The rims determine what type of alloy the rims themselves are made of. Alloy is lighter than steel but twice the price, and magnesium is lighter than both but very expensive. Both of which reduce weight on the wheels allowing for faster acceleration, but usually cost a little bit of grip as a result. Alloys and mags don’t like dirt however, and steel rims are best for offroad models. Carbon Fiber exists, but is extremely expensive for the weight saved and the prestiege gained.
The size of the rim relative to the whole tire is important as well, for the tire profile (the difference between the sidewall height relative to the width of the tread) and how much weight is applied as unsprung mass to the tires. Generally, a larger rim will provide more grip to the tires than a smaller rim, since each tire weighs a little more. Lower profile tires are generally sportier, and better at cornering, while high profile tires are more comfortable since the rubber can more effectively isolate the vibration of the road before it hits the suspension.
The Tires pt. 2
Tires have different costs associated with the car going faster, this is to reflect the effort which goes into making sure the tires don’t literally come apart at the seams at high speed. Note, this table was made for a 2012 model car, year appears to shift the prices significantly in earlier years, to the point where a relatively “normal” Q class tire costs five times what’s seen here. I also think i’m missing a few tires at the very low end of speed as well.
Tire cost can become extremely inflated if the car can go over 300 km/h, as can be seen easily here, and as a result, unless you’re selling a hypercar, this is one good reason to keep power under control, as well as sometimes shoot for lower grade tires than would be expected. (Y) class semi slicks for example are stupidly expensive compared to (Y) class sports compound tires. Both of them are almost triple the cost of a “standard” Y class tire.
Tires across the world have a universal system of measurement. The measurement works as follows, using this example.
225/70 R17 N113
225 is the entire width of the tread in millimeters.
70 is the aspect ratio of the tire, or what percent the sidewall height is relative to the width of the tire.
R is Radial, C is cross ply (which will be in place of the R).
17 is rim diameter in inches.
N is the speed rating, as shown above.
113 is the Load Index/Rating, which is measured per tire. Multiply the load index actual weight capacity of each tire by four to get the max load the tires can handle. I have provided most common load indexes here, but it is possible to make tires with less load index in automation, though they start to become a bit… memey below Index 70. Look it up if you want.
The Brakes
The brakes on the car are one of the critical components in the car. “If the brakes won’t stop it, something will” is not a good motto for a car designer. Basically everyone wants to have good brakes on their car, regardless of the demographic, unless it’s before 1960, and people don’t really care. Another neat little detail about tires, and grip is that the brakes need to be able to use the tires to actually stop the car. Making very grippy tires for example, and putting bad brakes onto them is usually not going to go over well with the consumer, since the brakes won’t completely lock/stop the tire. Tiny tires will give bad braking distance compared to larger, and wider tires in general. Ideally, unless you’re building a utility vehicle, you want just enough brake force to lock the wheels. That means matching the force to the grip the tire can provide if possible, without going too far over, especially before ABS is invented. Utility vehicles need brakes which DO go over the normal locking threshold, since they weigh down the vehicle more, giving the tires more grip, and more mass that needs to be slowed down. After ABS is available, there usually isn’t a significant penalty for exceeding brake force relative to tire grip, unless the brakes massively overpower the tires.
Drum (Single Shoe): The drum brake is the first, and only brake available at the beginning of the game. It operates by having a “shoe” inside of a sealed drum that once the brake pedal is pushed, the shoe swings out, and starts pressing against the inner edge of the drum which spins with the wheel, slowing the car down. They are usually woefully inadequate at the job, but they are cheap. Single shoe drums rarely work well with front engine vehicles, but mid/rear engine vehicles can sometimes scrape by with single shoes due to lack of mass, and therefore grip up front.
-
-
Solid Disk: The solid disk is what it says on the tin. It’s got a solid disk of metal that spins with the wheel, with a brake piston (or six) holding the brake pad. Once the brake pedal is pressed, the pistons squeeze down on the brake pad, causing friction, which then slows the car to a stop. The solid disk is generally slightly better than a drum of equal size with a single piston, and has much more surface area to dissipate heat over, making them very useful to use as soon as they are available. Extra pistons allow for smoother, and more comfortable brake application, as well as stronger brake force.
-
Vented Disk: Similar to a solid disk brake, but with vents inside the brake to allow for additional airflow to cool the brake, and as a result the brake pad, in turn helping to reduce brake fade. Vented disks are extremely useful for front engined cars, especially utility models. Most cars will experience more fade on the front brakes than the rear, which is where front vented brakes come in handy, as weight shifts forwards during braking.
-
Carbon Ceramic: A stupidly expensive brake type which basically never has issue with brake fade, unless the rotor is comically tiny. These are usually reserved for premium sports cars. Using this brake rotor will induce a limited production tag on the car as well.
With brakes, bigger is better. The limit for how large of a brake you can put onto the tire is determined by how large the rim is. Bigger brakes offer more force due to leverage, and are resistant to fading (overheating and becoming less effective) as there is greater surface area to soak/dissipate heat.
Pad type is what type of material the actual brake pad should be made of. Lower brake pad type leads to a more comfortable brake pad, since the material may be made of a softer material such as rubber, or something similar. Higher numbered pads on the other hand are usually harder brake materials or ceramics, including even steel on steel brake pads at the high end. They are incredibly uncomfortable, but highly resistant to fade.
Aerodynamics
Aero is relevant for most cars. Drag and lift (or downforce) for example affect how well the car will perform at increasing speeds. Various undertrays are available as options to help reduce the drag and lift on the car (sometimes undertrays can make the car lift more, depending on trim). Late game there’s even an option for a downforce undertray which instead of causing lift, pulls the car down.
Lift can be good or bad. Lift means that there’s less weight being applied to the tires, which usually means less grip, and a more dangerous high speed steering profile. On the other hand, lift reduces weight going towards the ground, and might help with acceleration a bit (assuming the car doesn’t actually lift off of the ground).
Downforce is the opposite of lift, and is provided with wings and lips as fixtures, though some chassis types come with some native downforce. Downforce gives the tires more grip, in turn enabling them better steering results, at the cost of overall speed at the high end since the engine has to push more effective weight forwards.
Additionally, there are active technologies, such as an active wing, and cooling flaps, which do a variety of things.
An Active Wing tells the game to treat the rear most wing as an active wing. What that does is instead of the wing being a static simple wing, it adds hydraulics to the wing which allows it to shift position as the car increases or decreases speed. This allows for higher downforce, while also reducing drag at the cost of weight, complexity and monetary cost of the hydraulics. This is generally only used on Super/Hypercars and occasional sports or track cars.
Lastly there’s cooling airflow. Cooling down the engine keeps it cool, and running reliably. Not cooling down the engine as much reduces drag, and may actually help with fuel economy, at the cost of potentially damaging the engine.
Cooling Flaps are somewhat pricey, but they allow for the engine to have a higher cooling capacity while also bringing down the effective drag that would normally be caused by having larger/more air inlets. This is usually done with electric actuators controlled by internal thermostats which open or close the vents as required to keep the engine running at the optimal temperature. This can be relatively expensive depending on the model of car and the target market, with a normal cost of $200 in materials alone. Cooling flaps are usually only worth adding onto Utility vehicles, and occasionally eco focused cars in countries where reliability particularly matters, allowing for high airflow when needed and low drag/high fuel efficiency when not. They can also be added to sports cars for maximum drag reduction, though this generally offers next to no benefit if airflow is designed to be below recommended (below 50, or 100% required flow) levels.
Brake airflow is a slider determining how much work goes into ensuring air can pass over the brakes and pads, which will in turn enable the brakes to cool off quicker with more exposure to moving air. This has some impact on the aerodynamics of the car, and will usually slightly reduce top speed, and make fuel economy marginally worse, but it is a viable option on cars where large brake rotors simply won’t cut it. It is an additional cost of up to at most 6 months of engineering time, but can be well worth the investment, especially on sporty, or utility oriented cars.
The Interior
The interior of the car is rather easy to figure out. Better interiors are more expensive, and more comfortable. End of story, right? Kind of.
The interior that you choose will have a variety of things that they do. Bench seats, while often necessary for family demograhics are rather uncomfortable. Putting more seats into the car will often be uncomfortable as well, since more seating means less space for actual people. It’s going to matter significantly which car you are going to be doing the seating for. A sports coupe with only one row of seats has no business having a three person bench seat in the front. A commercial van on the other hand might need that third seat however (though usually not). Additionally, you can add optional rear seating into most cars which have more than a single seat row. They aren’t the same quality of seat as a full additional seat, however, most optional seating is just that, optional. That means that the seats can generally be folded down, or are designed in a way in that they CAN accept a person, but can also reasonably accommodate cargo. Optional seats can allow a car to fit into multiple markets, and is a viable option on quite a few car types, such as Family Utility, or rarely Light Sport.
Each tier of interior quality (not the slider) is going to be more expensive, and heavier than the last (except for sport, which is special in that it weighs in between a premium and standard interior). Higher quality interiors also have a benefit in that they offer better sound insulation against the engine (except for sport, again, which is specifically designed not to insulate against the engine). Luxury/Hand Made for example can almost completely negate the sound of many engines. Remember though that the interior quality tiers get more expensive as seats are added to the car. A single seat hand made interior is going to be pricey, but usually not at pricey as a 9 seat people mover with a Luxury interior.
The type of entertainment matters as well. Newer entertainment costs the same as the previous tier in terms of mass and engineering time (assuming we ignore familiarity), but not cost. In some cases though, you’ll have the choice between one type of basic or standard item. Usually people will want to buy the new format over the previous one, unless they’re budget strapped, or the format is so new that putting them into a car is prohibitively expensive, such as the introduction year of CD players over cassette players. Entertainment methods which are near to be phasing out, such as CD player only radios in the mid/late 2000’s will be almost free to install since the format is older/more common. It won’t be as good as an equal tier system of the next format, but the prince difference will usually be significant.
Safety & Assists
Safety is extremely similar to the interiors. Better safety standards are (almost) always preferred, but safety can get weighty and expensive. Basic safety is the bare minimum, and might work for cash strapped budget buyers, or for people who just don’t want the added cost/weight, such as track car buyers outside of Gasmea. The issue with basic safety is keeping the car street legal, since it cuts out a lot of tech to barely scrape by. Standard safety is the standard, and should be normal for all models. Almost every car you produce should have standard safety measures. Advanced safety is cutting edge safety, like a collapsing steering wheel column in the ’50s. Advanced safety packages are expensive, and heavy. However the investment is usually worth the cost, especially in markets where safety is a huge concern, such as the Family market, regardless of wealth and country. Safety is also the only factor in a car which increases the weight of the car through use of the quality slider, which is a notable thing.
Power steering is almost required on some models of cars, especially once they start hitting over a ton. No matter what, power steering is going to be harmful to sportiness of a car, but improve drivability, though electric variable steering near the beginning of the ’00s comes close to being as good as a car without power steering. Power steering, depending on the type used will generally remove the ability for the driver to feel the road when compared to a manual steering wheel. Power steering on the other hand significantly reduces the physical effort that goes into actually steering the car, and is almost always required on a front engine car.
Drivers aids in most cases require an ECU, which means they can’t use a carbeurated engine.
ABS doesn’t need an ECU, and it helps to compensate for going a bit overzealous with the brake/pad type, since they prevent the brakes from completely locking up the wheels (which happens when the brake force exceeds the grip the wheel provides) and helps prevents uncontrolled skidding.
Traction Control and Electronic Stability Control serve two similar purposes of trying to keep the wheels from spinning. They are a rather significant investment to engineer, but nearly every demographic appreciates it, unless they can’t afford it, and they largely improve the car overall. Traction control is focused on wheelspin, and actually doesn’t do much if the car doesn’t produce enough power to spin the tires. ESC is traction control, combined with other equipment and tech to help the driver control the car in the event of a skid. That as a result directly adds to the drivability stat for steering the car.
Launch Control with ESC throttles the drivers input to the engine, restricting the engine RPM until “launch” is achieved, almost eliminating wheelspin in the process. Most demographics don’t need launch control, since most drivers don’t floor the gas at a standing stop. For demographics which do do that however, like Muscle, Sport, and Track especially, it’s usually a rather large boost for desirability.
The Suspension
The suspension isolates the bumping of the wheels from the rest of the car. How the suspension is tuned also has a major impact on how comfortable, and how sporty the car can be. All suspensions have some form of spring, and damper. The spring keeps the car from hitting the ground, and the damper makes the spring not repeatedly bounce the car after leveling onto straight terrain. Sway bars are also covered here, and they keep the body of the car on the ground by holding together both sides of the car, reducing roll relative to the axle they’re attached to, and the likelihood of a flip under normal conditions. On some cars, a sway bar is optional, but usually not.
- Standard: A standard suspension spring is usually a simple, single width coil that compresses when the car goes over a dip in the road. They are the most basic of springs, and as a result are dirt cheap to use.
- Progressive: Similar to standard springs, but made thinner or longer where applicable, and might be made of different materials at different points. These springs make for a more comfortable drive, at the cost of a bit higher manufacturing cost. These springs also have multiple spring stiffness values, and can carry double the cargo of a standard spring usually.
- Hydropneumatic: Or, hydraulic suspension.This is an extremely prestiegous suspension type, and very comfortable. However, it can suffer from major reliability issues, on top of cost. This pressurized system does allow for the most possible cargo to be loaded however.
- Air: Instead of springs, the suspension in these types of “springs” push against compressed air. This makes for an overall good all round suspension compared to a metal spring at the cost of some reliability and engineering time.
- Active Sport/Comfort: Computer assisted suspensions intended to have multiple modes of use. Very comfortable or sporty depending on the type selected, but stupidly expensive. This system can typically carry an amount of cargo in between a progressive and air spring system.
- Twin Tube: The basic hydraulic damper. One tube presses against another filled with hydraulic fluid. It’s not great, but it’s reliable and cheap.
- Gas Mono-Tube: Generally better than a Twin Tube in all ways but cost. This suspension has a rod pressing against a tube of compressed gas.
- Adaptive: A complicated type of damper filled with a magnetic fluid which can be tuned for different work conditions. This is a superior damper compared to the other tube designs, but it’s less reliable.
- Semi Active: Another superior damper, which tries as much as possible to cancel out the spring forces, typically using a computer to change damper characteristics.
- Passive: A simple metal tube keeps the body from tilting too far. Simple, cheap, and it works.
- Semi Active: Similar to a passive sway bar, but split in half, and attached to a hydraulic or electric arm. This arm acts to keep the car stable, and is overall better than a passive setup, if a bit costly.
- Offroad: A specific type of sway bar similar to a Semi Active sway bar, but with a driver operated toggle to disconnect the bar. This allows the axle to move free of the body of the car.
- Active: A fully active sway bar which works to ensure the maximum possible ride smoothness. It’s expensive, and prestiegous.
Lastly there is the suspension setup.
Camber of the tire refers to how much of an angle off 90 degrees the tires sit on the ground. A higher negative camber points the top of the tire inwards, and the base of the tire outwards. What this does is give the tire extra grip by using more of the tire on the ground. Camber is a good way to fine tune steering profile, though this does come with higher servicing cost since more of the tire is likely to be worn down.
Second is the spring stiffness. A harder spring stiffness will increase the frequency of bouncing of the springs, so a harder spring generally will bounce more when going over a bump when used with the same dampers as a soft spring. Harder springs are uncomfortable since there’s little “flex” for the driver and passengers, as they might end up absorbing most of the force instead. Hard springs make high speed driving more predictable. Soft springs are generally more comfortable, but can cause roll, and bottoming out issues. Stiffer springs can also carry a higher load capacity, provided the tires can handle it. Making springs stiffer generally cause the end with the stiffness to lose grip in the tires. Making the springs softer does vice versa since the tires can move a bit more freely compared to the body.
Third is the damper hardness. A hard damper will pretty much immediately smooth out the car after going over a bump. This is generally uncomfortable for the driver and passengers though. A soft damper will allow for more “bounce” in the springs, and is generally more comfortable. A good middle zone in damper hardness is good for making a driveable car though.
Fourth item is the sway bar stiffness. A stiffer sway bar keeps the car from rolling as hard in a turn. As a result of how they work, they also slightly influence grip of the tires, since the weight is applied to the axle of the tires themselves. It is possible to have 0 sway bar cars, but they generally need to ride very low to not have issue. Offroad driving cars are best with the minimum amount of swaybars possible.
Final item in suspension setup is determining how high the car should ride, or it’s default ride height. Lower cars inherently roll less, and generally have to deal with less drag. Higher cars roll more, but can haul more, and give the driver a better field of view. Cars in the middle range tend to be more practical to get stuff in and out of. Each buyer wants a different ride height for their intended purposes.
Common Trim Design Warnings and Fixes
Trims are vastly more complex than the engines themselves, since there are so many factors that play into them. Quite a lot of the issues you’ll run into can actually be ignored if you’ve already tried fixing them to the best of what’s available at the time. Bad brakes are an obvious example in 1946, since you’re stuck with single shoe drums.
Drivetrain Related Issues
-
Short Gearing Reduces/Significantly Reduces Car’s Top Speed:
This implies the obvious, in that the gear ratio of final drive is too short to use what power the engine provides, leading to an artificial cap caused by the gearing.
-
A Lot Of/Excessive Overdrive Due To Long Gearing:
Longer gearing can be used to make a fuel efficient overdrive gear. It will slow down the car overall, since the gears are longer and driven in for longer. This can be ignored in blue (a lot of) note status, but yellow (excessive) note overdrive just harms performance with little to no gain.
Wheel Related Issues
-
Car Has Minor/(blank)/Major Issues With Wheelspin:
While this is technically a drivetrain issue, it is mainly a wheel issue. Making a wider driving wheel, or adding extra rim size to the wheels can help reduce this. A differential can also be installed, which can help to reduce this. Tighter gear spacing may help too. Lastly, electronic techs later down the line can significantly reduce this, especially Traction Control.
-
X Tire Is Too Narrow For The Load It Carries:
This implies that the tire is too small in terms of width to carry it’s load. This will incur a minor drivability hit, usually. It will also reduce the load of what the car can carry. Narrow tires on a Van for example will give it good fuel efficiency, but hurt the cargo capacity, which will ultimately hurt your score.
-
X Tire Is Too Wide For The Load It Carries:
The tire might be a bit excessive for what it’s carrying. As far as I know, there’s no penalty for this, except probably requiring bigger brakes down the line.
-
X Tire Profile Is High:
A high tire profile means that the sidewalls are actually taller than the tire is wide. This makes for a fairly awkward to drive tire, and one which harms steering ability. Do not worry about this for pre-70s cross ply tires.
-
X Tire Profile Is Low:
A low tire profile means that the sidewalls are 40% or less tall than the width of the tire. This makes a tire that feels like you’re driving on the rim.
-
Car Tends Towards Understeer:
The car doesn’t turn as tight as it should. Making the front tires wider can fix this, as well as increasing the width of both. Reducing the rear size has less effect, but can help.
-
Car Tends Towards Oversteer:
Car turns tighter than it should. Making the front tires smaller can fix this, and reducing both as well will make the car oversteer less.
Brake Related Issues
-
X Brake Force Is Low Compared To Grip:
This implies that the brake is insufficient to actually lock, or almost lock the wheels on the axle they apply to. Can be fixed in a variety of ways, from brake pad improvement, to different brakes, to larger brakes.
-
X Brake Force Is High Compared To Grip:
This means that the brakes lock up the tire too easily, and makes the car overall harder to drive. Lower pad types, and smaller brakes can help here. This can be ignored for the back end of most utility cars, since they need a “grip reserve” to stop with full cargo load.
-
Brakes Show Slight/Suffer From/Have Severe Brake Fade:
This means that the brake starts to overheat, and lose braking force as a result of use. This generally only will show up when sportiness fade goes over 1%. Making larger brakes, with higher pad type is mostly the only way to resolve this, especially focused on the front, since weight shifts forward while braking.
Aero Issues
-
Downforce Causes The Car To Bottom Out:
Wings if set too powerful for downforce application will actually cause the suspension to completely collapse at high speed, completely bottoming out the car. Bringing the wing angle value down, or raising the car helps to eliminate this.
Drivers Aid Issues
-
Weight And Lack Of Power Steering:
Depending on the weight distribution of the car, and total mass, a car may require power steering to be drivable. Adding power steering, or lightening the front of the car resolves this.
Suspension Issues
-
Car Is Bottoming Out:
The body of the car hits the ground after a small bump in the road. Use stiffer springs, or raise the body of the car.
-
X Dampers Are Hard:
If you’re making a sports car, you can usually ignore this. If not, a hard damper is uncomfortable.
-
X Dampers Are Soft:
Generally a soft damper warning shouldn’t be ignored except on premium, and luxury cars.
-
X Ride Frequency Is High:
This generally won’t happen unless you completely harden the springs. A high ride frequency is good for sportiness, but bad for everything else. You can ignore this on the rear springs of utility trucks and vans however, since the extra spring hardness is used to carry cargo.
-
X Ride Frequency Is Low:
Same as the above, but on the opposite end of the spectrum. A lower frequency can be considered more comfortable. When this warning pops up, it implies that the springs might actually cause nausea due to an effect similar to sea sickness.
-
Roll Angle Is High/Very High:
Cars with softer springs tend to roll more, as well as cars set higher off the ground. The best way to reduce roll is with a sway bar, assuming you can’t alter the ride height, which you might not want to do on certain cars either due to the target demographic, or the limits of the suspension itself. Stiffening the springs, as mentioned may help, but often not by much.
Breaking Down the Stats
All cars have the five key stats, and four secondary stats that drivers will look at, each grouping having different base statistics, which are then modified by the modifying stats that go below them. Some buyers will look at specific stats, which are special subcategories.
Stats are calculated with key stats as a base, and then additional modifiers added or subtracted in separate groups.
Handling and Brakes, Drivetrain and Performance, Chassis, Suspension and Wheels, and lastly the Interior will all have separate modifier groups that will add or subtract from the base scores for the overall final result.
Drivability Breakdown
Evasion: Evasion is how much G force the car can pull at low speeds. As one would imagine, a high evasion stat lets the driver more effectively avoid road hazards.
Footprint: Generally, smaller cars can be considered easier to drive.
Control: How good are the brakes at low speed, and how well can the driver handle the power the engine produces? A car with better control is easier to drive.
Handling and Brakes
Assists: Generally refers to any form of traction aids the car may have. Having traction aids at all is good.
Steering: Will only show if you have power steering, or if there’s a penalty due to lack of it. Power steering always makes a car more drivable, even if the car doesn’t necessarily need it.
Brake Fade: Drivability brake fade, if it exists will hurt drivability, obviously.
Brake Quality: Better brake quality is always good for drivability (with some exceptions).
Assists Quality: Anything done with the quality slider for drivers aids will show here.
Brake Balance: Having imbalanced brakes will hurt drivability of the car. You don’t for example want 300 size rear disc brakes with racing pads and six pistons, and only have a tiny drum in front. This appears to measure balance relative to tire grip, and the brake force on each axle. One axle locking and another not is bad, for example.
Terminal Oversteer: Low speed terminal oversteer is extremely detrimental to drivability.
Wheel Spin: Wheelspin harms drivability. A little bit is okay however.
Circle Test: How close to a 20 meter radius can the car keep when driven at low speed? If it can’t do this without oversteering into the circle, or straying too far, it will be penalized slightly. If it can, it will be boosted slightly.
Brake Pad Type: What grade of brake pads are on the car? Metal grabby brakes? Spongy soft brakes? Drivable in between brakes?
Drivetrain and Performance
Torque Curve: How does the engine torque curve look like? A flat torque curve is generally easier to drive than a surging, near vertical torque curve.
Throttle Response: How responsive is the engine to requesting power from the driver. Higher response is almost always better.
Max Acceleration: Can the car accelerate in a reasonable period of time? If not, there will be a penalty.
Power to Weight: Is the engine underpowered for the car? This field is usually only used for penalties if the engine is in fact underpowered, with less than .025 power to weight ratio.
Drive Type: Generally penalizes RWD cars and 4×4 cars, since they are slightly harder to handle than a FWD car. Usually a minor penalty of 5%.
Torque Steer: Generally only applies to transverse FWD and AWD cars which output a lot of torque. Torque steer is what happens when the driveshaft is uneven in length on both sides of the car, as a result, the car will trend towards the side with the longer shaft under acceleration.
Gearbox: How much work goes into changing gears? Automatics generally won’t apply a penalty here, while Manuals would.
Diff: What flavor of differential is installed? Different differentials can make the car easier or harder to drive.
Top Speed: Not quite as important as sportiness top speed, however cars which can’t go fast can be considered less drivable, especially under highway conditions.
Suspension and Wheels
Suspension Tuning: A massive influence on how drivable the car is. Any normal suspension tune will be acceptable, in most cases, even if it leans sporty or comfortable.
Wheel Load: How weighed down are the tires compared to what they are rated to handle? Less load on the tires is generally more drivable, while edging close to the limit can be very undrivable.
Grip Reserves: How much extra grip is available when used for braking, some extra reserves are usually helpful. This usually means that the brakes won’t lock the tires in wet conditions due to less grip.
Roll Angle: How far does the body tilt in a turn? Generally 4 to 6 degrees is drivable.
Suspension: What type of springs are being used, and does it help to drive the car easier?
Suspension Quality: How much work went into the suspension setup. More quality is always better.
Bottom Out: Bottoming out at all usually hurts everything on the car, stats and the chassis itself.
Cargo Tilt: Is there a risk of any cargo spilling over the side in a high speed turn? Generally cars, usually Trucks and Vans specifically, with lower roll angles run this risk.
Tires: Are the tires good to drive on? Sports compounds and up are generally harder for a normal driver to work with.
Driver Height: How high above the road does the driver sit? A higher seated position allows the driver to see more, and is overall better for drivability.
Sportiness Breakdown
Cornering: How well does the car handle turns at high speed? High G force turns are key here.
Acceleration: How quickly can the car accelerate? Faster 0-100 times are key here.
Braking: How fast can you get the car to stop from maximum speed, and how bad do the brakes fade?
Handling and Brakes
Agility: How well can the car handle high speed turns? Higher G force at high speed is better.
Electronic Stability: ESC, if it exists is always beneficial to sportiness.
Launch Control: Launch Control on top of ESC is amazing for sportiness.
Brake Quality: Better brake quality makes for better sportiness.
Assists Quality: Same holds true with drivers aids.
Cornering Gs: The maximum G force at high speed drives this stat. Anything above .7G is good, usually.
Brake Fade: Brake fade is hard to avoid on high performance sports cars. However, reducing it is critical.
Pad Type: Grabby, harder pads are better for sportiness.
Power Steering: Power steering removes the drivers ability to “feel” the road when driving, even if the system is high quality. Avoiding it if possible is great, but heavy cars literally can’t be driven without power steering.
Circle Test: Same as the drivability circle test, but with a 200 meter circle, and much faster.
Drivetrain and Performance
Redline: How high can the car rev? Higher revving engines are sportier.
Diff: Most differentials help with sportiness to a degree that aren’t full lockers.
Cylinders: 6 cylinders is optimal for not incurring a penalty, while not giving a bonus. More cylinders boosts sport, while less hurts it.
Torque Steer: Refer to drivability above. It’s slightly less detrimental for sports cars.
Torque: How much peak torque the engine outputs. Higher is better.
Gear Ratio: Sports car drivers generally prefer tighter gear spacing, since it means you can keep the engine at higher power, even after going up a gear.
Loudness: Sports car drivers also like to be able to hear the engine of the car. Some interiors can reduce this.
Throttle Response: Same as drivability above, but with a much lower tolerance for an unresponsive throttle.
Gearbox: Sports car drivers generally hate automatics and much prefer manuals, or other gearboxes which offer manual options.
Top Speed: Critical in determining how sporty the car is.
Power: Also critical for sportiness. A car with a less than .05 power to weight ratio will be heavily penalized for sportiness.
Chassis and Body
Total Height: Sportier cars generally run lower than other cars, and is preferred over a high riding car.
Drag: Less drag is overall better, hence Coupe cars are better than larger cars such as SUV’s.
Chassis Quality: More work into the chassis types are better at pretty much everything.
Downforce: Downforce allows for less dangerous high speed steering, and it gives more of a feeling of the road. Downforce is sporty, lift isn’t.
Chassis Stiffness: Stiffer chassis types are more predictable to drive than a wobbly chassis, which is why materials like AHS and Light AHS steel is rather good for sports cars.
Suspension and Wheels
Roll Test: A test to see how well the car performs. A car with around a 3 degree roll angle is the peak of sportiness.
Suspension Quality: Higher quality suspension is better at everything.
Tires: Is the tire some form of sports compound? If so, it’s better for sportiness.
Suspension: Suspension choice matters for determining sportiness as well. Pushrod suspension is a notable example.
Interior
Seating: Single seat cars are very sporty, if extremely niche. Bench seats are not sporty generally.
Comfort Breakdown
Entertainment: How high quality is the entertainment system of the car? Fancy, brand new stuff, or barely a speaker?
Suspension: How high quality of a ride does the car have?
Interior: How comfortable are the seats?
Handling and Brakes
Spring Frequency: Lower (softer) spring frequency is comfortable, higher spring frequency is not.
Brake Quality: Again, higher quality brakes are generally better and more comfortable.
Steering: Power steering is generally comfortable compared to lack of it.
Brake Caliper: Different types of brake calipers have various degrees of comfort. Generally, more pistons on the caliper makes for smoother brake force application, which is comfortable.
Drivetrain and Performance
Gearbox: Automatics are much more comfortable for the driver than a manual gearbox.
Throttle Response: A relatively low throttle response is generally good for comfort of the car. Extremely low response is bad, and too high of response can be bad as well.
Torque: Reasonable torque is important for making a comfortable car. Lower torque is more comfortable than high torque.
Smoothness: Smoothness of the engine is rather important for comfort of the car. An engine which rattles around in the bay rattles the whole car and is uncomfortable.
Chassis and Body
Chassis Quality: A more worked on chassis is comfortable.
Chassis Stiffness: A stiffer chassis is generally more comfortable than a wobbly chassis.
Convertible: Soft top convertible cars have a comfort penalty of 8%, and hard tops have a comfort penalty of 4%.
Suspension and Tires
Suspension Options: Different suspension choices heavily influence the comfort of the car.
Suspension Tuning: Different suspension tuning will change comfort, sport and drivability of the car. Softer suspension is comfortable.
Tires: Different tire compounds are more or less comfortable. Medium compounds offer more comfort, and chunky offroad tires have penalty.
Tire Profile: High profile tires are rather comfortable, while low tire profiles are not.
Roll Test: A score assigned based on the roll angle of the car. 7 degrees appears to be the peak of what’s good for comfort.
Sway Bars: Sway bars which are stiffer will generally be less comfortable.
Suspension Quality: High quality suspension is always better.
Bottom Out: Bottom out is massively uncomfortable.
Interior
Sound Insulation: Sound insulation is measured against the loudness of the engine and the interior grade of the car, with higher grade offering more insulation, save for Sport, which is specifically designed not to insulate the sound of the engine.
Interior Quality: The interior quality of the car makes for a more comfortable car, obviously.
Seating: Bench seats in the car will give a 5% penalty to comfort, per bench. Optional seats have another 5% penalty, which can also stack with the bench penalty if the optional seating is also a bench.
Entertainment Quality: Entertainment quality refers to the type of entertainment system installed. Earlier entertainment systems, such as early AM radios won’t offer much boost to score, and in fact most will penalize it slightly. As time goes on, there will be greater score percents which will apply to new entertainment formats.
Passenger Volume: A more spacious car is comfortable, but this stat is hard to achieve without an extremely large car with minimal seats. Engine placement can also eat into the total passenger volume. Morphing the cabin to be bigger can bring this up.
Prestige Breakdown
Engine: How massive is the engine? How many pistons does it have? People always like big engines.
Footprint: Bigger cars are more prestigeous.
Interior: How high end is the interior of the car? Is it made of high quality material?
Handling and Brakes
Brakes: When carbon ceramics exist, they give a boost to prestige.
Drivetrain and Performance
Forced Induction: People like turbochargers. Small turbos give a small boost to prestige, and large turbos give more.
Gear Count: More gears in the gearbox is better for prestige, with 5 gears being enough to not incur a penalty, more offering more, less incurring a penalty.
Gearbox: The type of gearbox in the car will influence prestige. More advanced gearboxes for their time will boost prestige, such as a basic automatic on the ’60s and dual clutch in the late ’90s to 2000’s. The basic automatic will harm prestige over time however, once the advanced automatic becomes available to everyone.
Drive Type: Front wheel drive is bad for prestige, rear wheel drive is fine, and all wheel drive is beneficial to prestige.
Top Speed: Fast cars have prestige, while slow cars don’t. The bar for “what is fast” goes up over time.
Power: The more power the car produces, the more prestigeous it’s considered to be.
Chassis and Body
Chassis Stiffness: A stiffer chassis is better for prestige.
Chassis Prestige: Different types of chassis materials and configurations have different prestige values. A carbon fiber monocoque is extremely fancy for example.
Panel Prestige: The panels of the car are also a large factor in determining prestige. Aluminum is highly coveted, and carbon fiber even more so. Fiberglass on the other hand is basically plastic, and not good for prestige.
Body Quality: Putting more work into the shell of the car is good for prestige.
Chassis Quality: Putting more work into the chassis is also good for prestige, but not as influential as working on the body.
Convertible: Convertibles are inherently more fancy, and have a higher prestige rating.
Suspension and Wheels
Rims: The material the rim is made of has some benefit for prestige. Mags offer 1.5%, alloy offers .5%, and carbon fibers offer 3%.
Suspension: Certain suspension types offer prestige. Pretty much everything that isn’t a conventional spring is good for prestige.
Rim Diameter: Bigger rims are in general offer more prestige, though they can get a bit expensive if combined with a fancy rim type.
Interior
Interior Quality: Working on making a better interior adds prestige.
Seats: Bench seats are bad for prestige, and having optional rear seats also a negative, though the modifiers for an optional bench doesn’t stack.
Entertainment Quality: Better entertainment systems will improve prestige, while worse will detriment it.
Safety Breakdown
Safety: How modern are the actual safety systems in the car? Do you have airbags or not?
Weight: In a car versus car collision, who would win? Heavier cars are generally safer than light cars.
Footprint: Larger cars generally have more margin of error in the event something goes wrong for passenger safety.
Drivetrain and Performance
Engine Placement: If the engine is mounted in the front of the car, you get a straight 5% safety bonus.
Chassis and Body
Chassis Quality: A more thoroughly constructed chassis is safer than otherwise.
Convertible: Since convertibles don’t really have an effective roof on the car, they are inherently less safe than other trims.
Chassis: The type of chassis chosen will influence safety. As covered earlier in the guide, Ladder frames are generally less safe than other choices.
Panels: Panel type is also a factor of how safe the car is. Fiberglass in particular is just awful at keeping people safe.
Safety Quality: Working to make the car safer can be a rather significant investment, but one that pays off a lot in terms of safety score.
Safety: What type of safety instruments are there in the car? Early safety techs will almost always cause a negative here, but that’s to be expected.
Suspension and Wheels
Suspension Options: Air springs, active systems, and hydraulic springs are slightly more dangerous than a standard coil spring. Presumably due to the extra pressurized hydraulic fluid or air, which might possibly explode in an accident.
Interior/Other
Interior Quality: Higher class interiors are generally slightly safer than less great interiors.
Seats: Bench seats are slightly unsafe, since you can’t get the same safety equipment to protect the middle passenger. Optional seats are extremely unsafe in general, for similar reasons.
Practicality Breakdown
Seats: How many people can you safely seat in the car?
Doors: How many ways can you get people/stuff in/out of the car?
Spaciousness: Do the passengers have room to move their legs, or have room for extra baggage?
Chassis and Body
Load Capacity: A car which can haul more is more practical.
Accessibility: A car which is at a good height to load passengers and cargo is also good for practicality. Too low and people have to bend over to load things. Too high, and it’s hard to get in/out of the car.
Width/Height: Grouped together, because laziness, bigger cars are more practical in general.
Ground Clearance: A car set too close to the ground will be less practical if the car is actually loaded down.
Suspension and Wheels
Tires: Pretty much anything above medium compound tires are going to be less practical, since they aren’t typically designed to carry loads. Hard and chunkies are slightly more useful for practicality since they can resist the wear of daily use better.
Utility Breakdown
Load Capacity: How much can you load inside the car?
Size & Weight: How heavy is the vehicle, and how big is it? Will the chassis collapse if you put a fridge in it?
Towing Capacity: This stat is a bit weird, but can your car tow anything? Cars with high cargo capacity won’t usually be able to tow much as a result of how the formula works currently.
Handling and Brakes
Brake Fade: Utility brake fade is exceptionally hard to avoid, without using supercar tier brakes. However, reducing it is essential.
Braking Versus Grip: Brakes need to be set a bit stronger than most other cars for utility purposes. Stronger brake force is essential to stop a moving, loaded cargo vehicle. The braking at max load percentage directly translates to here.
Drivetrain and Performance
Extra Cooling: Engines for utility trucks tend to be run hard to accelerate. Extra cooling is essential to keeping them running.
Gearbox: The type of gearbox in the car is important for utility. Generally, automatics are preferred.
Differential: Though not required, lockers are a nice feature to have on a utility vehicle. Electric LSD is nice, but is often too expensive to put into most forms of utility focused vehicle.
Power: More power is always helpful when hauling loads.
Power Distribution: As a general rule, utility vehicles should be rear wheel drive, as a majority of the weight will be on the back end of the car. If all wheel drive is used, significant preference will be for mostly rear end powered cars.
Gearing: Being weighed down means that cars will accelerate slower. This can be offset with wider gear spacing, which applies more power sooner. High gear ratios will usually outweigh any wheel spin penalties for utility vehicles.
Chassis and Body
Environmental Resistance: Ideally, you’d want a vehicle which won’t rust on you immediately. A resistance rating of 45 seems to be the sweet spot for not being penalized here.
Offroad Breakdown
Ground Clearance: How high does the car sit above the ground? Higher cars are less likely to get stuck on rocks.
Tires: Can the tires handle dirt, or will they get shredded immediately?
Power Distribution: What type of drivetrain does the car have? Ideally it would be a 4×4 or AWD setup with power balanced to weight for an offroad vehicle.
Handling and Brakes
Braking at Low Load: How powerful are the brakes when the car is at minimum load? Better brake force is better overall for this stat, even if it goes over normal grip limits.
Stability: How stable is the car when going over uneven terrain? This usually is offset by the suspension tune favoring high vehicles, since a higher car will be a bit less stable.
Drivetrain and Performance
Differential: Manual lockers are almost a must for offroad cars. Open diffs are in general terrible for them. Viscous and Geared diffs do give some base score, but it’s offset with the penalty using said diff has. Electric diff is nice, but won’t give as great a bonus as a locker.
Torque Curve: A downward trending torque curve is generally preferred for an offroad vehicle.
Driver Aids: ESC and Traction Control are very useful for an offroad driving car, as one would assume.
Power to Weight: Higher power to weight ratios are generally preferred over a lack of it, mostly to power up hills and over rocks.
Gearbox: Manual gearboxes, and advanced automatics are preferred by offroad drivers. They generally don’t like sequentials or dual clutches. Basic automatics are acceptable.
Low Gear Speed: The lower the cap for first gear is in terms of max speed, the better. This allows for faster power application, which can force the car out of tough spots.
4×4: Does the car have a transfer case? A 4×4 drivetrain is quite simply the best choice for an offroad driver.
Weight: An extremely heavy car is more likely to get bogged down in mud. Staying under a ton is usually beneficial if possible.
Chassis and Body
Panel Material: Variants of steel are the best panel types for an offroad vehicle to avoid this specific penalty. Aluminum doesn’t handle dirt very well apparently, and even partial aluminium will give a penalty. Fiberglass and carbon fiber are even worse. The penalty for using these materials are usually offset significantly by environmental resistance bonuses however.
Undertray: It’s almost always a good idea to install an offroad skidtray if you’re shooting for an offroad type car.
Environmental Resistance: Offroad cars will be seeing a lot of dirt. If you can get the environmental resistance above 55, your’e not going to see a penalty.
Suspension and Wheels
Tire Offroad: Chunkies are the best tire type for an offroad driving car, however hard long life can work pretty well too, and medium compounds aren’t completely terrible. Sports compounds will die if they touch rocks though.
Suspension Tuning: Soft springs and dampers are usually best for offroad vehicles.
Swaybar: The less stiff the swaybar on the car the better. It’s okay to have “boaty” roll angles of nearly 8 degrees on offroad cars.
Rims: Stick to steel rims for offroad cars. Alloy and magnesium especially tend to corrode when in contact with dirt.
Spring Choice: This generally won’t apply unless you choose hydraulic suspension, or active comfort. However, both of these choices are great for offroad cars, if the buyer can afford it.
Tire and Suspension Quality: Higher grade tires and better suspension handle dirt better.
Market Breakdown pt. 1
The markets of automation is who you’re trying to design a car to cater to. Each market has it’s own subsections of what people want, sometimes favoring one thing over another, even though the market should, in theory be largely similar. I’ll try an explain these markets dividing them into chunks, starting from the top of each row and going down from there.

The offroad markets “generally” are looking for a SUV, although Offroad Utility prefers the open tray of your typical Pickup. The main features of an offroader is a very high ride height, with usually solid axle coil suspension. Budget and standard markets favor a reasonably fuel efficient vehicle, while the premium markets favor a large engine over fuel economy. Offroad utility is extremely similar, but prefers that open tray, and generally has cash in the range of a budget offroad car.

I’m going to cover delivery vehicles in a large chunk here, since they all aim for essentially the same thing, which is cargo area. Light delivery being acceptable with smaller bodies, and heavy delivery favoring large bodies. Comfort basically is an afterthought on delivery vehicles, as is drivability to a degree. The main focus is a reliable, and reasonably fuel efficient box.

A typical pickup truck. Pickups focus largely on utility, and often mix in a bit with offroad cars, since quite a lot of characteristics are shared. Your typical utility truck should be well rounded, reasonably priced, and have a major focus on utility, including some extremely “interesting” gearing to put down the maximum amount of power possible. Heavy Utility trucks need to have a pure focus on hauling capacity, and a large engine, while typically throwing everything else out to achieve it.

Utility Sport is a strange type of car. You want your Utility Sport builds to be large, well balanced (overall) and have a very powerful engine in all fields. All Utility Sport markets look at Drivability, Sportiness, Comfort, and Prestiege, on top of all the engine power related stats, AND utility on top of that. Your “low end” utility sport vehicle will typically be about as expensive as a typical family car. Premium markets, and the luxury market in particular being able to compete with the GT and Supercar markets.

Your typical passenger fleet car is an oddity, since they can be nearly any trim. In general they are larger vehicles, with an extremely strong focus on practicality, and reliability. Although the tooltip says that the car should be comfortable, i’ve found that standard (and sometimes basic) interiors with a basic entertainment system leads to a more desireable car.

Your typical Family Utility car can be basically any trim you can think of. The key thing being that the car needs to have at least 5 seats. Practicality is still a huge part of this market, as well as drivability and comfort. As you’d assume based on the market, they also care about utility, and torque.

A city car needs to be small, extremely simple to drive, and reasonably fuel efficient, especially when aiming for the City Eco market. Ideally it’d be a hatchback too, but sedans are viable choices too. It is extremely easy to over budget when designing a city car. Most city cars will have an I3, or I4 engine, sometimes with an eco turbo.

Quite similar to a City car, but designed for long distance highway travel over short distance. Commuter cars generally have an even distribution of focus between drivability, safety, fuel economy, and reliability. They also should have at least four seats, and ideally are sedans.

Market Breakdown pt. 2
Family cars are generally larger, drivable, and extremely safe models of cars, with at minumum five seats in the car. The family market is pretty much always the largest market in the campaign, and can deliver good income if you keep costs low.

Similar to the family market, but with a much higher focus on sportiness, as well as specifically favoring cornering, as well as power. Family Sport cars are acceptable with 4 seats.

A fun car is a reasonable car for everyday use, so it should be reasonably small, nimble, quick and a bit sporty. They can be a variety of trims, and need some degree of creature comfort.

A baby muscle car. Your typical pony car needs to be reasonably cheap, easy to produce, and still has a good size engine behind it. It’s also got to be relatively practical so, it’s not unusual to see a smaller city car on the outside, with a large engine on the inside to be considered a pony car. Coupes are preferred however.

The light sport category is a sports car category which is looking for a powerful car, which is good at cornering, and has decent throttle response while also being lightweight, and a bit fancy.

The muscle car is basically built entirely around the engine. A huge engine, as well as high torque and power are key here. Generally some prestige helps here as well. Basically nothing else is cared about. Steering is overrated anyways.

A track car is essentially a light sports car, but with basically everything stripped out of it, to save weight. The track car market is one of the few markets that will buy a single seater. The main focus of a track car is cornering, and braking, with sportiness being the key to everything.

A big, fancy sports car. Easy to drive, sporty, comfortable, and with a high rev limit and power.

High end, high power convertible car. The only real difference here compared to Sport is the trim, where this market caters to.

Unreasonably luxurious, and with an extremely powerful engine match this category pretty well. These cars are essentially hybrids of Track, Sport, and Luxury cars.

A typical convertible car is focused almost exclusively on comfort and prestige. Higher end models also have more of a focus on engine smoothness, and it’s not uncommon to see extremely complex, smooth running engines here.

Pretty much a cross between a muscle car, and a premium car. All driving stats are viewed equally, the engine needs to have the smoothness of a premium/convertible car, as well as a lot of power and high redline when the driver wants it.

Your typical premium car almost exactly meets the demographic requirement for an equal tier convertible, except without the collapsing roof. The only real difference here is that it seems safety is prioritized more.

Country Breakdown
Gasmea is more or less supposed to be a country following along the lines of the US. Car buyers tend to prefer larger than average cars, and have a very high desire for a prestiegous, comfortable, and safe car. The typical Gasmean will strongly prefer an automatic transmission over other forms of transmission, since they generally go hand in hand with the Gasmean preference for comfort and drivability. The average Gasmean is relatively wealthy, due to having the largest economy in the world of Automation, and can usually afford extra features.
The average Hetvesian generally doesn’t care about any specifics compared to other countries, except for a massive hard on for safety in particular, and fuel economy. Hetvesia is somewhat an alternative central Europe series of countries, such as Switzerland, Austria and the like. Hetvesians tend to be okay with most cars that would normally be considered slightly subpar, as long as the car is relatively small for their role, has decent fuel economy, and is very safe. Slightly below average wages compared to Gasmea, but they can still afford most cars.
More or less an alternative Italy, with a bit of Japan mixed in. Fruinians are obsessive environmentalists, as well as major sports fans. They don’t care about much, save for sportiness, and fuel economy and practicality of the cars they buy. It’s not entirely unusual for them to stick with manual transmission cars over an automatic, even if everything else about the car is the same. The average wage is slightly lower than Gasmea, but they can still afford a few features.
Archana is best described as an Eastern Bloc country shortly after the Second World War. Archanans significantly prefer offroad/utility cars, and they want their cars to be comfortable. The main issue with Archana is the fact that the average Archanan simply can’t afford a car built to the same standards of other countries, as on average they have 40 percent the available money of a Gasmean. The budget categories have essentially no money to speak of, and the normal “budget car” of another country may often be considered to be a “normal” or even “premium” category in Archana. It’s not unusual at all for a budget Fruinian sports car to be considered a Hypercar in Archana, for example. Archana also pretty much never acquires any fuel grade over Regular.
Cars in Dalluha are status symbols over everything else. Dalluha is largely considered to be the Shiekdoms of Arabia when compared to the world we live in. The average Dalluhan wants their car to be huge, fancy, and practical without really caring about being able to drive the car safely, or fast. They also don’t seem to care much about safety features, and it’s entirely possible to sell cars into Dalluha without any safety features at all, or the bare minimum for a very long time. The average buyer can generally afford cars on the same line as a Fruinian, while the wealthier markets can afford far more than a Gasmean, but the economy is tiny, and odds are there won’t be too many buyers.
Glossary of Terms
There’s a few terms which aren’t very well explained without having to look them up, so i’m going to try and put everything you’d probably have a question about here. For the sake of completeness, i’ll also add in stuff we’ve gone over already as well.
- Model: The base chassis, and it’s size, which determines what type of shell/trim can be used.
- Trim: The specific setup for the body type in particular.
- Wheel Base: How far apart the axles are from each other.
- Track Width: How wide the axles are, before rim offset.
- Family: The base configuration of an engine, such as it’s block type and valves.
- Variant: A variant of the family of engine. Can have a variety of changes, including sizing and fuel system types for example.
- Fill Factor: How much space in the engine bay the engine itself takes up. A higher fill factor requires more time to figure out where to put everything else, and increases engineering time, and service costs.
- Oversquare: Bore bigger than stroke.
- Undersquare: Stroke bigger than bore.
- Displacement: How much fuel in terms of volume the engine can hold assuming all piston chambers are filled. This is measured in CC, or cubic centimeters, or in the US, cubic inches usually.
- Bore: How wide the piston chambers are.
- Stroke: How tall the piston chamber is, measured from intake valve to the lowest point the piston can go in a cycle.
- Bottom End: Piston, and crank assembly.
- Top End: The valve system, along with the camshaft(s).
- Octane: A measure of a fuels resistance to knocking, and a measure of how efficiently the fuel is being used. Ideally, a car should use all octane, but not exceed it.
- Knocking: A knock, or “ping” is caused when some of the fuel preignites before it’s supposed to in an ignition cycle. Any knock at all is harmful to the efficiency of the engine.
- Valve Float: Valve float occurs when the valves are unable to completely close in an ignition cycle, usually due to high RPM. This results in the valves “jumping” the cam, as a result of momentum. This is usually very detrimental to the longevity of the valves, and engine as a whole.
- RPM: Revolutions Per Minute. This is how quickly the crank makes a full 360 degree rotation while running. Higher RPM ultimately delivers more power assuming torque remains the same or increases.
- Scavenging: Refers to exhaust pulses from each piston “lining up” and helping to pull exhaust from the most recently emptied piston chamber. A good exhaust ideally scavenges every last bit of exhaust out of the piston chambers before the exhaust valve closes.
- Overdrive: Can mean two things. An overdrive gear is technically any gear which has a ratio of greater than 1:1 (.99:1 is an overdrive gear, if just barely). Overdrive can also imply a final gear which is intended to be used near peak speed to run the engine at lower RPM, and save fuel.
- Final Drive: The final ratio of teeth of the last gear (not numerically, but physically, the last gear that actually spins the tires) in the assembly before the tires are turned.
- Tire Profile: Can also be referred to as the tire aspect ratio. A measure of how large the sidewalls are relative to the tread of the tire.
- Rim Offset: A value for how far the tires are pushed out relative to the normal end of the axles. Rim offset is often used to ensure stability in cars which have tire staggering.
- Tire Staggering: Essentially, any set of non equal width tires can be considered staggered.
- Terminal Oversteer: Basically, the car can’t be driven at any speed without losing the back end of the car (spinning out). Cars with terminal oversteer are basically deathtraps.
- Brake Fade: There are three categories of brake fade in automation, and they all refer to how much the brake pad burns off it’s effectiveness when braking. Brake fade itself is caused by heat saturation of the braking medium. Brakes turn motion into friction/heat to stop a car, however once the brake heats up, it’s harder to add even more heat to slow down further, hence brakes will “fade” or become ineffective if overheated.
- Drivability Brake Fade: How much the brakes fade when going from 100 km/h to 0.
- Sportiness Brake Fade: How much the brakes fade when going from top speed to 0.
- Utility Brake Fade: Similar to sportiness fade, but measured with maximum cargo capacity.
Light Campaign V4 Basic Walkthrough (Out of Date)
So, you want to have a go at the campaign, and the future meat of the game? Here’s some advice on where/how to get started.
For the sake of simplicity, and ease of instruction, I will be demonstrating a campaign on a tweaked (mostly to get rid of starting dealerships outsize of the starting country) Casual difficulty set in Gasmea.
Starting off is the Campaign Setup, which will dictate the difficulty of the campaign in the long term. Higher difficulty settings offer higher scores.
Starting off with presets, these are general simplified, and baked in templates for how hard the game should be, with Casual being quite casual, and easy to start off with, with Insane difficulty being immensely difficult, but offering a massive score multiplier for high score chasers. You can also choose the starting year here, and your company name.

The next page in the advanced campaign setup handles the funds available, the tech pool (basically research into the field) and the size of the factories and plots currently available to you. You can tweak these as you feel fit, maybe to roleplay as some company, or just make the game easier or harder.

Lastly there is the “default” dealership network sizes. The dealership networks are what actually allow you to sell the cars you produce. If you don’t have a dealership in a country, you can’t sell any of your cars there. Higher grade dealerships allow for a higher minimum, and maximum market awareness, which will be covered in the next sections.

Starting the game, and parsing the data.
After starting the game, you will be presented with a bit of fluff on the company you have, and a basic instruction on how to get started with the game. Reading and clicking through that will lead you to this screen.
This will open once you startup the campaign. The option of building the car from scratch, or letting the AI generate something close, and then let you tweak it will be available. I personally suggest building from scratch, but don’t be afraid to use the AI to get a good template going. The AI might take a considerably long time to generate a car, so be aware of that. After choosing what you’re doing with that, you’ll be presented with this.
This page shows the estimated maximum amount of revenue (or cash) you can get out of the targeted market, assuming you sell to the entirety of the aware market. In this case, the market awareness is a relatively low base value of 6%, so the profit numbers will be small to start out, until you bring awareness up. Clicking on one of these categories will bring you to the project management screen, but let’s not do that just yet as there’s some useful data here which you will reference back to off and on.


The bottom of the screen has a variety of stats and buttons available, such as selecting countries to add to the charts, to the specific tastes of the country, to the current regulations. The bottom right has the stuff i’m going to cover right now, since most of the rest is self explanitory.
- Limit to Awareness: This tickbox will limit the charts to only what you can do RIGHT NOW with what the markets know of your company. Awareness will go up and down over time as you sell cars. This tickbox is useful for every chart.
- Untapped Revenue: This shows how much of the available market you can get money out of. This will match Possible Revenue until you actually build and sell a car.
- Possible Revenue: How much money it’s possible to make out of the market in question.
- Monthly Sales Data: How many cars are being sold per month, and how much of a percent of said market is being sold to.
- Demographic Sizes: In particular, how many people are within the target demographic, and how is the global economy affecting the rate of growth or shrinkage into that market.
- Awareness: How aware is the populace of your brand, and how is the value changing over time? Dealerships will by default give some base level of awareness, but selling a highly competitive car is a massive factor into boosting awareness.
- Budgets +/- Spread: This will show the average budget of the market, and a spread going higher or lower than the value shown for their market. It’s entirely possible for the budget spread to go into the negative, which would mean that the market would be next to impossible to sell into.
- Affordability: How affordable is your car when being sold into the specific market? Higher affordability makes for higher competitiveness, or higher profit margins to pursue.
- Competitiveness: How well does your car compete against competing cars? This will show your most popular in production car for the market, it’s competitiveness rating, and what your competitors are currently doing.
Selecting a market at this point will bring you to a sandbox style car production. I will skip this step for now, as it’s pretty much the top three quarters of the guide. After completing the car, you will be sent to project management.
Managing a Project
So you’ve made your first car, and are now presented with this screen, or possibly the factory manager screen.
This screen shows the trims of the car model you propose to put into production. It’s usually not a terrible idea to add some extra trims, which can be done with the clone trim button beneath the name for the trim of the car, such as how I’ve demonstrated here. Initially you will have to come back here using the timeline on the bottom of the screen. Depending on your budgets however, it will usually be cheaper to engineer and produce a single trim and facelift another in later.

Moving on from that leads to the factory screen, where you’ll determine the size of your factory, as well as how automated it is. Clicking on the cog next to the factory location flag will bring up the factory UI. Clicking on the “new” button on the top left will allow you to purchase land, as well as a new factory to put on top of that land. For now however, we’ll tweak the factory provided.

Next is the factory configuration. Base size, specific size, and add-ons are controlled here.
(Image updated for LCV4)
In the case of this specific AI generated car, the car uses steel paneling, and galvanized steel. In order to continue, i’d need a medium factory in order to be able to use the steel panels, and a small factory in order to galvanize the chassis. In this case, a medium factory can handle both. Items with red production flags will not be able to be produced without an addon. Additional extra facilities are available as options too as an investment with long term benefits.

(Image updated for LCV4)
Next is the tooling. Factories should be at least slightly automated, unless they’re tiny, shed tier factories, in which case automating the process can actually damage production numbers in favor of saving on manufactuing costs. Keep an eye on the production numbers and price per unit, and also be aware that those values are subject to change based on the next screen. QA Threshhold determines how many cars are QA tested before they are sold. This makes cars more expensive to produce, but ensure that they meet a basic quality standard. Staff wages influence how “professional” your workers are, and the quality of their output. Higher staff wages mean faster production, and overall better cars. Lower wages mean cheaper, faster produced cars, up to a point, where the low wages will actually damage production volume.

Once that’s done, you will be presented with the engineering screen, which will have various paramaters, with tooltips which will explain what they do specifically. Automation is expensive but makes the engineers design with machine assistance in mind, which will make cars cheaper. Designing the components for manual labor will increase the overall production cost per car, but is usually faster to do, and is cheaper to engineer. Process determines how much material use is acceptable, which will impact material costs, and that can be important with exotic materials, like Titanium conrods. Streamlining the process can bring down output volume however, and costs some time. Reliability is what it says on the tin, make effort into boosting reliability, or make it cheap? Funding is also what it says on the tin. Injecting cash into the project will get it done faster. Not funding the project makes it take longer, but is much cheaper. Pressure is pretty important long term. Extra pressure will get the job done faster, but cost reliability, as well as limit what familiarity you get out of the project. Lower pressure does the inverse, and has a very beneficial long term knock on effect of making future projects faster/cheaper, presuming you use similar tech.


The last items are the factory overview.
Which will show if the factories have the production capacity to keep up with each other, as well as allow you to add costs to the engine/car should you so desire.


The Dashboard
This is the core screen of the game once you get here. The top left shows the time controls, while the top right has the saving tools, as well as the market button, which can be used nearly anywhere for an at-a-glance overview of the market statuses.

The Finances section includes a chart showing income and expenditures. The graph at the top left shows global market economy status. If the market is booming, more people will want to buy cars, and premium market sizes will go up. If the market is in a recession, more people will NOT want to buy cars, and higher tier individuals will typically drop down a tier in terms of affordability.
R&D Is shown on the top as well, with dates in terms of months for specific parts to become available for you to use. You can accelerate that by investing into R&D at the bottom of the screen. Low levels of investment are pretty cheap, but going crazy and trying to be 15 years ahead of time can get insanely expensive.
The bottom center is the project overview. This is the root of where your information comes from usually. It’ll show when projects complete, how many cars are being sold. How well used the factories are, and the profit of the last month.
The right is the News, where regulations will typically be announced, and taxes, if paid will show here as well. Recalls will be notified here, and will require action in order for the game to progress.
Very bottom of the screen leads you to other UI pieces.
World Markets & Trends is the same as the Markets button up top, and we’ve covered it before.
Marketing and Dealerships allows you to build up dealership networks to increase your awareness.
Car Projects and Engine Projects will bring you to the overview of each project you have, and allow you to facelift active projects (usually add some new features, without changing the base car/engine) or allow you to start new projects altogether.
General Advice For The LC
- Try to predict how large of a factory you need when building your car. Factory costs won’t/can’t be predicted by the designer, so you should keep that in mind when producing your car.
- Tiny factories are best used to build extremely limited production cars, such as Supercars.
- Small factories are usually best with sports cars, and luxury boats.
- Medium factories are good for introductory level mass produced cars, such as premium family cars, and other fancier premium trims in general.
- Large factories tend to be expensive to startup with, but can lead to vastly reduced costs for budget car types.
- Huge factories tend to be insanely expensive to work with and change, but lead to insane output, as well as insanely cheap cars. This makes them great for super cheap budget cars, or commercial type cars such as delivery/fleet cars.
- Smaller factories really don’t like to be automated, and large factories need to be automated in order to keep a decent production level going.
- Production flags are weighted against the automation level of a factory, and engineering tooling expectancy. A single No Mass Production flag in a fully automated huge factory will cut efficiency by 25%. A single No Mass Production flag in a fully manual tiny factory will do next to nothing.
- More automation will always make the price per car go down, even if it eats into overall production efficiency.
- Different countries have different wages, and different tax laws.
Conclusion
It’s very likely I’ve gotten something totally wrong in the guide somewhere along the way. I try my best to be accurate, but sometimes i’m not. If you find anything totally wrong, let me know in the comments. That way I can fix the issue.