Overview
THIS GUIDE IS A WORK IN PROGRESS, SO LOT OF THE STUFF MAY OR MAY NOT BE YET PUT INTO THIS GUIDE, Thanks!Hi there! Welcome to my complete guide of Car Mechanic Simulator 2015! This guide is meant to help nearly everyone, from beginners to almost know-it-alls. In this guide I will be covering virtually everything of Car Mechanic Simulator gameplay-wise (don’t expect to see lots of troubleshooting or game-enchantments here, I might do some, but I mainly focus on the gameplay.) Probably the best way to check if the answer you’re looking for is in this guide would be by pressing Control+F and typing the keyword(s).
Creating a profile and controls
Let’s get started. When you start the game, you need to make a profile first. You did it? Great! Now you can select ‘new’ in the menu, creating a new game, playthrough or campaign, whatever you want to call it. Right, so in normal mode you will be asked if you want to go through the tutorial, in expert mode you will not be asked this, as the game expects you to be experienced. If you selected the normal, feel free to go through the tutorial, just know that this guide teaches it all. The tutorial of the game walks you through the basics, like how to accept a job, and unmounting in the right place and order. Right, so, basic controls are just like in every other first person game, W,A,S,D to move around, and mouse to look around. The more ‘complex’ and somewhat unique controls to CMS (We’ll just call Car Mechanic Simulator CMS now on for simplicity) are:
I – Inventory – Pretty self-explanatory
O – Order information – When standing next to a car, this shows the task description of what you need to do to the car, faulty parts found, the car brand and model, which are fictional, minimum condition all the parts must be, money spent on job, bonus for completing tasks, and finally the bonus for completing the order. Here you can also choose a favorite for a part, creating a neon blue silhouette around the part and also you can finish the job regardless if the tasks are completed or not.
M – Move vehicle – When standing next to car you want to move, press M and select the destination. Parts that can be disassembled from under the hood without the need to use the lift, are usually airfilters, fuel filters, ignition coils, batteries, throttles, intakes, fuel rails, timing parts, exhaust manifolds, spark plugs, camshafts, camgears, brake servos, ABS pumps and modules, radiators and radiator fans, alternators, powersteering pumps, water pumps, engine head covers as well as engine heads.
H – Toggle body mode – When standing next to the car, you can press H and that ghosts the car body, making all the parts easier to see.
C – Toggle conditions mode – This mode allows you to see at what conditions parts are, just like you would in a manual examine mode.
T – Tablet – This device can be unlocked after earning 1000 experience points. There’s quite a few upgrades which I will be covering later.
1 – Disassemble mode – In this mode you disassemble parts, whether you’re looking at and engine, wheels, undercarriage, or even the body, just hold right click on the part you want to disassemble and off you go.
2 – Assemble mode – Pretty much the same as the disassemble mode, but it shows white ghosted parts where the parts belong. Hold right click on the ghosted part you want to assemble back to the car until a pop-up list appears and select the part from the list.
3 – Manual examine – In this mode you can manually examine parts by holding right click. Please note that not all parts can be manually examined. Every part that has been taken off can be seen at a set amount of prosentage, whether it’s in the inventory or on the pop-up menu of assembly. White means not examined, red broken, orange bad quality (you don’t need to replace orange parts), yellow medium quality, and green good/excellent quality.
Useful to know-controls:
I learned within around few hours of playing that shift + click makes life easier. If you’re in the shop, shift + click buys the part without asking for confirmation, in inventory it sells. Simple, right? Another simple thing that took me over 60 hours is that you can do this as well when fixing parts! Trust me, it makes life so much easier later.
If you’re still wondering how to start disassembling the engine, or even struggle to pop up the hood, it’s as simple as left clicking the hood in disassembly mode, and then left clicking the engine or any other location of the vehicle, such as wheels and undercarriage. You need to have the car on a lift before you can remove wheels or shocks and obviously the car has to be lifted up before you can access the undercarriage or exhaust.
Brakes
There can be up to six different parts per car that affect the braking. These are:
ABS Pump – Location: Under the hood (Some older cars or muscle cars may not have this)
ABS Module – Location: Under the hood (Again, not all cars have this)
Brake Caliber – Location: Behind the wheels mounted on the brake disc
Brake Pads – Location: In between of the Brake Caliber
Brake Disc – Location: Behind the rear wheels
Brake Disc ventilated – Location: Behind the front wheels
Disassembling the disc brakes – Take the wheel off, then the brake caliber (the screws for this are on the other side), brake pads, and finally the brake disc(ventilated), depending on is it on the front or rear).
Disassembling the drum brakes – Take the wheel off, then the Brake drum, Brake shoes and finally the drum wheel cylinder.
Changing the oil
Right, you’ve come across a oil changing job. How do you do it? It’s actually quite simple. First, get the car on to the lift, lift it up and find yourself a oil drain, it’s located next to the chairs that are next to the computer where you buy stuff.
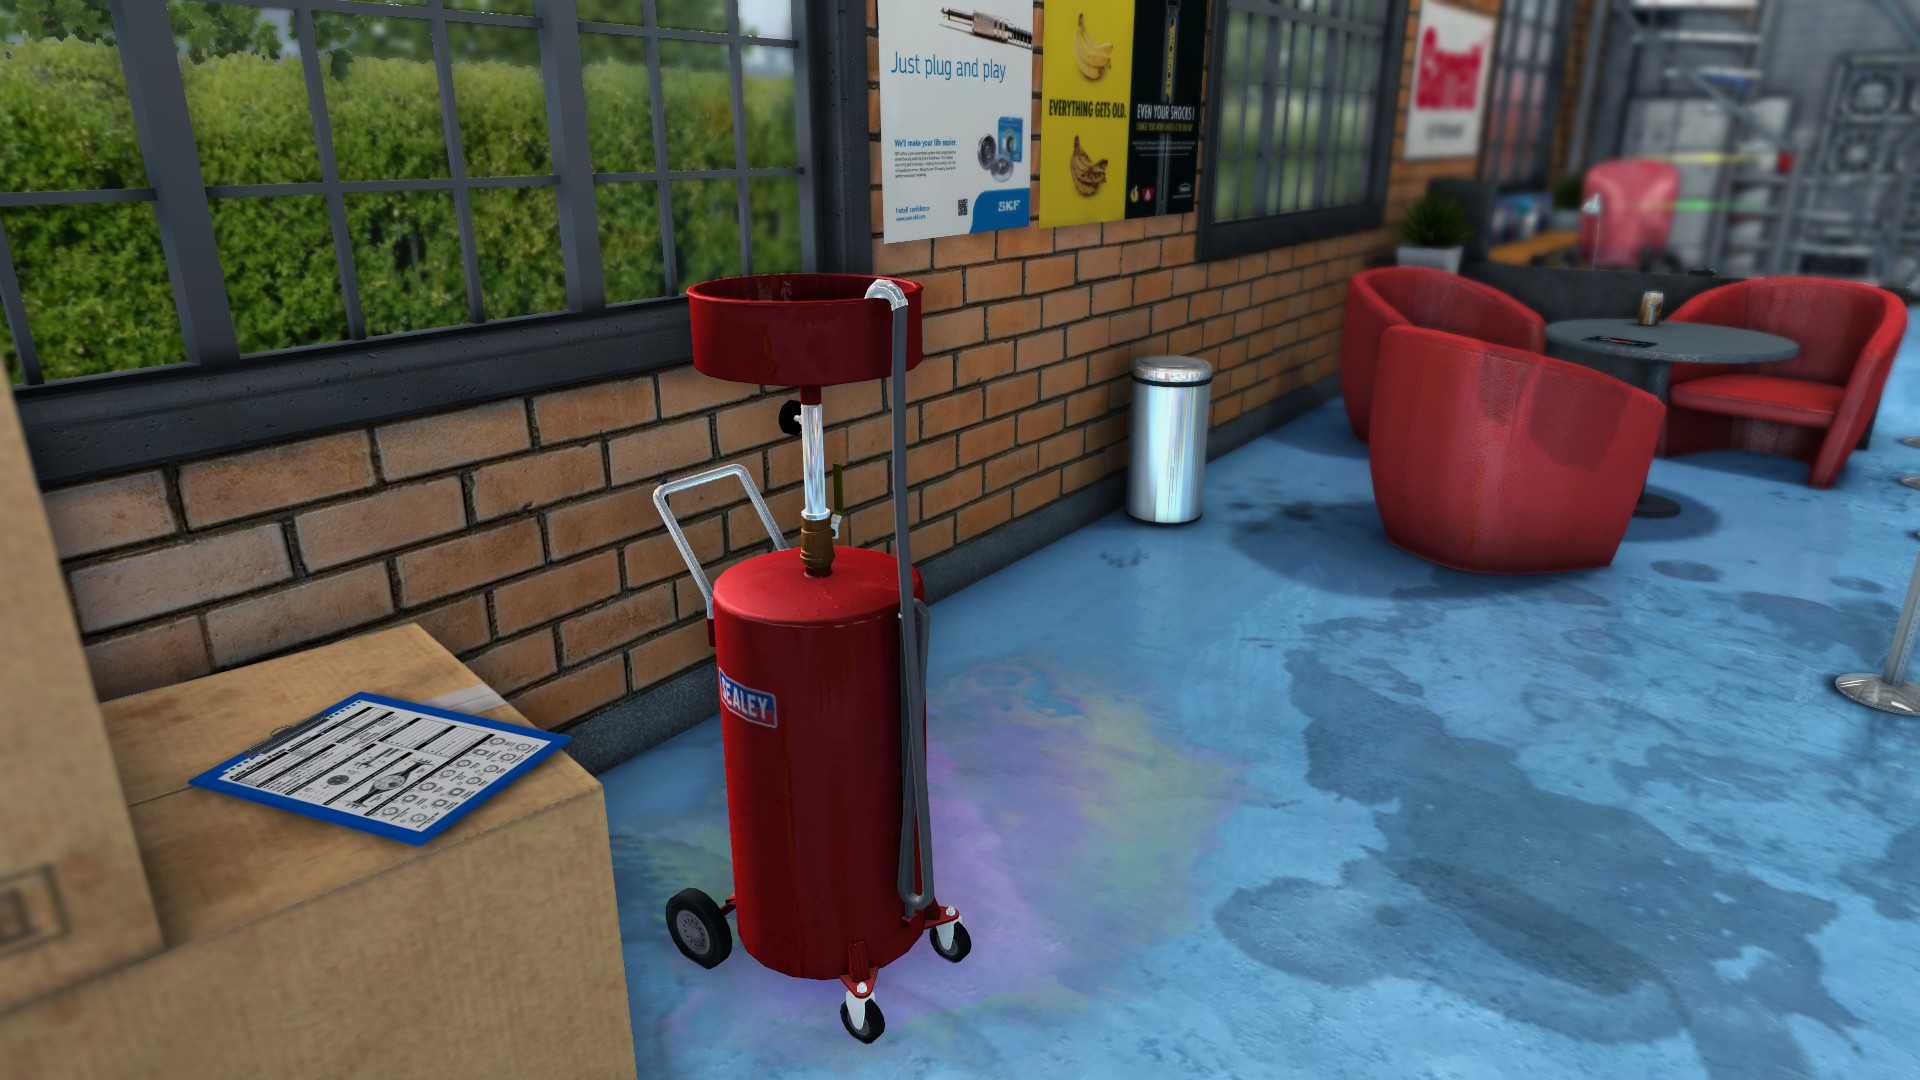

Next, take the oil drain under the car, look straight up as far as you can, and align the crosshair with the back of the oil pan like in the picture on the right, then left click and pull the plug out.
Adding new oil is as simple as going to the engine bay, taking off the oil fill plug, and pouring the oil in until the oil can tilts backwards slightly. There you go, you have successfully changed the oil in the car!
Ending words
I am an 17 year old boy who suffers from panic attacks, well, that’s about that.
Now, the most important message, I want you guys, whatever you’re celebrating, even if you’re not celebrating right now, happy any upcoming events in your life and I hope the best to you all!
Feel free to post constructive feedback and suggestions of what you want to learn from CMS! Together we make this guide the most versatile of them all! Oh, and please let me know of any grammatically incorrect sentences or anything that I may have missed. Thanks for reading!