Overview
Don’t know what upgrades are good or work together? Choosing a new character for the first time and don’t want to waste the first 10 minutes of your match reading all your skills? This guide’s for you!
Disclaimer
These upgrade paths were (almost) all created by members of Mistforge & Sanctum Falls. Look them up along with your chosen character’s name for a more detailed build explanation & strategies. This guide is only intended to be a quick reference guide for easy access while in-game.
If you notice any mistakes or have any ideas on how to make this guide better please let me know in the comments below, no matter how small. Otherwise feel free to discuss strategies, ask questions and comment on the effectiveness of the builds here.
To Do:
Add pictures (Pretty much done but I’m lazy (21 oct)
Give an alternative build for each class (slowly in progress, if you have a particular character you want another build option for, request them in the comments and I’ll probably add a second build for them)
Add creatures and their effectiveness
Will probably update guide whenever I get yelled at in comments or wherever.
…I’m not saying add this guide to your favourites but if you do it’ll show up in the steam overlay at the top of the guide list. 😉
Aisling
This build centres around support, stay near your friends when possible.
Don’t let Cador die!

Level 2: Cador’s Restoration (RMB Right)
Level 3: Spectral Wave (LMB Right)
Level 4: Chastise (Q Left)
Level 5: Shielding Presence (E Right)
Clash Talent: Echoes from Beyond
Level 6: Spectral Defense (LMB Right)
Level 7: Intimidation (Q Left)
Level 8: Pure of Spirit (E Right)
Level 9: Ghostly Might (Focus Left)
Level 10: En Garde (Focus Left)
Becket
Hope your aim is on-point! Cannons are for ranged combat, machine pistols for close.
This build is better for team-fights/targeting groups of enemies, for a more 1v1 orientated build replace levels 2 and 3 with “Rocket Booster” and “Fully Loaded”

Level 2: Flame Cannon (Q Right)
Level 3: Blast Radius (Q Right)
Level 4: Rocket Pack (E Right)
Level 5: Will to Power (Focus Right)
Clash Talent: Outgunned
Level 6: Refocus (Focus Right)
Level 7 Smart Grenade (RMB Right)
Level 8: Clip Service (LMB Left)
Level 9: Close Quarters (LMB Left)
Level 10: Blast Away (E Right)
Charnok
Attack the front-lines using your teammates as meat shields, anything goes wrong, blast out of there! (Buy all the right upgrades :P)

Level 2: Hunka Burning Love (E Right)
Level 3: Dive Bomb (Q Right)
Level 4: Blazing Fast (F Right)
Level 5: Precision Flame (F Right)
Clash Talent: Propulsion
Level 6: Meteoric Fall (E Right)
Level 7: Stoke the Fire (LMB Right)
Level 8: Fire Shelter (RMB Right)
Level 9: Superheat (Q Right)
Level 10: Backdraft (RMB Right)
Ezren Ghal
Not the tankiest build but you always have Spectral Form to escape

Level 2: Growing Dread (RMB Left)
Level 3: Storm of Souls (RMB Left)
Level 4: Spectral Haste (Q Left)
Level 5: Killer Instinct (Focus Left)
Clash Talent: Form Factor
Level 6: Will to Power (Focus Left)
Level 7: Renewing Communion (LMB Right)
Level 8: Will of the Wisp (Q Left)
Level 9: Unholy Ground (E Left)
Level 10: Cursed Well (E Right)
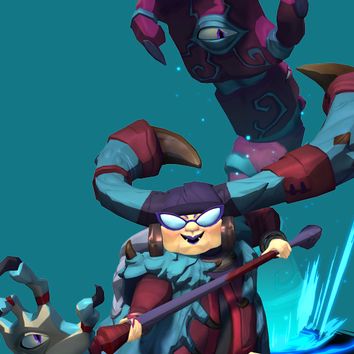
Griselma
Griselma has very poor mobility, don’t be caught in enemy territory with no stamina~
If you’re having trouble escaping the enemy, consider getting Exit Strategy earlier, otherwise, If you don’t find the need to teleport away from danger, the extra turret summon isn’t a bad idea either!
This build has three key upgrades that somewhat rely on one another, notably; Mark of Survival allows you to gain health when hitting shocked enemies, Life Line gives +20% to self-healing, and Beastial Feast allows your hands to eat debuffs and heal anyone near them. (including you with the +20% bonus!)

Level 2: Mark of Survival (LMB Right)
Level 3: Beastial Aura (RMB Right)
Level 4: Beastial Feast (RMB Right)
Level 5: Fringe Benefits (Focus Left)
Clash Talent: Phase Variance
Level 6: Life Line (Focus Right)
Level 7: Exit Strategy (E Right)
Level 8: Element of Surprise (Q Left)
Level 9: Portal Call (Q Right)
Level 10: Portal Collapse (E Right)
“I foresee great things for you!” -Torbjörn
Smack the hell out of your hands with this one, try to keep both your turrets active around team fights 24/7 too. You can use yourself and the hands to body block making it harder for enemies to leave combat

Level 2: Beastial Aura (RMB Right)
Level 3: Exit Strategy (E Right)
Level 4: Shattered Rift (Q Right)
Level 5: Empowering Touch (LMB Right)
Clash Talent: Beast Friends
Level 6: Bestial Attunement (RMB Left)
Level 7: Stumbling Block (Q Left)
Level 8: Escape Hatch (E Left)
Level 9: Masterful Focus (Focus Right)
Level 10: Focused Might (Focus Left)
HK-206
As the strongest ranged character, find somewhere to set up and do some work, get caught out of position, however, and you’ll be in trouble! If a ranged character is targeting you while you’re fortified you should probably move unless you can scare them off, it’s not worth the damage taken.
Pro tip: The damage bonus for Rapid Recalibration applies even when you aren’t fortified so you can quickly fortify and fortify before starting a fight to get that bit of extra damage.

Level 2: Mortar Love (Q Left)
Level 3: Rapid Recalibration (E Right)
Level 4: Heavy Artillery (Q Right)
Level 5: Servo Boost (E Right)

Level 6: Stonewall (Focus Right)
Level 7: Charged Rounds (RMB Left)
Level 8: Ballistic Accelerator (LMB Left)
Level 9: Armour Piercing (RMB Left)
Level 10: Hero’s Vitality (Focus Right)
Imani
Keep your distance, spam Q and watch out for those Assassins! The less you miss, the better Imani tends to be with all her consecutive hit bonuses. This build is about Focus generation; you can gain one level of focus for every roughly 13 hit shots

Level 2: Combat Sniper (RMB Left)
Level 3: Vertical Evasion (E Right)
Level 4: Die in a Fire (Q Left)
Level 5: Battle Fury (Focus Left)
Focus Talent: Stay on Target
Level 6: Concentration (Focus Left)
Level 7: Blast Radius (Q Left)
Level 8: Adrenaline Rish (E Right)
Level 9: Hit and Run (LMB Right)
Level 10: Stopping Power (LMB Right)
This build is for those that want more damage per shot rather than the focus gains. Charge to 2x and hit something, then in 1 second, it will increase to 3x till you miss.

Level 2: Dialed In (RMB Right)
Level 3: Choking Gas (E Left)
Level 4: Die in a Fire (Q Left)
Level 5: Blast Radius (Q Left)
Focus Talent: Stay on Target
Level 6: Battle Fury (Focus Left)
Level 7: Concentration (Focus Left)
Level 8: Debilitating Haze (E Left)
Level 9: Heavy Cable (LMB Left)
Level 10: Steel-Tipped Bolts (LMB Right)
Lord Knossos
Perhaps the strongest melee character works best with a support keeping you alive.
While Bull Rush is great for engaging enemies, make sure you know what you’re doing as it’s also your only escape!

Level 2: Goring Up (Q Left)
Level 3: Overrun (LMB Right)
Level 4: Raging Bull (E Left)
Level 5: Mighty Yawp (E Right)
Clash Talent: Trample
Level 6: Bloody Minded (Focus Right)
Level 7: Life Line (Focus Left)
Level 8: More Gore (Q Left)
Level 9: Heavy Barrel (RMB Left)
Level 10: Skill Shot (RMB Right)
Mozu
Without stamina or Dimension Door, you’re a free kill! Your vortex removes the threat of any ranged character and even stops some “non-ranged” attacks, for example, Tripp’s ult. This build starts you out by nearly maxing Mozu’s dps potential at level 2. Mozu is the best character for damaging a wound imo, high damage from a range, the enemy team can only stop you from hurting the Guardian by sending a non-ranged hero away from the wound to deal with you.

Level 2: One Dimensional Offence (LMB Right)
Level 3: Temporal Discontinuity (E Left)
Level 4: Reverse Polarity (Q Left)
Level 5: Battle Ready (Focus Right)
Focus Talent: Added Dimension
Level 6: Skirmishing (Focus Left)
Level 7: Open to Offence (E Right)
Level 8: Cantrip of Disruption (RMB Right)
Level 9: Warp Factor (Q Right)
Level 10: Enervation Effect (RMB Left)
This build has some crazy focus gains, make sure you read the skills you’re buying and make the most of them. At times you’ll be able to score max 3 focus in under 2 minutes

Level 2: Reverse Polarity (Q Left)
Level 3: Temporal Discontinuity (E Left)
Level 4: Will to Power (Focus Left)
Level 5: Channel Selector (RMB Left)
Focus Talent: All to Tether Now
Level 6: Warp Factor (Q Right)
Level 7: Refocus (Focus Right)
Level 8: One Dimensional Offense (LMB Right)
Level 9: Open to Offense (E Right)
Level 10: Renewed Attraction (RMB Left)
Oru
Oru is best in a team and dealing damage to multiple enemies at a time. If you sprint + jump before using your focus you’ll be agiler.

Level 2: The Long Game (Q Right)
Level 3: Ace in the Hole (Q Right)
Level 4: Short Sentence (LMB Right)
Level 5: The Spread (RMB Left)
Clash Talent: Cut the Deck
Level 6: Endurance (Focus Left)
Level 7: Easy Strider (Focus Left)
Level 8: Ace of Swords (RMB Right)
Level 9: Shattered Destiny (E Left)
Level 10: Touch of Destiny (E Left)
Pakko
This beast, like Mei, is born of the frozen winds of hell’s 9th circle!
Pakko Must be hitting someone with LMB for the +20 full body armour.

Level 2: Snow Bowling (Q Right)
Level 3: Forceful Impact (Q Left)
Level 4: Shattered (RMB Left)
Level 5: Frostbite (E Right)
Clash Talent: Lingering Effects
Level 6: Flash Freeze (E Left)
Level 7 Cold Kit Combo (LMB Left)
Level 8 Ice Breaker (LMB Left)
Level 9: Frozen Focus (Focus Right)
Level 10: Hardy (Focus Left)
Ramsay
Ranged heroes are annoying, but you’re too tanky to care! Build focuses on dps and debuffs.

Level 2: Lasting Effects (E Right)
Level 3: Jujumagumbo (LMB Left)
Level 4: Open Wounds (LMB Left)
Level 5: Counterplay (RMB Left)
Clash Talent: Poison Coat
Level 6: Whippersnapper (Q Left)
Level 7: Breaking Point (Q Right)
Level 8: Endurance (Focus Left)
Level 9: Skirmishing (Focus Left)
Level 10: Smear (E Right)
Roland
Roland is not currently in-game due to being reworked.

Rutger
Do damage, Plain and simple

Level 2: Rocked to the Core (RMB Left)
Level 3: Seismic Activity (Q Right)
Level 4: Teardown (E Right)
Level 5: Mineral Heavy (E Right)
Clash Talent: Mountain Range
Level 6: Ready to Rock (Focus Right)
Level 7: Life Line (Focus Left)
Level 8: Give Me The Slowdown (Q Left)
Level 9: Clawing for Shield (LMB Left)
Level 10: Rockslide (LMB Right)
The Margrave
Use Hellburst against ranged characters and Counter for melee!

Level 2: Leap Before You Look (E Left)
Level 3: Relentless (Q Left)
Level 4: Counter (LMB Right)
Level 5: Hero’s Vitality (Focus Right)
Clash Talent: Quick to Anger
Level 6: Life Line (Focus Left)
Level 7: Irresistible Charge (Q Right)
Level 8: Eternal Flame (RMB Left)
Level 9: Give Em Hell (RMB Left)
Level 10: Resounding Counter (LMB Left)
Tripp
You relentlessly follow people holding LMB while watching the light drain from their eyes as they try to escape.

Level 2: Marked For Death (RMB Right)
Level 3: Storm Surge (E Left)
Level 4: Skirmishing (Focus Left)
Level 5: In a Flash (E Left)
Clash Talent: Back in a Flash
Level 6: Heal Blade (Q Left)
Level 7: Kicking into Gear (Q Left)
Level 8: Shattering Blades (RMB)
Level 9: Overload (LMB Left)
Level 10: Cloak of Shadows (Focus Right)
###Will Add Description###

Level 2: Marked For Death (RMB Right)
Level 3: Killer Instinct (Focus Right)
Level 4: Storm Surge (E Left)
Level 5: Flash Step (E Right)
Clash Talent: Cutting Edge
Level 6: Heel Blade (Q Left)
Level 7: Shattering Blades (RMB Left)
Level 8: Full Charge (LMB Right)
Level 9: Will to Power (Focus Left)
Level 10: Kicking Into Gear (Q Left)
Tyto the Swift
Spin to win!

Level 2: Cut Down (RMB Left)
Level 3: Rake (RMB Right)
Level 4: Easy Strider (Focus Left)
Level 5: Skirmishing (Focus Left)
Clash Talent: Swooping it Up
Level 6: Bleed Dance (Q Left)
Level 7: Cyclone (Q Right)
Level 8: Pounce (E Left)
Level 9: Gnawing Out (E Right)
Level 10: Evade Defenses (LMB Left)
Uncle Sven
Arc your flasks over obstacles for sneaky hits and general harassment! This build supports, so stay near your allies and help them too.

Level 2: Bounces Off Me (Q Left)
Level 3: Only the Purest Ingredients (E Right)
Level 4: Absorption Matrix (Q Right)
Level 5: Focused Healing (Focus Right)
Clash Talent: Ooze and Ahhs
Level 6: Amity (Focus Right)
Level 7: Persistent Purgative (E Left)
Level 8: A Mean Ole Acid (RMB Right)
Level 9: Acid Reflex (RMB Right)
Level 10: Geek Fire (LMB Left)
Vadasi
Valuable team member, but difficult to play. Try not to kill yourself with Devotion! This build is full support.

Level 2: Keeping the Faith (Q Left)
Level 3: Succour (LMB Left)
Level 4: Another’s Keeper (Focus Left)
Level 5: Focused Healing (Focus Left)
Clash Talent: Divine Light
Level 6: Sanctuary (E Right)
Level 7: Divine Fury (Q Right)
Level 8: Righteous Defenses (LMB Left)
Level 9: Flameseeker (RMB Right)
Level 10: Eternal Flame (RMB Right)
Voden
Remember; Hidden Spring heals your teammates! This first build is poison orientated, keep your opponents poisoned for easy focus gain

Level 2: More Spores (RMB Left)
Level 3: Contagion (RMB Right
Level 4: Dead Eye (LMB Left)
Level 5: Bow Flex (LMB Left)
Clash Talent: Toxin
Level 6: Alternate Root (Q Left)
Level 7: Leaf No Trace (Q Right)
Level 8: Refreshment (E Right)
Level 9: Easy Strider (Focus Left)
Level 10: Endurance (Focus Left)
Assassin build

Level 2: Bow Flex (LMB Left)
Level 3: Geyser (E Right)
Level 4: Seeking Spores (RMB Right)
Level 5: Easy Strider (Focus Left)
Clash Talent: Heart of Oak
Level 6: Hit and Run (Focus Right)
Level 7: Hungry Spores (RMB Left)
Level 8: Companion’s Boon (Q Right)
Level 9: Refreshment (E Right)
Level 10: Spore Imitation (Q Left)
Wu
Tongue Lash is Brutal, use it wisely!
Level 1: Flowing Fist (LMB Left)
Level 2: Boundless Energy (RMB Right)
Level 3: Risking Tide (RMB Left)
Level 4: Whet Your Appetite (E Right)
Level 5: Rupture (LMB Left)
Clash Talent: Tongue Tide
Level 6: Battle Ready (Focus Left)
Level 7: Hit and Run (Focus Left)
Level 8: Lick and Load (E Left)
Level 9: Intercepting Fist (Q Left)
Level 10: Dim Mask (Q Right)
Xenobia
Debuffs, Debuffs, Debuffs! Often targeted by assassins. Your stun can be insane once upgraded!
Level 1: Banishing Sorrow (Q Right)
Level 2: Withering Gaze (LMB Right)
Level 3: Amity (Focus Right)
Level 4: Siphon Strength (LMB Right)
Level 5: Demoralizing Cry (RMB Right)
Clash Talent: Insult to Injury
Level 6: Feast of Spite (RMB Right)
Level 7: Building Anguish (E Right)
Level 8 Life Line (Focus Left)
Level 9: Crippling Anguish (E Left)
Level 10: Compounding Sorrow (Q Right)
Zandora
Play as a support, not just a tank, please!
Level 1: Strength of Arms (RMB Left)
Level 2: Rainbow Dash (Q Right)
Level 3: Amity (Focus Left)
Level 4: Life Goes On (E Left)
Level 5: Aura Renewal (LMB Left)
Clash Talent: Speed Persisted
Level 6: Dash of Healing (Q Left)
Level 7: Extended Focus (LMB Right)
Level 8: Foes Beware (RMB Left)
Level 9: Battle Armor (E Left)
Level 10: Hero’s Vitality (Focus Left)
Conclusion
beepboop
Griselma Maaaaiinnnnn!!!!