Overview
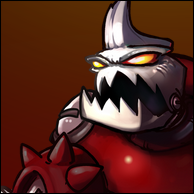
Image-based GuideClunk, Execute Order: Kilo, Alpha, November. Do you comply? Go out there my creation and give them hell!
Introduction

Know the Naut

Tips and Tricks

Match Ups I

Match Ups II

Match Ups III

Bite

Explode

Missile

Utilities – Tools of the Trade
Power Pills TURBO

Upgrades 3
+20/+40/+60 Max Health
Increases the Max Health of your Naut. For Clunk it can increase your Base Health from 205 to 265 and with Medical Pump to a whooping 355 Max Health. If youre having a hard time going up against stronger Nauts, it is heavily recommended you get this.
Med-i’-can

Upgrades 2
+100/+200 Health Per Min
Allows you to Regenerate your Health, this is good substitute for Power Converter. If an enemy Naut has some sort of Health Burning effect (Lonestars Dynamites/Skoldiers Earthquake) or Poison effect (Gnaws Bite/Poison Spit), this may allow you to survive if you take to many hits.
Space Air MAX

Upgrades 1
+1.6 Movement Increased
Clunk slow, makes fast movment. The faster you move, the faster youre able to reach your destination, the faster you’ll be able to enter a fight, the faster you’ll be able to get solar from winning a fight and helpping teammates.
Solar Tree

Upgrades 1
+20 Solar Per Min
Regen Solar, wait what! You’ll be able to get additional Solar from doing nothing. The more Solar in anyway you get the better as you’ll be able to grab your upgrades quicker which means a harder time for your foes.
Piggy Bank

Upgrades 1
+115 Solar
Its Free Solar… FREE SOLAR. There is some debate about which you should get. You can get both Piggy Bank and Solar Tree to maximize your Solar Growth. It is up to you what to sacrafice if you plan to do it, but you do have two kinds of Bite Upgrades to Increase and Regen Health.
Baby Kuri Mammoth

Upgrades 2
-20%/-40% Debuff Time
Decreases the ammount of time youre debuffed. It reducess all effects. I would get this if you feel youre Stunned or Snared too much for too long. If you want to survive longer get it, if you feel fine, dont. Its as simple as that.
Advanced Tips and Tricks – Radical Dude~
Being one of the few larger Nauts, while having good vertile mobility compared to the other larger ones (and some small Nauts), you can help your teammates set up an enemy for fail. There are some Nauts this will have trouble executing and is more easily done near the beginning of the game or when someone is trying to retreat or you notice the lone Naut.
By repeatedly jumping you can make it hard to near impossible from continuing in the intended direction, this of course slightly harder in large areas like in AI Station 404 and Ribbit IV. You can also do this when your Turret is getting pushed, by Body Blocking so they can not run. Dont be reckless, as anytime youre reckless will get you killed.
Nauts that are Hard to Perform on:
- Froggy G
- Lonestar
- Skoildir
- Ayla
Nauts that are Medium to Perform on:
- Coco
- Leon
- Gnaw
- Yuri
Nauts that are Easy to Perform on:
- Clunk
- Raelynn
- Genji
- Voltar
- Vinnie and Spike
Derpl that are Derpl to Derpl on:
- Derpl
If you are running Fragmenting Shells it is best to when pushing or when a Leon is around, to shoot the ground. The Explosion will still cause the same ammount of damage the missile will/had caused. This will lower the chance to miss as well, always aim at the feet.
This becomes extreamly well when pushing a Turret and the other Team and/or Droids are standing behind it. You will allow your Team to stay there just that much longer, by shooting at the ground escpially when a Fat Pete goes off.
Drop in from above on any map and preload an Eplosion.exe followed by a Screamer Engine.dll on your Bite.exe for maximum butt damage.
Basic Builds

Authors Build – Personalize Your Clunk

Early game you’ll want to:
- Screamer Engine
- Thermonuclear Cleaner
Getting these will allow you to lay up some kills easily and also the breaking point depending on your build. If you want to go more Missiles:
- Salvo Value Pack
- Free Flight Fins
- Blueprints Container
- Medical Pump / Power Converter / Power Pills Turbo / Med-i’-can
- Frafmenting Shells / Missile Barrage / The Juggernaut ‘Fat Pete’
- Free Flight Fins
If you want to be a Naut Slayer instead you can build it:
- Blueprints Container
- Quick’n Cleaner
- Medical Pump / Power Converter / Power Pills Turbo / Med-i’-can
- Thermonuclear Cleaner
- The Suckanator Power 9000 Cleaner
- Grease Lightning Snail
- Medical Pump / Power Converter / Power Pills Turbo / Med-i’-can
- Quick’n Cleaner
If need be, by End Game you should be working on the Upgrades you havent purchased yet, depending how often youre pushing the Turrets.
Personally, I like using Clunk more as a Naut Slayer since in my eyes, Less Nauts = Easier to Push. You can also mix it up a bit and make a Hybrid, but I havent tested any kind of way to Hybrid the skills other than buying one Upgrade of Thermonuclear Cleaner
Maps – Location, Location, Location

In early game is best to use the hideouts to your advantage (pay attentions to the leaves to make sure the other team isnt in there). After taking out Top Turret you’ll wanna hang out on the floating plaform where the Laser Blocker use to be as to pincer anyone when your team is pushing the 2nd one. After taking out the Lower Turret, you’ll want to pincer them by making them get stuck in the game the Turret had left behind.
When you get to about half in any fight its a good idea to plan your get away. When on top your path will be one of two. Make a B line to behind your Lower Turret (assuming the first one is still up) or juke and jive to behind the Laser Blocker.

Death from above. At the beginning after the first encounter is over (rule of thumb, other team backs off or dies), after wards start entering from the top. One Nauts always go up there (because of this you may want to heal at the base first especially if PwC are on the team), Two no one expects a falling bomb. When the team starts pushing to the Top Turret you’ll exclusively be entering from the critter area (Always Pincer, youre the Rock while teammates will be A Hard Place). If going for the second Bottom Turret you’ll shouldnt be entering from the Critter area.
Use the Jump Pad behind the first turret, this will be your get away even when the turret goes down (from pushing the team back) or if you wanna be classy, you juke to the Critter area and fall from above again (Clunk ran, I guess we can- BAHBOOOM!).

Again use the hide out to your advantage. If a Gnaw starts to set up there, he becomes high priority for everyone, one reason is because of the Worm switch they’ll have full control of the map. Most of your battles will be around the Worm switch, and when attacking at the bottom its best to control that area so you can force them to go onto the Worm gate. Dont rush into the hide out if you know the other team is in there, start by pre-firing and checking it out from a distance. Have your team as back up.
After destroying a turret less of your battles will be at middle. You can start using the other teams Critter area to heal. Your escape plan will be using the boosters. If a Coco or Leon is chasing, juke them by using them. If a fast naut is chasing never go for the Critter spot, same if a PwC is following you.

Clunk works best on Bottom hide out, or if youre able to get the Stealth Orb you can just ghost your team or a stragler. The bottom is perfect for pincering the other team, even the hide out infront of the turret is good for this too. This a double edge sword, so you must know what you’re doing as you can block yourself into a trap or just royally screw yourself.
Your escape route is pretty obvious since theres a bunch of Laser blocks in the Critter area, you should always B line for it and get behind one of them, you can also use the hide away and juke someone into the turret.
PwC: Any Naut in the Procceed with Caution part of this guide.
Change Log – Tweaks and Changes
Version History:
0.8 –
- Guide Added
1.0 –
- Map Information Added
- Advanced Tips and Tricks Added
1.1 –
- Version History Section Added
- Swiggins added in Match Ups
- Match Up split into three to accommodate the large information
- Utilities added
- Build List Updated
1.2 –
- Added Authors Build to the Guide (My personal build(s) I’ve used).
- Updated Basic Builds with better images.
1.3b
- Completely Image based (in the middle of changing)