Overview
A comprehensive guide on how to get every single medal in Epic Battle Fantasy 5. There are 133 medals in EBF5, varying in tasks required and difficulty. Medals open more of the Great Gallery, as well as usually helping you complete the game. Getting all the medals in EBF5 does not guarantee that you see and do everything the game, but do provide a good chunk of the additional challenges and optional areas. Medals are labeled under larger categories but can be individually selected using the table of contents. But first, some notes:• I’m making the assumption that anyone reading this has the deluxe version of this game; so I will include medals that can only be achieved in the deluxe version in with the other medals.• I won’t be giving a step-by-step guide for every puzzle (due to convenience) or listing any boss medals due to them not being hard to figure out ‘how’ to get.• Some medals are for much later in the game and contain spoiler content. If a medal has what I deem a spoiler image or method of obtaining then I will mark it with an [S]. However, consider this entire guide a spoiler if you truly want a blind experience.• After beating the final boss, a New Game + run is started immediately but your old save before the final boss is kept. The New Game + mode is an exact playthrough of the game where you keep your levels, gear, etc. However, New Game + does not allow you to get the medals for beating various bosses on Epic difficulty to keep things balanced. There is no medal that requires you to beat a New Game + run.• Finally, this isn’t related to any medals but there is a “bad ending” to this game. Both endings are still good and differ little, but to get the better ending you must complete all non-holiday quests and have all human party members become friends. To check on this, the Slime Cat warp room will eventually have a man named Bard that will read your fortune and talk about the characters who aren’t friends. Have the characters he mentions fight together for a while and then check back with him. You can also just beat the final boss on Epic difficulty to ignore this song and dance but that is very difficult.With that all said, enjoy and let me know if there is anything I got wrong or should add!
Exploration Medals
These are medals are ones completed in the overworld/out of combat. Most of the medals are story-centric or are just extremely likely to be completed in a normal playthrough of EBF5, but some require a bit more exploration and effort to accomplish. Remember, you can mark things on your map for later if you can’t do something right now.
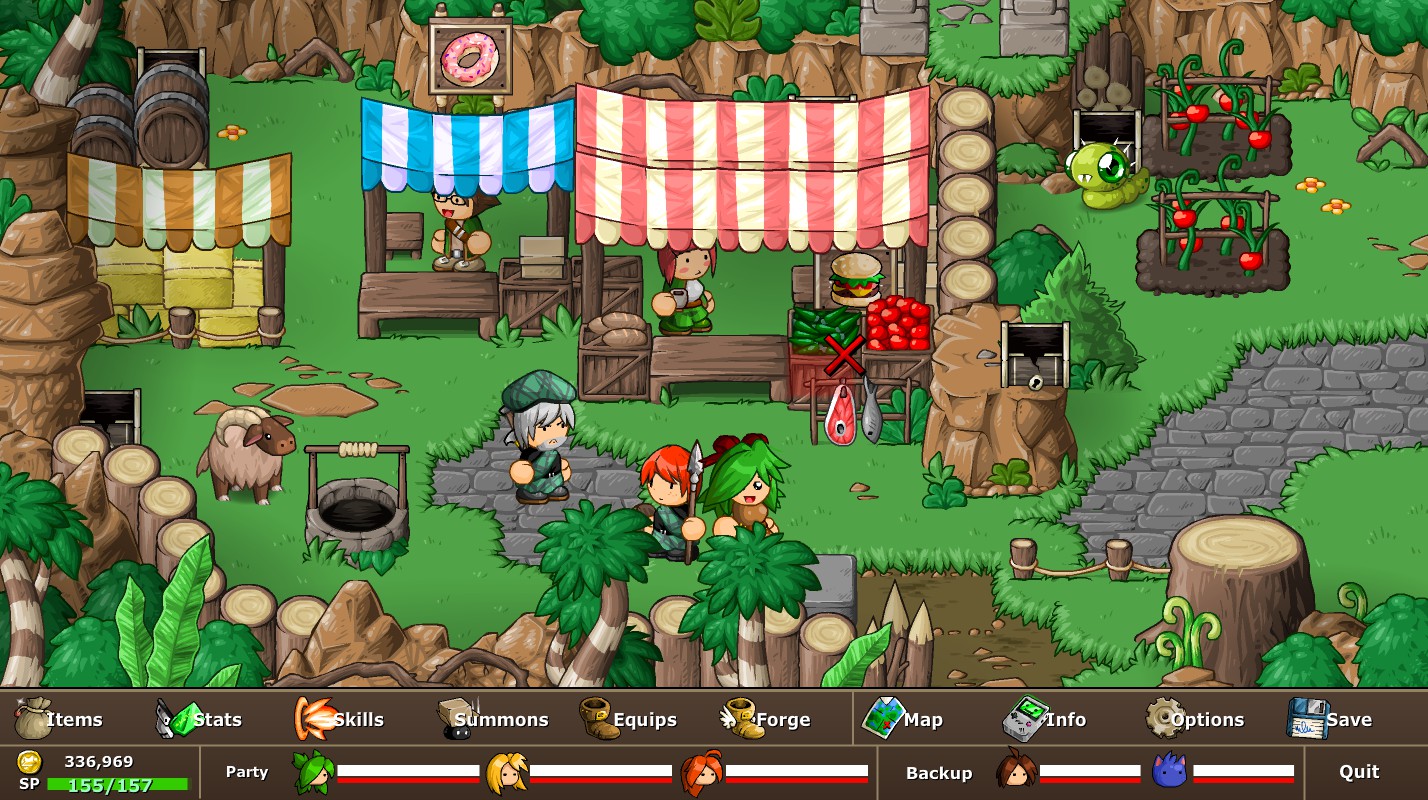
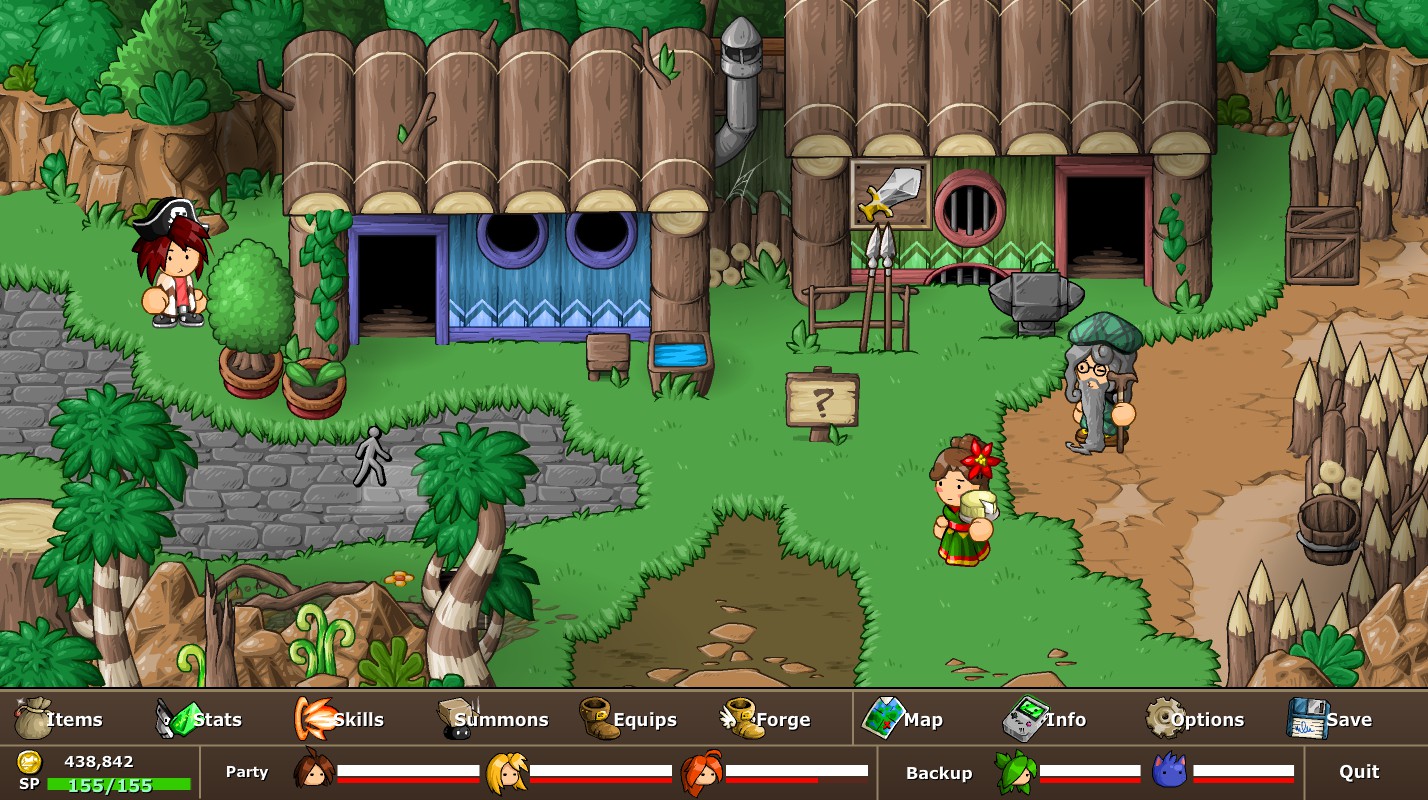
Wandering Out
“Begin your adventure by wandering away from home and into the jungle.”
After fighting NoLegs, head north and find the Hope Harbor food shop. Head left after that and you will enter the Wild Tropics.
Slip ‘n’ Slide
“Get familiar with some annoying puzzle mechanics.”
After defeating Jotun, the boss of the Wild Tropics, enter the ice cave behind him. This isn’t a new area but entering the second screen, past the NPCs, will net you this medal.
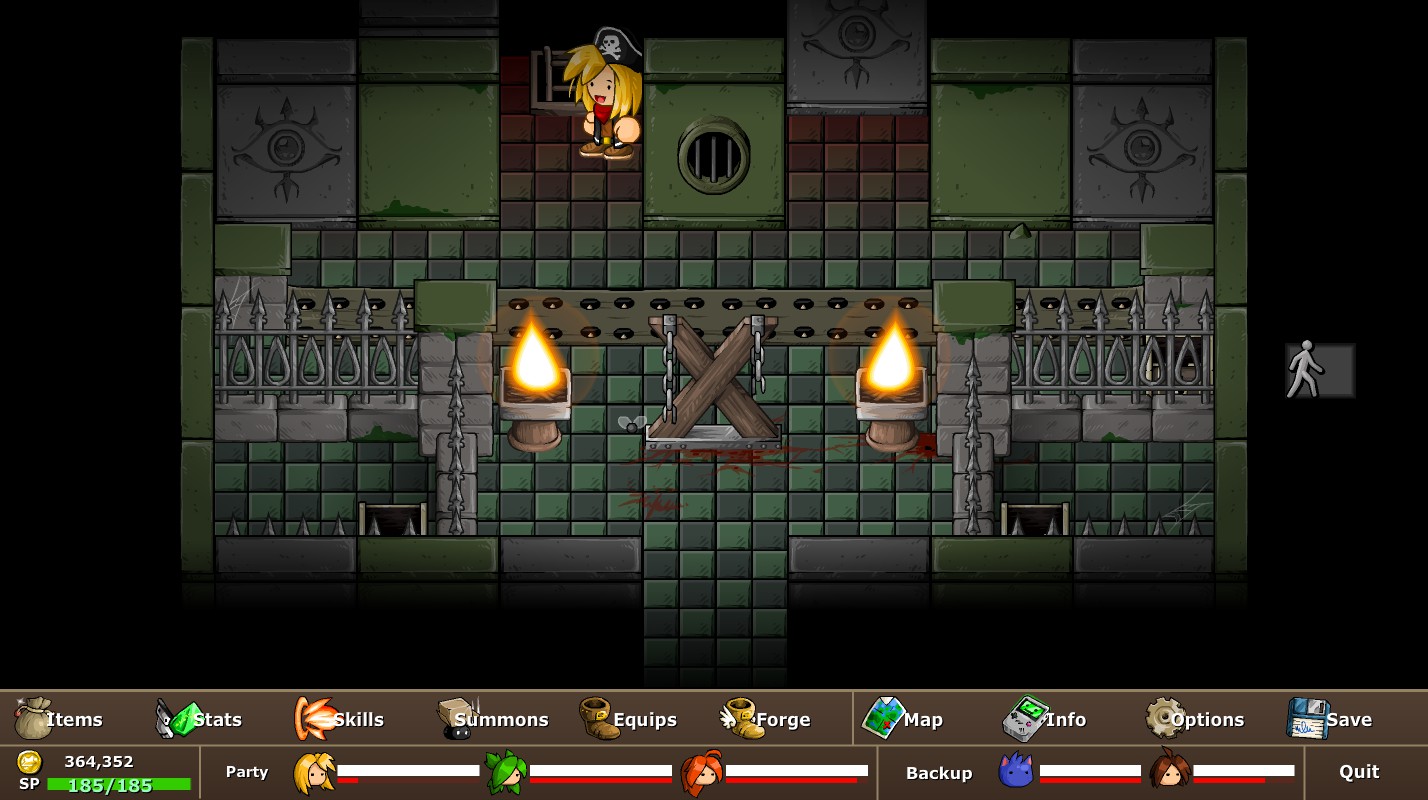
Over The Wall
“Enter the fascists’ fortress with a dangerous mission in mind.”
After defeating Anna & The Mighty Oak, progress through the No Man’s Land a bit further. You should come to the castle’s main gate; enter said gate and get this medal.
Party Hard
“A bunch of poorly drawn cartoon characters get together and smash things.”
To get this medal you need 5 team members at any point. This happens after you’ve rescued Natalie and are able to fight Lance and his Neon Valkyrie. After beating Lance, your party will take him prisoner and you will have all 5 team members.
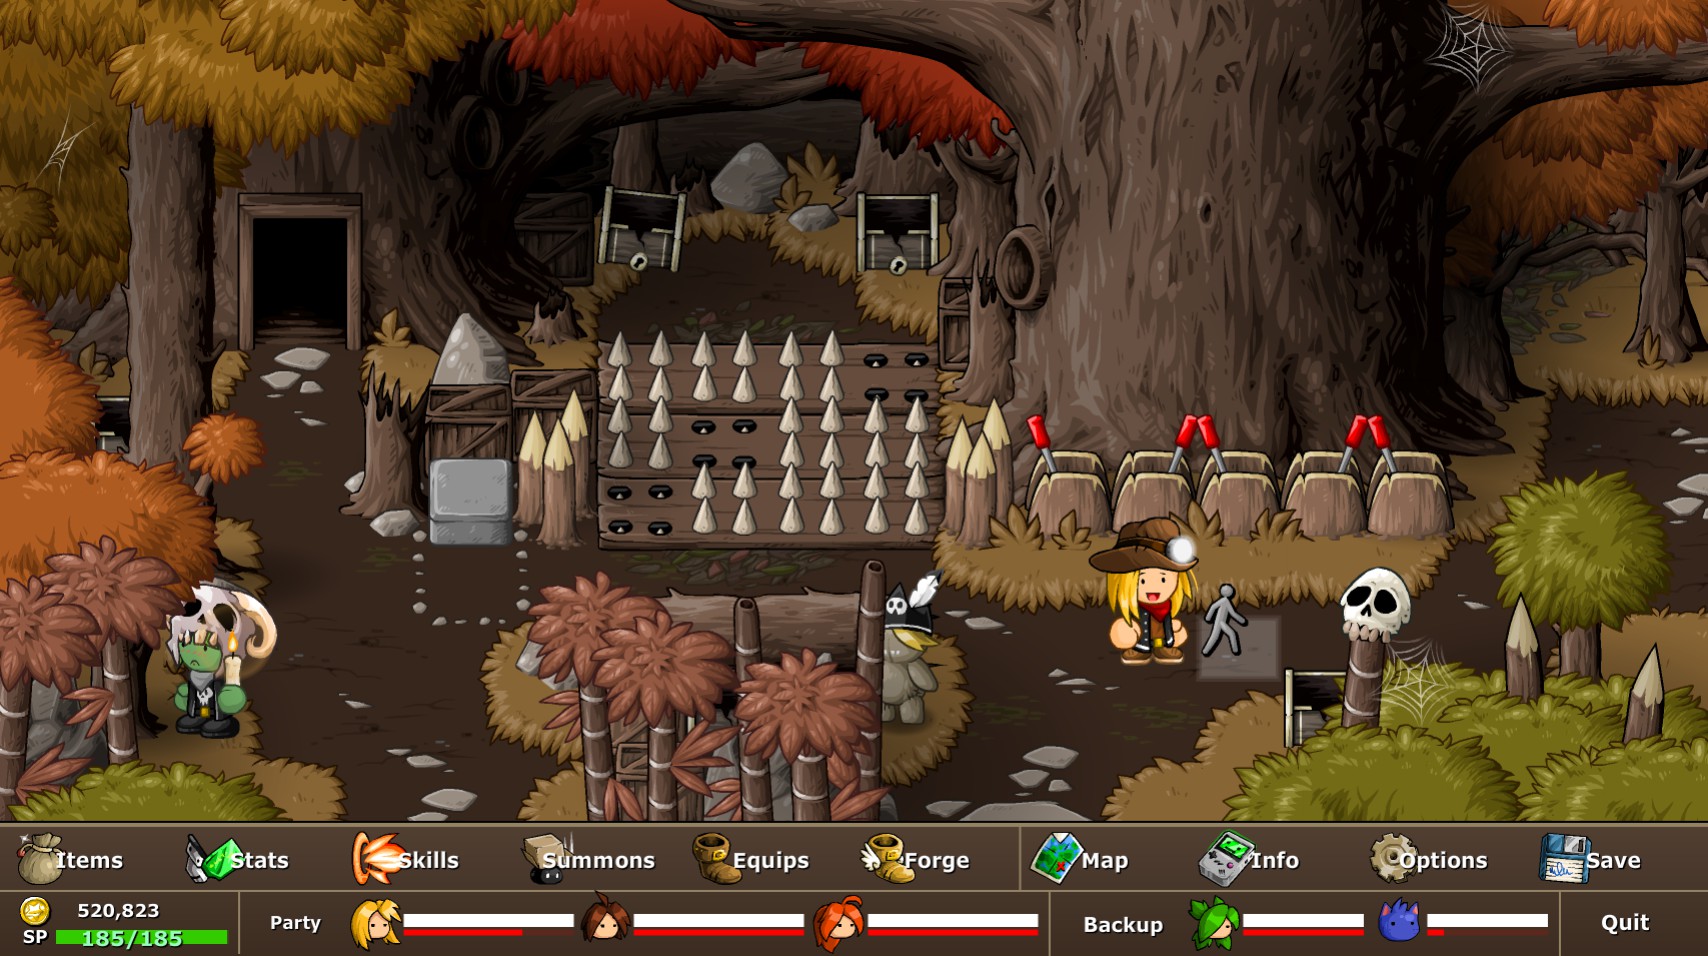
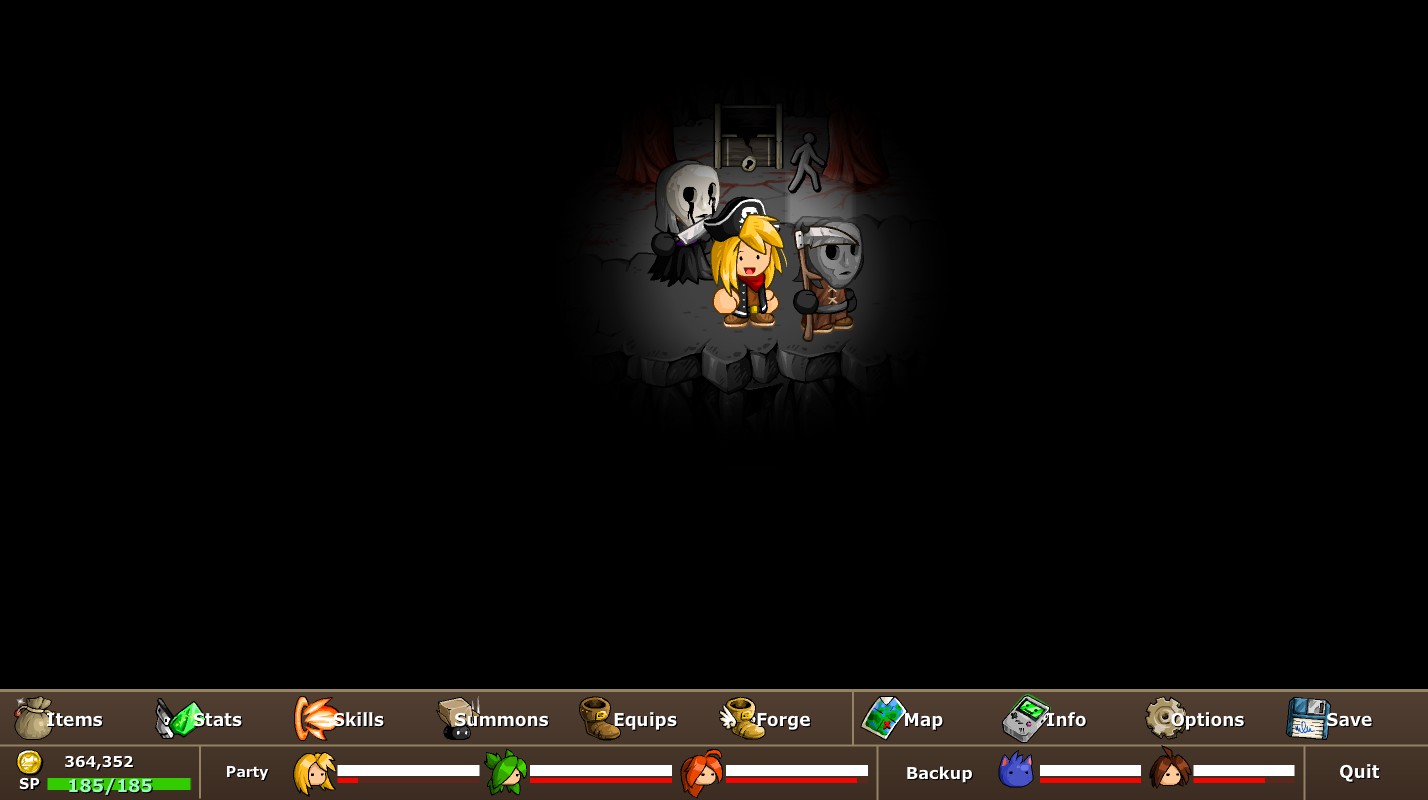
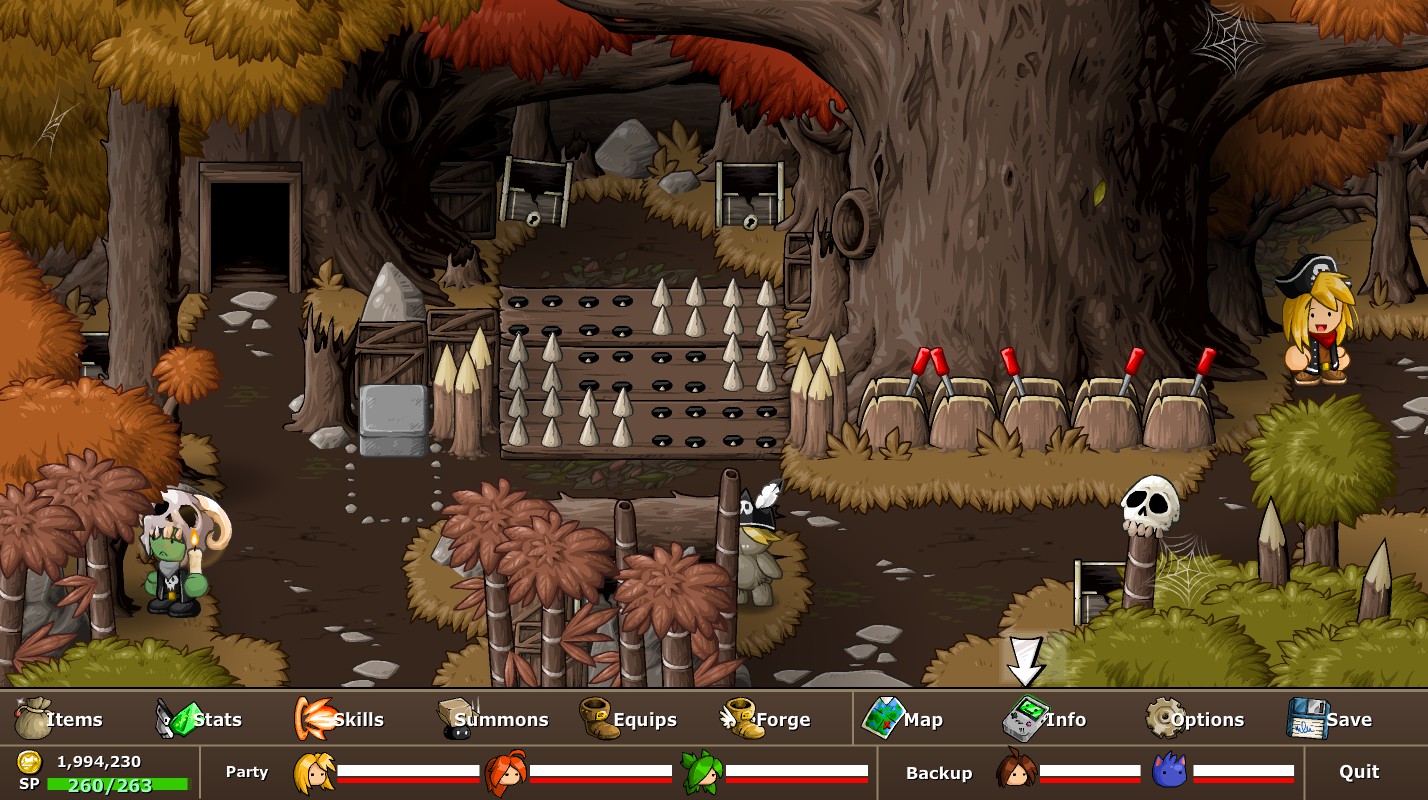
Swamped
“I have a feeling these woods might actually be haunted.”
Enter the swamp of the Mystic Woods. To do this first enter the haunted part of the woods, you can tell by the darker enemies and red trees. After that head through the tree with the shop and down to the forest floor. Go down once more and you will get this medal.
River Rapids
“Sail towards unknown lands on a dinky raft that’s totally sea-worthy.”
Enter the Rainbow River on the raft. There are multiple places you can do this but the main way is to go to the outside of the Ice Cave where you fight Jotun and head down after obtaining the raft.
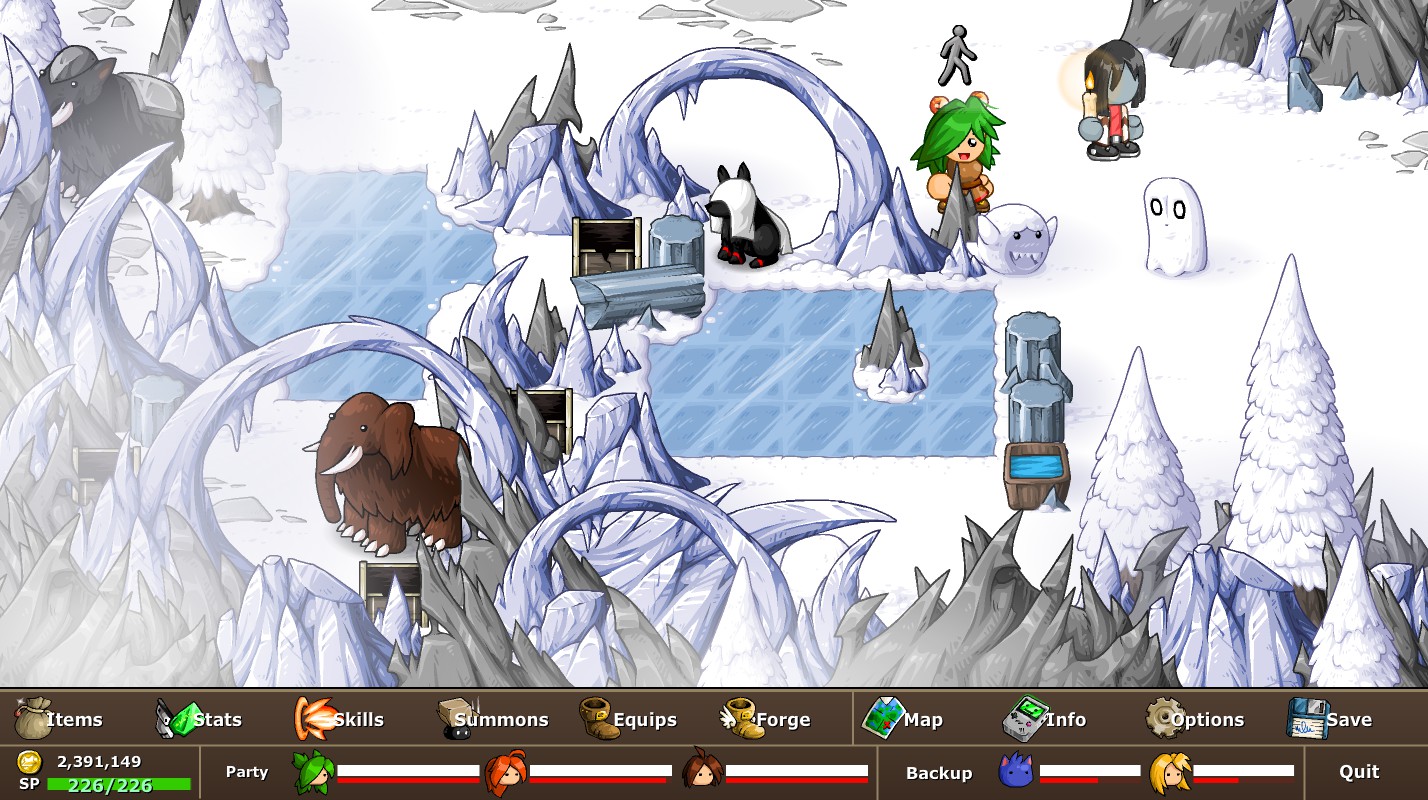
Arctic Expedition
“Unpreparedness won’t stop this adventure!”
Enter the Frozen Valley. After collecting the 6 Poseidon stones throughout the Rainbow River, return to the Rainbow Gate south of Hope Harbor and place the stones. After going through the gate, go down one more screen and you will get this medal.
Alien Landscape
“Look upon the remains of a devastated landscape.”
Enter The Rapture East of Redpine. There are a few entrances to The Rapture but only one is open from the beginning.
Uncharted Islands
“Sail south of the map, across the Great Sea, to discover new exciting lands!”
There is only one location to sail south from to my knowledge, which is here:
Then there is a bit of a maze, luckily I have the directions right here!
Start: South
Lilypad: West
Ice: South
Magma: East
Nothing: East
Arches: South (Heading North gets you to small island with nothing on it)
Coral Tree?: West
More Coral Trees: South (Arcade Machine Here)
Coral Tree Islands: South
Following this should get you to civilization again, as well as grant you a warp cat and a medal. This area has a shop with all items, and access to both the Data Bunker and Battle Arena.
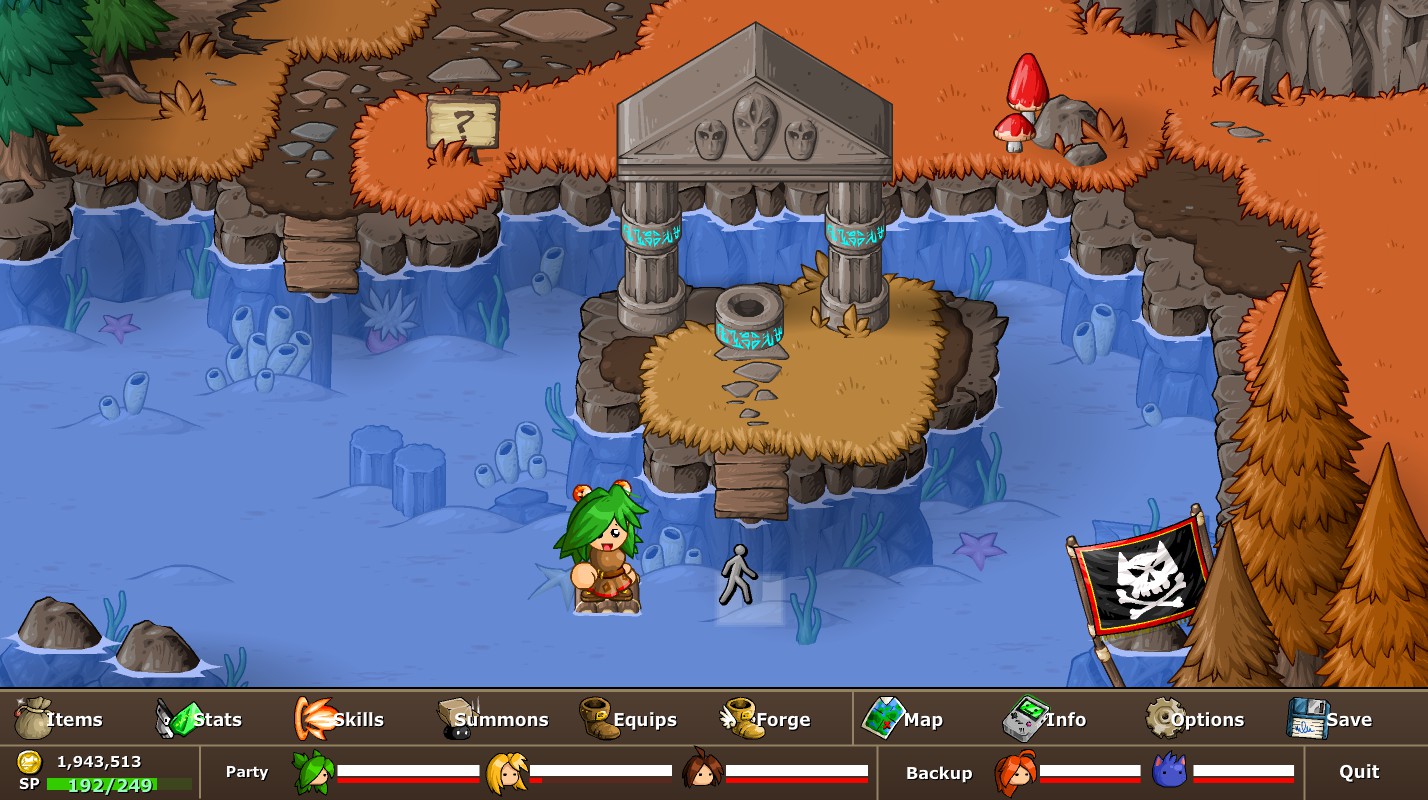
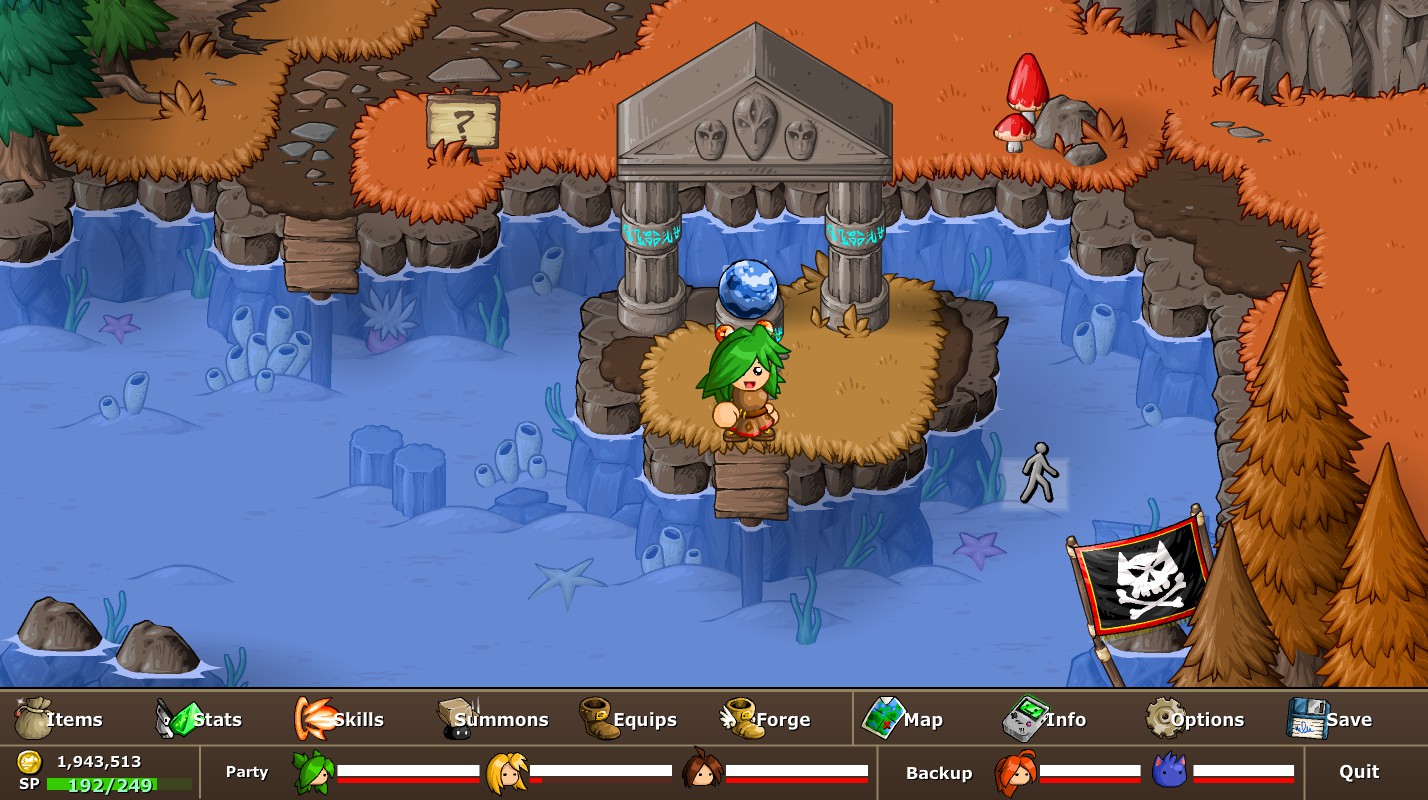
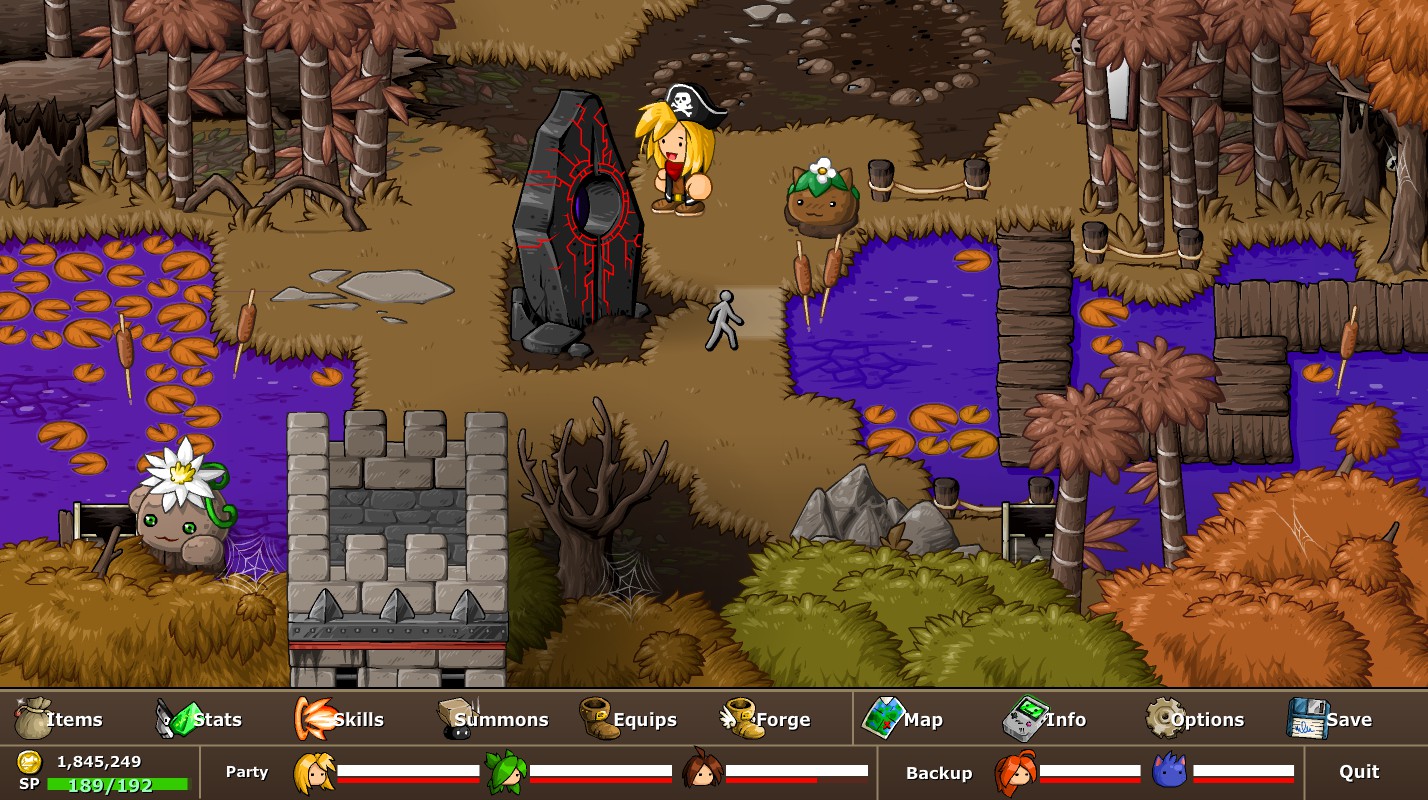
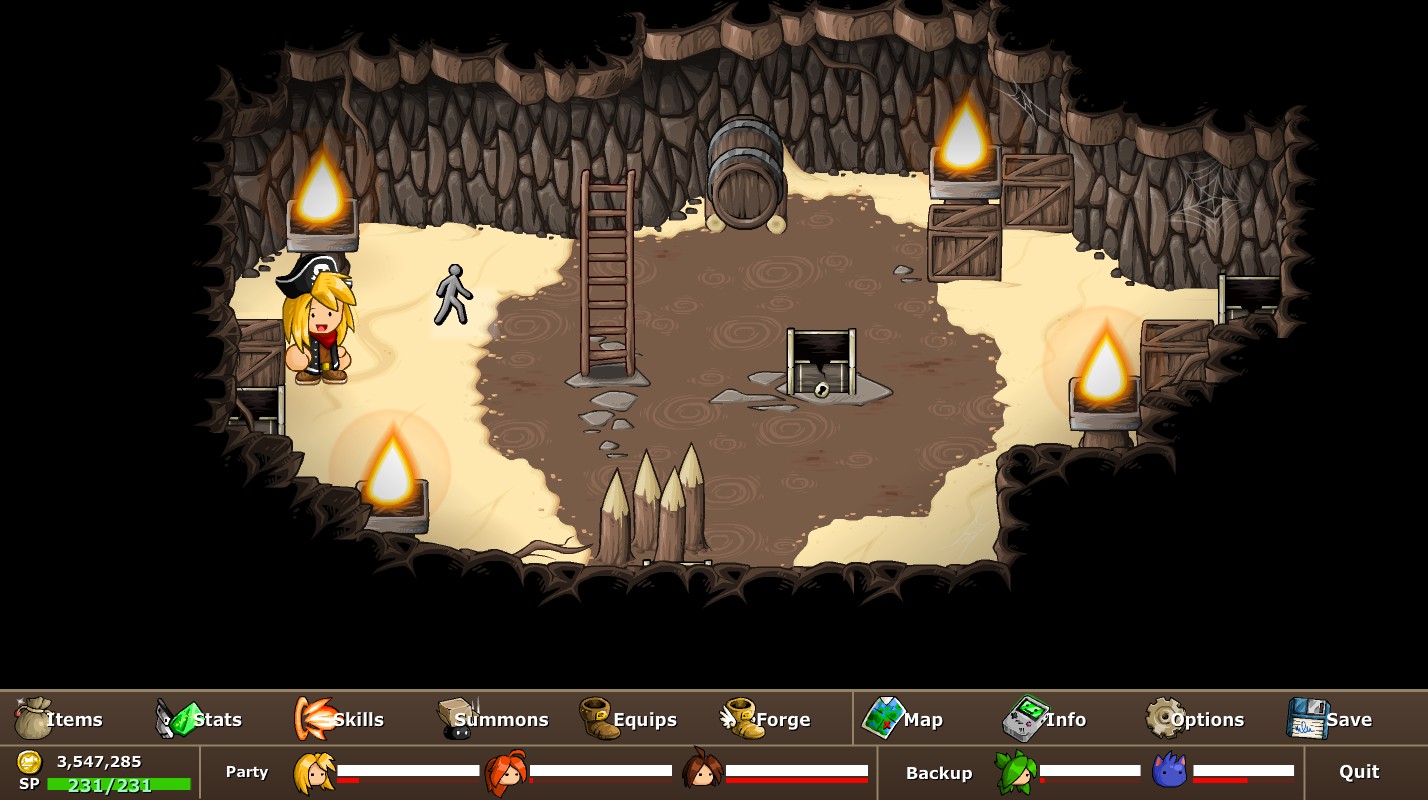
[S] World Saved?
“Defeat the final boss and finish the main story.”
Do as the description says. After collecting the 4 elemental orbs shown below, place them around the room with the Slime Cat. A portal will open and after a few Minibosses, the final boss will be able to be fought. Note: Defeating the boss also ends the game; finish up anything else you need to before doing this.
Water Orb: Redpine (After beating Poseidon)
Earth Orb: The Rapture (After beating two-headed Zombie Hydra, pretend its there)

Fire Orb: Lava Lake (After beating three-headed Magma Hydra)

Air Orb: The Rapture (In the big teleportation area)

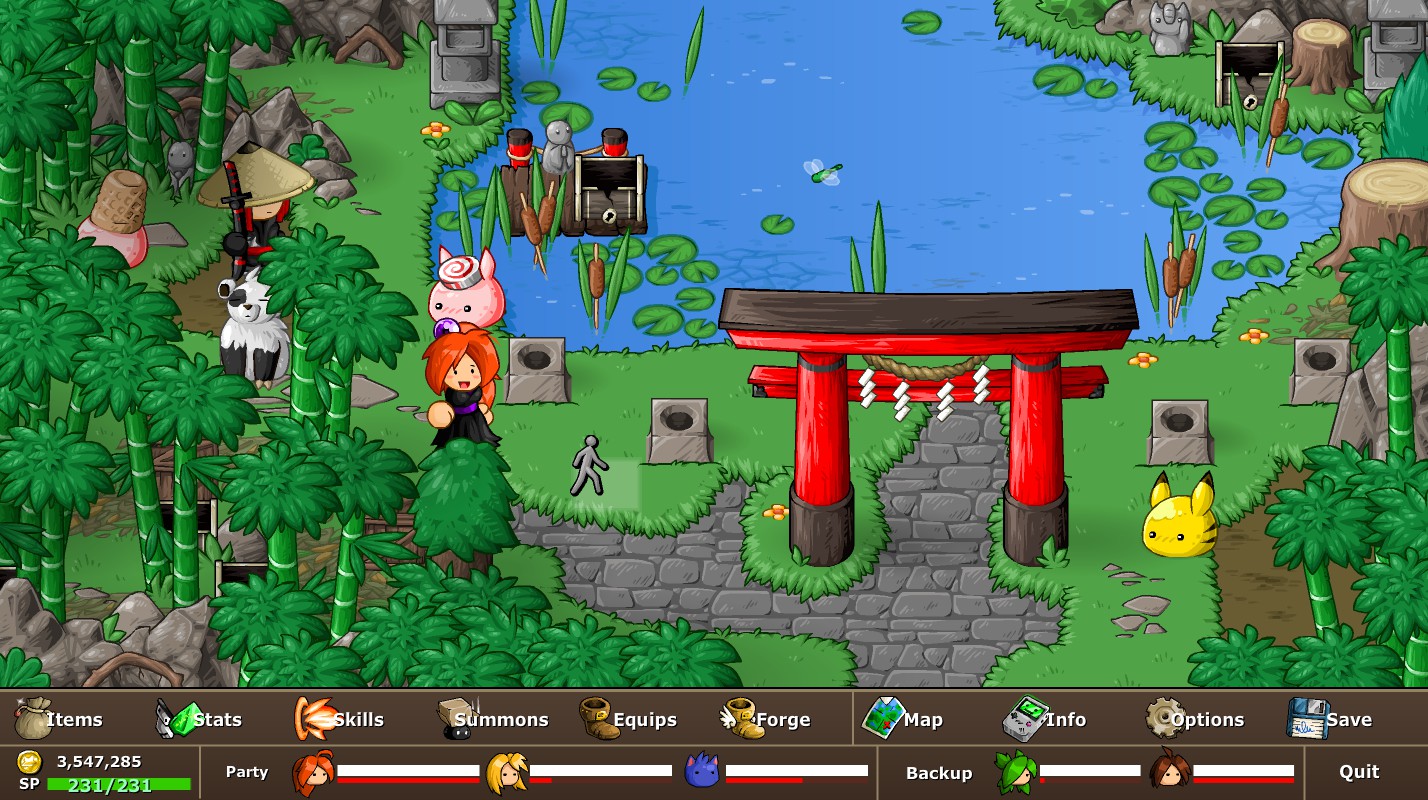
(Also there is a secret chest for placing all 4 of these in the Bamboo Forest.)
Instant Knowledge & Bonus Skills
“Learn a new skill through sheer willpower alone – no practice involved.”
“Adjust your default abilities to something more unique, and show off the real you.”
Both of these are very simple and can be done as soon as you get NoLegs. For Instant Knowledge, just go into the skills tab and learn any brand new skill. For Bonus Skills, take Matt’s barrier skill and give it to NoLegs
Roid Rage
“Get a taste of performance-enhancing steroids, like bacon or bread.”
Steroids are specialty food items that permanently boost a player’s stats. The very first steroid you can possibly find is in the chest next to where you fight NoLegs. Eat it to get this medal.
Upgrade Complete
“Fully upgrade a weapon – this is the best use of your cash!”
Not really a specific way of doing this. Just upgrade any weapon or armor (not flair) to level 5. If you haven’t completed this medal before you get to Redpine, the shop sells every single crafting item so buy away.
Best Customer
“Buy everything in the equipment shop. Maybe some new stuff will appear during certain months..?
Hope Harbor, Greenwood Village, and Redpine Town all have an equipment shop that shares the same stock of weapon, armor, and flairs. If you do all of the optional things in EBF5, you should have way more money than what is needed to own all of these items. The tricky part is that (I think) you have to own at least one set of holiday gear covered in the Generic Holiday medal.
Unlimited Blade Works
“Collect 150 different items of equipment. You don’t even need all of that.”
Yes, there are actually that many, even more than that in fact. Most bosses give equipment, and so do some NPC quests. I won’t list every single equip but a guide by DaGamerDude584 does a pretty good job at it.
List of Every Key Item and Equip in EBF5: [link]
Unusual Torture
“Melt down a captured foe and use it as a crafting material. The foe’s consent is not required.”
Again, no real specific way of doing this. Some higher levels of equipment will require a summon to craft it. This will consume the summon so be careful… you monster.
Ex: Lance’s Shadow Blast Level 3 needs a Red Flybot
Not Pokemon
“Equip more than 6 summons, but no more than 18, as that would be simply unfair.”
I don’t fear Nintendo. Throughout combat, you can capture enemies to use for later. Once you have captured 7 unique enemies, open the summons menu and double-check that they are all selected in the menu to the right.
Video Games
“Talk to every type of game console. They won’t talk back.”
There are 5 specific video game consoles to interact with. The locations of these are:
- Matt’s House
- Hope Harbor Item Shop
- Anna’s House
- Jamie’s House (Greenwood)
- Redpine Steroid Shop
The Xbox-looking devices in Lance’s castle that surround the monolith do not count towards this medal.
Bookworm
“Read every book in the library – not just for this achievement, but to actually learn!”
As soon as you see the Pink Slime Cat after No Man’s Land, head north. You will see a large stone building labeled “Library”. Enter this building and click on every single book possible, there are 23 in total (I am unsure if the books in the optional area contribute to this medal). These books actually teach you a lot about the game so I’d recommend actually reading them!
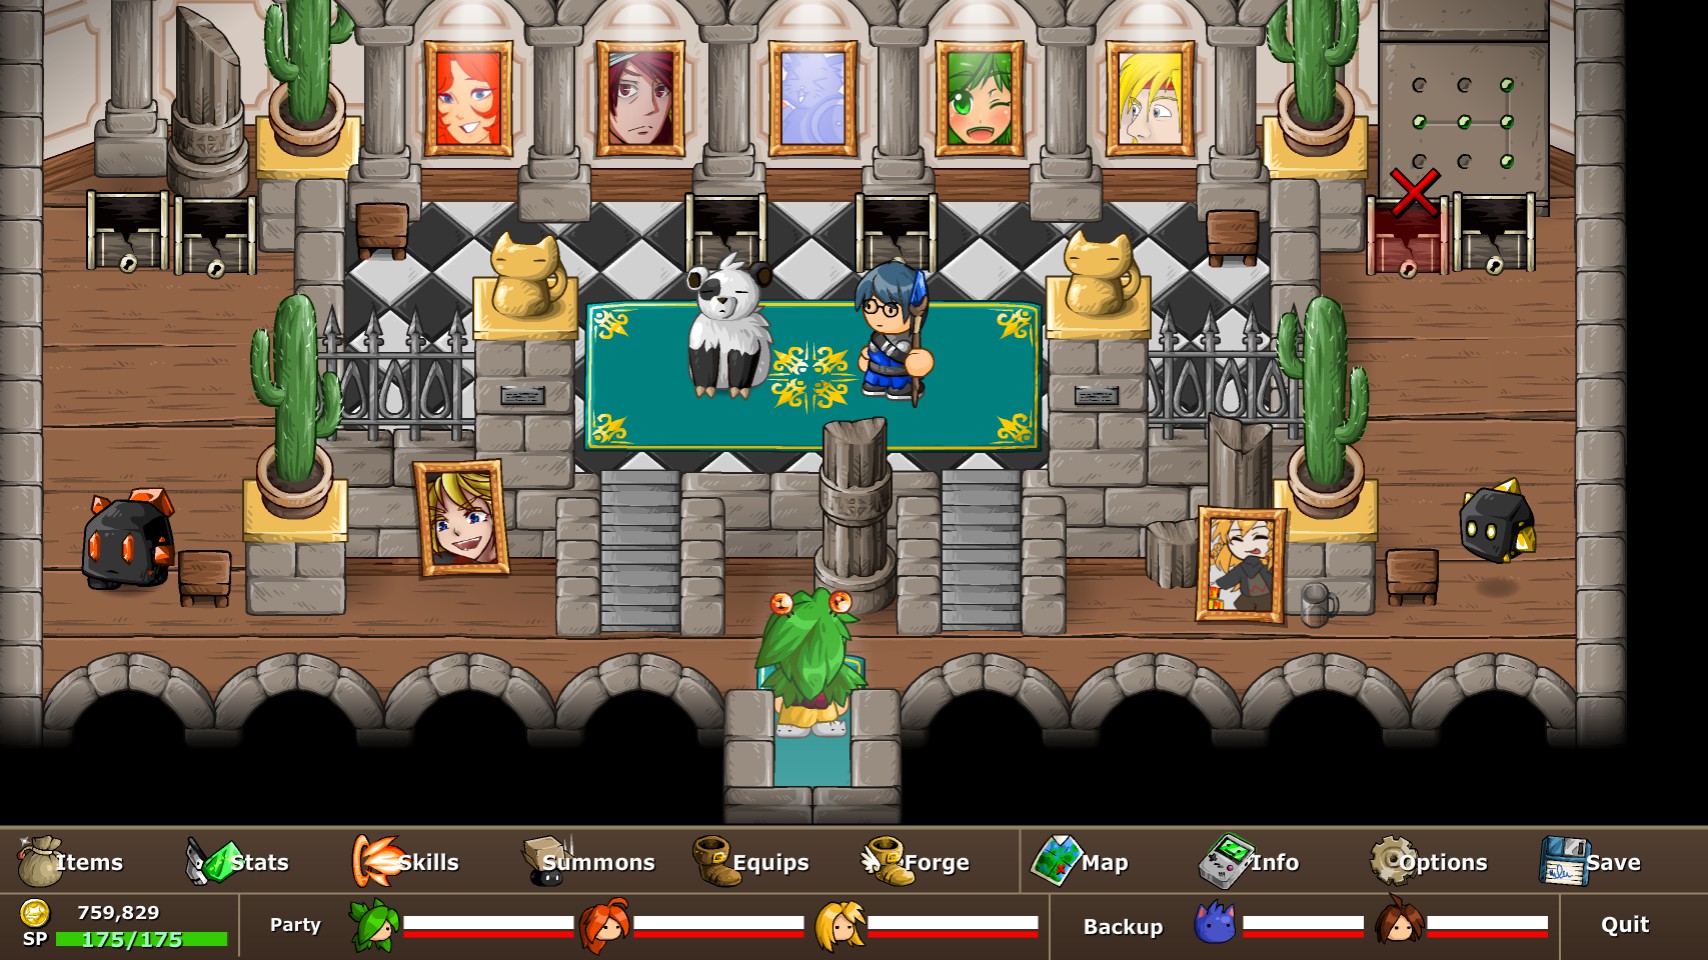
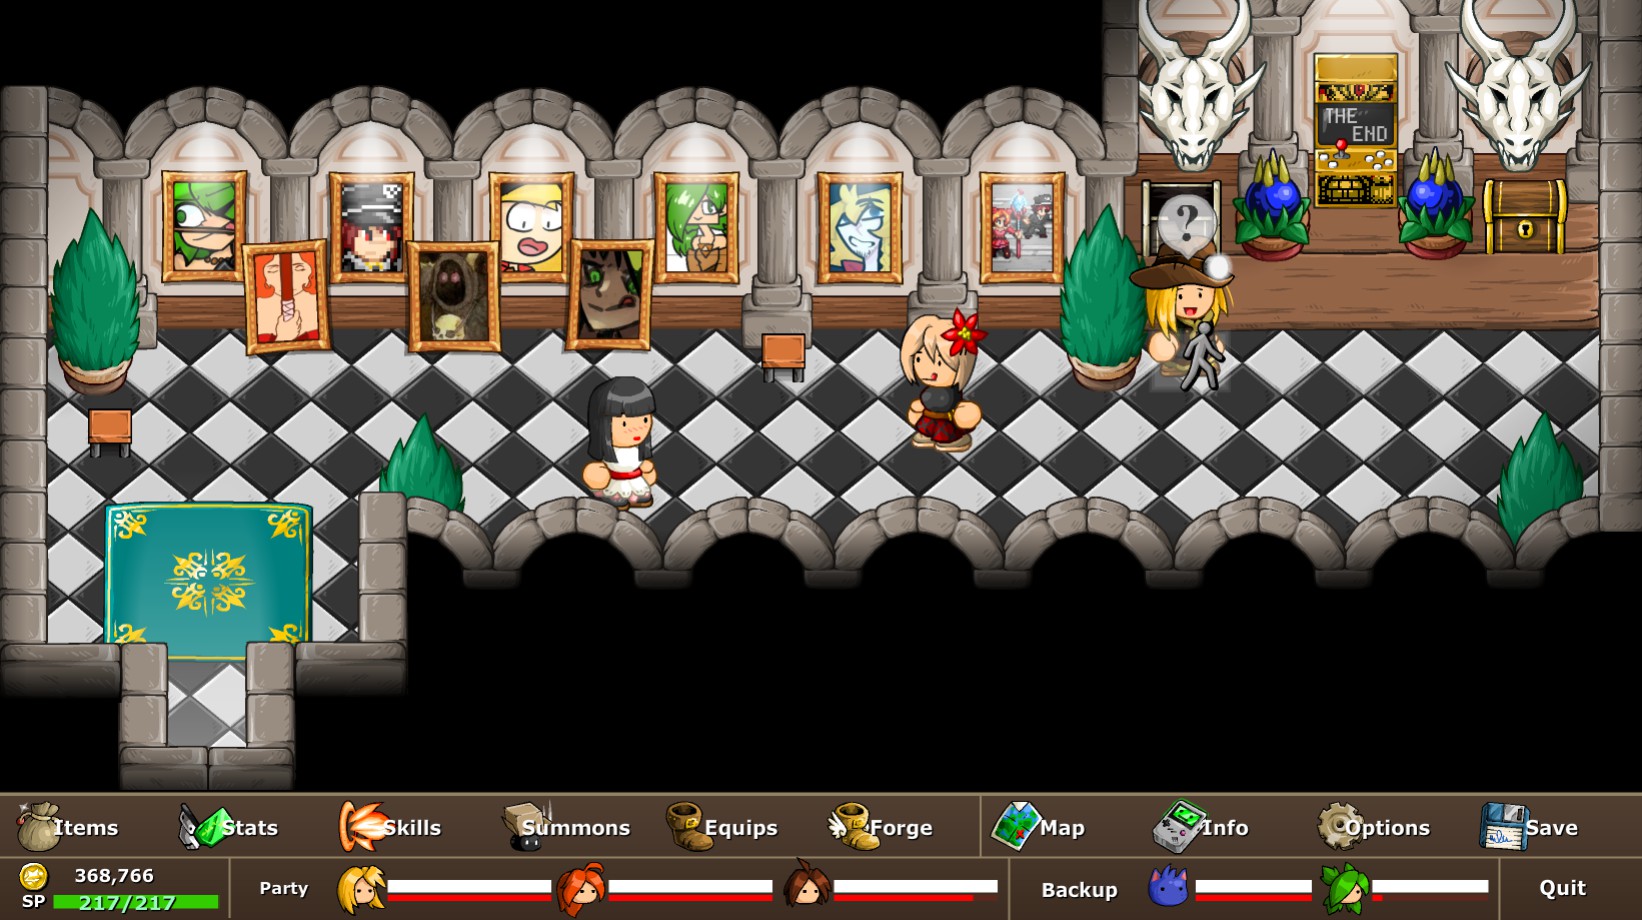
Art Connoisseur
“View a fine piece of artwork.”
Throughout EBF5, you can find paintings with beta designs for monsters as well as some fan art. The easiest places to find these are the Grand Gallery as well as the very first room of the No Man’s Land castle. Click on one of these paintings to see some dialogue and get a medal.
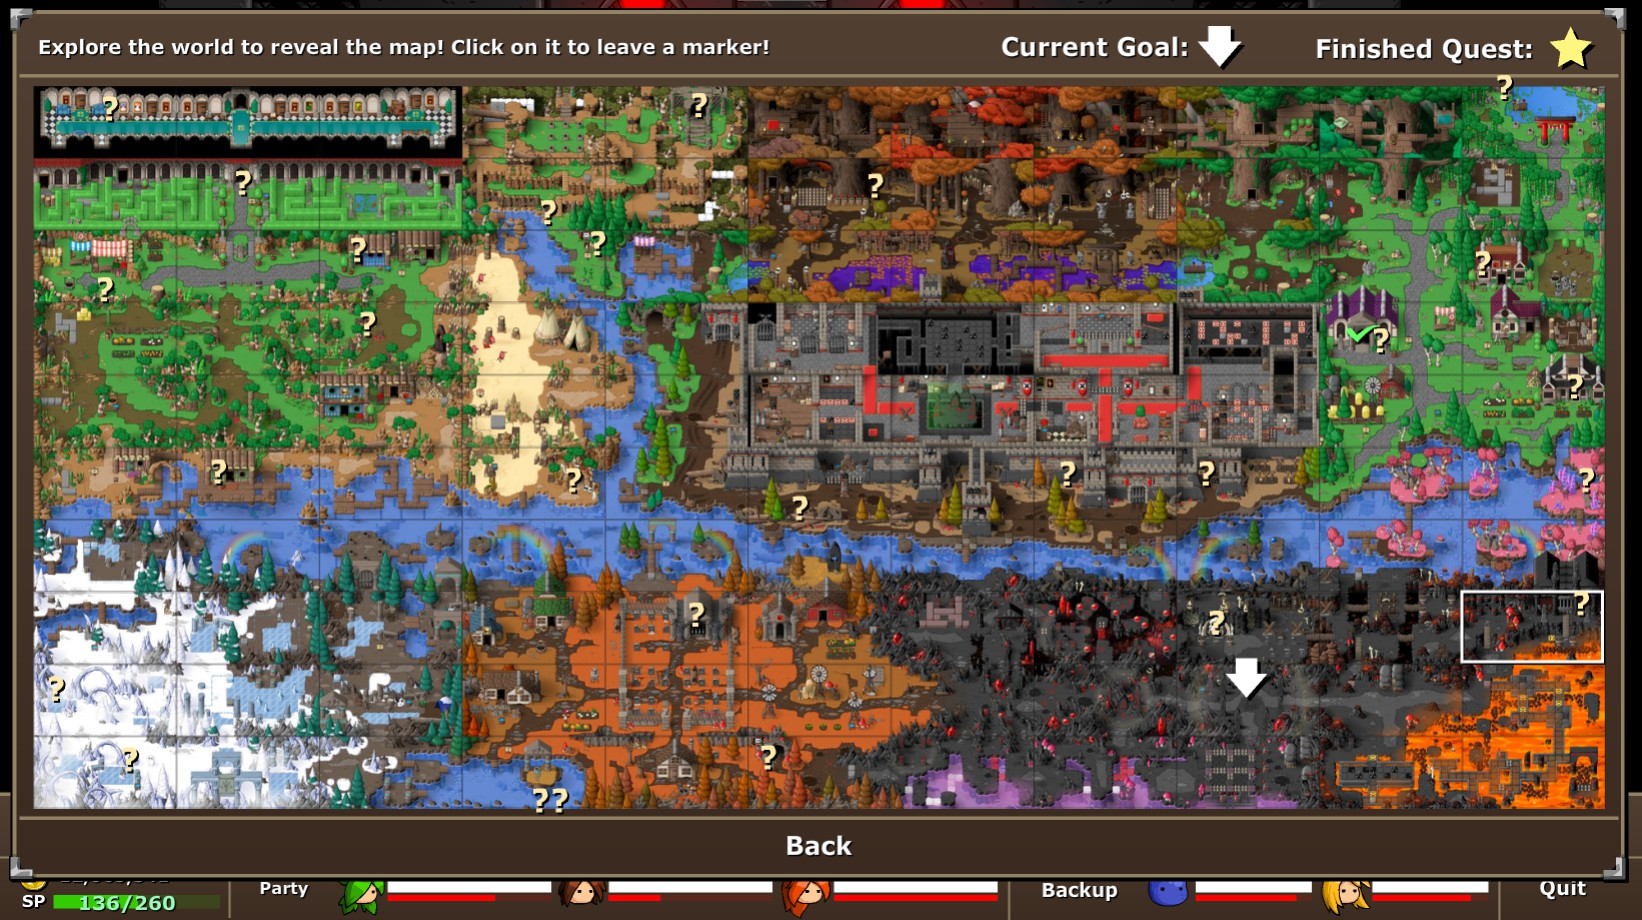
Cartographer
“Fill in the entire world map – which doesn’t include secret underground areas.”
Pretty straightforward, go to every overworld screen on the map. This does not include inside buildings, secrets, or underground areas but does include the optional areas Grand Gallery and Forgotten Ruins.
Helping Hand/Public Servant/Quest Cuck/Quest Completionist
“Complete 10 quests for NPCs, and experience the joy of helping others.”
“Complete 20 quests for NPCs, hoping they’ll ignore all of the damage you’ve done.”
“Complete 30 quests for NPCs, as apparently, they can’t do anything for themselves.”
“Complete 40 quests for NPCs. You’ll need to complete some of the holiday ones too.”
Doing all 4 of these will have you do every quest in the game. Some quests require that you get normal items while others require key items found around the map. There are extras of almost every quest key item so you’re not likely to completely miss things if you look around. In the Unlimited Blade Works section, I posted another guide (not made by me) that contains every key item and location if you can’t find anything. Also, check the ‘Generic Holiday’ section to learn how to do holiday quests. You need to do 3 holiday quests along with every normal quest to get the final achievement.
Generic Holiday
“Complete a rare holiday quest. (There’s totally no way to cheat the system…)”
In the Slime Cat warp area in specific holiday seasons, you can find NPC quests and items for sale in equipment shops. These quests require that you fight enemies for limited holiday material drops (Candy canes, Halloween candy, etc.). Not every holiday has items in the shop, but most do. Quests are available based on your PC’s system time, so you can change the date to any of these days to “cheat the system”. The holidays there are quests for are as follows:
- Chinese New Year – February
- Valentine’s Day – February
- Easter – March/April
- Halloween – October
- Christmas – December (You can also find Santa in the Frozen Valley, he gives you good stuff.)
Treasure Hunter & Chest Grabber
“Open 200 treasure chests. That’s a lot, but also just the beginning.”
“Open 400 treasure chests. You should be in jail by now.”
Both of these can be completed throughout a normal playthrough assuming you do optional dungeons and fight most enemies that block chests. Don’t forget, if there is a chest you cannot currently get to, mark it on your map and return later.
Also, you can turn on the “Treasure Finder” mode in the Cheats & Challenges menu within the in-game options in order to aid in your treasure hunting ways.
Booty Burglar
“Open 600 treasure chests. Not even the developer knows exactly how many there are.”
This is the tricky one, you technically can’t even get this one without doing optional dungeons. Listing the location of every chest is insanity so just keep your eyes open and regularly check back in areas, never leave a chest unopened or unmarked.
Also, you can turn on the “Treasure Finder” mode in the Cheats & Challenges menu within the in-game options in order to aid in your treasure hunting ways.
Tunnel Vision
“Find all of the treasure chests in the underground labyrinth. (Not counting any rooms!)”
After No Man’s Land, there is an optional dungeon called the Mineshaft Maze. It is, as said, a maze and there are various treasures, rooms, and enemies through it. There are 7 chests, 5 enemy encounters, and 3 rooms. Technically all you have to do is track down the boss and fight it, but taking the extra mile to explore the entirety of the mines will get you a medal. I don’t personally have a map for the maze but a user named SEVENTEEN made a great guide for this. (Not going to lie, I hate mazes and used this guide too.)
Mineshaft Maze Map + Puzzles: [link]
Like A Bird/Eagle Eye/Sixth Sense
“Find 50 secret treasures – keep an eye out for hidden shiny things!”
“Find 100 secret treasures – and remember, not all of them shine!”
“Find 200 secret treasures – there’s a lot more than that, but let’s stay reasonable!”
Throughout the overworld in EBF5, as well as other EBF games, you can find loot in random scenery by keeping an eye out for random sparkles or misplaced objects. Both of these medals require that you find large amounts of these secrets. I recommend using the mouse as it will alert you to any hidden treasure with a ‘!’ cursor; that or just spacebar the ♥♥♥♥ out of everything that doesn’t move.
Trading Cards & Card Shark
“Collect 25 monster cards. Maybe they’ll be valuable someday. But maybe not.”
“Collect all 50 monster cards. Huh? Some of these are just normal animals and household objects…!?”
Trading cards are collectibles that can be found in the more hidden chests of the game and as a reward for the arcade battles, optional dungeons, the Data Bunker, and the Battle Arena. Aside from some neat art, they grant bonuses but rather insignificant ones. Some cards eveb require finding secrets and standing on an empty island for a long tine. This medal is unique in that the same requires you to collect every last card where most other medals just require a high number. Luckily, the small number of cards means you’ll probably find them all if you are going after 100% completion anyway.
[S] Dungeon Crawler
“Defeat all 5 mega bosses in their optional dungeons, on any difficulty.”
There were originally 4 optional dungeons available (there’s more now) that house harder versions of the pre-existing boss fights:
1. The Freezeflame dungeon is available in the ice cave after beating Jotun. In there you will fight his two sisters, Sol and Skadi.
2. The Mineshaft Maze is to the right of the No Man’s Land castle gate. There you will fight the massive self-healing tank of a boss known as the Neon Vallhalla (I hate this one).
3. The Telperion in the Deathly Hallows directly west of where you fight Laurelin.
4. Lastly, the Crystal Caverns has two bosses for its respective sides. The eastern side will lead to the volcano god known as Vulcan while the western side has you fight the three-headed Crystal Hydra.
Defeat all these bosses and you will get this medal as well as unlocking the Temple of Trials.
Combat Medals
These medals are accomplished within combat and usually relate to a player’s skills or status effects. Again, most of the medals will be accomplished in a normal playthrough but some can be rather tricky and require special preparation.
Cooling Off
“And now, we wait. Quite a while, too.”
Some skills require cooldowns, others require a much longer cooldown of 10 turns. Use Lance’s M.O.A.B, NoLegs’ Nine Lives, or NoLegs’ Star Blast.
Conductive Stats
“Exploit a status effect that increases elemental damage.”
There are various neutral status effects in EBF5 that amplify certain damage types. Use one of these combos to do extra damage to a foe.
Wet + Ice/Electric
Chill + Water/Ice
Dry + Fire/Bomb
Tired + Bio
Heavy + Earth
Light + Wind
Curse + Holy
Weaken + Dark
Critical Condition
“Get a triple critical hit, with the power of status effects! (check which ones increase your critical hit chance)”
Critical hits do more damage than the average hit and stack up to 3 times. There is quite a number of ways to do critical hits such as:
- Exploiting elemental weakness and neutral status effects
- Pure random change (Good luck and bad luck status effects apply)
- The stagger and freeze negative status effects
- The brave positive status effect
- Certain weapons, armor, and flairs
- Certain attacks and many limit breaks
I would recommend attempting this medal when you have lots of gear to make this easy. The way I did this medal is by giving Matt brave and good luck, give the enemies stagger and bad luck and then using Cataclysm.
Second Chance
“Don’t die when you have been killed – the Morale and Auto-Revive statuses can get you out of trouble!”
As the description says, trigger one of two effects to get this medal:
- Use Morale to survive a lethal or insta-kill attack.
- Use Auto-revive to automatically revive an ally who has been killed.
Status Effect Medals
“I’m not bothering with putting all 7”
There are 7 medals that are obtained by being inflicted with a variety of unique status effects. These medals are Epidemic, Sometimes Invincible, Berzerker’s Rage, Disarmed, Fog of War, Uncontrollable Hunger, and Confusion. I’m grouping them together since enemies at one point or another will be able to inflict these and all of the medals should be obtainable on a normal playthrough. Here are the status effects you need:
Epidemic: Have every single player and enemy be infected with Virus. (There are many ways to do this. but my way is to enter a fight with only one target and have the Tentacle pin and inflict the target with Virus and then keep passing turns. Be sure to have no resistant gear.)
Sometimes Invincible: Avoid Damage Using Enchanted or Invisible.
Berzerker’s Rage: Berzerk (Use NoLegs).
Disarmed: Disable (Support enemies cause this).
Fog of War: Shroud (Squids cause this).
Uncontrollable Hunger: Hungry (Kill a Mammoth).
Confusion: Confuse (Many enemies cause this).
Back Attack
“What? Not even backup players are safe from taking damage?”
Once you have at least 4 party members, one will be placed in backup. Some enemy attacks hit players who are in backup as well as the main party. This most likely will happen is when you fight Lance and his Neon Valkyrie, but you’ll usually get this medal without trying anyway.
RIP In Peace
“Honour the dead by shuffling away their corpses and bringing in reinforcements.”
Much like Back Attack, this medal requires that you have a backup party member. When a party member dies, swap their dead body with a backup member and you will get this medal.
Freebie & Owned
“Watch your enemies be killed by their own environment, or by each other.”
“Sometimes the enemies don’t even have to do anything.”
Freebie requires that the enemy gets killed by the weather, a passive equipment attack, or another enemy’s attack. Meanwhile, Owned requires that a player is killed by an auto-attack or passive effect. Depending on the difficulty, Owned is much harder to do without intentionally trying.
EXP Pipeline
“Cut down over 1,337 innocent foes, for those sweet battle rewards.”
Ignoring the obvious number joke, this is the definition of a medal you will get on complete accident. Just play through the game, and if you still don’t have enough then grind or do optional dungeons.
Limits Broken
“Use a limit break – and if you’re reading this in advance – remember to set up a combo first!”
When a party member takes damage, they charge up their limit break meter. When it’s full, unleash a devastating attack and get a medal while you’re at it.
Nuclear Holocaust
“Destroy the world several times over by trying out every single Limit Break attack.”
Use all limit breaks, including those gotten from quests as extra limit breaks. I’d recommend making a list for this one since there’s a lot (20 to be exact). Also, you get to find out which ones you are never using again because some of those extra limit breaks are genuinely worthless. The 20 Limit Breaks are:
- Cleaver (Matt)
- Ragnarok (Matt)
- 7th Heaven (Natalie)
- Genesis (Natalie)
- Oblivion (Lance)
- Nuke (Lance)
- Mother Earth (Anna)
- Mighty Oak (Anna)
- The Destroyer (NoLegs)
- The Creator (NoLegs)
- Annihilate (Extra)
- Ion Cannon (Extra)
- Supernova (Extra)
- Absolute Zero (Extra)
- Tsunami (Extra)
- Black Hole (Extra)
- Death Metal (Extra)
- Hidden Power (Extra)
- Seven Swords (Extra)
- Art Attack (Extra)
Mercy & No Mercy
“Let a surrendered foe go free. Sometimes it feels good to be good.”
“Execute a surrendered foe in cold blood. You get EXP either way, so it really is senseless violence.”
When an enemy is hurt, has negative status effects, or is generally feeling outnumbered they will surrender. When an enemy surrenders, they will leave the battle next time it’s their turn. Let an enemy leave and also murder a surrendering enemy to get these two medals.
Slave Trader & Beast Tamer
“Enslave a beast, later to be forced into combat against its will.”
“Tame a strong monster as you work your way up the food chain.”
In the tactics menu, you can choose to capture a weakened enemy to use as a summon later. It’s not luck-based and there is a method to the madness between the lowering of health, buffing of your team, and debuffing of the enemy. Both of these medals require capturing a monster. I’m not 100% sure how to tell what qualifies as “a stronger monster” other than box type. A weak enemy usually can be captured just by lowering its health and has a cardboard box or wooden crate dropped on it. Stronger monsters require the debuffs and evasion lowering to even have a chance; they have shipping containers placed on top of them. I think the very first enemy that you can capture that qualifies is the Big Sand Slime.
Boss’s Boss
“Imprison your boss in a shipping container, for later use.”
Capture any boss or miniboss enemy. Getting the boss to low health alone won’t do this and in some cases can backfire by killing it on accident. Instead, debuff and apply non-damaging status effects, as well as kill its minions, in order to increase your chances.
None Are Safe/None Are Free/Gotta Catch ’em All
“Capture 50 different foes. No living creature can escape the completionist’s snare.”
“Capture 100 different foes. Leave no free animals to graze the fields – all bow before their master.”
“Capture 151 different foes. This game won’t actually make you catch all of them, but there was a time where 151 was considered impressive.”
There are roughly 200 capturable enemies in EBF5. As stated in the other capture medals, there is a certain finesse to capturing enemies. Capture a good majority of the enemies in the game and keep track of the ones you use for crafting as you will have to capture them again. You can see what enemies you have and haven’t captured and there’s enemy/boss rushes at the end of the game for the ones you missed.
X-Ray Goggles
“Scan 125 different foes.”
While scanning enemies is easy and beneficial to combat, it’s still hard to keep in mind every single enemy type. Just always check the enemy names at the start of a fight and if you see nothing, scan away. You can also turn on auto-scan in the cheats for everything but the Epic medals.
Give 100%
“Buff yourself to the max. Some equips will help out with this.”
A commenter mentioned that you can use Orange Juice to get this medal real easily. Otherwise, find gear like Matt’s Hockey Stick that increases the effects of buffs when leveled up. You can also be lazy and just wait for enemies to beat you to the punch (The Neon Valkyrie and it’s mega form both can do this easily).
1-100K Damage
“Deal over 999 damage with an attack – just smack an enemy hard.”
“Deal over 9,999 damage with an attack – a bit of leveling up should do the trick.”
“Deal over 99,999 damage with an attack – remember to exploit buffs, weaknesses, and statuses!”
The first 3 damage milestone medals aren’t very hard, which is why I am grouping them together. As long as you are the right level and are using enemy weaknesses and debuffs intelligently, you should get these medals in a breeze.
1M Damage
“Deal over 999,999 damage with an attack – you’ll need to set up a serious combo for this one!”
This is the culmination of the other 3 medals and general knowledge of the game. You need to be at least over level 20 and use a limit break along with weaknesses, debuffs, and status effects to do a massive amount of damage. However, no exploits are needed and you can do this medal without going too far out of your way. (Some enemies even have this much health so it’s encouraged to set these combos up.)
10M Damage
“Deal over 9,999,99 damage with a single attack – this is actually possible around level 35!”
This medal is pretty tricky. Dealing 10M damage is certainly doable, but takes a lot of preparation, gear, and finesse. For starters, in the Bamboo Forest, there is an NPC named Izumi who will give you a quest to collect slimes. Doing this gives you three slime encounters filled with harmless yet almost unkillable slimes to use as training dummies. This is where you should try to do your 1M (if you don’t have it already) and 10M damage medals.
There are many ways to deal 10M damage in one hit and many guides out there to help you, but I will go over what I specifically did. The focus is to manipulate Natalie’s Black Hole limit break against the slime bunnies’ extreme weakness to dark in order to deal maximum damage.
Natalie: Obtain the Obsidian Staff, Dark Bobble, Dark Gown, and Black Hole LB and fully upgrade them all to max level. Also put on flairs such as the One Ring and Balance Badge for stat increases or flairs like the Pocket Watch and Hoop Earrings to put things in your favor. With this Natalie should be able to get maximum magic attack from defending and can make the enemy invisible on a normal attack.
Other Players: Any 2 players will work so long as at least one can use Enfeeble and have gear that strengthens their debuff. The other player should have the Peace Badge or something else than can inflict Weaken. Giving Natalie brave can also be helpful so skills that can do that should be a focus.
Summons: There are really only three types of summon that I can think that would help this medal. Summons that turn the enemy invisible such as the Pink Squid can negate the need for Natalie to do so. The Omega Dragon and other summons can lower the enemy’s magic defense possibly further than Enfeeble could. Lastly, the Viking Monolith or Ninja Cat can give haste and speed the whole process up.
Doing this should be able to get you the 10M you need and then some, but remember that there are many ways to do this (the Hidden Power LB is another good one). Also, remember to utilize saves so you don’t have to grind up another LB if you fail once or twice.
Retaliation & New Strats
“Win 30 battles with the “Counter-Attacking Foes” challenge option enabled. These foes aren’t just going to sit there and take a beating!”
“Win 30 battles with the “More Foe Resistance” and “Less Player Resistance” challenge options enabled.”
In the Options menu, there is a selection of cheats and challenges you can enable. The top 3 are probably the most objectively difficult and are what needs to be turned on for these medals. Don’t do these together if you’re on a harder difficulty and pick your battles carefully. Only start doing this medal when you have at least 3 party members to be safe. You can also just turn on Zero difficulty mode and almost all cheats and blow through these medals.
Extreme Difficulty
“Defeat any boss with all challenge options enabled. Epic difficulty not recommended, but you can try if you’re bored.
In the Options menu, there is a selection of cheats and challenges you can enable. Defeating a boss with all of the challenge options seems daunting, and it can be, but there are ways to make this easy. For starters, most of the challenge options aren’t too harsh and aren’t nearly as hard as beating a boss on Epic difficulty. If you want to cheese this medal you can set your difficulty to Zero, turn on some cheats, and fight the first boss pretty easily (cheats kind of break some of these medals).
Secret Medals
Probably what most of you are here for. These medals are the odd ones that aren’t exactly self-explanatory, require some going out of the way to achieve, or are just done outside of the game in menus and such. I will try to use exact locations and methods but comment if you still need more details.
What Game?
“Paint the loading screen with the ooze of a 100 dead slimes.”
This medal is a callback to past Epic Battle Fantasy games. While the game would load there was always an interactive element on the screen to mess around with; EBF5 is no different. Before you even load onto the main menu there will be a menu to choose a language. Above that menu is a bunch of slimes, click on one to pop it. After 100 have been popped and you start up the game, you will gain this medal.
Family Roots
“Remember what you came from, and keep visiting your family even when you’re famous.”
As soon as you get to Redpine or anytime later, head back to Anna’s house and talk to her parents again. There will be some new dialogue and a medal waiting for you.
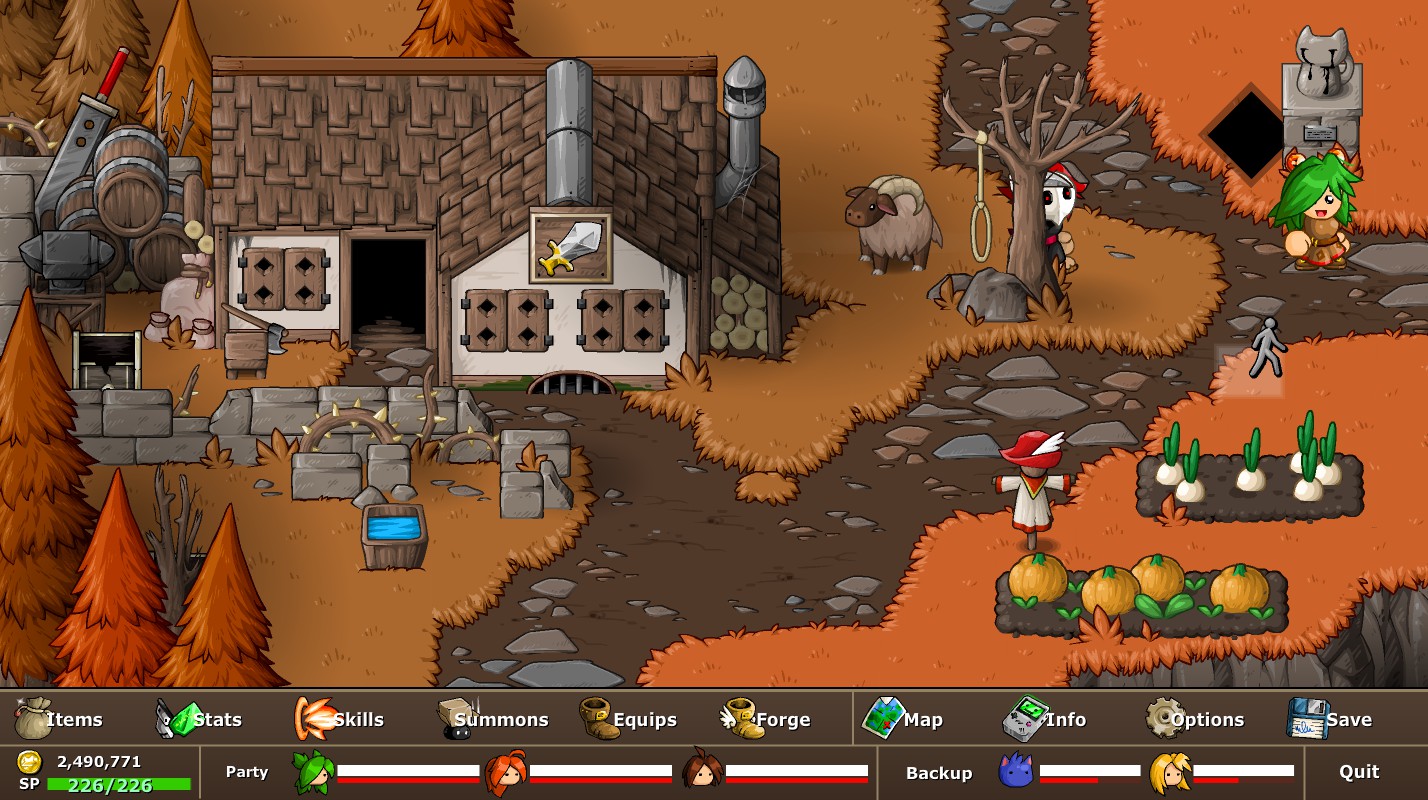
Secret Farm
“Help a wizard grow totally legal herbs in a barn.”
In Redpine, you will find a barn next to the item shop that has one wizard and a bunch of potted plants. It’s a tile puzzle, but a simple one at that. Complete the puzzle and question how legal your actions were.
Puzzle Solution (the only one I am doing):
*Start at the bottom left entrance
1. 2 steps right
2. 1 step down; 1 step right
3. 3 steps up
4. 2 steps right
5. 1 step up; 2 steps right
6. 3 steps down
7. 2 steps left; 1 step up
8. 1 step left; 2 steps down
9. 5 steps right
10. 3 steps up; 1 step left
11. 1 step up; 1 step right; 2 steps up
12. 1 step left; 1 step down
13. 2 steps left; 1 step up
14. 2 steps left; 1 step down
15. 1 step left; 1 step up; 2 steps left
16. 2 steps down; 1 step right
17. 1 step down; 1 step right
18. Fill in remaining squares
Squishy
“Click on something squishy a few times. There are several ways of getting this one…”
There is indeed a couple of ways of getting this medal, ranging in morality and cuteness. I’m not sure of all of them but here are the ones I’ve found, click on them a couple of times:
- Natalie’s chest if you’re a pervert (This can be done during combat or in her 7th Heaven Limit Break.)
- Jotun’s, Sol’s, or Skadi’s Eye/Belly. You can also be a mega pervert and click on Sol or Skadi’s chests.
- The Slime Bunny Equipment item.
- The snow sculptures on frozen players.
Where’s Satan?
“Discover the demon hiding in plain sight.”
Find a random animal NPC in the overworld and harass it a bunch. I’m not sure exactly which animals work and which ones don’t, but I do know it works for seagulls. You can do this very early with this seagull found in Hope Harbor.
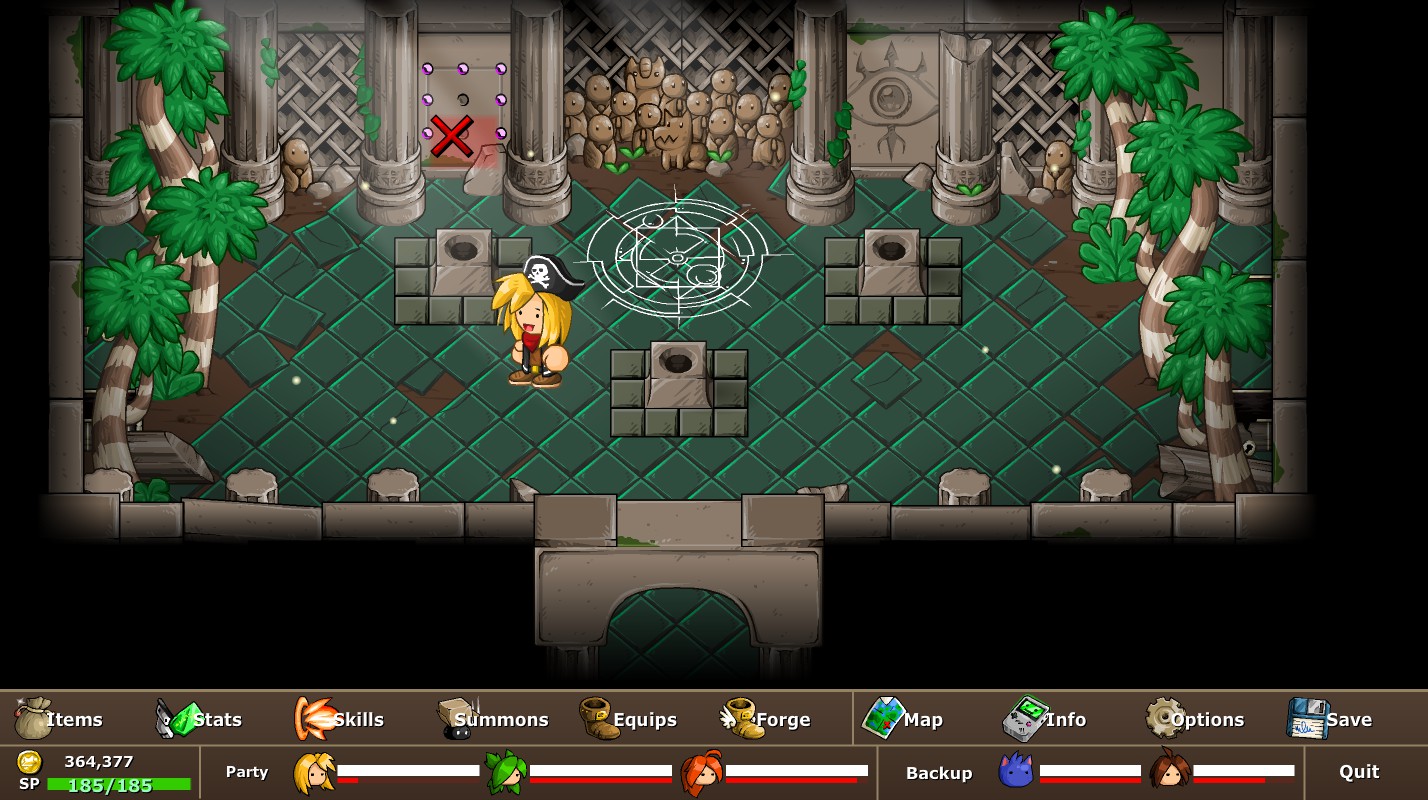
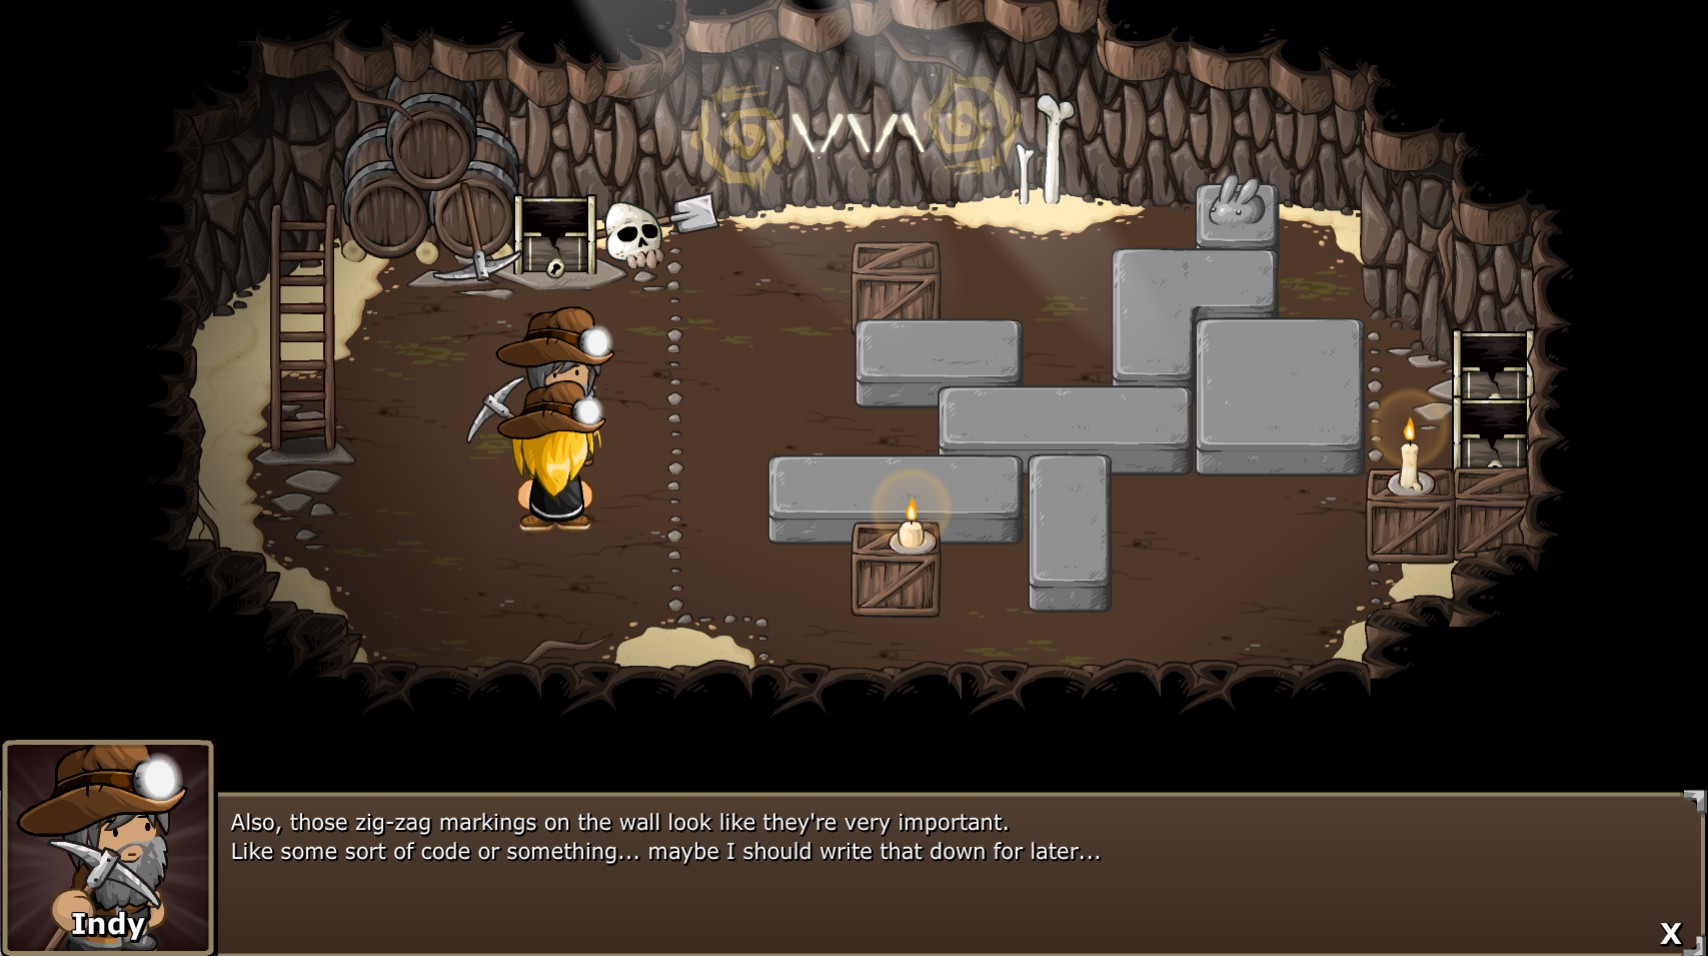
[S] Code Breaker
“Discover one of several secret codes.”
There various secret codes for puzzles scattered about the overworld and hinted at by the game. I’ll go over the ones I know:
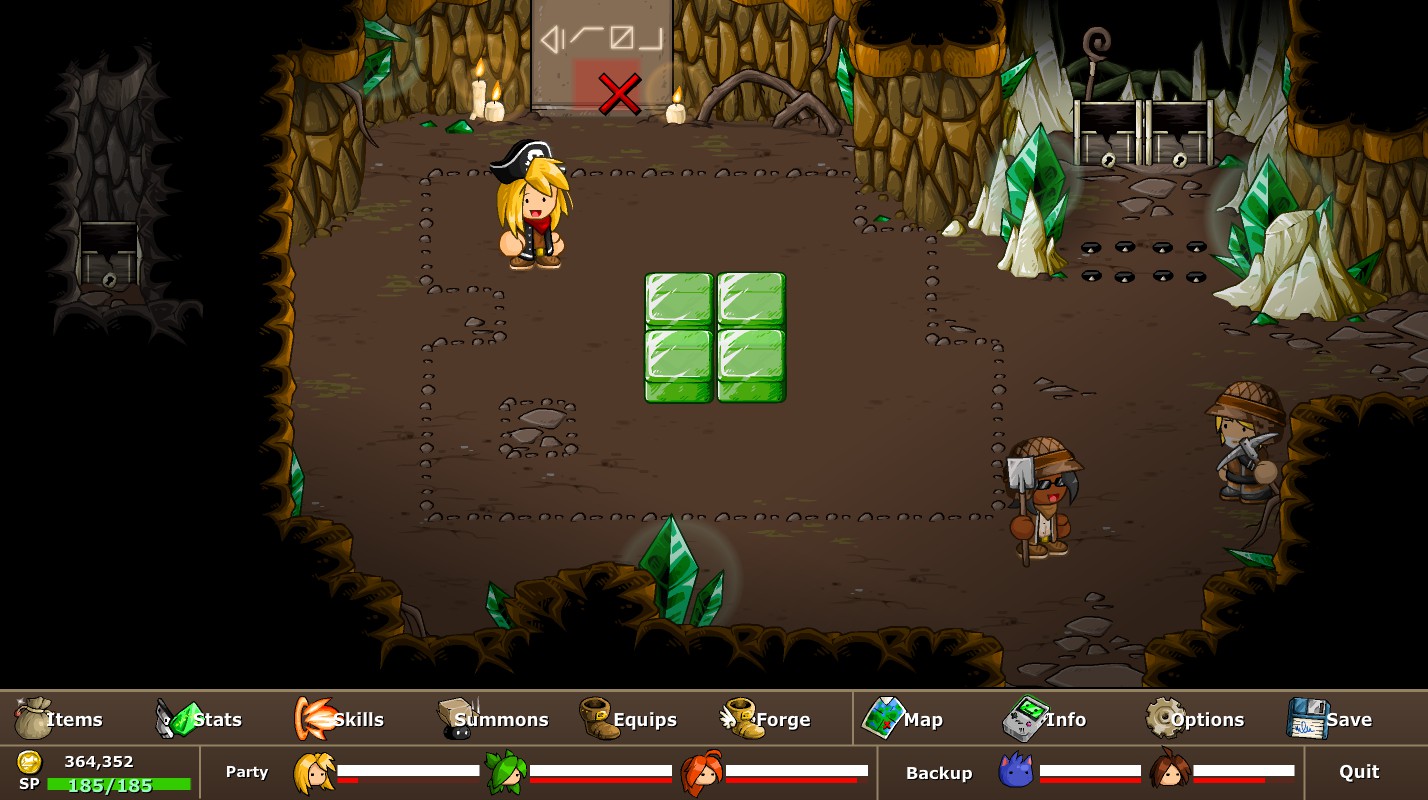
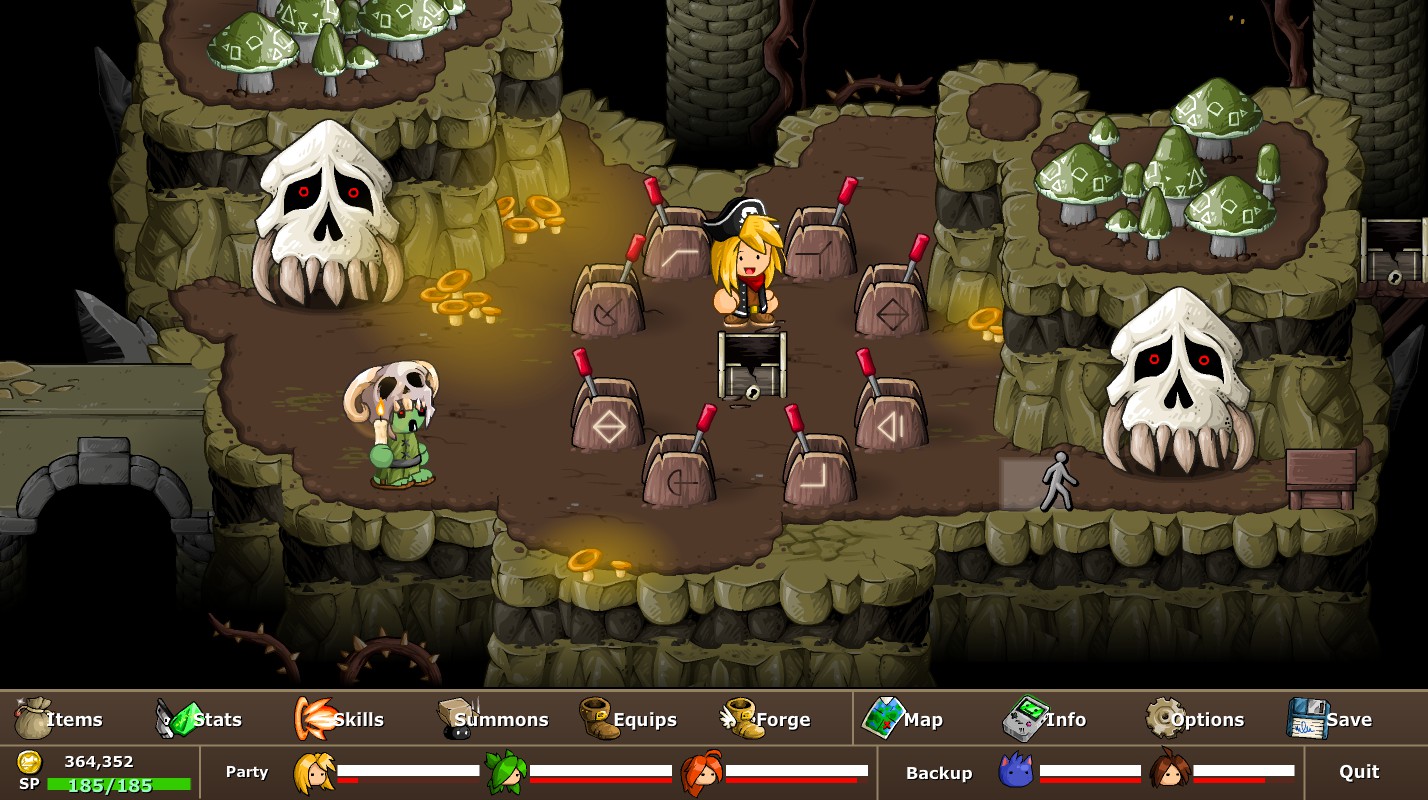
Forgotten Ruins Flower Puzzles: There are 5 chests to get from using the 3×3 grid of pedestals to make various shapes found on stones across the map.

Grand Gallery (In the 40 Medals room)
Redpine Windmills (3-2-1)

Rainbow River

Underneath Hope Harbor Weapon Shop
The Forgotten Ruins (Needed for Cloud Boots)
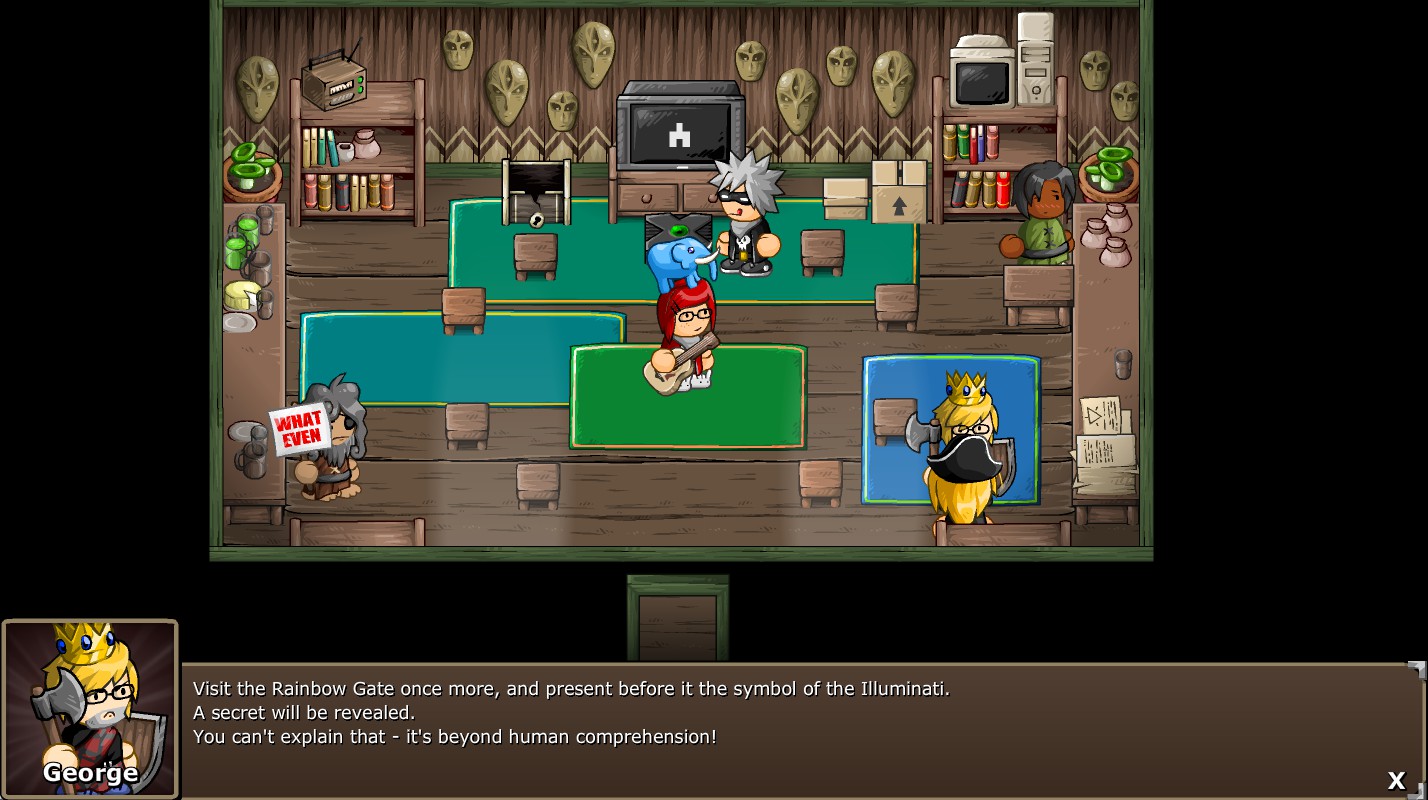
Illuminati Rainbow Gate: An NPC in Redpine tells you to present the Illuminati to the rainbow gate bridge.

Deathly Hallows Level Secret: In the Crystal Caverns, a key to the lever puzzle in the Death Hallows is found.
Wild Tropics Underground Cave: After completing the NPC quest next to the Monolith there is a cave. The NPC says there is a code which is inputted on the floor of the Mystic Woods.
Secret Soundboard
“Find the secret soundboard, just as the name of this achievement suggests.”
Go into your info menu, and then the quests menu. You should see all the NPCs that gave you quests, click on a bunch of them in random order and hear as they all make different sound effects.
Adventure Remix
“Start a new Custom Game with any settings, and get to Greenwood Village. It’s just like the normal game, but fresher!”
On the main menu there is an option to start a brand new game with special settings (might need to beat the game once to unlock it, not sure). If you don’t need to do a new playthrough of the game then I recommend only turning on scaling foes, setting the difficulty to Zero, and not caring about any quests or optional areas. The exact screen you need to go to is this one:

List of Fame
“Spend a minute or two watching the credits roll by. A lot of people were involved in the making of this game!”
On the main menu, click the credits button. Watch the credits scroll through entirely and get this medal (don’t worry, it’s not too long).
[S] Dim Depths & Secret World
“The plot thickens as buried secrets are uncovered.”
“Use the three Spiritual Stones to open the… Door of Time?”
After certain checkpoints in the game, you will be able to enter 3 cult ceremonies and 5 glitched areas. I will explain where to find the glitched areas in the “-□□□ .¬” medal. You only need to visit one cult area to get “Dim Depths” but it’s important to visit all 3. The cult ceremonies are blocked off by various factors and have you fight some enemies for some loot. More importantly, each cult ceremony unlocks a glitched area and gives you a jewel needed for later (from EBF4).
First Cult Ceremony: Underneath the Hope Harbor Weapon Shop
Unlocked By: Visiting Greenwood (The thief guy who blocked the weapon shop’s secret exit leaves to Greenwood.)
Second Cult Ceremony: Underneath the Cranky Man’s House in Greenwood
Unlocked By: You can always visit it, but the jewel is unobtainable until you get the Stepladder
Third Cult Ceremony: Underneath the crypt in the Redpine Cementary
Unlocked By: You can always visit it, but the jewel is unobtainable until you get the Candle
After all three places have been visited and you have the three jewels, make your way over to the Forgotten Ruins. In the top left, you will find an abandoned temple with 3 spots to place the jewels. After all 3 are placed, a portal will open to a strange place, and “Secret World” will be unlocked, as well as access to a secret boss (needed for Determination medal).

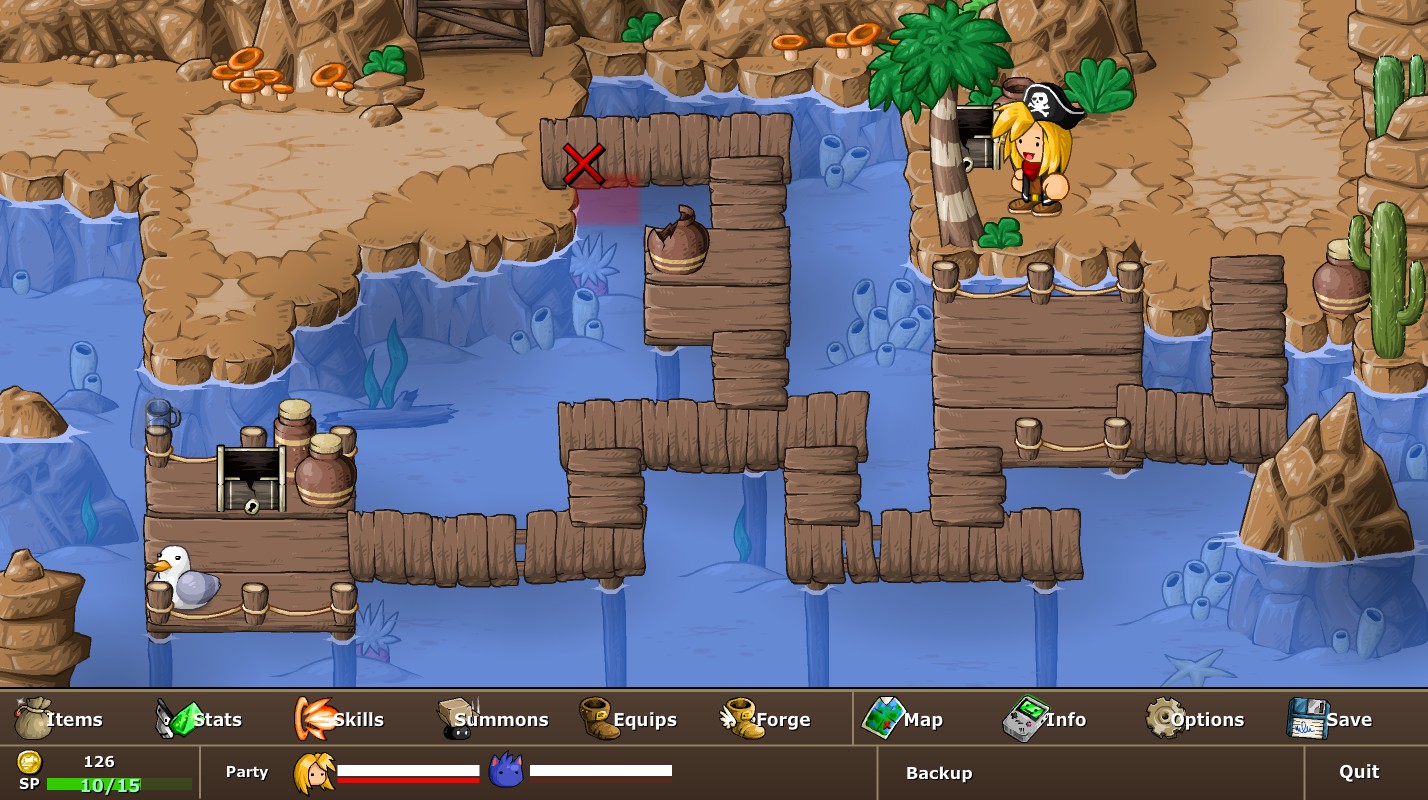
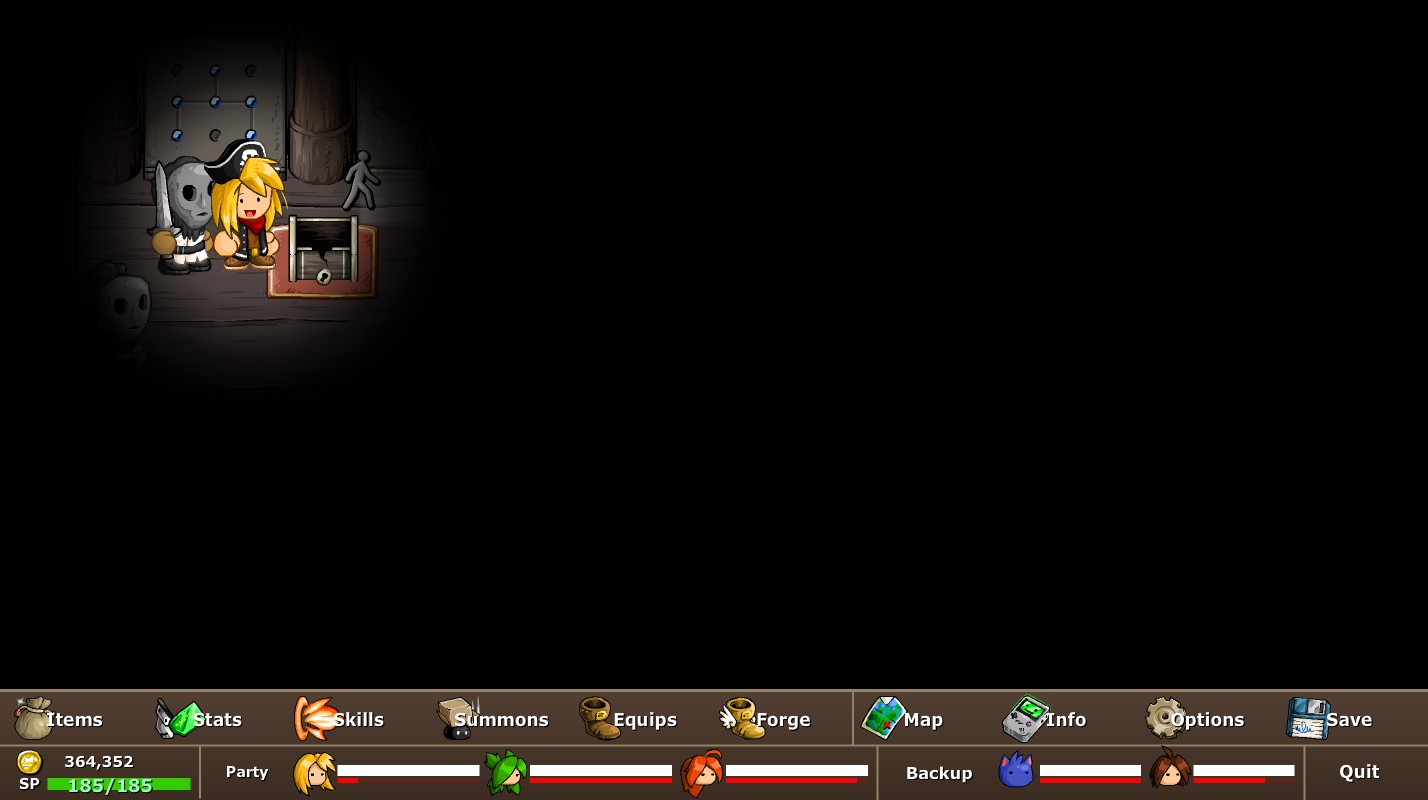
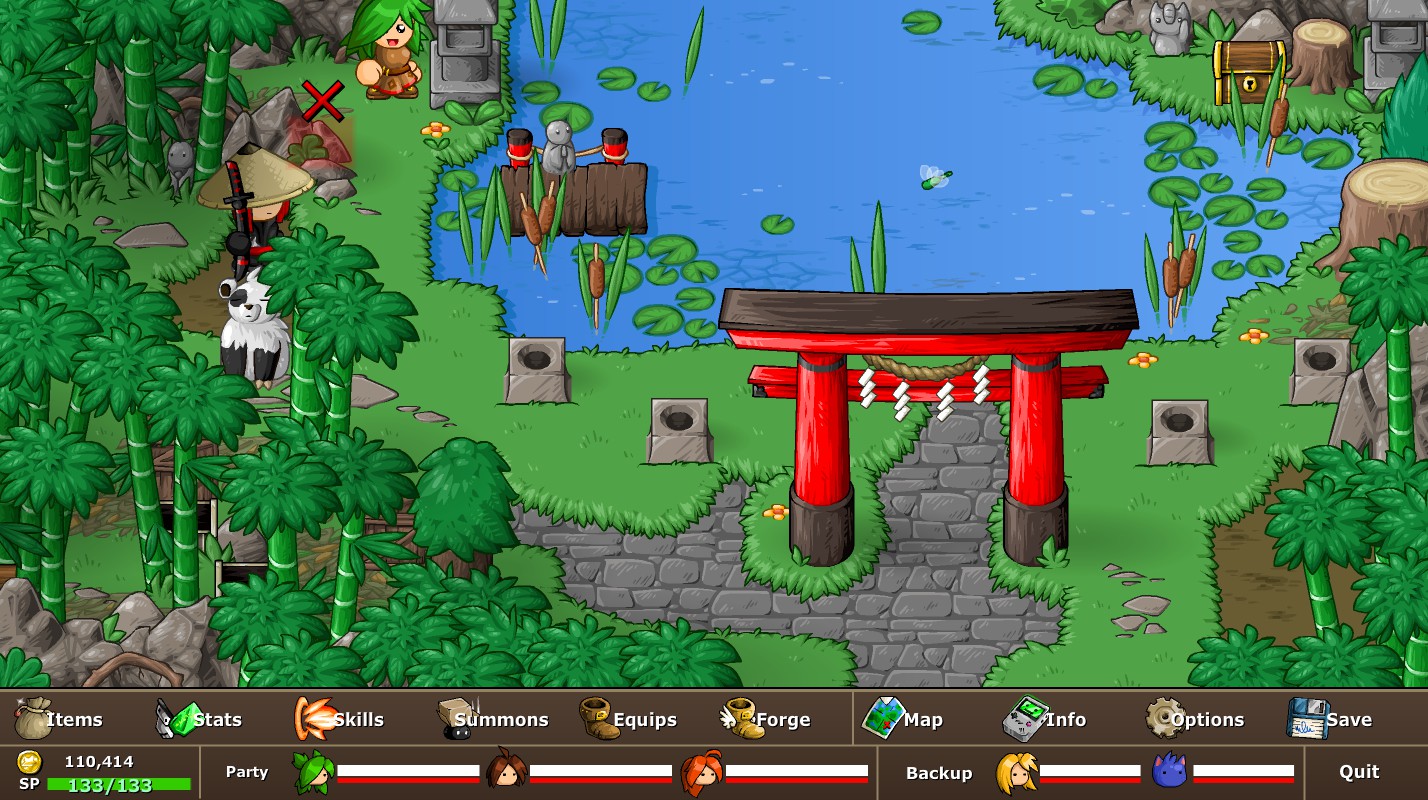
-□□□ .¬
“□□□□□- -□□□-□□□ ■□□? -□□□??”
After certain checkpoints in the game, you will be able to enter 3 cult ceremonies and 5 glitched areas. I will explain where to find the cult ceremonies in the “Dim Depths & Secret World” medals. You only need to visit the first glitched area to get “-□□□ .¬”, but visiting them all is important and you get good loot. Here are the locations of the glitch worlds and how to obtain them. (Caution: The glitched worlds are very tough and have some… unusual effects.)
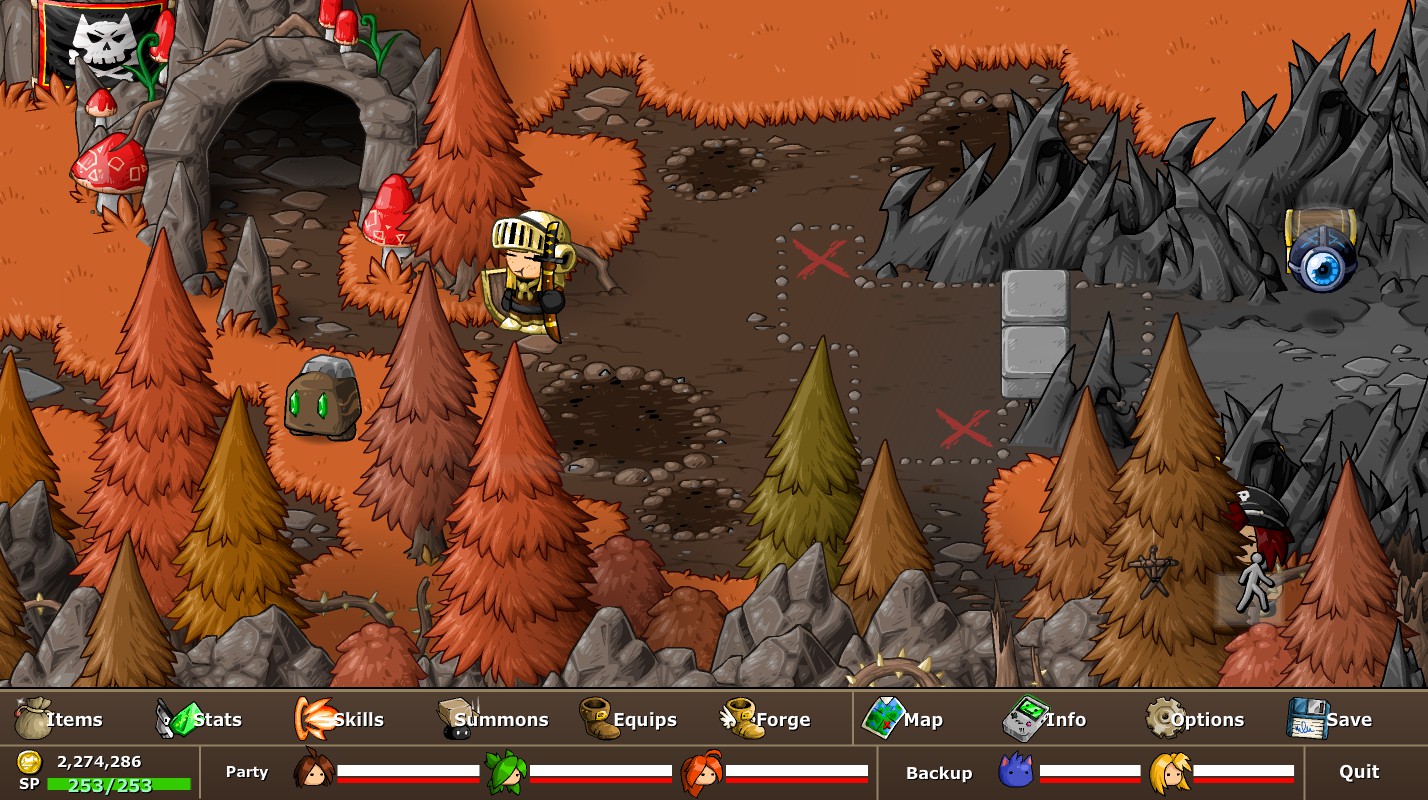
First Glitch Spot (To the left of me)
Unlocked By: Visiting the First Cult Ceremony

Second Glitch Spot (Below me)
Unlocked By: Having the Raft
Third Glitch Spot (Behind the Monolith)
Unlocked By: Beating the Second Glitch Spot
Fourth Glitch Spot (Behind the snow arch)
Unlocked By: Visiting Third Cult Ceremony
Last Glitch Spot
Unlocked By: Visiting All Glitch Area & Cult Ceremonies
Note: The last area is genuinely freaky and has a tough boss (needed for the Reformat medal).
Party Medals
There are 4 specific medals saved for when you fight your teammates. There are secret ways to make each one surrender as opposed to defeating them. This is how to do so.
Cat Person
“Intimidate NoLegs into surrendering, rather than beating him to a pulp.”
To spare NoLegs, simply either get him to very low health and buff yourself or hit him with a water attack (cats don’t like water). Do NOT do what I did and limit break the poor thing because you’re an ♥♥♥♥♥♥♥.
Nice Guy
“Flirt with Natalie to calm her down, avoiding the unsightly beating up of a girl.”
To spare Natalie, simply break her will to cause harm to Matt and NoLegs. Cast loveable on both of them and she will be forced to surrender.
Child Minder
“Force an exhausted Anna to surrender, rather than having to knock out a child.”
Anna is the hardest of the party members to spare in my opinion, especially if you are doing it on Epic. Anna has an intense fighting spirit and you must push her to her last legs and force a surrender. This is done as a typical surrender where your team’s buffs and health are weighed in with the enemy’s health, debuffs, and status effects. Hit Anna with status effects that cause debuffs and get her to very low health and she should surrender.
Seduction
“Exploit Lance’s weakness to make him surrender, but only during his 3rd and final appearance.”
You technically fight Lance three separate times. The first time he runs you over with a tank and kidnaps Natalie. The second time is about halfway through the No Man’s Land castle where he fights you by himself, he will flee before you can knock him out. The third time, however, is the boss fight for the No Man’s Land where he has his Neon Valkyrie. Get Lance and his tank down to very low health (or destroy the tank). Then use Natalie’s “7th Heaven” limit break and Lance will fall madly in love and surrender.
[S] Boss/Enemy Rush Medals
As I said earlier, I will not be covering any of the boss medals as they are pretty self-explanatory. However, I will cover the various boss and enemy rushes in the game. I will do this in two ways:
- The way to discover and access the particular rush in question.
- What waves of enemies are contained in the rush (minus one exception).
Also, yes, this whole section is one big spoiler so purists steer clear.
Arcade Cabinet Medals
“Find a hidden arcade machine. You’re pretty sure that wasn’t there before.”
“Complete all of the hidden arcade games. This unlocks the boss rush at Matt’s house.”
“Beat the Arcade Boss Rush at Matt’s house on Epic difficulty.”
Throughout the game, there is a collection of puzzle-type minibosses that take form as classic arcade enemies. The fights CAN be pretty easy, but that is only if you understand their gimmicks and plan ahead. Unlike the glitch areas and cult ceremonies, there doesn’t seem to be a certain point when they ‘unlock’ minus a few exceptions. I will show the location of each one and any known requirements, but if you can’t currently access them then just come back later (the arcade enemy will run out of its hiding place when it’s available). Lastly, I’ll give a general overview of the fight with the needed strategy.
ANGRY CHAIR: Hope Harbor Equipment Shop
Unlocked By: Nothing
Basic Strategy: Uses only non-elemental damage that debuffs defenses.
PHOENIX: Wild Tropics Cave System
Unlocked By: Obtaining the Candle
Basic Strategy: Prevent it from casting auto-revive and reviving it’s fellow foes.
TREAGURE: Grand Gallery 90 Medal Room
Unlocked By: Getting 90 Medals
Basic Strategy: Resistant to physical attacks, inflicts many status effects. Berserks when one is left.
ROBO: No Man’s Land
Unlocked By: Visiting Greenwood
Basic Strategy: Lands Critical hits on every attack, sometimes x2 Critical.

BOSH: Greenwood Village
Unlocked By: Nothing
Basic Strategy: Large defense debuffs, self-healing, and beserking when losing the fight.

TOTOM: Bamboo Forest
Unlocked By: Nothing
Basic Strategy: Does more damage when hurt and self-heals a lot with additional self-healing counter-attacks. Set up huge combos.
GLOB: Mystic Woods
Unlocked By: Nothing
Basic Strategy Variety of more unusual status effects.
PUMPKUS: Rainbow River
Unlocked By: Obtaining the Raft
Basic Strategy: Normally harmless but attacking them makes them angry and they will do lethal damage, healing them reverts this state.

GUOYE: Frozen Valley
Unlocked By: Nothing
Basic Strategy: Lowers defenses and casts both invisible and enchanted. Berserks when one is left.

CORALIA: The Great Sea
Unlocked By: Beating Posideon and Navigating The Great Sea
Basic Strategy: Attacks twice per turn. One is poison or water, the other is guaranteed stacking buff of two random stats.

SNEK: Redpine Town
Unlocked By: Nothing
Basic Strategy: Respawn like hydra heads but faster and inflict heavy scorch and disable, goes berserk at low healths.
THE MAW: The Rapture
Unlocked By: Defeating Two-Headed Zombie Hydra
Basic Strategy: Attacks with crushing x3 critical non-elemental and bio attacks that hit the whole party. Inflicts heavy virus on everyone. Attacks twice per turn and can counter-attack.
After defeating every arcade cabinet, Matt’s PC will light up in the house again and allow you to fight a rush of all arcade battles (this is very difficult as you need many strategies and sets of gear).
Arcade Boss Rush
Wave 1: x3 PUMPKUS
Wave 2: x3 ANGRY CHAIR
Wave 3: x3 BOSH
Wave 4: x3 ROBO
Wave 5: x3 GLOB
Wave 6: x3 SNEK
Wave 7: x3 PHOENIX
Wave 8: x2 TOTOM
Wave 9: x2 TREAGURE
Wave 10: x2 GUOYE
Wave 11: x1 CORALIA (Boss)
Wave 12: x1 THE MAW (Boss)
Data Bunker Medals
“Beat all simulations on the B2 floor in the Data Bunker, on any difficulty.”
“Beat both Epic Battle Fantasy 1 simulations on Epic difficulty.”
“Beat both Epic Battle Fantasy 2 simulations on Epic difficulty.”
“Beat both Epic Battle Fantasy 3 simulations on Epic difficulty.”
“Beat both Epic Battle Fantasy 4 simulations on Epic difficulty.”
“Beat the 2-Player Boss Rush on Epic difficulty.”
“Beat the 3-Player Boss Rush on Epic difficulty.”
After reaching the Data Bunker, covered in the Uncharted Islands medal, you will be able to play through a modified enemy and boss rushes made to replicate the previous EBF games. There are 2 simulations for every game and allow various amounts of characters. There are also 2 boss rushes that are unlocked by beating every simulation on any difficulty.
EBF1 Simulation 1
Wave 1: x3 Furry Slime
Wave 2: x3 Furry Slime
Wave 3: x1 King Slime (Boss)
EBF1 Simulation 2
Wave 1: x2 Haunted Tree
Wave 2: x2 Eyeball
Wave 3: x3 Eyeball
Wave 4: x1 Beholder (Boss)
EBF2 Simulation 1
Wave 1: x2 Glacier Eater
Wave 2: x2 Rock Eater
Wave 3: x1 Glacier Eater, x1 Rock Eater
Wave 4: Giga Golem (Boss)
EBF2 Simulation 2
Wave 1: 2x Red Bee, x1 Spikey Moth
Wave 2: x2 Spikey Moth, x1 Red Bee
Wave 3: x1 Sandworm (Boss), x1 Sandworm’s Tail
EBF3 Simulation 1
Wave 1: x2 Swordslinger, x1 Gunslinger
Wave 2: x3 Gunslinger, x2 Swordslinger
Wave 3: x1 Swordslinger, x1 Jack (Boss), x1 Gunslinger
EBF3 Simulation 2
Wave 1: x2 Red Clay, x2 Blue Clay
Wave 2: x2 Dark Clay, x2 Light Clay
Wave 3: x1 Blue Clay, x1 Protector (Boss), x1 Red Clay, x1 Dark Clay
EBF4 Simulation 1
Wave 1: x1 Florn, x1 Frose, x1 Stunflower, x1 Heasy
Wave 2: x1 Florn, x1 Frose, x1 Rafflesia (Boss), x1 Stunflower, x1 Heasy
EBF4 Simulation 2
Wave 1: x1 Blue Crystal, x1 Red Crystal
Wave 2: x1 Red Crystal, x1 Praetorian (Boss), x1 Blue Crystal
Epic Duo Boss Rush:
Wave 1: x3 Furry Slime
Wave 2: King Slime (Boss)
Wave 3: x2 Eyeball, x1 Haunted Tree
Wave 4: x1 Beholder (Boss)
Wave 5: x1 Glacier Eater, x1 Rock Eater
Wave 6: x1 Giga Golem (Boss)
Wave 7: x2 Red Bee, x1 Spikey Moth
Wave 8: x1 Sandworm (Boss), x1 Sandworm’s Tail
Epic Trio Boss Rush:
Wave 1: x3 Gunslinger, x2 Swordslinger
Wave 2: x1 Swordslinger, x1 Jack (Boss), x1 Gunslinger
Wave 3: x1 Red Clay, x1 Blue Clay, x1 Light Clay, x1 Dark Clay
Wave 4: x1 Blue Clay, x1 Protector (Boss), x1 Red Clay, x1 Dark Clay
Wave 5: x1 Florn, x1 Frose, x1 Stunflower, x1 Heasy
Wave 6: x1 Florn, x1 Frose, x1 Rafflesia (Boss), x1 Stunflower, x1 Heasy
Wave 7: x2 Blue Crystal
Wave 8: x2 Red Crystal, x1 Praetorian (Boss)
Battle Arena Medals
“Complete the Battle Arena with all players on any difficulty.”
“Complete the Battle Arena with Matt on Epic difficulty.”
“Complete the Battle Arena with Natalie on Epic difficulty.”
“Complete the Battle Arena with Lance on Epic difficulty.”
“Complete the Battle Arena with Anna on Epic difficulty.”
“Complete the Battle Arena with NoLegs on Epic difficulty.”
After reaching the Battle Arena, covered in the Uncharted Islands medal, you will be able to engage in character-based gauntlets. The main rules are that you must win all 10 fights without leaving the room and you can only have the designated character with no summons. Fighting with only one person is pretty tricky and so there is a lot of equipment changing and strategy involved. To top things off there are new enemies here that cannot be fought anywhere else (I will put a [N] next to these). Beating all arena gets you a medal and a new skill, each character also has a medal for Epic difficulty. The fights can be fought in any order and will be listed randomly (it’s usually easy to tell based on the sprite):
Matt
x1 Pink Squid
x2 Mud Slime, x1 Big Mud Slime
x2 Master Wraith, x1 Magma Chomper
x2 Tanuki Dog, x1 Grolar Bear
x1 Drowned Fallen, x1 Lost Fallen, x1 Burned Fallen
x2 Blood Bat, x1 Earth Dragon
x1 Red Creep, x1 Green Creep, x1 Blue Creep
x1 Sandstone Boulder, x1 Coral Boulder, x1 Dirt Boulder
x3 Zombie Hand, x2 Skeleton Hand
x2 Gem Idol, x1 Bone Golem [N]
Natalie
x3 Cat Wizard, x2 Cat Warrior
x2 Putrid Worm, x1 Mutant Chomper
x2 Wolf Dog, x2 Bone Bat, x1 Zap Dog
x2 Icecream Slime, x1 Big Icecream Slime
x2 Stumpy Gloop, x2 Roasted Gloop, x1 Beheaded Fallen
x5 Gem Idol
x2 Leaf Wraith, x2 Steel Wraith
x3 Fabulous Gloop [N]
x2 Fire Sprite, x2 Rock Sprite, x1 Topaz Ore
x2 Haunted Mirror, x2 Angel Mirror, x1 Wise Mirror
Lance
x1 Yellow Flybot, x1 Red Flybot, x1 Blue Flybot
X2 Cat Sniper, x2 Thorny Creep, x1 Cat Bomber
x1 Cannon Turret, x1 Harpoon Turret, x1 Laser Turret, x1 Fuzzy Worm
x1 War Mammoth, x1 Slime Bunny
x1 Steam Fish, x1 Jet Fish, x1 Gold Fish
x1 Tanuki Dog, x1 Fire Sprite, x1 Rescue Dog, x1 Thunder Sprite, x1 Zap Dog
x2 Seaweed Chomper, x1 Leafy Chomper
x1 Blaze Hydra
x1 Red Flybot, x1 Prototype 9X [N]
x1 Earthquake Bomb, x1 Acid Bomb, x1 Shockwave Bomb, x1 Nuclear Bomb
Anna
x1 Big Choclate Slime, x1 Big Sand Slime
x2 Slime Mouse, x2 Icicle Creep, x1 Coral Boulder
x2 Origami Wraith, x2 Master Wraith
x2 Snow Bat, x1 Sea Dragon
x2 Blood Bat, x2 Black Bear [N]
x2 Red Bush, x2 Sandy Bush, x1 Ancient Monolith
x2 Steel Wraith, x1 Viking Monolith
x2 Cat Ninja, x2 Wise Mirror, x1 Demon Mirror
x2 Burned Fallen, x2 Drowned Fallen, x1 Beheaded Fallen
x1 Green Bush, x1 Anna Doll, x1 Dark Bush, x1 Natalie Doll, x1 Red Bush
NoLegs
x2 Dark Bush, x2 Lost Fallen, x1 Crucified Fallen
x3 Cat Wizard, x2 Cutie Worm
x2 Snow Bat, x2 Bone Bat, x1 Electric Bat
x1 Matt Doll, x1 NoLegs Doll, x1 Lance Doll
x2 Lava Slime, x1 Big Lava Slime
x5 Skeleton Cat [N]
x1 Origami Dragon, x2 Book Worm
x2 Wooden Idol, x2 Metal Idol, x1 Gem Idol
x2 Wise Mirror, x2 Red Bush, x1 Angel Mirror
x1 Rock Sprite, x1 Dirt Boulder, x1 Dark Bush, x1 Marble Boulder, x1 Wind Sprite
Temple of Trials Medals
“Defeat all 5 bosses in the temple of trails, on any difficulty.”
“Beat the Foe Marathon on Epic difficulty.”
“Beat the Miniboss Rush on Epic difficulty.”
“Beat the Boss Rush on Epic difficulty.”
“Beat the Mega Boss on Epic difficulty.”
“Reach wave 30 in the Endless Battle.”
Upon beating all of the mega bosses and unlocking the Dungeon Crawler medal, the Temple of Trials will be open from both the slime cat warp room and The Rapture. Inside is 5 of the hardest bosses in the game, beating them on any difficulty will open a second room where a myriad of enemy and boss rushes needed for completion. The rushes consist of enemies and bosses from the base EBF5 game and nothing special like new enemies, rules, or areas. This is a great opportunity to catch any monsters you missed and refight bosses you may not have the medal for. Here are the different rushes:
Foe Marathon: Really long, contains all of the normal enemies from the game
Wave 1: x1 Laser Turret, x1 Cosmic Monolith, x1 Harpoon Turret
Wave 2: x1 Blood Bat, x1 Amethyst Ore, x1 Thorny Creep, x1 Cat Warrior, x1 Snow Bat
Wave 3: x1 Bone Bat, x1 Panda Bear, x1 Green Creep, x1 Zap Dog, x1 Earthquake Bomb
Wave 4: x1 Chocolate Slime, x1 Big Chocolate Slime, x1 Angel Mirror, x1 Dirt Boulder, x1 Red Bush
Wave 5: x1 Red Bush, x1 Big Mud Slime, x1 Amethyst Golem, x1 Mud Slime
Wave 6: x1 Hermit Creep, x1 Gold Fish, x1 Marble Boulder, x1 Sandy Bush, x1 Cat Ninja
Wave 7: x1 Topaz Golem, x1 Defender Mk III, x1 Jet Fish
Wave 8: x1 Matt Doll, x1 Wise Mirror, x1 Leafy Chomper, x1 Demon Mirror, x1 Natalie Doll
Wave 9: x1 Dark Bush (Big One)
Wave 10: x1 Lance Doll, x1 Burned Fallen, x1 Steel Wraith, x1 Stone Idol, x1 Shockwave Bomb
Wave 11: x1 Chunky Gloop, x1 Viking Monolith, x1 Electric Bat, x1 Fire Sprite, x1 Roasted Gloop
Wave 12: x1 Cat Sniper, x1 Cannon Turret, x1 Grey Pixel, x1 Cat Wizard, x1 Yellow Flybot
Wave 13: x1 Sea Dragon, x1 War Mammoth
Wave 14: x1 Mage Dog, x1 Zombie Hand, x1 Demon Mirror, x1 Magma Hand, x1 Lost Fallen
Wave 15: x1 Quartz Ore, x1 Scaly Worm, x1 Frost Wraith, x1 Cutie Worm, x1 Zicron Ore
Wave 16: x1 Metal Idol, x1 Wooden Idol, x1 Gem idol (Big Ones)
Wave 17: x1 Muddy Bush, x1 Big Sand Slime, x1 Lime Squid, x1 Sand Slime
Wave 18: x1 Green Pixel, x1 Beheaded Fallen, x1 Purple Squid, x1 Giga Harpoon
Wave 19: x1 Rock Sprite, x1 Magma Chomper, x1 Anna Doll, x1 Tanuki Dog, x1 Red Creep
Wave 20: x1 Steam Fish, x1 Wind Sprite, x1 NoLegs Doll, x1 Crucified Fallen, x1 Acid Bomb
Wave 21: x1 Wooly Mammoth, x1 Peal Golem, x1 Peridot Ore
Wave 22: x1 Water Slime, x1 Pink Squid, x1 Big Lava Slime, x1 Lava Slime
Wave 23: x1 Green Bush, x1 Blue Creep, x1 Red Pixel, x1 Brown Bear, x1 Red Flybot
Wave 24: x1 Hardy Gloop, x1 Camel Mammoth, x1 Rescue Dog, x1 Ice Sprite
Wave 25: x1 Icecream Slime, x1 Big icecream Slime, x1 Bubbler MX-01, x1 Blue Flybot
Wave 26: x1 Sky Dragon, x1 Nuclear Bomb
Wave 27: x1 Ruby Ore, x1 Putrid Worm, x1 Sandstone Boulder, x1 Fuzzy Worm, x1 Topaz Ore
Wave 28: x1 Earth Dragon, Grolar Bear, x1 Wolf Dog
Wave 29: x1 Sapphire Ore, x1 Coral Boulder, x1 Ancient Monolith, x1 Drowned Fallen, x1 Thunder Sprite
Wave 30: x1 Dead Pixel, x1 Obsidian Boulder, x1 Stumpy Gloop, x1 Cat Bomber, x1 Leaf Wraith
Wave 31: x1 Slime Mouse, x1 Seaweed Chomper, x1 Skeleton Hand, x1 Mutant Chomper, x1 Icicle Creep
Wave 32: x1 Omega Dragon, x1 Flame Wraith, x1 Master Wraith
Wave 33: x1 Slime Bunny (♥♥♥♥♥♥♥ Massive One)
Miniboss Rush: Contains the Chibi Knight and non-boss hydra encounters
Wave 1: x1 Panda Bear, x1 Chibi Knight
Wave 2: x3 Blaze Hydra
Wave 3: x1 Amethyst Golem, x1 Super Chibi Knight, x1 Amethyst Ore
Wave 4: x3 Zombie Hydra
Wave 5: x1 Camel Mammoth, x1 Ultra Chibi Knight
Boss Rush: Contains the main story boss fights minus the final boss
Wave 1: x2 Gem Idol, x1 Jotun (Boss)
Wave 2: x1 Neon Valkyrie (Boss), x1 Cannon Turret
Wave 3: x2 Cat Wizard, x1 Laurelin (Boss), x1 Cat Warrior
Wave 4: x1 Sapphire Ore, x1 Poseidon (Boss), x1 Quartz Ore, x1 Zicron Ore
Mega Boss Rush: Contains the refights to the main story boss fights
Wave 1: x1 Sol (Boss), x1 Skadi (Boss)
Wave 2: x1 Neon Valhalla (Boss), x1 Shockwave Bomb, x1 Giga Harpoon, x1 Shockwave Bomb
Wave 3: x1 Cat Bomber, x1 Telperion (Boss), x1 Cat Sniper, x1 Cat Ninja
Wave 4: x1 Ruby Ore, x1 Vulcan (Boss), x1 Topaz Ore, x1 Peridot Ore
Wave 5: x3 Crystal Hydra (Boss)
The Endless Battle: The enemy order is randomized every time but has more elemental consistency per battle than the Foe Marathon. Enemies can appear that are from the Greenwood Library and Battle Arena.
Final Thoughts, Complete Map, and Update Log
Whew! 3 full playthroughs and roughly 150 hours in-game and that’s a wrap for this guide! I want to thank you for reading this massive undertaking of a project, it means a lot to me. I would also like to thank the various commenters below as well as the Epic Battle Fantasy Wiki for helping me fact check certain things in the making of this guide. While we’re here, I thought it’d be nice to post a map of all of the areas of intrigue between optional areas, glitch spots, cult ceremonies, and arcade machines:
My battle is not done yet though. This guide may be finished but beating everything in the game on Epic in order to 100% the game is next on my plate. Do tell me anything else you want me to add or fix, I am sure I made plenty of mistakes. Again, thank you for reading and I will see you again if Matt ever decides to destroy my free time further and make a v3 or something.
Update Log:
4/7/2021 – Changed title
9/7/2020 – Small Touch Ups, Added Update Log
5/20/2020 – Updated for Version 2.0 of EBF5 & Added Missing Sections
February 2019 (Don’t remember the day) – Removed Boss Guides
January to August 2019 (Real Specific) – User Suggested Edits
12/28/2018 – Original Release!