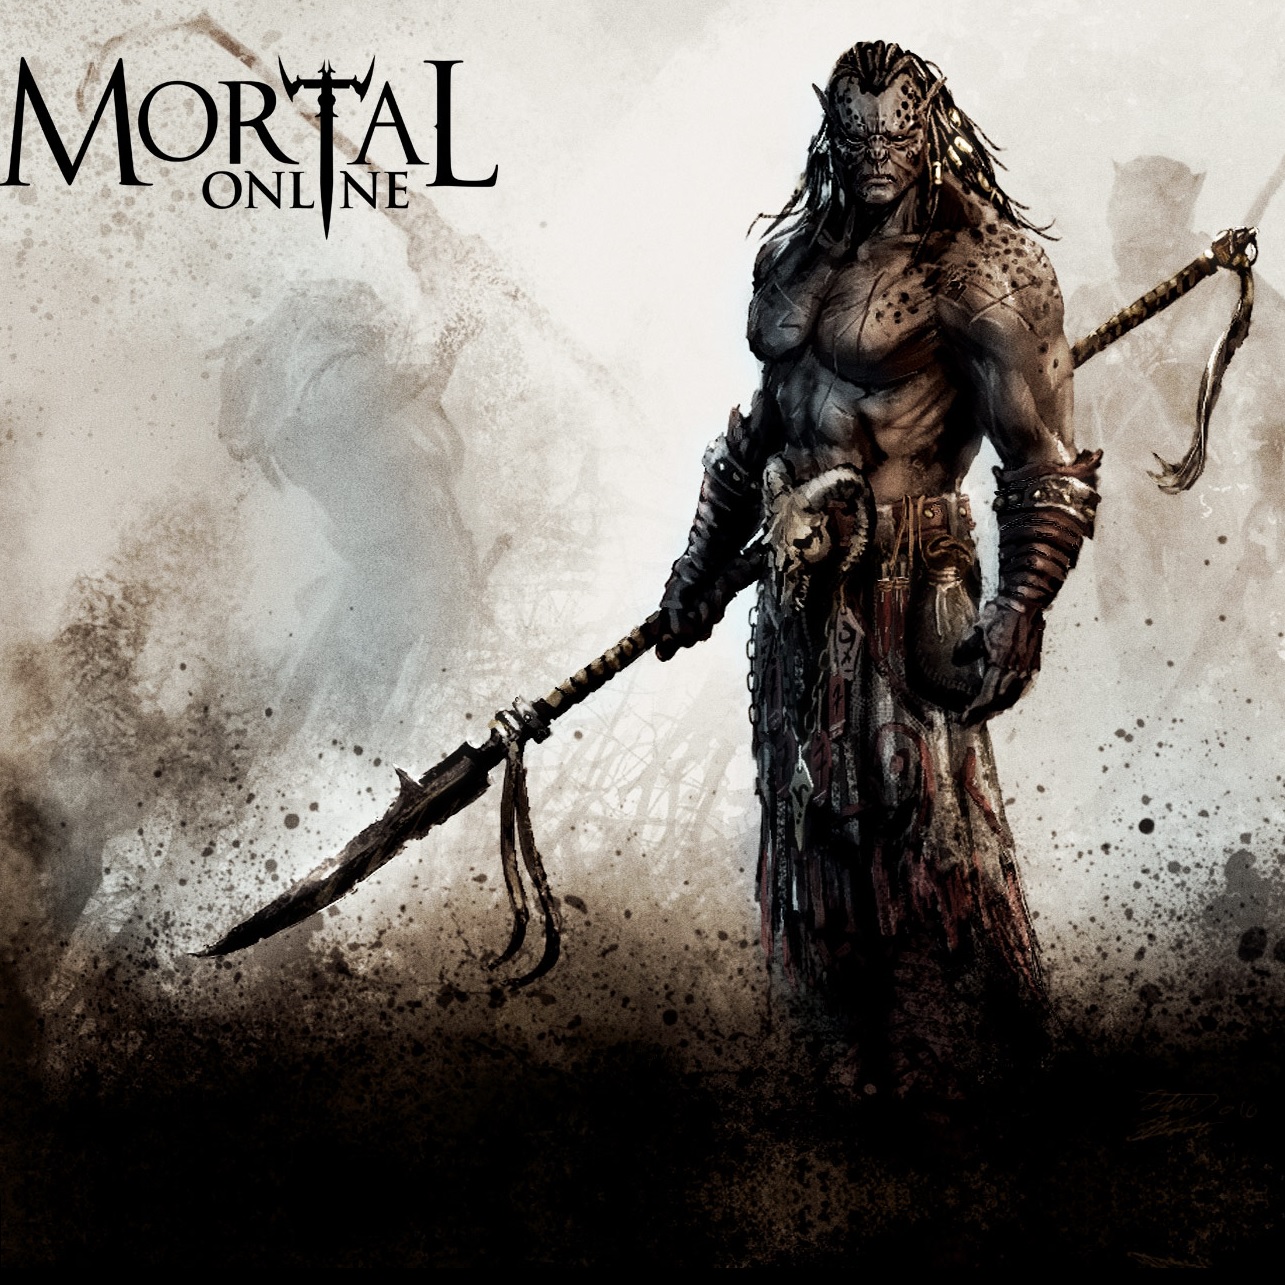
Overview
The complete guide to Mortal Online for beginners. This guide covers everything you should know about the game to get you started and more. Highly recommended to read before starting out or if you want to learn more about the game. The guide covers everything from mechanics, skills, crafting, combat, and much more.
About this guide
This guide is aimed for newer players I’ll try to explain some basic of MO. I will go over most things but I’m not going too deep in specific skills and mechanics, if you feel you need that kind of knowledge about the game or want to know it more in depth, I suggest searching for specific guides or ask veteran playes that are more knowledgable.
I highly suggest everyone to read it through before staring to play, since it’ll make many things much more clear and your experience much less frustrating.
Guide is mostly focused on PvE aspect of MO. Since you need to learn the basics it won’t matter mostly, but for pure PvP topics, those are more advanced stuff anyway, you’ll have to do some research yourself.
About Mortal Online
First of all, what is MO? It’s an first person, open world, full loot, full PvP sandbox MMO. What that means is basically you’re never safe, no matter where you are, so always keep that in mind. You can be attacked and killed by anyone anywhere, and if killed, all your items you’re currently carrying can be looted by other players. And as if that wasn’t enough, you can get your stuff stolen from your inventory right under your nose.
Sounds harsh? Well it’s not as bad as it sounds when you accept the fact, that everything you have is expendable and that there are areas in the world where you’re relatively safe. The first thing you should learn is to keep your eyes open and be aware of your surroundings. Not only to keep an eye for other players but also to know the environment and use it to your advantage. Also any negative action you take against other “innocent” players will mark you as criminal which means free game for other players. It might sound the game is not much fun with all the negative mechanics, but in fact those mechanics are what makes it so much fun. It gives you freedom, enables player economy and each action has some consequence. The longer you stick with MO, the more you understand it, the better it gets.
There are many repeating questions by new players, so to sum those up:
- No, there is no 3rd person view
- No, there is no in-game map. You can use mortalonlinemap.info and if you’re on Steam you can make is as overlay. Start navigating by landmarks as soon as possible.
- When you die, everyone can loot your stuff. If you were “blue” they will become a criminal, but most likely they already are if they killed you
- You will get attacked, killed and robbed. There is no way around that, so learn to deal with that, it’s part of the game
- If you get stuck, first try /stuck command. If it doesn’t work, press ESC, choose Support and file a ticket. GMs will help you as soon as possible
- There is no fast travel, no teleportation in game. You walk or ride where you want to go
- This is subscription based game. There is free unlimited trial which limits you in three ways:
- You can’t own a house
- You can’t use thievery skills
- Your effective skill level is capped at 60
Might be worth mentioning here, that you can have up to four characters on a single account, each character will cost you 9$ (one time fee). By having multiple characters you can be more self-sufficient and get more from what you get in the wild. You can butcher carcasess for more profit, you can make your own armor and weapons, cook your own food, etc…
Most frustration at the beginning comes from not understanding the flag mechanics enough. This is why I’ll start with this and you should know about it before starting the game.
Flag System
Flag system is many times where the most frustration lies for new players, when they get killed and they don’t know why. It’s a system, that describes what consequences your actions against other players and NPCs will have. There are five flags in the game that you should get familliar with before you start playing.
- Fledgling (yellow) – Those are new players that just started their new character. You’ll stay fledgling for couple of hours. While fledgling other players can’t hit you or steal from you. Be careful tho, if you make a criminal act, you will go grey and all your fledgling protection will be gone.
- Innocent (blue) – This is the normal status in the game. If negative acts are made against a blue player, the other player will become a criminal. Blue players are protected by guards in cities, can be resurrected by any priest in the world and if you die, looting your corpse will mark other players as criminal. Any criminal act, even if accidental, will mark you as criminal. This goes for any NPC as well, so be aware of blue animals left behind by other players. If you get killed, you can report your killer as murderer, increasing his murder count.
- Criminal (grey) – When you attack an innocent player or get caught stealing you become a criminal. The flag will last for 2 minutes since your last criminal act, and then it will revert back to innocent. While you’re marked as a criminal anyone can attack you without a penalty. Also in cities the guards can be called upon you to kill you on sight and not every priest will want to resurrect you if dead. Aiding any criminal will flag you grey also, so don’t go around healing thieves and murderers.
- Murderer (red) – When you kill an innocent player, they can report you for it and it will give you murder count. When you gain five murder counts you will turn red and be flagged as murderer. The rules for murderers are the same as for criminals, but the flag lasts for much longer. To lose murder counts you will have to wait for eight hours of ingame time without killing an innocent player for each murder count. In most cases if you see a red player you will want to run, hide or beg for your life, altho most of the time they will just kill you for their fun. Not all red players are so called “player killers” (PK or RPK) and not everyone is randomly killing other players, some just go red from PVPing, roleplaying, etc… So as a new player you sometimes have more chances to play it nice, since if their intention is to kill you for no reason, you most likely won’t be able to do anything about it 🙂
- Hidden criminal (grey with blue stripe) – This is a special flag that only you and the person you made a criminal act to (or the other way around) can see. When you duel someone, snoop or steal from someone, and no one else notices, only the person involved with such action will be able to see that you did something wrong. While someone is a hidden criminal, others still see him as innocent. To reveal such person to others, you need to push him and that will flag him as criminal to everyone. Be careful tho, beneficial acts, like healing, against hidden criminal will mark you a criminal even tho you saw him as innocent, so sometimes this can get a bit tricky. It’s safer to not do such dangerous things while in city or place with a lot of players.
I should add one more “flag”. Since there is no player groups in MO, playing together can get tricky if you accidentally hit someone. There is an exception to that. If you’re in the same guild as another player that you hit, you won’t be marked as criminal. For that reason I would suggest you get into the same guild as people you’re playing with.
Flags are probably the most important aspect of MO when you’re starting out, so be aware of them! Always “confirm” what you’re attacking or healing, always be sure you’re not looting blue corpse (there is even a message in loot window to warn you) and don’t loot stolen or illegal items (red border in inventory) if you want to be safe. In highly populated places it’s much better to be safe, while outside in wilderness your flag rarely matters, since you won’t be meeting players as often and it’s easily to wait 2 minutes for grey flag to go away.
Dirty Tricks
Flag system described above is responsible for some players behavior and are some “dirty tricks” players will do, to try to turn you grey. If you are careful you can avoid all of them and the first step is to know about them.
- Blueblocking – This is the most common way some players will try to turn you grey. When you charge your weapon the player will jump between you and your target, so that when you swing your weapon you will hit them instead. Keep an eye out for suspicious players, look around and don’t attack monsters when other players are near.
- Fledgling hitting – By now you should know that you can’t hit a yellow player. So if you’re yellow yourself, and someone attacks you, don’t go defend yourself and attack them back. Since they didn’t hit you, they will still be blue and therefor you’ll be marked grey yourself.
- Stolen/Illegal loot – When a criminal dies you’ll many times see all the players that are near will jump on it’s loot like vultures. In such looting frenzy it’s quite easy to loot a stolen or illegal item, so always be careful about what you loot. Many times the items you loot are not worth losing everything you have. The same goes for trading, always be carefull what other players give you.
- Pet traps – This trick is specially used in starter areas with pigs. What people do is they tame a pig (which is now a pet and therefore marked a blue) and leave it among many other grey pigs. If you’re not careful and are killing pigs like it’s no tomorrow, you might accidentally attack that “trap” pig. Confirming your target is an important thing in MO, master it as soon as possible.
- Scamming – Not as much a method to mark you grey, but still worth mentioning. In MO there are two ways to train your skills, one is by using them, the other is to read a book about them. Some books can be quite expensive and hard to get, and some people try to scam players by selling empty books named the same as skillbook you’re trying to buy. It’s best to buy from people you can trust or from brokers in town. Similar thing goes for most items, that you can name whatever while crafting, so be careful where you buy and what you buy.
I’ll say it again, just so you get this into your head, everything you have is expendable. If you can’t afford to lose something, don’t carry it around. Anything valuable put into bank, and go to bank often. You’re items are safe there, just like pets are safe in stables. It’s wise to always have some extra cash or a way to get some cash for the worst case scenarios. When you go into the wilderness, only take with you what you really need for the task at hand. And always keep your eye open and be aware of your surroundings. Try to learn the land, so you can use it to your advantage. For example, if you’re a good swimmer you can run to the water to try to escape, hide in the bushes, or use monster aggro to distract or get rid of your enemies.
So by now you could already figured it out, that towns are actually quite dangerous place if you’re not careful. This goes especially for new player areas, so it would be wiser to avoid them. If you are careful enough, you can gain a lot from those areas, but most of them are just not worth your time. Graveyard is one such place, too many players looking for opportunity to kill you there. Rather risk it and go out of the city, find a nice unpopulated spot and do your training/farming there, go to some less populated town or newbie friendly player city. The more popular the spot is (like town entrances, good farm and taming spots, …) the higher the chance some naughty players will be there.
Character Creation
Now that you know the basics of MO to start out, it’s time to dive into the game itself. First thing you’ll be presented when getting into the game will be the character creation screen. You have some options here that may affect the way you’ll play and it’ll determine your strengths and weaknesses. If you’re “min/maxer” it’s wise to plan your character out beforehand, what “class” you want to be, because your race and base stats (like age and height) once chosen cannot be changed in game at a later time (this might not be completely true for height, since there is some food in game to change that). Race and base stats will also determine your maximum attribute cap, so if for example you want to be a mage later on, don’t go make a strong dumb character. Attributes itself can be changed at any point in game (you need to train them tho) so the only thing that really matters are the caps.
Race
There are four base races (called Caldes) in MO, and when you are making a character you choose your ancestors from sub-groups of those Clades. Choosing your four grandparents will give you a mix of their attributes, so you can fine tune your character to what you need. That way you have a choice to make a well rounded char or to make a specialist with a specific role in mind. I highly suggest, if this is your first time playing MO, that you choose what race you like and don’t care about stats too much, because when you’ll learn the game and will see what you want to be (maybe you love archers in other games, but in MO you’ll realize you prefer a mage for example) and then make a new character. Your first play should be about learning the game, and those couple of hours you throw away will only help you to be better and make a better character the second time.
I’ll give a short description of each race, for more details about their lore you can read it here: [link]
Humans
Versatile race that’s the most widespread in MO world. They are more well rounded, but rarely useful for highly specialized roles.
Tindermene – Probably the most well rounded stats. No big weaknesses, but doesn’t shine anywhere also. They can have quite high intelligence and are quite tall.
Khurite – They make excellent fighters, having decent strength, high dexterity and constitution. They are not the tallest of races and lack intelligence.
Sidoian – Good strength, constitution and intelligence, but lacks in dexterity and psyche. They make decent crafters, since those three stats are important for them.
Kallard – Another fighter oriented race with high strength and excellent constitution, but they lack dexterity, making them slower as other humans.
Sarducaan – Good constitution, psyche and intelligence, making them useful as mages or tamers.
Alvarin
Those are the closest to what elves are in other RPGs. They have similar strengths, being dexterous and smart, but lacking physical strength. They make good thieves, dex fighters and mages.
Veela – Stronger and more dexterous group of Alvarin, making them better in fighter role.
Sheevra – They have a bit lower strength and dexterity as Veela, but make it up with psyche and intelligence, making them better as mages.
Oghmir
They are a race with very high strength, constitution and intelligence. This combination makes them very good at crafting professions.
Blainn – Highest constitution and decent dexterity, but they have a bit lower strength and intelligence.
Huergar – Highest strength of all races, making them the only ones to use the best bows in the game. High intelligence makes them excellent crafters and also decent mages.
Halfbreed
Halfbreeds are a mixed breed of Risar and humans. Thursar half gives them high strength and constitution, but lower dexterity, psyche and intelligence. With mixing in humans you can compensate for those weaknesses and make very good characters. Thursar half also gives them a lot of height, that helps with dealing even more physical damage, making them excellent fighters.
Attributes
Attributes in this game are quite important in MO. Not only they give you the basic effect you would expect from them, they also add 10% of it’s value to any skill that uses that attributes. This way you can actually have around 1200 skill point limit instead of 1100 as it says in skill window. For now just keep in mind, that strength based skills will be more effective at start, if you have high strength for example. Attributes are gained quite fast by using skills that are associated with them, so what you choose at start is not as important. It’s probably best to start with a bit higher strength (for carry weight), dexterity (for a bit of speed) and constitution (for more health).
As mentioned, you gain attributes by using the skills associated with them. So for example, to gain strength you can go chop some wood and it will raise with time. In your character window there are “+” sigh next to each attribute. This means that attribute is marked so that it can increase. If you click on the “+” sign you can set each attribute as “lock” or “-“. With “lock” it will not increase or decrease and with “-” it will start to decrease when you ran out of available attribute points and another attribute marked as “+” will want to increase. With that mechanic you can change your attributes and fine tune your character anytime. The only limit is your maximum attribute cap and minimum (which is 10 for each attribute).
Strength– Strength will affect the damage you make, increase your stamina and make you carry more weight. Some weapons also require higher strength to use and is especially important for archery and high strength bows.
Dexterity– Dexterity will give you more speed and increase your stamina.
Constitution – Gives determines your health and stamina, and increases your speed (half as much as Dexterity).
Intelligence– Increases your mana and helps you notice if someone is stealing from you.
Psyche– Increases your mana the same amount as intelligence and gives you a chance to resist some magic spells. Psyche also makes you move faster as ghost.
Size– Gives damage bonus, more health and carry weight.
The formula for bonus skill points gained from attributes is X/10, where X is an attribute for skill that only uses one attribute and (X+Y)/20, where X and Y are attributes for skills that uses two attributes. For example:
– To have 100 skill points Butchery (int), and you have 100 intelligence, you only need to train it to 90, that will give you effective skill level 100 after attribute bonus (90 + (100/10=10) = 100).
– To have 100 skill in Mining (str + con), and you have 80 strength and 100 constitution, you need to train it to 91 (91 + ((80 + 100)/20=9) = 100)
Some skills also compare directly your attribute value to your targets attribute value to determine a successful outcome (for example Stealing checks for Intelligence, so having high Intelligence helps you protect against thieves).
Classes
Since MO has a skill based system, there are no classes to choose from. Every character can be whatever “class” it wants to be, the difference is only how good it’ll be at it’s role. I’ll go a bit more into detail for specific builds later in this guide. For now just choose whatever race you like, and play around with age and ancestry to get a feel of how attributes work. If you know already what you want to be or have a bit more experience with MO, you can look at “Classes” section at the end of this guide, where I’ll give some example build with races and attributes to start out for specific roles.
Character Stats
After creating your character you’ll find yourself in starting area of whatever city you chose to started in. First you need to familiarize yourself with user interface and the information about your character.
Flag– your current flag (described in flag system)
Health – your current and maximum health. Grey part is what you can regenerate with resting, black parts you need to refill with sleeping. Red bar.
Stamina – your current and maximum stamina. Grey part is what you can regenerate with resting, black parts you need to refill with sleeping. Yellow bar.
Mana – Your current and maximum mana. Blue bar.
Reserves – thin lines above Health/Stamina/Mana are your reserves. When you ran out, you can’t regenerate your hp/stam/mana to full anymore and need to sleep.


Target
Flag– Your targets flag
Health– your target’s current health

In your character window (default P) you can see many stats about you. More important ones are:
- Hunger– tells you how hungry you are, ranging from not hungry at all (0) to very hungry (1800). Once you are above 700 hunger you can’t sleep anymore. Eating the right food while you have full reserves will also help you gain weight.
- Thirst– don’t worry about this one, it’s only for potion, you’ll most of the time be at 10/10, which is good
- Armor weight – how heavy armor you can wear before armor starts to slow you down. Any armor weight above 4 will start to decrease your mana regeneration even if you can support it. If you’re over your weight you can’t ride mounts anymore. You need to learn “Armor training” to wear heavier armors. When ordering an armor from armorcrafter tell him how heavy armor you want to have. The benefits of heavier armor is usually more protection.
- Health/Stamina/Mana reserves – the first number is your current reserve, the second number is your maximum reserve and the thin lines in your stats window number is the deficit value, where you start losing your maximum health/stamina cap. You can regain reserves by sleeping if you’re in deficit, after that you can only increase your reserves by eating. Different type of foods are better for health and some are better for stamina, so you need to think about what you eat sometimes too. You start losing reserves, when you’re regenerating your health/stamina. You start losing your weight when you’re in deficit and you gain weight by eating food that would increase your health/stamina reserves when you’re at maximum.
Next thing you need to familiarize yourself with are active skills, that you can use to perform various actions. Since the last patch, many actions can be done by simply pressing (default) R on some object and it will activate appropriate skill (like Gathering on pickables, Mining on rocks, etc…), but in case it doesn’t work, or you’re need skills that can’t be activated as simply, you need to at least know how to activate them. To access your skills you press (default) L. This opens up your skill window, where you can see how much your skills are trained, how close to your skill cap you are and what conditions you must meet to learn certain skills, parent prerequisites, if the skill can be learned by using or you need a book to learn it. In that window you can also see all skills you have available to use. To use a skill you drag it out to your hotbar and use it from there.
At start you should have skill Gathering that you use to pick up various items like flowers, mushrooms, water, etc… You should also have skills Rest and Sleep, which you use
to regenerate your health and stamina.
Depending on your weight loss/gain you can get attribute modification with different states, and gaining weight will give you some extra health points. You start out “Fit” and depending on your weight loss or gain you can get those states:
- Skeletal – -30STR +5DEX -30CON -5PSY +10INT
- Skinny – -20STR +10DEX -15CON +5INT
- Underweight – -10STR +5DEX -5CON +5PSY
- Lean – +5DEX -5STR
- Fit –No Change
- Stout – +5STR -5DEX
- Overweight – -10DEX
- Fat – -5STR -15DEX -5CON +5PSY +5INT
- Bulging – -15STR -20DEX -15CON +10PSY +10INT
- Obese – -30STR -40DEX -30CON +20PSY +20INT
Another useful thing to make shortcut for is “Guards macro” so you can call guards in guarded areas by simple pressing a button while having a criminal targeted. That way you don’t have to open chat and type in “/s Guards”, sometimes those couple of seconds is the difference between life and death. To do that open chat and type “/macros” to open macros window. Press “New”, in command type “Guards” (without “”), press “Save” and drag icon to your hotbar. If you change the macro you need to drag it out to hotbar again, it doesn’t refreshes by itself.

Tutorial Walkthrough
When you start a new character, some starting cities have tutorial to get you started. If you’re new you can probably choose only Tindrem or Morin Khur as starting city, they are both guarded cities that have tutorial. Even if this is not your first character and you start in a city with tutorial I would suggest you do it. It only takes about 15 minutes and you get some free skills and items at the end. For this guide I’ll assume you started out in Tindrem, since I prefer it as a starting place and has more options later when you finish tutorial, eventho it’s much more dangerous because there are more players there trying to take advantage of new players. I will go over town layouts later in the guide, so if you want to start in any other city you can adjust this walkthrough a bit.
UI
First set up your UI the way you like it. You can move any window around in mouse mode (default Z), you can also interact with your inventory in this mode, and there are some additional option under “Preferences” like additional hotbars and their size, displaying number on your character stat window and setting up shortcut keys.
Tutorial
For tutorial you will have an arrow telling you where to go, so you should find the NPCs quite easily. First you need to talk to “Tatius Koios” that will send you to “Lugus Llew”. He will tell
you to kill a pig and skin it, to get leather with which you’ll make a robe. It’s basically a combat tutorial where you’ll learn the basics of fight.
Combat tutorial
You charge your weapon with left mouse button (LMB) and you swing when you release it. You need to charge your weapon for couple of seconds, to get the full swing for maximum damage.
You can swing in any direction by moving the mouse left or right while you press LMB. You can set in preferences to use movement keys instead of mouse movement for
directional swing. If you set it that way, you use A+LMB or D+LMB. You need to be close enough to your target to hit it (depending on weapon you use) and it might be easier for you
to hit it from one direction than the other, so play around a bit and kill couple of pigs to get a hold of combat in MO. Just remember to keep an eye out for other players so you
don’t get “blue-blocked” or that you don’t kill a blue pig (mentioned above in “Dirty Tricks”). There is fourth swing called Thrust, which (by default, you can change that in
preferences to always use this attack) you use by holding ALT button while charging. This will be useful for bladed weapons or spears, where you want to do more piercing damage.
Thrust attack is easy to aim but also easy to block (since you don’t need any direction to block).
With right mouse button (RMB) you block while holding it and you can block in different directions as well, using the same movement + RMB as for swinging. If you time your block and
direction correctly you will get a perfect block, or in case blocking with only weapon, you get a parry that is indicated by sparks.
When you get a parry, you can counter-attack by clicking LMB (no need to charge it) and it will do the same damage, as if you would fully charge your swing. Also you prevent most of the damage by parrying. To be efficient in combat you must master parry technique. It’s good to know, that for NPCs you don’t need to block in the right direction (you can block in any direction) to get parry, making PVE a bit easier, but you need to read (and learn attack animation) other players to successfully parry their attacks. You will need to learn attack patterns and animations for monsters to be better at parrying and that takes practice. Pigs are a good place to start learning this and without learning to parry you’ll have hard time killing any monster in the world.
Butchery tutorial
When you kill a pig it will drop it’s loot. To pick it up, target it and press (default) R. This will open loot window and you can drag items to your inventory or right click each item to pick it up (right clicking an item in inventory will equip it or eat it, so be careful not to eat what you don’t want to). Pigs (or any other creature later on, altho some have additional loot) will drop it’s carcass, which you can further use butchery skill on (skinning knife skill you have in your skill window, so put it on hotbar) to get materials from it. The amount and what material you can extract from a carcass depends on your butchery and material lore skills (and later in the game you get much more materials if you use butchery at a butchery table).
Crafting tutorial
After you skin the pig and get leather (you need 16 leather for this part of tutorial), “Lugus Llew” will give you 50 Cotton and tell you to craft Heavy Robes Torso and Leggings. Follow GPS arrow that will lead you to crafting station, which you use by targeting it and pressing (default) R. This will open up crafting window. For now you only know how to craft Heavy Robes, so keep that armor type selected and from armor part select Torso. Put Leather in Primary Material slot, Cotton in secondary slot (backing material), leave sliders to far left (to use as little material as possible) and press “Craft”. Next select Leggings from armor part and craft those too. You can (if you have enough materials left) craft some more armor parts, but it’s not really needed, since Heavy Robe offers very little protection (and even more because of your low crafting skill). Now bring what you crafted back to “Lugus Llew”. You can keep the armor and equip it. He will now send you to “Adad Ganesh”.
Taming tutorial
In this part “Adad Ganesh” will ask you to tame a rabbit for him and will also teach you taming and pet control skills. Open skill window (default L) and drag taming skill to your hotbar. Find a rabbit (there should be plenty near him) that is not tamed (it’s still flagged grey) and use taming skill while targeting the rabbit. After a short time when you will tame the rabbit, go talk to “Adad Ganesh” to continue the quest. He will take the rabbit and send you to “Captain of the Guard”.
When you get to the “Captain” and tell him to open the door, he will offer you to choose a skill set. Always choose a skill set, because you get free items and skillbook for chosen profession. You can always train different skills later on, so this choice will not limit you in any way. After that he will open the door for you and you can venture in the world. Remember you can always get back to starting area, you just need to ask “Captain” to open the door for you if it’s closed.
Now that you finished the tutorial and familiarized yourself with the basics of gameplay, it’s time to experience the real MO. I suggest you decide what you want to be in this game (at least for now, keep in mind you can always change your skills and attributes and with it your profession) and what your profession will be. When you decide start training skills that suits your chosen path and slowly make money to be able to afford better gear.
I suggest you forget about graveyard, even tho that’s the next place the game will suggest you go, because it is full of people that will try to take advantage of you (blueblockers, murderers, etc…). As weird as it sounds, it’s much safer to go outside the city, find some relatively easy animals and kill them (will mention some interesting spots later in guide in section “World”), or return to starting area and practice more on pigs. Graveyard is OK, if it’s not too populated, just keep in mind it’s not a guarded zone. If you decide to be a crafter you should have an easier life at start, since you can spend quite some time in starter area and gather materials in relative safety. If you’re a tamer, you can let your pet do the work and avoid blueblocking that way with ease.
Skill System
Most your character development will be based around skills. Each character has a skill limit of 1100 primary skill points, which means you can really specialize in 11 skills (trained to 100). With added attribute bonuses (explained above) you get some “free” skill points, effectively giving you around 1200 skill points to use. I would suggest you specialize rather than be a jack of all trades, that way you will get most out of your skills. Rather have more specialized characters than one know it all. If it’s your first time playing MO and are still deciding what to do you don’t have to worry. Just try as much styles and skills as possible to find what you like, and with time start to abandon skills you don’t like, shaping your character with time.
Skills are divided into a tree structure and each skill is either a Primary skill or Secondary skill. Primary skills count toward your skill point cap, while Secondary skills are “free” and you can have as much of them as you want. For that reason you also can’t unlearn a Secondary skill, since it has no effect on your skill cap.
Each primary skill has a “+” sign next to it at first. This means it can be increased with training (or reading books). When you press “+” it will turn into “-”, which indicates that the skill will start to decrease, if another “+” marked skill would increase and you have reached your skill cap. You can lock a skill clicking on “-” sign which will prevent it from raising or lowering. To instantly decrease a skill, press a red “-” next to it, which will instantly decrease it for 1 point. This is useful if you’re over 100 effective skill and you want to lock it at certain number.
Many skills have prerequisites that you need to have it’s parent skill (a skill higher in tree hierarchy) at certain level. At the very least you need to at least learn about the parent skill to be able to learn about it’s child skills. How much you need will always be written in skill description, so make sure you meet the requirements before trying to level up a skill. Training a child skill will also increase your parent skill, so you can use that to your advantage by training difficult to train or expensive skills. For example, you don’t need to train Soft Armor Crafting to 100, as soon as possible start training Laminated Armor Crafting (requires 50 Soft Armor Crafting) and it will also increase Soft Armor Crafting. Do note that your skill will be limited by your parents skill, so if you have a parent skill at 50 and you train child skill to 100, you will only be able to use it as effective level 50, which is the main thing that limits you when building your character and requires you to specialize.
Many skills can be learned by doing an action that is related to the skill (for example, swimming will increase your Swimming skill). If the skill can be learned by using actions, it will say so with green text, and it will also state there what are the prerequisites if any. If it doesn’t say it can be learned through actions, you need to read a book about the skill to at least start to learn about the skill. Later you can keep reading the book or train by action once you know at least 0 points for that skill.
As mentioned, skills can be learned by reading a book. Books will most of the time train your skill to 70. The time spend reading a book will depend from skill to skill and some can take many days to finish reading. Not all books can be bought at every librarian and some are quite hard to find, but most what you need at start can be acquired from librarian in the starting city.
There are some librarians that don’t accept money as payment, those usually sell unique skill books. As an example is Arx Meridius in starting city, vendor that greets you when you get out of tutorial area and tells you to bring him undead heads. He sells many useful books (and some starter equipment) which you can buy by trading Walker heads to him. You get those heads from undead walkers in graveyards (the reason why everyone farms graveyards so much) and he only accepts those as payment. Each normal walker head is worth 8 silver to him and there are stronger undeads that are worth more as well. Those books can also be bought from different librarians for money if you prefer search for them and buy them that way.
Later in the guide I’ll describe more about certain skills, how to use them and where to get some rarer books for them. So if you’re interested in any at this point, you can find that under “Making a living” and find it under certain profession (if need to know about gathering skills for example, check “Gatherer” profession that describes Mining, Woodcutting and skills associated with them).
When reading a book, you will keep reading it even if you’re offline, so you should always have some book reading. To see how much time is left, hover your mouse over a book icon in the lower right corner of your screen. By right clicking on that icon you can also stop reading the book, but the book will be gone if you do.
Inventory
Next thing I’ll talk about is inventory and how to work with items. Items in this game can stack up to 10.000 of same item. To split stacks you can “shift+click” on stack. When writing a number for split numpad doesn’t work, so use numbers above the keys on keyboard.
If you right click on an item in inventory, you will equip it if it’s equipment, otherwise you’ll most likely eat it. So don’t go right clicking on that lovely wood you chopped.
Stacking items is also useful when it comes to thieves. Thieves are limited to what weight they can successfully steal. So having bigger stacks will help you against thieves. And this leads us to….
… Money. There are three currencies, gold, silver and copper. Conversion for each is 100, so 1 gold is 100 silver, 1 silver is 100 copper. As you could have figured out by now, it’s much safer to carry around 100 silver than 1 gold, because thieves won’t be able to steal it that way. When selling items to vendors, you can ask a vendor to give you silver instead of gold. Just “buy” the same amount of silver as he would give you gold in addition to your items. That way you can also exchange your currencies with the help of vendors.
Always keep an eye on the amount of weight you can carry. If you carry too much, you will become slower and slower until you carry that much that you won’t be able to move anymore. Speed is very important in MO, the ability to run fast can and will save your life. If you want to carry more get a mount, that you can equip with bags so that they will haul heavy loot for you. When carrying too much don’t go into water, you won’t be able to swim and will drown. In case of emergency you can use command “/droploot” (make a macro for emergencies) that will drop everything you have on you. It’s better to lose everything and maybe get it back later, than dying and losing it anyway. This is also useful if you’re training crafting and you have no intention of selling the items you craft. You can’t sell crafted items to vendors and destroying it one by one is a slow process, so it’s faster to drop everything and pick back up things you need (do it naked for less picking up).
Another thing about weight is your ability to ride mounts. If you are over your limit, and that goes for your armor weight also, your mount will throw you off if you try to ride it. When starting to learn riding always ride a mount with higher intelligence (7 – 10 or more int). If you get thrown off even when not carrying too much, it might be your mount has too low int for your skill, so ride it in first gear until you gain more skill.
NPC Services
Most items in game are player made. With the fact you can’t repair items and that you will die and lose everything eventually, this creates a healthy player economy. Never carry around what you can’t afford to lose (this is worth mentioning many times) and if possible always have some reserves in the city you’re currently stationed. Keep bringing what you get to bank often, don’t be too greedy. And when you are going to change the city you work in, bring with you only what you need.
Bank, mail, stables and broker are all local, meaning what you have in one city’s bank, you can’t access from another city and what you’re selling on one city’s broker can’t be bought in another city. You can’t send items to another city by mail and you can’t access your pets in other stables, only those that you stabled your pet in. This means, that whenever you change city you basically start from scratch. This is also the most dangerous thing to do in MO, moving your hard earned items from one city to another. This is why it’s important to have supplies in many cities, so you can travel light and in case of death you lose very little.
Why would you change city you might ask? Because the world is big, and with no way of fast traveling and sending goods around, you might want to move around from city to city depending on what your current thing you’re doing is. Let’s say you live in Morin Khur as a miner, and want to start mining Suburra. Your only choice is to go to Tindrem or Meduli, since this is where Suburra can be found. It would be too dangerous to mine there and haul everything back to Morin Khur. It’s safer to station yourself near the place you currently work. Gerring basic money to jumpstart your operation is quite easy, even if you get to a new city naked. All you need is to pick couple of flowers or plants, sell for basic weapon or tool and work from there on.
So far I covered that most items are player made, but there are some useful items that can be bought from vendors. There are various NPCs that offer their services, so let me describe them a bit:
Bank – Bank is the place where you store your items to be safe. Items in bank can’t be stolen and when you die you don’t lose them. There is a limit how many items you can store in bank, but there are also banks in same city that are not connected, so you can get more space that way. Use bank often, and always put in what you don’t need at the moment.
Mail – A NPC called Veredari serves as a mail in MO. You can send items within the same city to other players (also your alts if you have them). When sending you have the option to send with cash on delivery (COD), which means receiver must pay for items to get them. Each item you sell will cost you 1 silver (whole stack is considered one item). Careful when you take items out, if you press the “receive all” button and you get more items than you can carry, you won’t be able to move. This means you will need a friend, pet with bags or will have to destroy/drop items to be able to move again. Only take out of mail what you can carry and keep an eye out for suspicious players that might be thieves.
Stables – The role of stables is done by NPC called Equerry. Here you can stable your pet for a fee of 1 silver. You can put your pets to train of if you have a male and female mount you can breed them to get better mounts. You can stable up to 5 pets in one stable without Management skill, but there are usually many stables around, so you can have more pets in each city if you really need it. There is also an option to create a receipt for your pet, which can be sold on broker or send by mail if you want to sell your pets to other players (you can also transfer pet directly for free) and it will cost you 50 silver to make. Also if you buy a pet, you can turn the receipt in at stables to get the animal you bought, but you must turn it in at the same stables that this animal is stabled (it says on it which stable it’s for). Careful when carrying receipts, they can be easily stolen.
Broker – Broker can most of the time be found near banker. Here you can sell and buy items put on broker by other players. First tab will help you search for items on the broker (keep in mind you can only buy items on broker in the same city, altho you can search for other cities). If there is a “bag” icon next to the item, you can click it and see what items you get for buying it. This is mostly used for armor sets.
The second tab is Buy Orders, where players can put in what they are buying, and you can fill those orders (completely or partially) and earning what is offered. This could be described as some sort of player made quests and most things you see there are materials others need.
Third tab is for selling items on broker. You set a price, pay 10% fee and set how long the item will be listed. If you sell an item you will get your money by mail in the same city.
Library – There are many different librarians in cities, and they sell skill books.
Tindremic/Khurite librarian – Sells basic books, for most skills you need at start, like combat, weapons, gathering, crafting, etc…
Petrologist librarian – Sells books for material lores you need when mining.
Crafting librarian – Sells books for crafting, some can be found at tindremic librarian, but is more specialized
Animist librarian – Sells books that are focused more for tamers and mages
Zoology librarian – One of the biggest skill tree is zoology, you can find all sort of lore about creatures that inhabit MO world. To be successful at taming, butchering and to some degree fighting them, you need knowledge about them. This is where you get books for them if you don’t want to train it up manually. There is only (as far as I know) one zoologist in the game, he’s in wilderness in Vadda valley and can be quite dangerous to go there with bags full of gold, so be carefull.
Other book vendors – There are many other librarians out in the world that sell more rare books and usually don’t take gold as payment. Those are not necessary for beginners so I’ll skip them from this guide. There are enough resources on internet if you search for them (hint: Mortal Online book list) and if you’re gonna stick around in MO you need to do some research on your own anyway.
Vendors – For last this is a short list of vendors and some useful items they sell
Food vendor – Sells some basic food, mostly used for buying “dile” that can be cooked with 10.000 water which makes cheap mount food.
Utility vendor – Sells some useful items like Torch, Campfire, Mining axe, Bandages and starter weapons
Reagent vendor – Sells basic reagents needed for magic spells and some other professions
Gear vendor – Sells basic gear for adventuring like portable workbenches
I would like to mention Tindremic and Kallardian armor vendors found in starter cities. They sell Tindremic Scale and Kallardian Padded armor for 1.35 gold (for whole set), which is a good starting armor if you can’t get a cheap one from players. You should be able to get better and cheaper armor from players tho, but I like to mention them just so you have the option of quickly gearing yourself. Also if you can’t get a cheap player made weapon, you can buy one from gear vendor or “Arx Meridius” (he only takes undead heads as payment). Basic weapons (a bit better than worn) can be bought for 20 silver and exceptional version for 1 gold, but they are still worse than most player made weapons.
Pets
Owning a pet is not only limited to tamers. Anyone can have pets, if you have enough pet points to control it. You can transfer pets to other players or buy/sell them via receipt from players or broker. You gain more pet points by training skill Creature Control (and Advanced Creature Control), while also lowering pet point requirements by learning zoology lore skill for pet you want to control (for example Zoology Equidae skill for horses). For pet to remain under your control you need to feed it and keep it happy. You need as low hunger level and as high loyalty level as possible. Pet will gain loyalty if hunger is under 400 and will lose it if hungry or every time you give it a command (loses 10 loyalty for each command). If pet becomes too unhappy it will leave you so take good care of it. When pet is above 700 loyalty it will also gain 1 level every 30 minutes (skill Animal Care makes this faster) if it’s level is marked as “+” in pet window. To access this (and other pet specific options) press (default) K to open pet window. You can see your pet points here and the list of your pets. You can click a pet you want to inspect closer that will open it’s stats window. From there you can see it’s basic attributes (if you hover over str you can see how much it can carry) and if you scroll down left stats you can find it’s level lock. At the bottom there are couple of buttons for things like commands, pet equipment, renaming a pet, transferring it and abandoning it.
At the very bottom you will also see a bar that says “drag food here to feed”. To feed your pet you need to drag food from your inventory to this bar. The pet will then eat the amount it needs to get fed and will tell you if it like the food or not.
If you control more than one pet, your maximum pet points will get reduced by 20 for each pet above the first one. You can lower that penalty by training Herding. If you are over your maximum pet points your pet will start to lose loyalty.
If you logout, your pet will not logout with you but it will stay in game, which means it will eventually get hungry, start losing loyalty and leave you. To prevent this from happening either stable your pet when you stop playing or if it’s ridable mount it and logout while on it.
Death
So you died and don’t know what to do. Don’t worry, it’s not the last time. Get used to the fact, that dying is a big part of this game. When you die you become a ghost that can wander the land but not interact with anything. You need to find a priest that will resurrect you (or in rare case a player with enough Spiritism skill). Not all priests will resurrect a criminal so in case a priest doesn’t want to help you, and you’re just criminal (grey) not a murderer, just wait 2 minutes for your criminal flag to go away and try again.
There are two ways to find a priest when dead. First most common one is to look for pillars of light in the sky. They always “shine” on a priest, so just follow the light. If you really get lost, there is an option in your character window (default P). Under your stats there is a button (that was previously “Suicide”) that says “Teleport to nearest shrine”. It will do just that, teleport you to nearest priest that is willing to resurrect you, so be careful if you press this while you’re a criminal, it might teleport you into the wild.
After you resurrect you will lose a lot of reserves, be naked and with low health, so it’s best to get some rest (find a safe place). And if you’re lucky and are able to find your corpse, you can get back all your items. Altho most likely those items are lost to you, whether you died at a place full of monsters, someone killed and looted you, fell off a cliff, drowned or died in any other gruesome way that will prevent you to get your loot back. But this is MO and it’s part of life, the sooner you get over it, the faster you can get back on your track.
There is one benefit of dying tho (beside losing weight if that’s your plan). You can safely travel across the world in a fancy black and white fashion. So if you travel somewhere, are naked or don’t care what you lost, just continue to travel in ghost form and resurrect near your final destination. It’ll save you some time, since crossing the wilderness naked and maybe with low health will only lead to more deaths.
Combat
Not much more to say about combat, I think I’ve covered it mostly in Tutorial section. It is worth mentioning again, that to be successful in MO you need to practice parrying and get good at it. No amount of skill and armor will save you if you can’t parry and hit your enemies.
There is one more maneuver you can learn and master it in various situations and it’s called Dodge. To dodge double tap any directional key and you’ll dash into that direction. Dodging uses up some stamina, but you can evade swings that way if timed correctly.
Weapons deal three different types of damage, piercing, slashing and blunt and armors have the same three protections. Balancing those out can be important depending what you’re fighting, but that comes from experience. Weapons also have different weak spot chance, which means they have a certain amount of chance to ignore armor. Heavier weapons generally do more damage, but cost more stamina to swing. Position yourself carefully when fighting, if you are too far you will miss, if you are too close you can hit your target with weapons handle instead of it’s head, dealing low damage.
What weapon you should use depends on your preference and playstyle, so find the one that suits you best. In a nutshell daggers are fast, high weak spot, but are weaker and have short range. Swords are nicely balanced in damage, stamina consumption, speed and weak spots. Axes and maces deal higher damage but use more stamina. Spears are good for piercing damage, poleaxes that have good range, etc…
For new players I would suggest to stay away from bows and magic, and go foot fighter route. You’ll get most practice out of that and will be the cheapest to play. For bows you’ll need to buy arrows and for magic you need reagents. If you do go for bows, try to aim with arrow tip and not crosshair.
There is also mounted combat, but I’ll leave it out of this guide, since it’s a bit more advanced topic. I will list some builds under “Classes” in case you are aiming for that kind of playstyle. But even if you do want to be a mounted warrior, you should learn to fight on foot, because you can get dismounted.
During combat you will get damaged and to heal yourself there are couple of ways. You can use bandages, but you must not be in combat (weapon sheathed) so use this when you have some distance between you and your enemy. You can also use healing spells and healing potions during combat (which like all items are player made and quite uncommon). When out of combat you can regain health by resting.
World
Traveling around the world can be quite dangerous, especially since there is no ingame map and is easy to get lost. I suggest you start exploring bit by bit and slowly advance more and more into the wild, while learning to navigate by landmarks. When traveling also stay away from roads and well known spots, like mount spawns, resource spots etc… The less chance you have to meet a player the safer you are. Always try to stay in grass, forest or mountains and try to find alternative (altho longer) way to your destination, it’s usually safer that way. You can see monsters and predict their movement, if you don’t get too close they won’t attack, and even if they do, you can outrun most of them. Keep in mind also, mounts run uphill slower, use this to your advantage if chased by someone on mount. Save your stamina for sprint when you need it and learn to dodge.
And by all means, don’t announce to the world where you’re going and what you’re carrying, you’ll get ambushed fast that way. When traveling far I suggest you always head into nearby town first, to bank items and station yourself there and go to your hunt/gather spot from there.
Some of town layouts to help you find certain vendors (all credits to original authors, this is just a collection of images I found on the internet).
Tindrem – The biggest city in MO and a great place to start. You can find mostly everything there from books, crafting stations, nice starter area with many resources and couple of nice farm spots just outside of it’s walls. The downside is it has a lot of people in it at all times, which makes it difficult to avoid players that will want to harm you. I think if you keep your eye open and stay away from graveyard it’s still the best place to be and earn some starting money.
Morin Khur – Second starting place for new players surrounded with mountains. A little less riches around but still enough to get you started. Graveyard is a bit more remote with a few interesting spots (like a cave full of undeads), which is a plus since players are more spread out, but also is farther from town and guards if anything goes wrong. The downside, and also the reason I prefer Tindrem as starting point, is the fact that you need to travel quite far outside of town through a valley to find anything worth hunting, which can be quite dangerous and is many times camped by red players.
Toxai – A town just pass the Morin Khur graveyard beyond cliffs. Nothing much of interest there for new players, except for maybe Animist Librarian.
Meduli – South of Tindrem by the sea is a desert city of Meduli. It’s a nice place because it has many resources, especially for miners. It’s open nature does attract some amount of red players, so be careful if you go there.
Fabernum – Another town in the mountains, NE of Tindrem. Plenty of resources, nice town layout, but proximity of Kranesh makes it that you’ll have a high chance meeting a red player.
Vadda – Small city in the woods with plenty of trees and forest animals around. Most of the time it’s safe there and there is Zoology librarian near the town.
Bakti – A city in the south above the jungle. If you go to jungle this will most likely be your outpost. Some amount of PvP going on around, so it’s good to be careful.
Moh Ki – Seems like a quiet city, haven’t been much there but it might be a good place with little red player activity.
Kranesh – As a new player never go there. It’s a lawless town full of red players.
Gaul Kor – A remote town far in the mountains. Never been there, but since it’s lawless I guess it’s better to stay away from it as newer player.
Cave and Jungle Camp – Two camps that are lawless. They mostly serve as outposts when you’re hunting in the area.


Making a Living
There is many ways to make a living in MO. Game gives you complete freedom on what you can do and the way you do it. I will give you some ideas and common ways of making a living in the game, but you are encouraged to find your way and play the way you will enjoy MO the most.
Adventurer
By adventurer I mean a fighter of any sort, that makes his living by going into the wild and hunt animals and explore dangerous places in search of riches. For this you can be a foot fighter, mounter warrior, archer, mage, even tamer or dominator. Whatever skills you have that will help you survive and kill monsters in the wild. Most of your income will come from gathering monster carcasses and selling them to butchers, that will then extract materials from them to further sell to crafters (or vendor with profit). It’s possible to be a butcher as well as fighter, but you’ll sacrifice some combat skills for it. If you’re only into PvE it shouldn’t be much of a problem. You gain the ability to butcher your own carcasses and make even more profit by selling materials than just selling raw carcasses.
For adventuring you’ll most likely need good gear, weapons and armor. You’ll also need a mount that will be able to carry as much items you gather back to towns and will make your travels faster. A horse is a good choice, but if you train some Creature Control you can even get a Molva, that will help you transport even more items and reduce your need to visit towns.
Gatherer
The life of a gatherer is tough. You travel around searching various materials and haul them back to town, selling them to crafters. You can do many work in safety of town at the beginning, but for many sought out materials you’ll need to travel into the wilderness. Using most skills for your profession won’t leave you much skills (if any) to protect yourselves, so having a Molva will double the benefit of out as your mount that will carry you and what you find and to protect you in dire times. Learning the spots and the safest way there and back to town will be your main goal.
butcher
A butcher usually works within the safety of towns, buying carcasses and butchering them for materials, that he can sell for profit to crafters or even to vendor for some quick cash. It’s paired well with high cooking skill to further its profit by cooking what he butchered. Being a butcher is all about lore skill books, having plenty of them and having them at high level is important to gain as much from each carcass as possible. It’s a relative safe profession with a relatively good profit, and is a fine alt character for any adventurer.
Crafter
Being a crafter is probably self-explanatory. You turn materials into armors and weapons (or potions, houses, etc.. but I’ll focus on the most common crafting professions). To be a crafter you’ll need to be a gatherer by yourself or buy materials from them. As a crafter you’ll only have enough skill points to specialize in one type of crafting, or in case of weapon crafting even in one type of weapon. The more specialized you’ll be, the better materials you’ll be able to use to make rarer items. So you’ll need to find a balance between being more specialized or being more self sufficient. The main focus will also be on lore books, because for crafting not only you need high crafting skill, you also need high lore skill for materials you work with. It’ll take some time to train it up, and your items will be of lower quality at start, but eventually you’ll start making better items as your skills will grow and will be able to make more profit by selling them.
Tamer
As a tamer you’ll be hunting various animals and selling them to other players. Your main income will be from selling mounts, which can be quite profitable very early in the game. Zoology lores will be important part of any tamer, so you’ll have to also kill many of the creatures you want to tame. This will make your profession similar to adventurers and having some fighting skills will be needed. After you train your skills higher and are able to tame good combat pets you’ll start to depend on your own combat skills less, but they will always be useful when things goes wrong. A good profession to pair with tamer is Mage which will allow you to heal your pets during combat. Remember you don’t have to be a tamer to control a pet, so players will buy them as a way to deal additional damage, distraction or tank for them. Also the fact that mounts are used by every other profession makes it so you will always have a market for your skills. The downside is training all the skills up, which can take time and is one of hardest professions compared to others and also requires you to venture into the wild the most, so you need to learn to navigate the world.
Thief
First of all, you need to be subscribed to be able to use thievery skills. After that, you’ll probably be hated by everyone, since no one likes thieves (even less than player killers). But the rewards are great. You’ll be able to steal a valuable item from time to time and the greatest reward comes from locked chests throughout the world. Only thieves can learn lockpicking and open those chests without keys and riches in them can be quite nice. Since you’ll use up many primary skill points to get there, it won’t leave with much to protect yourself while you go search for those chests. Thieves are paired well with Magery or if you want to be more shady killer you can go for daggers and backstab. Whatever you do, speed will be your main goal, so you can run away with your stolen goods.
Services
There are many other ways to make a living in MO. You can also offer services to other players and build your character according to that. Those are just some quick suggestions:
- Postman – You carry items from town to town for other players. You’ll most likely have to vouch for those items with some kind of insurance and building up your reputation will be the most important thing. Being fast and knowing the land will be your main goal.
- Traveling salesman – Someone needs a rare book or some specific item only found in another part of world? You can help them, they order the item, you get it for them, for a nice fee of course. Or you just travel from town to town with rare items and sell where there is demand for them. You’ll need good knowledge of the world and where to get things, but you can turn that knowledge into good profit.
- Mercenary – You can be hired for escorts or protection. Being a good fighter will be a must and also knowing the land will help a great deal, when escorting other people through the world.
- Bounty hunter – Hunt down those criminals and protect the innocent. Get a revenge for someone unable to do it themselves and get paid for it. The proof for your kill will be the bounties head. When your name gets well know, you’ll bathe in riches.
The possibilities are endless and you can be whatever comes to your mind. Keep your mind open and think outside the box and you might find a niche thing that will make you famous and rich.
Character Builds
All credits for some of most common build descriptions to Diphling, I will borrow from his guide, you can find the original guide here: Build Guide[mortalonline.com]
Foot Fighter
About: The fighter is the front-line soldier who specializes in melee combat. Most PvP groups run with at least 50% of their group as fighters. Their ability to do sustained damage overtime is unmatched.
Skillcap: High
Main races: Thursar/Khurite, Tindremene, Khurite
Main stats: Strength, Dexterity, Constitution
Weapons: Any melee weapon.
Armor: Heavy armor
Advantages: Strong damage, best defense, can parry.
Disadvantages: Vulnerable to Mounted characters, especially mounted fatmages. Vulnerable to fall damage. Generally they have no magic resistance. Cannot self heal without bandages.
Special builds: There is a subset of warriors called Psyfighters- which essentially sacrifice strength for psyche in order to become resistant to magic damage.
Excels at: Soaking up damage, dealing damage. The primary PvP class.
Foot Mage
About: The foot mage is a strong support class. They are very mobile, and can kite. Their main strengths lie within group fighting- where they heal allies, and suppress enemies by denying enemy healing. They are also capable of killing low opponents with burst damage from their spells.
Skillcap: High
Main races: Sheevra, Veela
Main stats: Dexterity, Constitution, Psyche, Intelligence
Weapons: None!
Armor: Light armor, between 3 and 6 weight.
Advantages: Best recovery from low health because of healing spells. Surgical magic damage that ignores armor. High magic resistance due to psyche.
Disadvantages: Vulnerable to both melee and ranged attacks. Limited mana pool means you do not have sufficient mana to kill.
Special builds: Some mages can be thieves as well. I’ve stolen many bandages and even enemy weapons in combat before!
Excels at: Healing in PvE or PvP. Best support class.
Hybrid
About: Hybrids are essentially a warrior who has all of the magic skills, while sacrificing the use of heavier armor. They double as healers, and can finish enemies with magic spells. This is the hardest class to master, but one of the most rewarding. You must be a master fighter, as well as a master mage to pull it off.
Skillcap: Very High
Main races: Veela, Tindremene
Main stats: Strength, Constitution, Dexterity, Intelligence
Weapons: Depends on the strength. Most hybrids use 2h swords, or flanged pole maces.
Armor: Varies. Between 6 and 9 weight for light hybrids, and up to 24 for heavy.
Advantages: Can recover from damage quickly. Has the ability to switch between melee, magic damage, and healing very quickly.
Disadvantages: Extremely difficult to master. Vulnerable to melee and ranged damage unless you use heavy armor.
Special builds: With heavy armor on, and reduced mana regeneration, you will be what is called a “Paladin”. This build allows you to be a functional foot warrior with the advantage of healing spells, and some offensive spells.
Excels at: Being the jack of all trades. Best survival class.
Foot Archer
About: Foot archers are a decent PvE class. For PvP, they can be utilized to damage mounted characters from a distance. They also do decent damage versus mages. Unfortunately as a class, they are not very viable for PvP.
Skillcap: Medium
Main races: Thursar Khurite, Khurite
Main stats: Strength, Dexterity, Constitution
Weapons: Bows that are tailored to your characters strength. Exceptional Blunt Arrows do the most damage.
Armor: 9 weight armor is recommended for stamina regeneration, but it is not unheard of to see a mounted archer wear plated steel.
Advantages: Ranged damage. Most archer builds have room for a melee weapon as well, and this character could easily double as a fighter. Using incendiary arrows, they do good damage to structures.
Disadvantages: Their damage is not exceptional, and they are unable to parry.
Special builds: None that I know of.
Excels at: Keep enemy mounteds at bay.
Mounted Archer
About: Mounted archers are a very potent ranged class with high mobility. They are very potent in PvE, and do very good work versus other mounted characters in PvP.
Skillcap: Medium
Main races: Thursar Khurite, Huergarr, Blainn
Main stats: Strength, Constitution, Dexterity
Weapons: Bows tailored to your strength level.
Armor: Generally heavy plate armor, but they can run in lighter stuff if they must.
Advantages: Ranged damage while a horse with heavy armor is extremely survivable, and is very effective at kiting. Demolishes enemy pets. Can weakspot enemies by shooting them in the head.
Disadvantages: Hitting ground targets is hard, and if you are dismounted you’re stuck shooting on foot from a horse unless you have melee skills as well.
Special builds: Wheelchair Huergar builds forgo Dexterity for Psyche. You are useless on foot with that build, but you have the highest strength possible.
Excels at: Skirmishing with enemy players. The best at farming in PvE.
Mounted Combatman
About: The MC is a cavalry player which specializes in using weapons to hit things. Having an MC ride alongside a foot group is useful, as it allows for you to constantly pressure an enemy group, even when they are fleeing.
Skillcap: Medium
Main races: Kallard, Thursar mixes, Huergar, Blainn
Main stats: Strength, Dexterity, Constitution
Weapons: Heavy weapons. Most people use axes.
Armor: Heavy armor
Advantages: Capable of running easily from combat if in danger. Can dismount enemy mounteds. High damage and burst potential.
Disadvantages: Must be in melee. If dismounted forcefully you are basically stunned for a few seconds.
Special builds: Many mounted combatmen have the same skills as a foot fighter, and if built the same way as a footfighter they may double as one. Another MC build is known as the Wheelchair, where you sacrifice all dex for max height and strength on a Kallard or Huergar to do the most damage possible while mounted.
Excels at: Hunting down footmen, and dismounting enemy mounts.
Mounted Mage
About: Mounted mages are a high mobile burst damage dealer and healer. The have the highest single target damage in the game, as well as the ability to nuke enemy groups with an AoE spell. They are very powerful in large scale engagements, and they run circles around most foot fighters. Their weakness is the mounted archer, foot archers, and when they are hit by the spell “corruption.”
Skillcap: Medium
Main races: Huergar, Blainn
Main stats: Constitution, Intelligence, Psyche
Weapons: None
Armor: Light or medium weight armor.
Advantages: Highest burst damage in the game, has a very strong AoE attack (earthquake), very mobile unless dismounted.
Disadvantages: 2x as long cast time while mounted. Vulnerable to archers and mounted archers.
Special builds: There used to be a MM/Lance hybrid that did lots of melee damage with a lance, and then utilized magic for healing or burst damage at a range. I have not seen these lately, but these types of builds are possible.
Excels at: Burst damage versus ground targets.
Tamer / Dominator
About: Tamers and dominators
Skillcap: Low
Main races: Sheevra, Veela
Main stats: Dexterity, Constitution, Psyche
Weapons: Depends on the build, usually tamers will be a mage as well. Dominators are required to be mages.
Armor: Light armor.
Advantages: You point your crosshair at someone and tell your pet to attack them. It is really easy. For PvE you simply set your pet on a monster and heal the pet while it tanks and kills the target.
Disadvantages: They require a lot of skill points, and generally are not good at escaping. Mounted Archers demolish their pets as well.
Special builds: Dominator Mages are capable of using Demon Bats, which are a FLYING ranged artillery
Excels at: Doing PvE with your pet. A high level bear, minotaur, or spider is a very strong tank.