Overview
A collection of efficient approaches to different orbital maneuvers.Not an extensive guide. Not a basic orbital flight guide.
Intro
Hello Kerbonauts.
This guide uses some abbreviations. There’s a glossary section near the end, in case you need it. Regarding any word or expression you are not familiar with, the best approach is searching google/wikipedia, since the terminology is the same used in real-life space programs.
If you are new to this game, there’s something you need to understand: the rules in this game are the laws of physics. There are no shortcuts. There are two ways to play: flying by the seat of your pants, which is pretty straight-forward; or careful execution of planned flights. Since you are reading this I assume you are a fan of the second approach, much like me. In that case let me give you an important piece of advice: read up on the laws of physics involved, the maneuvers used in space flight, and the different types of orbits. An essential starting point is the wikipedia page on Kepler’s laws. Yes, you will read up on basic astrophysics to learn to play. That’s half the fun!
In a game about space exploration you will sooner rather than later come to realize how important it is to maintain good energy economy. Efficient flights require smaller and more efficient ships, which require less fuel to maneuver. The ability to maximize the velocity changes (deltaV) with a given amount of fuel is paramount to a good mission. Therefore, following the most efficient procedure in your maneuvers is essential.
In this guide you will find a collection of principles that point towards the most efficient way of doing any sort of orbital shenanigans (getting the most out of your deltaV supply). Think of them as pointers, as this guide is in no way extensive. Struggling with the very basics? Then before you even read this I suggest you find Scott Manley’s youtube channel. He has videos explaining every single sort of flight/maneuver you will need in this game.
Even the most complex concepts are summarized here, though if you want to see the math, there is a section at the end of the guide listing my sources.
This guide is entirely based on
Comprehensive list of efficient maneuver techniques. Come join the discussion! Post will be edited to reflect feedback/new tips. from KerbalAcademy
I curated in the Kerbal Academy subreddit. I decided to bring it here for bigger ease of access while in-game.
Enjoy
Basic principles
Avoid burning outside Ap/Pe. Each one is most efficient for certain maneuvers;
- Pe burn for adjusting orbit altitude (Ap altitude);
- Ap burn for circularizing new altitude (Pe altitude), or radial adjustments, and small plane changes;
- If you need to adjust your orbit (raise/lower Pe and lower/raise Ap at the same time) you want to burn radial while half way between the two based on time (which on a circular orbit would also be half-way based on distance);
Taking off
- No matter where you are, or which planet you are taking off from, the most efficient way is always to put yourself in a low stable orbit first, before leaving to go somewhere else. Get yourself in orbit as fast as you can, worry about the altitude later (make sure you leave the atmosphere though).
- If there is an atmosphere, adjust your thrust so you won’t waste efficiency fighting major drag while inside it. Too much thrust at low altitudes means you lose energy to air friction.
Landing
To land, there are different options:
- For landing at a specific spot, burn all your retrograde orbit delta V over the spot (over where the spot will be when you hit ground, due to planet rotation), then perform a suicide burn near the ground. Don’t spend any delta V on your vertical speed besides the suicide burn;
- For landing anywhere on the surface, either use the atmosphere to kill most of your orbital speed (by adjusting your Pe to an altitude below the edge of atmosphere) and use chutes or, for no atmosphere landing, do a constant altitude burn. This last method is a bit more efficient than suicide-burn, but keep in mind it is tricky to pull of especially on generally non-flat bodies such as moons, and with low TWR vessels;
Suicide burn:
- Do a full throttle horizontal burn to stop your orbital movement;
- Start falling;
- The tricky part: right before you hit an altitude too low to have time to stop, fire you engines vertically, to kill your fall. This is easy to get wrong, hence the term “suicide burn”;
Constant altitude burn:
- Do a reverse Hohmann transfer[en.wikipedia.org], making your orbit circular, and as low as possible (watch out for mountains);
- After that, burn in a retrograde vector, this will make your trajectory sub-orbital, but not too steep;
- The objective of this last burn is to make both your vertical and horizontal speeds zero the moment you touch down;
So basically you put yourself in a very low orbit, and only then do you do sort of a suicide burn, except this suicide burn is horizontal and gradually turns vertical, which is why you need high TWR.
The point of the constant altitude burn is, in a way, to do a maneuver similar to a suicide burn, but from a very low altitude, as the less time you are in a non orbital trajectory, the less time gravity will be adding to your vertical velocity, which in turn will mean less delta V will be allocated to vertical maneuvers. The name “constant altitude” refers to how very slowly you “lose altitude”.
I’ve read of an alternative method, the “gravity turn”. I’m still trying to fully understand the maneuver and pros/cons, but I’ll put it here now:
Gravity Turn:
- While in a circular orbit, perform a Hohmann transfer to a calculated Pe altitude. I don’t know a precise equation but the Pe altitude will depend on your ship’s thrust and initial parking orbit.
- Upon reaching the Pe, point your rocket retrograde and fire your engines. Maintain constant retrograde. As the velocity drops, your vertical speed will begin to increase thus rotating your velocity vector down. Make your thrust follow along this vector, by keeping it on the retrograde node;
- Eventually your ship’s thrust will be rotated enough to begin slowing back down your vertical speed.
Most Efficient Way to Land: Suicide Burn, good. Constant Altitude, better… Gravity Turn… Best? from KerbalSpaceProgram
Throughout the entire burn, your horizontal speed relative to the surface and your altitude will decrease. The eventual outcome would result in your ship landing at the precise moment both your horizontal speed and vertical speed reached zero;
Interplanetary travel
Do all the adjustments to your SOI encounter as far away from it as possible. 1m/s is a lot from across the solar system;
To be captured by an SOI, there are two options:
- If approaching at a velocity higher than the difference between your desired orbital velocity and that SOI’s escape velocity, plan to have the lowest Pe possible during the initial fly-by (mind the atmosphere) and do a retrograde burn at that fly-by Pe. This maximizes the Oberth effect[en.wikipedia.org]. Then adjust your Ap to the desired target. Then circularize at Ap (if needed);
- If you are entering that SOI at lower velocity than the difference between your desired orbital velocity and that SOI’s escape velocity, then just go straight to your target altitude and circularize;
(This whole “velocity higher than the difference between your desired orbital velocity and that SOI’s escape velocity” business is a mouthful, I know, but it is mathematically the most efficient approach. Right now I’m not entirely sure on how to actually calculate this and choose a capture method, but a fact is a fact, so I put it here. A sort of rule of thumb you could use to bypass this tricky calculation is: if your desired orbit is high altitude, do the low Pe approach, otherwise try to go straight for your target altitude. Reddit user listens_to_galaxies is the man behind the math.)
Gravity assists[en.wikipedia.org] sound nice in theory, but are only useful in extreme situations:
- from Eve to:
- Moho
- Jool
- System Escape
- from Jool to:
- Solar Polar Orbit
- Eeloo
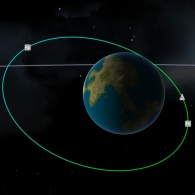
Orbital plane changes
For small adjustments (less than 38deg), just burn near Ap. Oberth effect won’t help if the burn vector is perpendicular to your trajectory.
For anything over 38deg, bi-elliptic transfers are the way to go:
- For more than 60deg, burn Pe as far as you can (ideally put you Apoapsis at the edge of the SOI), then adjust plane at the new Ap;
- For change between 38 and 60deg, do the same, but with a smaller Ap increase;
For target-based inclination adjustments, consider adjusting your orbit so that your Pe coincides with either the Ascending or Descending node, followed by the same process as above (either simply tweak at Ap, or do the bi-elliptic transfer). However, this is mostly a solution for high eccentric orbits. If your orbit is low and/or circular, that adjustment would not be worthwhile, so just burn at the node closest to Ap.
Glossary
Here’s the glossary, for all your abbreviation needs:
Ap – Apoapsis – the highest point in your orbit;
Pe – Periapsis – the lowest point in your orbit;
AN – Ascending Node – an intersection between your orbit and that of your current target (ascending means at this node you go from being “below” the target to being “above”, relative to the target’s own orbit);
DN – Descending Node – same as above, but the exact opposite (from “above” to “below”);
SOI – sphere of influence – the sphere of maximum distance beyond which a body will not affect your vessel with its gravity. In real life you are always being subjected to the gravity of an object, the influence just becomes extremely close to zero beyond certain distances, and the sphere in which the influence is relevant is called the SOI. In the game, the gravitational influence outside the sphere of influence simply drops to actual zero, otherwise your CPU would melt.
Sources
In response to yesterday’s Bi-elliptic inclination change transfer orbit in /r/KSP, I present a formal derivation of the most optimum inclination change transfer orbit. from KerbalAcademy
How to do a bi-elliptic inclination change transfer orbit in one picture. from KerbalSpaceProgram
What are your usual delta V expenditures on routine missions? Lets compare! from KerbalSpaceProgram
Can someone explain the physics of why suicide burns are the most efficient landing style? from KerbalSpaceProgram
question about landing on non atmospheric bodies from KerbalAcademy
What’s the most efficient way to leave Mun when landed in the twin crater? from KerbalAcademy
High planet orbit insertion. What’s more efficient? from KerbalAcademy
Most Efficient Way to Land: Suicide Burn, good. Constant Altitude, better… Gravity Turn… Best? from KerbalSpaceProgram
Acknowledgements
This guide is simply a compilation of conclusions, most of which were distilled in the Kerbal Space Program and Kerbal Academy subreddits. All credit goes to that community, especialy the users who wrote lengthy posts in which they dissected the math.