
Overview
If you’re done with the game but not DONE-done, look here for what to do next! Takes you step by step and is by NO MEANS spoiler free. I will tell you exactly what to do and in what order, so only use it if you’ve given up!
Getting Started: Diskettes, Upgrades and the Alien Language
Alright! You beat the final boss, and now you’re wondering what’s next. There’s tons of postgame content, so I’m here to walk you through step by step. The first thing you’re going to want are all 14 power-ups and all 12 diskettes.
Since you’ve probably obtained a certain number of diskettes and most of the power-ups, I’ll let you refer to the completed maps below to see what you’re missing. The first map is the basic one that you can access in-game, filled in completely so that you can see the basic locations of items. If you can’t figure out how to get into a specific room, consult the second, larger map for an idea of which side to enter from.
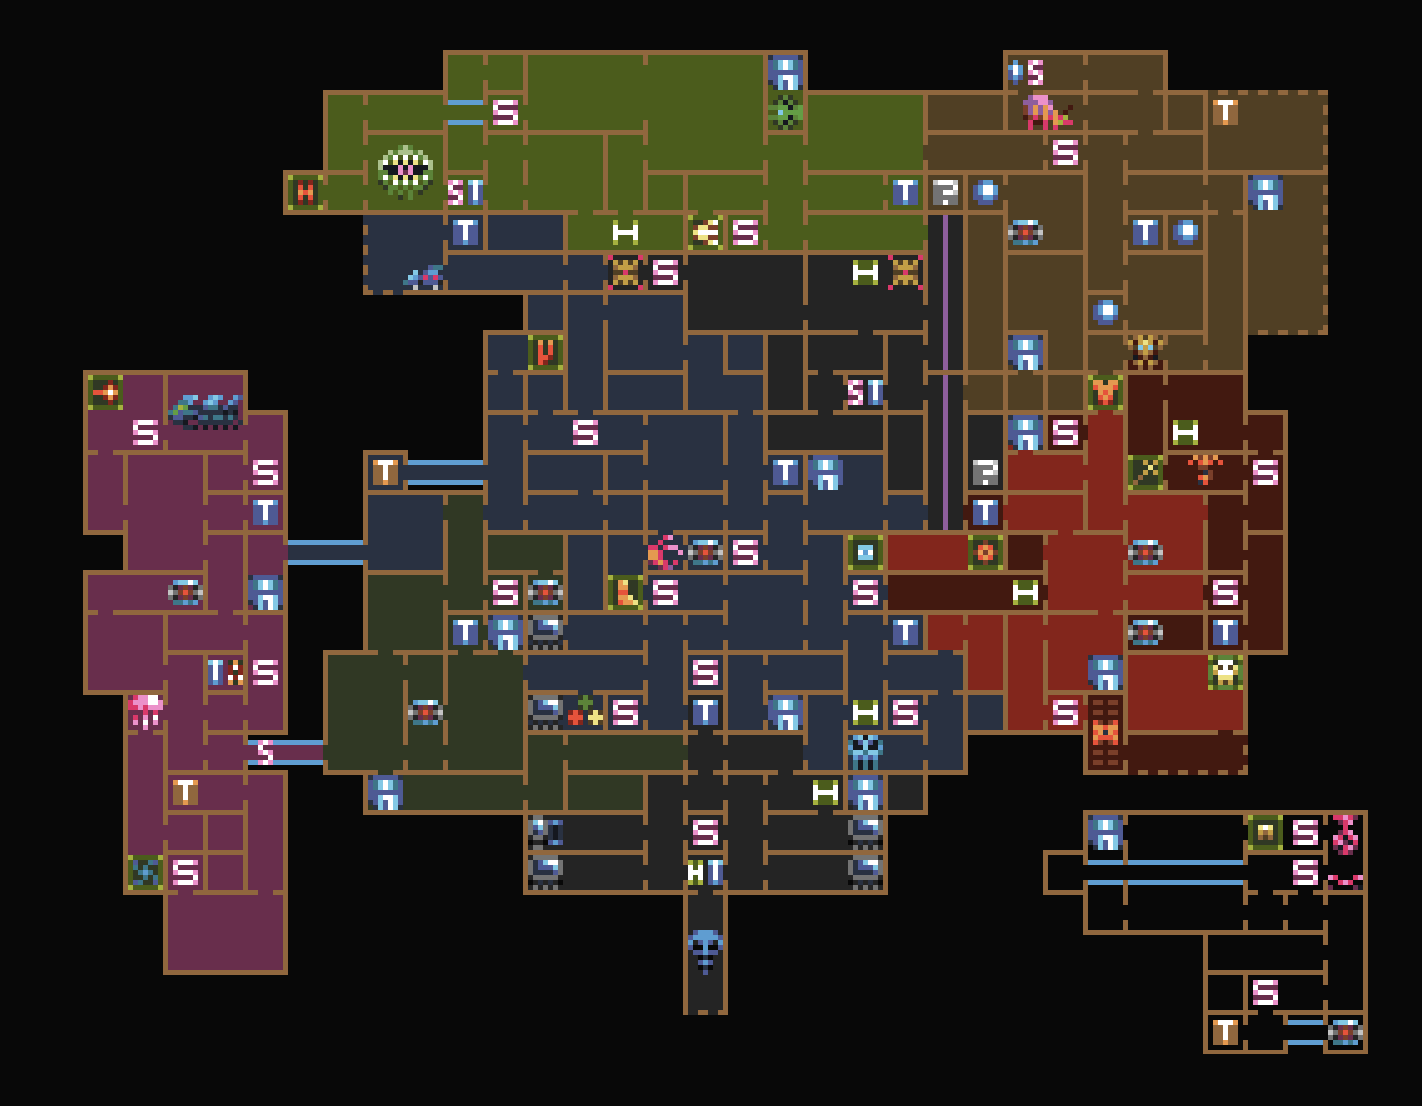
The second map can be found here; massive thanks and credit go to the creator, Menagy.
[link]
Once you’ve found the first 13 upgrades and 12 diskettes, head to map square 22-12 to get the Dash Booster X. Once you’ve got this, there’s one last thing to do before we move on: Dash your way up to 18-02 and speak with the Eagle you find there. He’ll give you the first hint you need to start translating the alien text you may have seen throughout the game. If you’d like to work out the translation on your own, it isn’t terribly difficult once you’ve got the partial cipher that the eagle provides, but there is a guide which provides a completed cipher, since the letters don’t change from game to game. Either way, the guide will assume from here that you can speak the alien language.
The Four Pillars and Dash Maze
Once you’ve got the Dash Booster X, the world is your oyster. The first thing to do is to find the four computers which unlock four pillars at the end of the dash maze. Again, refer to the maps to find your way into each room, which are located at:
- 14-08
- 20-10
- 12-12
- 17-08
When you’re finished accessing all of those, you’re ready for the Dash Maze. Head for the lowest part of the Submerged Zone and take the right exit, using the Keycard and Triple Shot to access a room with a Sun, Moon and Star in it. There is a terminal in the station that tells you what to do here, advising that you wait under the symbol that doesn’t exist: the station has a sun and stars nearby but no moon, so stand under the Moon sign and wait. After a few seconds, the floor will drop out and allow you into the Dash Maze.

Going to the right will take you eventually to the game’s second ending. It’s better than the one you’ve already seen… but not much. We can do better!
This time, head when you reach the planet’s surface to find the Four Pillars you unlocked. Unless you missed one of the computers, it’s boss time! The boss is tough but has a fairly simple gimmick and pattern: he’s vulnerable when descending to the floor at the start of the fight and after each phase. If you hit him enough before he can land, he’ll explode briefly and you’ll need to dodge lasers for a bit. If you CAN’T hit him enough, he’ll begin firing laser bullets and you don’t want to deal with that, so make sure you hit him before that can begin. The boss is difficult and personally I wasn’t able to defeat unless I was able to avoid dealing with this bullet-storm entirely.
Once the boss is finished, you’ll appear in a new room where you receive the first of four Keys. Finding the other three will be the next step.
The Four Keys
Once you’ve obtained the first key from the planet’s surface, it’s time to gather the rest. Each key is hidden somewhere on the base, disguised in such a way that you’ll never be able to find them without clues. Luckily, defeating the boss on the surface unlocks a number of helpful alien ghosts, who can be found around the station. Each one gives you the directions to one key disguised as a riddle. Their locations and riddles can be found below:
Alien 1 (location unknown)
THE LOCATION OF THE SECOND KEY
THE THREE BLUE CIRCLES FLOATING
OVER SAFETY LEFT FROM A FIERY
CHALLENGE
HEAD QUICKLY RIGHT PAST THE VISIBLE DOORWAY
This refers to the room 19-13, the save room left of the fire zone.

Alien 2, at 08-11:
THE LOCATION OF THE THIRD KEY
A SMALL PIECE OF HIGHER GROUND
RIGHT FROM A LARGE BODY OF WATER
LEFT OF A YELLOW RUINED VERTICAL CORRIDOR
WAIT ON TOP OF THE HIGHER GROUND TO GET THROUGH
This refers to the room 15-09, where following the instructions should be simple.

Alien 3 (location unknown)
THE LOCATION OF THE FOURTH KEY
A LONG DARK CORRIDOR HOUSING
THREE SHY MONSTERS
CLIMB THE SECOND LIT PILLAR
This refers to the room 22-02, where the three monsters rush away as you approach.

The Clock Room and the Stand
Time to put these keys to good use. Head to 28-01 and use the gold teleporter there. It will take you to a room where the keys will unlock the way forward, but you’ll quickly find your path blocked by a huge laser. The trick here is fairly simple and the answer to passing by safely is in the room itself: turn off your upgrades except for the three listed on the back wall of the laser room and you’ll be able to walk through it safely.
Here, you’ll find the infamous clock room. The time displayed on the clock will change depending on what items you have equipped, and the time displayed will affect which room appears when you move to the right.
Having more than one upgrade equipped when you move on will set you in an infinite room with a ghost that kills you. Equipping only one item at a time will let you into a room with a computer which bears a hint. Each upgrade lets you get into a room with a slightly different hint, and the plasma shield lets you into a much larger room which is currently blocked off, but which also contains a single hint: “Head to the Stand and enter the code”. We’ll focus on this for now and leave the other clues for later.
The Stand the computer is referring to here is in the lava area, and it opens up another puzzle. Located at 22-16 via a fake wall in 23-16, the Stand is set between two computers, one of which is simply story text and the other of which refers you to a number of hidden clues throughout the game.
The alien text reads:
HEAD TO THE STAND AND ENTER THE CODE
THE CODE MAY BE FOUND ON THE VERY WALLS AND RELIEFS OF THE REALM
IN THE ARTWORK
IN THE SANDSTONE
IN THE TEMPLE
IN THE SUBMERGED FORGOTTEN ROOM
ONLY THE KNOWLEGEABLE ONES MAY PROCEED
This is a clue for how to open the maze. There are four letters which need to be found in various areas of the game and typed via your keyboard while on the Stand.
The first clue refers to the artwork accessible via the Disk Reader, located at 11-14. Looking through the images stored on the diskettes, you can see at the bottom of one a line of alien text. Translated, it reads “First is M”
The second clue refers to a few blocks at the top left of 06-15, which read TWOW, meaning that the second letter in the code is a W.
The third clue refers to the room at 27-01, which contains a few off-color blocks in the shape of a triangle and the alien letter for Y. Therefore, Y is the third letter of the code.
The final clue refers to a room at the end of a gauntlet that you’ve likely already completed, past a fake left wall at the bottom of the temple’s main shaft. You found a diskette here, once, and there is also a submerged room containing nothing but the number four and the alien letter for A.
These clues solved, you can quickly and easily type the phrase “MWYA” while on the Stand, and you should hear a chime to indicate that the maze has been unlocked.
The Maze
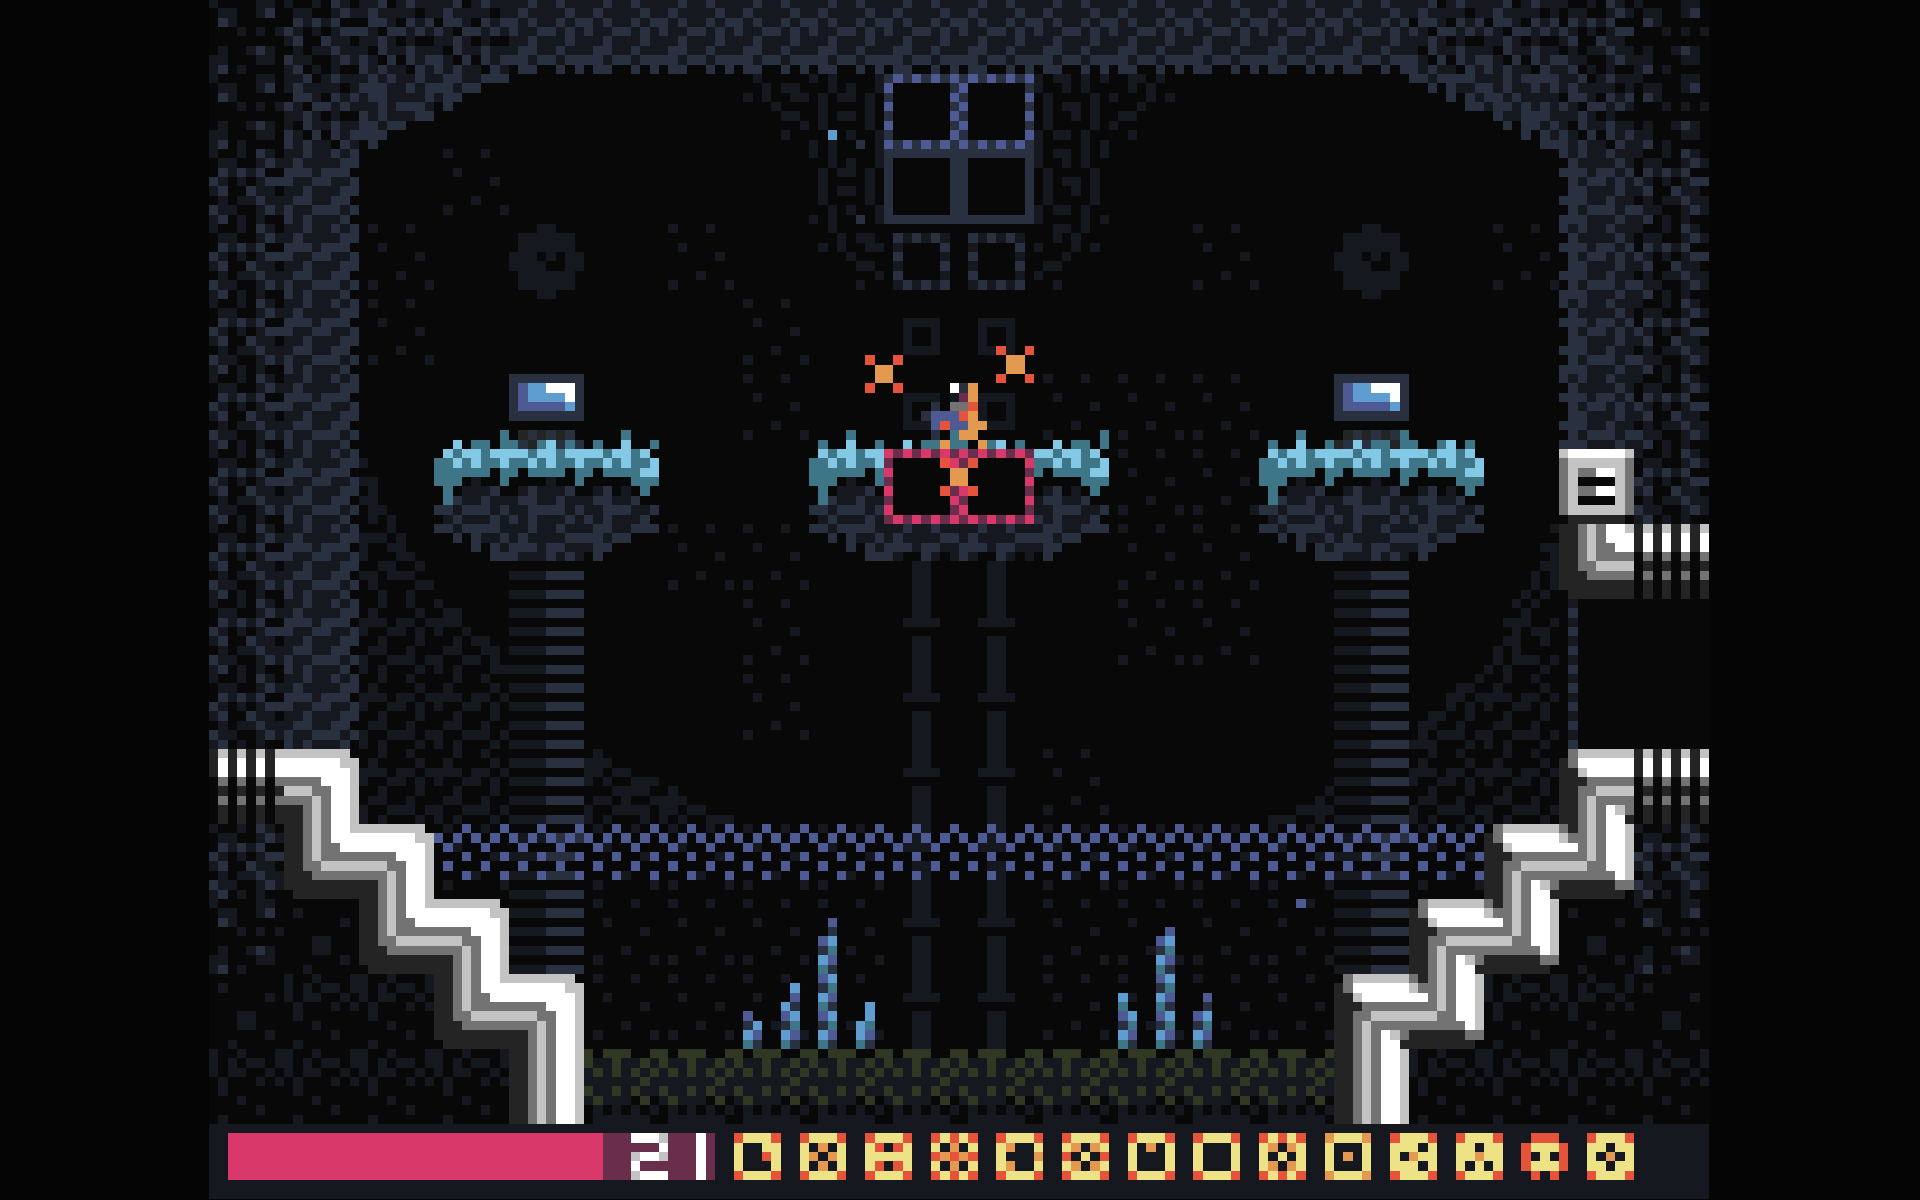
You’re now ready to return to the maze. Equipping only the plasma shield, move right from the clock room and start walking around. The maze is difficult to navigate, and the space inside it is non-Euclidean, meaning that it doesn’t follow normal spacial rules. Walking forward into a room and then back out of it the same way may not put you in the room you started in. Forunately, the maze is fairly small, and you’ll quickly run into a small cup with a portal in it, pictured below.
Fall down into that and then head left while shooting down. Head into the tunnel made by the first block you can break and you’ll find a computer there, which tells you to “Input the three initials into each of the told spots”

What this is referring to is a set of initials which will need to be typed in at each of the 13 locations hinted at by the clock room’s other 13 exits, which can be accessed by equipping only one upgrade before heading right out of the clock room. But we don’t know what those initials are yet (although maybe you can guess!), so we have to go deeper.
From the cup room, use the leftward exit above the cup, then head left one screen (past the save). In the next room, head left, then up, without changing screens, until you find a skull. Head up one screen from there. This puts you in a dead end, and the only way to go is back, which puts you into the entrance / exit room. Remember how to do that, it always works and it’s easy to find the cup room.
Now, from the entrance, head down one screen-transition and then to the left, through a path that should have a symbol under it, like the one inside the cup. If you can’t see it, try turning up your brightness. This should put you in a small room with a scary skull in it, but it’s harmless… for now. Climb on top of it and dash up to find a room with a big eyeball, some initials and a very unhappy man.
These initials, ESA (for Environment Station Alpha, if you couldn’t guess), are what you’ll need to type in at each of the points hinted at by the clock rooms. Now that we’ve finally got them, it’s time to get out of here. Use the above instructions to get to the entrance room and head left to leave.
The Clock Room’s Many Hints
Now that we’re back in the clock room, your next task is to find each of the areas specified by its many hint rooms, which are accessible by equipping a single upgrade and heading to the right. There are 13 in total, since the Plasma Shield is used to access the maze itself. The clues are listed below, and after the clues are the locations of the rooms to which they refer. Scroll slowly if you’d like to crack these codes yourself.
Also, if you’re having trouble remembering which codes you’ve entered and which you haven’t, make a trip to the room above the clock room. The blocks are in order.
Clue 1 – THE FIRST SIGN IS AT THE CENTER OF A SUBMERGED ARENA
Clue 2 – THE SECOND SIGN IN FRONT OF A CREATURE LONG FORGOTTEN
Clue 3 – THE THIRD SIGN IS ON METAL AT THE FIRST STEPS ON THE ROAD ONE CAN NEVER COMPLETE
Clue 4 – THE FOURTH SIGN IS ON A LEDGE OVER WATER UNDER A GLASS DOME
Clue 5 – THE FIFTH SIGN IS HIDDEN AWAY ABOVE A VERTICAL POWER
Clue 6 – THE SIXTH SIGN IS IN A MASS OF SAND ON A PLANT UNDER SIEGE
Clue 7 – THE SEVENTH SIGN IS AT THE BOTTOM OF THE WORLD
[no eighth sign, this is where the plasma shield would go]
Clue 9 – THE NINTH SIGN IS NEARBY ON A POINTED PILLAR NEXT TO ALMOST CERTAIN DEATH
Clue 10 – THE TENTH SIGN IS AT THE CIRCULAR WINDOW TO THE VASTNESS OF SPACE
Clue 11 – THE ELEVENTH SIGN IS ON THE SPOT OF WHAT WAS STOLEN
Clue 12 – THE TWELFTH SIGN IS WHERE EAGLES DARE
Clue 13 – THE THIRTEENTH SIGN IS ON AN OVERHANG ABOVE A RED LESSON IN MOVEMENT
Clue 14 – THE FINAL SIGN IS AT ANCIENT RUINS COVERED BY GLASS
And now for the correct locations. You should see eyes appear when you enter a code correctly.
Sign Location 1 – At 03-08, enter the code in the middle of the room.
Sign Location 2 – At 21-14, enter the code in front of Chozo Statue.
Sign Location 3 – Back on the planet’s surface (yes, you have to do the gauntlet over!) there’s a square to the right that looks different from the rest. Enter the code there.
Sign Location 4 – At 07-11, enter the code under the warp.
Sign Location 5 – At 11-06, enter the code above where the vertical dash upgrade was.
Sign Location 6 – At 12-18, enter the code in front of the blue flower.
Sign Location 7 – At 15-22, enter the code on top of the boss.
[no eighth sign]
Sign Location 9 – In the death-laser room, enter the code on top of the crystal.
Sign Location 10 – At 24-20, enter the code in front of the round window.
Sign Location 11 – At 26-17, enter the code where the Supercharge Module was supposed to be.
Sign Location 12 – At 18-01, enter the code where you met the Eagle.
Sign Location 13 – At 28-08, enter the code at the end of the hookshot course.
Sign Location 14 – At 25-00, enter the code while standing on the floating block.
Whew! Once you’ve got all those finished, head back to the area before the Clock Room and take the top right exit this time. It’s time to finish the maze and end this once and for all.
Killing a Ghost
Now that all the eye blocks are out of the way, you can easily cross and hit the switch on the other side. This releases the ghost, which you may have seen before if you’ve messed up in the clock room. If not, there’s very little to say about it. Don’t touch the ghost. If you need to take an exit and the ghost is in the way, leave and come back. The corner it appears from seems to be randomized.
Head back into the maze, using the Plasma Shield entrance. Transition the screen down, then left, which should take you to the solid skull. This time go left again, and you’ll find yourself in a Lost Woods-esque four-exit maze. The solution is blindingly simple after everything we’ve been through: use the exit which is indicated by the circles in the center. The largest one is the one to use. A few iterations of that take you to a computer which sends you out of the maze and reveals the ghost’s secret: it returns to rest in a smiling room.
You may have been here before while exhausting the map’s secrets, but the smiling room is located at 13-10 and now, finally, comes into play.
Make your way back to the room with the computer that told us the ghost’s weakness, and savor the trek: when you reach the room, you’ll be treated to the game’s final ending! Congratulations.
Post-Postgame
Once you’ve seen the 3rd ending, there is actually EVEN MORE TO DO.
Load your file and enter the glitch-zone. Tiles will bug out and load the wrong image, making it slightly difficult to navigate, but you’ll have the ability to use all your upgrades as you replay the game in hyper-speed. Defeating the Virus on this glitched mode unlocks the fourth and final (for real this time) ending.