Overview
There is no need to install Steam on dedicated servers. Valheim can be installed on dedicated server via SteamCMD (Steam Pipe). This guide will walk you through the process.
Installing SteamCMD (AKA SteamPipe)
There is no need to install Steam on dedicated servers. Valheim can be installed on dedicated server via SteamCMD (Steam Pipe). This guide will walk you through the process.
- Create a folder for SteamCMD.
For example: C:steamcmd - Download SteamCMD for Windows: [link] (You can Google “SteamCMD download” if you do not trust this link)
- Extract the contents of the zip to the folder you created.
- Open notepad and paste the following code into the new document: SteamCmd +login username password +force_install_dir valheim +app_update 896660 -validate
Valheim does not allow anonymous download of dedicated server so you will have to replace username and password with your steam account info. Click “save file as” Enter the file name you desire, example: valheim_updater.bat and select save as type as “all files” Destination (path) will be folder created in step 1.
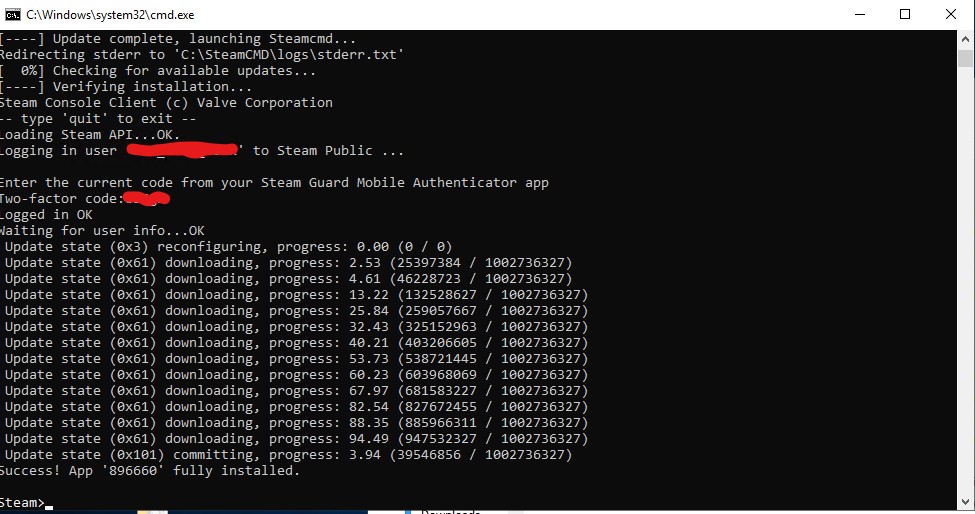
- Now go into the folder where you extracted the SteamCMD download and saved valheim_updater.bat (C:steamcmd). Double click the .bat file. SteamCMD will run and begin updating and installing its self. At some point it will pause for the two factor code Steam sends you. One entered the install will complete. Enter “quit” to close the cmd window.
NOTE: Anytime the publisher updates the game you will have to close the server and run valheim_updater to update server.
Run the Valheim Dedicated Server
Your install folder should now look like this:

Now to customize the settings to make the server unique
- In the install folder open the “valheim” folder and locate “start_headless_server.bat” Right click and select “edit”.
- toward the bottom of the script you will find
valheim_server -nographics -batchmode -name “My server” -port 2456 -world “Dedicated” -password “secret
- Here is where you will customize your server
-name “My server” Enter the name of your server that will be visible
in the Server list.-port 2456 Choose the Port which you want the server to
communicate with. Please note that this has to
correspond with the Port Forwarding settings on
your Router.-world “Dedicated” A World with the name entered will be created.
You may also choose an already existing World
by entering its name.-password “Secret” Sets the password.
- Now you want to add the following to the script:
-savedir “save” This will override the default save path where Worlds
and permission-files are stored making it easier to find your admin and ban lists. These files will now be found in the “save” folder in your installexample:
valheim_server -nographics -batchmode -name “My server” -port 2456 -world “Dedicated” -password “secret” -savedir “save”Save the file after changes and the server should be ready to run. Just double click the “start_headless_server.bat” file and the server will start.


