Overview
Learn how to make your hero customizable for players.Customized name, class and more.
What To Expect
Greetings. If you’re like me, you want to have a game that allows the player to create their own character, change their appearance and class, even write a nifty backstory just for them.
All this and more can easily be done in RPG Maker; no scripting required.
All you need to know is how switches work.
This guide is very basic and will tell you the simplest methods that RPG Maker is capable of.
It is possible to find scripts online that can make this easier, but I leave finding those up to you.
If you don’t want to bother with scripts, then read on.
Creating an Intro Scene
Obviously you want the player to be able to edit their character straight off the bat*,
so to make this easy, a scene dedicated to character customization is necessary.
* intro cutscenes that don’t involve the player notwithstanding
For the purposes of this guide, this scene will also have the player’s starting position.
Create the new scene. What will it look like? If it’s going to be a blank screen or one with
perhaps a basic picture in the background, leave the size at its smallest and ignore the
tileset. If you have a background picture, assign it with the Parallax Background.
If you want the scene to be a part of your world then choose your tileset and build the map
as normal.
Now, if you’re just using a blank screen/background graphic, go to the System tab on the
game’s Database and check Transparent ON. This means that the player will be invisible
when (s)he spawns. After that, your scene should look something similar to this:
Next, you need to create an event. This event needs no graphic, but the trigger does need
to be Autorun, to guarantee that it will activate on spawn. This event is how the player
will be able to create their character.

Changing the Hero’s Name
Inside your new event, you want the player to be able to come up with a
new name for their character. This is done with a simple event command.
Open the event command box, go to tab 3 and look for Name Input Processing,
which is under Scene Control. Click it, then select Actor 001 from the drop-down box.
This actor is the one that the player controls. You can also change how many
characters in the name the player can have (how long the name can be).
For maximum efficiency and to give the player an opportunity to avoid mistakes,
I suggest placing the Name Input Processing inside of a Loop, wherein the player
can only break out of the loop when they’ve confirmed the name is correct (just in
case they made a typo or changed their mind).
Now your event should look similar to this:
Something more about custom hero names. There are likely times when you want an
NPC to refer to the player’s character by name, such as when they are being greeted
by someone who knows them. This can easily be done when typing a message, using the
command n[1], which will be replaced in-game by the name of the Actor in slot 1. In fact, there
are a number of different message commands that can make your game even better. Take
a look:

Now that the player can change the name, let’s look at how they can change their class.

Changing the Hero’s Class
Since the player can now name their character, it would make sense that
they can change the class too. So let’s give them an easy way to do that.
Add a Show Choices command to your event (add it after the Name Input Processing
inside the loop if you are using a loop), and list up to four classes in there.
What if you have more than four you’d like for the player to select from? Then list
only three classes, and type “More…” in the fourth slot, then have that selection lead
to a second Show Choices command where you can list more classes. For this trick, a
loop is very highly recommended.
Once you’ve created the choices, you can change the player’s class by inserting a
Change Class command, under Actor in tab 1. If you’ve done it properly, your event
should now look like this:
A note on changing classes this way. Sometimes, if the class includes a spell or skill learned at level 1, that skill may not appear in-game. To get around it, change it so it is learned at level 2.

Changing the Hero’s Appearance
The character has been named and assigned a class, what’s next?
To change their appearance, of course. There are two ways to do this:
Have the character change appearance automatically depending on their class,
or allow the player to choose.
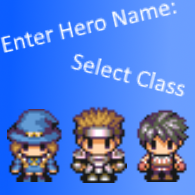
If you’re going to let the player pick then you should make yet another Show Choices
command loop after the class loop. Either way, the command you’re looking for is
Change Actor Graphic, found under System Settings in tab 3.
If you let the event pick automatically, then your event should now appear like this:
If you’re going to let the player decide, then it should instead resemble this:

You also need to add a Change Transparency command,
found under tab 2, and change it to OFF, which will reveal the character.

Other Customizable Aspects
Of course, exactly how customizable you want your player characters to be is
entirely up to you and your imagination. For more ideas, here’s some other
character aspects you can change:
Gender – Depending on the character’s appearance, you may want to
signify what the gender of the hero is. This can have other effects in your game,
such as how NPCs talk to them. You can indicate the gender with a simple switch.
Place it somewhere amongst the appearance loop. You could name it Gender, and
for Conditional Branches, indicate “If Gender is ON, Player is Male” or something similar.
Nicknames / Titles – Use command Change Nickname under tab 1, in
conjunction with Show Choices to allow the player to pick a nickname or title. Or take
a page out of MMORPG books and let your player earn new titles.
Other Party Members – If you’re willing to put more effort in, you can let the player
change ALL the members of their party for a completely customizable experience.
Vehicles – Found under tab 3, you can allow the player to change what their
vehicle(s) look like. Some DLC might include different colours or models that you can use.
A difference being a sailboat or a yacht, a hot air balloon or a helicopter.
Textbox / Window Colour – If you want to be even more abstract, also under tab 3
is the ability to change the message box’s colour.
Video Guide
I have also created a video tutorial on creating a game that allows the
player to change name and class. You can watch it here:
Last Thoughts
All the above commands and events can be easily changed and adapted so they will fit
right in to your game. Don’t be afraid to experiment! Also don’t forget to constantly test your
game so everything works as you planned.
On your event, you should add a Transfer Player command so you can get your player
out of the blank intro scene.
You might have noticed that the game in the images I showed you looked quite developed itself.
It is a game that allows complete customizability of the player character, as well as the ability to
create a story for them; the sort of game you might be planning on making yourself.
Whatever you plan to do with your game, I hope you have learned something here.
If you have questions about this guide or would like some more help with RPG Maker VX,
I am happy to offer my help. Send me a message and I will get back to you posthaste if I can.
I’m also willing to help out in testing your new customizable game; I love trying out games made with the help of my guides. Give me a shout if you need someone to playtest it.
Good luck with your game development!