
Overview
A guide where I’ll teach you how to find and customize a weapon’s texture.
Explanation & Preparation
We will need to download some tools in order to discover and modify files. These are mandatory and are used in other modding communities for Valve games.
VTF Edit [nemstools.github.io] – Allows you to import/export images and save them as .vtf and .vmt files.
GCFScape [nemstools.github.io] – Allows access into viewing and extracting from .vpk files.
Pixlr[pixlr.com] – Free to use within your browser, but comes with ads. It’s what I personally use to modify textures.
VTF files are textures, they are images placed upon a model. For example, think of a character’s hat, or coat. The fur or leather you’d see on their coat is a texture, same with the fibers of their hat.
VMT files are like a passport for VTF files, they provide the game with a path to find it so textures can be shown.
Now that we have our tools at our hip and a basic understanding of VTF and VMT files. Let’s open our file explorer so we create a place for our files to go. Follow this path. I have a different path on my end, so I cannot supply screenshots.
“Windows (C:) > Program Files (x86) > Steam > steamapps > common > nmrih > nmrih > custom”
—“Program Files” also works if you do not have (x86). I suggest you right click on your “common” folder and pin it to “Quick Access” for less headaches in the future.
–If your struggling to find where steam is downloaded on your device, go into your settings on Steam and click “Downloads” and select “Steam Library Folders”.
Create a new folder within “custom” and specifically name it, my_custom_stuff
Finding Weapon Textures
We’re now going to want to find the directory. Make your way to your Steamapps’ “common” folder and scroll down until you reach “nmrih”.
Scroll down until you find, “nmrih_dir” Right click it and open it with GCFScape. This file holds nearly everything that makes up the whole game.
In GCFScape things will be in ABC order, so click on “materials” and scroll down to “models” then “weapons”. All the melee, firearms and throwables are kept here.


Extracting Textures
From here, you can extract any textures you want. But for demonstration purposes we’re going with the Flare Gun. Open the “fa_flaregun” folder.
v_ammo_flare_d is the ammo.
v_fa_flaregun_d is the first person view of the weapon, also known as the view model.
v_fa_flaregun_n is the weapon’s mask. (Not certain on what masks do.)
w_fa_flaregun_d is the world’s perspective of the weapon, also known as the world model. It’s how the weapon looks when not in your hands.
w_fa_flaregun_n is the weapon’s mask from the world’s perspective.

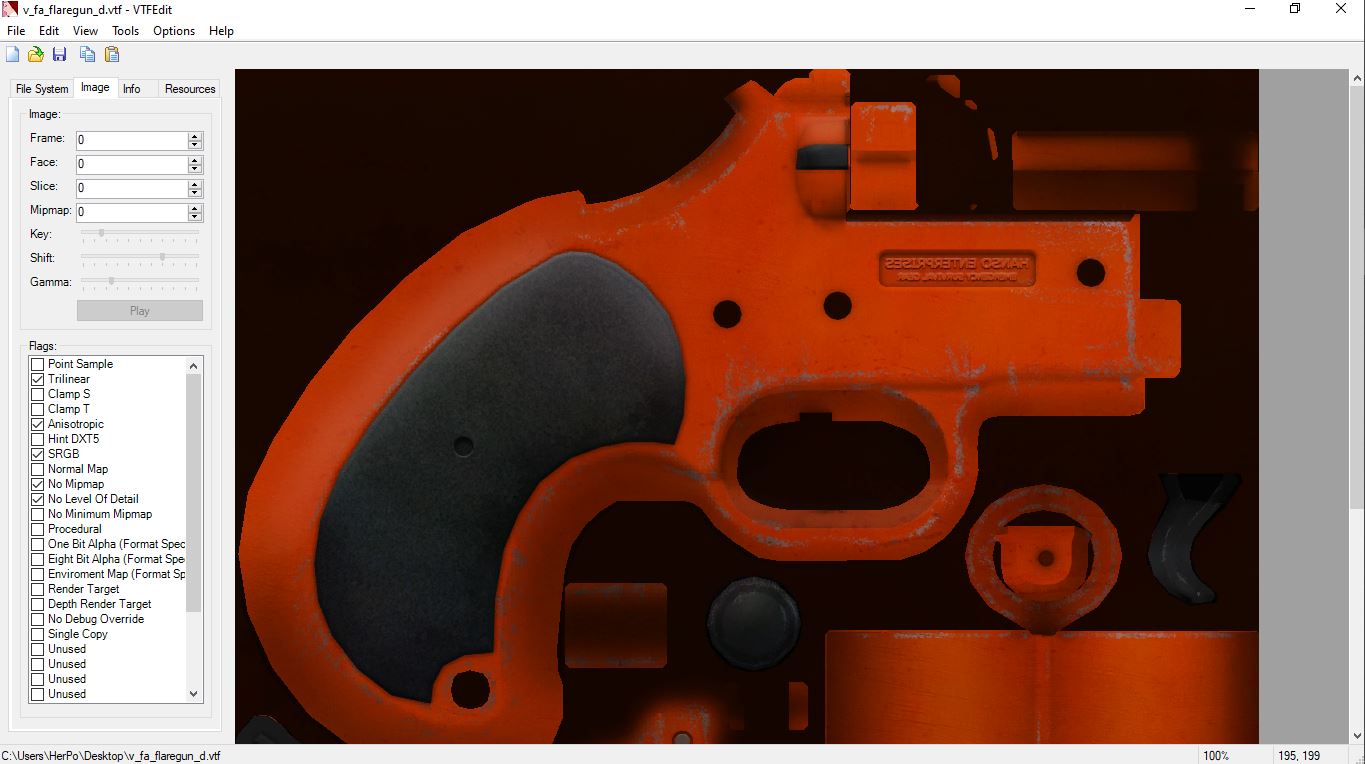
Extract “v_fa_flaregun_d” to your desktop for easy access and start up VTFEdit.
Drag and drop “v_fa_flaregun_d” into VTFEdit. You should see the gun’s texture laid out like this displaying all the gun’s parts.
Now hit “File” in the top left and click “Export”. I personally save the texture as JPEG format, so I can open the file in Pixlr[pixlr.com].

Modifying Your Texture
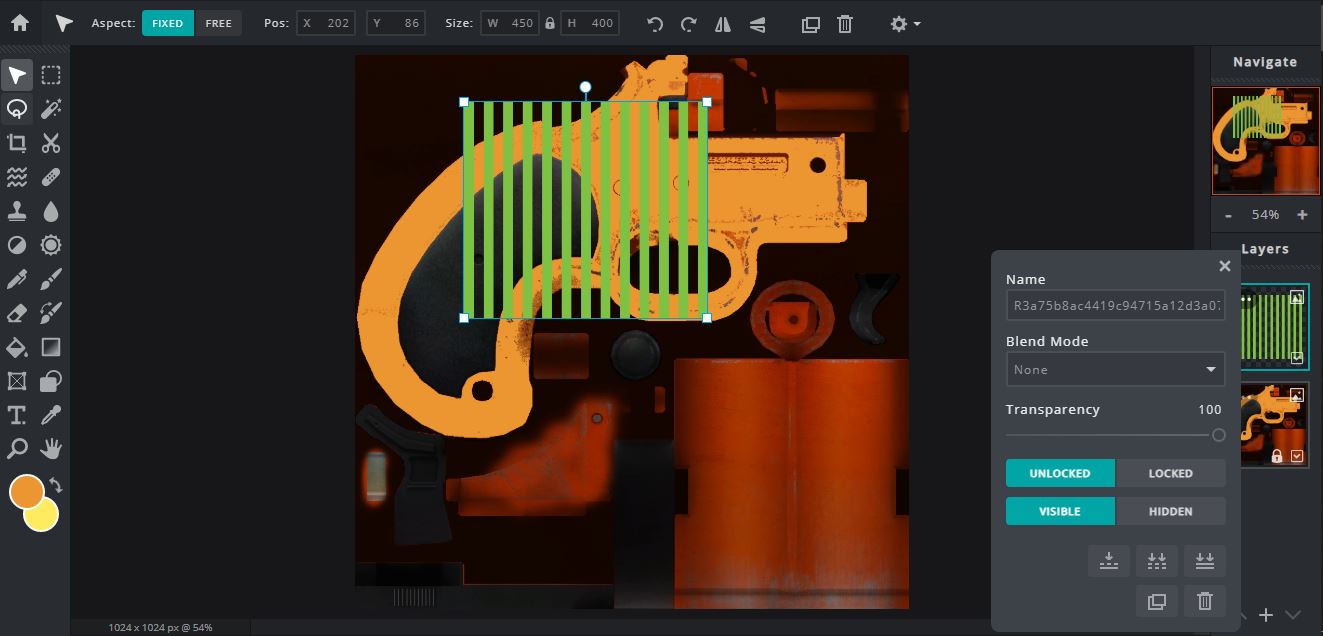
Open up whatever you use to modify your JPEG, PNG, TGA files. I’m opening up Pixlr.
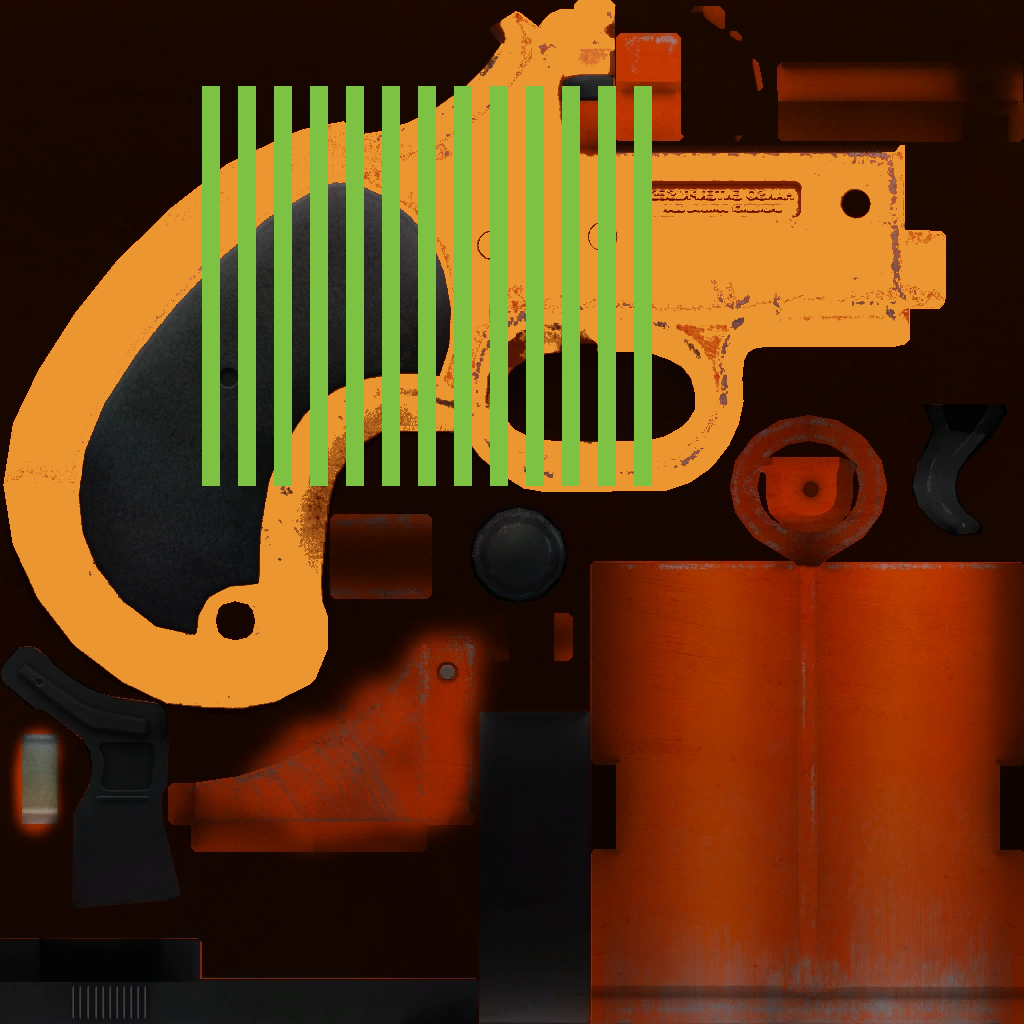
Clicking the three dots on the image’s layer to bring up the “Blend Mode” option. Select “Overlay”.

Now save your texture, you can name it anything.
Importing Your Texture
Open VTFEdit and go to “File” and click, “Import” and select your modified texture. Click “Ok” when this prompt pops up.
You will see a box on your left labeled “Flags”. The game uses these to help determine what the texture can and cannot do. Since we are modifying the flare gun, check mark these flags only.
Now save your texture, and name it what the original .vtf file is called, “v_fa_flaregun_d”. Your image file should now be a VTF file. If it asks you to replace the file, do so. The original file will always exist in the directory.

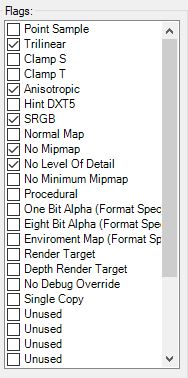
Note: If you want to know what flags you’re supposed to check mark on any texture, you can find out by dragging and dropping the original .vtf file from the directory into VTFEdit.
If you want to understand the flags, you can find the wiki for VTF formats here.
Creating A Path for Your Mod
We now have to create a path for the game to follow to load our mod.
Open File Explorer and make your way back to the “my_custom_stuff” folder we created in the Explanation & Preparation section.

We need to create folders to mirror the path we followed in the directory. The path will look like this:
“my_custom_stuff > materials > models > weapons > fa_flaregun”

Drop your “v_fa_flaregun_d” .vtf into the “fa_flaregun” folder.
Note: If you are modifying a different weapon, such as the Colt M1911. Your pathing will look the same, except “fa_flaregun” will be “fa_1911”.
Testing Your Mod
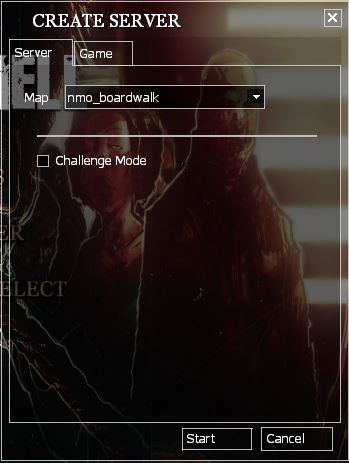
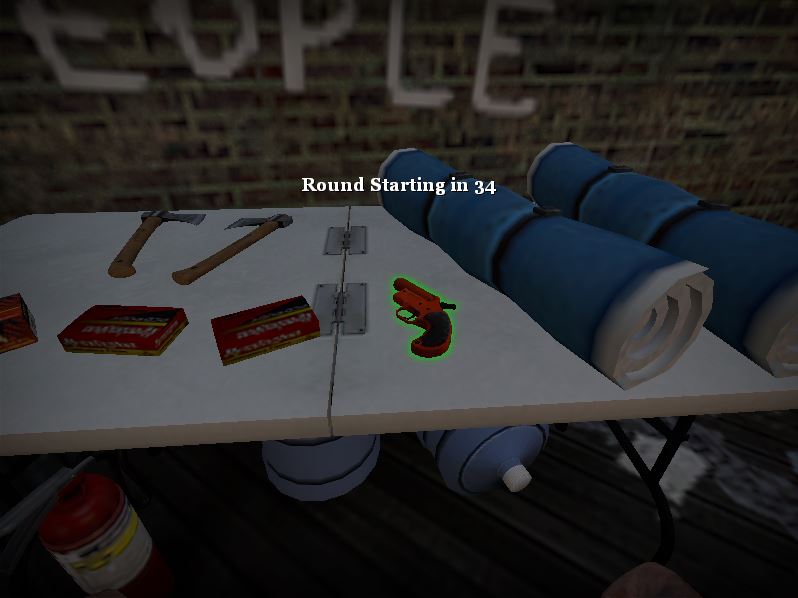
Start up NMRiH and create a server, select the map “nmo_boardwalk” as the flare gun is a guaranteed spawn.
Remember that we changed the view model’s texture. Right now you’re looking at it from the world’s perspective.
Upon picking up the weapon, the textures should change to the custom texture you made.

Author’s Note
This is the first guide i’ve made, and I hope it helps someone get into the world of texture modding.