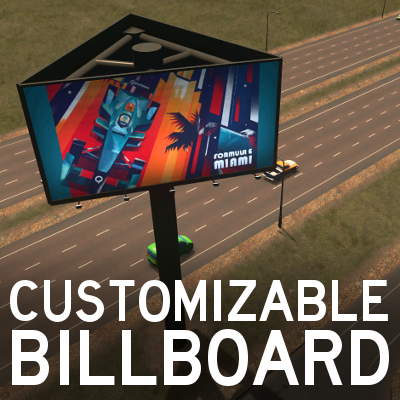
Overview
Create your own billboards with these ready to use templates…
Getting started
In this guide I will be sharing and explaining the template files you can use to create your own billboards. If you’ve never launched the asset editor before or don’t have any experience with image editing, this may be a little daunting. However, once you’ve gone through all the steps, you’ll know all the basics of asset editing.
This template is inspired by stmSantana’s Paintable Truck. I’m providing you with the original FBX files used for my own billboards which can be found here.
Downloading the template files
The template files for the triangular billboard (Park version) can be found here:
[link]
The template files for the wall-mounted display (Prop version) can be found here:
[link]
but the prop version can be customized similarly.
Once unzipped, you’ll have the following files:
You’ll want to subscribe any of the existing Big Billboards, so you can use them as an asset editor template. These billboards are already modified so they can be plopped anywhere. Specific values can be further customized ingame:
[link] You can also subscribe to the original Prop, but you don’t need it to create your own:
[link]

Editing ‘game ready’ images
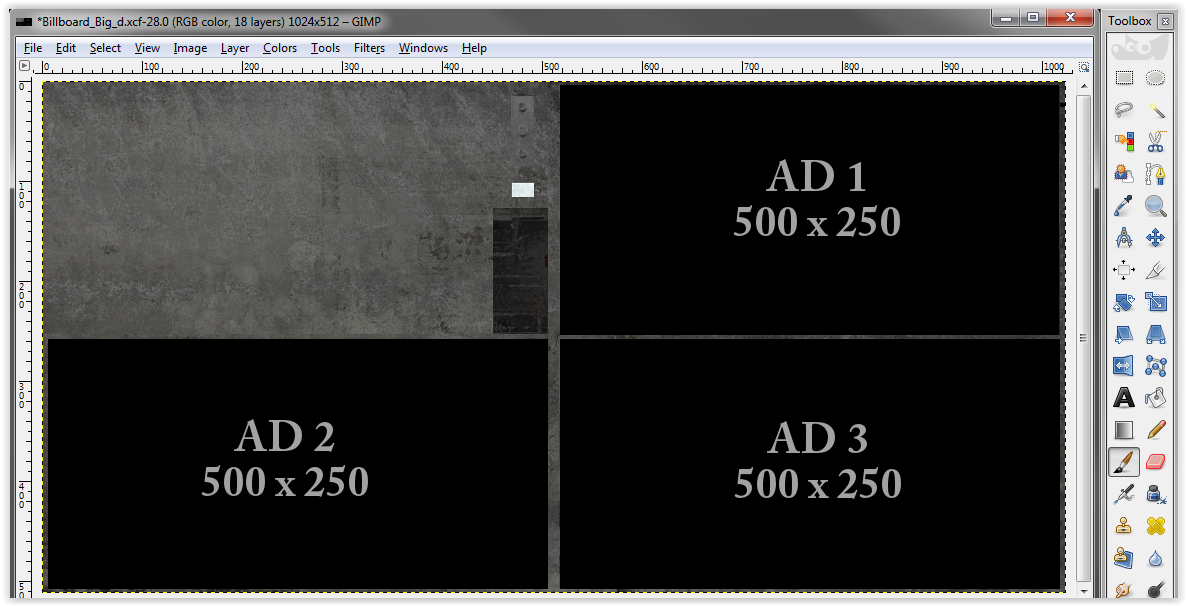
To create your own triangular billboard you’ll want to open up “Billboard_Big_d.png”.
To create your own wall-mounted billboard you’ll want to open up “Billboard_LED_d.png”.
In this example I’m using GIMP, but you can use Photoshop or any other image editing suite.
All images you choose should be scaled down to 500 x 250 pixels so they will fit perfectly.
One friendly reminder is to apply a ‘safe area[asset.zcache.com]‘. Using enough space along the border of your images, especially when applying text, will make the end result look better.

You will want to be very careful and significantly desaturate and darken any images you choose. Cities Skylines will really make your colors ‘pop’, so what looks good on your screen will not look good ingame. Additionally there’s an illumination mask which will brighten the images you’re using. For more in-depth tips and tricks please refer to this guide.

If you’re customizing the Prop version, you can add your own headlines to the news ticker. First type your text with a big bright font, then paste “Billboard_LED_NewsTickerOverlay.png” on top to give it an LED effect.
When ready, you should make sure all textures have the correct size, or you may actually crash the asset editor. Please stick to the values down below…
“Billboard_Big_d.png” – 1024 x 512 (Main texture)
“Billboard_Big_lod_d.png” – 128 x 64 (LOD texture)
“Billboard_LED_d.png” – 512 x 512 (Main texture)
“Billboard_LED_lod_d.png” – 128 x 128 (LOD texture)
“Billboard_Big_lod_d.png” and “Billboard_LED_lod_d.png” are used for the LOD model, which will appear when zooming out. You’ll want to downscale your main texture to LOD size, then replace the one from the template files. Otherwise your images will disappear when viewed from far away.
Saving your work
Once you’re happy with your work, you can go ahead and export your files. Make sure you stick to the correct terminology, i.e. “Billboard_Big_d.png” and “Billboard_Big_lod_d.png”. Using different names is guaranteed to make the files unreadable. If you want to make multiple variants, you’ll want to number your files. In that case you must alter the names of every file. Example:
“Billboard_Big_02.fbx”
“Billboard_Big_02_d.png”
“Billboard_Big_02_s.png”
“Billboard_Big_02_i.png”
“Billboard_Big_02_lod.fbx”
“Billboard_Big_02_lod_d.png”
“Billboard_Big_02_lod_s.png”
“Billboard_Big_02_lod_i.png”
“Billboard_Big_d_02.png”
“Billboard_Big_d_lod.png”
“LOD_d_Billboard_Big.png”
“Billboard_Big_c.png” and “Billboard_Big_lod_c.png” are color masks. You don’t have to include them but they can be used in the asset editor to change the paint job from grey to white, from black to pink. Whatever you prefer!
Loading the files in the asset editor
Now place all your files in the ”import” folder:
You can now launch your game and go into the asset editor!
Load up a new asset and select one of the original billboards.
If you’re working on a prop version, you can skip this step and create a new one directly.


You can now select your own customized version!
You may have to rotate it in the correct direction (press the X,Y,Z buttons).
You can also rescale the model if you prefer it to be smaller or larger.

You can alter any values you like. Just don’t increase the amount of tourists or garbage output, or you will get ”road connection” warnings ingame.
Once you’re done editing, hit the button in the top right of your screen and save your new asset.
By clicking the small yellow folder icons, you can also customize the thumbnail and preview image. These folders are temporary! Make sure you save these images elsewhere or you may lose them in the process. The preview image and thumbnail can still be altered later on which is useful if you wish to take ingame screenshots first.


Congratulations, your work is done!
Going ingame
That’s all there’s to it! Before you go ingame just make sure your new billboard is activated in the content manager, and you should be all good! Feel free to share your creations! 😀

