Overview
In depth guide made to help you to improve general game performance and stability on PC and fix related problems while also trying to maintain reasonable visual fidelity and image quality.*Many of these tips can be also be used for other games as well.
First Things First
Make sure you have the minimum required hardware in order to run the game properly, and also ensure that you have the latest video card driver installed!
“Note that the minimum requirement is created with Low settings and 1080p gaming in mind and Recommended with High and 1080p.” -cdprojektred website
NVIDIA Driver
[link]
AMD Driver
[link]
Oficial System Requirements

Resolution
We can all agree that we want to play the latest games at 1440p or 4K, but If performance is your goal, try turn back down resolution setting!
Higher resolutions cut into FPS more than almost any other setting besides ray tracing.
Optimized Settings
Assuming that you have recommended hardware, use “HIGH PRESET” and modify the options bellow accordingly:
- Volumetric clouds:Medium (+12% performance*)
- Screen Space Reflection (SSR): Low (+16% performance*)
- Ambient Occlusion: Low (+8% performance*)
- Color Precision: Medium (+3% performance*)
- DLSS Resolution Scaling (If available): Quality or Balanced**
- Leave Ray tracing turned OFF for better performance!
Note that besides SSR, changing these options produce minimum visual impact. The lower you go with SSR more grain you will see in reflections.
OPTIONAL:
Motion Blur: Off (+3% performance)
Level of Detail (LOD): Medium (+3% performance)
*From ultra to medium/low quality
**You can also use auto or performance option with some loss of image fidelity/quality and added blurriness. If you dont have and RTX card or have an AMD card you can also use the FidelityFX CAS option.
DLSS – Deep Learning Super Sampling

Example

Crowd Density
Go to gameplay tab in game settings and change “Crowd density” to low
Note that even with high settings most areas in the game are not well populated, so using low settings affect mostly crowded markets and some other hot spot areas.
Low setting will dramatically improve performance in these areas and will not affect that much visual fidelity or immersion.
*If you use a hard drive you can also turn on the option “Slow HDD Mode”

V-Sync
Turn off this option in game.
Some people (included me) noticed some minor performance issues (frame pacing) with v-sync turned on, so I advise to turn it off.
If you really want to use it, use your video card software setup this option. As I don’t use a g-sync or free sync monitor I simply turned off v-sync this option.
Restart the game!
If you change settings and performance seems to be not changed at all, try restarting the game.
This seems to work for general performance issues with the game. If I am playing for some hours and the game starts to slow down, I simple save, close the game and open again.
So if your are playing for some time and notice performance issues restart the game!
Image Quality/Sharpness
In game graphic settings, change this options bellow:
- Set Texture quality to High (You can only change this option in menu title screen)
- Turn off “chromatic aberration”
- Set anisotropy filter to 16x
Make sure you are running the game on proper resolution, (The resolution that matches your display /monitor spec) otherwise you will have a blurry image. Also ensure that you monitor sharpness settings is not set to low values of sharpness.
*Note that if you use DLSS, make sure that you use Quality option as using other than this may affect image quality/sharpness.
**Increasing Texture quality does not affect performance but it will increase GPU VRAM usage.
Turn on image sharpening option in in NVIDIA control panel for more sharpness. Set an value like 0.50 or 0.70 (if you use in have film grain you must also turn on “ignore film grain” option and put 1.0 value) and if you use AMD card you can use and similar option in Radeon Software (Gaming tab) called “Radeon Image Sharpening”.

Even though chromatic aberration is used as an artistic effect in this game, it will decrease overall image sharpness, so you should disable it if you want more sharpness.


Windows 10 Tune Up
Be sure that you have the most updated version of your Windows 10.
- Close all unecessary programs while you are playing!
- Use High performance profile in Power Options Plan (Find this in control panel or open start menu and type powercfg.cpl , click on it to open). If you don’t have thi sprofile by default you can create a new powerplan and select High performance.
- Turn on Hardware-Accelerated GPU scheaduling in Graphics Settings (Open start menu and type Graphics Settings, click on it to open) *Computer reboot is necessary*
- Disable any form of overlay that you may have in your computer, generally most people have these overlay turned on by default: Steam, Xbox game bar and Geforce experience and maybe RiveTuner overlay. (Note that you may need it to use steam controller and if you disable steam overlay you will lose the abiility to take screenshots)


Sharpness vs Aliasing
Be aware that as you increase sharpeness, you also will increase aliasing (Jagged lines around edges of objects or “the staircase effect” as image bellow shows) So you have to find a sweet spot.
This also also goes to game resolution. Higher resolutions will produce less aliased images (but lower performance if you don’t have the GPU horsepower).

Gamma Correction
Proper Contrast = Better/Sharper image quality
Be sure to take your time to configure image brightness/Gamma correction in game graphic options. A proper configuration can ensure your game has the best image quality and does not have a washed out appearance.

Software Overlay
Disable any form of overlay that you may have in your computer, generally most people have these overlay turned on by default: Steam, Xbox game bar and Geforce experience and maybe RiveTuner overlay. (Note that you may need it to use steam controller and if you disable steam overlay you will lose the abiility to take screenshots)


Tune up for NVIDIA Users
Go to 3D Settings in NVIDIA Control panel and change the settings bellow:
- Low Latency Mode: On
- Power Management Mode: Maximum Performance
- Monitor Technology: G-Sync (*If you have a G-Sync enabled monitor*)
- Texture filtering – Quality: Performance or Quality if you notice some artifacting.
- Max Frame Rate: Use this option instead of the game to limit the framerate. If you want more fluid gameplay you should consider limit the frame rate.
If you use AMD, you can probably find similar options in its VGA software.

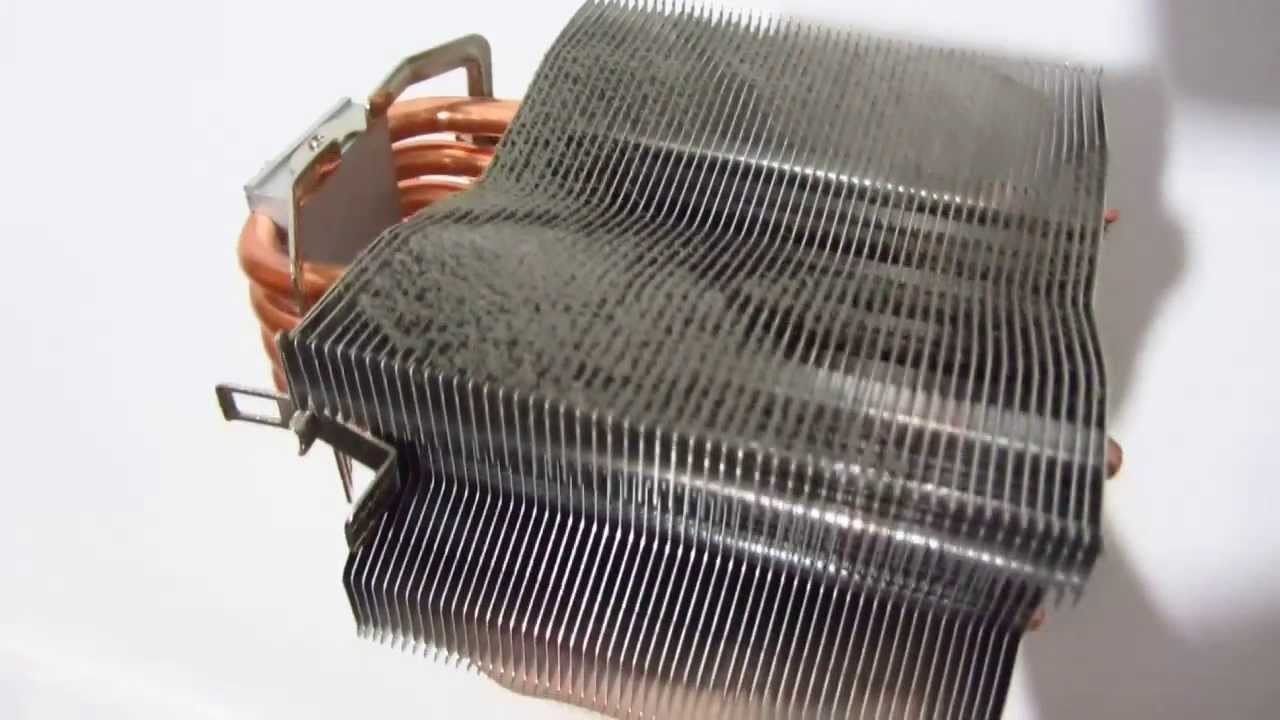
Hardware Thermal Throttling
As this game is intense on CPU and GPU, be sure that your hardware is not reaching its thermal limit, because if that is the case it will reduce its speed in order to mantain inside max temperature limit.
Hardware throttling is a automatic power management technique where CPU/GPU voltage (and clock speed) are adjusted “on the fly” in order to reduce the amount of heat generated by the chip to stay inside thermal limit and mantain chip integraty.
You may notice that the game will run slower, with sluggish performance and have random fps drops as your play. if that is the case, try to improve your computer heat dissipation and ensure to keep your computer free from dusk, with good airflow inside the case and not leave your thermal paste dry.
Manually increasing GPU fan speed may be a quick fix too in order to remediate high GPU temps (*This may turn up your computer noise level and potentially degrade the fan faster in long term*).
A quick guide on how to Lower GPU Temperatures
[link]
Beware of Poor Overclocking
Even so overclock can be great be sure to validate it thoroughly before attempt to run the game, as poor overlcocking can cause performance issues or in the case of using too much voltage without proper dissipation can lead to overheating and thermal throttling.
If you have high frequency memory, be sure that they are running at designed speeds, most of these memory you have to enable XMP profile in BIOS, because they don’t run at full speed by default!
*This option can vary its name and location from differnt motherboard brand, but try always to find in memory session the XMP Profile options (These are universal to all boards from Intel to AMD)

Beware of PostFX Injectors
Beware of Post-processing injectors like Reshade, ENB and other graphical mods, bacause even so they can be great in many occasions and allow you to modify the look of your game, they consume too much resource and GPU time.
If you are using one of these or intend to, expect to lose 5 to 7fps (At least!) even with few simple
contrast/color correction/FXAA effects enabled.
*Also note that this kind of mod is not endorsed by or affiliated with the copyright holders of the base game in any form.*
AMD SMT Tweak w/ *Fixed patch 1.05*
Simultaneous multithreading (SMT) is a technique for improving the overall efficiency of AMD Zen microarchitecture
What the fix does
The edit discorvered by Redditor “BramblexD “modifies the game’s scheduler to make it utilize more CPU cores, says / u / CookiePLMonster. Some users claim to achieve about 30% better performance. In order to this work, SMT option must be enabled in BIOS configuration (If you do not disabled it will be probably enabled)
*Note that this is a unofficial performance fix for AMD Ryzen cpu users and this mod modify the game executable and is not endorsed by or affiliated with the copyright holders of the base game in any form. I do not encourage you to modify the game executable, do it at your own risk*
Steps
1) Backup your Cyberpunk2077.exe to a safe location in case you need to reverse the configuration.
2) Download and install HxD Hex Editor.
3) Open HxD and search for the value 75 30 33 C9 B8 01 00 00 00 0F A2 8B C8 C1 F9 08
4) Change it to EB 30 33 C9 B8 01 00 00 00 0F A2 8B C8 C1 F9 08″
5) Save and run the game.
***Fixed by patch 1.05***
As stated by CDRedProject in latest patch “[AMD SMT] Optimized default core/thread utilization for 4-core and 6-core AMD Ryzen(tm) processors. 8-core, 12-core and 16-core processors remain unchanged and behaving as intended. This change was implemented in cooperation with AMD and based on tests on both sides indicating that performance improvement occurs only on CPUs with 6 cores and less.”
Memory Pool Tweak w/ *Fixed patch 1.05*
A new unofficial fix has been circulating online that supposedly improves performance in Cyberpunk 2077. This does mean that mileage may vary from user to user. Some users may experience a drastic improvement to performance, whilst others not so much. Some may notice a large boost in FPS, whilst others only notice less stuttering.
Make sure that you make a backup of file before editing them just in case something goes wrong and you want to go back to where you started.
Steps
1) Go to config folder inside Cyberpunk installation folder Ex: X:…SteamsteamappscommonCyberpunk 2077engineconfig
2) The file we will edit is “memory_pool_budgets.csv” .
3) After backing up the file, open it and prepare to change PoolCPU and PoolGPU values in first column called PC
4) Change PoolCPU to half of your system memory (If you have 16GB of RAM, the value will be 8GB and PoolGPU to your video card VRAM (total amount) value (If you have an 6GB video card, this will be the value you will set)
5) Save the file, open the game.
***Fixed by patch 1.05***
As stated by CDRedProject in latest patch it was “Removed the memory_pool_budgets.csv file. which was not connected with the final version of the game and had no influence on it (it was a leftover file used during the development to estimate memory usage. It had no effect on how much memory was actually allocated). Perceived performance increase after editing the file may have been related to restarting the game.”

Other Unofficial Tweaks
There are other famous unofficial performances tweaks that can be tested, so I will mention here and you can check it in the following links.
These tools allows you to configure hidden settings in Cyberpunk 2077. You can squeeze more FPS out of it this way. You can try them and test it at your own discretion.
Performance Overhaul Cyberpunk
[link] [link]Troubleshooting General Issues
**This is the official recomendation from cdprojektred website. For detailed information please check their site linked on the references of this guide**
“If your PC meets the minimum system requirements and you are experiencing low frame rates, slow or choppy performance, or long loading times, please follow the troubleshooting below:
1) Verify integrity of the game cache.
2) If you have any applications that are using overlay features, e.g Discord, Ubisoft Connect, Galaxy etc. disable their overlays or completely disable these applications.
3) Disable all unneccessary apps before launching the game. Including hardware monitoring and antivirus/anti-malware programs.
4) Clean install your graphics drivers following the instructions below:
NVIDIA
I. Download the latest drivers
II. Download Display Driver Uninstaller and run it to remove previous versions of drivers.
III. Clean install drivers that you’ve downloaded in step 1.
AMD
I. Uninstall your graphics drivers using the AMD Cleanup Utility software.
II. Download and clean install the latest drivers
*NOTE: If the issues in question occurred right after updating the drivers, install previous version and please report the issue to cdprojektred as recommended by them.”
Reference
[link] [link] [link] [link]My system Configuration
Here follow bellow my system configuration;
*Notice that even so I am have the recommended hardware and I am playing without ray tracing at 1080p at high/medium settings, I still see performance issues.
My system spec:
AMD Ryzen 5 3600,
NVIDIA RTX 2060 6GB,
Kingston 16GB 3200MHZ,
Kingston 720GB SSD (3x240GB RAID0)
ASRock B450 MOBO,
Corsair 750W PSU,
Aftermarket CPU cooler,
Windows 10 PRO 20H2 UpToDate,
Geforce Driver UpToDate
LG Monitor 29″ Ultrawide 21:9