
Overview
All achievements, 100% completion list guide, minigame guide, and everything you need in one place. Become a dragon among daddies.
Preface
Hello! Today’s destination is yet another 100% on SEGA’s second steam release in the franchise, Yakuza Kiwami! This January, I experienced Yakuza 0 for the first time and loved it. Needless to say, I was very excited to play Kiwami on PC! If you came from 0 and are expecting a similar grind, I’m here to reassure you that 100%ing in Kiwami is much easier than in 0. Yakuza 0 took me nearly 130 hours, but Yakuza Kiwami took 50! Of course, it’s still a pretty hefty challenge to get 100% and all achievements, but I think that it’s completely doable for anyone with a little time and practice.

If you are a new gamer looking to start this franchise too, I highly recommend playing 0 first, as it’s a better entry level game and gives this game a whole lot more context and emotion.
For a similar guide on Yakuza 0, see here:
[link]
Note:Update: This bug is now fixed.
As of 03/02/19 the achievement Mister Master is BUGGED. There are people who have gotten it by the 0.1% metric, but they would have used cheats or modified the game. It’s currently not possible to get it by normal means. You can still complete most of it, however, so I will let you know when to stop to avoid the bug. I assume SEGA will fix this eventually because it’s a pretty big bug.
alexa play baka mitai
If you are going for the platinum, please be aware that NO achievements in Kiwami are missable!
Unlike in Yakuza 0, where there are story missions with missable achievements, Kiwami lets you play through the story stress-free and allows you to complete everything else in a post-game free mode called Premium Adventure.
I’d like to credit people who have already done all the legwork that helped me compile this guide: CyricZ’s writeup on gamefaqs[gamefaqs.gamespot.com] and ゲーム攻略マン, a dedicated game strategy forum[dswiipspwikips3.jp]. Their information helped me out immensely for collectibles and data charts. Thank you very much to them and to anyone who uses this guide! If there are any errors in the guide, let me know in the comments and I’ll look into it.
I. Starting the Game

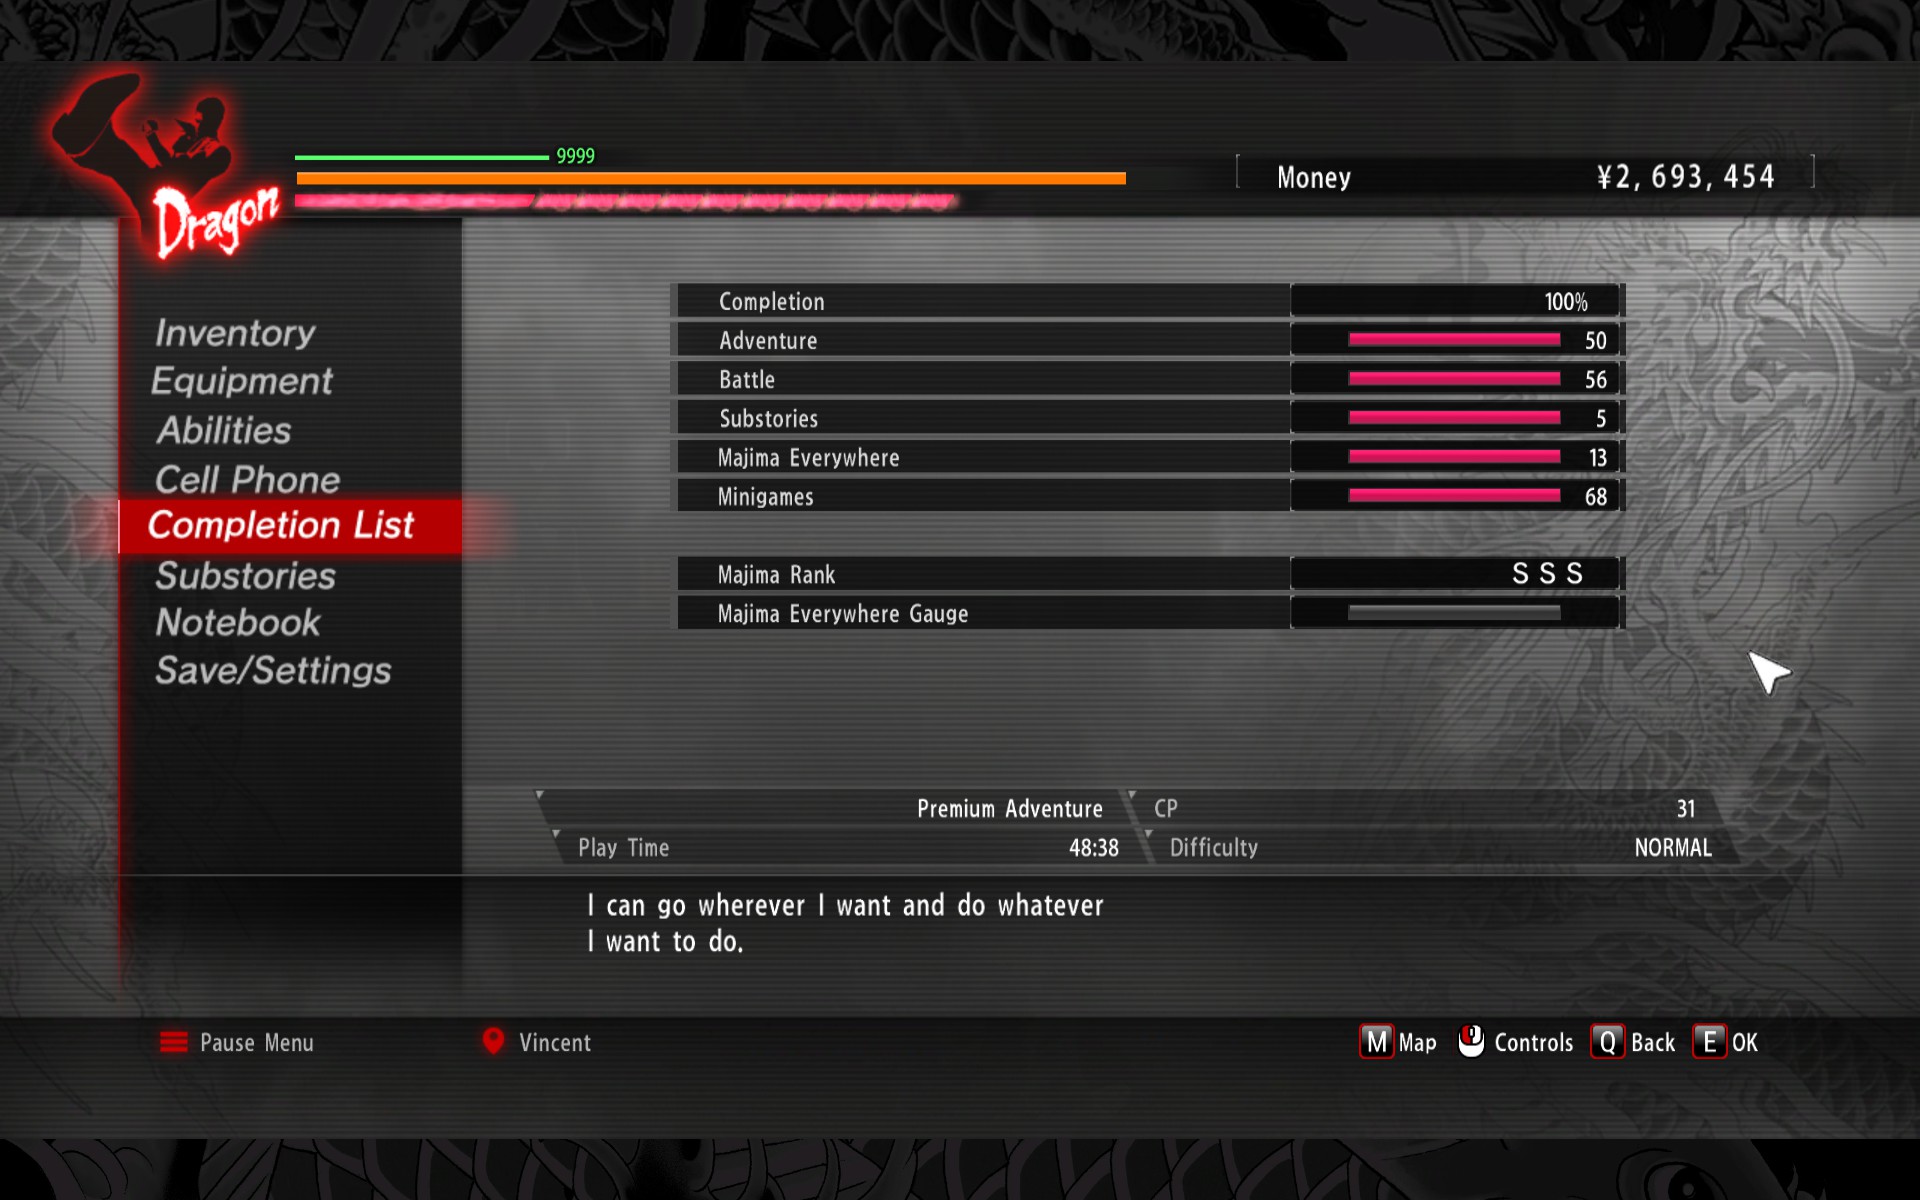
First, you should note that Yakuza 0 has its own in-game completion checklist that lead to a 100% game completion score, which in turn unlocks a specific achievement linked to it – “Perfectionist”. It’s the hardest achievement to get in this game. You can find the completion list in the in-game menu options under the “Completion” tab.
To get the 100% completion achievement, you must fully complete this list in one save file! It does not have to be done during the main story– the game allows you to complete them in a free-game mode called Premium Adventure, which uses your game clear save file to continue the game. Premium Adventure found on the main menu after completing the game once.
You can start your first playthrough on any difficulty. The game is pretty easy to learn and you can change the difficulty anytime, so do what feels right to you! My personal recommendation is to attempt the game on at least normal or hard if you’re planning a follow-up run on Legend difficulty so that you’re better prepared for what’s to come. After clearing the game once, you can use this guide to 100% the game successfully!

Collected the money owed.
Awarded upon starting the game and completing the prologue.

Completed chapter 1.
Awarded at the Chapter 1 end screen.

Completed chapter 2.
Awarded at the Chapter 2 end screen.

Completed chapter 3.
Awarded at the Chapter 3 end screen.

Completed chapter 4.
Awarded at the Chapter 4 end screen.

Completed chapter 5.
Awarded at the Chapter 5 end screen.

Completed chapter 6.
Awarded at the Chapter 6 end screen.

Completed chapter 7.
Awarded at the Chapter 7 end screen.

Completed chapter 8.
Awarded at the Chapter 8 end screen.

Completed chapter 9.
Awarded at the Chapter 9 end screen.

Completed chapter 10.
Awarded at the Chapter 10 end screen.

Completed chapter 11.
Awarded at the Chapter 11 end screen.

Completed chapter 12.
Awarded at the Chapter 12 end screen.

Completed the final chapter.
Awarded at the Chapter 13 end screen. Congrats!
II. Completion List: (Adventure)
BREAKING NEWS: Yakuza man STEALS children and treats them with RESPECT and DIGNITY
The completion list in Kiwami is split into five parts: Adventure, Battle, Substories, Majima Everywhere and Minigames. The rest of the guide will go over each metric in each category in detail. You may have gotten several completion points over the course the game already, in which case this will be made easier for you. In addition, I will list all the achievements in the game matched with where they fit in with the completion list to streamline the experience for you.
To look up a specific topic, see the sidebar or use CTRL+F to search keywords. Almost all topics are covered in this guide.
For clarity’s sake, I’ll list the highest necessary completion point metric. There may be several CP points leading up to it (ie, defeat 50 enemies, 100 enemies, 200 enemies, etc.) that aren’t visible until you fulfill the prerequisite point, so just know that what I’m listing is the FULL list of the minimum stats needed, even if your list doesn’t reflect it yet.

Completed 50% of the Completion List.

Completed 100% of the Completion List.
_________________________________________________________________________________
★ Talk to people 300 timesIf you didn’t get this by the end of the game, you’ll probably get it while trying to get all the other completion points. You can increase this by talking to literally anyone, including shopkeepers, people on the street, etc. It also includes people you interact with during missions. Stacks well with “Dine at eateries 100 times” as each time you order something, it counts towards this as well.
★ Dine at eateries 100 timesEat at any establishment 100 times. You can buy a CP reward to eat infinitely. It will come in super handy.
Please note that ordering all food items at once will only count as ONE trip. Thus, drinks are considered separate trips because you can only order them one by one. There is no perk to drink infinitely so the bars will have to be done in multiple trips, as after 3 drinks, you need to wait out the alcohol limit. The Alertness Hood accessory, if you have it, can help shorten the waiting period but its generally only a couple minutes so it’s not too bad.
Below is the list of establishments needed to complete the Adventure tab:
★ Complete Yoronotaki
★ Complete Akaushimaru
★ Complete Kyushu No.1 Star
★ Complete Sushi Gin
★ Complete Pronto
★ Complete Smile Burger
★ Complete Shellac
★ Complete Vincent
★ Complete Bantam
★ Complete Kanrai
NOTE: Pronto has two different menus during the day and night! You must get both for the completion.
★ Entertain yourself 100 timesThe fastest minigame to get this done is likely Asia Club or the Photo Booth. You can play any game, sing karaoke, dance, watch videos, etc to build up the counter.
★ Eat 30 food itemsFood items are the actual items that go into your inventory that you have to use to eat. Restaurants don’t count toward this. Going to any convenience store and buying 30 of the same item, then eating them all is completely acceptable.
★ Eat 30 medicine itemsLikely will have already unlocked just by playing the game. If not, you can buy any energy drink at a convenience or drug store and use it repeatedly during a fight. Unlike with food items, there is no CP bonus for using energy drinks on max health/heat so keep at least one enemy around to lower your health and drink up when you’re getting low.
★ Travel by taxi 30 timesPay the taxi fare 30 times to any area and this will unlock. ⠀⠀⠀⠀⠀⠀⠀⠀⠀⠀⠀⠀⠀⠀⠀⠀⠀⠀⠀⠀⠀⠀⠀⠀⠀⠀⠀⠀⠀⠀⠀⠀⠀⠀
★ Travel 100 km on footRun Kiryu run!
I don’t believe taping down a key to keep him moving works as he stops when he hits any obstacle, but if there’s an area that’s large enough for him to run in circles it might work. Typically, running around the city during the story and then for completion points in Premium Adventure get you relatively close but because the game is shorter than 0, it might take some additional effort. In my playthrough, I got around 70% of the way there even after having completed most of completion list, all substories, AND Haruka’s requests, so it might take some time.
★ Travel 10 km by dashingStacks with the earlier completion point, but this one requires you hold the dash key (E on keyboard, A on 360, X on Dualshock). Be sure to pick up the CP reward for unlimited running. You should regularly use the dash key while going place to place, because the 10 km can take awhile to build up.
★ Earn a total of 10 million yenThere’s multiple ways to get lots of money in the game, the most profitable being gambling using game items, items like the Ebisu socks, or the coliseum.
My personal recommendation, especially if you have learned the Tiger Drop move from Komaki. Replay the last Coliseum fight and aim for perfect matches (never get hit once) and you’ll get around half a million yen regularly! Then, with the reward points they give you, you can buy expensive items in the Coliseum store like Golden Plates and sell them for even MORE money at Ebisu Pawn.
If you have enough game items in your inventory, you can bet high stakes on the corresponding game and make good bank. Only recommended if you have completed all of Haruka’s minigame requests, as those items come in super handy there.
Can be bought as a CP Reward. Increases your money as you walk, but makes incredibly annoying noises. If you can tolerate it, equipping these early on and using them for extended periods of time will net you decent cash.
★ Spend a total of 5 million yenAs you collect money for the previous completion point, you’ll have enough to spend. Money is not as important in this game as Yakuza 0, so the best place I suggest you spend this money is on weapons and equipment at merchants for the upcoming Weapons/Gear completion points and on energy drinks.
★ Earn 1 million XPThis is an easy point to get, and likely may have already unlocked it while beating the story. Every point next to the experience bar represents 1000 points of XP. The maximum number of points you can get is 9999 points, or 9,999,000. Doing Majima fights, boss fights, and substories will increase it many levels.
I. Completion List: Locker Keys (Adventure)
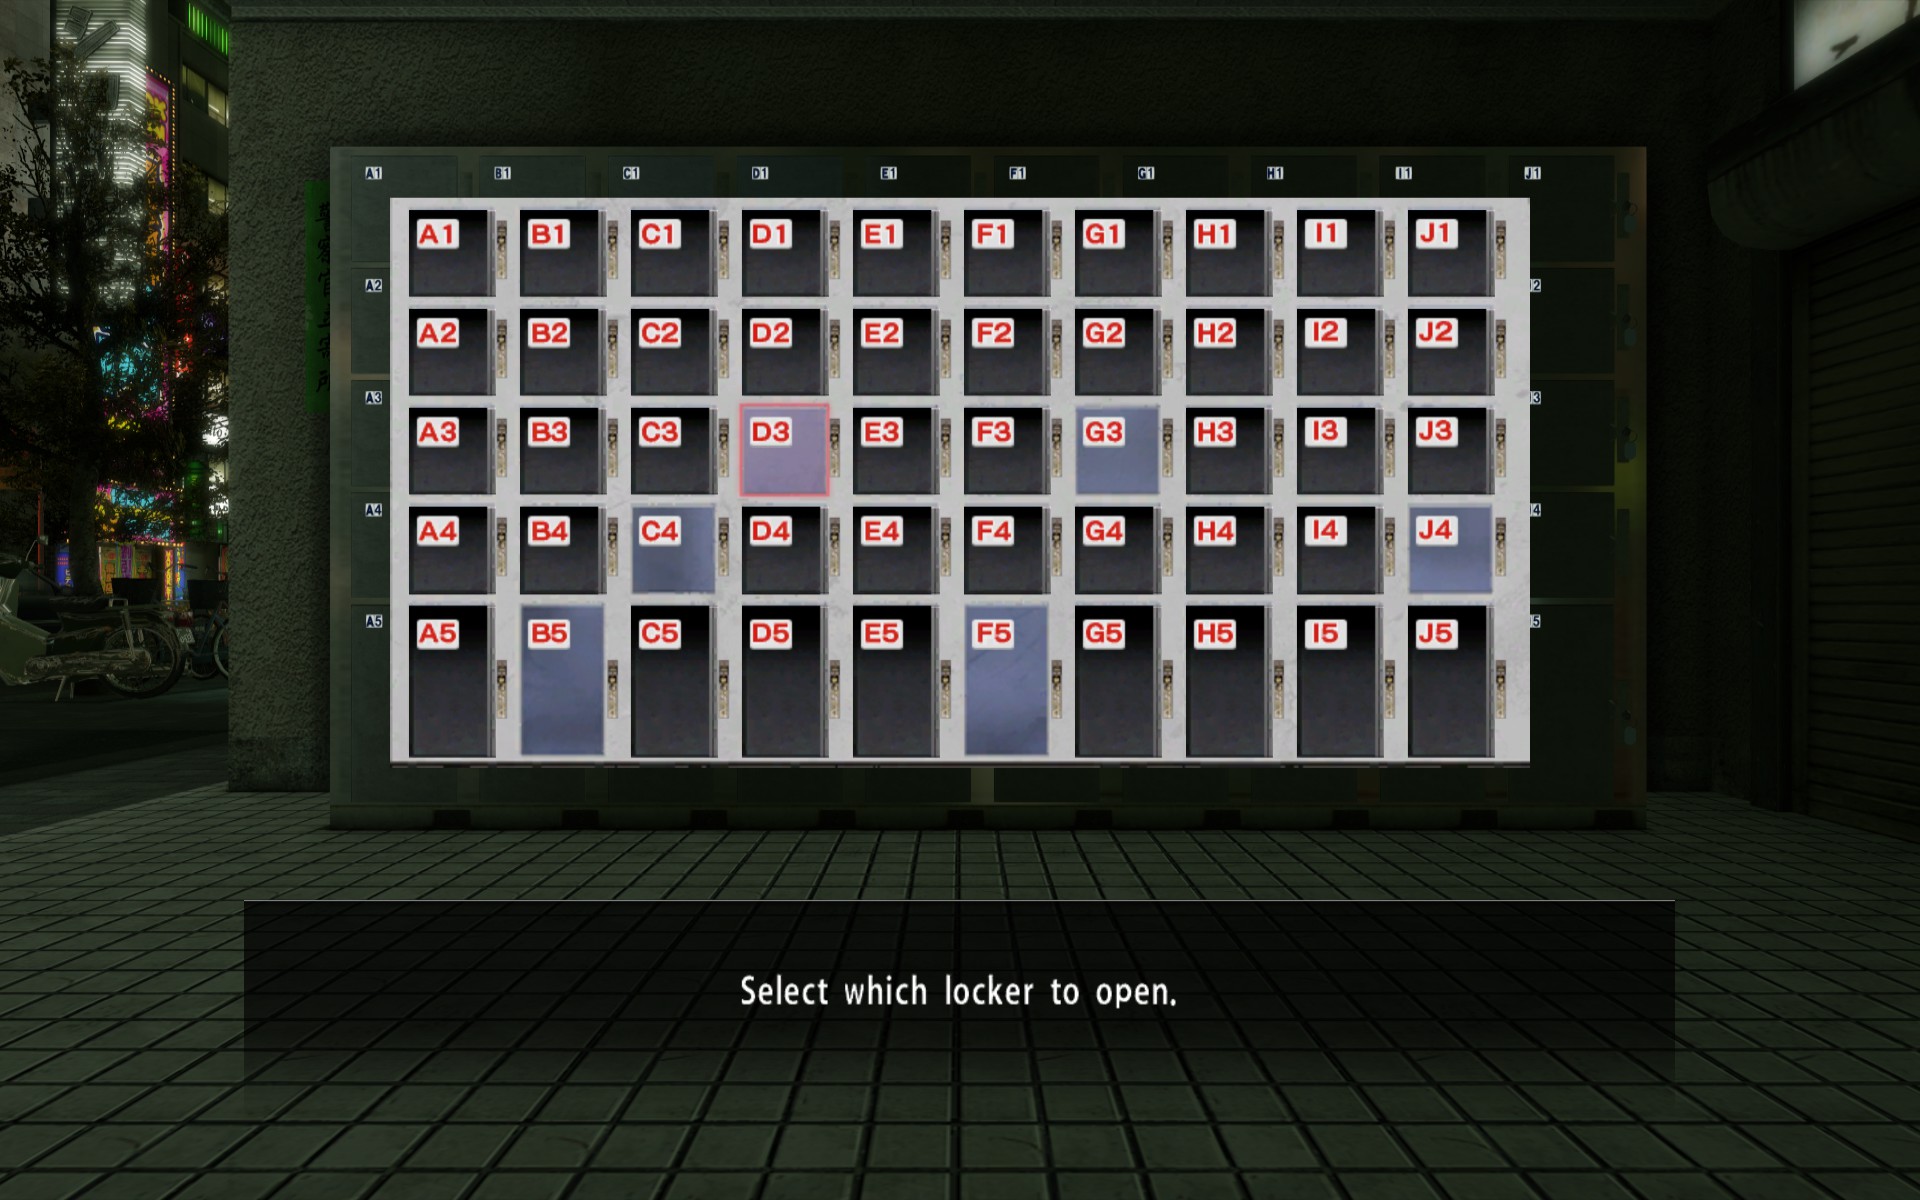
★ Open 30 coin lockersThere are a total of 50 locker keys scattered around Kamurocho. They appear as a sparkling white object, usually located on the ground. Some can be indoors and some are well-hidden. For the completion point, you only need to find and open 30 lockers.
The locker wall is located west of Millleneum Tower and is right next to the Lottery Booth / Gambling rooms.
II. Completion List: (Battle)
★ Defeat 500 enemies on the streetAnother easy point that will build up pretty quickly over the course of the game. The Mew Shoes and Charismatic Photo accessories can help boost the number of fights if you didn’t pick up too many fights previously.
★ Defeat 200 enemies in the Brawler Style
★ Defeat 200 enemies in the Rush Style
★ Defeat 200 enemies in the Beast Style
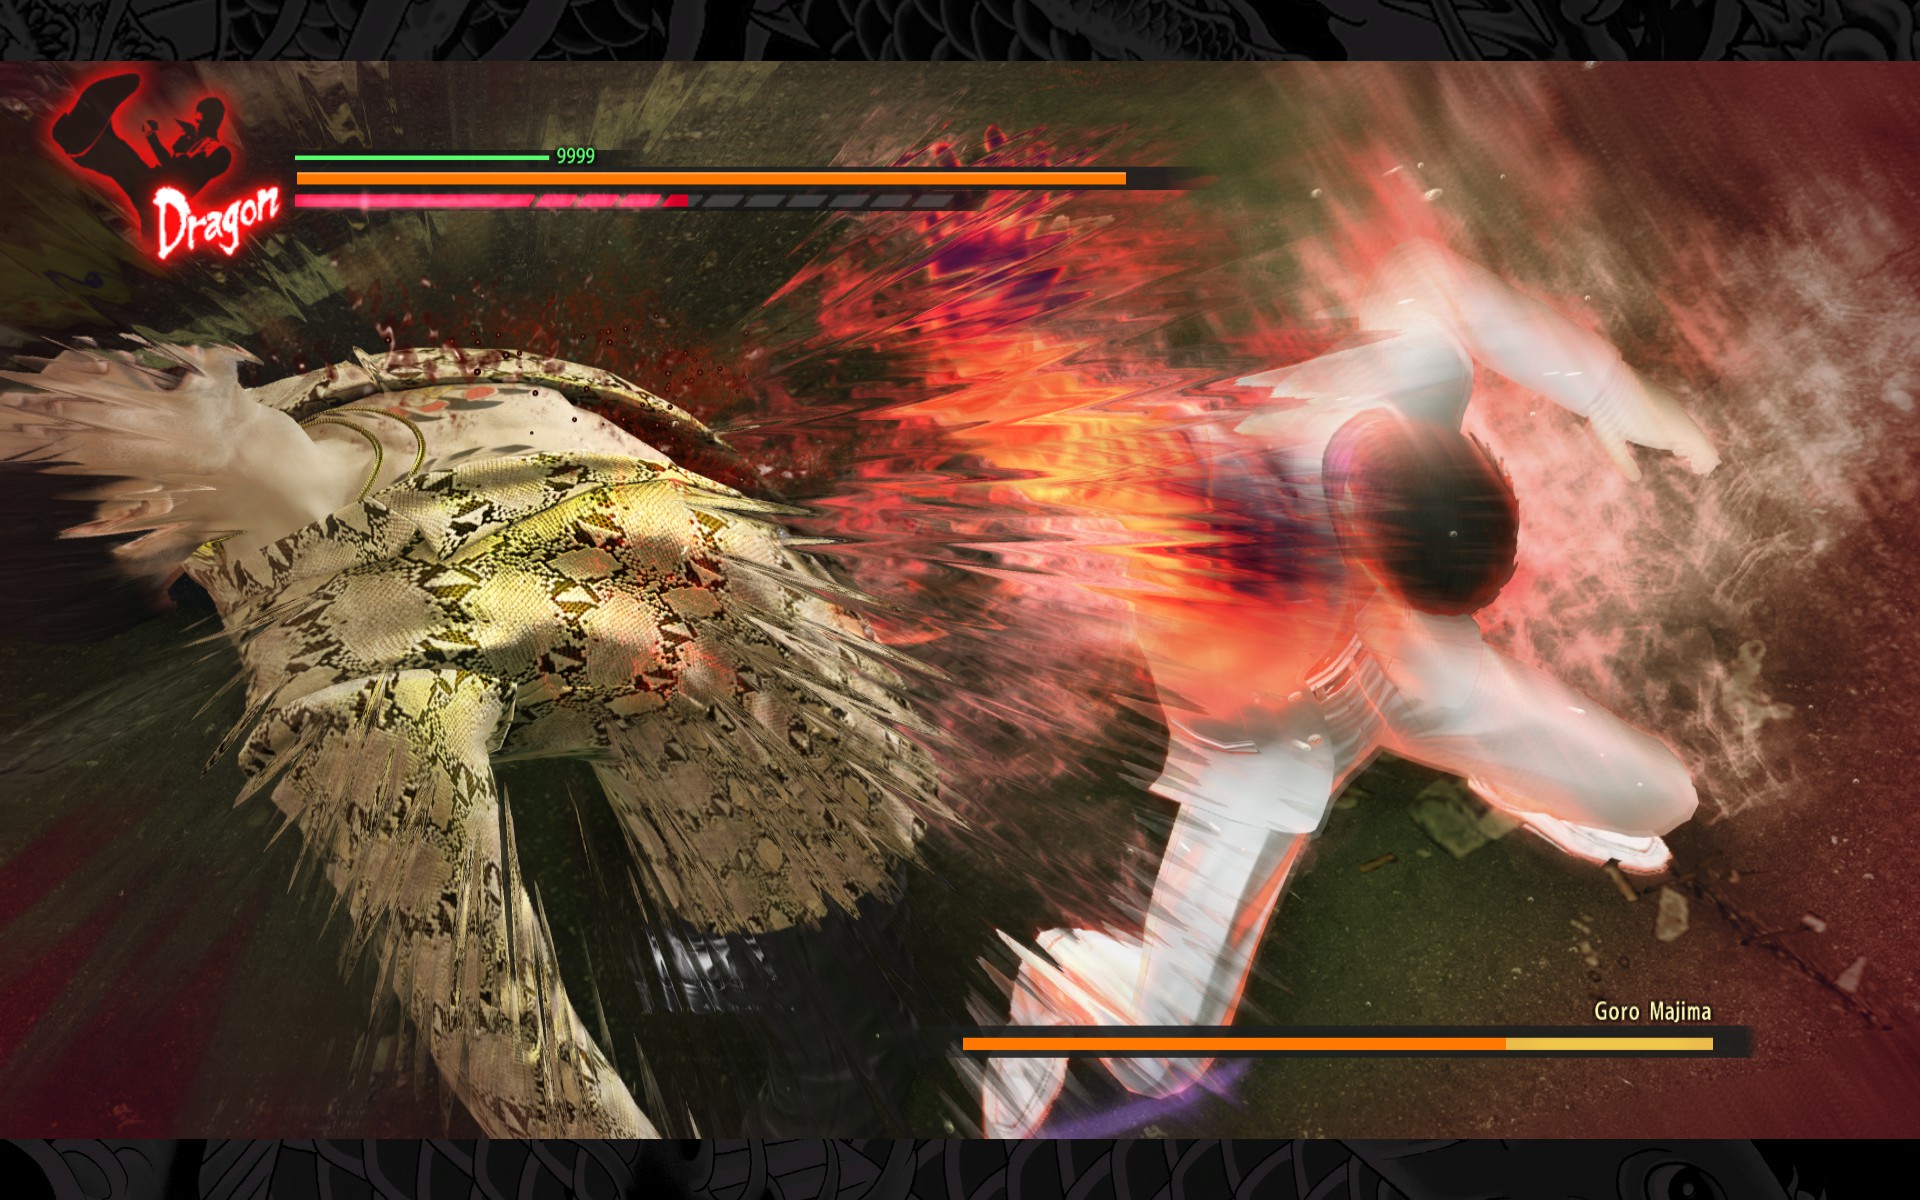
★ Defeat 200 enemies in the Dragon StyleAll styles are available at the beginning of the game. I recommend using an combination of Brawler, Rush and Beast through the story, and then switch to Dragon when you’ve upgraded your Majima Ranking enough and unlock Komaki’s training. The best place to rack up these numbers is during the long fight scenes during the main story and by fighting people on the street. Coliseum is a bit slow for this as it’s 1v1 only.
★ Help 30 attack victims around townSpawn randomly across the map. I find that attack victims spawn pretty regularly on the street next to Purgatory, along the top of the map, in the Champion district, and around the Park/Temple area in Kamurocho.
★ Defeat 10 nouveau riche enemiesTo get nouveau riche enemies to appear on the street, you’ll have to buy the corresponding CP bonus along with the Celebrity Perfume to increase their spawn rate. These are the shiny, gold suit-wearing guys. They appear randomly so it’s better to start on this early.
★ Defeat 1 Kiwami opponentA randomly generated point for defeating an enemy with the last name “Kiwami.” Likely would have appeared during the story unless you’re super unlucky. Should eventually appear if you are going for the 200 enemies/style and 500 enemies on the street requirements.
II. Completion List: Heat Actions (Battle)
photogenic Majima

★ Use 40 different Heat Actions
In progress.
★ Acquire 70 different gear items
II. Completion List: Komaki & Coliseum (Battle)


Completed all training for Komaki Style.

Won all tournaments in the underground coliseum.

Obtained at least 10 Soul, Technique, and Body abilities.

Obtained all Soul, Technique, and Body abilities.
★ Win 50 coliseum tournaments
★ Defeat 25 coliseum opponents
The coliseum is located in Purgatory and is best done in tandem with Komaki’s training, as coliseum prizes are needed in order to advance in his training. Be sure to store lots of health items in your Item Box before attempting the coliseum all in one go, or you may be stuck fighting Majima with low health and no health items later!For the beginning and intermediate fights, I highly recommend waiting and attempting as many crowd pleasers as possible because they will give way more points than just winning the fights. The “block an attack” and “dodge” pleasers will stack and give you a massive boost.
The first 3 rows of fights are trivial, and can be done normally. For the latter fights, Tiger Drop is the order of the day. Tiger Drop is the second to last ability unlocked through Komaki’s training. For weapon fights, I recommend the bat or brass knuckles.
In some areas, you can also knock your opponent off the stage for an instant win. Even if you fall yourself in the process, if the other guy goes first, you win!!!

★ Learn all 11 of Komaki’s movesAs you rank up in the coliseum and build up points, you will be able to buy the items Komaki requires for training. Most of these are relatively straightforward:
#59 – Komaki Style: Shot StopperDefeat two men. Relatively easy.
#60 – Komaki Style: SwordsmanshipRequires a Wooden Katana. You can buy one at the Coliseum or Ebisu Pawn.
#61 – Komaki Style: Roundhouse AttackRequires “Image of an Asura” from the Coliseum. Defeat seven guys in 3 minutes.
#62 – Komaki Style: Cat-Like ReflexesRequires “Image of a Cat” from the Coliseum. Defeat the man with a bat.
#63 – Komaki Style: Clear-Minded MasteryRequires “Image of a Snake” from the Coliseum. Majima must also be active in the city (no green marker on the mini-map).
#64 – Komaki Style: Evade and StrikeRequires “Image of a Kamaitachi” from the Coliseum. Dodge Komaki’s shotgun. This one can be a little tricky. I recommend standing in one place and dodging about 1 second after he raises his gun. There’s a slight gap between the moment he raises his gun and actually fires, so dodging too early will get you shot.
#65 – Komaki Style: Dharma TumblerRequired “Image of Dharma” from the Coliseum. Defeat Isamu Kumada.
#66 – Komaki Style: Fist ReversalRequire “Image of Four Gods” from the Coliseum. Defeat four large dudes. Try keeping your distance and use heat actions on them when possible.
#67 – Komaki Style: Knock BackRequires “Image of an Elephant” from the Coliseum. You’re supposed to be guarding without attacking or dodging, but I completed this fight just by running around the park in circles LOL…
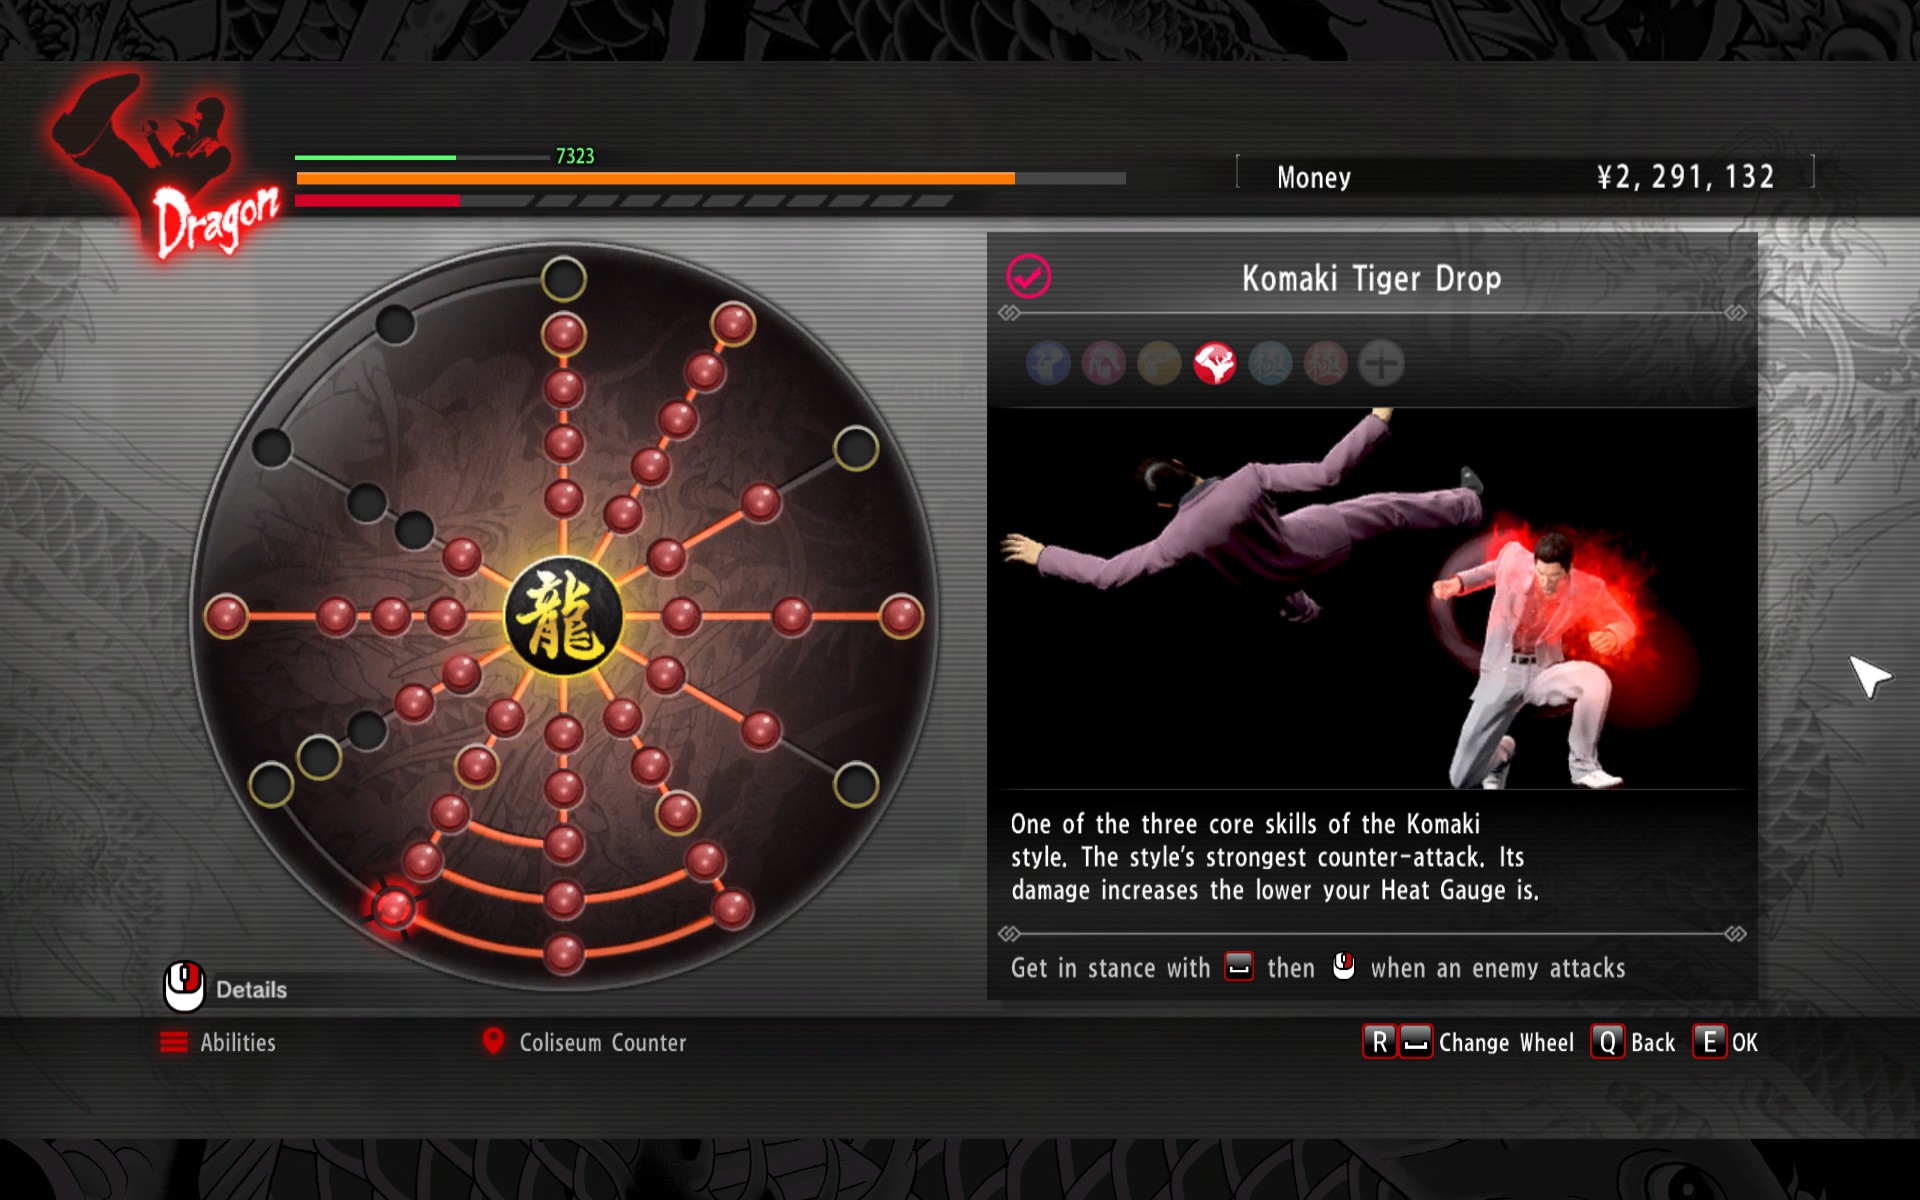
#68 – Komaki Style: Tiger Drop
About Tiger Drop:
The trick to using Tiger Drop is that you have to wait for the actual animation, not right away as soon as they start the attack. The exception to this is when enemies are dashing, in which case the entire dash counts as a single attack you can counter anytime. On the screenshot to the right, I took the screenshot in the exact moment you should be hitting Tiger Drop in Majima’s attack. Keeping that amount of space is also important, as if you’re too close, you’ll be hit and interrupted out of your fighting stance. It takes a bit of timing practice, but will be of immense help to you if you master it.
#69 – Komaki Style: ParryRequires “Image of a Dragon” from the Coliseum. Defeat Komaki. Tiger Drop is great here.
II. Completion List: (Substories)

Completed 10 substories.

Completed 30 substories.

Completed all substories.
★ Complete 40 SubstoriesIn total, there are 78 substories to complete in Yakuza Kiwami. The secret boss substory can only be activated after all other 77 substories have been finished. Many of these are nested substories or part of a tutorial, so there aren’t as many as it sounds.
Many of these substories appear in certain chapters, and pretty much all other guides on the internet are organized in such a way if you prefer to play all the substories as they come. The list below is organized by their order as they appear on the list in-game, as this is intended for people who are going through Premium Adventure.
If you are having trouble finding these, I highly recommend using the Encounter Finder, which will mark substories on your map. Additionally, some quests require Haruka to be with you, and others cannot be completed unless you are solo, including Majima Everywhere story battles.
II. Completion List: (Substories)
The following achievements are awarded for completing their corresponding substory:

Completed “The Price of an F-Cup.”
Substory #1

Completed “My Baby’s a Showgirl.”
Substory #2

Completed “Bet On A Champ.”
Substory #3

Completed “Wife of a Yakuza.”
Substory #4

Completed “A Doctor’s Duty.”
Substory #5

Completed “The Fake Mizuki’s Truth.”
Substory #7

Completed “Man On a Ledge.”
Substory #8
II. Completion List: (Majima Everywhere)
ULTIMATE MALE FANTASY

It’s a Majima dating simulator! As you encounter and fight Majima through the story and Premium Adventure, you will rank up with him, all the way to SSS Rank. This is required in order to unlock all the Dragon Style skills involving the Majima Everywhere system. As the rank bar is building, he will patrol the city in different modes and outfits in “free mode”. When you reach the end of a rank with him, Nishida will text you and Majima will wait for you in a special rank event. You’ll know if he’s out of free mode if there’s a green marker on your map.
Rank Events
When you reach the next rank, Majima’s subordinate will text you to indicate a special Majima event. Here are what these texts mean:
- Branch F – “Please help!” – Head to the hostess club Shine.
- Branch E – “I think it’s a riddle?” – Head to Mach Bowl.
- Branch D – “Looking for the boss” – Head to the Pocket Circuit Stadium.
- Branch C – “Did you know, sir?” – Head to the Nakamichi Club SEGA and talk to the Professor.
- Branch B – “A photo from the boss” – Return to Pocket Circuit Stadium.
- Branch A – “Please be careful!” – Getting this starts up “Don’t Forget Majima” as an option. I’d go to the Taihei Blvd. Akaushimaru and make sure you lower your Heat so the Sensor is active. Go in and out of the store until you hear the alert, then approach the big guy in sunglasses to the north.
- Branch S – “Watch out, Kiryu-san!” – Go to Nakamichi Club SEGA for the second MesuKing battle. You have to complete the first one for this to appear.
- Branch SS – “Check this out” – Head to the Coliseum. Hannya-Man can now appear in Breakout GP and Maximum GP. Select either tournament then back out if the first opponent isn’t Hannya-Man.

Met the mysterious lady, Goromi.
Unavoidable as you rank up.

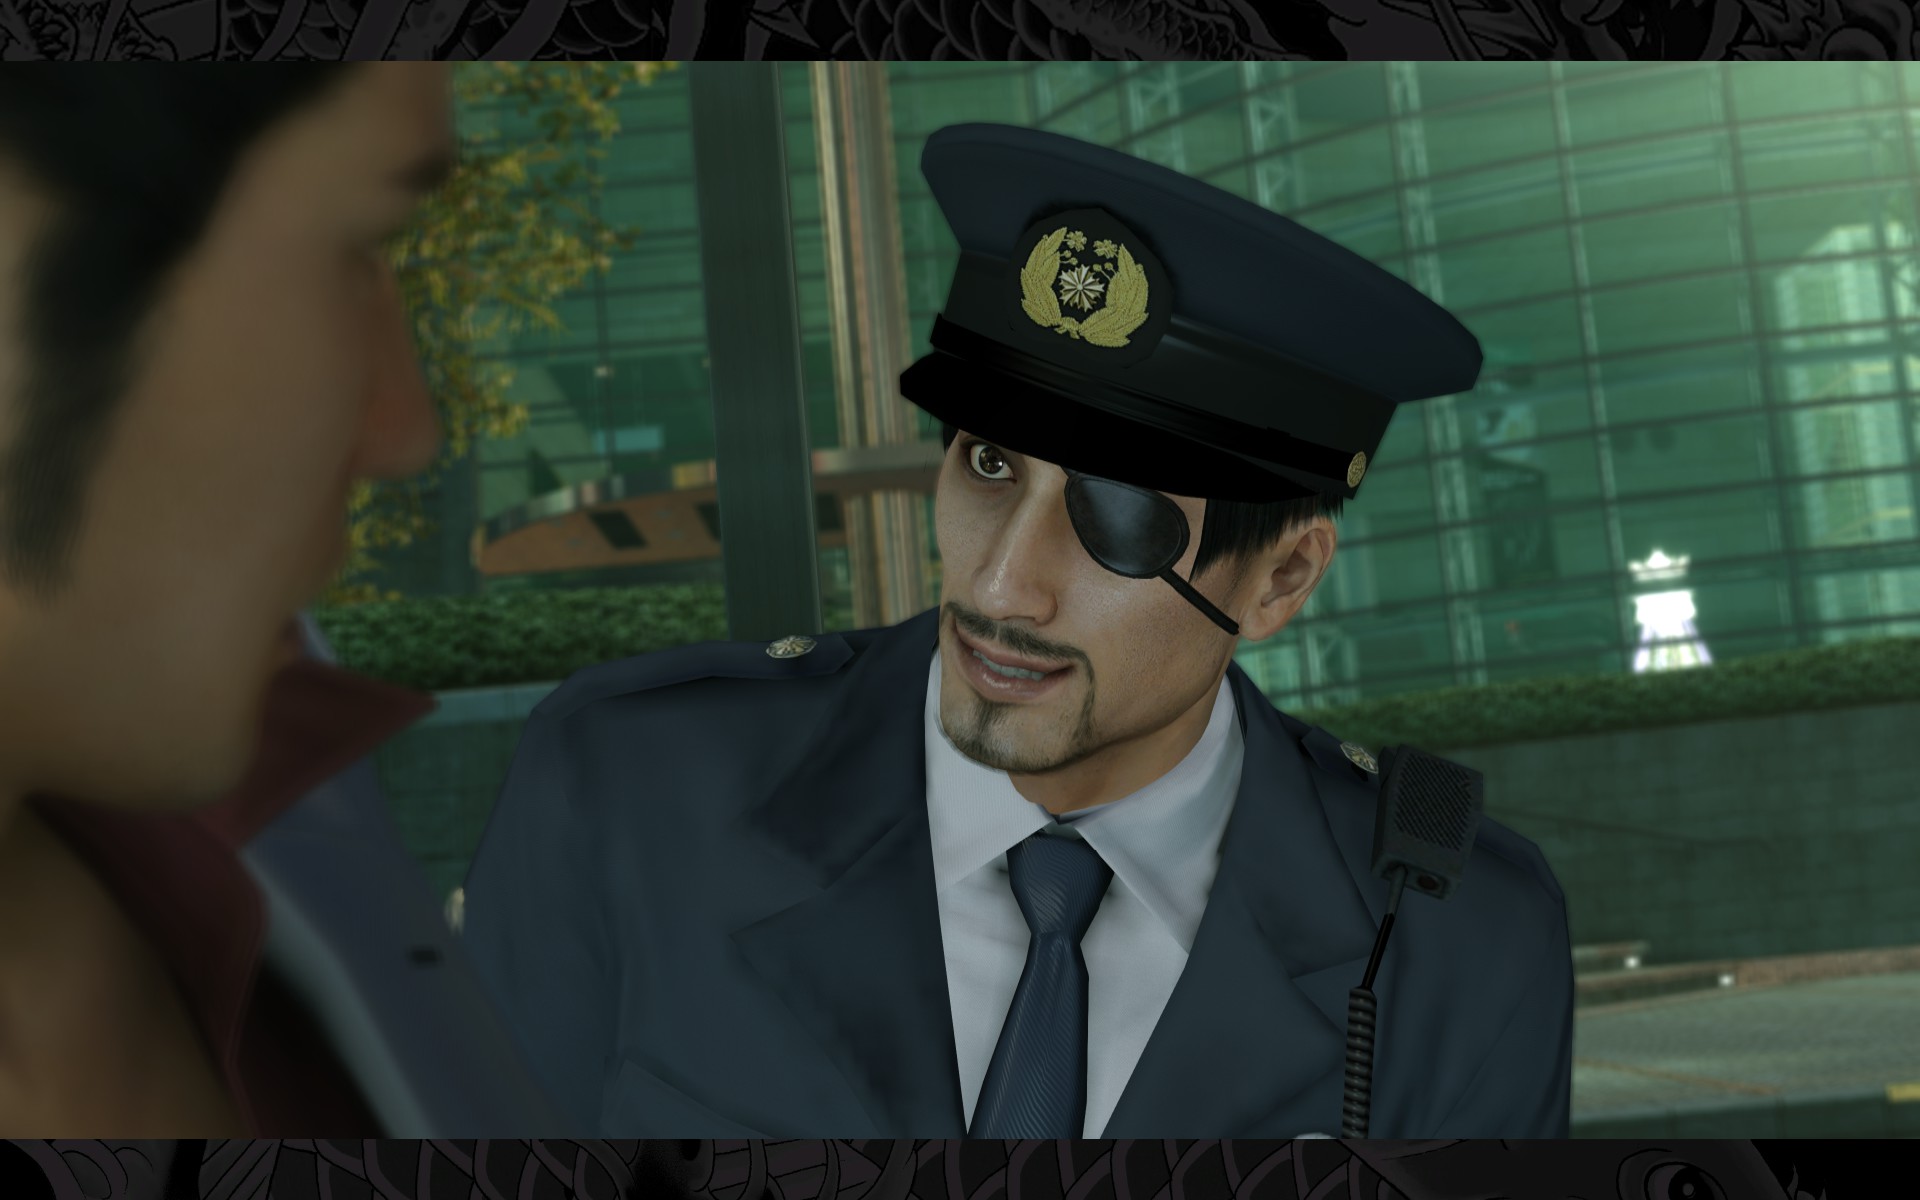
Met Officer Majima.
Unavoidable as you rank up.

Met Zombie Majima.
Unavoidable as you rank up.
Majima Everywhere

Got chased by Majima.
★ Win against Thug Majima 5 times
★ Win against Slugger Majima 10 times
★ Win against Breaker Majima 10 times
★ Win against Mad Dog Majima 10 times
★ Defeat Majima 50 times
While Majima is in “free mode” he will be patrolling the city. There are several different outfits he can show up in and you can usually tell apart the style he is using based off the color of his aura. He spawns in these outfits randomly, so you can enter and exit buildings repeatedly to try and get the one you want. It may require some patience. Once you have the Majima Sensor ability, you can also track him pretty easily on the map which makes this easier.
- Thug Majima – Normal clothes, blue aura.
- Slugger Majima – Normal clothes, yellow aura, carrying a bat.
- Breaker Majima – Normal clothes, red aura.
- Mad Dog Majima – Normal clothes, purple aura. Must be at least Rank S.
- Officer Majima – Police uniform, yellow aura.
- Zombie Majima – Gray skin and a blue aura. Does a bit of a zombie walk. Won’t appear until Rank C.
- Everyone’s Idol Goro – Iconic silver disco outfit, red aura. Won’t appear until Rank A.
- A Crack of the Bat – Majima will be in West Park with a bat. This one might only appear late in the game or at a high ranking.
- Majima Trash – Majima will be in the little alcove in Park Alley (just southwest of the entrance to West Park) speaking to someone. This one might only appear late in the game or at a high ranking.
★ Played 5 minigame battles against MajimaMajima can show up in any minigame, and some skill-related challenges require you to beat him at a certain minigame (see Rank Events above). You’ll inevitably get this if you’re going for the 100% and maxed Majima skills.
These are some the minigames he will show up in:

- Darts at Vincent
- Pool at Vincent
- Mach Bowling
- Batting
- Shogi
- Photo Booth
- Hostess Club Shine (Goromi)
- MesuKing
- Pocket Circuit
- Coliseum

Don’t Forget Majima

Thug Majima forced his way into a fight.

Slugger Majima forced his way into a fight.

Breaker Majima forced his way into a fight.

The Mad Dog of Shimano forced his way into a fight.
★ Majima forced his way into a fight 10 times
In order to get Majima to appear in random fights, you have to complete the Rank A email. He will only appear in certain fights in certain areas. You can usually tell apart the thugs that will start the fight from a distance as they’ll be idling and will start a unique dialogue with you before you fight them. This can take some patience, try entering and leaving a nearby building repeatedly near the target area until they spawn.
- Bare-handed Brawl – Thug Style fight
- In front of the Tenkaichi Poppo. Man in a tan jacket.
- North of the Todo Building on Shichifuku St.
- Swing, Batter Batter – Slugger Style fight
- Southwest of the southern entrance to the Champion District.
- In front of Children’s Park.
- Dance Majima, Dance – Breaker Style fight
- At the east end of Shichifuku St.
- Southeast of Theater Square in front of the theater itself.
- Remember Majima – Mad Dog Style fight
- Just outside Millenium Tower. Go in and out of Taihei Akaushimaru to get this to happen. Man in a black jacket with sunglasses.
- East of Mach Bowl’s entrance.
Suddenly Majima

Assaulted by Majima from above.

Assaulted by Majima from a manhole.
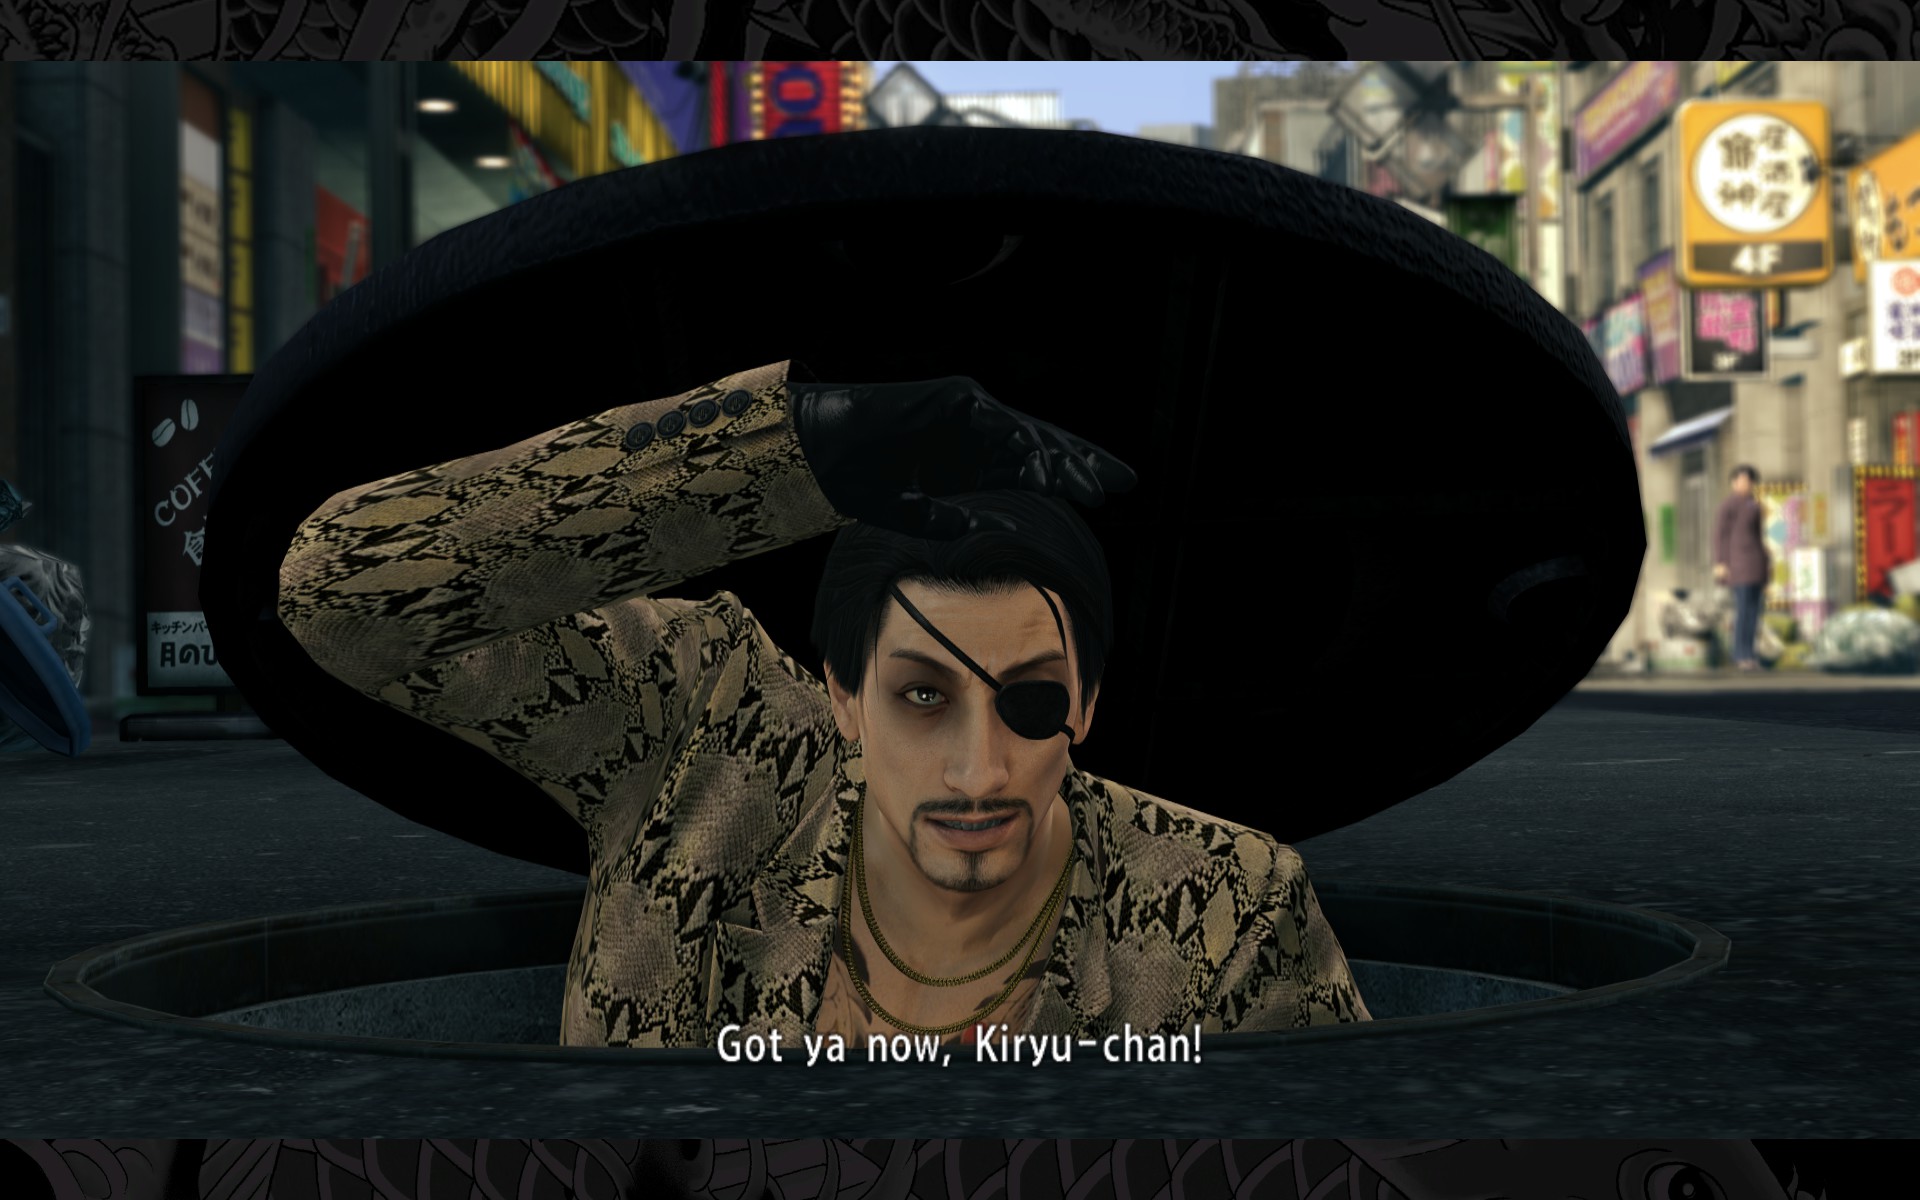
★ Get surprise attacked by Majima 10 timesThese two achievements are challenging for some people. The key to this is being very patient. Like his other modes, he WILL spawn but it is random. Enter and exit a building in the spawn area repeatedly till you hear him say “Kiryu-chan!” on a megaphone. I’ve recommended areas below.
- Majima from Above
- On Pink Street, between the southern gate and Shine. Recommend using the Mahjong parlor to spawn him.
- Outside Beam. Use Beam.
- Majima from Below
- On Tenkaichi St. next to the Kazama Family Office. Recommend using Serena to spawn him.
- In the Champion District, near the south entrance. Use Shellac.

Reached Rank B in Majima Everywhere.

Upgraded all Majima Everywhere abilities.
★ Learn 30 “Dragon of Dojima” abilitiesRequires you to max out Majima’s ranking and face him in one final showdown in addition to completing all of Komaki’s training. Complete and win all rank events and face him a couple times on the street and you’ll inevitably get this!
II. Completion List: (Minigames)
How you won’t feel attempting Yakuza minigames.

Played all minigames.
Be sure to watch a show in Club Asia if you haven’t already. It counts as a minigame for whatever reason, and it’s usually the one people are missing. All other minigames are covered in the guide below if you are looking to collect all the completion points in them.
- Batting
- Bowling
- Casino: Baccarat
- Casino: Blackjack
- Casino: Poker
- Casino: Roulette
- Club Asia
- Darts
- Gambling: Cee-lo
- Gambling: Cho-han
- Gambling: Koi-koi
- Gambling: Oicho-kabu
- Karaoke
- Mahjong
- MesuKing
- Photo Booth
- Pocket Circuit
- Pool
- Shogi
- UFO Catcher
The minigames in Yakuza are daunting to most and can often completely prevent people from completing their list after getting really, really close. It personally took me almost a month to understand and win all the minigames in Yakuza 0, leaving me stuck at 98% for awhile. Fortunately, after having wrestled with the AI, I figured that the chances of winning are actually pretty high if you even have a slight idea of how to play. The game will throw you “lucky hands” every now and then, and if you can recognize them, you don’t have to be a pro. You just know how to take advantage of what you get!
_________________________________________________________________________________
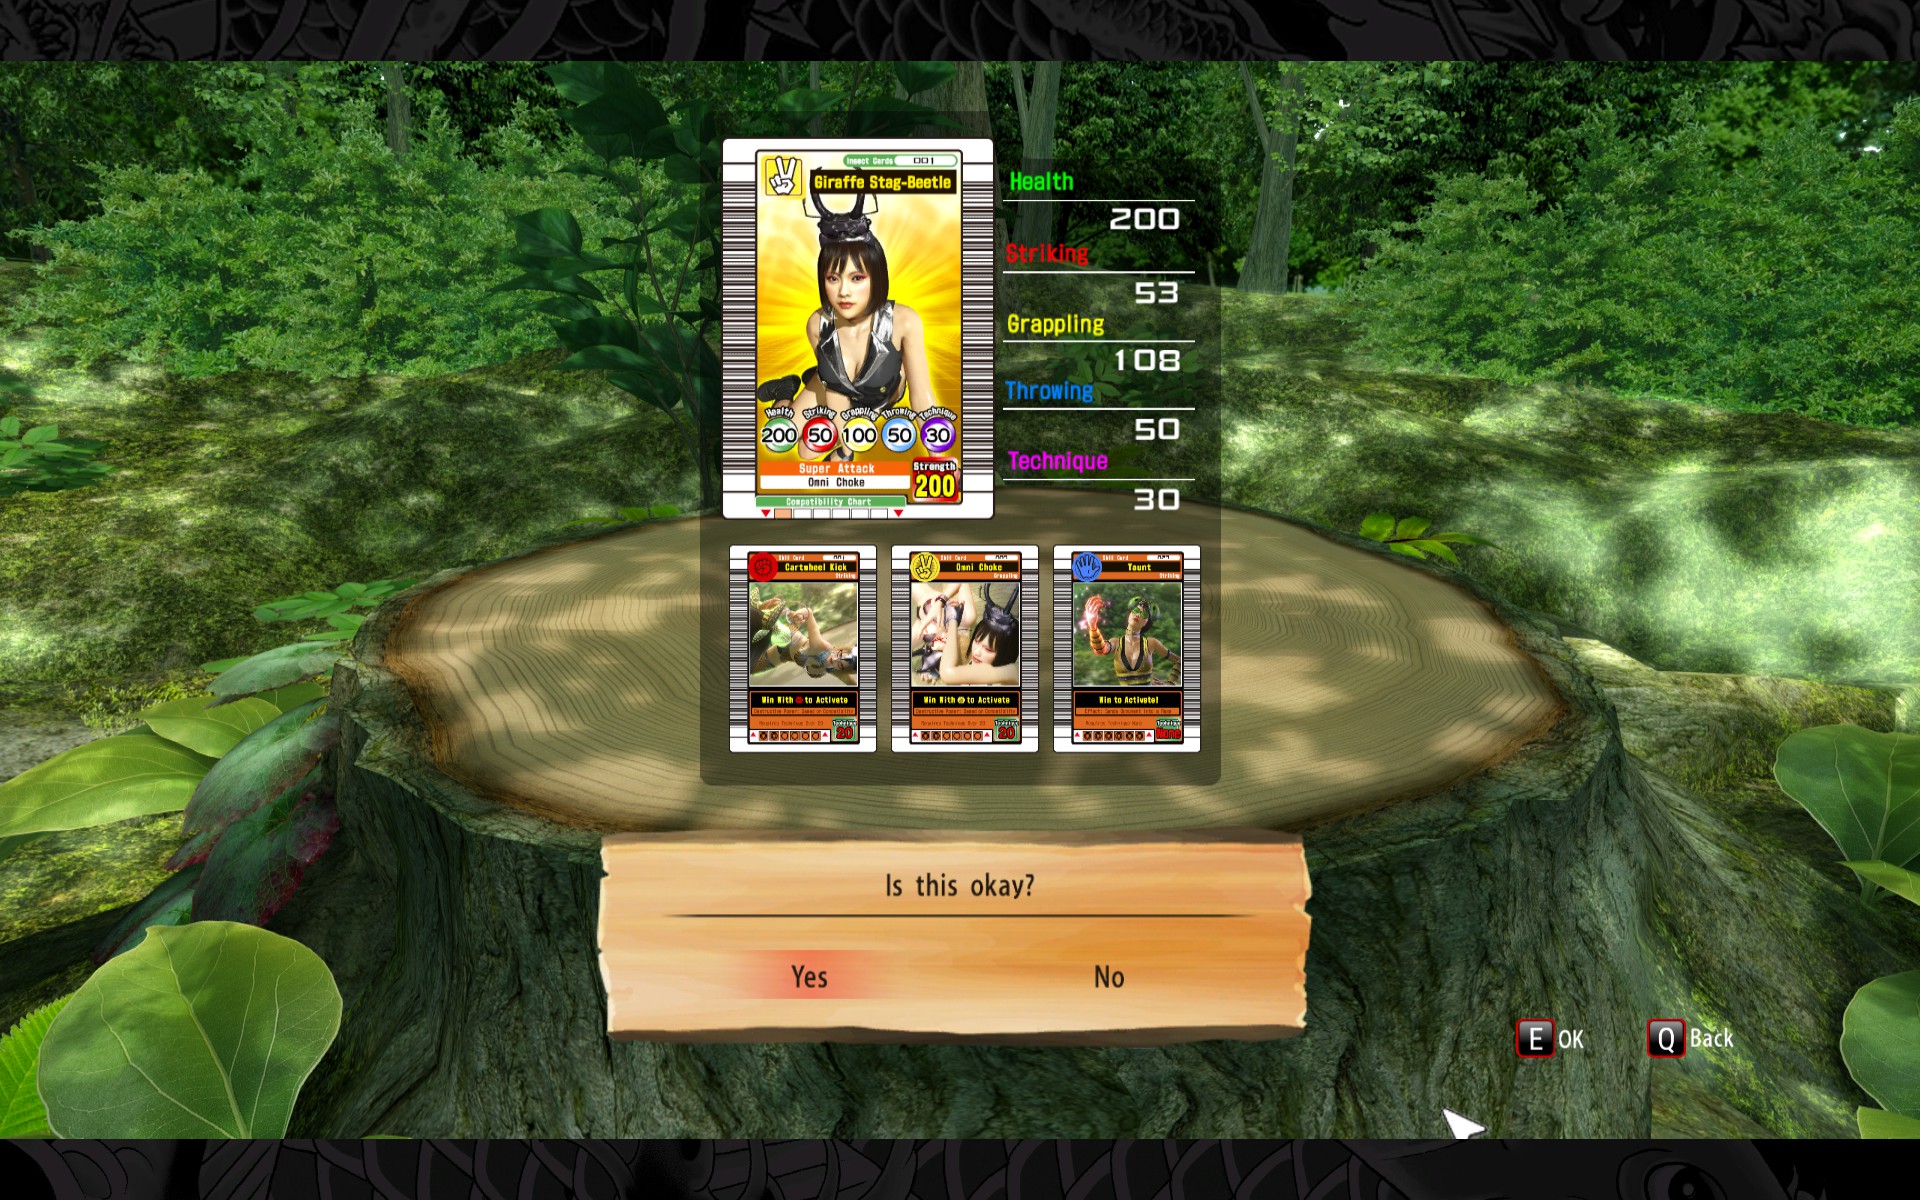

Won against all rivals in MesuKing.
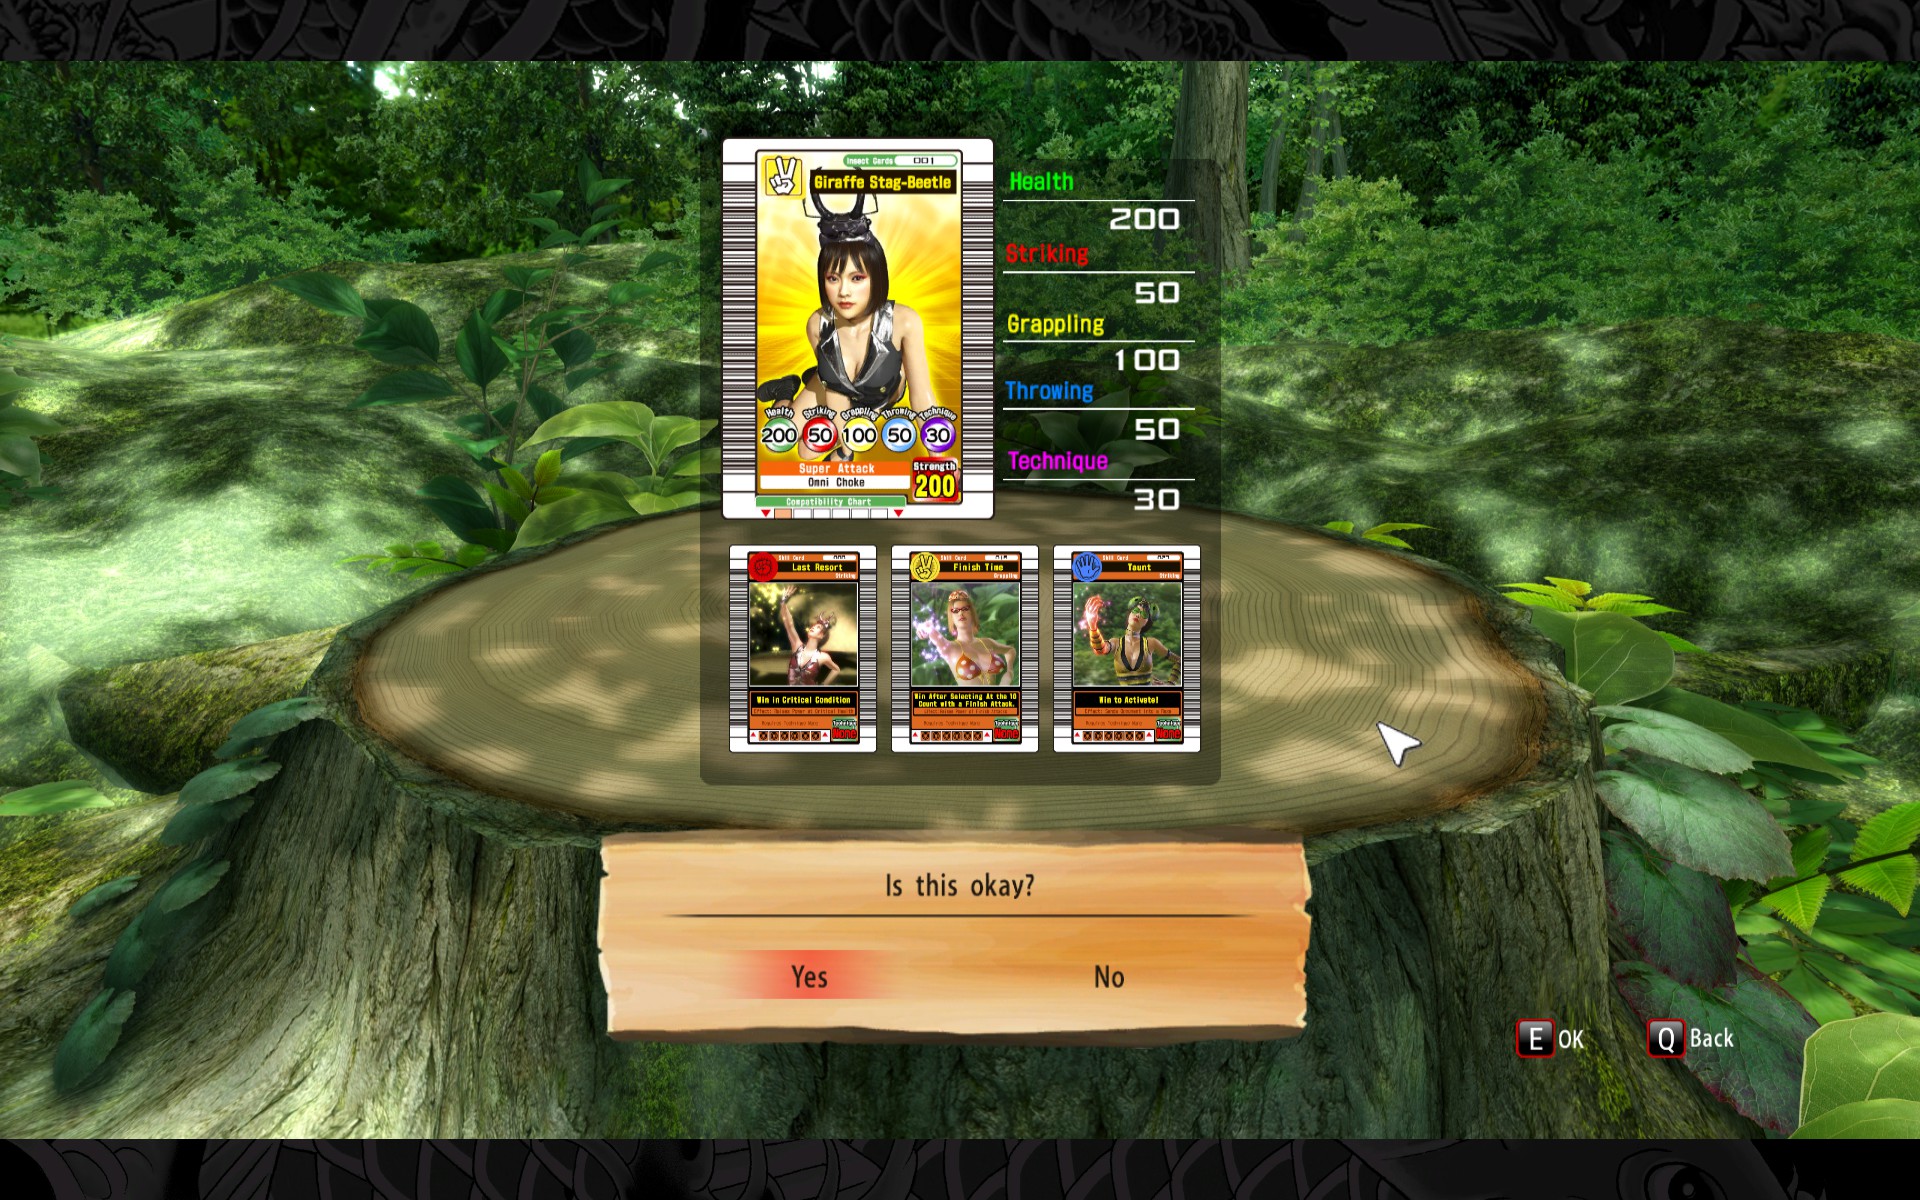
The above build is what I used for pretty much all the MesuKing battles and won the first try. I eventually replaced some of the ability cards for better ones (see right) you get from winning the substory battles, but the effect is still mostly the same. The only strategy required is to pick a hand that will beat your opponent’s strongest hand. So if your opponent’s strongest hand is Paper, they’ll be more likely to choose it, so you should go with Scissors. Also highly recommend Taunt, it’s a strong ability that makes your opponent pick their hand before you do, so you always know the right counterhand to pick.
Insect Cards
II. Completion List: MesuKing Cards (Minigames)
**Scroll up for more cards and info on MesuKing. Steam has a character limit so I had to split the section.**
Ability Cards
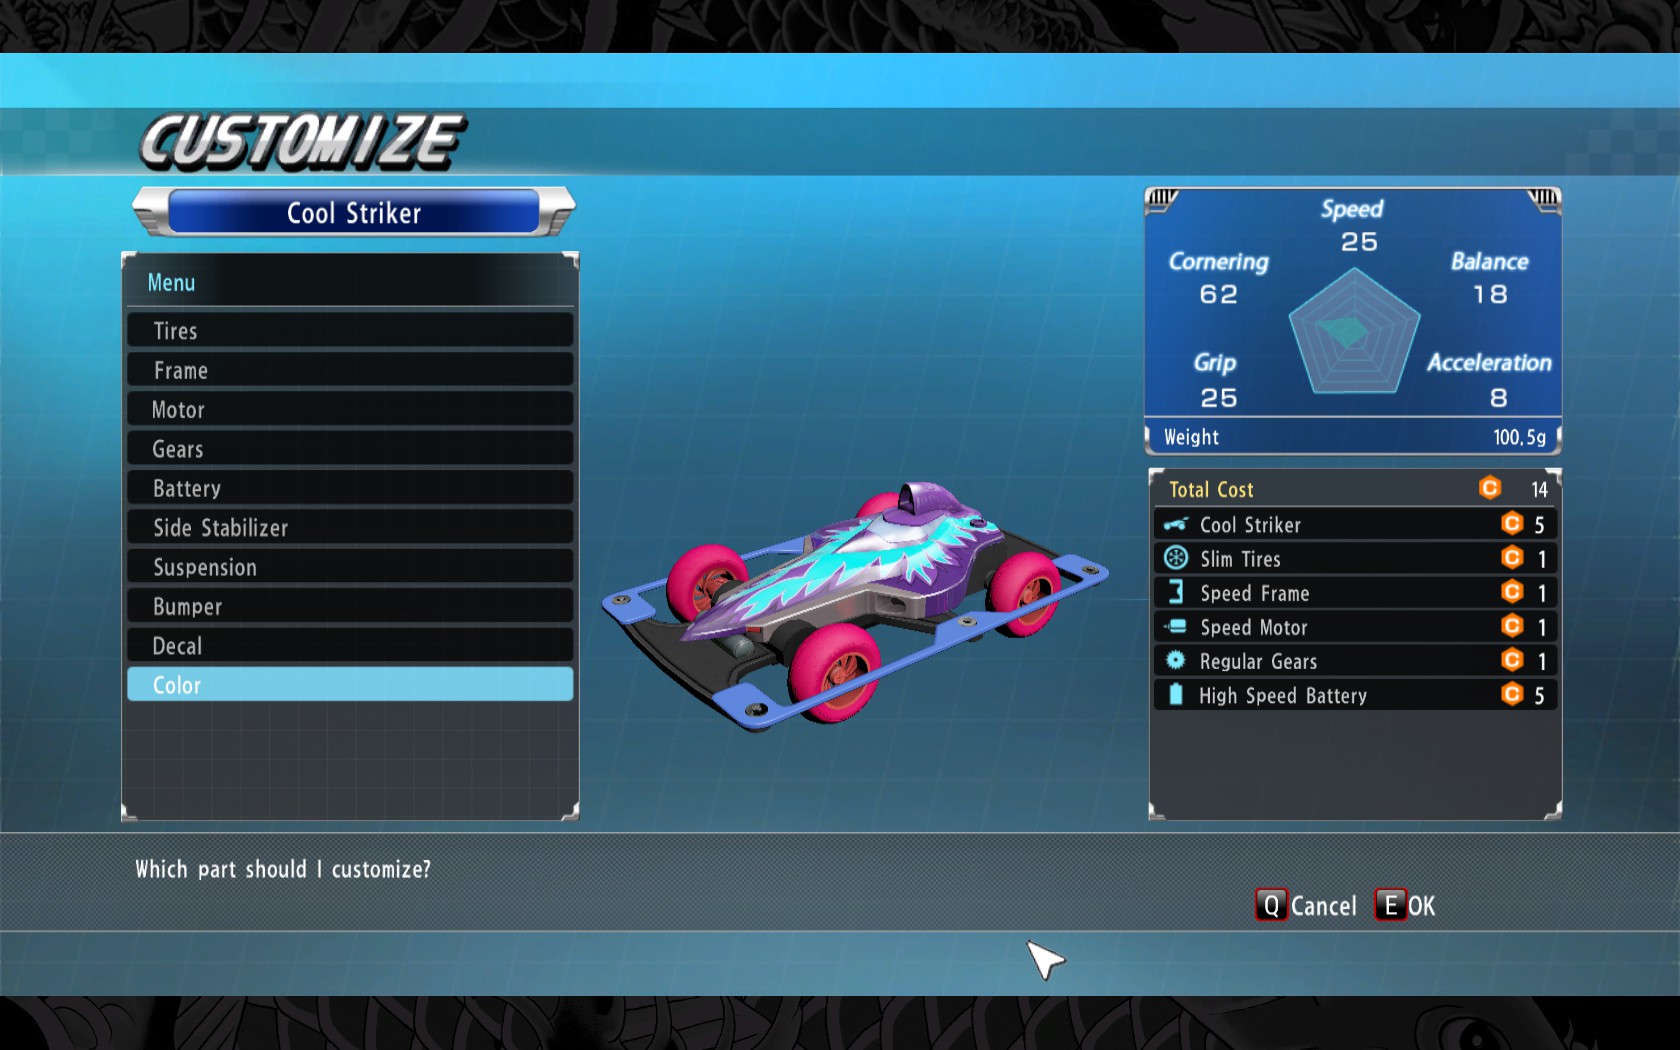
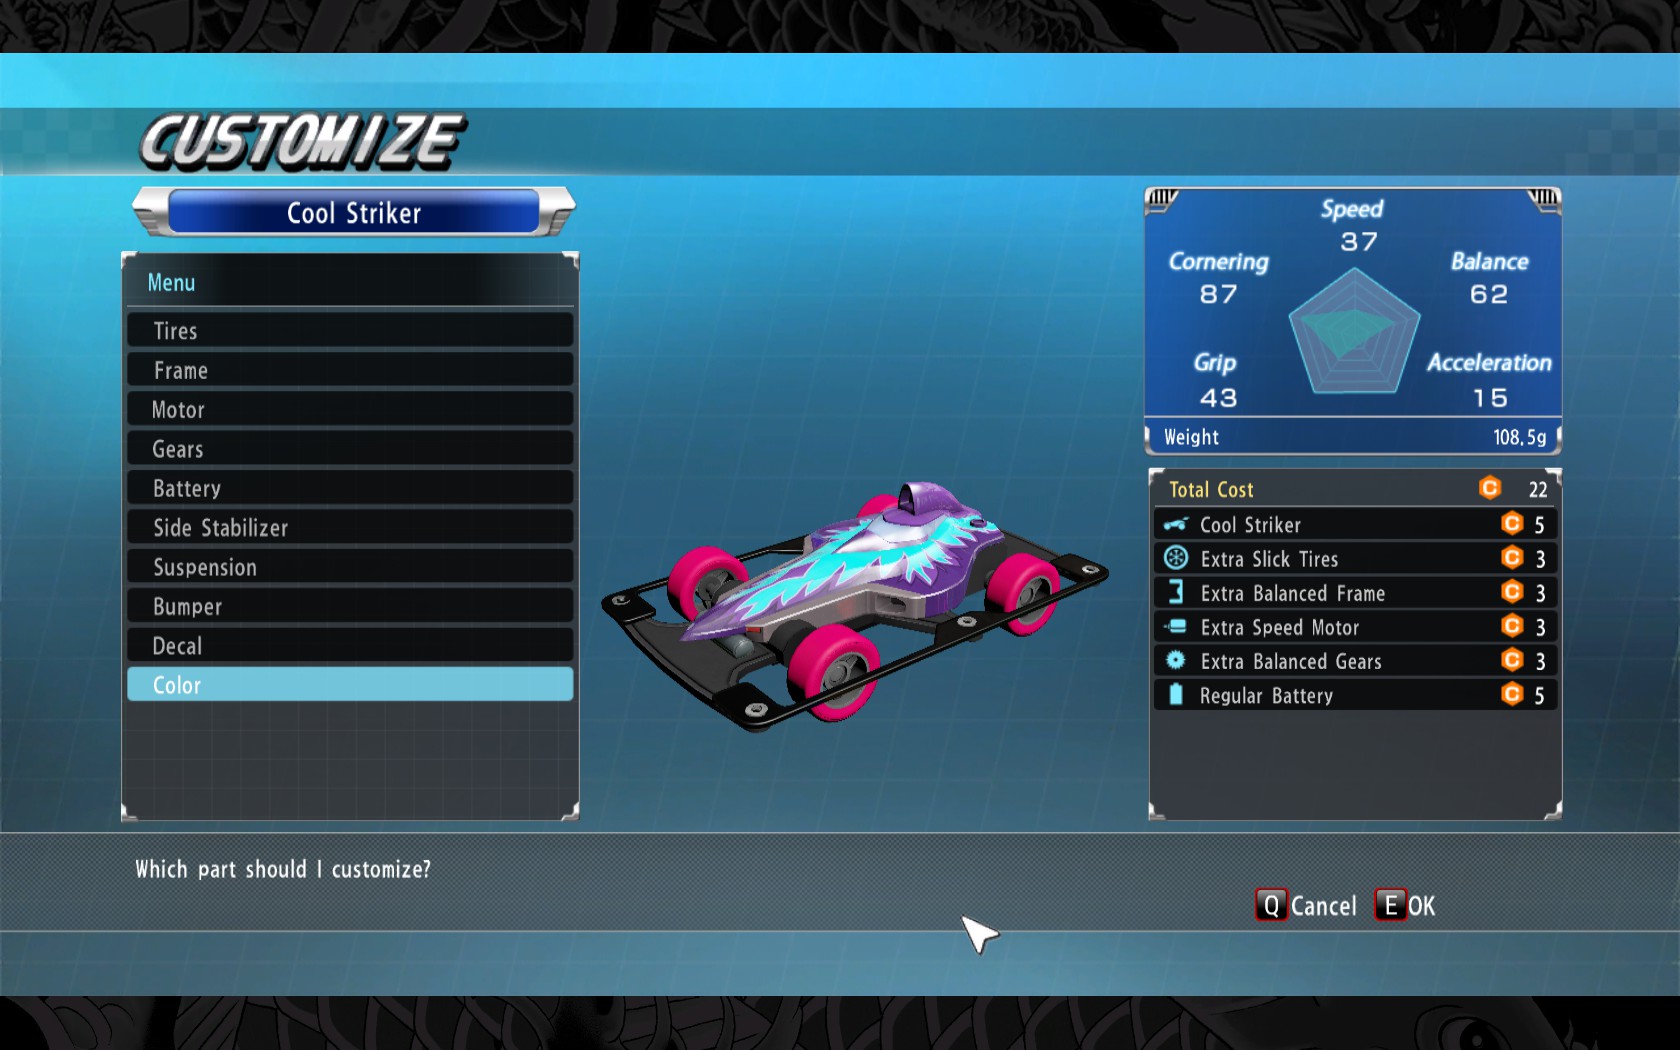
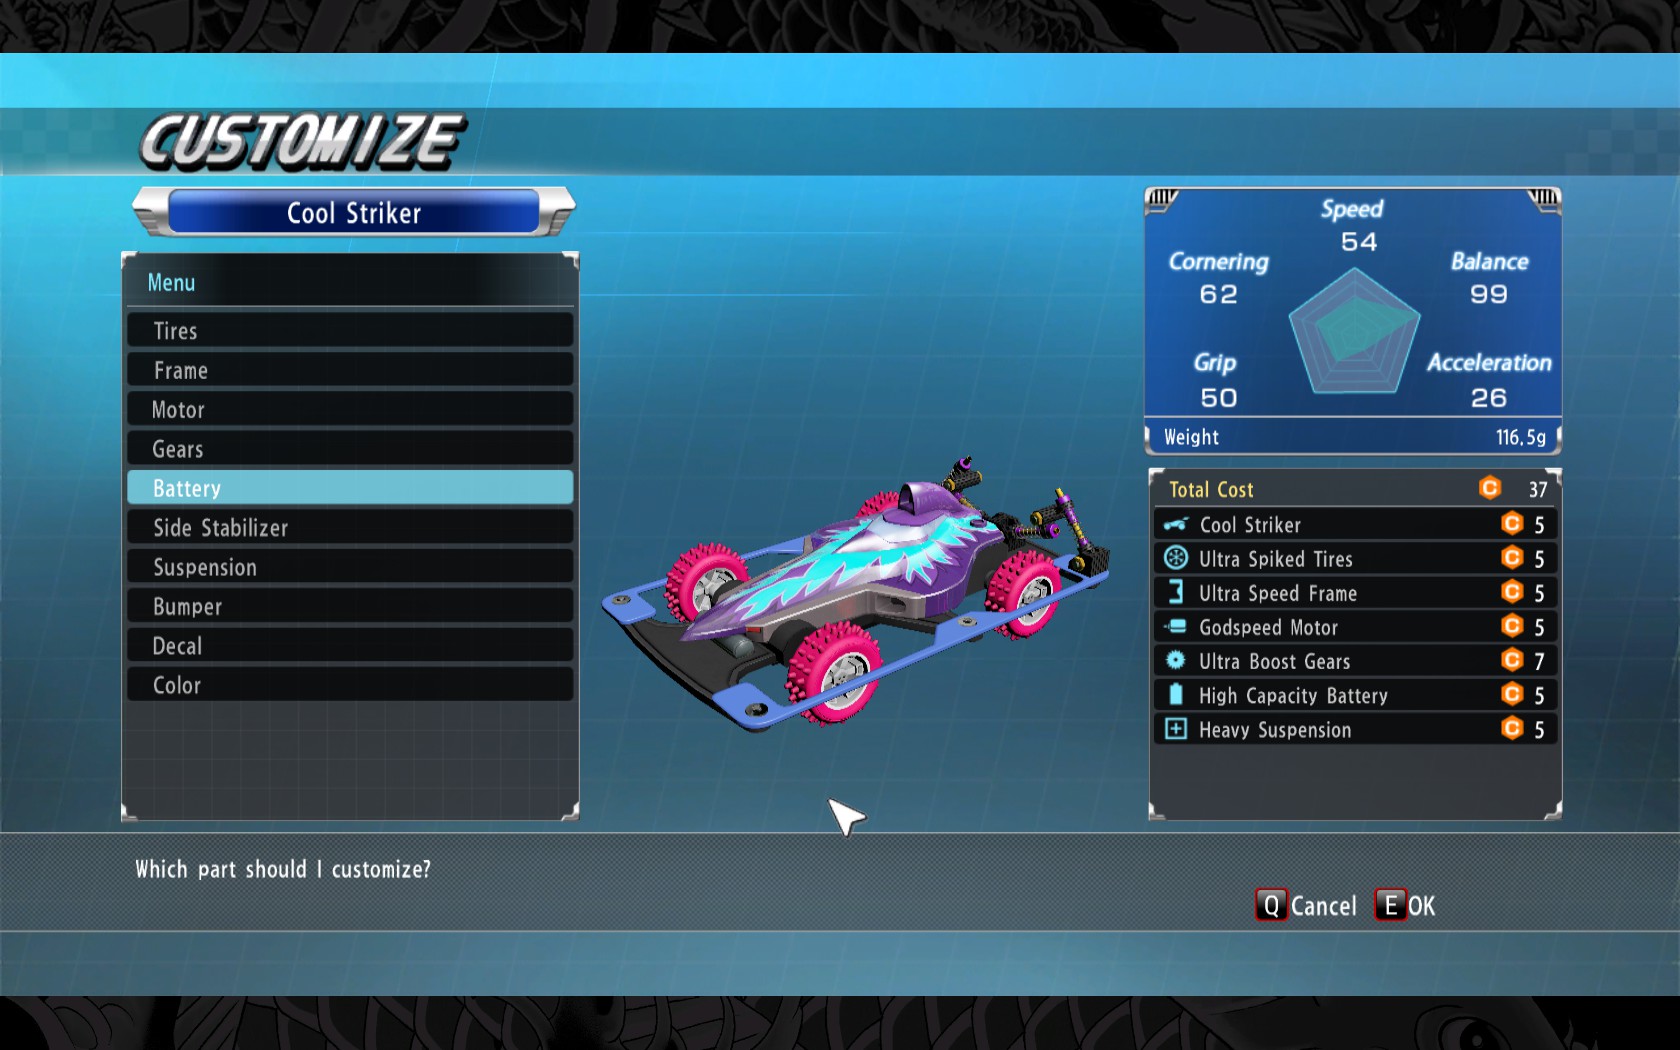
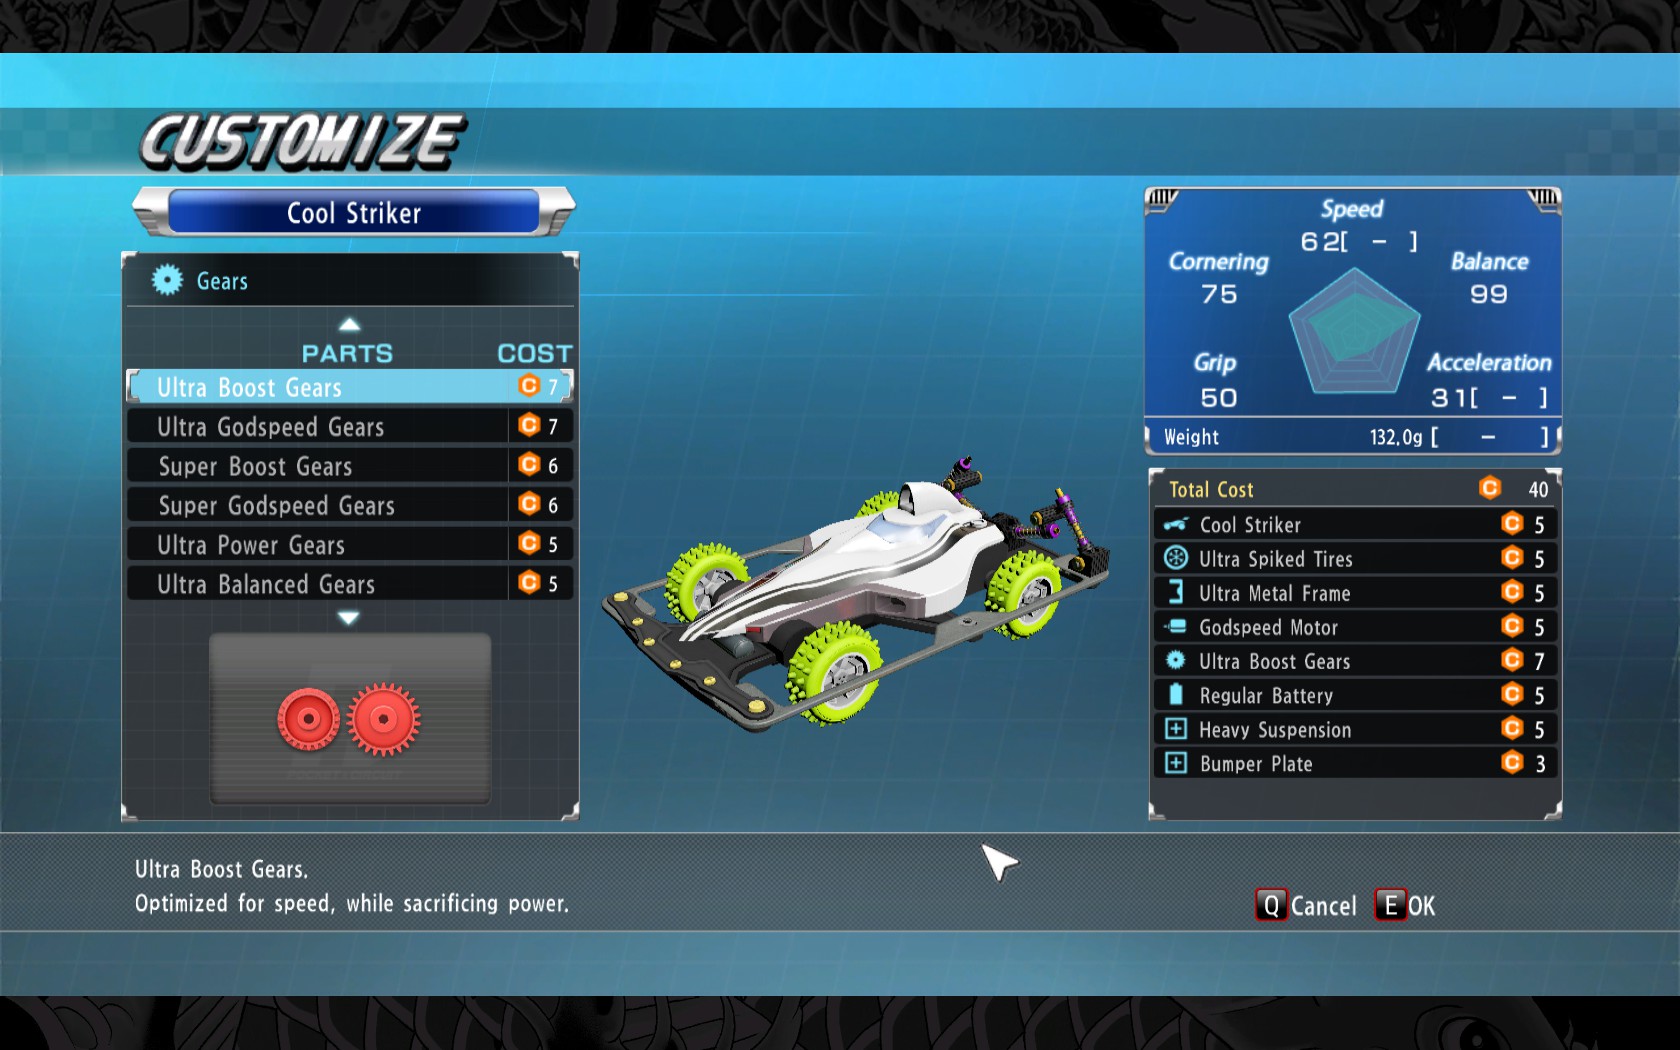
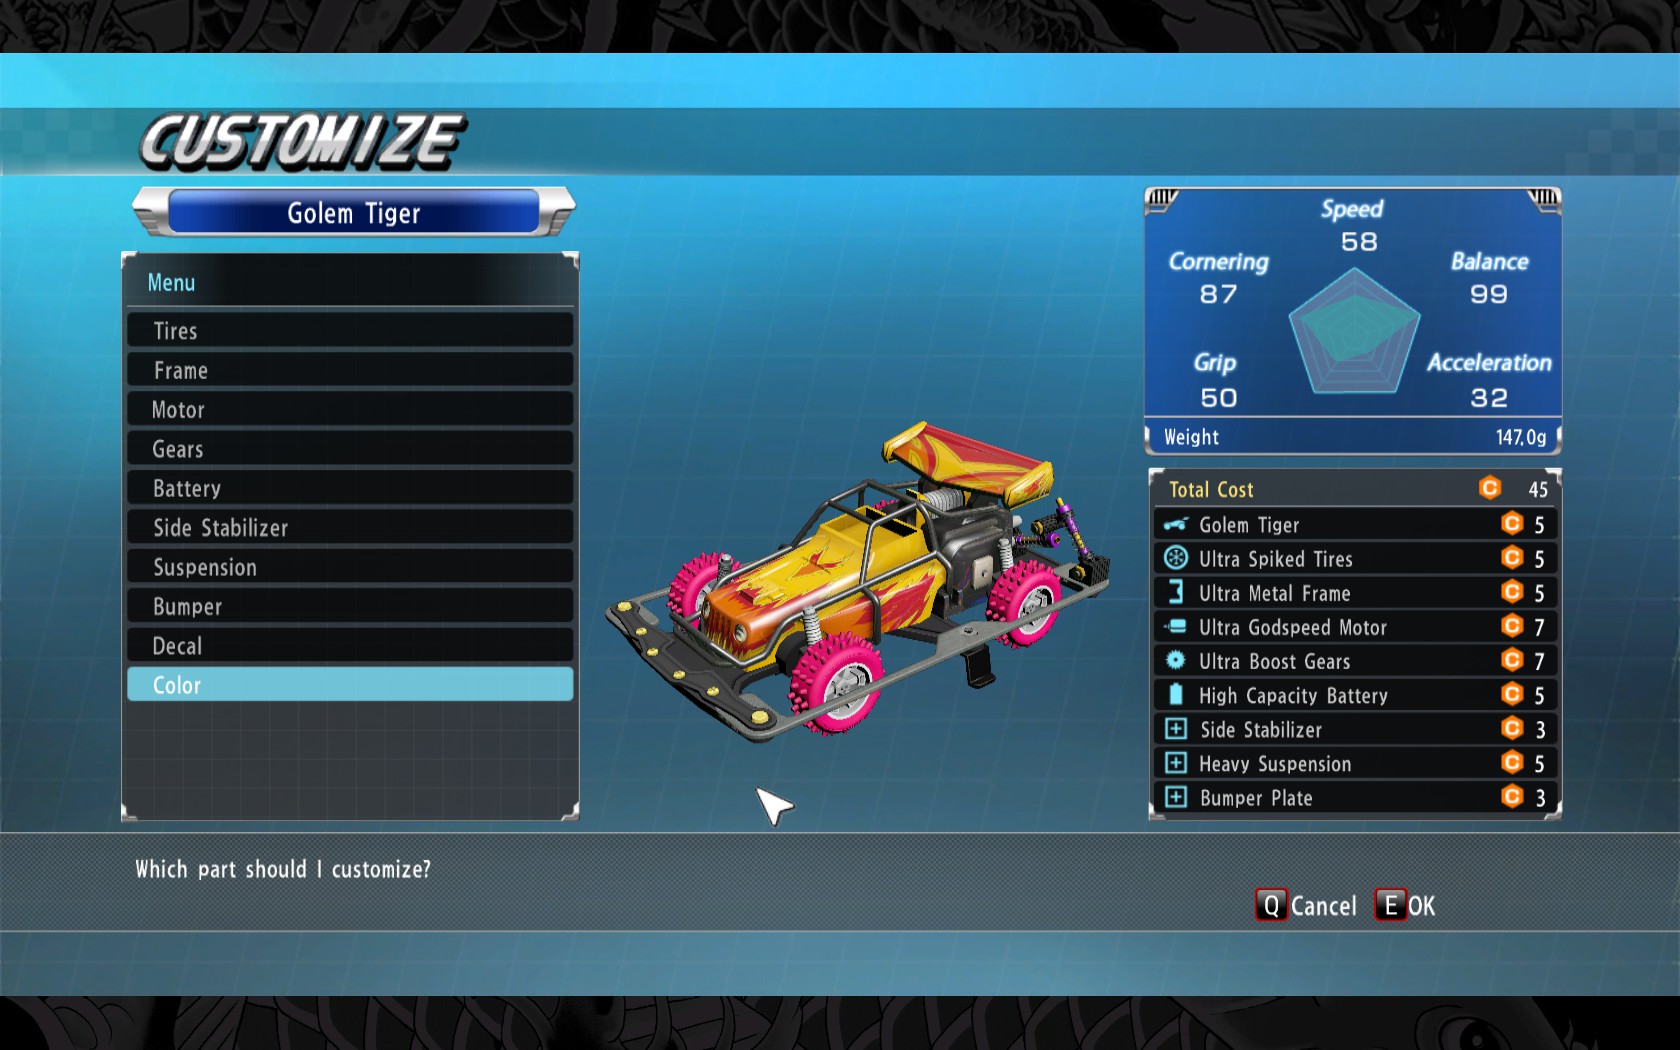
II. Completion List: Pocket Circuit (Minigames)
Gotta go fast (sonic) gotta go fast
Car Locations
- Golem Tiger – Default
- DRAG-ON – Pocket Circuit shop
- Devil Killer – Pocket Circuit shop
- Cool Striker – Locker E5
- Killer Bee – CP Package
★ Collect 20 different tiresA majority of these can be bought at the Pocket Circuit shop after winning each race. A cutscene will occur letting you know whenever new parts are in.
- Slick Tires – Default
- Slick Tires Plus – Pocket Circuit shop
- Extra Slick Tires – Pocket Circuit shop
- Super Slick Tires – Pocket Circuit shop
- Ultra Slick Tires – Pocket Circuit shop
- Soft Tires – Pocket Circuit shop
- Soft Tires Plus – Pocket Circuit shop
- Extra Soft Tires – Pocket Circuit shop
- Super Soft Tires – Pocket Circuit shop
- Ultra Soft Tires – Mach Bowl: Split Game Reward (7)
- Spiked Tires – Don Quijote
- Spiked Tires Plus – Pocket Circuit shop
- Extra Spiked Tires – Pocket Circuit shop
- Super Spiked Tires – Pocket Circuit shop
- Ultra Spiked Tires – Pocket Circuit shop
- Low Profile Tires – Pocket Circuit shop
- Low Profile Tires Plus – Pocket Circuit shop
- Extra Low Profile Tires – Pocket Circuit shop
- Super Low Profile Tires – Pocket Circuit shop
- Ultra Low Profile Tires – Pocket Circuit shop
- Slim Tires – Pocket Circuit shop
- Slim Tires Plus – Pocket Circuit shop
- Extra Slim Tires – Pocket Circuit shop
- Super Slim Tires – Pocket Circuit shop
- Ultra Slim Tires – Pocket Circuit shop
★ Collect 15 different motorsA majority of these can be bought at the Pocket Circuit shop after winning each race. A cutscene will occur letting you know whenever new parts are in.
- Power Motor – Default
- Power Motor Plus – Purgatory Weapons Shop
- Extra Power Motor – Pocket Circuit shop
- Super Power Motor – Pocket Circuit shop
- Ultra Power Motor – Pocket Circuit shop
- Speed Motor – Pocket Circuit shop
- Speed Motor Plus – Pocket Circuit shop
- Extra Speed Motor – Pocket Circuit shop
- Super Speed Motor – Pocket Circuit shop
- Ultra Speed Motor – Pocket Circuit shop
- Balanced Motor – Pocket Circuit shop
- Balanced Motor Plus – Pocket Circuit shop
- Extra Balanced Motor – Pocket Circuit shop
- Super Balanced Motor – Pocket Circuit shop
- Ultra Balanced Motor – Pocket Circuit shop
- High Torque Motor – Pocket Circuit shop
- High Torque Motor 2.0 – Beam
- Godspeed Motor – Pocket Circuit shop
- Godspeed Motor Mark II – Complete Substory #56
- Ultra Godspeed Motor – Pocket Circuit shop
★ Collect 20 different gearsA majority of these can be bought at the Pocket Circuit shop after winning each race. A cutscene will occur letting you know whenever new parts are in.
- Power Gears – Pocket Circuit shop
- Power Gears Plus – Pocket Circuit shop
- Extra Power Gears – Pocket Circuit shop
- Super Power Gears – Pocket Circuit shop
- Ultra Power Gears – Pocket Circuit shop
- Balanced Gears – Pocket Circuit shop
- Balanced Gears Plus – Pocket Circuit shop
- Extra Balanced Gears – Pocket Circuit shop
- Super Balanced Gears – Pocket Circuit shop
- Ultra Balanced Gears – Pocket Circuit shop
- Regular Gears – Default
- Regular Gears Plus – Pocket Circuit shop
- Extra Regular Gears – Pocket Circuit shop
- Super Regular Gears – Pocket Circuit shop
- Ultra Regular Gears – Pocket Circuit shop
- Boost Gears – Beam
- Boost Gears Plus – Pocket Circuit shop
- Extra Boost Gears – Pocket Circuit shop
- Super Boost Gears – Pocket Circuit shop
- Ultra Boost Gears – Pocket Circuit shop
- Godspeed Gears – Pocket Circuit shop
- Godspeed Gears Plus – Pocket Circuit shop
- Extra Godspeed Gears – Pocket Circuit shop
- Super Godspeed Gears – Pocket Circuit shop
- Ultra Godspeed Gears – Pocket Circuit shop
★ Collect 20 different framesA majority of these can be bought at the Pocket Circuit shop after winning each race. A cutscene will occur letting you know whenever new parts are in.
- Balanced Frame – Default
- Balanced Frame Plus – Pocket Circuit shop
- Extra Balanced Frame – Pocket Circuit shop
- Super Balanced Frame – Pocket Circuit shop
- Ultra Balanced Frame – Pocket Circuit shop
- Metal Frame – Locker J2
- Metal Frame Plus – Pocket Circuit shop
- Extra Metal Frame – Pocket Circuit shop
- Super Metal Frame – Pocket Circuit shop
- Ultra Metal Frame – Pocket Circuit shop
- Rocket Frame – Pocket Circuit shop
- Rocket Frame Plus – Pocket Circuit shop
- Extra Rocket Frame – Pocket Circuit shop
- Super Rocket Frame – Pocket Circuit shop
- Ultra Rocket Frame – Ebisu Pawn
- Rubber Frame – Don Quijote
- Rubber Frame Plus – Ebisu Pawn
- Extra Rubber Frame – Pocket Circuit shop
- Super Rubber Frame – Pocket Circuit shop
- Ultra Rubber Frame – Pocket Circuit shop
- Speed Frame – Pocket Circuit shop
- Speed Frame Plus – Pocket Circuit shop
- Extra Speed Frame – Mach Bowl: Split Game Reward (5)
- Super Speed Frame – Pocket Circuit shop
- Ultra Speed Frame – Pocket Circuit shop


Won all Pocket Circuit races.
★ Compete in races 10 timesYou will get this if you participate in every single race there is at least once. For most of these tested builds below, do NOT use boost!
★ Win the Introductory Race
★ Win the Little Racer Cup

★ Win the Rookie Race
★ Win the Beginner Cup

★ Win the Amateur Cup
★ Win the Standard Cup

★ Win the Intermediate Cup

★ Win the Advanced Cup
★ Win the Pro-am Race

★ Win the Elite Cup

★ Win the Expert Race

★ Win the Master Cup
★ Win the Champion Cup
★ Win the 2005 King of Speed Cup

★ Beat Hideki

★ Beat Figher

★ Beat Takuma
II. Completion List: UFO Catcher, Photo Booth
★ Acquire 15 different prizesThe new UFO Catcher in Kiwami is more challenging than the one that was in 0. Because the claw is only two-pronged, some items cannot be picked up easily. I suppose it’s a reference to how modern day claw games are a scam. Kiryu sure is feeling those 10 years…
There are two methods you can use: either pick up the toy with the claw normally, OR, knock the toy into the dispenser with the claw. If attempting to grab it normally, pay attention to the shape of the toy. It’s easier to grab areas that are small (ie. a foot), the top of the toy around its head/hat, or around the side of its body.
These are the toys that you can find in UFO Catcher:
- Bunchan the Java Sparrow (White)
- Bunchan the Java Sparrow (Pink)
- Jumbo Bunchan
- Chestnut the Squirrel (Blue)
- Chestnut the Squirrel (Red)
- Jumbo Chestnut
- AiAi
- GonGon
- MeeMee
- Baby
- Woo Papa
- Woo Mama
- Woo-kun
- Kyon-bo
- Kyon-chan
- Kara Kappa
_________________________________________________________________________________
I spy with my little eye Gorogorogoro-chan

★ Get 10 best shots in the photo boothThis is a simple, easy QTE minigame. There are four prompts that appear at the bottom of the photo, each one corresponding to a different pose. Hitting it on time gives you the “perfect pose” needed to get a best shot!
II. Completion List: Hostess Clubs (Minigames)
99 problems and my side gurl ain’t one of them

If you go to MEB, you can access two cabaret clubs, the JEWEL and SHINE. As you spend time with her and answer her questions correctly, her rank will increase. The amount of rank gained is determined by how enjoyable the time was. You’ll want to at least aim for the maximum meter so that each visit will rank her up one whole letter grade. They start off at F and can be increased to A rank. At A rank, you will get their substories. Finishing the substory grants you access to rank S.
For the best possible score:
- Equip a “Shirt” type item (no bandages for you, Kiryu!)
- Always order a drink! You don’t have to get the super expensive champagnes, but don’t be cheap and get the free drink.
- Order food if your meter seems too low. It won’t be necessary using this guide, but if you make a mistake or forgot to wear your Sunday best, you can use this to make up for it.
- Don’t bother with gifts.

Spent a steamy moment with Yui.
★ Complete Yui’s substoryYui is the hostess at the Jewel. She refuses to fall in love with customers. As Kiryu, you can talk to her and learn about her insecurities and problems. Girls got so many problems, Kiryu feels like the hostess here! She will actually reject gifts sometimes so don’t give one to her even if you have one.
Rank Topics
RankAnswer 1Answer 2F“I was in prison.”“At least you’re honest.”E“Men need to consider a girl’s feelings.”“Honesty is the best policy.”D“They’re jerks.”“How about “I love you”?”C“What a weird guy…”“Either”B“That’s certainly possible.”“Bet you’re in love already.”A“You won’t fall in love, right?”“Looking forward to it.”Secondary Topics
TopicAnswer 1Answer 2Taking classes“Cooking class”Plastic surgery“It’s your sister’s choice.”Class reunions“Maybe they don’t like fun.”Buying presents“That’s an old trick.”Toy poodle“The sooner you get him, the better.”Online reviews“You’re not cute.”Picture taken“Just don’t even smile.”Eighteen years old“Do you do that too?”“Challenge accepted.”Emotional movie“Age really matters.”Running late“I’m sorry to hear that.”

Spent a steamy moment with Rina.
★ Complete Rina’s substoryRina is the hostess at Shine. She’s a brand new hostess, finding her place in the world! As Kiryu, you’ll learn more about her and her career choice as a woman who prefers to be with women.
RankAnswer 1Answer 2F“Are you new here?”“You look happy.”E“That’s not really cheating.”“They’re so progressive overseas.”D“Go out with a guy.”“You don’t like yourself.”C“Either”“Am I cute?”B“Don’t be ridiculous.”“What about adoption?”A“Of course.”“Is there someone in particular?”TopicAnswer 1Buying a camera“You gotta spend it to make it.”Trying out different restaurants“Somewhere with tasty ramen.”Karaoke“He ought to sing current songs.”Idol Fan“It’s nice that you can get so close.”Christmas Crowds“I don’t like crowds either.”Forgetfulness“It’s the thought that counts.”Saying Dirty Things“Respond with pervy jokes.”Maid“Do you want me to help?”Host Clubs“How about at okama bars?”Gaining Weight“It’s better to be fat.”

Successfully asked a hostess out on a date.
Once you reach Rank D, if you have a successful session with your hostess of choice, you can ask her out on a date! This doesn’t increase her rank by very much so you only have to do it once. I recommend choosing Mahjong for the next achievement, or karaoke to see their unique songs.

Enjoyed mahjong with a hostess.
Stacks with the previous achievement. You can ask out either Rina or Yui on a date to play Mahjong with you! If you’re unfamiliar with Mahjong, see “Mahjong Tutorial” on the sidebar.
II. Completion List: Gambling, Casino (Minigames)

In progress.


II. Completion List: Darts, Pool (Minigames)

★ Perform 10 hat tricksA hat trick is when you land 3 bulls-eyes in a row. This should be done on Count-Up. Darts can be a little tricky and I feel like sometimes the throws land randomly, but I was able to get more consistent bulls-eye shots by doing the following:
- Hold down the throw button and wait for his hand to hold completely still
- Move the tip of the dart in the position somewhat below the center (sometimes it needs to be slightly to the left as well). Just like the image above.
- Release. May take a couple games for the stars to align.

_________________________________________________________________________________

★ Perform 3 combination shots★ Perform 3 carom shotsFor the best chances of getting combination and carom shots, play 9-ball pool solo. This will give you all the time in the world to line up your shots with no other player to worry about. 9-ball rules state that you must hit the next consecutive ball on the table, from 1-9. You can also purposefully foul in this mode (do not aim at the ball, either at empty space or any other ball) in order to change the position of the cue ball for better angles.
Both shots involve 3 balls: the cue ball and two numbered balls. To make a legal shot in 9-ball, one of those balls has to be the target ball.
Combination Shot

Let’s say you just started a new game, so your target ball is 1. To get a combination shot, you’d have to get the cue ball to hit the 1 ball, so that the 1 ball hits another ball into the hole. In this example, it’s the 3 ball that gets pushed in. +1 Combination shot! This is an easy shot to do if your two balls are nearby a corner, in a straight line so that one can be pushed directly into the other.
Carom Shot

A carom shot, which is much more difficult to do, involves you hitting the 1 ball again, but this time the cue ball bounces off it and hits another ball into the hole. In this example, the cue ball hits the target 1 ball, then hits the 5 ball, which lands the 5 ball in the hole.
So basically, the difference between the two shots is the ball that actually hits the ball that lands in the hole! Combination shot = target ball hits the ball in. Carom shot = cue ball hits the ball!
I personally found it easier to just play solo 9-ball and hit the target ball around the table as hard as I could repeatedly, without trying to land it in a hole. The reason it works is because the more balls there are on the table, the higher the chance that one of them will be knocked into the hole by chance. Remember that by using fouls, you can also set up the shots you want. Just be sure to actually hit the target ball when you go for the actual shot, as if you hit the wrong ball first it’ll be a foul and the shot won’t count even if you performed it right.
You can also attempt to set up a carom shot by using this video method, but you have to be very precise.
II. Completion List: Batting, Bowling (Minigames)

★ Get 10 Two Panel Knock-outsThis is relatively easy to get and should be done on the Hard course. Put the cursor on the corner or edge of the score blocks and hit the ball! You can also get way more points scoring this way as well, highly recommend doing it this way. See the image above for an example: I aimed at the gray corner border area connecting 1, 2, 4 and 5 and hit three in one shot!
★ Get 1600 points on the Easy course
★ Get 1600 points on the Normal course
★ Get 1600 points on the Hard course
★ Get 1600 points on the Extra Hard courseThe trick to hitting the ball is to watch Kiryu’s arms and bat, not the pitcher. In his default animation, he’s moving his bat in circles to prepare for a swing. As soon as he PAUSES, you should hit swing as fast possible! This is a guaranteed way to hit the ball every time if your hand-eye coordination is any good. Ignore the pitcher’s pacing and concentrate on the animation and you’re sure to get this.
There is virtually no difference between the difficulties. The area you have to aim at is different, but this only requires you to move your mouse a little so that the cursor is pointed at the target. In Normal, Hard and Extra Hard mode, if you light an entire set of panels, a small bonus target will appear above them. You will only have one chance to hit the target for a large amount of bonus points. For Hard/Extra Hard, you have to hit this target a couple times.
_________________________________________________________________________________

★ Bowl 10 strikesWhile it is possible to bowl strikes just by rolling the ball right down the center, there is also an alternative way by “curving” the ball that will help you get strikes far more consistently. You can see this alternative way above. This set-up requires you to move to one side a bit, aim towards the opposite side of bowling lane, then spin the ball so that the ball will curve back towards the center.
★ Earn a total of 5 in split gamesFor split games, this method is pretty much necessary to get 5+ frames. The easiest frames to do are for the completion point are: Baby Split, In the Dark, Poison Ivy, Bucket and Picket Fence. The video on the right showcases how to use it in order to win all 10 frames. I’ve copied it and can confirm it works.
II. Completion List: Mahjong Tutorial (Minigames)
100% luck 0% skill 0% concentrated power of will

Just a couple completion points away from 100% and Mahjong is one of them? About to give up because of this stupid minigame? Boi, I am here for you.
Mahjong tends to be the most daunting minigame in Yakuza for a multitude of reasons:
1) the game assumes you already know how to play mahjong
2) you don’t so you look at the help menu. the game does not explain anything.
3) it’s difficult to find information even online on mahjong that actually makes any sense, and plus this isn’t typical Chinese mahjong, it’s the Japanese version
4) the AI is wild even if you try beginner mode games.
Fear not! Your resident Mahjong newbie is here to explain it all in a way that actually makes sense. Because I learned all of Mahjong from scratch, I know your suffering and I will assume you know absolutely nothing about this game.
Mahjong may seem like a difficult game, and like any game it can be incredibly complex at a professional level, but you don’t have to be a neurosurgeon to play Mahjong acceptably well in Yakuza.
First off, think of the Mahjong tiles like a deck of cards. A regular Western deck has suits like Hearts and Spades, in addition to wild cards like the Jokers and Aces.
Mahjong is the exactly same and it has THREE SUITS:
BAMBOO STICKS


DOTS


NUMBERS (JAPANESE)


As you can see, just like the Western deck, each of these suits run from 1 to 9.
The Japanese numbers may require you to look up the number, so I’ve done the homework for you:

Aside from that, there two types of special wild cards, like the Joker, called “Honor tiles.”
The first are called “Winds” and the second “Dragons”
WINDS:


These each have a direction like “East” but you don’t need to actually learn their specific names, just how to tell them apart from the Japanese number tiles and Dragon tiles since they look a little similar.
DRAGONS:


The dragons may look similar to winds, but the winds will always be black and the Dragons come in three colors: “Red” “Green” and “White” AKA the blank tile.
Your goal in Mahjong is to match similar tiles.
Let me reiterate: ALL YOU NEED IN MAHJONG IS PATTERN RECOGNITION!!!
The game’s tutorial shows you lots of fancy hands to confuse you, kind of like how in Poker there are ridiculously lucky hands like a Royal Flush that you will never ever actually experience unless you’re a fictional character or a god.
In fact, there are only 3 simple patterns you need to know to win consistently. Here are the patterns you will ACTUALLY use and should actively look for while playing:
1. PAIR

2. TRIPLET

3. SEQUENCE

Because there are 4 sets of every suit in a game of Mahjong, you can also make quadruplets (4-of-a-kinds), but I found that they’re not worth actively seeking.
To get a winning hand you need:
For example, take a look at this hand:
II. Completion List: Mahjong Tutorial (Minigames) cont.
You can win with this hand, because you have:
- A sequence of bamboos with the numbers 1-2-3
- A triplet of dot with the number 1
- A pair of Japanese 6’s
- A 3 dragon triplet
- A sequence of dots with the numbers 7-8-9
That’s 4 groups of three and 1 pair!
That’s all you need to win the game.
Remember when I said that there’s 4 sets of each suit in the game? Take all those tiles, mix them all up, and split them into 4 different decks for each player.
As you go around the table, each player gets their turn to automatically draw a tile from their own deck. So, if the rng gods bless you with the tiles you need from your own deck, you can win just like that!
However, you can only keep exactly 14 tiles in your hand at all times, so after gaining a new tile, you have to pick one to discard. Once it’s been discarded, you can’t ever get it back.
For example, let’s say you have these tiles in your hand:
On your next turn, your deck gives you this:

Hey, that completes the Japanese Number 1-2-3 sequence! Now you have a decision to make. You have to let go of a tile so that the new one can replace it (can also be the new tile you picked up, but obviously we want to keep that one). But if you mistakenly throw away a tile that could have won you the game later, that’d suck! There are multiple options, such as:
- Discard the lone Wind tile, since even if you got another Wind tile, it wouldn’t do much for you and you’ve already got a couple pairs and potential triplets.
- Discard the Japanese number 9. Even though we have other Japanese numbers, they’re not even close to that 9 to make any kind of pattern, so unless you happen to get another 9 or 8 in there, it may be useless. In Mahjong, 1s and 9s are more difficult to match because they are what’s called the “terminal numbers” – they can only be matched with one set of numbers in a sequence. 1 can only make a 1-2-3, and likewise 9 can only make 7-8-9. Compare this to a 5: you can make 3-4-5, 4-5-6, or even 5-6-7. THAT’S ADVANCED CHINESE PHYSICS.
- Discard the Japanese number 1. This is the one that I would choose, but it might not seem obvious as to why. Now that you’ve picked up a 2 and completed a 1-2-3 combo, that other 1 is now just extra space! It may be possible to get another 1-2-3 sequence in the same suit, but since you already made one, the chance of it happening again is much lower. The only other possible combination would be a 1-1-1 triplet. You’d be betting on the chance that you will get ALL the Japanese Number 1 tiles in the game. It COULD happen, but knowing this game…. nah.
Then, it’s everyone else’s turn! This add and discard process repeats until either someone wins or everyone’s deck runs out.
Here’s an in-game example of what it looks like to win from your own deck:
On the right side there, you can see the option “Tsumo” which will end the match and give you the win. Tsumo is a winning state that means hidden, or “concealed hand”. This means that you only used tiles from your deck and never stole even once.

As other players discard tiles of their own and lay them out on the table, you have a chance to steal that piece as they discard them ONLY IF it makes one of those special 3-tile (or 4-tile) combinations in your current hand! Likewise, other players can steal from your discarded tiles as well.
Both ways are valid, but I highly, strongly, deeply recommend that you stick with drawing from your own pile for the most part if you’re a player just starting out for the first time. Do NOT attempt to steal other pieces until you’re actually comfortable with the game, because it’ll just be tons of suffering. Not only will you lose out on most points/winning hands, but you will also miss most opportunities for the completion points. If you steal, the game gets somewhat more advanced because you have to figure out what kind of hand will win the game for you (the 3 triplet/sequence – 1 pair sometimes won’t work here).
So let’s say now that you’re playing mahjong and you’ve only drawn from your own deck. This is what you have:
You’re ONE TILE away from winning! You only need either a Japanese Number 5 or 8 tile to complete your hand and win! If you’ve been drawing ONLY from yourself (so no stealing), you can activate a winning state called “Riichii.” The game won’t activate for you automatically, so once you see you’ve gotten close to a winning hand, you actually have to press Right Click to see the “Riichii” option appear.
Activating Riichi does not make you win, but it makes winning 10 times easier. Loosely translated, Riichi means something along the lines of “Hey, I’m such a savage, I’m gonna tell everyone I’m only 1 away from winning. I’m gonna bet my chances on that last tile appearing and mcfkcin’ win.” After declaring Riichi, if ANYONE drops a tile that completes your hand – in this case a 5 or 8 – you automatically win and get big d*ck points. In the meantime, your hand will be frozen and the game will go on auto till someone actually does drop the tile you need, the tiles run out, or someone else wins first. Any tiles that get picked up from your deck are automatically discarded unless it was a winning piece.
If the winning tile drops from your own deck, the “Tsumo” option appears.
If the winning tile drops from an opponent’s deck, an option called “Ron” appears. Ron means you stoled that sh*t to win!
II. Completion List: Mahjong CP (Minigames) cont.
Looks into the camera like on the Office

If you’ve played a bit, you may notice that the AI is totally screwy. Sometimes, all 3 opponents will call Riichi within the first 3 turns. Sometimes, you just happen to get a perfect winning hand from the start. It’s all rigged. You just have to be patient and wait for the right moments, or just reload repeatedly till the game decides it’s your turn to win.
Once you’re slightly experienced with Mahjong basics, here are the completion points you need:
★ Go out 10 times
“Go out” means “win”. Win 10 times with any number of points. Obviously, aiming for a higher score is better because there are 2 other completion points tied to getting a high score and they may take multiple tries to get.
Here are the rules you should play with for the easiest experience:
★ Go out with Riichi Ippatsu
As stated before, this is where you declare your hand “Riichii” when you’re one tile away from winning.
Riichi Ippatsu is exactly the same as Riichi, except this time you must win before your next turn. This means that among the next 3 tiles that each of your 3 opponents drop, one of them has to be your winning tile.
This is 100% luck based but I’ve had it happen to me around every 10 games I’ve gotten Riichi, so I believe the rng will lean in your favor if you do it enough times, especially if you call Riichi early before everyone’s already discarded all the tiles you need or taken them for themselves.
★ Go out with Mangan 5 times
Mangan is when you get 5 points after winning. You can sometimes get it on 4 points but only if you have a unique hand, it’s not as common as regular 5. I believe that if you score more than 5 points, you still get credit for a Mangan.
This can be pretty challenging so here is some information on how to make this easier:
In the middle of the game space, there are face-down tiles with only the far left one face-up. This revealed tile is called the “Uradora”, or the tile before the “Dora.”
“Dora” is an extra form of “points”, so to speak. The way it works is that the visible tile isn’t actually the bonus point, but whatever tile comes DIRECTLY AFTER IT sequentially.
So if the tile in the middle is this…
THIS tile will be worth a whole extra point. It will also stack, so getting 3 of that same tile in your deck means 3 more points.The other, face-down tiles usually stay hidden for whole matches but can be revealed when someone announces a 4-of-a-kind. If you’re lucky, having all those Dora stack will boost your score enough to get 5 points even off a simple winning hand. See my image for exactly this.
The order of the Dora is posted in the next tab for your convenience.If you used the rules I recommended, you will also get an additional kind of bonus point tile, called “Red Dora”, named after their literal appearance. The Red Dora tiles will always be the number 5 in a suit and having one in your hand will also net you an additional point.
Both these methods make getting Mangan easier. See the next block for a list of more point opportunities if you’re struggling.


★ Go out with Haneman 1 time
Like Mangan, but this time you need 6-7 points!
This requires you to not only combine Dora AKA bonus tile points, but also have a couple other tricks up your sleeve.Common ways to net additional points:
- Concealed hand – You won by Tsumo and only took cards from your own deck
- Any triplet of Winds or Dragons – 1 point per Wind or Dragon set of 3
- Terminals – All 1s and 9s, and Honor Tiles
- Inside only – Only 2-8s, no 1s and 9s, no Honor Tiles
- No points hand – No triplets or quadruplets. No Honor Tiles.
- All sequences – Only sequences (no three-of-a-kinds) without stealing
- Double sequence – The same sequence with the same suit, without stealing
- Last wall – Win on the very last turn
- Last discard – Win on the very last discard
- Mixed triple chi – Three sequences with the same numbers across 3 different suits (+2 if without stealing, +1 with)
- Full Straight – Complete sequence of 1-9 in a single suit (+2 if without stealing, +1 with)
- All Triplets – Only three-of-a-kinds in any suit

★ Go out with a Full Straight
In my opinion, this is hardest point in Mahjong to get because you can come VERY close to getting a full straight many times, but the game will end either because you ran out of turns or someone else called Riichii and won.
A full straight in Mahjong is getting a complete sequence of 1-9 in one suit, like in the image.
Getting this will not stack well with getting a Mangan or Haneman and you should expect to lose many times because essentially you’ll be giving up a lot of winning tiles in hopes of getting the right ones for the straight.
One method I used to make this faster is change the rules to make the game harder so that the other players would have more difficulty winning.
You can also make a save before starting a match and reload repeatedly in an attempt to get a luckier starting hand. It will be random each time. I find that it’s better to have at least 4-5 unique cards in a single suit. Multiples of the same suit don’t really help as much since with a full straight, you only have room for 1 more triplet and 1 pair.
If you’re confident in your abilities, you may also attempt to win by stealing. Do NOT attempt this if you don’t know what you’re doing. Sometimes opponents will drop the cards you need way more often than your lousy deck, so it can be easier to do it this way. Keep in mind that this means you have to win on your own terms and be aware of what your hand evaluates to.
Stealing Terminology
- Chi/Chow – Stealing to make a sequence of 3. Only works on the player to the left.
- Pon/Pung – Stealing to make a triplet (three-of-a-kind)
- Kan/Kong – Stealing/announcing a quadruplet (four-of-a-kind). Will activate next Uradora.
- Ron – Winning through stealing.
★ Earn a total of 10 million in mahjongKeeping the games short at quarter games will help you keep the profit in games you win so that you don’t lose it in subsequent matches. The top two best performing players both reap most of the reward pool at the end of the game, while the two worst can sometimes even hit negative values. Betting high at the advanced tables if you’re feeling lucky can boost this score, and luckily, the game doesn’t look at net profit. So if you lose 100 million trying to win enough games that add up to 10 million, that’s fine.
II. Completion List: Mahjong Order (Minigames)
Mahjong Uradora and Dora sequencing
Whatever Mahjong tile is being shown in the middle of your screen, the next consecutive tile to the right shown below is the tile that will give you extra points. If the tile is 9 or the last tile in the suit, the bonus point tile is 1 and starts again from the first tile in the set.
II. Completion List: Karaoke, Shogi (Minigames)
[sad tambourine noise]

★ Get 900+ in TONIGHT
★ Get 900+ in Iji Sakura 2000
★ Get 900+ in Bakamitai -Sorrow-
★ Get 900+ in Otometal MY LIFE– Haruka★ Get 900+ in Moment de la Petite Sirene – Yui★ Get 900+ in EURO de x3 SHINE – RinaIn the last three songs, you must pick Lively Interjections in order to get a 900+ score. Oatmeal Otometal MY LIFE can only be sung if you are accompanied by Haruka, so take her with you!
If you’re struggling with hitting the beats on time, you may be in for a rough time because there aren’t any tricks to make it easier. I suggest you try memorizing the song because the notes will line up with the lyrics and beat, and try hitting it SLIGHTLY earlier if you’re just barely missing them. You’re more likely to hit it if you’re ready earlier than later, when the marker has already passed.
★ Win 5 shogi games without a take backShogi is just like chess but with the ability to resurrect pieces you steal and “crown” pieces that make it to the opponent’s side of the board like in checkers. Most of the pieces are the same as well, save for the two Generals and the behavior of some of the pieces. This is a game that I struggled to learn because I was accustomed to Western chess rules. If you wish to actually learn Shogi, please feel free to look up guides about it, as it’s a very simple game to learn but difficult to master and perform well. I found that the Yakuza AI even at lower levels was a bit challenging (possibly because the main audience is Japan, they assume we already know how to play). If you do decide to play it legit, I do recommend going aggressive with your moves as the AI seems to be good at tearing down defense, but not as good at building its own.
For those of you who are like me and only want to get the CP point done, you can do what I did and install a Shogi app on your phone and set the opponent AI to high. Let the opponent in Yakuza move first, then copy whatever they do into your phone and see what the AI does to beat him. For this point, you simply must not use a take back or just disable them altogether before starting the match.
III. Haruka’s Requests


Walked 1km during Premium Adventure while holding Haruka’s hand.
Can only be done in Premium Adventure. You can ask Haruka to accompany you in Serena and NPC-walk through Kamurocho, as running at normal speed breaks her grasp. I believe it took around 20-30 minutes of walking straight up and down Kamurocho 2-3 times. “Even Goro’s Beads” accessory helps here so that thugs don’t continually interrupt you as you’re walking. Best donedone in tandem with the next achievement.

Obtained EX Rank on Haruka’s Requests.

As you complete her requests, her trust rank will increase and she’ll give you certain items.
Here is the list of Haruka’s requests, in order. For certain minigames, she may require you to go to either the secret casino in Kyushu No. 1 OR the casino underneath Purgatory. You’ll know which one is the right area when she stands next to the game table and calls out for you. If you fail a minigame, you must leave the area and then re-enter to try again.
- Protective Amulet – Buy from Don Quijote
- Staminan Royale – Buy from Kotobuki Drugs
- Beef Bowl – Buy from Akaushimaru
- Fruit Juice – Buy Natchan Orange from the Poppo on Tenkaichi
- Dog Food – Buy from the Poppo on Nakamichi
- Oicho-kabu – Earn 300 points in Oicho-kabu. Must be a net difference from the original amount you started with, so if start with 1000 points, you have to end with 1300+. The 10-10-1 Charhm and Trips Yokan item are useful here.
- Ramen – Buy from Kyushu No. 1
- Roulette – Go to the Casino and win 1000 chips. Must be a net difference from the original amount you started with, so if start with 1500 chips, you have to end with 2500+. The Red, Black or Zero Jewel are useful here.
- Wallet – Buy from Le Marche
- Cee-lo – Earn 500 points in Cee-lo. Must be a net difference from the original amount you started with, so if start with 1500 points, you have to end with 2000+. 1-2-3 Gum, P*ss Mountain Stone, All Ones Charm and Trips Yokan can be used here.
- Poker – Go to ♥♥♥♥♥♥ Casino and earn 2000 chips. Must be a net difference from the original amount you started with, so if start with 1500 chips, you have to end with 3500+. The Royal Joker Card can be useful here.
- Darts – Get 200 in Count Up. Try using the bulls-eye hat trick method I showed you above (See Darts section).
- Stone-cooked Bibimbap – Buy from Kanrai
- Shake – Buy from Smile Burger
- Cho-han – Earn 800 points in Cho-han. Must be a net difference from the original amount you started with, so if start with 1000 points, you have to end with 1800+. Even Goro’s Beads and the Lopsided Cigarette are useful here.
- Blackjack – Earn 3000 chips in Blackjack. Must be a net difference from the original amount you started with, so if start with 1000 chips, you have to end with 3000+. Blackjack Amulet and Bust Amulet are useful here.
- Batting – Get 1000 points or more on the Normal Course at the Batting Center
- Carbonara – Buy from Pronto, day menu only.
- Photo – Go to the Photo Booth in Theater Square Club SEGA
- Yakisoba – Buy from Poppo Showa
- Karaoke – Go to Karaokekan and score at least 800 on Haruka’s song. Your song isn’t necessary.
- Sherbet – Buy from Yoronotaki
- Onion Takoyaki – Buy from Gindaco
- Yakisoba Bun – Buy from M Store
- Koi-koi – Earn 1000 points in Koi-koi. Must be a net difference from the original amount you started with, so if start with 1000 chips, you have to end with 2000+. The Lucky Hanafuda Card is useful here.
- MesuKing – Go to Nakamichi St. Club SEGA and play against Haruka. Recommended to have the build I used above in my MesuKing guide.
- Abalone – Buy from Sushi Gin
- Plushie – Go to Theater Square Club SEGA and play UFO Catcher to get the monkey toy
- Bowling – Go to Mach Bowl and bowl three strikes within three frames
- Pool (Four-Ball) – Go to Vincent and beat your opponent at Four-Ball. This can be challenging if you’re unfamiliar with pool. Basically, in Four-Ball you want to hit both of the other balls on the table each turn. See the image for an example.
- Coffee – Buy from Cafe Alps
- Gold Plate – Buy from Ebisu Pawn. Also why… Haruka, just why…
- Baccarat – Go to the Casino and win 4000 chips. Must be a net difference from the original amount you started with, so if start with 2000 chips, you have to end with 6000+. The PLAYER’s Piece and BANKER’s Piece are useful here.
- Pool (Expert Rotation) – Go to Vincent and beat an expert player in Rotation. This is very challenging as the AI has very good aim on Expert mode and will pocket 5+ balls at a time if he goes first. Update: The bug on this stage in which it was impossible to win is now fixed.
It is, however, still the hardest Haruka request. I HIGHLY recommend using a flat edge (like a piece of paper or ruler) and lining up your shots perfectly. With a mouse and keyboard, your ball will 9 times out of 10 go where the line says it will. Topdown view is your friend. Additionally, try to pocket high value balls using combination/carom shots if you get the chance. If the shot is too difficult to pull off (like you can’t hit the target ball at all) try to leave the ball in a place where the opponent AI won’t be able to get off a good shot either.
It took me around 10-15 tries and a lot of patience. I could never get the break shot so if the AI got lucky and landed 30+ points on the first hit, I’d quit and try again (need to leave the bar and return). It’s okay to make mistakes as the AI will too. Pocketing the 10-15 balls makes a huge score difference, so try for them if possible but don’t risk your neck if you have an easy shot! It’s more important to keep a streak because if the AI gets 2-3 turns, he will pocket 5+ balls at a time and destroy your score.
- Karaoke Part 2 – Go to Karaokekan and get 950 on Otometal MY LIFE
- Bowling Part 2 – Clear three splits in a Split Game
- Batting Part 2 – Get 1200 points or more on the Hard Course

III. Climax Battles & Amon


Defeated Amon.
Highly recommended to have Tiger Drop for this boss fight. Amon will have two stages: the first is relatively straight-forward, and he can be killed with Tiger Drop easily as his moves are predictable. He uses a style similar to Dragon Style, except faster. You can also spam Heat Moves on him as you’re building up your meter.
Once he’s downed the first time, he will get up again with a harder version of Majima’s Mag Dog style and becomes much more challenging. Do NOT get caught in his spin move, and that’s a near insta-kill. Tiger Drop is useful here as well, as you can use it shortly after he finishes his spin animation as well as when he’s charging around the area. The whole running animation counts as an attack, so you can Tiger Drop him anytime here, but be sure to be within range.


Completed all of the Climax Battles.
In progress.
III. Legend Mode


Complete the main story on Legend Difficulty.
Start the story again on New Game+. Recommended to bring a stocked inventory on your clear save data before you begin. It is similar to Hard Mode, but you if you die at any point, you will restart at your last manual save. This is pretty trivial as you can save anywhere from the menu now.
Fin.


Obtain all other achievements.
And that’s all she wrote!

Dashi (Kasey)
[link]