Overview
(Jan 5, 2018)This guide explains the different aspects of designing a custom coaster that will wow your guests! Whether you’re new to the game or just looking for some tips and guidelines to improve your coasters, this guide is for you!
Introduction
Updates to this guide are on hold for now as I haven’t really had time to work on it or play the game. Hopefully I can get back to it at some point, but I can’t make any promises at the moment. Hope you enjoy the game and thanks for reading this guide 🙂
Hayo! I’m SirJC17, and I’ve made a guide that aims to help you learn how to build coasters that will thrill your guests. We will start by explaining some important concepts you need to know about before building. Then we will discuss the editor and how to use its wide range of tools. After that, we will discuss important track and design elements of coasters. Then, we will look at some sample layouts to give you a basic idea of how to design your coaster. Finally, we’ll talk about how to set up ride operations.
While this guide can be read all the way through in order, feel free to jump around to sections that you think will be the most helpful to you.
I made this guide because while there are plenty of helpful YouTube videos and similar tutorials online that cover coaster designing, there doesn’t seem to be very many guides or “manuals” of sorts right here on Steam that cover the many aspects of coaster editing (except for @ottologist’s guide, which I have not read beyond a quick skim or copied from in any way, as I don’t like copycatting and think that doing so would be unfair to him/her.) I have seen several people ask questions about how to make a good coaster. I wanted to make a guide that collectively answers those questions and gives people a general idea of what to consider and what to do when building a coaster.
While you read this guide, please know…
- This guide is currently up-to-date with Planet Coaster Update 1.5, minus a few exceptions, which are noted and will be updated asap. You may notice the UI in some screenshots is slightly outdated as this guide was initially published when Update 1.1 was live. No worries! The info is up to date and I’ve replaced some outdated screenshots with updated ones where necessary. I will do my best to keep the guide current!
- I’m not a real-life expert at coaster designing, so this guide is based mainly on my in-game experience and (somewhat limited) knowledge of how coasters work in real life.
If you find any information in this guide that is inaccurate, please let me know in the comments. If your correction is indeed true, I’ll gladly fix it and mention it the “Player-Submitted Suggestions and Corrections” list in the last section of this guide. - The “Special Layouts” sections are a work in progress. All of the other sections that I planned on adding are completed but still subject to minor edits/additions. Planned changes are mentioned in the last section of this guide. If there is a topic that I haven’t mentioned or planned but you think is relevant to coaster editing and design, feel free to suggest it in the comments. I want this guide to be as thorough and helpful as possible.
- I am putting the date of the latest significant guide update (not including minor wording/spelling edits) in the description. Whenever this date changes, please check back to see what’s new!
- You can try out some of the sample coasters used in this guide for yourself! A link to the collection of them is in the last section of the guide.
- Throughout this guide, you’ll see these arrows with circles on one end in some pictures. These indicate which way the coaster would move on the track.
- While this guide attempts to follow realistic guidelines, remember this is just a game. Your coasters probably won’t be 100% realistic and that’s okay. Don’t let realism get in the way of your creativity and have fun while building your coasters!
So with all of that out of the way, let’s get started with some basic concepts you need to know…
EFN Ratings Explained
Excitement, Fear, and Nausea (EFN) ratings are among the most important factors in determining who rides your coasters and who doesn’t. Every individual guest has their own tolerances and preferences for excitement, fear, and nausea. More generally speaking, each demographic (families, adults, teens) has a tendency to prefer different types of rides. Families with kids may look for gentler rides, while teens may go thrillseeking and get on the most intense rides they can find.
EFN ratings are a measure of the amount of excitement/fear/nausea experienced on a ride. They work mostly on a scale of 0-10, but they can go “off the charts” so to speak, ultimately capping at 20. The EFN values are being recorded as the coaster runs its course in test mode. The average values of the ratings throughout the ride determine the final EFN ratings.
Each rating scale is divided into red, orange, and green zones. Below is an explanation of each rating and it’s scale:
How thrilling your coaster is overall. As you may have guessed, the higher the better.
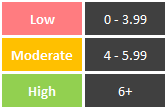
How scary or intense your coaster is. Some fear is good, but it needs to be balanced. Too much fear will scare off potential riders. Not enough may bore them.
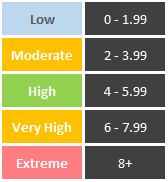
How dizzy/sick riders get on your coaster. You generally want to keep this value as low as possible. Vomiting after a ride does not make those happy amusement park memories you want to keep forever.
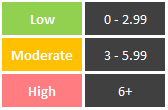
All of the above values are affected by factors such as g-force, inversions, speed, and heights. We will elaborate on each of these factors later on in this guide.
Because of the color-coding used on the rating scales, there is a tendency to think that anything besides “green across the board” is a problem. This isn’t necessarily true. While it’s totally possible to get all green ratings, you’ll find that a lot of coasters, when built fairly realistically, may fall a little short of green excitement and/or fear ratings. Personally, I think that’s a little harsh on the game’s part, but it is what it is. The good news is that a moderately-rated ride can still attract a lot of guests and be very successful. Now when you get red ratings, then you might want to be concerned as those ratings may deter guests and, in extreme cases, render the coaster unrideable (the game will alert you in this case).
Note that throughout this guide, I will use terms like “high” and “low” to describe EFN ratings. I’m talking about how “desirable or “undesirable” the ratings are in general, not the actual values of the ratings. So when I say “you want a coaster with high EFN ratings” I’m not implying that fear and nausea ratings should be through the roof.
G-Forces Explained
G-force is the amount of force being exerted on an object in a particular direction. Every unit of g-force (which is called a G) is equal to an object’s weight on Earth. So if a person weighs 150lbs/68kgs, then 1G (which is the natural force of gravity) is 150lbs/68kgs of force. 2Gs is 300lbs/136kgs of force. Likewise, 0Gs is 0lbs/kgs of force (free-floating, not being pulled in a given direction). Feeling the effects of g-force when going over hills, down drops, and around turns plays a big role in the making of a roller coaster’s ride experience. There are 3 types of g-forces that are important when building coasters.
Positive g-force is the downward force exerted on the body. As you sit and read this guide, 1G of positive g-force is being exerted on your body. More than 1G of force makes you feel heavier than usual. Riders will feel like they’re being pushed down into their seats. It is typically experienced on a coaster when the train reaches the bottom of a hill or starts to climb a hill.
Negative g-force is the opposite force — an upward force being exerted on the body. This force gives riders the feeling of weightlessness or being lifted out of their seats. Negative Gs are usually experienced when a coaster train crests a hill. Also known as airtime.
Lateral g-force is the sideways force exerted on the body. This force makes riders feel like they are being slung to the side. It is typically felt when going around curves.
NOTE: G-force directions are relative to the rider’s current orientation, not the ground. Also keep in mind that gravity contributes 1G of force in whichever direction the ground is, relative to the rider.
Choosing a Track Type
You decide that your park needs a new coaster. You take a quick look at the landscape and find a nice spot for one. You open up the “Coasters” tab and stare at your choices… Now what? Well, different track types lend themselves to different layout options. There are a few questions to ask yourself:
- Which types of coasters can I afford? (irrelevant in Sandbox mode)
- Which demographic(s) is this coaster targeted towards?
- How big do I want this coaster to be? How much space do I want it to take up?
- Do I want this coaster to interact with the terrain/scenery?
- Which seating position do I want (above-track, inverted, wing, flying, etc)
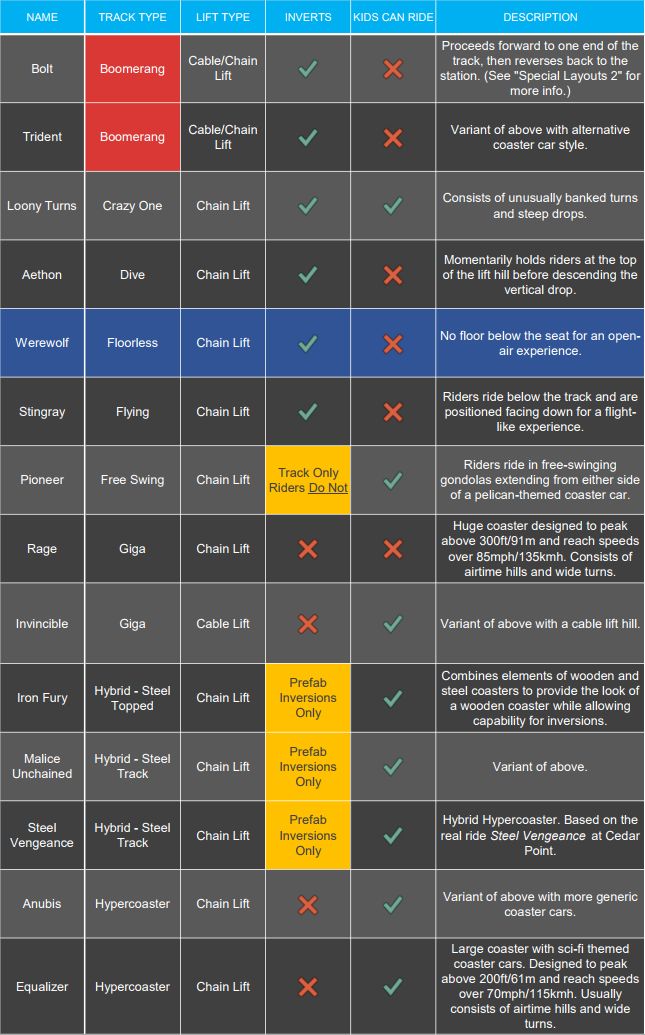
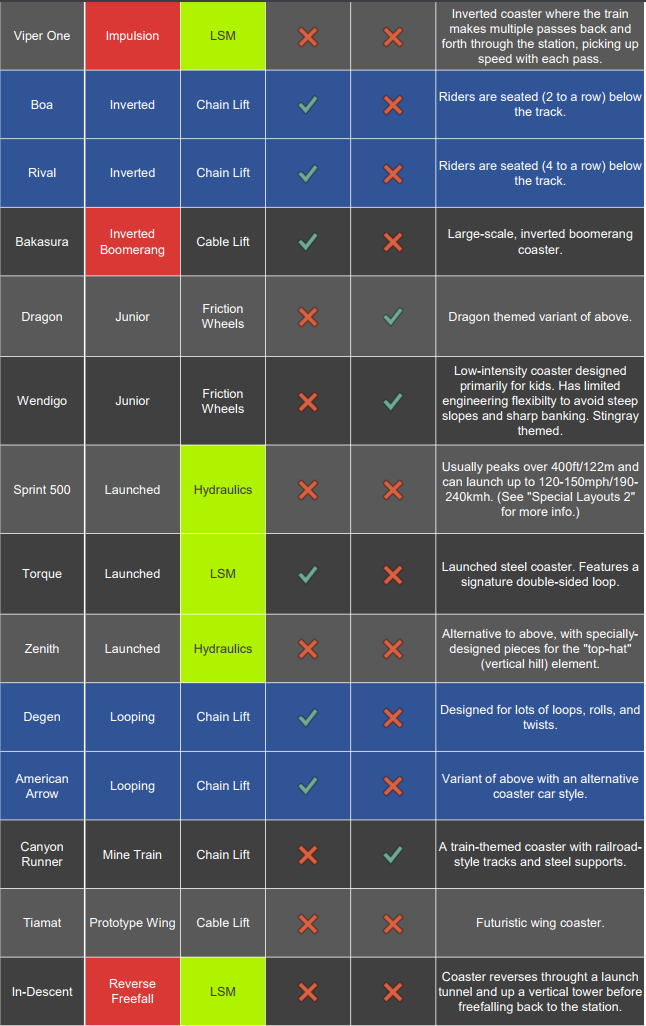
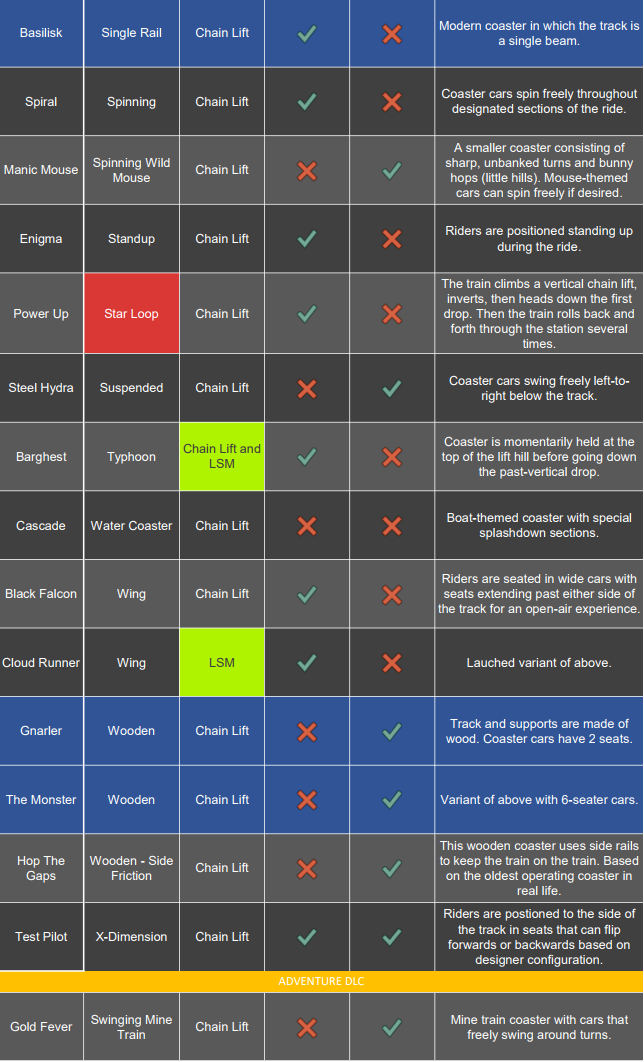
In-game, you can hover over a track type to see some basic info about it. But if want a quick rundown, here’s the complete list of the 42 coaster types currently in the game and basic information you need to know about each type:
NOTES:
- Coasters listed in blue are what I refer to as “standard coasters”. These coasters are the most generic in terms of layout, style, seating, and engineering flexibility. If you’re building a coaster for the first time and don’t want anything too special or complicated, try one of these!
- Track types written in red are bi-directional coasters. You CANNOT build these as typical full-circuit coasters! They won’t work properly if you do.
- Lift types listed in light green are launched options.
Coaster Editing 1: Editor and Testing Tools
Now that you’ve picked a coaster type, it’s time to get building! The coaster editor has a large array of tools and options that allow you to bring your dream coaster to life! Trying to explain every single tool and option in detail could be a guide in itself. I’ll cover as much as I can. The rest should self-explanatory and pretty straight-forward.
There are 2 ways to open the editor:
- Select a track type from the Coasters tab and place a station.
- Click on an existing coaster and click the ‘Edit Track’ button in the ride info panel (it’s the second button from the left on the bottom).
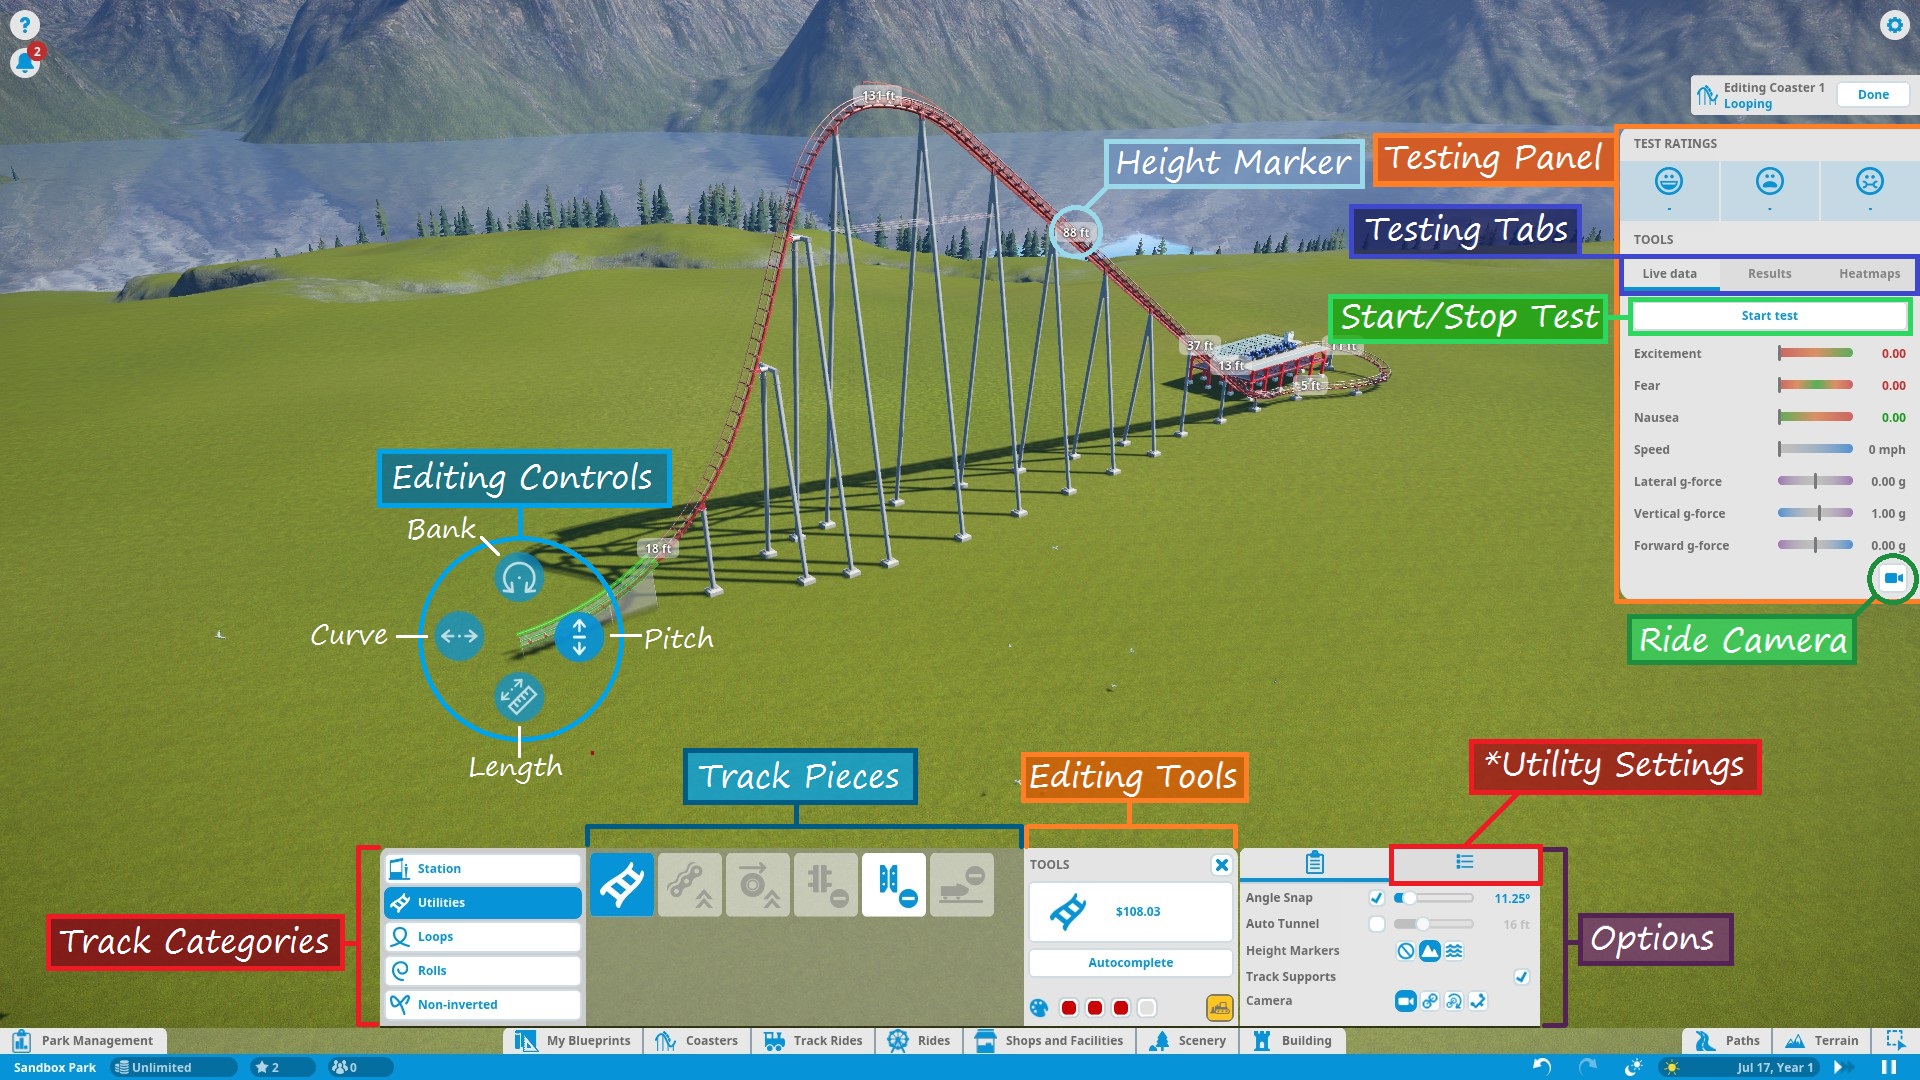
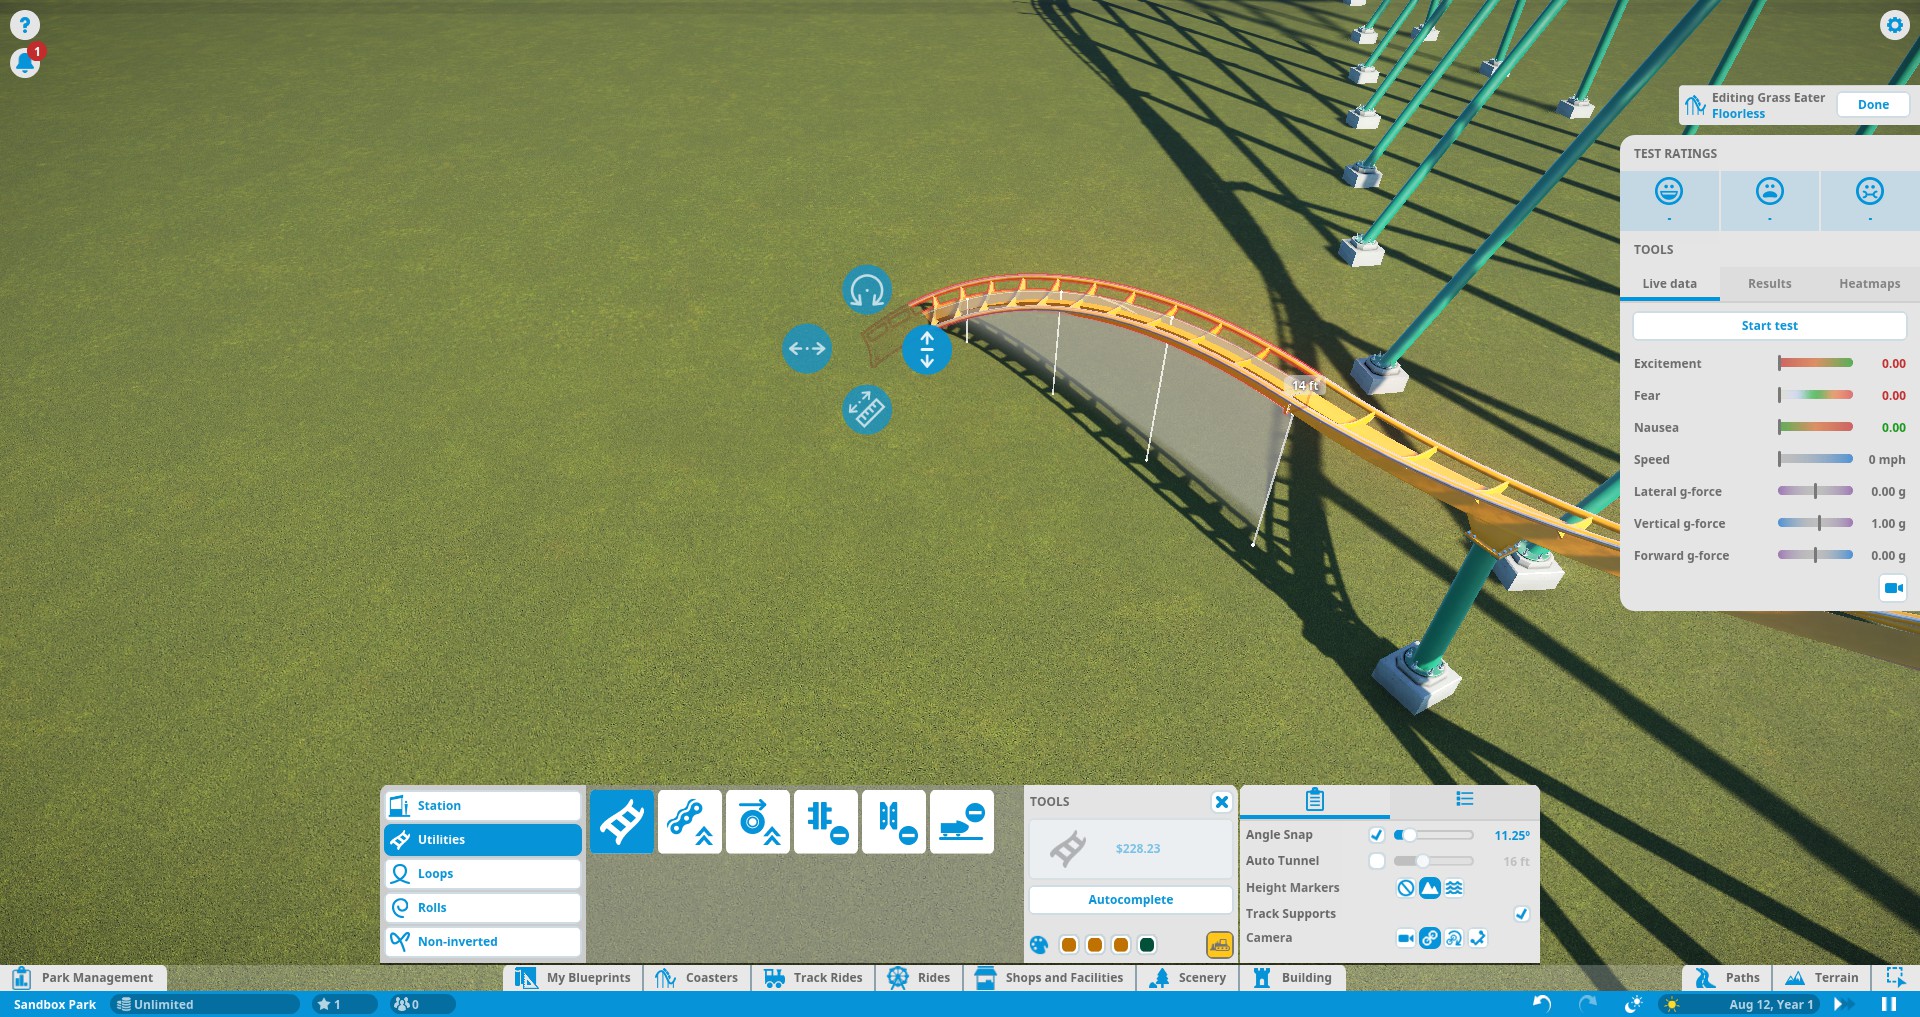
Here’s a rundown of the labeled parts of the screenshot above:
All of the track parts and pieces fall into one of the five categories:
- Stations (choosing the entrance/exit sides)
- Utilities (standard track, lift/launch mechanisms, and brakes)
- Loops (predefined vertical loops and loop variations)
- Rolls (predefined twists and other non-loop inversions)
- Non-Inverting (predefined track segments that do not bank more than 90 degrees)
NOTE: Loops and Rolls will not appear if the track type you’re working with does not allow inversions.
Shows all the available track pieces for a given category. All the various pieces outside of “Utilities” don’t really need individual explanation. Utility pieces are explained in their respective sections later in this guide.
Buttons that assist in track building:
- Build Button – Shows the type of track piece you’re building and its cost. Click to build the previewed track piece.
- Delete Button – Yellow bulldozer button in the lower-right corner. Click to remove the currently selected track segment from your existing track.
- Autocomplete – Attempts to connect the track back to the station (or fill in a gap between existing track segments) using standard track. Be careful when using this tool! Autocomplete attempts to find the simplest route, not necessarily the best. Also, note that autocomplete will not consider modifying the terrain to find a solution. If you’re building an underground tunnel and try to autocomplete the track, it will fail.
- Color Swatches – Allow you to choose the colors of the track piece you are currently editing. See “Ride Customization” for recoloring the entire coaster.
This panel features 2 tabs each with options to fine-tune editing and track pieces.
In the ‘Settings’ tab, you have:
- Angle Snap – Locks the track editing controls to specific angles. Check the box to turn angle snap on for simpler and more consistent building. Uncheck the box to turn angle snap off for complete control and precision.
- Auto Tunnel – Automatically digs a tunnel when building a track into the terrain. Use the slider to set the tunnel width.
NOTE: Occasionally, if you leave this option on when building close to the ground or water (but not into/under it), the game may tell you that the track piece is “obstructed” even though it isn’t. Try turning off auto-tunnel to fix this. - Height Markers – Markers along the track that inform you of the track’s elevation either above the ground or sea level, depending on which option you choose. You can turn them off altogether as well.
- Track Supports – Turns track supports on or off. No, your coaster isn’t going to fall apart if it doesn’t have supports. They are purely aesthetic.
- Camera – Choose how the camera moves as you build, or if it moves at all.
The ‘Utility Settings’ tab has options specific to track pieces in the ‘Utilities’ tab. I marked this one on the diagram because I will refer to it several times throughout the guide. Options like catwalks, chain/launch speed, brake settings, etc. are found here.
Allow you to modify the shape of a track piece before building it. Simply left-click one of circular buttons and drag in the appropriate direction to modify the track. Here are the control functions, starting from the top and moving clockwise:
- Bank (twist) Left/Right
- Slope Up/Down
- Lengthen/Shorten Track Piece
- Curve Left/Right
When building a predefined track piece you are given a different set of controls:
- Resize Larger/Smaller
- Angle Left/Right (relative to the last placed track piece)
You can also select existing track sections (usually a selection of two or more track segments) and adjust their shape/position using yet another set of controls:
- Move Left/Right
- Raise/Lower
- Bank Left/Right (not applicable to predefined pieces)
- Resize Larger/Smaller (predefined pieces only)
- Rotate Left/Right (predefined pieces only)
Gives you all the stats on your coaster as you are editing. Press the “Start Test” button to load up test dummies and take them for a spin! The test will repeat until you stop it with the “Stop Test” button or leave the editor.
At the top of the test panel are the EFN ratings. The train must complete a full circuit before these stats can be determined. Any time you edit the track, the results are cleared and have to be recalculated.
Under the EFN ratings are 3 tabs:
- Live Data – Displays data as the test train travels around the track.
- Results – Displays stats after the test train has completed a full course.
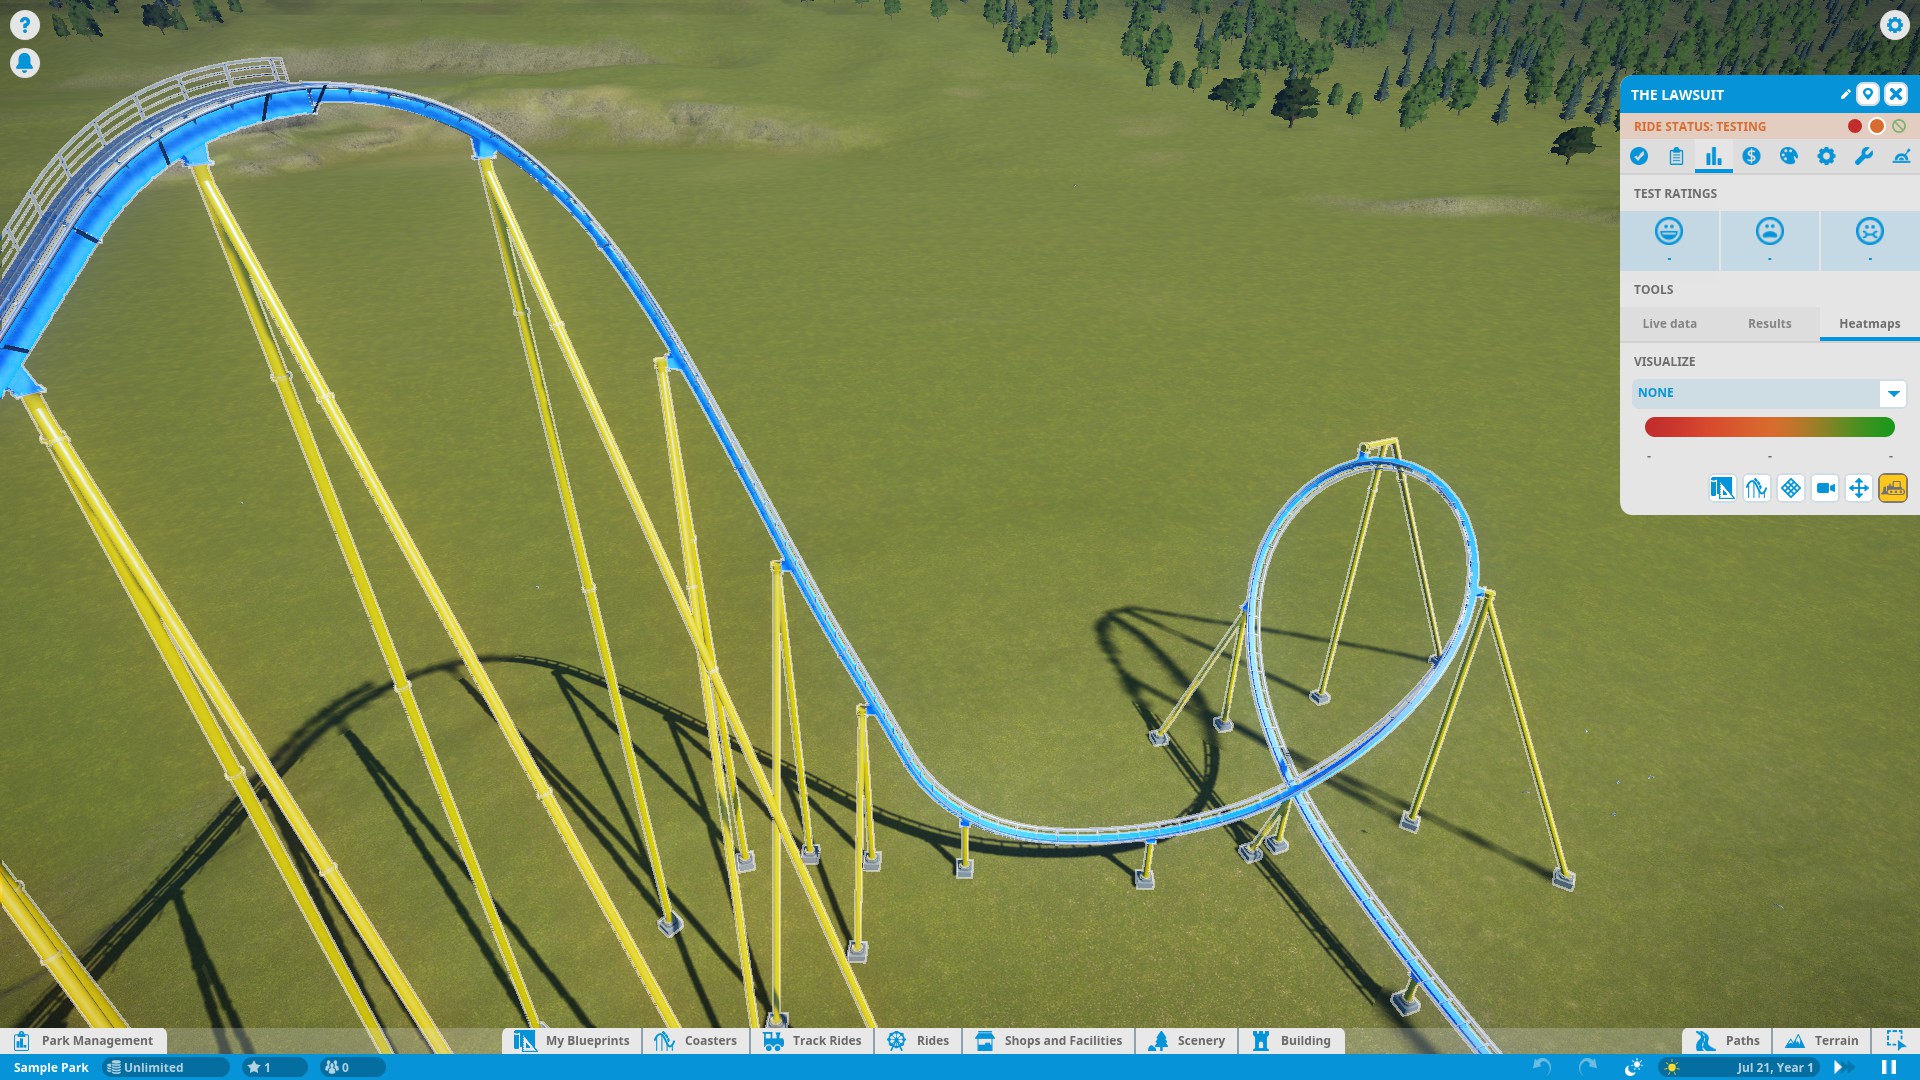
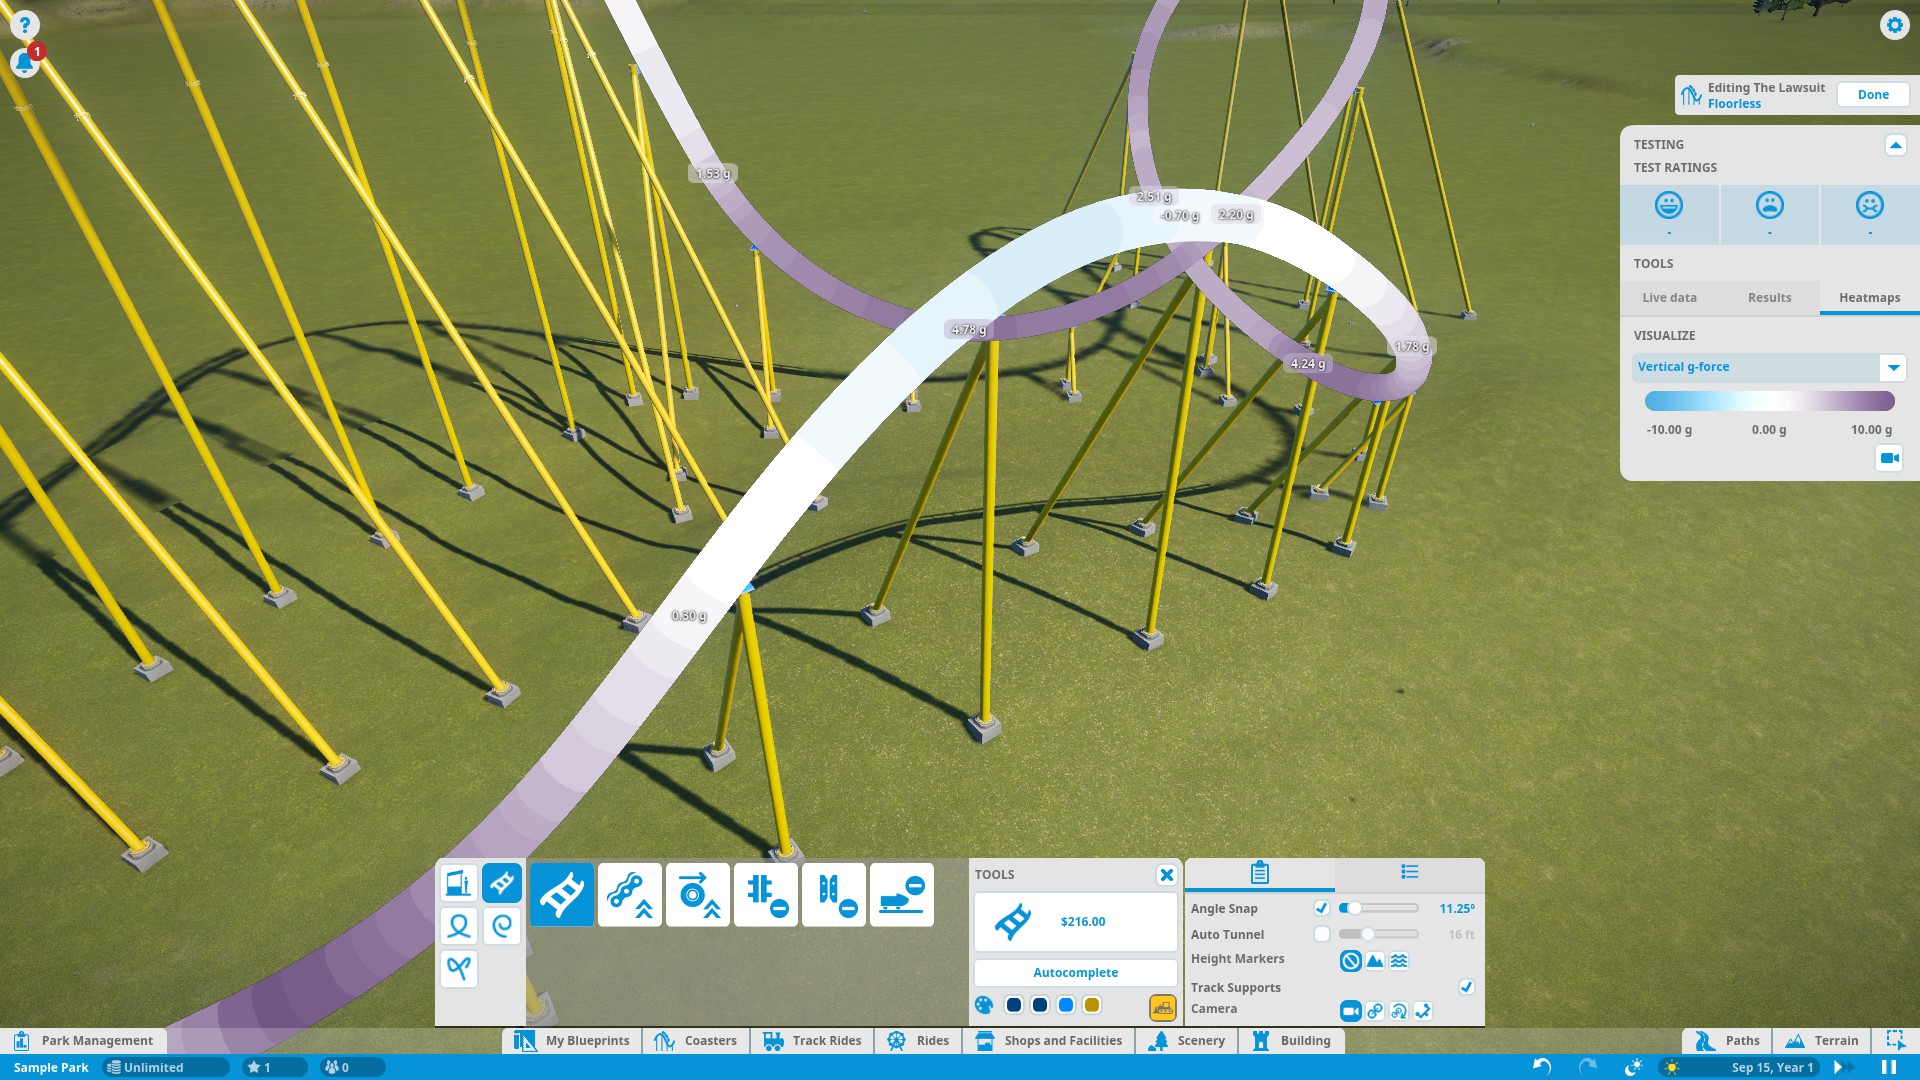
- Heatmaps – Takes live data and uses it to create an overlay on the track so you can see how the data changes over the course of the ride. Useful for finding sections of your coaster that may need improvement. As of Update 1.3, you now have an option to choose between “Live Data” and “Previous Run Data”. “Live Data” draws the heatmap during a test in progress and clears the heatmap at the start of each test. “Previous Run Data” creates/updates the heatmap at the end of each test.
Finally, in the Testing Panel you have a ride camera. This lets you hop onboard and experience your own creation! From a editing perspective, the ride cam can help test for rough spots in the track and test trigger timing (discussed later) to make sure riders get the experience you want them to have. And, of course, it’s sometimes just fun to ride what you build! Just be careful if you’re the type who gets queasy easily. The simulation may suddely become way too real way too fast.
NOTE: Test coasters will crash if the track isn’t complete. In an open and operational park, the derailed test trains may plow through your crowds of innocent guests! The guests don’t seem to mind this though and actually celebrate once they get up off the ground. Living in an E-rated game must be very pleasant…
Coaster Editing 2: Building and Editing Tracks
Now that you know what everything does, let’s talk about how to make tracks!
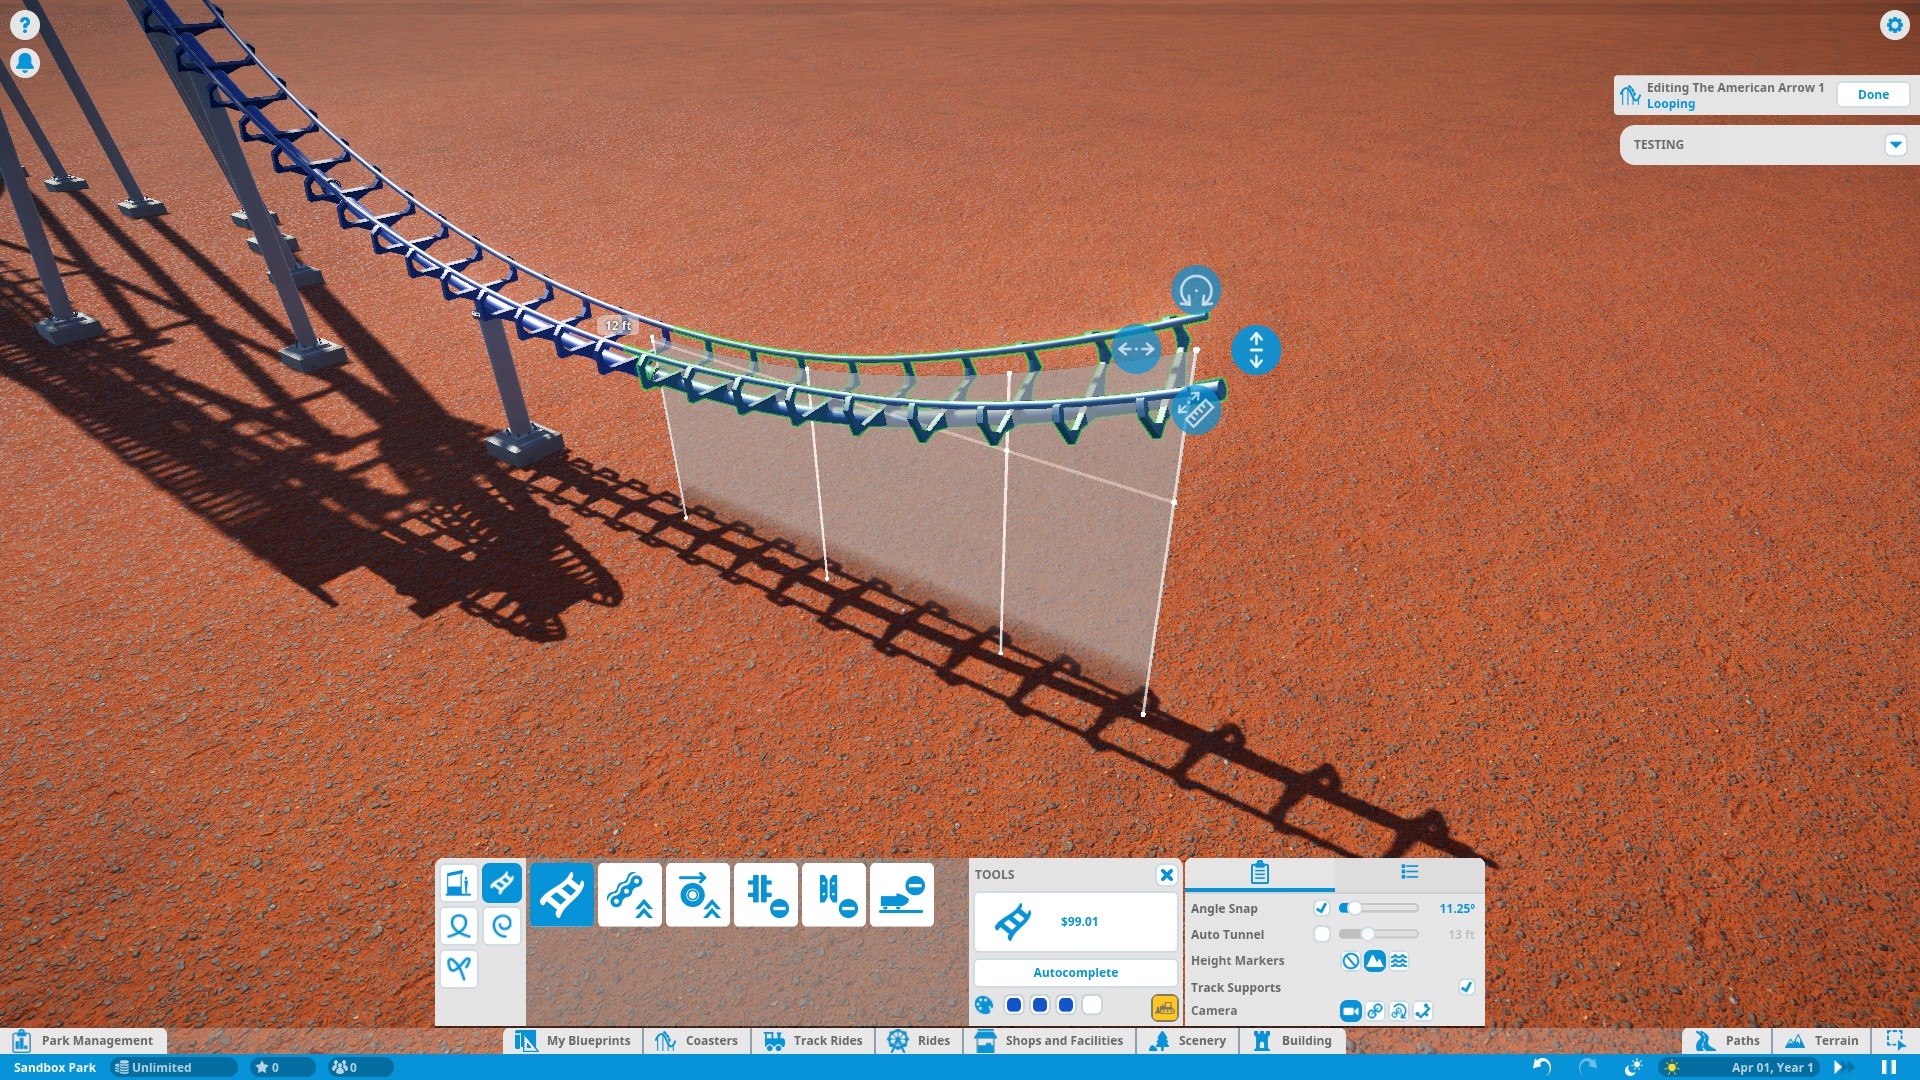
When adding a new track segment to your coaster, a preview of the segment will be highlighted green. By default, the previewed segment will have the same shape/configuration as the previous track segment unless an obstruction is present, in which case the previewed segment will conform to dodge the obstruction. The track will highlight red if you a) attempt to build through an obstacle/terrain with collisions (game setting) turned on, b) exceed track engineering limits, or c) don’t have enough funds to build the track piece.
The process for building the track is easy enough:
- Select the desired track piece from the list of available pieces, if it isn’t already selected.
- If necessary, use the editing controls to shape/resize the track piece.
- Left-click anywhere within the playing area to place the track segment. Alternatively, press the enter button or click the ‘build’ button in the editing tools panel.
- Repeat steps 1-3 as necessary.
If you’re building tracks and want to remove the last placed track piece, right-click anywhere in the playing area. POOF! It’s gone. Alternatively, you can press the delete key, click the ‘delete’ button in the editing tools panel.
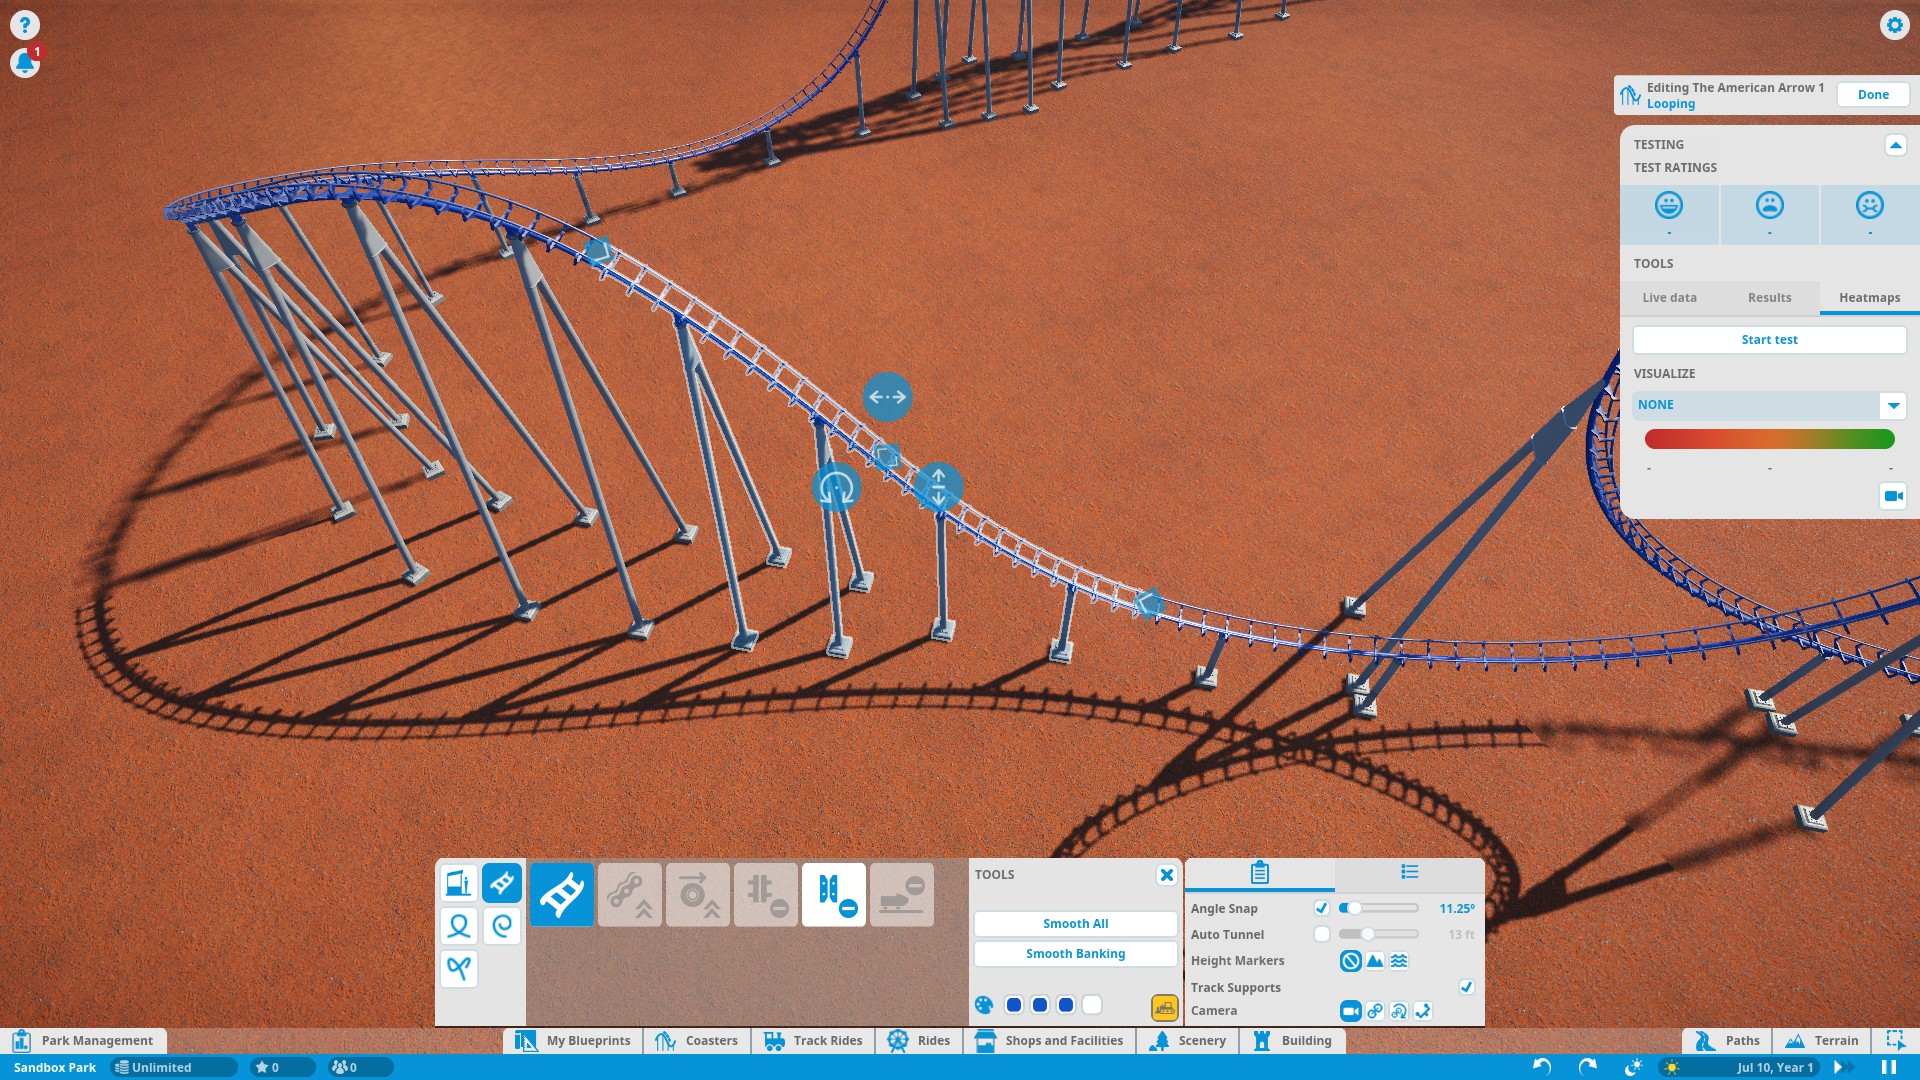
To modify existing tracks, click on an existing track segment. You usually edit in sections of two or more whole segments, so the game will sometimes automatically select a segment adjacent to the one you clicked on. Click and drag the little diamond markers (pictured above) to add/remove segments from your selection. From there you can…
- Use the editing controls to modify the selection.
- Right-click to delete the selected track. Alternatively, you can press the delete key or click the ‘delete’ button in the editing tools panel.
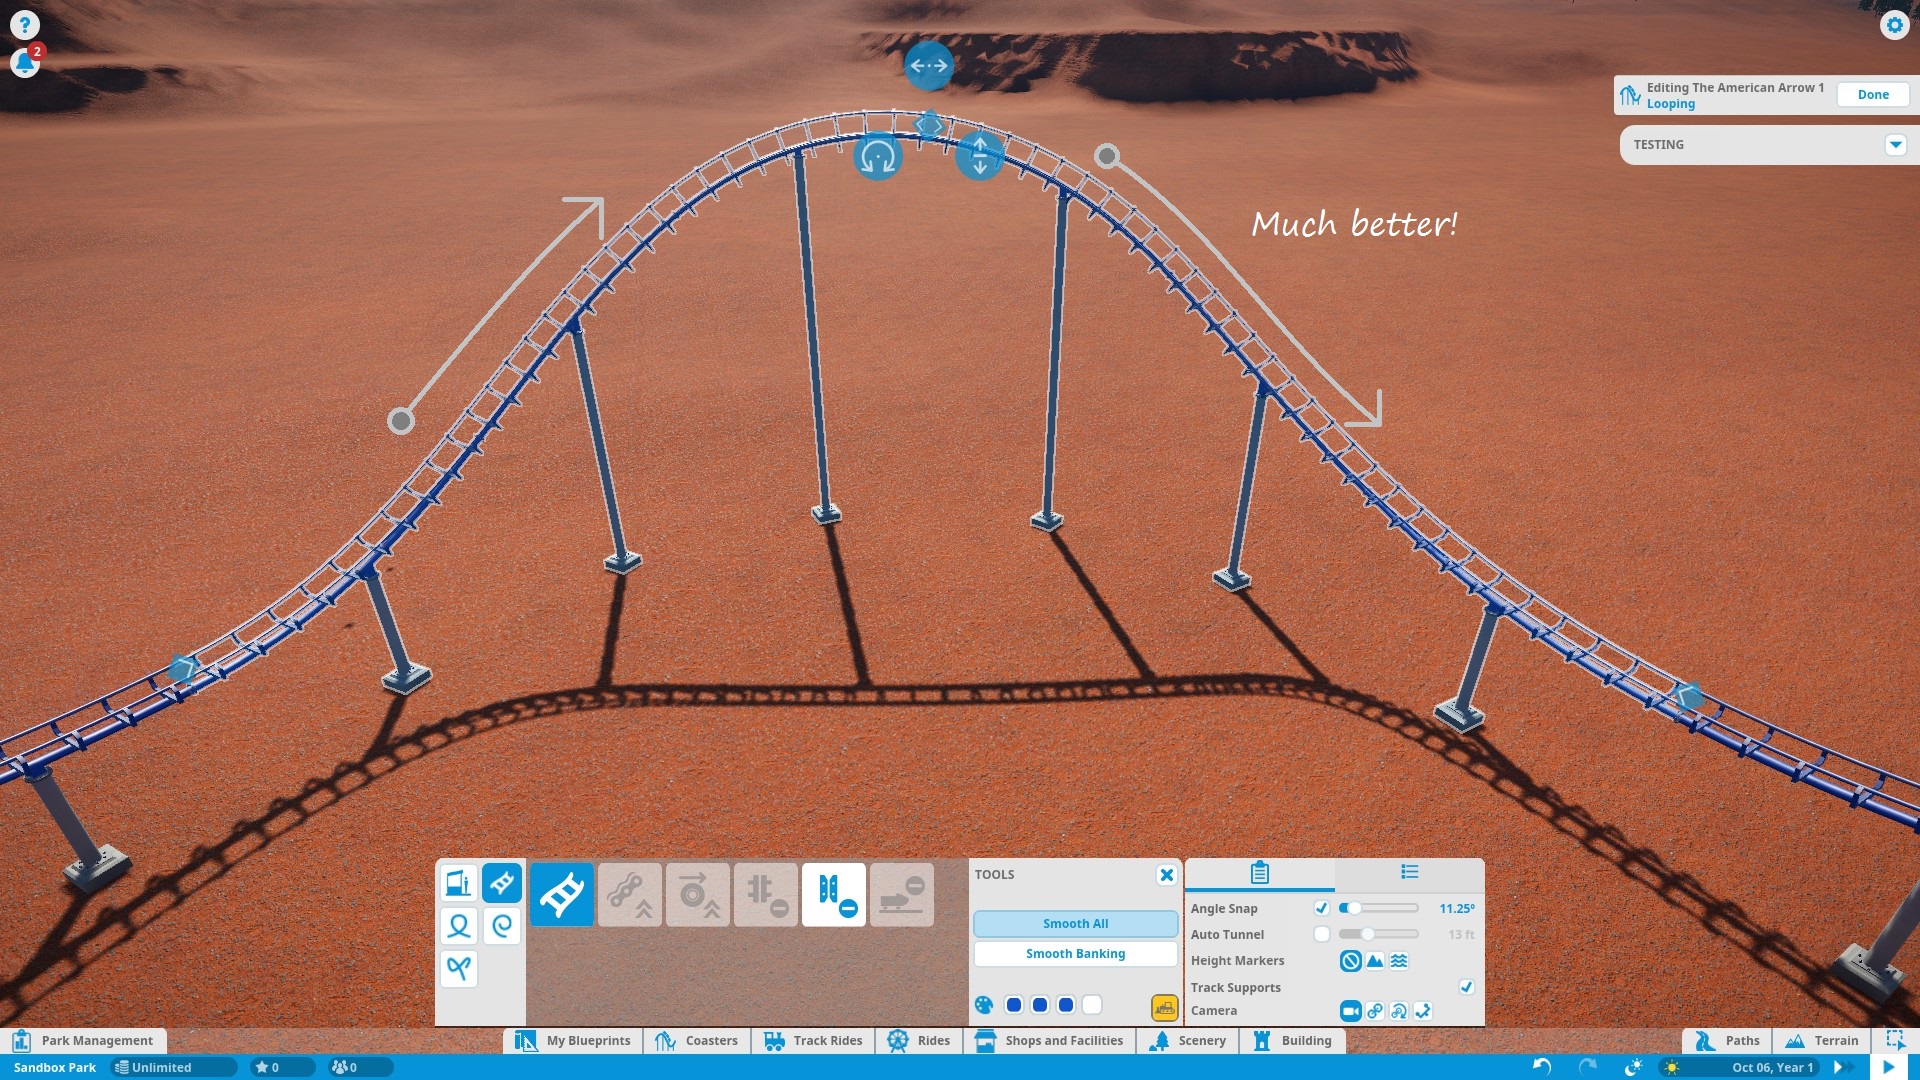
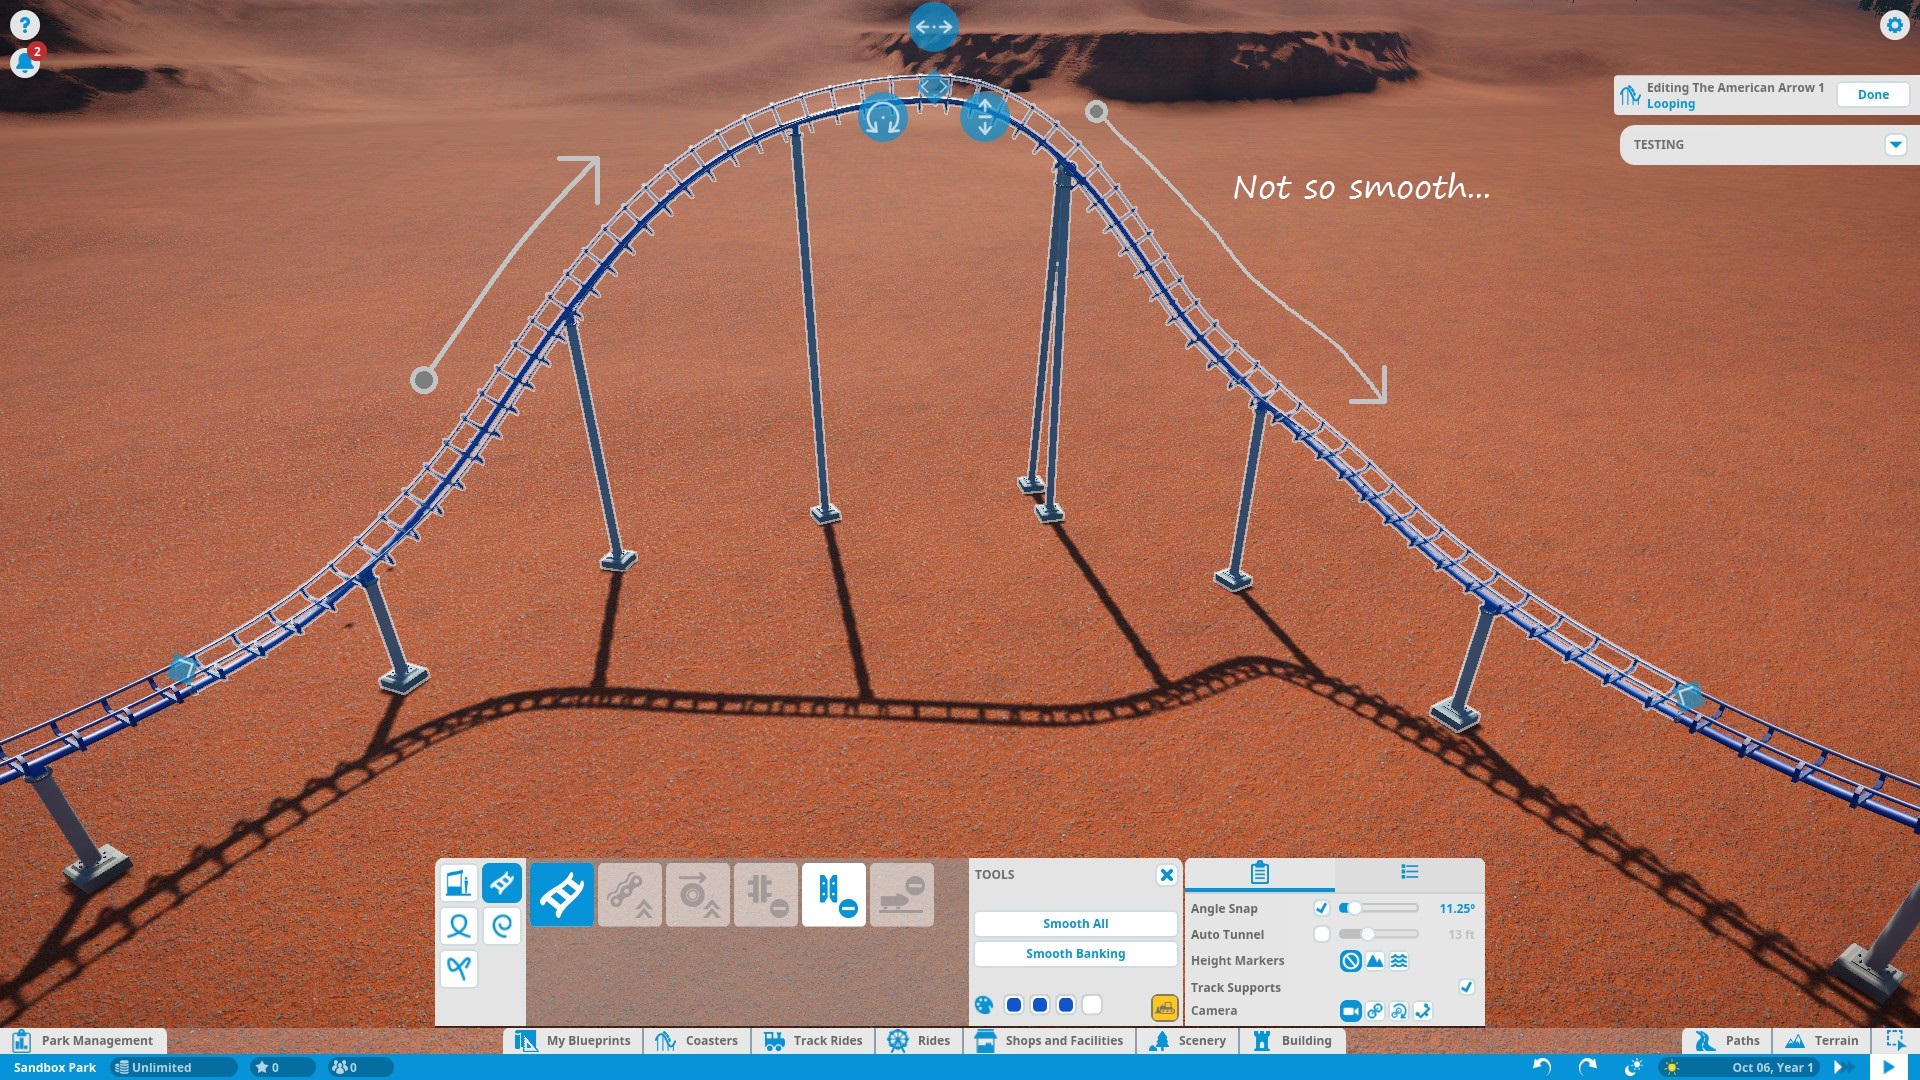
Keep in mind that the smooth tool does NOT affect prebuilt track sections or pieces adjacent to them. Also, beware that selecting and smoothing large sections of track may not give you the results you expected. Common side effects of track smoothing (particularly in large segments) include tightening of curves, un-inverting custom inversions, and odd, gradual banking on straight pieces of track (usually leading into or out of a banked curve). For best results, smooth out the track in small sections.
NOTES:
– When editing coasters, any obstructing scenery must be manually removed before building a track there. If you’re okay with guests smacking into tree branches, rocks, buildings, etc. you can turn off collisions in the game settings. Of course there are good reasons to do that too.
– You can use CTRL+Z and CTRL+Y to undo/redo your last modification. This applies to pretty much every form of building and editing in the game.
Stations

Finding a nice place for a station can leave you in a coaster-building equivalent of writer’s block. While there are no definite rules about station placement, here are some guidelines that will help you pick a good station location (pardon the cheesy rhyme, I couldn’t help myself…)
- Choose a spot that is accessible by path. Preferably, you want to choose an area that is relatively level and clear of tracks, scenery, and other potential obstructions. Otherwise, you may have to build a wonky-looking queue and/or exit path to dodge obstacles and get back to the main path.
- Try to place the station relatively close to a main path. Guests may not be willing to make a 1/2 mile trek down a trail through the woods just to get to your coaster. I you have to make a 1/2 mile trail, you may consider adding other rides, shops, and facilities along the way to give guests other incentives to walk that way.
- In most cases, you want to keep the station relatively low to the ground. Raising the station above the ground is common, but going too high just means you’ll have to build a lot of steps (which is also not very appealing to guests) going up to it. And depending on your track layout, the track may end in an uphill section that the train may or may not be able to climb, depending on the train’s speed. Keep in mind that a chain lift or other assisted lift hill (other than maybe drive wheels) at the very end of a ride is not very common and is generally considered to be a poor/tacky design element.
By default, the station is long enough for 1 default-sized train. You can expand the station to allow for longer trains.
If the train does not have an adjustable length (i.e. the spinning coaster) then a longer station will allow more trains to be held in the station. Note that in this case, only the foremost train will be loaded and unloaded. The trains behind it will not be loaded or unloaded until they are at the front of the station.
It’s best to decide how many cars per train you want and set the train to that size before you start building. This way you can design the coaster to work with the larger/smaller train size (see “Ride Operations” for more info on train size.)
When building the station, you are given a choice as to which side of the track both the entrance and exit points are on. Ideally, you want to arrange the entrance/exit to provide the fastest passenger loading/unloading times. Although it is reasonable to think so, guests will not enter and exit the ride at the same time even if the entrance and exit are on opposite sides. One advantage of using opposites sides is that guests can walk directly to the exit. When using the same sides, guests must walk to the front of the station to get to the exit gate.
When it comes to the actual placement of the entrance/exit along the side of the station, the placement can affect boarding efficiency.
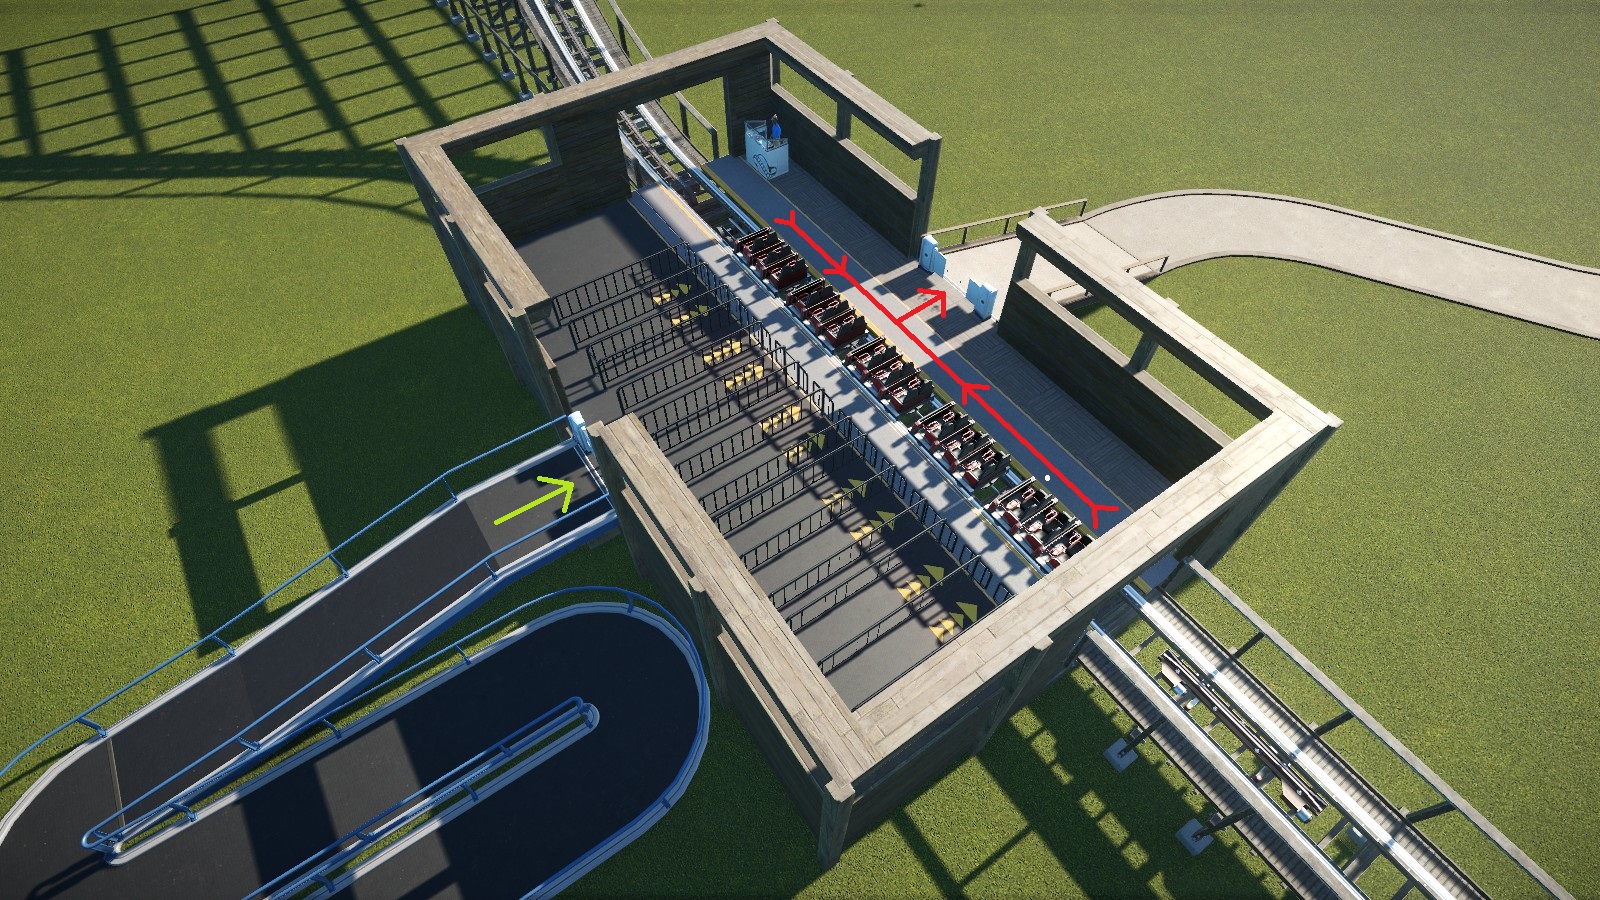
If the entrance and exit are on the same side, place the exit near the front (since this is where the exit line is) and the entrance a short distance behind that (in front of the entrance lines). The green and red lines show where the guests will walk when boarding/unboarding, respectively.

If the entrance and exit are on opposite sides, place them both near the middle of their respective sides, so that front-seat and back-seat riders are an equal distance from the entrance/exit.
Finally, in case you were wondering, you can only have one station. You cannot have multiple stations for loading/unloading and you cannot have a loading station and a separate unloading station.
The station has two utility settings: exit speed — the speed at which the train gets pushed out of the station, and entry speed — the speed at which the train get pulled into the station at the end. If train exits the station immediately onto a chain lift (discussed below) then you will want to set the station exit speed to match the chain speed. Otherwise, the train will either get shoved onto the chain lift or pulled out of the station faster than intended, depending on which speed is set higher. The same principle applies to entry speed and a preceding brake segment. This is a small adjustment that doesn’t really affect much in-game, but it makes your coaster just a little bit more life-like.
If your station isn’t directly connected to a chain or brake segment then the exit/entry speeds are pretty much up to you. The default speed of 9mph/14kph is usually fine in this case.
Chain / Cable Lifts and Drive Tires
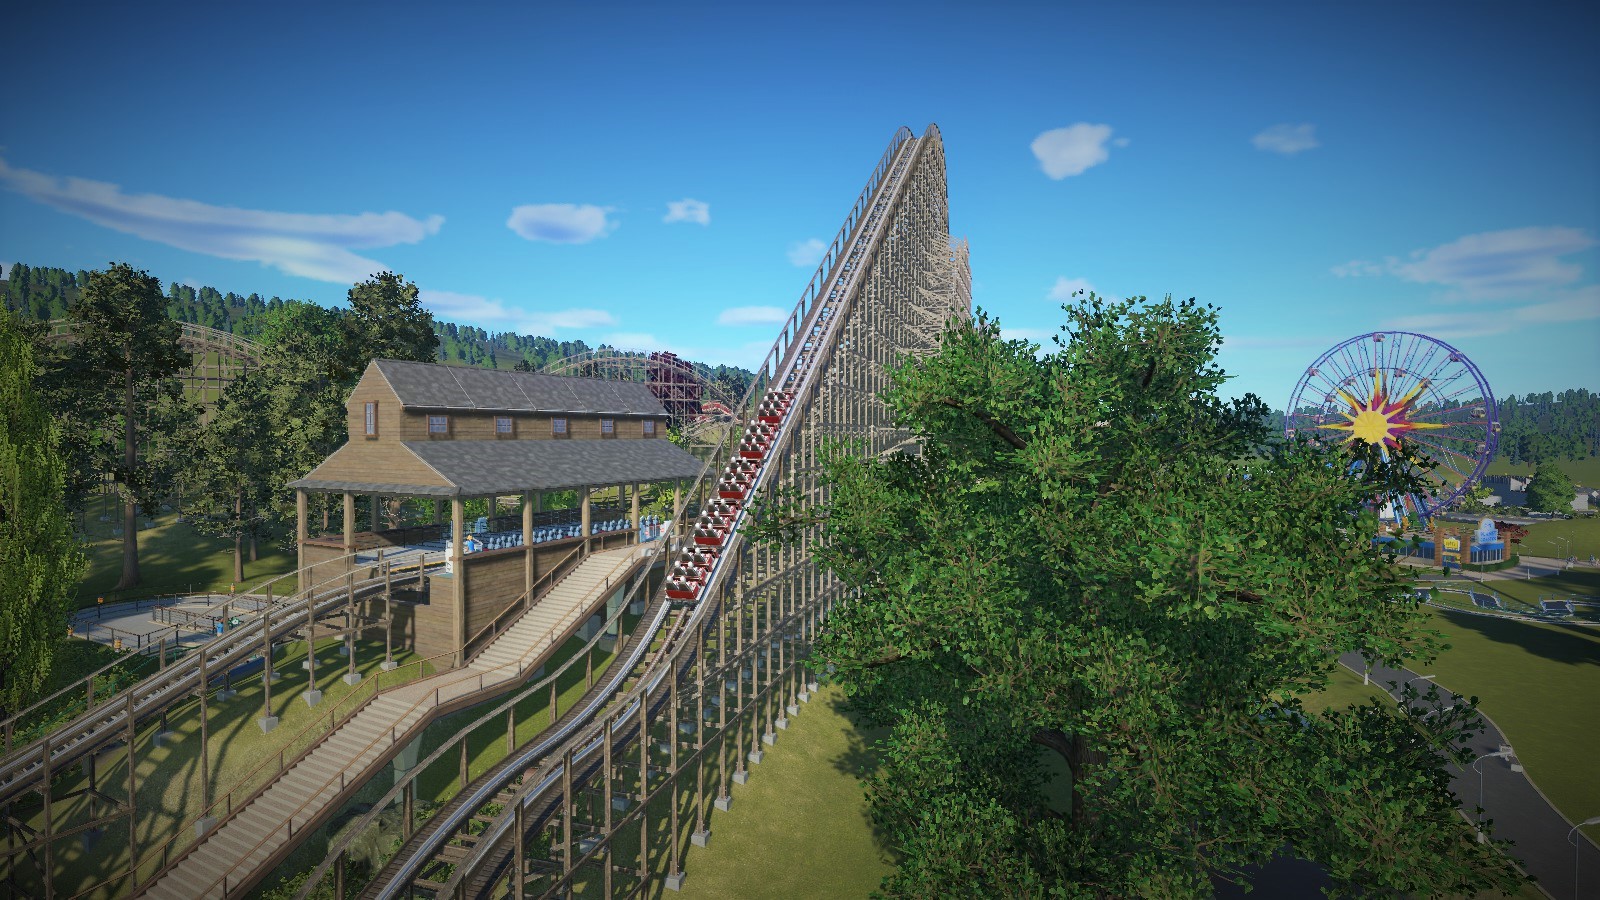
Coaster trains have no motor to power themselves along the track. They rely on gravity and mechanicisms on the track to stay in motion. The train gets an initial low-speed push out of the station. This initial push won’t give the coaster nearly enough speed to make for an exciting ride. So how do we achieve the speed needed to make a roller coaster complete the circuit? One way is with a chain lift hill. A chain lift hill is a large hill (the largest one on the coaster in fact that has a motorized chain going from the bottom of the hill to the top. The train latches onto the chain, which carries it to the top, then it detaches from the chain and gravity takes over as the train head down the first drop. The hill is usually placed immediately after the station, but sometimes there is a small (10-20ft/3-6m) drop and maybe a curve or small series of curves between the station and the bottom of the lift hill.
The chain moves at a speed somewhere between 4-14mph/6-23kmh. Most move less than 8mph/13kmh in real life.
Cable lift hills have the same basic principle as chain lifts. The difference is that instead of the train latching on to a continuously spinning chain, it latches on to a catch mechanism that carries the train to the top and returns to the bottom for the next train. You can think of a chain lift like a “coaster escalator” and and cable lift like a “coaster elevator”. Cable lifts are faster than chain lifts (with a top speed of 17mph/27kmh) but are only used with a handful of coasters in-game.
- Most standard-size coaster lift hills are between 120ft-200ft/36-60m tall. The average speed of the train at the bottom of the first drop should be somewhere between 50-70mph/80-115kmh. Any slower and the train might not make it around the track with reasonable speed (if it makes it around at all.) Any faster and it will become hard to keep the g-forces within reasonable limits unless you make everything unusually large.
- If the coaster is smaller than average (i.e. junior, spinning, sometimes wooden, etc.) then the lift hill is usually between 75-120ft/23-36m tall. The top speeds of these coasters usually stay within 35-50mph/60-80kmh.
- Hypercoasters and Giga coasters are designed to be large and fast. Hypercoasters peak between 200ft-299ft/61-91m, and giga coasters peak between 300ft-399ft/92-122m. These coasters normally reach speeds of 75-95mph/120-155kmh.
- It’s unusual to have more than one chain/cable lift hill on a single roller coaster. You should plan on using one lift hill at the beginning and relying on gravity do the rest after that.
- While allowed in-game, chain lifts are almost never curved.
- While it doesn’t really affect anything in-game, it’s generally considered bad design for the train to “tear up” the chain by approaching it at excessive speed. You want the train to approach the lift hill at roughly the same speed as the moving chain.
Both lift types allow you to control the lift speed. This choice is mostly up to you. Just remember that EFN ratings are going to be low on the lift hill, and if the time it take to climb up the hill is excessively long, the coaster’s final ratings will be negatively impacted. Usually, you want to clear the lift hill in 30 seconds or less.
Cable lifts have an additional setting the chain lifts don’t have — return speed. This determines how quickly the catch mechanism gets back to the bottom of the hill after carrying a train up. Just make the sure the speed is set fast enough so that the catch mechanism is back at the bottom before the next train approaches.
Drive tires are designed to push the train along a section of track at low speed. They are not a lifting mechanism nor are they speed boosters! If you attempt to use them as such on your coaster, the ride experience will be awfully disappointing. Drive tires are only meant to keep the train from fully stopping on level or minimally sloped track due to loss of momentum, such as the section of track between the main brake section and the station.
Powered Launch
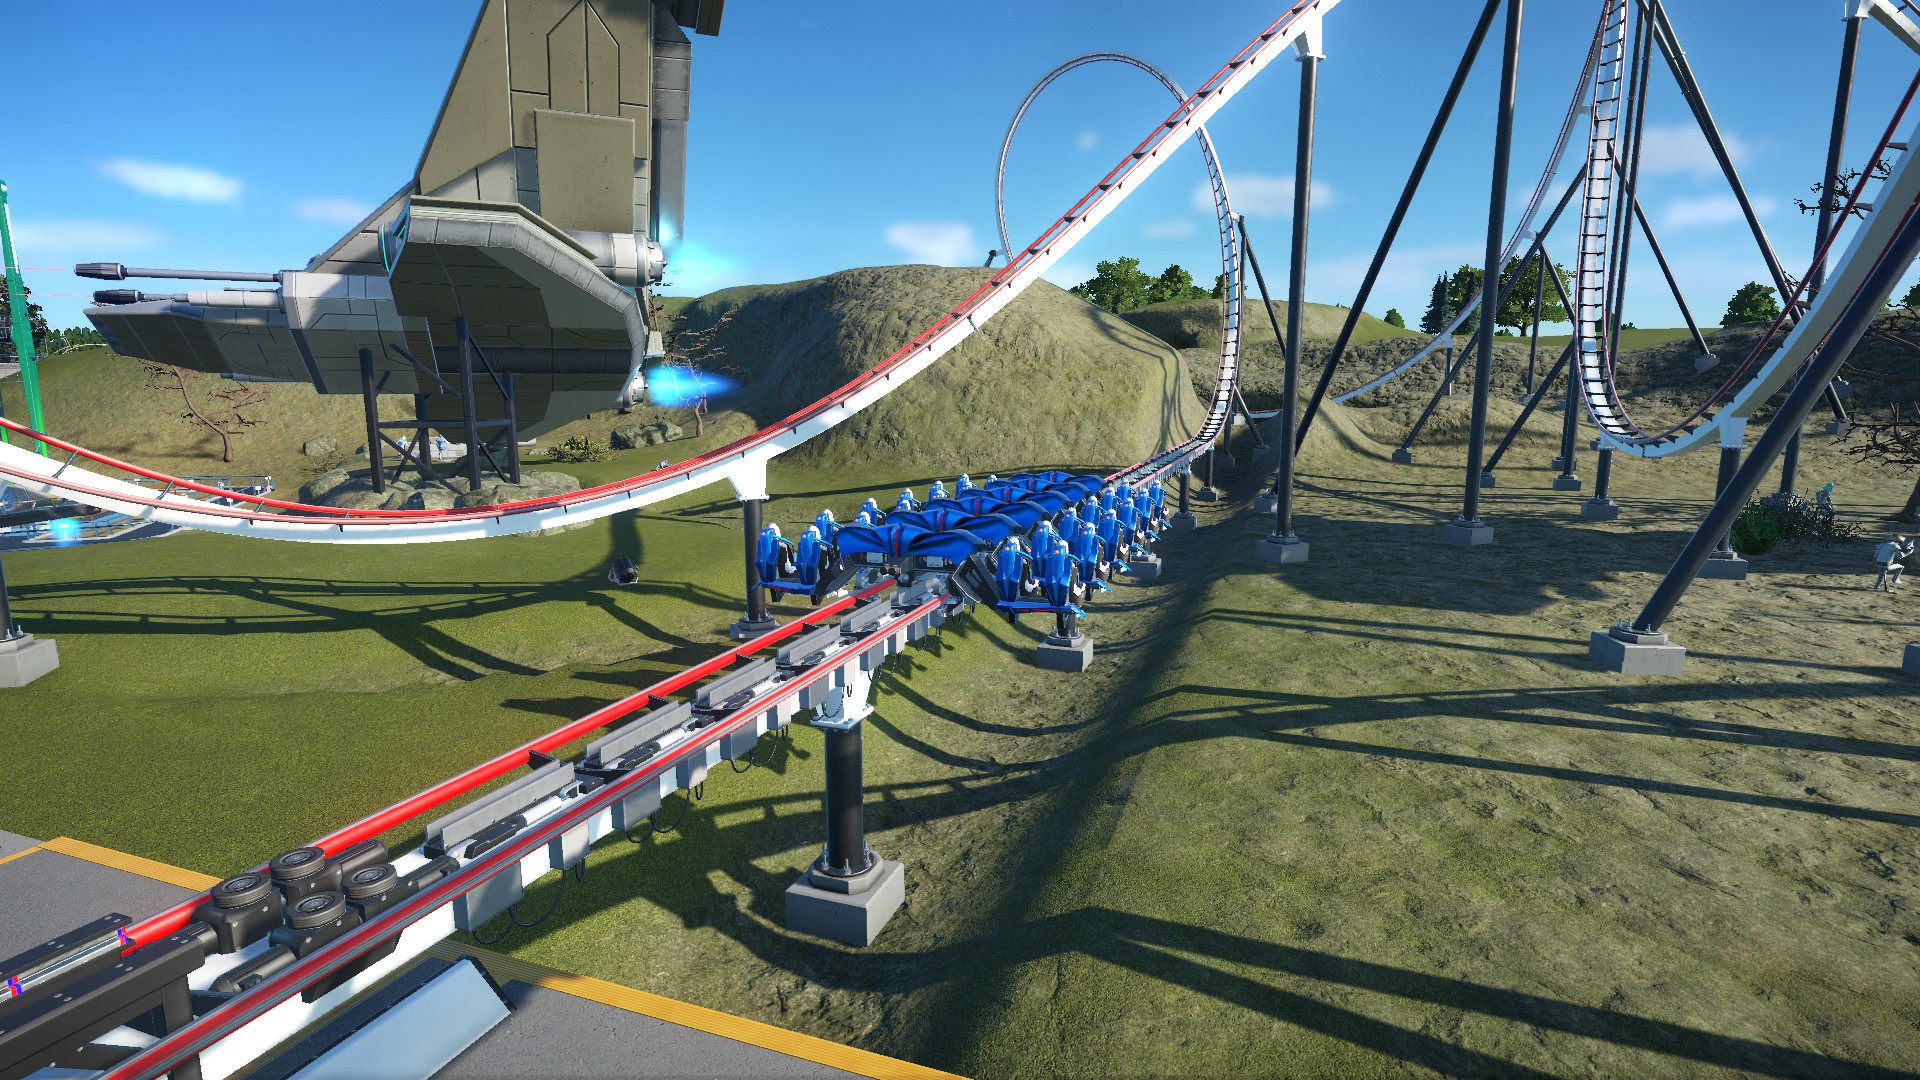
Sit back, look straight ahead, and hold on tight for this one! This alternative to the chain/cable lift gets your coaster off to a MUCH quicker start. Powered launch replaces the typical lift hill with a long, straight section of track. Mechanisms on this section of track accelerate the train to its max speed in just a few short seconds. This speed can be anywhere from 65mph/105kmh all the way to 175mph/282kmh, depending on the coaster type. Most launched coasters don’t usually surpass ~80mph/130kmh, but the world’s fastest launch coasters launch between 120-150mph/192-240kmh! Launch sections don’t take up as much vertical space as a chain lift, which is useful when building coasters underground or in a tight space. Launch sections also eliminate the slow climb before picking up speed. Because launched coasters don’t naturally need a “big drop”, a large vertical hill sometimes follows the launch section. Other times, a loop or some other tall inversion usually follows (as pictured above.)
Controlling High G-Forces and Track Banking
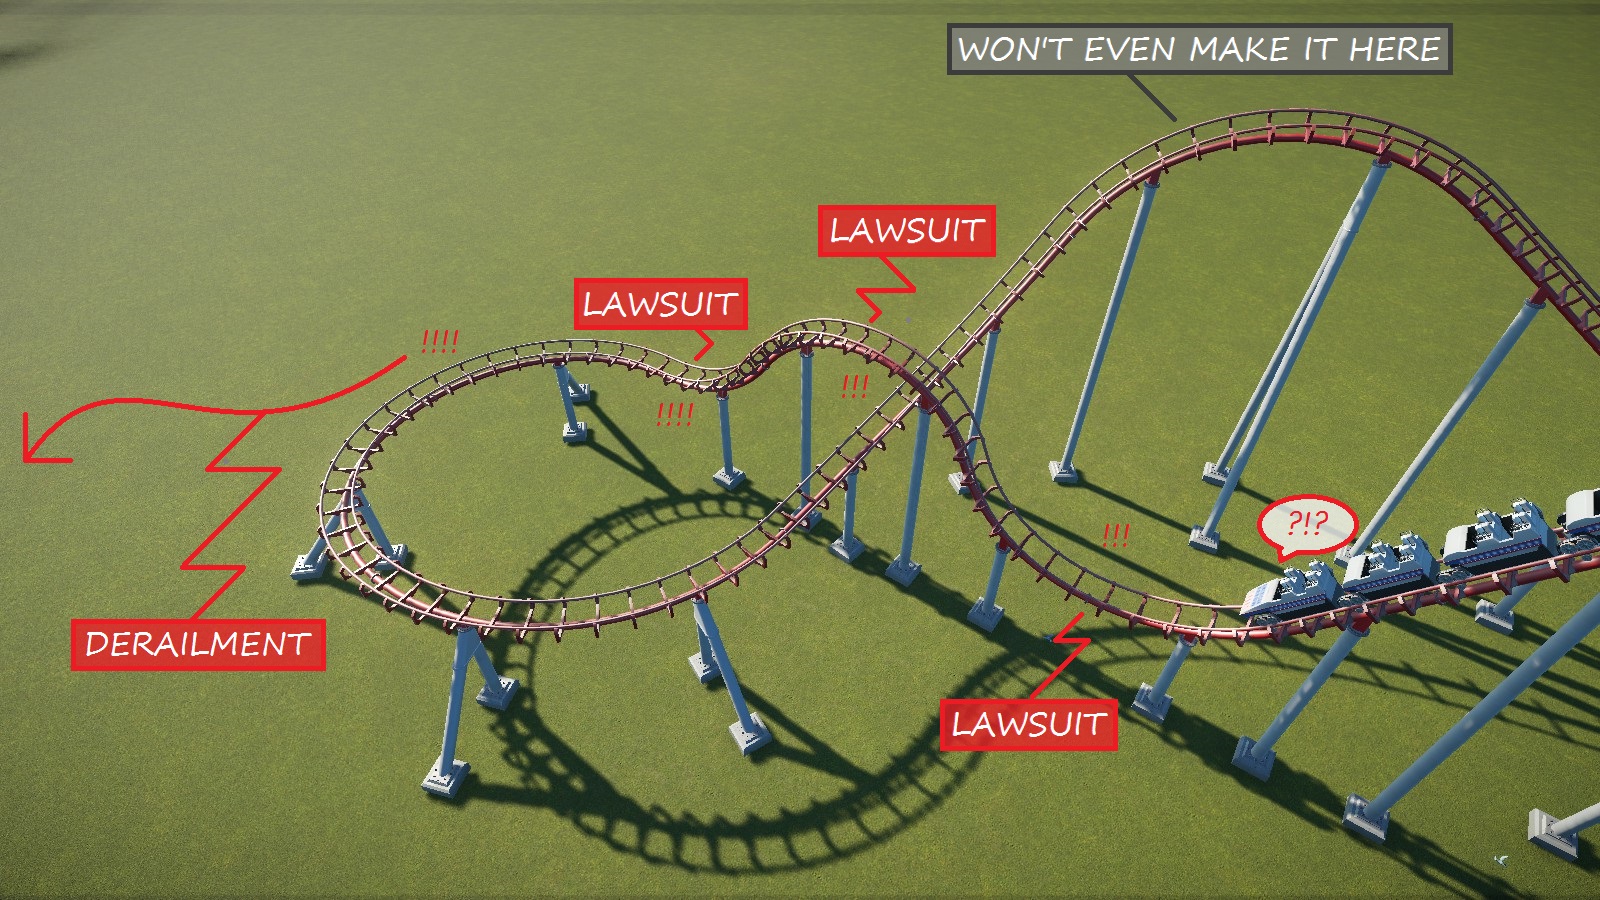
High levels of g-force are a highlight among most roller coasters, and pushing the limits of the human body’s tolerance to g-force is something to strive for when designing one of these beasts. But is it possible to go too far? Yes, it is. Extended exposure to extreme g-force can lead to serious injury, which in Planet Coaster, is represented by high amounts of fear and nausea (being an E-rated, family-friendly game and all). It could also theoretically overstress and damage the train and track, which Planet Coaster translates into frequent ride breakdowns.
So how far can you push these limits before lawsuits start coming your way? Well, here are some general guidelines for g-force limits in coaster designing that real life coasters tend to go by:
- The upper limit for positive g-force is about +6Gs. However, most coasters keep it at or below +5Gs. After about +4.5Gs or so, some riders may experience a blackout (which is brief and harmless under normal circumstances) due to the blood in their head rushing to their feet. At +6Gs or more, riders may experience back/neck injury (remember a person weighing 150lbs/68kgs has 900lbs/408kgs of force being exerted on them at +6G!) as well as blacking out. That kind of force doesn’t usually make for a good day.
- Humans are a lot less tolerant to negative g-force. The limit is about -2Gs, but most coasters don’t exceed around -1G. Any more than that will cause too much blood to suddenly rush to the head, which also doesn’t make for a good day.
- High lateral g-force is more uncomfortable than harmful, as long as the rider is tightly secured in his/her seat. Generally, you want to keep lateral Gs below 2 or 3.
So now that you know what is generally considered to be acceptable, how do you keep g-force within that range? Firstly, you should know what causes high Gs in the first place. High amounts of g-force are caused by quick, sudden changes in the direction of travel.
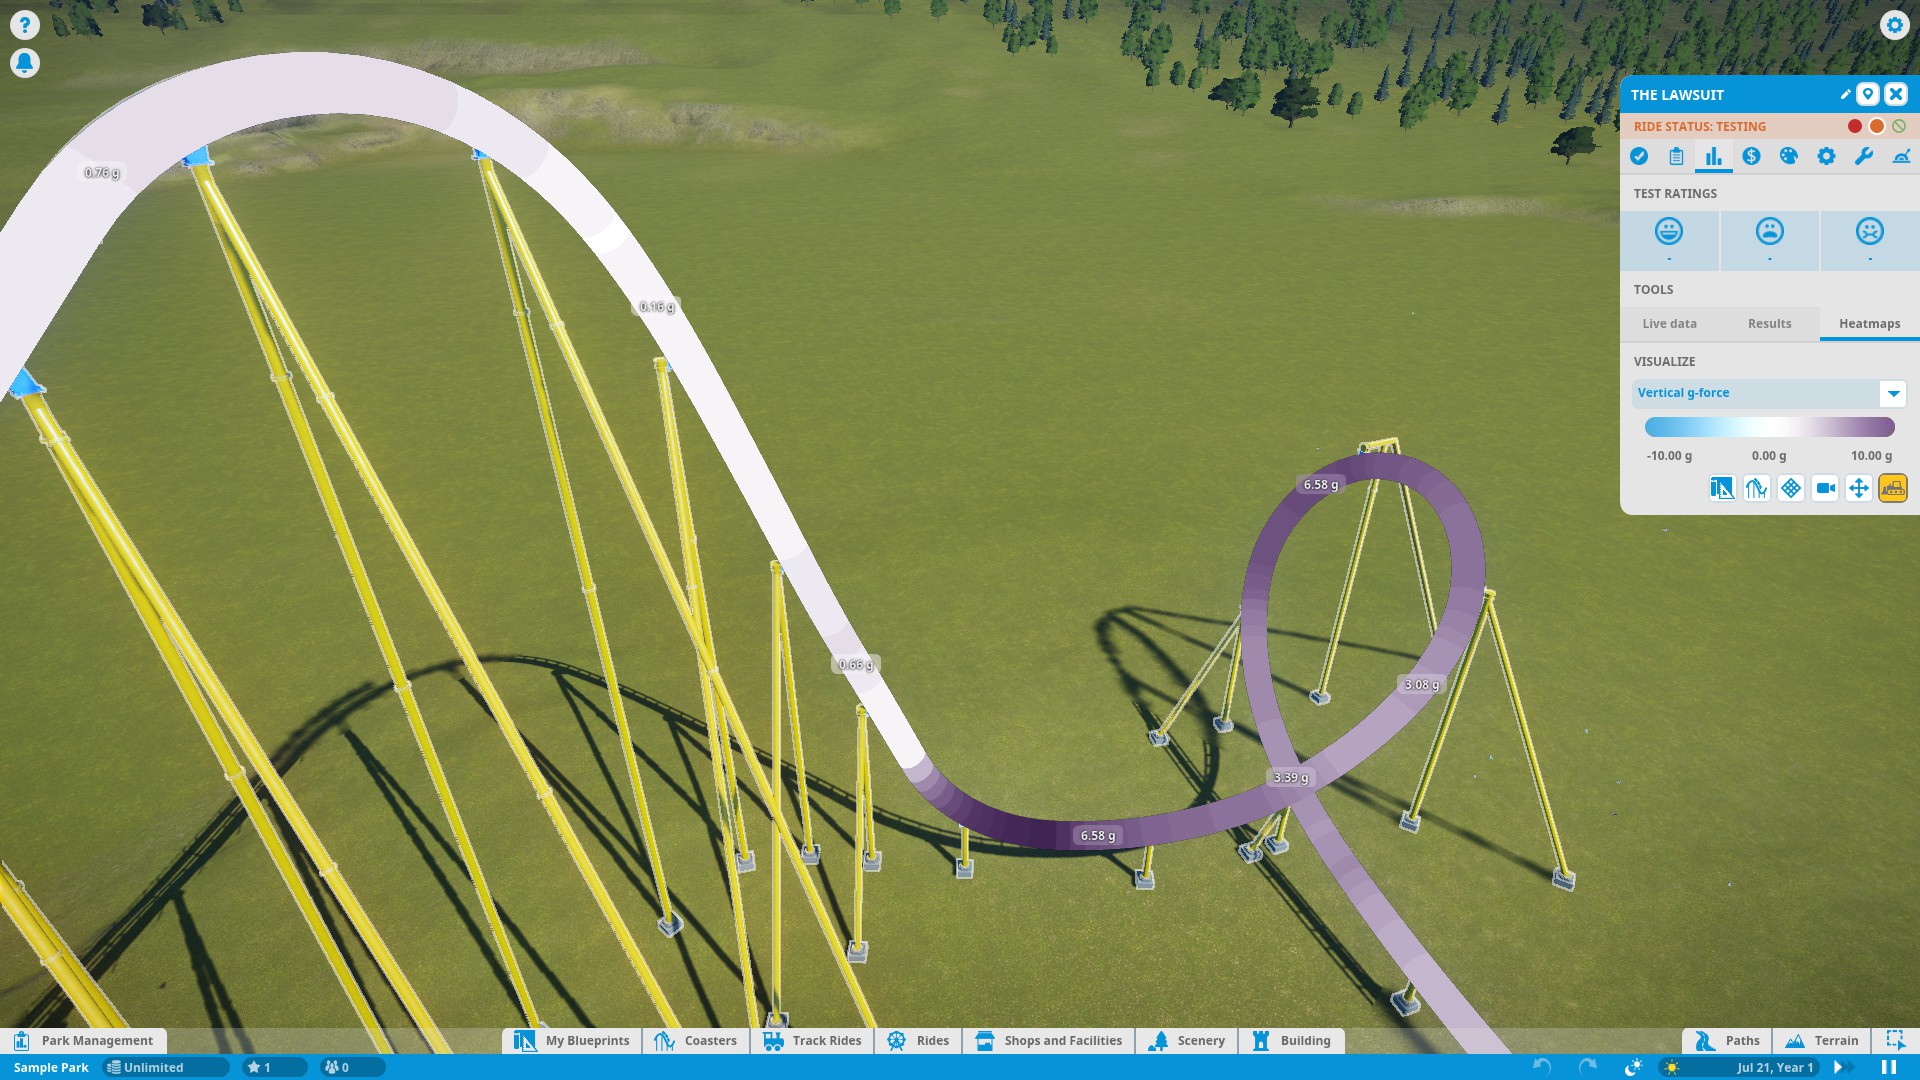
Take a look at this example. We have the first drop followed by an inclined dive loop:
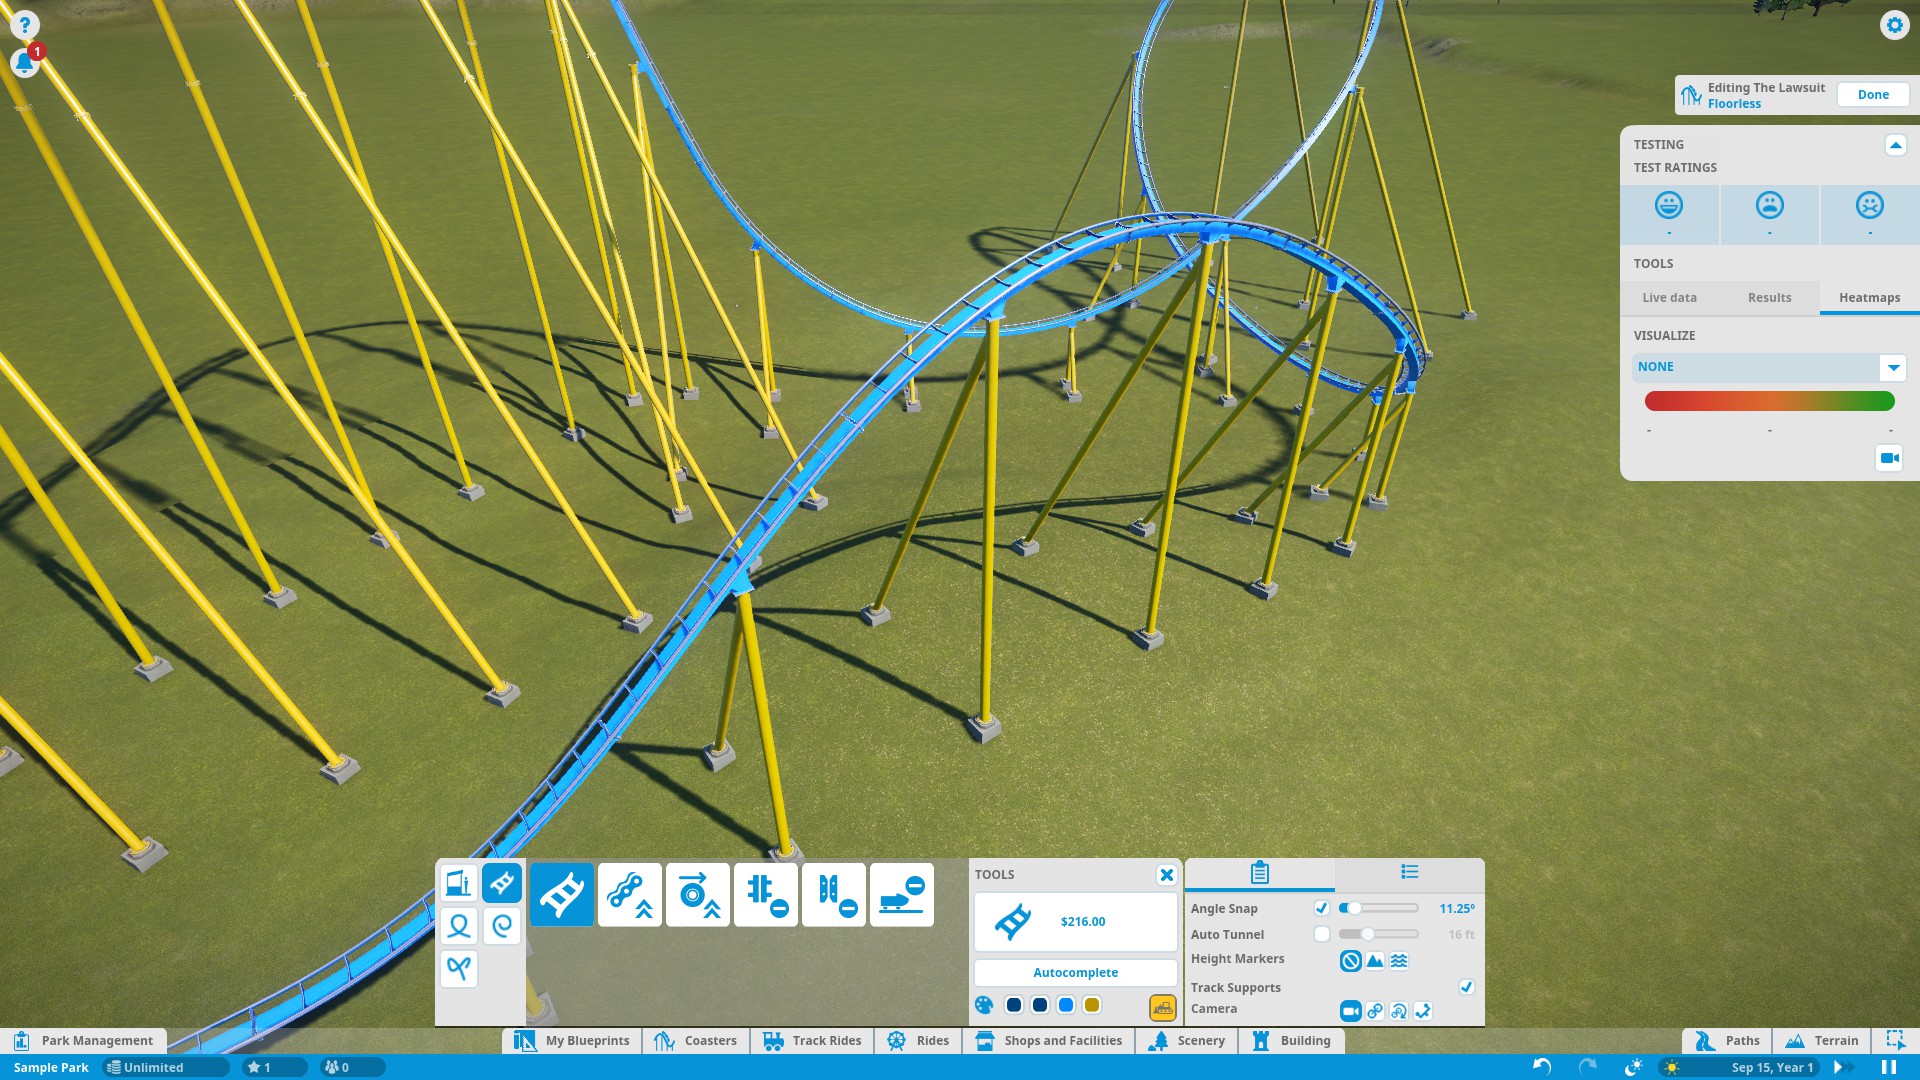
The g-force reaches around +10Gs as the coaster levels out at the bottom of the hill. It hits about +6.6Gs as it goes around the tightest part of the loop. This is because the coaster changes it’s vertical direction too rapidly for the given speed of the coaster (which at this point is about 65mph.)
So you have two options to bring the g-force down:
1) Slow the coaster down.
2) Widen the radius of the arc of travel for a slower change in direction.
Since this is the first drop, we don’t really want to slow the coaster down. We are trying to conserve speed for the rest of the ride. So what we want to do is increase the size of the transition of the slope at the bottom of the hill as shown in the picture.
Similarly, we can increase the size of the dive loop. This will a) Increase the arc of travel, and b) Slow the train down more around the top of the loop.
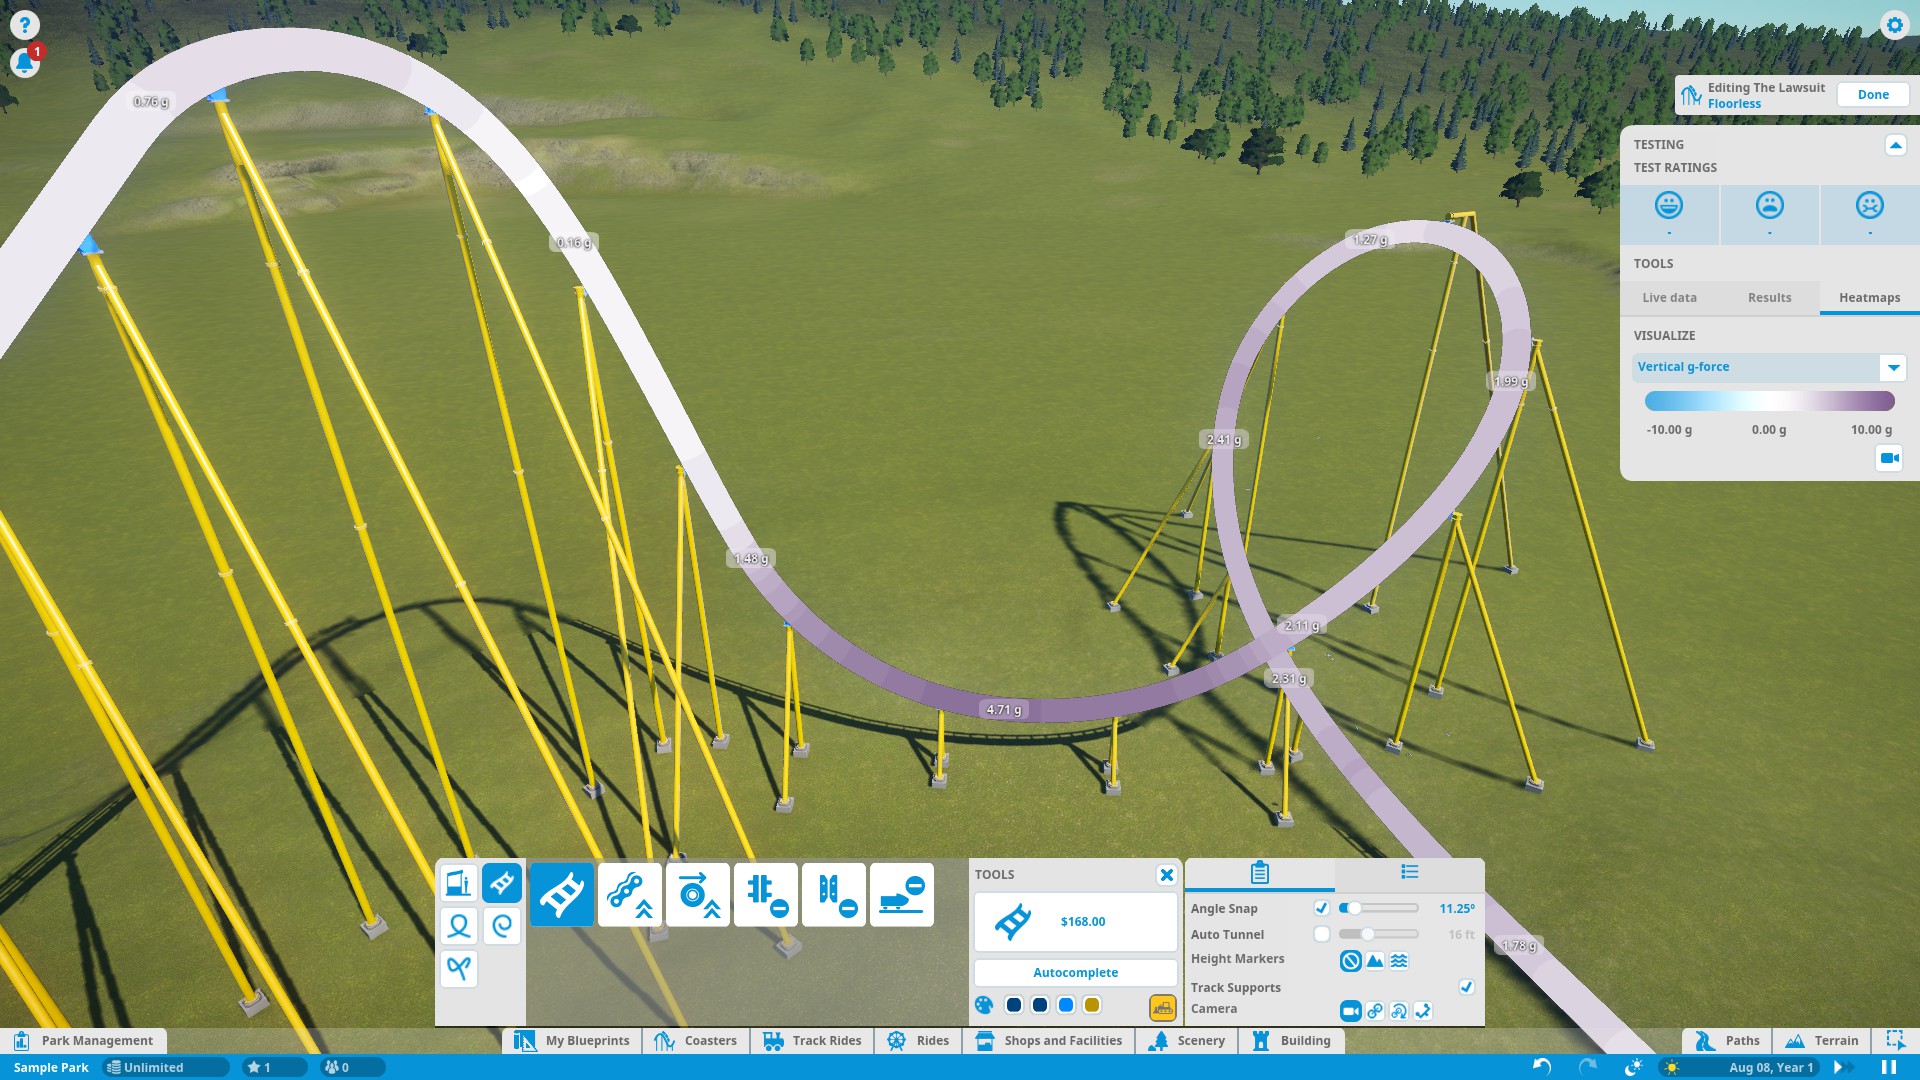
Here is an improved version of the above example:
Notice the larger transition at the bottom of the hill as well as the much larger dive loop. Also notice the much lower g-force ratings. +10Gs is now about +4.75Gs and +6.6Gs is now +2.4Gs. I don’t think we need screenshots of every heatmap, but I’d also like to mention that the average fear rating on this section has dropped from 7+ to 5 (which is good). Excitement has also decreased slightly from 9 to 8, but that’s not a huge deal in the grand scheme of things.
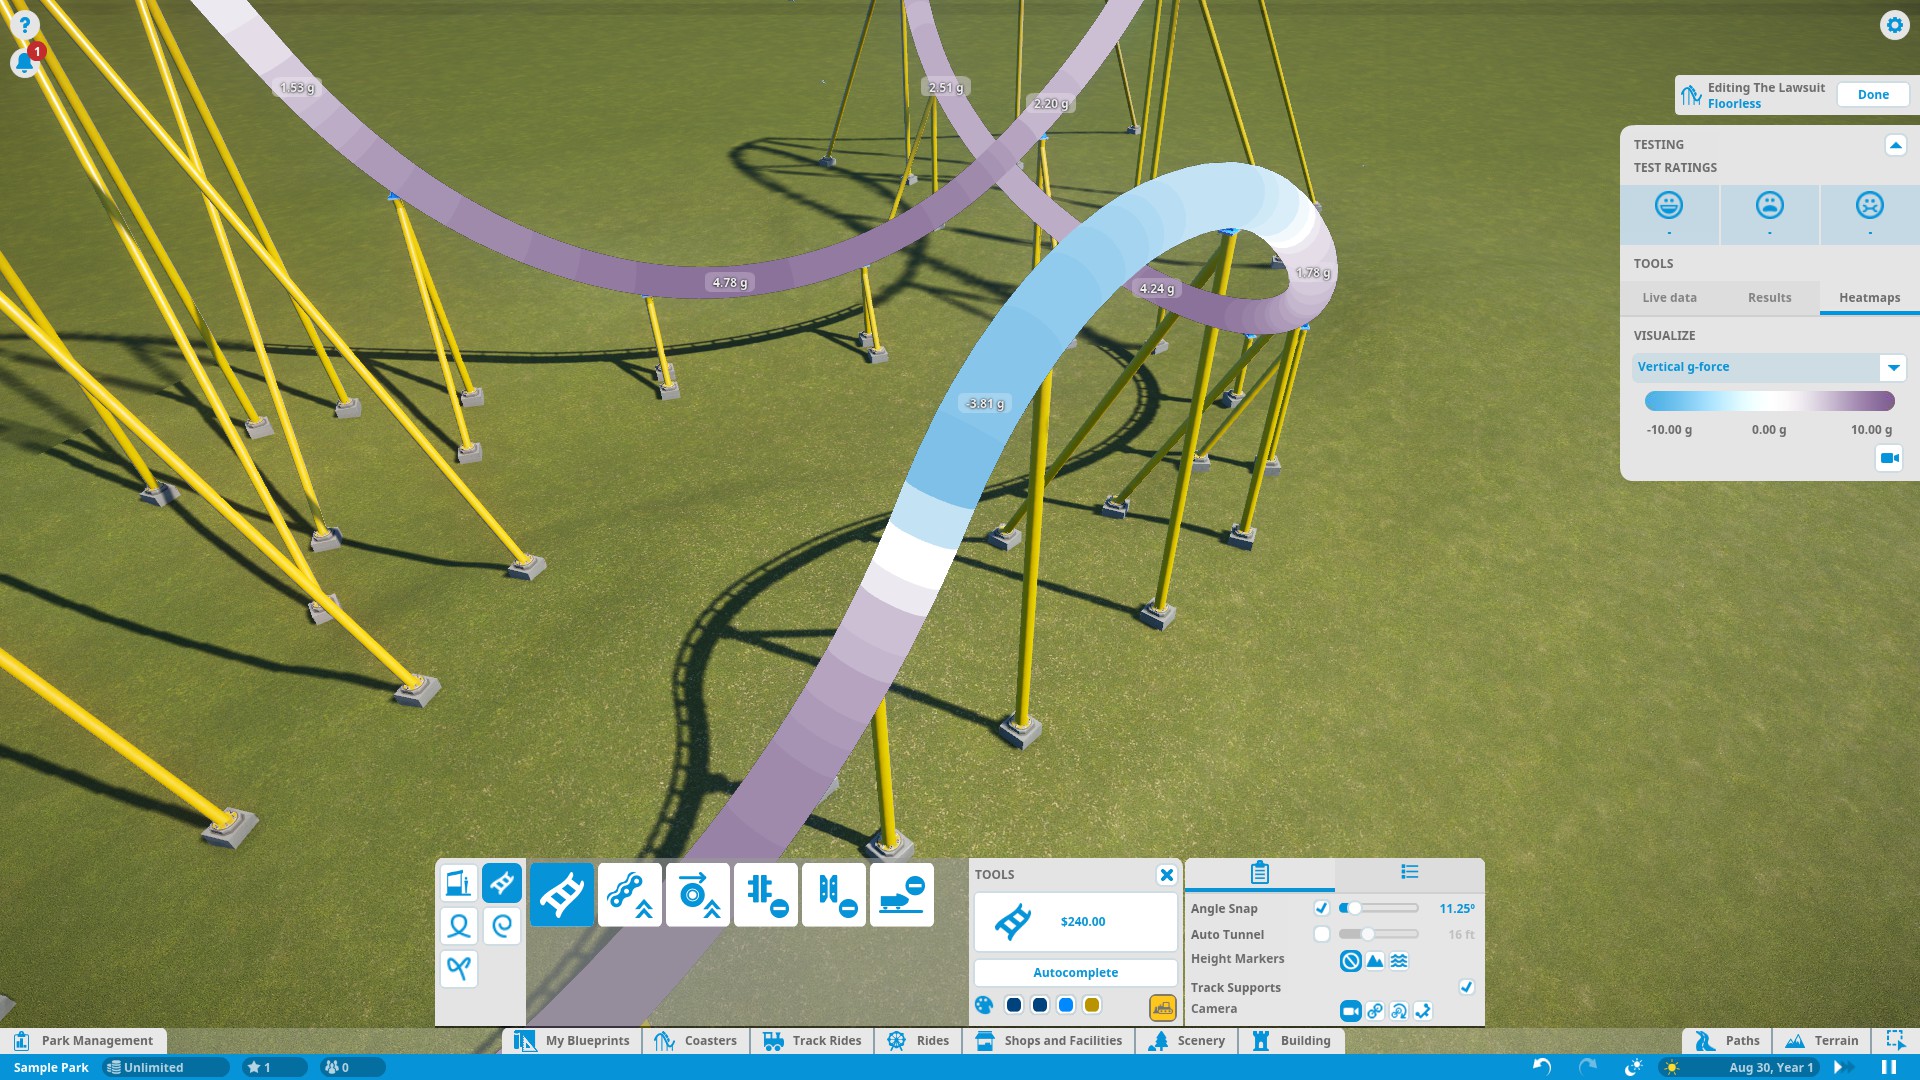
The same principle applies for negative g-force…
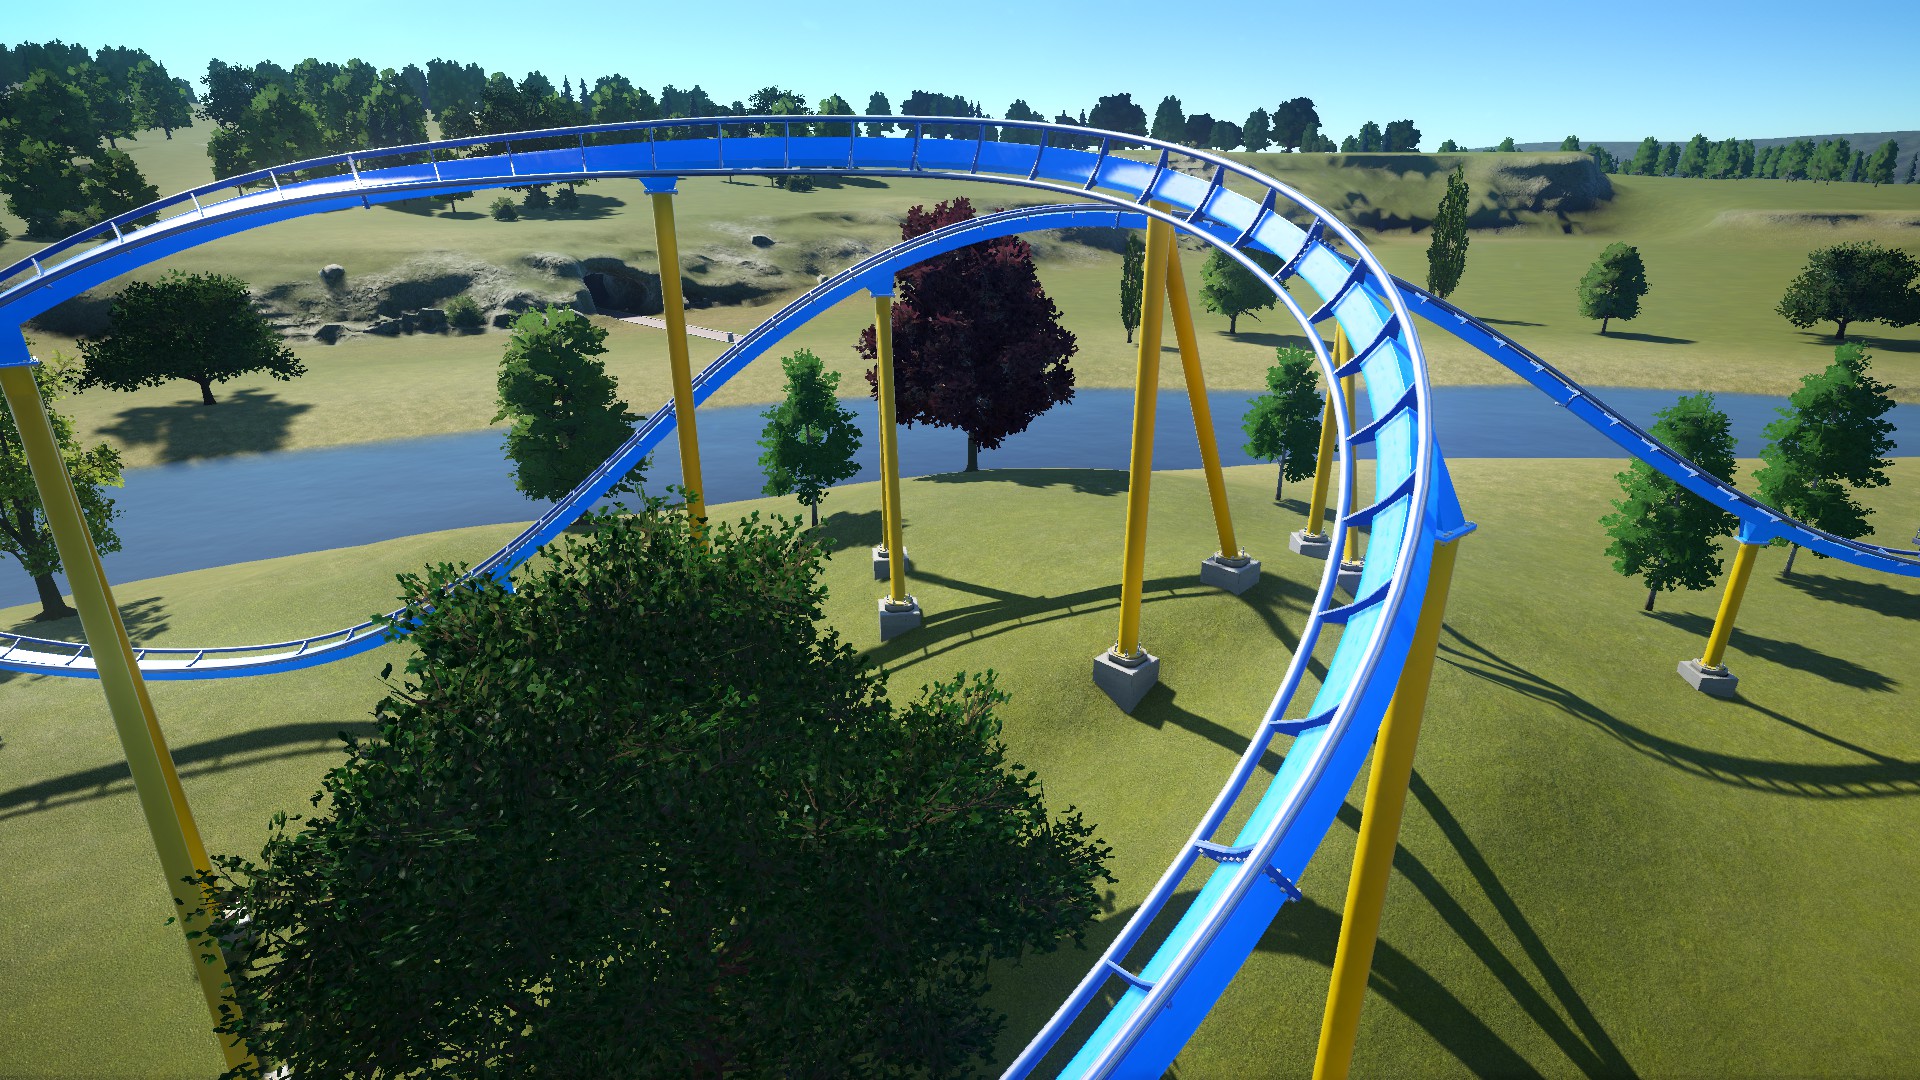
Lateral g-force can be controlled by widening turns, but more importantly BANKING them! Not doing this is a common rookie mistake.
Banking is when the track leans to the left or right. On curves, the track is usually banked to the inside of the curve. Doing this converts some of the lateral Gs exerted during the curve into more tolerable positive Gs. The more you bank a curve, the more lateral Gs get converted into positive Gs. When a curve is banked at 90° angle (completely sideways), all lateral Gs will become positive Gs.
You can bank the track towards the outside of a curve, too. However, this is a lot less comfortable to riders as you are converting lateral Gs into negative Gs, which the human body is a lot less tolerant to. You should try to avoid banking curves to the outside, except at low speeds or on coasters that are designed for it (“Crazy One” track type, for example).
TIPS:
When making high speed banked curves, use a short, straight piece and bank it to the desired angle before the turn so that the entire curve is banked. Do the same coming out of the curve. Otherwise, the very beginning and end of the curve will be unbanked and pull high lateral Gs.
Remember, gravity is always pulling riders toward the ground at 1G of force. So when a level (not necessarily straight) track is banked 90 degrees, the riders experience 1G of lateral force. (Thanks @AinsLey for pointing this out!)
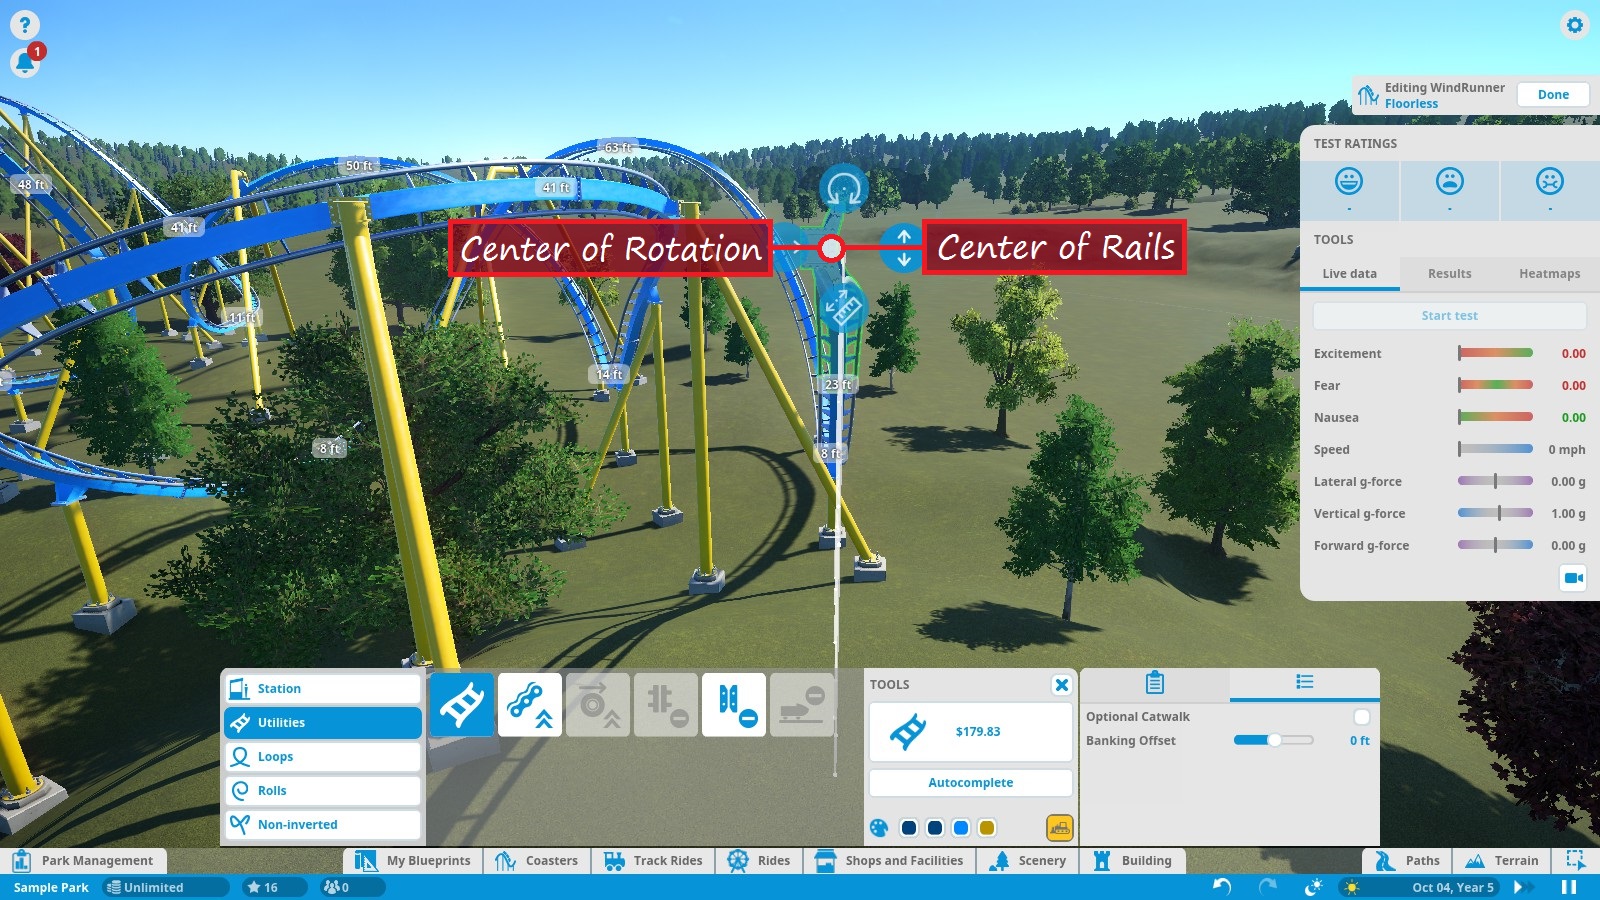
I often ignored this setting in utility settings because I never really knew what it did. After I finally figured it out, I quickly discovered that it can be very useful in adding that extra edge of realism to my coasters! When banking a track, bank offset determines the distance (in feet, meters, whatever you use) between the center of rotation and the track rails. So with 0ft bank offset (default), the center of rotation is right between the track rails.
This means as the track banks, riders will pivot around their feet (or slightly lower) and their upper body will swing around the center of rotation. This induces some lateral Gs.
Moving the offset slider to the right will move the center of the rails down (relative to orientation) from the center of rotation, as pictured below:
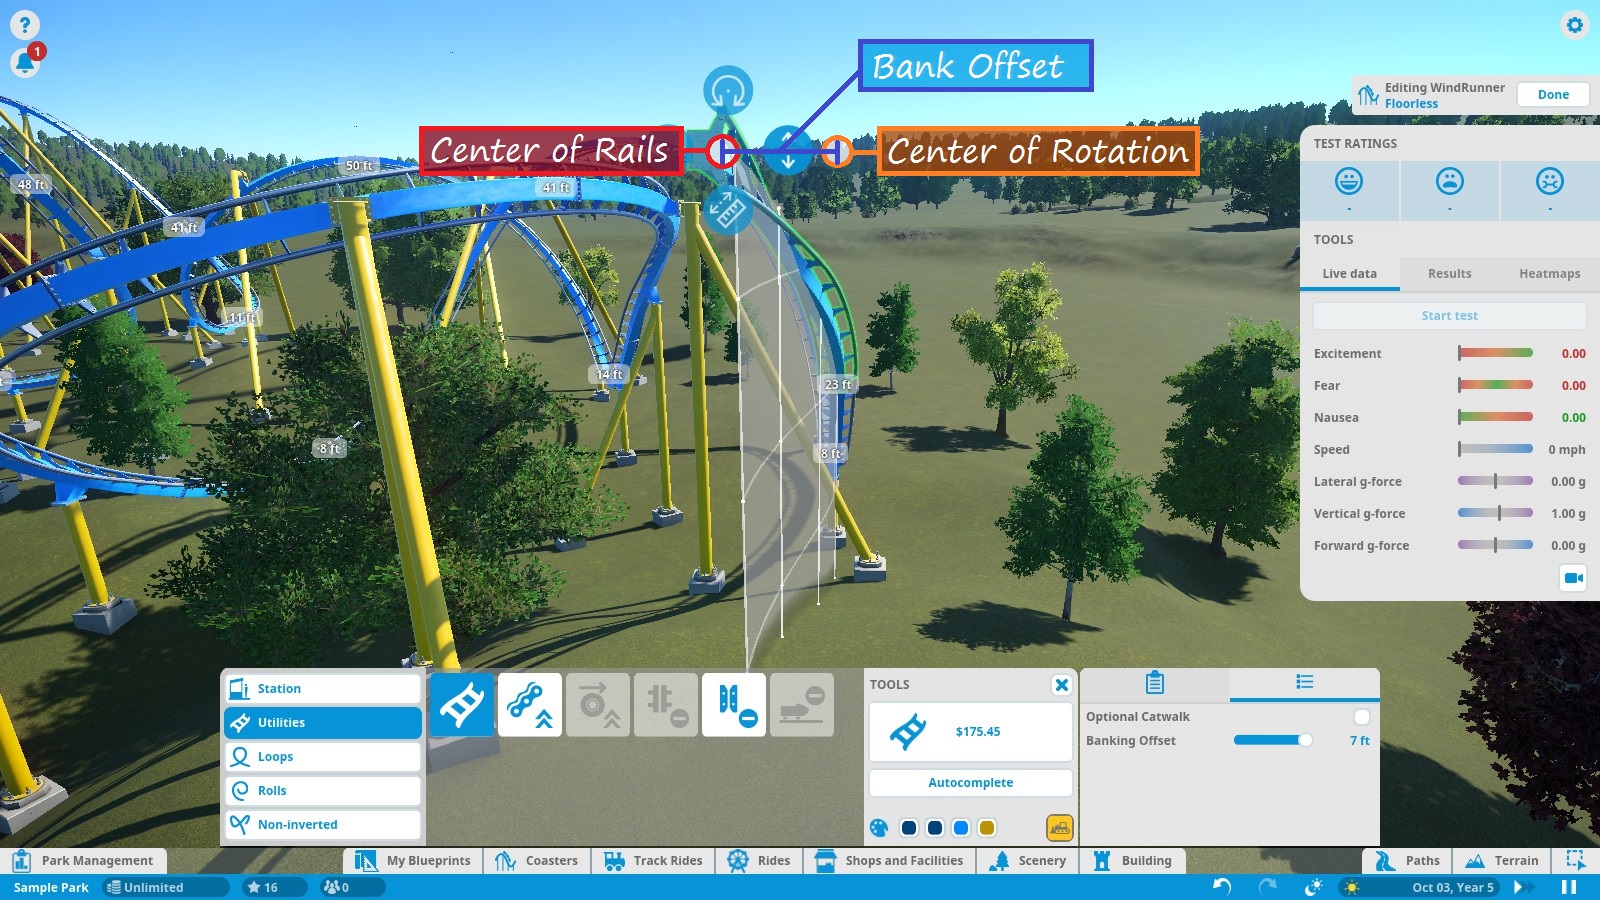
Moving the offset slider to the left will move the center of the rails up from the center of rotation and exaggerate the effects of 0 offset. This kind of offset isn’t standard and would probably feel awkward on a real coaster.
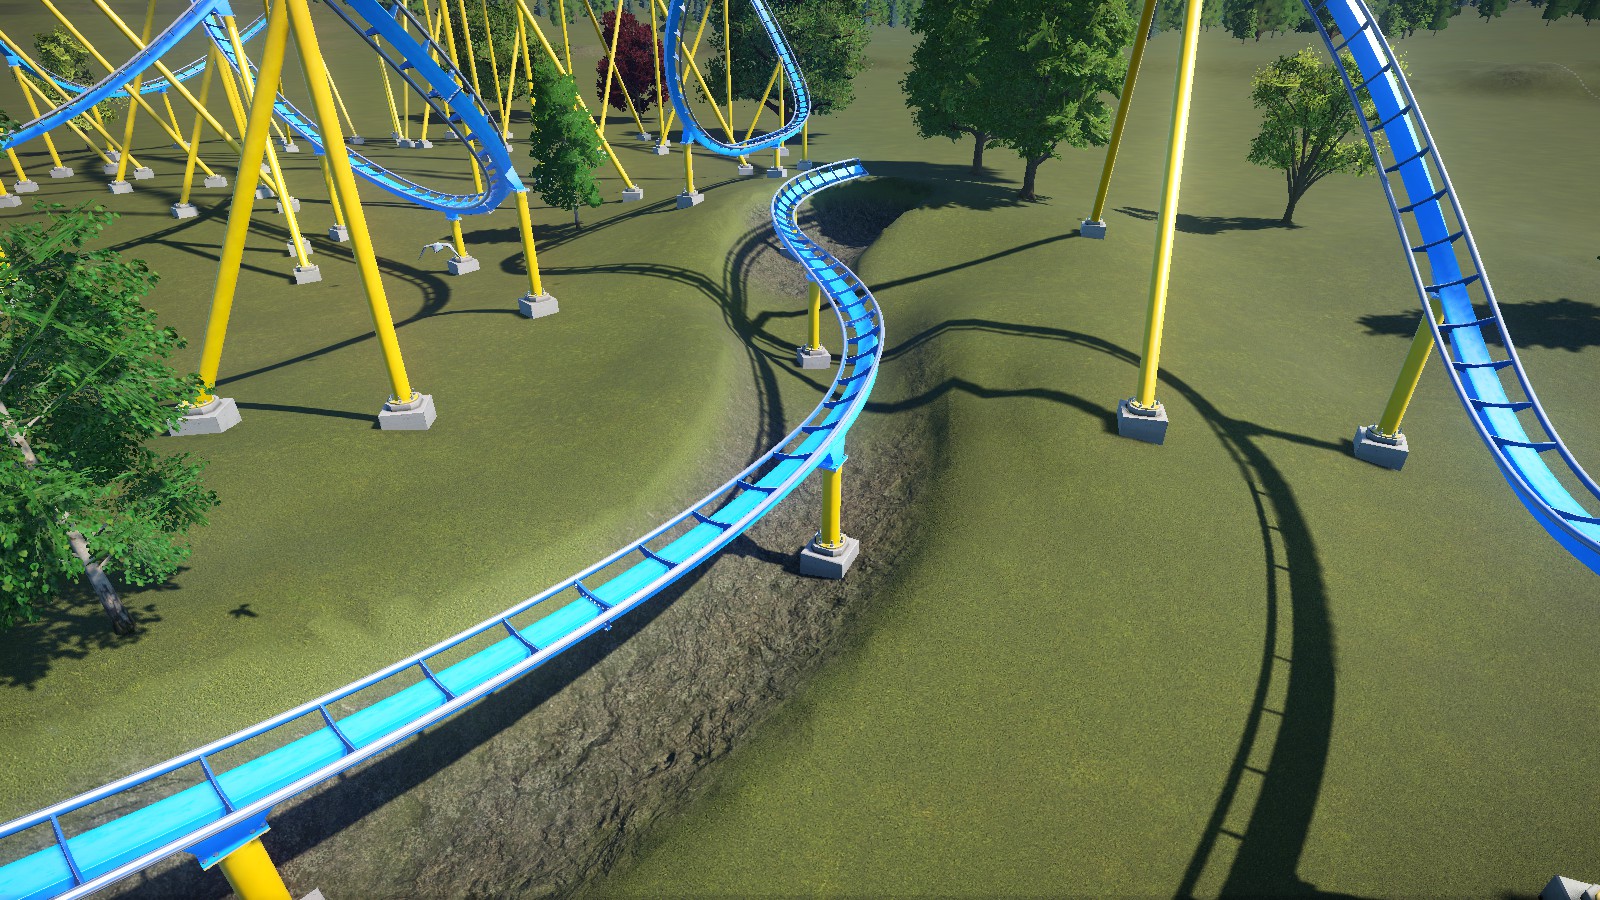
A prebuilt example to compare offset vs no offset would be a heartline twist and inline twist. The heartline roll is banked with offset; the inline twist is banked without.
Here’s another example. The difference is very subtle, but like I said, it gives your coaster that extra edge of realism and comfort. This is 0 offset vs 4ft offset:
Important Track Elements
Below are some track elements that can significatly effect EFN ratings when done correctly.
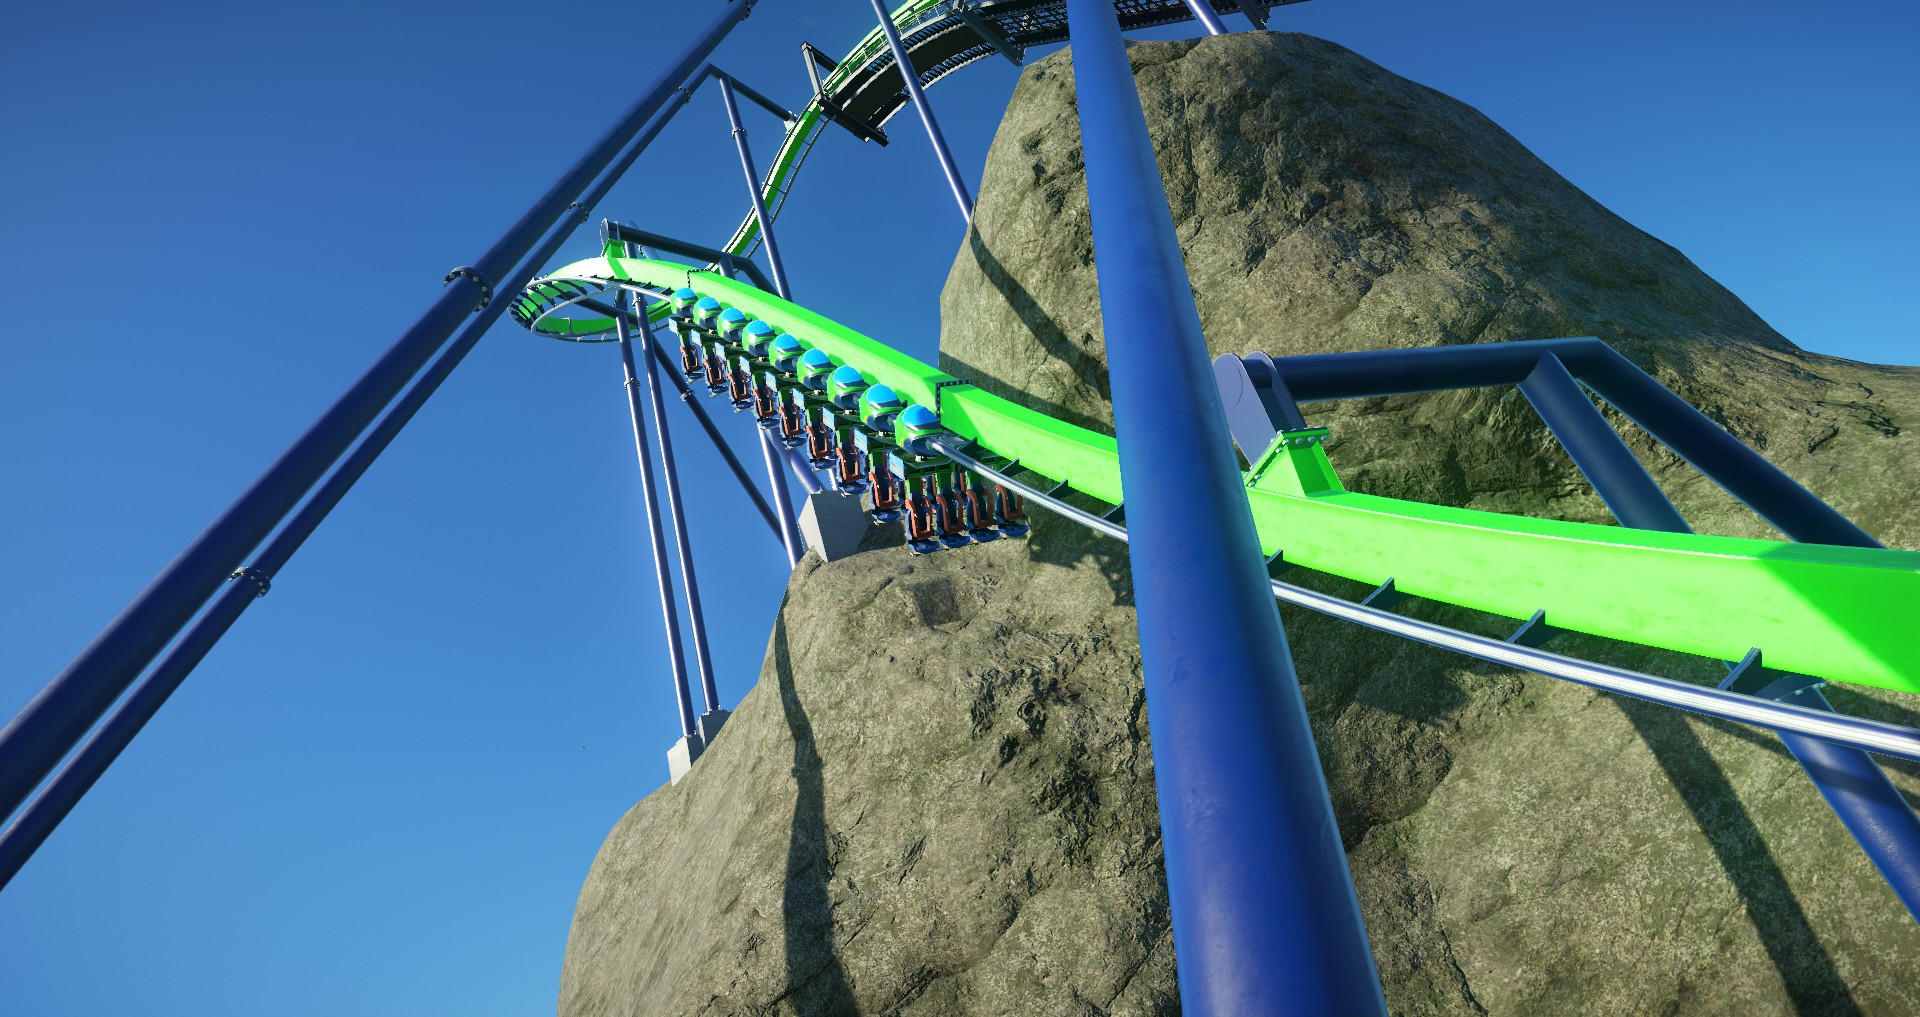
The drop itself is usually angled down between 50-80 degrees. Certain coaster types can have vertical or past-vertical drops, but this is not typical on a standard coaster. The drop usually levels out within 30ft/9m of the ground. Steeper drops result in quicker acceleration and higher EFN ratings.
The drop can be straight or it can be curved to the left or right (common on steel coasters.)

There is a fine line between an airtime hill and a large, unexciting hill. So when designing these hills in your coaster, it’s important to test the coaster on the hill for 2 things: vertical g-force and excitement. You can use the heatmaps to see both. When vertical g-force is at or below 0G, airtime has been achieved. On the vertical g-force heatmap, the line will be white or very light blue, with the values ideally somewhere between 0G and -1G. On the excitement heatmap, the line will be solid green, with values around or above 8-10. If the excitement heatmap doesn’t appear green over the hill, then you didn’t quite achieve airtime. You’ll need to make the arc of the hill a little smaller.

- Loops – elliptical inversions
- Rolls – twists and rolling inversions
- Non-inverted – special turns and loops that do not bank more than 90 degrees. On track types that do not invert, this is the only available category.
Inversions (which from this point on refers to any special track piece) are EFN rating boosters when done correctly. Controlling the speed during an inversion is key. If the speed around an inversion is too fast, fear and nausea ratings will spike, and g-force guidelines will be scrapped. If the speed around an inversion is too slow, excitement and fear ratings will drop drastically, or even worse — the coaster may get stuck or rollback! Guests cannot rides coasters that get stuck or rollback.
Testing inversions is very important when designing coasters, and it’s a good idea to test them before building the next part of the track, in case adjustments are needed. There are 3 heatmaps to pay attention to when testing inversions: vertical g-force, speed, and excitement. Vertical g-force should stay within the guidelines mentioned earlier. Speed should usually be somewhere between 25-40mph/40-65kmh around the highest/tightest point of the inversion. Excitement should stay around 7 or more throughout the inversion and should not drop below 5 for more than a brief second. Otherwise, the inversion could hurt to the coaster’s EFN ratings more than help. Usually, if the g-force and speed are properly controlled, the EFN ratings will be good as well. It’s never a bad idea to check just to be sure though.
It may take some trial-and-error and resizing to get the inversions right. If you are struggling to make a particular inversion both exciting and tolerable, you may need to try a different type of inversion. Generally speaking, the faster your coaster is moving, the larger the inversion needs to be. Tall inversions (loops, zero-G rolls, cobra rolls, etc.) are good when approached at high speed (around 50mph/80kmh or more). Shorter inversions (corkscrews, inline twists, cutbacks, etc.) are better when approached at relatively low speed (40mph/64kph or less).
Something that a lot of first-time coaster designers try to do is build long sections of upside down track. While brief inversions are cool, being upside down for a prolonged time can be uncomfortable and scary. In-game these upside down sections can hurt EFN ratings more than help, so be careful of that.
Most coasters that invert have between 3-7 inversions, although the current world record is 14!
Brakes
Slowing down a coaster may sound counter-intuitive, but there are plenty of situations where they can prove really useful. There are 3 primary types of brakes in the game:
- Trim Brakes are used to slow down the train slightly. They’re generally short and placed before tight curves and inversions to help ease the g-force exerted during the curve/inversion. Trim brakes are not really designed to bring the train to a near-stop from high speed. However, they can be placed almost anywhere, including curved, banked, and sloped tracks.
- Friction Brakes are used when heavy braking is needed. These are frequently placed at the end of a coaster to prevent the coaster from flying into the station at dangerous speeds. They can be placed on sloped track, but not curved or banked track.
- Block Brakes are a special type of brake capable of bringing a train to a complete stop if necessary and then releasing the train at a given speed. If a complete stop isn’t necessary, then they will slow the train down to a set target speed. These are typically only used on coasters that run more than 1 train. They must be placed on straight, unsloped (or nearly unsloped) track. Take a look the next section for a more elaborate explanation of block brakes.
Each of the types of brakes allow you to adjust the target speed (the speed at which the brake stop slowing the train down) and the deceleration rate (how quickly the brakes slow down the train) via the “Utility Settings” tab. You will frequently need more than one brake segment to slow the train down to a target speed. If the brake section is too short, the train will pass over the brakes before they can fully slow it down. The last two statements do not apply to block brakes. You will almost never need multiple block brakes back-to-back. A single block brake will stop the train from any speed if it needs too. If you want to slow down the train before it reaches the block brake, you can add trim or friction brakes before the block brake.
Block Brakes
If you want to get more riders through your coaster in a shorter span of time, you can run multiple trains along the track. However, in order to do this, there needs to be a way to make sure that the trains are always spaced apart to avoid potential collisions. Also, since the station usually only holds one train at a time, there needs to be somewhere to hold the remaining trains until they can occupy the station.
Block brakes are designed to do just this. So how does a block brake work? It’s fairly simple. The section of track between block brakes is called a block. Only one block can be occupied at a time. If a train passes over a block brake and the next block is clear, the brake will slow the train down to a given speed (that you, the designer, can configure.) If the next block is not clear, then the brake will bring the train to a full stop and hold it until the next block is clear. Then it will release the train and the train will continue around the track. The station and the chain lift both functionally serve as block brakes and will also hold the train until the next section of track is clear.
You always need at least 1 block brake (not including the station or chain lift) for every additional train you want to add, unless the station is capable of holding multiple trains, in which case you may not need them. Most coasters are designed to run 2 or 3 trains simultaneously (see “Ride Operations” for more info about running multiple trains.) There is usually a block brake about halfway or a little over halfway through the ride, and then a second block brake at the end just before the station. If you add too many block brakes on a single track, trains can never achieve adequate spacing on the track, resulting in frequent stops during the ride. When trains have to stop mid-run, EFN ratings take a hit. The reason is not so much because of the stop itself (which does not factor into the final EFN ratings), but because of the slower release speed that makes the rest of the ride slower and consequently less exciting.
Ideally, you want to space out the block brakes so that a mid-run stop is never needed and any holding will be at the end of the ride. It’s also a good idea to place a mid-run block brake on the top of a hill so that the train can pick up speed again after passing over the brake. Note that a drop in excitement and fear after passing a block brake (whether coming to a full stop or not) is pretty much inevitable — another reason to not get carried away with block brakes. Also note that the coaster will probably lose a lot of speed after passing the first block brake. This is where smaller inversions, hills and turns come into play.
Block brakes have four configurable settings:
- Target Speed – if the train does not need to stop, it will be slowed down to this speed. Can be set pretty high, but usually kept under 25mph/40kmh.
- Deceleration Rate – the rate at which the train slows down to the target speed.
- Release Speed – if the train needs to stop, it will be released at this speed. Can only be set up to 8mph/13kmh.
- Acceleration Rate – the rate as which the train accelerates to the release speed.
By default the target speed is 13mph/21kmh. For best EFN results on a mid-run block brake, you’ll want to set this to be roughly the same speed as the train as it approaches the brake, which should generally be 25mph/40kmh or less. The release speed just needs to be set fast enough for a stopped train to be able to make around the remainder of the track once started again. The other values may be adjusted as you see fit.
Basic Layouts and Landscaping
Now that you know about the components and concepts that make up a good coaster, it’s time to talk about layouts. There are many, many ways to layout a coaster, and I can’t really discuss them all to you. So I’ll show you some basic layout patterns that will work with most traditional coaster types. Then, in the next section, I’ll show you some layouts for special track types.
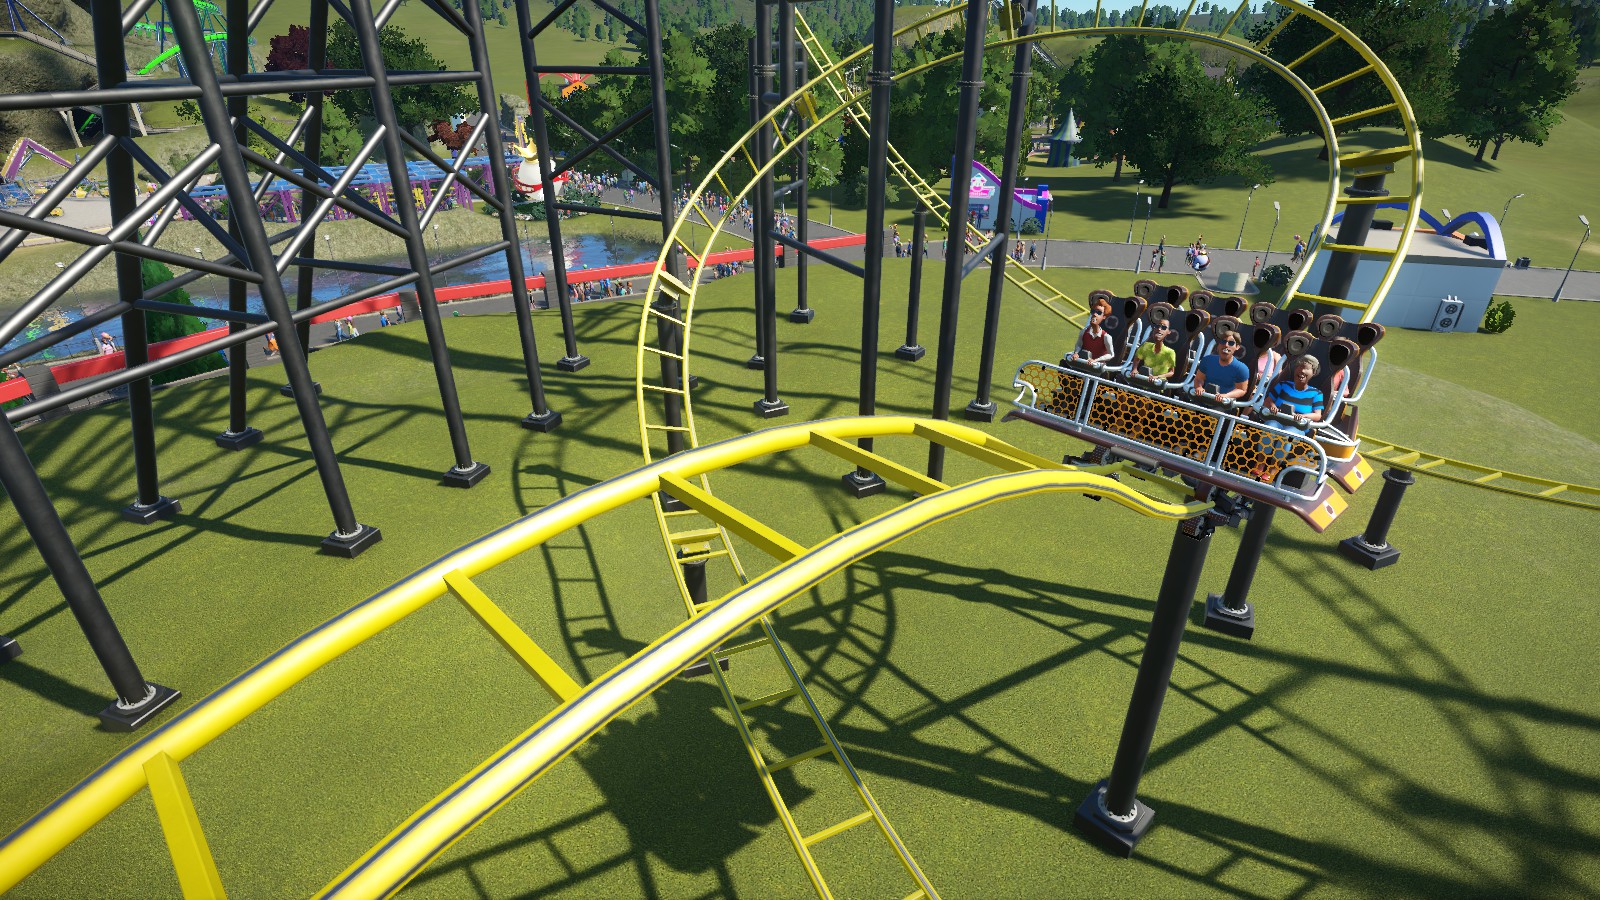
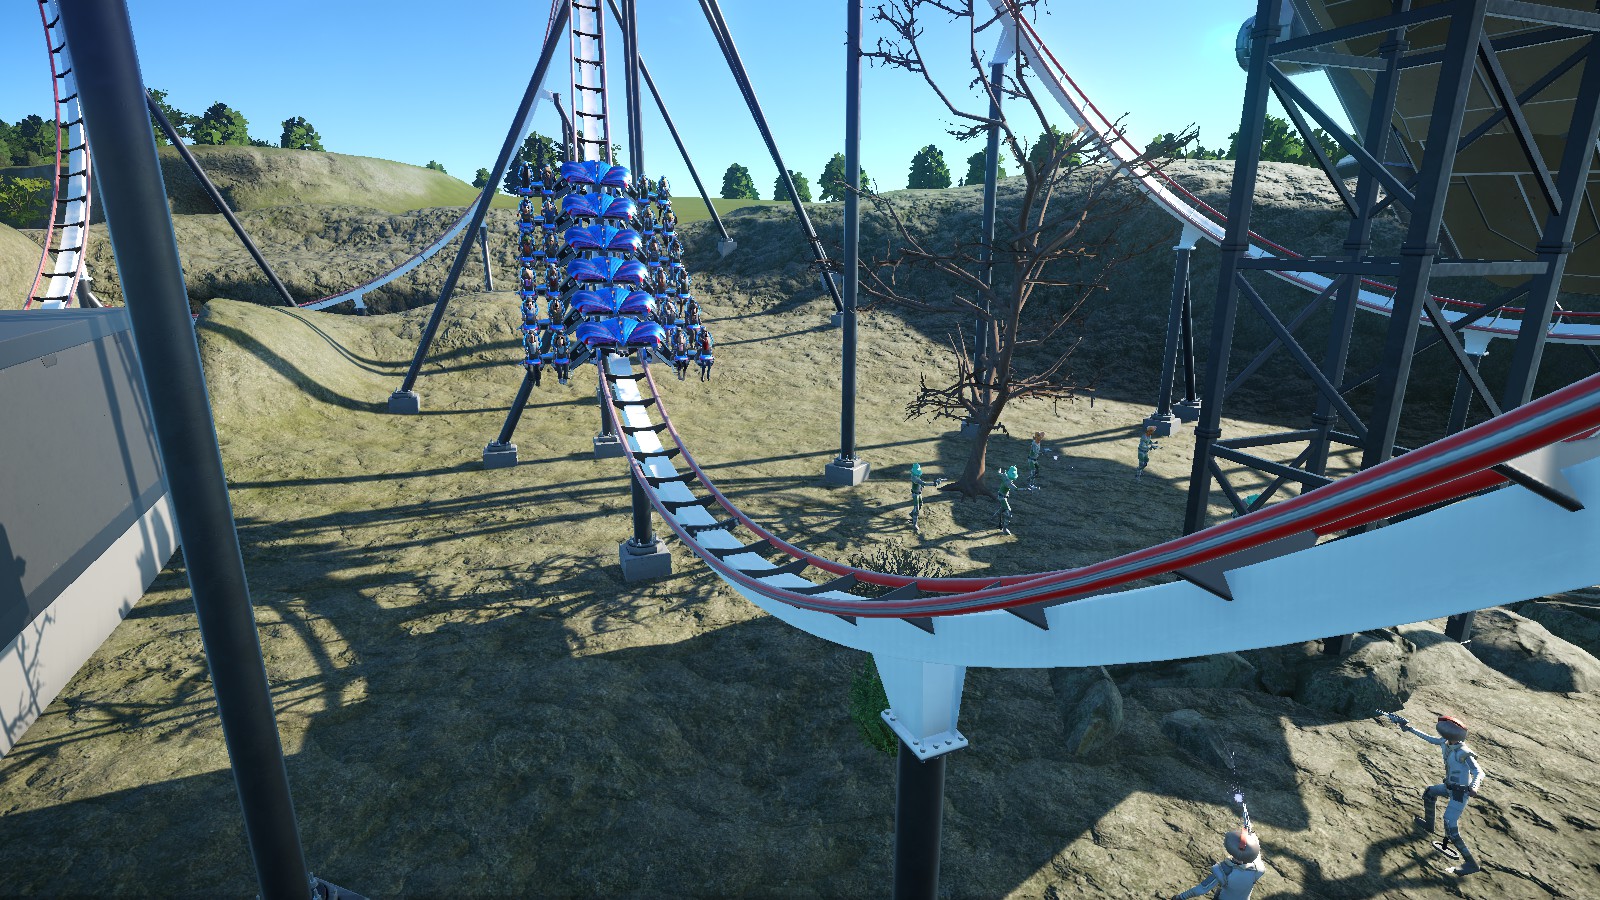
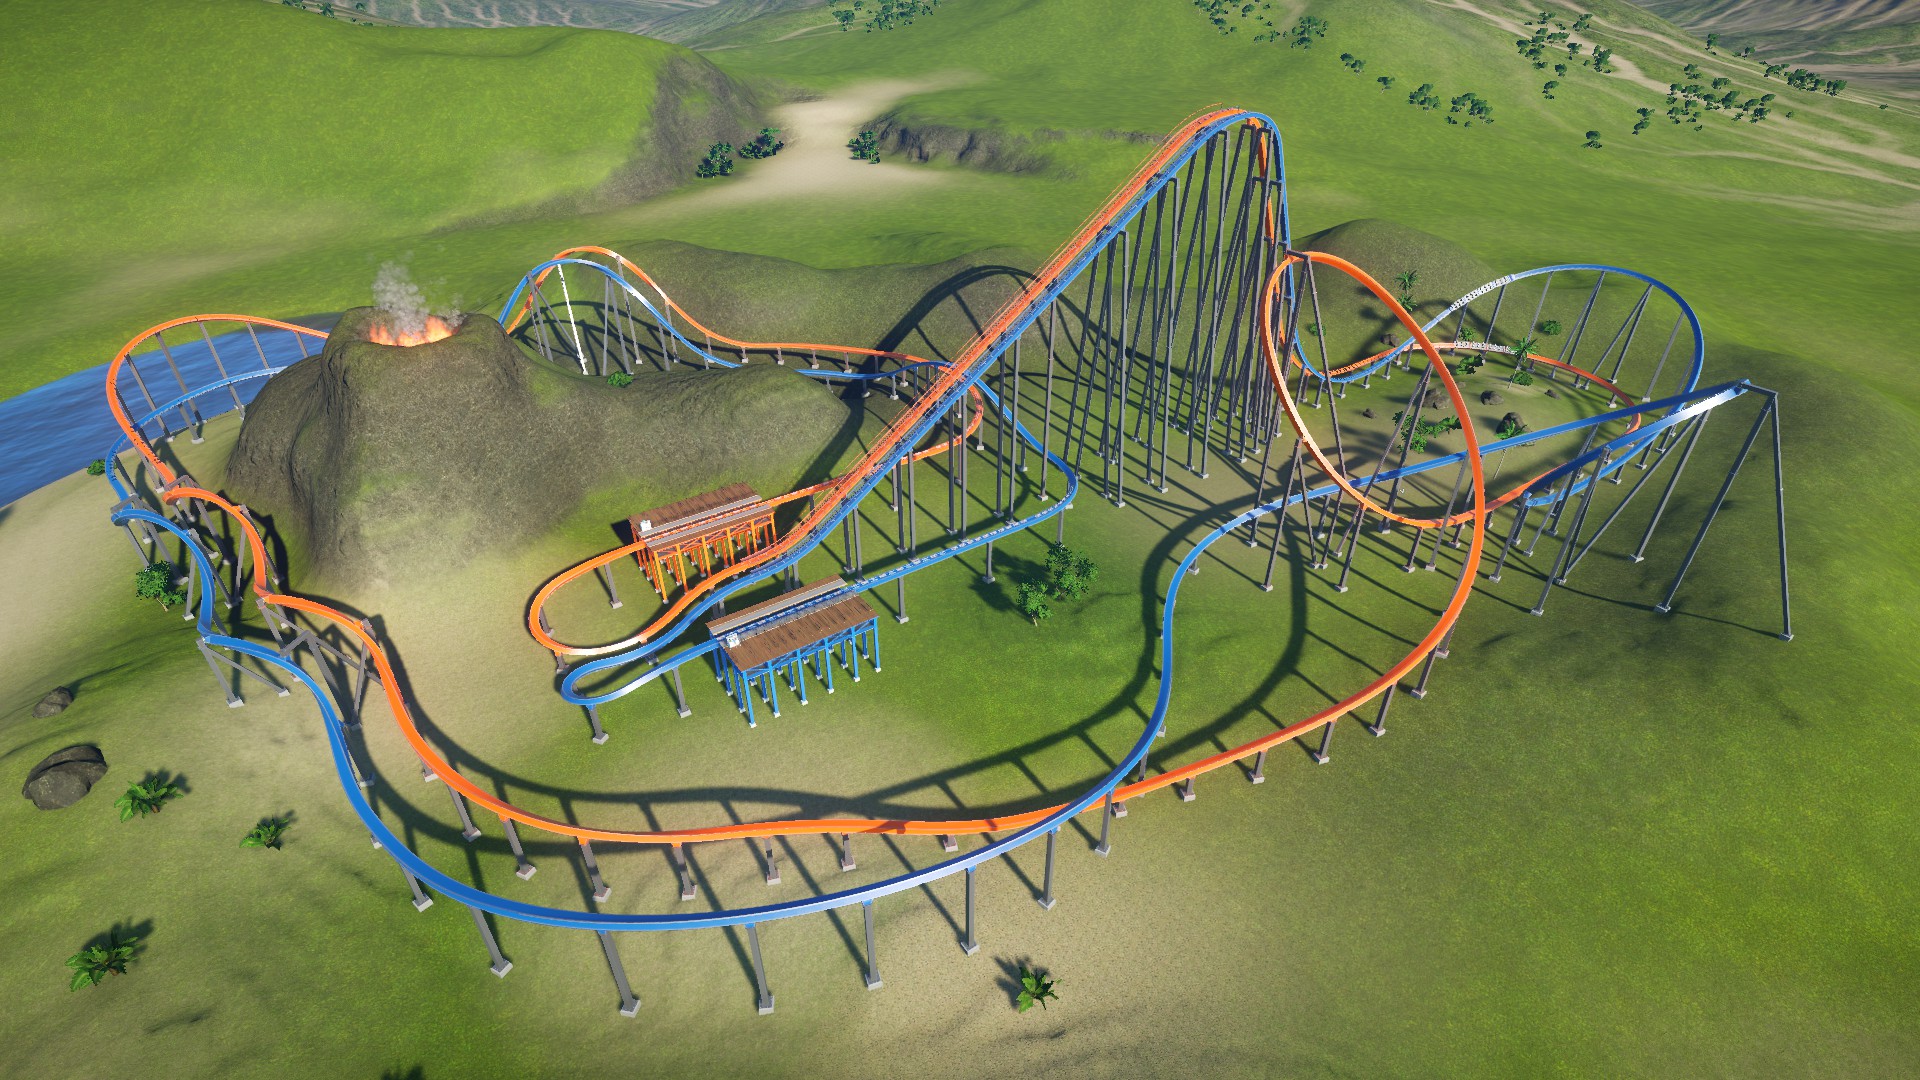
I made this floorless coaster specifically to demonstrate some of the previously mentioned elements of roller coasters, hence all the screenshots of it throughout this guide. We will use it one more time to demonstrate a basic layout with inversions…
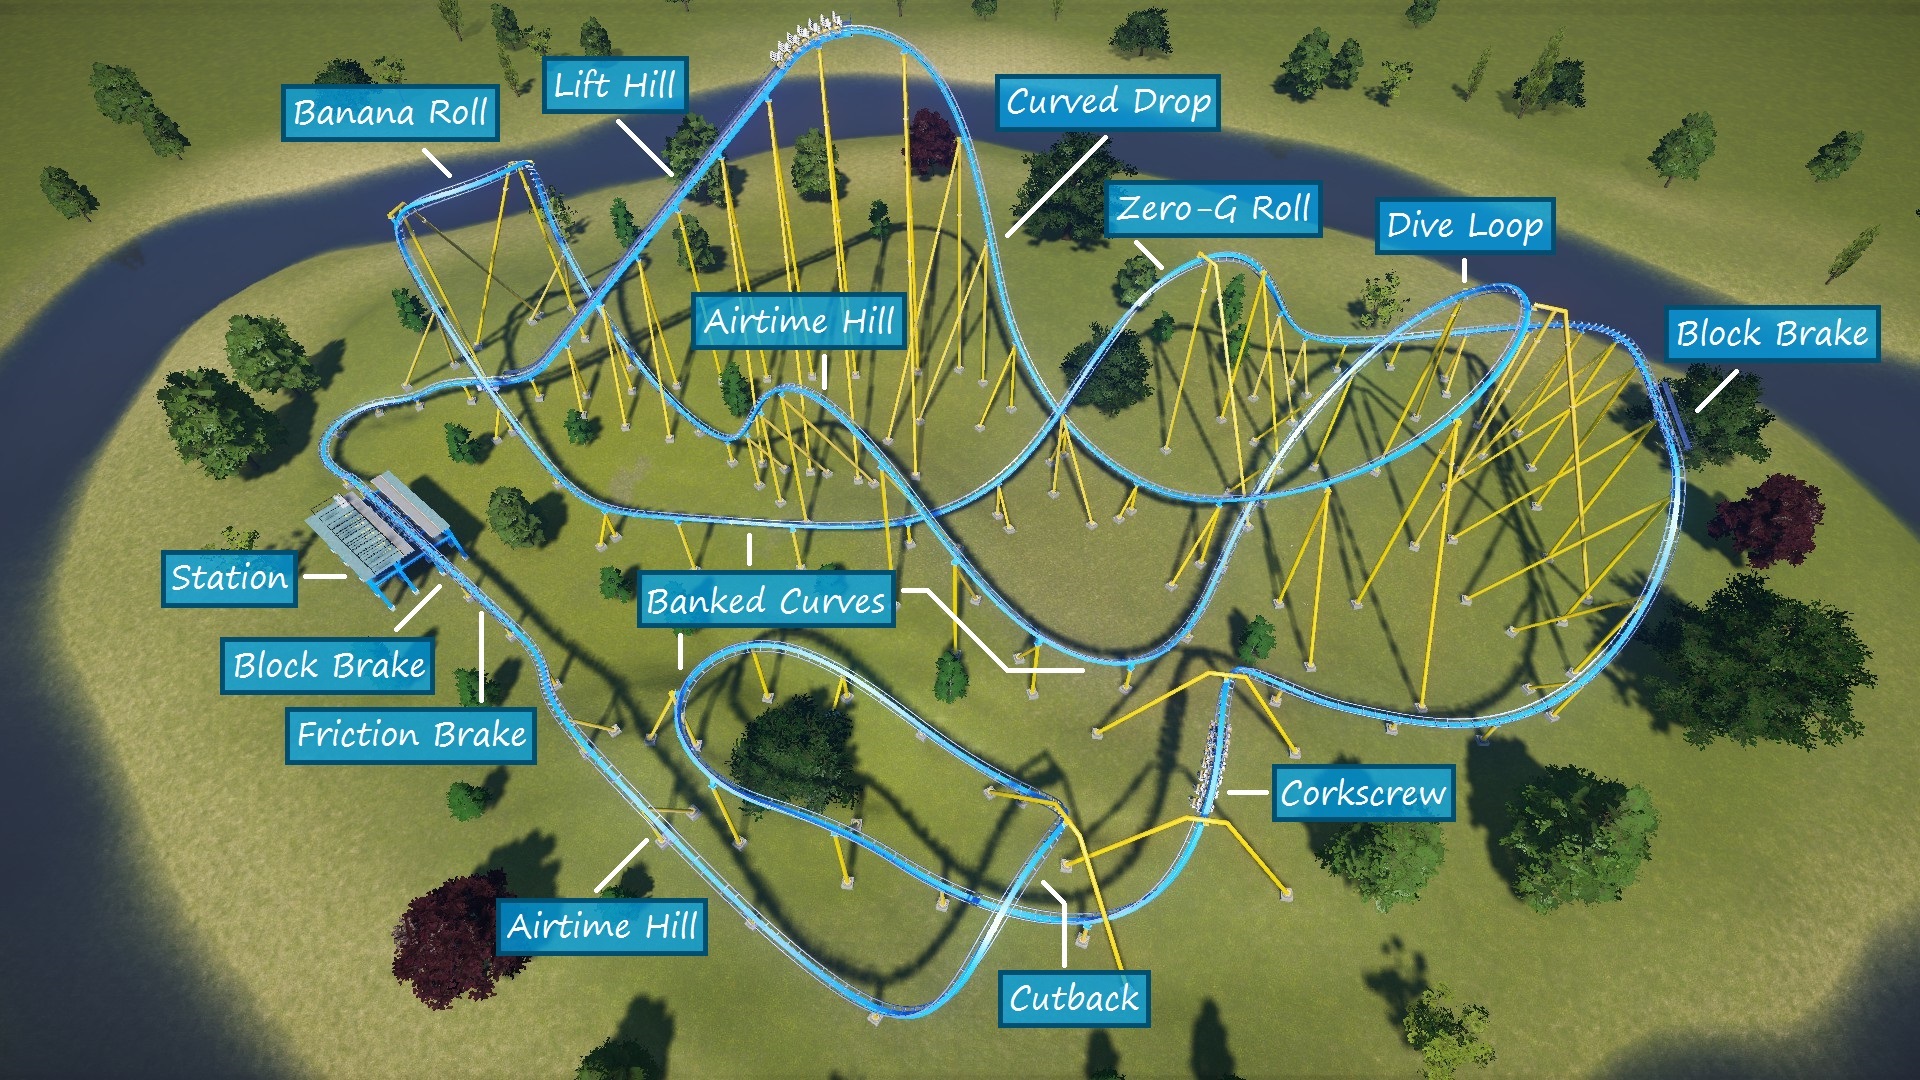
- EFN Ratings: E = 6.81, F = 4.01, N = 1.32
- Max. G-forces: Positive = +4.8Gs, Negative = -0.8Gs, Lateral = 1.6Gs
- Max. Speed: 67mph/108kmh
- Biggest Drop: 150ft/45.7m
- Inversions: 5
- Airtime Count: 3 (total duration 2.5 seconds)
Key Features (** applies to most coasters, not just this type of layout)
- ** Station is placed on the outside of the layout. It doesn’t necessarily have to be placed on the outside, but locations that are easily accessible and clear of tracks and supports are usually the best.
- ** Small drops and curves between the station and chain lift are common, but are used primarily for directional control. These drops and curves do not generate high amounts of excitement or fear, and should be brief when included.
- ** The track usually weaves and loops in and out of itself. This both looks really nice and conserves valuable park space. For aesthetic realism, try to avoid removing track supports when possible. Don’t let it mess up your creativity though. A single missing support usually won’t hurt.
- ** There is a general up-and-down motion of the track throughout the ride. Long, level sections of track can lower EFN ratings.
- Large inversions (loops, hammerheads, cobra rolls, etc.), wide curves and tall hills are best during the first half of the ride when the train has the most speed. Smaller inversions (corkscrews, inline twists, cutbacks, etc.), curves and hills are better after the mid-run block brakes (or about halfway through the course on layouts without mid-run block brakes) when the train is running slower.
- ** Brakes are placed before the station so the the train doesn’t slam into the station.
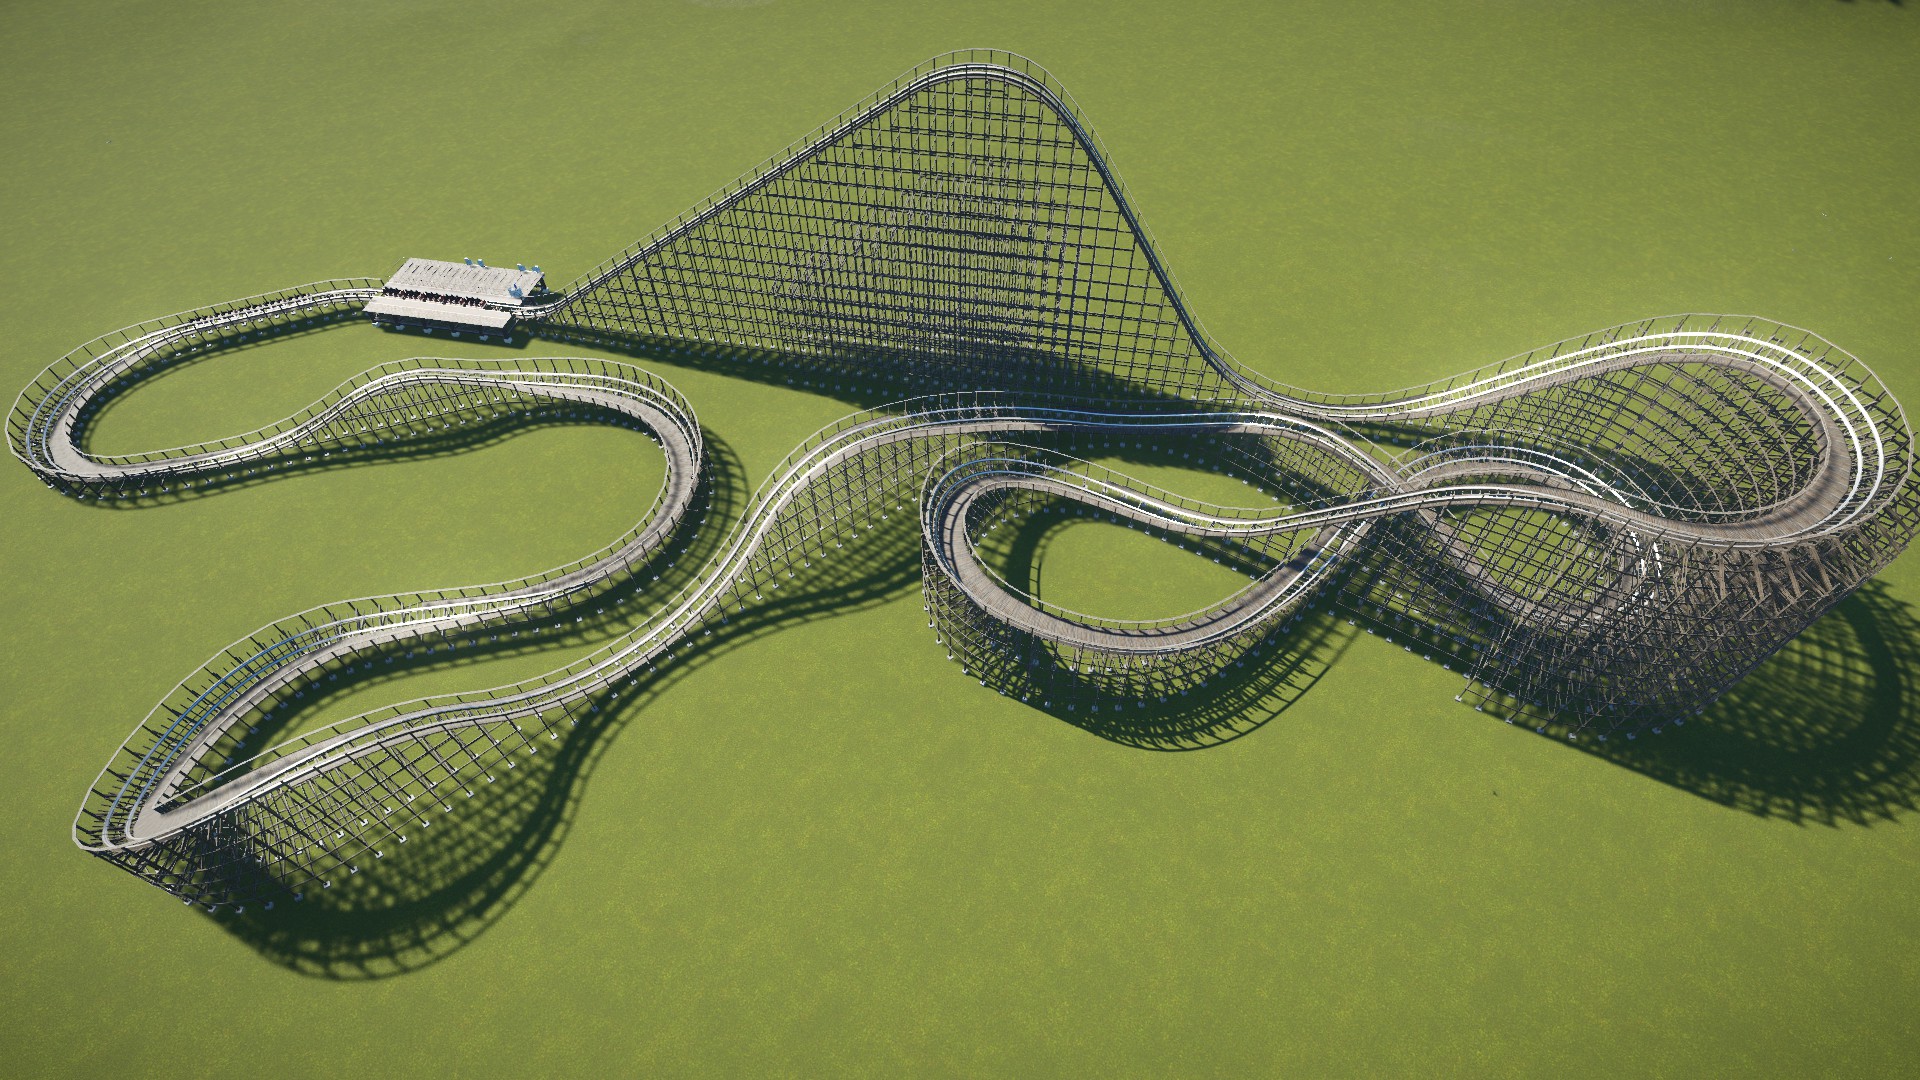
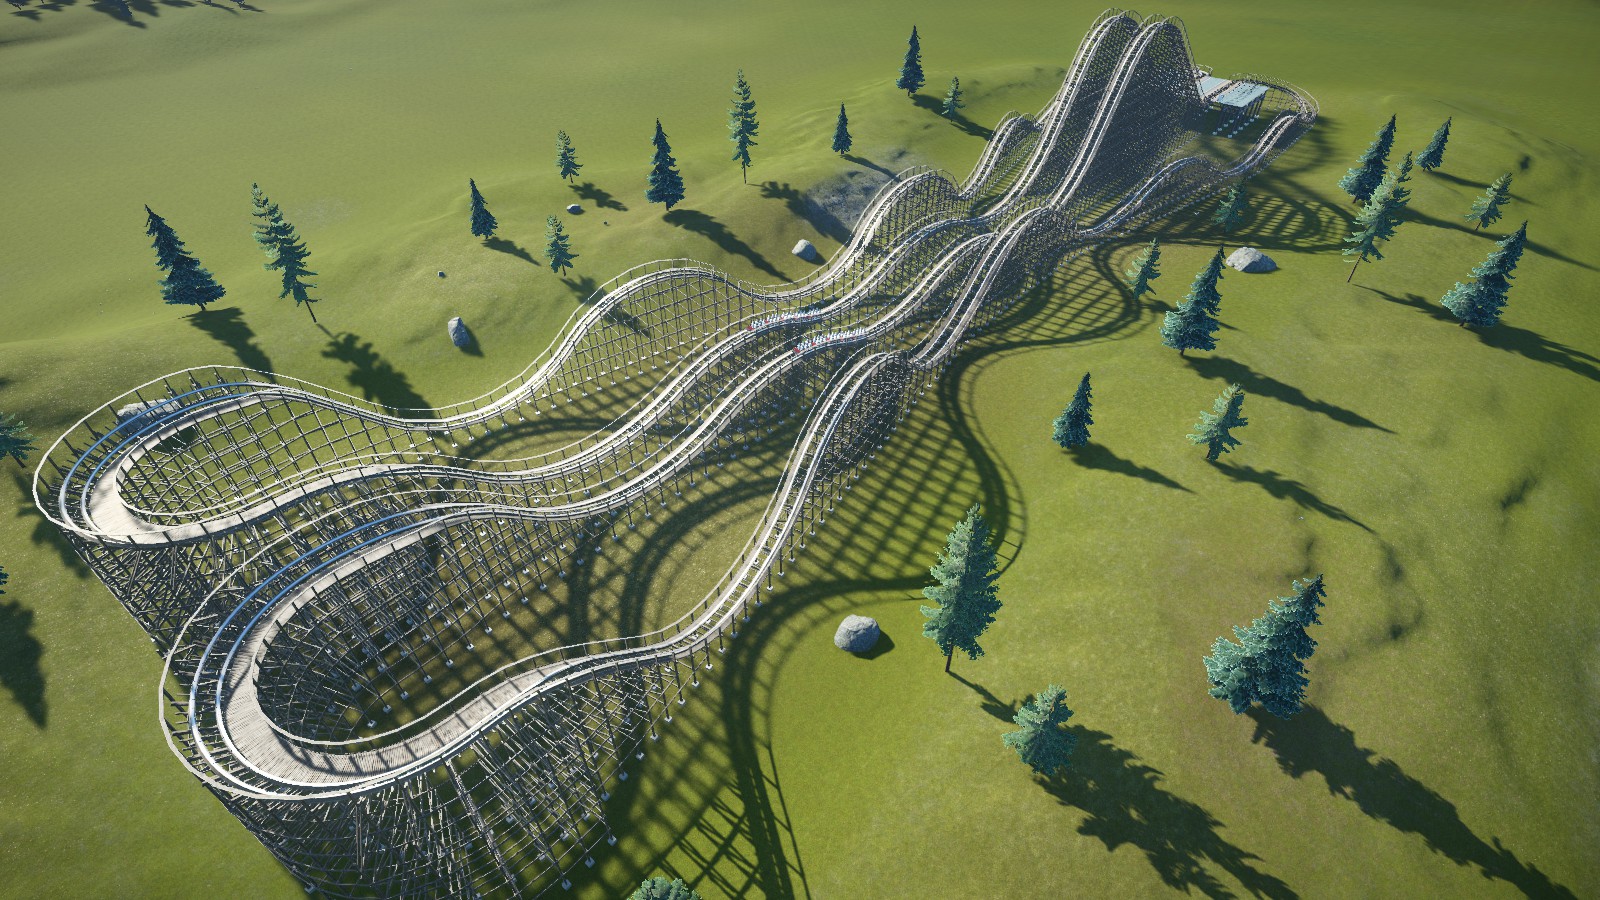
This next screenshot shows a wooden coaster layout.
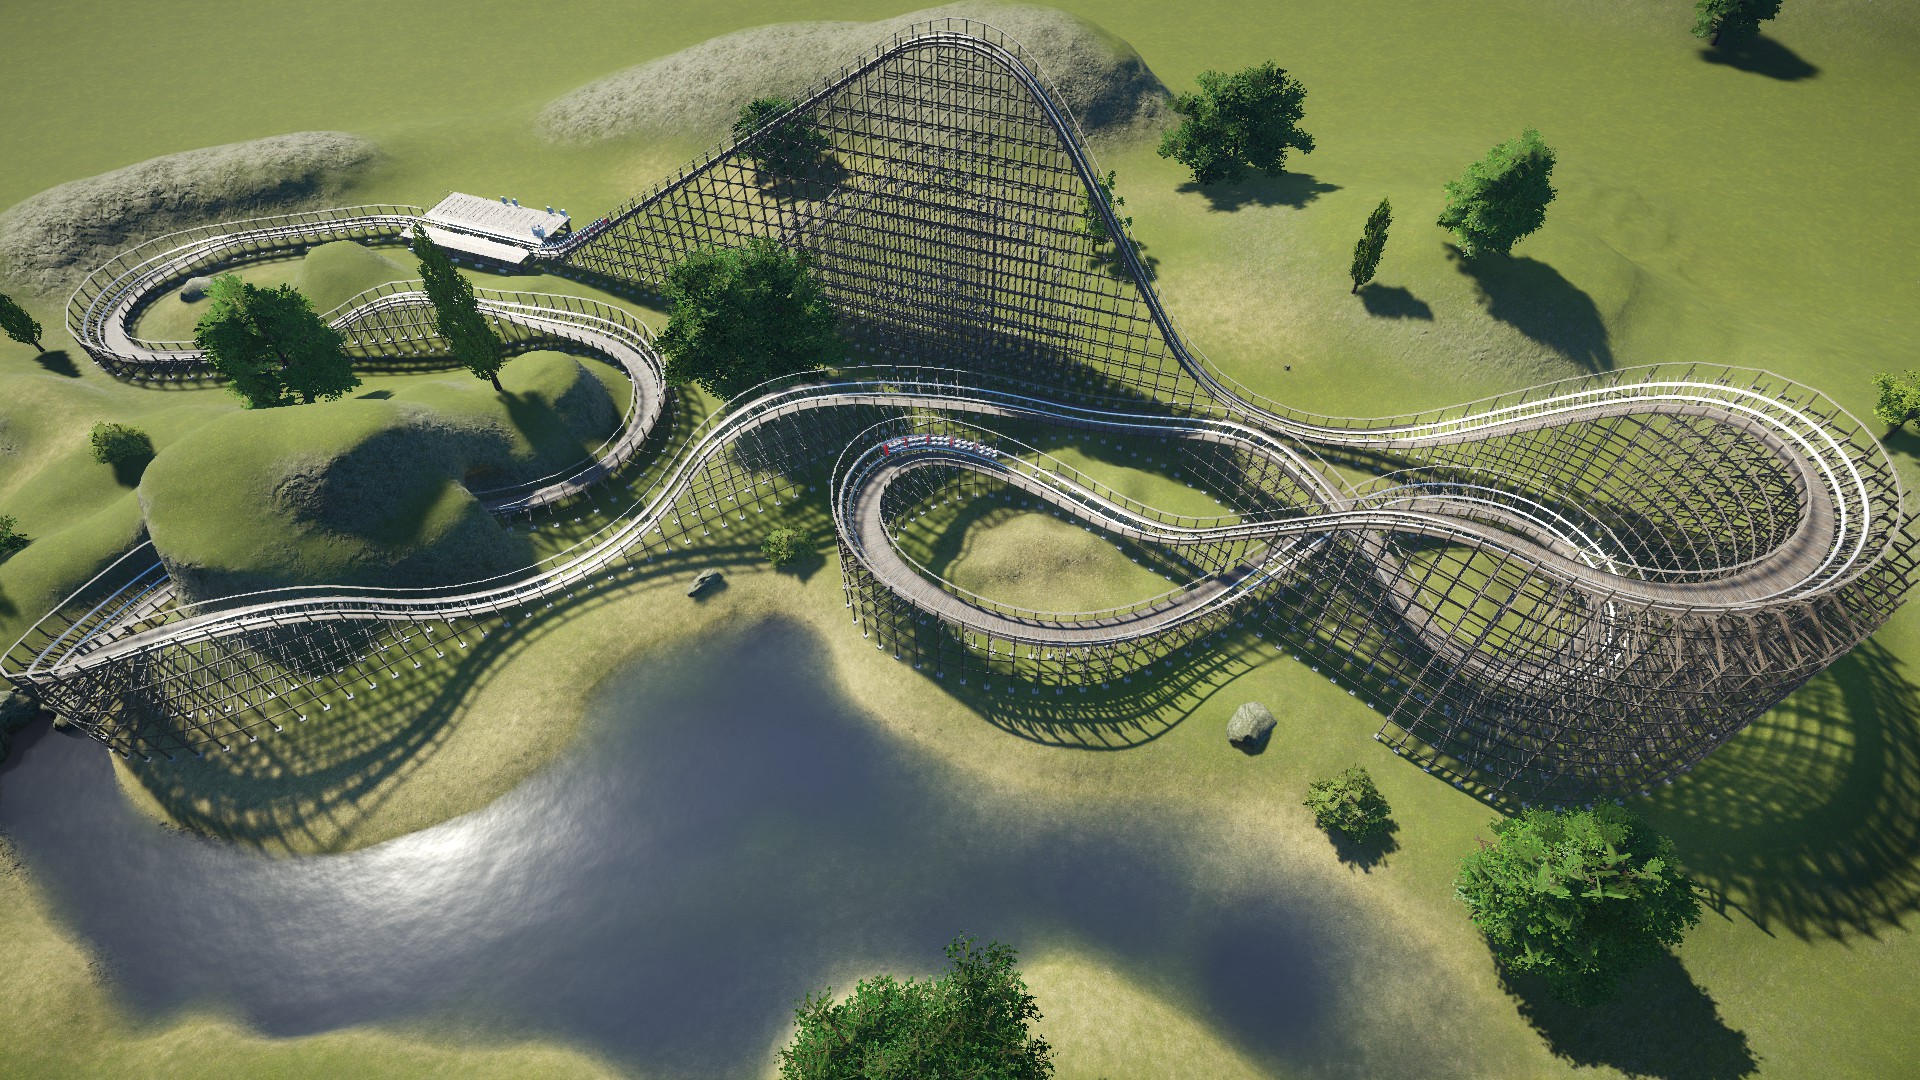
– EFN Ratings: E = 6.86, F = 4.21, N = 1.03
– Max. G-forces: Positive = +4.2Gs, Negative = -0.6Gs, Lateral = 2.75Gs
– Max. Speed: 58mph/93kmh
– Biggest Drop: 113ft/34.4m
– Airtime Count: 5 (total duration 2.7 seconds)
Since wooden coasters share a lot of qualities with other non-inverting coasters and have some unique features of their own, I decided to knock out both topics at once.
Key Features
(Non-Inverting and General Aspects)
- ** The layout relies heavily on sharp curves, steep drops and airtime hills for excitement. The exact inclusion/balance of these elements depend on the coaster type. A lot of coasters that don’t invert have some other special feature (cars swing/spin freely, coaster is really tall/fast, coaster is especially gentle, etc.) that makes up for the lack of inversions.
- ** The track passes through a tunnel. Tunnels (natural or structured) and brief underground sections are a common element to real life coasters to create a dark and/or claustrophobic experience. While they do not seem to affect EFN ratings, they may help boost the coaster’s scenery ratings, which attracts more guests.
(Wooden Track)
- Wooden support system. A lot more sophisticated-looking than most steel support systems. The aesthetics of wooden supports can tie in very nicey to certain areas of your park, especially western or pirate-themed areas.
- Friction is high on wooden coasters. Coaster trains lose speed fairly quickly and can often get stuck or rollback on hills during the building/testing phase. From what I can tell, it can be argued that the physics for wooden coasters in-game are a little off.
- For the reason above, wooden coasters in-game usually stay relatively low to the ground (within 45ft/14m or so) after the first big drop or two.
- The track has catwalks (wooden walkways and railings) all the way around it. Steel coasters usually only have catwalks on chain lifts, brake-sections, etc. (where maintainance workers would need access). Catwalks are purely aesthetic in-game and can be turned off via the Utilities Settings, but most wooden coasters have these.
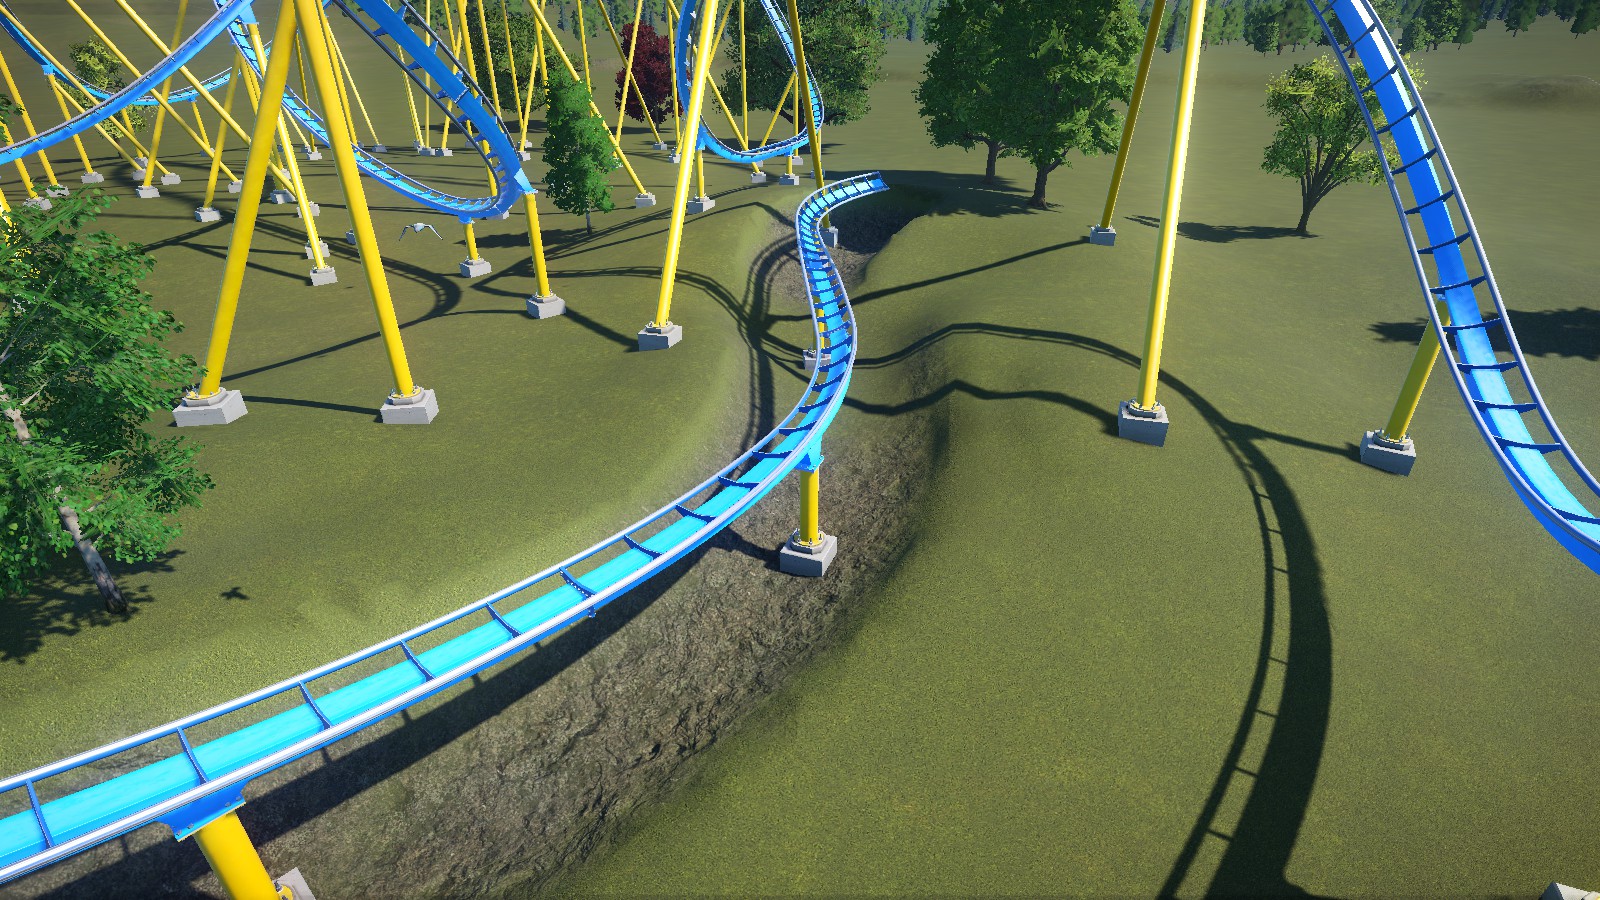
I felt the need to throw this in there as well while talking about layout designs. Notice how the wooden coaster above ties into the landscape. This is more of an aesthetic feature than anything, but incorporating the landscape into the design can really make your design look a whole lot better. In the example above, the landscaping was done after the coaster was built. Depending on your park and the coaster you have in mind, it may be better to do the landscaping first, especially if the coaster is designed specifically to work with the landscape. I wouldn’t recommend placing scenery first, though, as it may get in the way while your trying to build the coaster.
In this case I made the lake first. Then I raised and roughened the areas between the tracks so they weren’t perfectly flat. While I was doing this, I decided to add the tunnel (spontaneous creativity is a good quality to have in this game). I added some texture to make the landscape look a bit more natural. Finally, I added some trees, shrubs and rocks for a small scenery rating boost.
Here is a before-and-after comparison:
Of course, not every coaster needs landscaping or scenery around it, but it is something to consider when designing your coasters.
Special Layouts 1: Small Coasters
Now let’s look at some special coaster types that do not follow the typical layout pattern.
Not every coaster has to be extreme. There are many guests (especially kids) who actually prefer to stay on this side of the stratosphere and not reach supersonic speeds. The following layouts usually have lower EFN ratings than normal, but this does not necessarily mean they are “worse”.
Here is a sample junior coaster demonstrating a typical gentle layout. This layout can be applied to other track types as well.
STATS:
– EFN Ratings: E = 5.09, F = 3.27, N = 0.81
– Max. G-forces: Positive = +3.2Gs, Negative = -0.2Gs, Lateral = 1.9Gs
– Max. Speed: 47mph/76kmh
– Biggest Drop: 65ft/19.8m
– Airtime Count: 3 (total duration 1 second)
As you can see, the EFN stats are lower than usual, but not too bad. Again, don’t let orange excitement and fear stats convince you that your coaster design is not good enough, because that’s not necessarily what they’re intended to imply. Orange excitement and fear stats are an indicator of a gentler ride. Red stats are an indicator of poor design.
Apart from stats, you can see that the ride isn’t extremely tall. Most gentle coasters peak below 120ft/36m. They usually aren’t all that fast either and don’t exceed about 55mph/90kmh. The layouts consist of relatively gentle hills, curves, and sometimes inversions.
These coasters have special cars with gondolas on either side that swing freely side-to-side. They aren’t very big at all and very easy to design. I made this one in about 15-20min.
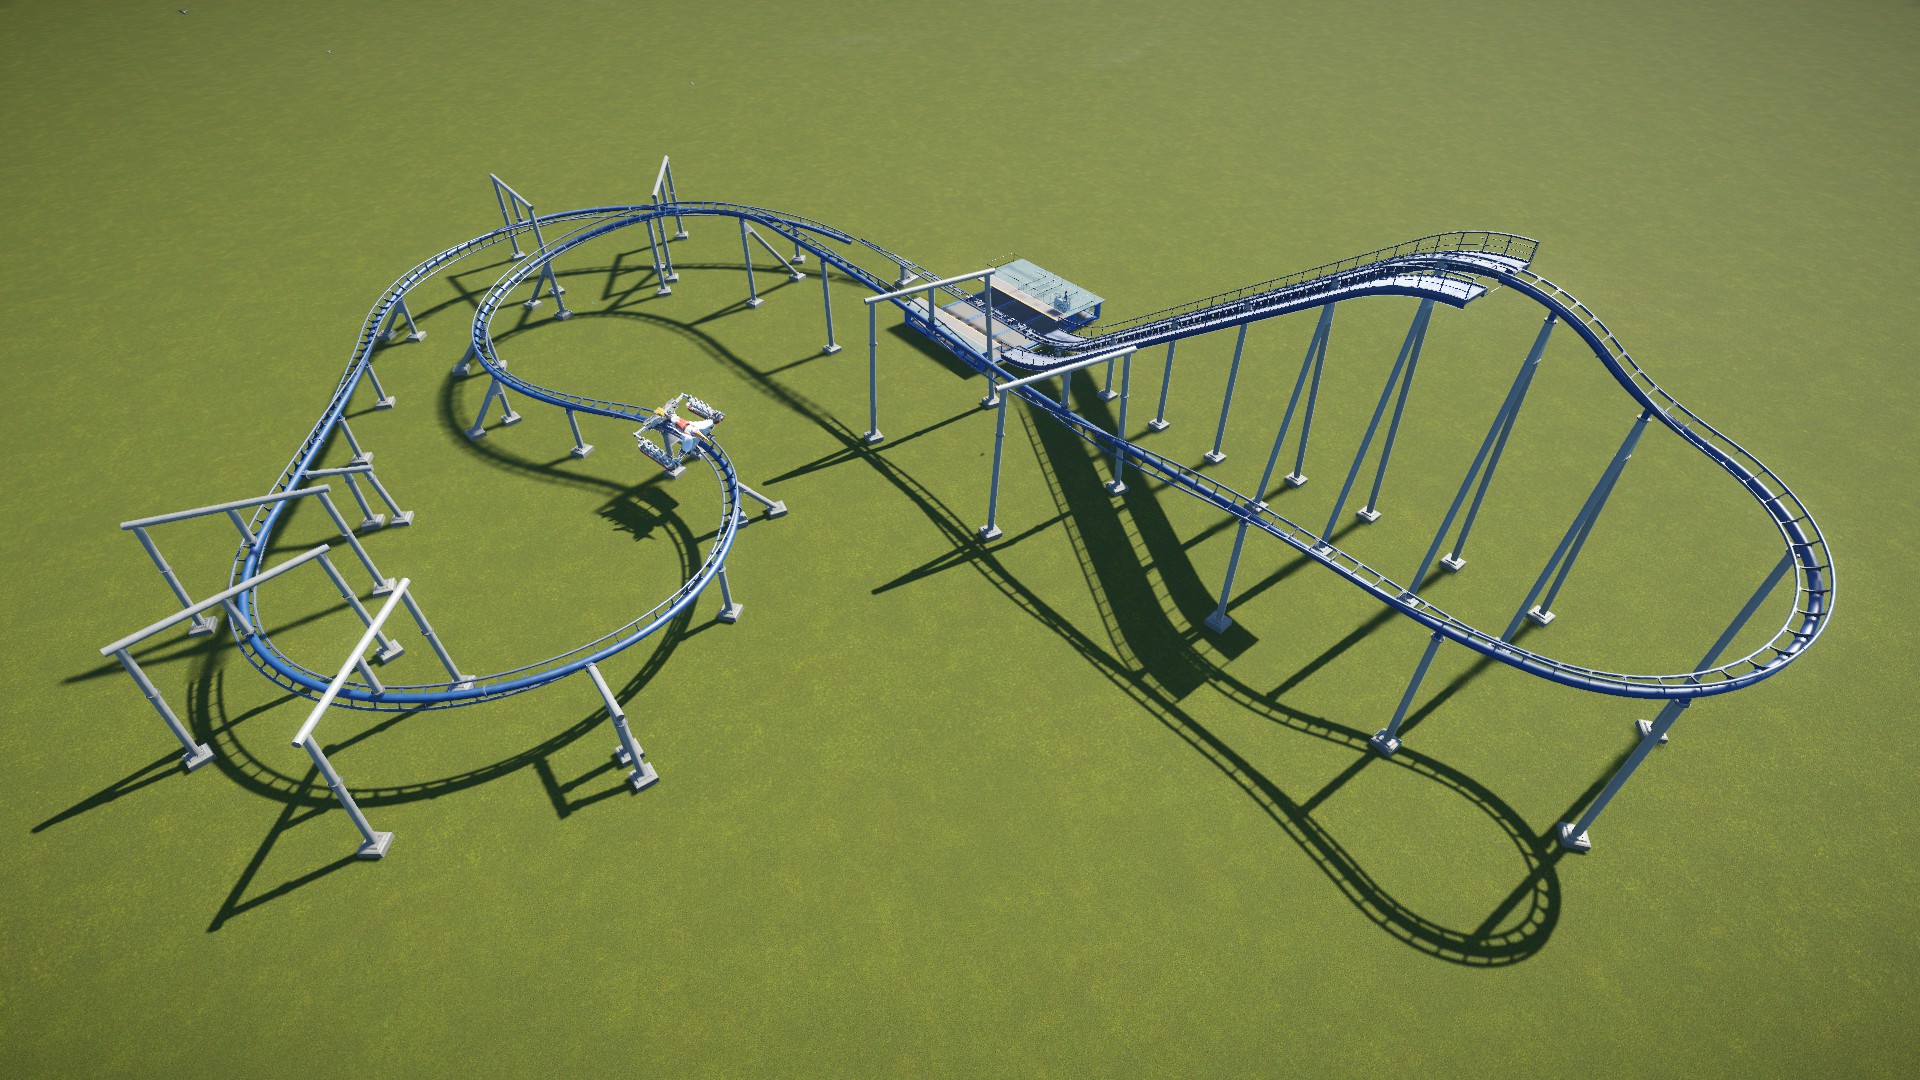
– EFN Ratings: E = 3.79, F = 2.64, N = 0.34
– Max. G-forces:Positive = +2.1Gs, Negative = -1.5Gs, Lateral = 1.4Gs
– Max. Speed: 34mph/55kmh
– Height: 69ft/21m
– Airtime Count: 0
Note that while the track inverts, the swinging gondolas are not meant to invert. Riders appreciate not getting dumped out of the ride! The inversions and curves will have to be large so that the gondola doesn’t flip over. Also the coaster can’t be very fast (I’d keep it below 35mph/55kmh). However, since the gondolas are free-swinging you can bank the track in unusual ways, so feel free to get creative there.
You may also notice the negative Gs are a little high for a ride of this type. The negative Gs max out on the inline twist. I believe the g-force stats are based on the car itself (the part that looks like a bird) not the gondolas. So on this coaster I think the g-forces here are acceptable.
I’m covering both spinning and wild mouse together since they have a lot in common. These coasters focus less on speed and more on slinging you around. From a designer’s perspective, the layouts for these are cheap, space-efficient, and simplistic. However, the small size and slow/unusual ride experience cause people to debate whether these should count as actual “coasters” or just some glorified junior ride, especially in the case of wild mouse coasters. [*Work in Progress. To be contined…*]
Special Layouts 2: Huge Coasters
These coasters are the biggest, tallest, and fastest coasters in the game! Hold on to your hair for this one!
Hypercoasters soar over 200ft/60m above the ground at their peak. They are designed to reach speeds of 75-85mph/120-135kmh. Because of their heights and speeds, hypercoasters have large, smooth layouts that primarily consist of wide, sharply-banked turns and large airtime hills.
Giga coasters are the big brothers of hypercoasters. They have similar layouts, but peak at heights over 300ft/92m and reach speeds in excess of 90mph/145kmh! There are only a handful of these in the real world.
Here is a giga coaster showing what these monster layouts generally look like:
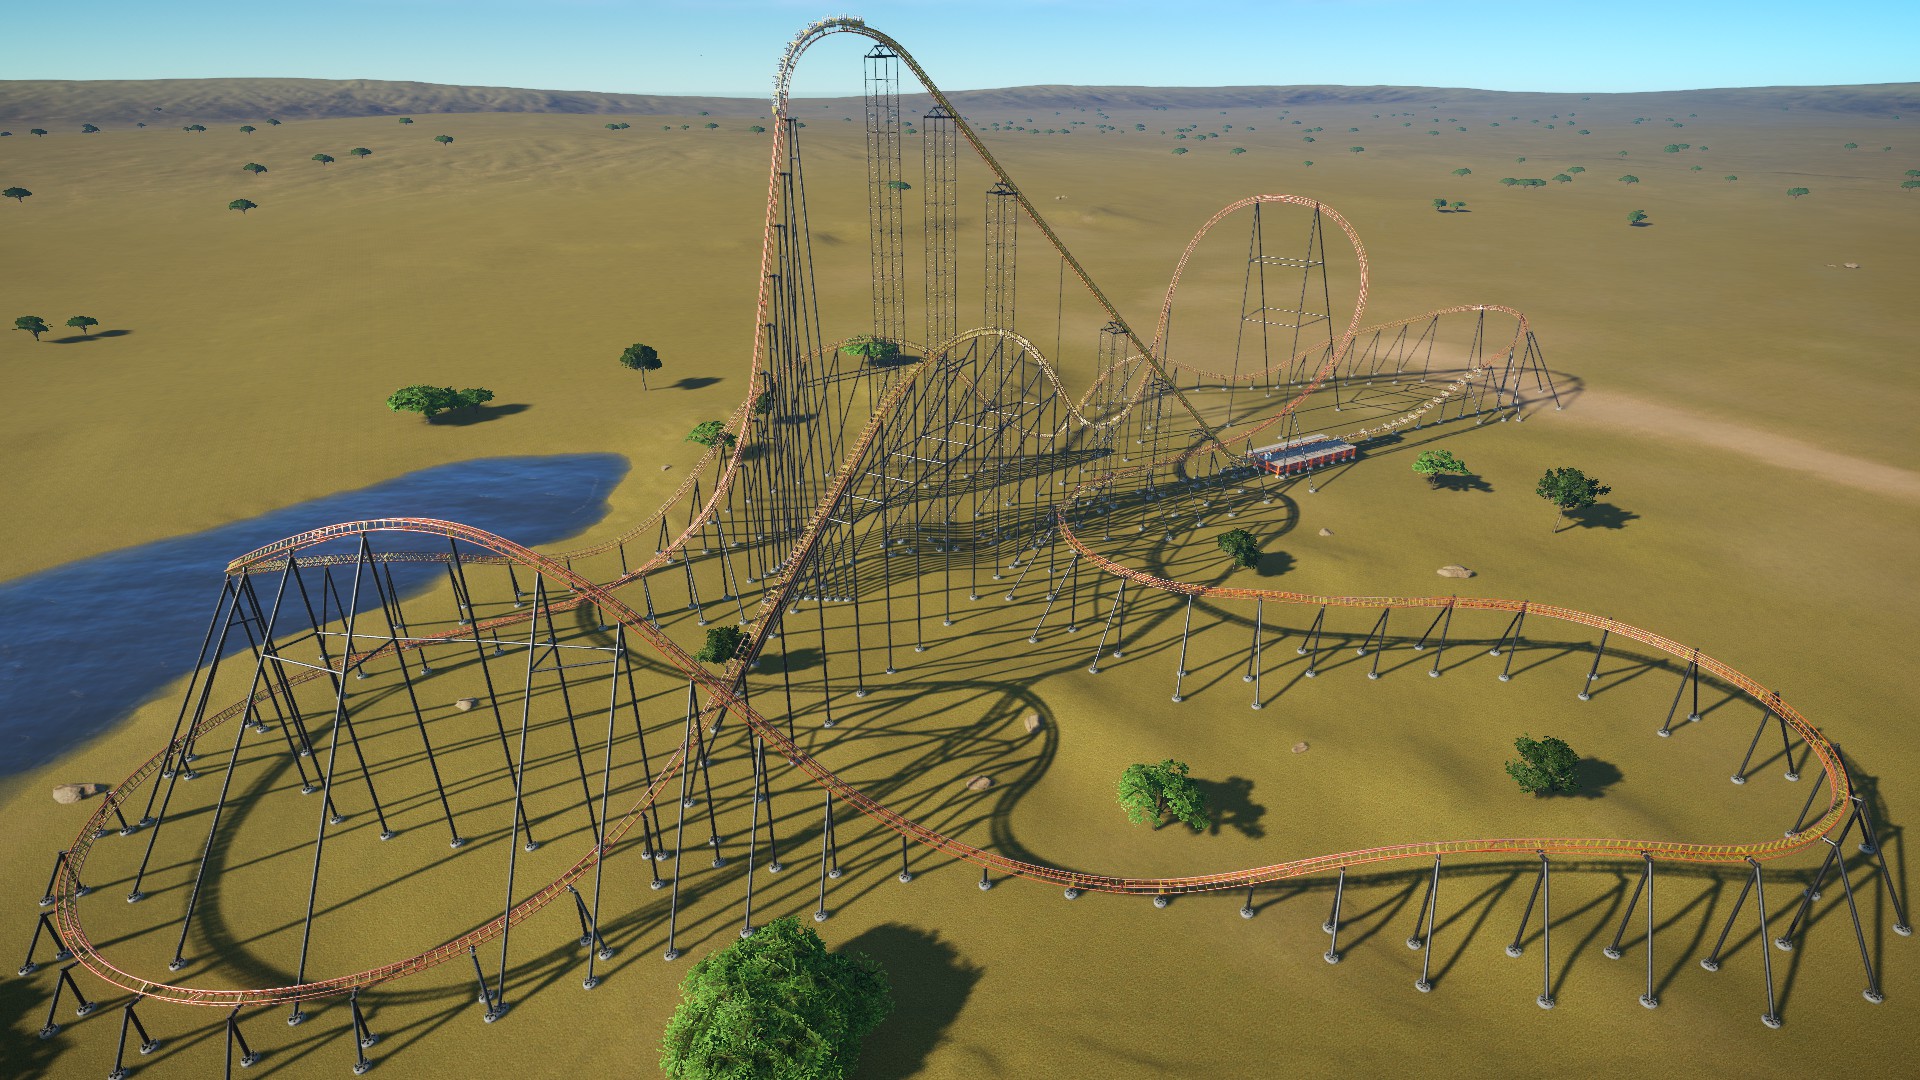
– EFN Ratings: E = 7.81, F = 5.27, N = 2.10
– Max. G-forces: Positive = +5Gs, Negative = -0.7Gs, Lateral = 2.7Gs
– Max. Speed: 91mph/146kmh
– Biggest Drop: 277ft/84.4m
– Airtime Count: 6 (total duration 5.6 seconds)
Layout Features
- 304ft/92.7m lift hill. As stated above, hypercoasters exceed 200ft/60m, giga coasters exceed 300ft/92m.
- Wide, banked turns. In order to keep lateral g-forces on the charts, turns have to be very wide. The are also usually banked sharply, reaching bank angles at or near 90 degrees.
- Large airtime hills. Since hyper/giga coasters can’t invert (safely), airtime hills are the main source of excitement. Like turns, hills also have to be quite large to keep g-forces under control. Remember to make sure your airtime hills actually create airtime. Failure to do so can negatively impact EFN ratings.
Strata coasters are the fastest and tallest of all coasters. These steel giants are specifically designed to reach heights over 400ft/122m tall and speeds over 100mph/160kmh! Due to their insane speeds and heights, strata coasters don’t (nor can they safely) use a typical layout. Sprint 500 and Zenith are is Planet Coaster’s strata coaster track types. Only a couple of these coasters actually exist in the real world and they all follow nearly the exact same layout. The following example shows the typical layout for this type of coaster:
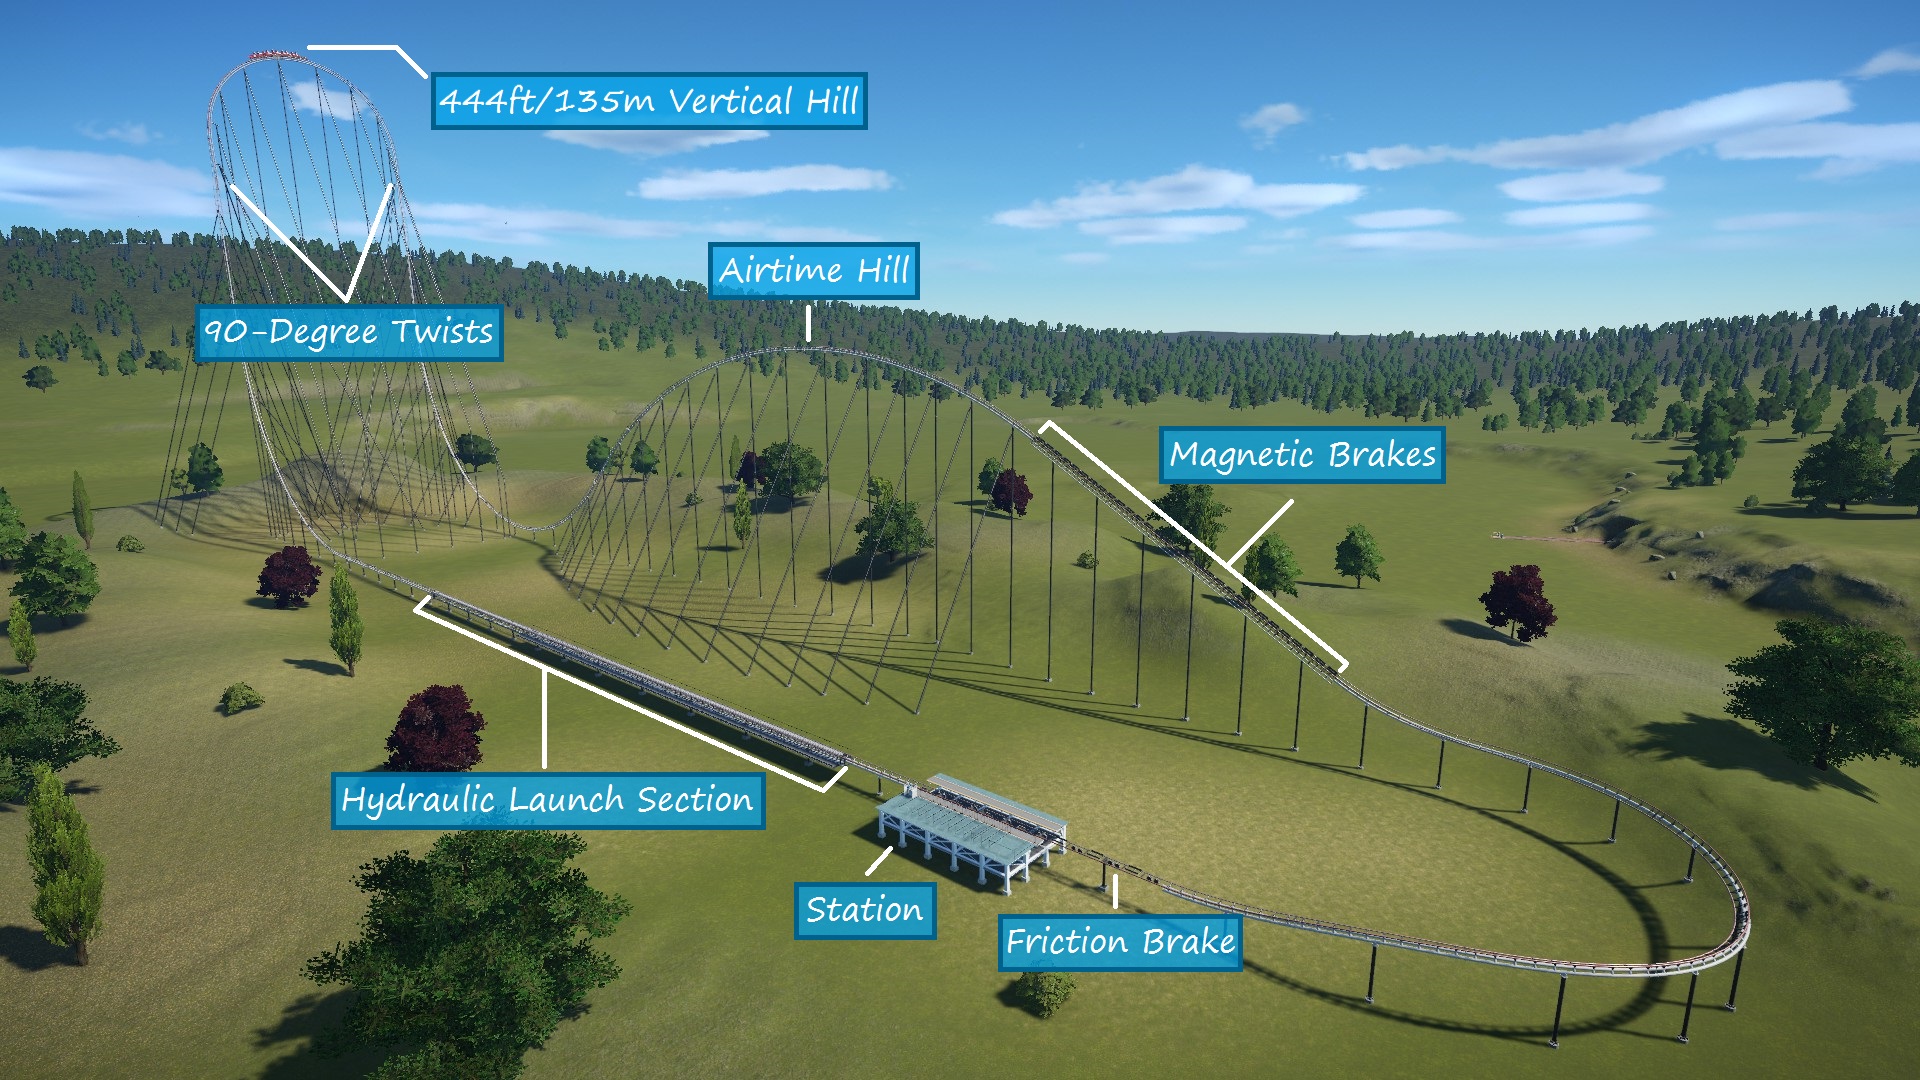
– EFN Ratings: E = 7.43, F = 4.84, N = 1.80
– Max. G-forces: Positive = +5.4Gs, Negative = -1.45Gs, Lateral = 0.5Gs
– Max. Speed: 120mph/193kmh
– Biggest Drop: 427ft/130m
– Airtime Count: 3 (total duration 5.4 seconds)
Layout Features
- The launch section holds the train for 3 seconds (adjustable in-game) and then very rapidly accelerates the train to 120mph/193kmh.
- The launch section is followed by a vertical hill (aka top hat) that soars 444ft/135m above the ground. Near the top of the hill, the track twists 90 degrees to the right (in this case; the left works too). The train crests the hill very slowly, pulling airtime or near-airtime in the process. After the crest, the track twists 90 degrees the right again and heads straight back down 423ft/129m.
- After the vertical drop, a huge airtime hill follows. At the crest, the train is still blazing down the track at roughly 85mph/137kmh.
- After the crest, magnetic brakes (functionally the same as friction brakes) slow the train down to sanity, which on this coaster is 20mph/32kmh. From there the train makes a u-turn back into the station.
- Excitement should be really high (6+ with an average around 10) throughout the ride. The ratings will be lower at the crest of the vertical hill and after the brake section. The part after the brake section can have a major impact on EFN ratings, so be careful not to make it too long/slow.
- Despite the massive speed and height figures, the ride experience is fairly short. From launch to brake run (which is considered to be the “actual” ride) is usually going to be well under 30 seconds. On this coaster it’s about 23 seconds.
- The track is laid out in long segments. Keeping G-force under control when going over 100mph/160kmh requires turns, hills, and the transitions into/out of them to be very large. The trainsition into the vertical hill consists of four 70ft/21.3m segments, each one increasing the slope angle by 22.5 degrees.
- There are no block brakes. The game allows you to build them, but you can’t set up multiple trains on this coaster type. Even if you could, if a block brake had to bring one of these trains to complete stop from 80mph/130kmh, riders’ souls would briefly run ahead of their bodies. Not to mention the lawsuits that would filed against you from hospitalized riders…
NOTE: Zenith was added in Update 1.4, a good while after the sample coaster above was made. Zenith has specially-designed pieces for creating a more realistic top hat element.
While current strata coasters follow the same general layout, feel free to experiment with the layout and add your own flair to the ride. Can you design a layout with multiple airtime hills? Can you shorten the post-braking section of the ride.
Also note that the Sprint 500 is not always used as a strata coaster. It may also follow a large-scale hyper/giga coaster layout with a launch section in place of the traditional lift hill.
RANDOM FUN FACT In real life, strata coaster trains occasionally don’t make it over the vertical hill and rollback! They’re designed to do this though and riders usually get a re-launch. Rollbacks don’t happen in this game. Unless, of course, you just build the hill in such a way that the train couldn’t possibly make it over, in which case the test dummies only get a 1/2 ride and rate your coaster accordingly.
Special Layouts 3: Bi-Directional Coasters (WiP)
Most coasters aren’t designed to roll back. These coaster types, however, do just that!
IMPORTANT NOTE: The following track types CANNOT function as full-circuit coasters! Attempting to use them as such will result in the coaster passing the station instead of stopping and/or getting stranded somewhere along the track.
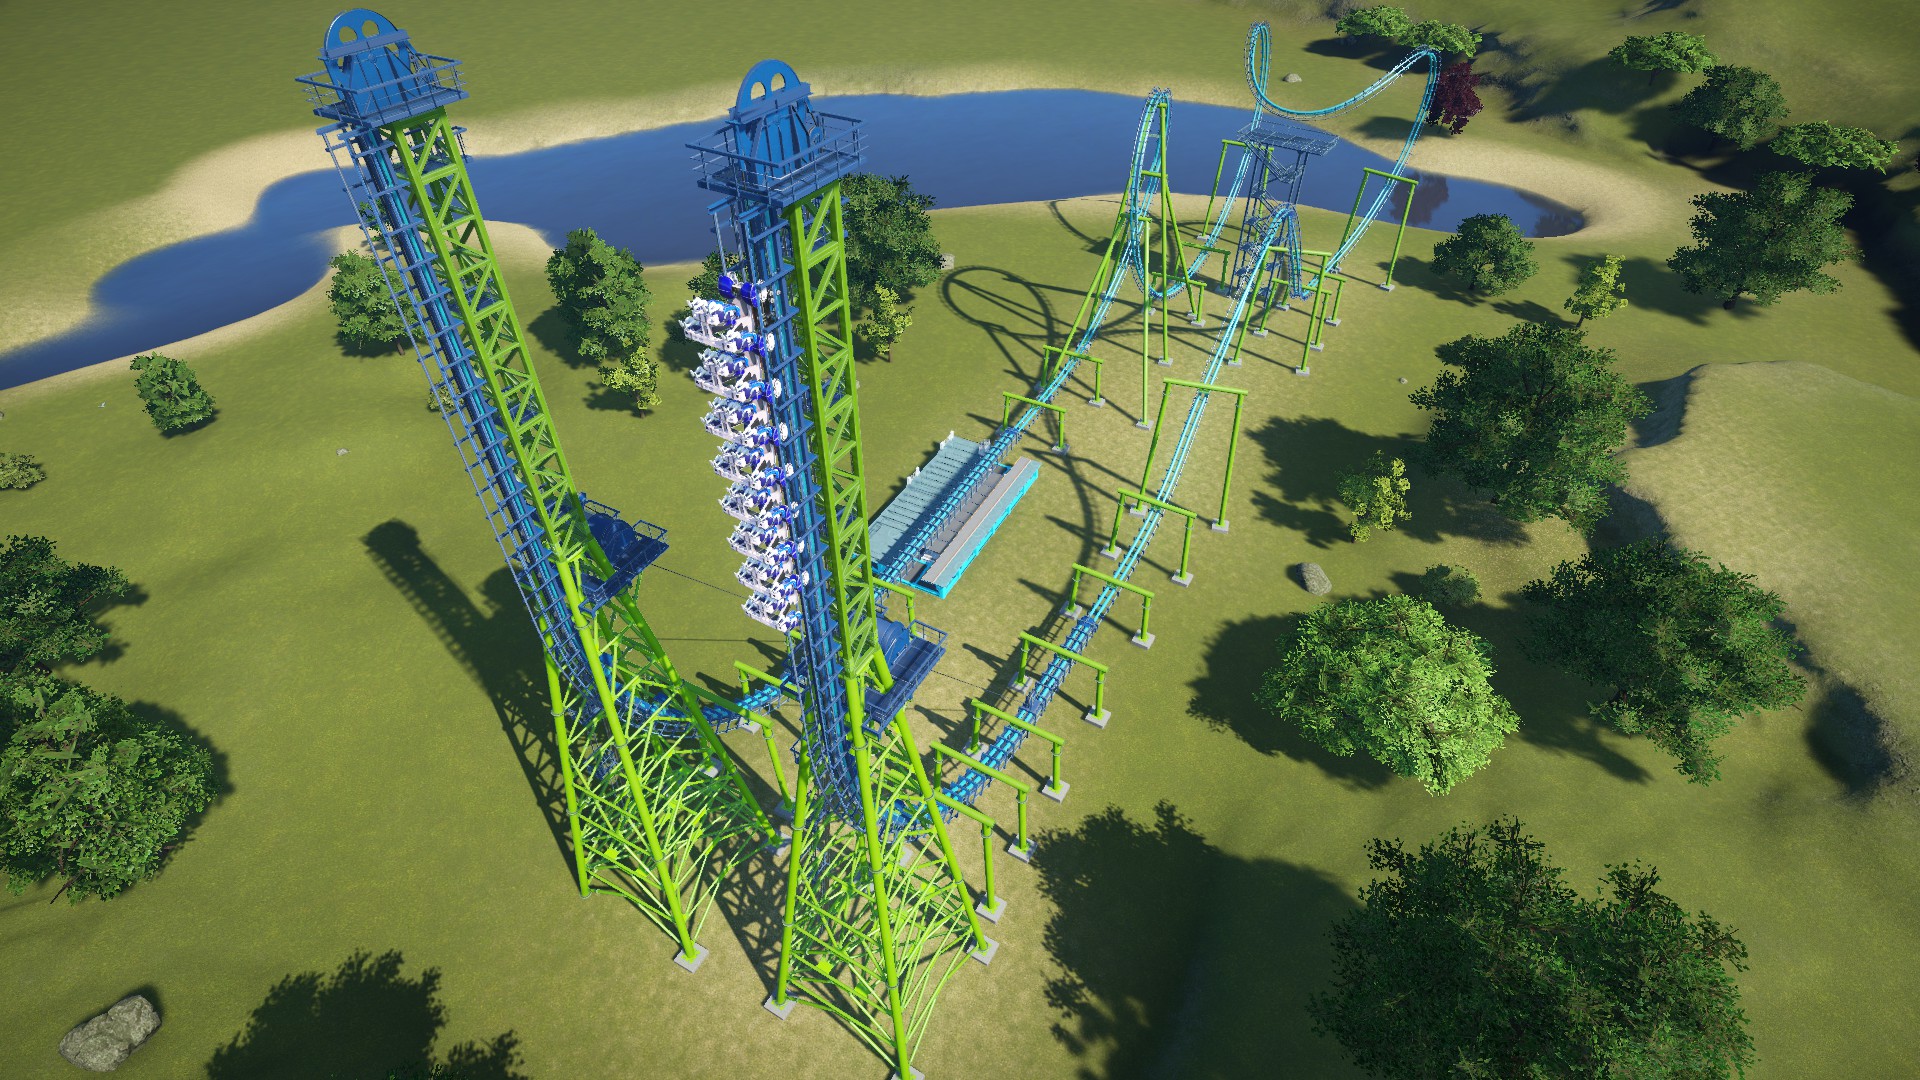
Boomerang coasters consist of two lift hills: a cable lift behind the station and a chain lift at the opposite end of the track. The coaster reverses out of the station and up the first cable lift. The train then drops back down the hill and rolls through the station. Typically, a cobra roll (or similar inversion) and a small hill or loop follows. The train climbs the next lift hill and then reverses back down the track. The train passes back through the station again and partially rolls back up the first hill before finally rolling back into the station. Here’s a typical layout:
When editing the track, there are prebuilt cable/chain lift hill sections in the utilities track peices. Normally, you only use one of each piece. You can go to the utilities tab to adjust settings like lift speed and drop delays. If you want to boost EFN ratings (who doesn’t?), decrease the launch delay (the delay before reversing up the hill) and increasing the release delay (the delay before dropping the train down the hill) on the first hill.
Unfortunately, there’s not a a whole lot of design flexibility here. The lift hills are only really designed to be the default length. While you can technically extend them and give the train more speed, the fixed shape of the bottom of the hill will cause high amounts of positive g-force if you do. Because of the train’s relatively low speed, you can’t build a whole lot between lift hills as the train won’t have enough momentum to complete the ride. Finally, for obvious reasons, you can only run train on the track.
Though the EFN ratings aren’t exactly hair-raising, the unique ride experience of boomerang coasters makes them worth some park space and funds.
One of my favorites! This coaster type is basically a boomerang coaster on steriods!
The biggest differences (apart from size) are the inverted track and the custom-height vertical lift hills. Also, the overall increased speed and height allow for more design flexibility and higher EFN ratings than standard boomerang coasters. Otherwise, giant boomerangs are conceptually the same as standard boomerangs.
Just for the record, the lift hills/towers do not necessarily have to be side-by-side as I made them in these examples. Most boomerang coaster layouts loosely resemble a U shape. Your coaster can loosely resemble whichever letter you prefer as long as the coaster ultimately makes it back to the station.
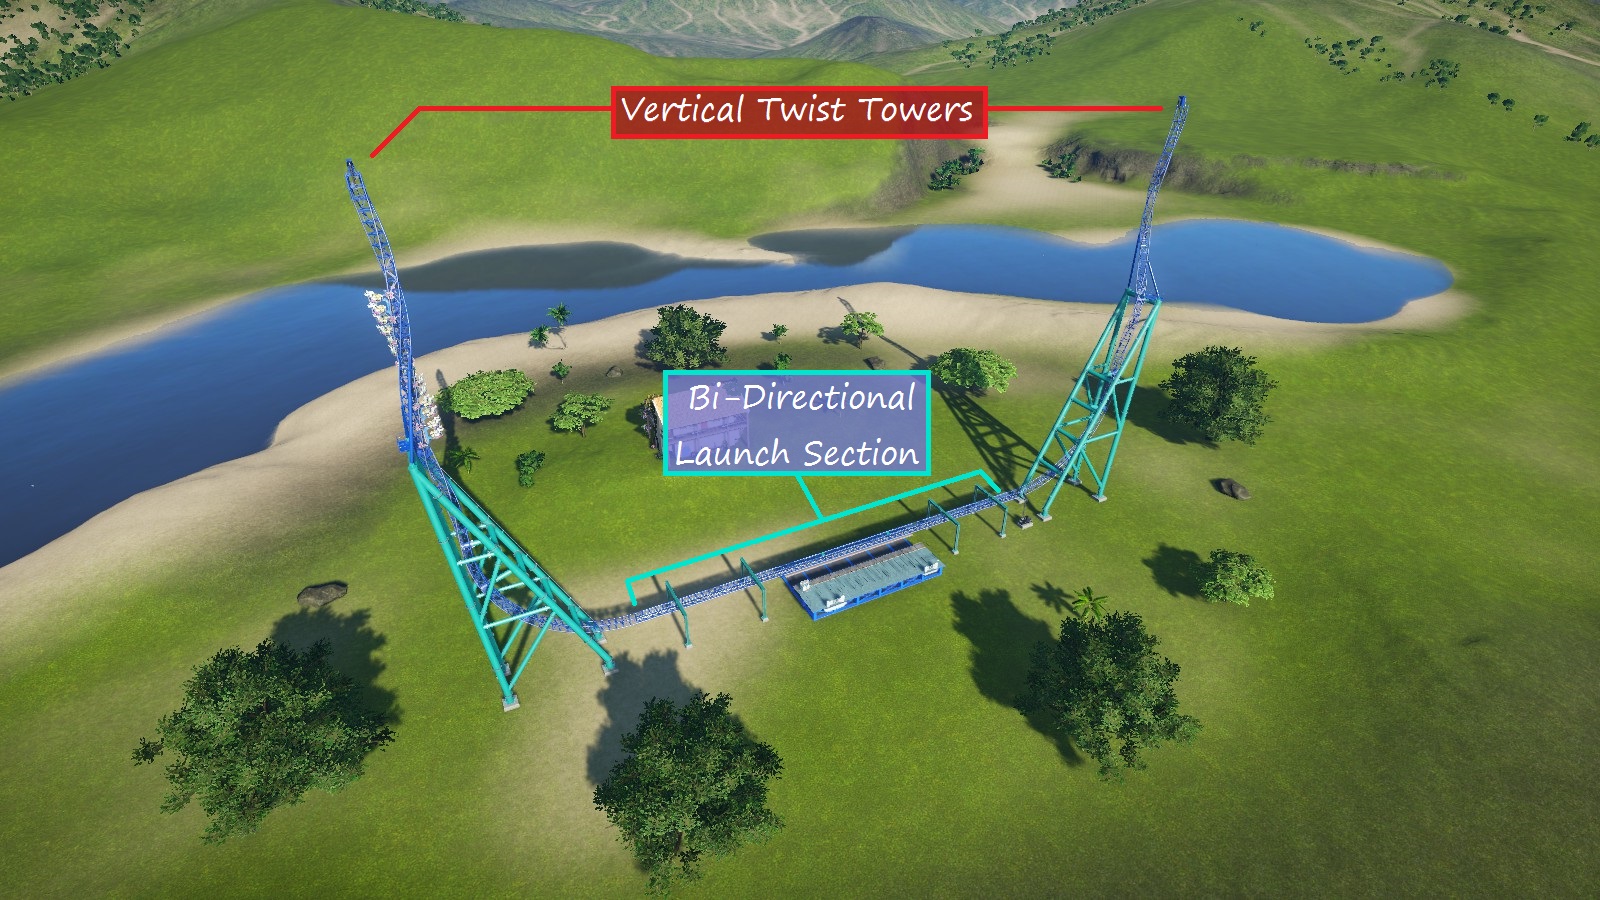
Impulsion coasters are what I like to call “half-pipe” coasters. The train moves back and forth between two vertical twist towers (these are special utility track pieces) launching faster and faster as it passes through the station. Once it completes a specified number of passes, it stops at the station.
The game’s prebuilt version of this coaster (“Wrangler”) is about as good as it gets, so I’ll use that layout as our example.
You may have noticed the positive g-force is really high. Due to the shape of the prebuilt towers, the only options to lower the g-force is to either slow the ride down or make your own twist towers. Slowing down the ride means to train won’t get as close to the top of the tower and EFN ratings will drop. Making your own towers works, but the special tower supports will be replaced with standard supports, which is not as aesthetically pleasing. The design choice there is up to you.
In the Ride Operations tab, you can choose how many times the train passes through the station before stopping.
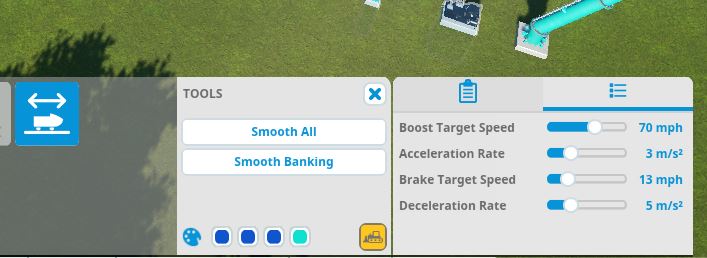
When building a station or launch section of track, you can choose the “Boost Target Speed” in the utility settings. This is the max speed the coaster should reach. It takes a few passes to get to this speed. If you find the train isn’t reaching the target speed, increase the number of passes.
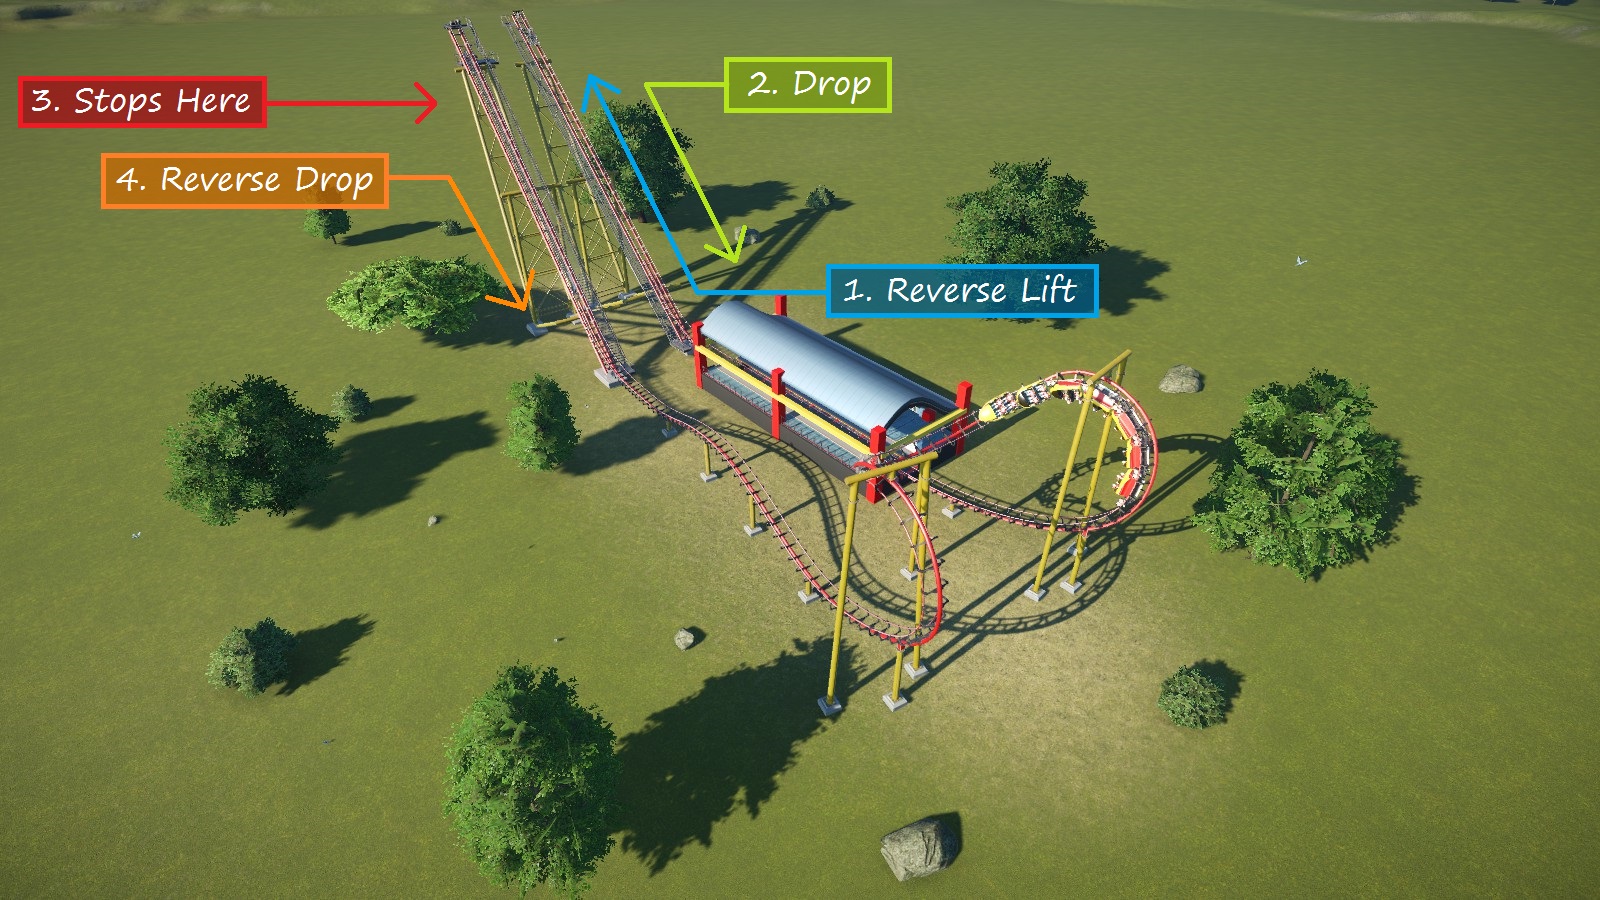
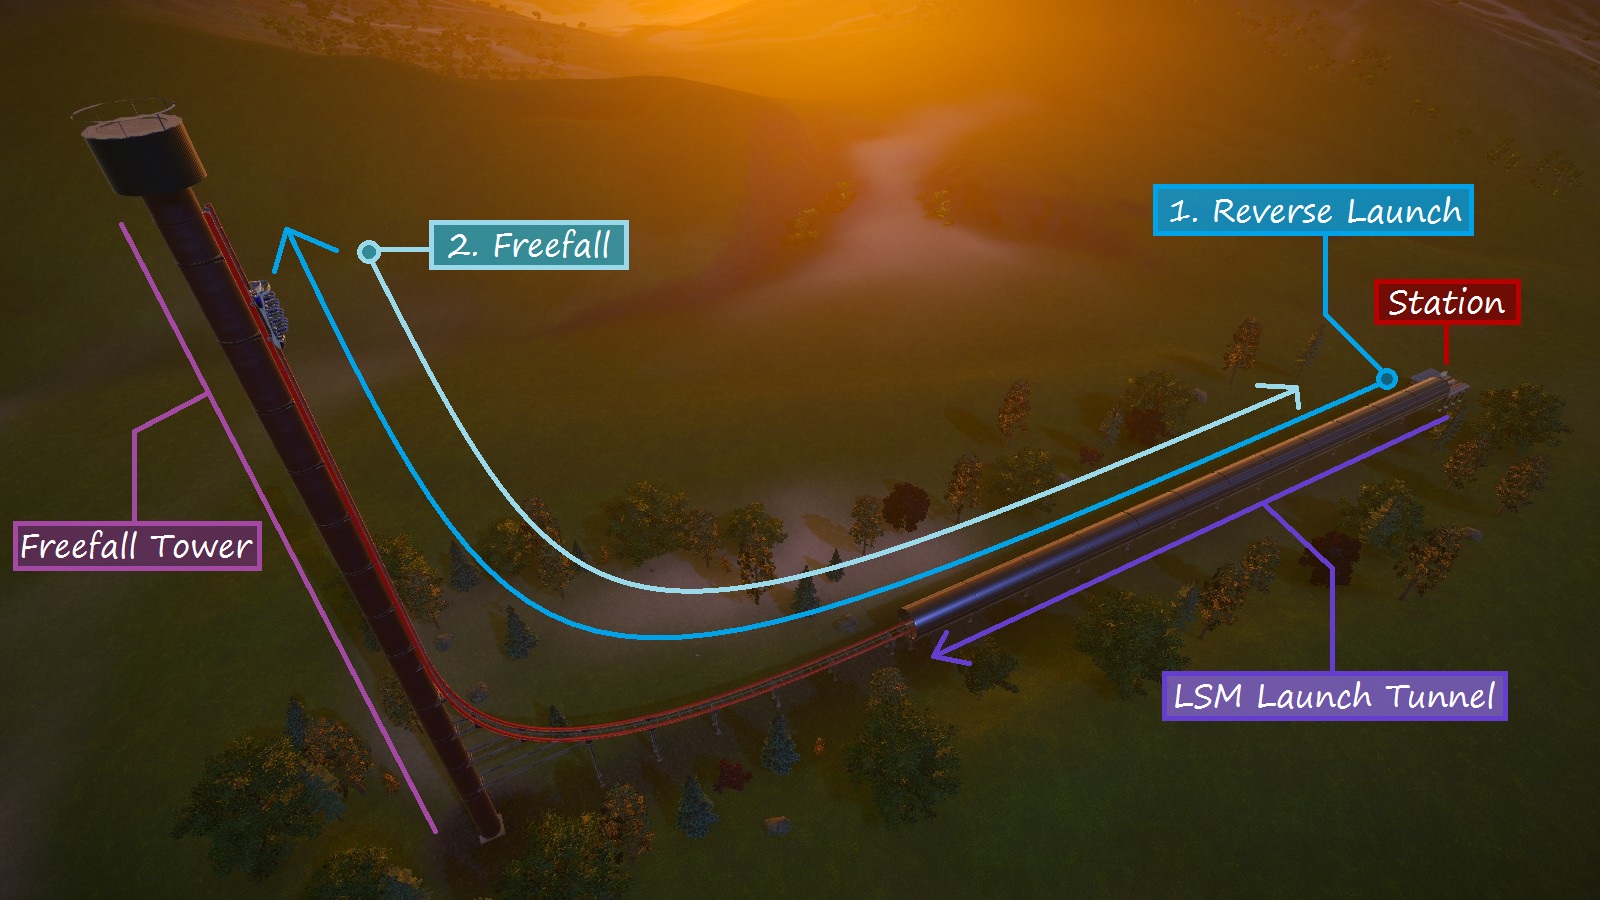
Reverse launch coasters accelerate riders backward down a LSM launch section (optionally enclosed in a tunnel) and up a vertical tower. Then the coaster freefalls back down the tower and makes its way back to the station.
Here is the in-game blueprint known as “Spire of Shock”
From a designer’s perspective, there’s really not much to this one. Every piece is a special prebuilt section and the layout above is pretty much the only way to design it. You do however have control over the length and speed of the launch section and the height of the tower.
This coaster is only 30-ish seconds long, so you can get riders in and out pretty quickly. It’s worth noting, though, that the cost of this coaster will make you scream louder than the freefall, so be prepared for that.
Dueling Coasters
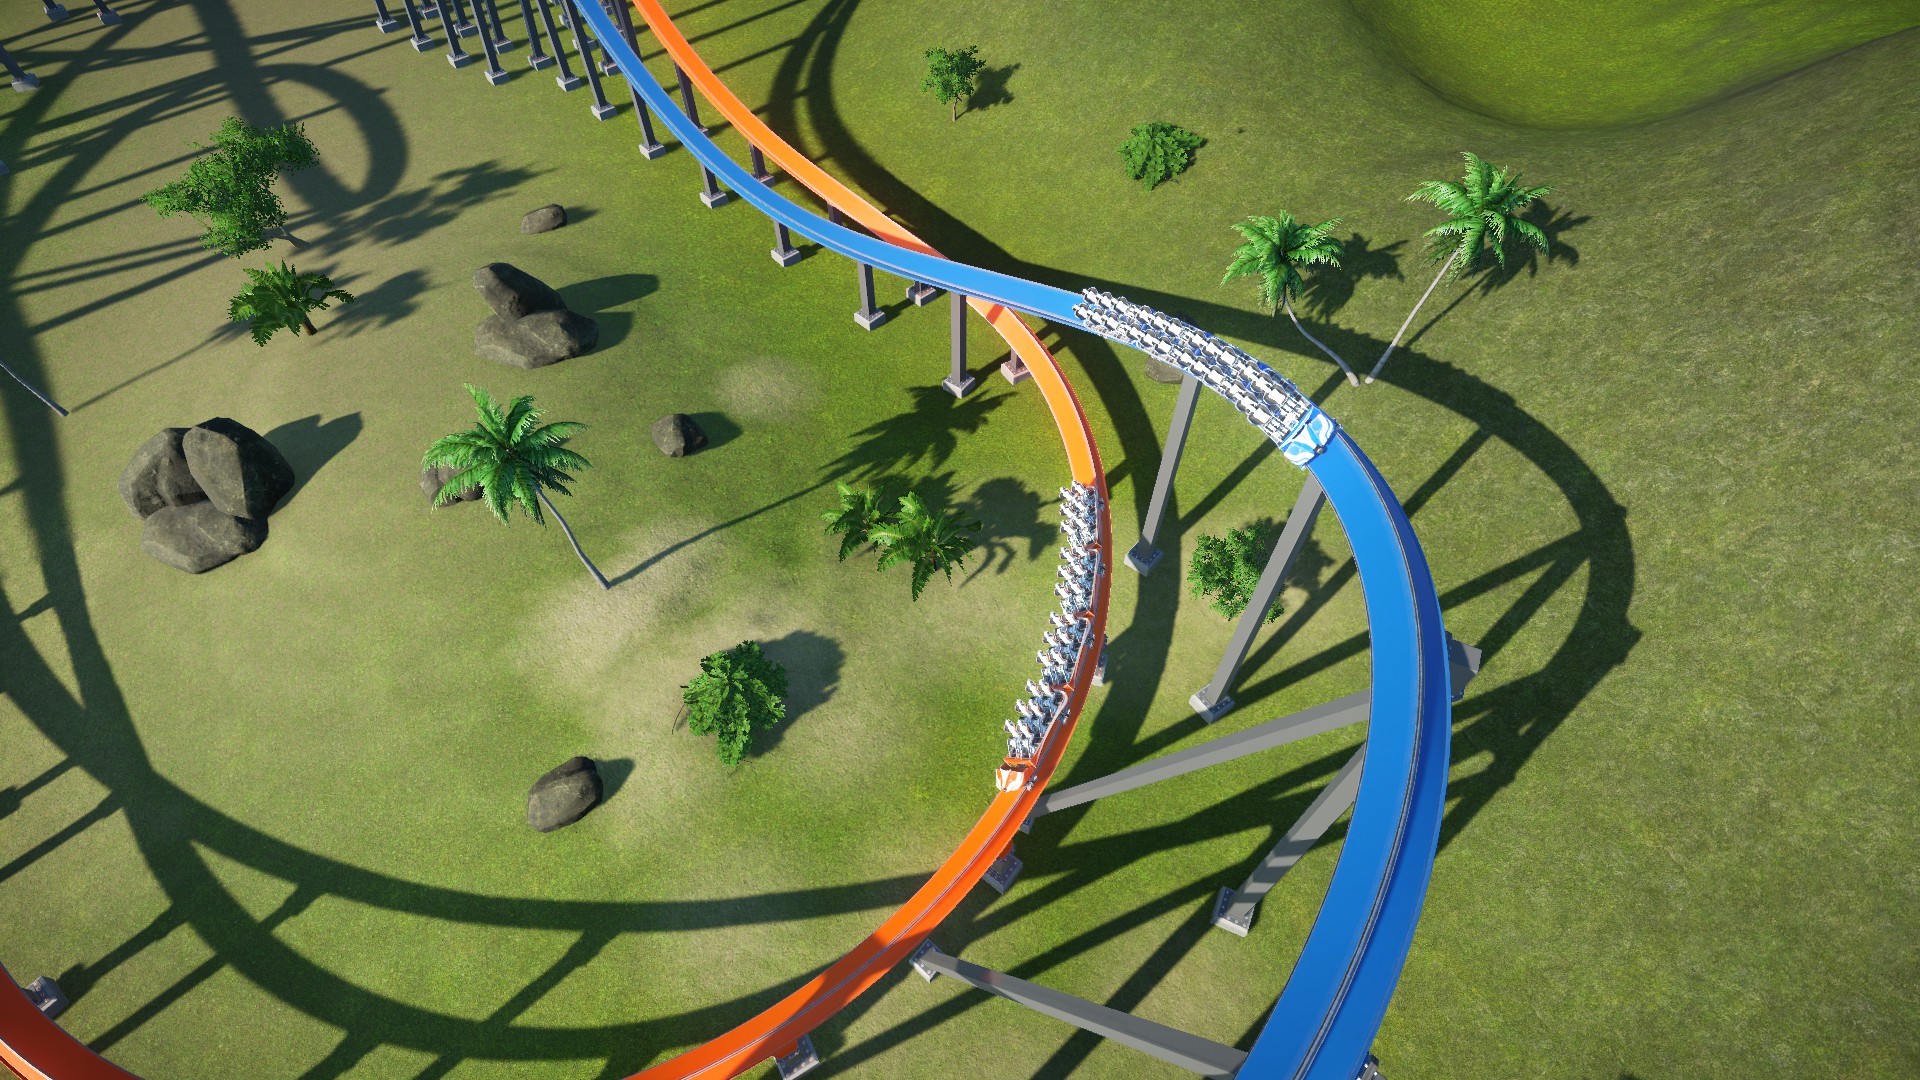
Want to take coaster building to the next level? Try building two coasters together! Dueling coasters are two (or more) coasters that are designed to run together as one ride. Sometimes, the tracks interweave with each other. Other times, the tracks mirror each other. Either way, dueling coasters are both pleasing to watch and even more amazing to ride! Dueling coasters joined the Planet Coaster party in update 1.2 which was released in mid-April 2017.
There are a few signature features of dueling coasters:
- Coasters start at the same time and end at roughly the same time.
- On interweaving coasters, the trains usually take turns “leading” throughout the ride to make it feel like a race. They often perform certain inversions or maneuvers in sync. Sometimes, the trains approach each other from opposite directions.
- The layouts are generally more spread out than normal coasters. While I suppose it can be done, it’s hard to fit twice the track in the same amount of space.
Below are two sample layouts that I made for this guide. The first one is a single-rail interweaving layout, and the other is a wooden mirrored layout. They were both built in a fairly short amount of time and it shows, but the stats for both aren’t bad so I won’t complain.
Now that you’ve got the basic idea of dueling coasters, here’s some advice for applying them to Planet Coaster.
Dueling coasters are not a specific track type. You can technically use any track type for a dueling coaster. I would recommend using a track type that is not designed for a specific layout. A boomerang track, for example, would not be ideal for dueling coasters. I chose a single-rail and wooden tracks for my sample coasters because both track types have a lot of design flexibility.
Each dueling coaster track is built separately. You’re really building two coasters really close together and then setting them up to operate together. You’ll probably have to switch back and forth between coasters while editing — work on a section of coaster A, then build the counterparting section of coaster B, then go back to coaster A and repeat.
Whether coasters mirror or interweave each other, they usually climb parallel lift hills in sync. If you want both coasters to climb in perfect sync, the chain speeds have to be exactly the same speed. Even if the chain speeds read the same value, the speed slider may be moved slightly while not changing the read value. This small difference may cause the coasters to fall out of sync. Usually, I move the speed sliders on both coasters just enough to make the chain speed read the speed I want, then I test to make sure they stay in sync throughout the entire lift hill.
When designing a mirrored section or layout, be sure to note how each piece is shaped (bank angle, slope, length, etc.) and smoothed on the first track so that you can easily mirror the other track. Also, you may want to leave angle snap on for these projects. This will save a lot of guesswork, as well as sighs and grief as you watch your coasters slowly fall out of sync.
While this may sound obvious, I managed to ignore it and had to learn the hard way… In Challenge or Career modes, dueling coasters cost twice as much as a normal coaster.
As mentioned before, dueling coasters need to start in sync. Coaster chaining lets you do just that with not only 2, but 3, 4, or even 5 coasters!
If you click on a coaster track and go to the “Operations” tab (icon looks like a gear) in the info panel, you’ll see a feature called “Coaster Chain”. Click “Create Coaster Chain” and select up to 4 additional coasters to sync with the one you’re currently working with using the multi-select tool. You can drag a rectangular area around the desired coasters or hold the Ctrl key and left-click on each desired coaster. Once you confirm your selection the “Coaster Chain” section of the Operations tab will look something like this:
You can close the chain (which closes all synced coasters), test the chain, or open it (which opens all synced coasters). When the chain is open, the chained coasters will all start in sync when their loading conditions are met.
You can also see the status of individual coasters, but you cannot open/test/close them here. You have to go to the specific coaster’s info panel to open/test/close it. If a coaster in the chain breaks down, the other coaster(s) will continue operating as usual.
Finally, you can add/remove individual coasters from the chain as you wish, as long as you have at least 2 and no more than 5. You can also remove the chain, in which case the coasters will go back to operating individually.
Triggered Events
Perhaps you’ve made a sci-fi coaster and want the riders to experience an epic space battle! Maybe you want the Kraken to rise up from the depths of the sea as riders pass by. Maybe you want to jumpscare guests as they ride underground. Or maybe you just want the ride to end with confetti and bubbles.
In any case, you can achieve some incredible timed effects and events using ride triggers. Triggers are points along the track that activate scenery when a coaster train passes them. You can use any of the special effects, animatronics, and lights in the game. For audio effects, you have to use “Park Speaker – Triggered”. You can have multiple triggers as well as multiple items linked to a trigger. You can click on scenery items to adjust the duration of activation.
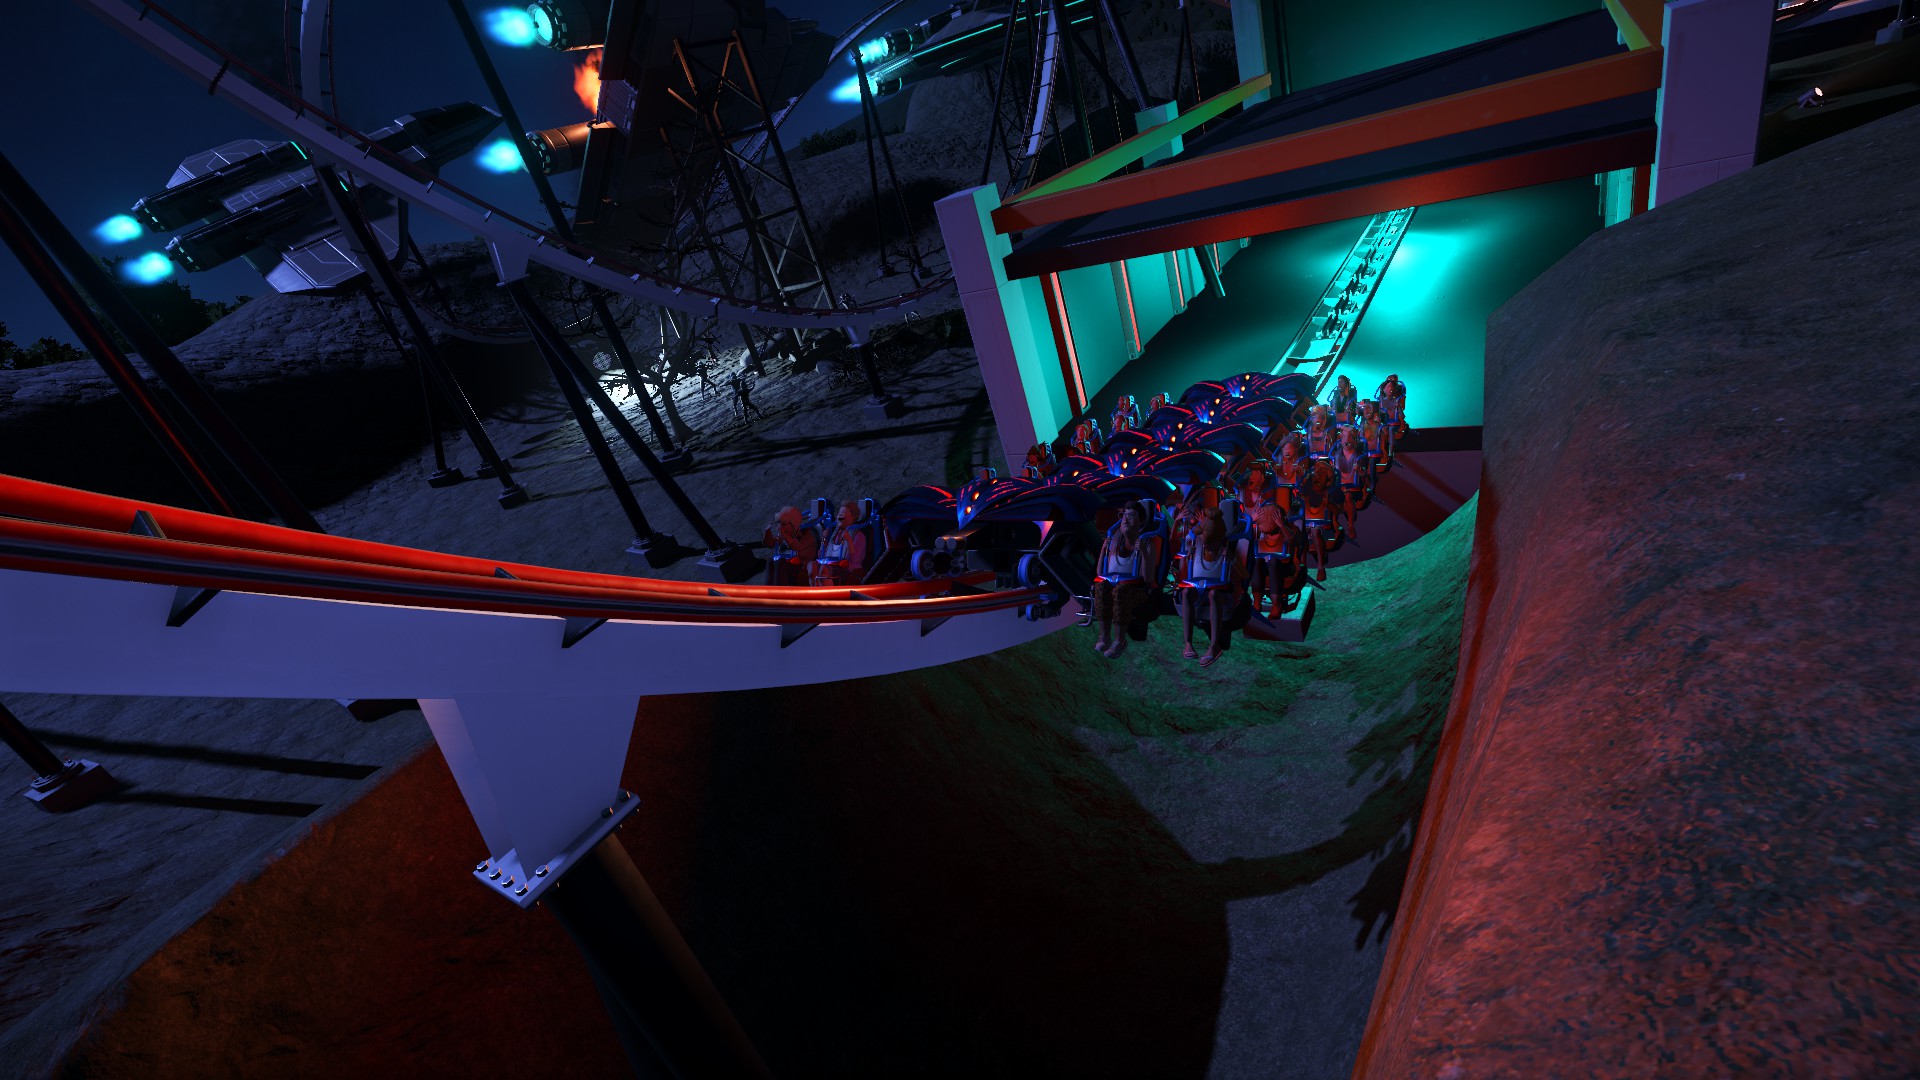
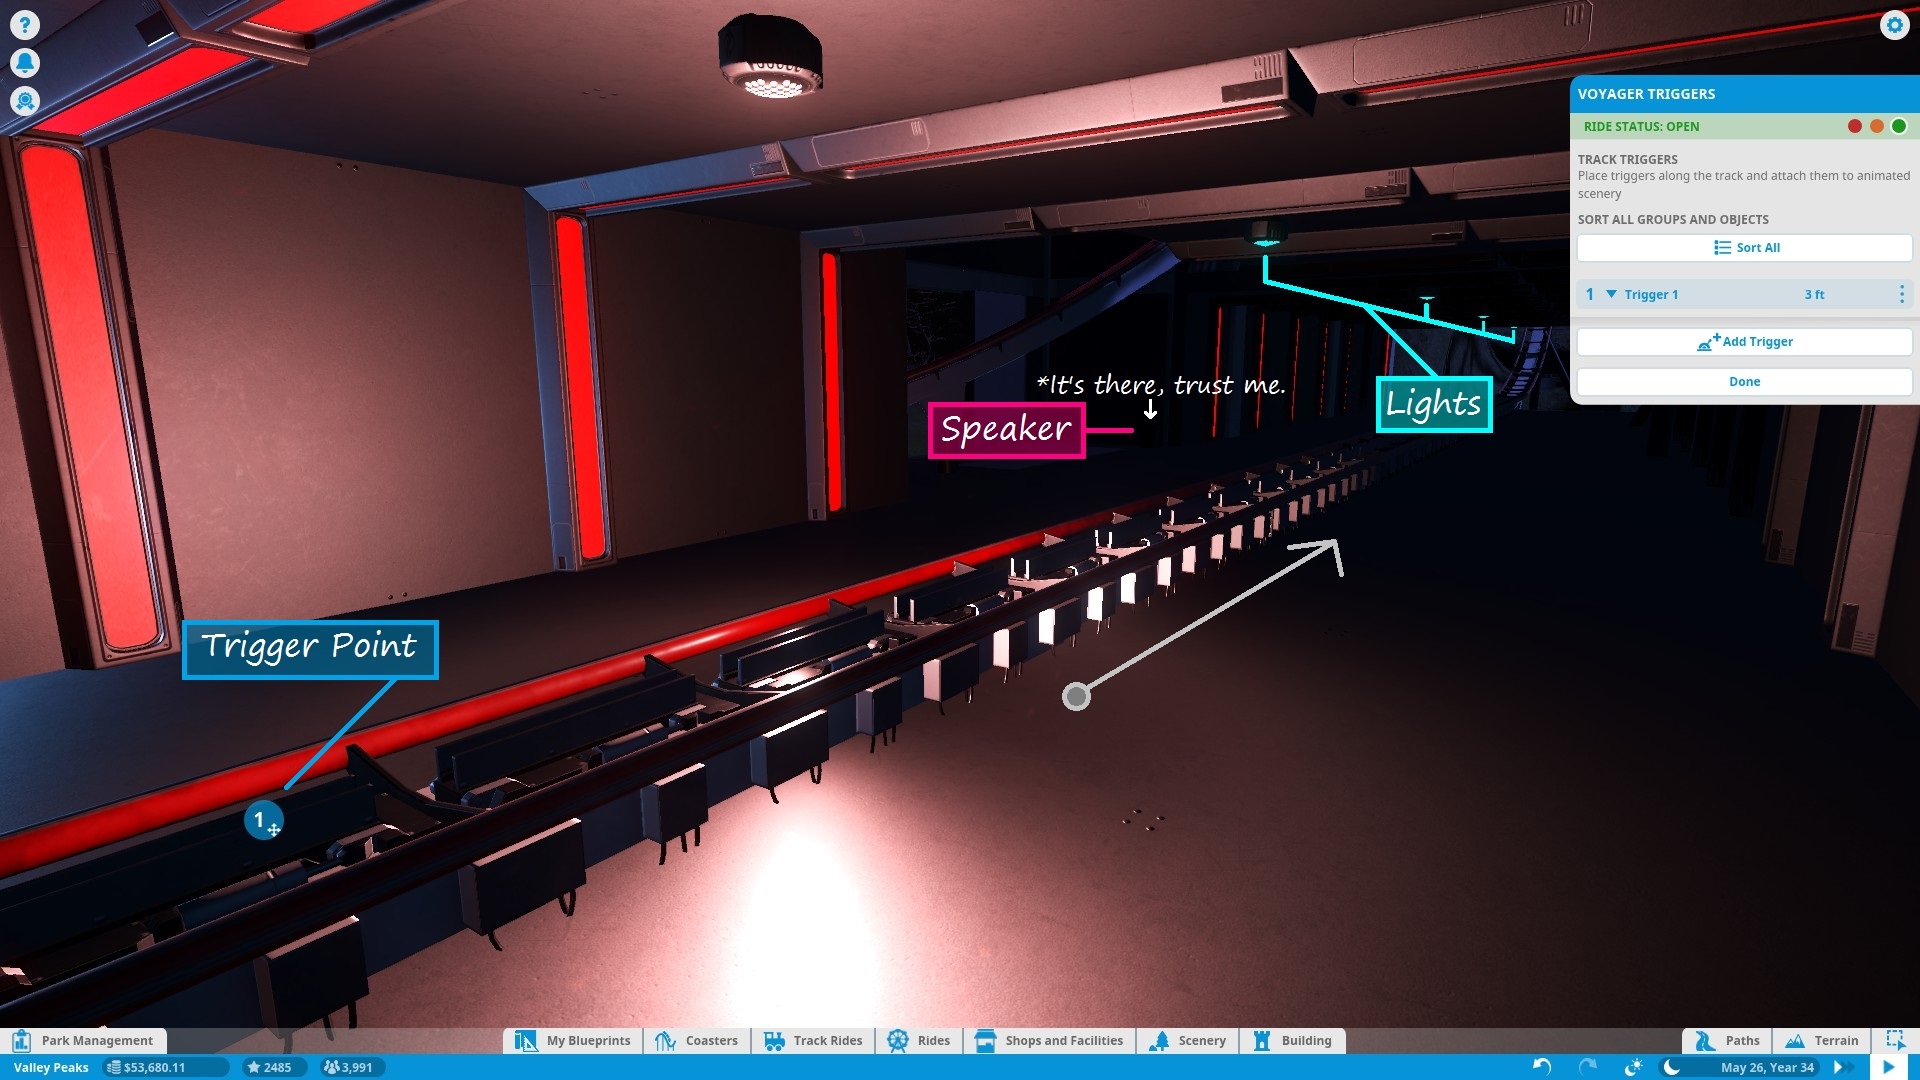
The first step is to place the triggered scenery where you want it. In this case I have four light-blue area lights in the tunnel and a speaker off to the side that will enhance the sound of the launch. The red light you see is not triggered and is always on to light the station at night.
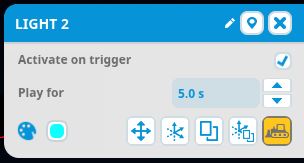
Most triggered items (except speakers) have a configurable duration so that they stop after a given amount of time. The lights on this coaster stay on for 5 seconds after activation.
Once the scenery is in place, we need to create a trigger to link it to. To do this, we’ll select the coaster and go to the Triggers tab. It should look something like this:
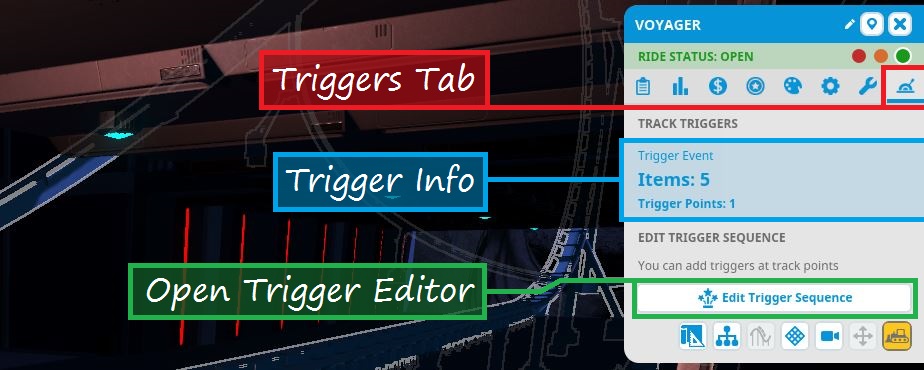
This panel let’s us see how many triggers and scenery items we have in place. We can also get to the trigger editor from here. Let’s do that. Click on the “Edit Trigger Sequence” button to pull up the trigger editor. It will look like this at first:
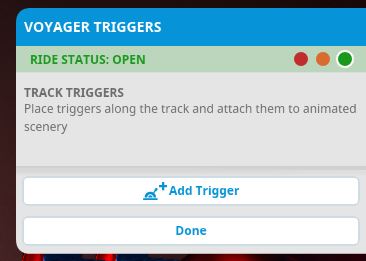
Click on “+Add Trigger”. A blue circle with a number (pictured in the 2nd image of this section) will appear on the track. This is the trigger that will activate the scenery. You can click and drag it along the track to the point where you want the coaster train to activate it. The trigger will now appear in the trigger editor. You can click the trigger name to rename it if you want. You can also click the three dots to the right of the trigger to pull up more options such as duplicating the trigger, removing it, or setting its color (useful for organizing/identifying when using lots of triggers). Click the little white arrow (pictured below) to see any objects attached to the trigger (we currently have none so you won’t see any objects now).

We have the scenery. We have the trigger. Now it’s time to put two together. Click “+ Connect Objects to Trigger” to… you know. All connectable scenery will highlighted. You’ll now use the multi-select tool to connect the desired items to your trigger. You can connect up to 100 objects to a single trigger. In our case, we need the 4 area lights and the speaker all attached to the same trigger. Once you’ve selected the desired object(s), click “Confirm”, and voila! They are now linked to the trigger. The end result will look something like this:

Like with the trigger, you can click on an object’s name to rename it. You can also click the three dots to the right of an object to change the object’s active duration, duplicate the object (activate it again using the same trigger), or remove the object from the trigger.
So now our lights and speaker activate on the trigger. There still one problem; all the lights turn on at the same time. As I mentioned before, the lights are supposed to activate one after the other. To the right of an object’s name is the delay value. You can set the delay for that object in seconds from trigger activation. In this example, the delay for each light would be set 0.3 seconds longer than the previous light, so the delay values would be 0.3s, 0.6s, 0.9s, and 1.2s, respectively. The speaker would have no delay since I want it to play sound right away.
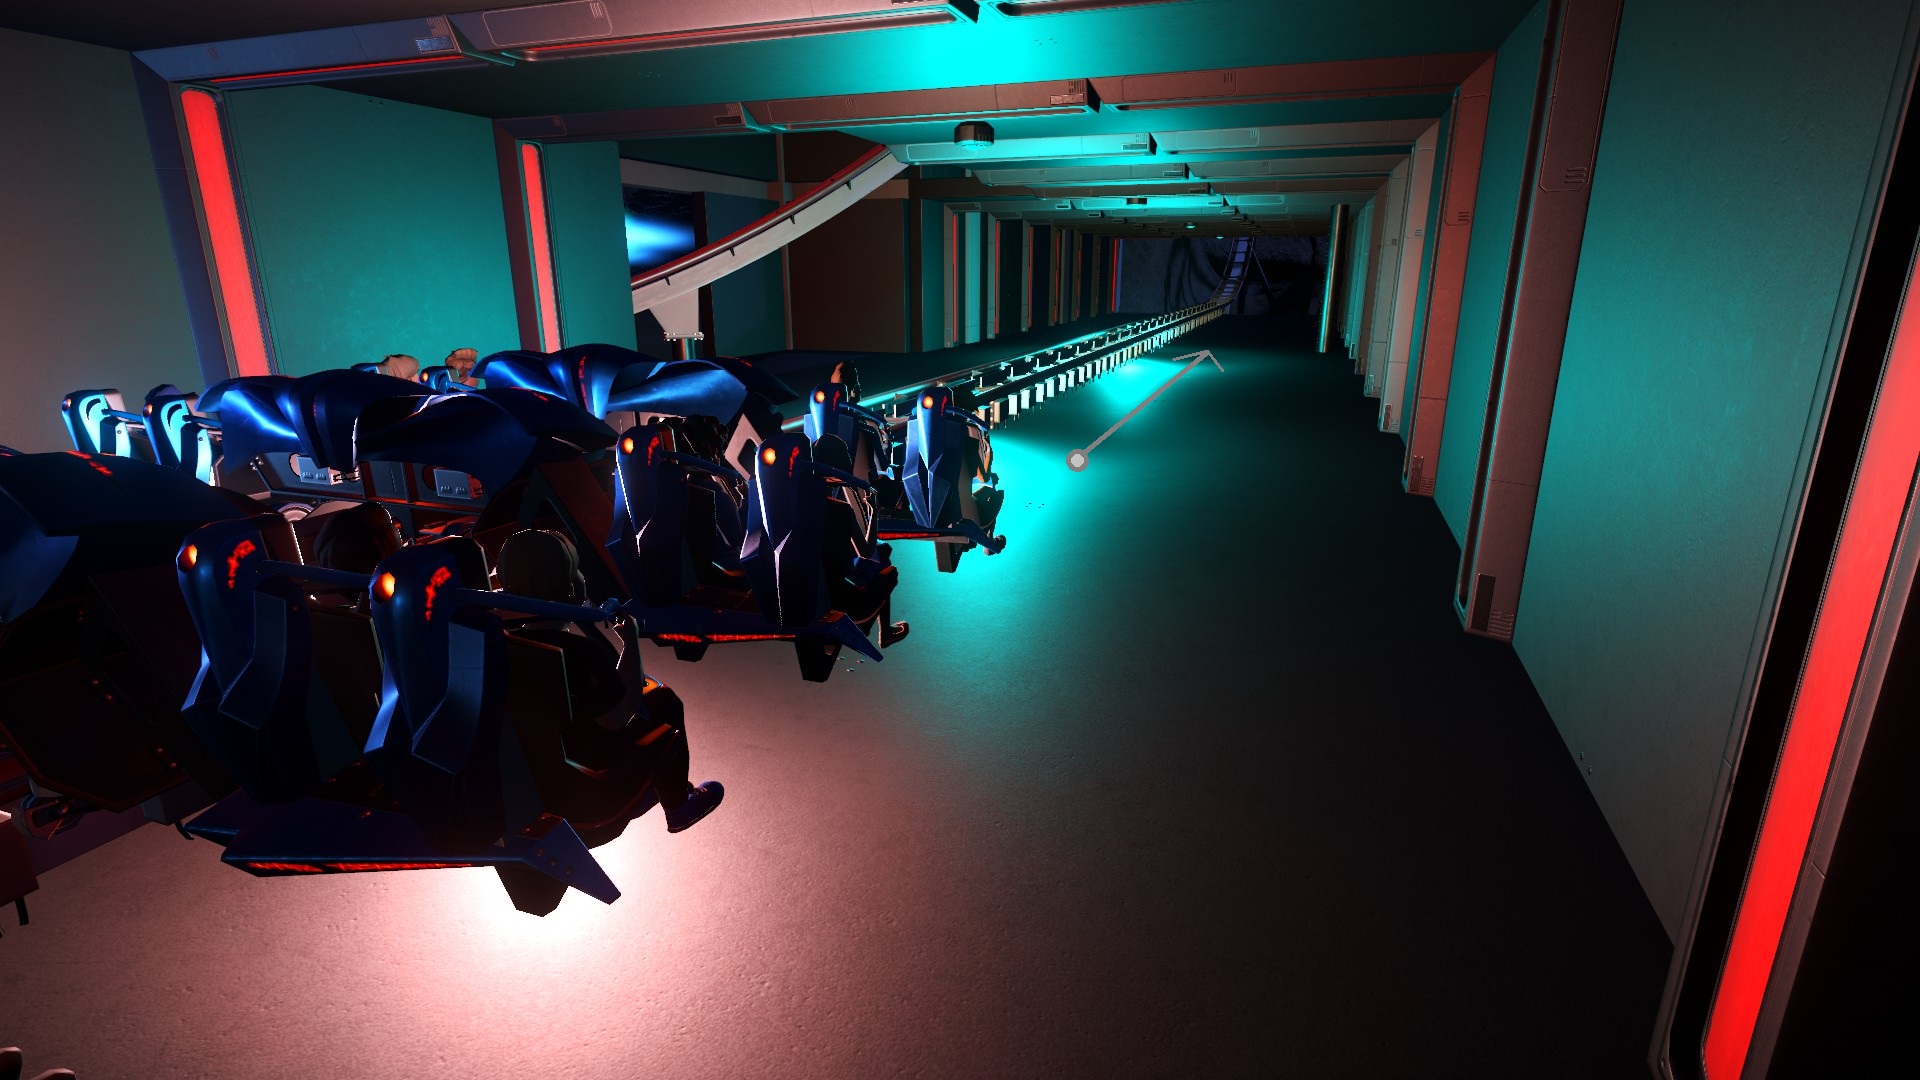
The Voyager launch tunnel is now complete! The lights and speaker are triggered as intended. From here, you can add more objects to your trigger or add more triggers to your coaster.
If you mouse over any trigger or object, a play button will appear to the right. You can test the trigger/object at any time using this button.
Triggered events do not boost EFN ratings, but they do boost track scenery ratings. The improved scenery ratings will attract more guests and increase profits from your coaster.
Ride Customization
Here are a few settings that allow you to add your own style to your coaster. None of these affect the coaster’s ratings (EFN or scenic), so these settings are mostly for styling and theming.
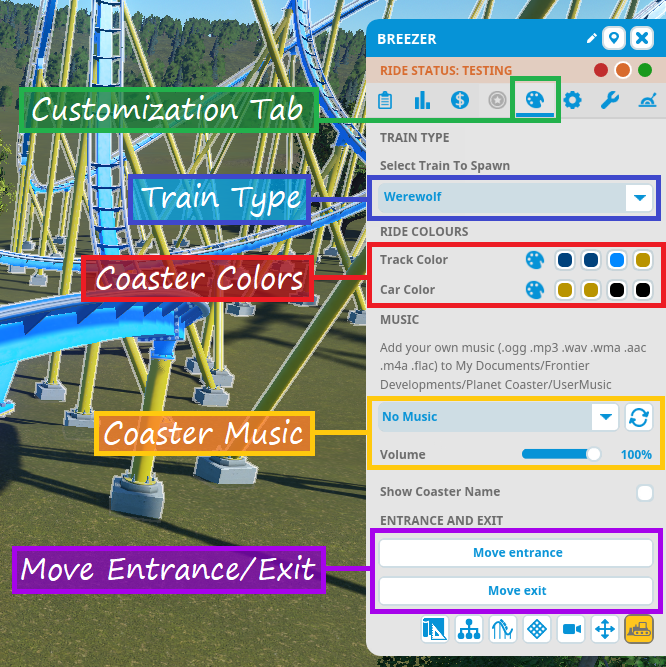
Prior to Update 1.4, each coaster type had only one train style. After the update, some coaster types support alternative train styles from other coaster types. If the chosen coaster type supports other train styles, you’ll see a dropdown allowing you to choose an available style.
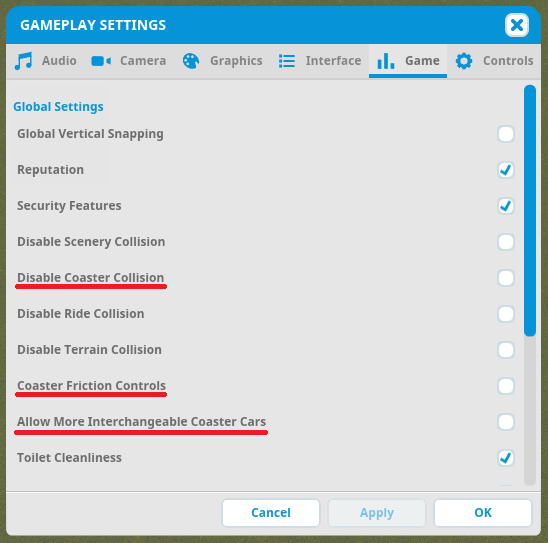
By default, the game only allows you to swap between styles that are truly compatible with the track type. If you want more choices, you can go to Settings>Game and check the box to “Allow More Interchangeable Coaster Cars”. The tradeoff here is that those added train styles aren’t really designed for the track type and may visually clip the track and/or use the default coaster sounds.
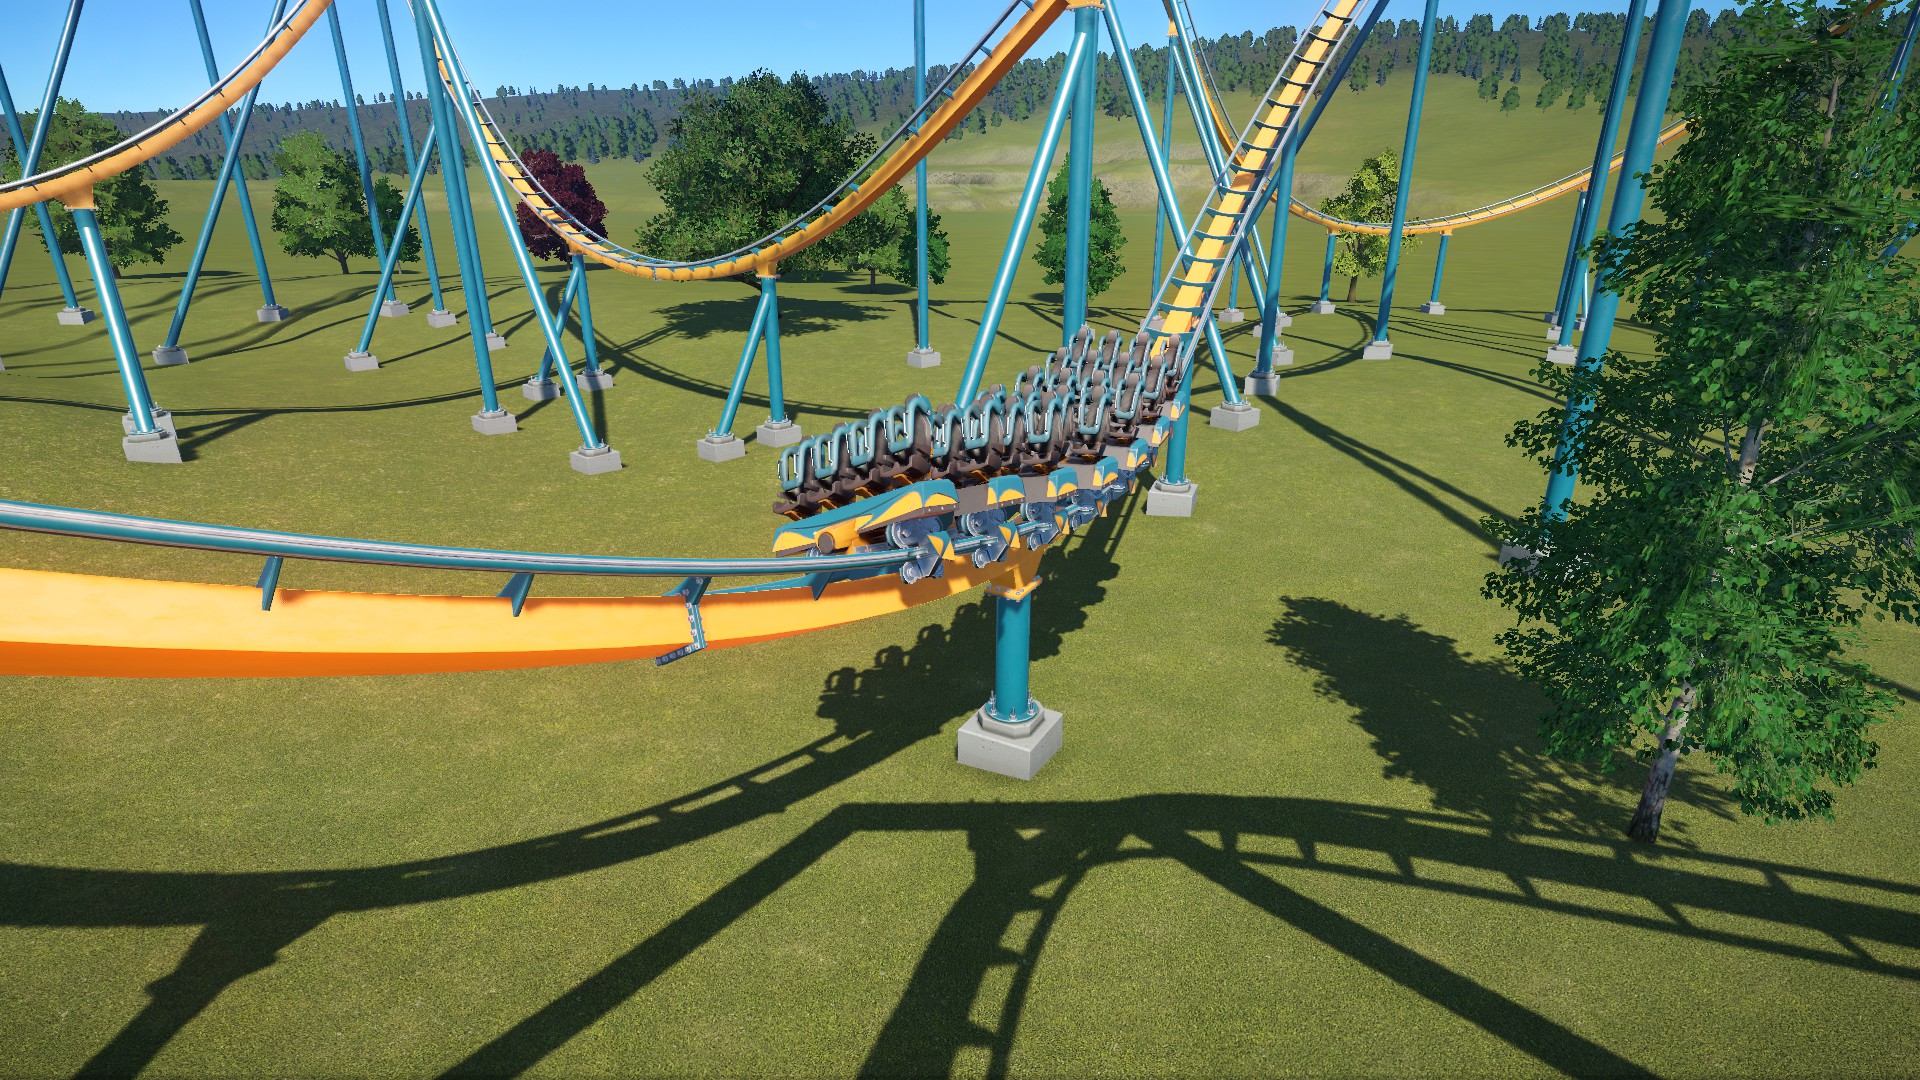
Each color swatch allows you to choose the colors for certain parts of the coaster track and train cars. You have the freedom to color your coaster however you want. What’s “right” and “wrong” is a matter of opinion.
Sometimes, it can be hard to come up with color combinations you like. If that’s the case, here are some suggestions and guidelines to help you out:
- Painting the track and supports the same color usually doesn’t look good.
- Blue, yellow, black, and white are the easiest colors to pair with others. Green, orange, red and teal are often paired with those colors. Pink, purple, brown, and medium gray are hard to pair with other colors.
- White or black supports with the track being the color of your choice almost always looks good.
- Using all pale/dull colors probably won’t look good unless the coaster is being colored to fit into a certain theme. A pale yellow, cactus green, and copper colored coaster might not look so bad in a western area, but it would probably look very odd elsewhere.
- Pairing vibrant colors with dark colors usually looks good.
- When using certain bright colors (yellow, hot pink, lime green, etc.) you’ll probably want to set the color a little bit darker than you actually want it to appear on the coaster. Otherwise, your coaster will likely be blindingly bright. In the examples below, the green in the green-and-blue combo is toned down a bit but still very vibrant. The orange in the orange-and-blue combo wasn’t toned down as much so it looks really bright in comparison to the other examples.
- With painted wooden coasters, white is a common color for supports and red for rails/accents.
To give you some ideas of which colors work together, I’ll show you a few common color combos as well as a couple personal favorites.
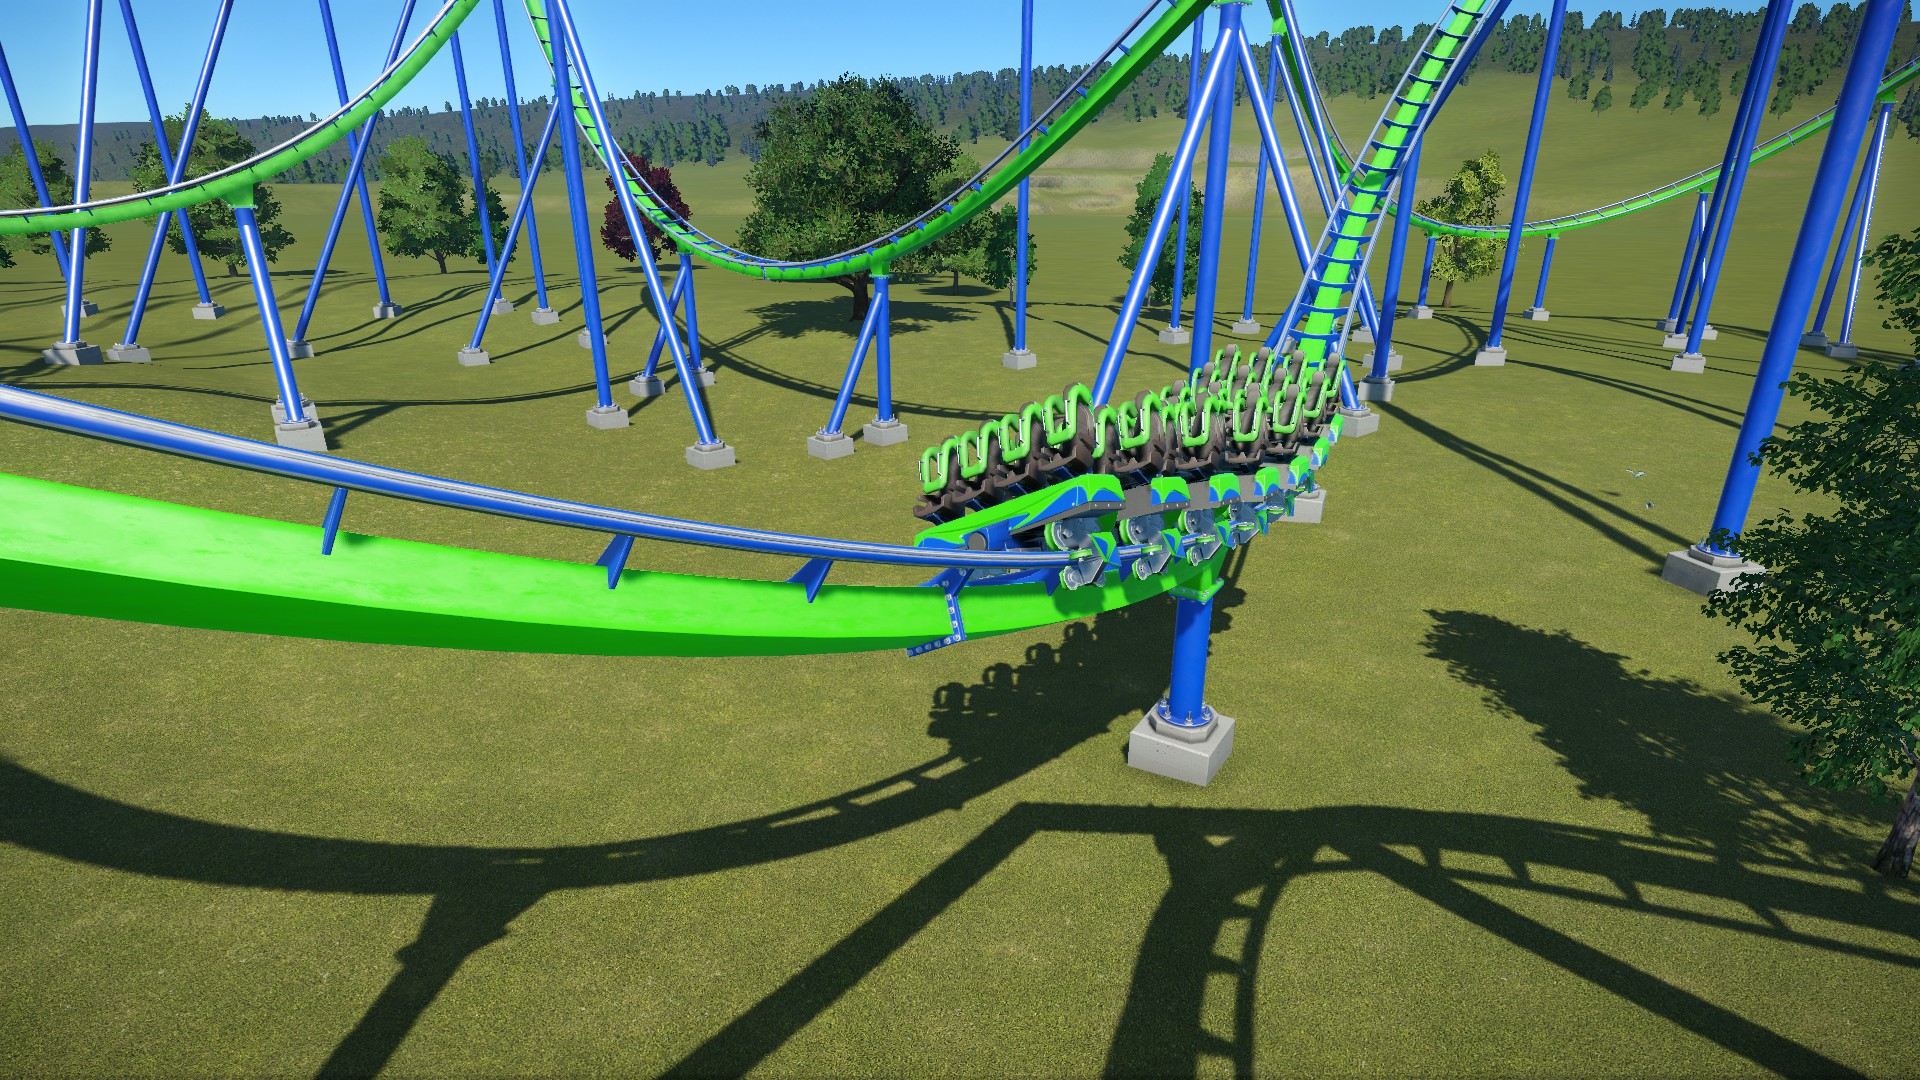
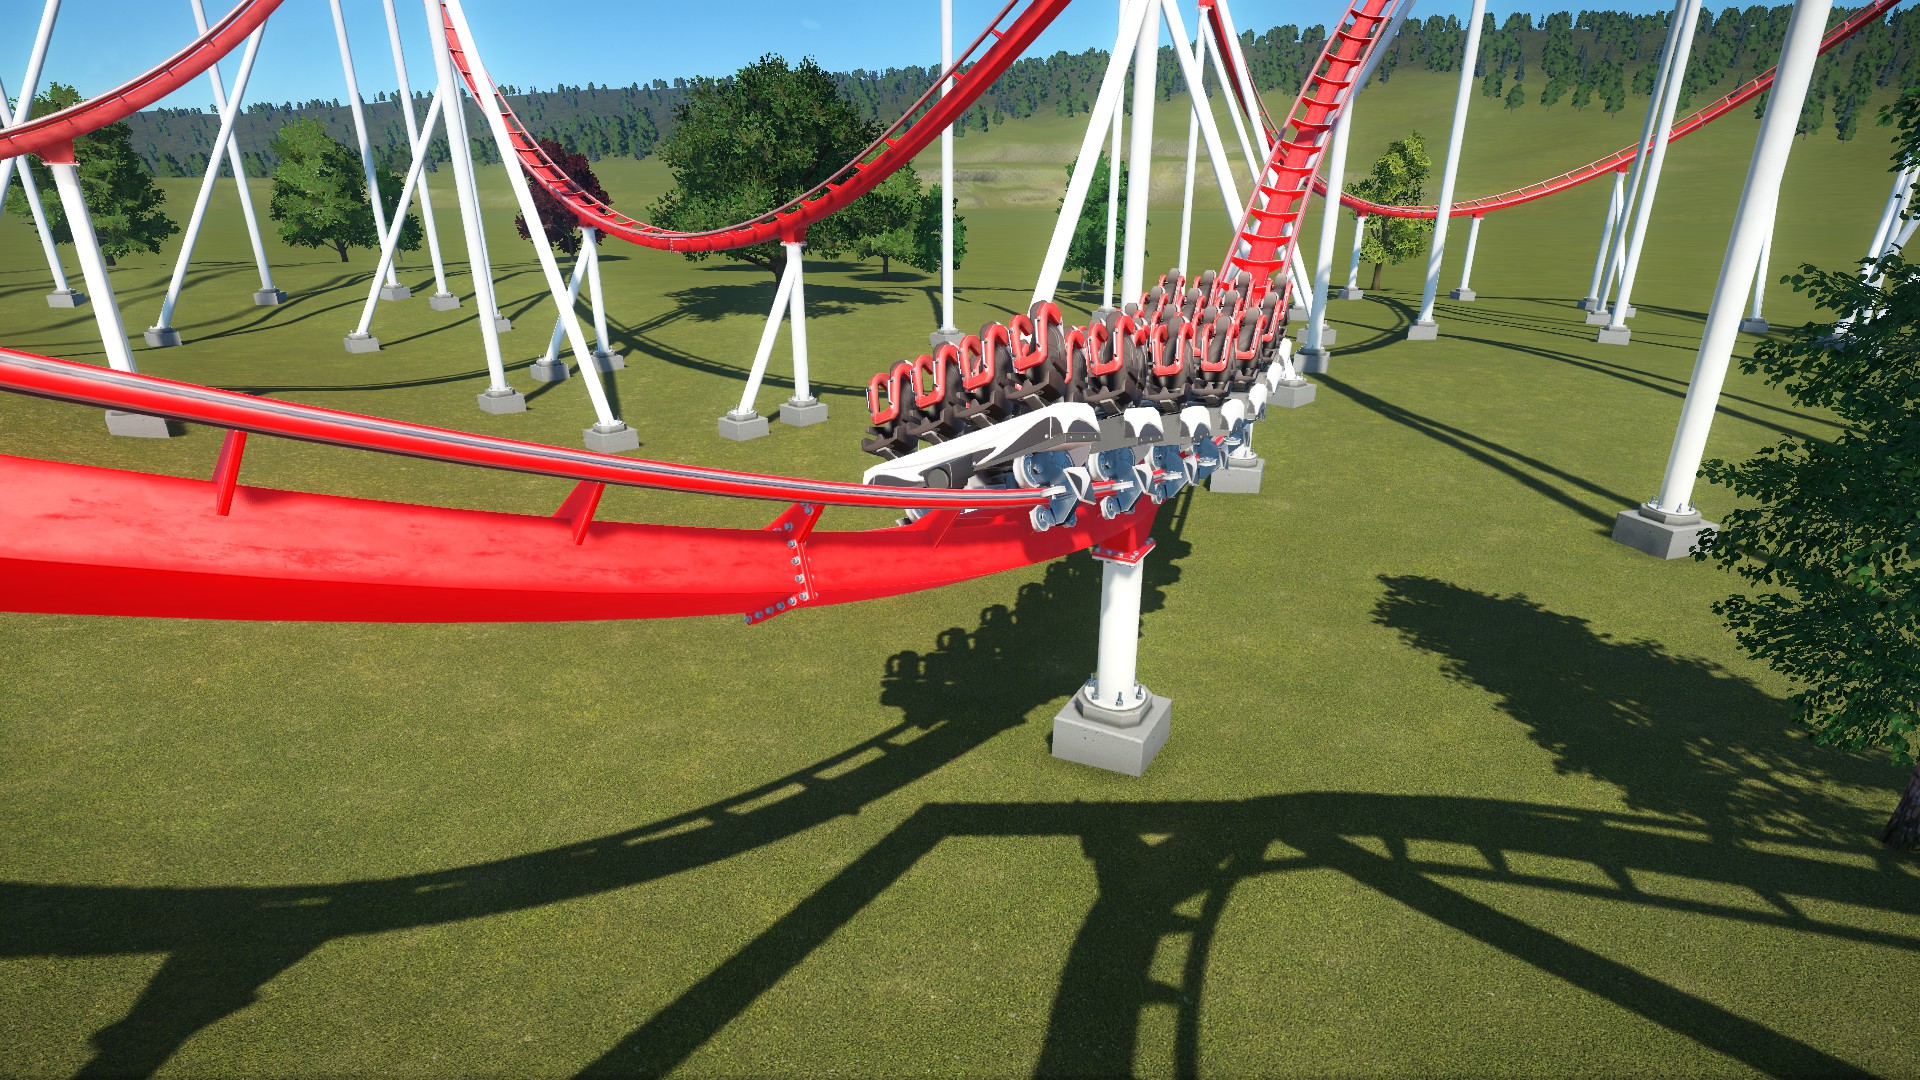
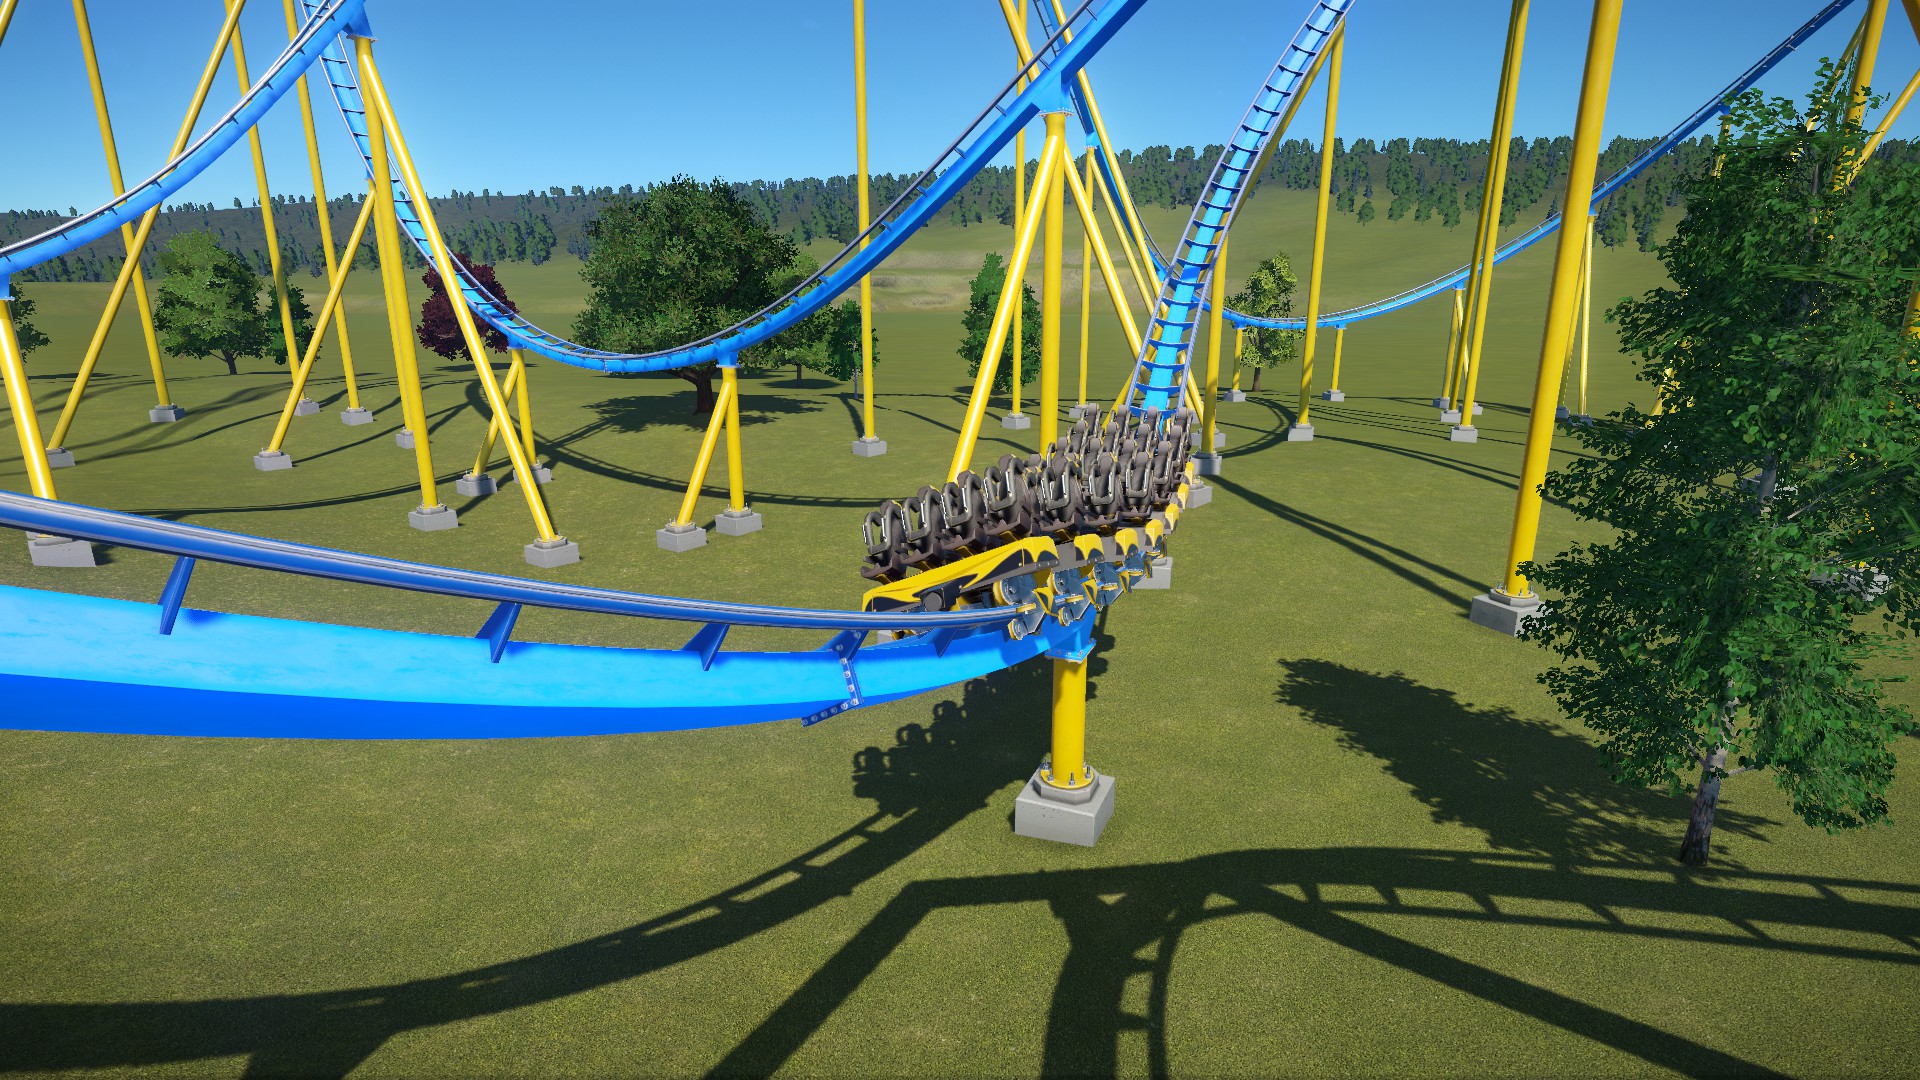
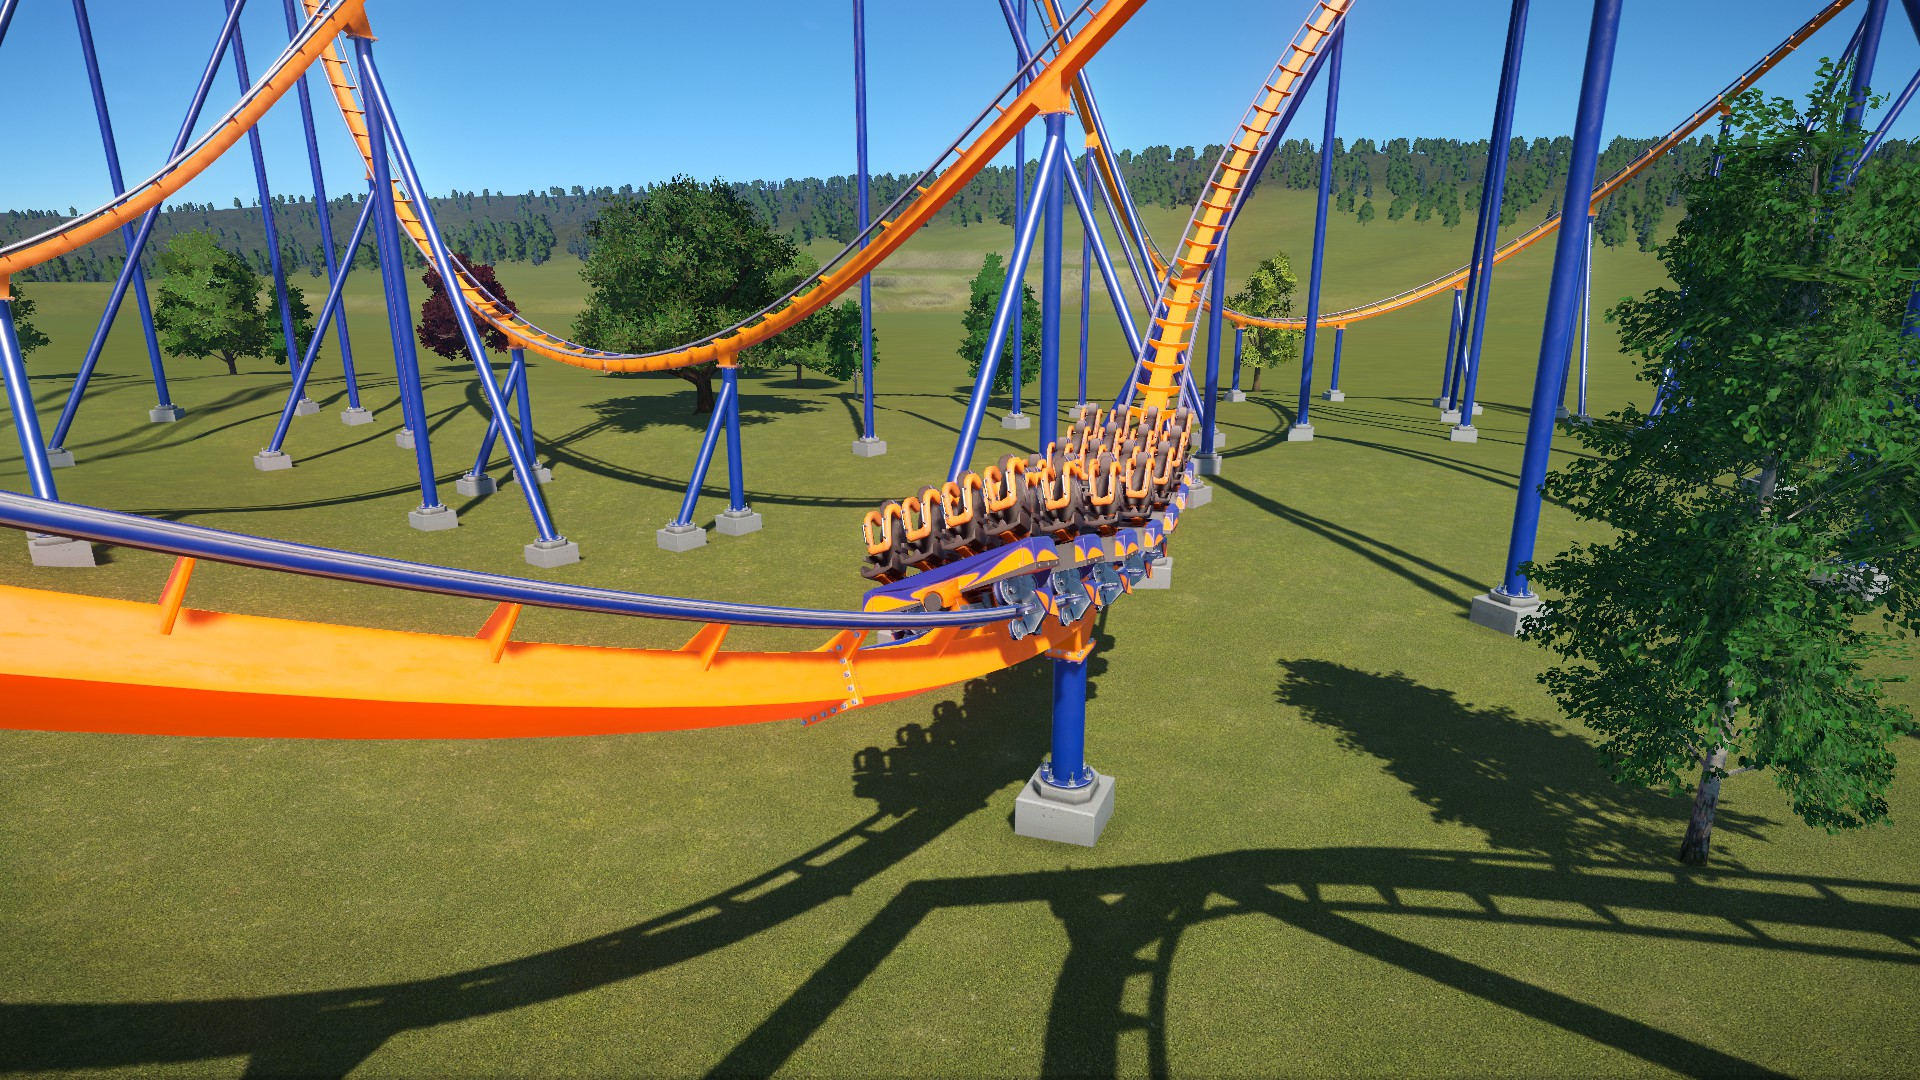
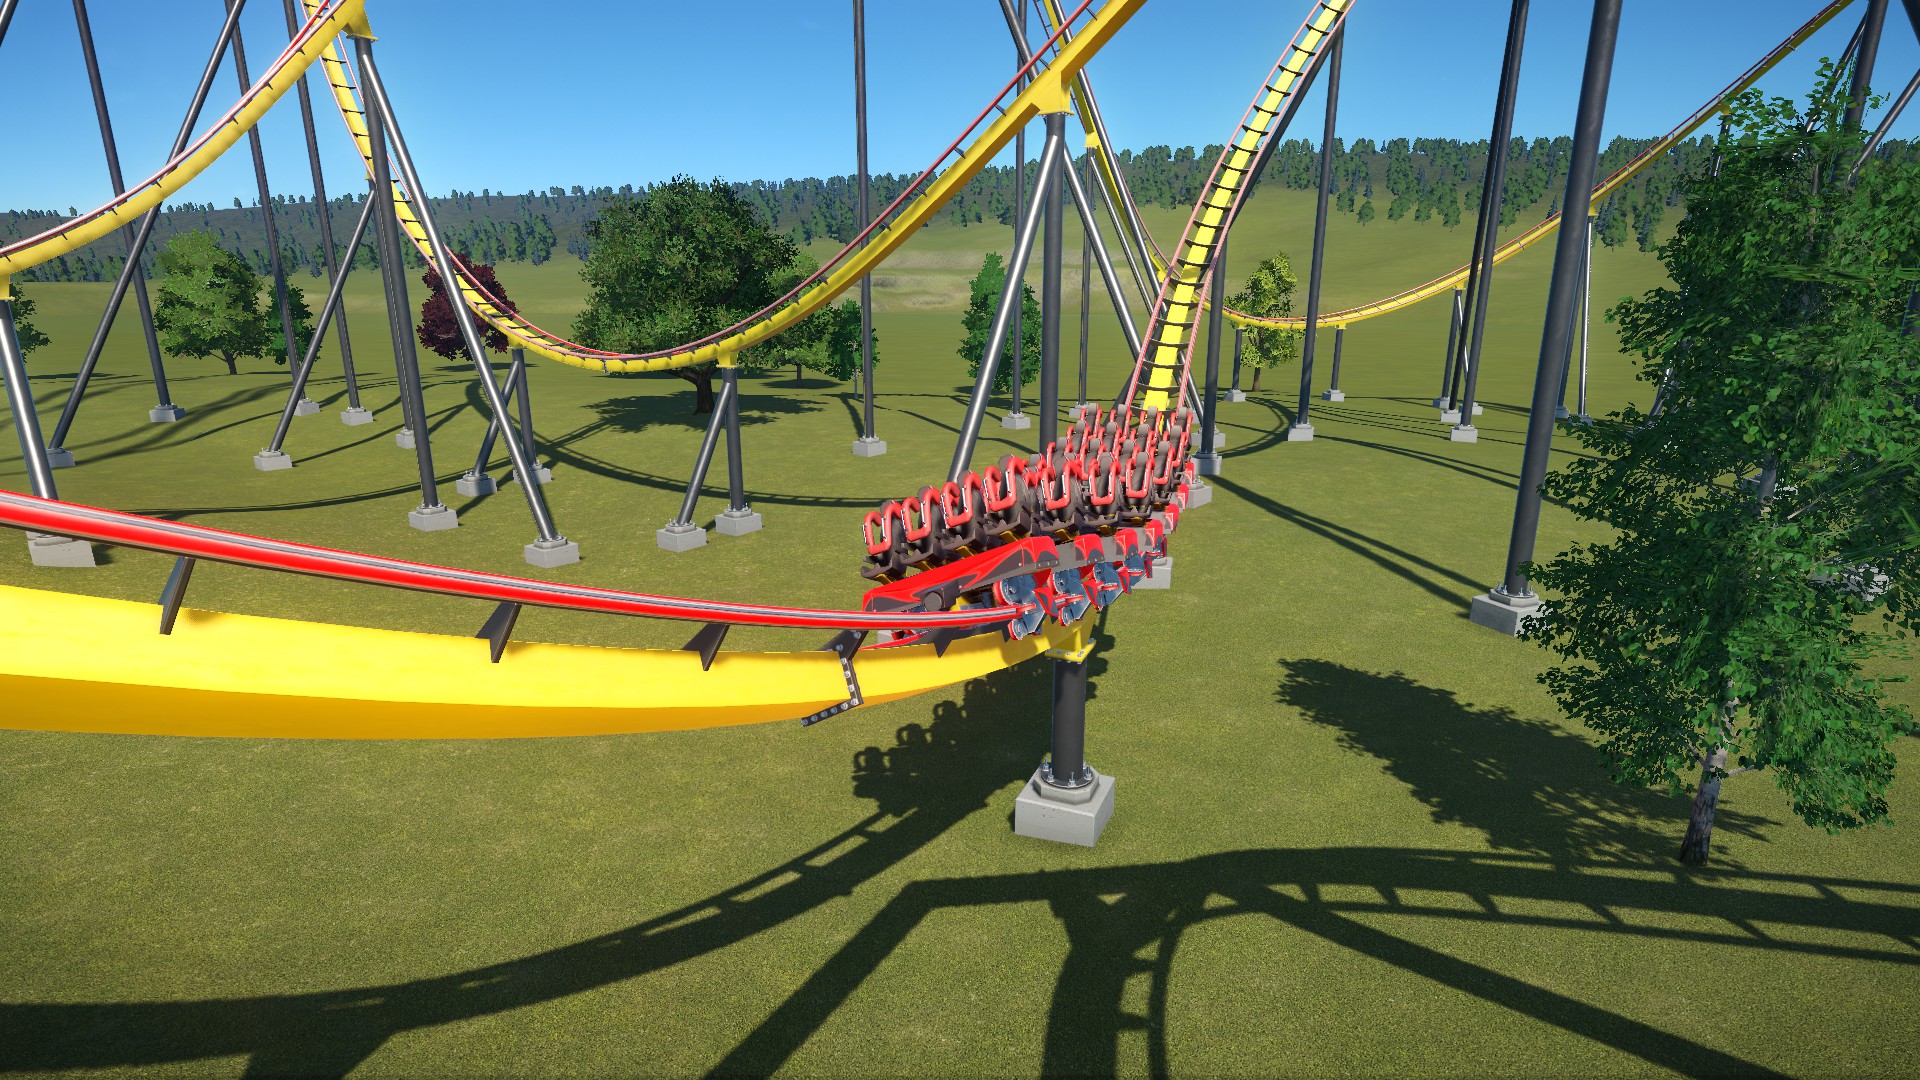

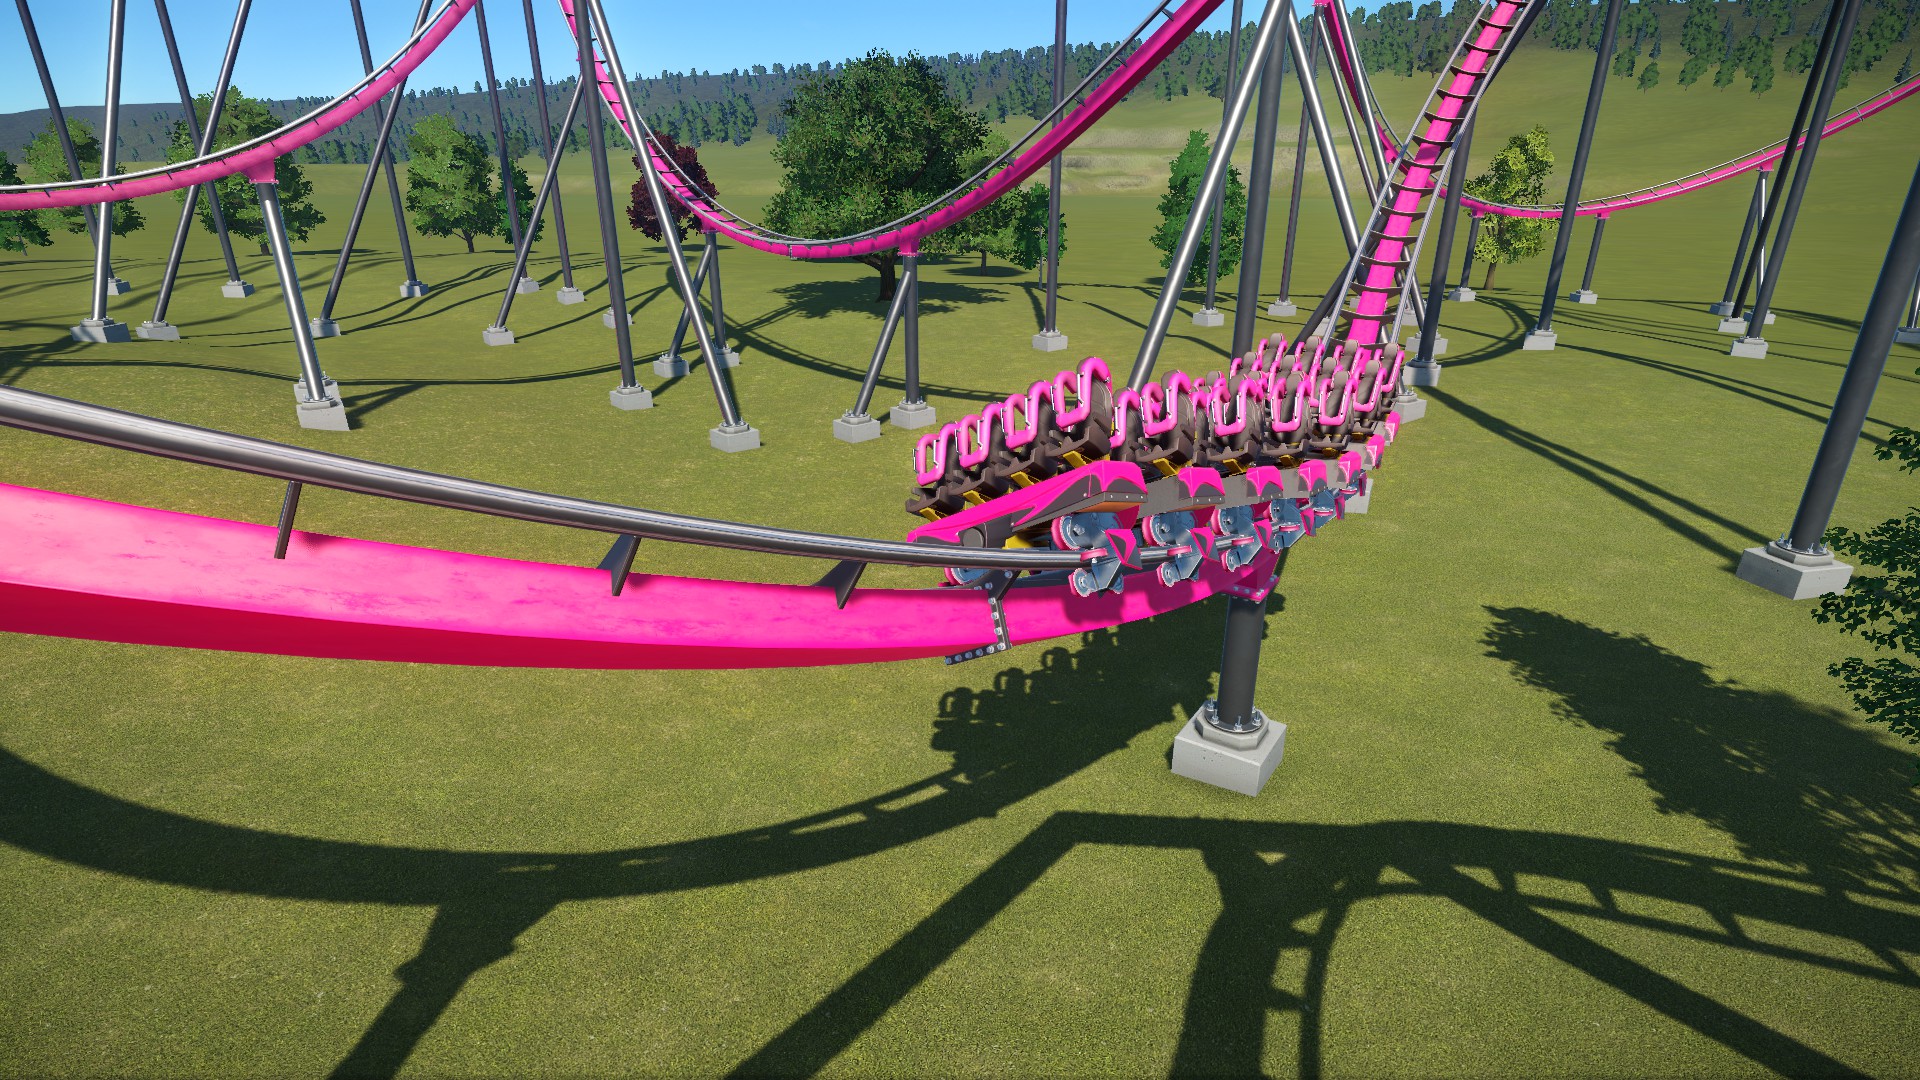
If you want to recolor a certain section of track instead of the entire coaster, see “EDITING TOOLS” in the “Coaster Editing 1” section.
You can add music to your coaster to enhance the ride experience even more! The music is played on the coaster trains so that riders can hear it throughout the ride.
You can use any song in the game, including your own music. If you are creative and want a challenge, you can try building a coaster in sync with your favorite song or one of the in-game songs.
If manually syncing up coasters with music isn’t your thing, there are several songs under “Rollercoaster Music” in the music picker that actually sync themselves up to your coaster! The songs dynamically change between various levels of volume and intensity based on how fast your coaster is moving. Try them out and find a song that suits your coaster!
This is where you can move the station’s entrance/exit gates after they’ve been placed. (See “Stations” for details.)
Ride Operations

Once you have a layout that you like, it’s time to define how the coaster will operate once it’s opened and ready for riders.
To set operating rules, click on your coaster and select the Operations tab (the one with a gear icon). The Operations tab is divided into four categories:
- Capacity
- Coaster Chain
- Load Rules
- Priority Pass Queue
Priority passes are a bit beyond the scope of this guide, so we’ll skip that one. Let’s discuss the other three.
Here you can choose the number of cars per train and the number of trains running simultaneously. These settings determine the coaster’s throughput (how many guests can get through a ride in a certain amount of time). Higher throughput means shorter queue times and higher monthly profit.
The number of cars per train is limited to the size of the station. If you want more cars than the current station can hold, you’ll have to edit the track and expand the station. Keep in mind that train length not only affects throughput, but the ride experience as well. Long trains don’t accelerate and decelerate as quickly as shorter trains. They may move more slowly around the track and hang noticeably longer (if not get stuck) on tall inversions and hills. That could cause EFN ratings to drop. Likewise, shorter trains will generally move faster, which will likely result in higher EFN ratings. Generally it’s better to decide the train length before you start building and design the track to work with that train size. Otherwise you may get your coaster just the way you like it only the realize that adjusting the train length changes ratings and stats to values you’re no longer happy with (and trust me, that sucks).
Adding more trains to your track will greatly increase throughput and, if done correctly, won’t effect your ratings. Unless the station is capable of holding multiple trains (generally only applies to single-car coasters such as “Looney Turns”), you will need block brakes in your layout to be allowed to add more trains. See the “Block Brakes” section for the full scoop on how they work and how to add them to your layout. Basically, you need 1 block brake section for each additional coaster you plan to add. You also need to check the “Block Sectioned” box in the Operations panel to enable the use of block brakes to hold trains as necessary. When I design coasters, at the very least I usually make a “holding” block brake at the very end of the ride to hold an extra train just outside of the station. This way, when a train leaves the station, the next one can move in and unload and load again while the first train travels around the track. If you time this right, it minimizes the amount of time that the station is empty.
In the case of single-car coasters, you may add as many cars as the station can hold without using block brakes, after which it’s 1 block brake per addtional car.
Coaster chaining allows you have 2-5 coasters start in sync with each other. This feature has already been discussed in the “Dueling Coasters” section. Refer back to that section for details.
The following set of options play a big role in the efficiency and timing of your coaster:
- Min. Rider Load – Determine how full a train should be before departing.
- Increase if your coaster is generally busy and/or leaving partially empty. Remember that groups tend to prefer riding together. If 2 seats are left and a group of 4 is next in line, they’ll wait for the next ride.
- Decrease if your coaster isn’t busy and/or you want keep trains moving. This allows guests to get in and out of the ride faster.
- Min. Waiting Time – Number of seconds that must elapse before checking to see of the min. rider load has been reached. If the min. rider load has been reached at that time, the train will depart. Otherwise, train will depart whenever the min. rider load is met or max waiting time is reached.
- Increase if you want the train to fill up more before checking for min. rider load.
- Decrease/disable if the min. rider load is being reached/surpassed but the ride isn’t starting.
- Max. Waiting Time – Number of seconds before the train departs, even if the min.rider load hasn’t been met.
- Increase/disable if you want to give guests more time to reach the min. rider load.
- Decrease if you want keep trains moving, regardless of rider load.
- Min. Departure Interval – Number of seconds that must elapse before the train departs, even if min. waiting time and rider load has already been achieved.
- Increase for more spacing between running trains.
- Decrease for less spacing between running trains.
- Don’t Block Station – Train will depart as soon as the next train arrives. Overrides minimum rider load, but not the minimum departure interval.
- Enable if you want to keep trains moving, regardless of load.
- Disable if trains aren’t reaching desired rider loads despite guests waiting in the queue.
Coaster-Related Game Settings (WIP)
Over the last few updates, the game has added options that affect the game’s coaster-building mechanics. From the pause menu in-game, go to Settings > Game to see these options (underlined in red)
Normally, the game does not allow you to build tracks through the ground (without a tunnel), water, buildings, or scenery.
Disabling coaster collision will override this limitation, allowing tracks to clip through pretty much anything that gets in the way.
The most practical reason I’ve found to disable coaster collision is to build scenery closer to the track than the game typically allows, as pictured below. With coaster collision enabled, I would not have been able to build rocks that close to the track.
Other reasons may include rebellion against physics, exploration of planet’s crust, and non-violent sadism (watching riders clip through things may bring some people pleasure…?)
[To be continued…]
QUICK REFERENCE GUIDE (WIP)
Since the guide has become quite long over time, I’m going to see if I can sum it all up in one place with some general guidelines and reference charts!


- Moderate (orange) excitement or fear isn’t always bad; many guests will still ride.
Positive: +5.5G
Negative: -1G
Lateral: ~2 to 3G
*(Some coasters might exceed these values slightly due to their nature.)
- Which types of coasters can I afford? (irrelevant in Sandbox mode)
- Which demographic(s) is this coaster targeted towards?
- How big do I want this coaster to be? How much space do I want it to take up?
- Will it be full-circuit or bi-directional? (This is important as each track type can only be designed as one or the other, never both!)
- Do I want this coaster to interact with the terrain/scenery?
- Which seating position do I want (above-track, inverted, wing, flying, etc)
- Can I build multiple stations? No, coasters can only have one station.
- Can I build synchronized (dueling) coasters? Yes you can. See “Dueling Coasters” for more info.
- Why is my coaster passing the station and getting stuck? Sounds like you’ve used a bi-directional coaster type for a full-circuit layout.
- Why is my coaster not climbing the lift hill? There are a few reasons that might be happening:
- No Chain or Cable Lift mechanism — make sure you’ve used the cable or chain-lift track for the hill. The train can’t pull itself up on standard track.
- Used Drive Tyres — those aren’t designed for pulling the train up. They’re designed to keep the train in motion on level track.
- Bank your tracks around turns to reduce lateral G-force and high fear levels.
- Most coasters stay under 200ft/60m except for hyper, giga, and strata (Sprint 500) coasters. Those peak above 200ft/60m, 300ft/90m and 400ft/121m, respectively.
- Use friction brakes to slow the train wayyy down and trim brakes to slow it down slightly.
- Block brakes slow and, if necessary, stop the train until the track ahead is clear of other coaster trains. Usually required for running multiple trains. See the “Block Brakes” section for further explanation.
Conclusion and Misc. Guide Info
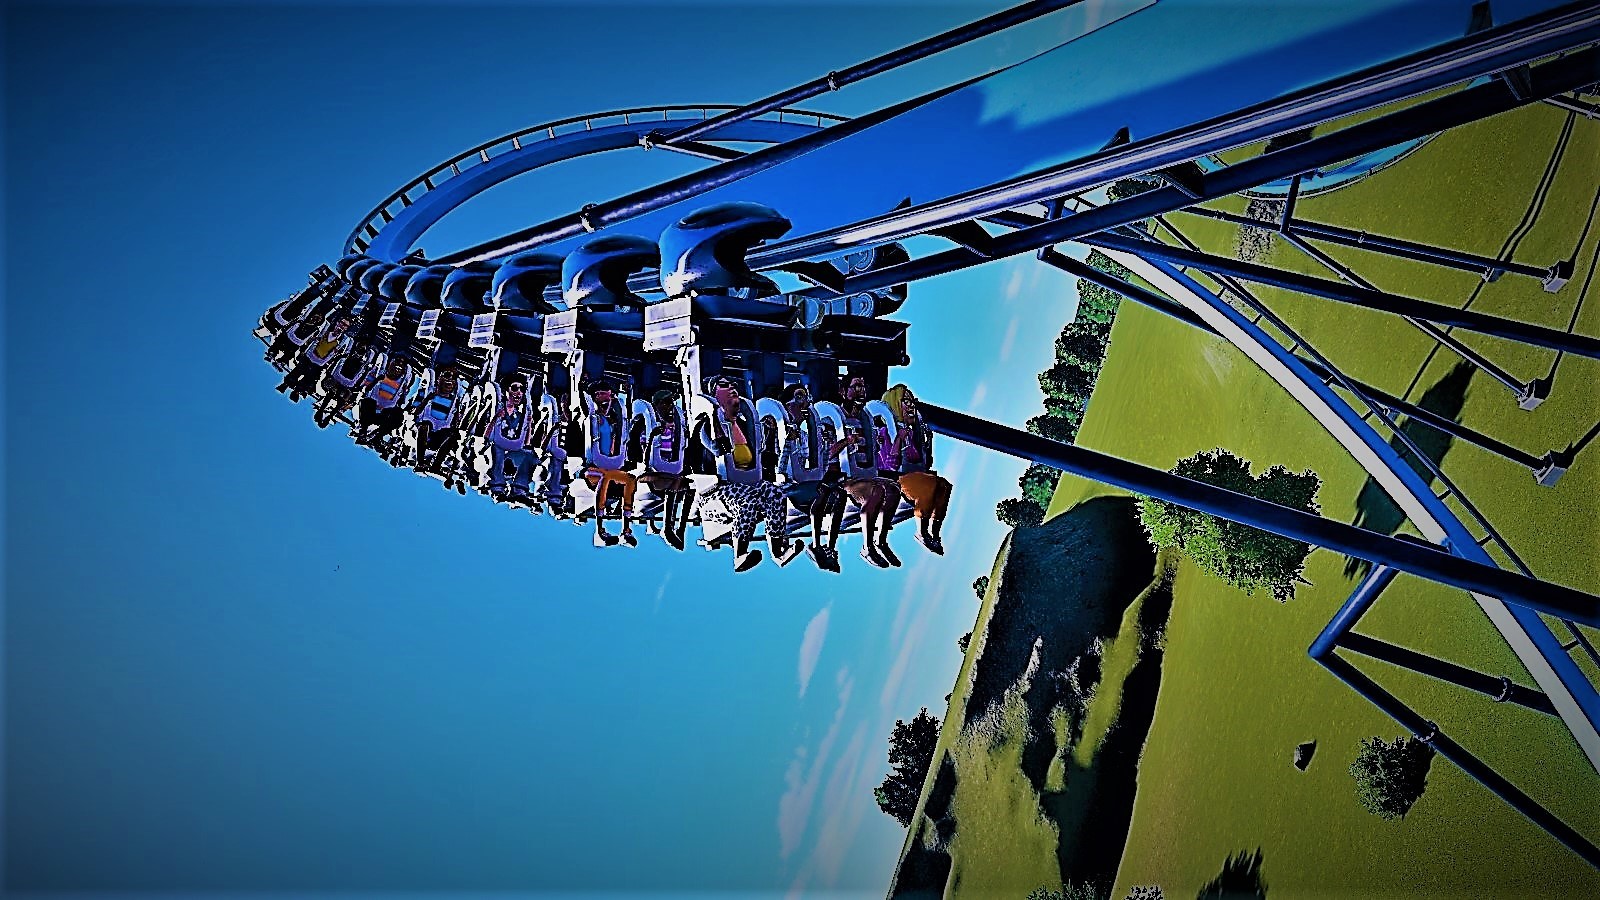
So there you have it! I wanted to share my knowledge to help out those who are just starting out and/or are struggling to build a coaster that they (and their guests) are pleased with. Hopefully you learned a thing or two in this guide. Coaster designing can seem difficult and intimidating at first, but with some practice you will be designing some amazing thrillers! Just remember to have fun and let your creativity take over!
Thanks for taking the time to read this guide. If it helped you, please rate it up, favorite it, and share it with fellow coaster friends! Also, please feel free to drop suggestions, corrections, and any other feedback you may have in the comments.
Happy coaster building! 🙂
If you want to try out some of the sample coasters used in this guide, here they are!
[link]
I will be adding to this list as time allows.
Unfortunately, a few coasters were lost when I overwrote the savegames of the parks they were in (poor decision on my part). I may make a few new coasters to replace them and update the guide and collection with the new ones.
Here are some of the things I plan to work on as time allows:
- Finish discussing special track layouts.
- Proofread / correct spelling errors. I promise English is my first language and I speak it fluently. It doesn’t always show when I type stuff out, though.
- Replace sample coasters that were lost in savegame overwriting with new layouts.
- Restyle some of the older labeled screenshots for improved consistency, color, and readablilty. The “Ride Operations” section contains both of my previous label styles (no color, then solid colors). “Triggered Events” has the newest labels with translucent color.
[4/18/17] – Added new info to “Stations” section.
[4/19/17] – Added new info to “Track Banking” sub-section.
[4/20/17]
- Added metric equivalents/approximations alongside all relevant measurements.
- (“EFN Ratings”) Added the rating scale for nausea.
- “Brakes” section is now directly above “Blocks and Block Brakes” for better continuity.
- Various spelling/wording fixes.
- (“Chain Lifts / Cable Lifts”) Replaced a screenshot.
- (“Special Track Layouts”) Added “Strata Coasters”.
[4/21/17]
- Rounded off several metric equivalents to neater values (ending in even numbers or 5) to seem more natural to metric-minded readers. Only edited where relative approximates are acceptable.
- Started work on coaster editor section to explain basics of the editor to new players and coaster builders.
[4/22/17] – Coaster editing sections no longer considered work in progress. Still subject to edits/additions as I see fit.
[4/23/17 – 4/25/17] (Forgot to document a few edits, sorry)
- New “Deuling Coasters” and “Ride Operations” sections.
- A number of spelling edits.
[4/27/17]
- New section: Ride Customization
- Finished up a few sections and unmarked them as work in progress.
[4/30/17]
- New Section: Triggered Events
- (“Coaster Editing 1”) Re-labeled screenshot with new labeling style for consistency with other labeled screenshots.
- Updated intro/conclusion to reflect the current status of the guide.
[5/08/17] – Created a link to the collection of sample coaster blueprints.
[5/09/17]
- “Putting It All Together: Basic Layouts” renamed to “Basic Layouts and Landscaping”.
- (“Basic Layouts and Landscaping”) New sample wooden coaster to replace the previous one. Blueprint (“Sasquatch”) added to the sample coasters collection.
- (“Basic Layouts and Landscaping”) Landscapcing sub-section added.
[5/29/17]
- A couple of new/modified pics, including edited labeled coaster pics.
- General wording/spelling edits.
[6/01/17]
- I am now putting the date of the latest significant guide update (not including minor wording/spelling edits) in the description. Whenever this date changes, please check back to see what’s new!
- (“Triggered Events”) Removed duplicate image.
[6/02/17]
- Recreated sample wooden duelling coaster in “Duelling Coasters”. Blueprint (“Ridgeline”) added to the sample coasters collection.
- (“EFN Ratings”) Rating scales now displayed in a table format.
- (“Coaster Editing 2”) A few informational additions.
[6/07/17] – (“Chain Lifts/Cable Lifts”) New guidlines added for smaller coasters.
[6/19/17] – (“Chain/Cable Lift and Drive Tires”) New / reorganized info.
[6/26/17] – (“Sample Layouts 1”) New Layout for boomerang coasters. Blueprint (“Rewind”) added to the sample coasters collection.
[6/27/17] – Revisions for Update 1.3
[7/01/17]
- (“Choosing a Track Type”) New table to allow for better formatting and more entries as the game updates (I was bumping the word limit for that section).
- (“Triggered Events”) Info and screenshots revised for Update 1.3
- (“Powered Launch”) Replaced pic. The other one looked a little tacky :-/
[7/23/17]
- (“EFN Ratings”) Styled tables for EFN rating scales. Been wanting to do that for a while.
- (“Choosing a Track Type”) Spinning Wild Mouse added to the table.
- Directional arrows added to some coaster pics for clarity. This is a WIP project, so expect more of these edits.
- (“Coaster Editing 1”) Updated info about heatmaps.
[8/28/17] – (“Controlling High G-force and Track Banking”) Discussed banking offsets. Been wanting to get to that for a while.
[8/30/17] – Details about syncing coasters has been moved from “Ride Operations” to “Dueling Coasters” and edited to fit into it’s new context. I feel the information is more relevant in that section.
[8/31/17]
- (“Dueling Coasters”, “Coaster Editing 1”) Restyled labeled pics.
- (“Choosing a Track Type”) Steel Vengeance added to the table.
[9/01/17] (Ongoing)
- Revamping the Special Layouts sections. This will include recategorized sections, new coasters, and redesigned stat tables!
- New layout for Giant Inverted Boomerang track type. Blueprint (“Flashback”) added to the collection.
[9/25/17]
- (“Choosing a Track Type”) In-Descent added to the table.
- (“Special Layouts 3”) Discussed reverse-launch (In-Descent) coasters.
[11/10/17] (“EFN Ratings”) Revised section with nicer looking charts (IMO) and more accurate context.
[11/22/17] — Update 1.4 Revisions
- (“Choosing a Track Type”) Zenith, Cascade, and Hop The Gaps added to the table.
- (“Choosing a Track Type”) The table now specifies bi-directional coasters.
- (“Special Layouts 2”) Included the new Zenith coaster as a strata coaster type.
- (“Ride Customization”) Info on interchangeable train styles added; updated picture.
[12/15/17] (“Choosing a Track Type”) Changes to the coaster table, including spelling edits, info corrections, and modified styling options. Basically, I lost the save file and had to recreate the table…
- Kids can ride Crazy One (Looney Turns). Thanks @jc.jones for the correction!
- Ride Customization discussed. Thanks @Sylvanas for the comment about coaster music!
- A collection of some the sample coasters used in this guide has been published. Thanks @malacar for the suggestion!
- (Introduction) “You can try out some theof the sample coasters…” Thanks @AinsLey for reminding me that I still need to proofread… lol
- Directional arrows in coaster pics. Thanks @SlartiCraftFast for the suggestion!

