Overview
This tutorial will guide you through creating and using Tags in the level editor and applying them to in-game dialogue. You will not need advanced knowledge of the editor to learn from this tutorial.
Creating Dialogue
Before you create any dialogue, you need to set-up a scene for it to take place in. Open a level in the editor with a playable character (a new level should already have one), create a floor and place a separate actor on it a small distance away from the player. Now open the Tile Browser and go to the Sensors and Triggers tileset, grab one of the sensorBlueface tiles and place it between the player and the other actor. Your set-up should look like this:

Now we create the actual dialogue. For this tutorial, we will have the non-player actor ask if you’ve seen their lost spikebird. Start by placing a Cinematic Event from the Cinematic tileset wherever you please, this will be used to start the cinematic chain and make the actor talk.
Right-click on the Cinematic Event tile and select “onEvent:”, a list will appear with actions you can choose. Scroll to the top of the list and select actorTalk, type “Have you seen my spikebird?” into the “line” field.
Now you need to choose what actor speaks the line you wrote. Right-click on the non-player actor and choose “Set Id”, enter a recognizable name. Now your actor can be set as a target for the actorTalk trigger, this can be done by right-clicking on the Cinematic Event and clicking the (Actor:) tab beside the actorTalk trigger. You can also select the Cinematic Event and press 3 until “onEvent “actorTalk” is highlighted and click on the actor to set it as a target.
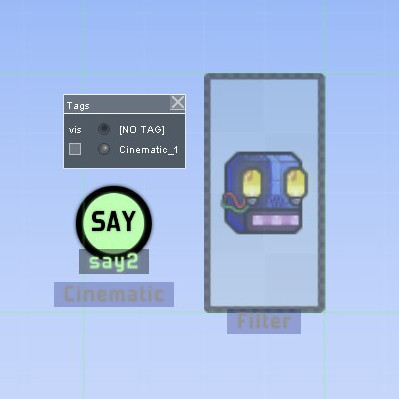
Now you need to create a set of responses from the player. Place two Cinematic Say tiles from the Cinematic tileset and make sure they have the same Id. Right-click on a Cinematic Say tile and go to Cinematic Settings, enter “Nope.” into the line field and enter “Yes, I have!” into the second Say tile.
To complete this basic dialogue, add two more Cinematic Event tiles (with unique IDs). These events will be used for responses from the non-player actor. Repeat what you did with the original Event tile, but have the actor say “Okay, bye.” and “Really? Where?”.
These Cinematic tiles are not connected yet and the player sensor will not start the cinematic chain. To fix this, right-click on the sensor and set the “Sensed:” action to startCinematic with the original Event tile as the target. Click the okay button, right-click on the sensor again and go to Filter Settings, set disableAfterUse to true.
Each of your cinematic tiles will have a (Next:) target. This defines what cinematic step is next in the chain. Set your Say tiles as targets for the original Event tile, and the latter two Event tiles as targets for their respective Say tiles.
The cinematic chain should be all set-up now. But before you press F5 and test the level, you need to make sure the non-player actor isn’t hostile. Right-click on the actor and go to Set Custom AI, choose templateAI and change “peaceful” to true.
Test your level and make sure the dialogue works properly. You will have to press F5 again to test the other chain of dialogue.
Toggling a Dialogue Option
You can now talk to the non-player actor, but you can lie that you have seen their spikebird when, in reality, you shouldn’t have. To fix this we can use Tags. Tags are like layers you can turn on and off with a trigger, but exist on more than one Z dimension.
To create a tag, press Ctrl + T, enter a name for it in the bottom field and press okay. You can switch between editing the tag and your normal map layers by pressing K for the Tags List, which also lets you set if a tag is visible (equivalently, enabled) or not when the game starts. You can also use your Left and Right Arrows. For this tutorial, leave your tag invisible.
Now we need to move your Say tile with the “Yes, I have!” line into your tag. Switch to the tag-free layers and select the Say tile, then use Ctrl + Right Arrow to move it into your tag. Now it will not appear as a dialogue option until the tag is enabled.
To enable your tag, place a second player sensor and set the “Sensed:” trigger to setTagVisiblity. Select your tag and make sure the “visibility” option is true. Add a spikebird, make sure it’s peaceful, and you’re done!

