
Overview
This is not a step by step tutorial on how to create a realistic looking digital human render.but rather a workflow breakdown of my recent portrait.
Introduction
I have kept my workflow strictly to Blender as much as possible but ultimately ended up using Zbrush for final displacement since Blender consumes much more memory than I anticipated compared to Zbrush.
Marvelous Designer were also used for the creation of clothing
and because this is a fairly advanced breakdown I wont be explaining everything and only the key thing that I think the reader should keep in mind.
Click here to view it
Gather References / Preparation
good reference is a very essential part of achieving realism, gather as many references of the subject as you can. Varities in angle and lighting is a must to help you understand depth better.
in my case, I used Supermodel Yolanda Thein as reference.
once I have gathered my references, I dragged them all into the viewport – line them up and make them facing toward Y-axis( front facing when press Numpad 1 ) and placed it somewhere away from my workspace. My viewport looks something like this
the references can be then organized into a group for easier toggling on and off


Always good to have some anatomy reference . I usually do a google up of Facial Anatomy.
and I really recommend any future portrait sculptor out there to get this book Anatomy of Facial Expression [anatomy4sculptors.com]. this book is a must because it has very detailed reference from 3 essentials angle covering varities of facial structure and races. along with very detailed written explaination for each part of the face.
this is my top go to for Facial Anatomy reference.
Having a solid understanding of basic facial anatomy is very important when you sculpt the subject likeness
here is some samples from this book that I believe the reader should keep in mind or heck even save a copy and use it as reference.
male and female have their own distinctive jawline shape


Facial Creation
Modeling Stage
I followed this by César Salcedo
to make the eyeballs, link to its assets is also included in the video description.
there is a few thing you need to keep in mind when making the eyeballs
the eye’s iris should always touch the top of your eyelid.
eyeballs should face about 4-5 degree outward like this.

Sculpting Stage
for the face I used my basemeshes on Blendermarket [blendermarket.com]as a base for a likeness sculpt, doing this would save me the time of having to retopologize each time thus sped up my workflow and it is recommend for any new Sculptor out there, no shame in using basemeshes as a starting point.
Blender have something called Multires modifier which is the same thing as Geometry Subtool in Zbrush. With Multires Modifier you can bump up or lower subdivision at your choosing easily
start off with low subdivision count and shape the face, then slowly add subidivsion and refine it more.
break symmetry once youre content with the shape of the face.
here is a rough evolution of my sculpt ( not the whole thing I forgot to documented the first phase )
ultimately this is the final sculpt of the face after many iterations
Wrap3 Stage
to create those pores details and Base texture I used Multichannel Face #54 [texturing.xyz] by TexturingXYZ for pores displacement. and R3DS Wrap [www.russian3dscanner.com] program to wrap and project the texture. if you havent already, you can grab a free license of R3DS on their main website if youre a student.
once Im done wrapping them, I projected the 3 channel came with it.
if youre still curious on the full process of wrapping check Killer workflow[texturing.xyz]


Displacement Stage
This is the part where you create pores details for your sculpt
to utilize XYZ displacement I separated it into 3 channel
R – Displacement
G – Tertiary
B – Microdisplacement
putting each of them in separated layer with a slightly exagerated strength, which can be adjusted using the slider later on. for more detail on how to use TexturingXYZ Multichannel maps do check out their website. they have some really awesome tutorial if youre curious.


I used Subtool Layers, and create a new layer each time I sculpt a different part. which can then be adjust and soften using the slider for a more non destructive workflow.
the reason I didnt do this in Blender is because Blender’s Multires modifier is broken when used with Armature or Shapekey. it will literally break your model, so make sure to disable Armature modifier and delete shapekey if you have any when using Multires.

Hair Creation
Hair Grooming
this stage is the most tedious process out of the rest if youre looking to create some convincing looking hair.
before I do anything I Duplicated part of the scalp, and area where the eyebrows and eyelashes are as a different group for performance purposes.
first things first I need to do some annotation on the hair, figuring out where to place the Parent or Guide to guide your Children Hair. I do it by placing a guide where a clump of hair is.
note that each Color represents a new group of Hair Particle.
I went through many stages and iteration of the hair groom. at first I separated it into two parted, left parting and right parting of the hair. but this method is no where as good because it couldnt blend the hair like the reference.
Here is the final hair Matched up Result.


You dont want to overdone the Hair Particle because the more strand there is the more control you get over the hair but the harder it is to achieve smooth result, I had to reworked the scalp many time to get it right.
Density Map
you think the grooming was the hardest of them all? think again! the tedious part is Painting the Density map and building hairline. No matter how you do, having hair on your emitter will causes lag when you weight paint them so I use Texture Influence method, but this method is not very widely use by Blender users or at all because its very hard to get it to work. but this method is much faster since it only recalculate when the stroke is lifted comparing to the Weight recalculate everytime new information is added.
if youre planning to weight paint the density map, you could Right click – Subdivide the mesh right to add more density to the mesh at the cost of ram.
Hair Shading
for hair shading utilized the Hair info “Intercept” node and hook it onto a color ramp being left is the root of the hair while the very right of the color ramp is the tip of the hair, connect the color ramp onto The Principle Hair BSDF
Melanin value for dark hair ( asian ) is 9 to 10
Brown is between 8 and 9
while
Blonde is < 8
with <3 is gray hair.
to test to see where the intercept are you can make the points on the color ramp colorful like this


Texturing
Using the projected multichannel maps,I use Clone Brush tool while in Texturing Mode in Blender to fill any gap.
Here is a Before and After Clone Brush cleanup


here is an evolution of the Albedo texture. I ended up mixing it with a scan data I had a while back to give it more life.

the texturing for Albedo itself is only this
I organized them into frames for easier future tweaking. using Hue Saturation – Value node as Toggle
Vector Blur group were implemented to blur masks.

I ended up masking with Curvature map and multiplying the Micro displacement map ontop of the Utility – B ( Fake Specular ) for pores, to get Specular Map
Curvature Information can be implemented using Geometry node – Pointiness plug right in the Color Ramp, the Color Ramp will then be adjusted to get the mask that you want and should look something like this


Iris texture creation
Iris can be created using TexturingXYZ but since im a little cheap so I decided to use Online image of irises. downside to it is almost all of them are overly bright or overly saturated so its no good if you would just plug it straight in. good news , with some clever masking you can easily create your own iris texture.
here is some samples of iris texture
by separating the iris color into R or G or B , you can use that information and plug it into a color ramp to clamp it, use that as a mask to mix and get the iris color that you want. desaturation and darken is recommended.
and here is a Comparison between before and after retouch


Skin Shading
the key element to create realistic and convincing skin is by having good specular reflection on the skin. for SSS shader I kept it simple as I have no idea how to implement Subdermal or Epidermis layers, but then again I felt like SSS radius is doing that already
my specular reflection was heavily inspired by this theory published by Wikihuman [vgl.ict.usc.edu]

Cycles only have Glossy node which is same thing as Roughness but reversed while its Color Input is Specular with value of 0-1.
Oh and here is my Skin Shader/ Texturing in nodes


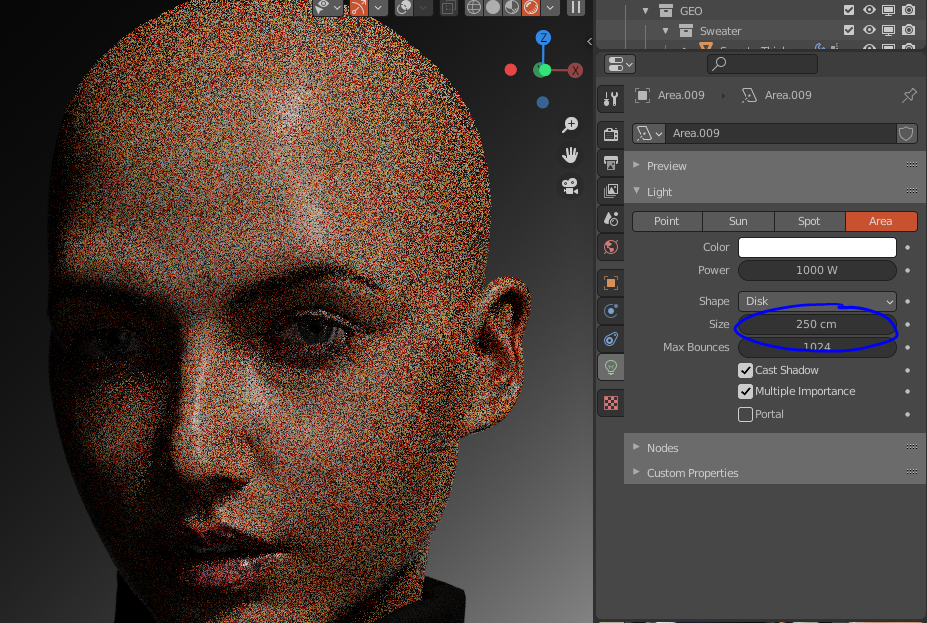
Lighting Scene
lighting a scene is second key element to realism because your render can look weird or awkward even when lighted wrongly. using something called a 3 points lighting is the simplest lighting setup for portrait render. with Key light being the main source of light that brighten the subject while the other 2 specular lights to fill any darkness to your subject.
I also added some Blackflags, these are complete black geometry with 0 specular reflection on it to absorb the light where I dont want it to bleed, for example the hair can get a little bleed when shine under light.
and this is without blackflags and with Blackflags to block incoming backlight


note that keylight is usually smaller size compared to Specular because you want it to produce a sharper shadow than specular, because specular is just there to fill in any gap.
here is the difference between a small size and large size

Portrait Essentials
some facial essential you need to have is a caruncle, the fleshy part in the corner of your eyes

Eye pupil size is also quite important in creating a consistent look.
the neutral pupil size are usually half the diameter of the iris and while its size is depends on the amount of light is directing to your eyes
for example
pupil at this size is considered neutral in neutral light environment while
the pupil is dilated like this when under low light condition pupil at this size is considered normal in neutral lighting environment

I used trial version of Marvelous Designer[marvelousdesigner.com] to generate the sweater
Im fairly new to MD so made my super simple.

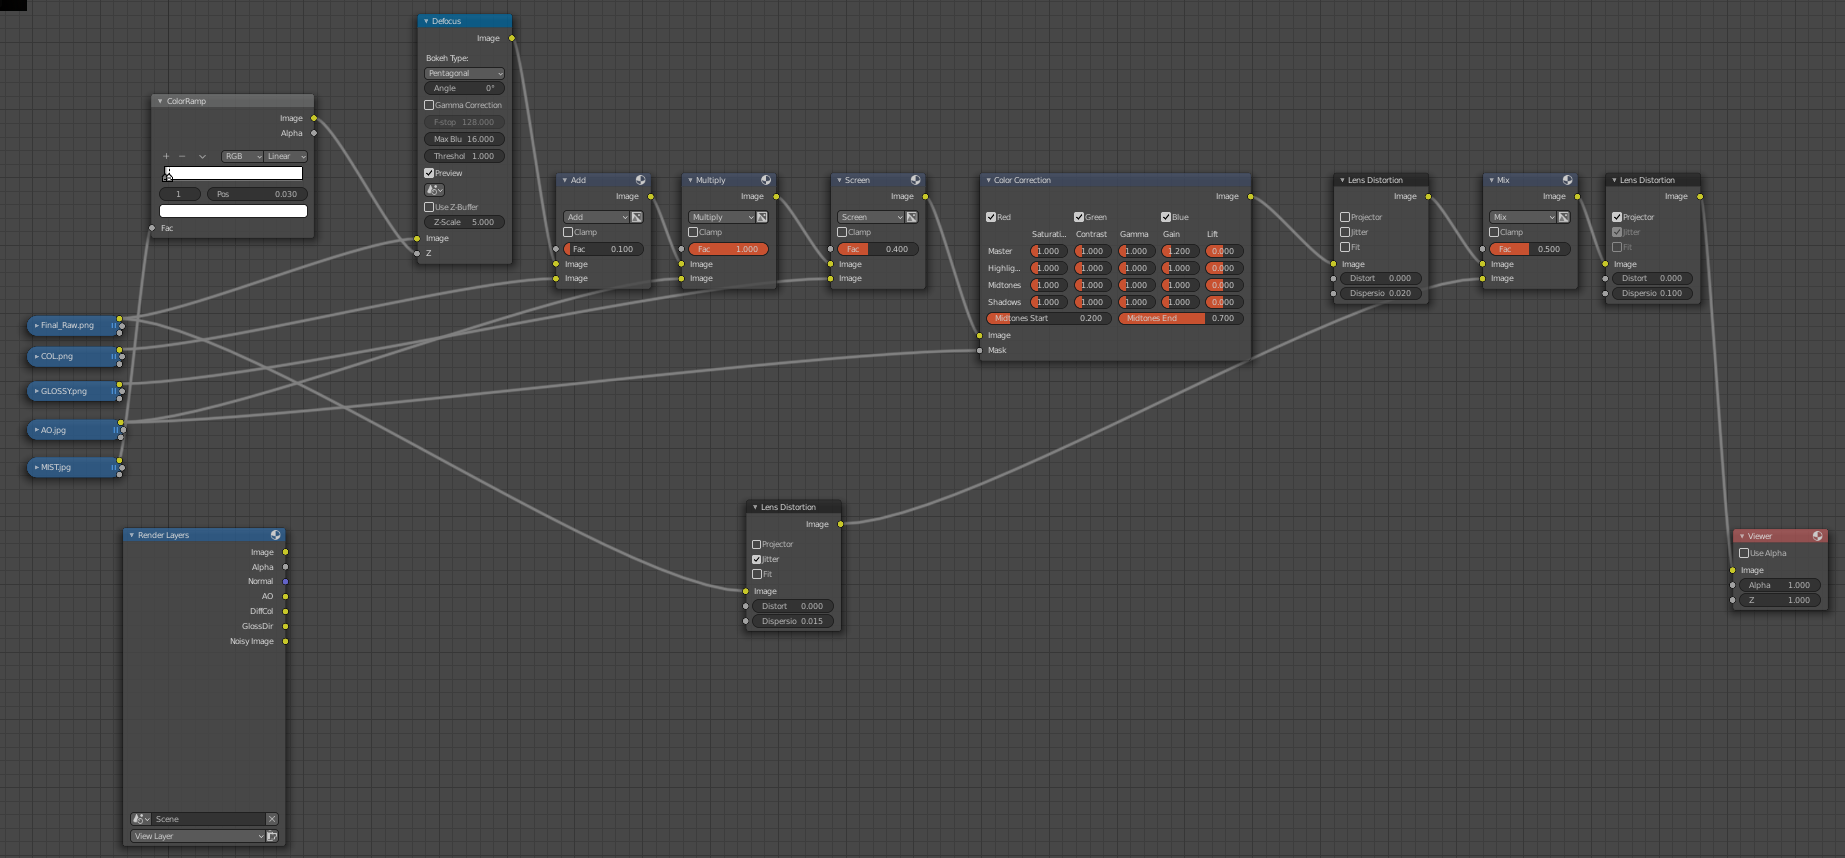
Composisting
the Composisting stage is something I like to do afterward to enhances the image, I was never too good at rendering skin so I had to use other passes to enhances the portrait.
here are the 3 passes I think you should enable before rendering your portrait
Glossy Pass – can be use for enhancing reflection on the eyes and hair even
AO – this pass can be use to darken corners and creases.
Diff Col -can be use to Color Dodge onto the Portrait to clean up any dark or give more fleshy look. use for enhancing skin mostly
while Mist pass can be use to post process Depth of Field into the portrait.
here is my full composistor node tree
Camera Noise Effect
Lens Distortion node are used to create this noisy abreviation effects ( fish eyes effect ) to mimic a camera.
Depth of Field or DOF for short
to create DOF effect I use Mist pass and hook it onto a color ramp to clamp its distance , mist goes to Z input while the image goes to Image
Color Correction is the one I play around with the most, and probably the most interesting out of the all, able to control and color correct by playing around with the settings, if youre new to this I recommend oyu stick to the Master row, as they control the overal color based on each columns.


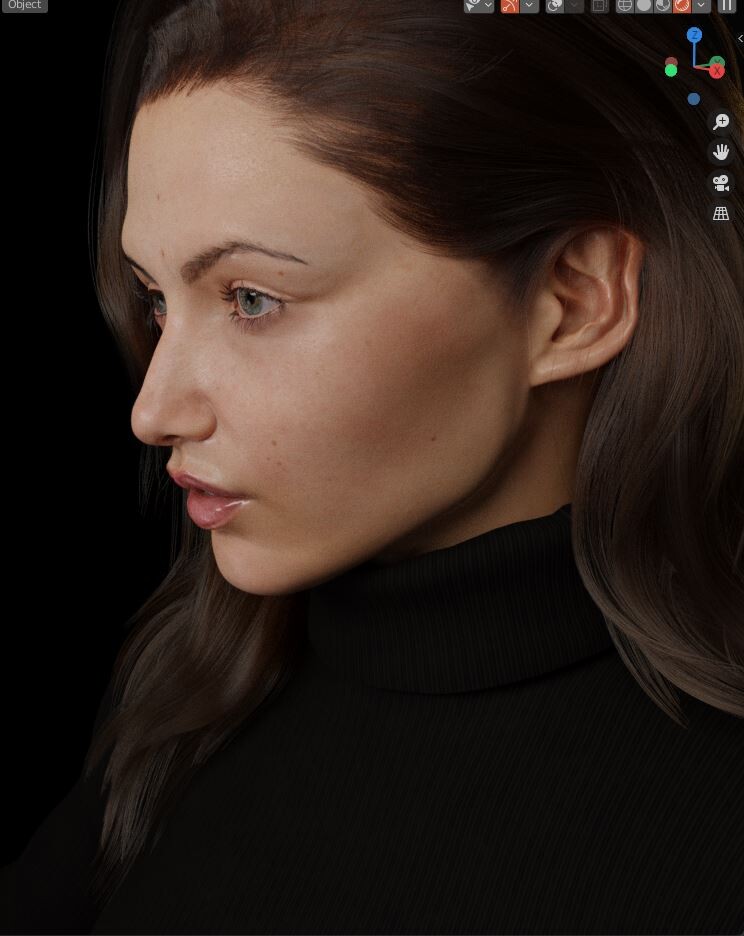
Final Renders
⠀⠀⠀⠀⠀⠀⠀⠀⠀⠀⠀⠀⠀⠀⠀⠀⠀⠀⠀⠀⠀⠀⠀⠀⠀ ⠀AO PASS and COL PASS


Final CYCLES
Artistic Black and White
Final EEVE


Behind the Scenes Xtras


Background
Heyoh! So just a bit background about myself. My name is Chuong Tran, I am a Self-Taught 3D artist who has a loving interest in making Digital Human, I love to sculpt people likeness. I first started learning these as a hobby, and instantly finds it more enjoyable than gaming, been spending 3-4 hours a day learning this during my free time ever since. really looking forward to getting a job at bigshot company who is looking for Likeness Sculptor later in life, my plan after High School is taking Art School since I never had a proper introduction to these thing … Over the year I have used many 3D software, gave Maya a few tries but too intimidating to relearn everything so I kept my workflow as strictly to Blender as possible. I am fairly influence at Substance Painter, Zbrush and others. but Organic Sculpting/Modeling is my strongest skill.
below is the link to my portfolio, keeping track of most of my creations/progression over the course of 2 years of self taught 3D.
Contact Information
If youre interested in my work or wish to contact me in anyway here is some platform you can contact me
Link to buy this work for PORTRAIT STUDY –
Blendermarket[blendermarket.com]
or
Gumroad[gum.co]
Instagram – boof1337
Discord – ClaudeTheBoof#2207
Email – [email protected] or [email protected]
Artstation Page[artisawesome.artstation.com]
Artstation main page[www.artstation.com]
Also if you find this guide helpful in anyway, why not like it?