Overview
Tips on how to win on nmo_Dodgeball!
UPDATE
Updated to V5.
Guides to read before reading this guide
This is optional reading, of course, but if you don’t know what zombie dodgeball is, check out this awesome guide that explains all the basics:
[link]All credit for that guide goes to its creator, Ake-t!ts.
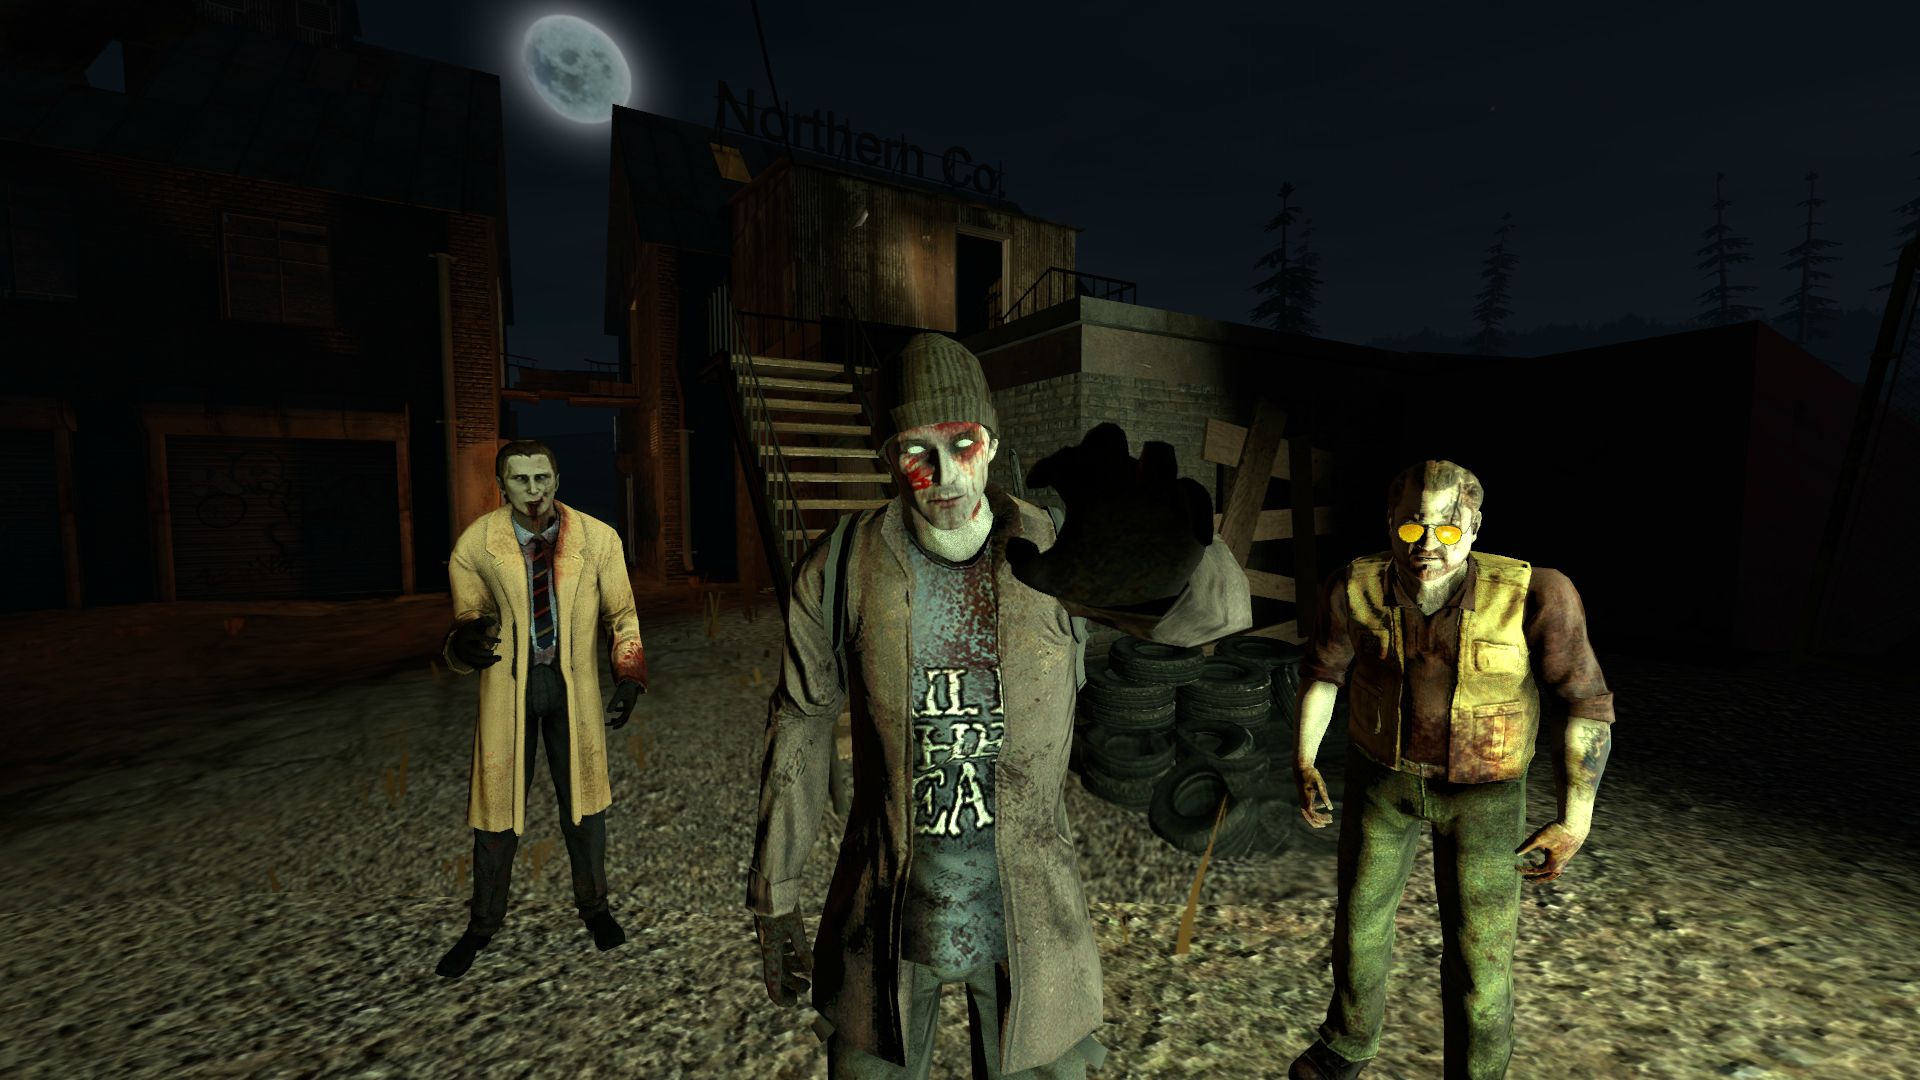
Hi!
First off- and I’m going to be very clear on this- I’m assuming you know the in-and-outs of the custom map nmo_dodgeball, its rules, and what you’re trying to do in it. In short, this is not a newbie’s guide.
This is a guide examining deeper strategies that affect gameplay in minor ways in the overall gameflow of a zombie dodgeball game. Since there are already quite a few guides telling you the basics of the game (check out Ake-t!ts’ guide!) and what you’re trying to do in it, I’m not going to repeat their words here, and instead go straight to the meat of what I want to say.
If you don’t know what zombie dodgeball is, I advise that you stop reading or you will just waste 15 minutes of your life reading something you don’t understand.
Other than that, sit back, relax, and enjoy my first guide!
Contents
On the surface, zombie dodgeball is a very basic game. It’s centered, usually, around two key concepts:
1. The Cart-o-Doom thing that basically is a giant GG
2. Upgrades
Every game, it seems like the team which gets these things first wins the game. But as we will see shortly, dodgeball is a much more complicated game than killing zombies and buying things.
Below are the contents of this guide.
Section 1: “Harrassment”
1.1: Runners and harrassment
1.2: The panic button
Section 2: Gates
2.1: Open gates
2.2: Closed gates
2.3: Positioning
Section 3: Weapons
3.1: Weapon rushes
3.2: Melee vs Guns
3.3: Weapons and the environment
Section 4: Gold
4.1: Health and revives
4.2: Trophies
4.3: Vending machines
4.4: Runners
Section 5: Upgrades
5.1: Upgrades and harrassment
5.2: Upgrades vs Weapons
5.3: Upgrades in more detail
Section 1 is a section covering and defining the idea of “harrassment”, another key, but hidden concept of zombie dodgeball. Section 2 deals with gates and how you should use them. Section 3 covers weapons, and which ones you should buy first. Section 4 tells you how you should use your gold, and finally Section 5 shows the relationship upgrades has on you, the enemy team, and on your gold; it also includes a little guide explaining upgrades in more detail.
Section 1: Harrassment
Simply put, harrassment is an invisible variable on a team that results from the team’s inability to kill zombies. Generally speaking, the less zombies you can kill, the more harrassed you are.
Things that can add harrassment, in no paticular order:
-Enemy team members’ killing skill
-Enemy runners
-Enemy weapons
-Enemy upgrades
-Zombies that are spawned and killed by the enemy (therefore coming onto your side)
-Your team’s total zombie count
-In-team fighting on your side
A spectator can usually tell which side is winning based on the above factors.
Things that can get rid of harrassment, in no paticular order:
-Your team members’ killing skill
-Your weapons
-An enemy deathcart thingy
-The panic button
And a spectator knows they’re in for a good, long game based on more of these things happening.
As I’ve said before, on the surface dodgeball is about killing zombies. If you dig deeper, it’s who can buy the gg-tier stuff first. And the concept tying all that together is harrassment. It doesn’t matter if you can kill zombies from 5 open gates if the enemy has bought AK’s, because that’s going to eliminate any harrass you put onto the enemy, and they can use their gg-tier AK to put harrass onto you, or if they’ve just pressed their panic button. The more harrass the enemy team is putting onto you, the smaller your chances are at winning.
The balance of harrass is usually focused on one team- in other words, at any given moment, one team has always more harrass than on the other team. The balance of harrass may be shifted slowly throughout the game, and lengthy games usually have many balance shifts of harrass. There are, however, a few things that can temporarily alter the balance of harrass and do so in a short time period.
1.1: Runners and harrassment
Runners are a wonderful tool in dodgeball, and a common result of pressing the button a few times are panicked gg’s from the enemy team. However, sometimes the enemy team can deal with runners swiftly, leading to you having given the enemy a few extra gold, while making your team many gold away from a better weapon or an upgrade. How, then, should you use runners as to maximise their potential? To do so, you must take into account:
-the skill level of the enemy team
-whether or not the enemy has machetes/fire axes
-the enemy team’s position
-the amount of harrass the enemy team has
You can also use this simple question to determine whether or not your runners would be “worth it”:
Will the enemy dispatch the amount runners I have sent them in more time than it will take for my team to gain back the gold that I have spent on the runners, and then some?
All of this is dependant on the factors listed above. A skilled player can easily dispatch hordes of runners, but it may take him a lot of time to do so. It will take him less time if he had a machete or a fire axe, which one-hit kills every runner. If he is near the runner spawn, he may not have enough time to escape the initial runner swarm, which leads to his death, and if he’s busy fighting exploding, infection-cloud zombies, he may just have to book it, leading to your team getting a free minute of no harrass from the enemy team, thus temporarily shifting the balance of harrass in your favor.
1.2: The panic button
Other than being an incredibly loud and annoying sound effect (and being the death of my FPS on multiple occasions), the panic button is another way of quickly altering the balance of harrass that a team has.
When you hear the panic button, you should always panic. Why?
-If the panic alarm is on your team, you only have about 10 seconds to open up your gates and start killing. That clear court isn’t going to last a long time, and the enemy is still killing zombies, sending them to your side.
-If the panic alarm is on the other team, this is the moment when you’re most vulnerable. The enemy knows they have an advantage over you (after all, they DID just get rid of all of their harrass) and they are going to use it. They may buy weapons or upgrades from a clear vending machine, send hordes of runners after you, or open up all the gates and try to kill them with a chainsaw- or all three together. Combined, that may force your team to call the gg if your team has already pressed the panic button.
This is probably the most important section of the guide, since this is how you win. There may be thousands of combinations of strategies that have forced gg’s over the months on the dodgeball court, but each and every one of them can be countered easily with another strategy. Only one strategy has worked for each dodgeball game:
Put harrass on the enemy team.
That is how you win. I have said it right there. If you don’t want to keep on reading and your eyes are tired, stop, because this is how you win. The rest of this guide is just explaining more things that affect the game. But that is how you win.
Section 2: Gates
Ah, gates. Trolls use them to quickly end a game. Losers close them in an attempt to stop the hordes. And winners stand in front of them, killing 5 or 6, waiting, and then repeating in an endless game of Farmville, NMRiH version.
Gates are crucial to the success of a team, but they are also very detrimental. They put harrass on the enemy team, while putting harrass on you (though, with upgrades, the harrass you put on the enemy is less than what the gate puts on you.)
You play a gambling game throughout dodgeball, trading your team’s harrass for the hope that you’ll put that harrass on the enemy team. This section tells you how to avoid the results of the saying, “the house always wins”.
2.1: Open gates
I want to start by saying this very important sentence:
After the knife stage, always keep at least one gate open at all times.
Yes, it’s so important I went through the painstaking effort of italicizing words inside an underlined sentence.
If you want another way of looking at harrass, you can do so using open gates.
The amount of harrass team A has is equal to the number of gates open on team B’s side, plus extra harrass from inefficiency on team A.
This is just a general statement, and wouldn’t really work if, say, both teams had their zombies upgraded to kingdom come. But it’s just a nice little way of aproximating a team’s harrass.
Now, I would like to address the issue of efficiency, the term from above. Basically, efficiency is:
The number of zombies you kill from opened gates before fresh zombies arrive from those opened gates
————————- (over)
The number of zombies spawned from the open gates each “wave”
To clear things up, here’s an example of the above equation.
Let’s say team Greendale has 10 gates open. The entirety of team Greendale possesses AKs and are standing in front of the gates, shooting zombies. However, one of the team members is a poor shot, leading team Greendale to kill only 9 zombies before fresh zombies spawn in. 9/10 = an efficiency of 90%. The extra 10% (1 zombie) is converted to harrass on team Greendale.
If you have a low efficiency, you are only harming yourself by keeping multiple gates open. If you have a high efficiency, you can probably deal with extra innefficiency with little to no effort (just like another team member from the example above just simply shooting the extra zombie). If you have a perfect efficiency, great! Time to relax and watch the other team get wrecked!
Note that correctly placed gas cans have 100% efficiency.
HOWEVER…
If you like a game of gambling, keep gates open and inefficiency high. I’ve found that hordes of normal zombies are easy to take care of- I mean, you don’t even have to aim or spend any effort if you have an AK or a chainsaw. This is a risky strategy, but it pays off, and you can quickly send 30 or 20 zombies in a minute to the enemy side, rather than over a long time period (waiting for the waves to spawn). And 30 zombies in a minute is a LOT of harrass.
2.2: Closed gates
Before I go on about closed gates, I want to define ‘potential’. Basically, potential is the amount of open gates your team can handle at any given moment while maintaining 100% efficiency. Now, I also want to define wasted potential. No, it is not the amount of zombies your team can handle while being on drugs, but instead is:
The difference between the amount of open gates your team can handle while maintaining 100% efficiency and the amount of gates currently open.
If team Greendale can easily handle 8 gates but are only opening 4, they have a wasted potential of 50%, which means they’re basically throwing away 50% of their potential.
Note that when I say “can handle”, I mean having little or no “wasted time”. I define wasted time as the amount of time your team spends waiting for the next wave to spawn in. If you do not have any wasted time, you are opening too many gates. And if you have tons of wasted time, you are opening too few gates.
Closed gates are also a gamble, but instead they’re a gamble on the skill of the enemy team rather than yours. Every gate you close is a bit less harrass on the enemy team, and a bit less harrass on your team. You may be taking a break- but so’s the enemy. And they’re going to use every chance they have to get back at you.
2.3: Positioning
Do you hate being cut off from the vending machines, health, or runner button? Do you despise having to turn around every 5 seconds because you’re right next to the runner spawn? Well, then you have the wrong positioning!
Positioning is simply where your open gates are. There isn’t one best way to open your gates, but I generally enjoy concentrating all open gates in a single area, so that if you are ever inefficient, your teammates can help you out, and vice-versa.
There also isn’t one best place to open your gates, so I’ve decided to list the most common areas people open their gates, and why they do it. It’s complicated to do this with words, so instead I’m using mathematical symbols.
[][][][][][][][][][]
t x h
Just kidding. The boxes above represent gates on Greendale. To the right is the runner button, and to the left is the runner spawn. To give you more orientation, ‘x’ is where the vending machines are, ‘h’ is where health is, and ‘t’ is where the trophies are, in order from runner spawn to runner spawn button. Below’s the same diagram for Oakhampton:
[][][][][][][][][][]
h x t
Note that runner spawn is always where the trophies are.
Okay, now that we’re clear on that, let’s begin our lesson on positioning!
The Haven
Greendale:
[][][][][][x][x][x][x][x]
Oakhampton:
[x][x][x][x][x][][][][][]
The Haven is the location on each team that is furthest from runner spawn. You have an advantage here if the enemy loves their runners since you’ll see and hear them coming, and health and pills are right there if you need them, so if you heal up, you won’t waste much time. The runner button is also here for more aggressive players. However, it’s hard to spawn zombies and get health without getting grabbed by your spawned zombies, and thus the runner button is usually out of reach if you’re maximising your team’s potential in The Haven. A mild place for mild players.
Catch-22
Greendale:
[][][][x][x][x][x][][][]
Oakhampton:
[][][][x][x][x][x][][][]
If you’re setting up camp here, you have the advantage of not getting cornered. In fact, you’ll never get cornered, since you have both sides of the court to run around in. You’re also very close to ammo. However, if you turn your back for too long, those pesky zombies from the gates you left open will grab you in the back and maul you to death while you’re grabbing your precious shotgun shells! Usually, you’re safe to grab medical supplies or send runners, but you’re going to leave your team unguarded and ammoless. I don’t recommend this if you’re using ammo-intensive guns, as usually you can’t fight back against zombies if you have no ammo, and if you have no ammo, you can’t get to your ammo. Catch-22!
Duke Nukem
Greendale:
[x][x][x][x][x][][][][][]
Oakhampton:
[][][][][][x][x][x][x][x]
If you have balls of steel, this is the ideal getaway location for you! Even though you’re right next to runner spawn and thus have to constantly watch your back, if you survive the initial runner horde, you have the rest of the court to run on! If you’re not being constantly groped by runners, check out our beautiful and safe RUNNER SPAWN button! Those damn zeds have to walk the entire court to get to our luxurious runner spawn button, which means it’s safe for the most part! If you’re risky and you love to send runners to the enemy, this is the ideal location for you! Just remember to watch your back!
Section 3: Weapons
Section 3: Weapons
3.1: Weapon rushes
3.2: Melee vs Guns
3.3: Weapons and the environment
I want to get something off my chest first. Dodgeball is a team game. You don’t win because you’re more “pro” than the rest of your team, or you have a chainsaw. You have to be a team player to maximise the amount of gates you can open and comfortably deal with. It’s a team game. Be a team player. If you know that 3 of your teammates want fire axes, and they’re good with fire axes, don’t be an ass and get the machete because you want it. There is no best weapon– all there is is good teamwork. And with good teamwork, matches are won, and you have a good and enjoyable game. Arguing, like we’ve seen before, just adds harrassment on a team. So get off that vending machine and onto the court, because that’s where you’re needed.
Now with that gone let’s talk about killing zombies fast!
3.1: Weapon rushes
So which weapon should you rush for first? Ask yourself these questions:
Q: Is my enemy sexually violating the runner button?
Q: Is my enemy shooting 9mm rounds using a M9?
Q: Is my enemy using infection cloud or explosive zombies?
Q: Is my enemy using double health or undead pregnancy?
If your enemy is seriously using the runner button way more than they should be in the early game, chances are that as the game goes on they’re going to keep on doing that. A machete or fire axe is good insurance against runner hordes. Weapons with large clips are also good, but if you run out of ammo or are cut off from your ammo source at least you have a chance at fighting back.
If your enemy is already using a high-tier gun, buy a higher-tier gun. They’re already putting harrass on you, and the only way you’re going to win is not to remove that harrass- but in addition to that, put harrass on the enemy.
If your enemy is using infection cloud (which can be seen in the early game, since it only costs 20), don’t bother buying an axe, or a machete if you’re really behind. Keep on farming till you get a gun- any gun is suitable against an infection cloud zombie. You can hit I.C. zombies with melees and take little damage, but it’s going to take you a lot longer to do that than if you just shot them in the head with a 12 gauge round.
And if your enemy is using double health or undead pregnancy and you’re still rushing for a weapon… gg. Well, not really. Machetes do wonders against double health since it only takes 1 more hit to kill a zombie with double health with a machete, and another quick swing can easily take out a baby. Also, you’re getting double income, so as long as you’re comfortably handling any zombies the enemy throws at you, you should be able to get a gun before long and turn the tide.
Note that shotguns 1-hit kill every zombie, regardless of upgrades. Yes, the double barrel does more than 1000 damage in a single headshot.
If you’re not in the mood to do a lengthy Q and A with the enemy team, look at the enemy team’s skill. It doesn’t matter how pro the enemy is with melees- you can save your money for a M9 or a gun other than the shotgun and easily outkill the enemy. Always keep this in mind: your goal is not to satisfy your weapon needs, but instead to outkill the enemy. If you don’t like the M9, but it’s your only choice, buy it. It may be your team’s chance at winning the game.
3.2: Melee vs. Guns
The dodgeball court never remains silent for long, because of this golden rule:
All guns, except the shotgun, will outkill melees.
A losing team’s court, however, stays silent for long periods of time. Why?
Common sense.
Derp! I forgot! Guns require ammo! This is where the concept of ‘overhead’ comes in. Generally speaking, melees require no overhead, meaning you don’t ever have to return to the vending machines, while guns have overhead, meaning that you have to return to the vending machine a lot. Simply put, overhead is the ease of usage of a specific weapon. The less you have to “care” for the weapon, the less overhead there is.
Overhead is negated with the factors below:
-Killing speed
-Aiming time
While overhead is added with the factors below:
-Reloading time
-Ammo consumption
-Ammo storage
-Inaccuracy
The Winchester rifle, for example, has a lot of ammo storage, doesn’t use up a lot of ammo, and is pretty accurate, while it doesn’t take a lot of time to kill zombies with it. It, however, has a sloooooooooow-ass reloading time, which gives its usage a lot of overhead. The AK, however, has a quick reloading time, with the only issue being ammo storage and the amount of ammo you get per vending machine box (10 per box while .357 gives out 12). It’s also not pinpoint accurate. The chainsaw has a relatively low overhead, giving you a good minute or two of carnage and only requiring four boxes of fuel to fill you up.
All in all, melees are used for insurance, not killing. They’re useful in the early game, but as upgrades are bought their usefulness is negated. Use them for runners, and if you’re out of ammo.
3.3: Weapons and the environment
Chainsaws consume fuel, which is damaging to the planet and the ozone layer. They also are ♥♥♥♥ against explosive zombies.
Before you buy a weapon, consider what the enemy is buying. Are they buying infection clouds? Then don’t buy a chainsaw, dickfart! Are they buying double health? Then don’t buy a sniper rifle, dickfart! Counter the enemy. The worst thing you can do to your team is to drive the effectiveness of a pregnant zombie upgrade deeper by buying a Winchester rifle.
This also goes the other way. If you see that the enemy already has Mac-10’s, don’t buy infection clouds! That’s just going to put you 20 gold away from something much more useful against Mac-10’s, like double health.
There is no best weapon, overall, in the game, but there is a best weapon for each and every situation. If the enemy isn’t using upgrades because they bought AK’s, a chainsaw is best. And if they’re spamming upgrades, an AK is best. Think before you buy, and not only will you save your team’s money (preferably), but also increase your chances of winning.
Section 4: Gold
I’m going to keep this section short, just like you should keep your strategies short. Don’t diddle-daddle at the vending machine, salivating at a chainsaw while an explosive zombie sneaks up behind you. Know what you’re going to buy, change tactics slightly based on the situation, and spend that gold fast. Every gold can be converted into a weapon, a health kit, or even a trophy. Gold gives your team strength, and it gives you a numerical gauge at how much your team is winning. Gold is your team’s life. But it’s just a number. And it’s going to stay a number unless you spend it.
So how do you spend it?
Here’s how.
4.1: Health and revives
When I talked about how gold is your team’s life, I literally meant it. Gold (10, to be exact) buys you a never-ending flow of health kits, and 10 more buys you a never-ending flow of pills. Useful, right? Not in the early game. As Ake-T!t’s guide said, gold is very important in the early game. And thus, we come to the first golden rule of gold:
The value of gold decreases as time goes on.
To see why this is so, consider how long it takes you to kill a zombie with your fist, and how long it takes you to kill a zombie with an AK. Because the killing time with a fist is so large, each and every gold you get matters a lot. While with an AK, the killing time is short, so you can afford to spend gold randomly on everything.
Health is something that falls in between the late game and the early game. You WILL need health, no matter what, but 10 gold in the early game is a huge amount. With that, you can buy a machete to increase your killing speed, or save up to an axe, or a shotgun to counter an aggressive foe’s infection cloud. A nice point to buy health is after the early-tier weapons. Once you have your machete, axe or early gun, you should start to consider opening up those health crates.
These same fundamentals apply to revives, but revives have a few exceptions, namely:
-If your screen is black and white and you’re the only member on your team
-The server has 6 or more players on it and you’re the only member that’s alive on your team
-All of the above and you’re getting your ass kicked
You simply cannot outkill a team of 3 or 4 people, even if they have knives. Revive your team as soon as you can if everyone is dead in the early game. The golden rule applies here as well, as in the late game revives are less crucial since you can just easily handle a horde with a chainsaw or an AK.
Revives will always put your team back in terms of gold, and will always give a 10 gold advantage to the enemy, but revives are also your chance at fighting back.
4.2: Trophies
Even in the late game, you shouldn’t relax and jump around to dance music. Your court may be empty, but you’re still in a race. Let’s look at the second golden rule of gold:
Buy things your team needs first.
It doesn’t matter if you’re putting plenty of runners on the enemy team- the rules of the game have remained unchanged. Get to the gg items first in the late game, and then you can put your focus onto other things. You WILL gain gold faster if you have even 1 trophy with, say, a MAC-10 than if you bought an AK for 160. Get those 3 trophies first, and start that 5 minute timer to gg.
4.3: Vending machines
Taking the golden rules of gold stated so far, we can more clearly see what vending machines truly are.
Vending machines are not there for you to shoot guns and have fun. Vending machines are there for you to counter the things the enemy has bought. Which leads to the third golden rule of gold:
Use gold to counter your enemy’s gold.
I am going to repeat this: dodgeball is a team game. Do things for your team, rather than for you. Don’t randomly buy upgrades such as infection cloud if you see that the enemy has guns already. Be a team player.
4.4: Runners
Runners are a unique case, in which gold is physically converted into instant harrass on the enemy team. There are no delays in this conversion and you do not need to kill additional zombies for the harrass to take effect- the result is quick, brutal, and often hilarious.
You can mostly use the steps I gave in the beginning of the guide for how to use runners, but remember that the golden rule of gold also apply to runners. Don’t spend 9 gold on runners if you’re 9 gold away from a better weapon.
Section 5: Upgrades
Upgrades are, as mentioned at the beginning of this guide, a thing that can end a game. By themselves, however, they are nothing more than 20-40 gold wasted. Over time, though, they can increase harrass on the enemy up to a point where the enemy team has to either resort to the panic button or randomly sprinting around. In the latter case, that’s where the Cart-o-doom comes in and kills everything and everyone. This section tells you how to maximise your use of upgrades, and how to make the enemy team literally run for mommy.
5.1: Upgrades and harrassment
Like weapons and tactics- and I’m going to be very clear on this- there is no best upgrade. There is a best upgrade for each situation, however, and you should look at audio and visual cues (do you hear slashes of flesh or shotgun shots?) in order to determine which upgrade you should go for first.
Infection Cloud
What it does: Remember that sewer water in Chinatown? Now every zombie is surrounded by it!
What it’s good against: Enemies who love melee
What it’s bad against: All guns who do not require to be right up in the zombie’s face to maximise killing potential (revolver, I’m staring at you)
Hidden benefits: Extremely potent in the late-game, as a horde of 50 zombies is much harder to run from when they don’t have to reach you in order to harm you
The Infection Cloud is what I define as a passive upgrade. By itself, it isn’t going to single-handedly kill off the enemy team. What it IS going to do is make the enemy panic, and generally make their life harder. It should be combined with other upgrades that will actually do something, since it’s easily counterable by itself.
In my opinion, you’re better off saving that 20 gold for something else, like a weapon or a 40-gold upgrade. You should always buy this upgrade sooner or later, however, if you plan on getting the GG cart of doom. It will drastically decrease the amount of room the enemy team has to run around from the cart, leading to quicker GG.
Ghost Zombies
What it does: Make zombies immune to fire. They do NOT become invisible, because that would just be OP
What it’s good against: Enemies who love fire
What it’s bad against: Everything except sniper rifles. The enemy can still see, hear, and kill the zombies very easily, since they only disappear from vision around the distance a shotgun can no longer penetrate 2 zombies.
Hidden benefits: Looks cool
Hidden benefits to the enemy: You can no longer check the amount of zombies that are on the enemy’s team at a glance
Ghost Zombies is another passive upgrade, although this is a VERY passive upgrade, as zombies gain no additional offensive power from it. I define thse types of passive upgrades as defensive upgrades, upgrades that instead of harming the enemy team, defend the zombie from the enemy team.
In my opinion, don’t buy this unless you have nothing more to spend your gold on. This only works on enemies that love to use the fire cans, and from what I’ve seen, people like to use gas cans in an offensive rather than defensive manner, putting cans on gates rather than on the spawns of enemy zombies.
2spooky4u zambi goasts
Double Health
What it does: Double the health of the zombie. What did you expect?
What it’s good against: Everything except shotguns. Exceptionally good against semi-automatic weapons, since lag makes landing even one shot hard. Oh, and also fire axes
What it’s bad against: Machetes, shotguns, and automatic weapons. This includes the chainsaw
Hidden benefits: Becomes a real pain in the ass late-game because it’s a pain in the ass to kill with an AK! And since the AK is the best tier gun everyone’s using it!
Health Zombies is another defensive upgrade, except this time it isn’t ♥♥♥♥ like Ghost Zombies. It’s a useful upgrade to get because you’re technically sending two zombies to the enemy side for every one you kill. However, it’s easily counterable- buying this in the early game will just make the enemy use shotguns- and probably piss them off enough so they can use the 30 gold they saved to buy a better, more offensive upgrade.
In my opinion, Health Zombies is an upgrade that should be bought after an offensive upgrade, such as Explosive or Pregnancy. It will add more harrass onto the enemy team as a result, and you will have an easier time dealing with the enemy.
Note: The machete only takes 3, rather than 2 powered hits (fire axe) to kill a double health zombie. And shotguns always 1-hit kill any zombie.
Explosive Zombies
What it does: Makes zombies blow up after you kill them, taking up to 50 health
What it’s good against: All melees and all guns that require the user to be up close, and chainsaws
What it’s bad against: All guns barring the ones mentioned above
Hidden benefits: Lag, and smoke! Makes killing zombies in rapid succession almost impossible!
Explosive Zombies is an incredibly useful upgrade. Not only does it affect melees (and basically take melees out of the entire game), but it also affects all guns to a degree. The cloud of smoke that’s released after every explosion renders rapidly aiming and killing multiple zombies with a MAC-10 or a Winchester obsolete, and enemies have to either resort to spraying-and-praying (which makes for frequent trips to the vending machines, which are blocked by zombies you can’t take out), or waiting until the smoke clears enough so they can aim properly. It throws melees out of the equation, and is a serious pain in the ass for gun users.
In my opinion, you should always compliment this upgrade with Double Health, to be a bigger pain in the ass to gun users. Not only can they not aim properly- they have to take twice the amount of shots to kill a zombie!
Undead Pregnancy
What it does: Makes all zombies teenagers on MTV- all zombies spawn babies on death
What it’s good against: All guns that don’t have ludicrous ammo clips
What it’s bad against: All melees, including chainsaws, and guns with large clips, like the MAC-10 or AK
Hidden benefits: Great when paired with runners!
Hidden benefits to the enemy: Each zombie baby is counted as a normal zombie- they give 1 gold when killed. Do the math yourself
Undead Pregnancy is usually the upgrade I go for first, since it’s great against guns and not so good against melees. Since most guns outkill melees, the Undead Pregnancy has a greater offensive magnitude against the enemy team. Undead Pregnancy, however, is also the easiest to counter out of all the upgrades. A chainsaw aimed at the neck of the zombie instead of directly at the head (it still counts as an attack on the head) will kill the spawned baby instantly (they spawn in the upper-chest area of a zombie) and with almost no extra effort. A little backing up and a shove with a melee will always take care of a baby quickly. And guns with large clips will just waste an extra bullet on the baby.
In my opinion, Undead Pregnancy is a gamble. You’re making life harder for the enemy, but you’re also giving them double income. It is a very situation-dependent upgrade. If the enemy is still stuck with shotguns, get this upgrade since shotguns have the smallest clip of any gun in dodgeball. If the enemy, however, is still using melees, use an upgrade that will suit them better, like Infection Cloud or Explosive Zombies.
Section 5: Upgrades (continued)
5.2: Upgrades vs Weapons
Unlike runners or weapons, the effect of upgrades is not instant, and if you buy them at a wrong time, they won’t have any effect at all on the enemy team.
First of all, you must be sure that your team will be able to kill enough zombies to spawn a decent amount of upgraded zombies on the enemy’s side in order to pose a serious threat. Don’t buy upgrades if you already have 40 enemy zombies on your team.
When you’re at the vending machines with 40 gold (or any other substantial amount of gold), and you’re deciding between a weapon or an upgrade, ask yourself this question:
Will the weapon I buy put more harrass on the enemy team than this upgrade?
If you’ve answered yes, then buy the weapon, you dumbo. Buy things that will always benefit your team- I’m sure I’ve mentioned this countless times.
Always double check upgrades. Double check to make sure the enemy hasn’t purchased guns or something of that sort, and most importantly double check to make sure your team isn’t being flooded by zombies. Upgrades, like in RTS games, take time to take effect. Sure you can buy the upgrade in a second- but it may take 5 minutes or more before the enemy feels the brunt of the upgrade. Double double triple quadruple check upgrades, because the worst thing you can do to your team in a dodgeball game is to waste gold. And upgrades, at their worst, can do just that.
5.3: Upgrades quick reference guide
This is the only optional subsection in the entire guide- if you’ve had enough, you can skip this subsection and go straight to the conclusion. But if you want more analysis on upgrades, here you are.
If we examine upgrades in more detail, we notice that their gold costs affect their nature. There are three gold costs for upgrades-20, 30, 40, and they all stand for different things.
20: The passive club
This upgrade (Inf. Cloud) harm the enemy directly, but it needs to be complimented by other upgrades in order to pose a serious threat. Don’t buy this on its own unless you’re sure you can follow up with another upgrade shortly, or that you can swarm the enemy with the advantage this upgrade presents you with.
30: The defensive club
These upgrades do not harm the enemy directly, however they can stand firmly on their own. They are not serious threats, but instead they compliment other upgrades, making them more deadly. These upgrades also have positive benefits for the zombie itself. Don’t buy these on their own unless the enemy is already getting their asses kicked into orbit.
40: The offensive club
These upgrades harm the enemy directly, but they can be easily countered. They are serious threats on their own, but their full effects are not realized without other upgrades. Buy these on their own and they will do their job satisfyingly, but don’t rely on them too long, and always accompany them with other upgrades as soon as possible as soon as you’ve bought them.
There are also upgrades whose effects are improved as the game goes on and the zombie count goes up. These are:
Infection cloud
The infection cloud’s harming effect is only fully realized if the enemy has close to 50 zombies. This will make running around much more harder, and thus survival chances slimmer.
Ghost zombies
If the enemy has grenades, targeting distant hordes can be rendered incredibly tough with zombies that vanish after a short distance. In addition, the enemy has to keep close to the zombies in order to kill them in rapid succession and in large numbers.
Explosive zombies
Killing even one zombie makes killing more extremely hard, due to a large smoke cloud.
Runners can also add to an upgrade’s lethality.
Infection cloud
Infection cloud limits available running space, and thus enemy members are more likely to be cornered and sexually violated by hordes of runners.
Explosive zombies
Giant clouds of smoke can limit reaction time for enemies, so if they kill too many explosive zombies in a short time, they may not be able to see a horde of runners approaching them until it’s too late.
Undead pregnancy
Children can add to the horde of runners chasing enemies.
Upgrades are sometimes also harmful to the team that purchased them and beneficial to the team they’re affecting.
Ghost zombies
Limits teams’ abilities to quickly view the amount of zombies on another team’s side.
Explosive zombies
Lowers FPS for every person on the server whenever a zombie is killed
Undead pregnancy
Provides double income for the enemy
Take all of these factors into consideration when purchasing an upgrade.
SOMETHING TO ALWAYS ALWAYS REMEMBER
All upgrades will make the enemy team know which zombie you’ve spawned and which zombie they’ve spawned. This may be used by the enemy team to prioritize certain zombies over others.
If you buy upgrades, don’t be surprised if you see an increase in the amount of zombies that the enemy spawns on your side, since they know which zombies to kill.
V5 changes!
Nothing much has changed, apart from the fact that
-Knives are now hammers
-New upgrade: Tacticool zombies
-New feature: slot machines
Hammers have replaced knives in the dodgeball court due to knives now requiring 4, instead of 3, hits to kill a zombie. They also have less range than knives, so keep that in mind and try to keep your distance and attack zombies from the side.
Don’t touch Tacticool Zombies and Slot Machines. Although they sound good on paper, they really don’t make that much of a difference- and in the case of TZ, they actually help the enemy team, as the upgrade as of now is incredibly buggy and often results in zombies getting stuck in the floor. Slot Machines have the chance to give your team rewards, but by the time that you can play slots without harming your team’s gold that much is the time when you don’t need anything else. And also, it has a chance to spawn an invincible runner on your team’s side. Take a lesson from real life and don’t waste your hard-earned money on gambling.
Conclusion
This guide may be added to or amended after it’s published, so if you see any errors feel free to post on my profile or the comments section of this guide and I’ll fix the errors as soon as possible. Same goes for any questions you have- post them and I’ll hopefully have the answers!
I would like to thank Ake-t!ts’ guide, as it was partially responsible for the creation and contents of this guide. And I would like to thank you, reader, for reading through this sea of text.
Now, if you excuse me, I have some zombie blood to spill onto the dodgeball court.
-41488 pls don’t copi thx