
Overview
A comprehensive guide of the many enemies of DOOM Eternal, and how to kill them.
Introduction
Now updated for both DLC! Certified spoiler-free!
This guide is meant to be a comprehensive, in-depth, spoiler-free analysis of the many enemies of DOOM Eternal, giving you insight on their attacks, behaviors, and most importantly, the strategies to beat them. This guide does NOT cover the game’s bosses, excluding the Doom Hunter, who is initially treated as a boss before being introduced as a regular enemy later on.
As you can see, this guide is quite lengthy; this is for people who want in-depth knowledge of every enemy in the game, whether you are new to the entire series or an experienced player of the game looking to streamline your skills. There are a lot of enemies in the game, so there are, naturally, a lot of sections, where I have tried to detail every single enemy as well as possible.
I have tried to list viable strategies for dealing with every demon listed below, some based off of in-game or online guides and some based off of my own personal experience. I may update entries with better strategies as time goes on. This guide should contain no spoilers, besides the mention of every enemy you will battle in the game, as well of the mention of a couple of late-game weapons, so if you have not yet finished the story it should be safe to read through.
This guide is long; don’t come here if you’re looking for a tl;dr version of things (though I am currently working on a shorter version of this guide, for people who don’t want to read four paragraphs about a regular Zombie).
Zombies
The most basic enemy in the game, affectionately referred to by some as “walking resource bags.” Pathetically slow and weak, incredibly common, and often found in groups. If you’re ever in a tight situation and need health, ammo, or armor in a pinch, these are your guys, and they’re found just about everywhere. They cost one point of fuel to chainsaw, so they will virtually always be available to drop ammo.
If you find a tight group of zombies, an extremely effective method of gaining armor is to scorch them all with the Flame Belch, before popping a well-placed explosive or Blood Punch to kill them all and drop massive amounts of pickups. If you are using the Punch and Reave rune, which causes enemies killed by Blood Punch to drop health, this can be an extremely effective method of gaining health back as well.
In many late-game encounters, when hordes of heavy demons are being thrown at you and your resources (particularly, your ammo) are being strained, you will find that a couple of zombies (or other fodder enemies) will spawn endlessly to provide you with much-needed resources. If you’re stuck alone against a Doom Hunter or Marauder and find yourself low on ammo, simply kite around until you can find one, and chainsaw him open to reveal the rewards inside.
The only thing to be careful of with zombies is that although they are weak, they can and will attack you. Be mindful of your surroundings; there is nothing more embarrassing than being on low health and accidentally backing up into a zombie you didn’t know was there, and being killed by the weakest enemy in the game.

Imps
The mainline pests of the DOOM franchise. Another basic enemy you will encounter from the very beginning to the very end, but considerably more dangerous than the zombies. Though not much stronger, Imps are fast, mean, and capable of attacking from afar and up close. Like other fodder enemies, you will almost always find them in groups, so they can be easily harvested for armor and health. They also cost one point of fuel to chainsaw, so they are useful for refilling your ammo supply as well.
Interestingly, there seems to be some variation to the Imp’s behavior in combat; though they are all capable of close and long-range attacks, some Imps will aggressively close in and attempt to claw you, while others will choose to flee and attack from afar, and may attack or flee when you approach them.
The most irritating trait of the Imp is its mobility; Imps are incredibly fast, can navigate up and down vertical terrain quickly, and almost never stop moving. The only time an Imp will typically stop moving is to charge up its fireball; it is vulnerable during this time, and a single stray hit, even if it does not stagger the Imp, will typically stop it from charging and stun it for a moment. The Super Shotgun’s hook is also an effective way of catching them, especially when trying to chainsaw them.
The in-game guide recommends using bullets to slow them down, as both bullet-consuming weapons have a high rate of fire that makes it easy to catch moving Imps, especially as it only takes a couple of rounds to get them ready for a glory kill. The plasma rifle is also very effective for accomplishing this, and a skilled marksman can even take them down in a single shot with a well-placed sticky bomb from the shotgun.
Though flimsy and weak on their own, a swarm of Imps can be surprisingly dangerous to an inattentive player, as they are capable of dealing considerable damage, especially on higher difficulties. Remain aware of your surroundings to avoid having your health and armor chipped away by stray fireballs or sneaky Imps behind you; in a battle with larger demons, that Imp may be the difference between life and death.

Zombie Soldiers
Another type of basic enemy you will encounter. Zombie Soldiers are considerably more dangerous than their shambling brethren, having more health, speed, and firepower. They will attack you at range with an automatic, arm-mounted cannon that fires bursts of plasma projectiles at you. They can also charge their cannons to fire a three-shot burst of larger balls of energy, which will travel a distance before exploding.
Generally, soldiers will attempt to keep their distance from you, often trying to find a better firing position. Though they are nowhere near as fast as you, they are much faster than the shambling resource bags, so be sure to keep track of their movements.
The soldier’s projectiles are surprisingly strong and accurate, even at a distance. Keep moving to avoid catching a salvo to the face. The charged shots are slow and easy enough to avoid, but they have an explosive area of effect, and will do considerable damage if they manage to hit. The balls CAN explode earlier than their maximum distance, if you are closer to them, so be wary.
The in-game guide recommends using the combat shotgun to dispose of them, claiming a point-blank shotgun blast will instantly stagger them, though this is true of most fodder enemies (if the shotgun doesn’t simply kill them first, of course). However, a wide variety of weapons are effective for dealing with them, particularly the assault rifle and plasma rifle, so use whatever weapon you deem is necessary depending on the situation.

Shield Soldiers
The Shield Soldier behaves somewhat differently from the regular soldiers, namely in that they possess a large energy shield and a shotgun. This shield can absorb ridiculous amounts of punishment from non-plasma weaponry, and though it is outright useless at range, the shotgun can deal considerable damage up close. Its hitscan properties make it virtually impossible to dodge, so it is important to mind your distance when dealing with them.
Fortunately, there are a number of ways to deal with these shield-wielding pests. The most straightforward way is, as stated by the in-game entry, using a plasma-based weapon; namely, the Plasma Rifle or the Ballista. I would personally recommend the Plasma Rifle, as using a Ballista shot for a single shield seems wasteful. As the shield is damaged, it will gradually turn red until it overloads, causing a small explosion; not only will this instantly kill the wielder, but it will damage any nearby demons as well.
If you find yourself low on plasma rifle, worry not. As the shields only protect their front, a well-placed explosive behind them should easily do the trick, be it a grenade, sticky bomb, or rocket. A Blood Punch will instantly kill shield soldiers as well. Alternatively, you could simply chainsaw right through their shield AND restore your plasma ammo, killing two birds (and one demon) with one stone (chainsaw), as they only cost a single point of fuel.
Do NOT waste your time attempting to brute-force their shield down with shotguns, bullets, or rockets. The shields are ridiculously resistant to non-plasma weapons, and you will waste considerable amounts of ammo attempting to kill just one of them.

Mecha-Zombies
The in-game codex does not actually possess a separate entry for Mecha-Zombies, despite them clearly being different enemy types from regular zombies or zombie soldiers. They are something of a mix between the two; the sluggish movement of a zombie, combined with the armament of a soldier.
Like regular zombies, they will slowly shamble towards you to attack, unlike the more aggressive behavior of the soldiers. However, they will still fire an automatic, arm-mounted energy blaster at you, similar to the ones the soldiers will use. Like the soldiers, they are surprisingly accurate even at range, so keep moving. They can be dealt with using whatever tactics you typically use to dispatch fodder enemies, though they are surprisingly resilient, often able to withstand multiple shotgun blasts even at point-blank.
The only unique trait that the Mecha-Zombie possesses is its alternate attack: a jet of flame fired from its arm cannon when you get in close enough. This flamethrower is not accurate or considerably damaging, and quite easy to dodge, but it can, like any other fodder enemy, be dangerous to an inattentive Slayer who happens to be in the wrong place at the wrong time. Maintain a safe distance or kill them quickly if you get in up close.

Gargoyles
In basic terms, Imps with wings. Gargoyles are flying fodder enemies who will spit acid at you from afar, or slice you with their claws up close, very similar to the Imps. Their most notable difference is, as previously stated, their ability to fly, though they are not capable of doing this for long and mainly use this ability for traversing the battlefield quickly.
Like all fodder enemies, they are weak and fragile individually, but gain their strength in numbers. Gargoyles can be very irritating foes, and relentlessly chip away at your health if you are not careful. Fortunately, they are exceptionally fragile even for fodder enemies, and only take a couple of shots to kill. Additionally, shooting one while it is flying will stun it and send it sprawling to the ground, leaving it open for a followup attack.
The in-game guide states that the Gargoyles are weak to the Ballista, as it does extra damage against flying enemies, but this is redundant, as the Ballista will typically one-shot most fodder demons, regardless of whether or not they possess the ability to fly. I would generally recommend using the same weapons you often use to dispose of Imps, the Heavy Cannon and Plasma Rifle, as they are useful for tracking the fast-moving enemies.

Lost Souls
Fortunately, the Lost Souls are not quite as numerous as they were in the previous game, only being seen on their own on a very small number of occasions. They are weak, fragile, and able to be killed almost instantly with any weapon, though the in-game guide lists the shotguns and ice bomb to be the most effective means of dealing with them.
The main appearance of Lost Souls in the game are not from scripted spawns, but from being generated by Pain Elementals, discussed later in this guide. They are used as projectiles by the demon, spawned and launched at you.

Tentacles
The bane of free-roaming sections, Tentacles have one goal: ambushing you on your way through the level, springing out of the ground to lash out at you and take out chunks of your health. They are considered “environmental” demons, as they are more like hazards than actual enemies. Though they may seem to simply be a nuisance, they can be extremely dangerous in some situations, especially on higher difficulties.
In most appearances, a Tentacle can be identified by a fleshy hole in the ground, though they will sometimes be hidden under the infamous purple goo. In the case of the latter, they are EXTREMELY dangerous as you cannot dash away from them in time to avoid their attack, forcing you to remain aware and prepared to react fast at all times. In many appearances where the holes are visible, several holes will be scattered about the area; there is no way of telling which holes contain tentacles and which do not, so you must be extremely careful.
As if that wasn’t irritating enough, Tentacles cannot be glory killed, meaning that they will not be able to replace the health they take from you (they will drop health pickups if you are low, like all enemies, but only a minimal amount). They will drop armor if scorched with the Flame Belch, but the amount is minimal and it should only be done as a last resort. They can drop ammo when chainsawed, however.
If a Tentacle springs up at you, you must react fast to either kill it or dash out of its range. A point-blank blast from either shotgun (though the Super Shotgun is more likely to guarantee an instant kill) or a quick burst from the Heavy Cannon will often be enough to kill it before it strikes, though it is not guaranteed. If you retreat from the Tentacle’s range, it will retreat after a couple moments, so strike fast before it retreats and you are forced to lure it out of its hiding spot again.

Cueballs
Like grenades, but fatter and uglier. Similar to the Possessed Engineers of the previous game, Cueballs are extremely useful in combat situations, as they can be sent flying into a crowd of enemies or a bigger, more problematic enemy to deal massive explosive damage.
Unlike their previous appearance, where they would shamble after you and explode, they have now been completely lobotomized, and will stand completely unmoving, making no attempt whatsoever to turn you into Slayer barbecue, even if you close in. Additionally, they will be launched by even the slightest amount of damage from you, allowing you to quickly send them flying in whatever direction you’d like.
Though they are rarely found in the game, they are often useful in whatever encounters they appear in and should be utilized to their fullest extent, as they can do even more damage than your Rocket Launcher. Do not be afraid to use them when needed.

Arachnotrons
Ah, finally on to the heavier enemies! The Arachnotron is the very first enemy type that you will encounter in your rampage, but this does not mean that he’s an easy one; on the contrary, you’ll find him to be a thorn in your side for the rest of the campaign. The Arachnotron has two different main methods of attack; the notorious cannon mounted on top of him, as well as a volley of grenades which stick to surfaces and explode after a short delay.
The cannon is the Arachnotron’s primary method of attack: it is quite similar to the soldiers’ arm cannons, firing short salvos of automatic fire and the occasional charged shot at you, though it is considerably more dangerous, in no small part due to the strength and mobility of its user. The Arachnotron is extremely fast and agile, not only able to traverse vertical terrain with ease, but able to stick himself to walls and ceilings to gain a better firing position.
Fortunately, there is an effective way to disable this weapon, in a manner similar to disabling most of the game’s enemies: shooting it. A well-placed sticky bomb or precision bolt shot will instantly destroy the Arachnotron’s turret, leaving him unable to harass you with it. It is worth noting that while all weapons are technically capable of dealing damage to weak points, you will find that some are much more effective than others (generally, automatic weapons are much less effective than stronger, slower ones).
This will come at a cost, however; without the turret, the Arachnotron becomes much more aggressive, attempting to rapidly close the distance between you and its rather damaging legs. It can pounce at you from a distance, and sweep its legs deceptively far when up close. Without its turret, it will also fire its grenades far more often, leaving you to deal with constant volleys of explosives.
Unlike the previously mentioned enemies, the Arachnotron, as a Heavy enemy, requires 3 points of fuel to chainsaw, as do all other Heavy-class enemies in the game. As this is worth your entire supply, it is worth careful consideration whether it is worth chainsawing an Arachnotron, particularly when one could kill far more dangerous targets with the same amount of fuel, so use discretion when doing so.

Cacodemons
Big, red, floating meatballs with teeth. Another Heavy enemy type encountered very early on, the Cacodemon is a common foe the game will throw at you on several occasions. The Cacodemon has a very basic behavior: it will gradually float towards you, spitting purple balls of plasma at you, until it is within range of its melee attack. Like the other Heavy demons, it will take your maximum amount of fuel to chainsaw him, so think carefully before carving him open for ammo.
Though simple, the Cacodemon is still a dangerous opponent. His projectiles will blur your vision and briefly slow you, similar to how they did in 2016, and they do large amounts of damage, to boot. Occasionally, the Cacodemon will charge up and fire a burst of several orbs in a line, which can deal massive amounts of damage if not dodged. If he closes in, his melee attack is also extremely dangerous, even able to kill you from high amounts of health on higher difficulties.
While he can do very high amounts of damage, the Cacodemon is an extremely easy enemy to kill. All one has to do is pop a sticky bomb or frag grenade into its mouth, at which point it will play an amusing animation where it swallows the grenade and has it explode inside, rendering it instantly available for a glory kill. Alternatively, once acquired, a fully charged Arablest shot will instantly kill a Cacodemon. Despite being explosive, rockets do not seem to trigger the instant stagger.
Take note that firing a grenade into the Cacodemon’s mouth DOES NOT kill it, nor does it even considerably damage it. You must follow up with a glory kill, or the Cacodemon will soon return to its usual business of attempting to kill you. The Super Shotgun’s hook is useful for accomplishing this if you are otherwise incapable of reaching the Cacodemon in time.
One thing I have found particularly problematic about the Cacodemon is how silent and surprisingly stealth it can be. While distracted in a firefight with other demons, the Cacodemon may silently sneak up behind you and attack with its bite, taking out a huge chunk of your health. Keep an eye out for any Cacodemons, and dispose of them quickly.

Prowlers
A Heavy demon very similar in behavior to an Imp, with a couple of differences, the most notable of which is the ability to teleport. Like Imps, Prowlers will try to throw fireballs or close in to melee distance, but they behave much more intelligently, regularly attempting to ambush you with their short-range teleportation.
Prowlers have more health than Imps, but they are still weak and can be disposed of quickly with heavier weapons, most notably the Super Shotgun, which is capable of instantly killing one at point-blank. Its hook also makes for an effective means of catching the teleporting demon, as the hook will actually follow them through teleportation (though it will often break off soon afterwards).
The in-game guide also recommends using ice bombs to lock Prowlers down, as once they are frozen, they are unable to teleport and can easily be killed with a shotgun blast or whatever your preferred method of violent disposal may be.
It is worth noting that although Prowlers are relatively weak on their own, often seen in groups, and behave (and appear) similar to Imps, they are NOT fodder enemies and are not considered by the game as such. As such, they will require all three points of fuel to chainsaw; given the weak nature of these enemies, it is strongly recommended to save your fuel for stronger enemies.

Carcasses
More of a support demon than a mainline attacker, the Carcass is nonetheless a troublesome opponent. He is able to move surprisingly fast, and often projects shields from a distance in front of you to slow you down. These shields can be extremely dangerous if wielding explosive weapons such as the Rocket Launcher or sticky bombs, as they will instantly detonate on impact with the shield…and in your face.
The Carcass’s greatest strength is also his greatest weakness, however, as the massive shield is vulnerable to plasma weapons similar to the shield soldiers. Upon being overloaded with the Plasma Rifle or Ballista, it will burst and harm enemies nearby, potentially even killing the Carcass who projected it if it is close enough. If short on plasma ammo and stuck in a tight spot, a Blood Punch will also remove the shield as well.
Despite mostly being a support demon, the Carcass is more than capable of attacking with a burst of ring-shaped energy blasts, traveling very quickly towards you, and it can send a shockwave through the ground to track you down. These attacks are not difficult to dodge, but can still be problematic in a hectic combat situation.
Despite the Carcass’s dangerous nature, it has relatively low health, though it still requires three fuel points to chainsaw. It is recommended that you save these fuel points for another Heavy enemy, if possible.

Hell Knights
Big brutes hellbent on a single goal; violently crushing you into dust. Very similar to their behavior in the previous game, the Hell Knights are aggressive and robust melee powerhouses. They are faster than their previous incarnations, however, and you must constantly move to avoid being caught in their attacks. The Hell Knight will make a beeline straight for you, and can navigate very quickly, so it is important to maintain distance from them.
The Hell Knight will punch and swipe at you once close enough, and will regularly perform a leaping attack in an attempt to close the distance. This leaping attack will create a damaging shockwave around them, so make sure you aren’t too close to the landing site. He may also perform this shockwave attack when jumping up or down terrain to reach you, so be wary.
The Hell Knight is capable of enduring quite a bit of punishment, though most heavier weapons can dispatch him quickly. A couple of well-placed shots from the Ballista or Super Shotgun can make short work of him (though caution is recommended with the latter), and a single rocket burst can annihilate him. The in-game guide suggests using the Chaingun, as this will stun him much faster than other weapons and leave him open to attack, or simply give you a little more breathing room.
As always, the most dangerous thing about these enemies is their ability to shred you if you are inattentive. You may find yourself walking backwards often when fighting Hell Knights; ensure that you do not walk yourself into a corner or another enemy.

Dread Knights
Hell Knights on steroids, and worse, UAC technology. Its attacks are very similar to its weaker brethren, but they are enhanced by arm-mounted energy blades that allow it to deal much more damage. They also possess a couple of new attacks that make it even more dangerous: an enhanced version of the shockwave attack, and a ranged attack.
When performing the same kind of shockwave attacks a Hell Knight would, lunging through the air at you, the Dread Knight will create an even larger shockwave that is quite difficult to dodge, and lingers on the floor, dealing damage to you if you don’t move away immediately. This shockwave lingers for quite some time, and can kill you quickly when combined with his powerful melee attacks. At a distance, he will slice the air and send a beam of energy at you, dealing considerable damage if it connects, though it is thankfully easy to avoid.
Fortunately, he possesses the same major weaknesses as the Hell Knight: the Chaingun, faltering it and slowing its advance towards you considerably. Additionally, while the Dread Knight is stronger than the Hell Knight, it does not seem to be significantly tougher, and can be killed fairly quick with heavier weapons.
Of the Heavy enemies in the game, the Hell Knight is easily one of the most dangerous. If you are trying to find a target worthy of using all of your chainsaw fuel to get rid of, a Dread Knight would be an excellent candidate for it, as the chainsaw can instantly remove him from play.

Revenants
Spooky scary skeletons…with jetpacks. Revenants are extremely mobile Heavy demons who will harass you with a constant barrage of rockets from a distance, using their jetpacks to gain better firing positions. They may fire barrages of unguided rockets, a targeted precision shot from the air, or a burst of lock-on rockets that will track you if not dodged.
The Revenant’s rockets can be weakened and ultimately disabling by destroying one or both of the shoulder cannons, forcing the Revenant to resort to melee attacks. This can be difficult, however, as the shoulder cannons can be difficult to hit while the Revenant is constantly moving. The Precision Bolt is generally the best method of removing them, though the Sticky Bomb, Ballista, and, surprisingly, the Heat Blast mod for the Plasma Rifle are all effective as well.
The Revenant is most vulnerable when hovering the air, attempting to target you with laser-guided missiles. Blasting its shoulder cannon while it is airborne will cause it to fall to the ground, leaving it briefly vulnerable. It may also fire lock-on missiles at you, which will cause a visual warning to appear on your screen. However, these locks can be broken by simply jumping and dashing, something that you should already be doing so much you barely notice the missiles were there in the first place.

Pinkies/Spectres
Despite the new dashing mechanics, Pinkies can still be quite dangerous in this game, charging straight for you and doing massive damage on impact. Armored in the front, they can sustain massive amounts of damage, so one must deal with them from behind in order to deal any significant amount of damage.
Disposing of Pinkies is extremely simple if you have a Blood Punch ready, as a Blood Punch will instantly kill a Pinky. Explosives are also extremely effective, as a grenade or rocket detonated behind the Pinky will do massive damage, though rarely enough to instantly stagger or kill it. Ice bombs are also an effective method of dealing with them, as the Pinkies cannot move and you can simply move in behind them.
It is worth noting that Pinkies can turn extremely fast, so attempting to dash behind them for an attack can be much more difficult than one might anticipate, though it is still possible with quick timing and reflexes. They can also turn surprisingly well while charging, so don’t think you’re safe just because you stepped out of the way.
For dealing with their invisible brethren, all of the previous tactics work just as effectively. The in-game guide states that ice bombs make them targetable with the Lock-On Burst, but I have not been able to do this, though an ice bomb does make them much more visible and therefore easier to deal with.

Mancubi
Big. Mean. Ugly. Real ugly. The Mancubus is a dangerous tank of a beast that soaks up damage and deals plenty in return with its deadly arm cannons, launching fireballs from a distance and spraying you with flames from up close. These should be considered high-priority targets, and dealt with as such.
At a distance, the Mancubus will bombard you with fireballs that do large amounts of damage, but it becomes even more dangerous up close, as it will hose you with flamethrowers, and, if close enough, create a massive, lingering wave of fire at its feet to ward you off. As such, it is generally a good idea to deal with them from a distance.
Their cannons, fortunately, can be destroyed to cripple them, once again with Precision Bolts, Ballistas, Sticky Bombs, or whatever other methods you may have deemed fit to deal with destructible weak points. Once broken, their massive fireballs become pitiful little toots of plasma, and their flamethrowers are disabled. Their shockwave is not, however, so use caution at close distances.
An interesting thing about the Mancubus is that if you glory kill it from the front, targeting the chest area, you will perform an animation where you force the Mancubus’s heart down its throat, causing it to explode. This explosion is not just for show, and will damage nearby demons at no cost to your own health.
This can also be accomplished with the chainsaw, though it will consume all of your fuel. Mancubi are dangerous targets, so it might be a wise idea to take one out with your chainsaw if you’re in a pinch. Which brings us to our next entry…

Cyber-Mancubi
Bigger. Meaner. Still just as ugly. The Cyber-Mancubus is very similar to its unarmored variant, except that its entire body is now decked out in armor, complete with enhanced cannons. These cannons will fire green projectiles that do even more damage, and to make matters worse, they cannot be destroyed. Ever.
Fortunately, there is something that can be destroyed: its armor, which will all disappear with a single well-placed Blood Punch. Take note that it will almost certainly use its deadly shockwave attack when you close in for a Blood Punch, so speed is key. Use the Meat Hook to close in quickly, and your dashes to get away before you soak up too much damage.
Once the armor is gone, the Cyber-Mancubus has just as much health as a regular one, though it will still do much more damage, so be wary. As one of the most dangerous enemies in the game, it would also be a prime candidate for chainsawing when you have full fuel, and as an added bonus, chainsaws and frontal glory kills will cause it to explode like a regular Mancubus would.

Pain Elementals
Well-done floating meatballs. The only other permanently flying enemy in the game, Pain Elementals can harass you from the sky, pelting you with an endless supply of Lost Souls. On top of all that, he can be surprisingly tanky if not dealt with properly, so make sure to give him plenty of attention and care.
The Pain Elemental will throw Lost Souls at you, typically in an individual fashion, though he may sometimes fire a trio of them at you. These Lost Souls can be shot out of the air, but aren’t worth the time and attention and are best dodged instead. The Pain Elemental will not attempt to close in to melee range, but it has a surprisingly strong melee attack if you get too close, so use caution if hooking it or otherwise attempting to close in.
The best way to deal with Pain Elementals is with the Ballista, especially when using the Arablest; when upgraded, two fully charged shots is usually enough to blast it straight out the air. If using other weapons, however, the Pain Elemental will soak up surprising amounts of damage, able to withstand several rockets or Super Shotgun blasts.
While the Lost Souls that the Pain Elemental more or less behave like projectiles, they are separate entities and can be shot down. While the Pain Elemental has his souls floating around him, pop him with an explosive, such as a Sticky Bomb or Arablest shot, and all of his Lost Souls caught in the blast radius will cease to exist.
These should be considered high-priority targets, as they can deal quite a bit of damage if left unchecked. As Heavy demons, the chainsaw is able to instantly kill them if at full fuel, so don’t be ashamed of using it on these baddies.

Whiplash
Slick, sneaky, sadistic snakes. Whiplashes are wicked fast, and can deal alarming amounts of damage very quickly. They slither about the battlefield, often trying to ambush you from behind with its energy whips. It is also surprisingly dangerous at range, using an energy wave attack to harass you from afar.
The Whiplash often keeps its body low to the ground, and can change elevation extremely fast by using its whips as grappling hooks to get up ledges. As a result, they are irritatingly difficult to hit, and are best dealt with using automatic weapons like the Chaingun and Plasma Rifle. The ice bomb is also particularly useful, as it locks them down and leaves them vulnerable to attack.
The best way to avoid the Whiplash is to consistently move around the battlefield, staying out of its range while harassing it from afar, though this may prove difficult on smaller battlefields. While it is difficult to hit, it does not have much health for a Heavy demon. If you are a skilled enough marksman to hit it with heavier weapons like the Ballista or Rocket Launcher (or if you simply use the Lock-On), the Whiplash can be dealt with very fast.

Barons Of Hell
Oh, great. Now they’re on fire. The Barons of Hell are very similar to their 2016 counterparts, acting as aggressive minibosses classified as “Super Heavy” enemies. They are very similar in behavior to the Hell and Dread Knights, attempting to close in to melee distance, though they will regularly pelt you with fireballs when at a distance. Despite their size, they are extremely fast, so mind the gap between yourself and them.
The first thing you will notice about Barons of Hell is how much health they have, able to withstand incredible amounts of punishment. They are even capable of withstanding a BFG shot at times, so it should go without saying that it will take a large amount of ammo to bring them down. Fortunately, they share the same weakness as the Hell Knights, being easily stunned by the Chaingun to slow their rapid advance towards you. Use this to keep them at bay, and use heavier weapons to bring them down quickly.
A notable thing about Barons of Hell, and all other Super Heavy enemies, is that they CANNOT BE CHAINSAWED. No ifs, ands, or buts. Super Heavy enemies cannot be instantly killed with the great communicator under any circumstances, so don’t waste time trying. However, the Crucible is capable of killing them, though there are more dangerous enemies it could be used against.

Tyrants
These guys are huge, which means, of course, that they have huge guts for ripping and tearing. Many of you know and love the Tyrant by his classic identity as the infamous Cyberdemon. A towering mass of health and firepower, they can be easily identified by their massive curved horns, their arm cannons, and the fact that they’re no less than 20 feet tall, making them stand out very clearly on the battlefield.
If you thought the Barons of Hell could soak up some serious damage, wait until you meet these guys. You’ll be burning a lot of ammo to bring them down. As Super Heavy enemies, they cannot be chainsawed, and can shake off a BFG blast from full health. Thankfully, there is a classic, foolproof method to kill the Tyrant: shoot it until it dies.
The Tyrant has a number of attacks, the most dangerous of them being his cannon’s beam. Those of you who fought him in 2016 will be quite familiar with this attack; his cannon will point a laser sight straight at you and lock on before firing a massive laser; it is very difficult to dodge, and it is recommended to either break line of sight or time your dodge at the last moment before he fires with a well-timed dash or double jump.
Another attack he will use, though not nearly as dangerous, is a missile rain also borrowed from his 2016 appearance. The Tyrant will fire a barrage of missiles into the air, painting the area around you with pentagram-shaped targets. Though these targets saturate a small area, it is important to note that these missiles can be fired from virtually anywhere on the battlefield, even if the Tyrant does not have line of sight, so it’s important to keep moving (though by now you should understand that goes for any enemy).
A rather irritating attack he will use is a shockwave sent through the ground that will track you down and hit you for an annoyingly high amount of damage. The easiest way to avoid this shockwave is to simply change elevation, as it can only move horizontally. A well-timed dash can also avoid this attack.
When he is not using any of these special attacks, he will simply fire a large barrage of missiles from his gun directly at you, very similar to the Revenant’s. It appears that these missiles can sometimes lock on, but it is of little importance as the lock is broken just as easily. Like anything else in his arsenal, though, they will do a lot of damage if they hit you, so don’t get caught off guard.
As pointed out by the in-game guide, the Tyrant’s single biggest weakness is his bulkiness, moving and turning extremely slow. He will slowly saunter across the battlefield as opposed to actively hunting you down, so if you need some breathing room to deal with other enemies, just run away (no, seriously). You can also exploit this slow turning speed with the Super Shotgun’s hook, by pulling yourself in to attack at point-blank and dashing behind him before he can react. Due to his extreme size and slowness, he will prove an incredibly easy target to hit even at extreme distances or speeds.
Take heed: the Tyrant will not always spawn alone. Multiple late-game encounters may have you fighting two at a time, so be wary of them. It is worth noting that despite their incredible size and strength, they only cost one Crucible charge to destroy. There are few enemies as dangerous (and none as tough in sheer health) as the Tyrant, so if you’re in a tough situation, it may be worth using that charge to bring one down (plus, it looks way cooler than the other Crucible kills).

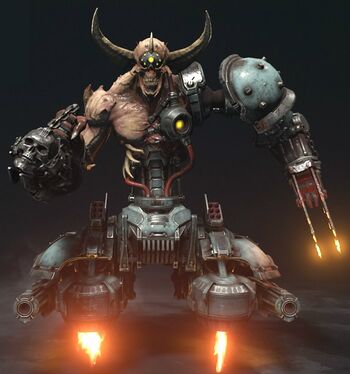
Doom Hunters
Because having just one phase to your fight isn’t enough. Doom Hunters are dangerous enough to warrant a boss fight the first time you encounter one, so be extremely careful when fighting them. They have a surprising amount of mobility, a large amount of health, and plenty of firepower to deal with you at any range. They are unique in that they have two “stages” to them, even when encountered after their boss fight, so familiarize yourself on how to deal with him at both stages.
In both stages, the Doom Hunter has two main attacks: using its cannon, and using its chainsaw. The cannon will glow and fire several fireballs at you, and he will use this attack from virtually any distance, so be wary. His chainsaw, though it can only attack within melee distance, is incredibly dangerous, so caution must be used when fighting him up close.
In his first stage, he will be connected to a hovering, rocket-powered sled that allows him to move fairly quick around the battlefield. This sled can pelt you with a constant stream of bullets, or fire a barrage of lock-on missiles at you which must be evaded with dashing or jumping. Though the missiles are easy to evade, they will do massive damage if you are hit, so don’t get hit.
He will have one more trick up his sleeve during his first stage: an energy shield protecting his body from harm. This shield can absorb a huge amount of damage, even from plasma weapons, and will regenerate only seconds after it breaks. Do not waste your time on this shield, even if the game suggests otherwise. You will burn ridiculous amounts of plasma ammo just to bring his shield down for a few seconds and deal some extra damage to him. Deal with the sled first, as destroying it will permanently disable his shield.
The sled will take MASSIVE damage from a Blood Punch; two Blood Punches will instantly destroy it, which is especially useful late-game when you are able to store two Blood Punches. However, you must use caution not to get caught by his chainsaw attack; move in for the punch, and move out immediately. Otherwise, maintain your distance and keep pelting his sled with whatever you can until it breaks.
In my opinion, it’s a waste of time and ammo to try going for his shield when the sled is so easy to destroy once you have him figured out. However, if you are fond of the idea of busting his shield and attacking him directly, it is possible to kill him without having to destroy the sled, though generally more tedious. The Plasma Rifle seems to be far better suited to breaking his shield than the Ballista, making it the recommended weapon of choice for this strategy,
If you do break his shield, make sure to capitalize on it as quickly as you can, as it does not stay down for long. The shield breaking will not damage him like it does the Soldier and Carcass, so don’t expect to get by just by breaking it and running off. Lay into him with as much damage as you can crank out; even if you do destroy the sled, damage taken to his body appears to transfer into his second stage, making him easier to kill.
Once you get him down to his second stage, his sled will break and he will be forced to eject. This animation takes some time, but you will know it has been done even if he is not within your line of sight when he states that he has taken “CRITICAL DAMAGE.” Once ejected, he will only be able to use his cannon and chainsaw, though he will be much more mobile and he will float around the battlefield.
With his shield down, he is much weaker in this phase, and can be disposed of quickly with a couple Super Shotgun blasts or bursts of rockets. He is much more aggressive, however, and will attempt to close the gap quickly so that he can carve you open with his chainsaw. Don’t give him this opportunity, and get rid of him as soon as his shield his down.
Side note: the Doom Hunter is the only enemy in the game who will cost TWO Crucible charges instead of one. The Doom Hunter CANNOT be killed with the Crucible before he is separated from his sled, including being hit with the Crucible; it will cost one charge to destroy his sled, and one charge to kill him, which is frankly a waste of charges that could be put to better use against Tyrants or Arch-Viles. The charge for destroying the sled will still be consumed even if Infinite Ammo is enabled.
The Doom Hunter will be quite difficult the first time around, as he is encountered as a boss fairly early on and you will be limited in your arsenal. As a boss, you will be able to visually see his health, making it easier to tell how close you are to killing him. Once you have killed the first Doom Hunter, you will be dropped into an arena where you will have to fight two more of them at once, so be cautious and use the strategies discussed above.
Due to your limited arsenal at the time, you will be restricted on your heavier weapons, only having the Super Shotgun and Rocket Launcher to combat him along with your smaller, but still useful guns. It appears that the boss Doom Hunters are stronger than the regular ones, having a larger health pool and being immune to Ice Bombs.
Marauders
If you’ve heard anything about DOOM Eternal, you’ve almost certainly heard about these jerks. Tougher, faster, more dangerous than anything else you’ve fought, and all for one key reason: you cannot fire at him with wild abandon. Killing Marauders requires patience, timing, reflexes, and, most importantly, careful spacing.
The Marauder has a simple but dangerous set of attacks: a short dash, a shotgun attack at close range, an energy-axe throw from long range, a summonable dog that will rush straight for you and repeatedly bite you, and his melee attack, which is the key to beating him. When he uses his axe, his eyes will flash green, and that will be your opportunity to strike.
The first and most important rule: DO NOT GET TOO CLOSE TO THE MARAUDER. His shotgun attack is virtually unavoidable, and will do massive damage to you. It is always, ALWAYS better to have him too far from you than too close, no matter how many dogs and axes he may throw at you. The dogs, while dangerous, have low health and can be disposed of quickly, while his axes can be easily dodged.
The Marauder’s entire combat loop is based around a spacing gimmick, as he will only use his melee attack when within “medium” range of you. If he is outside of this range, he will simply throw axes, but he will also attempt to close in; if you are not experienced with finding the “sweet spot” for his range, keep him at a distance and let him come to you while you dodge his other attacks.
The next most important thing is to understand that he will not attack while he is shielding your blows, and his shield is literally invincible. No, not nearly invincible, it is absolutely, 100% unbreakable. You could spend an hour firing your chaingun at him with Infinite Ammo enabled and get nowhere. You must let him come to you and attempt to use his axe, or else you will never get an opening.
That being said, his shield will only protect him from attacks from the front, so a well-placed explosive behind him can damage him, though he will deflect them away if you fire them too close, so careful aiming is required. Interestingly enough, it was recently pointed out to me that the Marauder will only summon his dog while he is shielding your attacks. As a result, it would be good to avoid hitting his shield whenever possible to minimize the amount of irritating minions he throws at you.
Next pro-tip: don’t try to be a badass and fight the Marauder in the middle of a huge encounter, when you have two dozen other demons breathing down your neck. The Marauder will require all of your attention, and you will be ripped apart by everything else that is trying to kill you. Clear the battlefield first, THEN deal with him, unless you really, really know what you’re doing.
The Marauder is fast, but not as fast as you. While clearing the area, keep moving to keep him off of your back, as the dog and axes will prove fairly easy to avoid even in the middle of hectic combat. If you happen to have an opportunity to attack him, take it, but do not waste time having a showdown with him while you’ve got other demons to deal with. When the arena is clear enough that you have the required breathing room to move around without interference, then you can properly engage.
So, once you’ve cleared the battlefield and it’s just you and him (and a few endlessly spawning fodder demons to give you ammo and health where needed), how do you bring him down? The best way to lure out his melee attack is to keep him at range and avoid his axes. Eventually, he will begin making a mad sprint towards you, and you will know that he is about to attack. Ensure that his dog has been dealt with before he does this, as it can distract you at the wrong moment and cost you plenty of health.
The best weapons for dealing with the Marauder, once he is vulnerable, are the Super Shotgun and Ballista. Some prefer the SBS combo, while others prefer BSB; I find that the order does not make a huge difference, though with the BSB combo you can use a charged shot from the Arablest on him when he initially opens up. A skilled player can also use the Rocket Launcher’s Lock-On Burst when he is vulnerable, but this requires very careful timing.
It is important to use these guns, as they will stagger the Marauder and give you an extra second or so to deal damage. With other weapons, you may be able to deal damage while he is open, but he will be quick to raise his shield again and deny you the extra damage you could inflict if you had stunned him. As you use the Super Shotgun, you will want to get in close, but you will also want to move away quickly before he retaliates with his own shotgun.
If you don’t have ammo for these guns, I find the Chaingun can be used in a pinch, though it will not stagger him like the other weapons and you will not be able to deal as much damage. If you are low on ammo (or health), you will find roaming fodder enemies during every single Marauder encounter that can be chainsawed (or glory killed) for your much-needed resources. Keep your Super Shotgun and Ballista ready at all times, and the Marauder will be much easier.
The Chaingun has another use in fighting the Marauder, particularly for inexperienced players. If you are struggling to figure out the Marauder’s timing properly, or you are wedged in a tight hallway encounter with him (even as an experienced player), the Energy Shield mod can be extremely useful in keeping yourself safe while he creates an opening. This is more useful for defense than actually damaging him, but can be useful nonetheless if you are struggling with him and need a little extra breathing room.
Don’t. Honestly, unless you’re messing around with cheats enabled or something, just don’t. It’ll be a waste of time and precious ammo.
He will show a notable resistance to all of your superweapons; namely, the BFG, Unmaykr, and Crucible sword. In the case of all three, he will shield himself from them as soon as you attempt to attack him with them, even if he is in the middle of attacking. This makes him extremely difficult to hit (though not outright impossible, with an extremely well-timed stagger) with any of them, and you will likely lose a lot of health and superweapon ammo attempting to do so. Even if you can score a hit, the damage he takes will not be nearly enough to kill him (with the exception of the Crucible, of course).
Because he is virtually immune to superweapons in any practical situation, it is recommended to simply not use them at all. Eventually, you will get good enough at fighting him to where he is nothing more than another nuisance, if not still a particularly irritating one. Be careful, patient, and responsive, and he will eventually become just another enemy.

Arch-Viles
Imagine a walking Buff Totem with an irritatingly high amount of health, a surprisingly high amount of damage output, and the ability to teleport. Meet the Arch-Viles, the single most dangerous enemy you will ever fight outside of bosses. Upon spawning, an Arch-Vile will waste no time in summoning hordes of enemies right on top of you and buffing their speed and damage shortly afterwards, so you will know when one is on the battlefield.
Thankfully, Arch-Viles have three major disadvantages: they are slow (practically stationary, save for teleporting), easy to spot, and surprisingly fragile for a Super Heavy class. Because of this, they can be easily disposed of before they become a major issue, if one is quick enough to catch them before they start stirring up trouble.
Enemies who are summoned will initially be motionless, glowing orange as they “materialize.” They are immune to damage(?), but will not move or attack until fully summoned. However, if you are able to falter the Arch-Vile with a heavy attack, such as a blast from the Super Shotgun or an upgraded frag grenade, any enemies still in the process of being summoned will be killed instantly. Therefore, it is crucial to track down the Arch-Vile as fast as possible.
The Arch-Vile will not stop summoning enemies until he is dead; if you do not kill him, the enemies will NEVER stop. The Arch-Vile is theoretically capable of summoning any enemy in the game (though the exact enemies may vary between encounters); this includes other Super Heavy demons, even the dreaded Marauders, so the Arch-Vile should be your number one priority in an encounter, NO exceptions. If dealt with quickly, his threat will be kept minimal; if left unchecked, he is easily the single most dangerous enemy in the game.
Also note that the Arch-Vile will buff ALL enemies on the map, not just the ones he summons. This increases their speed and damage considerably, making even the fodder enemies far more dangerous. As other demons will spawn endlessly, it is not worth trying to kill them unless they are directly between you and the Arch-Vile, or you need resources from a chainsaw or glory kill. Also note that killing the Arch-Vile will NOT kill any enemies he summoned, so it is even more important to kill him before you become overwhelmed.
As stated above, the key to beating him as quickly and efficiently as possible is hunting him down and staggering him with heavy attacks. If you are quick enough (especially if you memorize where he spawns for an encounter), you can cut him off before he has a chance to summon or buff anyone, leaving him without any more backup than what is already on the battlefield. Take note, however, that if he manages to buff enemies, it will not wear off until he is dead; attacking him will not undo it.
The Arch-Vile will defend himself while he focuses on summoning, retreating behind an impenetrable wall of fire that will block all attacks, forcing you to move around it (or simply Blood Punch right through it, if you’re of less patience). If cornered, the Arch-Vile may attempt to counterattack or teleport away; in the case of the latter, he will shoot damaging waves of fire at you similar to the Summoner from the previous game. He may also summon a ring of fire at your feet, forcing you to move out of the way; this can be done at close and long range, so be wary.
When teleporting, the Arch-Vile will generally not move far, nor will he move nearly as often as the infamous Summoner. He will typically summon a fresh wall of fire to protect him, however, which may force you to maneuver around (or use a Blood Punch charge) to attack him again. Though he does not move far, it can be disorienting, and failing to reach him in time may result in even more enemies being summoned.
As a Super Heavy demon, the Arch-Vile possesses a lot of health and cannot be killed with the chainsaw. Therefore, it is highly recommended that, if you plan on using your Crucible for anything, the Arch-Vile is an excellent candidate for it, as you can remove him before he has the chance to summon any enemies if you are quick enough. Other superweapons like the BFG and Unmaykr can be effective as well, though he will likely survive the first BFG shot (however, it will remove any unwanted weaker enemies in the immediate vicinity).
An important note: though I cannot confirm this, it appears that the Arch-Vile cannot attack and summon at the same time. If you get close and manage to draw his attention (i.e. shoot him), he will not summon enemies while he is attempting to defend himself, giving you a window of opportunity before he teleports a safe distance away to attempt summoning again.

Maykr Drones
The Khan Maykr’s very own army of Mini-Me’s. The Maykr drones are something of an anomaly; though the in-game codex classifies them as Fodder enemies, they are much closer to Heavy enemies and should be treated as such, due to the high amount of health they possess and, uniquely, that they require three fuel to chainsaw as opposed to one, like all other “Fodder” enemies.
The reason for this is simple, however; Maykr Drones will drop a boon of resources when killed with a headshot, often enough to refill most, if not all of your health and ammo. Their heads are also extremely weak; while their bodies can resist impressive amounts of damage for their small size, they will die quickly when shot in the head, especially with a precise attack like the Ballista or Precison Bolt (in fact, those should be the only weapons you try to use to do so).
Take note that they will ONLY drop resources when killed with a headshot. Killing them with a bodyshot or glory kill will not drop any additional resources than a regular demon would, and a shot to the head that does not kill them will not cause them to drop any resources; shooting their head is not a guaranteed one-shot kill if you are using a weaker weapon like the Heavy Cannon (regular shot) or Plasma Rifle. Shotguns seem to be surprisingly ineffective at scoring headshots, though the Sticky Bombs mod can do so effectively with careful aim.
The problem? They’re irritatingly fast, constantly strafing left and right as they pelt you with barrages of golden balls of light. By the time you have the shot lined up, they’ve likely already moved again. As a result, you must be quick to nail their head and drop the boon of resources stored within. Despite lacking arms, they still possess a powerful area melee attack if you attempt to get in close, so make sure to take them out from a distance.
If you are struggling to hit them, a good way to nail them is to wait until they are shooting at you, as they will not move during their attack. However, you must be careful not to let them hit you while you are lining up the shot, and they will soon move again. If you are truly struggling, and you badly need those resources, an ice bomb will freeze them in place and make scoring a headshot trivial. A well-placed Sticky Bomb or Ballista shot can destroy their head if you are too close to use the Precision Bolt as well.
The reason Maykr Drones are at the bottom of this list is not because they are dangerous, but because they are encountered very late, only battled in one level in the entire game (and one Slayer Gate), though they are incredibly common during this level and can be an irritating distraction or a valuable blessing, depending on whether you are skilled enough to consistently nail headshots. At the end of this level, you will fight a red variant of the Drones; whether these variants are stronger or simply a cosmetic variant is currently unknown to me.

Turrets (DLC 1)
A brand new type of ambient enemy, introduced in the first DLC to the game. These small towers will contain a single eye that fires orbs at you, similar to the Kalibas fight in Nekravol. More of a nuisance than a threat, it is still important to deal with them anyway, as they can whittle down your health in a combat scenario if you are not paying attention to them.
As stationary enemies, the Turret cannot pursue you around and will instead remain locked in place, firing fast-moving projectiles at you. Though these projectiles are not individually dangerous, they move far more quickly than the ones from the Kalibas fight, forcing you to stay on the move to avoid being hit. Though the projectiles have a seemingly infinite range, the Turret does not; it will only engage you when you close in within a certain distance.
The Turret is relatively easy to destroy, but it can defend itself in a couple of situations. The Turret can only be destroyed by shooting the eye, while shooting the pillar will do nothing. The eye will retract inside of the pillar if you approach too close or keep your crosshairs on it for too long (about 4-5 seconds in my experience). While it cannot shoot at you in this state, it is completely invulnerable to damage as well, forcing you to leave it alone until it starts firing at you again. Moving your crosshairs off of it may not be enough, and you may have to move it to the edge of your vision before it exposes itself.
As a result of this, shotguns are generally ineffective against the Turret (save for the Sticky Bomb mod), and it is better to use the Precision Bolt or Ballista as they will deal heavy damage to the Turret and easily kill it in two shots. The quickest way to bring it down is to use one of the aforementioned weapons, then quickly swap to the other and fire again. When destroyed, the Turret will drop a small amount of ammo, but will yield no other resources.
There are a couple of interesting qualities to the Turret. Though it is often found in the areas between combat encounters, like tentacles, it is found almost equally as often in the encounters themselves, especially earlier on in the DLC. As a result, the Turrets are considered enemies in combat encounters, and you will not be able to progress until all of them are destroyed. If you have killed all the enemies in an area and there are nothing but Imps and Zombies meandering, check if you missed any Turrets.
(No image yet, will add one as soon as possible.)
Spirits (DLC 1)
Meet the Spirits. You will learn to hate them very, very quickly. Once known as the Summoners in the previous installment, they have returned from death to enact their revenge upon you as ghostly Spirits, now equipped with an entirely new ability: the possession of other demons.
The Spirit is considered an ambient enemy, due to its unique traits and behavior. The most significant of them is that the Spirit cannot directly attack you if caught in its bare from. Instead, the Spirit will wreak havoc upon you by possessing a single enemy, instilling them with incredible buffs and turning even something as weak as an Imp into a considerable threat, and turning larger demons into absolute ultra-nightmares.
When a demon is possessed by a Spirit, it will gain a blue aura and its eyes will glow a similar color, showing that it is possessed. Once a Spirit possesses a demon, it will buff them with greatly increased speed and attack strength, like the Buff Totem. What makes it far more dangerous than a Buff Totem, however, is that it will greatly buff the health of its host, turning them into nigh-unstoppable damage sponges.
Possessed demons cannot be faltered or frozen, meaning that you have no way of holding them down, save for the Plasma Rifle’s Microwave Beam, but you will not want to use that; it is your only means of killing a Spirit once it has been ejected from its host (exorcisms can be performed by shooting the host demon until it dies).
Once a Spirit possesses a demon, it will permanently remain there until the host dies. There is no way to remove it, whether by passage of time or any other means, except forcing it out of the lifeless corpse of its host, which will prove difficult with their increased resilience. Once exposed, however, the Spirit will find a new host within a few seconds, forcing you to act quickly to destroy it.
There’s one major catch, however: the Spirit has no physical form, and cannot be damaged in any conventional manner. You’re going to have to fire up your proton pack and equip the Microwave Beam to kill the Spirit for good once they pop out of their recently deceased host. This is the ONLY way to kill the Spirit, and it will take several seconds of your time (during which you will be completely exposed) and a considerable amount of ammo, so ensure you are prepared, or it will escape and you will be sent back to square one. It takes roughly 75 cells (on UV) to kill a Spirit.
Sometimes, if a Spirit possesses a less troublesome demon, it may be a better idea to simply avoid it and leave it in there while you deal with the larger ones, ensuring that if it gets away, it will have limited options. Additionally, this should make it easier to catch and kill it when you don’t have a legion of Mancubi and Hell Knights waiting to cash in on those few moments of exposure while you zap it. Use your better sense of judgement to decide whether to occupy yourself with the Spirit or simply dodge around it for a while.
It is safe to assume that every enemy in the game can be possessed, though you may not be guaranteed to fight every single one. It seems that the Spirit does not seem to bias its choice much on host strength much and instead picks seemingly at random on most occasions. There is no way to prevent the Spirit from possessing at least one enemy, however, as it will always spawn inside of an enemy to begin with.
It goes without saying that the more dangerous the host, the more dangerous the Spirit’s possession will be. Hell Knights and their larger counterparts in particular are some of the most dangerous due to the fact that they cannot be staggered at all and can nearly outrun you, not to mention their significant damage boost. Meanwhile, Super Heavy Demons can become entire minibosses in themselves as they are buffed. Because of this, Spirits can be the most dangerous enemy in the entire game despite never directly fighting you at all.
Interestingly, if you can eject a Spirit and there are no suitable hosts around for it to possess (usually when roaming, as encounters will usually have some spare fodder at the very least), it will simply fade away and die on its own, though these occasions are incredibly rare, if they ever happen at all.

Blood Maykrs (DLC 1)
The final new type of mainline enemy introduced by the DLC, the Blood Maykrs are a force to be reckoned with. A much heavier version of the Maykr Drones, equipped with a full-body shield that renders them completely immune to damage, forcing you to wait until the opportune moment to take them out. Their attacks are incredibly dangerous, not because of their damage, but because they can slow you down to a crawl, leaving you helpless to the hordes of other enemies you may be fighting.
The Blood Maykrs will quickly float around the Stage, similar to Maykr Drones. They appear to be far more mobile than their smaller counterparts, making them far more difficult to evade. Their body is covered in a glowing yellow shield that protects them from all forms of damage, and it will only lower itself when they stop to perform a powerful attack. It is then possible to kill them in the same way as the Drones, with a well-placed shot to the head (bodyshots can kill, but have significant damage resistance). This offers a significant advantage and disadvantage compared to fighting Drones: while they will stop moving to expose themselves, making them easier to hit, they will only expose themselves while they are about to launch a powerful attack.
The Blood Maykrs will fire a stream of small, yellow projectiles very similar to the Maykr Drones’ attacks while they are on the move. These projectiles are the least dangerous attack in its arsenal, but it will not expose itself while firing them. Its more dangerous attacks come in the form of a spread of large balls of energy, launching a beam of energy from its spear at you, or causing the ground underneath your feet to glow with yellow cracks of light and harm you, similar to the Arch-Vile’s flame circle attack.
All of these stronger attacks are dangerous not just because of their damage, but because they will slow you down significantly, leaving you highly exposed to other attacks. This is especially a problem with their attack that makes the ground harm you, as it can catch you off guard and trap you if you are not aware of your surroundings. Because of this, the Blood Maykr should be considered a significant threat and disposed of as such. Note that killing a Blood Maykr with a headshot will cause them to release a fountain of ammo and health, just like the Maykr Drones.
Interestingly, there is no in-game Codex entry on the Blood Maykrs, despite being a regular enemy that you will fight on many occasions.

Giant Tentacles (DLC 1)
Let no joyful voice be heard! Let no man look up at the sky with hope! And let this day be cursed by we who ready to wake…the giant tentacle. Interestingly enough, there is no in-game Codex entry on these, though I figured they still deserve a section. The Giant Tentacles only appear a couple of times throughout the entire campaign, dramatically making a Kraken-style entrance in all of their 50-foot glory before lashing out at you. Trust me, you’ll know them when you see them.
Aside from the obvious size difference, the Giant Tentacles behave very similarly to Tentacles, waiting under the surface until you draw too close before popping out and striking you. Fortunately, despite being the size of a Titan, the Giant Tentacles are more bark than bite. They will take several seconds to rise out of the ground once triggered, giving you ample time to flee outside of their reach before they can strike. While they’re emerging, you can simply dump your ammo into them at your preferred distance until they retreat for good; if you don’t kill them in time, simply bait them into emerging once again and shoot them until they die.
It should go without saying, but unlike their smaller counterparts, the Giant Tentacle cannot be chainsawed for ammo.
“Spectre” Whiplash (DLC 1)
By now, you’ve probably become plenty acquainted with the Whiplash, and how irritating they can be. You may find yourself dealing with them and asking yourself, “Could they possibly be any more annoying?” Great news! With the new DLC, they are! Though regular Whiplash are still present in the DLC campaign, there is a new, invisible breed of them, able to inconspicuously sneak up on you and attack from seemingly nowhere.
Like the Pinky Spectres, the Spectre Whiplash is a functionally identical enemy to its visible counterpart, using the same set of attacks as usual. Their low visibility, however, is far more dangerous than with the Pinkies, as their skinnier frames that slither across the ground are more difficult to see than the big, bulky frames of the Pinkies.
The most dangerous thing about their invisibility, however, is likely the inability for rockets to lock on to them. EDIT: You can supposedly lock onto a Spectre Whiplash if it is faltered, most likely by another rocket or explosive, though you must be quick to lock it before it gets away again. One of the quickest, easiest, and safest ways of disposing of Whiplashes is now much less viable in combat, forcing you to use other tactics. It is also not possible to grab onto them with the Meathook, another reliable method of catching them.
Fortunately, they share the same weakness of both Whiplashes and Spectres of Ice Bombs. Not only will these stop them from moving about, but it will visibly expose them, allowing you to lock on and quickly dispatch them if desired. Aside from that, you should treat these the same way as the regular Whiplash: with extreme violence, in the usual manner to which you are accustomed.
Screecher Zombies (DLC 2)
Imagine a walking landmine that, rather than simply damaging you, instead had the far worse alternative of buffing everything around you like a Totem. The Screecher Zombie fills the role of being perhaps the most dangerous fodder-type enemy in the game, being a completely normal Zombie enemy with one major catch: if it dies, it buffs every demon in a large radius, increasing their speed and damage significantly.
Screecher Zombies appear to be entirely normal Zombies, save for an easily identifiable purple glow emitting from their body. Screechers are, fortunately, as slow and stupid as regular Zombies, and can be avoided easily. Avoiding them is not the issue, however, as killing the Screecher is what triggers its buff. When it is triggered, an on-screen notification will display, and any enemies buffed by it will have a purple glow (very similar to a regular Buff’s red glow).
The buff will only be removed from enemies after a certain, annoyingly long period of time, after which they will return to normal. Killing other Screechers in this time frame does not seem to stack the buff’s duration, but likely resets the timer and will buff anyone nearby who was not already buffed. This can be irritating if you are trying to kill regular Zombies who have been buffed for ammo, and they instead turn out to be Screechers (as the glow from the buff makes them virtually indistinguishable).
The obvious solution to dealing with these enemies is, of course, not to kill them. However, they are even more fragile than their regular counterparts, and a single stray shot could be enough to set them off; it is virtually guaranteed if you use any explosives near them. In the fast pace of combat, it is also surprisingly easy to mistake them for a regular Zombie and attempt to pop them for a glory kill, only realizing your mistake once it’s too late.
Stone Imps (DLC 2)
Because regular Imps weren’t irritating enough, now they have a rather annoying set of natural armor in the form of stone hides, giving them a light grey color to set them apart from their regular orange counterparts. Though they still behave fairly similar to regular Imps, their new armor and a unique new attack makes them far more of a handful to deal with.
The Stone Imp’s armor makes them highly resistant to almost every mainline weapon in your arsenal, save for one: the Combat Shotgun’s Full Auto mod. Though the Imp is not immune to damage, it is highly resistant to anything that is not a Full Auto barrage (regular shots with Full Auto equipped do not count; the mod must be active). They will also take several shots to kill, often needing three or four blasts even at point blank, though this is offset by the fact that they will drop bonus shotgun ammo when killed with Full Auto (stacking on top of its Mastery Bonus).
Other options to kill the Stone Imp include the Chainsaw (it still only requires one fuel, making it a good option), superweapons (though using a BFG for an Imp seems a little overkill, doesn’t it?), and the newly introduced Sentinel Hammer, which will almost always kill them instantly and usually stagger them for a glory kill if it doesn’t. On that note, Stone Imps are still vulnerable to glory kills if they are damaged enough without being killed, so you can still use them as emergency resource bags if need be.
The Stone Imp’s attack pattern is the same as the regular Imp, save for one new attack: a fiery charge tackle, not unlike the Pinky’s charge. The Stone Imp will spin up into a yellow, flaming ball, then soar through the air at extremely high speed, spinning towards you like an angry hedgehog. Though it doesn’t do a heavy amount of damage on impact, it can be surprisingly difficult to dodge, and will shake your screen horribly, disorienting you and possibly leaving you exposed in a difficult situation. This is not a suicide attack, and the Stone Imp will not be damaged by it, leaving them to use this attack as many times as they please.
Armored Barons (DLC 2)
Yet another variant of a pre-existing enemy, the Armored Baron is a Baron of Hell encased in a shiny, high-tech suit of armor, somewhat resemblant of the Cyber-Mancubus, and wielding a huge flail to throw at you. This armor renders it immune to all forms of damage, making them far tougher to kill than their regular counterparts; fortunately, their attack pattern is not too much different, making them easy enough to deal with if you’re attentive.
There are two ways to remove the Baron’s armor, with one being far more practical than the other: shooting its flail when it attempts to use it in an attack, or beaming its armor off. Given the amount of time and ammo it takes to remove its armor using the latter method, attacking the mace is really the only method you’ll ever want to use. When it prepares to attack, it will make a sound and green flash identical to the Marauder’s chime: use this moment to counterattack, shooting at the flail with a Precision Bolt or Ballista shot to break it.
If you successfully land a hit, the armor will break, turning the Armored Baron into a regular, exposed Baron, who you may dispose of in the usual manner. Be warned that they will still be fully mobile, and they will attempt to attack you as a regular Baron would (save for the fireballs), so stay on the move. Their armor will regenerate after just a few seconds, protecting them again and forcing you to remove the armor to bring any further harm, so make sure you are ready to damage them as much as possible when you break the armor.
Though it is possible to kill an Armored Baron after breaking their armor just once, it is likely that it will take multiple attempts to successfully kill them. Fortunately, you can greatly extend your window of killing the Armored Baron by using the Sentinel Hammer to stun them, offsetting their armor’s recharge time enough for you to viably kill them before the armor recharges.
As for the Baron’s attack pattern, it is simple and predictable, as it simply alternates between attempting a regular melee attack, and throwing its flail at you, both of which are easily dodged, provided your attention is not elsewhere and your movement is not restricted. If it misses its flail, it is best to simply bait out its melee and move away again, making it use its flail again sooner. It does not seem that the Armored Baron can throw fireballs in either form, making it less dangerous at a distance than its regular counterparts.
Though the regular method of breaking the flail is far more practical, you can also break the armor by brute force with the use of any plasma-based weapon, though the Microwave Beam is by far the most efficient for this task. As you damage the armor, it will begin to glow and turn red as it “heats up” until it is ultimately destroyed, though its “health” will recover if it is left alone again. The Microwave Beam gives no visual indicator as to how close you are to breaking the armor, leaving you to eyeball how much more damage it requires.
However, this method is slower, more dangerous, consumes more ammo, and is overall far less practical than simply destroying the mace, which is a large target that becomes stationary when exposed, making it very easy to hit if you are actively aiming for it. There is no real reason to try brute-forcing the armor off…except to say that you did.
Cursed Prowlers (DLC 2)
Behold yet another invulnerability-gimmick spinoff of a common enemy type, now buffed into a far more dangerous variant: the Cursed Prowler, an enemy that has gone from a mere nuisance to an alarming threat on the battlefield. Colored a distinctive green shade to tell them apart from the others, the Cursed Prowler is a thankfully rare enemy, though it can be extremely dangerous if not avoided and dispatched due to its debilitating curse.
Cursed Prowlers behave and attack exactly as a regular Prowler does, attempting to teleport behind you for a melee ambush, and throwing projectiles at you from a distance when it cannot. If you are unfortunate enough to be hit by it, however, you will be “cursed,” displaying an onscreen notification. This curse acts as a dangerous poison that constantly drains your health and removes your ability to dash, along with tinting your screen with an annoying green shade. Though the health drain can be insignificant if you are well-supplied on it, the inability to dash can be incredibly dangerous in the middle of any combat situation.
What is perhaps even more annoying is that there is only one way to remove the curse: killing the Prowler who cursed you, which can only be done with a Blood Punch after the curse is applied. Though this sounds simple enough, the Cursed Prowler is made immune to your lock-on weapons as soon as you are cursed; namely, this includes the Meathook, your best method of reaching a Prowler on the move. Combined with your inability to dash, this can make catching the Prowler difficult if it slips away, so DO NOT LET IT SLIP AWAY. Blood Punch it as soon as possible, or it will be much more difficult to deal with.
Fortunately, once the Prowler curses you, it has nowhere to hide, as it is marked with an icon (similar to Empowered Demons) that can be seen through walls, ensuring that you never lose track of it no matter where it tries to run off to. If you do happen to lose track of the Prowler, this allows you to track it down quickly before it whittles away all of your health. Dealing with the Cursed Prowler should be your highest priority, as your loss of health and inability to dash means almost certain death if not cured promptly.
You may be wondering the theoretical question: “What if I get cursed, and I have no Blood Punches?” The answer is simple: you are up a very unpleasant creek without a paddle, and in all likelihood, you are going to die pretty damn fast unless you fix that problem. As a result, if there is a Cursed Prowler on the field, it is best to keep at least one Blood Punch on hand at all times until you have dispatched them.
The best way to deal with the Cursed Prowler, however, is to not get hit by it in the first place and dispatch it as quickly as possible. Before the curse is applied, it is as vulnerable as any normal Prowler, and can quickly be dispatched with the exact same methods, preferably with the Super Shotgun, as its grappling hook will ensure you are close enough to quickly dispatch the Prowler if you are cursed along the way.
Though they have a high level of danger if left unchecked, the Cursed Prowler poses virtually no threat if it is disposed of as soon as possible. Therefore, it is a good idea to prioritize it as soon as it appears on the field, to ensure that it does not ever become a threat. Simply kill it with whatever methods you would normally use for a regular Prowler, and you won’t have many issues with it.
Riot Soldiers (DLC 2)
Veterans of the DOOM series may remember the infamous “Chaingunner” zombie, a nuisance who makes his triumphant return to the series as another (yes, another) variant of a pre-existing enemy type, the Shield Soldier. Though they function very similarly to the regular Shield Zombies, they wield upgraded shields and their iconic chainguns, which can whittle your health down quickly under sustained fire.
Riot Soldiers can most easily be identified by their bright yellow shields, setting them distinctly apart from regular Shield Soldiers even at a distance. Unlike the regular shields, these upgraded variants are absolutely immune to any damage from the front, being completely unbreakable defenses for the soldiers behind them. As a result, your only options to dispatch them are generally explosives, fired behind the shield (the Remote Detonation mod is particularly useful for this), or being lucky enough to catch them with their backs turned, though the AI’s tendency to always be facing you will make this difficult (though the Ice Bomb is a viable method for this).
Like the shotguns of the regular variants, the Riot Soldier’s chaingun has limited range, though its projectiles move extremely fast (bordering on being a hitscan weapon) and will lay down a constant barrage of fire. Though it is not dangerous on its own, going up against it combined with other enemies can, as usual, make them far more dangerous if you are not attentive. The best way to avoid them is to simply keep your distance as you would with a regular Shield Soldier, and their chaingun will be ineffective against you.
Demonic Trooper (DLC 2)
Closing out this guide for good (unless id announces more DLC in the future) is a surprisingly easy enemy, the simplistic Demonic Trooper, a fodder enemy clad in red full-body armor that often appears in medium to large groups. Overall, they behave very similarly to Zombie Soldiers, firing at you with a fully automatic rifle, though their projectiles are faster and lacking the airburst charge shot. They are incredibly fast, however, able to run at Imp-like speeds while strafing and firing at you.
Fortunately, for the final type of new enemy introduced, they pose little real threat. Their only real gimmick is that they cannot be glory-killed or chainsawed (denying you health from them, though the Flame Belch can still cause them to drop armor), but they have very little health, only able to take about as much abuse as a regular Zombie Soldier, if even that much. Upon death, they will drop a small amount of ammo, making the inability to be chainsawed less significant.
You can use whatever methods you please to dispatch these demons, as they are incredibly fragile and easily disposed of. However, I would personally recommend weapons suited for fast-moving enemies (the Heavy Cannon, Chaingun, and Plasma Rifle) due to their high movement speed, especially as it only takes a couple of shots from any of those to bring them down.
General Tips and Tricks
- NEVER stop moving. Many faster enemies will be constantly pursuing you across the battlefield, and standing still for even a moment can have potentially fatal consequences. Jump and dash regularly to avoid being pinned down.
- Manage your resources. Don’t wait until you’re out of ammo for all of your guns to chainsaw an enemy; you want to have all of your guns ready for use, all the time, especially later in the game, or you’ll be overwhelmed.
- All guns do damage. Just because a weapon is not explicitly recommended for fighting an enemy does not (generally) mean that it is ineffective in a pinch. The most important skill in DOOM Eternal is knowing how to adapt to a situation on the fly and effectively use every weapon at your disposal. If you are out of ammo and can’t use the gun you want, use another gun until you can refill it.
- Use your equipment. The Flame Belch is most effective when used on large groups of smaller enemies, or used on a bigger enemy that you can wail on to drop large amounts of armor. The Ice Bomb can be useful when you need breathing room, and the frag grenade is a powerful weapon in any situation. When upgraded, they can be extremely deadly if used correctly.
- Be careful of melee attacks. Though some are stronger than others, all enemies in the game possess rather damaging melee attacks (even the fodder enemies), so when you are closing in for a shotgun blast or a Blood Punch, be sure to damage them and move out of range before they retaliate…or kill them before they do.
- Weak points on enemies which possess them can be surprisingly tough, despite their title, and they can soak up damage from regular fire for most weapons (save for heavier ones, like the Rocket Launcher and Ballista). Use mods that deal extra damage to weak points instead, to disable them much faster.
- Most importantly of all, rip and tear until it is done. When you lose health and armor, don’t retreat, but keep pushing through the hordes to take back what is yours. Use the chainsaw regularly to keep your ammo full at all times.
I hope that this guide proves useful for both new and experienced players alike. If you have any strategies or other important comments, feel free to let me know. If this guide does well, I am planning to write further useful guides for this game in the future. Thank you, and be sure to give the guide a good rating if you liked it!
EDIT: Now that both of the game’s DLC have been released, this guide will likely not need to be updated ever again. However, if you have suggestions or additions to make, I may still make adjustments to the guide if necessary. Thanks to everyone who has supported this guide and helped it become so popular!
If you’d like a similarly comprehensive guide concerning the many weapons available to you to fight these demons, be sure to check out my other guide, The Slayer’s Arsenal, found below.
[link]