
Overview
Equipping Characters on Nightmare such as Aldarion | Alistair | Leliana | Mabari War Hound | Morrigan | Oghren | Shale | Sten | Wynne | Zevran | Loghain | + Tactics script.
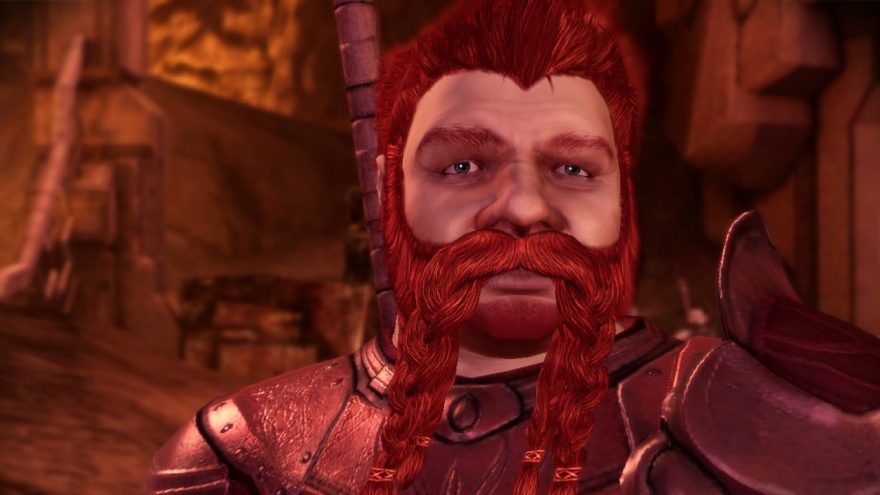
Alistair | Templar | Champion | Build
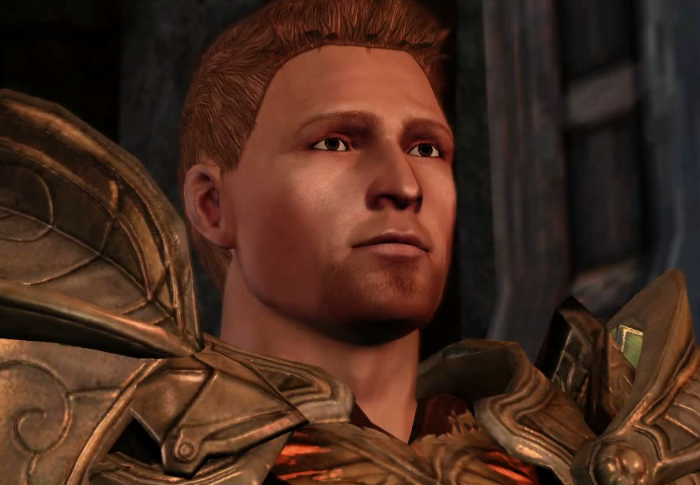
Strength 20 Dexterity 17 Willpower 15 Magic 12 Cunning 11 Constitution 13
Starting Inventory
Warden’s Longsword (Grey Iron)
Splintmail Armor set (Grey Iron)
Templar’s Shield (Ash)
Runic Worry Token
Talent Selection
Alistair can present some pretty difficult choices about what you take first. My early priorities were a helpful mix of offence (e.g. Overpower, Assault, Bravery), making sure Alistair draws ‘aggro’ onto himself and away from his allies (e.g. Threaten), the defensive (e.g. Shield Tactics), and having something in place to recover stamina during battle (e.g. Death Blow). After that, filling out the Templar and Champion talents become my next priorities. I ended up giving the Shield Defense talent tree the lowest priority because Alistair started off without any talents in the tree and thus risked compromising a more effective development in the time it would take to reach Shield Expertise. At least with other trees Alistair was one or two away from rounding things out.
Starting Talents
Righteous Strike
Powerful
Shield Bash
Shield Pummel
Shield Block
Shield Cover
5th level
Threaten – Alistair is my main tank, so as much as possible I want the monsters to concentrate their efforts on him.
6th level
Overpower – I script Alistair so that he can knock multiple foes off their feet with his shield in succession as they close in. Very handy.
7th level
Shield Defense – I don’t have any room in my script for this yet, but it’s the only available talent where Alistair hasn’t fallen short of the prerequisites.
8th level
Bravery – One of my mottos when playing Dragon Age is “Passive talents are your friend.” This is one of the best for a Warrior. It always grants a small bonus to physical resistance and damage. The real kicker is that it provides an increased chance for critical hits that rises in proportion to the number of foes above two that Alistair faces.
9th level
Cleanse Aura – This is one ability that I prefer to use manually since it is useful, but only in select situations since it will remove my own enchantments as well.
10th level
Shield Tactics – A passive ability that prevents the foes from gaining flanking bonuses against Alistair.
11th level
Precise Striking – A 10% slowdown to attack speed is well worth the bonus to attack and the up to maximum +15% chance of scoring a critical hit. This is especially the case when Wynne adds Haste as a sustained ability. *Note* Paracelsi would prefer to have Alistair get this much earlier, since improving attack bonus is much more of a concern at lower levels. It is a valid point. But like I said, developing a warrior who can include the full run of the shield-based talents, as well as the Templar and Champion talents, is always going to confront a player with difficult choices. In my case I prefer that Alistair acquire as many shield-based talents as possible as the first priority. One is not necessarily the better. There is indeed room for subjectivity in how you want to develop your characters.
12th level
Death Blow – Allows Alistair to recover stamina each time he lands a killing blow on his target.
13th level
Assault – A nice talent for scoring quick damage in four blows. I script him to use it on an enemy that has 90% or more of its Health.
14th level
Shield Mastery – A passive ability that improves pretty much every other Shield-based talent for Alistair.
15th level
Shield Balance – A stepping stone to …
16th level
Shield Wall – Once this is acquired, it becomes Alistair’s shield-sustained talent for the balance of the game. It provides a hefty bonus to armor, and a +10 bonus to defense on account of Shield Mastery.
17th level
Shield Expertise – Augments Shield Wall so that Alistair cannot be knocked down, as well as a +5 bonus to defense.
18th level
War Cry – In case Alistair gets surrounded and feels the need to relieve the pressure. It is also a stepping stone to …
19th level
Rally – A sustained ability that Alistair will always keep active to always provide allies within a certain radius from himself with a bonus to defense. Can be wickedly powerful in conjunction with Miasma.
20th level
Motivate – Enhances Rally so that it also provides a +10 bonus to attack.
21st level
Mental Fortress – Provides a welcome +25 bonus to mental resistance. It could wait though.
22nd level
Holy Smite – A useful anti-magic ability that will stun Mages, and inflict extra spirit damage on them. A frequent tactic is for Alistair to use Holy Smite on the Mage, then close the distance before the Mage snaps out of it. By the time the Mage recovers, it is usually too late. Alistair will keep him knocked off his feet with his shield talents. Death is usually a matter of course. However, considering that Aldarion has anti-mage abilities of his own, this could wait.
23rd level
Superiority – Augmenting War Cry so that it knocks enemies back.
24th level
Taunt – Another method for Alistair to draw aggro on himself. Whereas Threaten is a sustained ability that draws aggro with each blow Alistair lands on his target, Taunt is an activated ability that will increase aggro on all enemies within a certain radius. Other talents were a more immediate priority.
Skill Selection
Starting Skills
Combat Training
Improved Combat Training
Expert Combat Training
6th level
Combat Tactics – One of my priorities for Alistair is for him to have a very extensive script so that he can react to a whole bunch of different situations while on autopilot. Combat Tactics adds another slot to his script menu.
9th level
Improved Combat Tactics – Same thing
12th level
Master Combat Training – This is a prerequisite to some of Alistair’s shield and weapon talents.
15th level
Expert Combat Tactics – Rounding out this skill tree.
18th level
Master Combat Tactics – And finishing it off.
21st level
Survival – More of a filler than anything else. The other thief-type skills don’t really make sense for Alistair.
24th level
Improved Survival – Another filler.
Attribute Increases
My first priorities are 42 Strength so that Alistair is more or less within reach of Dragonbone massive armor, and 26 Dexterity, which is a prerequisite for some of the shield talents. One thing to keep in mind is that I will up Alistair’s Cunning when I want to add a talent like Master Combat Training or Master Combat Tactics. Once I’m getting close to 42 Strength and 26 Dexterity, I go with a steady +1 Dexterity, +1 Willpower, and +1 Constitution. Dexterity simultaneously increases attack and defense. Willpower provides more stamina so that Alistair can use his activated talents. Constitution increases his staying power as a tank.
Alistair | Templar | Champion | Tactics + Equipment
Script
Self: Any – Shield Wall
Self: Any – Rally
Self: Any – Threaten
Self: Any – Precise Striking
Self surrounded by at least 4 Enemies – War Cry
Enemy over 90% Health – Assault
Enemy over 50% Health – Overpower
Enemy at Short Range – Shield Pummel
Enemy at Short Range – Shield Bash
Nearest Visible Enemy – Attack
Alistair is scripted to keep his crucial sustainables up at all time, and to use his shield to knock down incoming enemies, in succession if he has to. Cleanse Aura and Holy Smite are two abilities I prefer to use manually, since they are very situation-specific.
Inventory
Main Weapon: Keening Blade (Grandmaster Flame Rune x2, Grandmaster Silverite Rune)
Shield: Duncan’s Shield
Missile Weapon: Antique Warden Crossbow
Armor: Cailan’s Armor set
Amulet: Magister’s Shield
Belt: Swordsman’s Girdle
1st Ring: Runic Worry Token
2nd Ring: Ring of the Warrior
High defense, attack, and damage are the staples for a shield-wielding warrior. Cailan’s Armor set comes with almost no fatigue penalty, allowing Alistair to both use sustainables and his various activated talents. I also used to have Alistair wield the Cailan’s Arms set, but I now I consider the Keening Blade and Duncan’s Shield as providing greater aggregate benefits.
Morrigan | Shapeshifter | Blood Mage | Build
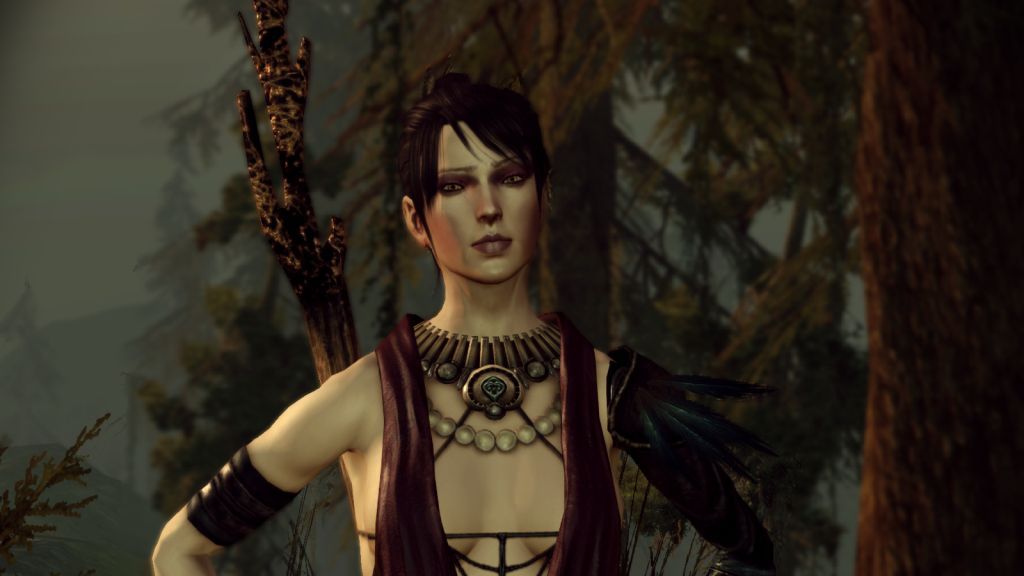
Strength 14 Dexterity 16 Willpower 21 Magic 24 Cunning 12 Constitution 10
Starting Inventory / Magic Staff (Steel), Morrigan’s Robes, Clasp of the Wilds
Talent Selection
Starting Talents at 7th level
Spider Shape
Winter’s Grasp
Frost Weapons
Lightning
Vulnerability Hex
Disorient
Horror
Drain Life
There’s more than one way to develop Morrigan. She’s two steps away from Blizzard and Tempest each, so she may be a natural candidate for a damage caster who can cast the Storm of the Century Combo. She’ll also need to develop the Mana Alteration spell tree in order to acquire Spell Might to complete the combo. A benefit of this is that she’ll then be one step away from Mana Clash, one of the best anti-mage abilities in the game. This is certainly a powerful build that works and cannot be faulted on any level. Problem for me is I’ve already designed my Arcane Warrior for this.
An alternative build for Morrigan is one that allows her to take advantage of both the Shapeshifter and the Blood Mage specializations in a nearly seamless system. The idea requires a bit of explanation. Once Morrigan develops her Blood Mage abilities, she will always keep the Blood Magic sustained ability active. Blood Magic draws upon health to power spells instead of mana. It amounts to a calculated gamble that the increased spell casting power will suffice to win the battle quickly enough to minimize the risks of drawing on health to empower spells. This gamble is often justified, since a single casting of Blood Wound for example often suffices to win a battle outright. If Morrigan’s health is getting too low for comfort, she invokes the Flying Swarm ability. This will basically turn Morrigan into a fast and mobile spell-like entity that inflicts continuous nature damage on all enemies next to her. It also won’t affect her comrades. Any attacks no her while in Flying Swarm mode will not detract from her health. It will instead reduce her mana, which will have been untapped while she was in Blood Mage mode. With Master Shapeshifter, the Flying Swarm will recoup health whenever it inflicts damage on the monsters. For an idea of what Morrigan can do with Flying Swarm, check out this video (not made by me):
So, Morrigan can let loose as a Blood Mage. If her health is getting low, she can turn into a Flying Swarm. Any attacks to her only reduce her untapped mana. Her own damage on the monsters recoups her health. Once she’s back to full health, she can revert back to human form and resume Blood Magic. This can lead to quite a destructive and self-replenishing cycle, assuming the battle will even last that long.
If you do rely on Morrigan as your single Mage for your party, and whichever build you choose for her, be sure to include Heal in the mix so that she can aid her comrades once in a while. Get her Arcane Tomes if you rely on her as your sole mage. My progression for Morrigan was:
8th level
Bear Shape – More of a stepping stone to other abilities.
9th level
Sleep – A useful spell for a group of enemies that surround the party. Morrigan can also follow up by casting Horror on a sleeping target to either kill it outright or otherwise inflict plenty of spirit damage. This is the Nightmare combo.
10th level
Insect Swarm – See my comments above.
11th level
Death Magic – This doesn’t work very well with Blood Magic, so it’s really a stepping stone to other abilities in the tree.
12th level
Master Shapeshifter – The real point of this is so that Flying Swarm will recoup Morrigan’s health whenever she inflicts damage.
13th level
Curse of Mortality – A deadly single-target spell. It inflicts minor damage, but also prevents the target from getting healed for its duration.
14th level
Blood Magic – Allows Morrigan to draw upon her health instead of Mana to power her spells.
15th level
Blood Sacrifice – Use with care. Can bail out Morrigan if she’s low on health and she wants to continue to use Blood Magic, but can also kill a wounded party member. It’s also a stepping stone to …
16th level
Blood Wound – This is like Crushing Prison on crack. It may not score as much spirit damage on an individual target as Crushing Prison, but the fact that it has pretty much the same effect on multiple foes and can be cast without hurting your comrades even if they’re in the area of effect means this spell often suffices to win battles by itself.
17th level
Death Cloud – Blood Wound inflicts spirit damage, so it makes sense to add a storm-spell that also uses spirit damage. This point will become evident when I describe Morrigan’s inventory.
18th level
Cone of Cold – Now she starts to round things out by adding cold damage to her repertoire, which will be enhanced by her Robes of Possession. It may be an equally valid choice to take this and Blizzard earlier, especially if you rely on Morrigan as your only Mage. I suspect the reason I put it off till this point may be because Aldarion already had it.
19th level
Blizzard – Icing on the cake.
20th level
Affliction Hex – A minor spell with the benefit on reducing the target’s elemental resistances.
21st level
Misdirection Hex – A spell that causes its target to pretty much miss all of its physical attacks. Keep in mind that it will draw that target’s ‘aggro’ when you use it.
22rd level
Death Hex – The target will be vulnerable to critical hits for the duration. It will also draw ‘aggro’ from the target. This spell, in conjunction with Death Cloud, can also subject the target to the Entropic Death combo that inflicts massive Spirit damage.
23rd level
Blood Domination – This has some utility, but Morrigan’s other abilities often prove decisive.
24th level
Waking Nightmare – Another card for Morrigan’s deck. It works very similarly to Chaos in older D&D rules systems whereby multiple foes simply wander around and become sitting ducks for the party’s attacks.
Skill Selection
Starting
Herbalism
Improved Herbalism
Combat Training
Improved Combat Training
9th level
Expert Herbalism – The real point to this is to be able to take advantage of a method for raising limitless gold that involves selling Potent Lyrium Potions at a profit. The method requires the Master Herbalism skill, so Expert Herbalism is really just a stepping stone.
12th level
Master Herbalism – And voila.
15th level
Combat Tactics – Unlike Wynne or Aldarion, I heavily script Morrigan since her participation is often in situations where I don’t have direct control over her. I thus like to give her as many tactics slots as possible.
18th level
Improved Combat Tactics – Same thing.
21st level
Expert Combat Tactics – Same thing.
24th level
Expert Combat Training – Improving her ability to cast a spell despite damage.
Attribute Increases
I pump up Magic first to get fourth talents in various spell trees. After that, I go with +1 Magic and +2 Constitution. This makes sense, considering the particular system I have set up for Morrigan, and also because she has items that provide considerable boosts to Spellpower so there isn’t as much of an onus to increase Magic as much.
Morrigan | Shapeshifter | Blood Mage | Tactics + Equipment
Script
Self: Any – Blood Magic
Self Health < 50% – Flying Swarm
Enemy clustered with 3 other Enemies – Blood Wound
Self Mana – 10% – Deactivate Flying Swarm
Self surrounded by at least 4 Enemies – Waking Nightmare
Self surrounded by at least 3 Enemies – Sleep
Enemy Sleeping – Horror
Enemy Health > 75% – Winter’s Grasp
Enemy Health > 50% – Lightning
Nearest Visible Enemy – Attack
I actually have rather more extensive scripting for Morrigan since many of her abilities will not harm comrades, and since her participation is often in scenarios where all of the other comrades have to join in as well.
Inventory
Weapon: Corrupted Magister’s Staff
Helmet: Reinforced Magus Cowl
Armor: Robes of Possession
Gloves: Silk Weave Gloves
Boots: Enchanter’s Footing
Amulet: Lifedrinker
Belt: Destructionist’s Belt
1st Ring: Blood Ring
2nd Ring: Dreamsever
Some items provide bonuses that are helpful for any Mage build: Magic, Willpower, Spellpower, mana regeneration, and defense. Items that provide bonuses to Spirit damage will augment Blood Wound, Death Cloud, and the Nightmare combo. The Robes of Possession provides a hefty bonus to cold damage that will augment Cone of Cold, Winter’s Grasp, and Blizzard. The Silk Weave Gloves will increase the damage she inflicts while in Flying Swarm form. The Blood Ring will also reduce the hit on health that she takes whenever she uses Blood Magic to cast spells.
Leliana | Bard | Ranger | Build

Strength 18 Dexterity 22 Willpower 16 Magic 14 Cunning 17 Constitution 10
Starting Inventory / Enchanted Dagger (Grey Iron), Seeker’s Circle
Talent Selection
Starting Talents at 7th level
Song of Valor
Dirty Fighting
Below the Belt
Deft Hands
Improved Tools
Pinning Shot
Crippling Shot
Rapid Shot
Shattering Shot
The Bard and Ranger specializations have a certain synergy or way of complementing each other that makes this the perfect build for Leliana. I have certain priorities to address, and in a certain order.
Mechanical Expertise at 8th level: A lot of traps that will come shortly will require this, so not getting it now means missing out on a lot of experience. This, by the way, coupled with a high enough Cunning score, suffices for pretty much every trap in the game.
Archery: For Leliana to simply acquire Aim represents the economic route to making her an effective Archer. Aim, in conjunction with the Song of Courage and bonuses from many of her items, will also allow her to score critical hits with her bow with great frequency. Leliana often makes certain parts of the game so much easier by either using her bow to egg on outlier monsters as part of the ‘drawing out’ technique, or by wiping them out as a sniper in a process of attrition. The delay caused by Aim will be more than offset by the Repeater Gloves that drastically reduce the firing time. She will towards the end acquire Master Archery, but by then it becomes icing on the cake.
Bard Songs: The two key songs here are the Song of Courage and the Captivating Song. The Song of Courage provides hefty bonuses to critical chance and attack bonus. The bonuses increase with her Cunning score. The Captivating Song is one of the best ‘swarm control’ abilities in the game. If her comrades are surrounded by a lot of enemies, Leliana can plant herself in the thick of it and keep the monsters locked down in a nearly perpetual state of stun. The monsters will have most, or at least many, of their attacks interrupted when this song is active. More Cunning will make the Captivating Song harder to resist.
Ranger Pets: Whatever shortcomings Leliana may have in comparison to a melee Rogue build that focuses on dual-wielding talents (like Zevran), they will be more than made up for by the Ranger pets. My usual choice was the Blight Wolf. It is very fast, has a higher defense than the other pets, and can use Overwhelm to score hideous damage on its target. The Blight Wolf can also help clear out monsters close to the party faster, thus allowing Leliana to return to her bow quicker.
Sometimes though, certain boss battles make defense negligible since the boss will hit most of the time anyway. In such isolated instances I will summon a Great Bear that has far more health.
At later parts of the game, one of my practices was for Alistair to turn off his Rally and for Leliana to turn off her Song of Courage as soon as they arrive in a new area. Leliana then summons her Blight Wolf. Now Alistair will turn Rally back on, and Leliana will turn Song of Courage back on. The Blight Wolf will now be empowered by both sustained abilities, and the results are impressive. The Blight Wolf can also augment Leliana’s use of Captivating Song, since it provides an extra attacker to chomp away on the stunned monsters.
Note that summoned pets and other sustained abilities will make a huge demand on stamina. But Leliana will be effective without activated talents. Sure, the odd Dirty Fighting or Deadly Strike is nice, but Leliana’s efficacy will not rise or fall by it.
Melee Attacker and Backstabber: Leliana is no slouch when she’s forced to draw her axe and dagger, even before she attends to this priority. But once she’s attained Aim and the Ranger talents, I have her round things out with Dual-weapon talents and Rogue close combat talents. She becomes equally deadly with either bow or axe & dagger, and with the Blight Wolf in tow to boot.
*Note* Paracelsi is absolutely correct when he says it is easy for a player to struggle with this build during the low to mid levels, although it really starts to shine at the higher levels once things fall into place. One of his recommendations for attenuating the rough early going is to have Leliana make frequent use of poisons for her melee weapons when she has to fight up close, and to use elemental grenades to damage multiple foes when opportunities present themselves. And indeed I did have Leliana use such tactics quite frequently during the early going to make up for some of her early defects.
My progression was:
8th level / Mechanical Expertise
9th level / Distraction
10th level / Song of Courage
11th level / Deadly Strike, Lethality (Tome of Physical Technique)
12th level / Captivating Song, Melee Archer (Tome of Physical Technique)
13th level / Aim
14th level / Summon Wolf
15th level / Summon Bear
16th level / Summon Spider
17th level / Master Ranger
18th level / Dual-Weapon Training, Combat Movement (Tome of Physical Technique)
19th level / Coup de Grace
20th level / Dual-Weapon Finesse
21st level / Defensive Fire
22nd level / Master Archer
23rd level / Dual-Weapon Expertise
24th level / Device Mastery
Skill Selection
Starting
Stealing
Improved Stealing
Poison-Making
Combat Training
Improved Combat Training
8th level
Survival – Getting an early read on where the monsters are is actually pretty helpful. It also helps with at least one quest in the game.
10th level
Improved Survival – I will need at least two ranks to be able to complete a quest in the Dalish Camp. It is also a stepping stone to having Leliana be able to detect the presence of any monsters in the area.
12th level
Expert Survival – A stepping stone to Master Survival.
14th level
Master Survival – Completing this skill tree.
16th level
Expert Stealing – There are some good items that can be pickpocketed, and Leliana is my designated cutpurse.
18th level
Master Stealing – Rounding out this skill tree.
20th level
Expert Combat Training – Now it’s time to develop this tree, both for the combat bonuses but also to ensure access to certain talents.
Attribute Increases
My first priorities are to raise Leliana’s Dexterity to 30 and her Strength to 27. The reason for this is that she will wear items that raise both Dexterity and Strength by 4. This in turn allows her to begin using Dragonthorn bows (34) and The Veshialle (31). Then I let Cunning catch up. After that, I alternate between +2 Dexterity +1 Cunning and +2 Cunning +1 Dexterity each level. Dexterity simultaneously improves both attack and defense. Cunning helps trap disarming, armor penetration, chances of successful attacks and landing critical hits in conjunction with her Song of Courage, and makes the Captivating Song harder to resist.
Leliana | Bard | Ranger | Tactics + Equipment
Script
Self: Any – Song of Courage
Enemy at Long or Medium Range – Aim
Enemy at Long or Medium Range – Jump to Tactic #7
Enemy at Short Range – Switch to Melee
Enemy at Short Range – Dirty Fighting
Enemy: High Armor – Deadly Strike
Enemy Target of Leliana – Attack
Leliana’s default script is to keep Song of Courage active, and use Aim with her bow. She only draws her axe and dagger when the monsters come close enough. There are three instances of manual control. One is where the monsters in melee range have been cleared out, only leaving those that are still at a distance. In this instance I manually switch Leliana back to her bow. Note that you can’t integrate any switch back into the script, otherwise she’ll get stuck in an endless weapon switching loop. The second is where I want to pick the right moment and the right spot to use Captivating Song.
The third is when I summon a Ranger pet. This in part because I want to retain control over my choice of pet. It is also because whenever I enter a new area and do not have to fight right away, I have to summon the pet again and reset its script. Yes, it’s a headache, but it is worth it. I script the Blight Wolf as follows:
Enemy Health > 75% – Overwhelm
Self surrounded by at least 3 Enemies – Dread Howl
Enemy Health > 50% – Shred
Enemy attacking Leliana – Charge
Enemy at Short Range – Growl
Nearest Visible Enemy – Attack
Inventory
Missile Weapon: Far Song
Primary Melee Weapon: The Veshialle (Grandmaster Frost Rune, Grandmaster Lightning Rune, Grandmaster Paralyze Rune)
Off-Hand Melee Weapon: The Rose’s Thorn (Grandmaster Frost Rune, Grandmaster Dweomer Rune, Master Hale Rune)
Helmet: Helm of Honnleath
Body Armor: The Felon’s Coat
Gloves: Repeater Gloves
Boots: Bard’s Dancing Shoes
Amulet: Seeker’s Circle
Belt: Longbowman’s Belt
1st Ring: Harvest Festival Ring
2nd Ring: Silverleaf
By default she’ll use the best bow in the game to hit enemies at a distance. If enemies get too close, she’ll then switch over to probably the best dual-wielding combination for Rogues, The Veshialle plus The Rose’s Thorn. Many of her items provide bonuses that augment her abilities: Cunning, Dexterity, defense, attack, bonus critical/backstab damage, and bonuses chances of both melee and ranged criticals. Leliana is definitely an instance where individual pieces of armor provide greater aggregate benefits than any leather armor sets.
A potential alternative bow is the Sorrows of Arlathan, for anyone who has the Witch’s Hunt DLC. I don’t use it, however, so the Far Song is the bow of choice for Leliana in my playthrough.
Sten | Warrior | Reaver | Build
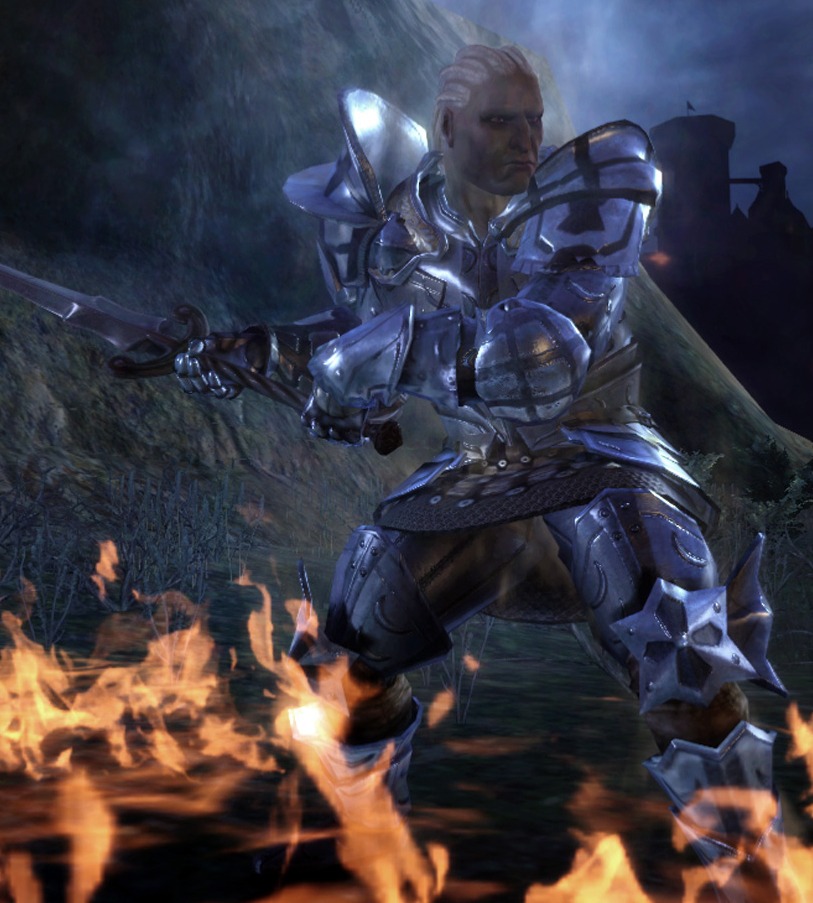
Strength 28 Dexterity 15 Will 15 Magic 12 Cunning 10 Constitution 13
Talent Selection
Starting Talents at 7th level
Powerful
Threaten
Precise Striking
Taunt
Pommel Strike
Indomitable
Sunder Arms
Mighty Blow
Powerful Swings
8th level
Bravery – An awesome passive talent that increases combat prowess depending on how numerous your foes are.
9th level
Stunning Blows – Another nifty passive ability that gives Sten a chance to stun his opponent with any blow that lands.
10th level
Two-Handed Strength – A passive ability that lessens the penalties from Powerful Swings.
11th level
Two-Handed Sweep – A nice ability that combines offense and defense. If Sten gets surrounded, I script him to unleash this so that it hits all of his foes around him and knocks them back as well.
12th level
Death Blow – Sten is a heavy hitter so Death Blow can be triggered quite often, recouping Sten’s stamina whenever he kills his target.
13th level
Critical Strike – I have Sten scripted to use this on any enemy that can’t move. This often leads to pulling off the Shatter combo for frozen targets.
14th level
Shattering Blows – A passive talent that increases Sten’s power against Golems and such.
15th level
Sunder Armor – An activated talent that, if it hits, will reduce the target’s armor by 20. Not cumulative. Sten will be scripted to use it against heavily armored targets.
16th level
Destroyer – Whereas Sunder Armor is an activated talent, Destroyer is a passive talent that always has the latent ability on a given blow to give its target a -5 penalty to armor. Again, it is not cumulative.
17th level
Devour – An occasionally useful ability whereby Sten recoups health from the dead bodies of any fallen enemies. I script him to use this when his health is less than 50%.
18th level
Frightening Appearance – This can be quite devastating in Sten’s hands. His high Strength greatly reduces the odds of its target being able to resist it. Once it kicks in, the target becomes a sitting duck for Sten’s sword swings. If you’re inclined towards developing your Grey Warden as a two-handed weapon Warrior, a good build is actually to combine Berserker and Reaver together. Berserker should be developed first to provide static damage output. Reaver can then be developed to provide Devour and Frightening Appearance as utility powers. You’ll need Death Blow as this build can really make a tear through stamina. Also, don’t rely on this as your sole tank. Instead, include a shield-wielding warrior like Alistair as your primary tank and let your Grey Warden hit from the flank.
19th level
Aura of Pain – Pretty useless, but at this point Sten pretty much has all of what can meaningfully improve his effectiveness. I’m pretty much choosing fillers for Sten.
20th level
Blood Frenzy – If anything justifies taking the Reaver specialization, it’s Devour and Frightening Appearance. Certainly not Aura of Pain, and certainly not Blood Frenzy either. One extra point of damage for each 10% of health you’ve lost is a terrible return for a sustained ability that demands a 60 stamina upkeep. This and the rest of the talent selections are just fillers for Sten.
21st level
Disengage – I script Sten to use this if he gets surrounded again after using Two-Handed Sweep.
22th level
Perfect Striking – More of a filler than anything else.
23rd level
Melee Archer – Another filler.
24th level
Rapid Aim – Now I’m improving the rate at which Sten can fire his crossbow, which is admittedly occasional at best.
Skill Selection
Starting
Combat Training
Improved Combat Training
Expert Combat Training
Master Combat Training
9th level
Combat Tactics – Sten has a mixture of sustained talents that I always want him to keep active, and plenty of activated talents that I want him to use according to the situation. I thus want him to have as many tactics slots as possible.
12th level
Improved Combat Tactics – Same thing.
15th level
Expert Combat Tactics – Same thing.
18th level
Master Combat Tactics – Rounding the skill tree out. Everything else is just filler afterwards.
Ability Increases
The first priority for Sten is to increase his Strength so that he can use the two-handed version of Starfang. After that, I go with +2 Strength and +1 Willpower on each level up. Another thing to keep in mind is that I will add Cunning if I need it for a skill like Improved or Expert Combat Tactics.
As I get towards the upper levels I add something like Disengage or the odd archery-based talent, so I will add a little bit to Dexterity if it’s needed to acquire such a talent.
Sten | Warrior | Reaver | Tactics + Equipment
Script
Self: Any – Indomitable
Self: Any – Precise Striking
Self: Any – Powerful Swings
Self Health < 50% – Devour
Self Surrounded by at least 3 Enemies – Two-Handed Sweep
Self Surrounded by at least 3 Enemies – Disengage
Enemy within Short Range – Frightening Appearance
Enemy Can’t Attack – Critical Strike
Enemy Attacking Sten – Pommel Strike
Enemy Health > 50% – Mighty Blow
Enemy using Melee Attack – Sunder Arms
Enemy Target of Sten – Attack
The attack bonus from Precise Striking offsets the attack penalty for Powerful Swings, allowing Sten to increase his damage. Sten’s activated talents are scripted according to very specific situations, allowing him to defend himself, set up his target for the most damage, strike them while they’re vulnerable, and reduce their ability to fight.
Inventory
Main Weapon: Starfang (2H) (Grandmaster Frost Rune, Grandmaster Lightning Rune, Master Silverite Rune)
Missile Weapon: Precision-Geared Recurve
Armor: Juggernaut Armor set
Amulet: Apprentice’s Amulet
Belt: Sword Belt
1st Ring: Lloyd’s Magic Ring
2nd Ring: Golden Ring
The two-handed version of Starfang, the Juggernaut Armor set, the Sword Belt, and Lloyd’s Magic Ring all help Sten do what he does best, crank out massive damage with each two-handed swing of his sword.
Wynne | Spirit Healer | Build
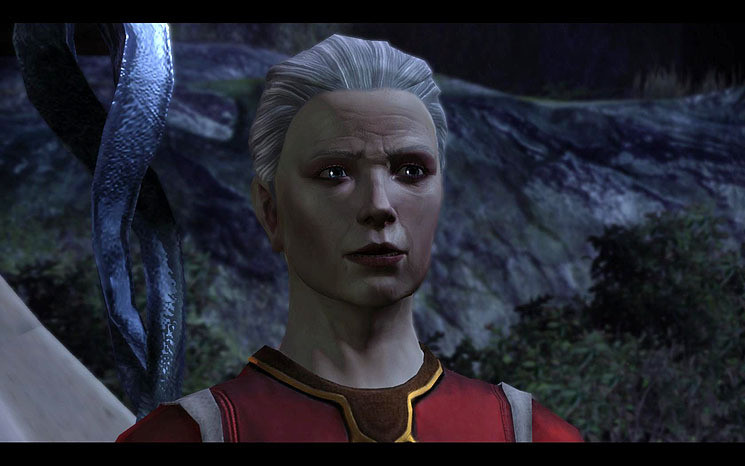
Strength 14 Dexterity 14 Willpower 26 Magic 29 Cunning 16 Constitution 13
Starting Inventory: Silver Aron, Senior Enchanter Robes
Talent Selection
The setup that I describe here provides just the right mix of offensive damage, healing, and crowd-control such that you can pretty much rely on her as your sole mage from the word ‘go’, if you’re so inclined. As a side note, I also have Wynne cherry-pick the Blood Specialization. What I mean is that she takes the specialization at 14th level in order to get its bonuses to spellpower and Constitution, but won’t select any spells or abilities that are made available by the specialization.
Starting spells at 12th level
Arcane Bolt
Group Heal
Lifeward
Revival
Rock Armor
Stone Fist
Earthquake
Heal
Rejuvenate
Regeneration
Mass Rejuvenation
Heroic Offense
Heroic Aura
Heroic Defense
Glyph of Paralysis
I have Wynne add the following spells through Tomes of Arcane Technique:
Spell Wisp – The bonus to Spellpower this sustained ability provides starts off pretty small, but it becomes quite large at higher levels. The bonus becomes well worth the rather small upkeep of 30 and fatigue penalty of 5%.
Lifeward – This is like using a Heal Contingency in BG2, and can often come in handy for either particularly intense battles or as a fail-safe against certain special attacks that inflict massive damage.
13th level
Haste – Increases attack speed (i.e. attack animations) by 33% while imposing a -5 penalty to attack. On the whole this really does enhance melee attacking power, especially when stacked with other sustainables like Telekinetic Weapons, Flaming Weapons, Miasma, Song of Courage, and then Rally.
14th level
Cleansing Aura – A great sustained ability for particularly intense and prolonged fights, since it heals everyone somewhat every few seconds even while Wynne is using another ability. It drains mana rapidly, so be discriminating about when you use it.
15th level
Flame Blast – Wynne begins to develop her powers over fire. This can be useful for when Wynne wants to damage a small cluster of foes that may be lined up next to her comrades.
16th level
Flaming Weapons – This sustained will add +20 points of fire damage with each weapon blow. Not bad.
17th level
Fireball – This is sometimes a preferable offensive option to what Aldarion can do depending on the situation. It comes out in a flash, knocks its targets off their feet, and continues to score lingering fire damage.
18th level
Grease – This spell can combine with another fire-based spell for one of the better spell combos in the game, Grease Fire. In fact, a Grease spell followed up immediately by a Fireball is one of the best combos there is because it allows Wynne to utilize both crowd-control and heavy damage almost instantaneously.
19th level
Inferno – Another useful lingering damage spell, and one that Wynne will be well equipped to use. Can be thrown in along with a Storm of the Century for good measure, or put on top of Grease for an especially deadly Grease Fire combo. *Note* Combining a fire spell with a Storm of the Century usually requires that the Storm be completed first, since a fire spell and a cold spell (i.e. Blizzard) will otherwise cancel each other out.
20th level
Glyph of Warding – For particularly crowded fights Wynne can plant this Glyph into the thick of things, granting bonuses to defense and mental resistance.
21st level
Glyph of Repulsion – This has more than one use. One is that it can be used as a method of crowd control by planting it at a narrow bottleneck (e.g. hallway) to keep the enemies back. If you cast Glyph of Paralysis on it before it expires, it will unleash the Paralysis Explosion combo. Wynne can also use it to drive back foes during particularly intense fights by planting it in the thick of things. She can also use it as a defensive resource by planting it right at her own feet after she has scored a lot of ‘aggro’ on the monsters.
22nd level
Arcane Shield – Now Wynne keeps this active to boost up her defense rating. This is useful not just when enemies get close to her but also when archers take aim at her.
23rd level
Staff Focus – Wynne does spend a lot of time firing away with her staff, so this certainly can’t hurt.
24th level
Arcane Mastery – Adds +5 to Spellpower. Hard to argue with that.
Skill Selection
Starting
Herbalism
Combat Training
Combat Tactics
Improved Combat Tactics
Expert Combat Tactics
Master Combat Tactics
15th level
Improved Combat Training – Mages always have an interest in developing this skill tree, plus it gives Wynne a +1 mana regeneration bonus during combat.
18th level
Expert Combat Training – Same thing.
21st level
Master Combat Training – Rounding out this skill tree. She already has her Combat Tactics tree filled out as well, so anything after is just filler.
Attribute Increases
I initially pump up Magic in order to access the fourth-tier talents in spell trees. After that I alternate between +2 Willpower +1 Magic and +2 Magic +1 Willpower with each level.
Wynne | Spirit Healer | Tactics + Equipment
Script
Self: Any – Spell Wisp
Self: Any – Flaming Weapons
Self: Any – Haste
Self: Any – Arcane Shield
Self: Surrounded by at least three enemies – Rock Armor
Self: Health < 50% – Heal
Ally: Health < 50% – Heal
Nearest Visible Enemy: Attack
Wynne is rather minimally scripted, both because many of her abilities require precise placement or the right situation, and also to reflect her role as the ‘quarterback’.
Inventory
Weapon: Staff of the Magister Lord
Helmet: The Libertarian’s Cowl
Amulet: Aneirin’s Token
Armor: First Enchanter Robes
Gloves: Cinderful Gauntlets
Belt: Belt of the Magister Lord
Boots: Magus War Boots
1st Ring: Ring of Ages
2nd Ring: Ring of Study
A lot of Wynne’s items provide bonuses helpful to Mages, Magic, Willpower, defense, Spellpower, and mana regeneration. I’ve ditched the Reaper’s Vestments in favor of the First Enchanter Robes, which provides bonuses to Magic, Willpower, and defense. Some of Wynne’s items also provide bonuses to fire damage, her key source of offense. Ring of Ages offers elementals resistances, which is useful for a character who always tries to stay out of the thick of it. Aneirin’s token will also augment the bonus to Spellpower that Wynne receives when she uses Vessel of the Spirit.
For those of you with the Witch’s Hunt DLC, and even better option for Wynne’s robe may be the Vestments of the Reaper (+9 Willpower, +6 Magic, +10 armor, +12% spell resistance).
Oghren | Berserker | Tactics + Equipment
Strength 42 Dexterity 21 Willpower 24 Magic 14 Cunning 12 Constitution 21
Starting Inventory: Silverite Battleaxe, Silverite Dwarven Heavy Armor set, One for the Ditch
Talent Selections
Starting Talents at 19th level
Berserk
Resilience
Constraint
Final Blow
Powerful
Threaten
Bravery
Death Blow
Pommel Strike
Indomitable
Stunning Blows
Critical Strike
Sunder Arms
Shattering Blows
Sunder Armor
Destroyer
Mighty Blow
Powerful Swings
Two-Handed Strength
Two-Handed Sweep
I can’t really give advice here. Oghren doesn’t join until much later in the game, at which point he has almost everything that could commend itself.
Script
Self: Any – Berserk
Self: Any – Indomitable
Self: Any – Powerful Swings
Self: Precise Striking
Self surrounded by at least 3 Enemies – Two-Handed Sweep
Enemy can’t Attack – Critical Strike
Enemy > 50% Health – Mighty Blow
Enemy attack Oghren – Pommel Strike
Enemy using Melee Attack – Sunder Arms
Enemy High Armor – Sunder Armor
Nearest Visible Enemy – Attack
I keep three sustained abilities active in order to maximize damage output, as well as Indomitable to make sure Oghren never leaves his feet. Two-Handed Strength, Precise Striking, and the attack bonus from the Gloves of the Legion more than offset the attack penalty from using Powerful Swings.
I also script activated abilities that combine offense and defense according to situation. Examples include Two-Handed Sweep should he get surrounded, and Pommel Strike to someone who is attacking him directly. This mix of activated and sustained abilities can really chew into stamina, especially when Berserk is one of those sustained abilities. This is offset by Oghren having both the Death Blow passive talent, and the Chasind Great Maul.
If you’re so inclined, a possible Warrior build for your Grey Warden is to combine Berserker and Reaver together, and wield a two-handed weapon. Not so much for Blood Frenzy but for the utility powers of Frightening Appearance and Devour. To make this work, you’ll need Death Blow as soon as possible to recoup stamina. Develop your Berserker talents first, and then the Reaver talents second. This build isn’t exactly a tank either, and is often in considerable danger of dying himself. It is more of a pure damage dealer. Bring Alistair along as your second warrior if this is how you want to design your Grey Warden.
Inventory
Primary Weapon: Chasind Great Maul (Master Lightning Rune x2, Master Dweomer Rune)
Secondary Weapon: Precision-Geared Recurve
Armor: Legion of the Dead armor set
Amulet: Apprentice’s Amulet
1st Ring: Seal of Rat Red
2nd Ring: Surveyor
Belt: One for the Ditch
The Chasind Great Maul is perfect for a two-handed Berserker. The Legion of the Dead armor set provides welcome bonuses to damage, willpower, attack, and constitution.
Attribute Increases
I simply go with the formula of Strength +2 and Willpower +1 during each level up.
Zevran | Assassin | Duelist | Build
Strength 20 Dexterity 34 Willpower 20 Magic 14 Cunning 16 Constitution 10
Starting Inventory
Leather Armor set (Hardened)
Long Sword (Red Steel)
Crow Dagger (Red Steel)
Mixed Metal Rounds
Talent Selection
In previous run throughs I used to have Zevran pick up whatever leather armors and daggers were left after Leliana had first dibs. After a while it felt like Zevran was just picking up the scraps. So I started to invest some thought into how Zevran could become a uniquely powerful character in his own right. Here I make a case for an exclusively melee-based Rogue that combines the Duelist and Assassin specializations together. There are some essential ingredients for this build.
Maximum Defense: The Dueling sustained talent (augmented by Keen Defense), the Dual-Weapon passive abilities, pumping up Dexterity, and item bonuses work together to put the Rogue’s defense through the roof. This Rogue build can wade into the thick of it with little fear of dying.
Maximum Attack Rating: Again, the Dueling sustained talent, Dual-weapon passive abilities, pumping up Dexterity, and high item bonuses means the Rogue will rarely miss.
Maximum Critical Hits: The inherent bonus to melee critical chance from the Assassin specialization, item bonuses, and the Lethality talent will make this Rogue build a beast for landing critical hits. Zevran’s chance of scoring critical hits ranged from 36% to 39%, and that was even before Leliana’s Song of Courage kicked in during those occasions they worked together. Some hardcore Dragon Age buffs like to engage in extensive Damage Per Second calculations, and the frequent argument is that Cunning-based dagger Rogues have the best DPS since daggers have a somewhat faster attack animation. My beef with this is that it doesn’t take into account the frequency of critical hits and backstabs, something the DPS calculators themselves acknowledge. Dual wielding two full-sized weapons slows things down to be sure. Wielding a full-sized weapon and an off-hand dagger represents a good compromise, especially when you can find the right sword and dagger combination to justify it. Suffice to say I was quite pleased with how this build for Zevran turned out, notwithstanding that it can be pulled off more effectively for your own Grey Warden build than for Zevran himself. Note also that I don’t even bother with Pinpoint Strike on account of my high probability for scoring critical hits passively anyway.
Maximum Opportunities for Backstabs: The Coup de Grace and Combat Movement talents, plus having a Rune of Paralysis in his main-hand sword, will also give Zevran plenty of opportunities for backstabs. I also script Zevran to enter Stealth mode whenever he can after his Health drops to 75% or less, which will provide even more opportunities for backstabs.
Momentum: Dual-wielding weapons slows down weapon attack animations by 0.5 for each weapon. Momentum speeds up weapon attack animations by 0.7 for each weapon. This definitely increases the damage output for this Rogue-build. Keep in mind that it drains stamina so be prepared either for the ability to shut down once your Rogue runs out of stamina during a prolonged fight, or have stamina regenerating items in place.
Dual-Weapon Mastery: Again, many Rogue builds rely on daggers so they don’t bother with Dual-Weapon Mastery. I still take it (albeit towards the end), since it will reduce the activation cost for the dual-weapon talents.
Feast of the Fallen: Until I acquire this talent, I limit Zevran’s script so that he keeps Momentum and Dueling active, while not calling upon any activated talents. Once Feast of the Fallen is in place, then I will include activated talents in his script.
Zevran starts off with the following talents at 13th level
Mark of Death
Exploit Weakness
Dirty Fighting
Below the Belt
Deadly Strike
Lethality
Evasion
Stealth
Stealthy Item Use
Combat Stealth
Dual-Weapon Training
Dual-Weapon Sweep
Flurry
Momentum
I then used the following progress:
14th level / Lacerate
15th level / Dueling
16th level / Feast of the Fallen
17th level / Master Stealth
18th level / Upset Balance
19th level / Keen Defense
20th level / Combat Movement
21st level / Coup de Grace
21st level / Dual-Weapon Finesse
22nd level / Whirlwind
23rd level / Dual-Weapon Expertise
24th level / Dual Weapon Mastery
This suffices to make Zevran a fairly powerful character in his own right, which I don’t mind as he is a secondary support character. If you’re interested in a party that has two Rogues, a Bard/Ranger and a Duelist/Assassin can complement each other perfectly. The Bard’s Song of Courage will augment the fighting prowess and critical hit ability of the Duelist/Assassin. The Captivating Song will allow the Duelist/Assassin to go to work with backstabs.
Skill Selection
Starting
Poison-Making
Improved Poison-Making
Expert Poison-Making
Master Poison-Making
Combat Training
Improved Combat Training
Expert Combat Training
Master Combat Training
15th level
Combat Tactics – Zevran has a mix of sustained talents that I want him to always keep active, and some very useful activated talents that I like him to use but only in certain situations. I thus want him to have as many tactics slots as possible.
16th level
Improved Combat Tactics – Same thing.
18th level
Expert Combat Tactics – Same thing.
20th level
Master Combat Tactics – Rounding out the skill tree.
20th level
Trap-Making – More of a filler than anything else really. And so on. Everything else is filler afterwards.
Attribute Increases
My first priority is to have his Cunning catch up to Dexterity. Lethality will always increase his damage output based on Cunning. The Exploit Weakness talent from the Assassin specialization will further increase his damage on backstabs, and again based on Cunning. After that I switch back and forth between +2 Dexterity and +1 Cunning or +2 Cunning and +1 Dexterity during each level-up.
You may have noticed that I have Zevran wearing some equipment that has significant Strength prerequisites, and yet I don’t add to Strength during his earlier level-ups. The reason is that I temporarily lend Zevran some Strength enchancing items (e.g. Helm of Honnleath) so that he briefly meets the prerequisite and can equip items like Varatorn’s Armor or Imperial Edge, and then he returns the items back to the party members who lent to him (e.g. Leliana takes back her Helm of Honnleath). His armor items will stay equipped, since he only needed to meet the Strength prerequisite at the time that he equipped the items. His weapons will stay equipped as long as he never switches to a second weapon set. The precise details of this will be explained at various points in the guide.
However, at some point I want to equip him with a Dragonbone Executioner’s Helm (minimum 38 Strength). So at the higher levels, as I approach 20th level or so, I add +4 to Strength along the way to put him just within reach whereby he can add enough Strength-enhancing items that will allow him to reach 38 and equip the Helm.
Zevran | Assassin | Duelist | Tactics + Equipment
Script
Self: Any – Dueling
Self: Any – Momentum
Enemy Elite or Higher – Mark of Death *Note* Paracelsi notes you may need to be careful with this, since it can turn into Zevran isolating himself from the rest of the party and exposing himself to a boss by himself. At the same time, it is also my experience that it is only an Elite or higher enemy that is worth using this talent on. If you do script in this fashion, keep a careful eye on where Zevran is going.
Self: Health < 75% – Stealth
Self surrounded by at least 4 Enemies – Whirlwind
Self surrounded by at least 3 Enemies – Dual-Weapon Sweep
Enemy at Short Range – Dirty Fighting
Enemy has High Armor – Deadly Strike
Nearest Visible Enemy – Attack
I only add the three active talents once Zevran has acquired Feast of the Fallen.
Inventory
Main Hand Weapon: Imperial Edge (Grandmaster Frost Rune, Master Paralysis Rune)
Second Hand Weapon: Dead Thaig Shanker (Grandmaster Frost Rune, Master Dweomer Rune)
Helm: Executioner’s Helm
Amulet: Apprentice’s Amulet
Armor: Varathorn’s Armor
Gloves: Pushback Strikers
Rings: Imperium Ring Set
Belt: Shadow Belt
Boots: Cadash Stompers
The Imperial Edge provides bonuses to attack, damage, and melee critical chance. The Dead Thaig Shanker adds a much welcome bonus to Cunning. The Shadow Belt and Pushback Strikers add more bonuses to melee critical chance. The Imperium Ring set increases armor, Cunning, and Strength. The build is stamina-intensive, so the Executioner’s Helm and Varathorn’s Armor provide welcome bonuses to stamina. The Cadash Stompers also provide bonuses to Dexterity, armor, and melee critical chance.
Note that I can set this up without having to spend any attribute points on Strength for Zevran. All I need to do is loan him some Strength-enhancing items long enough to get the armor pieces on. This works so long as Zevran never switches to a second weapon set (which I don’t).
If I were to use a Duelist/Assassin as my Grey Warden, The Veshialle and the Rose’s Thorn would be my weapon set up. I would also use a different armor set, ideally one that comes with both fatigue reduction and stamina regeneration. Possible candidates include The Felon’s Coat along with other individual pieces of leather armor. Another candidate could be Wade’s Superior Dragonscale Armor set. Another candidate is Cailan’s Armor set, with the additional perks of a bonus to backstab/critical damage, and a percentage chance of dodging attacks. Nonetheless, the item set up I describe above is perfectly adequate for Zevran as a support character. He performs well enough with it.
Shale | Tactics + Equipment

Strength 22 Dexterity 21 Willpower 14 Magic 10 Cunning 10 Constitution 32
Talent Selection
Starting Talents at 10th level
Powerful
Threaten
Precise Striking
Taunt
Pulverizing Blows
Slam
Quake
Stoneheart
Bellow
Rock Mastery
Hurl Rock
Stone Arm
I think it is easier to give advice on Shale by not giving a level by level breakdown, but rather an explanation of the fundamentals of how Shale works (and since Shale should be able to acquire all available talents anyway).
Shale has access to four unique talent trees, the Pulverizing Blows tree, the Stoneheart tree, the Rock Mastery tree, and the Stone Aura tree. The first talent in any of the trees is a sustained talent. The Stone Aura tree has all passive talents as its second, third, and fourth talents. The other trees have activated talents as their second, third, and fourth talents. When you select one of the four sustained talents, Shale can only use the activated (or passive) talents from the same tree as the sustained talent. This means that Shale has four different modes or styles of play.
Pulverizing Blows: This mode embodies the maxim, ‘the best defense is a good offense’. She’ll get +11 to damage, +3 to armor, and -10 to defense. I might be willing to treat this as Shale pretending to be a two-handed warrior. But the fact remains that the activated talents here are so sucky that the -10 penalty to defense becomes even harder to swallow. Slam takes too long to connect. Quake will inflict friendly fire damage on party members. This means Shale has to put her neck out well ahead of the party to make effective use of it. And even if she does, the penalty to defense means the monsters will chop her down before her comrades can bring in the cavalry. Killing Blow drains all of her stamina, making this a highly committal move. Not my preferred mode for Shale.
Stone Aura: This mode allows Shale to confer some pretty nice buffs on her comrades, but also makes her extremely vulnerable. The +12 bonus to armor does not make up for the whopping -50 penalty to defense. I rarely if ever use this mode. Leliana at least rarely takes a scratch when using Captivating Song.
Rock Mastery: This mod emphasizes attack at a distance. The key benefit is that any archers in the party will gain a +10% chance for ranged criticals, and reduced firing time. This could definitely work well if Leliana is in the party. My problem with this is that the activated talents require Shale to get closer to the enemies, so much so that the enemies will close in rather more quickly than I would like in an archery or spell themed battle. I might keep this active if my strategy for a given fight is to have an archer with a powerful bow snipe at a long distance. But that’s about it.
Stoneheart: The only mode that I seriously consider as having value on an ongoing basis. Shale gets hefty bonuses to armor, health regeneration, and stamina regeneration. This also complements the activated talents that allow Shale to exercise crowd-control and to draw ‘aggro’ upon herself from other monsters. I develop this tree first. Everything else is mere filler as far as I’m concerned.
Script
Self: Any – Activate Precise Striking
Self: Any – Stoneheart
Self Surrounded by at least 4 Enemies – Regenerating Burst
Self Surrounded by at least 3 Enemies – Bellow
Enemy Elite or Higher – Stone Roar
Nearest Visible Enemy – Attack
Shale always keeps Precise Striking and Stoneheart active to maximize her attack bonus. She’ll activate crowd-control talents when she’s surrounded. She’ll also ‘aggro’ a particularly powerful enemy when it shows itself. Shale can get a decent defense rating with the right crystal, and in conjunction with other party members’ abilities like Rally and Miasma. Even if her defense rating isn’t the highest imaginable, it is also compensated for by the armor and regeneration bonuses provided by the Stoneheart mode.
Inventory
Large Brilliant Ice Crystal
Small Brilliant Lightning Crystal
These two crystals best complement the Stoneheart mode in my opinion. The Ice crystal provides a hefty +15 bonus to defense, and a bonus to health regeneration that will stack with the +12 health regeneration provided by the Stoneheart mode. The lightning crystal provides bonuses to both attack and dexterity (and thus defense as well).
Attribute Increases
The first priorities are 38 Strength so she can wear a small brilliant crystal, and 38 Constitution so she can wear a large brilliant crystal. After that I pump up Dexterity, which amounts to a decision to use her as a tank. It is, at least to some degree, justified by wearing the Large Brilliant Ice Crystal. However …
A Different Vision for Shale
“Item-wise, there is no one perfect item setup for Shale. Ideally you should be changing item setups depending on the type of enemies you intend to fight – against undead, for example, equipping small crystals with the fire element for offense will significantly increase Shale’s damage output (almost all undead and darkspawn take %bonus damage from fire). If you specifically intended to fight an undead horde of mindless zombies, then you’ll also want to equip large ice/electric crystals for defense which would give you extra defense/dodge/health regen. Against an undead horde of spellcasters a large spirit crystal for defense would be more appropriate for the spell/spirit resistance, and so on.”
“Takes work and planning, yeah. For the record only Abominations and the Archdemon have lightning resistance, so great advice on using a small lightning crystal – it works on pretty much everything else. When Shale’s damage is converted to an element type it ignores armor. High end small crystals also grant her a free +30% damage.”
“You’ll want to tailor her stat distribution to the role you expect her to fill. While it’s possible to make her something of a jack-of-all-trades, I wouldn’t recommend it. Dropping most of her points into str seems to work for me because Shale is ultimately an inferior tank – she simply lacks too many of the +defense talents other warriors have. She does get a hefty amount of dodge/missile avoidance from large lightning crystals, so she can be a decent tank when required but her real strengths lie in her buffs (most are unique to her) and damage abilities (affected by str, and gain massive bonuses from small crystals).”
*Note* Just to clarify, I contemplated the concept that Paracelsi describes before I ever wrote this guide. My viewpoint (and I admit that it is my particular viewpoint) is that emphasizing Strength and damage dealing would have been my choice as well if any of the crystals provided significant bonuses to both armor and health regeneration. If there were such crystals, Shale’s resiliency would have depended on damage reduction and passively recouping health, and not at all dependent on increasing her defense rating. The problem was I don’t think any of the available crystals provide good enough armor and health regeneration bonuses to justify it. The ones that come closest are the Large and Small Brilliant Natural Crystals, but the bonuses they provide are too meager in my honest opinion. Nonetheless, Paracelsi does provide some valuable insights for those of you wanting to include Shale as a core party member.
Aldarion | Grey Warden | Arcane Warrior | Build part 1
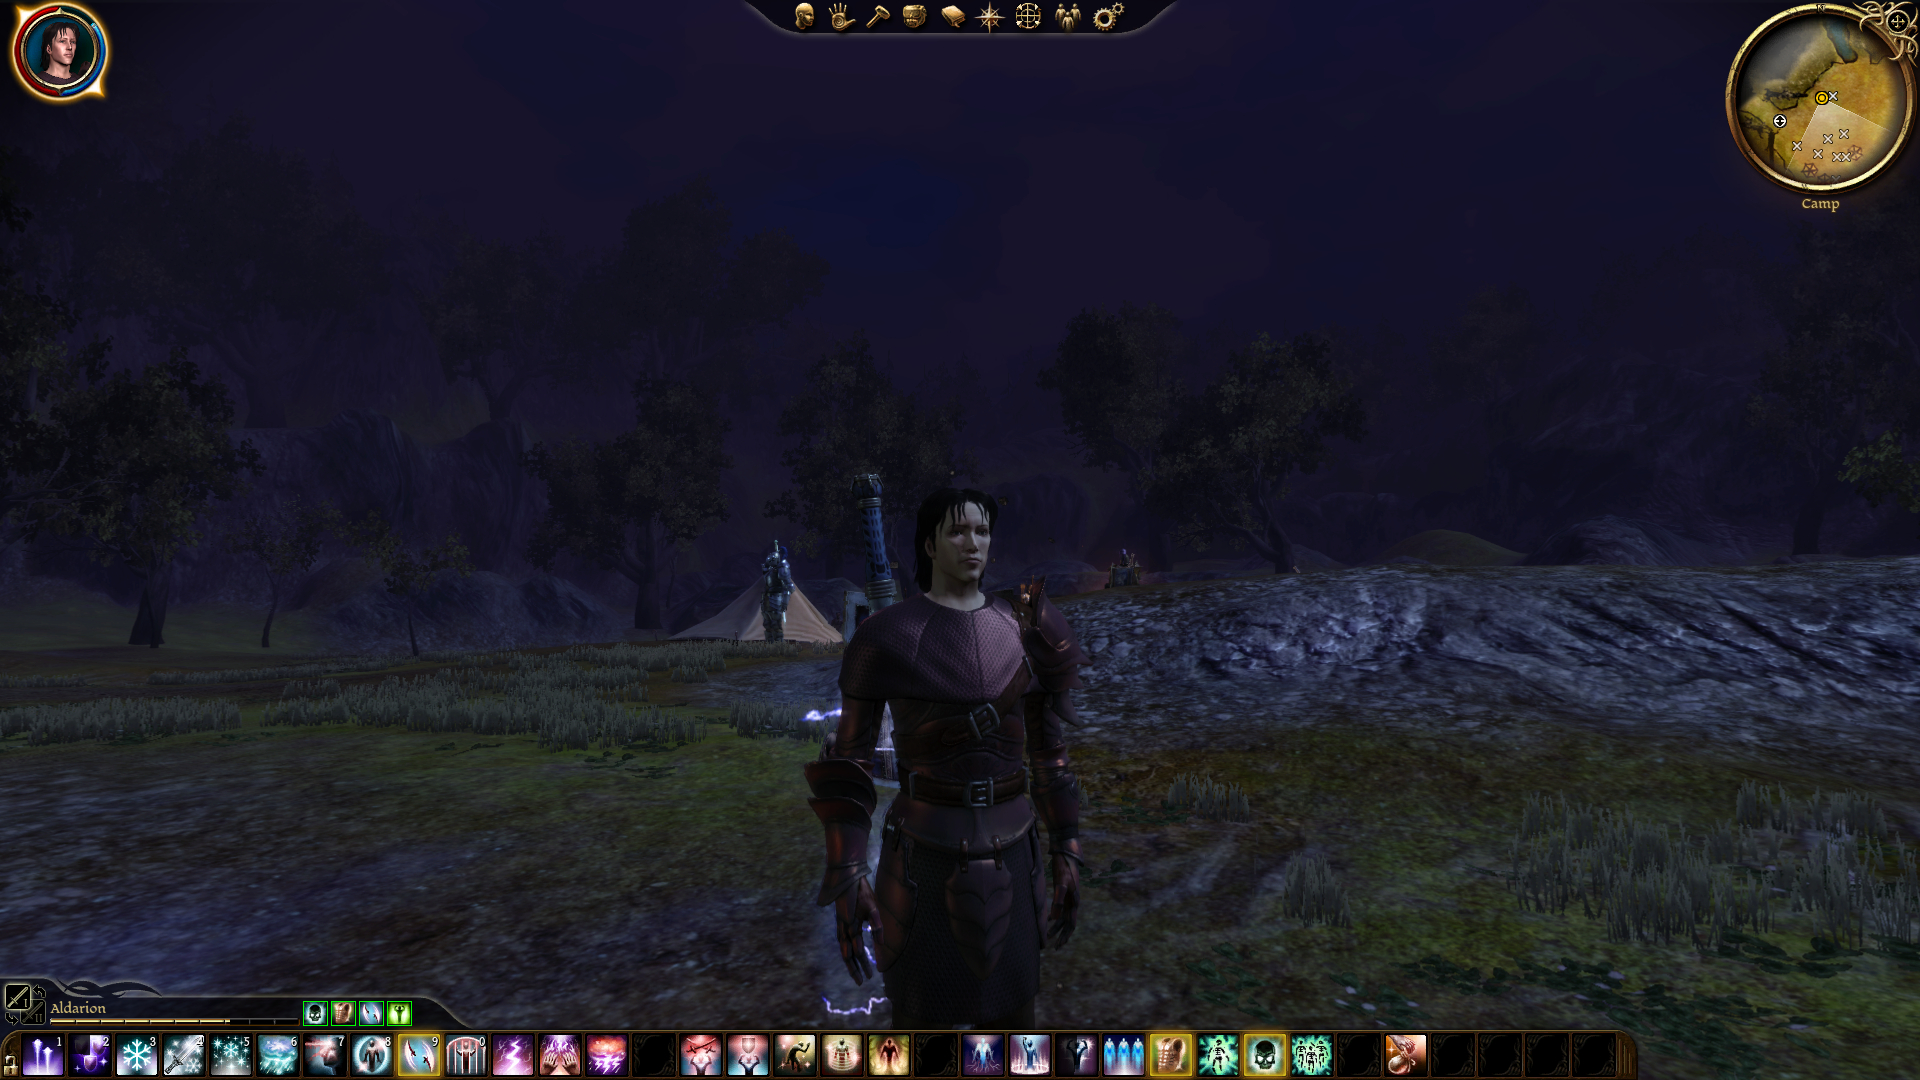
Starting Attributes at 1st level/
Strength 10 Dexterity 10 Willpower 16 Magic 22 Cunning 11 Constitution 10
Talent Selection
There’s sort of a continuum to how you can play and develop your Arcane Warrior. I describe three approaches along that continuum, and explain my preference as well.
Tank Arcane Warrior: The idea is that as soon as possible your Arcane Warrior acquires all of the sustainable talents like Stone Armor, Miasma, Shimmering Shield, Combat Magic, etc. and always keeps them active. In other words, this is a roundabout way of creating a tank. For an early-career Arcane Warrior, Mana for actual spellcasting can be a challenge. For those who like this build, any spellcasting that comes afterwards is incidental to the main function of the build. My view is that, at least in the early going, this doesn’t provide anything that you couldn’t get through a heavily-armored and shield wielding Champion.
Pure Spellcasting Arcane Warrior: The idea is to focus exclusively on spellcasting power. Win the fight in short order through your spells. Switch over to your sword in the event that any happen to make it close enough. Sure, it works. But if this is where you wanna go, why not just develop a staff-shooting Spirit Healer or Blood Mage?
Hybrid: My preference, and the one I view as most in the spirit of playing an Arcane Warrior. I don’t race for the Arcane Warrior sustainables right away, because there’s plenty of activated spells that I like to use. And indeed, the armor bonus provided by Rock Armor at lower levels is pretty negligible. Weakness and Paralyze as prerequisites to Miasma are pretty hard to swallow in the early stages of an Arcane Warrior who still wants to cast spells. The idea is to tactically squeeze the utmost out of your activated spells in order to damage the monsters, or otherwise tip the scales in your favour, so that the spells either win the battle outright or assure the advantage when you close in. Melee combat often represents the finishing touch. At mid to higher levels I then pick up sustainables like Miasma and Rock Armor, which then become much more meaningful. It is at this point that I start to have my cake and eat it too (although my Arcane Warrior was doing just fine in melee combat beforehand). Keep in mind that use of activated spells will often ‘aggro’ monsters against the Arcane Warrior. Either a high defense, or an activation of Shimmering Shield, or both, can very often suffice to neutralize the ‘aggro’.
There’s also an exploit, if you want to call it that, to get the most out of a hybrid Arcane Warrior. At higher levels I often have the Arcane Warrior max out with a lot of combat-related sustainables. However, if I know that it would be advantageous to start a certain battle with activated spells at a distance, I’ll simply turn off those sustainables and let the Arcane Warrior recoup a now larger pool of available stamina. He then uses whatever activated spells he wishes on the monsters from a distance. Should any of the monsters close in, the Arcane Warrior’s script will kick in and begin to reactivate his combat-related sustainables.
Starting
Arcane Bolt – A default starting spell for a Mage. It is useful as a damage option in the early going.
1st level
Winter’s Grasp – This spell has lasting value, since its ability to inflict cold damage on a single target increases with each level, and it comes out in a flash.
Frost Weapons – This becomes useful when Aldarion surrounds himself with party members. However, its damage is inferior to that of Flaming Weapons and I mostly quit using it after Wynne joins the party. It still does find occasional use against fire-based creatures though.
2nd level
Cone of Cold – The advantage of starting with an Elf mage and putting all your bonus points into Magic is so that you can use this awesome spell as early as the 2nd level. It does significant damage in its own right, but the clincher is that it sets up the monsters for significant hacking down by the fighters while they remain frozen. This in indeed one of the best spells for a hybrid Arcane Warrior. It is also often the first part of the Shatter Combo whereby a critical hit, or Spirit Prison, or Stone Fist, will kill the target outright.
3rd level
Mind Blast – Sometimes useful as a stop gap in its own right since it can stop an incoming swarm in its tracks. Keep in mind that the stun effect is brief, and it will ‘aggro’ the monsters, so you better have a good follow-up.
4th level
Force Field – There are three strategic uses for this spell. One is if you anticipate that the monsters are about to swarm a single character en masse. Cast Force Field over that character, buying the rest of your party time to go to work while the monsters waste their efforts.
The second use is if you are dealing with a boss creature who may be quite tough, but his followers may be decidedly easier to handle. Take that boss out of the fight temporarily by putting the Force Field over him, and then go to work on his followers. Once you’ve finished taking out the followers and the Force Field has worn off, you can hopefully deal with the boss by himself.
A third potential use is the Shock Wave combo. Maybe there is a tough monster, but he’s at a distance. Keep him out of the fight for bit with the Force Field. If after a while he’s still surrounded by comrades, cast Spirit Prison right over top the Force Field to unleash a Shock Wave. Keep in mind that opportunities to pull this off are usually rare, but keep an eye open.
5th level
Telekinetic Weapons – Once the party becomes settled, Aldarion maintains this spell while Wynne will maintain Flaming Weapons. The two spells together will dramatically increase damage output for the party during up close combat.
Lightning (bonus) – A useful single-target damage spell, but also a stepping stone.
6th level
Shock – Inflicts electrical damage in a cone-area. This is often the perfect follow up to Cone of Cold. First, freeze several monsters in place with Cone of Cold. Then deliver even more damage with Shock over the same area. Keep in mind that any monsters that survive will go ‘aggro’ on you once they are no longer frozen in place.
7th level – Arcane Warrior as 1st Specialization
Crushing Prison – This is a fantastic spell that can keep a monster stuck with continuous spirit damage for its duration. If you’re so inclined, you can follow up with other spells or physical attacks to kill it in short order. It is also a capper spell for both the Shatter and the Shock Wave combos.
8th level
Tempest – This blankets a decent-sized area with continuous electrical damage. It is also part of the Storm of the Century combo.
9th level
Combat Magic – I didn’t get this right away at 7th level because I had yet to find a useful set of armor. But when the time is right Combat Magic allows an Arcane Warrior to use their Magic score instead of Strength to determine armor and weapons that can be equipped. It also allows the Arcane Warrior to use Magic to determine weapon damage, thus obviating any need to put any points into Strength.
10th level
Weakness – Now I’m heading for Miasma.
Paralyze (Tome of Arcane Technique) – Same thing.
11th level
Blizzard – Blankets the area with continuous cold damage, and also has the potential to freeze enemies in place. It is also another part of the Storm of the Century combo.
Miasma (from Tome of Arcane Technique) – Always imposes -10 penalties to attack and defense to any monsters within its radius, making it highly commendable to Arcane Warriors.
12th level
Aura of Might – A passive talent that increases the power of Combat Magic.
13th level
Mana Drain – A stepping stone to other talents in the Mana tree.
Aldarion | Grey Warden | Arcane Warrior | Build part 2
14th level
Shimmering Shield – A powerful ability that lessens the damage the Arcane Warrior takes, either physical or elemental. Very powerful but also drains Mana rapidly. I script it so that it’s activated only when Aldarion is surrounded by three or more monsters. This is often the key to neutralizing ‘aggro’ when my Arcane Warrior has used activated spells on the monsters.
15th level
Mana Cleanse – This spell is bugged and does the exact opposite of its stated description. It replenishes enemies’ Mana instead. Nonetheless, it is a stepping stone to both Spell Might and Mana Clash.
16th level
Fade Shroud – A passive ability that augments Combat Magic so that it provides a Mana regeneration bonus as well as a 25% chance to dodge attacks.
17th level
Spell Might – The last piece needed for the Storm of the Century combo, and also a stepping stone to Mana Clash.
18th level
Mana Clash – This is probably the best anti-mage ability in the game. It drains enemy mages of Mana, and scores just as much damage on them at the same time. It also comes out in a flash, and doesn’t require an Arcane Warrior to sheath his weapon first.
19th level
Rock Armor – Now the armor bonus it provides is meaningful.
20th level
Walking Bomb – This and Virulent Walking Bomb add another possible offensive weapon to Aldarion’s repertoire. It is also a stepping stone to Death Syphon. *Note* I usually restricted my use of this spell against groups of enemies like archers that I knew would stay back, and thus present no risk of infecting my party members. Paracelsi makes the additional point that this and Virulent Walking Bomb can provide very effective weapons against boss enemies like Dragons, since there is no risk of the boss monster dying outright and infecting nearby party members.
Death Syphon – This is one of the linchpins of the build, as it allows Aldarion to recoup Mana from enemies that die within its radius. Greater spellpower means more Mana recouped. It is this ability that often allows Aldarion to sustain his Shimmering Shield through especially intense and prolonged battles.
21st level
Virulent Walking Bomb – Provides another potent offensive weapon, as long as I can make sure its targets stay well back from me.
22nd level
Arcane Shield – The defense bonus provided by this spell correlates with the spellpower of the caster, so it makes sense to put off acquiring this until later. And it is a perfect fit with Aldarion’s abilities as an Arcane Warrior.
23rd level
Staff Focus – Aldarion does sometimes use his staff for long-distance missile fire. It’s also a stepping stone to …
24th level
Arcane Mastery – A passive ability that provides a much welcome +5 bonus to spellpower.
25th level
Chain Lightning – Rounding out the Lightning tree with another offensive option.
Mass Paralyze (Tome of Arcane Technique) – An option that temporarily paralyzes any monsters within its area of effect. Another card in my deck.
Skill Selection
Starting
Herbalism and Combat Tactics – These are given to a Mage Warden by default.
1st level
Coercion – Coercion is a key skill for any Grey Warden character, as only the Grey Warden can make use of it during dialogues. Not developing this skill can mean a lot of lost opportunities that could have come your way.
3rd level
Improved Coercion – To make doubly sure that I can make my Coercion or Persuasion checks during the early parts of the game.
6th level
Trap-Making – It is possible to exploit the “Traps are a Girl’s Best Friend” quest in Lothering repeatedly for limitless gold and xp, as long as the Grey Warden character has at least one rank in the Traps-making line of skills. That is exactly what I intend to do, to a point.
9th level
Combat Training – This line of skills will have definite benefits for an Arcane Warrior, but for now this selection improves Aldarion’s chances of getting a spell off when hit.
12th level
Improved Combat Training – Continuing the development of this line of skills, and adding a +1 to Mana regeneration at the same time.
13th level
Expert Coercion (by Tome of Skill and Sundry) – I acquired this from the Tome of Skill and Sundry, refining further my ability to make Persuasion or Intimidation checks.
15th level
Master Coercion – Now this skill line is completely rounded out.
18th level
Expert Combat Training – Continuing the development of this line of skills, and adding a +2 bonus to attack at the same time.
21st level
Master Combat Training – Maxing out the skill tree.
22nd level
Stealing – So that I can access Slim Couldry’s quests.
24th level
Improved Combat Tactics – The more Mana I acquire, the more sustainables I can put up. I therefore start to develop this skill tree so that I can make room for more sustainables in my Tactics menu.
Master Combat Tactics (by Tome of Skill and Sundry) – Same thing.
Attribute Increases
I head straight for a Magic score of 25 on my first level up so that I can get Cone of Cold right away. I then go with +1 Dexterity, +1 Willpower, and +1 Magic thereafter. Dexterity simultaneously increases both attack and defense. Willpower adds to my Mana pool for both the sustainables and the activated spells. Magic provides a bonus to attack, and increases both my Spellpower and my damage from my Spellweaver sword. The Lifegiver obviates the need for any Constitution increase. I occasionally add to Cunning if I need to add a skill like Expert Coercion.
Aldarion | Grey Warden | Arcane Warrior | Tactics + Equipment
Script
Self: Any – Activate Combat Magic
Self: Any – Death Syphon
Self: Any – Spell Might
Self: Any – Miasma
Self: Any – Spell Might
Self: Any – Rock Armor
Self: Any – Arcane Shield
Self: Any – Telekinetic Weapons
Self surrounded by at least 3 Enemies – Activate Shimmering Shield
Self surrounded by no Enemies – Deactivate Shimmering Shield
Nearest Visible Enemy – Attack
I set this script up to keep the combat sustainables up. Shimmering Shield is activated only when the physical fighting gets crowded, and then deactivated once the pressure lets up. The activated spells, most of which require either precise placement or specific situations, are left to manual control.
Inventory
Main Weapon: Spellweaver (Grandmaster Flame Rune, Grandmaster Silverite Rune)
Shield: Fade Wall
Staff: Wrath of Heaven
Helmet: Corruption
Armor: Wade’s Superior Dragonscale Armor set (with Evon the Great’s Mail)
Amulet: The Spellward
Belt: Andruil’s Blessing
1st Ring: Lifegiver
2nd Ring: Key to the City
Aldarion gets the prime cuts for equipment, including the Arcane Warrior-specific sword, a shield that boosts both defense and Mana, an armor set that provides lots of armor and little to no fatigue penalty, and a Helmet that will protect him from the Archdemon’s breath weapons. The Wrath of Heaven staff will increase even more the damage from the Storm of the Century.
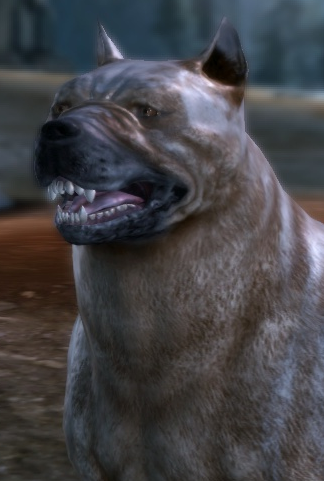
The Mabari War Hound
Strength 20 Dexterity 17 Willpower 15 Magic 12 Cunning 11 Constitution 13
Starting Talents at 7th level
Growl
Dread Howl
Fortitude
Charge
Talent Selections
I can’t really give any advice here, since the Hound will easily be able to get every talent available to him. I have to say I never really use the Hound on any ongoing basis. His armor, attack, and defense ratings are not anything to write home about. He does have a few things going for him. One is I guess the ‘coolness’ factor of having your own dog as a joinable companion. Another is that the Dog is one of the relatively best for using the ‘drawing out’ technique, since his running speed allows him to quickly regroup with the party. One other is that the Hound is not susceptible to grab attacks from certain boss monsters like the High Dragon and the Brood Mother. In the end, it just isn’t enough for me to keep him on as a core party member. The biggest knock against the Hound for me is that he doesn’t really provide anything that I couldn’t already get from Leliana summoning the Blight Wolf in as a free fifth party member.
Script
The script is very similar to the one that I use for the Blight Wolf:
Enemy > 75% Health – Overwhelm
Self surrounded by at least 3 Enemies – Dread Howl
Enemy > 50% Health – Charge
Enemy within Short Range – Growl
Nearest Visible Enemy – Attack
Inventory
Collar: Pure B*itch Braid
War Paint: Swiftrunner Paint
About as much as you can hope for I guess.
Attribute Increases
+1 Strength, +1 Constitution, +1 Willpower
I hope I’ve let on by now that I’m not dependent on the Hound, but his effective use does depend on damage output and (in my honest opinion) frequent use of his activated talents. More staying power doesn’t hurt either.
*Note* Paracelsi has a different preference for treating the Hound as a damage dealer, and therefore putting everything into Strength. The idea is that another character like Alistair can play the tank role, allowing the Hound with its speed to quickly swoop in from the flank. This viewpoint also argues that the Hound’s use of activated talents will be infrequent at best, so it’s best to emphasize damage through its standard attacks.
Loghain Mac Tir

Now only thing I will say is that I did not bother about Loghain much, that is if you decided to pick Loghain over Alistair,then you should take Alistair gear before you Execute or Exile him and give it to Loghain. Well since Loghain is Champion by default he could replace Alistair should you just try to turn him in to Templar with Alistair Tactics Script and Equipment he may be not a bad replacement.