Dreams and Nightmares: Turning the Nightmare into a Looter's Dream
Reasons to Grind
For this segment, I'm going to be comparing D&N to Vana a few times.
In terms of D&N, people sum it up as "shorter, but harder" which I'd say does the mission justice. Enemies don't drop heat, crowns, or materials- only hearts, and at a fairly uncommon rate. The treasure boxes also don't drop rarities, materials, or even usables; only a small amount of crowns and heat. That doesn't matter though, as the real reason you'd grind D&N is for the loot at the end, of course.
While Vana can pay out an average of 15 radiants, D&N pays out roughly 30. The most I've gotten in one instance is 45. The only con to this is that the crowns don't really compare to Vana runs at all, but the heat can surmount to just about the amount needed to level up an item by the time you've gathered all the crystals necessary for it.
Addendum: In my personal opinion, Dreams and Nightmares is much easier done solo than in a party, as other party members will constantly draw aggro and make things even more chaotic and unpredictable among the hordes of enemies at the last arena.
In terms of D&N, people sum it up as "shorter, but harder" which I'd say does the mission justice. Enemies don't drop heat, crowns, or materials- only hearts, and at a fairly uncommon rate. The treasure boxes also don't drop rarities, materials, or even usables; only a small amount of crowns and heat. That doesn't matter though, as the real reason you'd grind D&N is for the loot at the end, of course.
While Vana can pay out an average of 15 radiants, D&N pays out roughly 30. The most I've gotten in one instance is 45. The only con to this is that the crowns don't really compare to Vana runs at all, but the heat can surmount to just about the amount needed to level up an item by the time you've gathered all the crystals necessary for it.
Addendum: In my personal opinion, Dreams and Nightmares is much easier done solo than in a party, as other party members will constantly draw aggro and make things even more chaotic and unpredictable among the hordes of enemies at the last arena.
The Foes You'll Face (Regularly)
Before we get too ahead of ourselves, let's go over the enemies, as the void variants have a few differences from their non- infested counterparts.
 Void Gel | Threat Level ★★★★☆
A swarm- infested variant of a toxigel, specifically. This is by far the most dangerous enemy you can face in Dreams and Nightmares, as their spin attack- like the regular variant- shoots out spikes which can inflict Poison, in random directions, very fast. If you see one about to perform the spin attack, put your shield up or get ready to dash, unless it's far enough away for you to potentially move out of the way of.
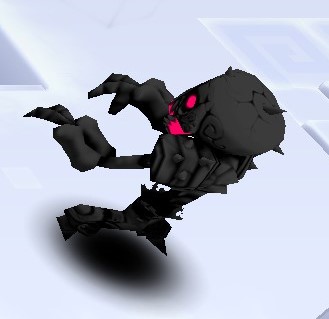 Void Zombie | Threat Level ★☆☆☆☆
A swarm- infested variant of a zombie. For some reason, the void variant removes the breath attack from the zombie, making them one of the easier- if not easiest- enemies to deal with in Dreams and Nightmares.
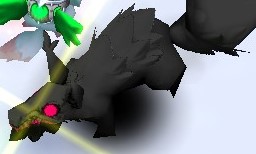 Void Wolver | Threat Level ★★☆☆☆
A swarm- infested variant of a wolver. While the void variant removes its ability to burrow/teleport, they seem to move more erratically, especially when you're shooting projectiles near them. Engage caution and don't get caught in a circle of these beasts mid- fight.
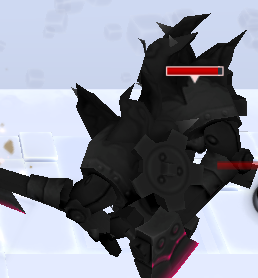 Void Lumber | Threat Level ★★★☆☆
A swarm- infested variant of a lumber. These big bads are bigger and tankier than their non- swarm counterparts, and hit harder too; making use of an axe reminiscent of the Ironwood Sentinel way back at the Crash Site. Use their slow nature to your advantage.
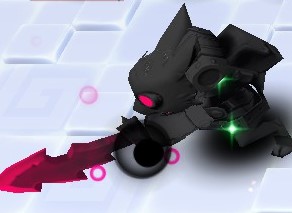 Void Thwacker (/Gremlin) | Threat Level ★★★☆☆
A swarm- infested variant of a gremlin thwacker. These behave very similarly to their T3 variants, being able to dash towards you, perform a stunning spin attack, heal themselves, and run away when low on health. They can also "throw" a hammer at you, but instead it's replaced by a slower moving Swarm Turret projectile. Good news is, they also no longer have a shield protecting themselves from behind. They carry around a purple and black colored Striker- like weapon, though similarly to the lumber, this is only a visual change.
 Void Soul | Threat Level ??? (Varies)
Void souls are everywhere as you play Dreams and Nightmares. They work similarly to all other soul variants, slowly floating towards the player before swelling up and exploding after a certain amount of time. Void souls drop absolutely nothing and spawn infinitely, so it's best if you just ignore them as you travel about the core, or destroy them from a distance if they start becoming an issue. Do NOT attack them with melee, especially when they're in the process of self- destruction; doing so will cause them to explode preemptively.
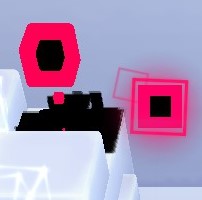 Swarm Turret | Threat Level ??? (Varies)
Treat swarm turrets as an indestructible T1 Gun Puppy that possesses T3 damage. Swarm turrets are more of a hazard than an enemy, thus obviously one should avoid taking damage from them. They fire a slow moving bullet every five seconds.
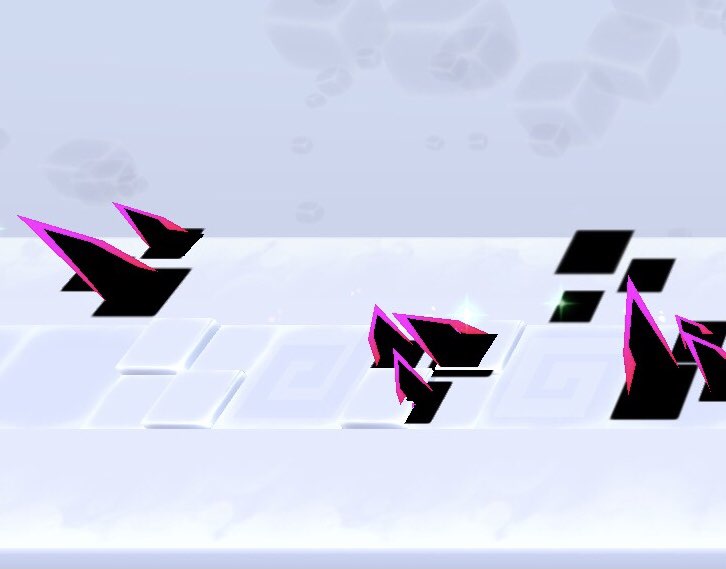 Swarm Spikes | Threat Level ??? (Varies)
Lesser known and only seen in A Step Beyond levels, swarm spikes only appear in or around certain combat rooms. They resemble square black holes that spawn behind the player, before deploying several spikes out of them after a small delay, dealing damage if the player is atop them when this happens.
Some more notes...
Spaghetti code
Some void monsters don't actually disappear immediately. Namely, void wolvers freeze for a bit before dying and void lumbers leave their shadow and collision box behind for a few seconds. I'm led to believe that since their non- swarm counterpart death animations aren't instant, Three Rings must have simply copied and pasted it over to these void variants while just overlaying the "swarm death animation" on top of it without adjusting the duration accordingly.
:nerd:
Void Gel | Threat Level ★★★★☆A swarm- infested variant of a toxigel, specifically. This is by far the most dangerous enemy you can face in Dreams and Nightmares, as their spin attack- like the regular variant- shoots out spikes which can inflict Poison, in random directions, very fast. If you see one about to perform the spin attack, put your shield up or get ready to dash, unless it's far enough away for you to potentially move out of the way of.
Void Zombie | Threat Level ★☆☆☆☆A swarm- infested variant of a zombie. For some reason, the void variant removes the breath attack from the zombie, making them one of the easier- if not easiest- enemies to deal with in Dreams and Nightmares.
Void Wolver | Threat Level ★★☆☆☆A swarm- infested variant of a wolver. While the void variant removes its ability to burrow/teleport, they seem to move more erratically, especially when you're shooting projectiles near them. Engage caution and don't get caught in a circle of these beasts mid- fight.
Void Lumber | Threat Level ★★★☆☆A swarm- infested variant of a lumber. These big bads are bigger and tankier than their non- swarm counterparts, and hit harder too; making use of an axe reminiscent of the Ironwood Sentinel way back at the Crash Site. Use their slow nature to your advantage.
Void Thwacker (/Gremlin) | Threat Level ★★★☆☆A swarm- infested variant of a gremlin thwacker. These behave very similarly to their T3 variants, being able to dash towards you, perform a stunning spin attack, heal themselves, and run away when low on health. They can also "throw" a hammer at you, but instead it's replaced by a slower moving Swarm Turret projectile. Good news is, they also no longer have a shield protecting themselves from behind. They carry around a purple and black colored Striker- like weapon, though similarly to the lumber, this is only a visual change.
Void Soul | Threat Level ??? (Varies)Void souls are everywhere as you play Dreams and Nightmares. They work similarly to all other soul variants, slowly floating towards the player before swelling up and exploding after a certain amount of time. Void souls drop absolutely nothing and spawn infinitely, so it's best if you just ignore them as you travel about the core, or destroy them from a distance if they start becoming an issue. Do NOT attack them with melee, especially when they're in the process of self- destruction; doing so will cause them to explode preemptively.
Swarm Turret | Threat Level ??? (Varies)Treat swarm turrets as an indestructible T1 Gun Puppy that possesses T3 damage. Swarm turrets are more of a hazard than an enemy, thus obviously one should avoid taking damage from them. They fire a slow moving bullet every five seconds.
Swarm Spikes | Threat Level ??? (Varies)Lesser known and only seen in A Step Beyond levels, swarm spikes only appear in or around certain combat rooms. They resemble square black holes that spawn behind the player, before deploying several spikes out of them after a small delay, dealing damage if the player is atop them when this happens.
Some more notes...
Spaghetti code
Some void monsters don't actually disappear immediately. Namely, void wolvers freeze for a bit before dying and void lumbers leave their shadow and collision box behind for a few seconds. I'm led to believe that since their non- swarm counterpart death animations aren't instant, Three Rings must have simply copied and pasted it over to these void variants while just overlaying the "swarm death animation" on top of it without adjusting the duration accordingly.
:nerd:
Arsenal of Choice
Considering the mixture of monster families to deal with, I have a loadout I use that works fairly well.
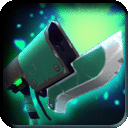 Arcana
Obstacle destruction, ranged option, picking off weak targets
An excellent choice overall. Long range and fast bullets, perfect for picking off enemies from afar and making your way through the depths. The only ineffective damage you'll be dealing towards is void thwackers and void wolvers.
 Winter Grave
Preemptive tile activation, crowd control, wave 5 of arena
A more situational weapon, the Winter Grave is still nice to bring along for more troubling fight rooms, and wave 5 of the main arena due to the large amount of void gels.
 Dark Briar Barrage
Crowd control, waves 2, 4, and 6 of arena
A great bomb for taking out zombies and wolvers en masse.
 Dark Retribution
Preemptive tile activation, crowd control, waves 3 and 6 of arena
A DBB, but for gremlins instead of wolvers. It's ill- advised to try and use this against large groups of void gels (especially in wave 5 of the arena), however. Something to note is that it can sometimes trigger ghost blocks or hit switches behind walls. Only sometimes, however.
 Swiftstrike Buckler
Increased attack speed, minuscule defense
You wouldn’t normally be engaging in fights during D&N unless you were forced to, and in the final arena, you’re going to be throwing out attacks and constantly moving anyway.


Chaos Set
Pure offense
Some might be deterred seeing Chaos being used in this instance due to stun and poison lasting far longer, however I personally cannot live without the damage increase and charge time reduction. Of course, if you have the UVs, then Black Kat is the obvious choice.
 Seraphynx
More efficient health regeneration, invincibility
Especially useful in the main arena; bumping up the rate of hearts dropped is a must.
Mind you…
This is just the loadout I use for Dreams and Nightmares, and you don’t need to as well, unless you’re looking for one to use. In the end, try and toy around with different weapons, experiment, see what you’re most comfortable with!
ArcanaObstacle destruction, ranged option, picking off weak targets
An excellent choice overall. Long range and fast bullets, perfect for picking off enemies from afar and making your way through the depths. The only ineffective damage you'll be dealing towards is void thwackers and void wolvers.
Winter GravePreemptive tile activation, crowd control, wave 5 of arena
A more situational weapon, the Winter Grave is still nice to bring along for more troubling fight rooms, and wave 5 of the main arena due to the large amount of void gels.
Dark Briar BarrageCrowd control, waves 2, 4, and 6 of arena
A great bomb for taking out zombies and wolvers en masse.
Dark RetributionPreemptive tile activation, crowd control, waves 3 and 6 of arena
A DBB, but for gremlins instead of wolvers. It's ill- advised to try and use this against large groups of void gels (especially in wave 5 of the arena), however. Something to note is that it can sometimes trigger ghost blocks or hit switches behind walls. Only sometimes, however.
Swiftstrike BucklerIncreased attack speed, minuscule defense
You wouldn’t normally be engaging in fights during D&N unless you were forced to, and in the final arena, you’re going to be throwing out attacks and constantly moving anyway.
Chaos Set
Pure offense
Some might be deterred seeing Chaos being used in this instance due to stun and poison lasting far longer, however I personally cannot live without the damage increase and charge time reduction. Of course, if you have the UVs, then Black Kat is the obvious choice.
SeraphynxMore efficient health regeneration, invincibility
Especially useful in the main arena; bumping up the rate of hearts dropped is a must.
Mind you…
This is just the loadout I use for Dreams and Nightmares, and you don’t need to as well, unless you’re looking for one to use. In the end, try and toy around with different weapons, experiment, see what you’re most comfortable with!
A Step Beyond A Step Beyond A Step Beyond...
Dreams and Nightmares takes on a different approach in terms of difficulty. Since enemies only drop hearts, and boxes only drop a minute amount of heat and crowns, you cannot get a vitapod in this mission at all once you're in. Sure, you could buy a 12 HP vitapod from Basil for 3kcr, but if you're going to be grinding D&N most of the time, this will slowly drain you of your crowns. A better choice would be to rely on the Healthy Boost sprite perk. Swift Steps isn't that useful until you're very keen on how absolutely everything in this mission works.
Two Steps Beyond
There are two "A Step Beyond" segments.
After the cutscene at the core terminal, you enter the core, spawning with Vaelyn as a combat NPC in a room with an Arsenal Station and a party button. While you are in these rooms, no Void Souls will spawn. Consider these as relative safe zones before you start your trek out through the core.
As you explore, you'll come across sphere- shaped tile objects along the path, with varying colors. These spheres correspond to their "block" counterparts outside of the core, i.e. white spheres act just like regular blocks, being destructible without any further effects, orange spheres acting like explosive blocks, blue spheres acting like ghost blocks, and black spheres (named swarm spheres) acting like monster cages, except these will only spawn swarm- infested monsters when broken.
A Step Beyond segments are randomly generated. They consist of long, drawn out paths through the core which lead off into rooms which contain random assortments of blocks, party button/combat rooms, key rooms, or box rooms. Here, the map is your best friend. Pressing "B" (by default) will bring up the map- if somehow you didn't know until now- and it's important to look for specific room shapes. Thinner rooms leading to a (sometimes semicircular curled) dead end have nothing but boxes there; avoid them. Rooms that are a dead end in the shape of a large box or egg contain keys, which should be picked up as there will undoubtedly be a door requiring it soon. (Sometimes the generation is really cruel, and generates the door far away and/or through combat segments. Persistence is key.)
 An example of an egg- shaped key room. Note it sometimes only faintly resembles an egg.
 An example of a box- shaped key room.
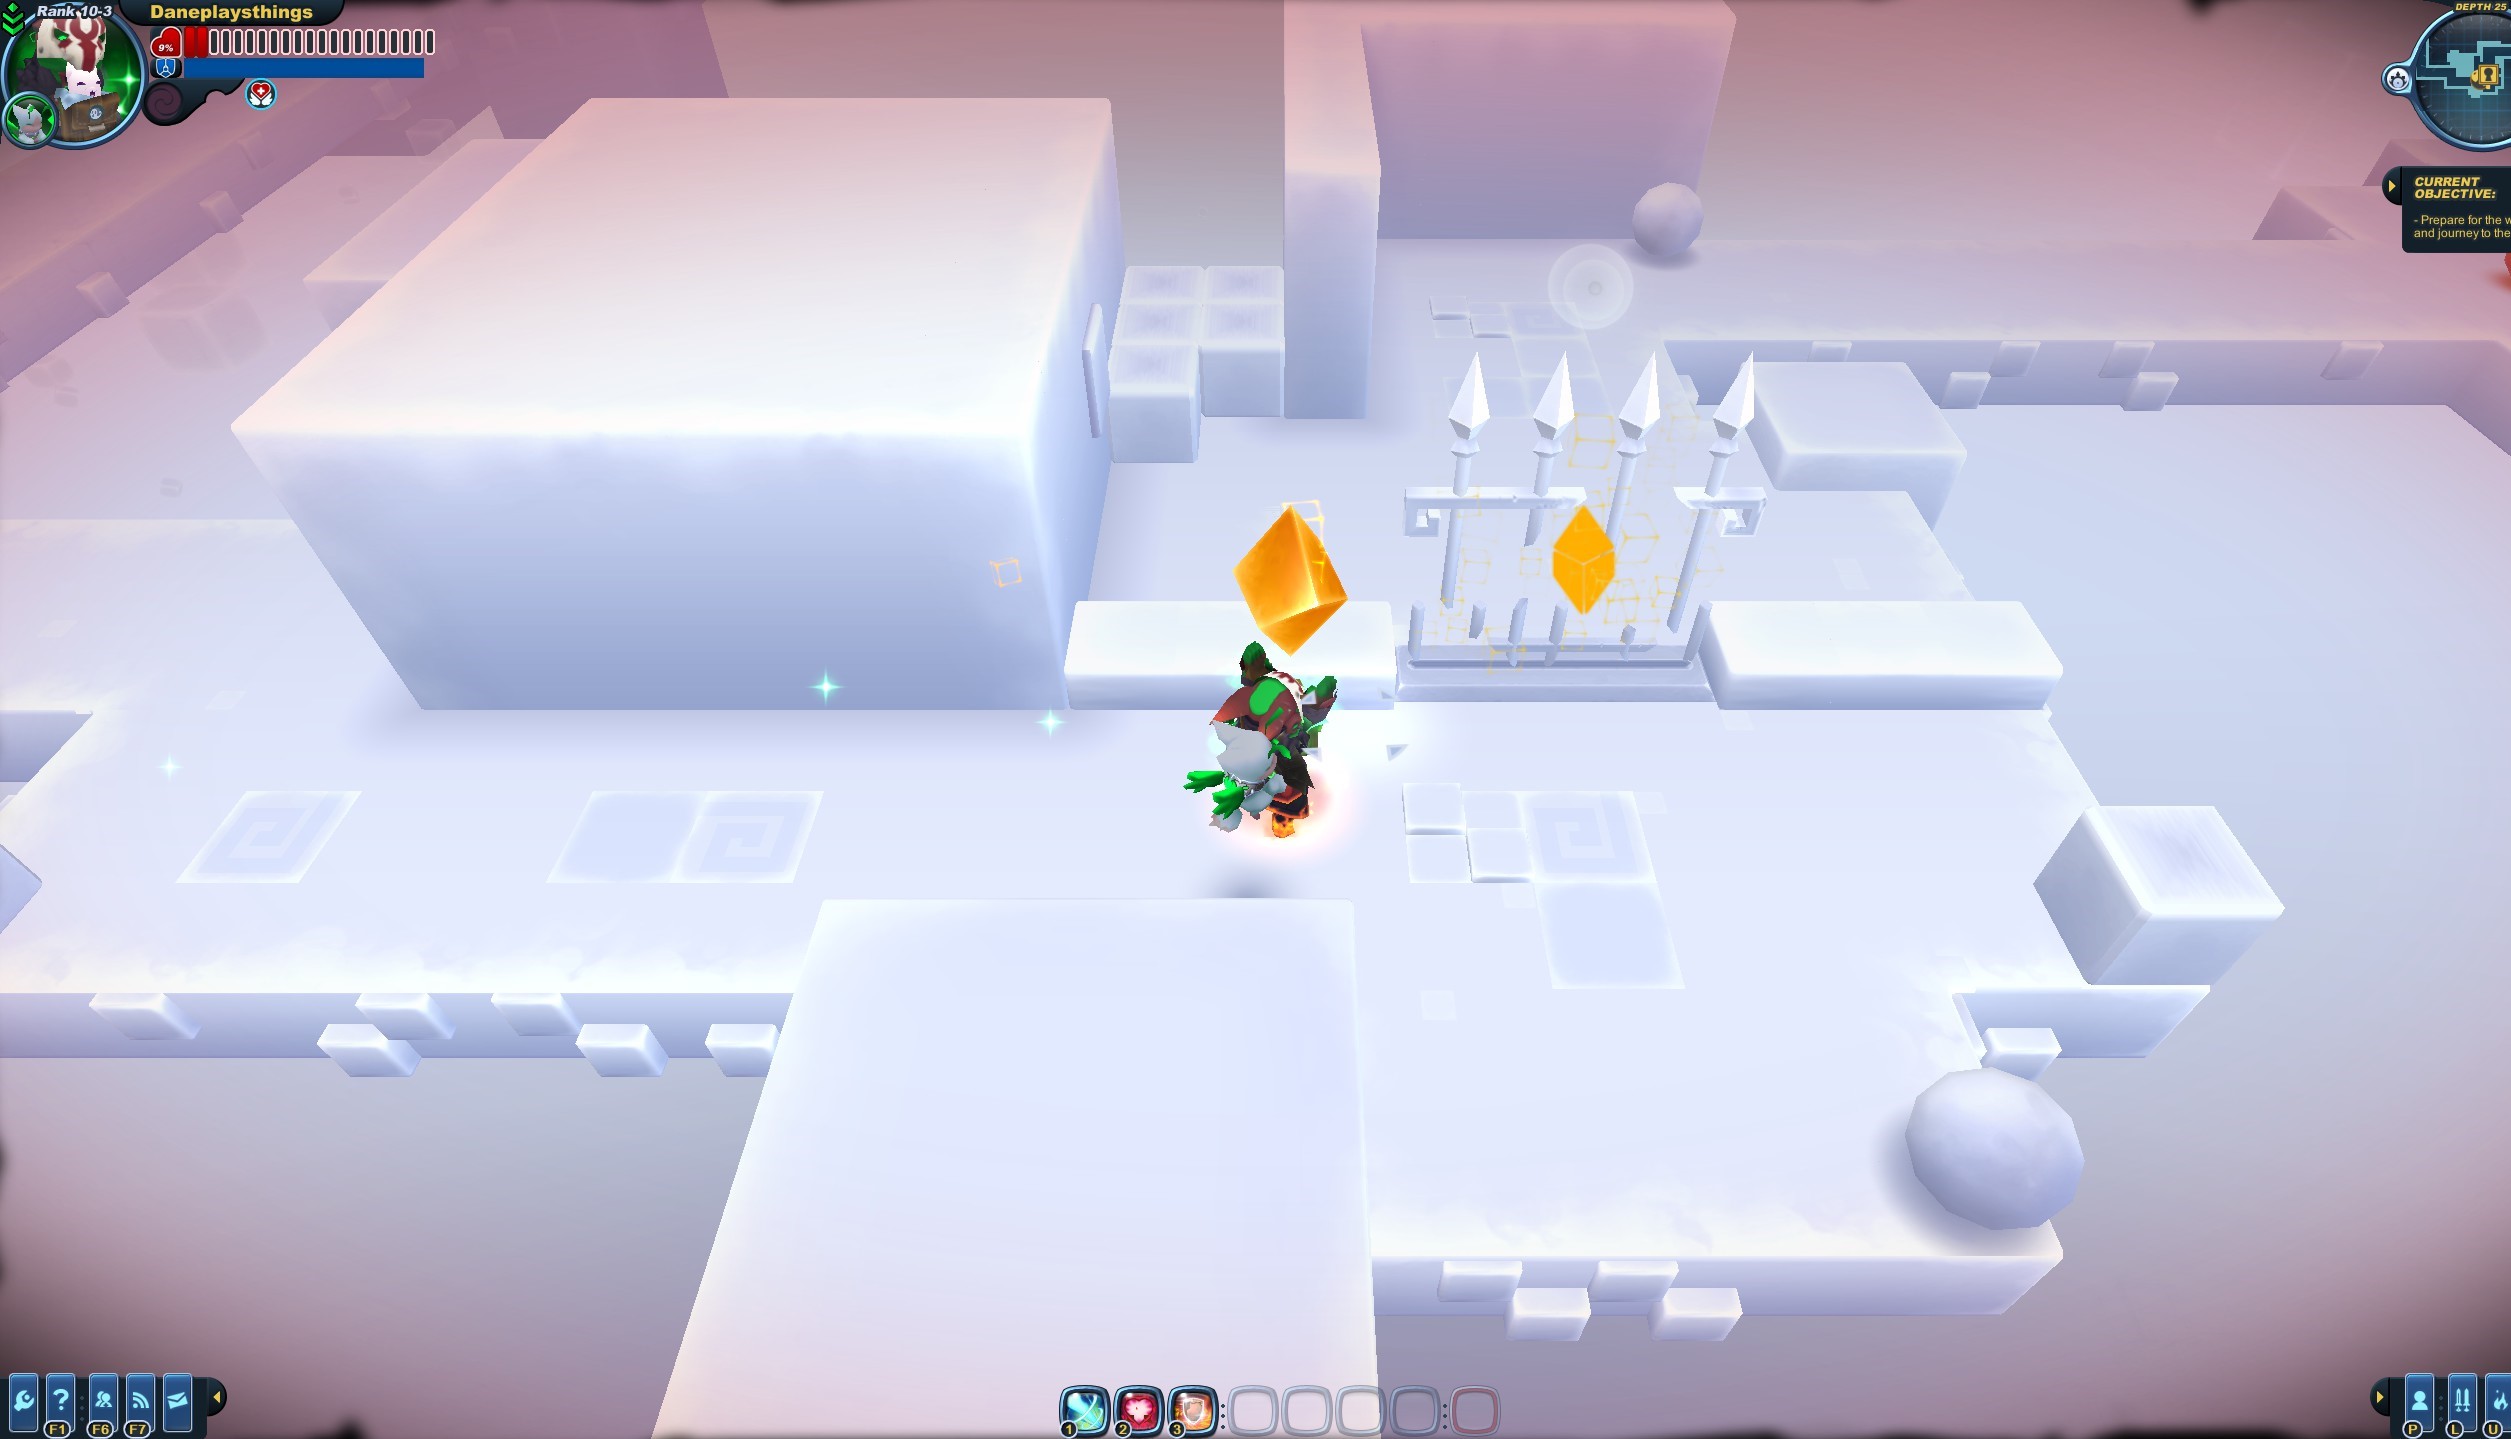 Segments with a locked door usually have a small "u" shape.
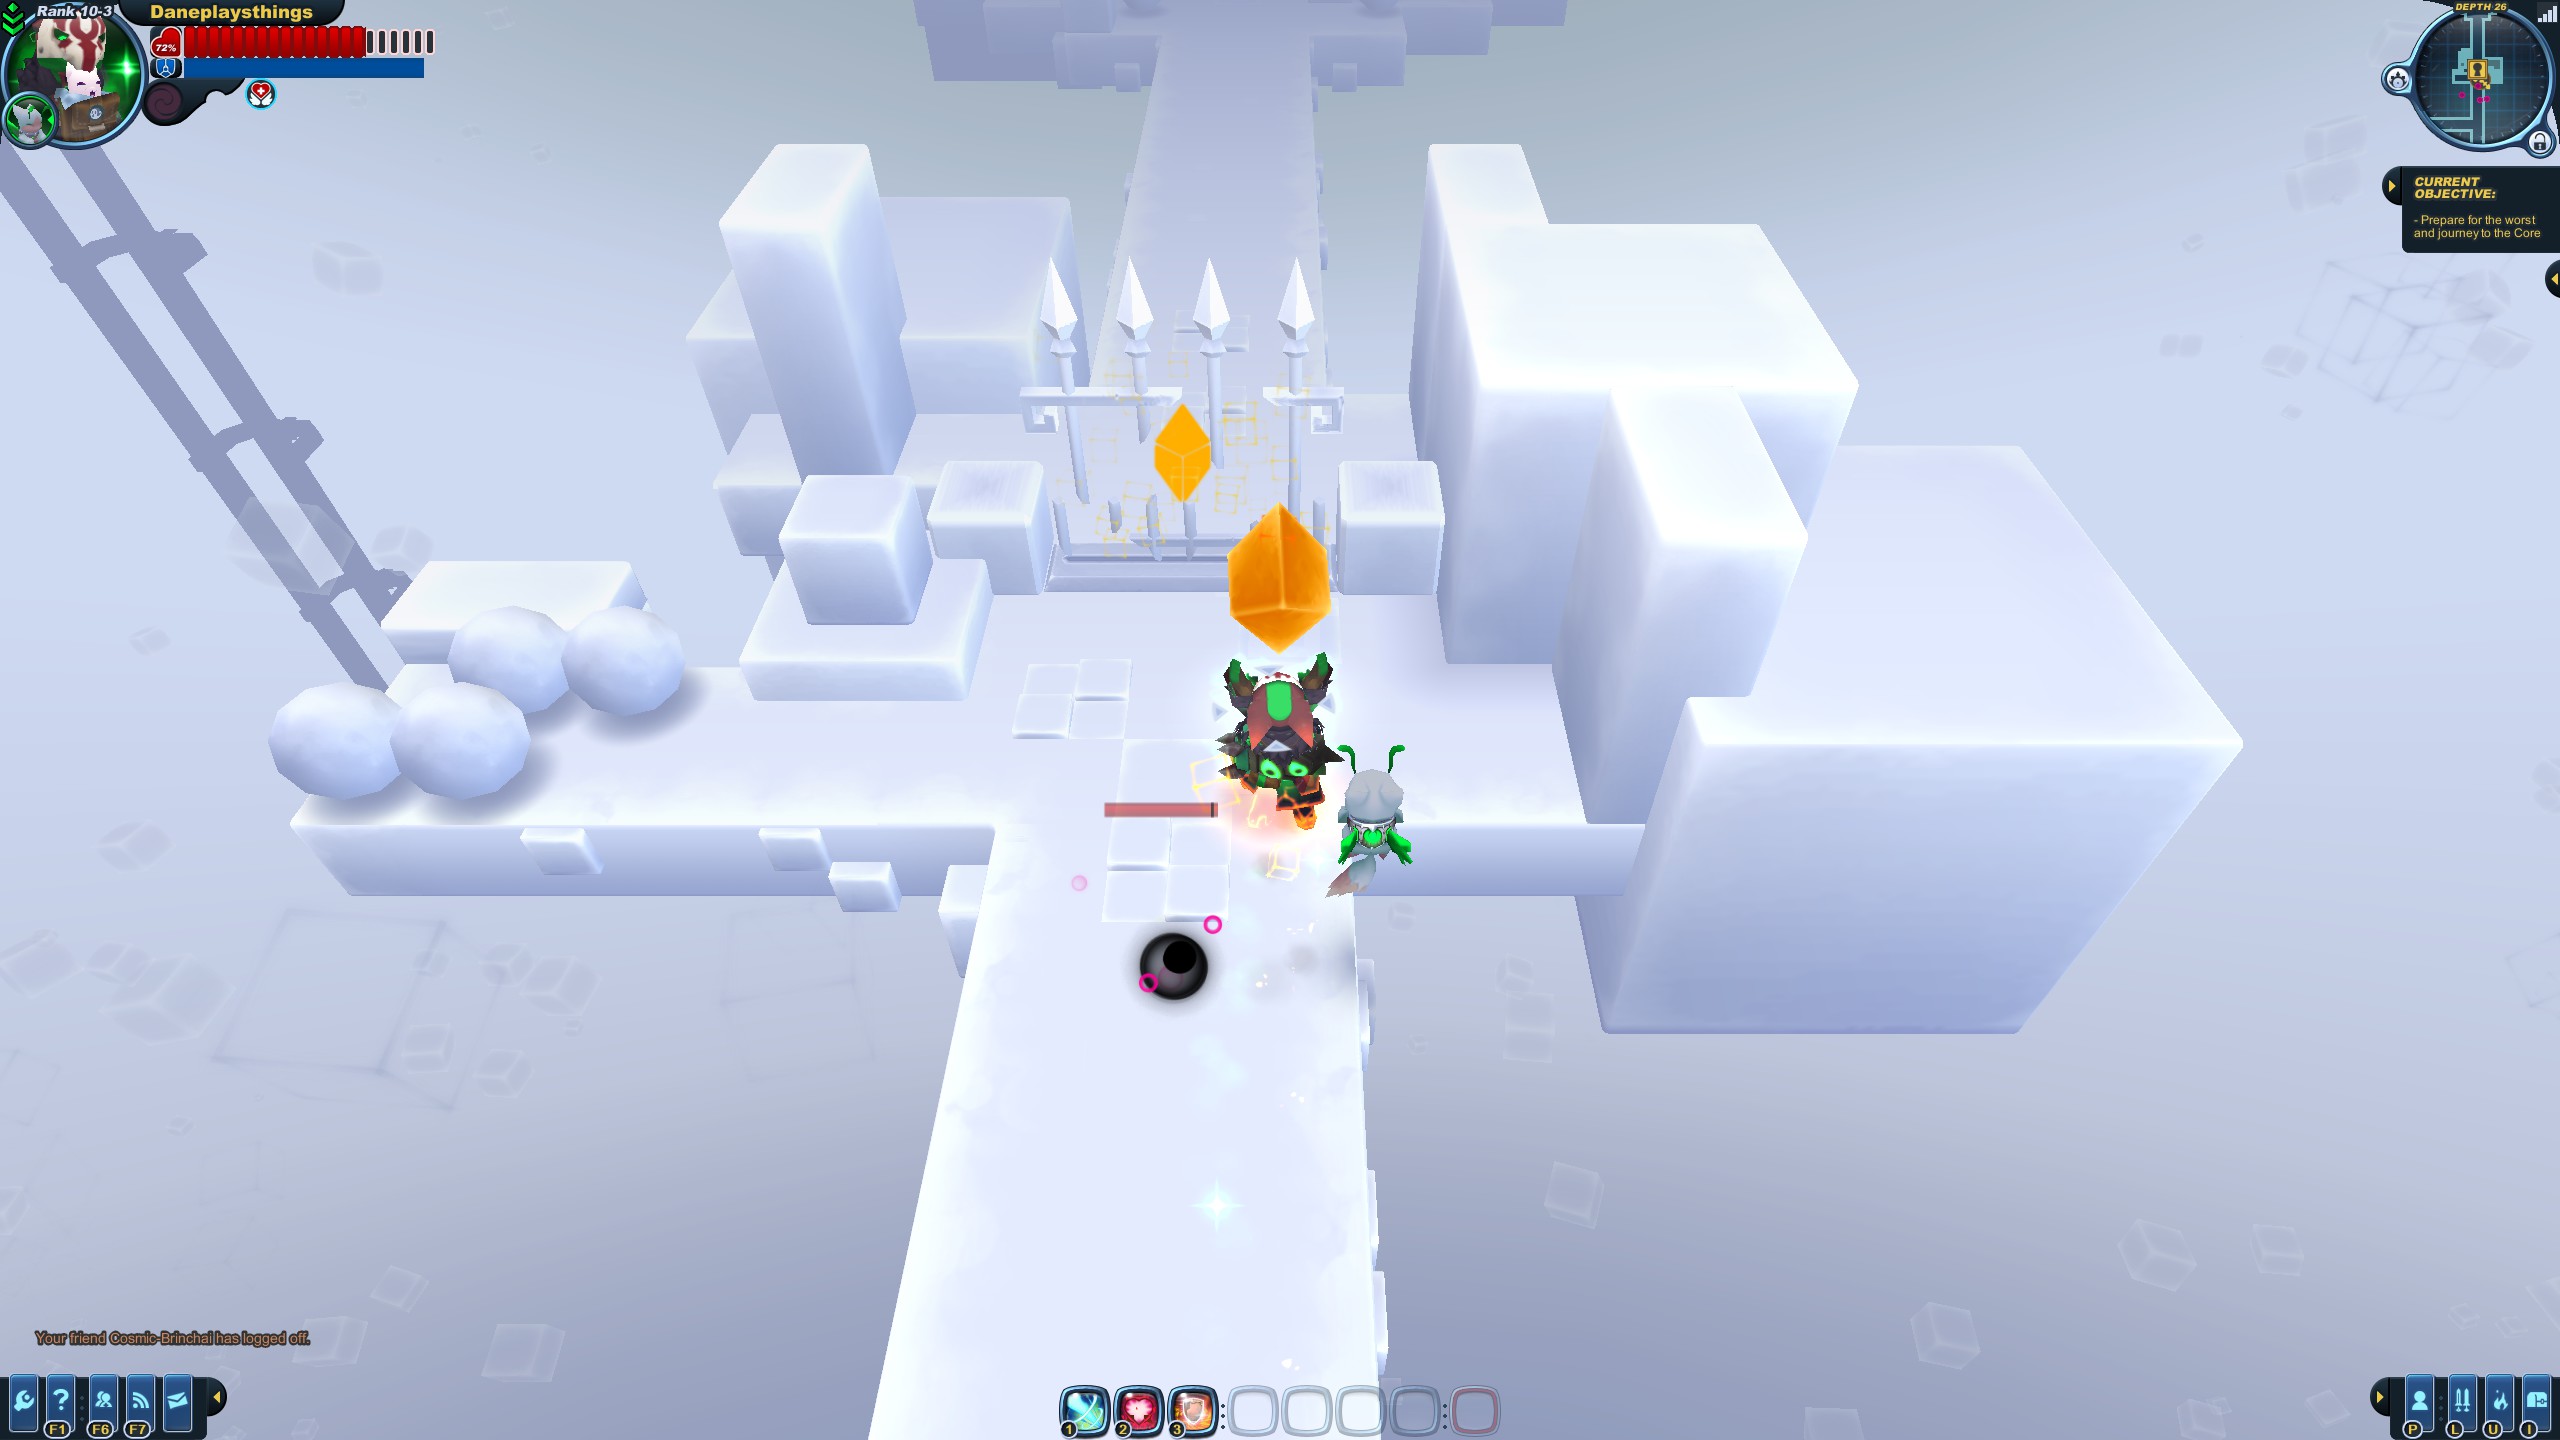 Though sometimes, they may appear like this.
 A room containing treasure boxes. Avoid.
 Shown: The elevator on the left, and a dead end segment containing treasure boxes on the right.
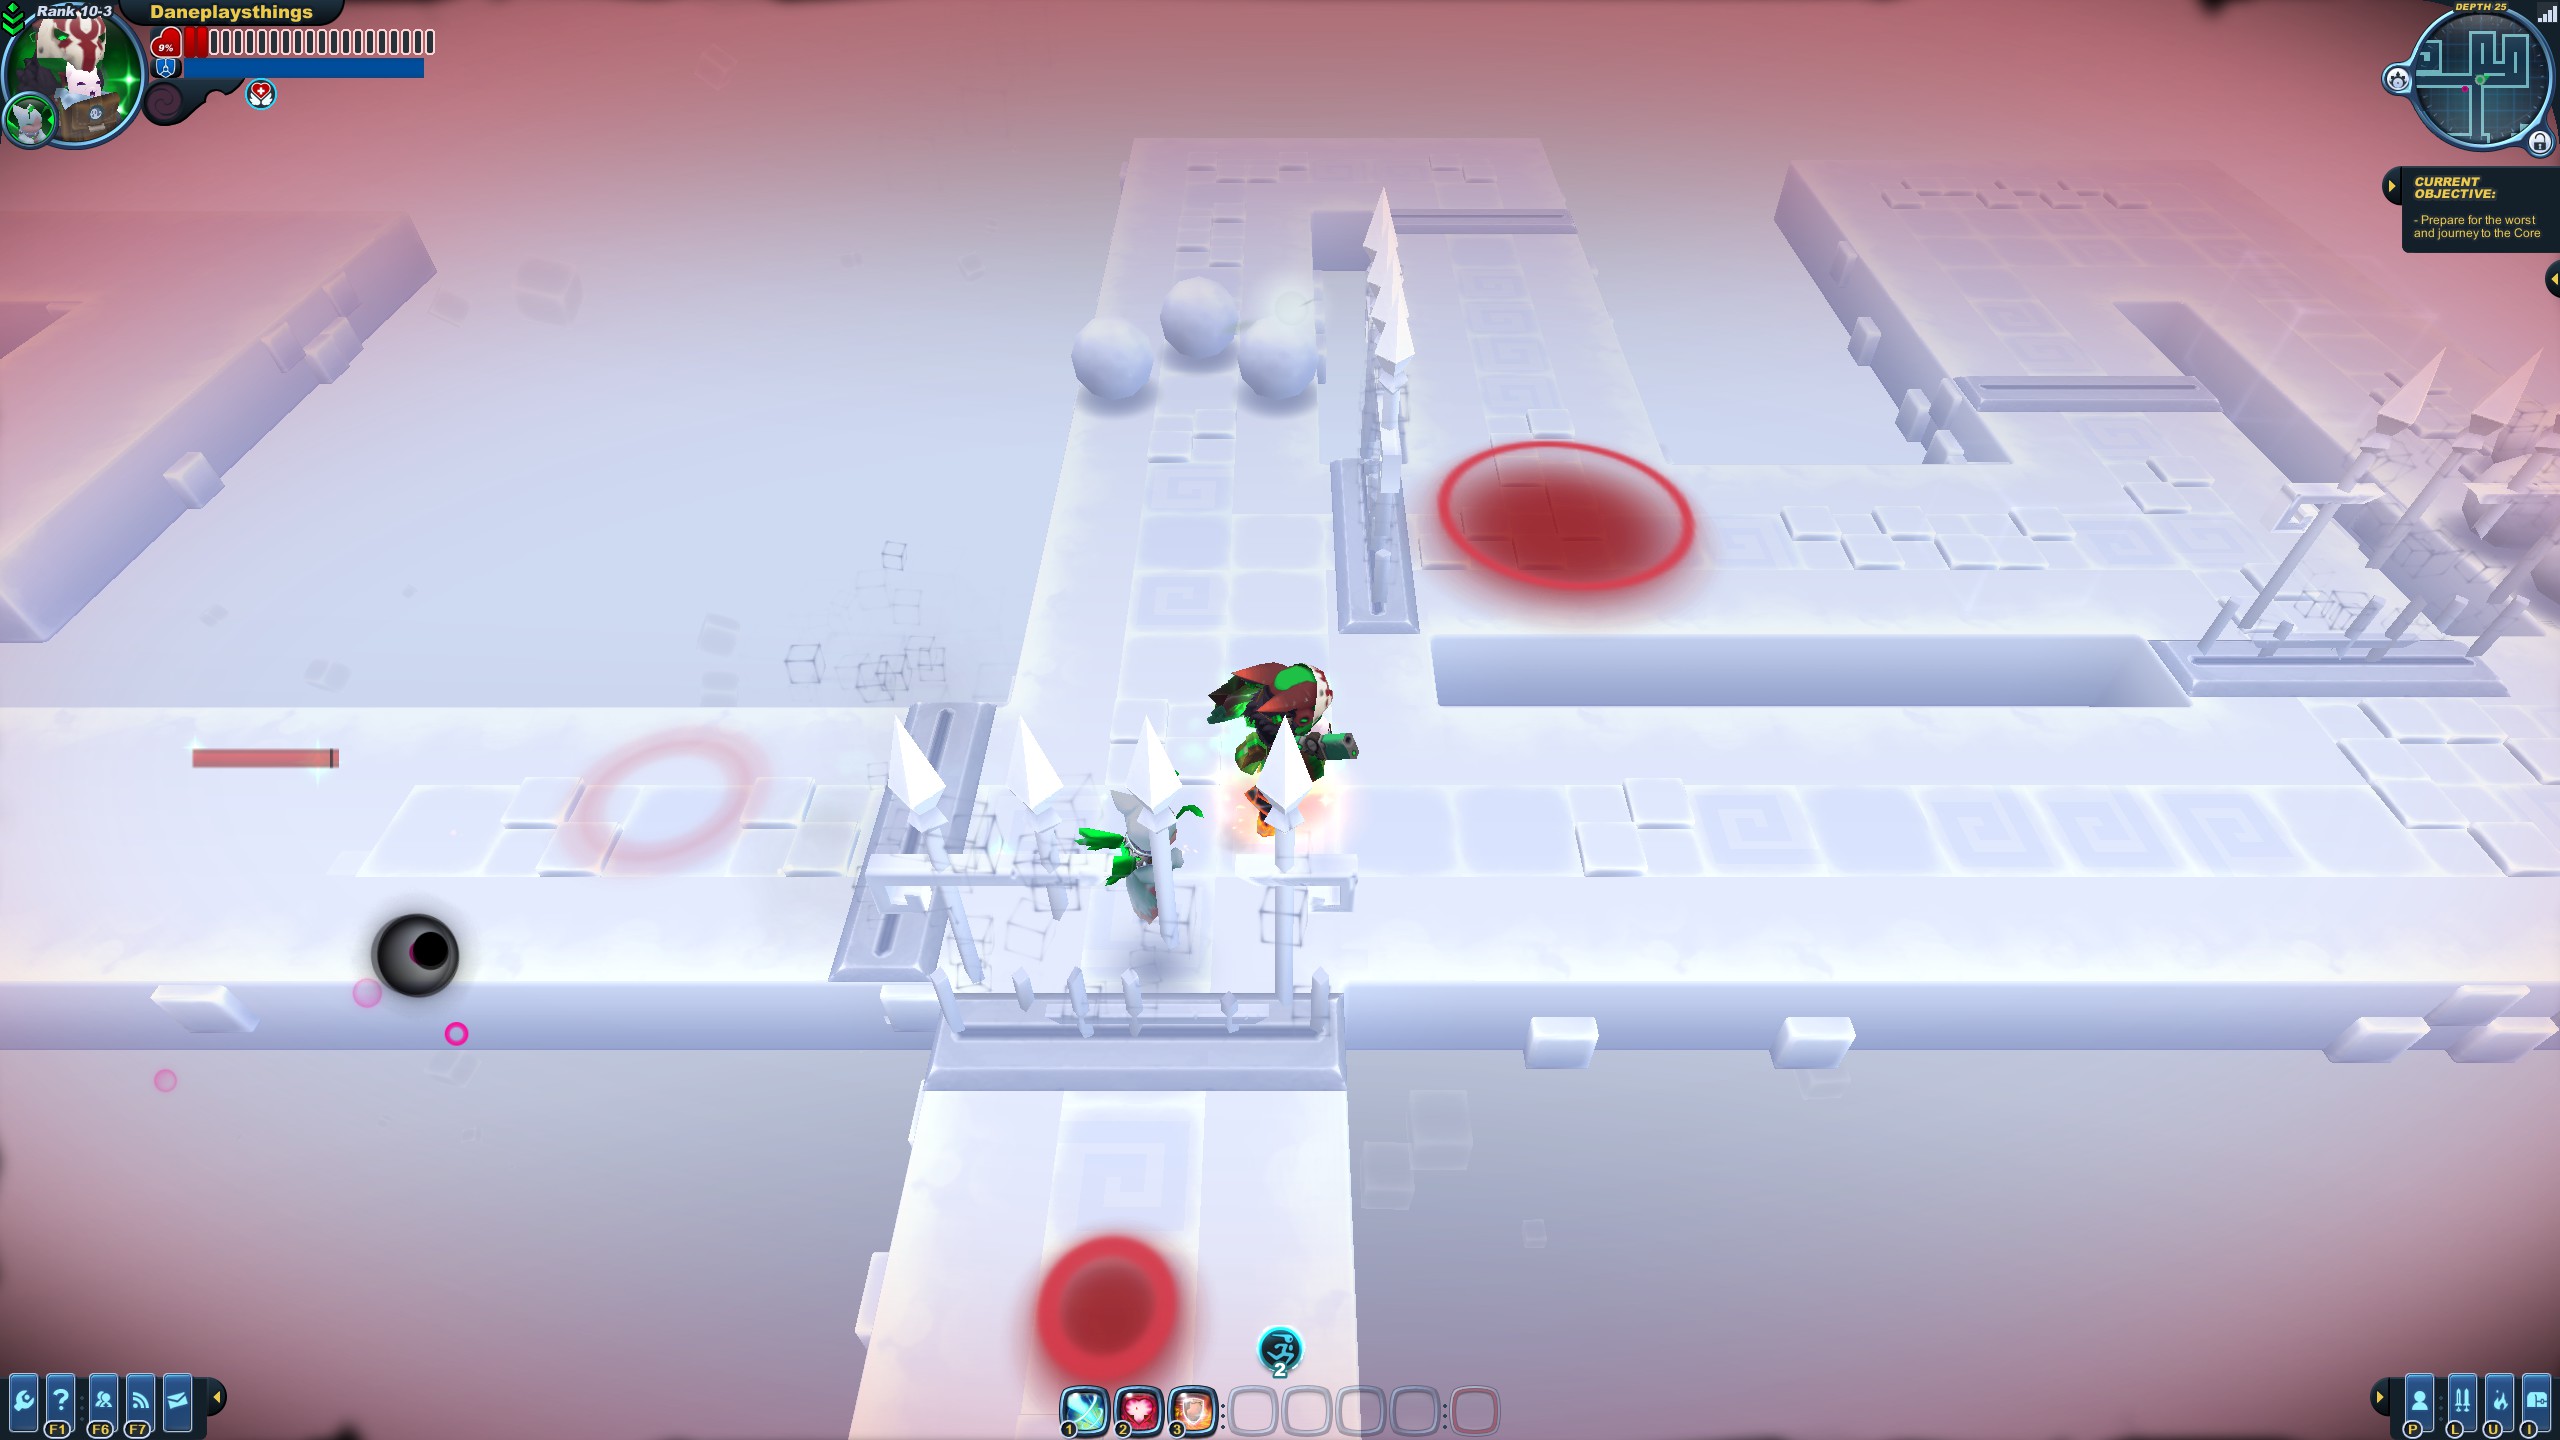 A combat room meant to hinder your progress. Two void lumbers will spawn upon activating the party button. This room additionally makes void souls more of a threat, due to having less room to work with and maneuver around them.
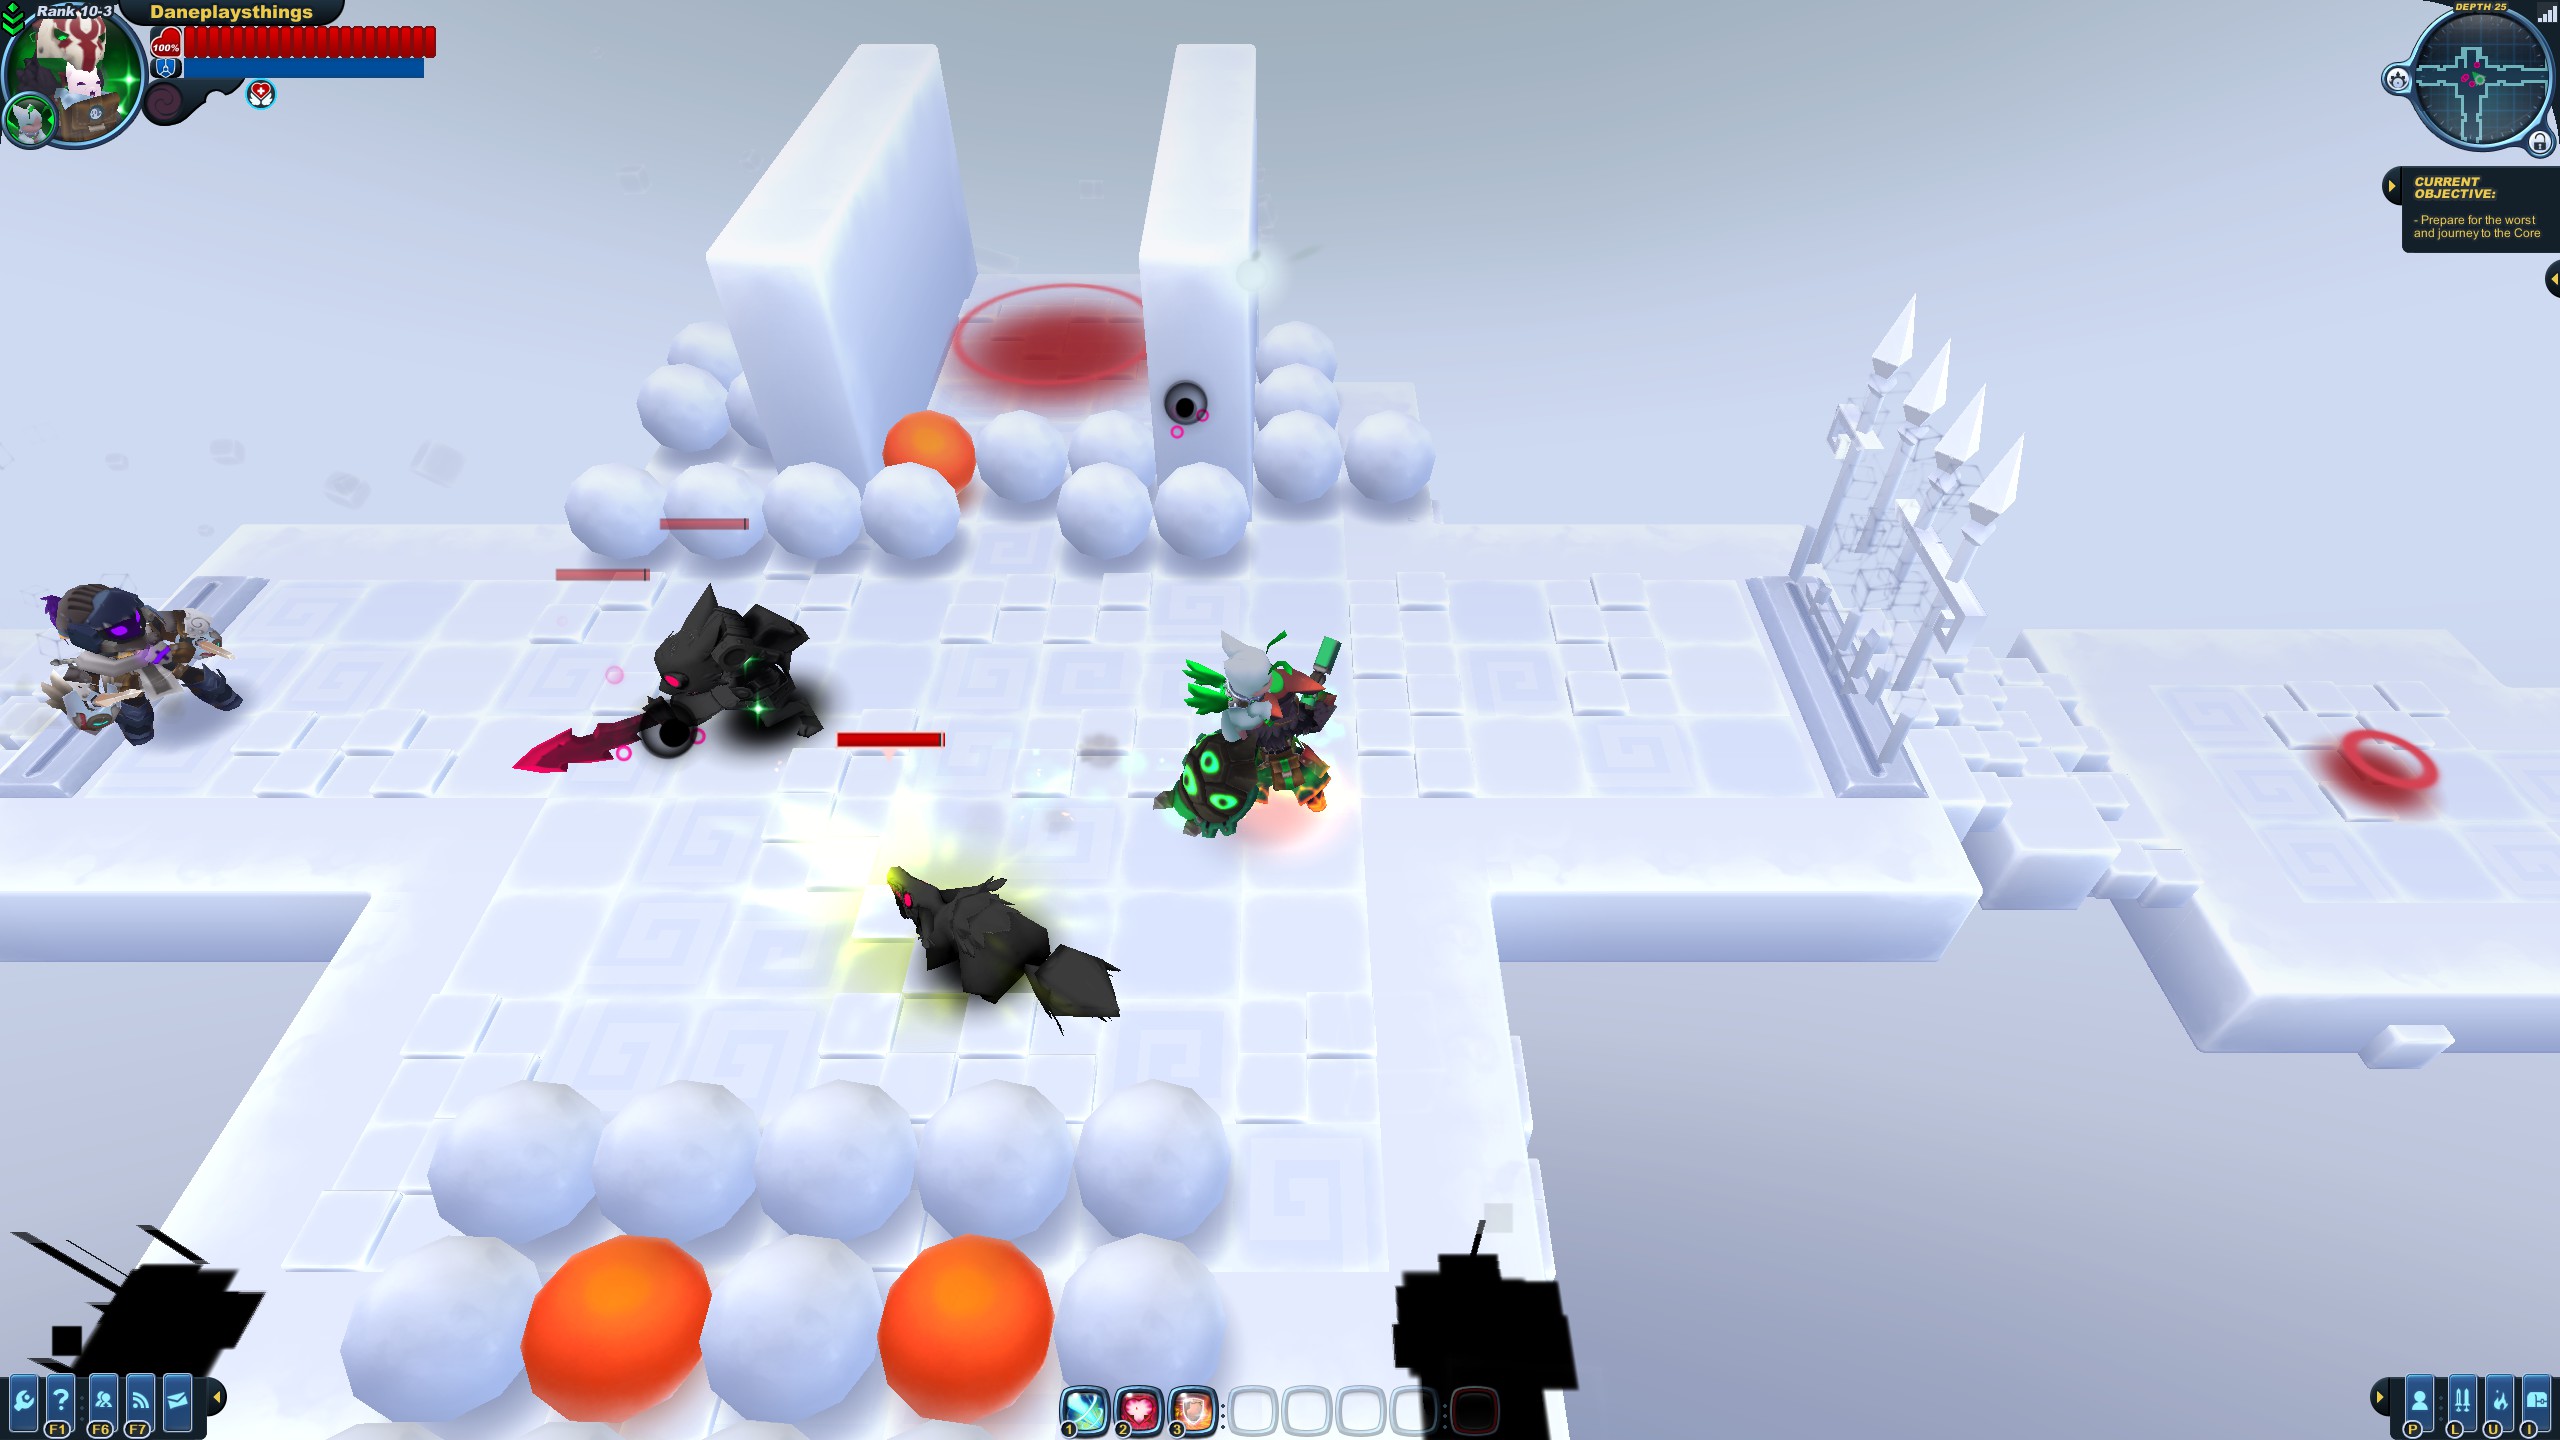 Another combat room. Pressing the party button will pin you against multiple waves of void monsters, and won't let you leave until they're all disposed of. Be prepared.
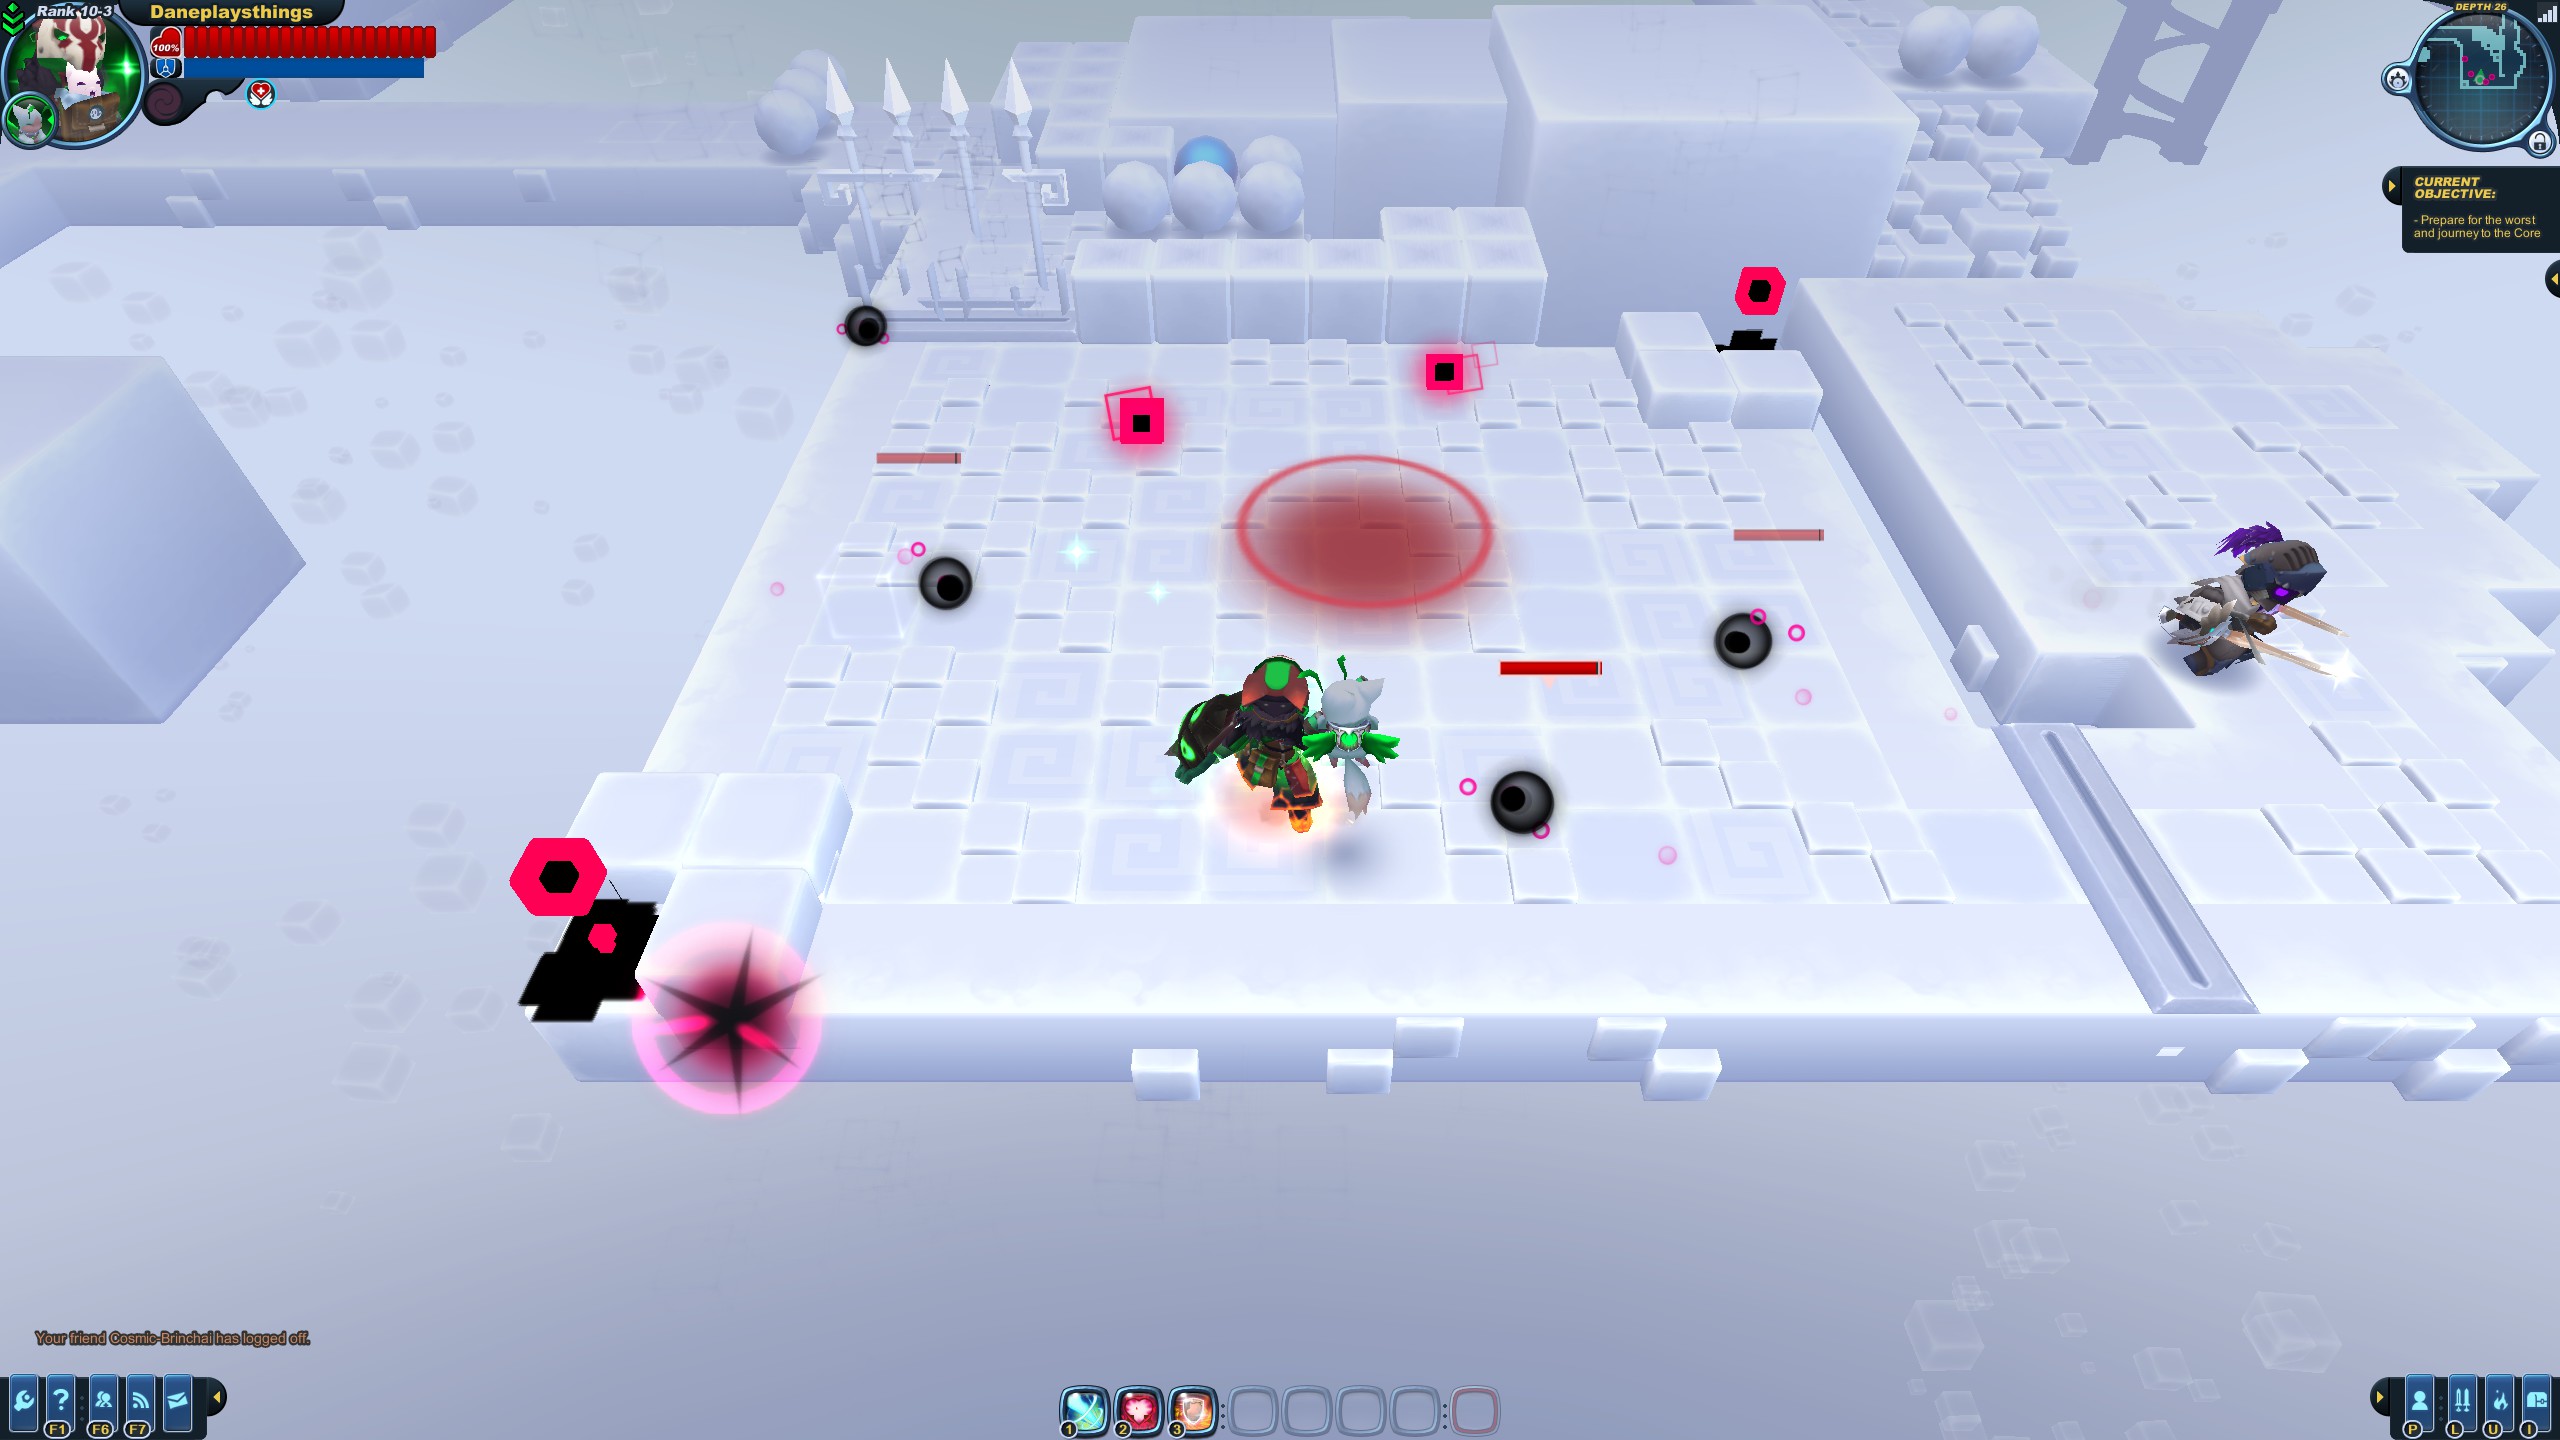 Yet another combat room. Similar to the previous one, but the price of having more room is the pair of Swarm Turrets on either side of the arena. Be on your toes!
You get the idea. Be wary of any rooms with lots of walls and/or ones with party buttons in a larger-than-normal room.
Lonely Souls
Not interested, thank you
As void souls spawn infinitely all around you as you explore the core, eventually one is sure to spawn in front of you, causing you to drag the soul along with your knight's collision box, before it eventually explodes on you. If you see a soul being dragged by you, simply move out of the way and continue walking as the soul detonates behind you. It's a good idea to swap your attention back and forth between the map and your knight so you aren't caught off guard if- and when- this happens.
The Importance of the Magnus
Gimmick good!
If you didn't know, on top of the wacky knockback mechanics, Magnus charge shots have a larger hitbox than normal. You can use this interesting property to activate ghost blocks early and hit switches from the side in order to access places earlier than intended. This is especially important in Dreams and Nightmares, in which combat should be avoided if whenever possible, which leads into...
DO NOT DIE... Twice.
Simple, right? This is more of a reminder that your main goal is to get to Descent into Darkness. As said before, you should try to avoid combat whenever possible and preserve your health as much as you can. If you have to spark in an A Step Beyond level, then running D&N consecutively might not be for you, just yet.
Two Steps Beyond
There are two "A Step Beyond" segments.
After the cutscene at the core terminal, you enter the core, spawning with Vaelyn as a combat NPC in a room with an Arsenal Station and a party button. While you are in these rooms, no Void Souls will spawn. Consider these as relative safe zones before you start your trek out through the core.
As you explore, you'll come across sphere- shaped tile objects along the path, with varying colors. These spheres correspond to their "block" counterparts outside of the core, i.e. white spheres act just like regular blocks, being destructible without any further effects, orange spheres acting like explosive blocks, blue spheres acting like ghost blocks, and black spheres (named swarm spheres) acting like monster cages, except these will only spawn swarm- infested monsters when broken.
A Step Beyond segments are randomly generated. They consist of long, drawn out paths through the core which lead off into rooms which contain random assortments of blocks, party button/combat rooms, key rooms, or box rooms. Here, the map is your best friend. Pressing "B" (by default) will bring up the map- if somehow you didn't know until now- and it's important to look for specific room shapes. Thinner rooms leading to a (sometimes semicircular curled) dead end have nothing but boxes there; avoid them. Rooms that are a dead end in the shape of a large box or egg contain keys, which should be picked up as there will undoubtedly be a door requiring it soon. (Sometimes the generation is really cruel, and generates the door far away and/or through combat segments. Persistence is key.)
An example of an egg- shaped key room. Note it sometimes only faintly resembles an egg.An example of a box- shaped key room.Segments with a locked door usually have a small "u" shape.Though sometimes, they may appear like this.A room containing treasure boxes. Avoid.Shown: The elevator on the left, and a dead end segment containing treasure boxes on the right.A combat room meant to hinder your progress. Two void lumbers will spawn upon activating the party button. This room additionally makes void souls more of a threat, due to having less room to work with and maneuver around them.Another combat room. Pressing the party button will pin you against multiple waves of void monsters, and won't let you leave until they're all disposed of. Be prepared.Yet another combat room. Similar to the previous one, but the price of having more room is the pair of Swarm Turrets on either side of the arena. Be on your toes!You get the idea. Be wary of any rooms with lots of walls and/or ones with party buttons in a larger-than-normal room.
Lonely Souls
Not interested, thank you
As void souls spawn infinitely all around you as you explore the core, eventually one is sure to spawn in front of you, causing you to drag the soul along with your knight's collision box, before it eventually explodes on you. If you see a soul being dragged by you, simply move out of the way and continue walking as the soul detonates behind you. It's a good idea to swap your attention back and forth between the map and your knight so you aren't caught off guard if- and when- this happens.
The Importance of the Magnus
Gimmick good!
If you didn't know, on top of the wacky knockback mechanics, Magnus charge shots have a larger hitbox than normal. You can use this interesting property to activate ghost blocks early and hit switches from the side in order to access places earlier than intended. This is especially important in Dreams and Nightmares, in which combat should be avoided if whenever possible, which leads into...
DO NOT DIE... Twice.
Simple, right? This is more of a reminder that your main goal is to get to Descent into Darkness. As said before, you should try to avoid combat whenever possible and preserve your health as much as you can. If you have to spark in an A Step Beyond level, then running D&N consecutively might not be for you, just yet.
Confronting the Nightmare
After making it through the two A Step Beyond levels, it's time for the main attraction of Dreams and Nightmares, Descent into Darkness.
Unlike the previous levels, Descent into Darkness is never randomly generated. The only randomness in this level are the enemies that are chosen to spawn. This does not include the arena, which is almost always the same.
Before we get into anything...
Take as LITTLE damage as possible
No pain, all gain
Once you arrive at Descent into Darkness, your main objective should be getting to the arena without taking any damage, if possible. If an emergency revive is used before you get to the arena, you will have to clutch the rest of the mission pretty hard.
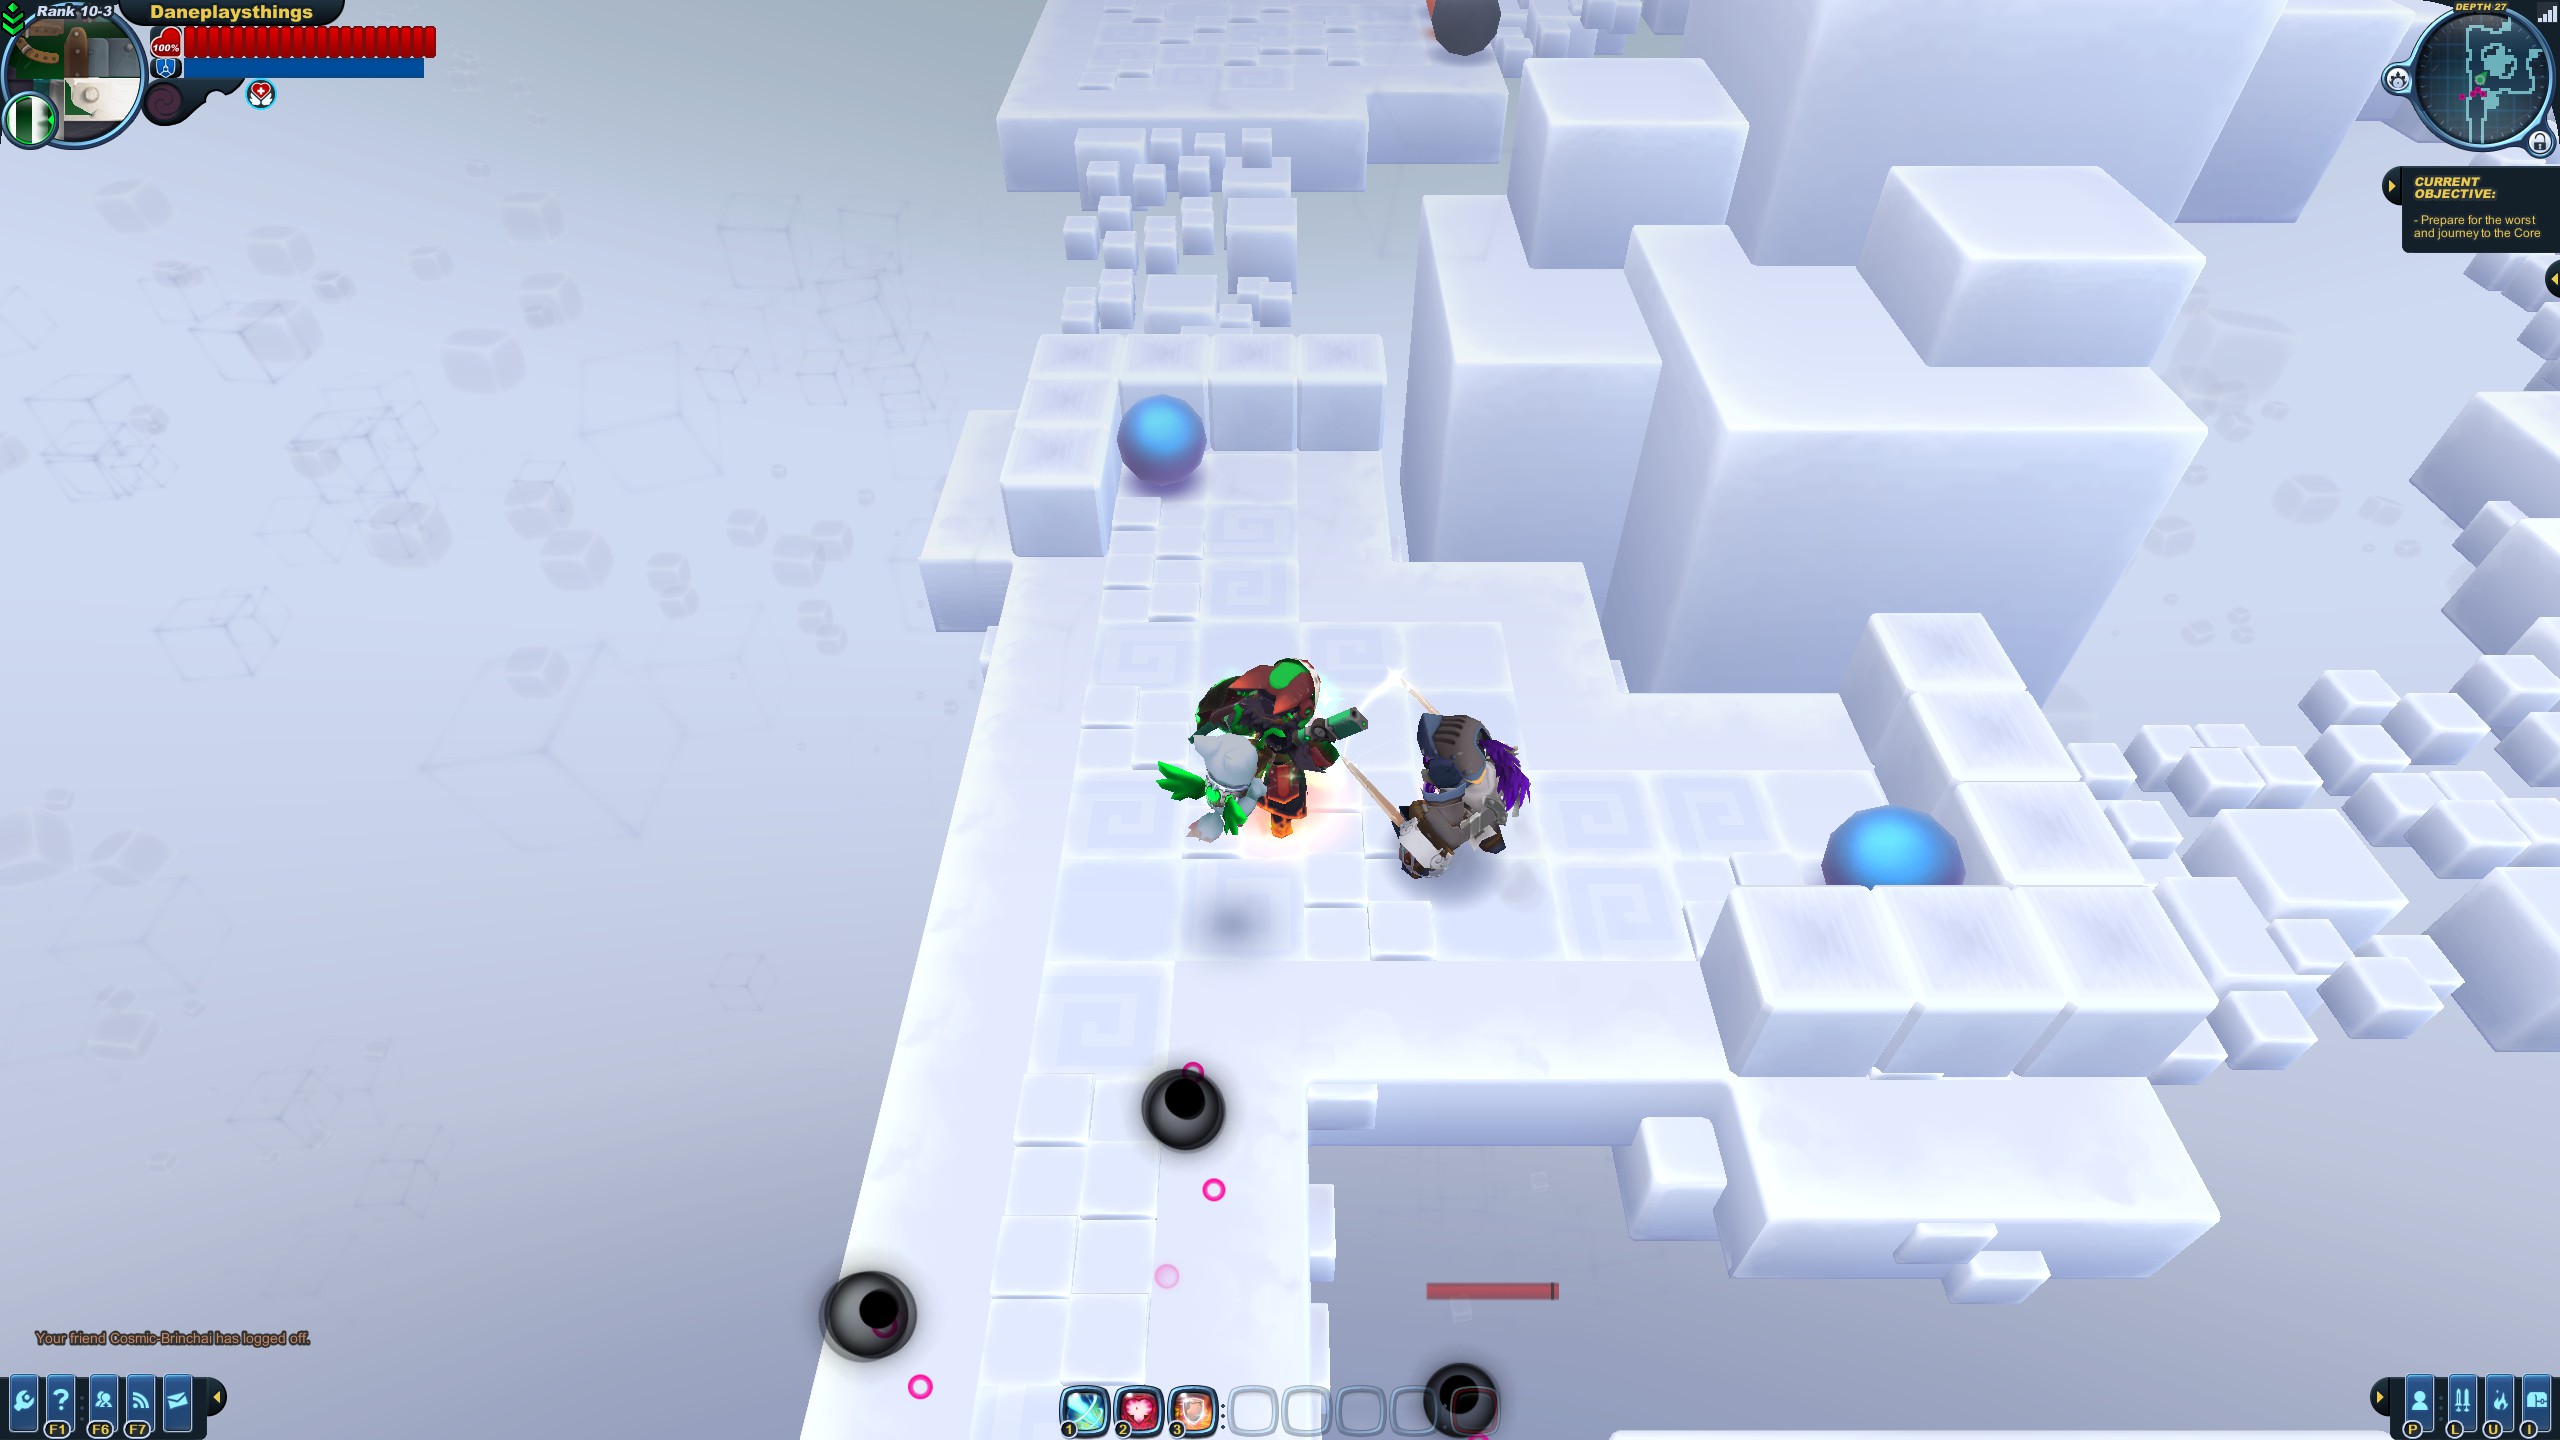 First, you'll come to a junction in the path. Both converge back into the main path at the apex, where a party button resides. As the paths are blocked off by swarm spheres with an explosive sphere in the center, what I like to do is first shoot the explosive sphere, then immediately shield bash, resulting in me getting past the two spawned void monsters with some extra leeway, due to them being stunned. One could also just break a single swarm sphere and shield bump the monster out of the way, with some degree of risk. The safer option would be to shoot a swarm sphere, then either let the monster come to you then walk past it, or kill it, then continue.
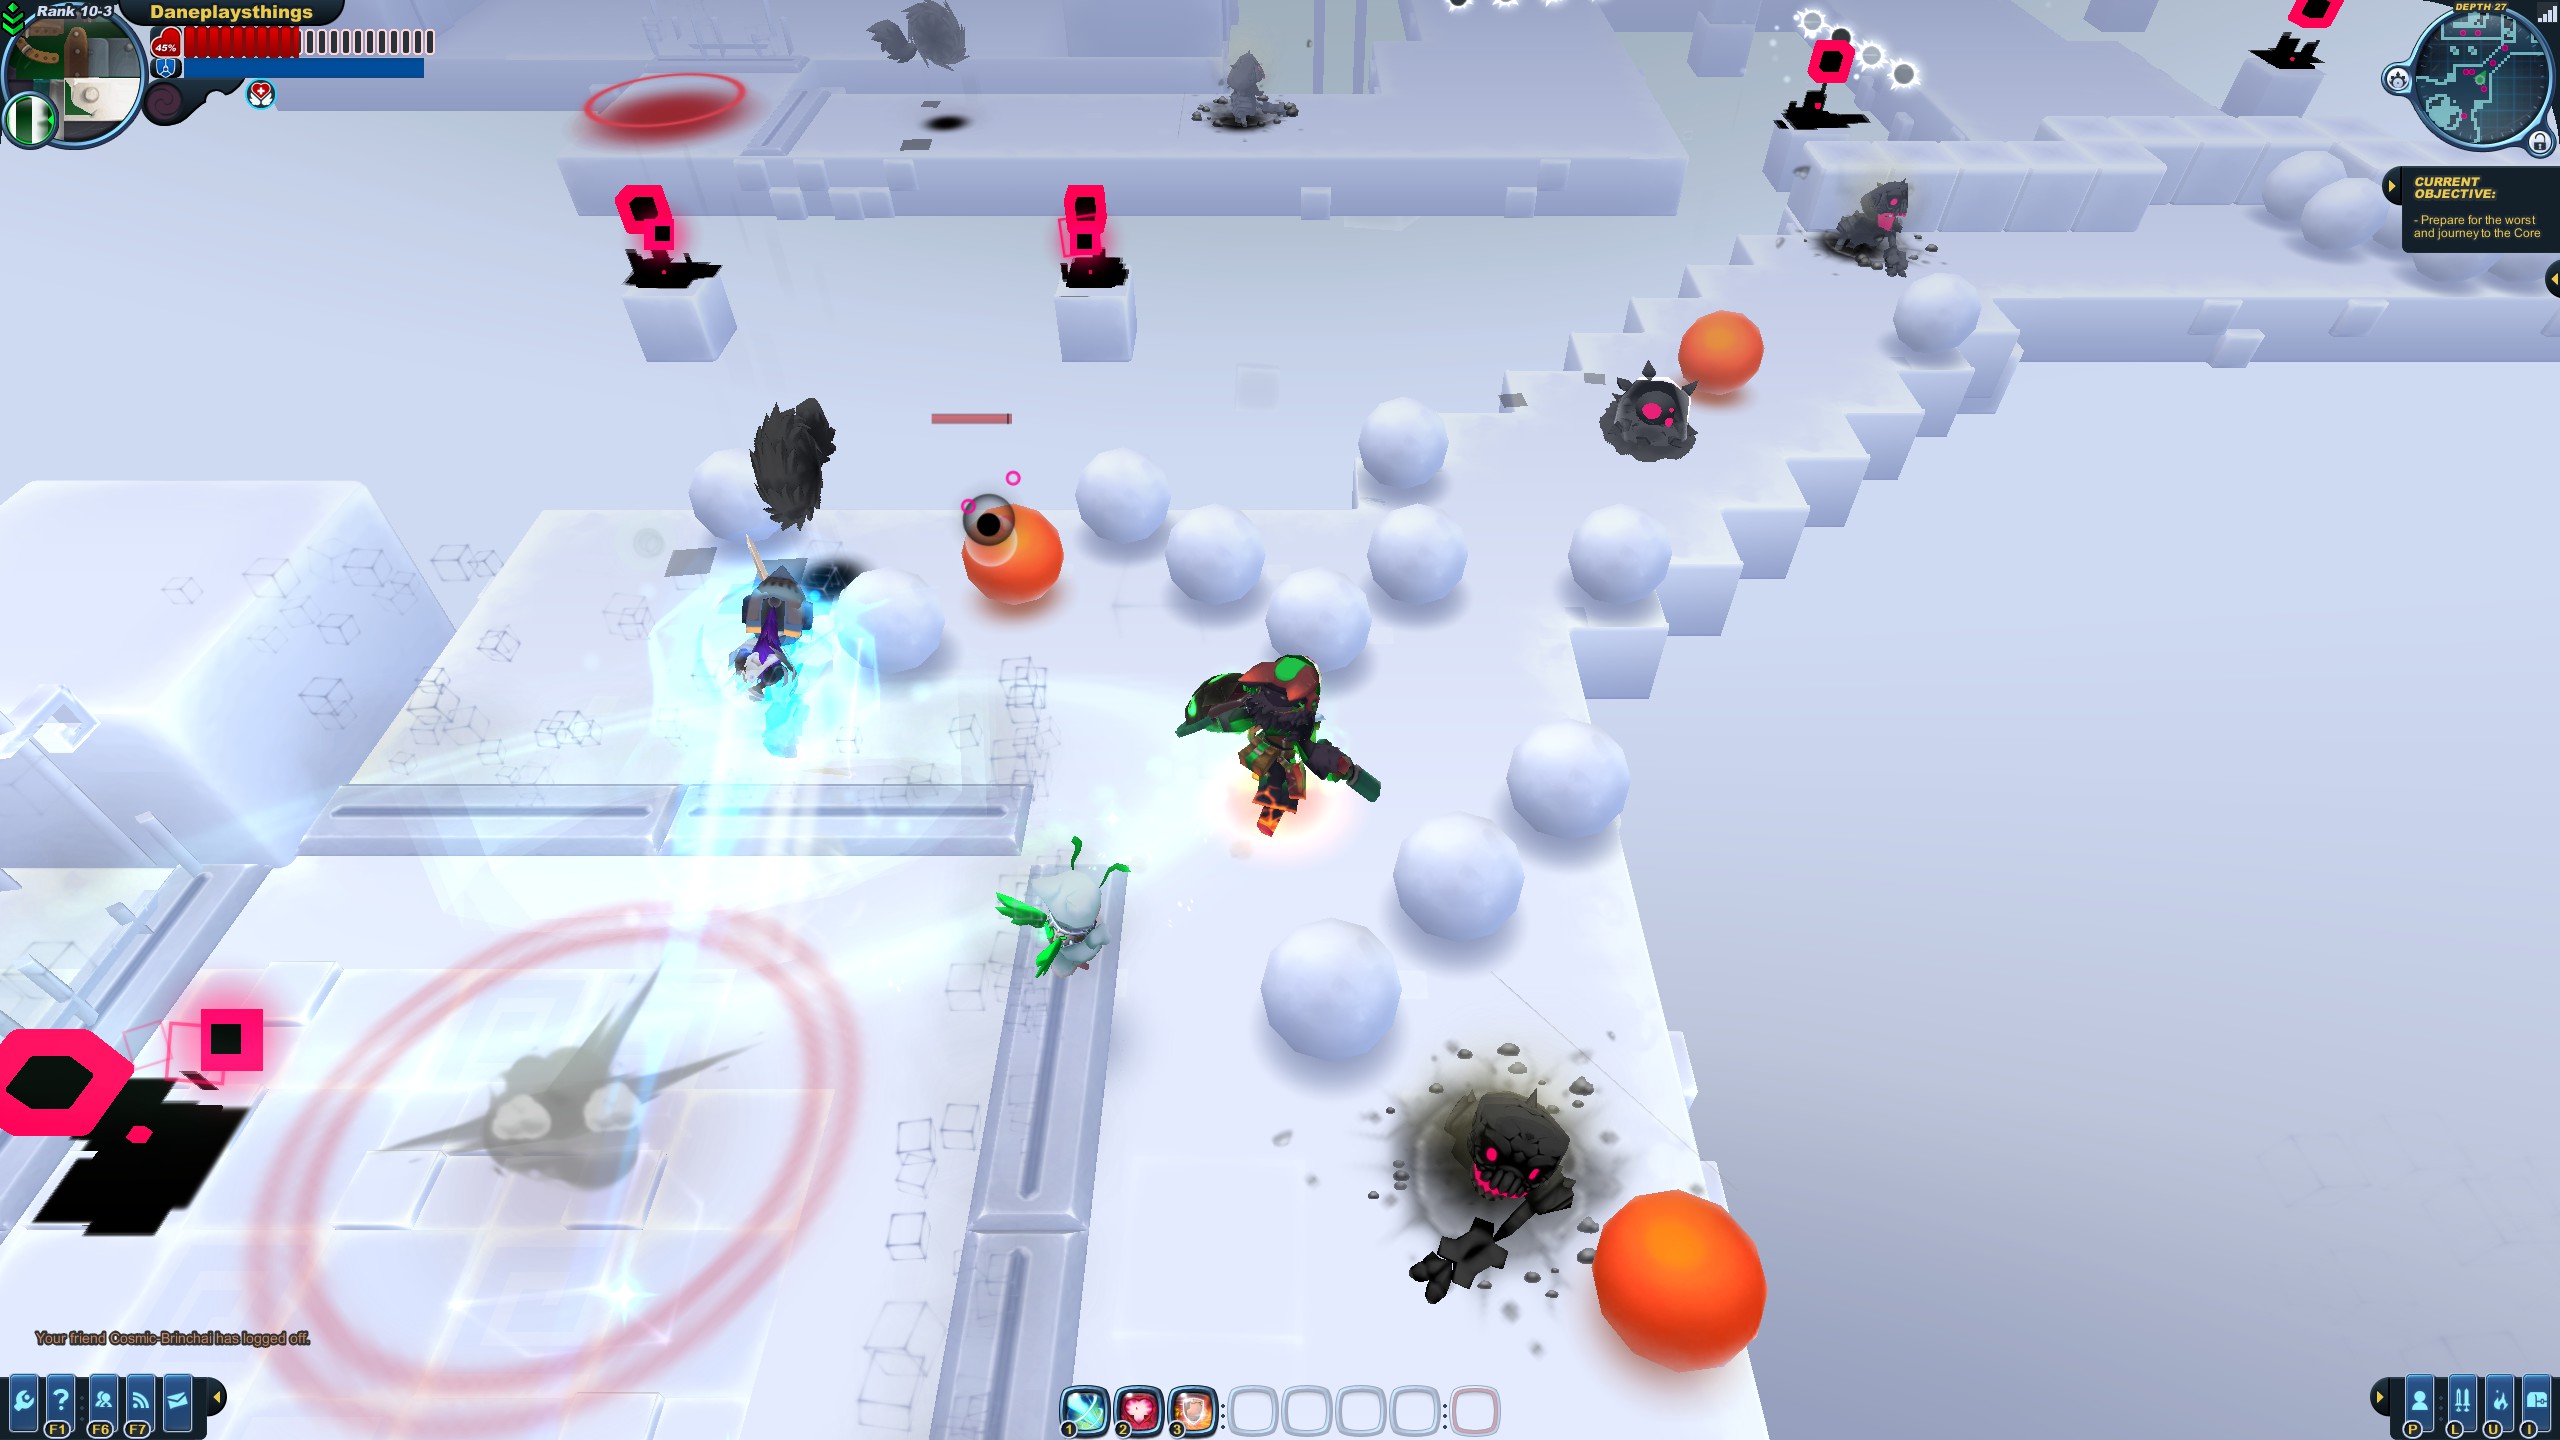 After activating the party button here, numerous enemies will be spawned in- of random types- and three swarm turrets will be spawned behind you (with more up ahead). It's important that you keep moving here. Shield bump enemies out of the way or to get them away from you; engaging them is not worth it, as it increases the chances of you getting hit. Destroy the ghost blocks to open up the rest of the path.
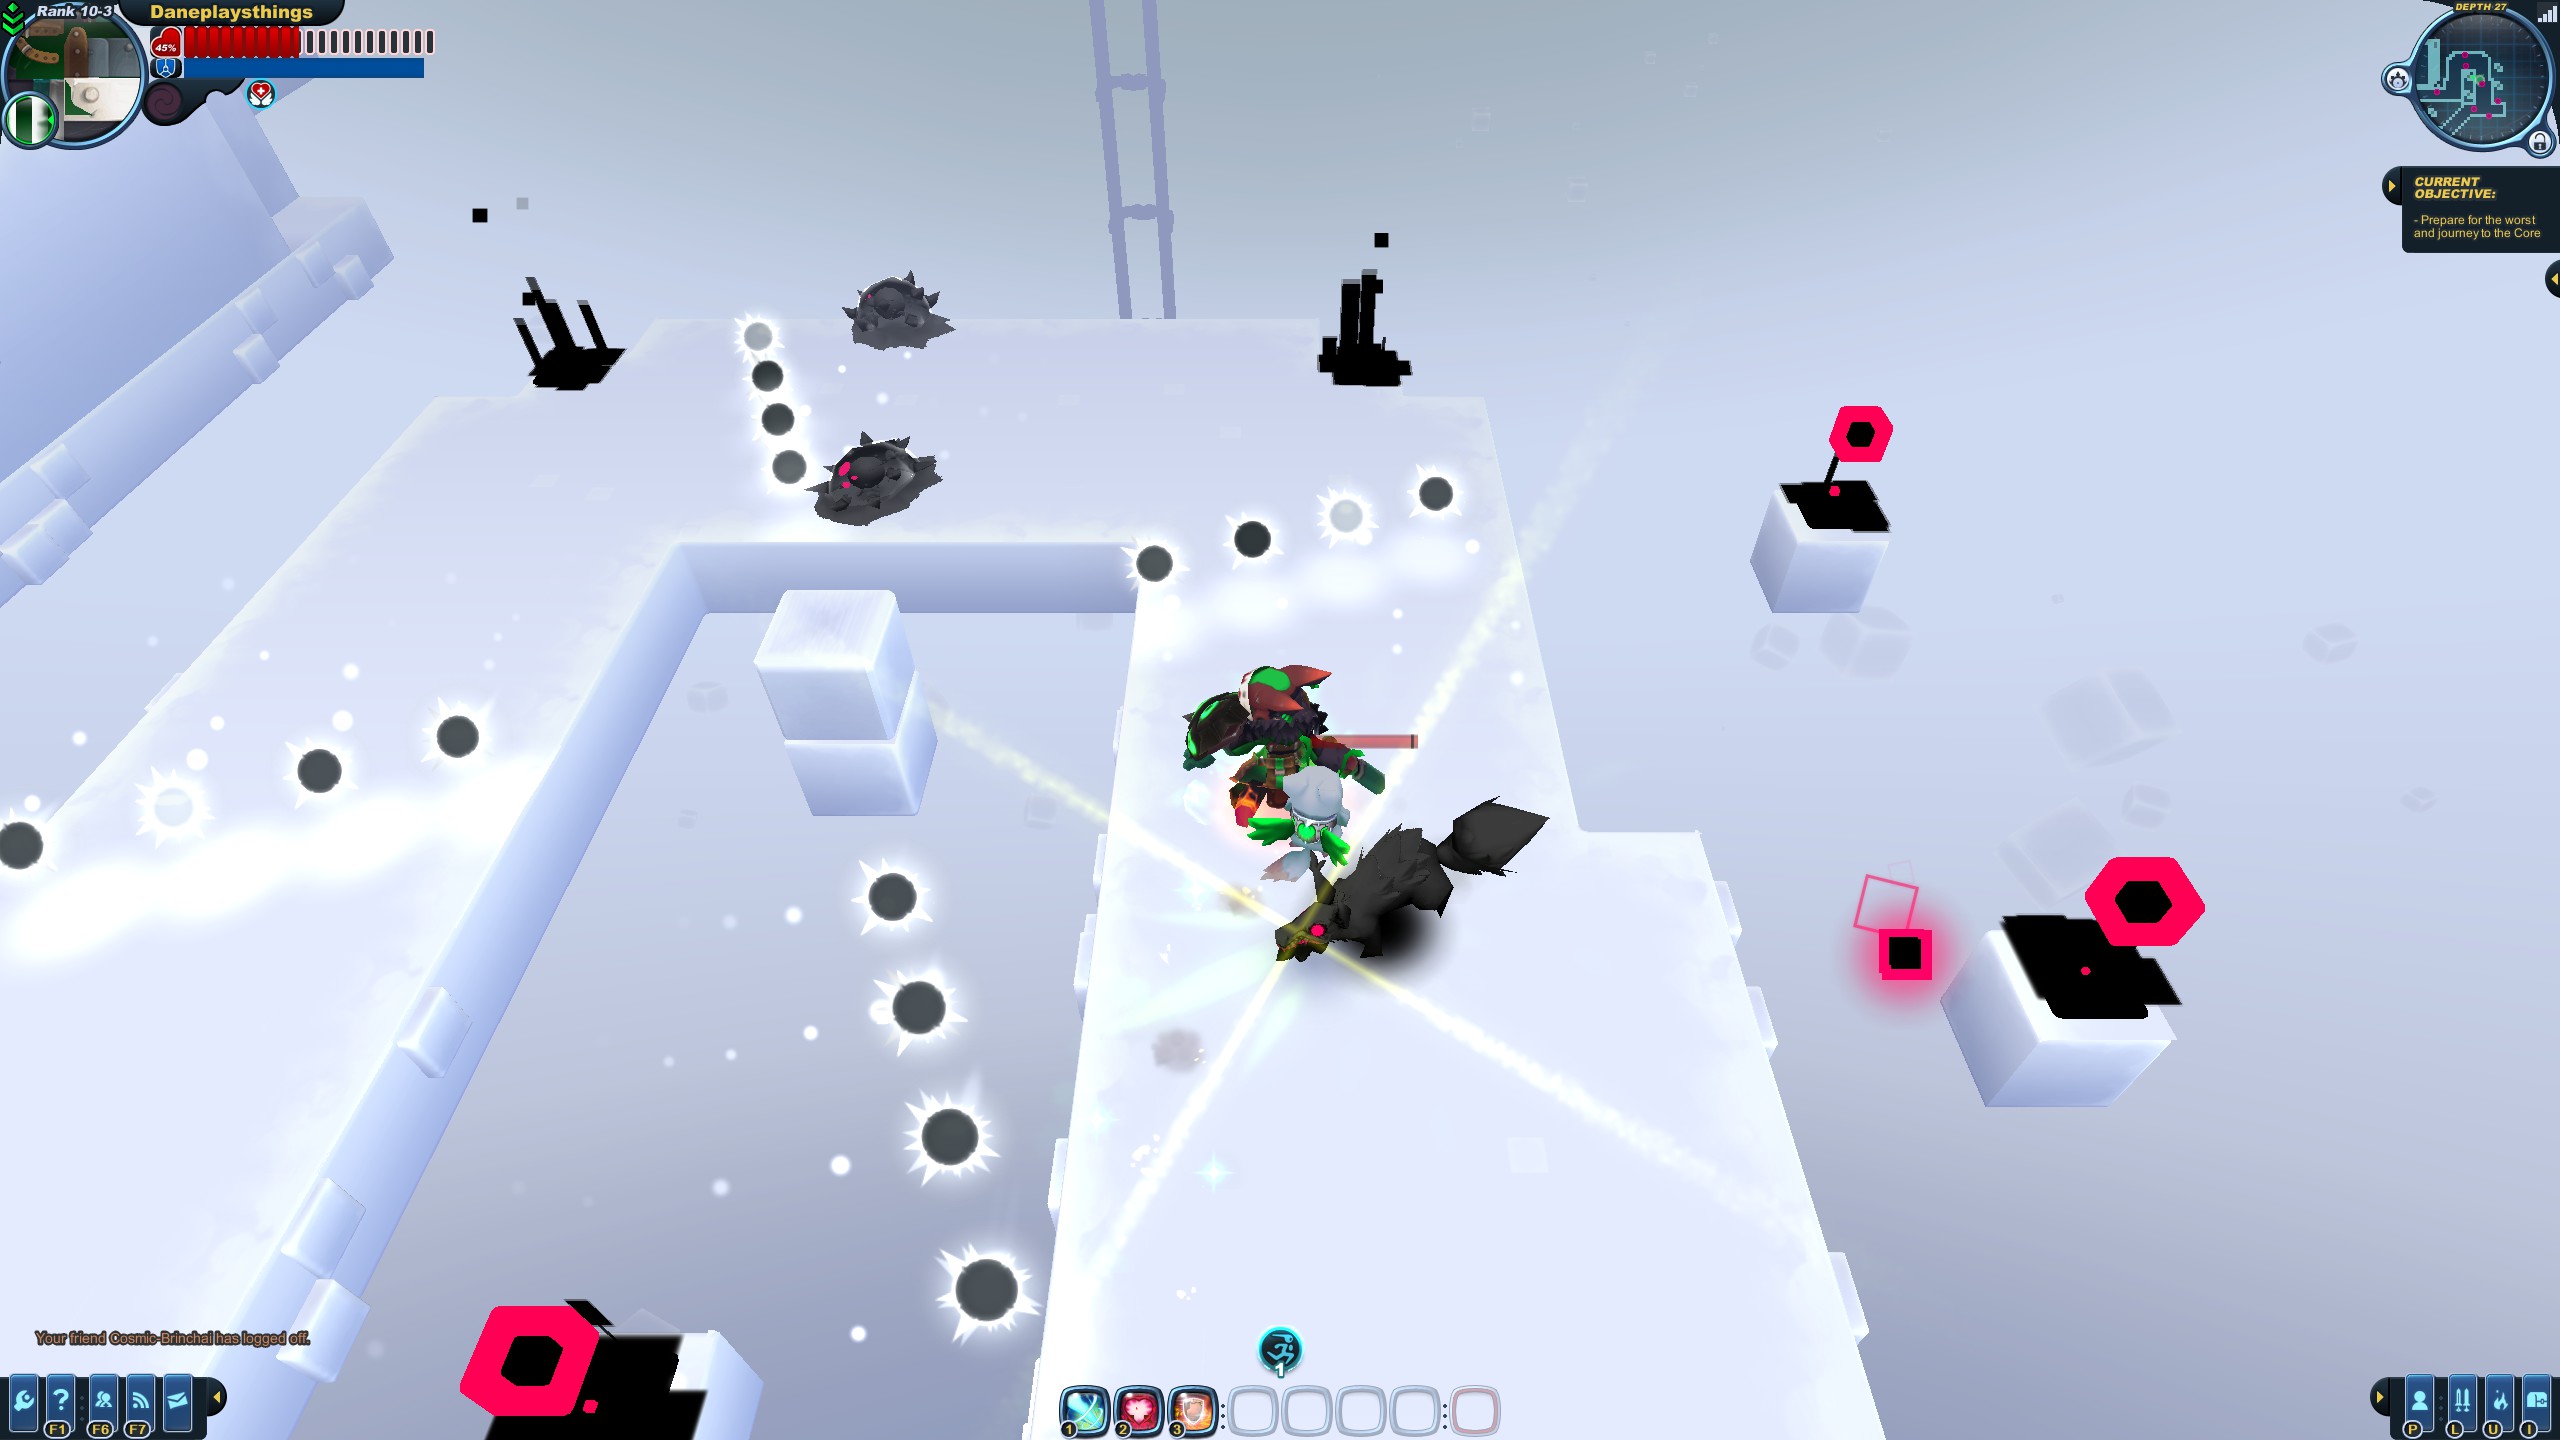 Once you arrive at the rotating bullet chains, you can choose to either slow down and shield bump enemies away, or dash through the bullets. Again, do not bother fighting anything here.
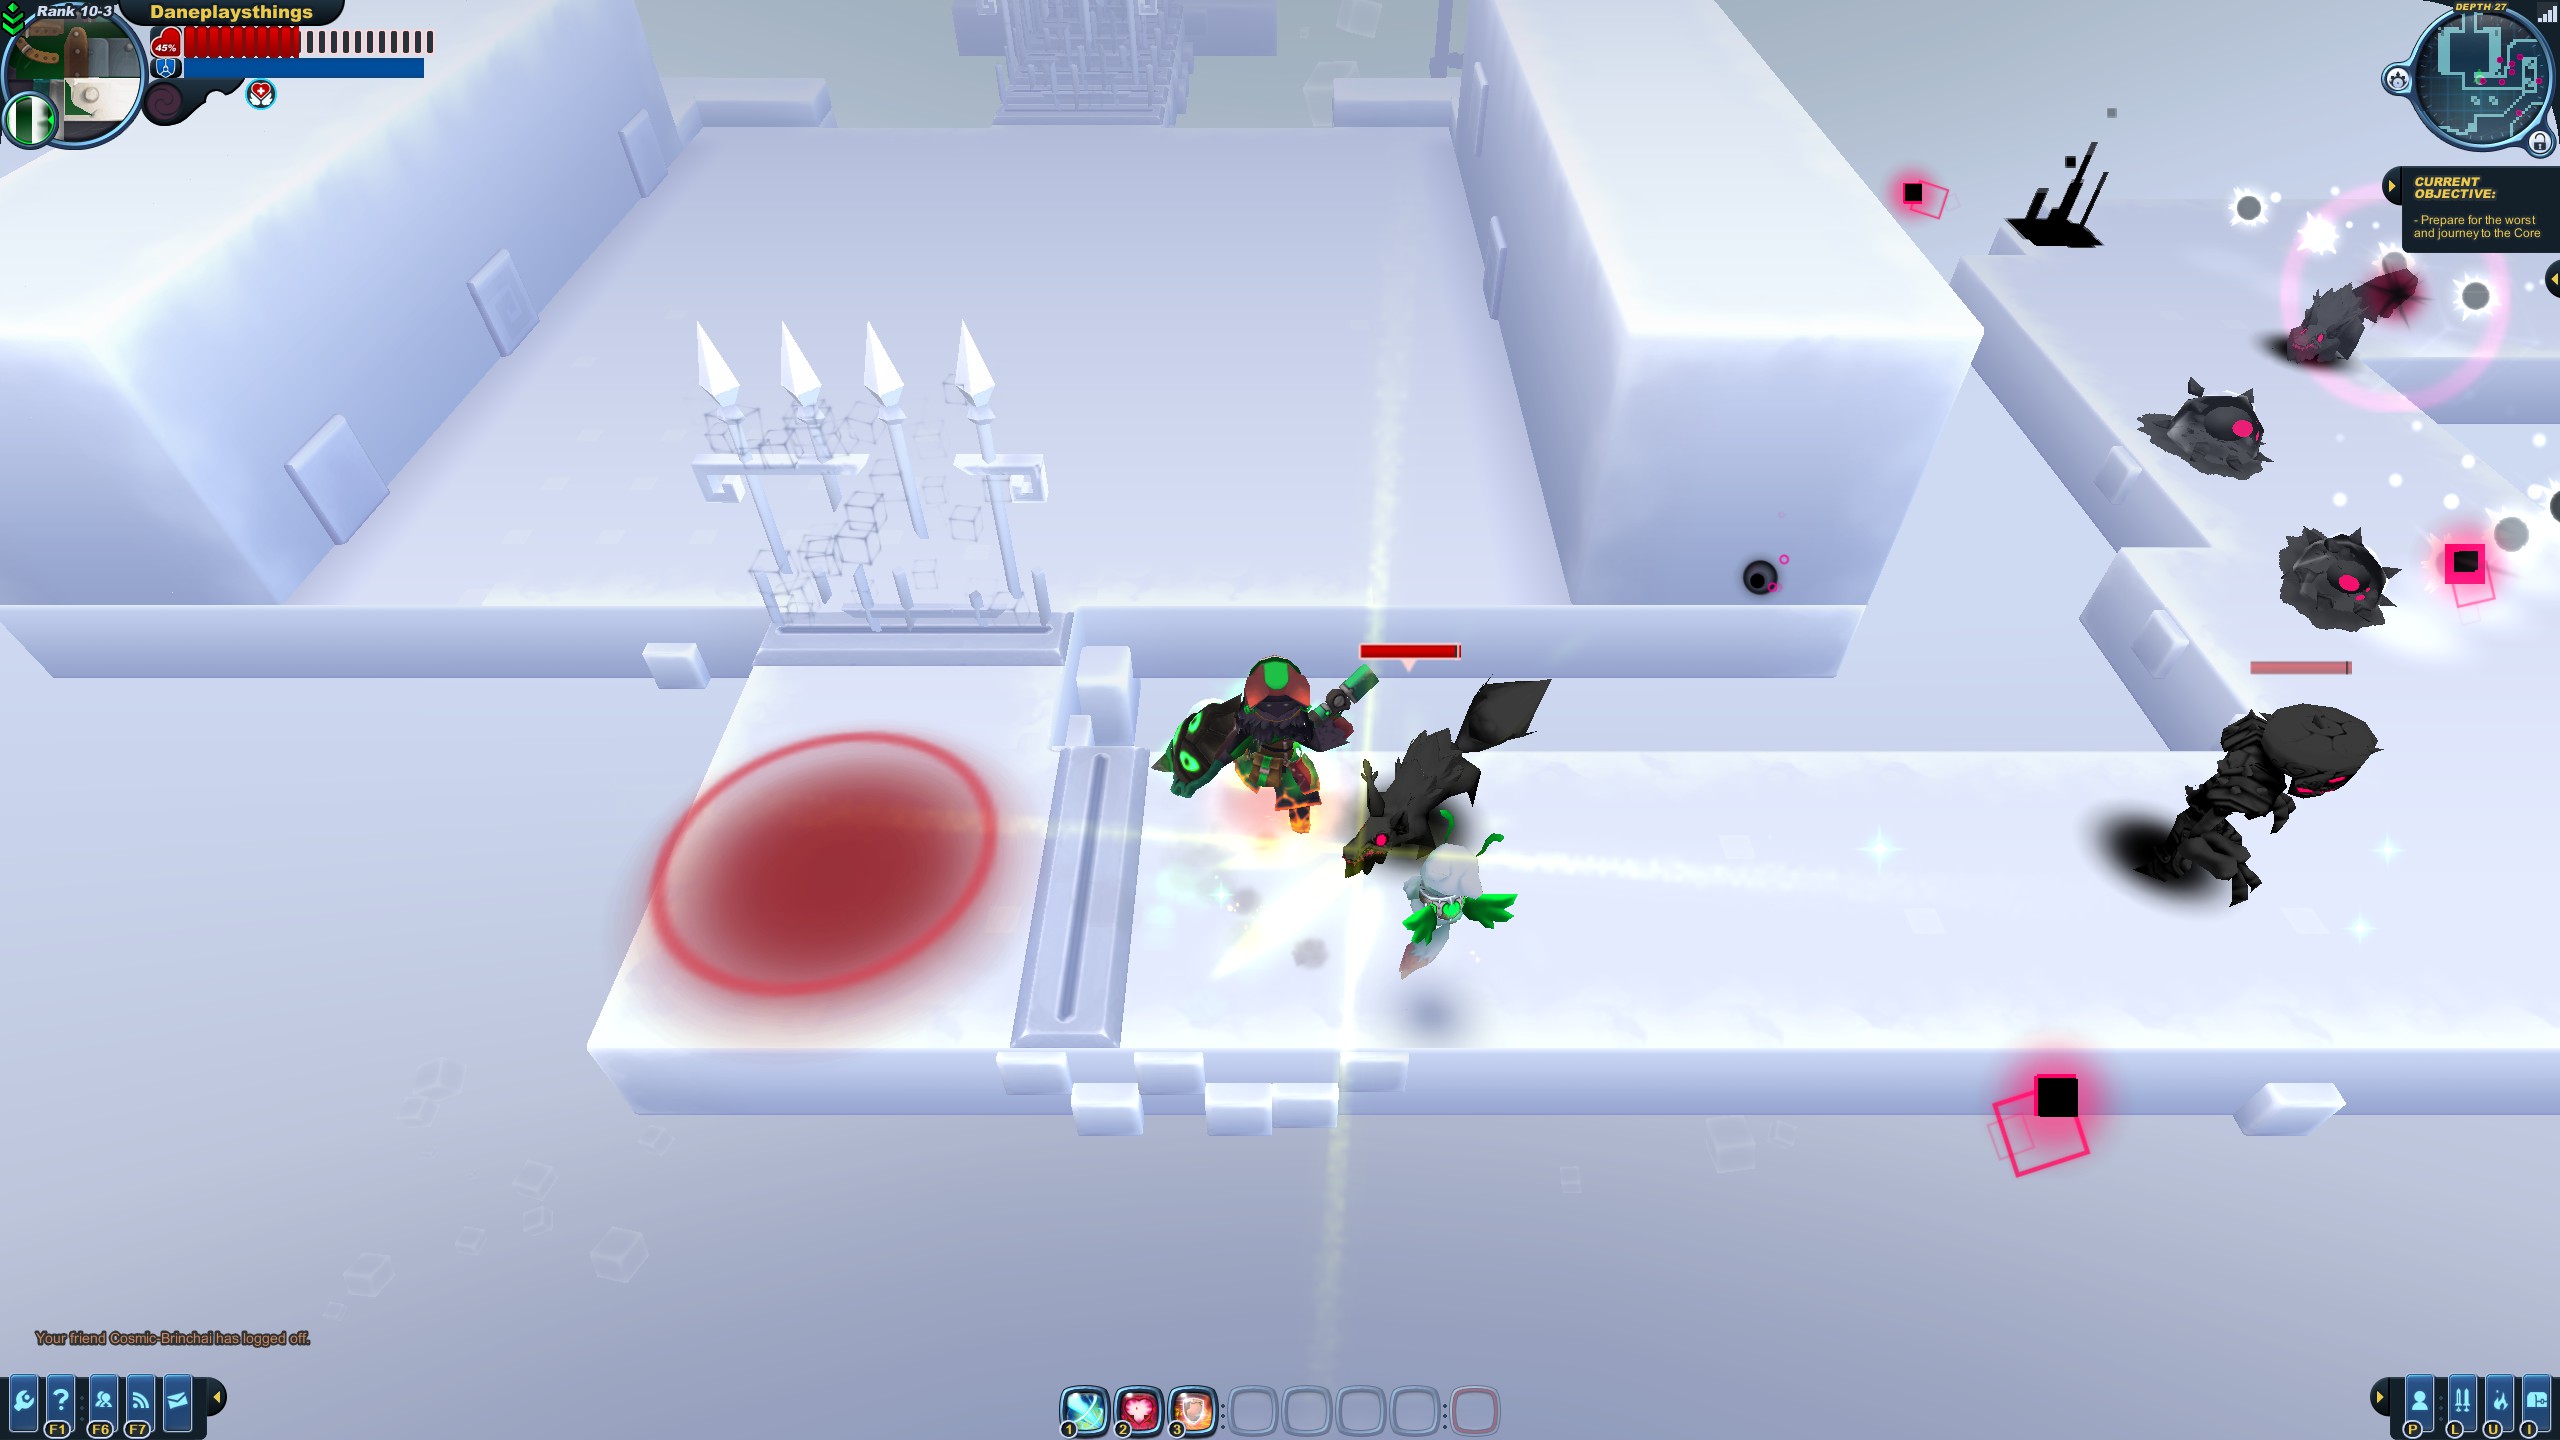 Eventually, you should get to another party button. Activating this party button will immediately kill all the enemies in the previous segments.
The Button Room
A deadly game of Snake (made worse with Vaelyn)
After pressing the party button, you'll be in the button room, with Vaelyn teleported to you. A button will be spawned somewhere on the floor, and pressing it will lower one of the gates ahead and spawn another somewhere else. Additionally, another enemy is spawned into the center of the room, with a corresponding respawn panel (so just try to avoid them as usual). Vaelyn will immediately attempt to hack away at the swarm monsters, which can either serve as a decent distraction, or cause her to catapult a monster right into you while you're focused on the buttons. It's generally a good idea to keep tabs on where Vaelyn is and what she's doing, especially if it seems she's about to unleash a charge attack.
TL;DR…
If SOLOING, Focus on dodging attacks and pressing all the buttons.
If PARTYING, Have everyone spread out to different corners of the room. This will ensure buttons will be activated quickly by whoever is closest to wherever the next one spawns.
After stepping on all the buttons, two large yellow arrows will appear on the floor pointing towards the exit, leading into the main arena.
Unlike the previous levels, Descent into Darkness is never randomly generated. The only randomness in this level are the enemies that are chosen to spawn. This does not include the arena, which is almost always the same.
Before we get into anything...
Take as LITTLE damage as possible
No pain, all gain
Once you arrive at Descent into Darkness, your main objective should be getting to the arena without taking any damage, if possible. If an emergency revive is used before you get to the arena, you will have to clutch the rest of the mission pretty hard.
First, you'll come to a junction in the path. Both converge back into the main path at the apex, where a party button resides. As the paths are blocked off by swarm spheres with an explosive sphere in the center, what I like to do is first shoot the explosive sphere, then immediately shield bash, resulting in me getting past the two spawned void monsters with some extra leeway, due to them being stunned. One could also just break a single swarm sphere and shield bump the monster out of the way, with some degree of risk. The safer option would be to shoot a swarm sphere, then either let the monster come to you then walk past it, or kill it, then continue.After activating the party button here, numerous enemies will be spawned in- of random types- and three swarm turrets will be spawned behind you (with more up ahead). It's important that you keep moving here. Shield bump enemies out of the way or to get them away from you; engaging them is not worth it, as it increases the chances of you getting hit. Destroy the ghost blocks to open up the rest of the path.Once you arrive at the rotating bullet chains, you can choose to either slow down and shield bump enemies away, or dash through the bullets. Again, do not bother fighting anything here.Eventually, you should get to another party button. Activating this party button will immediately kill all the enemies in the previous segments.The Button Room
A deadly game of Snake (made worse with Vaelyn)
After pressing the party button, you'll be in the button room, with Vaelyn teleported to you. A button will be spawned somewhere on the floor, and pressing it will lower one of the gates ahead and spawn another somewhere else. Additionally, another enemy is spawned into the center of the room, with a corresponding respawn panel (so just try to avoid them as usual). Vaelyn will immediately attempt to hack away at the swarm monsters, which can either serve as a decent distraction, or cause her to catapult a monster right into you while you're focused on the buttons. It's generally a good idea to keep tabs on where Vaelyn is and what she's doing, especially if it seems she's about to unleash a charge attack.
TL;DR…
If SOLOING, Focus on dodging attacks and pressing all the buttons.
If PARTYING, Have everyone spread out to different corners of the room. This will ensure buttons will be activated quickly by whoever is closest to wherever the next one spawns.
After stepping on all the buttons, two large yellow arrows will appear on the floor pointing towards the exit, leading into the main arena.
Climax
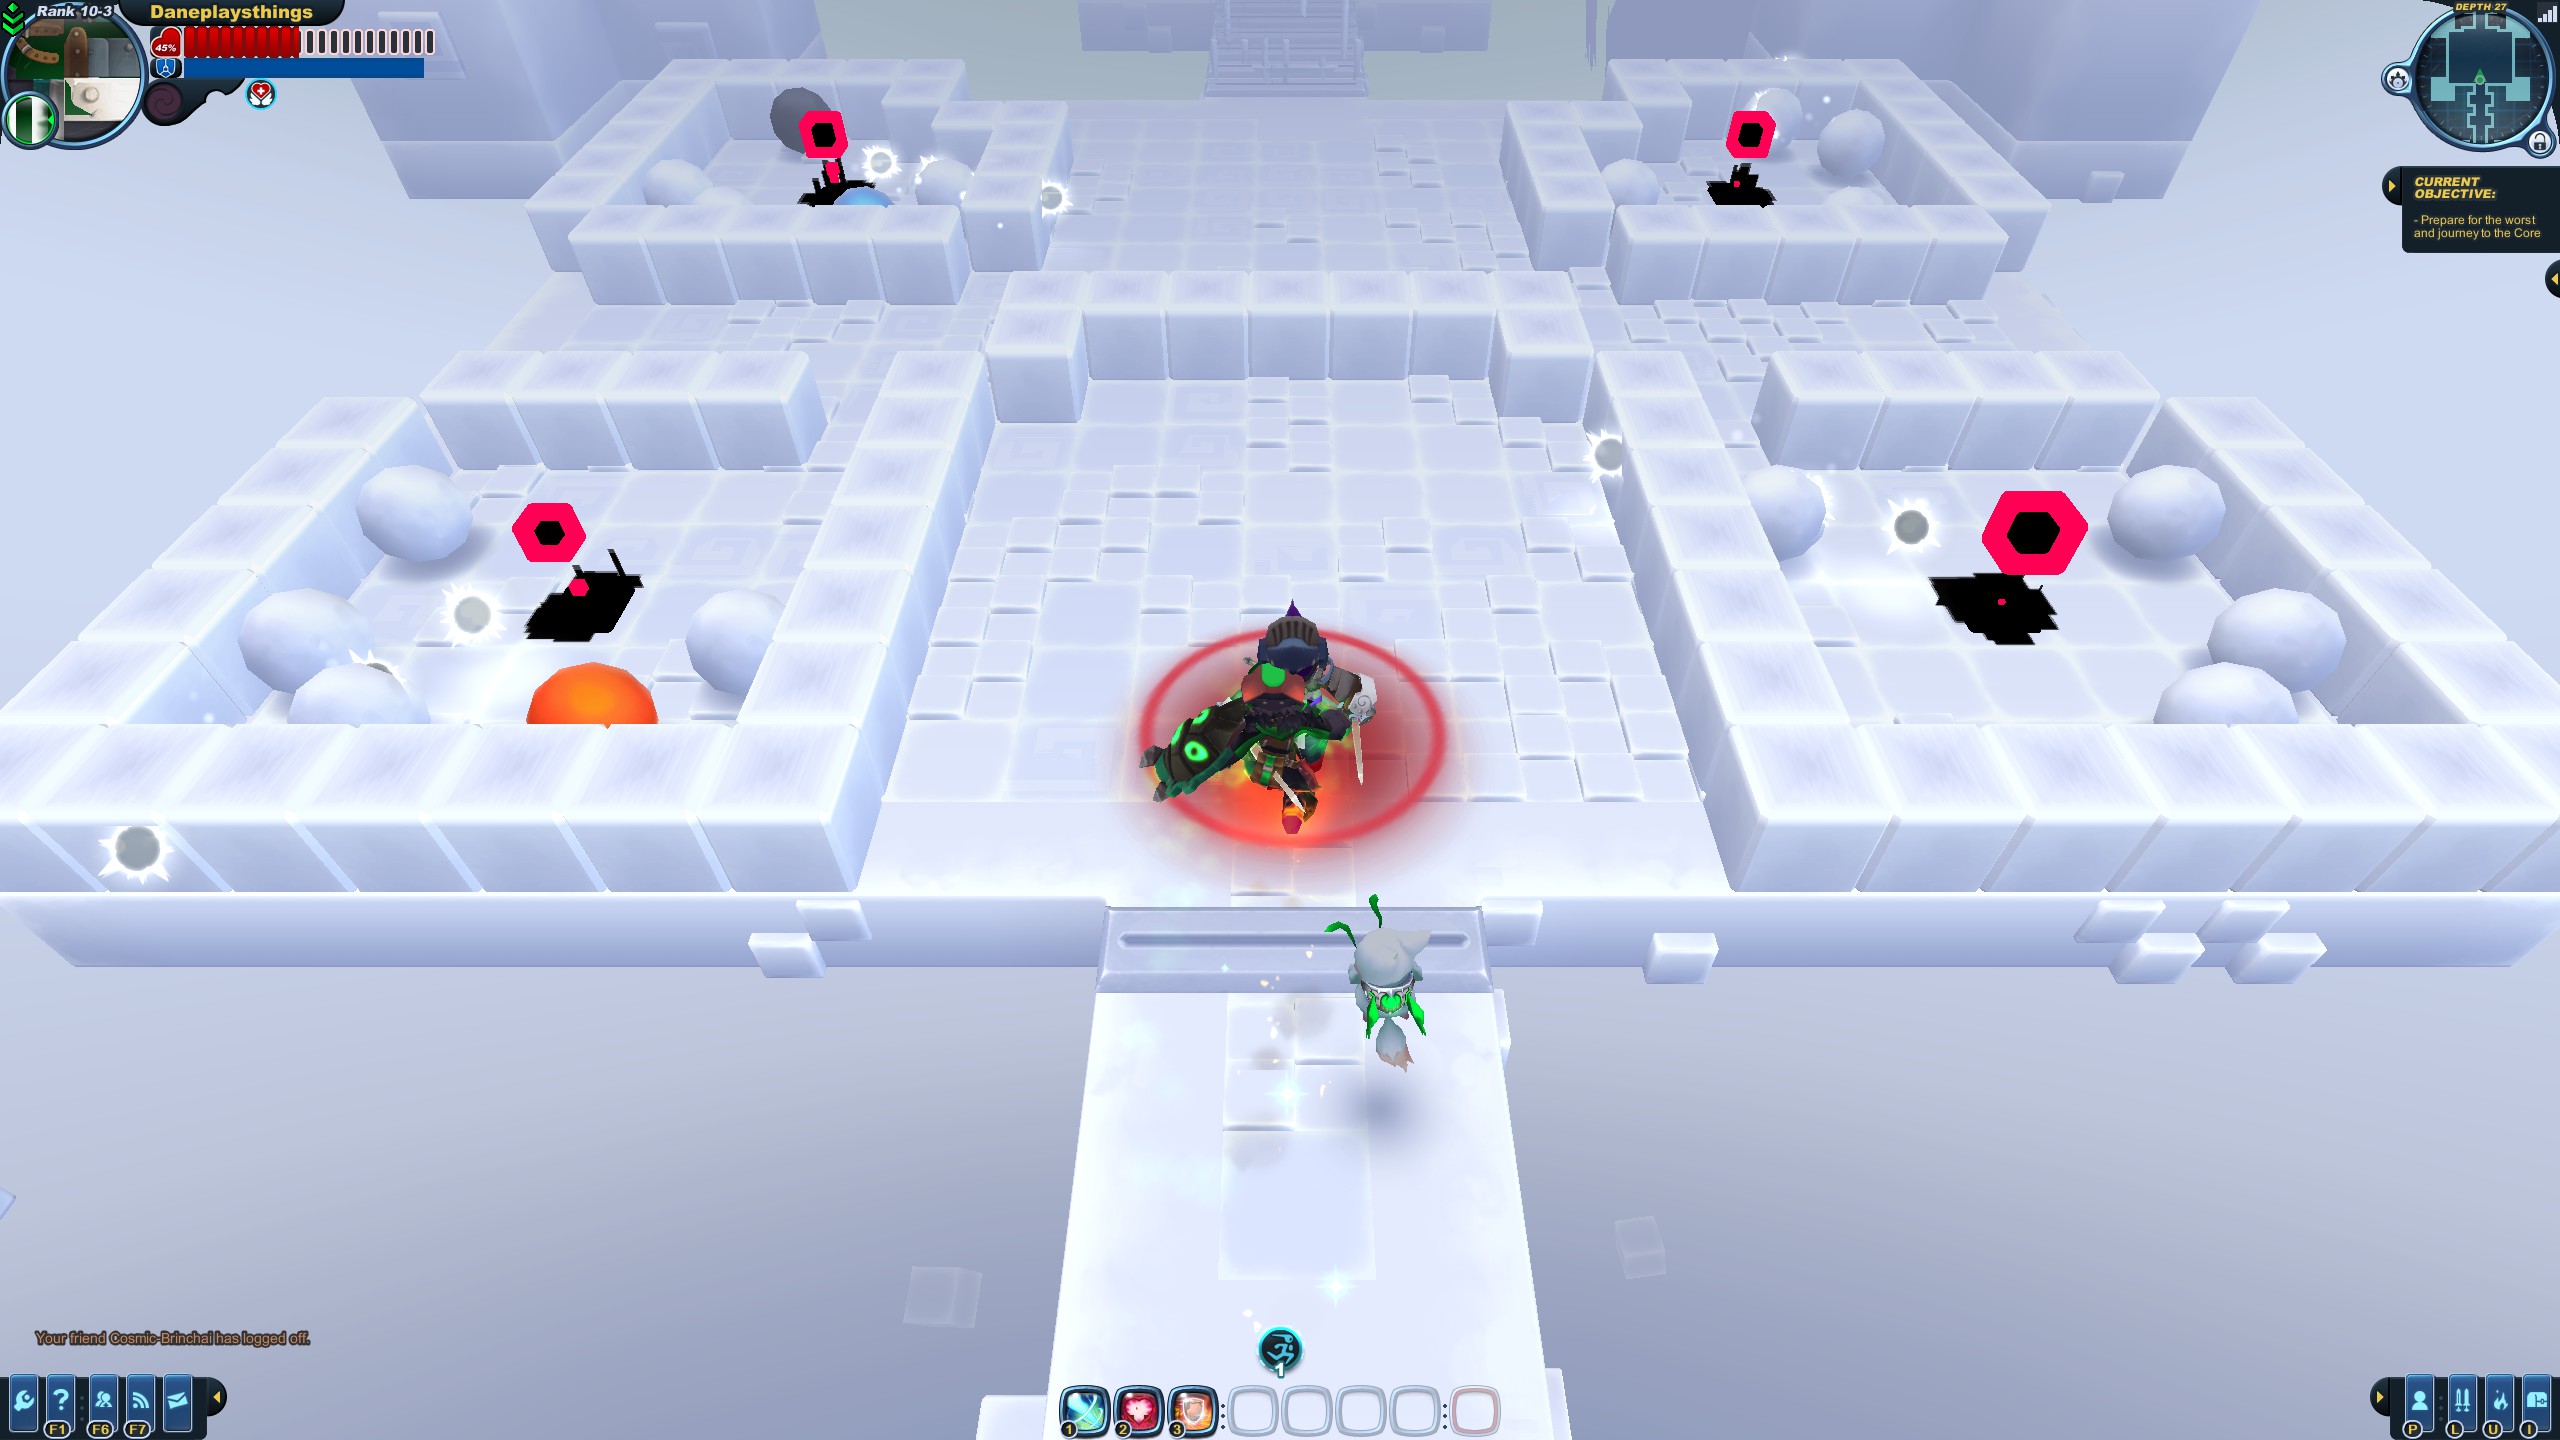
Now, for the main obstacle. If you're using a Seraphynx here, it's generally a good idea to use Heart Attack at the start of each wave.
Wave 1
Void Gels and Void Lumbers
After the button room, stepping on this party button will teleport Vaelyn to you for a split second before teleporting her to the exit, leaving you in the arena with some void gels, void lumbers, and four swarm turrets with rotating bullet bars- which are present throughout the entire arena's duration. Void souls will continue to spawn endlessly. Dispatch the lumbers and toxigels from a distance. Kill a lumber last to take advantage of its long would- be death animation before the second wave begins.
Wave 2
Void Wolvers and Void Zombies
If you haven't already, now would be a good time to open up all corners of the arena. Then, proceed to move counter- clockwise around the arena, letting the void wolvers tail you, placing down Dark Briar Barrages as you go. From here on out, do not stop moving. It's important that you don't hug the wall too closely, or else the void wolvers have a chance of sprinting in front of you, stopping you for a moment or even surrounding you. Once almost/all of the void wolvers are taken out, continue using the DBB to get the void zombies down to low health, then pick them off with the Arcana.
Wave 3
Void Thwackers and Void Lumbers
Switch to the Dark Retribution and do the same as before. Note that some void thwackers tend to clump up near the top or bottom of the arena when they're low on health. Find an opportunity to pick them off with the Winter Grave, or just keep running and bombing past them. Switch back to the DBB to whittle down the zombies and pick them off with the Arcana once more.
Wave 4
Void Wolvers and Void Zombies
Same process as wave 2. Switch back to DBB.
Wave 5
Void Gels and Void Lumbers
If you haven't used your emergency revive before this point, great! ...Because it's probably going to be needed here. This is by far the hardest wave of the arena, as the ginormous amount of void gels make an approach rather tedious due to their random nature. In most cases, they forget about you quickly and wander about the arena, only to spin attack you when you wander close enough. They also tend to aggro onto Vaelyn behind the exit gate, spin attacking randomly. In both instances, find the time to avoid and kill them off so they can't cause any more issues. This wave is also where I like to get rather comfortable using the Winter Grave. However, since the 'Grave makes you stand still for a second after firing a charged shot, it's integral that you factor in when would be a good time to pull the trigger. ESPECIALLY keep void soul wereabouts in mind as you do this, as soul monsters are capable of nullifying the piercing properties of a magnus charge shot, worse when there's the imminent danger of blowing yourself up on one because of such. After you've thinned down the numbers of the enemies in this wave, you can then switch to the Arcana and gun down the remaining ones. After the last gel or lumber is down, you've pretty much won!
Final Wave
Void Thwackers and Void Zombies
After wave 5, this wave should look like a joke. DR for the void thwackers, DBB to weaken the void zombies, Arcana and/or Winter Grave to finish off the stragglers. Once the last swarm monster goes down and the two yellow arrows appear, you've done it! Now get to the elevator and claim your prize!

What a haul!
TL;DR…
If SOLOING, Keep your distance from enemies (or time your movements as to bait out their attacks) and use effective weapons against each wave as needed while moving counter- clockwise.
If PARTYING, Do the same as above, but try and have everyone spread out away from everyone else as evenly as possible, as to not accidentally cause a stray attack to hit (one of) your teammate(s).
Wave 1
Void Gels and Void Lumbers
After the button room, stepping on this party button will teleport Vaelyn to you for a split second before teleporting her to the exit, leaving you in the arena with some void gels, void lumbers, and four swarm turrets with rotating bullet bars- which are present throughout the entire arena's duration. Void souls will continue to spawn endlessly. Dispatch the lumbers and toxigels from a distance. Kill a lumber last to take advantage of its long would- be death animation before the second wave begins.
Wave 2
Void Wolvers and Void Zombies
If you haven't already, now would be a good time to open up all corners of the arena. Then, proceed to move counter- clockwise around the arena, letting the void wolvers tail you, placing down Dark Briar Barrages as you go. From here on out, do not stop moving. It's important that you don't hug the wall too closely, or else the void wolvers have a chance of sprinting in front of you, stopping you for a moment or even surrounding you. Once almost/all of the void wolvers are taken out, continue using the DBB to get the void zombies down to low health, then pick them off with the Arcana.
Wave 3
Void Thwackers and Void Lumbers
Switch to the Dark Retribution and do the same as before. Note that some void thwackers tend to clump up near the top or bottom of the arena when they're low on health. Find an opportunity to pick them off with the Winter Grave, or just keep running and bombing past them. Switch back to the DBB to whittle down the zombies and pick them off with the Arcana once more.
Wave 4
Void Wolvers and Void Zombies
Same process as wave 2. Switch back to DBB.
Wave 5
Void Gels and Void Lumbers
If you haven't used your emergency revive before this point, great! ...Because it's probably going to be needed here. This is by far the hardest wave of the arena, as the ginormous amount of void gels make an approach rather tedious due to their random nature. In most cases, they forget about you quickly and wander about the arena, only to spin attack you when you wander close enough. They also tend to aggro onto Vaelyn behind the exit gate, spin attacking randomly. In both instances, find the time to avoid and kill them off so they can't cause any more issues. This wave is also where I like to get rather comfortable using the Winter Grave. However, since the 'Grave makes you stand still for a second after firing a charged shot, it's integral that you factor in when would be a good time to pull the trigger. ESPECIALLY keep void soul wereabouts in mind as you do this, as soul monsters are capable of nullifying the piercing properties of a magnus charge shot, worse when there's the imminent danger of blowing yourself up on one because of such. After you've thinned down the numbers of the enemies in this wave, you can then switch to the Arcana and gun down the remaining ones. After the last gel or lumber is down, you've pretty much won!
Final Wave
Void Thwackers and Void Zombies
After wave 5, this wave should look like a joke. DR for the void thwackers, DBB to weaken the void zombies, Arcana and/or Winter Grave to finish off the stragglers. Once the last swarm monster goes down and the two yellow arrows appear, you've done it! Now get to the elevator and claim your prize!
What a haul!
TL;DR…
If SOLOING, Keep your distance from enemies (or time your movements as to bait out their attacks) and use effective weapons against each wave as needed while moving counter- clockwise.
If PARTYING, Do the same as above, but try and have everyone spread out away from everyone else as evenly as possible, as to not accidentally cause a stray attack to hit (one of) your teammate(s).
Conclusion
So... why don't people grind this as often as Vanaduke?
While the amount of radiants you can get are usually pretty high and the mission is factually shorter than FSC, the numerous unskippable cutscenes and long, mostly action- devoid time spent in both A Step Beyond levels really drags it down. Not to mention the amount of crowns that Vanaduke can pay out, and crowns are... kind of important to have in SK, ATOP garnering radiants through each run, it's not hard to see why one is grinded so much over the other. Still, if you're really hellbent on leveling something quickly and have the motivation to push past the boring stuff, then grinding D&N at least for a little isn't a bad call.
While the amount of radiants you can get are usually pretty high and the mission is factually shorter than FSC, the numerous unskippable cutscenes and long, mostly action- devoid time spent in both A Step Beyond levels really drags it down. Not to mention the amount of crowns that Vanaduke can pay out, and crowns are... kind of important to have in SK, ATOP garnering radiants through each run, it's not hard to see why one is grinded so much over the other. Still, if you're really hellbent on leveling something quickly and have the motivation to push past the boring stuff, then grinding D&N at least for a little isn't a bad call.
More Spiral Knights guides
- Do not fear! Orb hunting tips are here!★ 5 (1.8k)27k views2.7k ♥5 minUpdated Jun 17
- Getting Cash - Ways To Make Money★ 5 (537)25k views561 ♥7 minUpdated Aug 1, 2013
- Spiral Knights - The Complete Guide!★ 5 (1.2k)21k views1.4k ♥106 minUpdated Mar 29, 2022
- Don't be a Derp: 10 things to know in Spiral Knights★ 5 (323)18k views304 ♥16 minUpdated Feb 4, 2025
- The Spiral Sallet★ 4 (171)14k views143 ♥7 minUpdated Dec 30, 2023
- Expert Guide on Maximizing Your Power --- Equipment Sets and More★ 5 (468)13k views622 ♥12 minUpdated Mar 11




This guide was created by its original author on the Steam Community. Are you the author and want it removed? Request removal.