![How to redeem '3rd Echelon' map - [DEPRECATED; GAMESPOT REMOVED THE PAGE] for Tom Clancy's Splinter Cell: Conviction](https://steamsolo.com/wp-content/uploads/2021/07/how-to-redeem-3rd-echelon-map-deprecated-gamespot-removed-the-page-tom-clancy-s-splinter-cell-conviction.jpg)
Overview
A Guide to get started dying your armor. From crafting the bits and pieces you need, to the reagents and recipes you need to make different colors.
TL;DR Dye Making Process
Here is the overall Dye making process:
- Harvest reagent ingredients
- Create a Glass Flask mold — Blacksmith bench: 15 Iron Bars
- Create Glass Flasks — Furnace: 3 glass per Flask
- Fill the Glass Flasks with water — Use at a water source
- Cook the Dye at a Firebowl Cauldron — Water-filled Glass Flask + [Reagent]
- Dye your armor
TL;DR: Base Color Recipes
All dyes are created in the Firebowl Cauldron.


TL;DR: Light and Dark Colorant Variations
Each Base Color has a Light and a Dark color variation that is made in the Firebowl Cauldron by:
[Base Color Dye] + [Light or Dark Dye Colorant] = [Light or Dark Color Dye] and [Glass Flask]
Eg. 1 Blue Dye + 1 Dark Dye Colorant = 1 Dark Blue Dye and 1 Glass Flask (empty and reusable)
NOTE: As of this writing there is no way to “mix” colors other than the light or dark variations. You cannot, for example, mix blue and yellow dye to get green.
Base Color Reagents/Recipes and Where to Harvest
Red :
You will need 1 Cochineal and 1 Water-filled Glass Flask to make 1 Red Dye.
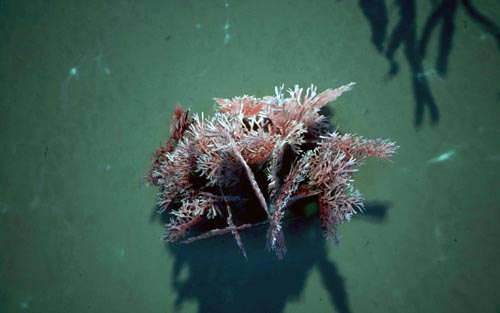
Orange :
Note: There are two very different looking “coral” plants in the deep part of the river, they BOTH yield the same reagent.
You can harvest these plants until they poof, just make sure that you do not drown while harvesting. You will gain Plant Fiber and Orange Phykos. The icon looks like reddish-orange branch coral, and this is the reagent you will need to make Orange Dye.
It takes 1 Orange Phykos and 1 Water-filled Glass Flask to make 1 Orange Dye.
Yellow :
You need 5 Brimstone and 1 Water-filled Glass Flask to make 1 Yellow Dye.
Green :
It takes 20 Plant Fiber and 1 Water-filled Glass Flask to make 1 Green Dye.
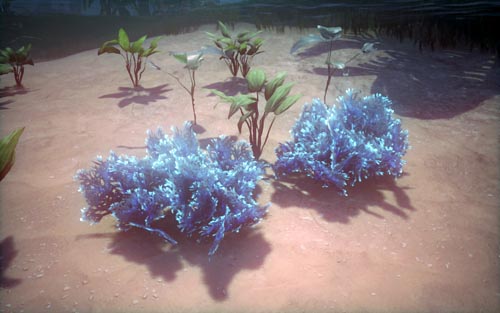
Blue :
You need 1 True Indigo and 1 Water-filled Glass Flask to make 1 Blue Dye.
Cyan :
You will need 1 Glowing Goop and 1 Water-filled Glass Flask to make 1 Cyan Dye.
Purple :
You will need 1 False Mandrake and 1 Water-filled Glass Flask to make 1 Purple Dye.
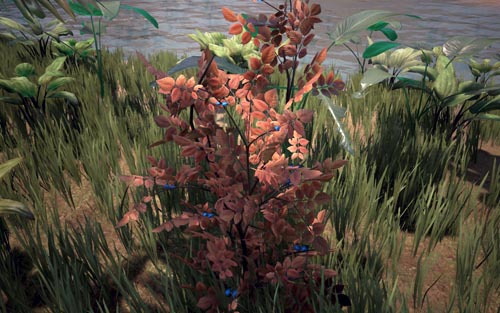
Brown :
You will need 5 Seeds and 1 Water-filled Glass Flask to make 1 Brown Dye.
Grey :
You will need 1 Grey-flower Lupine and 1 Water-filled Glass Flask to make 1 Grey Dye.
Light and Dark Color Variations
There is a light and a dark variation for every Base Color. Light colors require Light Dye Colorant, and Dark colors require Dark Dye Colorant.
Light Dye Colorant:
This is made just like regular base dye colors, but it can not be used independently to dye armor.
Place 5 Bone and 1 Water-filled Glass Flask for each Light Dye Colorant you want to create in the Firebowl Cauldron.
To make a Light Dye color, you place 1 Light Dye Colorant and 1 Base Color Dye in the Firebowl Cauldron. This will result in 1 Light Dye and 1 Glass Flask. Apparently because you are using 2 Flasks to create one new color, you get an empty flask back. These empty flasks can be reused.
E.g. 1 Blue Dye + 1 Light Dye Colorant = 1 Light Blue Dye and 1 Glass Flask
Dark Dye Colorant:
This is much the same as the Light Dye Colorant. It cannot be used independently to dye armor.
Place 3 Tar and 1 Water-filled Glass Flask for each Dark Dye Colorant you want to create in the Firebowl Cauldron.
To make a Dark Dye color, you place 1 Dark Dye Colorant and 1 Base Color Dye in the Firebowl Cauldron. This will result in 1 Dark Dye and 1 Glass Flask.
E.g. 1 Blue Dye + 1 Dark Dye Colorant = 1 Dark Blue Dye and 1 Glass Flask
How to Make Glass Flasks
You need to create A Glass Flask mold at the Blacksmithing bench with 15 Iron Bars.
As of the writing of this compendium, you only need ONE mold per Furnace you are creating Glass Flasks in. It is NOT consumed when you create a Glass Flask, and can be moved from Furnace to Furnace if you like.
Next, find some Glass. This can be looted from some human (NPC) enemies in higher “level” content areas, but, you can create it yourself by placing Crystal in the Furnace.
You will need 2 Crystal to make 1 Glass. (Rocknoses make for good crystal-farming creatures)
After you have the Mold and the Glass, you place them both in the Furnace and turn the Furnace on. This will create Glass Flasks. It takes 3 Glass to make 1 Glass Flask.
How to Fill Glass Flasks
Take your stacks of Glass Flasks to a water source, this could be a Refreshment Statue, Well, or River/Lake.
Note: The Statue of Refreshment runs out of water fairly quickly, so I would advise using one of the other sources if you have a lot of Glass Flasks to fill.
Place the stack of Glass Flasks on your HotBar (like you would any item you want to use). Now you can fill it by pressing the appropriate HotKey, just like you would your Waterskin. It will take the Glass Flasks off the Glass Flask stack and put it back into your inventory as Water-filled Glass Flask. Repeat this filling process until your Glass Flasks are full.
Dying Armor
Now that you have made the dye colors of your choice, you can dye different parts of your armor. Make sure that you have the flasks of dye in your inventory before you begin.
Open your inventory window, select the piece of armor you want to dye (you do not need to unequip it). There will be several buttons at the bottom left inventory screen with options like “DROP” “REPAIR” etc.
One new option should be “DYE”. Click on the Dye option. It will bring up a view of your piece of armor on the left with different slots that you can color. Each colored square is a different area of your armor, and each can be dyed. On the right side of the dying menu should be a list of the different dyes you have in your inventory.
By clicking one of the colored squares under your armor (left side of the menu) and then clicking on one of the flasks of dye (right side of the menu) you should be able to preview what your armor would look like with that color on that “color slot”.
If you cancel or hit escape your armor color will not be changed, so you can play around as long as you like without committing to using the dye. Once you are happy with your color choices, click on the SAVE button and this will dye your armor. When you save, the dye you used is consumed, and you do not get the glass flasks back.
A very similar process is used to dye armor that is in your inventory, but unequipped. Select the armor in your inventory. This will bring up extra options at the bottom left of your inventory menu. After the DROP, REPAIR, etc you will now see a MORE option. Click on More and a sub-menu will appear. This should have the DYE option. Click on DYE and follow the steps to dye equipped armor.