Overview
Stuck on how to get past the beginning and set up your economy? Learn the basics of district planning, taxation and how to be a manipulative lying politician to the city council for the most gain.
Introduction
If you’re starting out, you’re probably confused by what you see on the screen. Unlike other city-builders and empire-management games, Urban Empire doesn’t really give you much direction as to what, exactly, you are meant to do to keep your city running and not bleeding money. While there are a lot of open elements later in the game depending on how you want to build your city and which victory condition you want to go for, the early game (at least through Eras 1-2) are going to be fairly liner as you build your first districts and start getting cashflow.
This guide will walk through how to set up the cornerstone of your new city. This tutorial can be viewed on YouTube here:
Key Concepts
The fundamentals of building a successful city come down to understand several elements, most of which are visible on the interface but don’t really stick out to you unless you know how to read them.
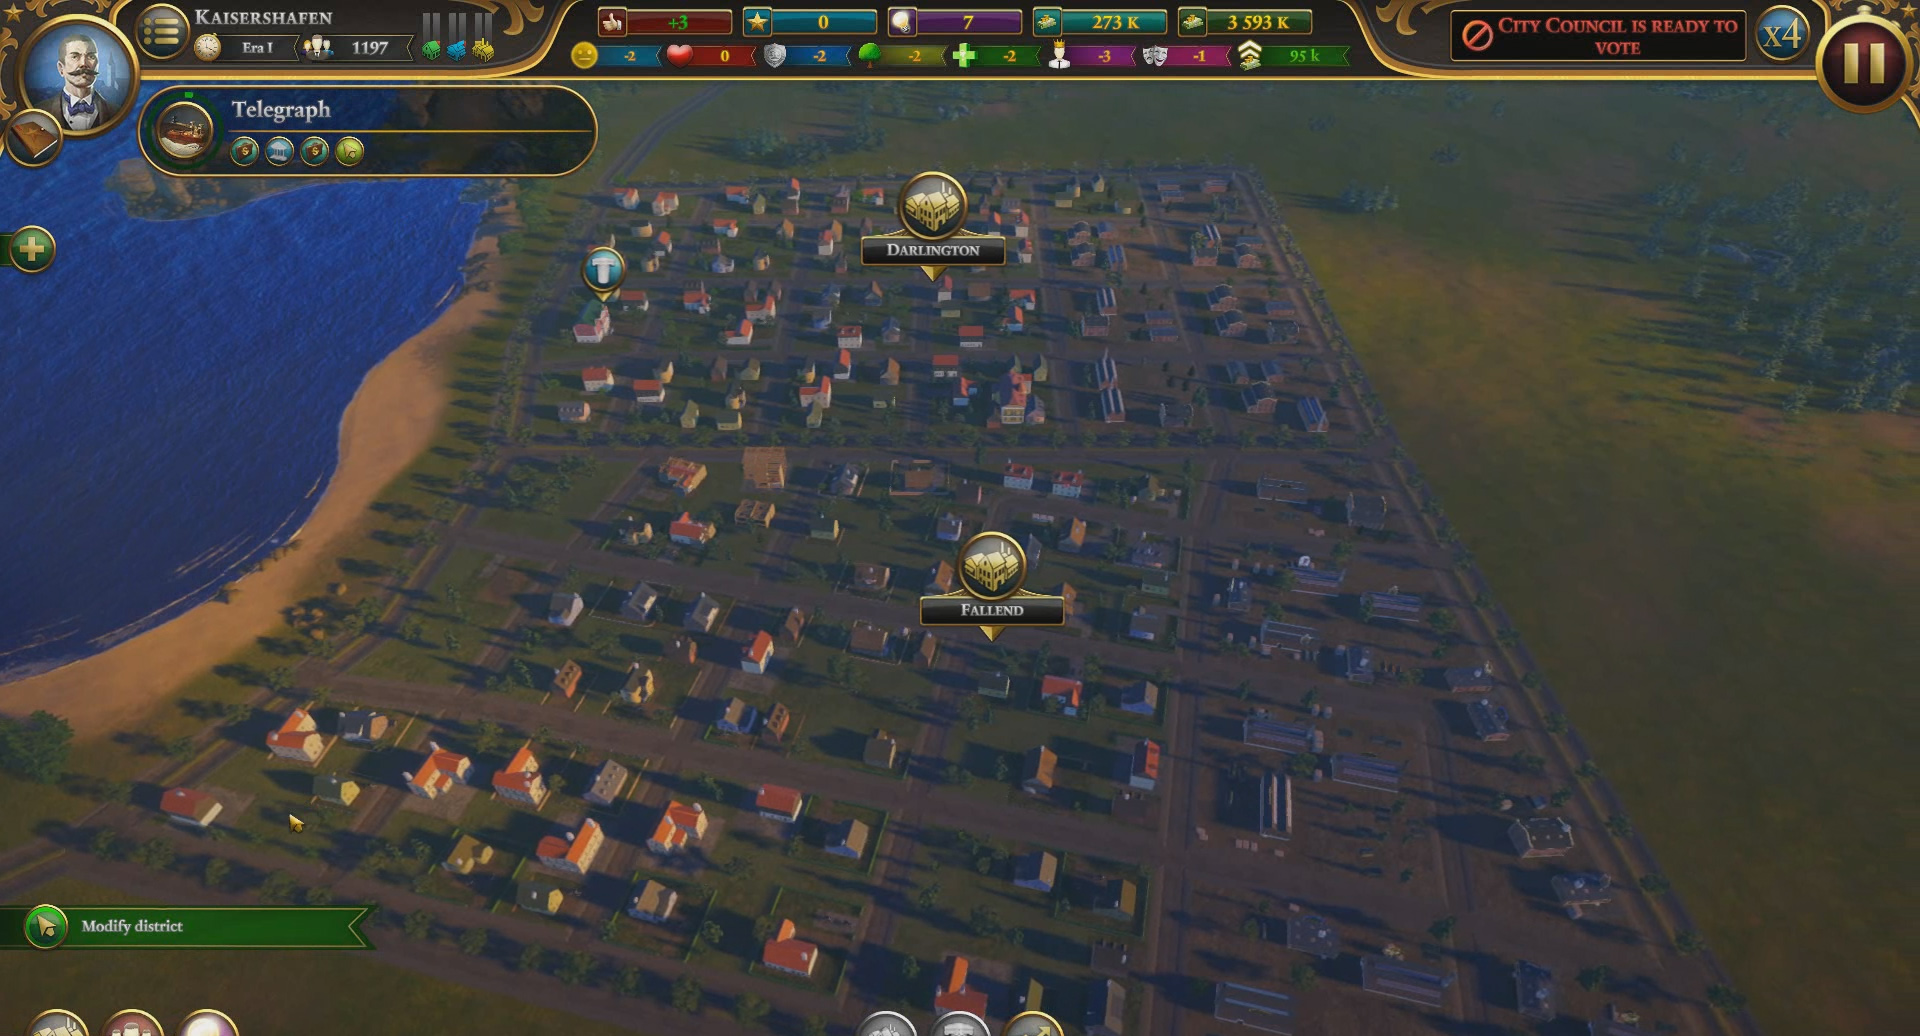
Funds
The backbone of any city builder is money. You need this stuff. In Urban Empire, it comes in two flavours:

- The first figure is your personal funds. This your family wealth, mostly accumulated from a monthly wage (which can be adjusted through a council vote). You can use personal funds to build things without council approval, though this often is not a good idea. More usefully, you can endorse services to improve their effective range.
- City funds are what the City Council uses for anything they vote on. You really don’t want to spend your own money when the city will pay for you.
Also important to note is the balance. This shows how much money the city is making or losing each month. Obviously, red is bad; green is good. Cashflow is more important than funds – funds can always be recovered, but you have very limited time and opportunity to stop a diving cashflow.
The most essential thing to consider here is to keep city funds as high as possible and maintain positive cashflow. You need working capital to invest in new districts and services and you need the cashflow to pay for their upkeep. Players can make a fatal mistake in purchasing something (especially with personal funds) that the city can’t afford to maintain, and one mistake like this can essentially put you into an unrecoverable slide into debt (you can’t demolish buildings until Era 2).
RCI
In the top right corner, you can just see three icons and bars. These represent RCI, or residential, commercial and industrial needs. The higher the bars, the more demand there is for those districts and services. If there is an oversupply, the bars will turn red, and you will see many city blocks remaining vacant.

Essentially, responding to the RCI bars will guide you through growth and expansion. Businesses won’t thrive and you won’t make the return on your investment if you ignore the RCI needs.
Wheel of Life
The icons represent the average satisfaction of the population across their needs: social life, security, physical environment, healthcare, personal growth and fun. These are improved through providing services and passing certain edicts.

Demand initially starts low, but increases as you go through the Eras, requiring you to invest more into making people happier. This is quite important when it comes to mayoral elections starting from Era 3, but can be ignored in the first two eras.
Meeting their demands early on is easily possible, but requires you to sacrifice cashflow that you could otherwise use to set up more districts. Apart from some negative events, not fully meeting these demands won’t set you back.

The heart of the city – and the whole game – is the City Council. Every decision you make, whether it’s passing a new law, proposing a new district or modifying an existing district, must get a majority vote in the council. The game promotes this as a complex juggling act between different parties as you try to win their favour. The reality is that the system is simple and easy to exploit.
Councillors will generally vote in favour of anything that benefits the city as a whole. They will vote against anything that doesn’t help the city. This is actually a good thing: the Council won’t do anything stupid to ruin your city, and if they unanimously oppose your edicts, it’s probably not the right thing to do.
If you want to make sure that the council passes your proposals, keep two things in mind:
- Have lots of funds in reserve, plus positive cashflow. Councillors will rubber-stamp most building proposals if the city can afford it.
- Have positive relations with the factions. Most of the time, you won’t need to bully them using goodwill points unless you really need to get something through, so having a higher disposition will mean more councillors will support you. Also pay attention to events that give bonuses to relations.
Taxation
The key in securing good cashflow, apart from responding to the RCI needs, is tax. Initially, you can only change taxes based on industry and citizens, but in later eras you can tax specific bands in your population.

There are a few rules when it comes to adjusting taxes:
- The Council will not approve of increased taxes if you are not in a budget deficit
- The Council will be more lenient to higher taxes if you are in a budget deficit
- Left-wing parties will always approve; right-wing parties will always oppose. The key is to secure enough moderate votes to get a majority.
Increasing taxes is the only way to solve a budget crisis. However, increased taxes will affect the livelihood of your population. People have less money to spend, businesses don’t make as much money, so you can reach a point where businesses close and you lose sources of tax. This is why you shouldn’t necessarily try to max your tax.
However, you don’t have to lower taxes either. Getting taxation raises passed can be tough, but keeping them high is easy. When you get too much tax revenue, the council will ask you to lower them, and this will generally be pushed through with no opposition. The tax cut isn’t much compared to what you gain.
Knowing this, we can kick-start our city’s economy by abusing this simple mechanic.
Building Your First District
You will be prompted to build your first city. Do so. As you are paying from your own funds, this requires no approval. You will, however, notice an economical phenomenon.

When you lay down a district, the city’s cashflow will be hit severely for the first few months. This is because the city is paying for the upkeep, but there are no residences or businesses generating any money, After a few months, the district will be built up, and cashflow will be restored. Districts should always be making more money than their cost to operate. In theory, every time you build a district, you should be positive cashflow unless you add too many things. A district without any services will make money.
Normally, the game progresses as you gradually accumulate funds and cashflow to set up more districts. However, you can make this process much faster by exploiting this cashflow drop.
Taxploitation
To summarise the above information:
- The Council will approve tax increases if you are in negative cashflow
- Districts will cause a huge cashflow penalty until they are fully built up, after which they become profitable.
You probably guessed it: we’re going to lie like a politician.
After the district gets approved, you will immediately be hit with the penalty. This will last for around two months and can even get worse if your city is experiencing a fluctuation. This is where you strike.

Go to the Council and ask for a tax increase. Industry taxes generate the most revenue and the parties are more lenient towards that change, but you can also get some tax dollars from the citizens as well. Depending on how much negative revenue you have, you can go up to 10% for both, but don’t get greedy or else the parties will generally oppose you. You don’t have to aggressively threaten the parties. You just need enough to give you a majority.
Allow time to pass. You will notice that your cashflow is recovering due to businesses and housing being built. Then, when it’s time to vote for the tax bill, push it through. If you weren’t too greedy, you don’t need to pull any goodwill strings, but if it’s close, do what you need to do. Remember that you only need a simple majority. The Council will vote based on the economy at the time of the proposal, not the current economy. Even if you are back in positive cashflow, you can still push this through.
The following month, you have receive a HUGE revenue injection with the increased taxes. Not only that, as the district becomes complete and businesses are running at full capacity, you also get the net gain from that district, giving you the double bonus of tax revenue and overall increased revenue as businesses make more money, and more citizens moved in to be taxed.

Depending on which point in the game you are up to, you can get huge changes in cashflow. Even in the early eras, you might be able to get a net revenue gain of 100k or more. This gives you plenty of room to add service buildings and upgrade your districts, and later build more districts.
First District Note
This may seem impossible with your first district. This is because, at the onset of the game, there is literally no one in your city, so there is ZERO revenue and the council can’t tax it. You have to give it a couple of months to build up. Once you start seeing the industries going up, push the tax bill through. If you did this right, you should go from -44k to +50k in the first year, giving you an enormous kick-start.
If you miss the opportunity, or only get a smaller tax boost due to mistiming it, you can do this on your second district instead.
Research & Expansion
You should have enough funds to build more districts. If you didn’t get a huge cash boost, you can exploit the tax phenomenon again, though if you played your timings right, you should be able to absorb the building costs without having to increase taxes again. If you find yourself starting to hit around -20k, you might want to build another district and hit the tax button again. If you expand too fast too soon, you’ll end up going into another doom spiral.
Note that if you raise taxes way too high, RCI demands will go into the negatives as people can’t spend money and businesses close down. This will eventually balance out, but it can be an effective game over if your balance can’t go back up. The trick is to invest the tax money back into the city by building services and upgrading districts, which should increase revenue over time without requiring you to lower taxes.
If the Council pushes for a vote to lower taxes, go with it.
For Research, getting Telegraph as one of your first two ideas is important, as it allows you to customise the district’s zoning. Normally, the second district will need to be more industrial-focused, though if you don’t have Telegraph by then, you can build a default district and tweak the zoning later, or build another district.
What next?
Go through the rest of the Era 1 technologies and expand your city. You should be able to get 4-5 districts up and running, and even begin adding improvements such as Gas lights and Sewers. Remember that adding utilities will improve the effectiveness of businesses, but have a heavy upfront cost. Also begin adding service buildings to address the Wheel of Life demands, and they can also improve effectiveness.

This should give you enough of an economic foundation to power through Era 2. Despite your new wealth, don’t splurge on things that aren’t desperately needed. You still need to build more districts and later on the costs for things like the University will be VERY high. By Era 2, you should be able to maintain a 200k to 500k revenue, which opens up options for the rest of the game.