
Overview
This guide gives an explanation on Influence and Diplomatic Points, and the related Negotiation Screen, which are the means to Diplomatic Victory in Endless Legend. It will also discuss some points of consideration for diplomatic strategies.
Introduction
War never changes. The only path to change, is peace. This guide will teach you the basics of peaceful play in Endless Legend, mainly by conveying some information that is currently missing in the game interface and manual.
“Another cataclysm is coming, and it is we, the Drakken, who must save the world of Auriga!”
The basic tool you, the player, have for achieving diplomatic victory is Influence, the last ‘I’ in ‘FIDSI’. It is a currency that can be produced by your cities just like your other FIDS (Food, Industry, Dust and Science). Like dust, influence is piled up in a ‘treasury’, to be spent later at an appropriate place and time. Diplomatic victory is, however, not directly tied to your production of influence, unlike the economic victory is to dust. In order to win, you need to convert that influence into Diplomatic Points (DP). There are two ways to do this: improving diplomatic relations and proposing diplomatic exchanges. You can always check your current diplomatice score and the amount required for victory, on the Score Screen (F10).
Version history
Version 1.3
- Corrected some information in the influence section, and added the Drakken quest rewards.
Version 1.2
- Added a section on single player strategy
Version 1.1
- Wrote a section describing the negotiation screen.
- Corrected some information in the influence section, and added the Ardent Mages quest reward.
- Added screenshots!
- Added a brief note about sea trade routes.
Version 1.0
- Wrote an introduction and sections on influence and Diplomatic Points, as well as a section on the benefits of peace and alliance.
Influence points, how to get them and how to spend them
As all other FIDS, influence is produced by your cities in one or more ways: from exploited tiles, from improvements, and from workers assigned to work influence. Like dust, influence can also be awarded from quests.
Unlike FIDS, influence is not produced from any type of terrain or anomalies, except while the ‘religious fervor’ event is in effect; this causes exploited anomalies to produce +4 influence for its duration. Furthermore, Drakken players produce +3 influence from exploited ruins (along with +2 science). The tiles that do produce influence are city centers and borough streets, both of which give 1 influence at level 1, and 2 influence per additional level.
Influence from exploitation is not granted from terrain, but from city district tiles.
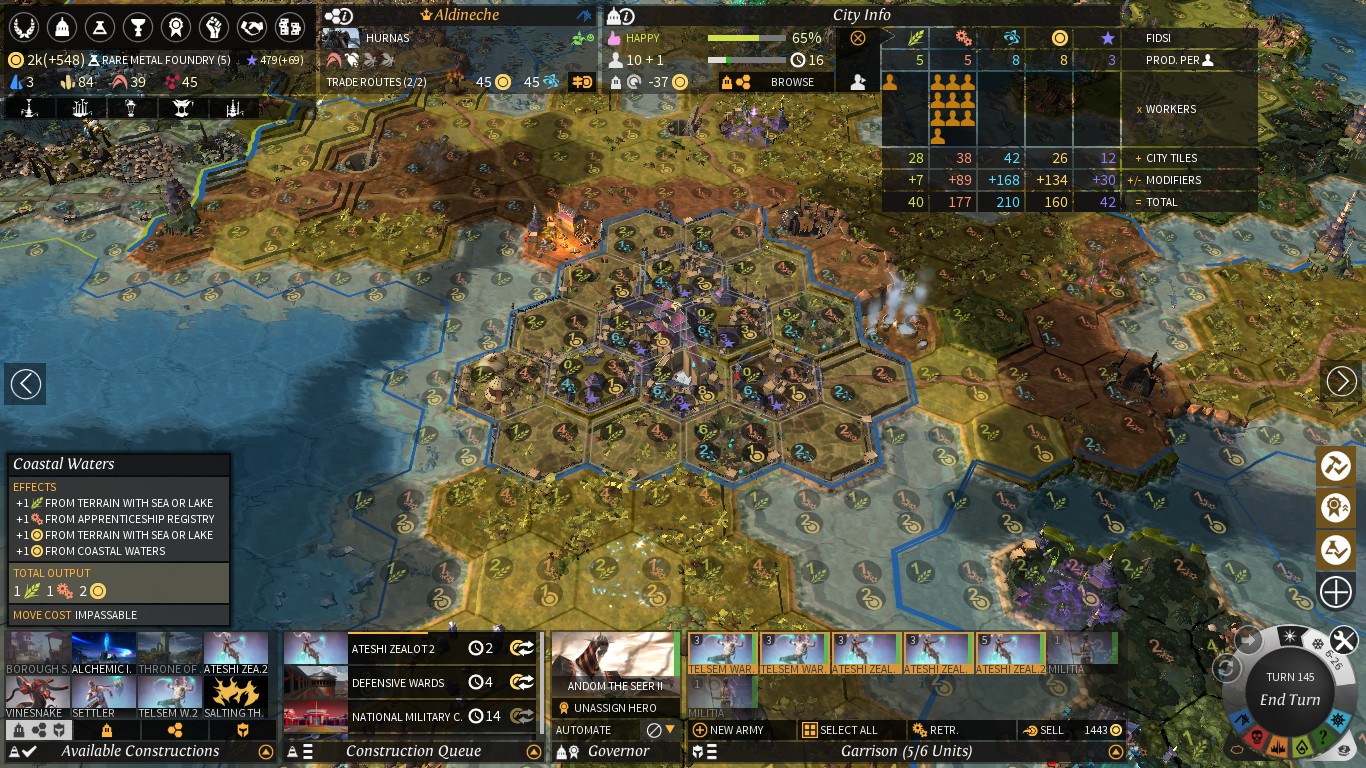
‘Religious Fervor’ event.
Improvements that produce influence are …
- Sewer System (Era 1)
- Glory of Empire (Era 2)
- National Museum (Era 3)
- National Arena (Era 3, Guardians expansion only)
- Aura of Empire (Era 5)
- Arena of Champions (Era 5)
- Arts Council (Era 5)
- Throne of Emperors (Era 4 Legendary Building, Guardians expansion only)
Improvements that increase influence per worker assigned are …
- Glory of Empire (Era 2)
- National Museum (Era 3)
- Aura of Empire (Era 5)
- Imperial News Network (Era 5)
Other related modifiers are …
- Hero capacities: Influence Boost/Efficiency 1/2/3. These are typically found on Drakken and Cultist heroes.
- Hero skills: also typically found on Drakken and Cultist heroes.
- United Empires Council (Era 6 tech): This gives a +100% modifier to both influence production AND Diplomatic Point gain, so obviously very powerful. Not all games reach the point were you are able to research this, though.
There are also related improvements and bonuses that are unlocked by faction quests, I will add these as I find them:
- Aura of Leadership (Drakken Chapter 2 Reward)
- Auriga Institute (Drakken Chapter 8 Reward)
- Altar of Transcendence (Ardent Mages Chapter 7 Reward)
There are five things on which you can spend your influence:
- Proposals and declarations on the negotiation screen
- Assimilating Minor Factions
- The Empire Plan
- Converting Minor Faction villages (Cultists only)
- Espionage actions (Shadows expansion only)
This guide is mostly concerned with negotiation, which is what you need to be doing in order to win a diplomatic victory, but keep the other things on this list in mind so you do not use up all of your influence on proposals and have none left for an assimilation or for the empire plan at a crucial moment.
Diplomatic Points gained per turn, AKA Passive DP
I take diplomatic relationship to simply refer to the level of trust and interaction between two empires. There are five levels of diplomatic relations in Endless Legend. They are, in order of least to most friendly:
- War
- Truce
- Cold War
- Peace
- Alliance
War allows both empires to attack each others armies and cities everywhere.
Truce and Cold War allows both empires to attack each other outside of the other players territory (so attacking cities is not possible).
Peace and alliance disallows both empires from attacking each other, anywhere. They also open up more options for diplomatic proposals and declarations (see following sections).
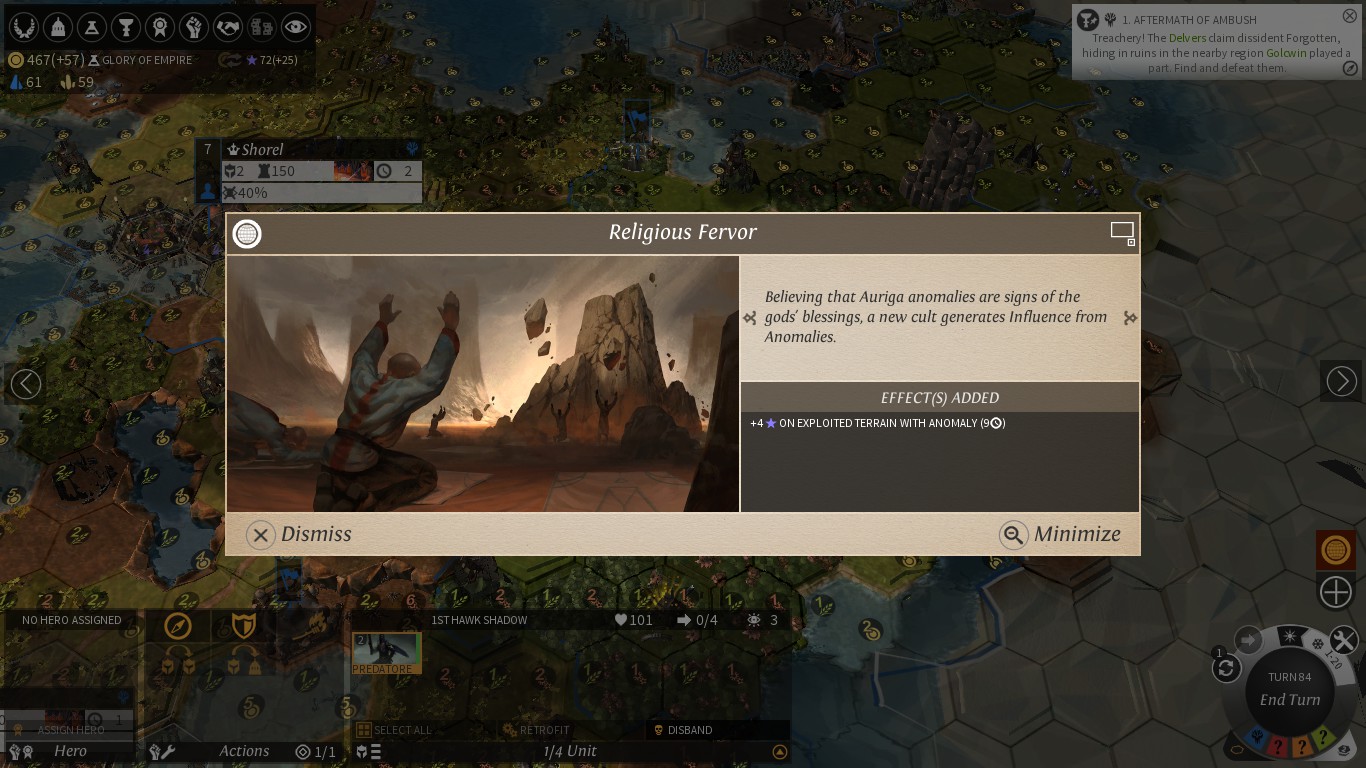
You can check your current relationship with all individual opponents via the diplomacy screen (F7). Note that truce and cold war share the same space on the grid, but can be differentiated in the tooltip (hover the mouse cursor over their avatar) or in the negotiation screen (click on their avatar).
The diplomacy screen, featuring the diplomacy grid.
At the end of each turn, all players gain DP for each other player in the game. The amount is different depending on relationship levels. For each other player, depending on your relation to that player, you get:
- War, Truce or Cold War: 1 DP per turn
- Peace: 2 DP per turn
- Alliance: 4 DP per turn
So for example, in a 4 player game, being at peace with 2 empires and in cold war with the 3rd, you would gain 5 DP per turn (2+2+1). Your DP per turn is also shown on the Empire Screen (F1), in the empire effects list, though they may be hard to find. It will say (for example):
+4 Diplomatic Points on empire from peace
+1 Diplomatic Point on empire from cold war
The Empire screen (F1). Your passive DP is listed in the ‘Empire Bonuses’ window to the right, but it can be hard to find.

I have noticed that I will a lot of the time get one DP too many per turn (one more than listed on the empire screen) when in one or more peace or alliance relations. I have made a bug report about this on the Amplitude Forums.
This is done using the negotiation screen. From the diplomacy screen (F7), click on the avatar of the empire you want to interact with. All players start the game in Cold War with one another, and have the option of declaring war. You may also propose peace or alliance from a state of cold war, but these options require you to first unlock specific techs. Players in war have the option to propose a truce. Players in truce have the option to declare a war, but not peace or alliance. 20 turns after a truce is agreed upon, the relationship will automatically change to cold war again. More on proposals and declarations in the next section.
Diplomatic Points gained from proposals, AKA Active DP
The diplomatic items (options) available in the negotiation screen (accessible from the diplomacy screen (F7)) can be broadly categorized in two ways: either as proposals or as declarations. Adding proposals to the list of terms and then clicking ‘Make an offer’ will send a message to the other player informing them of the deal you have suggested. They will have the option of accepting, rejecting or making a counter-proposal. Only if they accept the deal will your influence be spent, treaties signed, goods exchanged and Diplomatic Points scored. Declarations, on the other hand, will take immediate effect without the consent of the other empire, but they will not score you any diplomatic points. Each item has an associated cost in influence, which is not fixed but rather depends on current relationship status and game speed.
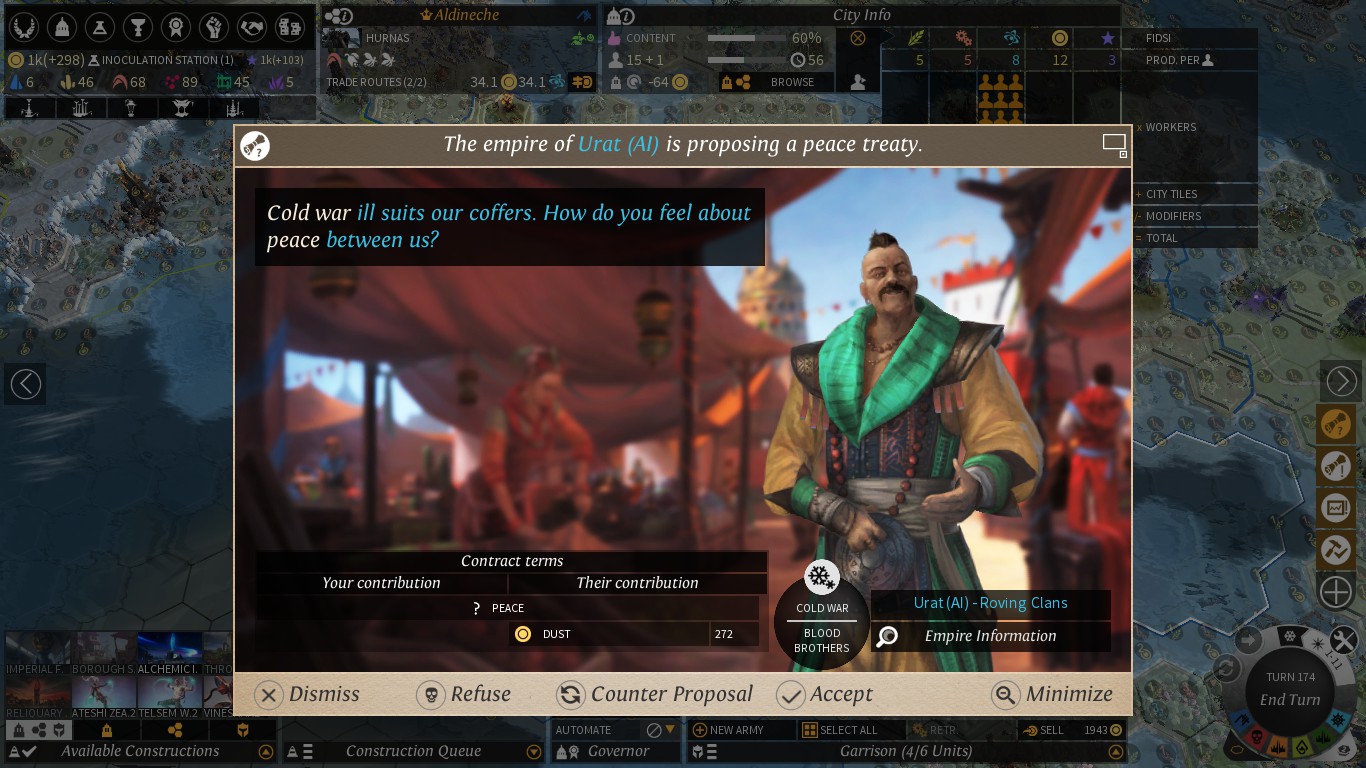
Receiving a proposal from an opponent.
Receiving a declaration from an opponent.

As a rule, items that improves your relationship level are proposals, and items that worsen it are declarations. An exception to this is the Force Truce, Force Peace and Force Alliance items, only available to Drakken players. These will improve relations but without the other player consenting, so they are really more like declarations. ‘Force’ options also provide no diplomatic points for the exchange, but forced peaces and alliances will contribute to your DP per turn, as normal.
Early game peace proposals are usually accepted by the AI without any other items included in the deal.
Whenever an opponent accepts your proposal, you score 1 Diplomatic Point for every 5 influence points spent on the deal. An exception to this is the ‘Declare war on: (third party)’ item, which does not contribute to DP.
How many Diplomatic Points do I need in order to win?
The Diplomatic Score needed to achieve victory depends on two factors, game speed and map size. Here’s a table:
Please note that map sizes are listed with their recommended number of players, but the actual number of players has no influence on the score needed for Diplomatic Victory. You can check the amount needed, as well as your current score, in-game at any time by consulting the Score Screen (F10).
The Score screen (F10). The diplomacy tab displays your current DP score. Hover over the ‘Diplomatic’ label to see how much is needed FTW.

Additional benefits of peace and alliance
As mentioned earlier, peace and alliance prevents military conflict between partners. This is good for you at most times, but your partner may change their mind later, declare cold war or war and launch a surprise attack on your armies or cities. Also as mentioned earlier, peace and alliance increase your (and your partner’s) DP gained per turn. But there are more reasons to want peace treaties and allies!
First off, before you can propose a peace treaty or an alliance, you need to aquire the appropriate techs. These are Diplomat’s Manse (Era 2) for peace treaties, and Hospitality Den (Era 4) for alliance.
Trade routes are an additional source of dust and science. Trade routes are created between friendly neighbouring regions when both cities have built the Right of Way improvement. If a string of friendly regions all have built Right of Way, the trade routes will connect even further and produce more dust and science. Peace and alliance allow trade routes to be connected to other empires and not just between your own cities. This can give you longer trade routes resulting in more dust and science gained per turn. This can be even further increased by bonuses from commercial and research agreements (see below).
Sea trade routes can also be connected, between neighbouring cities (maximum of one ocean region apart) that have the Cargo Docks improvement built. But as each city has a cap on how many trade routes they can have, if your land trade routes are more profitable you will not be able to make any sea trade routes.
Being in peace or alliance adds the options of map and vision exchange, as well as commercial and research agreements, which aside from granting you DP when successfully negotiated are really useful for their own effects. Just be careful about exchanging vision with all players if you’re playing with the Shadows expansion as this will let them easily infiltrate your cities.
Being in peace or alliance opens up 3 additional tabs in the negotiation screen:
- Tab 2 lets you offer or request dust or strategic/luxury resources
- Tab 3 lets you offer or request food, industry or science stockpiles
- Tab 5 lets you offer or request techs
These 3 tabs are your main tool for forging a lasting peace on Auriga. Give your friends what they want, and they’ll want to stay friends with you. This is true for both AI and human opponents, though your strategy will probably be a little different in each case. More on that later.
Adding dust and resources (2nd tab) to the deal makes your partner more likely to accept.

Being in an alliance will cause both players to get an empire-wide increase to their production of influence. (I don’t have the numbers on this right now, will update later). It also causes both players to gain additional influence when they kill units belonging to a common enemy! So be prepared to declare war when someone is threatening your precious allies!
More on the Negotiation Screen
You can also trade techs. Gifting your friendly neighbours the Imperial Highways tech will help you both out greatly!

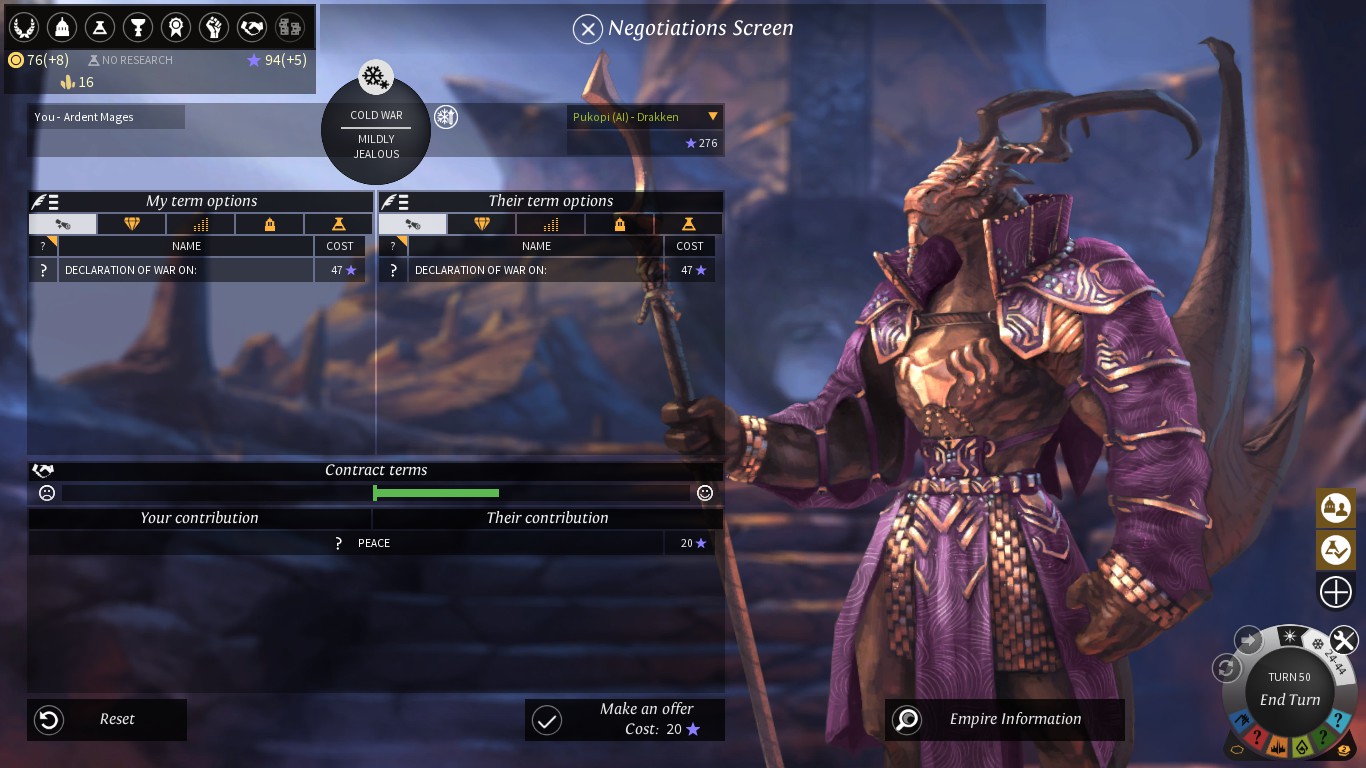
On the top of the negotiation screen is shown your current relationship to this empire, and underneath their current attitude towards you (if it is an AI empire). Directly to the right of this information is a collection of icons that show what kind of treaties are currently signed. Hover over these icons with your mousecursor and the tooltip will tell you more. You can also see how much influence the other player has at the moment.
Next are two boxes, each containing the terms that can be added to the contract. The left box ‘My term options’ is for items you wish to give to the other player. The right box ‘Their term options’ contains the items you can ask for in exchange. Click on a term to add it to the deal. Some terms, like ‘commercial exchange’, are unilateral, meaning that they always affect both parties.
When dealing with AI players, notice the bar in the middle, right under ‘Contract terms’. This shows you whether the AI will accept your proposal or not. As long as the bar extends to the right of the divider (green bar), you can be sure that they will accept it. If it extends to the left of the divider (red bar), they will refuse it. This bar is not shown when dealing with human players, so you will have to put a little more thought into figuring out what they want.
Next is a larger box, showing the terms that have already been added, along with their individual influence costs. Clicking on a term will remove it from the list.
Finally, you have two buttons. ‘Reset’ will clear out the ‘Contract terms’ box so you can start over. When you are ready to present your offer to the other player, click on ‘Make an offer’!
All proposals except ‘Declare war on: (third party)’ score Diplomatic points equal to 1 for every 5 influence spent. Remember, declarations do not score Diplomatic Points!
Declarations (tab 1):
- Declaration of war
- Cold war (if in peace or alliance)
- Peace (if in alliance)
- Force truce (Drakken only)
- Force peace (Drakken only)
- Force alliance (Drakken only)
- Close borders (not available in war)
The other player may not enter your regions. - Map embargo
Stops sharing map with the other player. This will not hide parts of the map given by your earlier map exchange, it will only stop sharing future exploration. - Vision embargo
Stops sharing vision with the other player. - Vision and map embargo
- Commercial embargo
Cancels commercial agreement. Your trade routes may still connect to the other player. - Research embargo
Cancels research agreement. Your trade routes may still connect to the other player. - Market ban (Roving Clans only)
Renders the other player unable to use the Marketplace (F8) until removed or nullified. - Market ban removal (only if opponent is Roving Clans and has banned you)
Lets you use the marketplace again (use against the player who banned you). - Compliment
Reduces the cost of positive diplomatic actions and increases the cost of negative actions against this player. - Warning
Increases the cost of positive diplomatic actions and reduces the cost of negative actions against this player.
Proposals, treaties (tab 1):
- Truce (if in war)
Enter the state of truce for 20 turns with the other player. While in truce, no peace or alliance can be declared, but war may be declared again (at a greatly increased cost in influence). - Peace (if in cold war)
- Alliance (if in cold war or peace)
- Open borders
The other player may once again enter your regions. - Map exchange
Both players exchange their current and future maps. Does not remove fog of war. - Vision exchange (requires map exchange)
Both players exchange vision from cities, armies and improvements. - Vision and map exchange
- Commercial agreement
Increases dust gained from trade routes between empires for both players. The bonus increases up to 20% over a number of turns. - Research agreement
Increases science gained from trade routes between empires for both players. The bonus increases up to 20% over a number of turns. - Market ban removal (Roving Clans only)
Offer/request to remove market ban as part of a bigger deal. - Declare war on: (third party)
Offer to declare war on a third player, or request that your partner declares war on a third player.
Proposals, resources (tab 2):
- Dust
- Titanium
- Glassteel
- Adamantian
- Paladian
- Mithrite
- Hyperium
- Dye
- Emeralds
- Gold
- Spices
- Wine
- Blood Crystal
- Grassilk
- Moonleaf
- Quicksilver
- Titan Bones
- Dust Orchid
- Dustwater
- Hydromiel
- Pixie Blood
- Redsang
Proposals, stockpiles (tab 3):
- Food Stockpile
- Industry Stockpile
- Science Stockpile
Proposals, cities (tab 4)
- All your and the other party’s cities are listed here, except for those that are currently under siege
Proposals, techs (tab 5)
- All Era 1-5 techs not already known by the other party are listed here
From what I read, in the Shadows expansion it is also possible to exchange heroes (spies and hostages), but I haven’t played Shadows yet so I won’t add it at this time.
Single player strategy
Single player diplomacy is all about gaming the system, since the AI players always have a price for co-operation. They will always accept whatever treaties you ask for, if you just give them enough dust, resources or tech.
Unlock Diplomat’s Manse as soon as possible, then sign peace treaties with all empires as soon as you meet them. This will double your Passive DP. If your production of influence is low when you reach Era 2, get Glory of Empire before Diplomat’s Manse.
If you are playing Drakken, you will have contacted all other empires at turn 1 and can sign (or force) peace treaties with them as soon as you unlock Diplomat’s Manse. If you are playing another faction, you will first have to find a faction before you can sign treaties with them. If there is a Drakken player in the game, sign a peace treaty with them, then exchange maps. This will let you see all players’ starting locations. Now send scouts to contact them so you can sign treaties.
When gifting or trading resources, number of terms is better (for you) than the quantity of each term. You spend more influence and thus gain more DP if you offer 10 Titanium, 10 Glassteel, 10 Adamantian and 10 Palladian rather then offering 40 Titanium.
Gifting techs should be not be done frequently, since this will significantly boost the AI’s economy, especially at higher difficulty levels. Only gift techs when this will help your own economy. A good example of this is Imperial Highways, which will increase your dust and science income if your neighbours also build Right of Way in their cities. Don’t give Imperial Highways to players that can’t connect trade routes to your cities.
The amount of influence producing techs you need to unlock over the course of the game will vary, depending on your faction, number of players and how the game plays out. It is better to get too much influence than too little. Remember to make good use of the Empire Plan!
When it comes to luxury boosters, Dye is your best friend. It grants +50% influence for its duration. If you can’t produce enough to have the booster up at all times, plan ahead. If you need a lot of influence in the coming 10 turns (or 5 on fast speed), activate the booster and shift all of your workers over to influence. After the booster ends, return your workers to other tasks.
In single player, you have a lot of freedom over if you want to build a tall empire (few, bigger cities) or a wide empire (many, smaller cities). Here’s a few advantages and disadvantages to each:
Tall empire, pros:
- Fewer cities makes luxury boosters cheaper
- Fewer cities makes negotiation and empire plans cheaper, more bang for your influence
- Fewer cities makes your empire easier to defend against agressors
- More districts per city means more influence produced per district due to district levels
- More districts per city means higher fortification values
- Smaller empire gives you less expansion disapproval
- Having fewer regions means there are more regions for your opponents to settle, making them less likely to fight you for land
Cons:
- Fewer cities gives you fewer trade routes
- Fewer cities makes negotiation cheaper, meaning you have to make more proposals to earn the same amount of DP
- Fewer regions gives you less access to strategic and luxury resources
Wide empire, pros:
- More cities gives you more trade routes
- More cities makes negotiation more expensive, meaning you need to make fewer proposals to earn the same amount of DP
- More regions gives you more access to strategic and luxury resources
Cons:
- More cities makes luxury boosters more expensive
- More cities makes negotiation and empire plans more expensive, giving you less value per influence spent
- More cities makes your empire harder to defend against agressors
- Less districts per city means less influence produced per district, due to district level
- Less districts per city means lower fortification values
- Larger empire gives you more expansion disapproval
- Having more regions means there are less regions for your opponents to settle, making them more likely to fight you for land
Multiplayer strategy
TBD
Factions suited for a diplomatic playstyle
TBD
To do
- Write a section on multiplayer strategy
- Write a section on considerations for each of the main factions
Summary
Gain 1, 2 or 4 DP per other player per turn, depending on relationship status
Also every 5 Influence spent on proposals (but not declarations) = 1 DP
To achieve Diplomatic victory, you need to score diplomatic points over the course of the game, partly by entering (and hopefully staying in) peace and alliance relations, and partly by proposing treaties and trade offers via the negotiation screen. Stay friendly with as many players as possible, and protect your friends by any means possible. They are your lifeline!