![[ENG] Creating a loading screen for the No More Room in Hell map. for No More Room in Hell](https://steamsolo.com/wp-content/uploads/2021/07/eng-creating-a-loading-screen-for-the-no-more-room-in-hell-map-no-more-room-in-hell.jpg)
Overview
Detailed guide to creating a loading screen for the No More Room in Hell map in English.
Greeting.
Greetings, the official nmrih forum was closed, because of this, a lot of useful information was lost, including instructions for creating loading screens for nmrih maps. I decided to create a small guide where I will show you how to create a loading screen and embed it to the map(so that other players can see it).
Introduction.
Let’s start with the fact that we will understand how the loading image should look and where it should be located. For example, let’s take a loading screen from the official nmo_broadway map.
Like all loading images, it is located in the game folder on this path: “materials/vgui/loading/”, in this case, the picture is located on the same path, but in the vpk archive of the game. But you do not need to upload the image into the vpk archive.

Nmo_broadway.vtf – loading screen that will be displayed if the player uses a normal aspect ratio:

Nmo_broadway_widescreen.vtf – loading screen that will be displayed if the player uses a widescreen aspect ratio:
.vmt are files that specify the path to the .vtf files(about them later)
.vtf textures of the loading screen use the following flags:

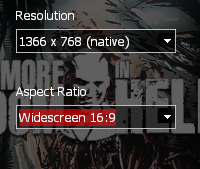
Resolution:
Everything you need to create.
To create a loading screen, you will need:
- Two images: one in a resolution of 1920×1200 (for widescreen monitors), the other in 1600×1200
- VTFedit program (you can also use alternative programs for creating and editing .vtf textures):
Step 1. Creating .vtf textures.
First you need to turn your images into .vtf textures:
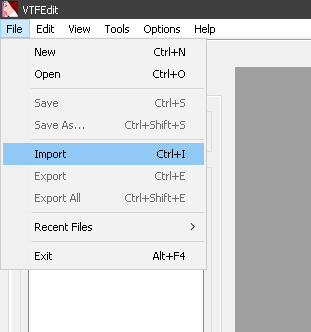
- Open VTFEdit, find the “File” section at the top, then click on “Import”:
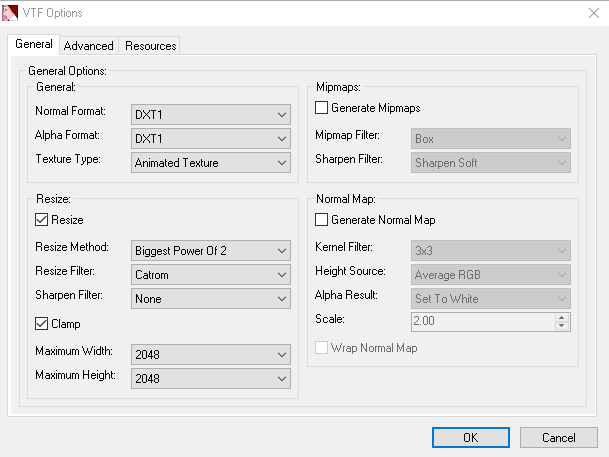
- Select 1600×1200 image, after which I recommend using these settings (with such settings, the picture in total will weigh 24 MB, the quality will be the best):
If such a weight of the image does not suit you, then I recommend the following settings(with such settings, the total weight will be 4 MB, and the quality will be slightly worse):
- (optional)Also, you can use the “Sharpen Filter” to apply one of the filters to the image(some filters may not work or spoil your image):
- After you are done with the settings, click OK and the .vtf file will be created.
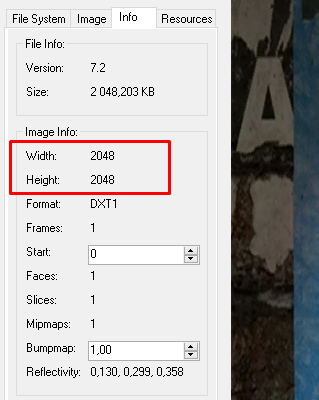
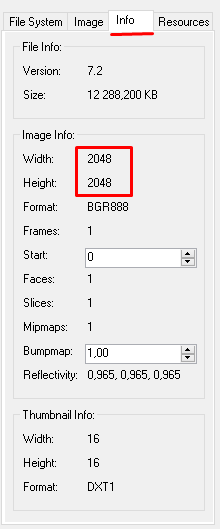
- In the “Info” section, check the image resolution, it should be 2048×2048
- Next, in the “Image” section, set the following flags:
- Save the .vtf image file. The name of the image with a resolution of 1600×1200 should be the name of the map, for example:
- Do the same steps for an image with a resolution of 1920×1200. The name of the image with a resolution of 1920×1200 should be the name of the map + “_widescreen” at the end, for example:


As a result, you should get two files with the .vtf extension:

Step 2. Creating .vmt files.
After .vtf textures of the loading screen are ready, you need to create .vmt files for them.
Example of the loading screen .vmt file of the nmo_broadway map:

.vmt files can be edited in any text editor, you can do it manually or create it in the VTFEdit program.
Creating .vmt files using VTFedit:
- Open one of the .vtf textures.
- In the “Tools” section, select “Create VMT File”
- In the “Options” tab, select “UnlitGeneric” as the “Shader”:
- Click Create.
- Repeat these steps for the other one .vtf file


Just in case, check the .vmt files using a text editor, they should look something like this(of course, instead of “nmo_map” will be the name of your map):
- nmo_map.vmt must be:
- nmo_map_widescreen.vmt must be:


Step 3. Embedding the loading image into the map.
Also, so that other players can see your picture, you will need to embed it into .bsp map file. To do this, you can use any program that allows you to do this, in this case I will use Pakrat (you may need to download Java for it to work).
Download link:
[link]
Like all custom content(models, textures, sounds, etc.), you need to embed the loading screen into .bsp map file.
To do this:
- Open Pakrat.
- Find .bsp file of your map.
- Open it.
- Drag and drop .vtf and .vmt files in Pakrat
- Click “Yes to all”(so that the file path is automatically corrected)
- Save the .bsp map file.

The path must be like this(if you can’t fix it automatically, fix it manually:
