Overview
Explanation of controls, save/loading, and anything else to get started.
About
V-Katsu is a character creation software that lets you make a full avatar for a VR program. It’s currently only geared for Japanese users who want to make an avatar and become a ‘Virtual YouTuber‘ or ‘VTuber‘.
Don’t lose all hope, though! V-Katsu is currently marked as ‘Steam Early Access‘, so it may have more features down the line – and you can still have some fun making an avatar!
This quick-manual lists the important parts you need to know to use VKatsu, especially if you are unable to read Japanese.
※This guide was originally written with Version 1.2.2, so things may eventually become obsolete.
※Some updates were made as of v1.2.12
Readme / Links
Official website: [link]
Official Twitter: Tweets by vkatsu_project
※Update changelogs are also here.
IVR-Shop: [link]
※Required for uploading, see relevant section
V-Katsu manual: [link]
※A copy is also in your game folder, at v_katsuDefaultDatamanual
V-Katsu license: [link]
※You should only use V-Katsu after understanding the terms and conditions of the license.
※I will not provide assistance relating to these links and documents.
Startup
By default the game will run at 1280×720 windowed. When starting the game, you’ll have the option to open a basic configuration menu for your resolution.
There is no Configuration menu in the main menu. You have to enter the Character Creator to access it.
The main menu will have four choices:
- Character Creator → Female,Male
- Virtual Room → VR, Camera
- Upload → VRM, Cloud Save
- Quit
For more information on the menus, see the relevant sections.
※ Bug: Even if you turn it off in the Creator, music will still play in the main menu.
Character Creator
※There is no undo button, but you can reset the slider. You can’t reset the colours.
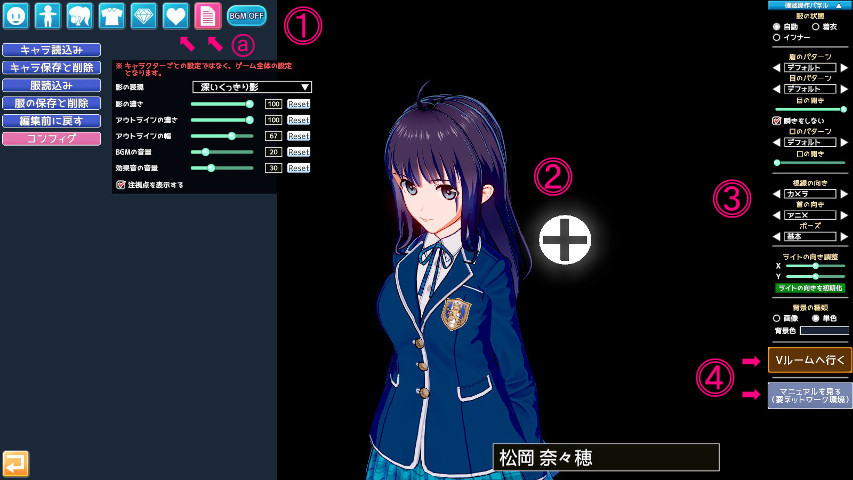
{a} – The two rightmost tabs are the ‘Profile‘ and ‘System‘ tabs.
Profile: Character bio, and pre-configure the face for file export.
System: Save/Load, Reset All, Config
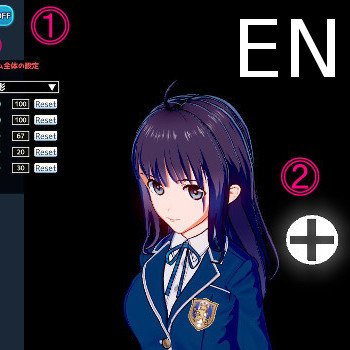
{2} – Character view. Click in this area to move the camera.
※The white + symbol is the origin / pivot point for the entire view.
{3} – Scene settings.
※You can toggle clothing, set the face, pose, and lighting, or change the background.
{4} – Move to the VR Room (remember to save first)
––– open the manual (it opens the web version in your browser)
— Controls
Left MB: Rotate on XY Axis
Middle MB: Pan on XY Axis
Right MB ← →: Zoom
Right MB ↑↓: Move origin/pivot point Y
Left & Right MB (hold both): Move origin/pivot point on XZ Axis
F2: View hotkey reference card
Space: Hide UI / Photo Mode
R: Reset all camera settings
1: Hide/View the origin/pivot point
F11: Take screenshot (Photo Mode only, not related to Steam Screenshots)
There are some extra camera controls on the keyboard, but it’s not designed for a QWERTY keyboard, so the keys are not in the most comfortable of places.

(red keys)
= – Lower FOV
] – Raise FOV
; – Reset FOV
(yellow keys)
>. – Clockwise Z Rotation
| – Anticlockwise Z Rotation
?/ – Reset Z Rotation
(pink) Numpad – Rotation, same as Left MB
(green) Home, End, PgUp/Down – Same as Right MB
(violet) Arrow Keys – Same as Left & Right MB
Numpad 5 – Reset Rotation
— System Tab (Save/Config)

When saving a character, you also need to take a photo. If you’re overwriting a file, you’ll be asked if you want to retake the photo or not.
When loading a character, you can filter which part of the character you want to load, ie. Face, Body, Clothing, etc.
Loads the default character. In addition to the sliders, all colours, clothing, bio, etc. are reset.
You can set the rendering method (ie. cel-shading vs diffuse), outline thickness, and sound volume.
The BGM toggle only applies inside the character creator – to disable music in the main menu and all other modes, set the volume here to 0.
— Custom Textures
As of v1.2.12, a few articles of clothing in the Tops section are intended for custom textures. You can also export the UV map as a guide.
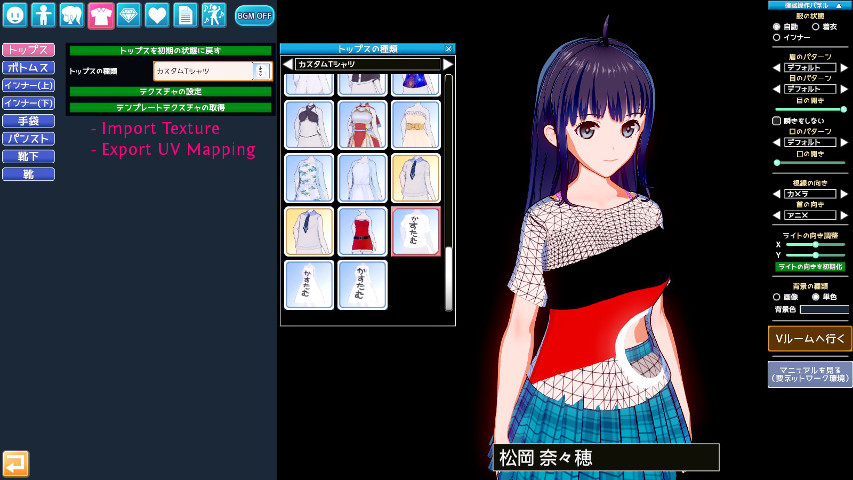
- Textures should be a square-shaped PNG file, ideally with a power of 2. (ie 512×512, 1024, etc.)
- The exported UV map used for your reference will be a 1024×1024 PNG with indexed colours.
- The alpha channel is also supported.
Virtual Room
There are two different rooms. You need to select a character before it can start.
Uses VR to control your character.
You need to be playing the game in Steam VR for the VR Room to work.
There are 3 buttons: Calibrate, Menu, and Grab.
- Calibrate: Aligns your avatar with the VR headset. Use this to adjust height problems.
- Menu: Load outfits and facial expressions
There are also 8 face presets you can toggle with the analog sticks.
※The actual buttons will differ depending on the controller.
※You can also press Space on the keyboard to Calibrate your avatar.
Uses a webcam. A microphone is optional.
The scene settings panel on the right is similar to the one in the character creator, ie. light and pose options.
- The webcam will use face recognition and use it to rotate/tilt your character’s head and body.
- If you have a microphone, lip-sync will occur and the sound will be output to the speakers.
※ You currently cannot disable speaker output. Beware of sound feedback loops.
Upload / Export
Local model exports to VRM, FBX, OBJ, or any other file format is not available.
As of Version 1.2.2, you can upload your VRM directly to NicoNicoDouga’s server for their VirtualCast streaming software, but you can’t download or directly recieve the VRM file.
Uploading from V-Katsu requires you to buy a Character Ticket from the IVR shop.[www.i-vr.shop]
Custom Data / Savedata
Your savedata will be in the game’s install folder, at v_katsuUserData
You can also place some custom data for the game to load.
v_katsuUserDatacap – Screenshots
※Independent from Steam screenshots. If you take screenshots while in Photo Mode (hide the UI), a lossless PNG copy will be saved here.
v_katsuUserDatachara – Character savedata
v_katsuUserDatacoordinate – Outfit savedata
v_katsuUserDatabg – Background art
v_katsuUserDatacardframefront – Foreground art for the character photo
v_katsuUserDatacardframeback – Background art for the character photo
※Image files must be in PNG format.
Legal
This Steam Guide can be used under the Creative Commons BY-NC-SA 4.0 licence.
You may credit me as “éirich“, or “エイリフ“. In addition, please include a link leading back to this Steam guide.
For a human-readable summary of the licence (which is NOT the actual licence,) go here: [link]