Overview
This guide includes a walkthrough, all Gem locations, how to get all Achievements, and the endings that you can obtain and how to get them.There is also some fun things I’d like to point out.
Before We Begin
I was told that this walkthrough may be a little out of date as of the Halloween 2020 update. For the most part, however, many things did not change. The layout of the manor itself has changed (not by much, however) and there are major sprite reworks. If possible, just ignore the images.
If you’re still insistent on using this guide: Follow the story beats first, and, if you’re lost on a puzzle or something, feel free to use this guide. Mad Father is best played this way.
I’m going back to edit this guide because I use a lot of confusing language, which is my fault.
References
vgperson’s “Mad Father” page[vgperson.com]
Controls
The controls are the standard Japanese RPG kind.
MAIN GAME
Move: Arrow keys
Interact/Confirm: Z/Space bar
Inventory: X/Esc
To pull out/put away chainsaw: Shift
To use chainsaw: Enter
CUTSCENE
Continue Dialogue: Z/Space bar
Skip: X
The HUD
INVENTORY
Mad Father‘s inventory is quite simple. To open it, press X or the Escape key. Using the UP/DOWN arrow keys will result in you switching between the previous and next inventory slots. However, using the LEFT/RIGHT arrow keys will switch between the tabs ITEMS and KEY ITEMS.
KEY ITEMS are items that get you Gems, or to showcase how many Gems you have, or to show off your cool chainsaw that you get later in the game (along with a flashback, of course). (Some items that give you Gems for completion do not always go into KEY ITEMS.)
ITEMS are things that aren’t very important otherwise and that you use later on, depleting it from your inventory permanently after a singular use (or maybe more!).
COMBATIVE(?) SCENARIOS
This is a scenario when you have to smash the Z key or Space Bar (in the unpaid version) or smash a combination of arrow keys in a sequence for around five times (in the paid version) as quickly as possible. At the top right, you’ll see a blue bar which is Aya’s health, and it will go down for every four(?) seconds that remain in the scenario.
In the middle is the combination of arrows I talked about (if you are reading this for the paid version which, I hope you are, because there’s quite a big difference between the paid and unpaid version if you’ve played both). That’s nothing important, really, but the above bar is golden yellow and it shows you how many times you have done the combinations successfully. Fill up the bar, and Aya’s free from death!
If you cannot fill the completion bar before Aya’s health is fully drained, you’re left with a YOU DIED screen.
Walkthrough – First Floor and Second Floor
PROLOGUE
Optional; only follow this guide if you want the full Mad Father experience, or the one Gem involved. It is quite linear and I do not think that this needs its own separate placeholder in a guide, but, nonetheless…
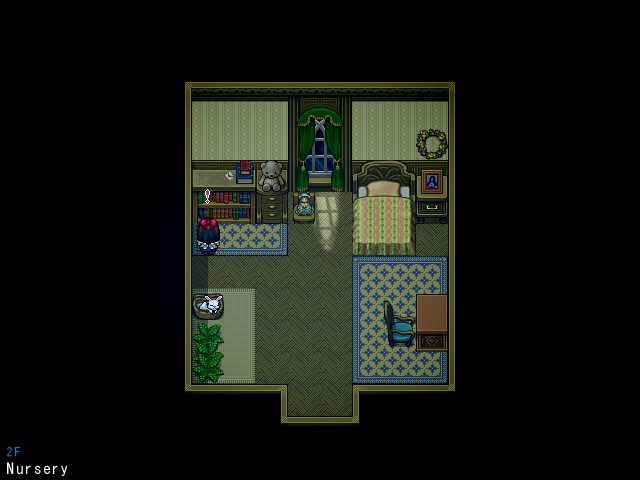
All you can really do is look around the room (and get a lot of flashbacks, which is basically most of the game anyways, so you can prepare yourself for a lot of cutscenes that you probably don’t want to see).
Examine Snowball, examine the portrait of Aya’s mother next to her bed, examine the doll, read the book, whatever you want to do. Just make sure you go to bed after that…and then wake up?
Exit the 2F Nursery and go to the crow. The crow is your save point anywhere, anytime in the game. They’re usually everywhere…and that’s useful in this game (but not as useful as Misao’s quicksave feature).
AFTER PROLOGUE
Alright! You probably won’t see the bold and underlined text ever again.
First of all, get Snowball. He’s essential. If you haven’t already, you might want to get the Gem in the bookcase after Aya reads such a cute(?) and memorable(?) book.
Go into the door on the left of Aya’s bedroom. She’ll run back out, but you want to run back in. Grab the sparkly Archives Key on the floor.
Leave. Now, you want to go into the great hall on the left. Make sure you go down the stairs, and try to go to the door on the west of the first floor. Make sure you avoid the zombie! Or…whatever it is. (It’s a spirit.) They’ll drain Aya’s health if she’s on the block next to them. (And, unfortunately, Aya is constantly moving at maximum speed, so make sure you don’t stop when they’re on your heels!)
Enter the 1F Bathroom (which is the door on the left), and make sure you go investigate around the upper left of the tub. Leave quickly, and then go to the room on the right of that (the 1F Reception Room). There should be a box that moves toward you. Make sure you push it towards the shelf on the right (since Aya can’t reach something that’s at the top that she needs). Once that is done, you must have gotten a Kukri Knife.
Now, observe the moving painting on the left of the fireplace. This will trigger a quicktime event and a cutscene afterwards. Once Aya leaves, go back inside and move the painting aside. You can then leave.
Now go back upstairs, but head to the left instead of the right, then enter in the first door you see (which is on the screen after the one you have just entered, the 2F West Hall). The Archives Key will unlock the 2F Archives. If you have a keen perception, you will see that there was Ogre on the upper left, observing a bookshelf. Make sure you observe that, and be sure to check for anything else (which should be a book called The Flame Egg, which will be important later).
You will also get a code memo. If you were observant, you must have noticed that there was a safe in the room on the left of the 2F Nursery (which is in the 2F East Hall).
Q: I can’t figure out the combination!
A: 7482
Afterwards, go to the door on the left of the Archives and cut the web with the knife. Get the sparkly and leave.
After collecting those items in the safe and witnessing another Flashback (which is common throughout the game, don’t worry), go to the 1F Cafeteria (which is the large door in the central hall). Go into the Kitchen (which is on the right) and get the sparkly in the cabinet.
Afterwards, you must have noticed there’s a little area for stocks. Go in there, and investigate the rug to reveal a trapdoor, and go inside. Now, the door is locked, but Snowball can fit through the hole. Select Snowball in your inventory once you get to the hole, and make sure you grab the sparkly before going back out.
Leave to the Entrance Hall and go to the rightmost door on the first floor. This will take you to the basement, which has a horrendous monster. Aya should remember The Flame Egg from reading it in the 2F Archives (and if she does not recall this, go back up to the Archives and read it). Go into your inventory and fill the Empty Lighter with the Lighter Oil. Now, Aya will kill the monster, granting you access to the rest of the basement.
Walkthrough – B1F and B2F
Get the Wood Bucket and Eyeball Bottle in the Taxidermy Room (which is in the room on the right of Aya coming inside.)
After the cutscene, you may choose to check Maria a couple of times if you please to get the true ending. Make sure you know where to use it before endgame.
Go to the Storeroom and get the ladder.
Go all the way to 2F and go to the attic. Place the ladder where it truly belongs, and then shove the movable pot to the edge so it can break open for you to get a Mini Chainsaw.
Head back to the B1F Corridor, which is after the Storeroom, and use the chainsaw to break the wooden barricade.
When you find the crying girl in the cell, make sure Aya asks if the Eyeball Bottle that she has is hers. Go to the 1F Reception Room and make sure Aya notices that there’s crying next to the fireplace. Go out past where the painting originally was, fill the Bucket with water, and put out the fireplace. Crawl inside, move the firewood(?) aside, and drop the Eyeball Bottle.
Head back to the cell and allow the girl to come out, then pull the lever inside the cell to open the door.
After the corridor loops, go talk to the woman. Get her to follow you. Enter the Storeroom even after she disappears. Once that cutscene is over, go to the corridor and it will no longer loop with her corpse right there.
There is an old man pointing; he wants you to go to that wall. Chainsaw the wooden crate in the B2F Laboratory to get the Forceps. Leave to the Toilet (the bottom-right room in the B2F Passage) and use the Forceps to get the Rusty Key out of the farmost toilet. Wash it in the bucket, and then use it to open the B2F Passage.
Head over to the kitchen area of the B2F Cafeteria. Cut off a slice of meat with the chainsaw, put it in your inventory, then fry it. Try to head out to the following room!
After that event, head out the room. After that event, a boy should appear (if he is not there already). Get the plate of meat and serve it to him. Make sure he has some table manners in the process.
The following puzzles are very self-explanatory, but I’ve blacked them out. Click on them, hover your mouse over them, whatever helps you.
In the Trick Room…
The painting…must be turned appropriately.
The nun…has a spear that must be given to the armor.
The armor…must be pushed to the left.
The Bouquet…must be taken from the left side, then be put in the right side.
The girl…must be decapitated, then placing the Doll Head on the headless doll.
Aya…must imitate the peeking girl.
In the first diary room…
The baby…must be pushed towards the mother.
In the second diary room…
Both animals…must be put in the drawer.
The mother…must be pushed out of the room.
In the third diary room…
The Kitchen Knife…must be picked up and given to the boy.
The mother…must be cleaned with the Napkin.
In the fourth diary room…
The girl…must be decapitated.
B3F and Endgame
Getting closer to endgame. Doesn’t it feel great? You must at least have been in for thirty minutes, I assume, if my estimation is correct. This is the final floor.
In the hallway of rats, grab the Door Key and retreat. (You can’t force your way through; Aya will die by then.) Go into the locked door on the right and push the shelf to the left. Chainsaw the crack in the wall and get Mom’s Perfume. Leave the rooms quickly and apply the perfume to get past the rats.
In the Guest Room, open the fourth door from the left, then open it again after it closes. When the monster runs after you, go into the door and Aya will automatically close it for you. (This is a moment of trial and error and even playing the original over and over again still made this part hard. Make sure you save.)
Sleep on the bed until it moves aside and crawl into the tunnel. Push the vase out of the way and brace yourself, as you will open the door on the cell you are about to enter. Once the door is open, go over to the vase and block the monster in (because, for some unexplained reason, they cannot get past a vase). After that, go back to the cell that this all originated from and hurriedly get to the opened door on the other cell and close it with Z.
You are now free from the monster! Head further down the corridor and enter the room. There will be a door you cannot open, and Aya will take the doll with her since that is what is causing the issue.
Go to the B3F Passage to see that our…friend…of ours has the key to unlock a door that we could not open previously (somehow). Enter in.
I do not have a guide for the tunnels, but just absolutely make sure the dolls cannot see you! Their range is still hard for me to calculate (so, when I get around to experimenting, I’ll make sure to fill everyone in on that) but they are able to see you when you are directly next to them. Make sure you utilize the hiding spots and, if they are moving in a direct way, you can just trail behind one of the dolls.
Once you get to the Incinerator Room, pull the Scalpel out of the wounded female and try to open the door (which is locked). Go all the way to the right after leaving the Incinerator Room and make sure you save, as another trial and error part comes along. (This is another segment that I have failed in the paid version but have succeeded in multiple times in the unpaid version. Sad.)
There is a patrolling doll. If you are close to her, she will hear your footsteps and you will die, even if you are standing still, since she will smell you. Head up the ladders (but she will be able to hear this action, so make sure she is decently far away before you do this).
Aya will then notice the chandelier that she cannot reach. Reach the plank out. If Aya tries to reach out towards the chandelier, she will fall and she will get killed. To avoid this, place a sandbag so she can be weighed properly.
Time the part where the chandelier will fall directly on top of the monster. If they are already directly under it, they will move aside and kill Aya. However, if they are about to move under it (which would be a space next to where the chandelier would drop), chainsaw it.
Go all the way to the right where the dog is and get the Hammer. Go inside of the Cultivation Room. There will be a tile puzzle that you must solve. (If you have solved it before in a different save, there will be the option for you to automatically solve it, which is “Solve it quickly.”)
There will be a mandrake in the room. Don’t uproot it; instead, take it with you. Use the hammer to break open a pot in the room so you can get Earplugs. Go to the cliff closest to the dog (without triggering it to come after you) and uproot the mandrake. Use the Scalpel on the dog to receive the Incinerator Key.
Head towards the Incinerator Room, open the door, and throw the Creepy Doll in. Return to the door that the doll guarded.
This is the endgame room. Once you’re ready, hop into the portal.
In the chase scene..
Most of the doors require the spam Z/Space bar quicktime event. There is one door that is locked by a lever next to the door that was used to enter inside. I like to bait the father into the end of the corridor, then find a way to trap him, and then open the lever once he’s occuppied with his…chainsaw.
Gem Locations
Admittedly, all of the photos are from the Gem locations reference guide above. It is also in the same order. Think of this as an excerpt.
2F Nursery, leftmost bookcase shelf.
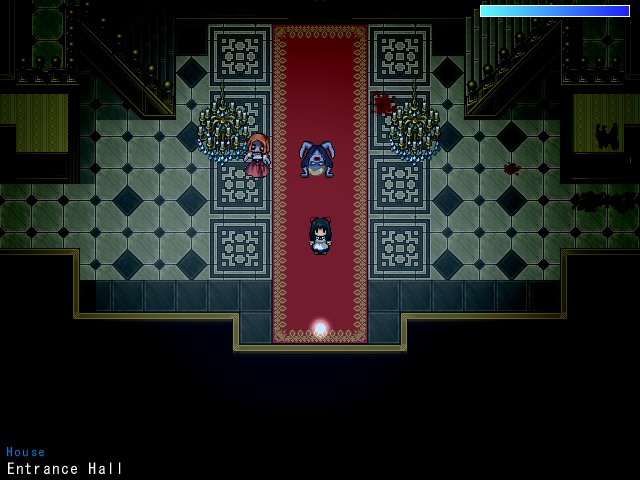
Entrance Hall, at the very bottom.
Alternatively, instead of getting them when the spirits are around, you can also get this later (since they disappear).
2F Bedroom, getting the Pendant from the girl in the 2F Archives and showing it to the 2F Bedroom.
Once Aya has left the room, she can enter it again to get the Pendant. You can then go to the 2F Bedroom, stand where the motherly spirit was, and show the Pendant from your inventory.
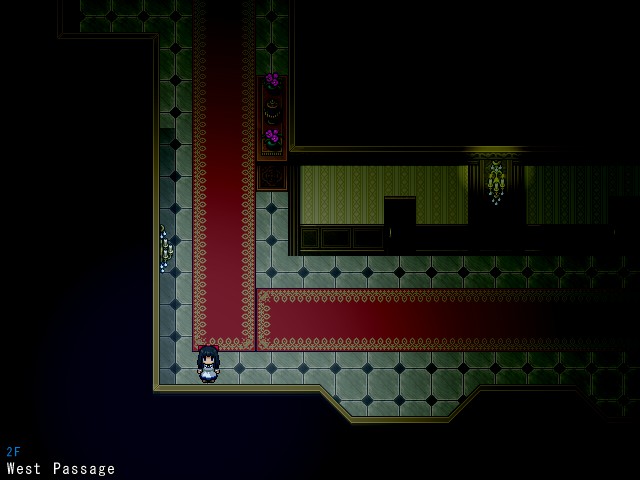
2F West Passage. There will be a zombie crawling down, just follow where he goes.
2F Doll Room, on the throne.
Such regal. Very wow. This room is used for nothing, other than being a key ingredient of the Code Memo to unlock the safe and this Gem here.
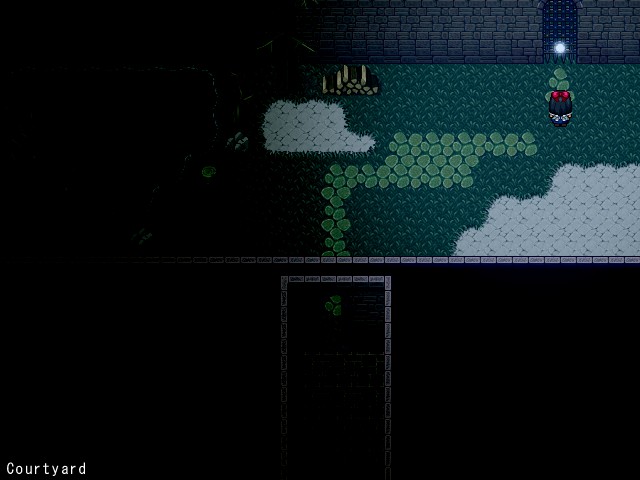
1F Courtyard, next to the gate on the far right.
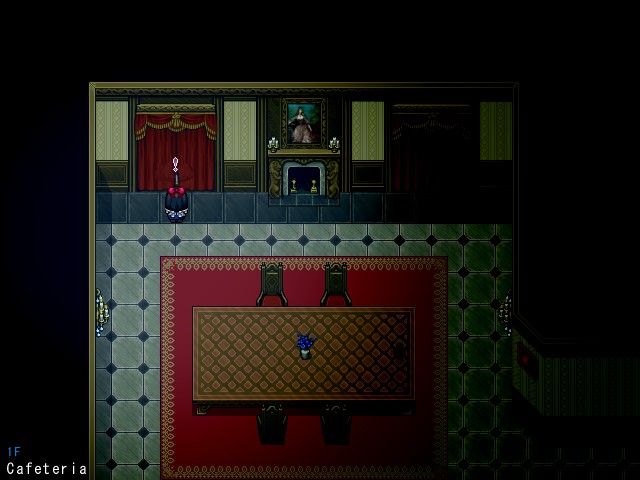
1F Cafeteria, behind the curtain.
A body will appear. Upon walking away, the corpse will fall to reveal a Gem.
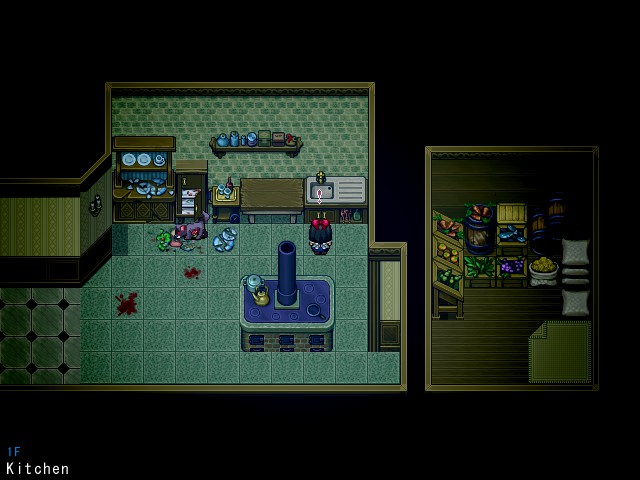
1F Kitchen, in the cabinet of the sink. This is also next to where the Oil is received in the main walkthrough.
B1F Cultivation Room, after the cutscene.
Very tragic cutscene. Tear to my eye.
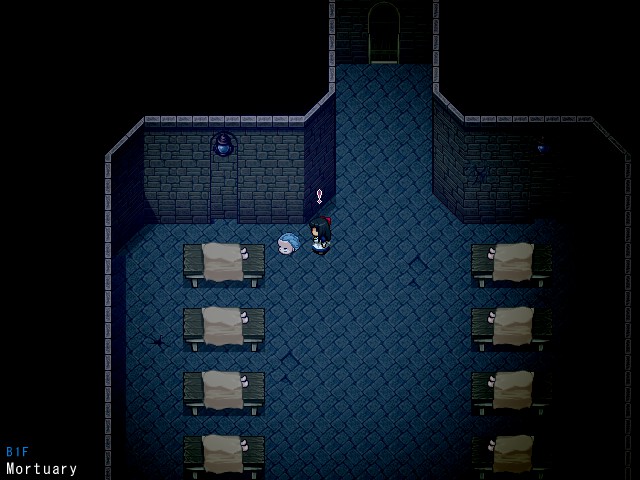
B1F Mortuary, with the headless corpse.
You will have to enter and leave the room twice. There will be his body on the bottom right of the room and all you have to do is stand on the right of the head to get this Gem.
2F Attic, the barrels on the left.
B1F Passage, destroy the barrel.
B1F Spare Room, returning the girl her eyes.
This is part of the storyline…baka.


B2F Passage, destroy the barrels.
B2F Laboratory, destroy the glass cases.
Tunnel, HIdden Passage
From the jail, you enter the hidden passage. Have fun with all the dolls on the way.
In the B2F Jail, there is a male in the jail cell. You have to go through the Tunnel so you can get the key to release him.


B2F Mirror Room
Pretty self-explanatory.
Tunnel, Big Passage. Next to the fallen rocks.
Yet again, have fun with the dolls.
After opening the dog by using the Scalpel, the mandrake will give you a bone. Head to the B3F Private Room and put the bone into the dog’s mouth.


In the B3F Cultivation Room, there is a glowing mandrake. This is found after Aya hears glass breaking whilst walking next to the Cultivation Room, right after using the Scalpel on the dog.

Achievements
The achievements section is separated into the order that you can get them in. If there is something out of order, please tell me.
Mother’s Portrait – This achievement can only be obtained when you look at the portrait of Aya’s mother in the prologue.
Mother’s Child – At the beginning of the game, you must have gotten the Archives Key from the ghostly mother, then you must have seen that child in the Archives. Go to the area where the mother was with a Pendant in your inventory, then use the Pendant. You will get an achievement and a Gem.
House of Horrors – In the Gems Walkthrough, I mentioned that there is a secret walkthrough in the 2F West Hall. Just observe where the corpse is crawling and go there. You will get an achievement and a Gem.
It’s Behind You… – You get this achievement by playing through the storyline. This is the storybeat where Ines (the blonde-haired, green-eyed, and pale-skinned girl) appears behind you.
Maria – When Aya finds Maria in the B1F Lab, inspect her twice so you can get a Room Key underneath her skirt. Go all the way up to the 2F Archives Room and inspect the diary. (This is a main storybeat for the true ending.)
Headhunter – You must have seen the bodyless man (the blue-haired head on the floor). Well, once you leave and come back, his body will appear in the lower right of the room. It’s quite easy, just stand on the right of the man’s head and the body will follow you, thus triggering a cutscene where you get a Gem and an achievement.
Come Again…? – In the hallway after seeing the bodyless man, you see a man sitting down in a sideroom with flies surrounding him. You must talk to him to get this achievement, also with good foreshadowing.
Sight Restored – Much like It’s Behind You, you get this achievement by playing normally. This is retrieved by giving the eyeless girl her eyes.
Motherly Meal – This is required to the storyline, but I may need to explain it. After escaping the angry spirit twice (in the kitchen area, and then in the hallway), there is a hungry boy. Chop off Raw Meat using your chainsaw, put it into Aya’s pocket, then cook it. Pick it up, and serve it to him! He’ll give you something to put into your ITEMS, and an achievement.
Kitai Shinsho – This is received when you read the book in the B2F Laboratory.
Snowballs – In B2F’s laboratory, you can see that there is a cabinet on the upper right. Examine it for some Snowballs!
Mad Giant – By Mad Giant, they probably meant that monster in the lab that was roped up midair and was angry. Just release him! Go up the stairs, pull out that shiny chainsaw, and cut away at the rope.
No Fear – This is where you get one of the Gems. There is a prison area with four cells. To the upper left one is a doll-avoidance minigame. After that, you will get the key. Shove the barrel out of the way, open the door, and then unlock the cell holding the corpse.
Survivor – There’s a cliff somewhere between two areas where you have to avoid killer dolls (I believe in B3F), and you must fall off it. And then struggle for your life, successfully. Sounds about right.
Creepy Doll – When trying to ignore the killer dolls in the tunnels, there is one doll that isn’t moving (that you can inspect). Inspect that doll, and this doll will get you an achievement.
Red Jigsaw – In the room with a lot of mandrakes, you must have noticed that you need to solve a puzzle that has Aya’s portrait. After blood spills onto it, you must examine it.
Special Gift – After pulling out the mandrakes from its roots, make sure you cut open the dog using the scalpel. Go over to the mandrake, and it will give you a bone! How nice of him/her, right?
Love Letter – At endgame with Ogre, there is a letter on the left of the portal. Read it.
Ogre – Towards the endgame, you get to freely talk to Ogre. Just talk to him if you want, and the achievement is granted. A winner is you.
Dog’s Best Friend – After getting the bone from the mandrake (which is after cutting open the dog with the Scalpel to get the Incinerator Key), go all the way back to that dog that Aya woke up beside.
Love is Madness – This is received by choosing to not save Father.
Beauty Preserved – This Achievement can be received by getting Bad Ending 2. You must save Father and choose to not save Maria.
It’s Playtime – Towards the endgame, choose to save Father. Then get chased.
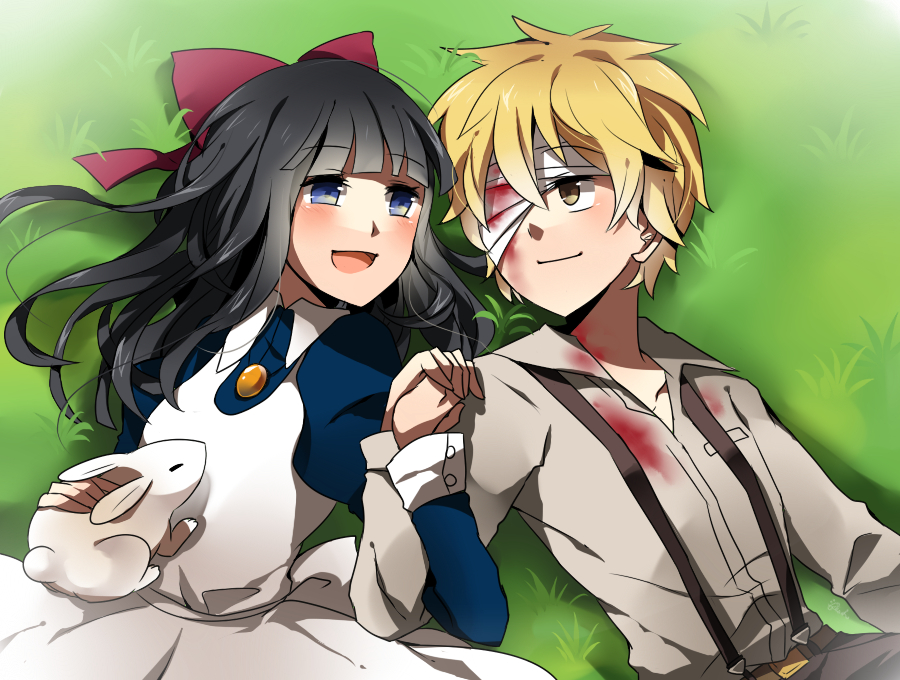
Charm of Happiness – You get this by choosing to save father, whilst at the same time have read Maria’s backstory. This is when the mysterious blond youth kisses the forehead of Aya, the “charm of happiness.”
The Promise – The True Ending is received once you have chosen to save Father and have chosen to read Maria’s backstory.
Familiar Face – The “secret event” they are referring to was the IF story. You get that by collecting all 21 Gems by the time endgame rolls around.
Aya’s Future – Just play the IF storyline once you’ve gotten all 21 Gems with the true ending.
All Endings
Bad Ending 1
Choose to not save Father.
Find Maria.
Bad Ending 2
Choose to save Father.
Continue the chase as normal.
Do not save Maria.
Continue the chase.
True Ending
Read Maria’s diary. This can be done by searching her skirt when she is knocked unconscious by Father, which will give you her room key. Her room is in the Archives, through the upper left door.
Choose to save Father.
Continue the chase as normal.
Save Maria by getting the Bandage from the upper right shelf.
Continue the chase as normal.