Essential Guide on Dragon's Dogma Online!
・Resources (Download, servers, patches, wiki pages, etc).
There's three main Dragon's Dogma Online servers at the time, this will most likely change with time but finding newer servers is as easy as searching for them online.
Here's a few lists with links to many related websites. Replace any middle dot (・) with regular dots to access these pages, Steam gets angry at me if I put outside URLs here. You can check them in the Wayback Machine if some of them get taken down.
- DDON: This is the server that started it all, it aims for a vanilla experience with custom content such as new dungeons, Hardmode, Permadeath, Boss Rush, etc.
- Dogma Rising: This is a streamlined iteration with customized spawns, boosted XP gain and high drop-rates. It's good for a casual experience and getting into the endgame fast.
- LegacyDDON: Another streamlined iteration but with a different, more thoughtful take on class balacing and XP, aiming to be as close to the retail game as possible.
Here's a few lists with links to many related websites. Replace any middle dot (・) with regular dots to access these pages, Steam gets angry at me if I put outside URLs here. You can check them in the Wayback Machine if some of them get taken down.
Official websites:
- dd-on・jp: Old official Dragon's Dogma Online website.
- members・dd-on・jp/lestanianews/top: Old official Dragon's Dogma Online newsletter.
- twitter・com/DDO_official_JP: Old official Dragon's Dogma Online Twitter page.
- capcom-onlinegames・jp/pc: Old official COG (Capcom Online Games) website.
WIkis:
- ddon・wikidot・com: A still functional wiki page from back when this game was still officially working. It only goes until the Season 2 era.
- h1g・jp/dd-on: A still functional wiki with a lot more in-depth content.
- reference・dd-on・com/build/index・html: Wiki created by the devs Annuate and Laith.
- mega・nz/file/DwkE0KzL#h2eCJRMjZCnexblup0Igwaq7hN7_mI3fQQDPdrQ1ZZI
・Installation and Account Creation.
Any server you've downloaded the game from will include an executable called 'ddo_launcher.exe', run it as admin and you'll see this:
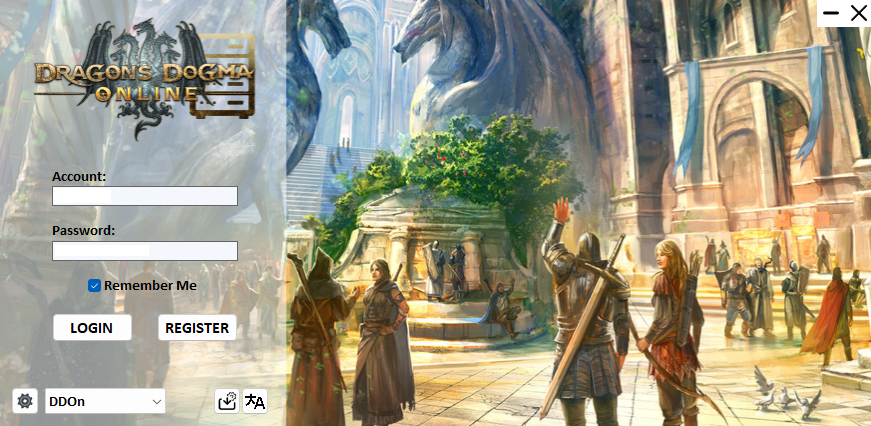
I had to update this guide, servers don't use that launcher anymore. It should look like this:
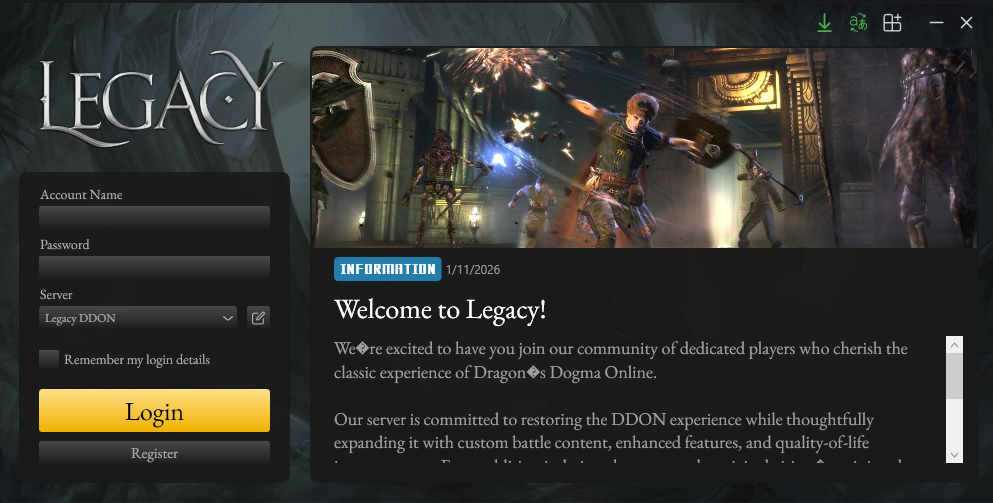
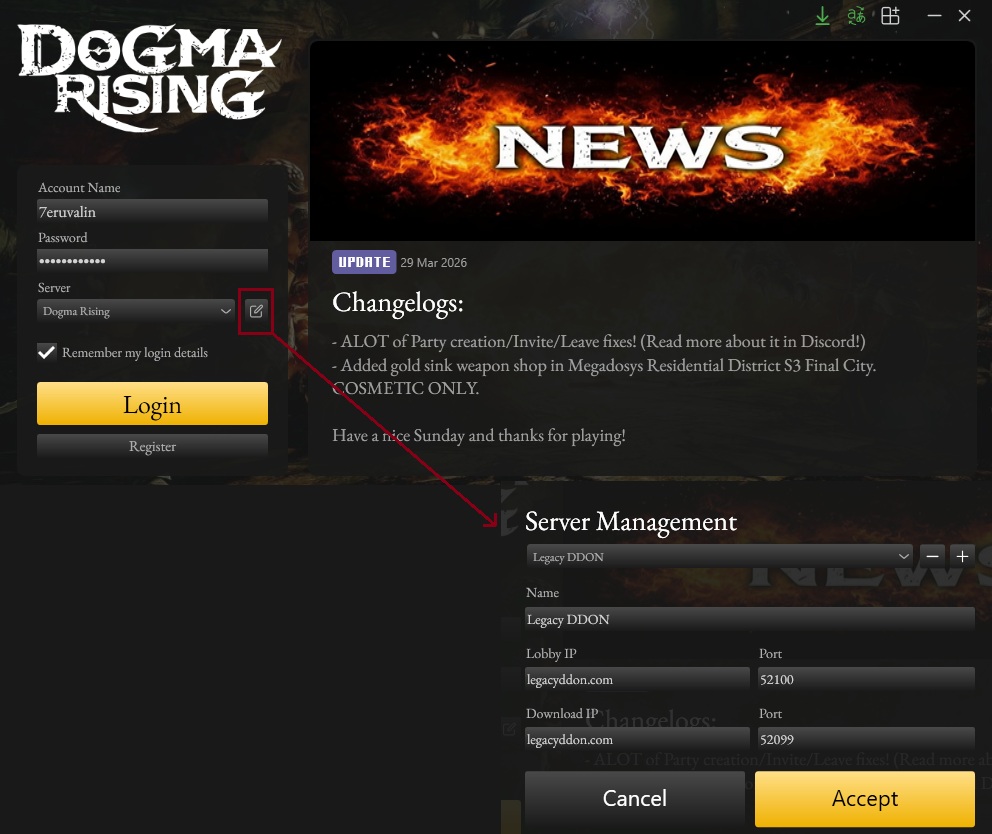
To add a server, click on the 'Edit' icon. Then you'll be asked to add a name, Server IP and DL IP.
You can click on the (+) icon to have multiple servers added in the launcher's server list.
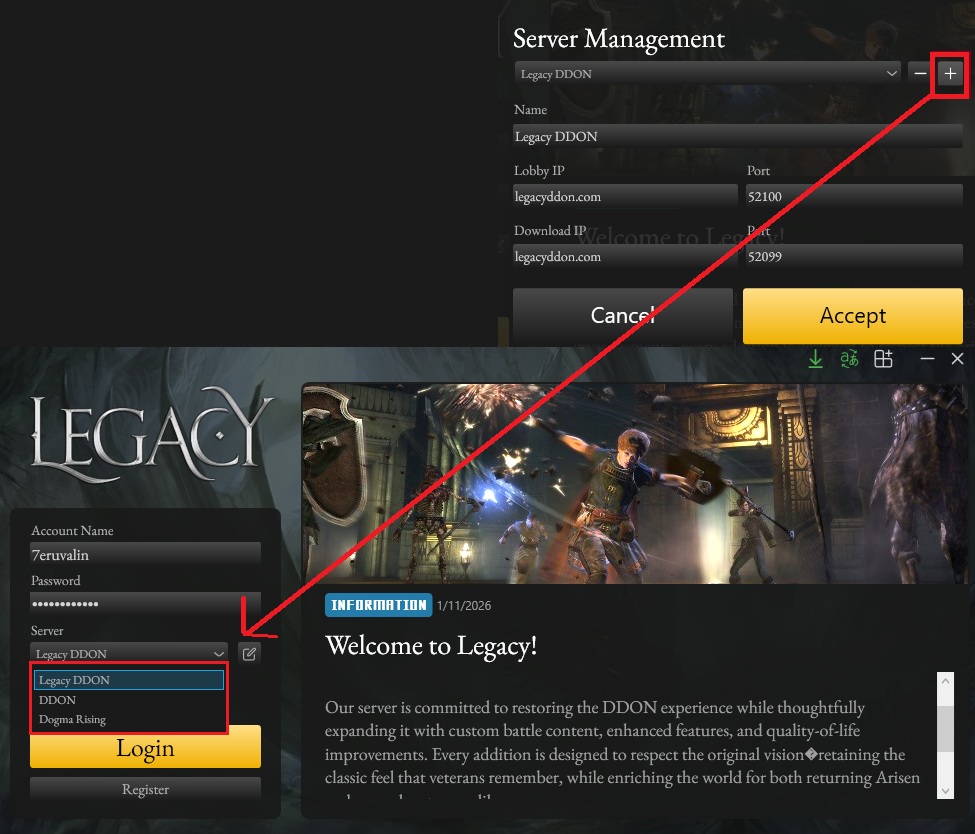
Click 'Save' and make sure that your desired server is selected.
Launcher might ask you to install Net.Framework, but it will probably take you to its download automatically.
Creating an account is as simple as clicking on 'Register' with your desired username and password inserted, keep in mind that you will be creating an account for the server you've selected, as each server uses their own user registry.
The server IP from the previously mentioned servers are these:
New servers (Or iterations of these previously listed servers) might use different Server IP and DL IP, and possibly ports too. That's up to you to get them.
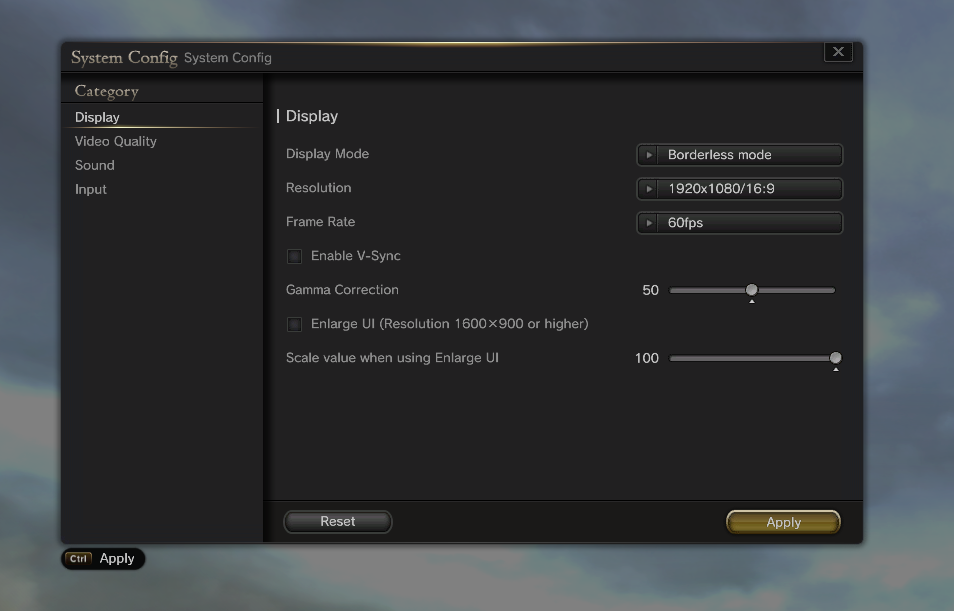
When you first login, it'll ask you to set up a few configs like mouse/keyboard or controller keybinds, you can select 60fps here too (If you installed the 120fps patch, selecting 60fps will still make the game run at 120fps).
For troubleshooting please refer to their respective communities and webpages. I don't work for them, so I can't do anything if something goes wrong.
I had to update this guide, servers don't use that launcher anymore. It should look like this:
To add a server, click on the 'Edit' icon. Then you'll be asked to add a name, Server IP and DL IP.
You can click on the (+) icon to have multiple servers added in the launcher's server list.
Click 'Save' and make sure that your desired server is selected.
Launcher might ask you to install Net.Framework, but it will probably take you to its download automatically.
Creating an account is as simple as clicking on 'Register' with your desired username and password inserted, keep in mind that you will be creating an account for the server you've selected, as each server uses their own user registry.
The server IP from the previously mentioned servers are these:
- Dogma Rising:
Server IP: dogmarising・org / Port: 52100.
DL IP: dogmarising・org / Port: 52099. - DDON:
Server IP: dd-on・com / Port: 52100.
DL IP: dd-on・com / Port: 52099. - LegacyDDON:
Server IP: legacyddon・com / Port: 52100.
DL IP: legacyddon・com / Port: 52099.
New servers (Or iterations of these previously listed servers) might use different Server IP and DL IP, and possibly ports too. That's up to you to get them.
When you first login, it'll ask you to set up a few configs like mouse/keyboard or controller keybinds, you can select 60fps here too (If you installed the 120fps patch, selecting 60fps will still make the game run at 120fps).
For troubleshooting please refer to their respective communities and webpages. I don't work for them, so I can't do anything if something goes wrong.
・The Basics of Dragon's Dogma Online! (Part 1)
First Steps: Character Creation.
Don't get overwhelmed by the character creation.
- You can edit your character's appearance later.
- You're not locked into your selected Vocation.
- Red-colored vocations are entirely Damage-focused.
- Green-colored vocations are Support.
- Blue-colored vocations are Tanks.
- This is not a tab-target or button-smashing game, this is a real-time combat ARPG just like the original Dragon's Dogma or other MMORPGs like Black Desert , more akin to a traditional RPG that requires good positioning and understanding of its overall gameplay loop.
- This means that you'll have to make good use of your tools. A Fighter, for example, will need to learn how to block incoming damage and, if done correctly, make a Parry. A Spirit Lancer needs to learn where to use their dodge (Scath Movef) in time to gain rage points and avoid incoming damage. And so on.
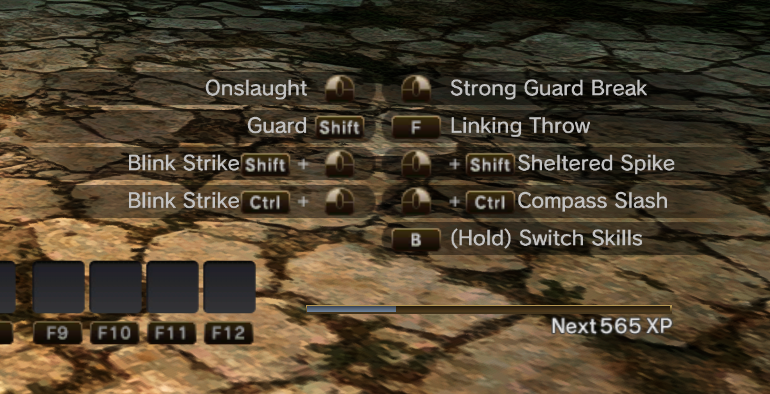
After the tutorial, you'll arrive to The White Dragon Temple. Don't rush it, explore it, you'll get most of it that way. The main quest will guide you through it naturally.

The White Dragon Temple will be home to most of this game's mechanics.
- Initial Main Quests are accepted here.
- Items can be claimed here.
- Your and your Pawn's appearance vocations can be changed here.
- You can craft, buy, sell and upgrade your gear here.
- Your personal Home will be manageable from here.
- Your clan will be manageable from here.
- Your Pawns will be manageable from here.
- Your Dragon Force Augments will be obtained here.
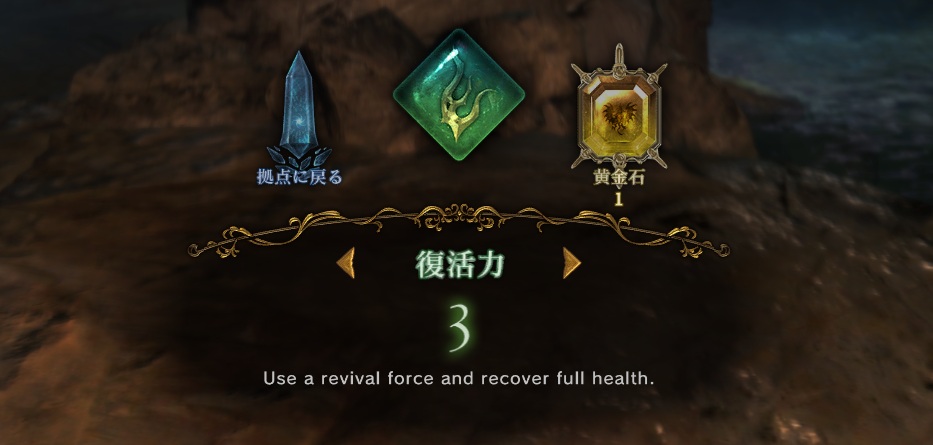
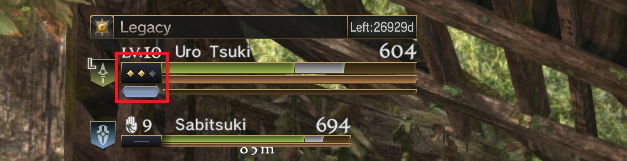
Each Revive you have left is marked as a diamond-shaped yellow dot in your Health gauge. If you've consumed a Revive, it'll be marked grey.
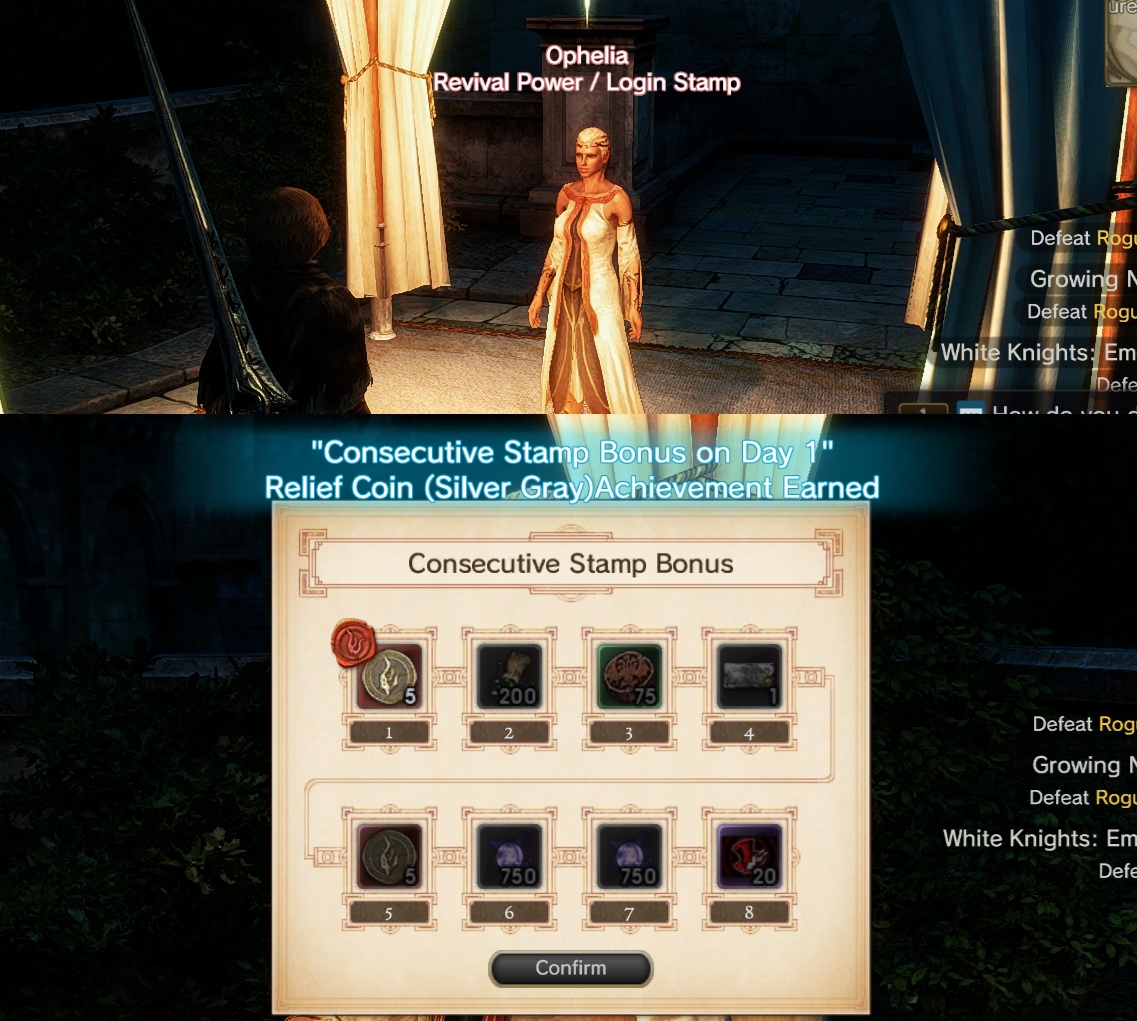
Remember to always claim your Login Stamp with her.
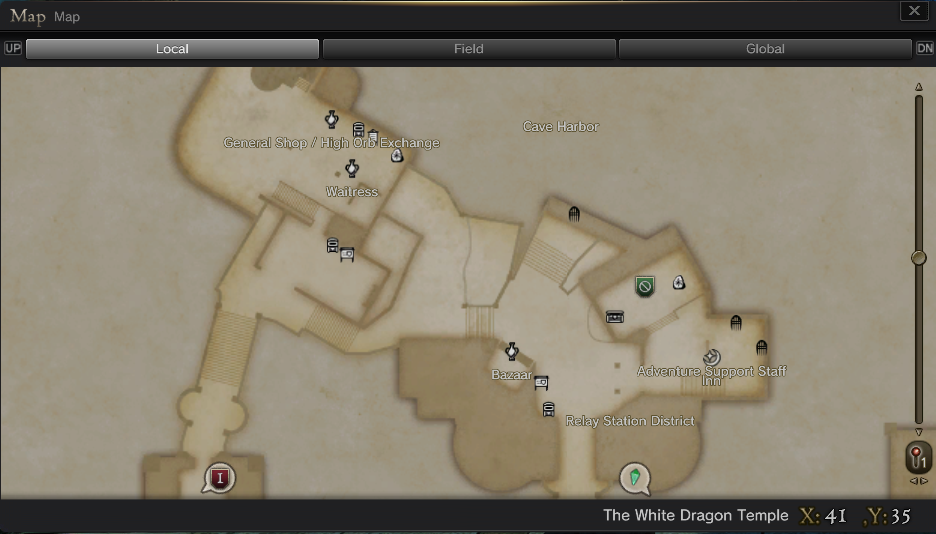
The 'Relay Station District' on your right is where your Vocation and Skills will be managed.
You can change your vocation, buy/upgrade and assign skills and augments here by talking with the Archibald.
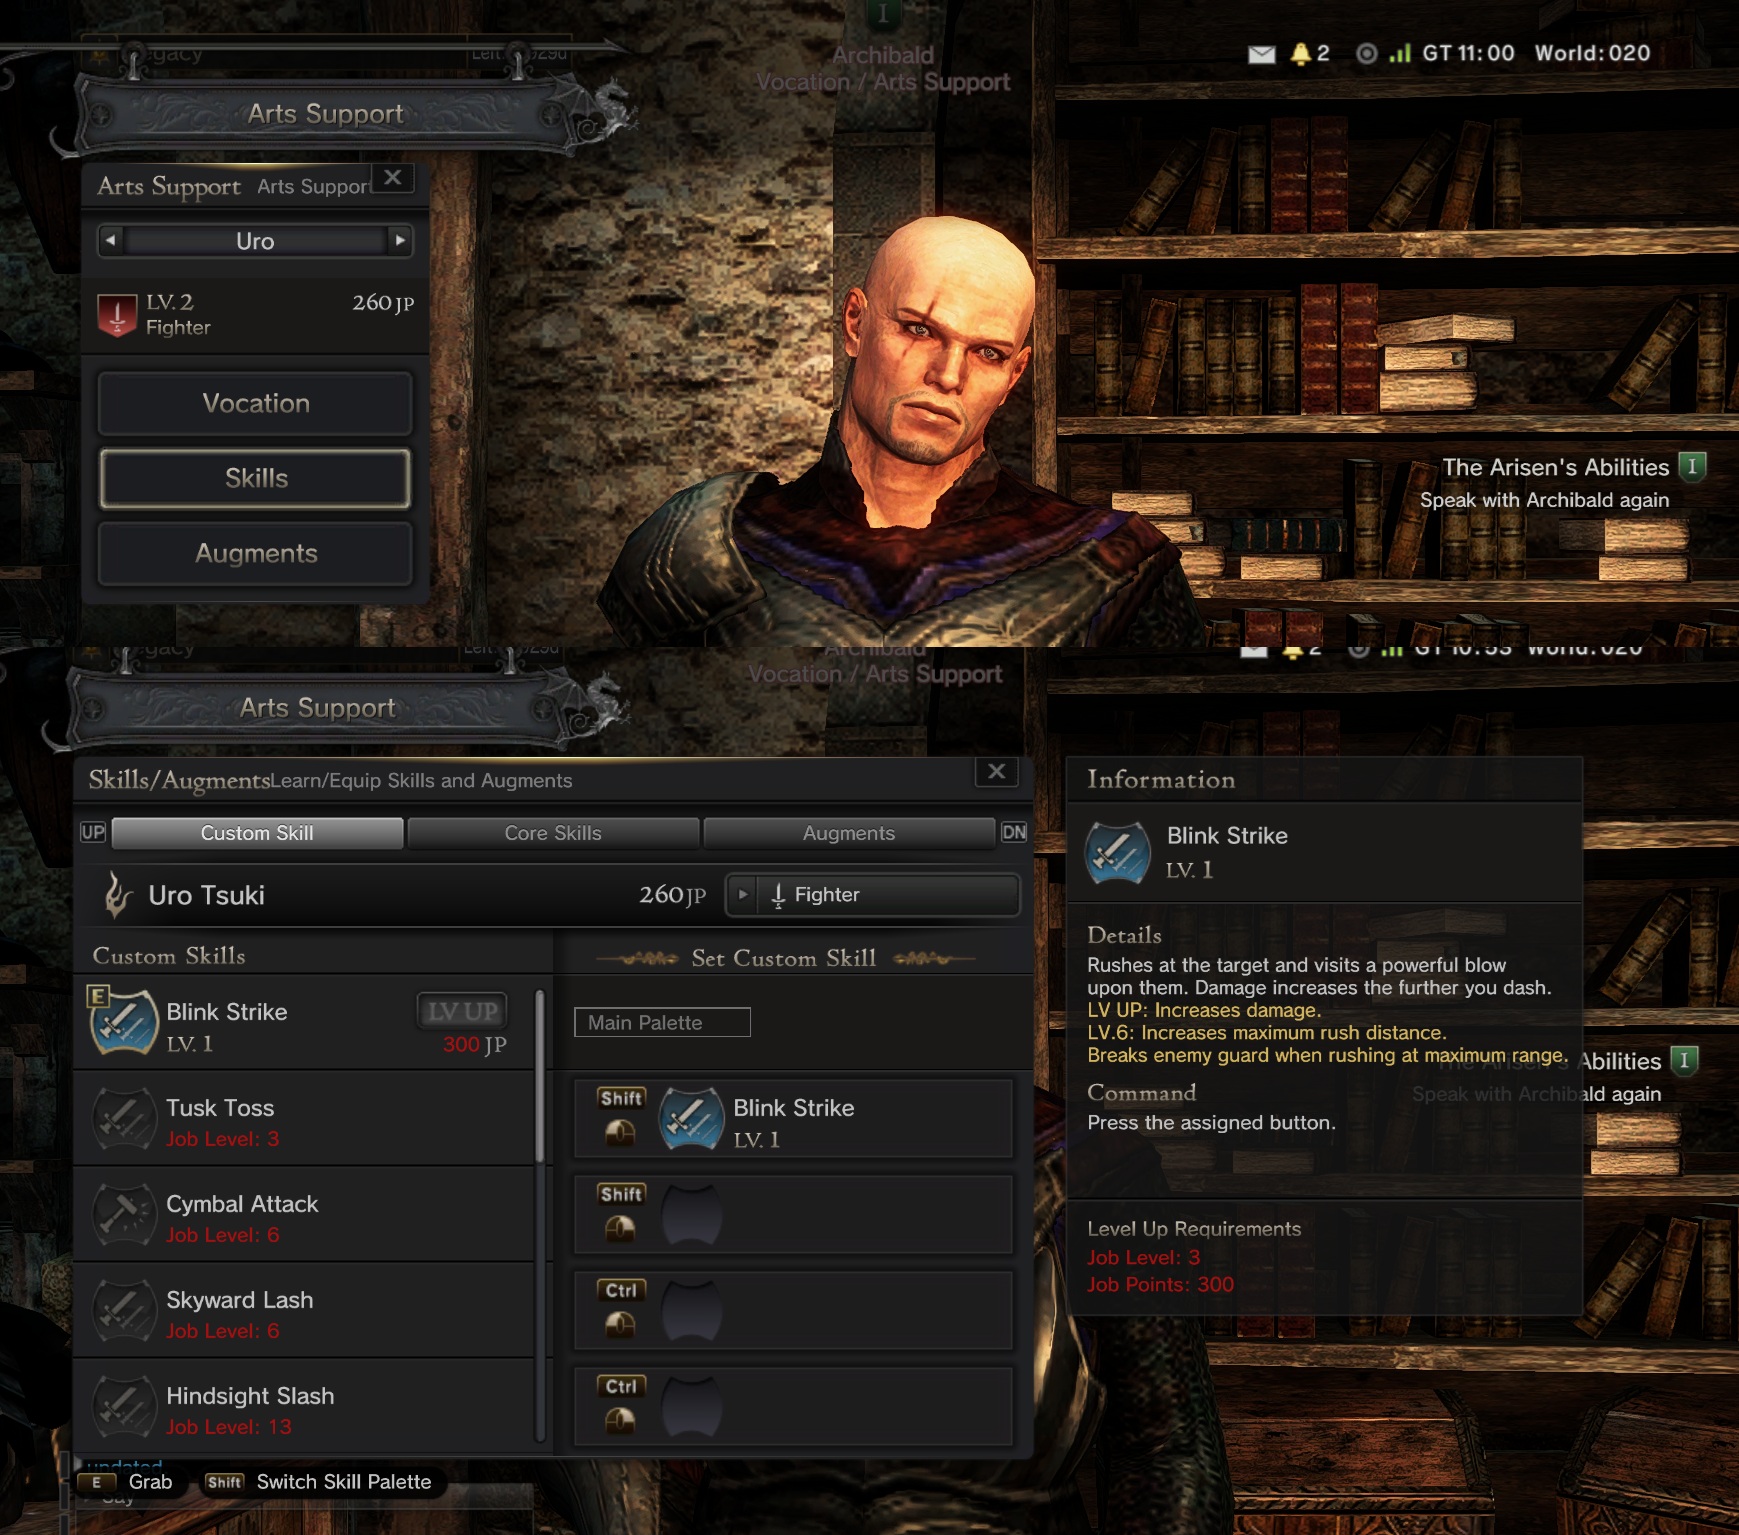
You can see that these skills are sold by a currency called 'JP'. It refers to 'Job Points' and you gain them by leveling up, doing Grand Missions (Raids) or completing some selected quests.
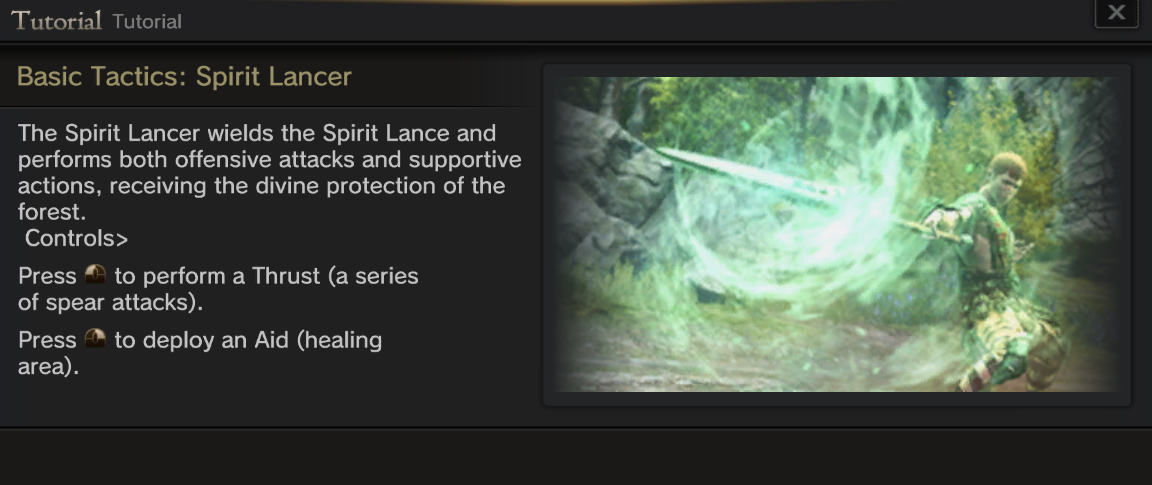
Don't waste your time with meta builds if this is your first playthrough; there is pretty powerful and unbalanced stuff in this game (...mainly from the High Scepter), but any weapon is suitable. Experiment, take your time and enjoy; always try new skills and read the in-game tutorial to understand each weapon's basics.
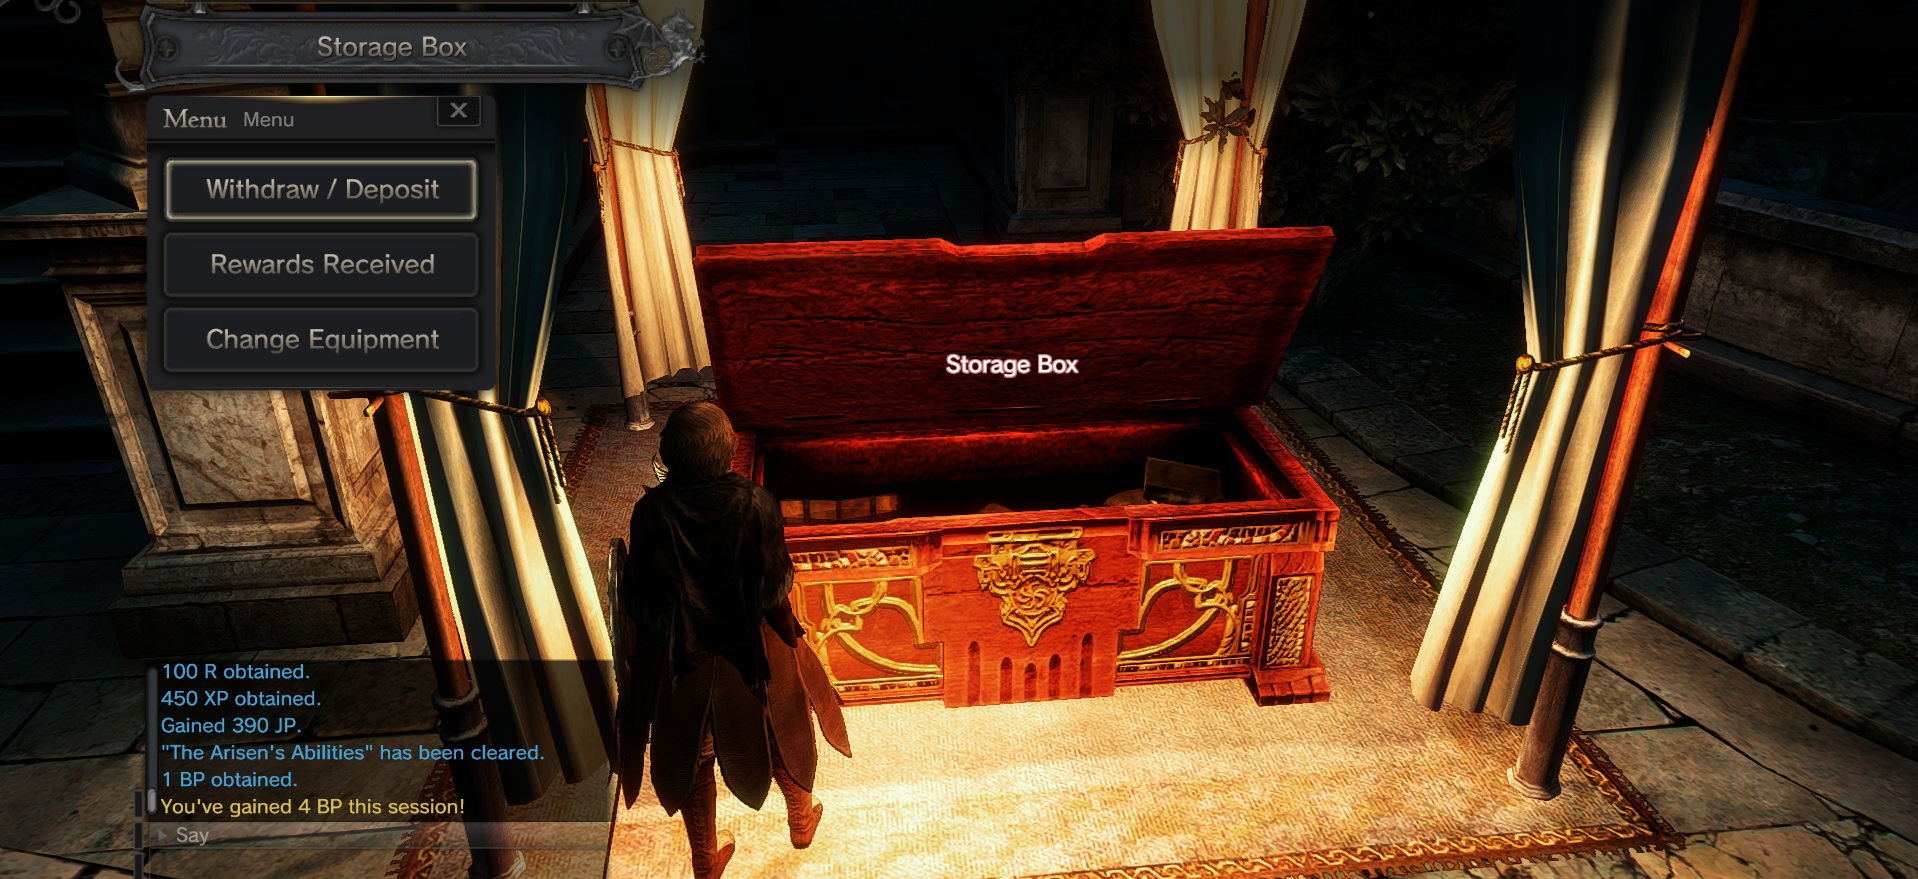
You can withdraw/deposit or claim Quest Rewards at any Storage Box.
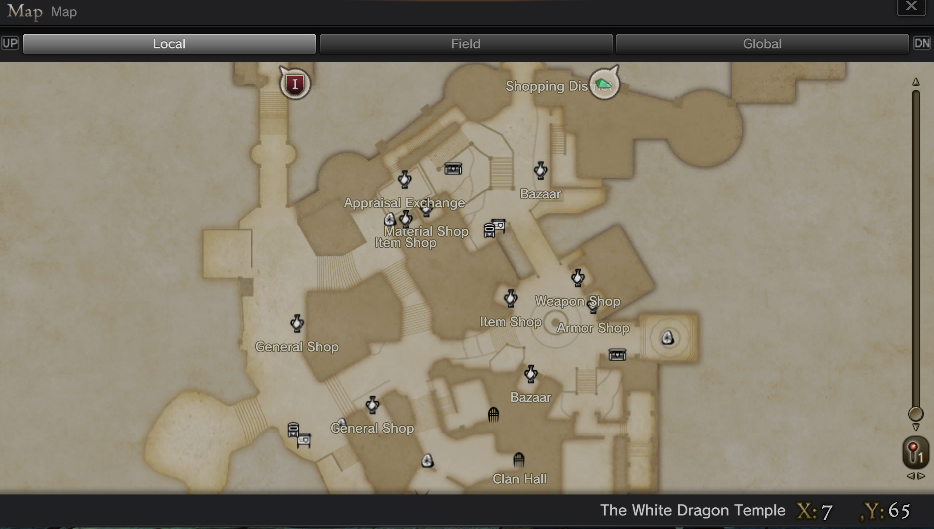
The 'Shopping District' on your left is where you'll buy or sell items and upgrade your gear.
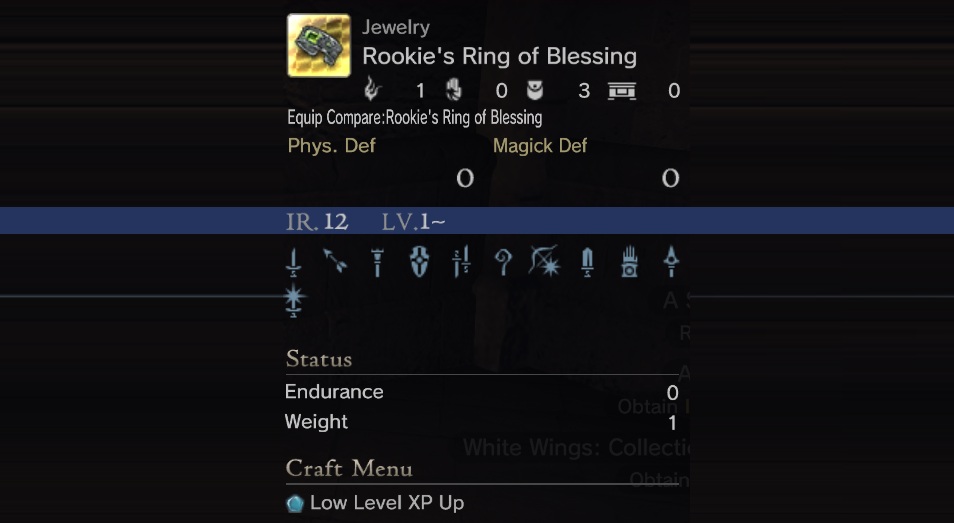
You'll receive an item called 'Rookie's Ring of Blessing' as a reward for the 'The Slumbering God' quest (One of the first Main Quests), it provides you with a 20% XP gain until lvl 40, and you can equip it to your Pawns too! It's in the Common jewelry tab.
I have to make this into various parts because Steam has a limit of characters for each guide page :P
・The Basics of Dragon's Dogma Online! (Part 2)
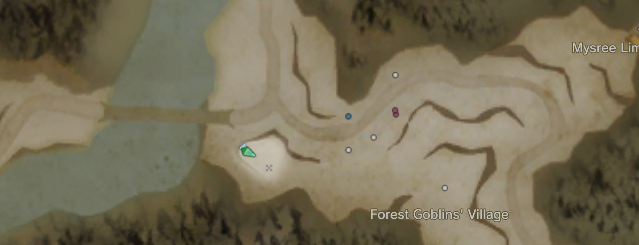
In the minimap you'll see that each enemy is marked as dots of different colors.
There are various types of quests in this game.
Red quests are Main Quests, they guide you through the game's main storyline.
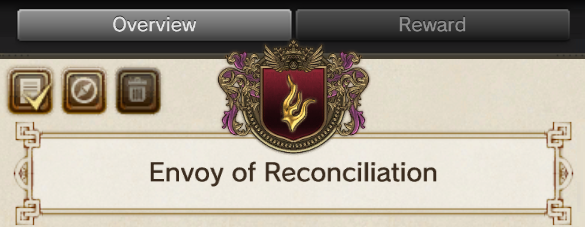
Main quests will guide you through each location at its correct pace.
Green quests are Personal Quests; they unlock game systems and guide you through its mechanics.
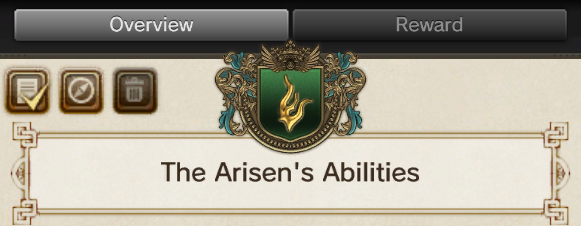
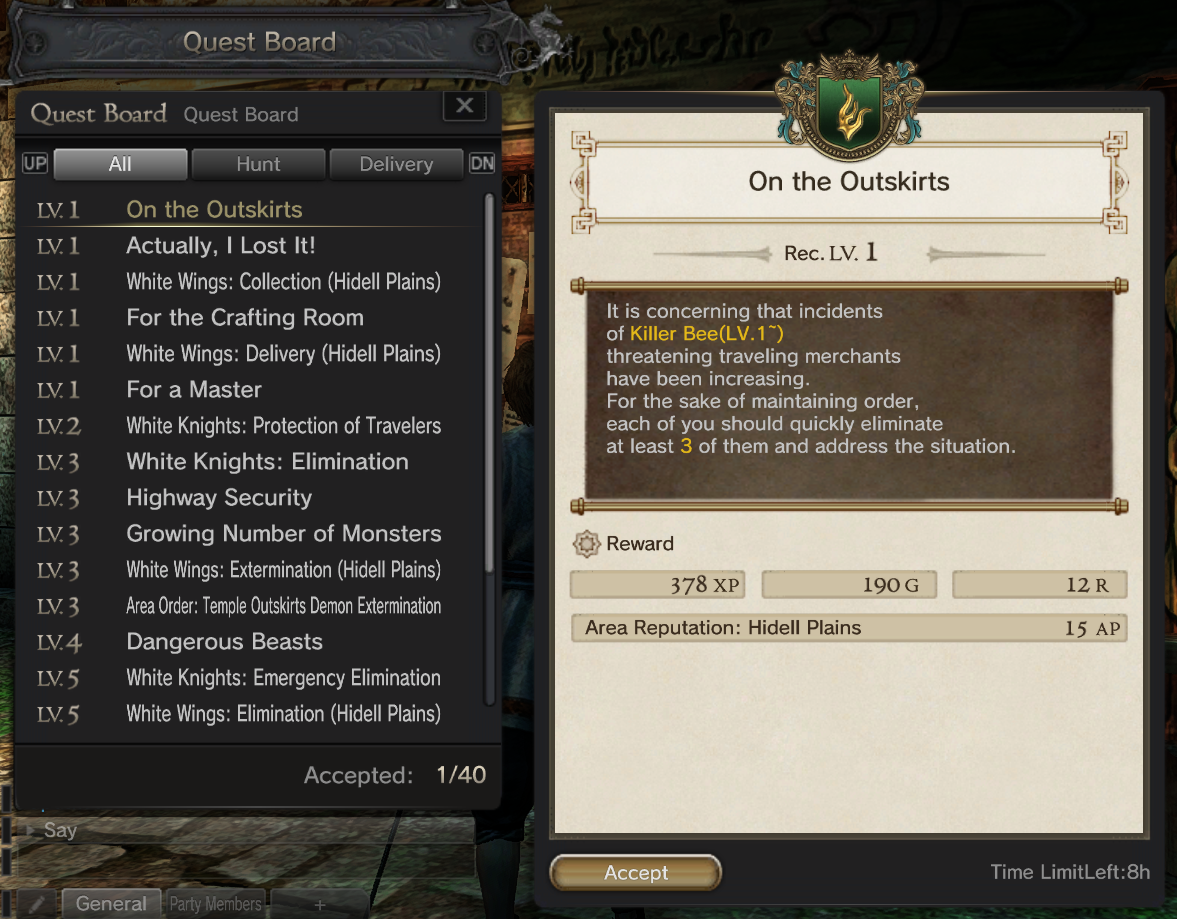
Board Quests are miscellaneous quests that refresh every X hours indefinitely. They will be your main source of XP, so get used to them.
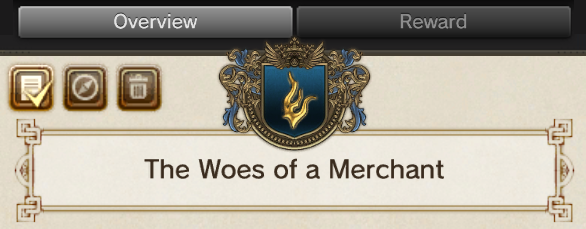
Blue quests are NPC/World Quests; they develop a specific storyline and reward you with Area Progression.
Quests with this icon are (obviously) blocked, talking to that NPC will sometimes provide info on how to unlock that quest but most require to just level up your character or the Area Progression level. Some of them require you to dismiss everyone on your party before acepting them.

Area Progression (World Level) is tied to the quests provided by each locale's Area Master, but you increase your World Level by killing enemies marked as a blue dot in the minimap or completing various other quests in a locale.
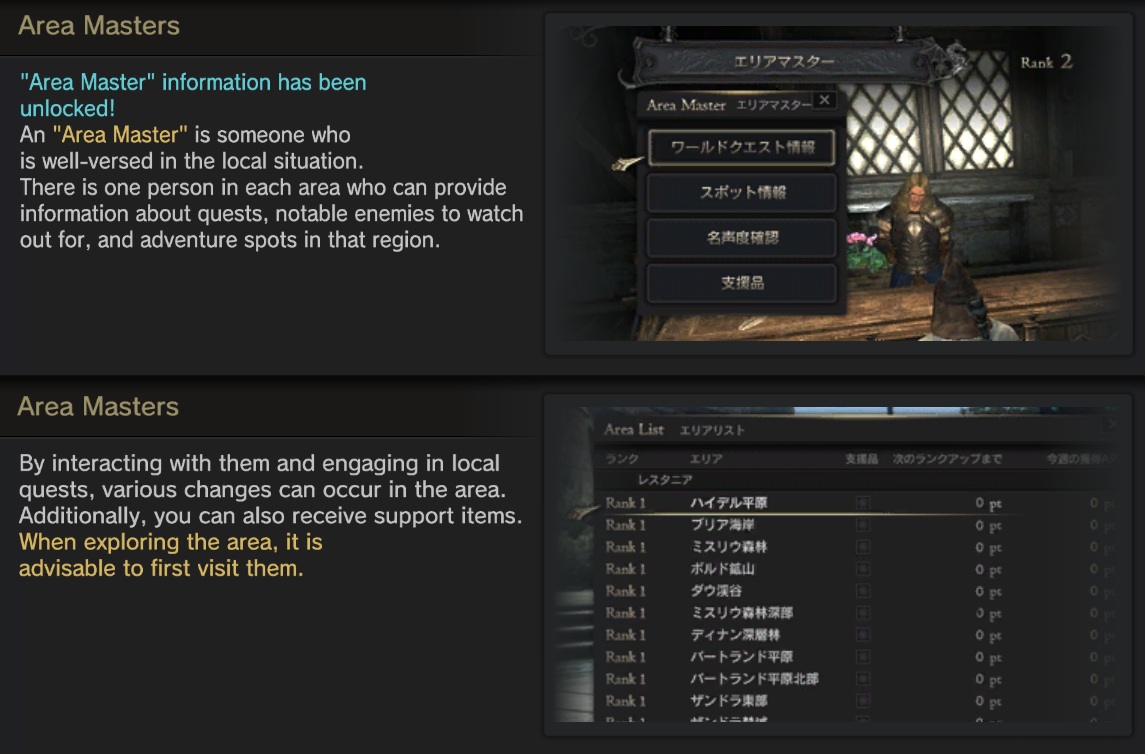
Area Masters will provide you with quests that can reward you with extra XP and items, and leveling up the area will open new paths and make new enemies appear.
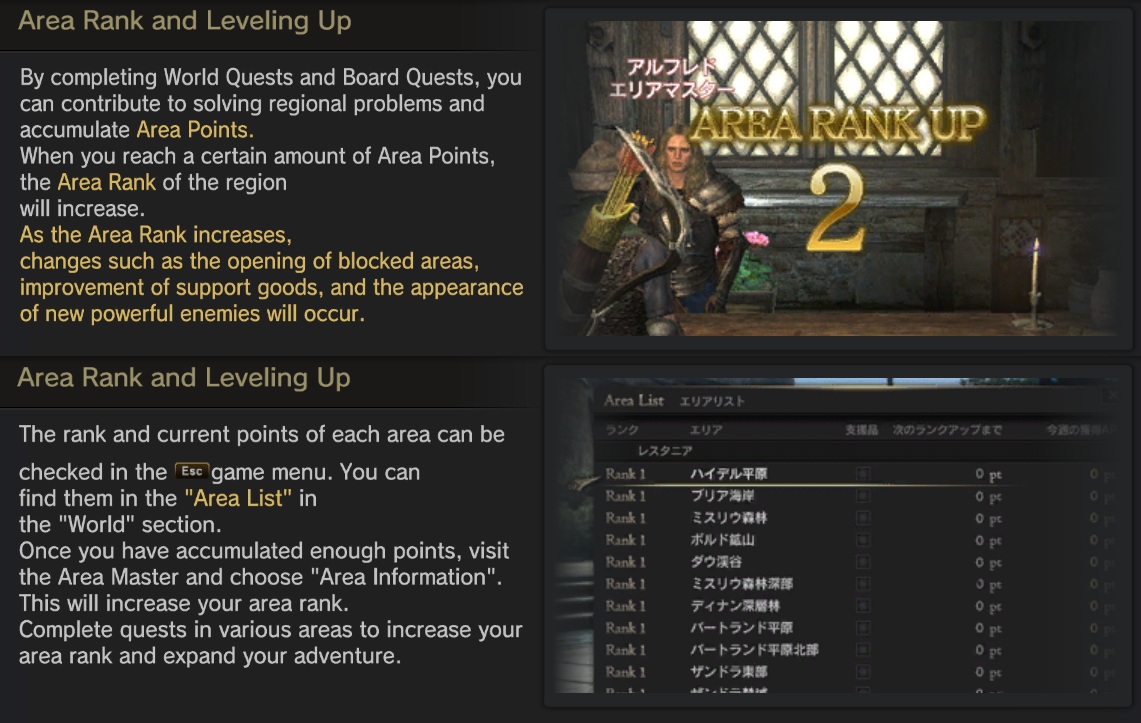
You can complete different quests or just one quest over and over and it will still increase the World Level.
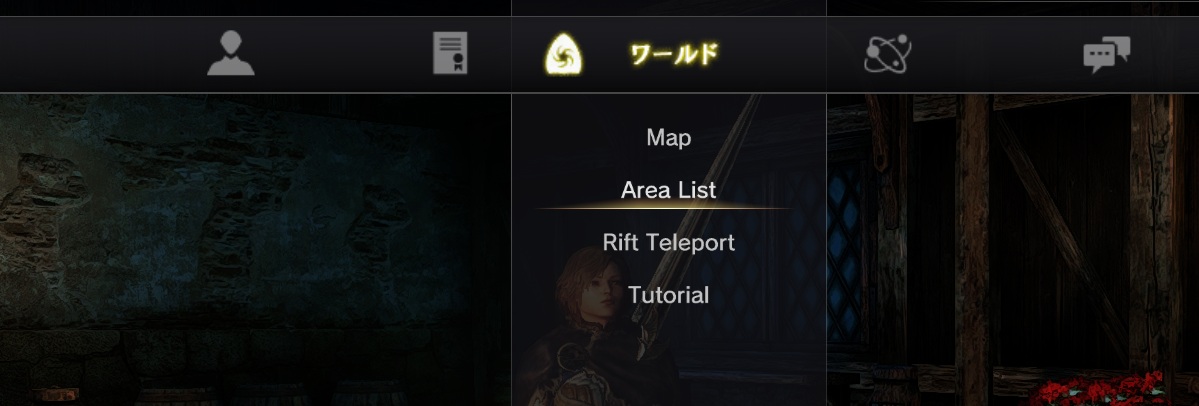
In the 'Area List' menu you can see which area is ready to level up, and how many Area Points you have on each zone.
A few minutes into the main questline you'll go to the village of Tel and be asked to interact with its Portcrystal, it will unlock the teleport system. You can teleport whenever you want at the cost of X (depends on the server you're in) Rift points.
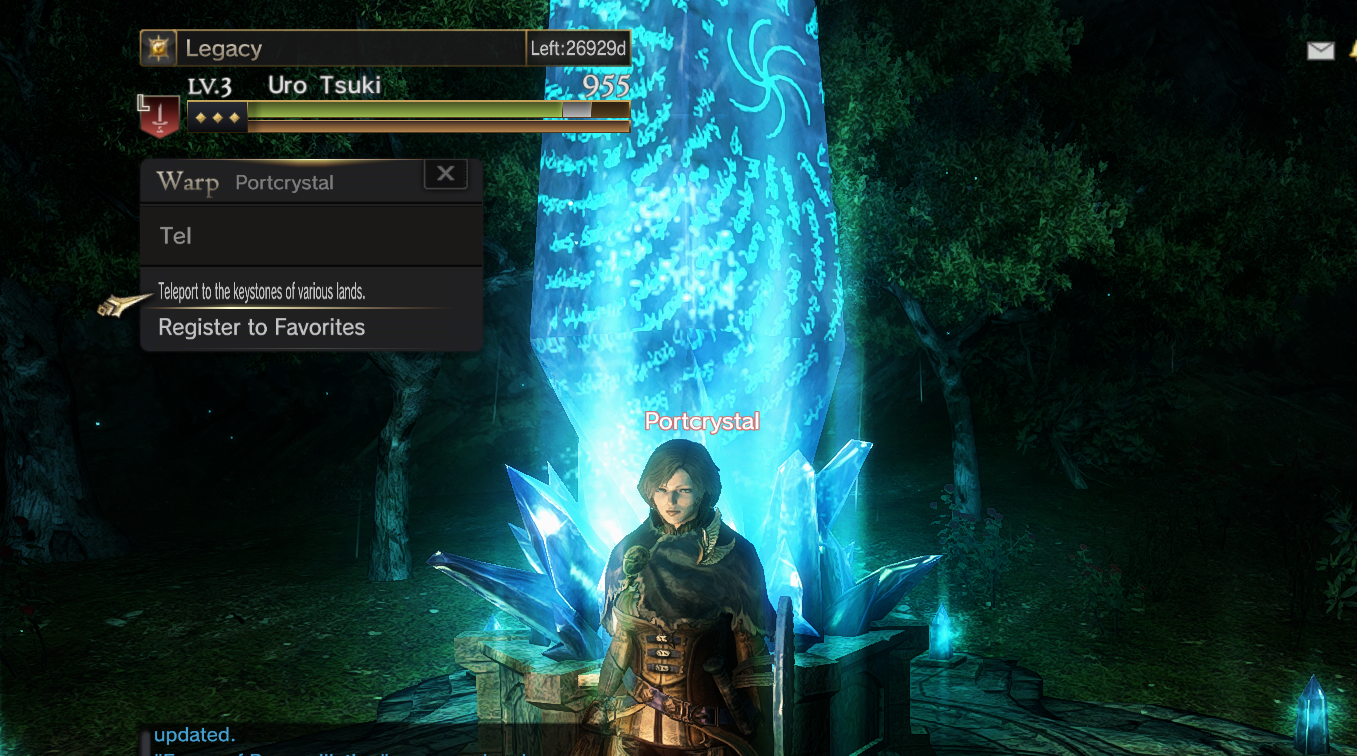
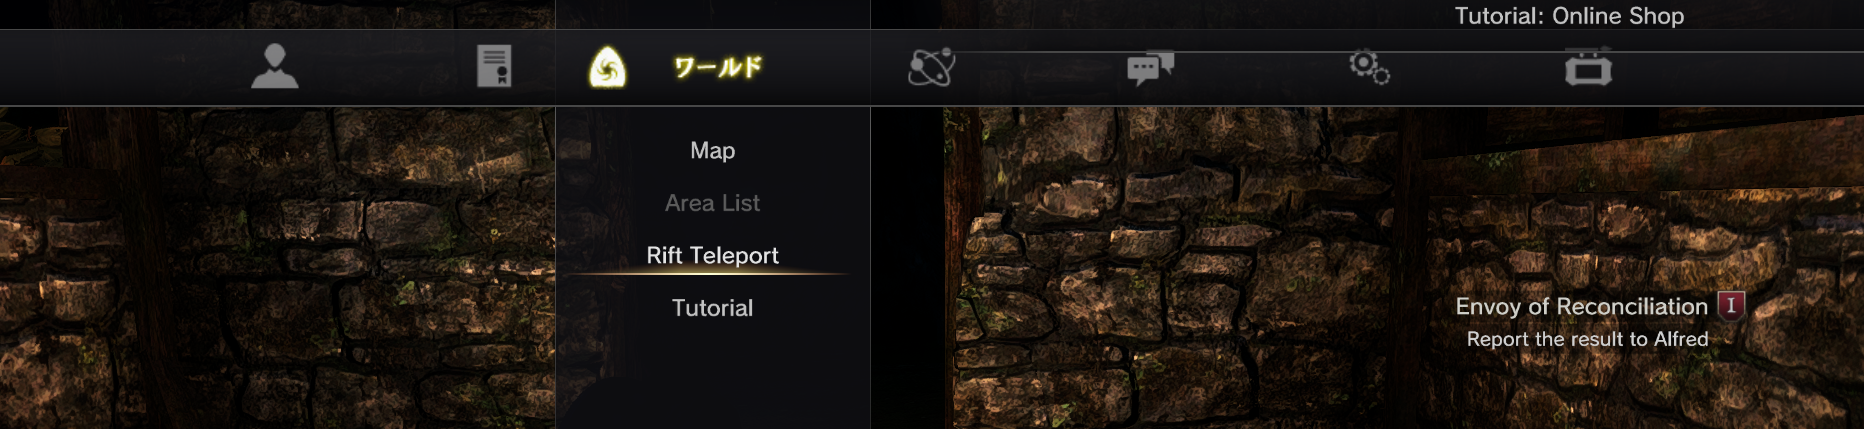
Each time you interact with an area's Portcrystal, it'll unlock in your Rift Teleport menu.
There's a few tiny teleport locations called 'Sub Portcrystals' located all around the map too.
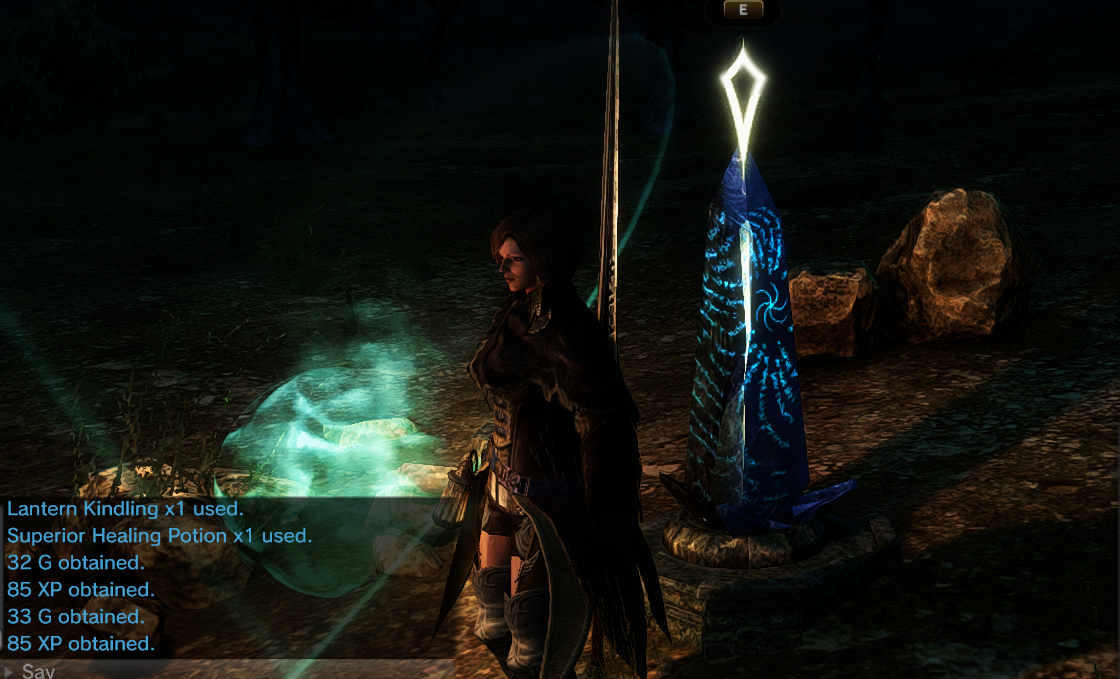
You'll obtain your first Main Pawn at the level 6 quest titled 'A Servant's Pledge'.
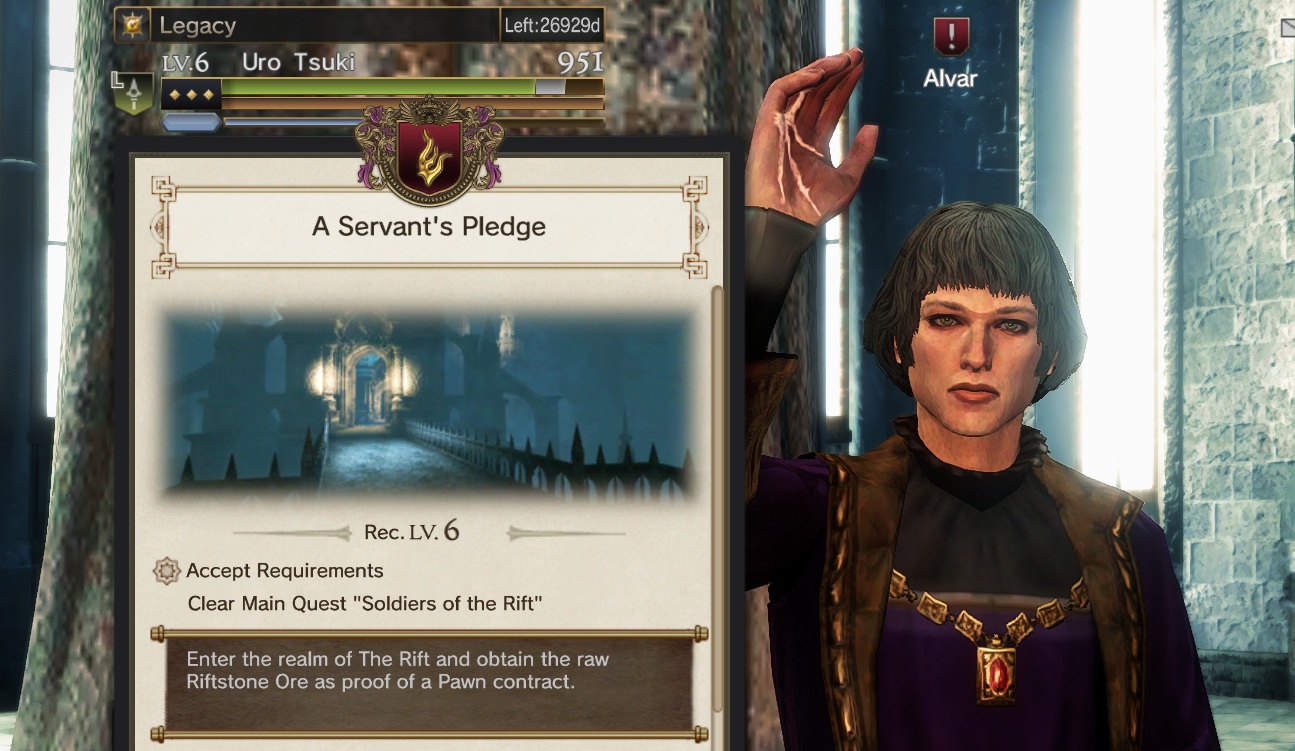
It'll naturally guide you all the way through, and you'll be eventually asked to create your Pawn at the Audience Chamber.
You can change their equipment by interacting with any Storage Box.
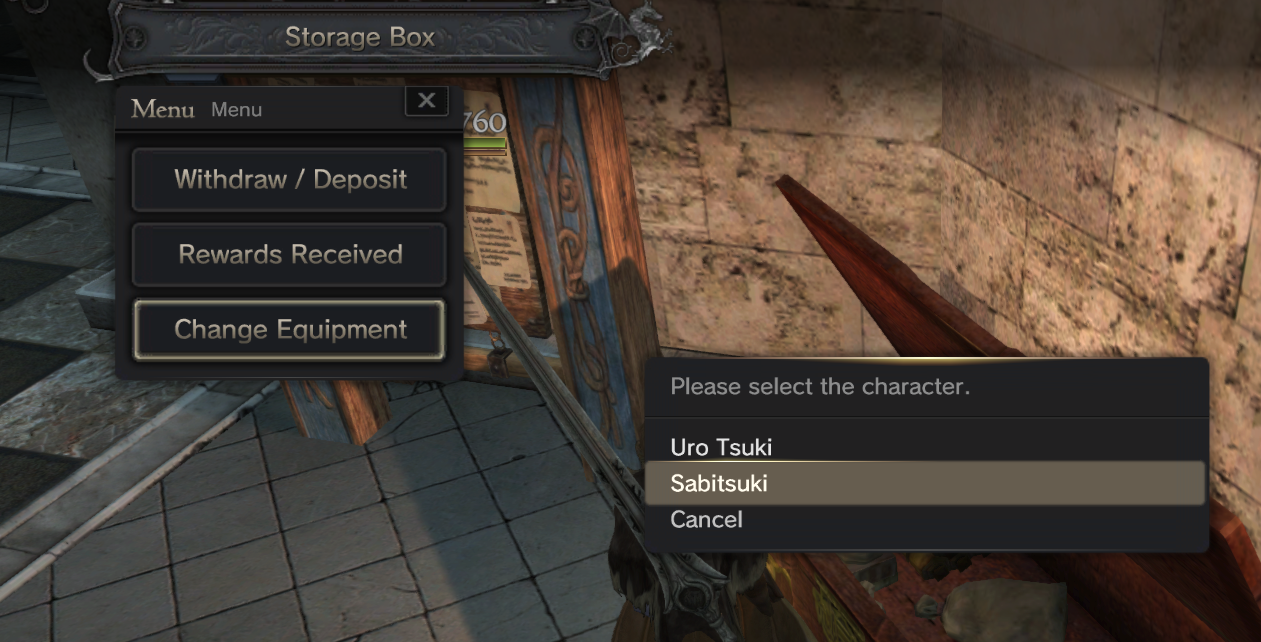
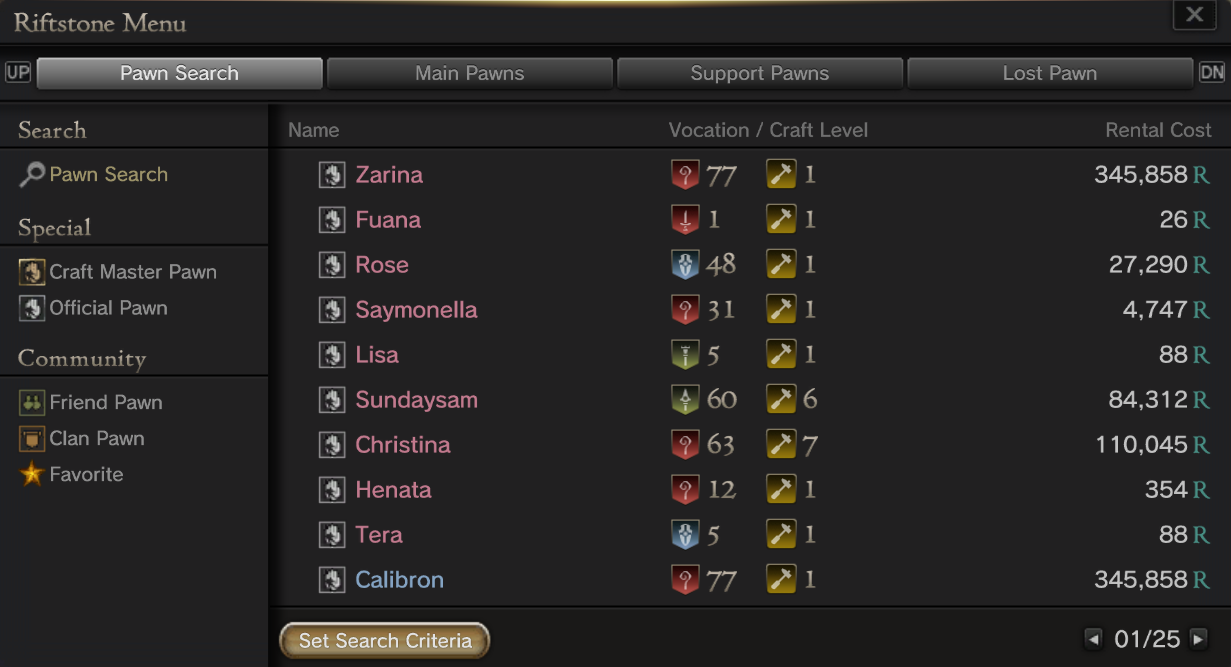
Now you can interact with any Riftstone to add another Pawn to your team by hiring them in the 'Pawn Search' option. It will not be a Pawn of yours, you're hiring them from other players and they won't level up with you.
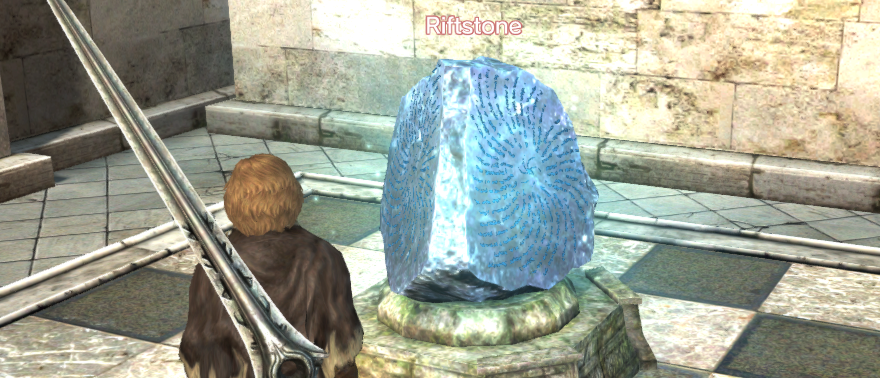
If you logged in and your Pawn isn't there with you, summon them back at your nearest Riftstone.
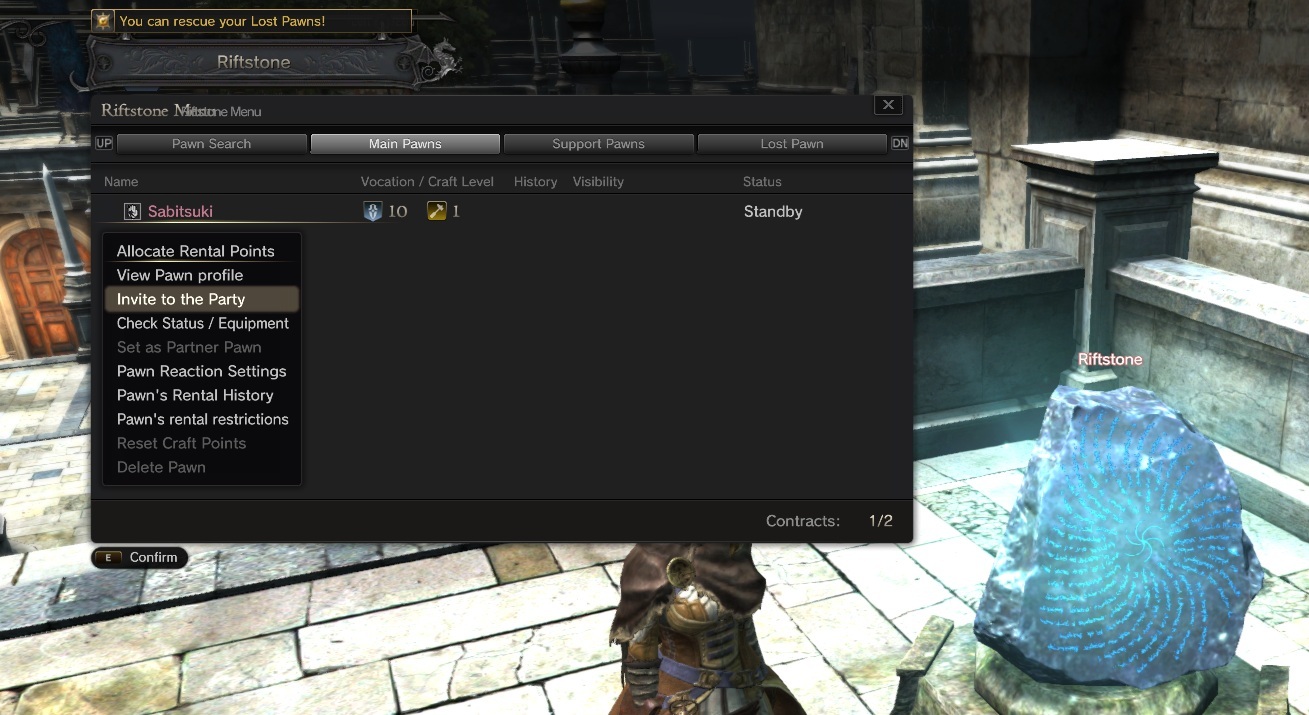
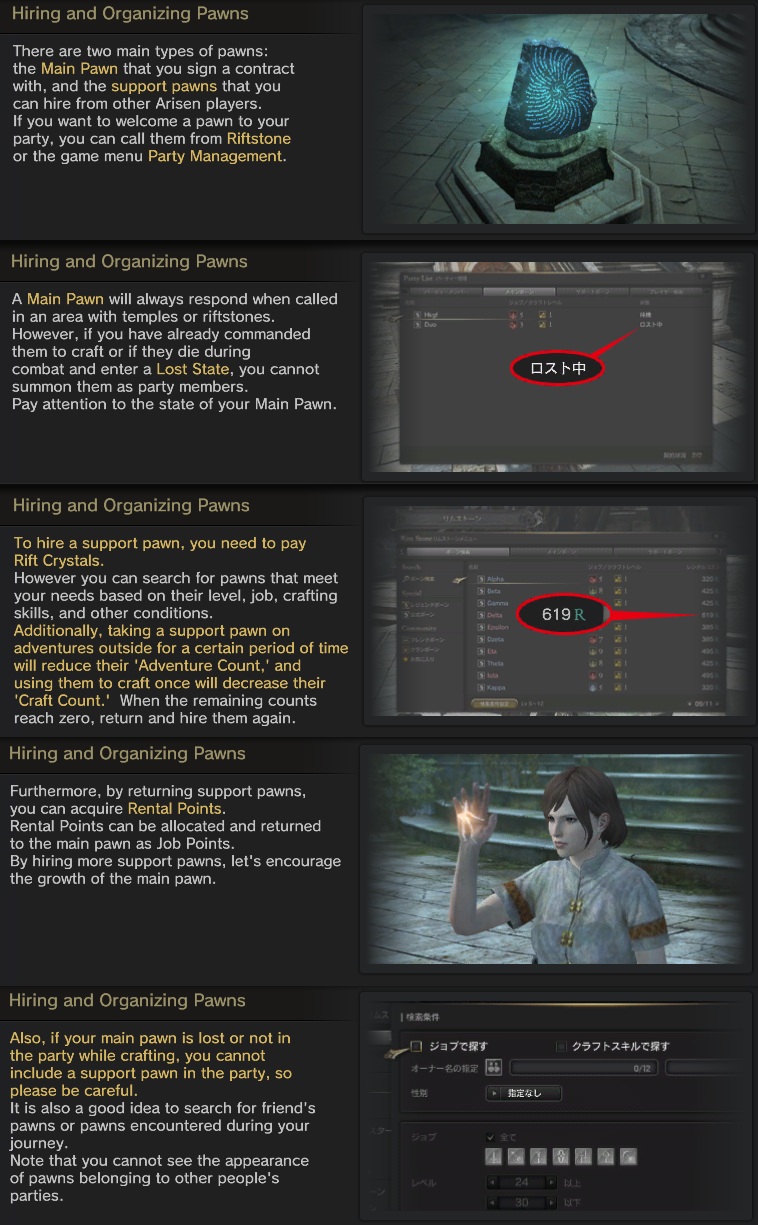
Keep in mind that hiring Pawns costs Rift points depending on their level, this exists for you to not hire overpowered Pawns during Early-Game. If in your party there's a Pawn (or player) with more than 20 levers lower or above you, no XP will be gained until your team is between the 20 levels range.
The translated in-game tutorial does a great job at explaining this.
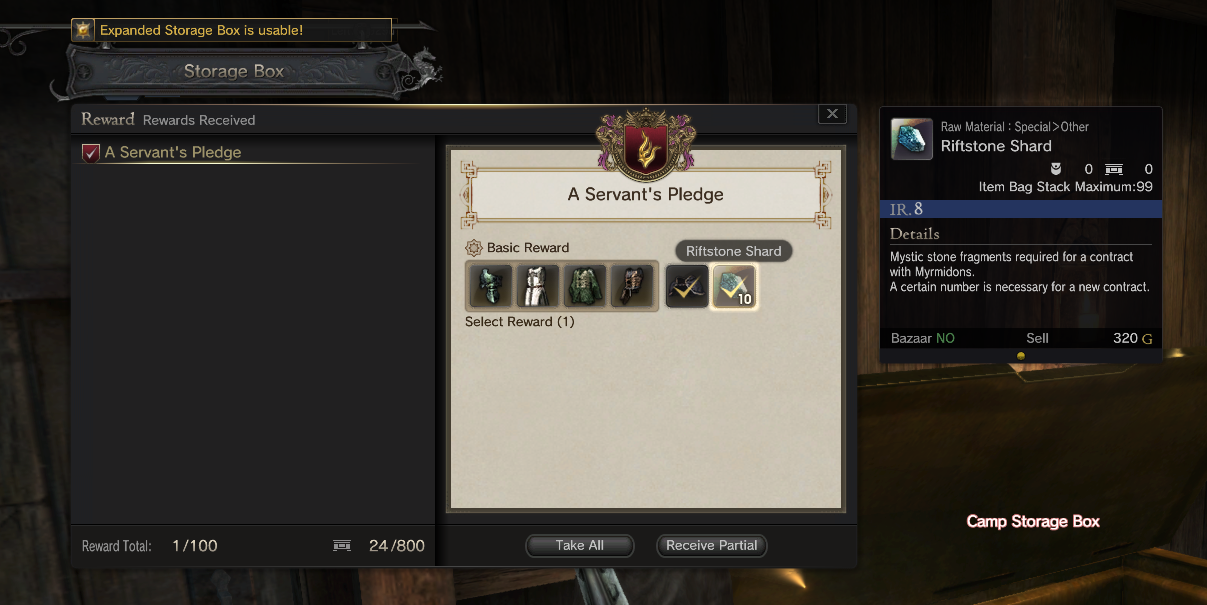
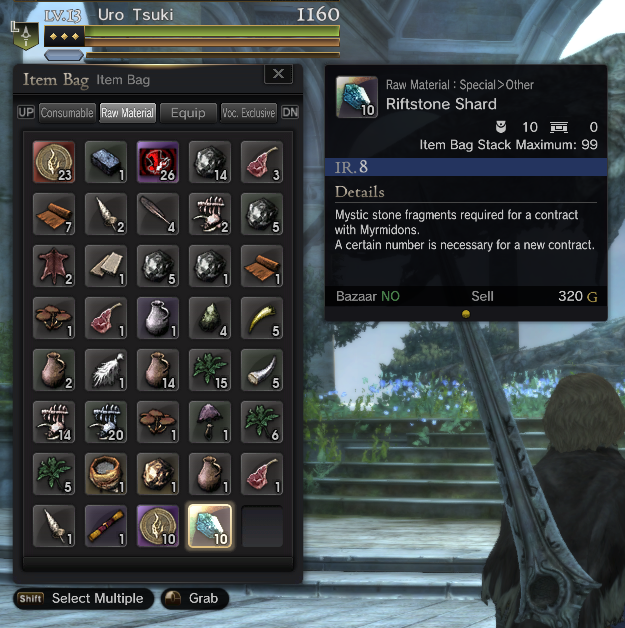
That very same quest that allowed you to create your main Pawn will reward you with 10 Riftstone Shards, you can claim them at any Storage Box and use them to create your second Pawn :)
After getting your first Main Pawn, you'll be able to accept a quest titled 'Reliable Source of Information' from Seneka.
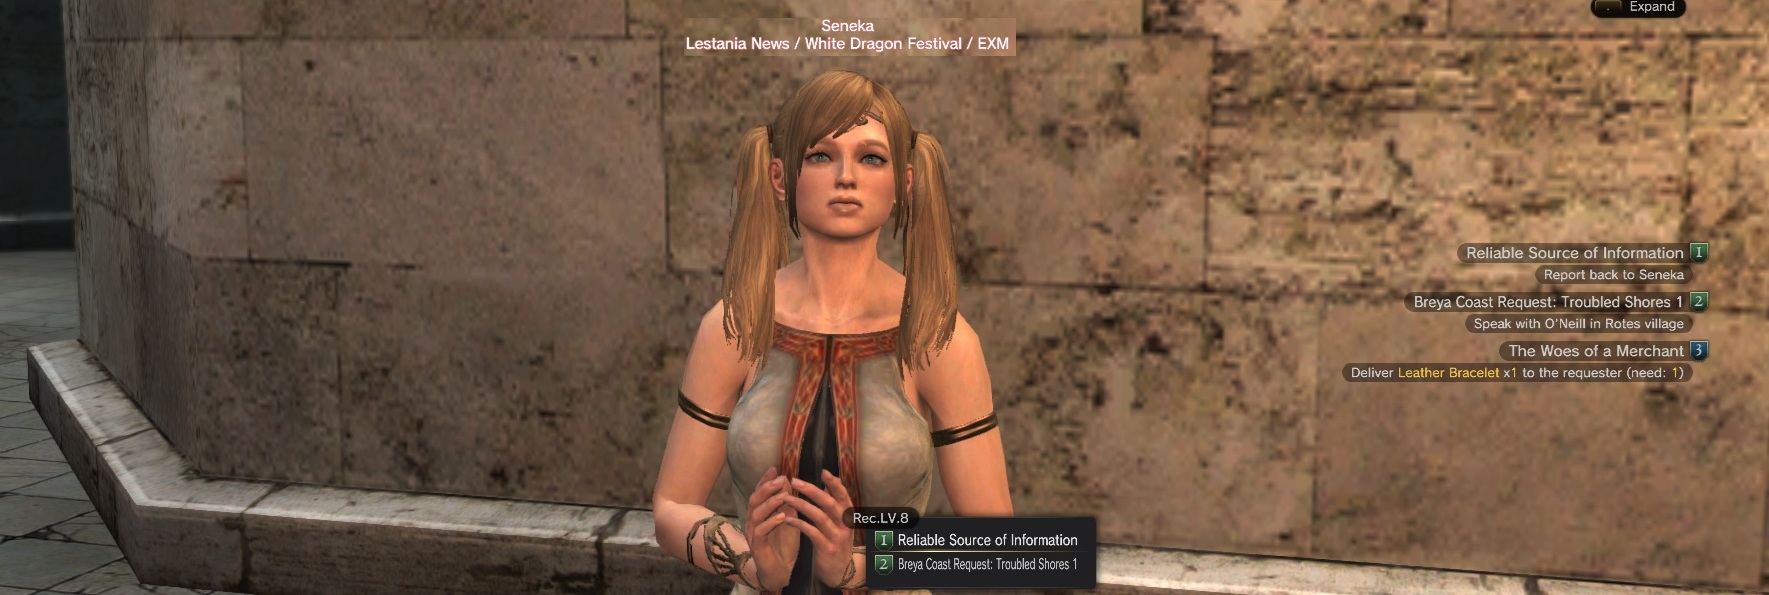
It will unlock Reward Missions, an online-focused type of quests.
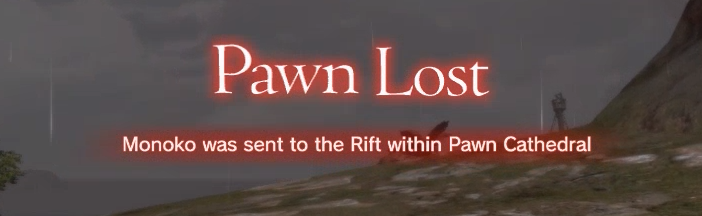
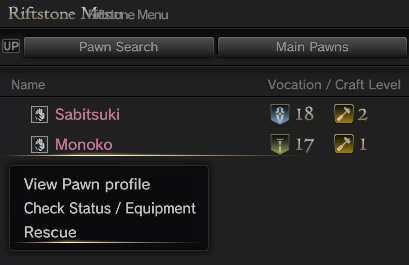
If your Pawn dies and you don't revive them in time (Or if you leave the locale they died in), you'll see this message:
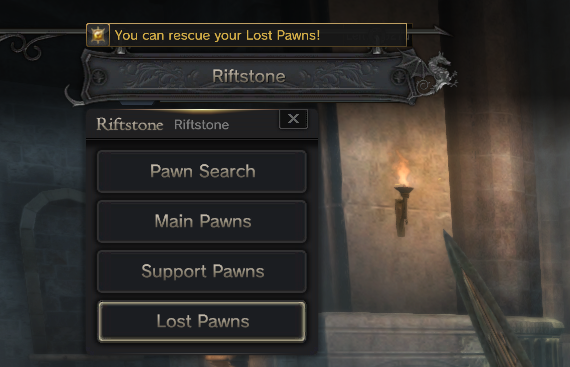
You won't be able to invite them to your party if you don't go to a main Riftstone like The Pawn Cathedral's Riftstone and click on 'Rescue' inside the 'Lost Pawns' option.
One big difference between Dragon's Dogma: Dark Arisen and Dragon's Dogma Online is that here you can create as many Pawns as you want. You just need to collect 10 Riftstone Shards and give them to the White Dragon at the Audience Chamber by clicking in the 'Myrmidon’s Pledge' option.
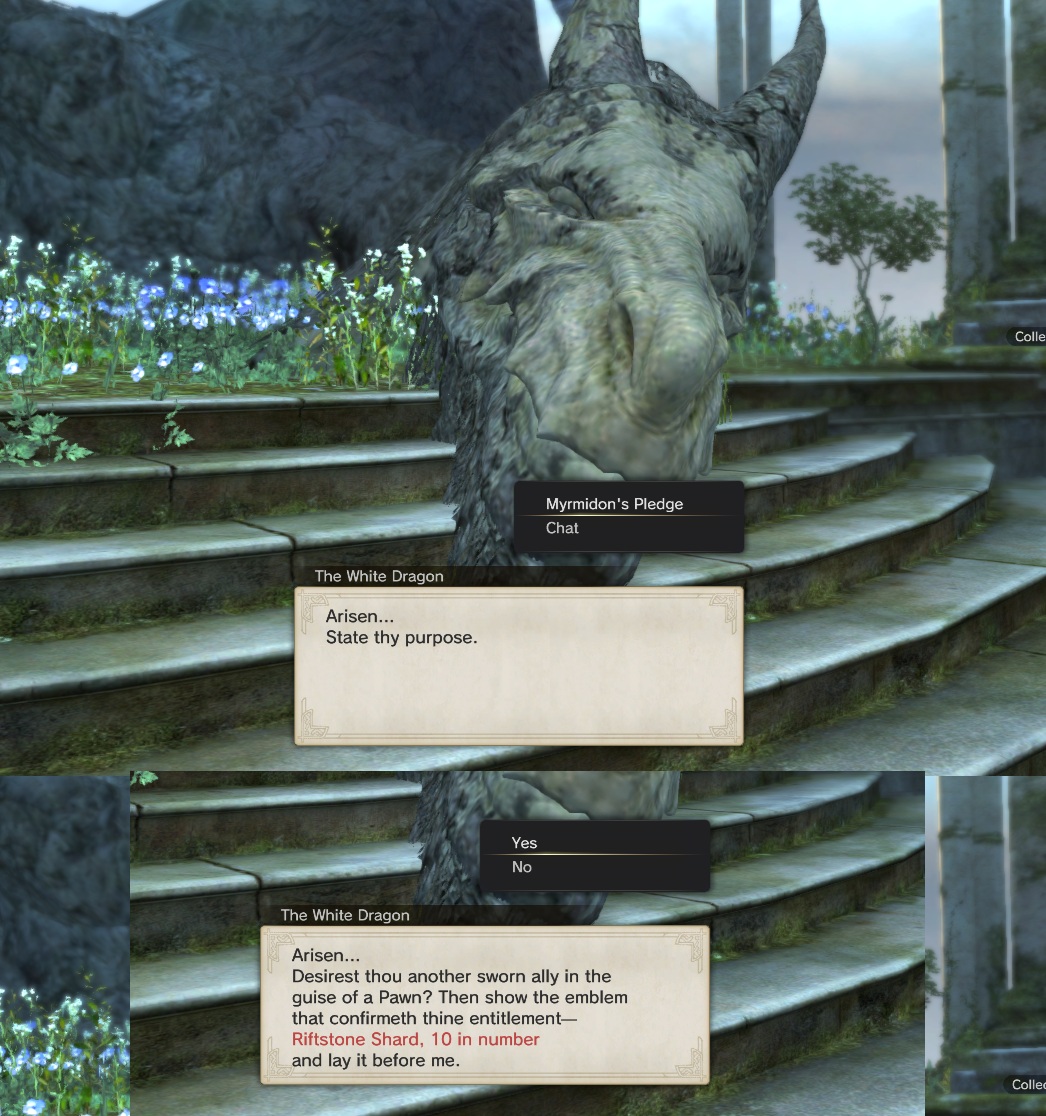
But you'll only be able to do this once you've finished the Personal Quest provided by Iris in the Audience Chamber, only a few hours into the game.
- Purple means that killing that enemy provides you with BO (Blood Orbs).
- Blue are World Quest enemies.
- Green are enemies that will push a Personal Quest forward.
- Grey are regular enemies.
Quest Types and Area Masters
There are various types of quests in this game.
Red quests are Main Quests, they guide you through the game's main storyline.
Main quests will guide you through each location at its correct pace.
Green quests are Personal Quests; they unlock game systems and guide you through its mechanics.
Board Quests are miscellaneous quests that refresh every X hours indefinitely. They will be your main source of XP, so get used to them.
- Tip: While exploring, loot as much as you can. Early-game delivery quests (from the Board) are a great way to gain extra XP, and they require items from various enemies you'll find along the way.
Blue quests are NPC/World Quests; they develop a specific storyline and reward you with Area Progression.
Quests with this icon are (obviously) blocked, talking to that NPC will sometimes provide info on how to unlock that quest but most require to just level up your character or the Area Progression level. Some of them require you to dismiss everyone on your party before acepting them.
Area Progression (World Level) is tied to the quests provided by each locale's Area Master, but you increase your World Level by killing enemies marked as a blue dot in the minimap or completing various other quests in a locale.
Area Masters will provide you with quests that can reward you with extra XP and items, and leveling up the area will open new paths and make new enemies appear.
You can complete different quests or just one quest over and over and it will still increase the World Level.
- Tip: You can make an already completed Area Quests be available once again by just teleporting again to any Portcrystal.
In the 'Area List' menu you can see which area is ready to level up, and how many Area Points you have on each zone.
Rift Teleports
A few minutes into the main questline you'll go to the village of Tel and be asked to interact with its Portcrystal, it will unlock the teleport system. You can teleport whenever you want at the cost of X (depends on the server you're in) Rift points.
Each time you interact with an area's Portcrystal, it'll unlock in your Rift Teleport menu.
There's a few tiny teleport locations called 'Sub Portcrystals' located all around the map too.
Pawns System
You'll obtain your first Main Pawn at the level 6 quest titled 'A Servant's Pledge'.
It'll naturally guide you all the way through, and you'll be eventually asked to create your Pawn at the Audience Chamber.
You can change their equipment by interacting with any Storage Box.
Now you can interact with any Riftstone to add another Pawn to your team by hiring them in the 'Pawn Search' option. It will not be a Pawn of yours, you're hiring them from other players and they won't level up with you.
If you logged in and your Pawn isn't there with you, summon them back at your nearest Riftstone.
Keep in mind that hiring Pawns costs Rift points depending on their level, this exists for you to not hire overpowered Pawns during Early-Game. If in your party there's a Pawn (or player) with more than 20 levers lower or above you, no XP will be gained until your team is between the 20 levels range.
The translated in-game tutorial does a great job at explaining this.
That very same quest that allowed you to create your main Pawn will reward you with 10 Riftstone Shards, you can claim them at any Storage Box and use them to create your second Pawn :)
After getting your first Main Pawn, you'll be able to accept a quest titled 'Reliable Source of Information' from Seneka.
It will unlock Reward Missions, an online-focused type of quests.
If your Pawn dies and you don't revive them in time (Or if you leave the locale they died in), you'll see this message:
You won't be able to invite them to your party if you don't go to a main Riftstone like The Pawn Cathedral's Riftstone and click on 'Rescue' inside the 'Lost Pawns' option.
Creating More Pawns!!
One big difference between Dragon's Dogma: Dark Arisen and Dragon's Dogma Online is that here you can create as many Pawns as you want. You just need to collect 10 Riftstone Shards and give them to the White Dragon at the Audience Chamber by clicking in the 'Myrmidon’s Pledge' option.
But you'll only be able to do this once you've finished the Personal Quest provided by Iris in the Audience Chamber, only a few hours into the game.
・The Basics of Dragon's Dogma Online! (Part 3)
Dragon Force Augments
After you finished the main quest titled 'The Crimson Crystal', you'll unlock the Dragon Force Augments. This is a core game mechanic so you better not miss it.
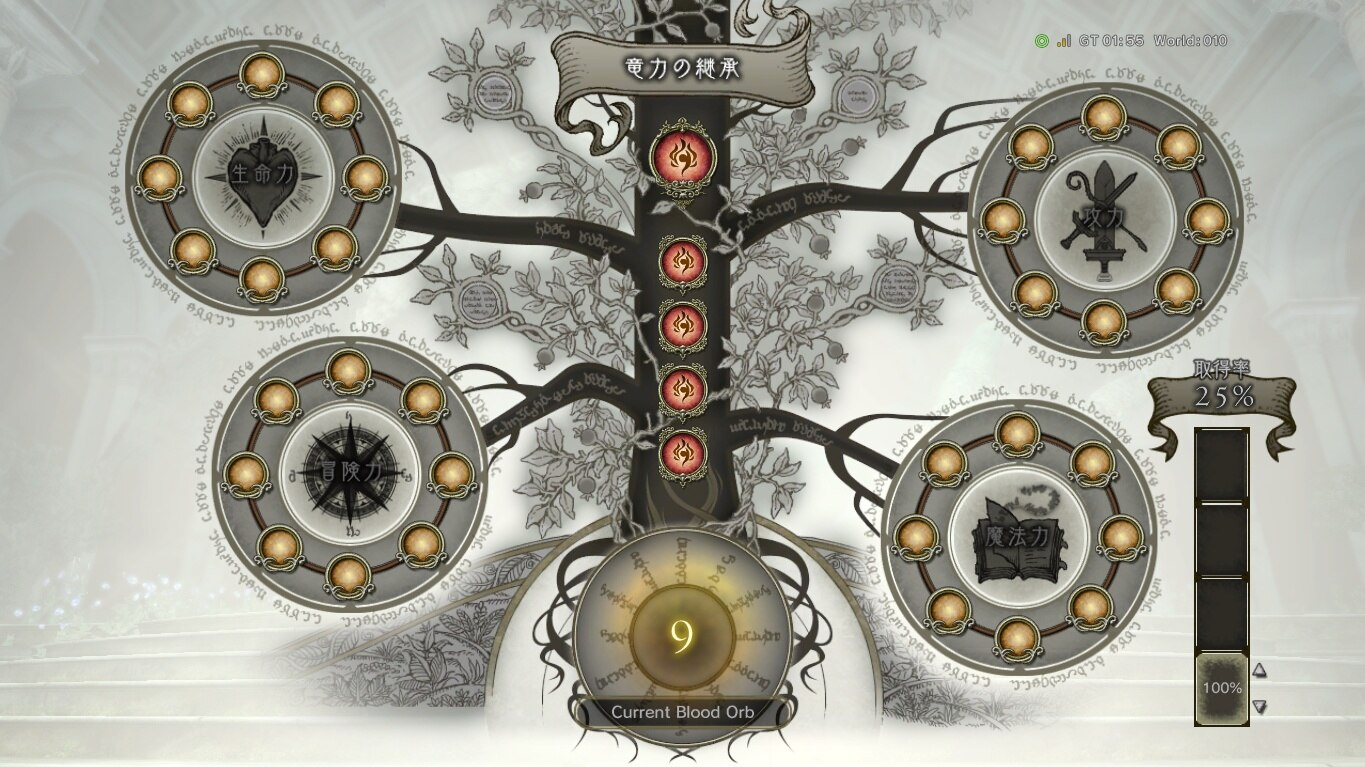
By talking with the White Dragon, you can use the Blood Orbs you've obtained to unlock perks from this Skill Tree.
To obtain Blood Orbs (BO), you must search for enemies with purple health bars, they're marked as a purple dot in the minimap.
Crafting System
Eventually you'll obtain a Personal Quest titled 'Crafted Token of the Heart' which will guide you to the Crafting Room / Workshop.
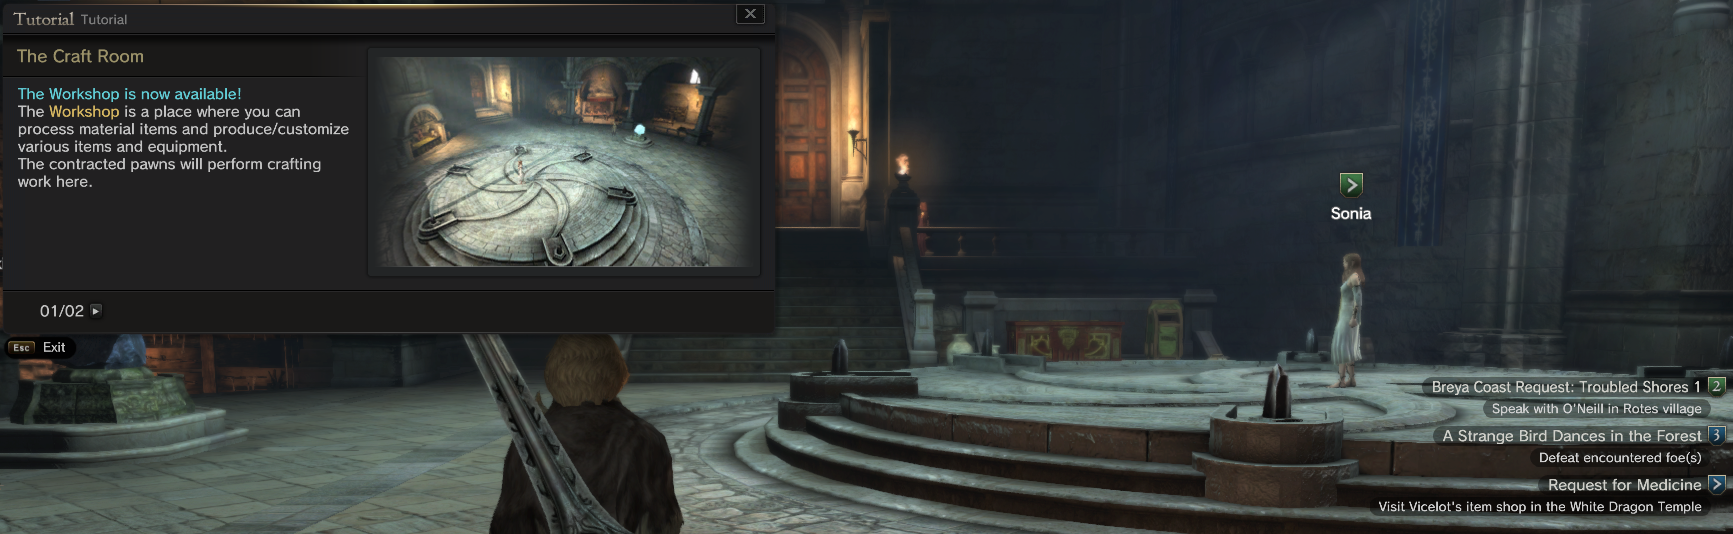
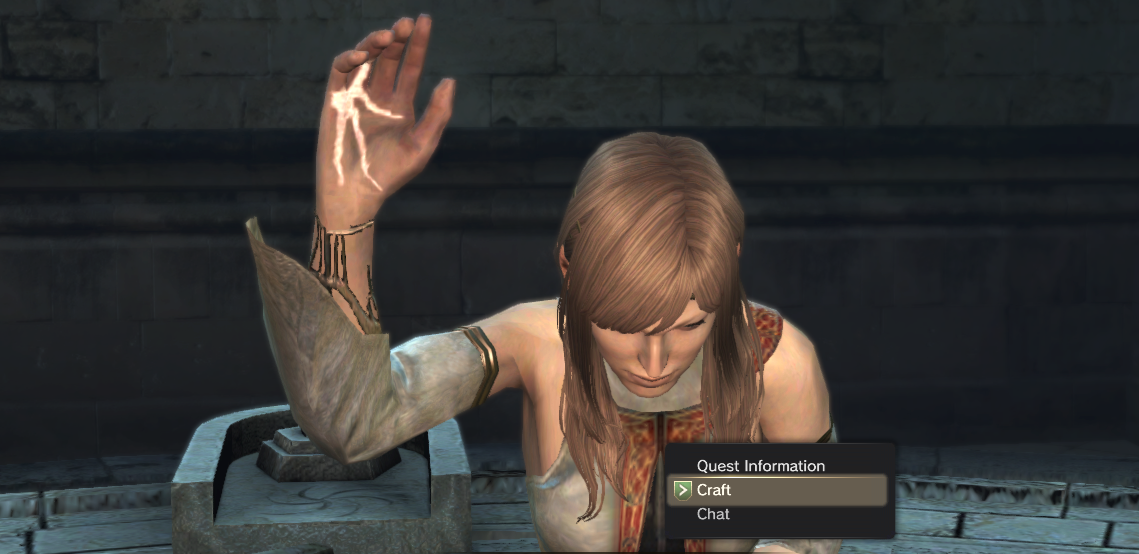
Speak to Sonia if you want to enter the Crafting menu, you'll be able to see what recipe is available, which's your Pawn's Crafting level, change color of some gear, enhance equipment, etc.
Pawns will do the trick for you, and you can level up their Crafting skill.
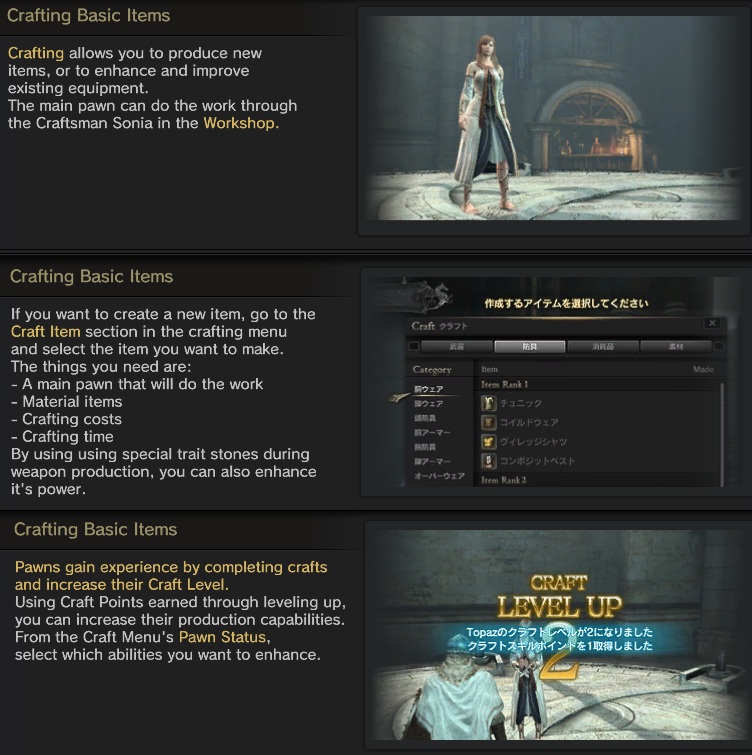
You'll be asked to select various Pawns to do the crafting for you.
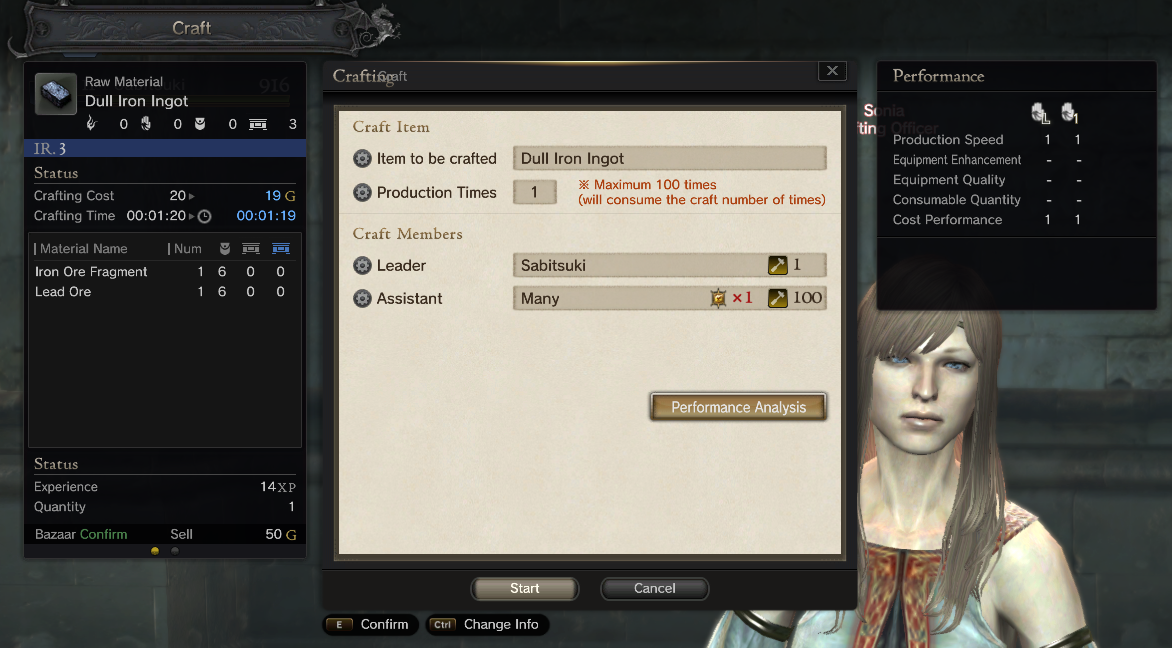
There'll be a few Personal Quests in the Crafting Room that will guide you through the process naturally, and you can buy stuff from the Material Shop and Bazaar in there.
You can craft pretty good items here, and if you buy an 'Enlightened Ring Plate' from the Material Shop and give it to Gregory at the Shopping District to trade it in the Appraisal Exchange menu.
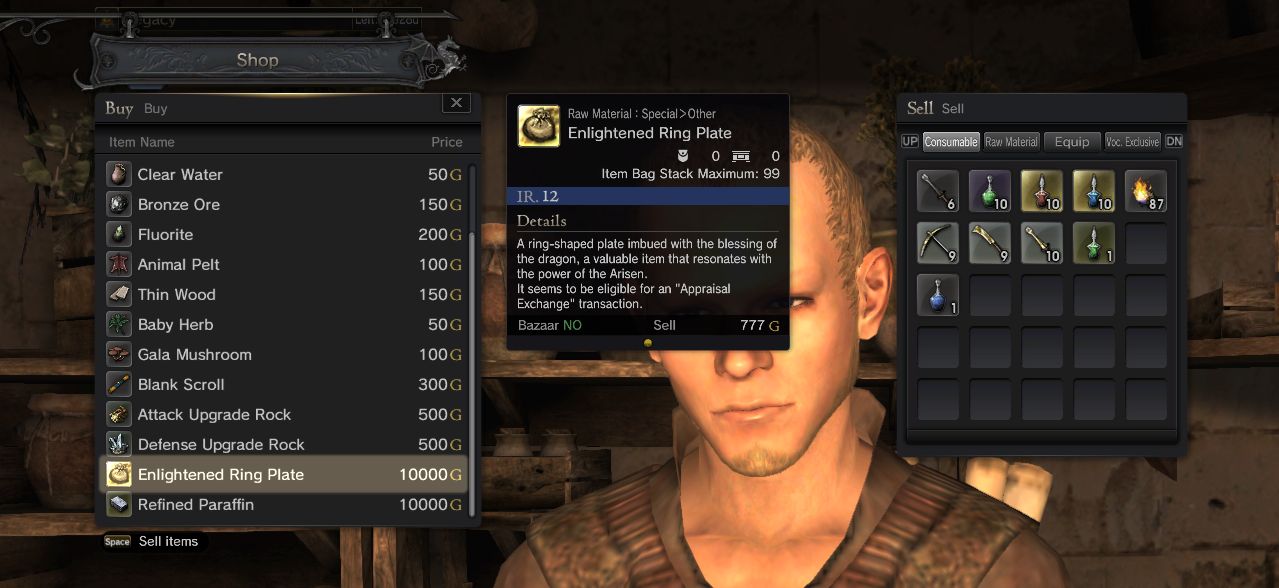
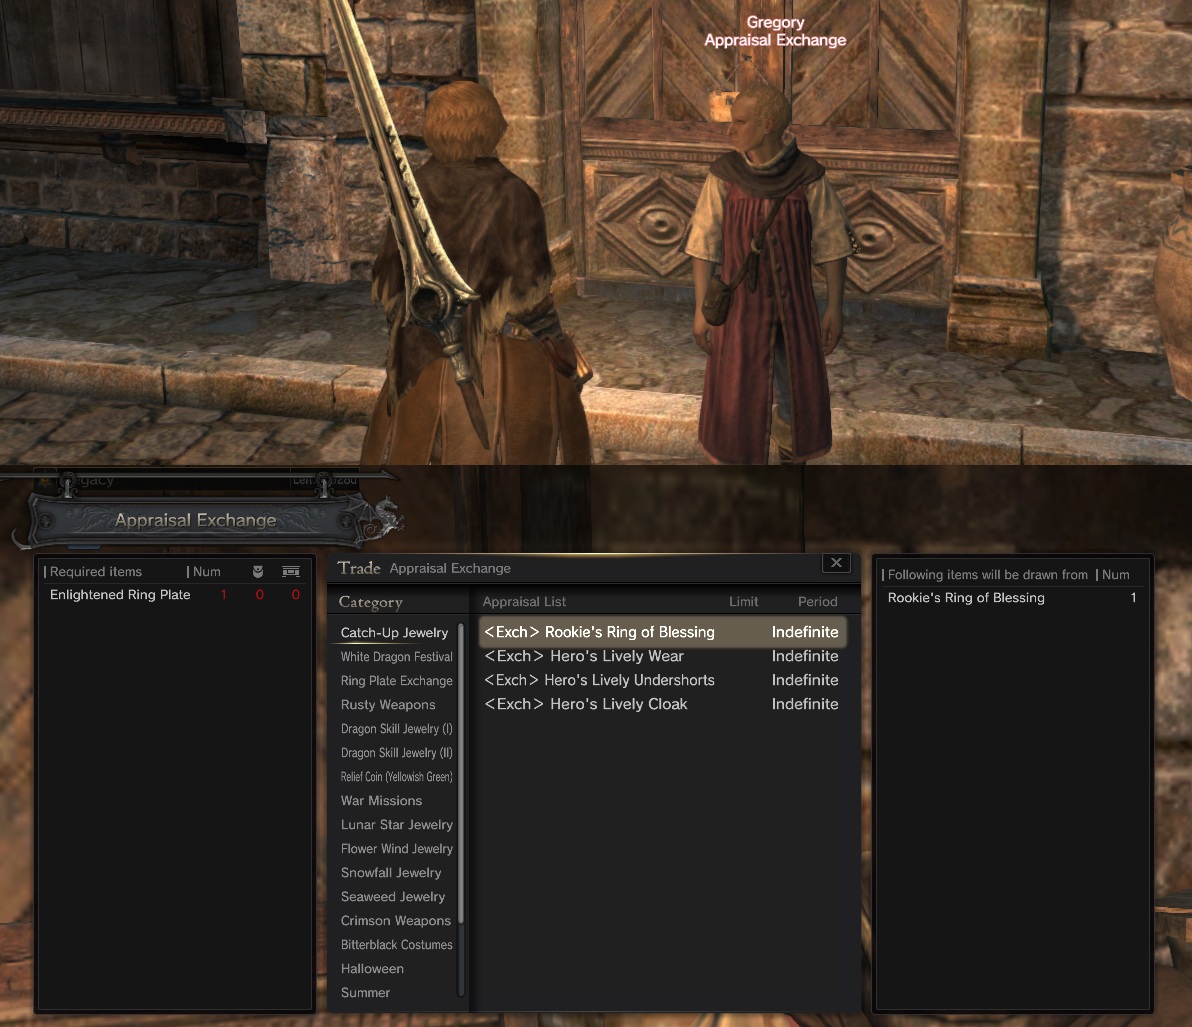
- Check ddon・wikidot・com/crafting:home for an in-depth explanation.
You can also enhance your gear at Sonia's 'Enhance Equipment', you'll be asked to provide certain resources for each item you want to enhance.
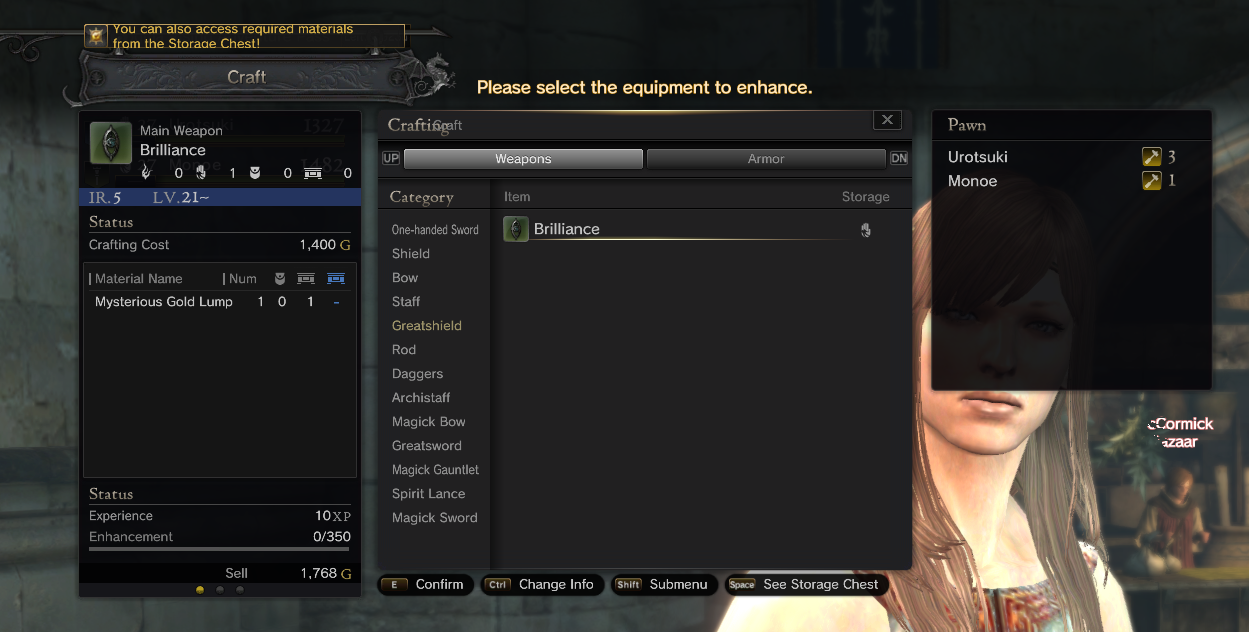
It's really useful in any Vocation below lvl55, then enhancing becomes somewhat irrelevant until you reach the Endgame.
Edit your Character/Pawn Apparance
To edit the appearance of your character or any of your Pawns, go to The Beauty Salon at the Shopping District of The White Dragon's Temple and interact with Morris.
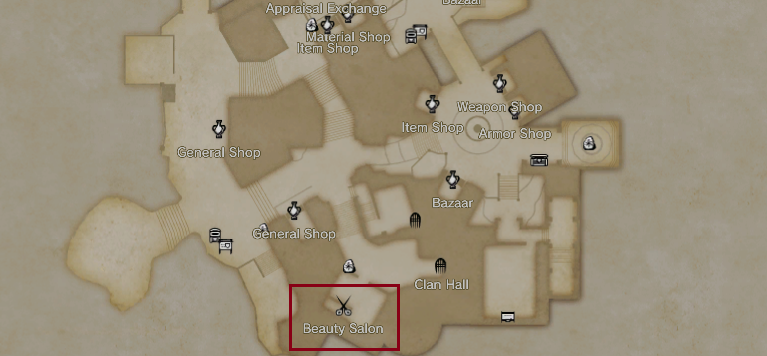
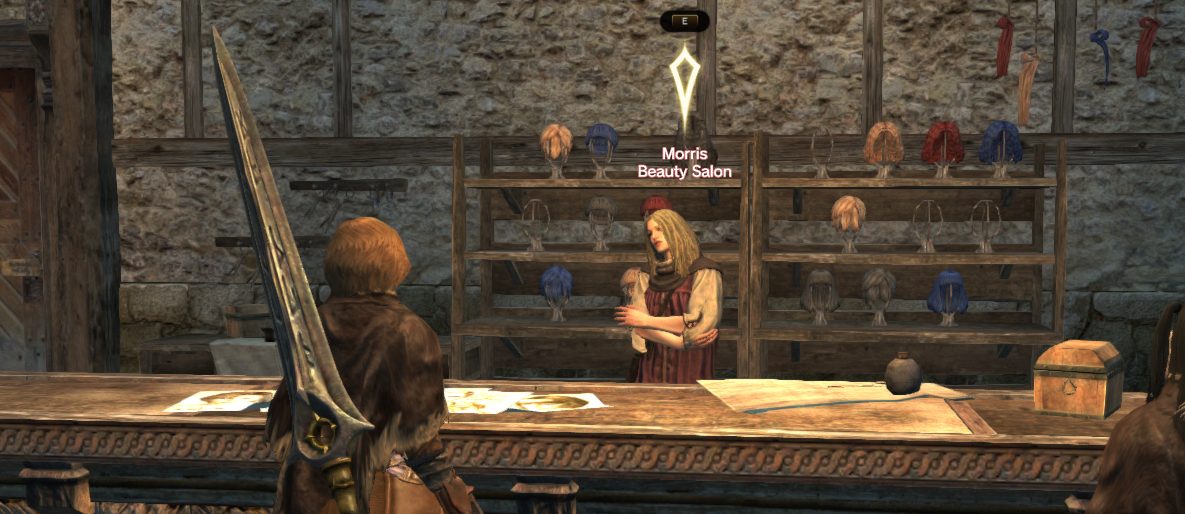
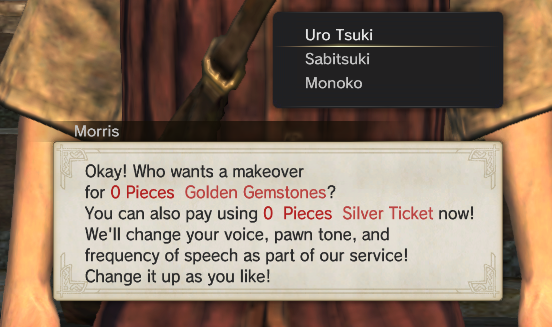
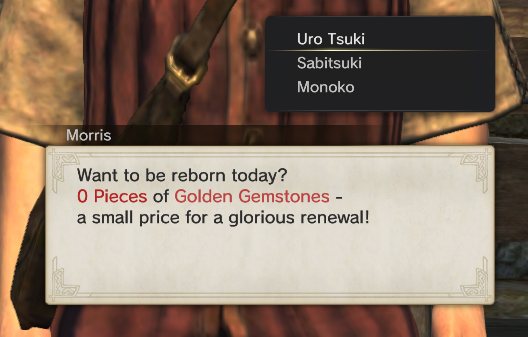
Both the 'Beauty Shop' and the 'Reincarnation' options will ask for Golden Gemstones, but since these currencies aren't available anymore you'll most likely get your edit for free.
・Bitterblack Maze!
Bitterblack Maze (BBM) is one of Dragon's Dogma Online most interesting dynamics; it is a rogue-like alternative playthrough assigned to each of your characters, and you'll run through a different iteration of Dragon's Dogma: Dark Arisen's Bitterblack Island, so if you've already played that game before, you're good to go.
To unlock BBM, you have to finish the Personal Quest titled 'A Reliable Source of Information' from Seneka, we've talked about it before.
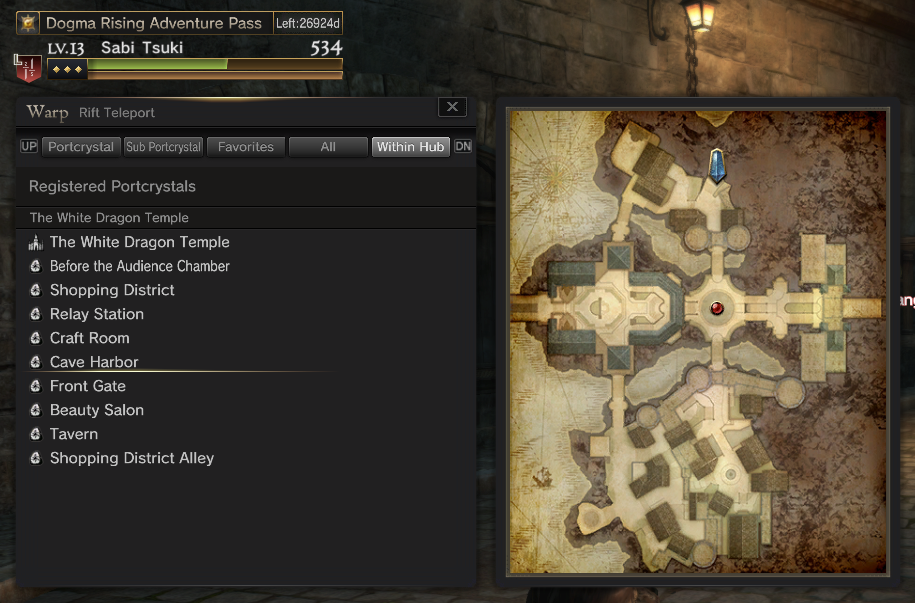
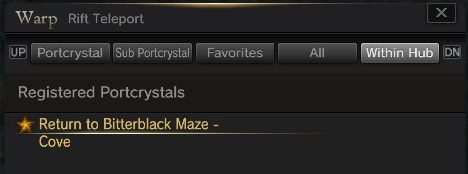
Then head to 'Cave Harbor' in the Relay Station (You can access it through its main gate or via the 'Within hub' section of the 'Rift Teleport' menu).
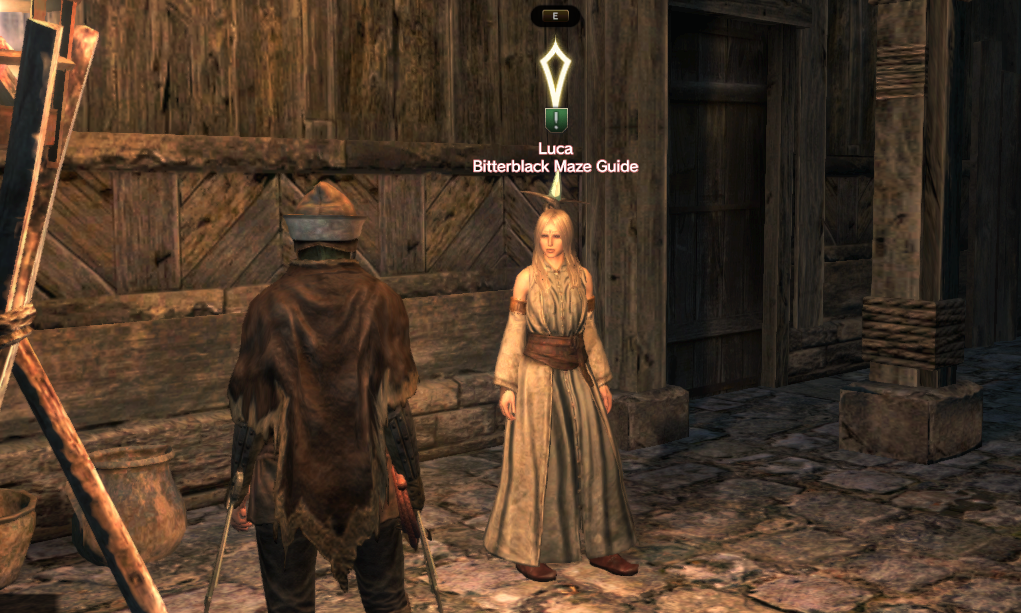
And talk to Luca, the Bitterblack Maze Guide, to start a quest titled 'To the Bitterblack Maze'.
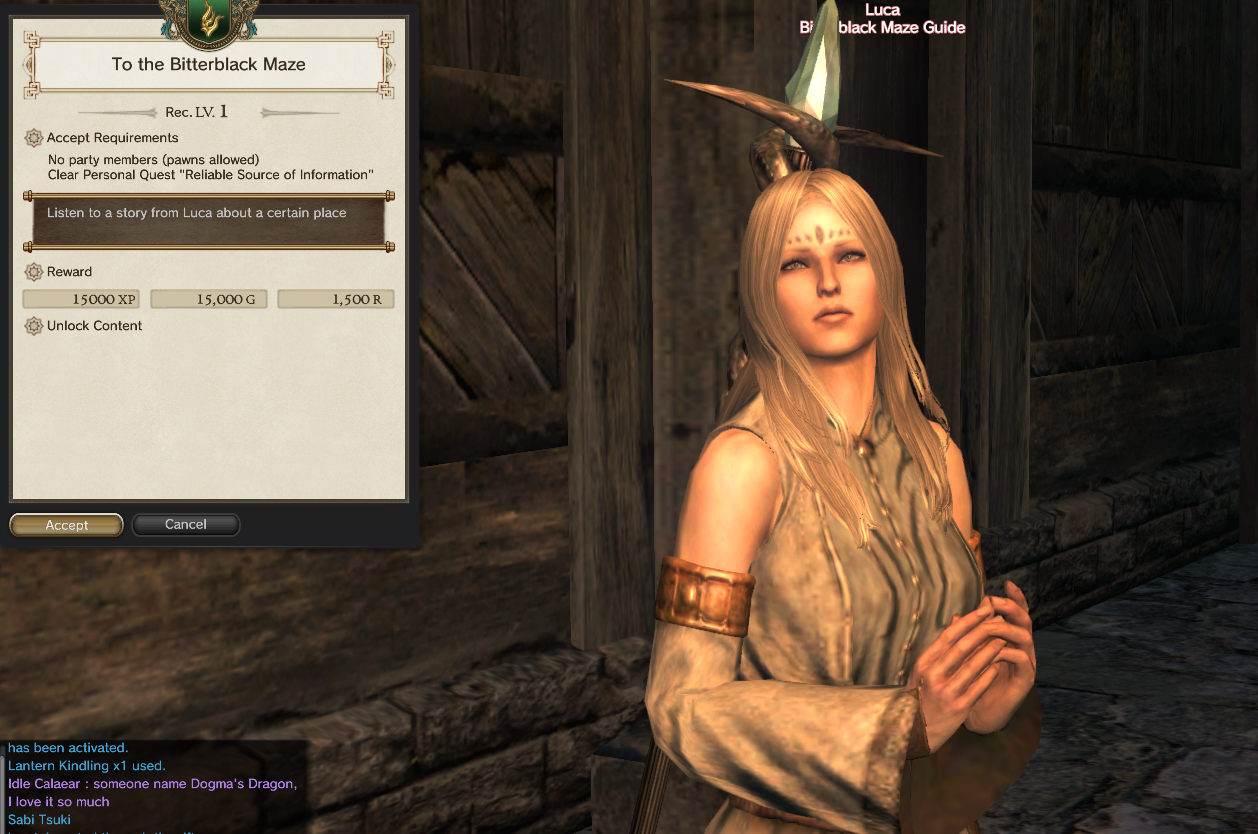
(There's various translations of DDON right now, so 'Luca' could be called 'Lyka' in your game).
She'll ask you to interact a few more times with her, and then this tutorial will pop-up.
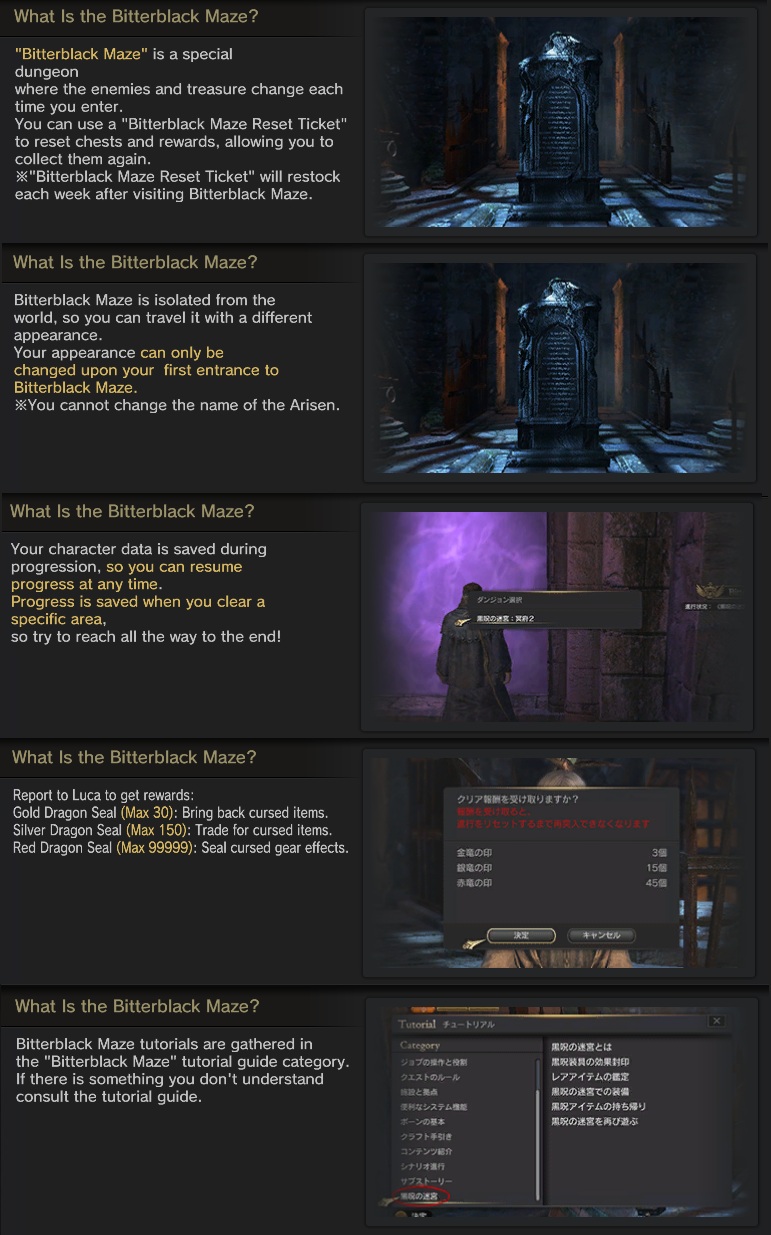
Now interact with this little spark and you'll be able to get into Bitterblack Isle- I mean, Maze!
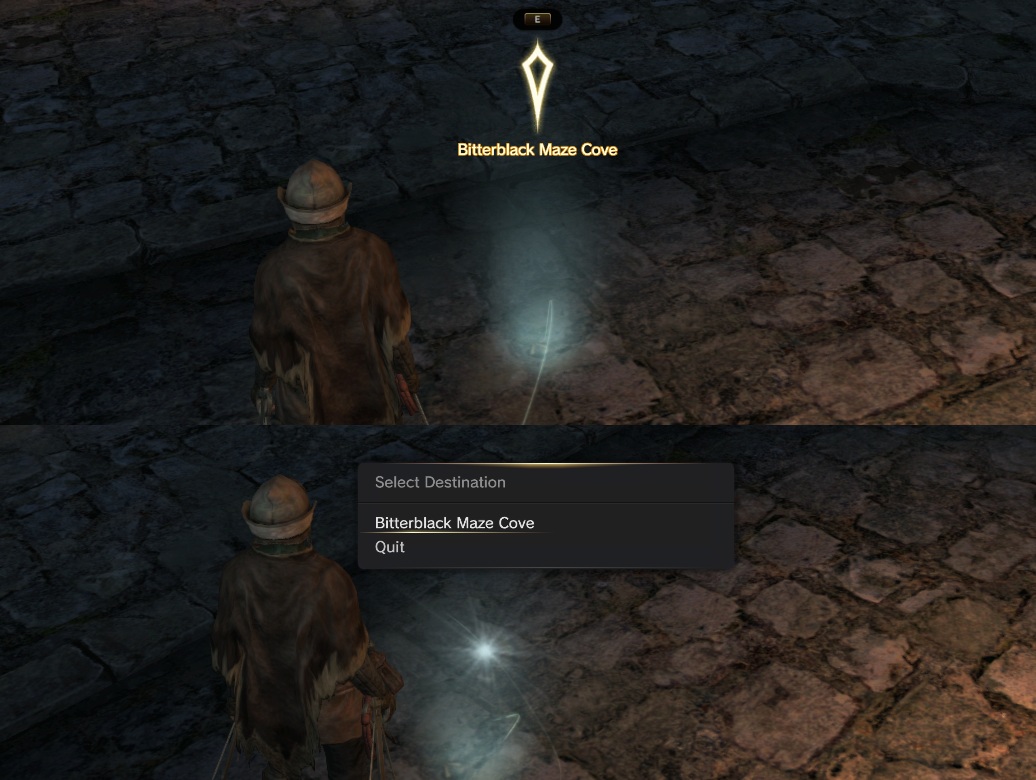
As the tutorial says; upon entering BBM you'll be asked to create a new character, and said character's appearance will stay like that forever.
Now interact with the Portcrystal from BBM's entrance.
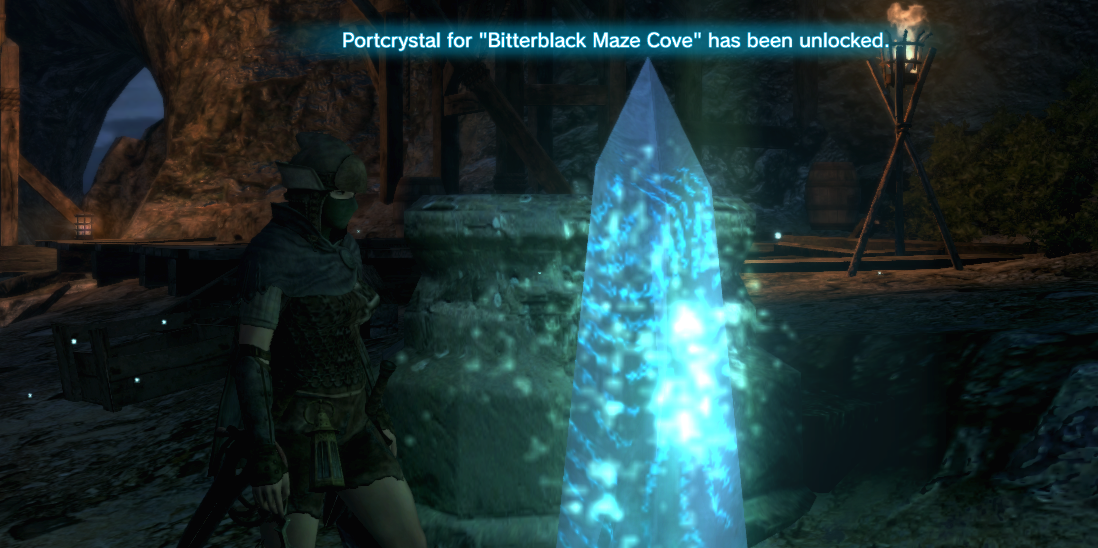
Bitterblack Maze is essentially a Rogue-like designed within the Bitterblack Isle's from Dragon's Dogma Dark Arisen but including scenery layouts and enemies from Dragon's Dogma Online.
You'll start at lvl1 each run with lvl 1 equipment and all your Skills unlocked, but with no regular Augments nor Dragon Force Augments. You'll have to assign each Skill at both NPCs there, or else you'll go naked.
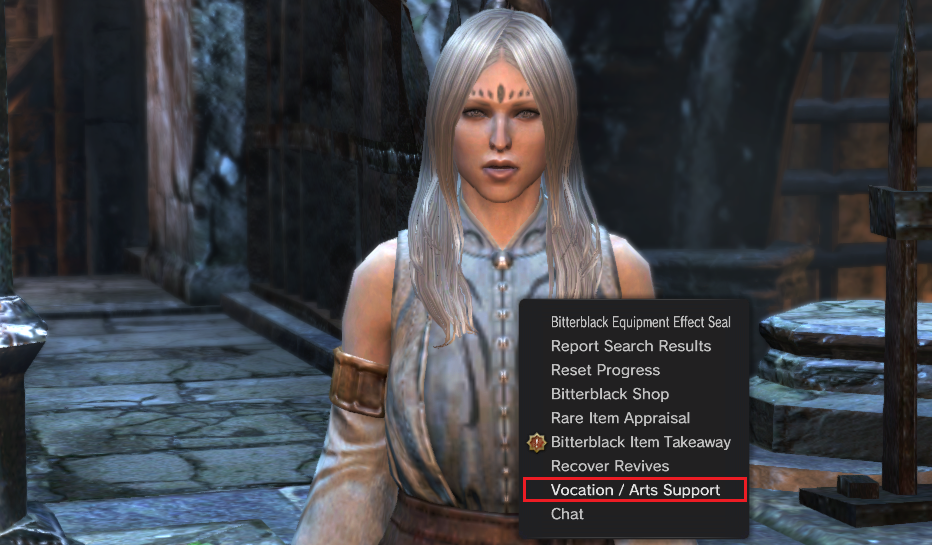
Pawns are not allowed here, so you either go solo or in a party up to other 4 players.
You'll have to kill enemies to level up and you can unlock chests with new content (But some chests require you to kill each enemy from that room to unlock them). These chests will always contain gear from your currently equipped Vocation.
Your main goal is to beat the final boss, but keep in mind that your run will end when you die and ran out of Revives.
You can always exit the dungeon by warping to the BBM Cove, but not if you're in combat.
If you enter through the main gate, you'll start a Regular BBM run.
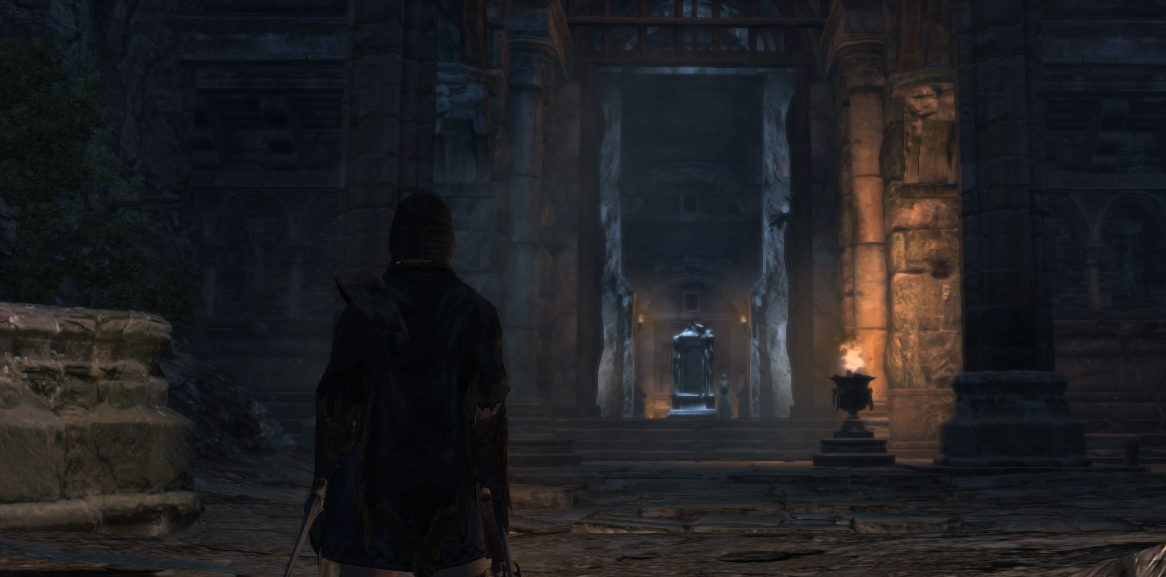
If you enter through the 'Abyss' gate to the left, you'll start an 'Abyssal BBM' run.
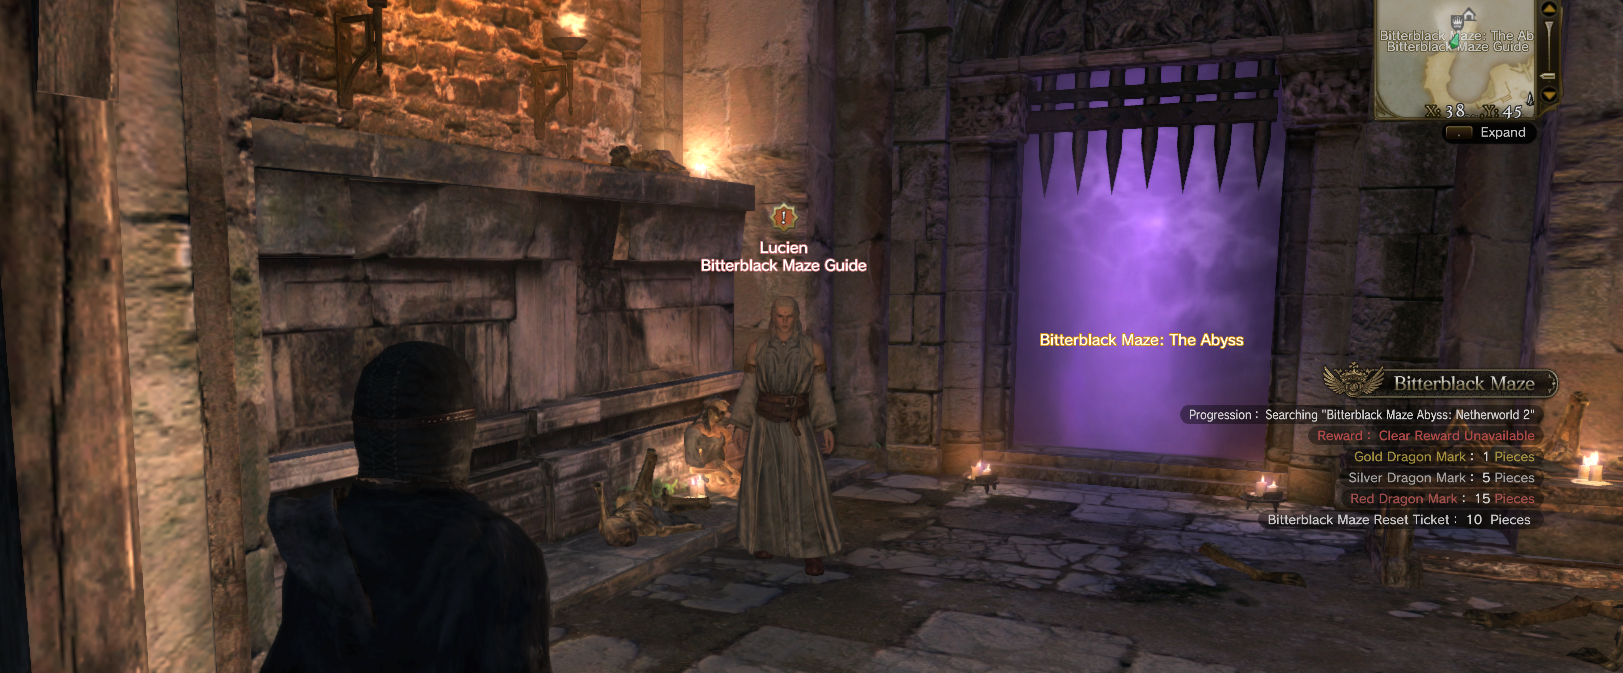
The main difference between these two is difficulty and loot quality; Regular BBM is the normal playthrough and Abyssal BBM is its own sort of Hard Mode. There's also exclusve content in Abyssal BBM that you won't find in Regular BBM.
If you're in a Party and everyone is ready to start, each of you need to interact with the door. If not, the Party Leader won't be able to start the run.
To start a new run, you can either reset your current progress or reset your progress and rewards, as shown above.
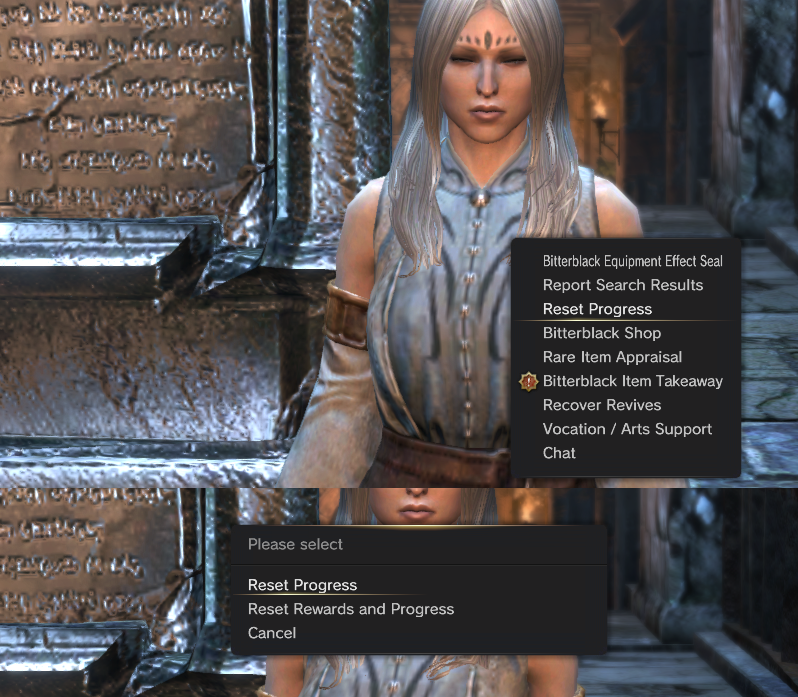
But to reset your BBM run, you have to use one Reset Ticket. You can see them at the right side of your screen.
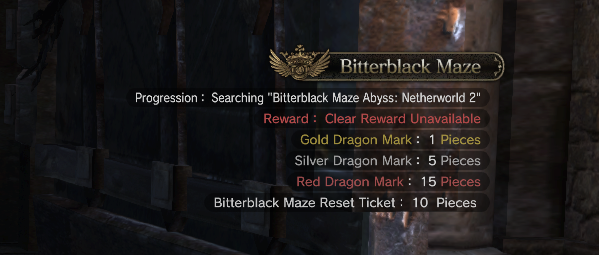
You have to wait 1 week to refill your total of 10 Reset Tickets, and you normally wouldn't be able to obtain more (But that could change depending on your server). Reset Tickets will reset both the regular BBM and Abyssal BBM, so (if you desire) you can finish both of them and then consume a Reset Ticket.
After finishing a run, you can report your progress at Lyka. Depending on your performance, you'll obtain various items from these three currencies:
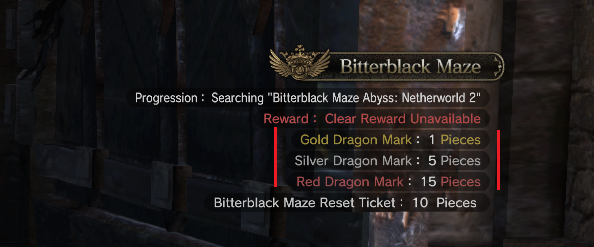
Golden Dragon Marks will transfer items from Bitterblack Maze to the regular world.
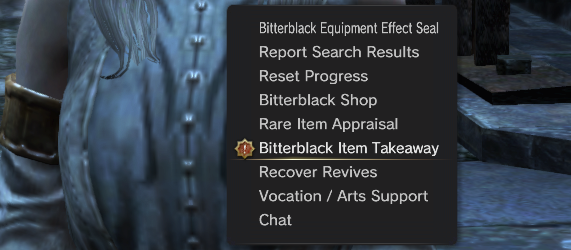
Each transfer between your BBM character and you regular character will cost 3 Golden Dragon Marks.
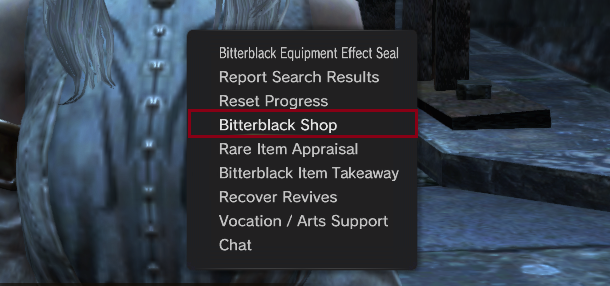
Silver Dragon Marks will allow you to buy exclusive items via the 'Bitterblack Shop' option.
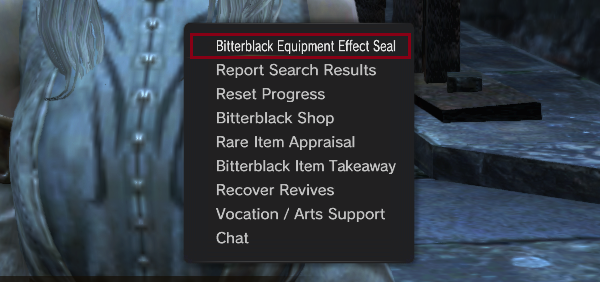
Red Dragon Marks will allow you to remove certain effects from the possible jewelry you can obtain in the maze, via the 'Bitterblack Equipment Effect Seal' option. This is pretty useful if you're aiming for a certain build, or if there's an effect you don't like.
As you can see, the Golden Dragon Marks are the most important of them all. Bitterblack Maze will provide you with a lot of already enhanced or high quality gear (...exclusive cosmetics too) that could help you in your journeys in Lestania.
If you get to the end of a regular BBM run, you'd obtain:
Red Dragon Marks are pretty important because the main reason everyone will get into BBM is to get its exclusive Jewelry items, which would be:
These glowing chests will appear after defeating one BBM boss.
It is pretty broken to be fair; these Jewelry can be equipped at lvl 1 by every vocation, it's a must for every new character's early-game.
How to access Bitterblack Maze
To unlock BBM, you have to finish the Personal Quest titled 'A Reliable Source of Information' from Seneka, we've talked about it before.
Then head to 'Cave Harbor' in the Relay Station (You can access it through its main gate or via the 'Within hub' section of the 'Rift Teleport' menu).
And talk to Luca, the Bitterblack Maze Guide, to start a quest titled 'To the Bitterblack Maze'.
(There's various translations of DDON right now, so 'Luca' could be called 'Lyka' in your game).
She'll ask you to interact a few more times with her, and then this tutorial will pop-up.
Now interact with this little spark and you'll be able to get into Bitterblack Isle- I mean, Maze!
As the tutorial says; upon entering BBM you'll be asked to create a new character, and said character's appearance will stay like that forever.
Now interact with the Portcrystal from BBM's entrance.
How does Bitterblack Maze work?
Bitterblack Maze is essentially a Rogue-like designed within the Bitterblack Isle's from Dragon's Dogma Dark Arisen but including scenery layouts and enemies from Dragon's Dogma Online.
You'll start at lvl1 each run with lvl 1 equipment and all your Skills unlocked, but with no regular Augments nor Dragon Force Augments. You'll have to assign each Skill at both NPCs there, or else you'll go naked.
Pawns are not allowed here, so you either go solo or in a party up to other 4 players.
You'll have to kill enemies to level up and you can unlock chests with new content (But some chests require you to kill each enemy from that room to unlock them). These chests will always contain gear from your currently equipped Vocation.
Your main goal is to beat the final boss, but keep in mind that your run will end when you die and ran out of Revives.
You can always exit the dungeon by warping to the BBM Cove, but not if you're in combat.
If you enter through the main gate, you'll start a Regular BBM run.
If you enter through the 'Abyss' gate to the left, you'll start an 'Abyssal BBM' run.
The main difference between these two is difficulty and loot quality; Regular BBM is the normal playthrough and Abyssal BBM is its own sort of Hard Mode. There's also exclusve content in Abyssal BBM that you won't find in Regular BBM.
If you're in a Party and everyone is ready to start, each of you need to interact with the door. If not, the Party Leader won't be able to start the run.
Reset Tickets
To start a new run, you can either reset your current progress or reset your progress and rewards, as shown above.
But to reset your BBM run, you have to use one Reset Ticket. You can see them at the right side of your screen.
You have to wait 1 week to refill your total of 10 Reset Tickets, and you normally wouldn't be able to obtain more (But that could change depending on your server). Reset Tickets will reset both the regular BBM and Abyssal BBM, so (if you desire) you can finish both of them and then consume a Reset Ticket.
Rewards and Dragon Marks
After finishing a run, you can report your progress at Lyka. Depending on your performance, you'll obtain various items from these three currencies:
- Golden Dragon Marks.
- Silver Dragon Marks.
- Red Dragon Marks.
Golden Dragon Marks will transfer items from Bitterblack Maze to the regular world.
Each transfer between your BBM character and you regular character will cost 3 Golden Dragon Marks.
Silver Dragon Marks will allow you to buy exclusive items via the 'Bitterblack Shop' option.
Red Dragon Marks will allow you to remove certain effects from the possible jewelry you can obtain in the maze, via the 'Bitterblack Equipment Effect Seal' option. This is pretty useful if you're aiming for a certain build, or if there's an effect you don't like.
As you can see, the Golden Dragon Marks are the most important of them all. Bitterblack Maze will provide you with a lot of already enhanced or high quality gear (...exclusive cosmetics too) that could help you in your journeys in Lestania.
If you get to the end of a regular BBM run, you'd obtain:
- 4 Golden Dragon Marks.
- 20 Silver Dragon Marks.
- 55 Red Dragon Marks.
- 6 Golden Dragon Marks.
- 30 Silver Dragon Marks.
- 80 Red Dragon Marks.
Red Dragon Marks are pretty important because the main reason everyone will get into BBM is to get its exclusive Jewelry items, which would be:
- Bitterblack Bracelets: Provides the user with general bonus effects.
- Bitterblack Earrings: Provides the user with Vocation-related bonus effects.
These glowing chests will appear after defeating one BBM boss.
It is pretty broken to be fair; these Jewelry can be equipped at lvl 1 by every vocation, it's a must for every new character's early-game.
・Character Stats + Penetration Rate.
Let's have a quick look at your character/Pawn's stats.
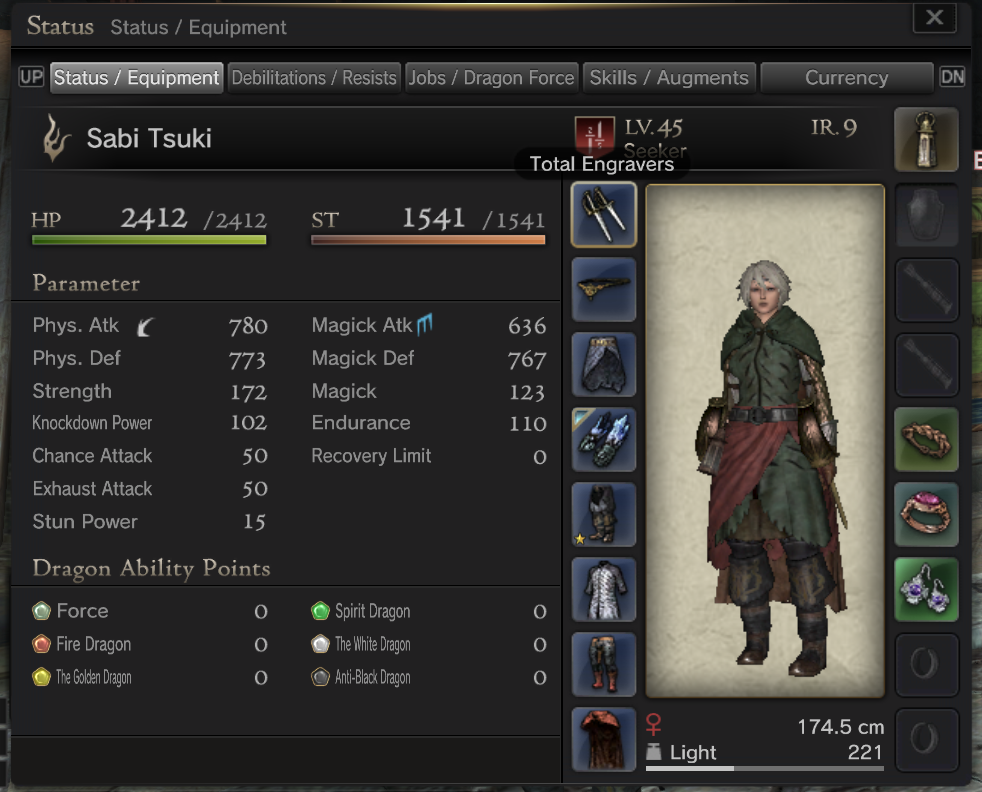
These stats are dependent on your gear and crests/upgrades you added to them; they will also be affected by your unlocked Dragon Force Augments.
From Physical/Magick Attack 200 to 300, each point is 0.5% + damage.
From Physical/Magick Attack 300 to 400, each point is 0.26% + damage.
From Physical/Magick Attack 400 to 600, each point is 0.25% + damage.
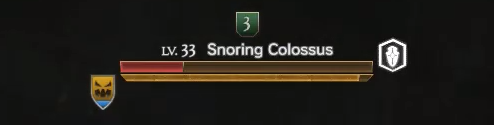
That shield goes from yellow to blue depending on how much you hit the enemy (This one doesn't need you to hit weak spots to get filled), and when it goes full blue, the enemy's Rage State bar will have a massive decrease in total and you'll be able to do more damage to their weak spots.
Ergo, your Chance Attack is the chance you have to topple an enemy down after their Rage Status bar got deplenished.

Getting it to a total of 100 points means that ALL damage you'll receive can be recovered via Magick healing.
This one's a hidden stat, and it's one of the most important stats: Penetration Rate affects how damage scales with your Physical/Magick Attack values. For each of your attacks, the game calculates your damage vs. your enemy's defense, and that's Penetration.
This is how the Dogma Rising server explains it:
The Penetration Rate formula is: 2^(atk/149) * (1 + %damage)
That's why having your weapon's level up to date is heavily important.
The overall math provided by Dr. Aven on the Dogma Rising Discord server gets to this:
These stats are dependent on your gear and crests/upgrades you added to them; they will also be affected by your unlocked Dragon Force Augments.
- Physical Attack.
- Magick Attack.
From Physical/Magick Attack 200 to 300, each point is 0.5% + damage.
From Physical/Magick Attack 300 to 400, each point is 0.26% + damage.
From Physical/Magick Attack 400 to 600, each point is 0.25% + damage.
- Physical Defense.
- Magick Defense.
- Knockdown Power.
That shield goes from yellow to blue depending on how much you hit the enemy (This one doesn't need you to hit weak spots to get filled), and when it goes full blue, the enemy's Rage State bar will have a massive decrease in total and you'll be able to do more damage to their weak spots.
- Chance Attack.
Ergo, your Chance Attack is the chance you have to topple an enemy down after their Rage Status bar got deplenished.
- Exhaust Attack.
- Stun Power.
- Endurance.
- Recovery Limit.
Getting it to a total of 100 points means that ALL damage you'll receive can be recovered via Magick healing.
Penetratio Rate
This one's a hidden stat, and it's one of the most important stats: Penetration Rate affects how damage scales with your Physical/Magick Attack values. For each of your attacks, the game calculates your damage vs. your enemy's defense, and that's Penetration.
- If your weapon's level is 5 levels above your enemy's level, you'll get a total of 100% Penetration on your side.
- But if your enemy is 5 levels above you, they'll get 100% Penetration against you and nuke your ass.
This is how the Dogma Rising server explains it:
Simply put, this is the ratio of 'your attack VS the enemy's defense'. The highest it can be is 1 (100%). You usually achieve max Penetration when your weapon's level is about 5 levels above the enemy's level. It can be further supplemented with flat attack bonuses from crests and Slayer effects at any point, in order to deal with enemies equial to or higher than your level.
The Penetration Rate formula is: 2^(atk/149) * (1 + %damage)
That's why having your weapon's level up to date is heavily important.
The overall math provided by Dr. Aven on the Dogma Rising Discord server gets to this:
- The Attack value is used to compute the Penetration Rate, which is a multiplier that directly acts on your damage.
- This multiplier floors at 3.125% and caps at 100% so stacking attack stops being useful past a certain point (depends on your enemy's defense).
- Penetration Rate works in a way where gaining 150 Attack doubles you damage (which is roughly a 5 lvl increment on Gear) up to the point where you reach 100% Penetration Rate.
- For emblem slots, DPS classes (Red-colored classes) that deals mostly 1 type of damage prefer %damage in the emblem (especially Fighter and Warrior). On the opposite, multi damage class prefer flat Attack value.
- Slayer gear acts as flat Attack conditioned by the type of enemy you are striking.
- Differing base Attack value is just an old lie from capcom trying to make us corelate big damage numbers with big attack value. Any class will reach 100 Penetration Rate at the same point with similar gear.
- Upgrade your weapons and stay above the enemy level.
- Having a weapon 5 levels above your enemy grants you 100% Penetration.
- Being 5 levels below your enemy means you're getting your cheeks clapped.
・Classes and Leveling.
The game rewards you for doing everything it offers, so do not stick to World Quests and Main Quests only, they're not necessarily the best source of XP.
The most efficient way to grind during early to mid-game is via Board Quests, they are not only optional quests, but a primary way of leveling up in Dragon's Dogma Online.
Gather every item you find, chop every log, take every mineral, loot every enemy; it's very likely that there'll be a Delivery Quest asking you to deliver said item, that way you can level up incredibly fast during early to mid-game. This way the game rewards you for exploring every single part of the map, every dungeon, every World Boss, every cave has something that will provide you with more XP, gold, Blood Orbs or Area Progression.
Eventually you'll be able to repeat Board Quests and grind in the highest level areas.
A few tips to keep in mind:
Always experiment, try new Vocations for both your character and your Pawn. Class/Vocation/Job balance depends on the server, but it's overall a pretty well balanced game... Mostly... Partially...
This part gets a lot of players confused, and the game does not explain it entirely.
When you're looking at any gear at a shop, you'll see something like this:
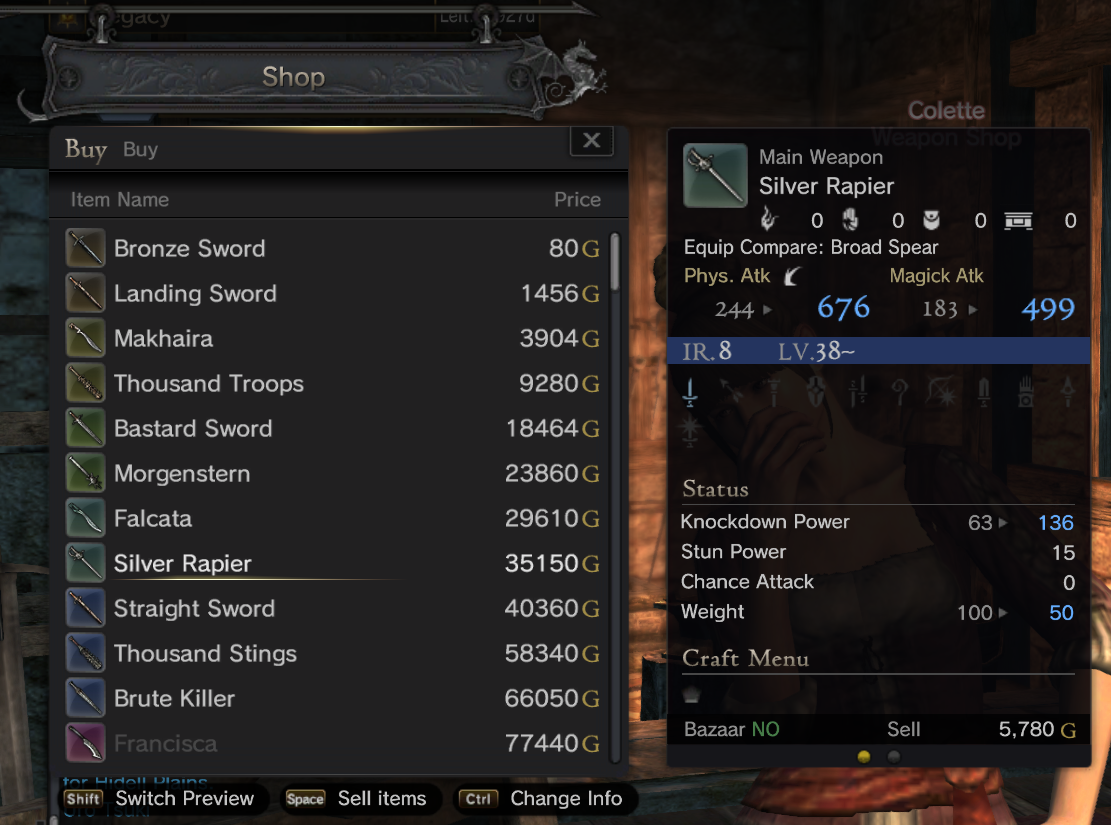
After selecting the item you want, it asks you how many of it you want and if you want it on your item bag (Your active inventory) or in the Storage Box (Where you can withdraw or deposit items).
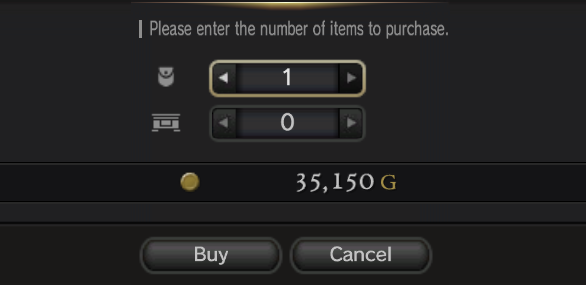
But if you're buying something you cannot equip, this message will appear.
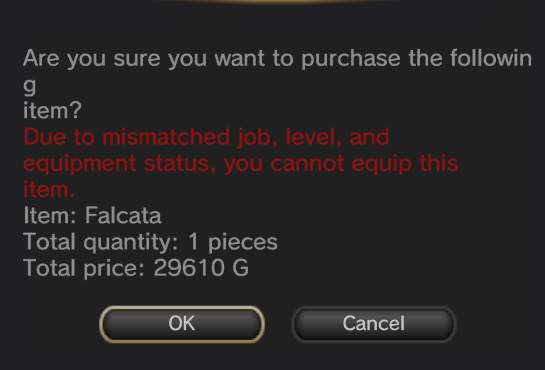
So, how do you know what are you lacking to equip that gear? It's much simpler than it looks.
The highlighted symbol refers to the Vocation you need to equip that item.
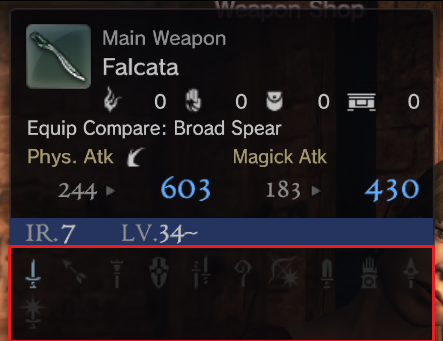
The 'LvL.' refers to the level you need to equip that item.
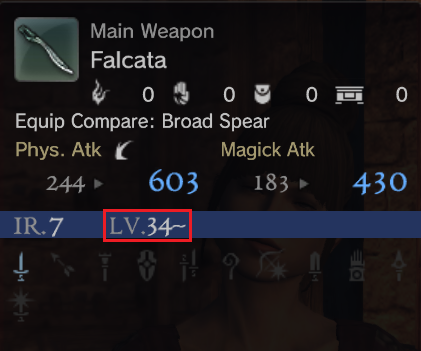
Ignore the 'IR.', it refers to Item Rank (As shown in the 'Terminology' page of 'The White Dragon Temple[ddon.wikidot.com]').
Those four symbols are inventory types and their respective number refers to how many of that item you already have in that specific inventory.
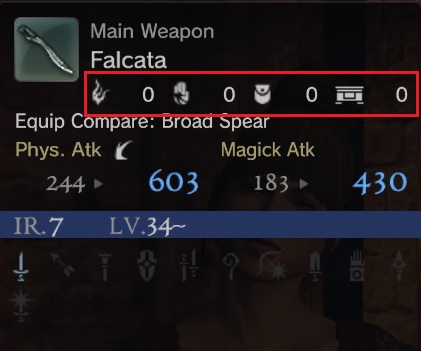
The game will tell you if you can or cannot equip something, but it's up to you to check if it's your vocation or your level.
The most efficient way to grind during early to mid-game is via Board Quests, they are not only optional quests, but a primary way of leveling up in Dragon's Dogma Online.
Gather every item you find, chop every log, take every mineral, loot every enemy; it's very likely that there'll be a Delivery Quest asking you to deliver said item, that way you can level up incredibly fast during early to mid-game. This way the game rewards you for exploring every single part of the map, every dungeon, every World Boss, every cave has something that will provide you with more XP, gold, Blood Orbs or Area Progression.
Eventually you'll be able to repeat Board Quests and grind in the highest level areas.
A few tips to keep in mind:
- Leveling up the World Level with the Area Master (As explained earlier) will unlock new enemies and paths.
- The main source of your damage will come from your gear, not your level. But your level will allow you to equip better gear.
- You can respawn enemies and World Bosses by teleporting to any safe area like The White Dragon Temple and going back.
- If you're on a team with a Pawn or Player with 20 levels higher or lower than any other member, nobody in that party will gain XP.
- Always upgrade your Pawn's equipment.
- The Rookie's Ring for Blessing not only provides its holder with a 20% XP boost until level 40, but when you reach level 90 with any Vocation, it will start giving you 50% XP boost for any other Vocation you'll level up with it, again until level 40.
- Sorcerer is a pretty good Damage-dealer for your Pawn as a beginner.
- Alchemist is pretty good for your Pawn as a Tank.
- Magick Archer is great for yor Pawn as a Support.
Classes on Dragon's Dogma Online
Always experiment, try new Vocations for both your character and your Pawn. Class/Vocation/Job balance depends on the server, but it's overall a pretty well balanced game... Mostly... Partially...
Damage Vocations: Red-colored Classes
- Fighter is great for balance between damage and armor, has incredible Augments and can block instead of evading, meaning that you'll have to learn when to do a Parry; sadly, some attacks can't be blocked.
- Hunter has a Reloading mechanic that will reward you with stronger arrows and cooldown reduction if you succed at reloading your bow. Your damage will increase/decresade depending on the target's distance, and you'll see as a yellow or orange dot that will be changing as you move closer. It's a great Vocation if you're interesting in DPS and being able to hit weak spots, but you're really weak in terms of armor.
- Sorcerer is a pretty curious class; you'll have to complete a minigame while casting a spell that will reward you with a boost in damage. You can do skill chains based on elements, and the damage boost will provide you with a ridiculous damage output during mid to end-game, but you're pretty vulnerable while casting. Keep in mind that some enemies are invulnerable to magick damage.
- Warrior can accumulate damage and explode it into your enemies' faces, it's pretty fun and does high physical damage while being able to tank a lot thanks to their high max health. Sadly, they have high poise but lack mobility.
- Seeker is a high mobility class focused on DPS and skill chains. It's fun as hell, but they do little damage on early-game, so you learn the target's weak spots.
- High Scepter is a controversial one, it was nerfed in LegacyDDON because of how broken it is. It's a DPS class that casts spells by consuming points obtained by performing well against other enemies, giving it a pretty high skill ceiling and versatility. It has great damage for both close and large distance, and can evade easily. Sadly and similar to the Spirit Lancer, the High Scepter's arsenal is mainly obtained via crafting.
Tank Vocations: Blue-colored Classes
- Alchemist is a Tank class that attacks via short-range gauntlets and applies stacks into an enemy. Some of these stacks include totally unique debuffs. Sadly, they're essentially a late-game class, as their Job Trainer becomes available at the end of the main questline.
- Shield Sage applies status effects and enchantments, counters damage and attracts the enemy's aggro. It's great for crowd control, but as a player you'll be pretty dependant on the rest of your party to do the damage.
Support Vocations: Green-colored Classes
- Spirit Lancer is both a Support class thanks to their various healing skills and a Damage-focused class thanks to their great damage output via spears and skills. They can unleash a damage/healing boost when they recharge the blue bar below their health, and their evade and repositioning is great; sadly, most of their weapons from mid-game onwards are only obtainable via crafting.
- Priest will provide status cleanse, healing and levitation. Priests don't do that much damage and can't evade easily, but when they heal close to a high-tier enemy, you'll be able to see their elemental weakness. Sadly, they can't enchant weapons like their DDDA equivalent did.
- Elemental Archer is a Support/Damage class that can be used as a DPS-focused vocation or a Support via crowd control and heal. They can heal above the max health limit. Sadly, their Job Trainer will be available at mid-game.
Equipment Menus
This part gets a lot of players confused, and the game does not explain it entirely.
When you're looking at any gear at a shop, you'll see something like this:
After selecting the item you want, it asks you how many of it you want and if you want it on your item bag (Your active inventory) or in the Storage Box (Where you can withdraw or deposit items).
But if you're buying something you cannot equip, this message will appear.
So, how do you know what are you lacking to equip that gear? It's much simpler than it looks.
The highlighted symbol refers to the Vocation you need to equip that item.
The 'LvL.' refers to the level you need to equip that item.
Ignore the 'IR.', it refers to Item Rank (As shown in the 'Terminology' page of 'The White Dragon Temple[ddon.wikidot.com]').
Those four symbols are inventory types and their respective number refers to how many of that item you already have in that specific inventory.
The game will tell you if you can or cannot equip something, but it's up to you to check if it's your vocation or your level.
・Auxiliary Mechanics.
There's various other things you'll be unlocking by doing Main Quests and Personal Quests, such as Clans (Obtained in the 'Gathering in the Clan Tavern' quest), the Personal Home, Pawn's Special Skills, etc.
After the lvl 16 main quest titled 'The Girl in The Forest', you'll be able to start a Personal Quest provided by Ophelia titled 'Lestania's Best Dressed'.
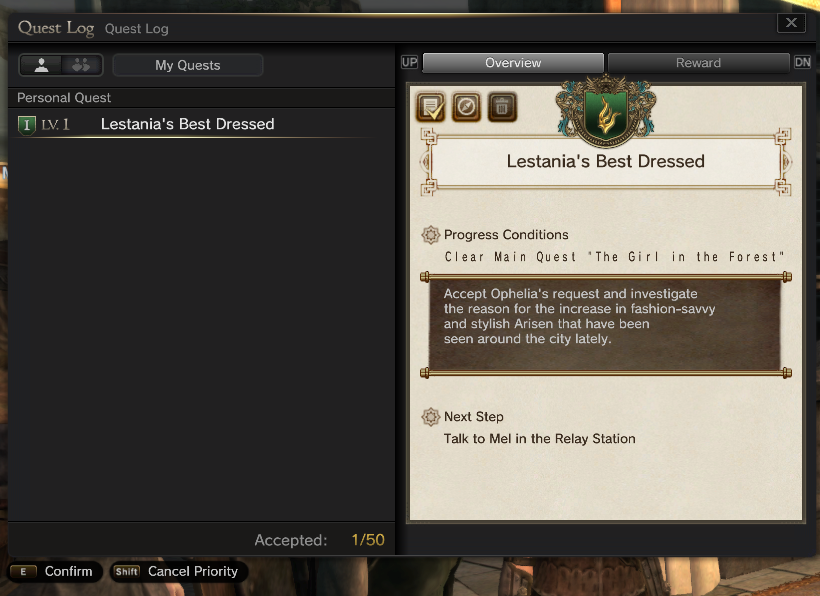
That quest will make you go to the Relay District and then to the Craft Room to talk with Sonia, eventually you'll be guided to the Mysree Forest where you'll take a quick visit to Emerada, the witch of the woods, who'll ask you for 5 Scrolls of Sorcery.
You can obtain them as drops in various places of the map (They can appear in the Hidell Catacombs, Merguda Flood Channels or in the Morrow Caverns) of by crafting via Sonia's menus by using Harpy Pinion, Blank Scrolls and (most importantly) Amethysts.
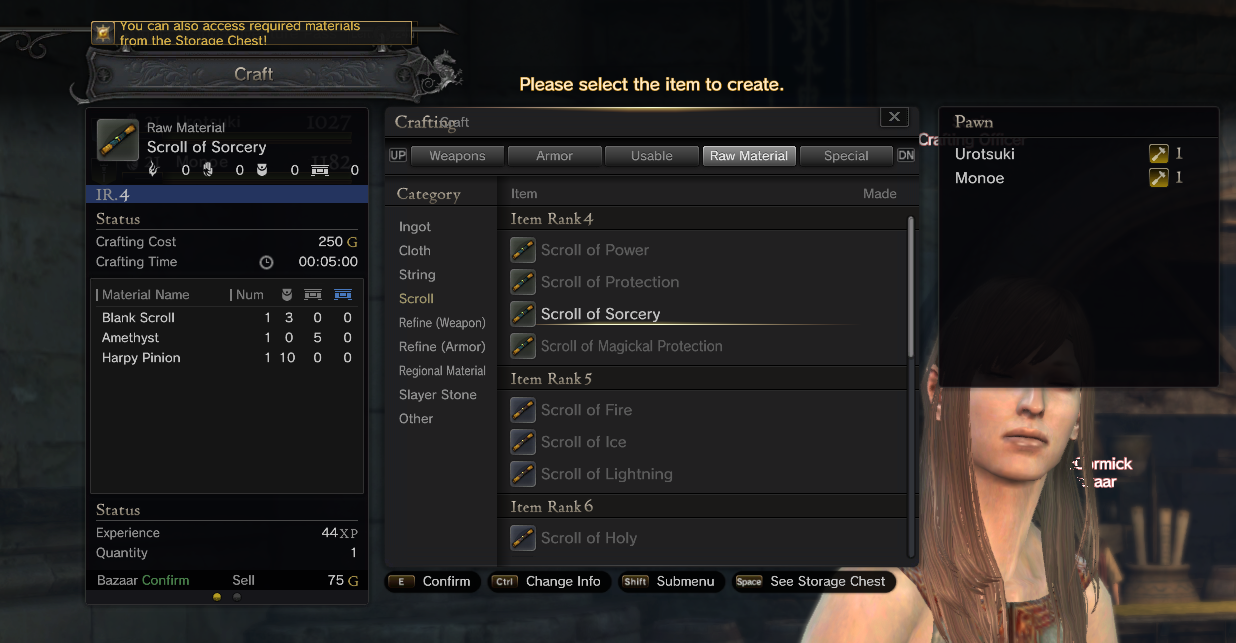
Go back to the 'Lone House in the Forest' and give them to Emerada.
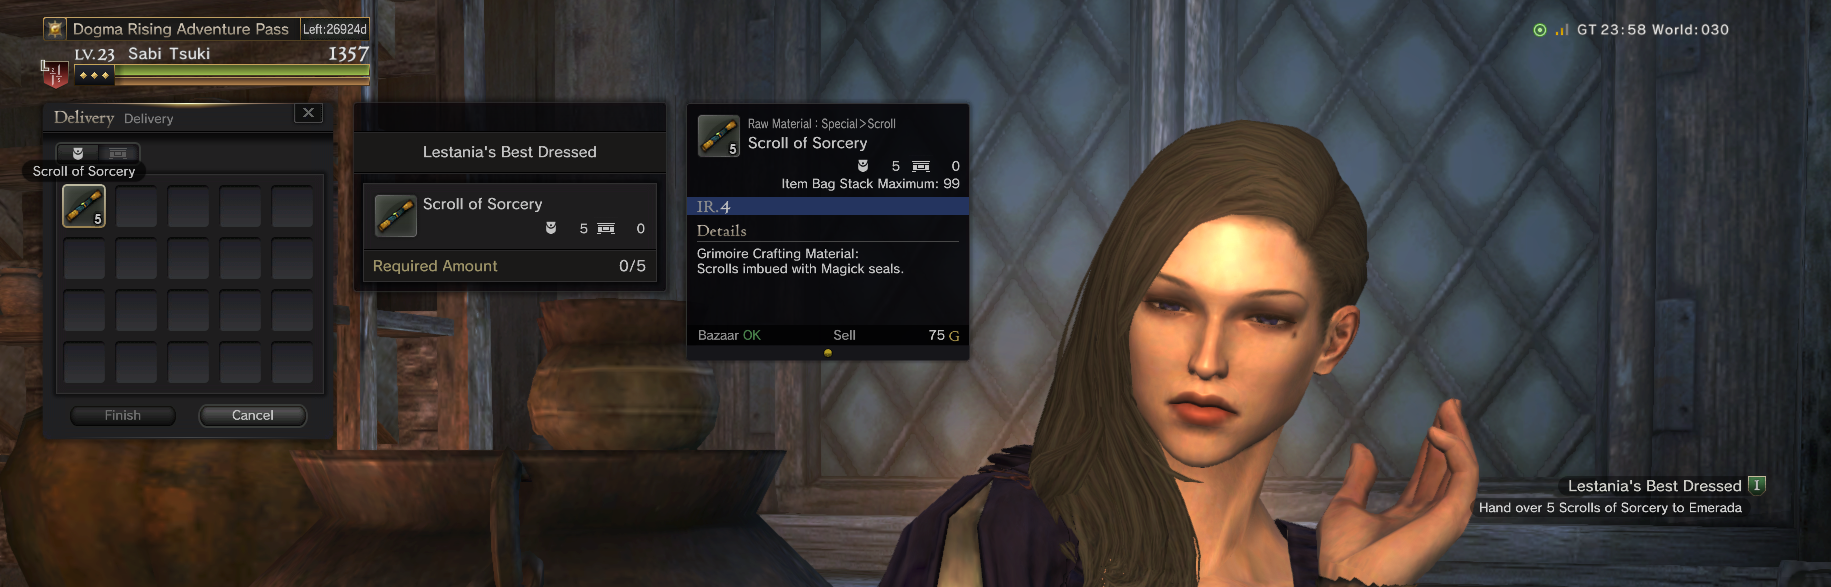
Go to your character's equipment/status menu and press the 'Submenu' key ('Shift' by default), you can now press on 'Select Dress Equipment' and that would be your Transmog menu.
There's a lot of pretty cool exclusive dresses from Bitterblack Maze, just so you know ^w^!
This depends on the server you're in, but you can exchange certain currencies for various types for Cosmetics, such as the Ghost'n Goblin Coins.
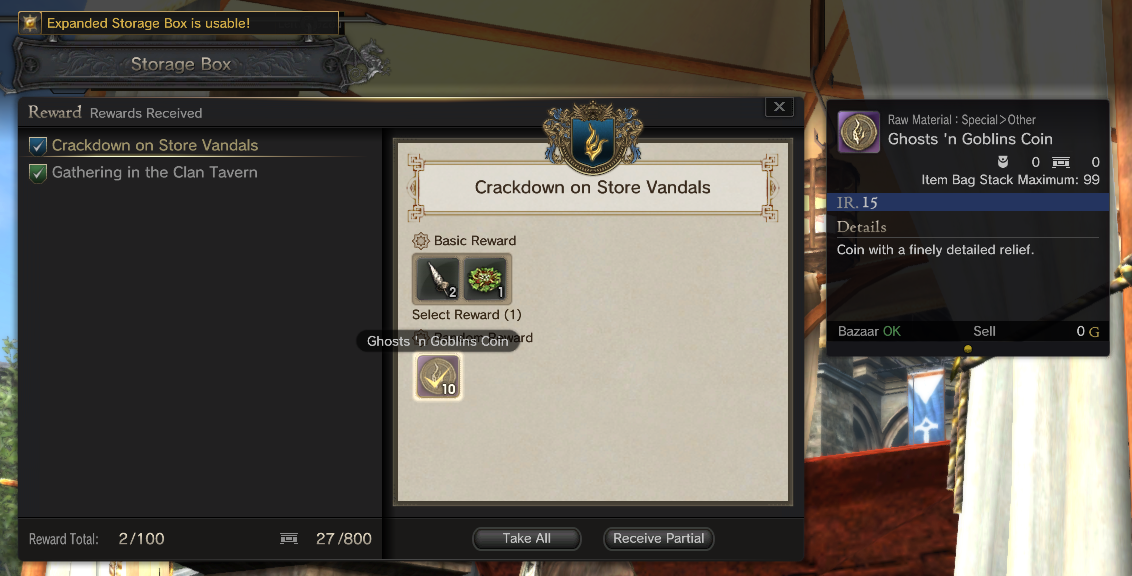
The Persona 5 collab coin can be exchanged into Phantom Thieves outfits, it's so cool hahah
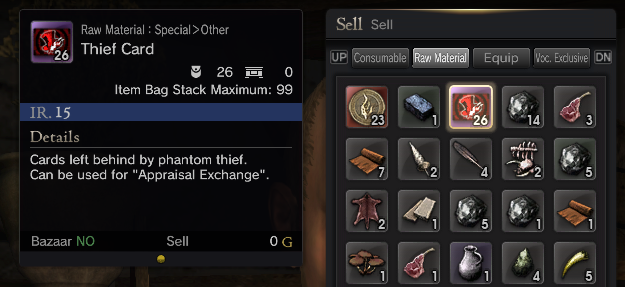
These items are exchangeable via different NPCs.
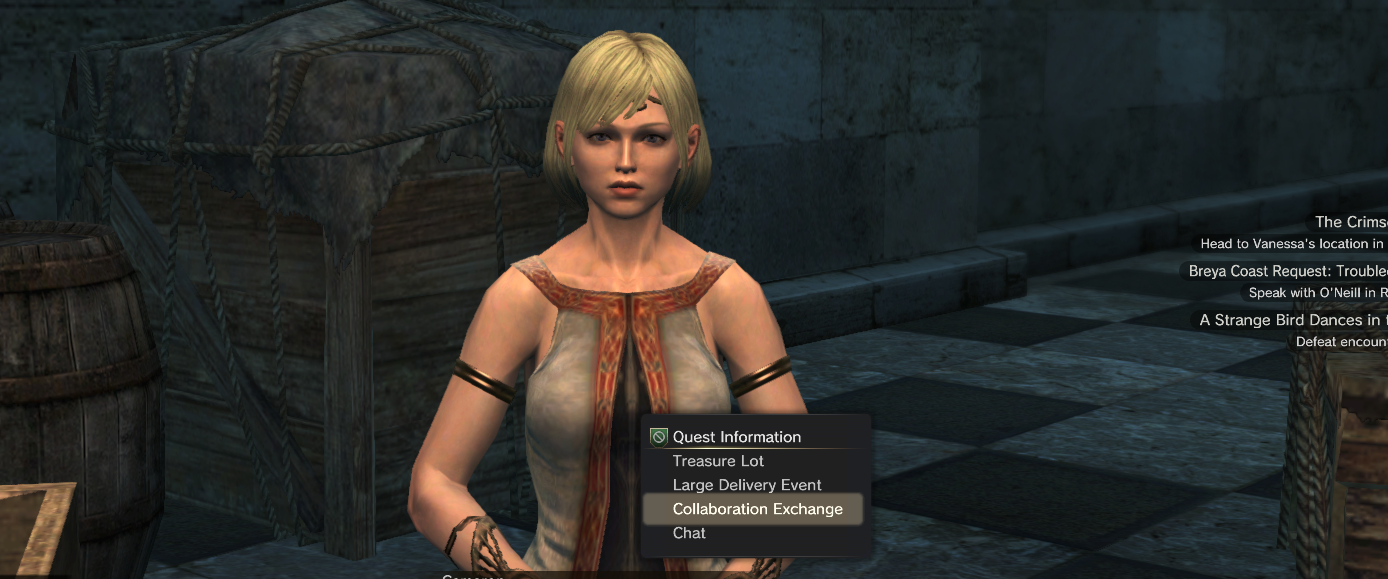
Cameron, the girl sitting at the desk before the Audience Camber, can be used to exchange coins from DDON's collabs with Attack on Titan, Ghost'n Goblins, Monster Hunter and Berserk, but first you'll have to use the 'Seasonal Currency Exchange' option in her menu.
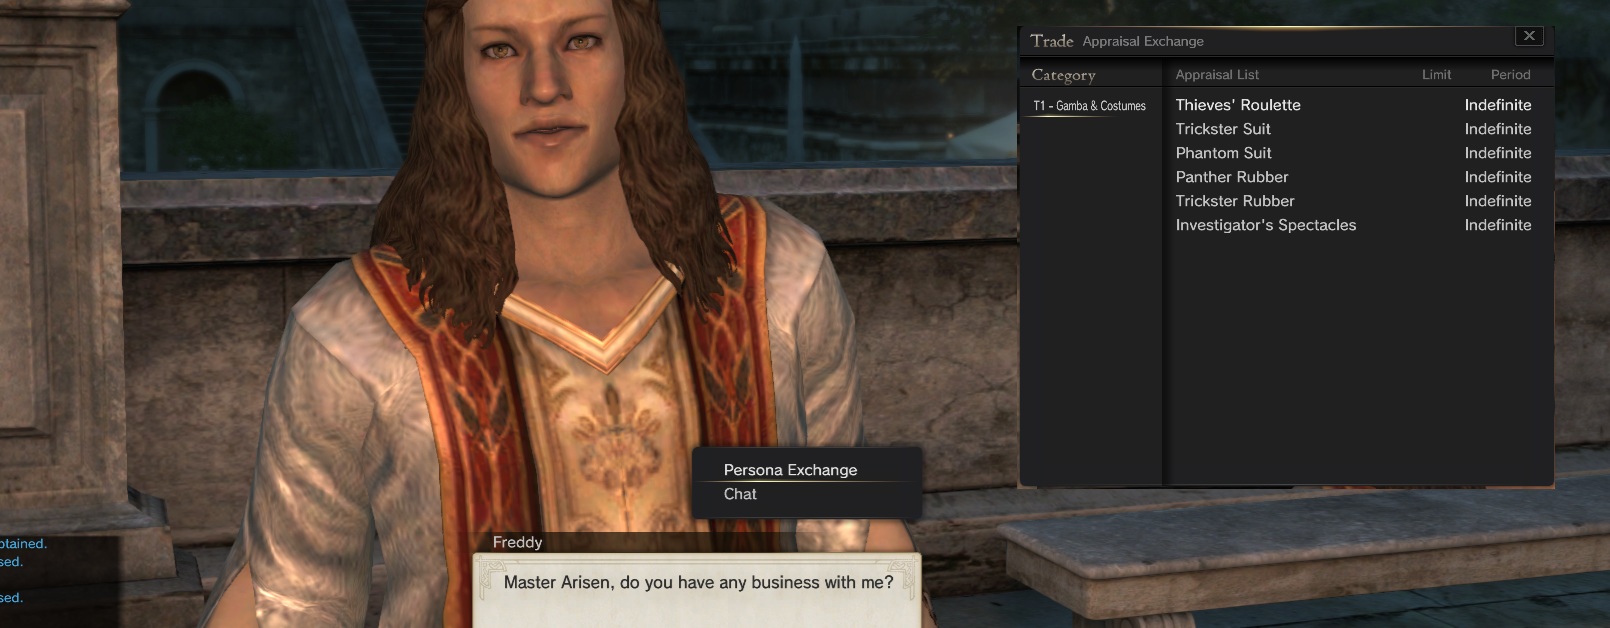
Persona 5 items can be exchanged by talking with Freddy next to The White Dragon's Temple.
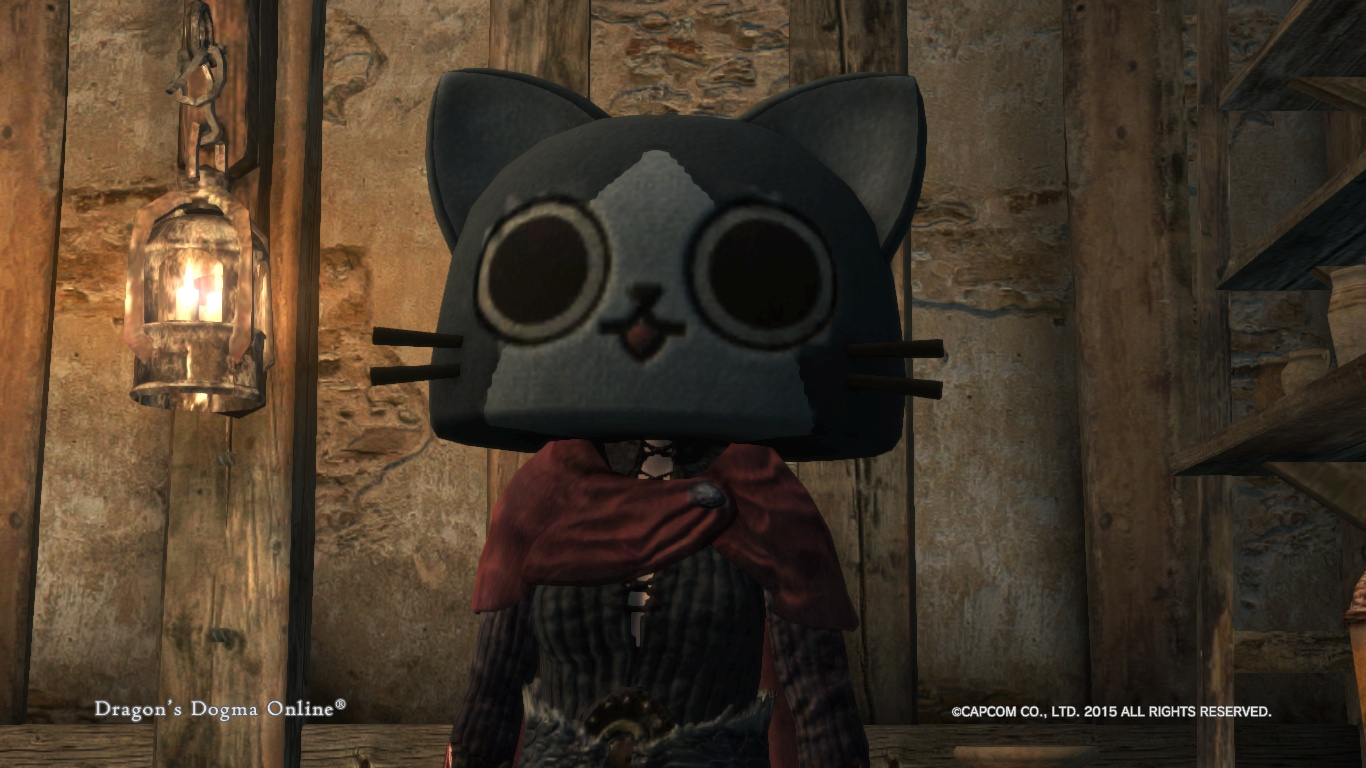
These collab items and exchange NPCs tend to change depending on the server you're in.
At the Relay Station you'll eventually be able to speak with Julia, who will provide you with a Personal Quest titled 'Living With the Partner Pawn'.
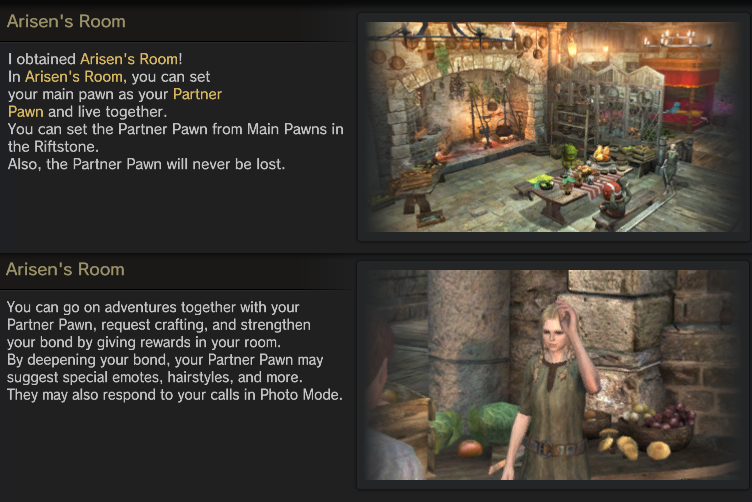
You'll be able to select a Pawn as 'Partner Pawn', and you can give them Riftstone Shards to deepen your bond with them.
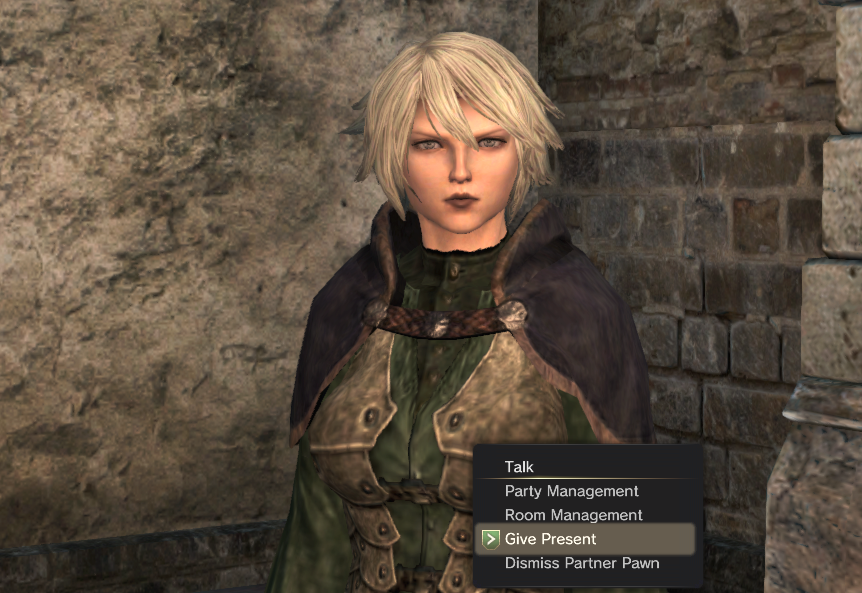
This way they will wait for you each time you go back to your Personal Room. Don't worry, you can still take your Partner Pawn to advetures.
Partner Pawns will give you Partner Personal Quests if you deepen your bond with them enough times (You can give them one gift per day); after developing your bond enough, you will see a new option called 'Grant Request - お願いを聞く' when talking to your Partner Pawn. These are daily quests to gain a few extra XP and items :)
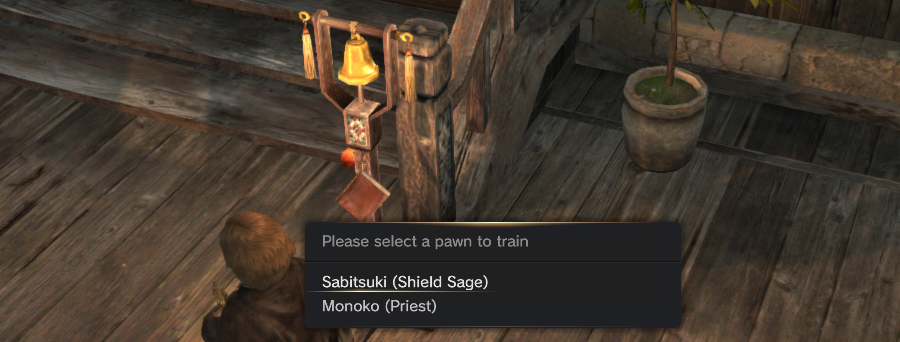
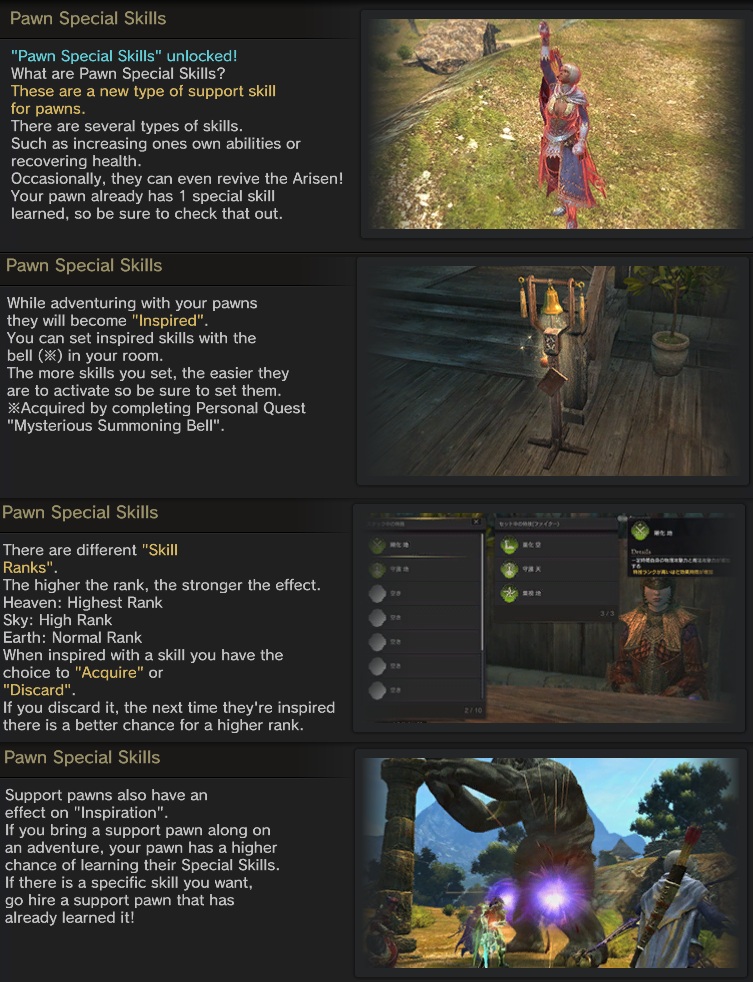
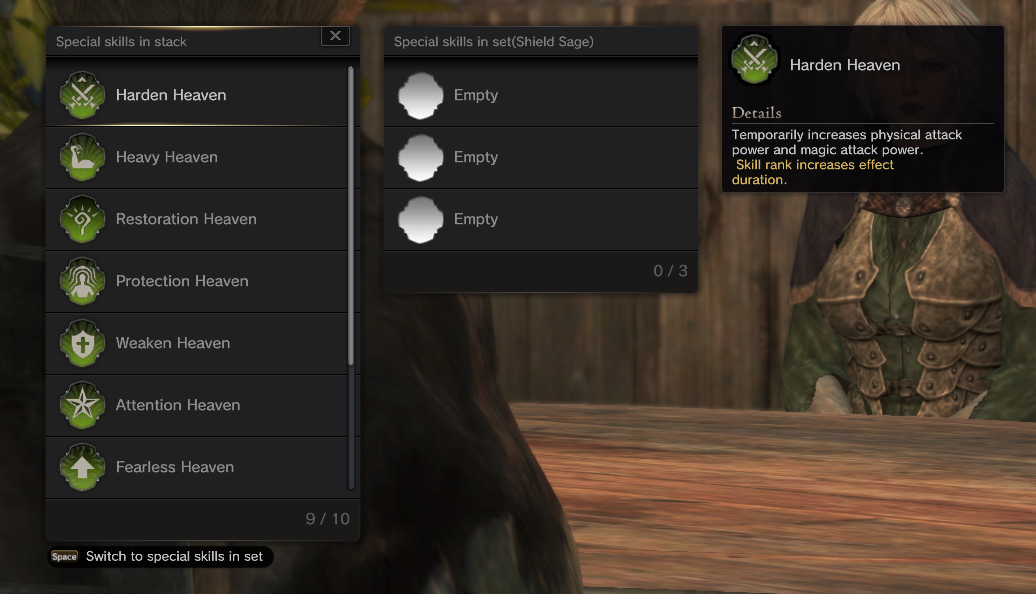
Explore your Arisen's Personal Room, you'll find curious options like being able to customize it, train your Pawns (Customize their playstyle) at the ringing bell, give them Pawn Special Skills, take a bath with them ( ͡° ͜ʖ ͡°) and get a few pets, it's pretty cool.
You'll also have this intruder, he'll give you a Personal Quest if you're in a solo party (No Pawns or players in your party). You can always dismiss Pawns from your party in the Pawns menu.
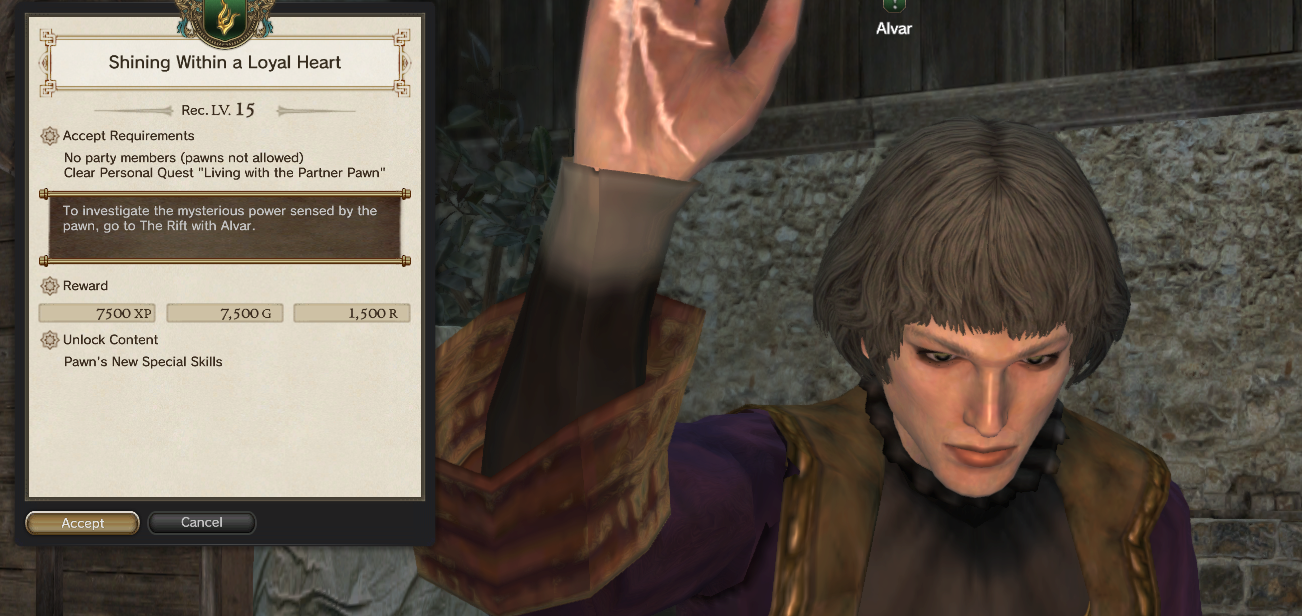
Completing said quest will unlock Pawn Special Skills to allocate in the ringing bell. Your Pawn will use these skills randomly during longer combats.
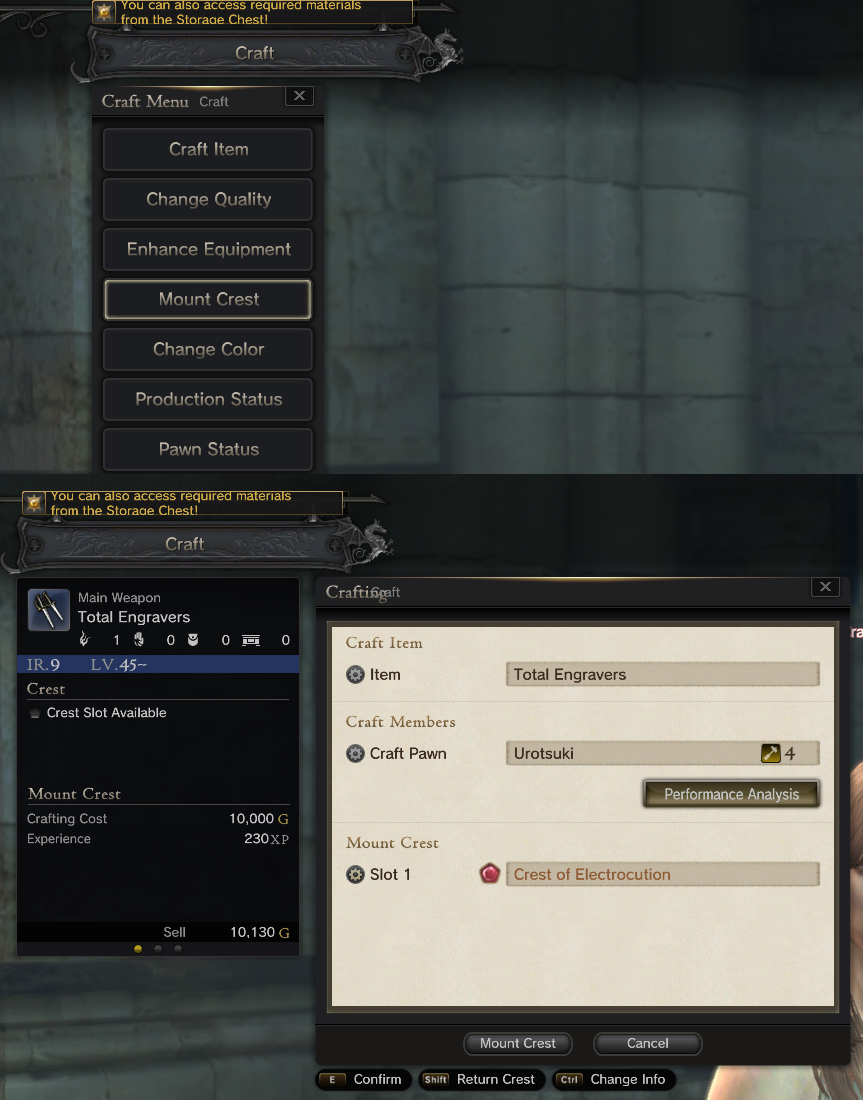
Crests are a great way to keep your damage up to date.
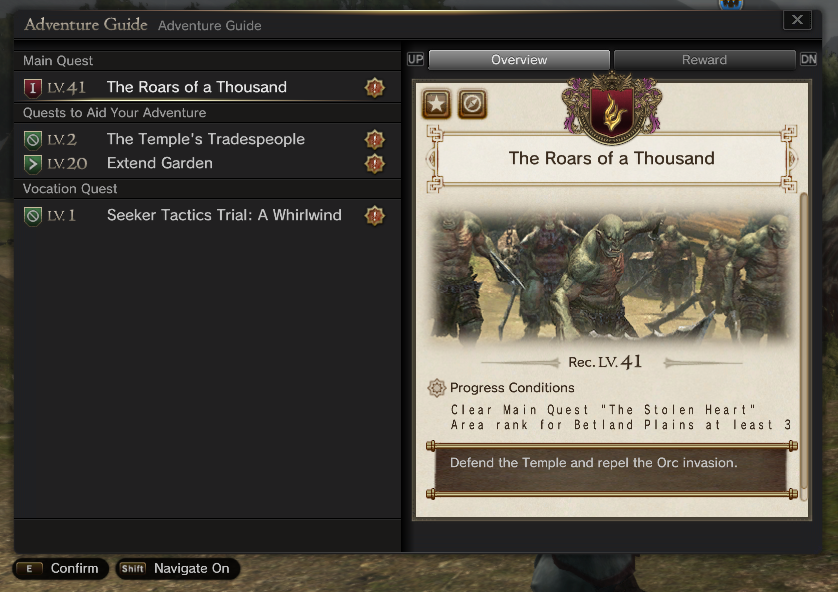
This one's quick; If you're somewhat lost, you can always check your Adventure Guide and see which quests the game would recommend you to finish to advance in main and optional content.
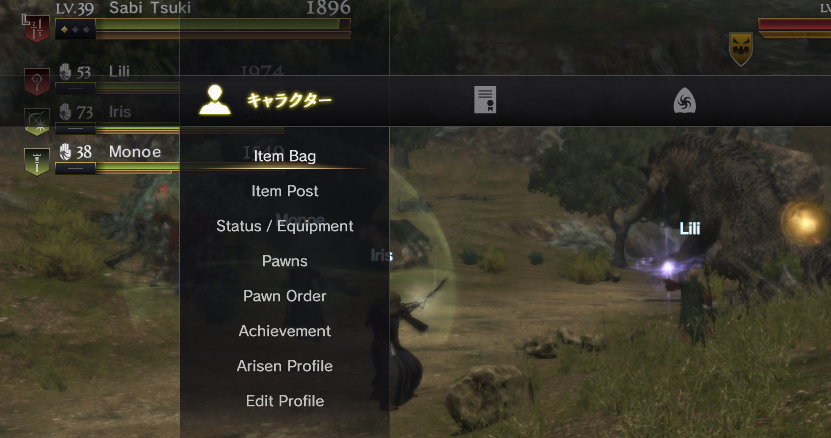
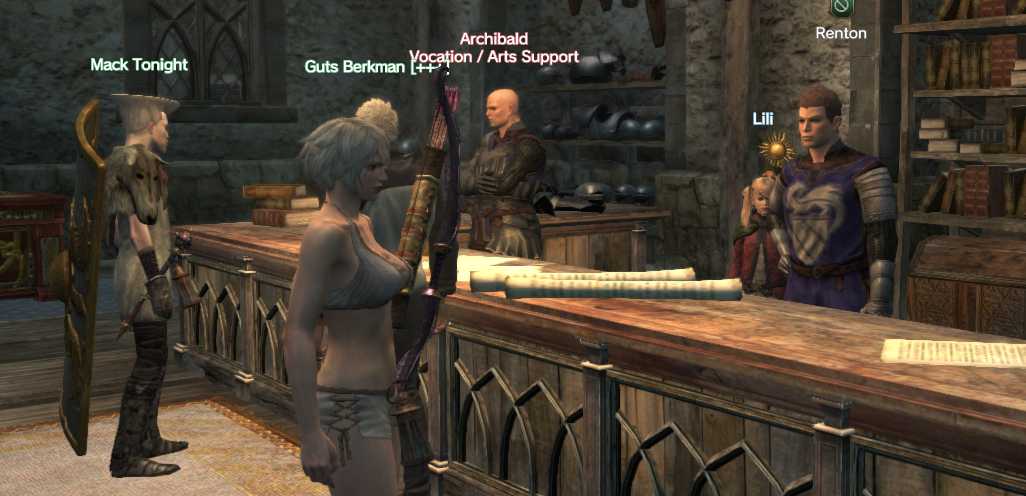
For example; the class High Scepter (the most broken Vocation) needs to be unlocked by completing a lvl10 Personal Quest provided by Renton.
If you don't do that, it will appear in your Adventure Guide.
How to unlock Transmog
After the lvl 16 main quest titled 'The Girl in The Forest', you'll be able to start a Personal Quest provided by Ophelia titled 'Lestania's Best Dressed'.
That quest will make you go to the Relay District and then to the Craft Room to talk with Sonia, eventually you'll be guided to the Mysree Forest where you'll take a quick visit to Emerada, the witch of the woods, who'll ask you for 5 Scrolls of Sorcery.
You can obtain them as drops in various places of the map (They can appear in the Hidell Catacombs, Merguda Flood Channels or in the Morrow Caverns) of by crafting via Sonia's menus by using Harpy Pinion, Blank Scrolls and (most importantly) Amethysts.
Go back to the 'Lone House in the Forest' and give them to Emerada.
Go to your character's equipment/status menu and press the 'Submenu' key ('Shift' by default), you can now press on 'Select Dress Equipment' and that would be your Transmog menu.
There's a lot of pretty cool exclusive dresses from Bitterblack Maze, just so you know ^w^!
Event Cosmetics
This depends on the server you're in, but you can exchange certain currencies for various types for Cosmetics, such as the Ghost'n Goblin Coins.
The Persona 5 collab coin can be exchanged into Phantom Thieves outfits, it's so cool hahah
These items are exchangeable via different NPCs.
Cameron, the girl sitting at the desk before the Audience Camber, can be used to exchange coins from DDON's collabs with Attack on Titan, Ghost'n Goblins, Monster Hunter and Berserk, but first you'll have to use the 'Seasonal Currency Exchange' option in her menu.
Persona 5 items can be exchanged by talking with Freddy next to The White Dragon's Temple.
These collab items and exchange NPCs tend to change depending on the server you're in.
Personal Room
At the Relay Station you'll eventually be able to speak with Julia, who will provide you with a Personal Quest titled 'Living With the Partner Pawn'.
You'll be able to select a Pawn as 'Partner Pawn', and you can give them Riftstone Shards to deepen your bond with them.
This way they will wait for you each time you go back to your Personal Room. Don't worry, you can still take your Partner Pawn to advetures.
Partner Pawns will give you Partner Personal Quests if you deepen your bond with them enough times (You can give them one gift per day); after developing your bond enough, you will see a new option called 'Grant Request - お願いを聞く' when talking to your Partner Pawn. These are daily quests to gain a few extra XP and items :)
Explore your Arisen's Personal Room, you'll find curious options like being able to customize it, train your Pawns (Customize their playstyle) at the ringing bell, give them Pawn Special Skills, take a bath with them ( ͡° ͜ʖ ͡°) and get a few pets, it's pretty cool.
You'll also have this intruder, he'll give you a Personal Quest if you're in a solo party (No Pawns or players in your party). You can always dismiss Pawns from your party in the Pawns menu.
Completing said quest will unlock Pawn Special Skills to allocate in the ringing bell. Your Pawn will use these skills randomly during longer combats.
A few tips regarding equipment:
- To save money, keep upgrading you Pawn's weapons only, and upgrade their armor when you see them dying too much. Armor isn't as relevant as weapons for them, as they can dodge, block, parry or run away.
- Enhancing your weapons is pretty useful and will have a lot of impact during your first 50 levels.
- Save in your Storage Fox every resource/material you find, they might be useful for crafting weapons or enhancing them.
- If you've found one or various Crests, check them and if you're interested, use them in one of your weapons via Sonia's crafting menu.
Crests are a great way to keep your damage up to date.
The Adventure Guide!
This one's quick; If you're somewhat lost, you can always check your Adventure Guide and see which quests the game would recommend you to finish to advance in main and optional content.
For example; the class High Scepter (the most broken Vocation) needs to be unlocked by completing a lvl10 Personal Quest provided by Renton.
If you don't do that, it will appear in your Adventure Guide.
・Enjoy! (˶>⩊<˶)

More Dragon's Dogma: Dark Arisen guides
- Hero Achievement and Missable Quests Guide★ 5 (3.5k)58k views7.1k ♥30 minUpdated Aug 2, 2016
- Dragon's Dogma: Dark Arisen. Getting started 101 and "did you know's?"★ 5 (918)53k views1.1k ♥17 minUpdated Jan 20, 2016
- The Arisen's Handbook: A Guide to Adventuring in Gransys★ 5 (1.7k)42k views3.4k ♥91 minUpdated Oct 8, 2023
- The Guide to Vocations and Skills★ 5 (806)42k views1.9k ♥86 minUpdated Jan 1, 2020
- Chronological Quest Guide for dd:da★ 5 (779)33k views2k ♥54 minUpdated Jul 5, 2023
- Vocations, Strengths and Weaknesses, all Part of a Whole - Writings of an Aged Arisen★ 5 (575)32k views873 ♥33 minUpdated Jan 3, 2021



This guide was created by its original author on the Steam Community. Are you the author and want it removed? Request removal.