Overview
February 10th, 2020 update: Due to getting back into Conan, I’m restarting work on this guide, and will be updating, adding, removing, and generally giving it a tune-up. Check out the contact info if you have anything you’d like to add, correct, all that fun stuff.A general, all purpose guide to surviving the harsh world, touching on every aspect of the game.
Creating Your Character
Conan Exiles has a very rudimentary character creation system.
Gender

To begin with, you pick your gender. Nothing fancy here, you’re either male or female. Differences are limited to hair styles and faces. While male characters can change their endowment size, female characters can only change their breast size. While males can also change their breast size, it obviously has a more noticeable effect on females.
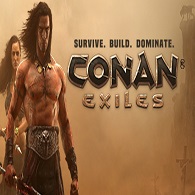
Race
After choosing your gender, you move on to race. There are several to choose from, and they are:
Each race has their little description. Some say they are good merchants, some are good at archery, some are good at sorcery. I’ve noticed no actual difference in relevant skills, so these are either there simply for storytelling, or they’re planning on making races distinct. As of now, there’s very little difference.
Religion

There are four religions available in the game, but based on the icon, there might be seven by the time the game is finished. Of the current religions:
Crom: Does not require an altar, and therefore one doesn’t exist
Set: God of serpents and justice, requires the Altar of Set. For this avatar, you’ll be able to summon a giant snake.
Yog: God of cannibals, requires the Altar of Yog. For this avatar, you’ll be able to summon a giant squid type thing, reminiscent of Cthulhu.
Mitra: God of right and justice, requires the Altar of Mitri. For this avatar, you’ll be able to summon a large Zeus type looking metal humanoid thing.
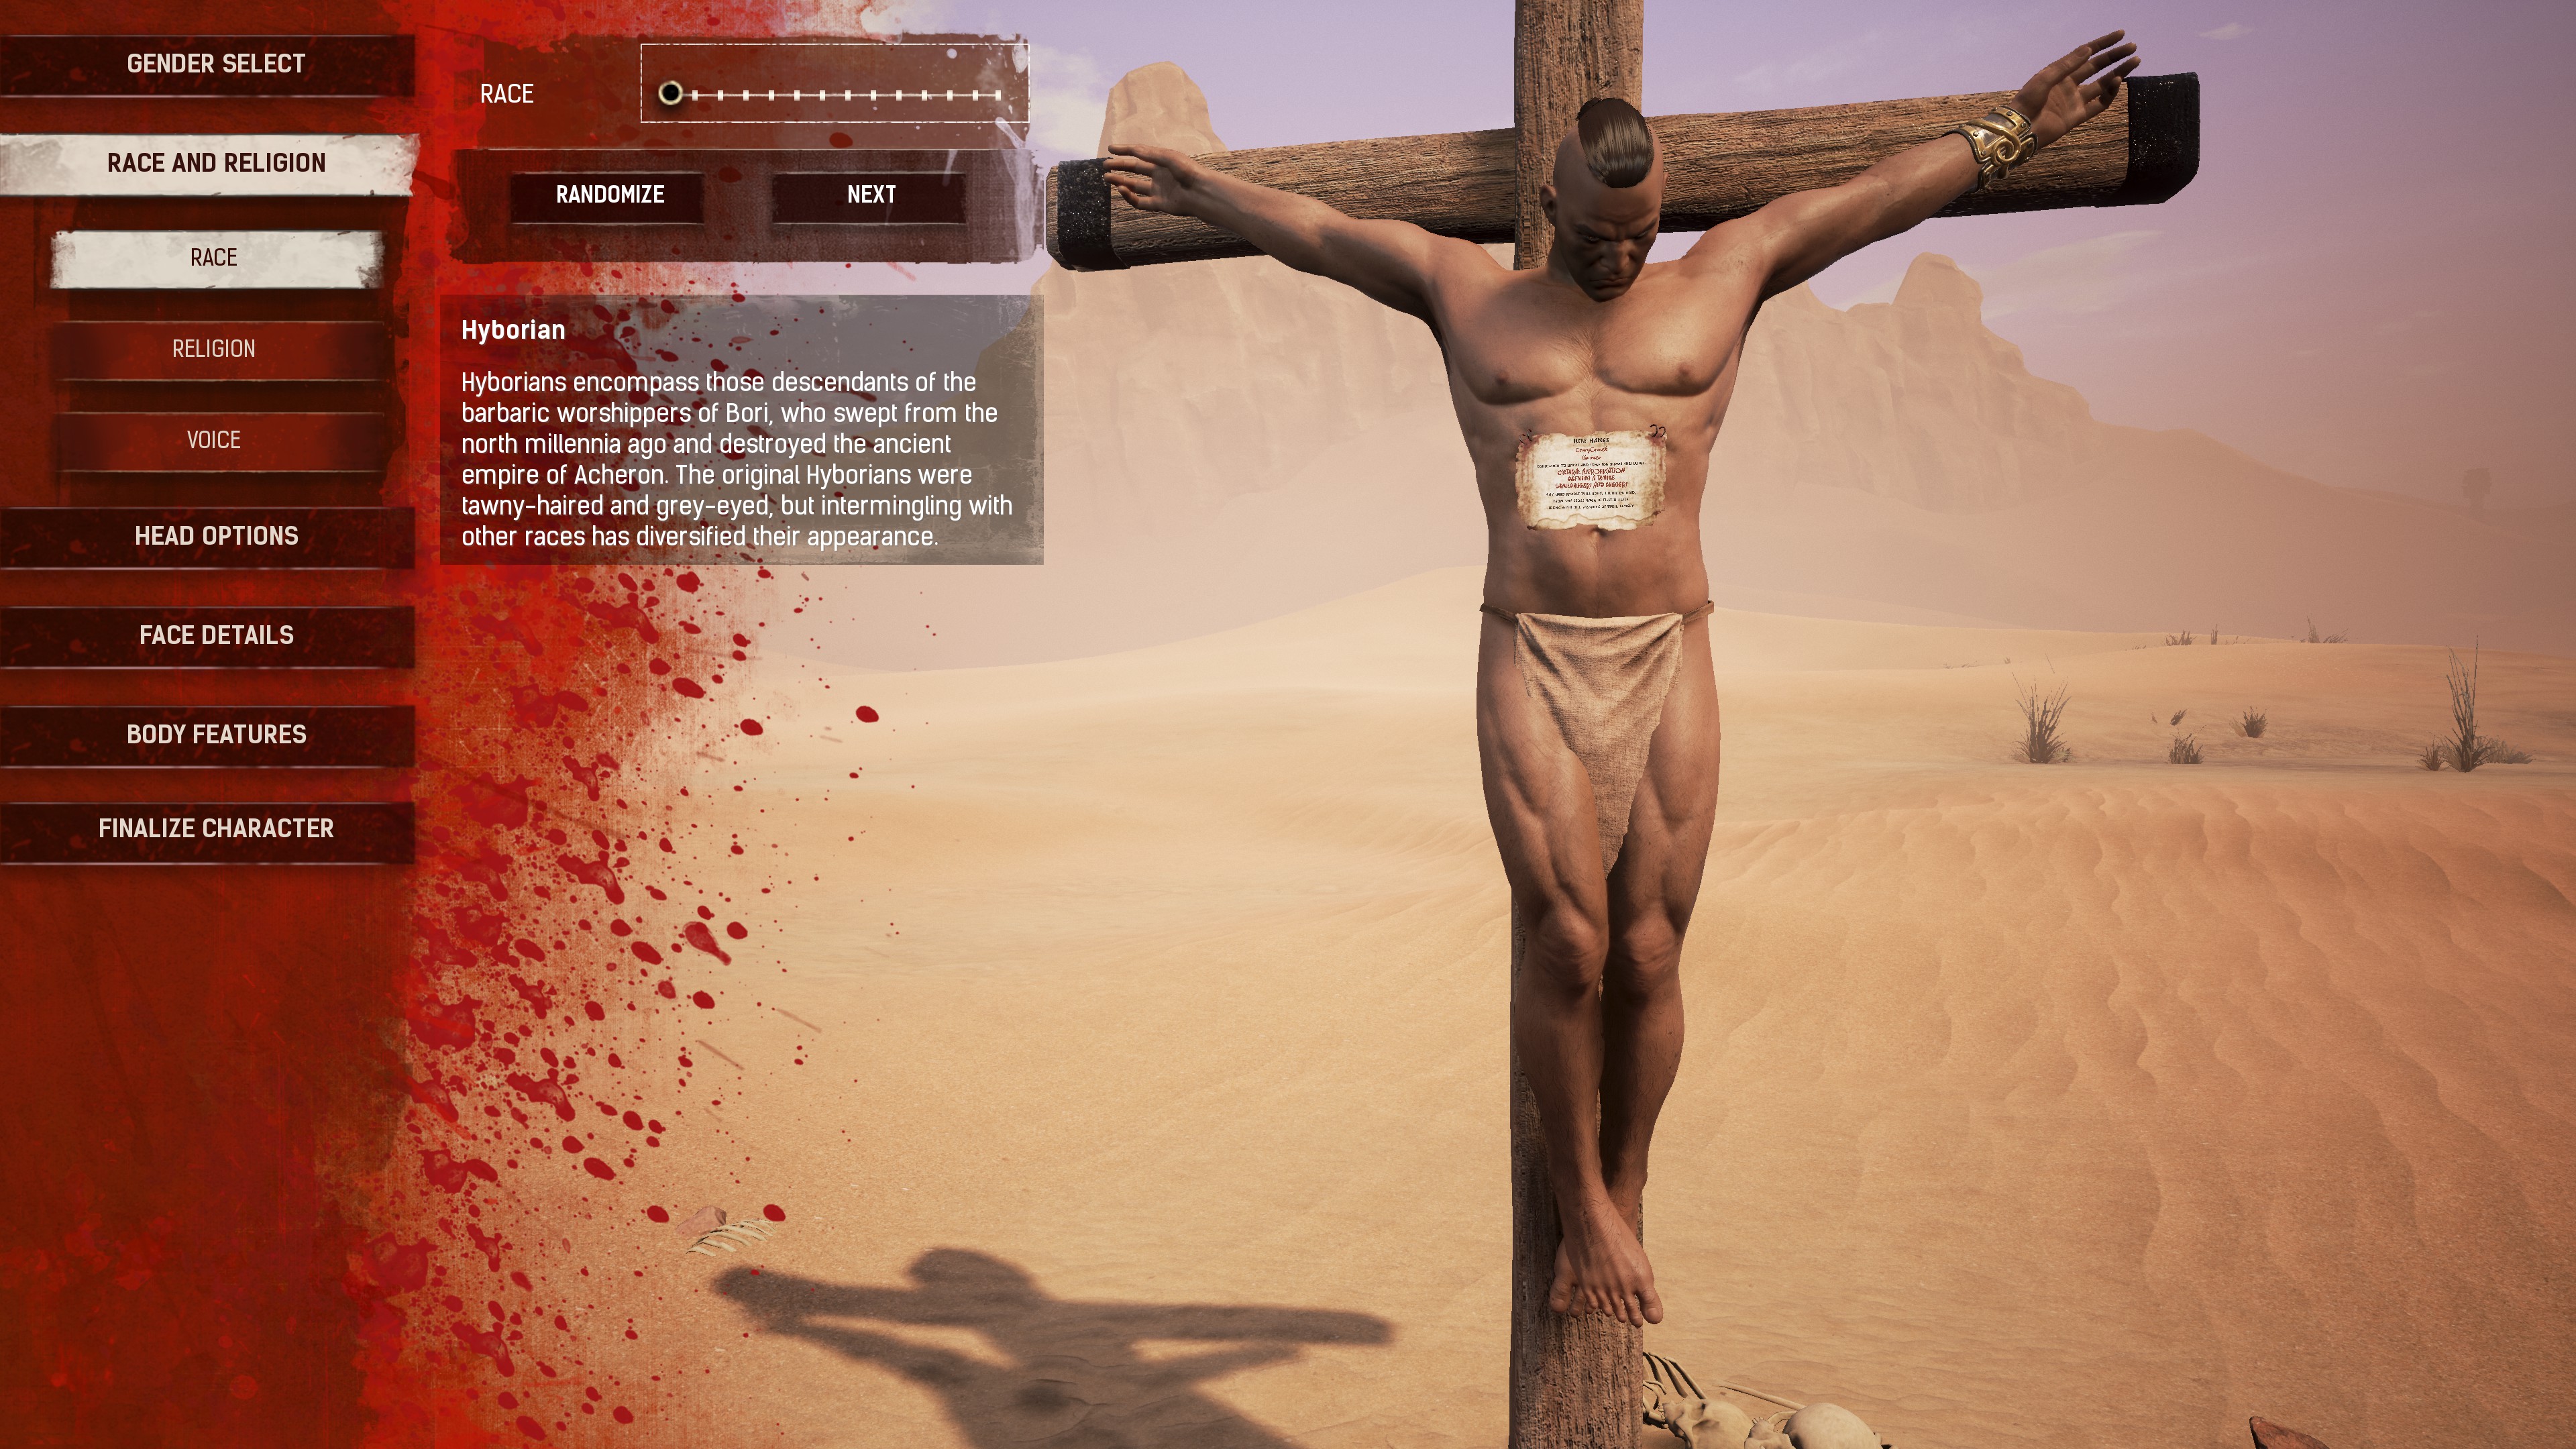
Voice
Change your voice if you so desire. They all sound pretty similar if you ask me.
Head Options

You can customize the look of your character’s face. You can choose a face, hair and hair color, eye brows, facial hair and cosmetics.
Face Details

Change your character’s jaw and chin, cheeks, nose, mouth, ears and eyes.
Body Height

Is your character short? Tall? Average?
Body Physique

For males, you can change both breast size and your endowment. For females, you can change breast size only. Which makes sense.
First Hours

With five different spawns on two servers (four on my own, one on a live server), I always began in the same spot. I can assume from this that spawn locations aren’t random, or the system that chooses where you spawn is either broken or uses some badly designed algorithm.
Assuming everyone starts at the same spot, you’ll want to head over to the rock where the cross is and grab the pouch to fill with water. You can also grab the note to hear some dialog.
You’ll see a bunch of plant life around you. Pressing E on this will net you plant fibre, which you can use to create some of the basic clothing. You can hold E, no need to press it repeatedly. If you stop collecting fibre, it means that particular node is now depleted and you need to move on. To make a full Coarse Clothing set, you’ll need 59 fibres, which should come quick.
After this, you’ll want to start following the road and making your way more. Collect fibres and branches as you go, and you can also pick up the small pieces of stone without tools.
If you follow the road until it basically ends, you’ll see a gap in the rocks ahead of you. Keep running toward that gap, and you’ll eventually find a grassy area in which you can make your way downwards. Keep running and you’ll come across a body of water. If you get chased by something at this point, keep swimming; apparently enemies can’t swim. I’ve also been able to get away from the crocidiles this way, for some reason.
Once back on land, you can look around and figure out where you want to start off. It’s at this point I recommend you buy the Apprentice Craftsman recipe, as you can then build a bedroll which will allow you to update your spawn point, so when you die, you’ll respawn at where you last used the bedroll. This recipe will also give you the Stone Hatchet, which can be used to chop down trees and attack enemies.
You might want to choose a spot underneath an outcrop, because by being underneath something large enough, you’ll trigger the Shelter stat (it’ll pop in on the left). This will be useful to protect against sandstorms (if the server or you have them enabled).
To be continued
Character Stats, Survival Stats & Status Effects
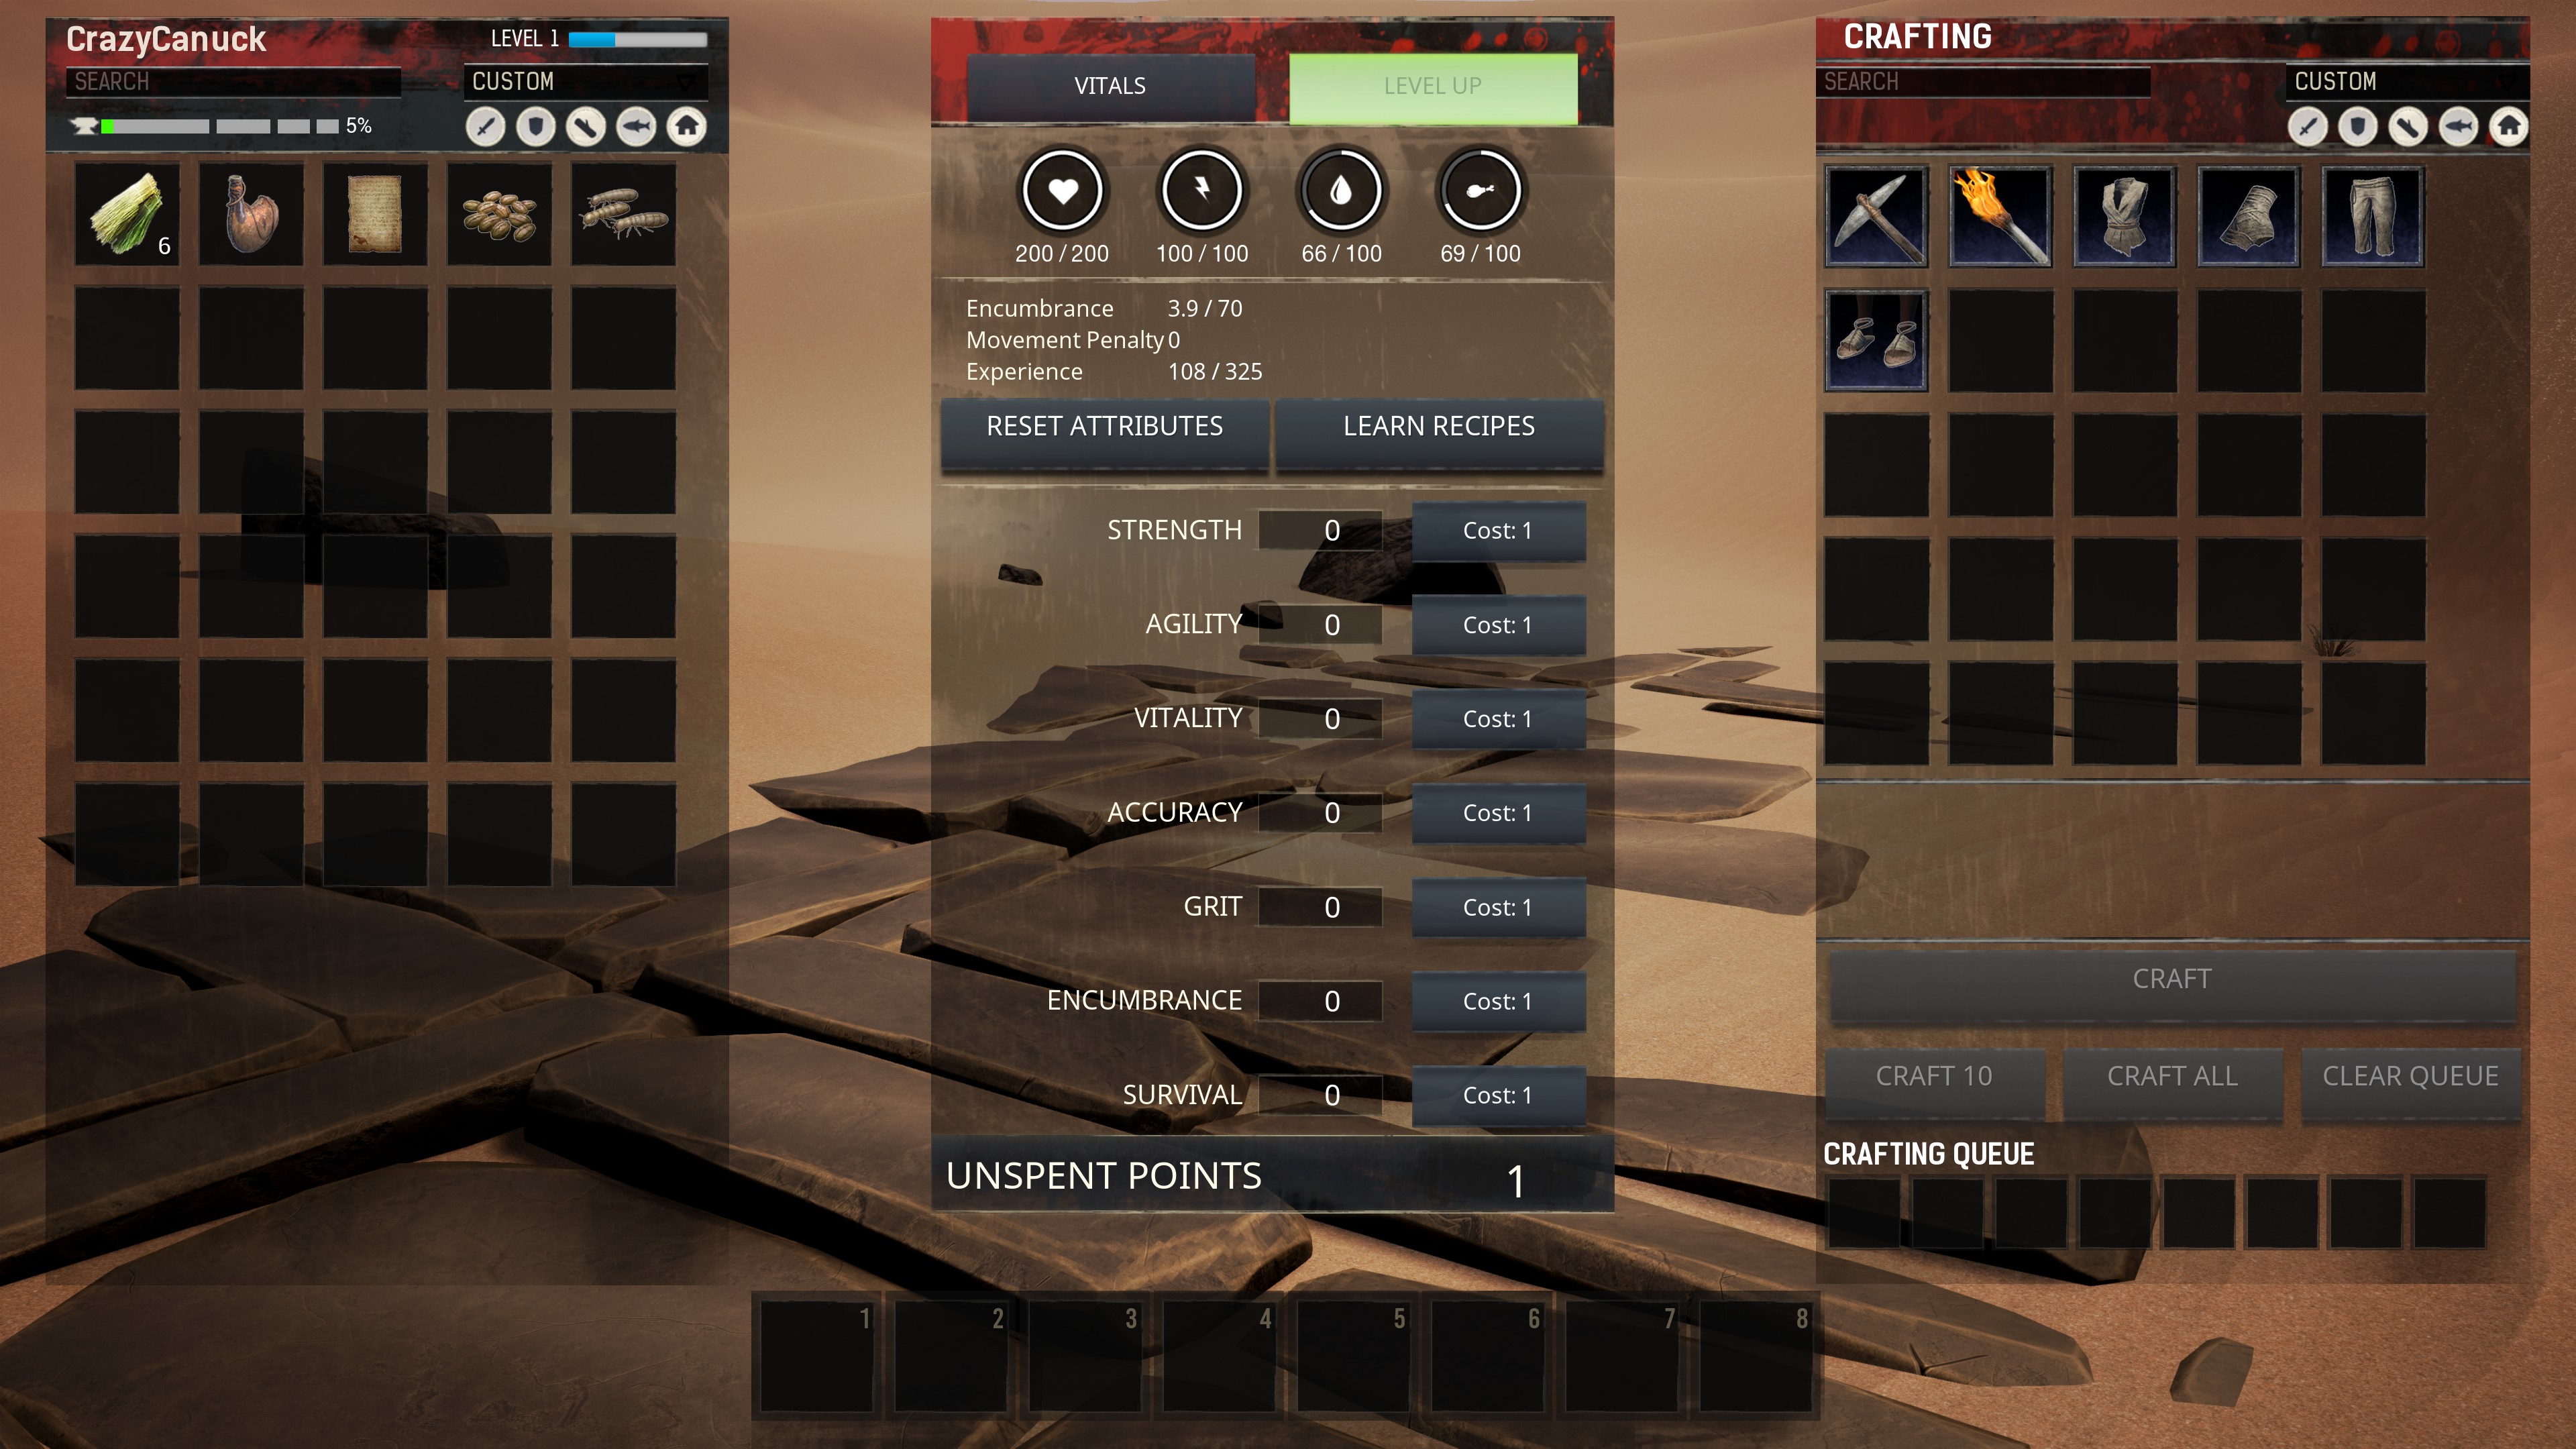
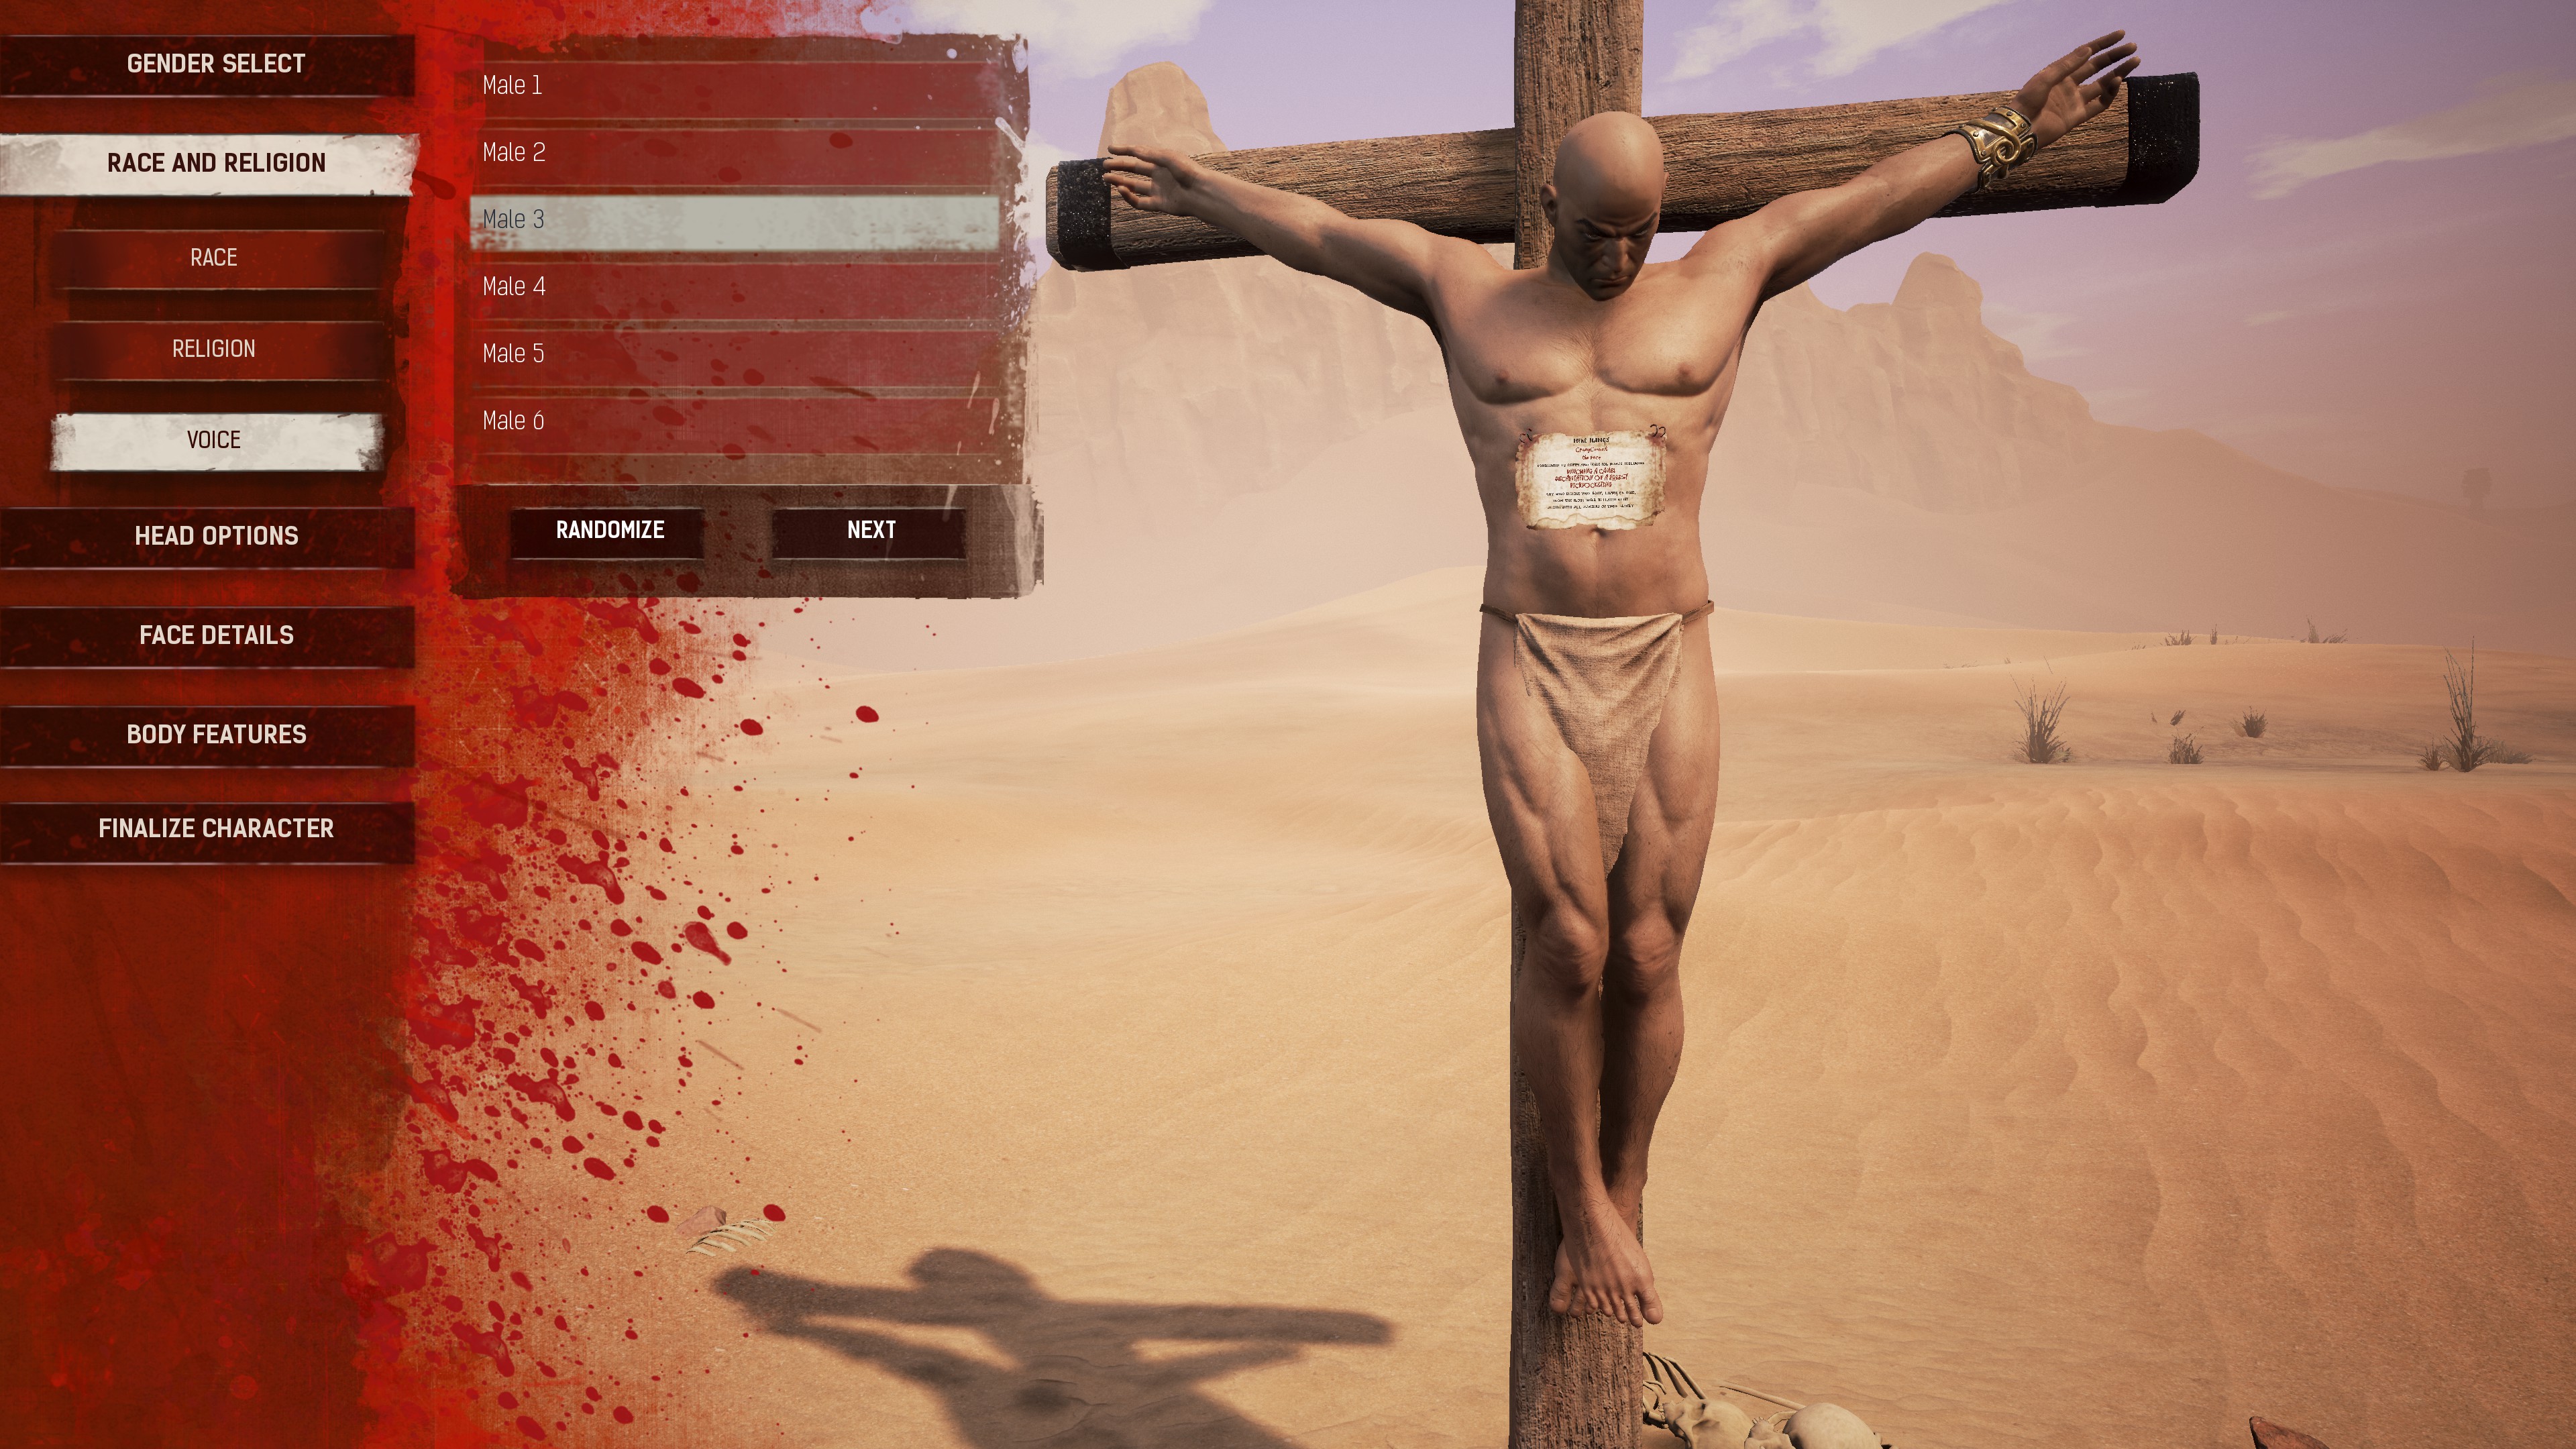
Conan Exiles has a pretty standard character progression system. You earn XP by doing pretty much everything; scavenging resources, attacking enemies, crafting, so on. Every level earned you will gain a stat point that you can put into one of the following seven stats.
Stats max out at 50, and they require more points for every five levels. Therefore:
Levels 1 to 5: 1 point each
Levels 5 to 10: 2 points each
Levels 11 to 15: 3 points each
Levels 16 to 20: 4 points each
Levels 21 to 25: 5 points each
Levels 26 to 30: 6 points each
Levels 31 to 35: 7 points each
Levels 36 to 40: 8 points each
Levels 41 to 45: 9 points each
Levels 46 to 50: 10 points each
One point to remember is that while the developers have said sorcery is eventually coming, there is no current stat that takes that into account. Unless Accuracy will also apply to sorcery, but who knows right now.
Strength
Your Strength determines how much damage you do to an enemy with melee weapons. It only affects melee combat.
Agility
Agility affects your stamina with various types of armor. The heavier the armor, the slower you move, so a high agility stat could offset that slower movement penalty. I don’t know to what extent this works yet.
Vitality
Pretty self explanatory, the higher your Vitality the more health you have.
Accuracy
Accuracy dictates how much damage you cause with ranged weapons. As mentioned above, no clue if this will include sorcery (assuming fireballs and such), or if that will be a stat on its own in the future.
Grit
The higher your Grit, the more stamina you have, meaning you can run for longer amounts of time, swing more often before tiring, etc.
Encumbrance
Encumbrance is, if you’ve played any Bethesda game ever, how much you can carry before slowing down and eventually being unable to move altogether. The higher the stat, the more you can carry before you need to discard items or store them.
Encumbrance is broken into four bars. Green is unencumbered, you can move like normal. Yellow is lightly encumbered, your stamina depletes slightly faster. Orange is very encumbered, and your stamina depletes even quicker. Red is fully encumbered and you cannot move at all.
Survival
The higher your Survival, the more effective food items are.
At the top left of your screen, you’ll have six icons. These are your survival stats. From left to right, they are:
Health
How much health you currently have. Getting attacked, drowning, etc. will drop this. Once the outer circle depletes, you die.
Stamina
How much stamina you currently have. Sprinting for a long time, swinging a weapon, etc. will all deplete this stat. Move normally (don’t hold shift) and don’t do any actions and this will gradually increase. When the outer circle depletes, you’ll need to wait for it to recharge.
Thirst
How thirsty you are. This naturally depletes over time. You can quench your thirst by drinking from your pouch (if it’s been filled) or from a water source. If the outer circle depletes, your screen will get a blueish border, and your health will start to drain.
Hunger
How hungry you are. This naturally depletes over time. You can eat food to refill this. Better food, and cooked food, refill more than the insects you scavenge.
Experience
This is your experience bar, essentially. Every time the outer circle fills up, you’ve gained a level.
Encumbrance
This is your encumbrance. The more you carry, the heavier you are, until you’re carrying too much you can’t even move. The bar will eventually fill and change color based on how much you’re carrying.
You can acquire status effects throughout your adventure. If you’ve played any sort of MMO, you’ll know what these are, they can either negatively or positively effect some aspect of your character.
Crippled
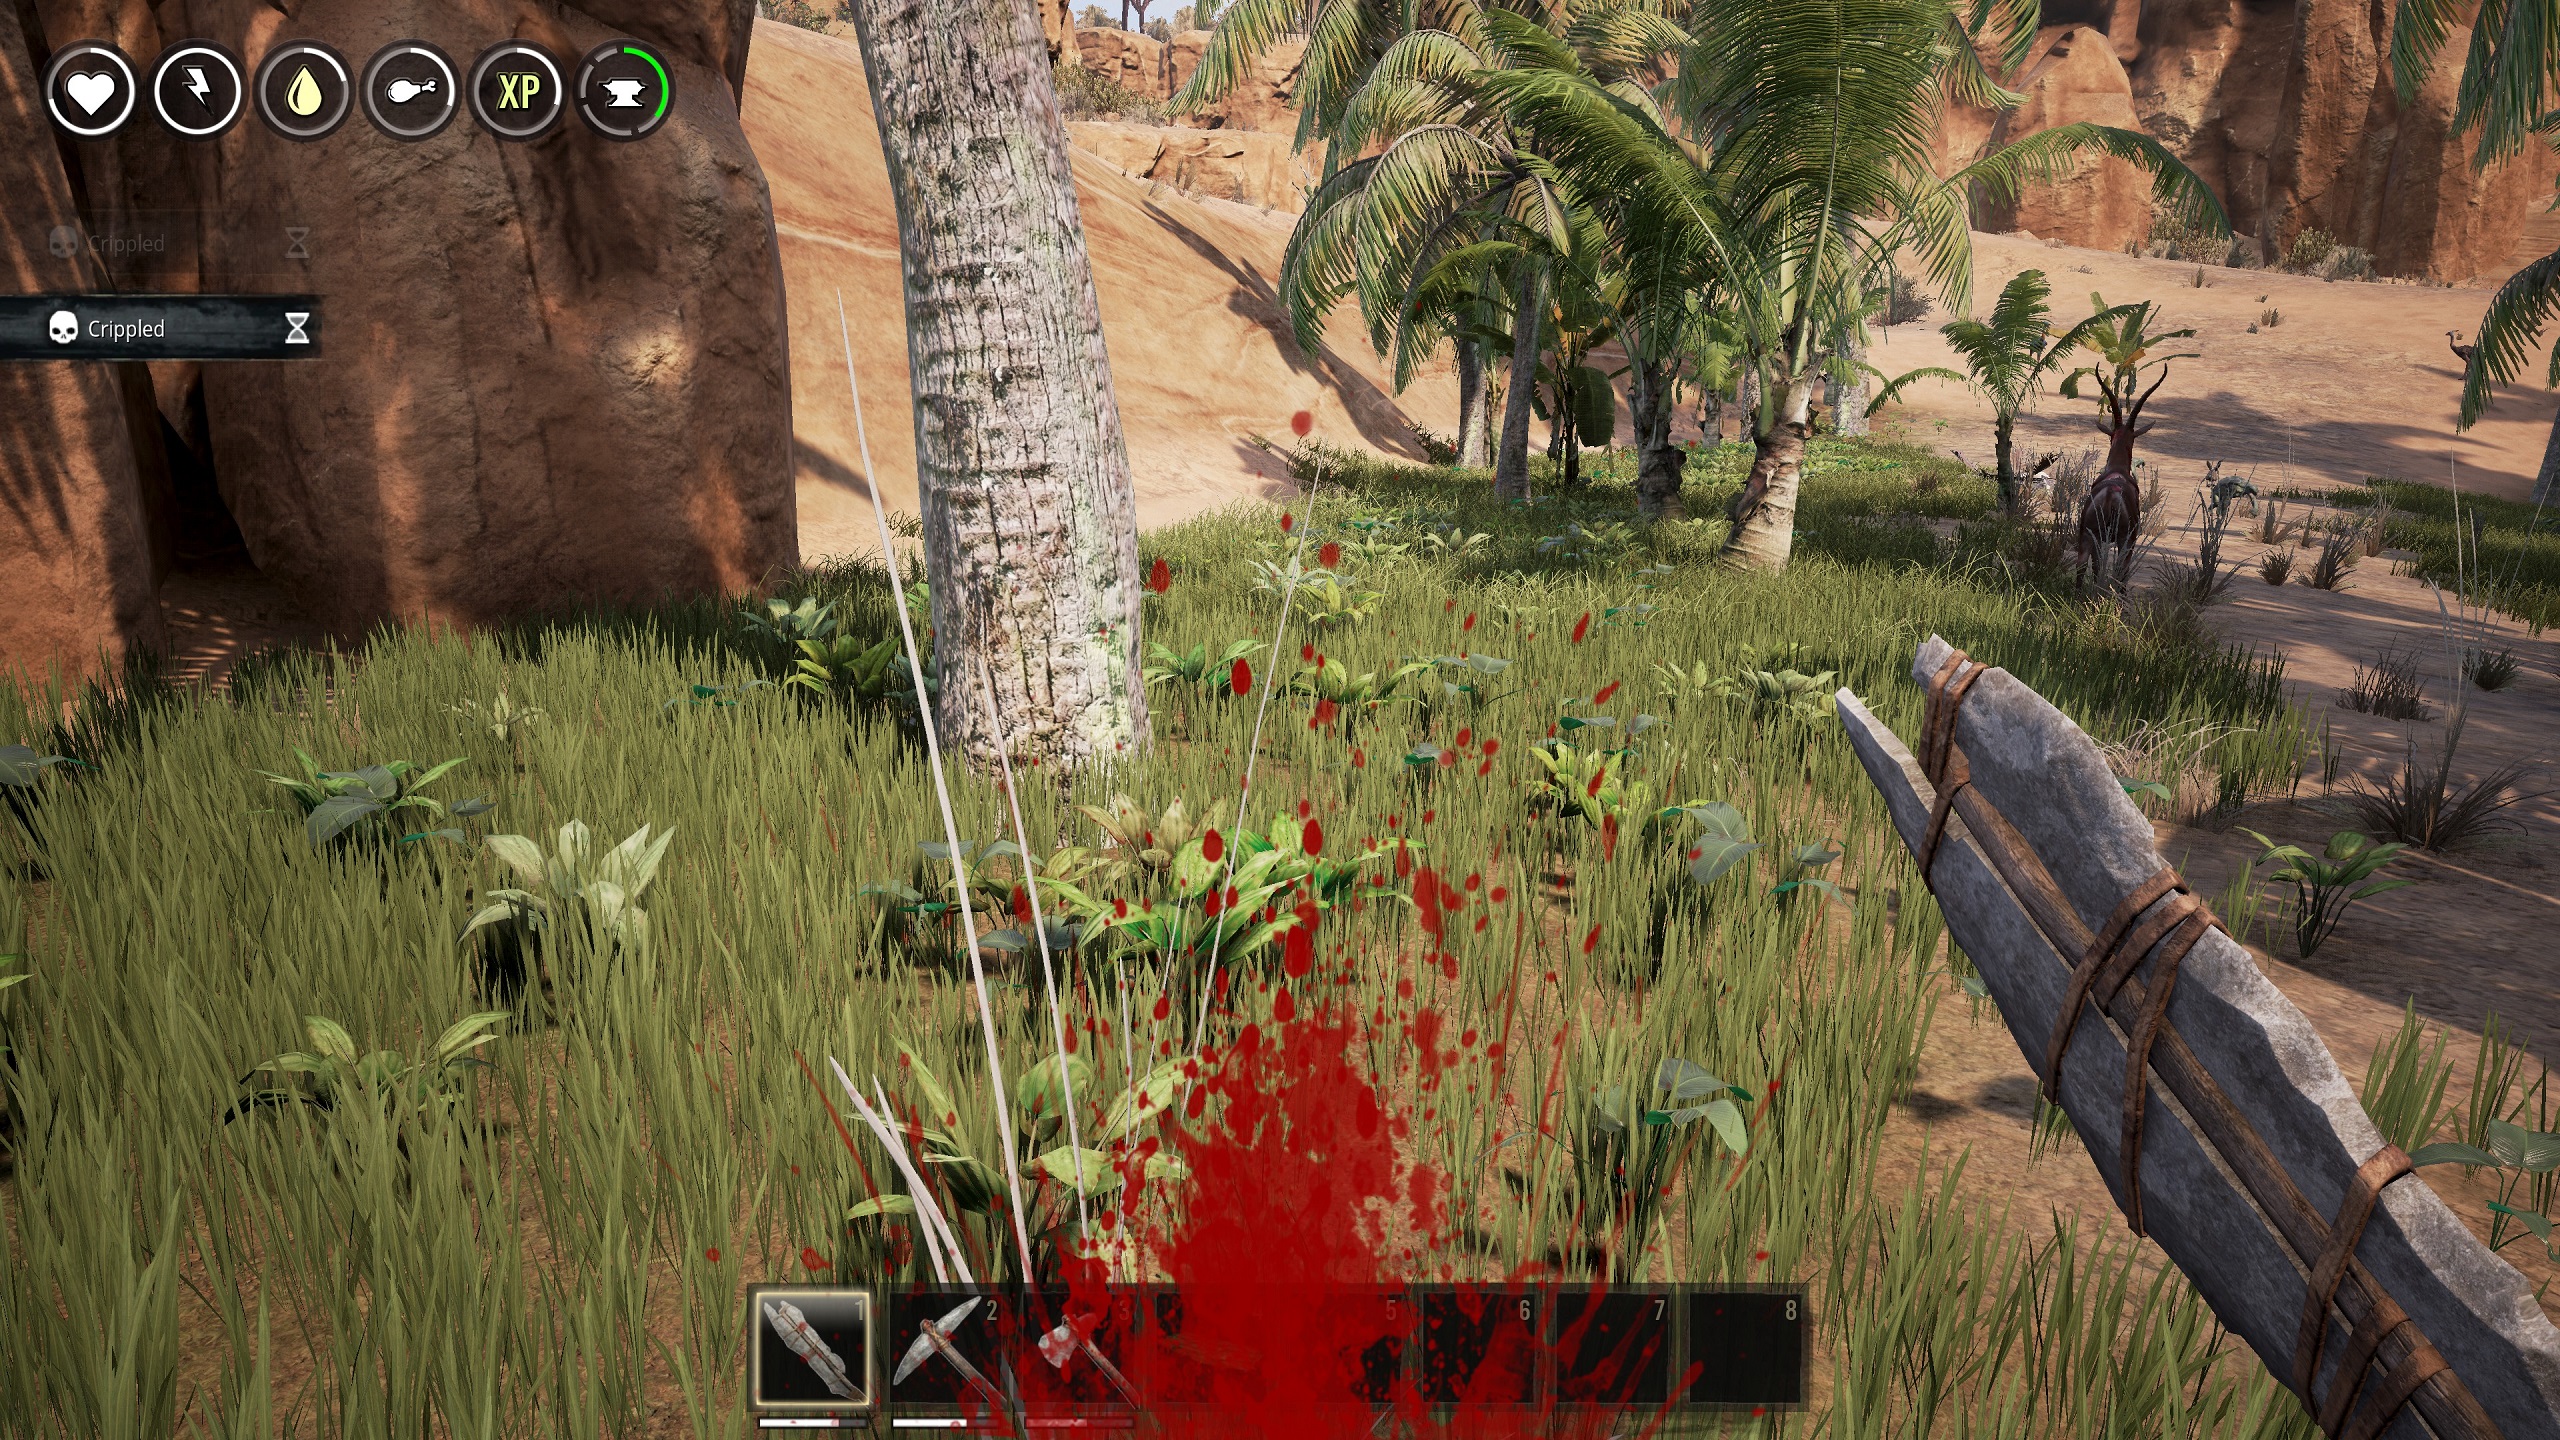
I occasionally get these from other exiles, but always get it from Hyena’s. It seems to only stack once, but is applied each time you’re hit. It reduces your movement speed.
Sheltered

I haven’t yet hit a sandstorm (how, I don’t know), but I imagine this status will protect you from its effects if it’s displayed on the screen. Apparently underwater helps as well.
Gathering & Cooking
To survive in Conan Exiles, you’ll need to gather items to craft the various recipes that’ll help you, y’know, not die. Some resources are easy to find and in large numbers, with a quick respawn timer, and some will take you to the outskirts of the world, give you few resources, and take quite a while to respawn.
When it comes to attacking enemies, be sure to attack them again once they’re dead! When you kill a crocodile, for example, you can attack it more and get bones, hide or flesh. Do this on every enemy you kill until their body disappears. It won’t be a ton of extra loot, but it’s enough to warrant an extra four seconds of weapon swinging.
Plant Fiber

Plant Fiber is one of the most common resources, and you’ll find plenty of bushes at your spawn point. In addition to plant fiber, you can also find insects, which act as food for hunger (albeit a very, very minuscule amount), as well as seeds. You can usually gather from a bush three times before it disappears. Small bushes, like the brown ones you see spread throughout the world, do not give anything.
Stone

This kind of stone can be picked up without any tools.
Stone (Mining)

These large chunks of stone will require a pickaxe to mine, and you can usually get between three and six whacks at them before they disappear.
Branch
Branches are used in many things, including weapons (for handles) and campfires. You get precious few when chopping down trees, so be sure to pick them up off the ground whenever you see them.

]Tree

Trees will, when chopped, give you wood and branches. Wood will be abundant, branches will be very few. The larger the tree, the more whacks it will require, and the more it will give you. The quality of your tool will change how many whacks are needed.

Coming soon.
Crafting – Recipes
You need to buy recipes in order to craft more advanced items, and some items require multiple recipes to acquire. Recipes are presented here in the same order they are in the game (as of this guide’s update; if a game update changes how they are presented and I don’t catch it, please let me know). Recipes are also sorted by function, just like in the game. These are Construction > Decoration > Combat > Survival.
If an item doesn’t have a note, there’s nothing special about it. If it doesn’t have a “Teaches” listing, it is a self contained item. For example, buying the Torch recipe unlocks just the Torch.
Acolyte of Yog
Required Level: 1
Cost: 50
Requires: N/A
Teaches: Pit of Yog, Yog Cleaver, Purified Flesh
Acolyte of Mitra
Required Level: 1
Cost: 50
Requires: N/A
Teaches: Shrine of Mitra, Mitraen Ankh, Ambrosia, Offering to Mitra
Acolyte of Set
Required Level: 1
Cost: 50
Requires: N/A
Teaches: Sepulcher of Set, Setite Ritual Knife, Set Antidote
Survivalist
Required Level: 1
Cost: 0
Requires: N/A
Teaches: Stone Pick, Improvised Torch
Notes: You start the game with this unlocked
Weaver
Required Level: 1
Cost: 0
Requires: N/A
Teaches: Coarse Armor Set (Tunic, Handwraps, Leggings, Footwraps)
Notes: You start the game with this unlocked
Apprentice Craftsman
Required Level: 2
Cost: 1
Requires: N/A
Teaches: Stone Hatchet, Fiber Bedroll, Twine
Experienced Survivalist
Required Level: 3
Cost: 1
Requires: N/A
Teaches: Campfire, Sealed Waterskin
Apprentice Stonemason
Required Level: 3
Cost: 1
Requires: N/A
Teaches: Sandstone Building Set (Foundation, Wall, Ceiling, Door Frame), Simple Wooden Door, Repair Hammer
Torch
Required Level: 5
Cost: 1
Requires: Apprentice Craftsman
Wooden Box
Required Level: 5
Cost: 2
Requires: Apprentice Craftsman
Armorer
Required Level: 6
Cost: 2
Requires: Apprentice Craftsman
Teaches: Armorer’s Bench, Wooden Targe
Blacksmith
Required Level: 10
Cost: 3
Requires: Apprentice Craftsman
Teaches: Furnace, Blacksmith’s Bench
Carpenter
Required Level: 10
Cost: 3
Requires: Apprentice Craftsman
Teaches: Carpenter’s Bench, Shaped Wood, Wooden Signpost, Wall Sign
Journeyman Craftman
Required Level: 10
Cost: 3
Requires: Tanner, Blacksmith, Carpenter
Teaches: Iron Pick, Iron Hatchet, Silk
Tanner
Required Level: 10
Cost: 3
Requires: Apprentice Craftsman
Teaches: Tannery, Hide
Firemaker
Required Level: 11
Cost: 1
Requires: Apprentice Craftsman, Torch
Teaches: Standing Torch, Stygian Brazier
Bedshaper
Required Level: 13
Cost: 3
Requires: Apprentice Craftsman
Teaches: Bed
Hunter
Required Level: 14
Cost: 2
Requires: Apprentice Craftsman, Carpenter
Teaches: Gazelle Head Trophy, Kudo Head Trophy, Antelope Head Trophy
Bracketed Torch
Required Level: 15
Cost: 2
Requires: Journeyman Craftsman, Torch
Firebowl Cauldron
Required Level: 15
Cost: 4
Requires: Journeyman Craftsman, Experienced Survivalist
Bonfire
Required Level: 16
Cost: 2
Requires: Apprentice Craftsman, Experienced Survivalist
Big Game Hunter
Required Level: 21
Cost: 3
Requires: Journeyman Craftsman, Hunter
Teaches: White Rhino Head Trophy, Black Rhino Head Trophy, Rhino King Head Trophy, Grey Rhino Head Trophy
Master Craftsman
Required Level: 30
Cost: 7
Requires: Journeyman Craftsman, Firebowl Cauldron
Teaches: Steel Hatchet, Steel Pick
Steel Pickaxe
Required Level: 45
Cost: 10
Requires: Master Craftsman
Wall Lantern
Required Level: 45
Cost: 3
Requires: Master Craftsman, Bracketed Torch
Large Water Well
Required Level: 49
Cost: 10
Requires: Master Craftsman, Master Stonemason
Crafting – Inventory
When you first begin the game, you’ll have access to a small selection of items. These are: Stone Pick, Improvised Torch, Coarse Tunic, Coarse Handwraps, Coarse Leggings, Coarse Footwraps. By exploring, crafting, killing and collecting, you’ll increase in level, which will allow you to distribute points to your stats, as well as learn new recipes.
Some recipes will require specific workstations, like the Blacksmith, to create higher level weapons and armor. These recipes can be found in the Crafting – Benches section.
For now, ingriedients will not be listed, as they will be likely to change, possibly several times, over the course of the game’s development.
Stone Pick
Improvised Torch
Stone Hatchet
Repair Hammer
Sealed Waterskin
Torch
Stone Sword
Wooden Shield
Hunting Bow
Flinthead Arrows
Stone Club
Stone Maul
Fiber Bindings
Truncheon
Stonebrick Gateway
Stonebrick Gate
Reinforced Stone Gate
Reinforced Stone Gateway
Stone Dagger
Javelin
Yoggite Cudgel
Coarse Handwraps
Coarse Leggings
Coarse Footwraps
Sandstorm Breathing Mask
Twine
Hide
Silk
King Rocknose Head Trophy
Crafting – Benches
The following items all require a specific bench to be made, and cannot be made from within your inventory.
——————————
——————————
Building
Building your town, castle or fortress was one of the big advertisements of the game.
In a way, it makes sense, because it wouldn’t be an open world crafting survival game without construction aspects, but on the flip side, the lore and world of Conan is all about combat and fighting. I guess you need suspension of disbelief for a little bit, huh?
More information on building is coming soon.
Thralls & Avatars
Coming soon.
Enemies, Death & The World
Crocodile
Status: Aggressive
Takes a lot of hits with basic weapons or tools. Very deadly to new players.

Antelope
Status: Passive
Provides hide and meat. Will run away when attacked.

Nordheimer Exile
Status: Aggressive
Fellow barbarians! Only they’re not friendly. Can be more or less deadly, depending on what they’re equipped wit.

Shaleback
Status: Aggressive
The red and green shelled Shaleback’s will attack you on sight, but the smaller ones, usually seen around nests, will not.

Baby Shaleback
Status: Passive
These baby shalebacks won’t attack you at all, even if you steal one of the eggs. They also die in one hit to any weapon, including tools.

Imp
Status: Aggressive
They will attack you on sight, and more often than not, you’ll hear the music indicating you’ve been spotted long before you see them, as they have exceptionally long range (regardless of your draw distance setting).

Cursed Wall
Status: Indifferent
These seem to act as the boundaries to the game. If you attempt to cross a cursed wall, you’ll be immediately killed and sent to a random spawn point if you haven’t chosen one using a bed.
Hyena
Status: Aggressive
Sadly, they don’t laugh, but they are pretty deadly.

Scorpion
Status: Passive
I believe these are passive creatures, as I’ve danced around one, gotten right up close and basically ran in circles around it, but they never attacked. Oddly, I also couldn’t attack them, even when crouched.

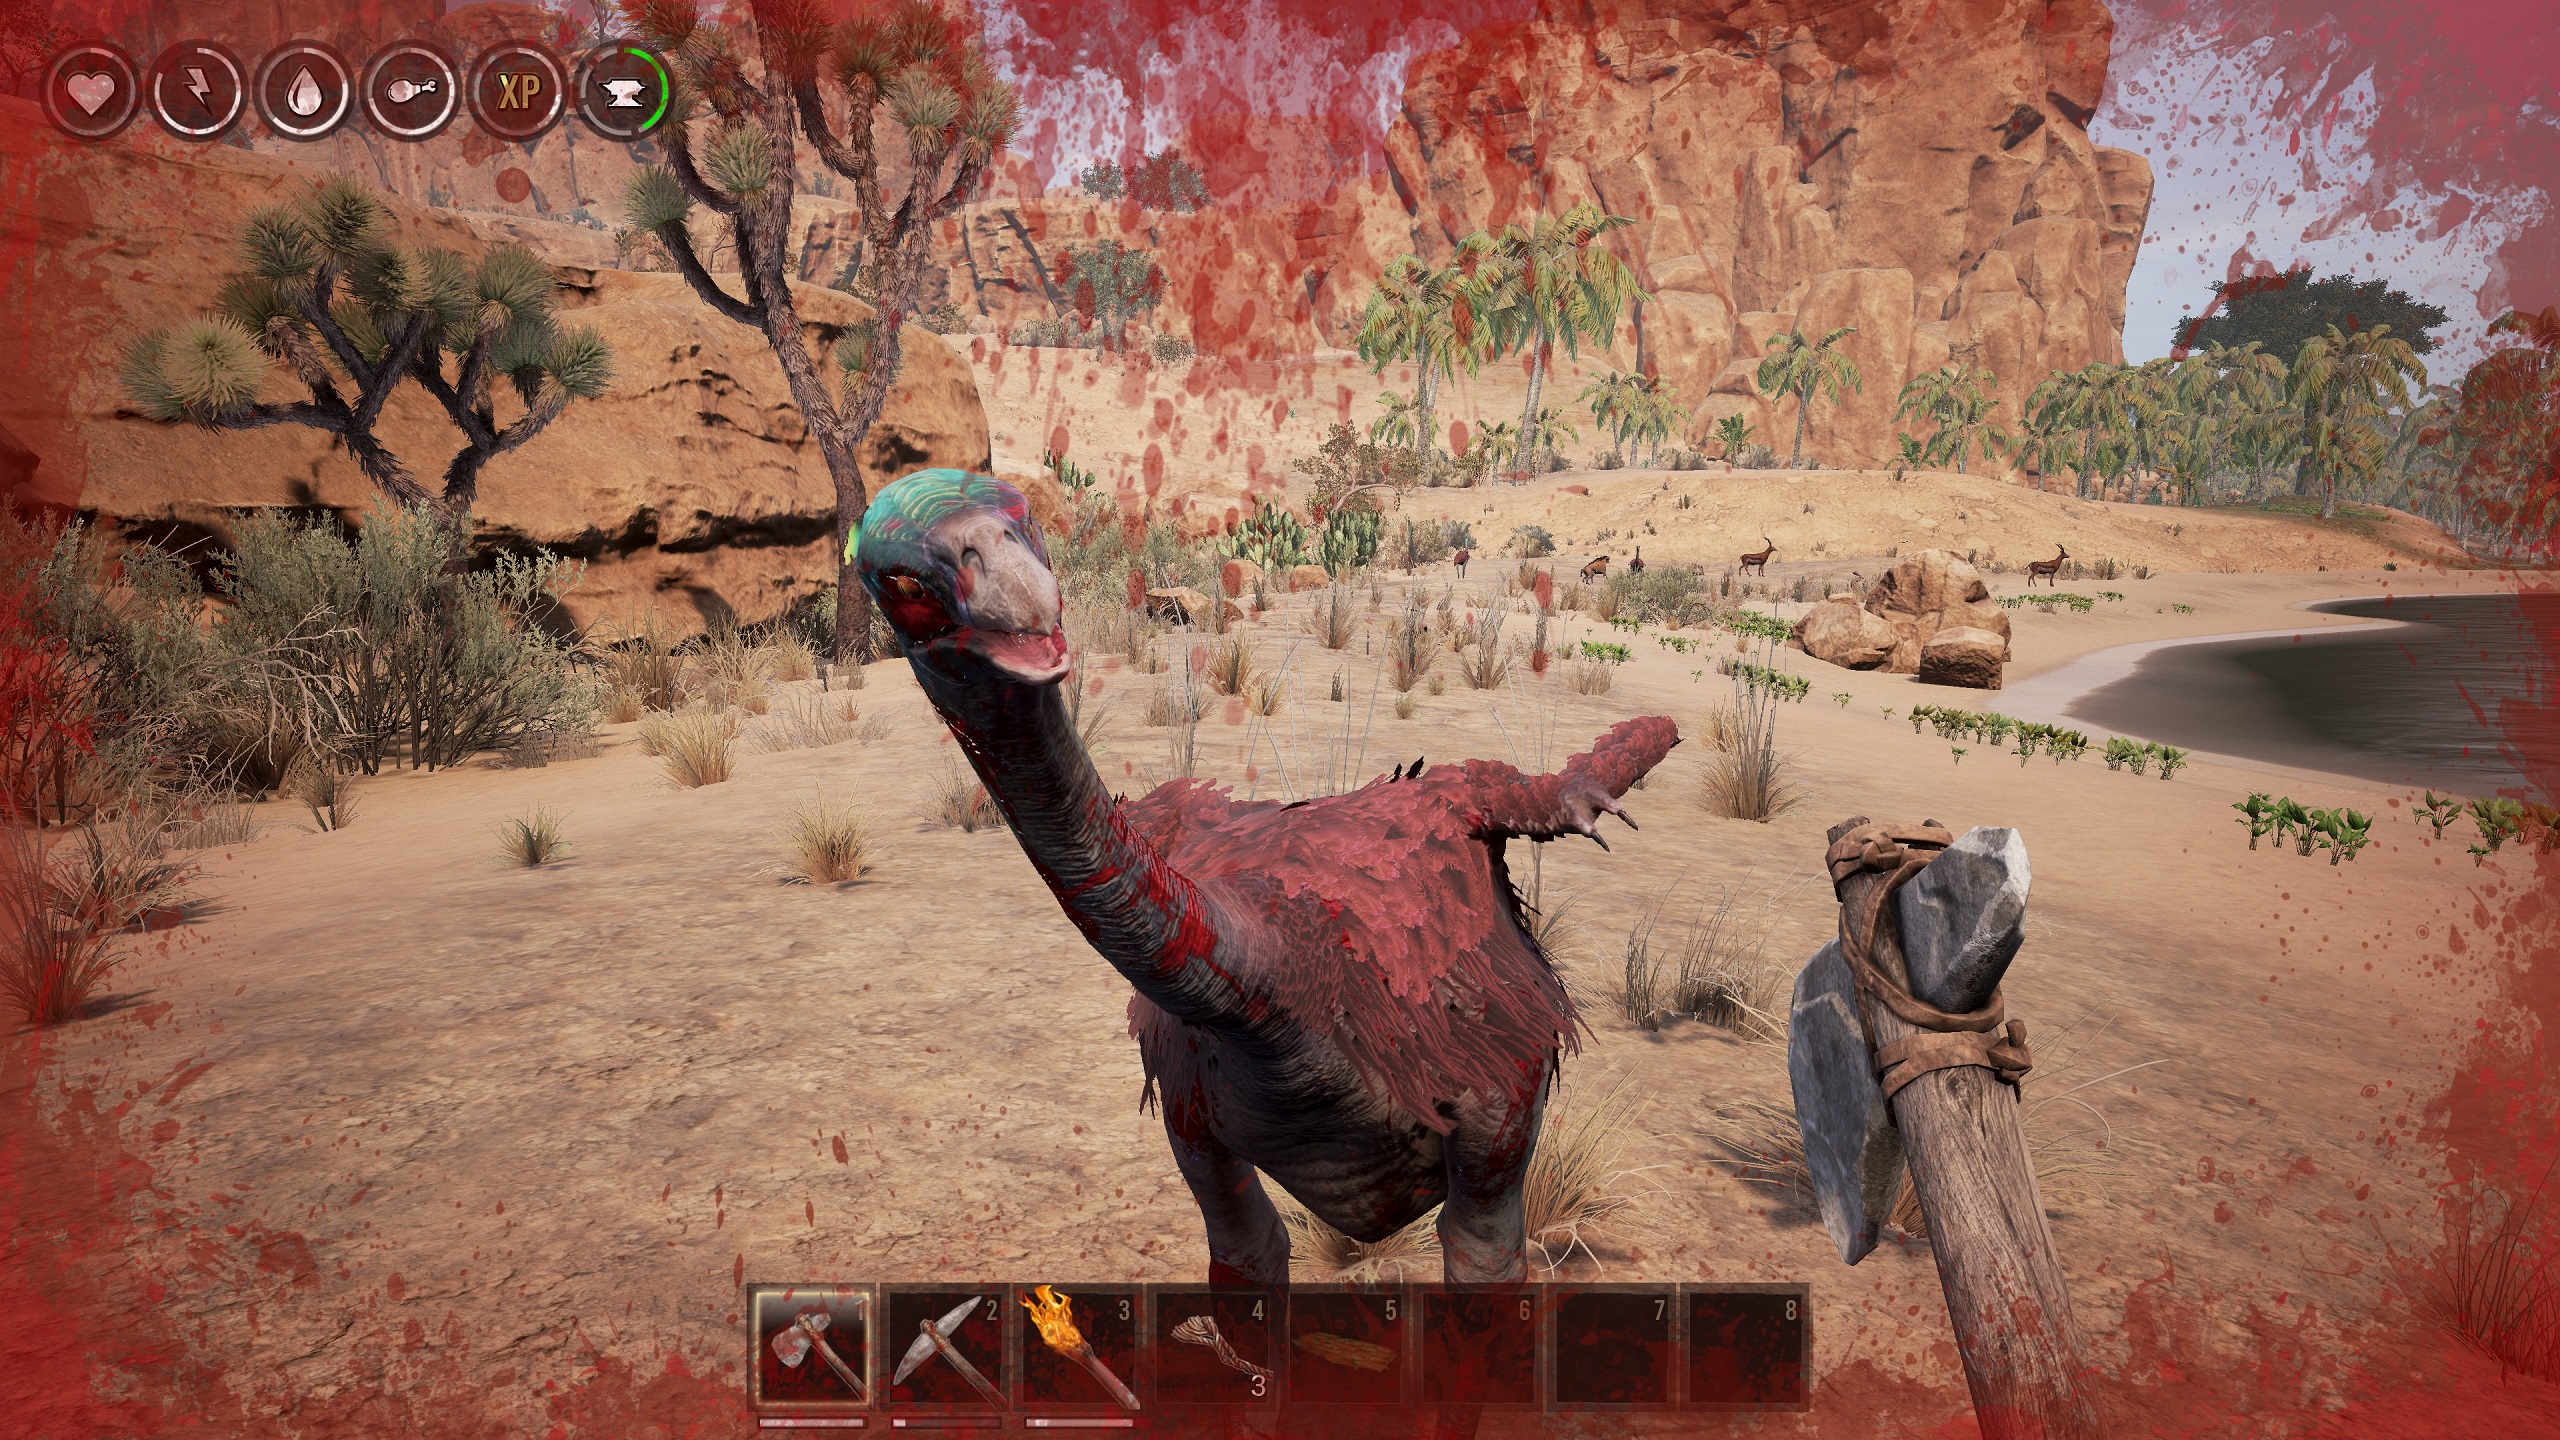
Ostrich
Status: Aggressive
I didn’t think these were aggressive until I got too close, and then I was a bloody pulp. They seem to be passive as long as they’re not approached.
Spider
Status: Aggressive
Only found in caves (at least that’s the only place I’ve found them thus far), they will definitely go after you. They also have a poison; I’ve been hit by Crippling Poison which has stacked up to three.

White Rhino
Status: Aggressive
Very deadly, you won’t encounter the rhino until you get a bit more toward the city. Don’t fight them unprepared.

You’ll run into various structures, areas, objects and more throughout the world.
Ghostly Tablet
These tablets, when activated with, will give you some background on the world, spoken to you by a ghostly voice. You’ll encounter one at the very beginning of the game, and spread throughout the world. They shine white as you approach. As of this time, I’ve only found one other tablet.

Underwater Tablet
Similar to the above, these will give more information on the world when interacted with. They shine red, as opposed to white like the Ghostly one, and I’ve only ever seen these underwater.

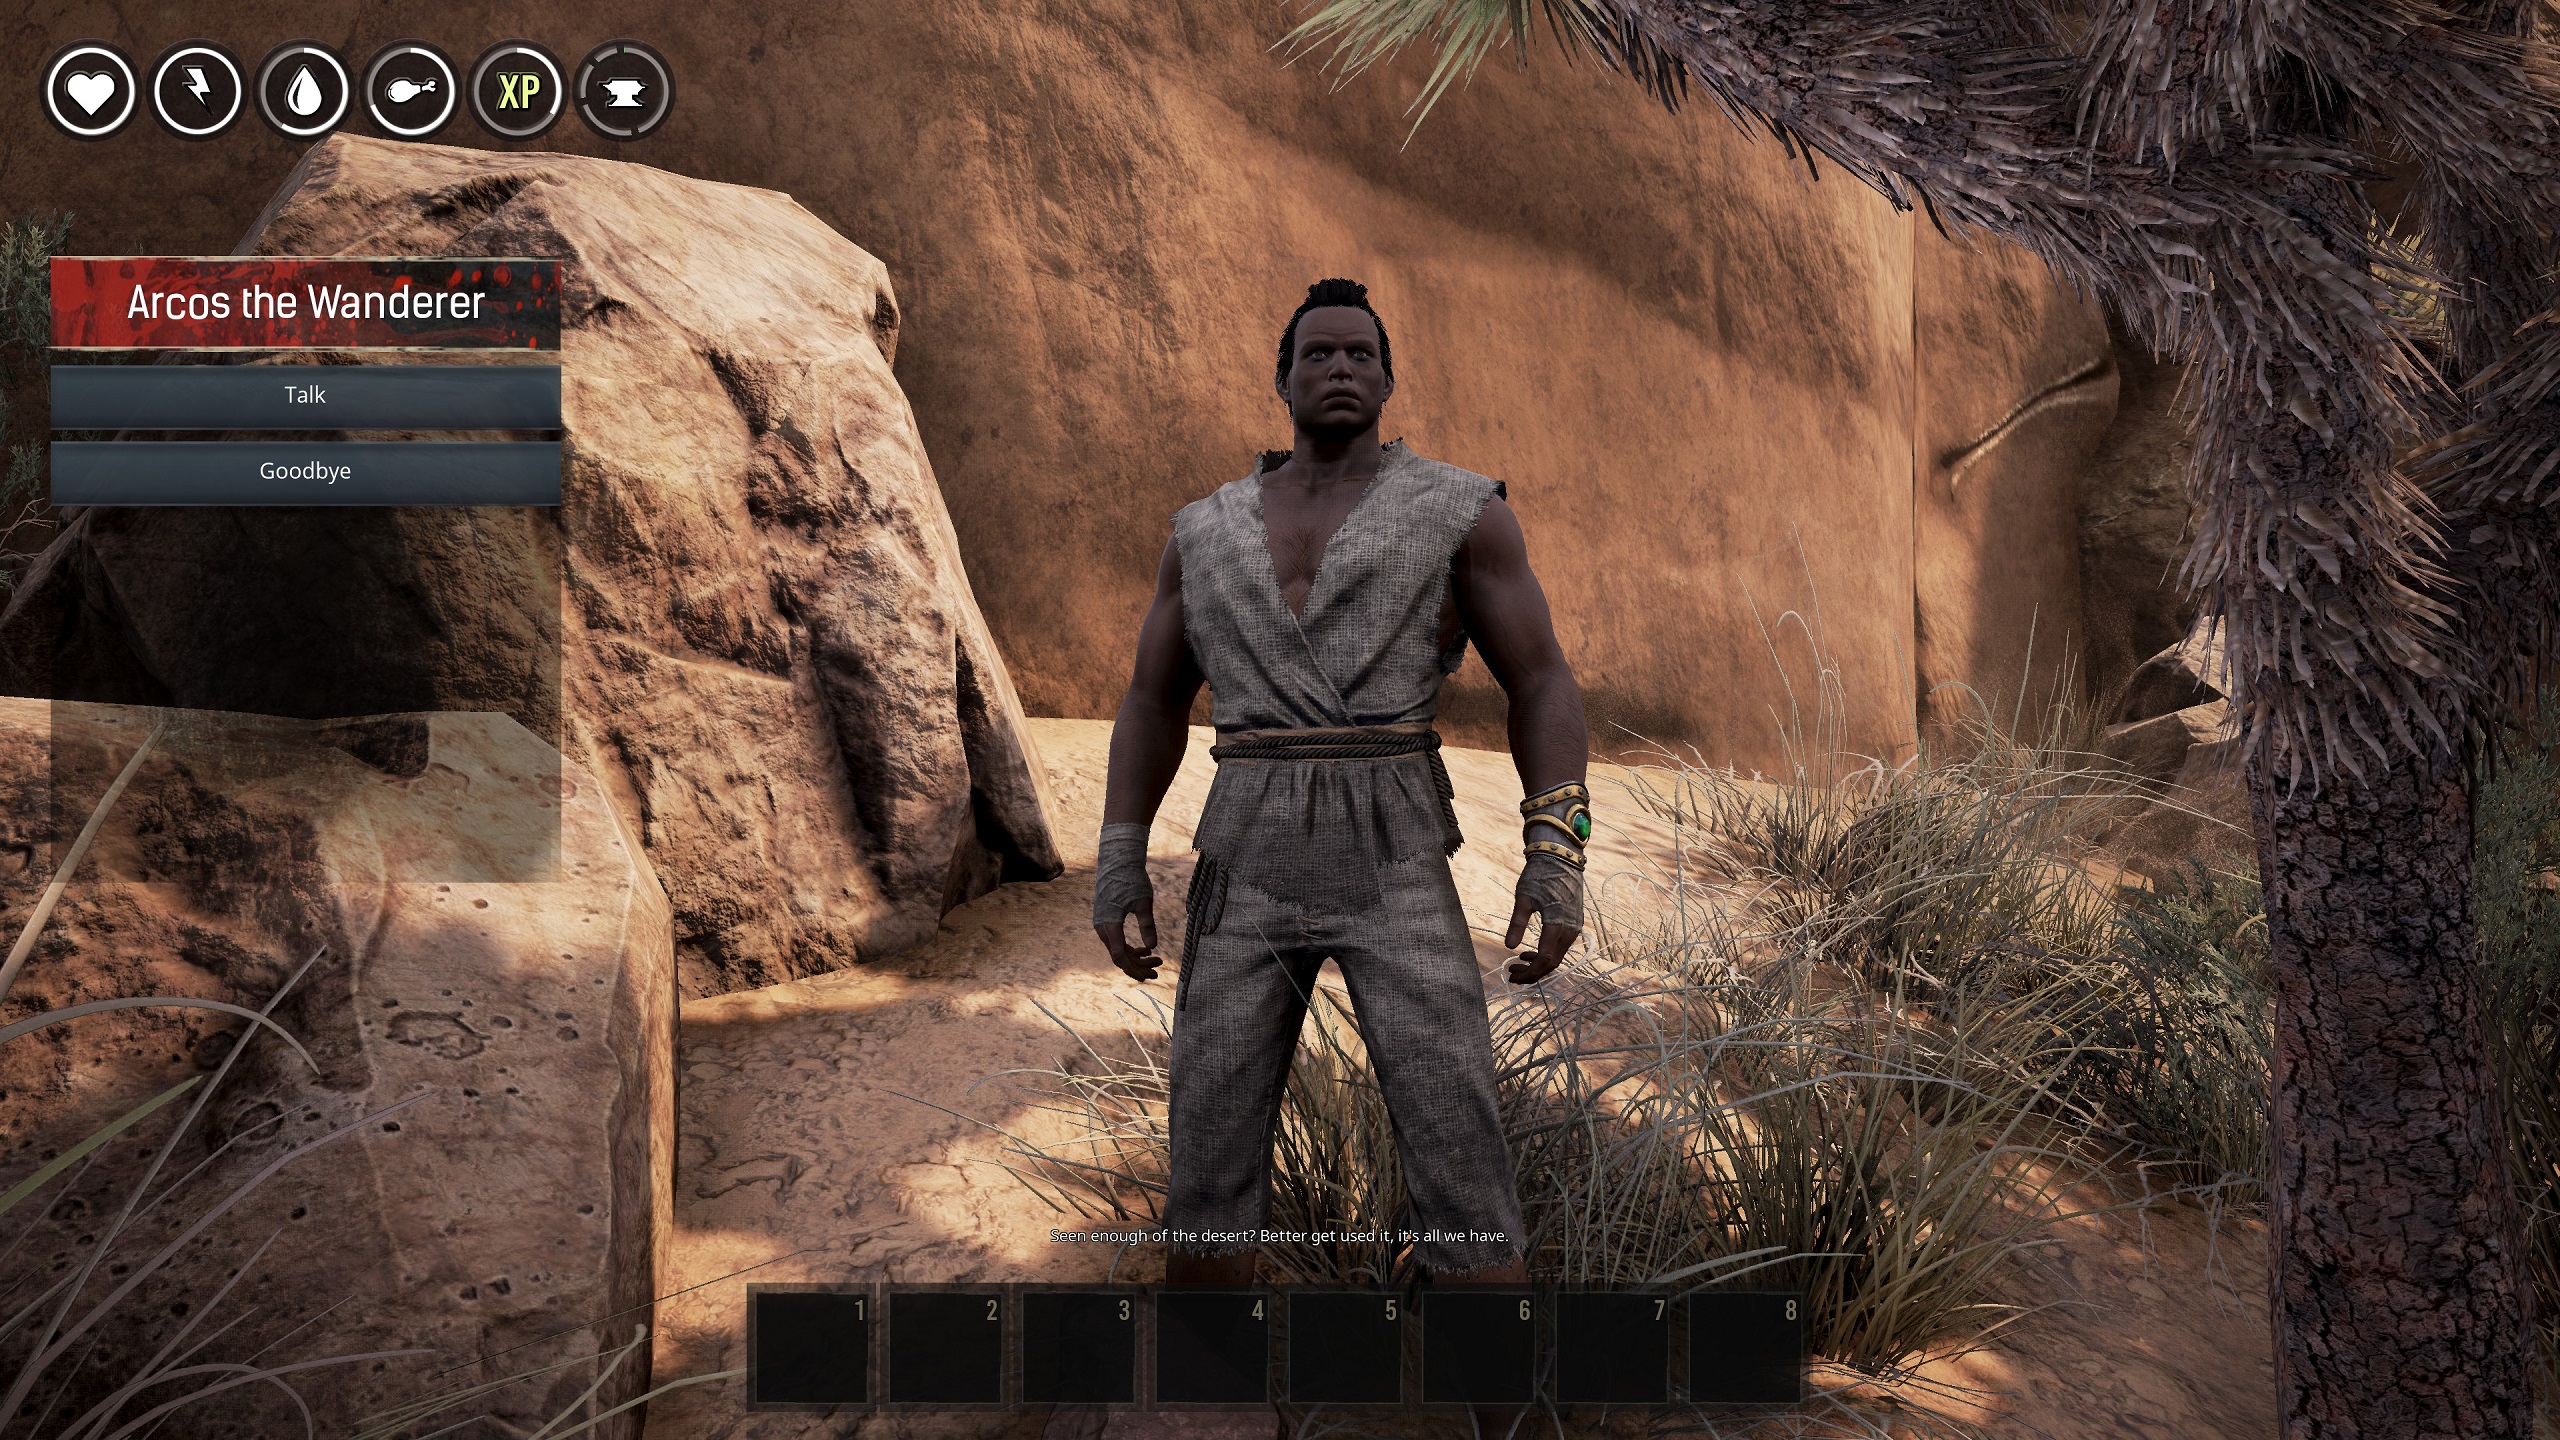
Wanderer
Over several characters, I’ve only encountered one NPC who was friendly, and it’s been this one every time. You can talk to him for some more information on the world, but otherwise he does nothing.
Clans
Soon.
Map
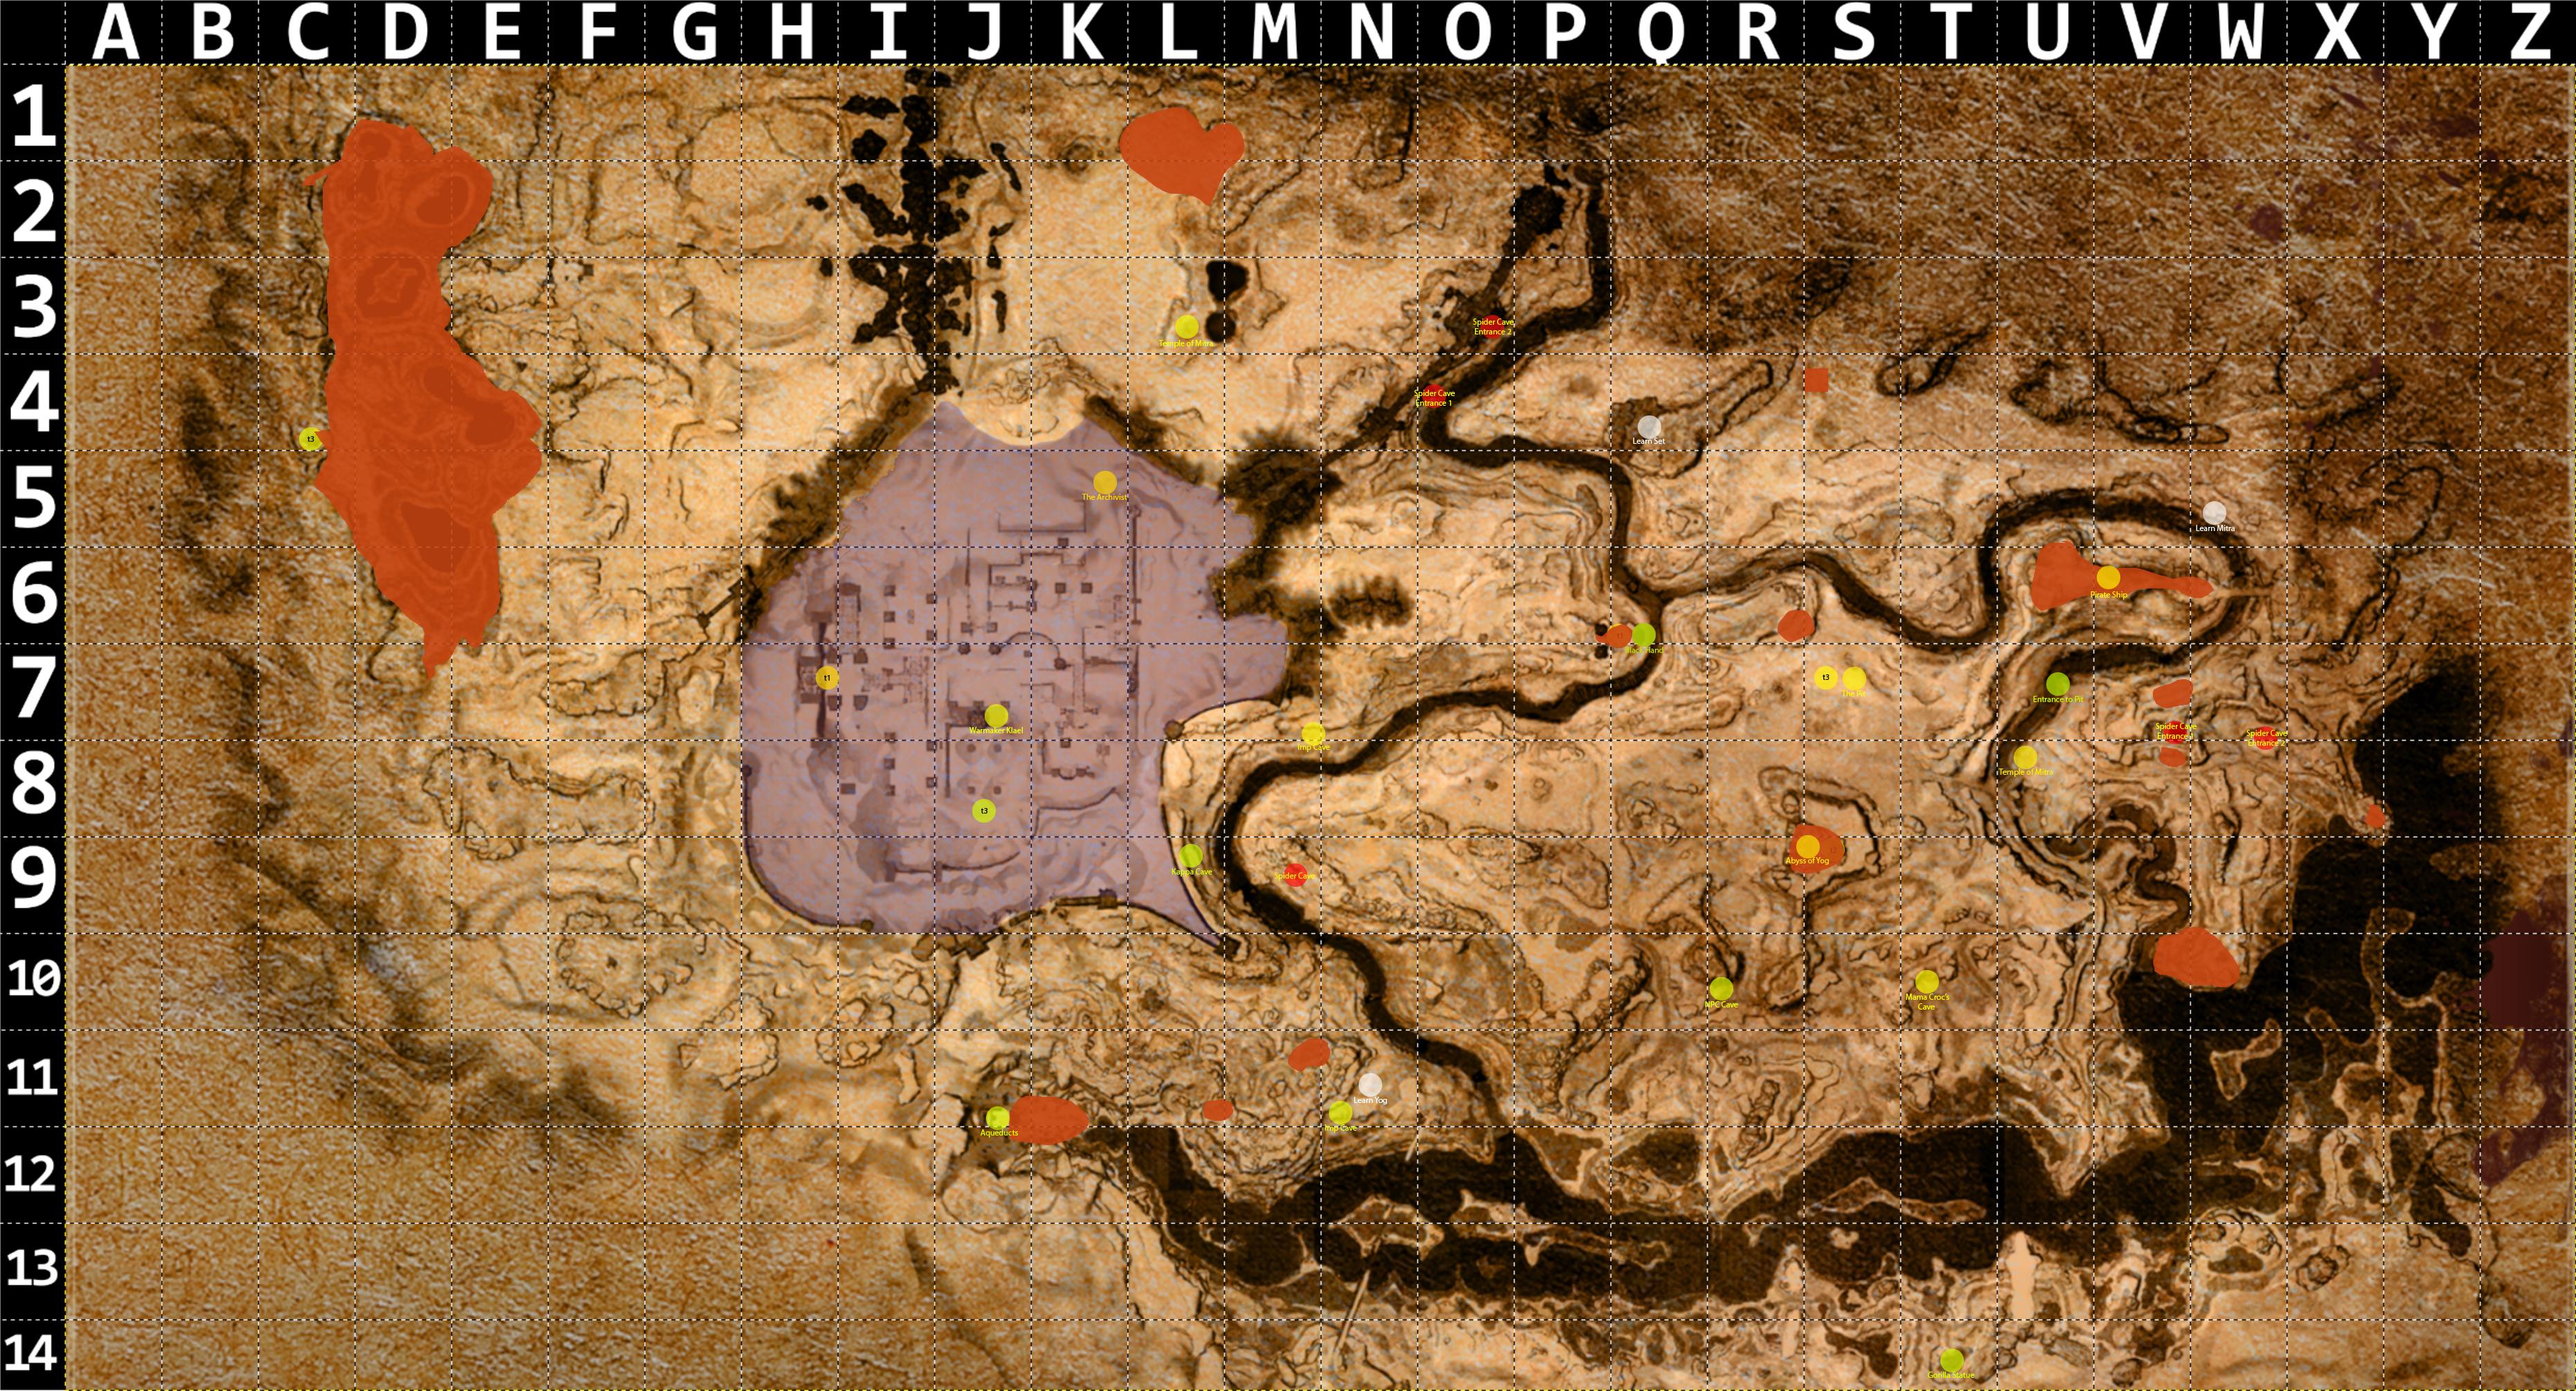
The above map was posted to Conan Exile’s subreddit by user BeesForDays. I take no credit for it and am posting it for information.
Hosting Options
When starting a server, you can configure pretty much every aspect of it, whether you’re starting an online game or an offline/co-op game. Going down the list…
General
Server Name: Pretty self-explanatory.
Number of Players: You can set this up to 70. The more players, the more demanding.
Server Password: Password to connect. Set this and give it to friends if you don’t want a public server.
Admin Password: Password needed to execute administrator functions.
BattleEye Enabled: Tick to require people having BattleEye to connect. Untick to let anyone join. This option cannot be ticked for single player.
PVP Enabled: Tick to allow players to kill each other. Untick to make it a PvE server.
Community: Set the tag that will appear on the server browser. Use this to indicate what kind of players you want on your server.
Server Region: Set this based on where you are (or your server if its elsewhere).
No Ownership: Tick this and people will not be able to claim ownership to buildings, beds, etc. Untick this and people can own items.
Can damage player owned structures: Tick this and your buildings can be damaged by enemies, other players, and yourself. Untick and your buildings will be invulnerable.
Enable Sandstorm: Tick this to have random sandstorms wreak havoc. These can be very dangerous. Untick this and sandstorms will never occur.
Clan Max Size: Set how many people you want to allow to join one clan.
Maximum Nudity: This overrides any player selection. Full will show breasts and penis, partial will show only breasts (female only), and none will cover up everything. When streaming, you may want to consider None, as Twitch will be selective in who they ban, as they don’t really have a protocol other than not partnered = hell with you.
Progression
Player XP Rate Multiplier: Increase this to earn XP at a faster rate. Decrease to earn XP at a reduced rate.
Player XP Time Multiplier: Increase this and you’ll earn resting XP (which is always accruing) at a faster rate. Decrease to earn XP at a reduced rate.
Player XP Kill Multiplier: Increase this to earn XP from killing enemies at a faster rate. Decrease to earn XP at a reduced rate.
Player XP Harvest Multiplier: Increase this to earn XP from harvesting resources (fiber, stone, etc.) at a faster rate. Decrease to earn XP at a reduced rate.
Player XP Craft Multiplier: Increase this to earn XP from crafting items at a faster rate. Decrease to earn XP at a reduced rate.
Day/Night Cycle
Day Cycle Speed: Increase this to make a day in the game go by faster. Decrease to make it slower.
Day Time Speed: Increase this to make the day last longer than usual. Decrease to make it quicker.
Night Time Speed: Increase this to make the night last longer than usual. Decrease to make it quicker.
Dawn/Dusk Time Speed: Increase this to spend more time between dawn and dusk hours (05:00-06:59 and 17:00-18:59 respectively)
Catch Up Time: Increase this setting to give new players a head start. The higher the number, the longer it’ll take for the server to sync with the player.
Survival
Stamina Cost Multiplier: Increase this to make your stamina decrease at a quicker rate. Lower it to allow players to use more actions before stamina depletes.
Player Active Thirst Multiplier: Increase this to make your thirst level decrease at a quicker rate. Lower it to allow players to spend more time being productive and less time drinking.
Player Active Hunger Multiplier: Increase this to make your hunger level decrease at a quicker rate. Lower it to allow players to spend more time being productive and less time eating.
Logged Out Characters Remain in World: Tick this if you want characters to remain in the game when they disconnect. This keeps their body where they last were. Untick this and players will leave when offline.
Drop Equipment On Death: Tick this to have players drop their equipment when they die, making it necessary to get back to their corpse to retrieve their items. Untick this and you lose nothing when you die.
Everybody Can Loot Corpse: Tick this and anybody can loot the corpse of any dead player. Untick this and only the dead player can loot their own corpse.
Combat
NPC Respawn Multiplier: Increase this and killed enemies will respawn after a longer period than usual. Decrease and they respawn quicker.
Thrall Wakeup Time: When you capture an enemy to be a thrall, you need to drag them back to your base. Increase this number to keep them unconscious for longer, or decrease it and they’ll wake up sooner.
Avatar Lifetime: Increase this number to give avatars more time in the world when summoned. Decrease this number and they’ll live for a shorter period.
Disable Avatars: Tick this to disable avatars completely. Untick to keep them as usual.
Harvesting
Item Spoil Rate Scale: Increase this to allow food to last longer before going bad. Decrease it and food will become garbage pretty quickly.
Harvest Amount Multiplier: Increase this and you’ll get more resources every time you harvest something. Decrease it and you’ll get less.
Resource Respawn Speed Multiplier: Increase this and resources will spawn quicker after being depleted. Decrease it and it’ll take longer.
Land Claim Radius Multiplier: Increase this to give players more “land” when claiming something, which will affect resources and NPCs. Decrease this to give them less.
Crafting
Crafting Speed Multiplier: Increase this to make crafting take longer. Decrease to make items within seconds.
Chat
Chat Local Radius: Increase this to allow chat messages to travel further from your character, reaching more people. Decrease this to shorten the distance.
Max Message Length: Determines how long a message can be.
Chat Has Global: Tick to make it a global channel.
Region Access Control
Region Allow: Tick the box of each region from where you want to allow players.
Block By Country Code: If you want to block people from a certain country, but not necessarily the whole region, enter the country codes here.
Admin Panel
While in a server you own, you can press SHIFT+CTRL+C (default) to open the admin panel, or press ESC and get into it from there.
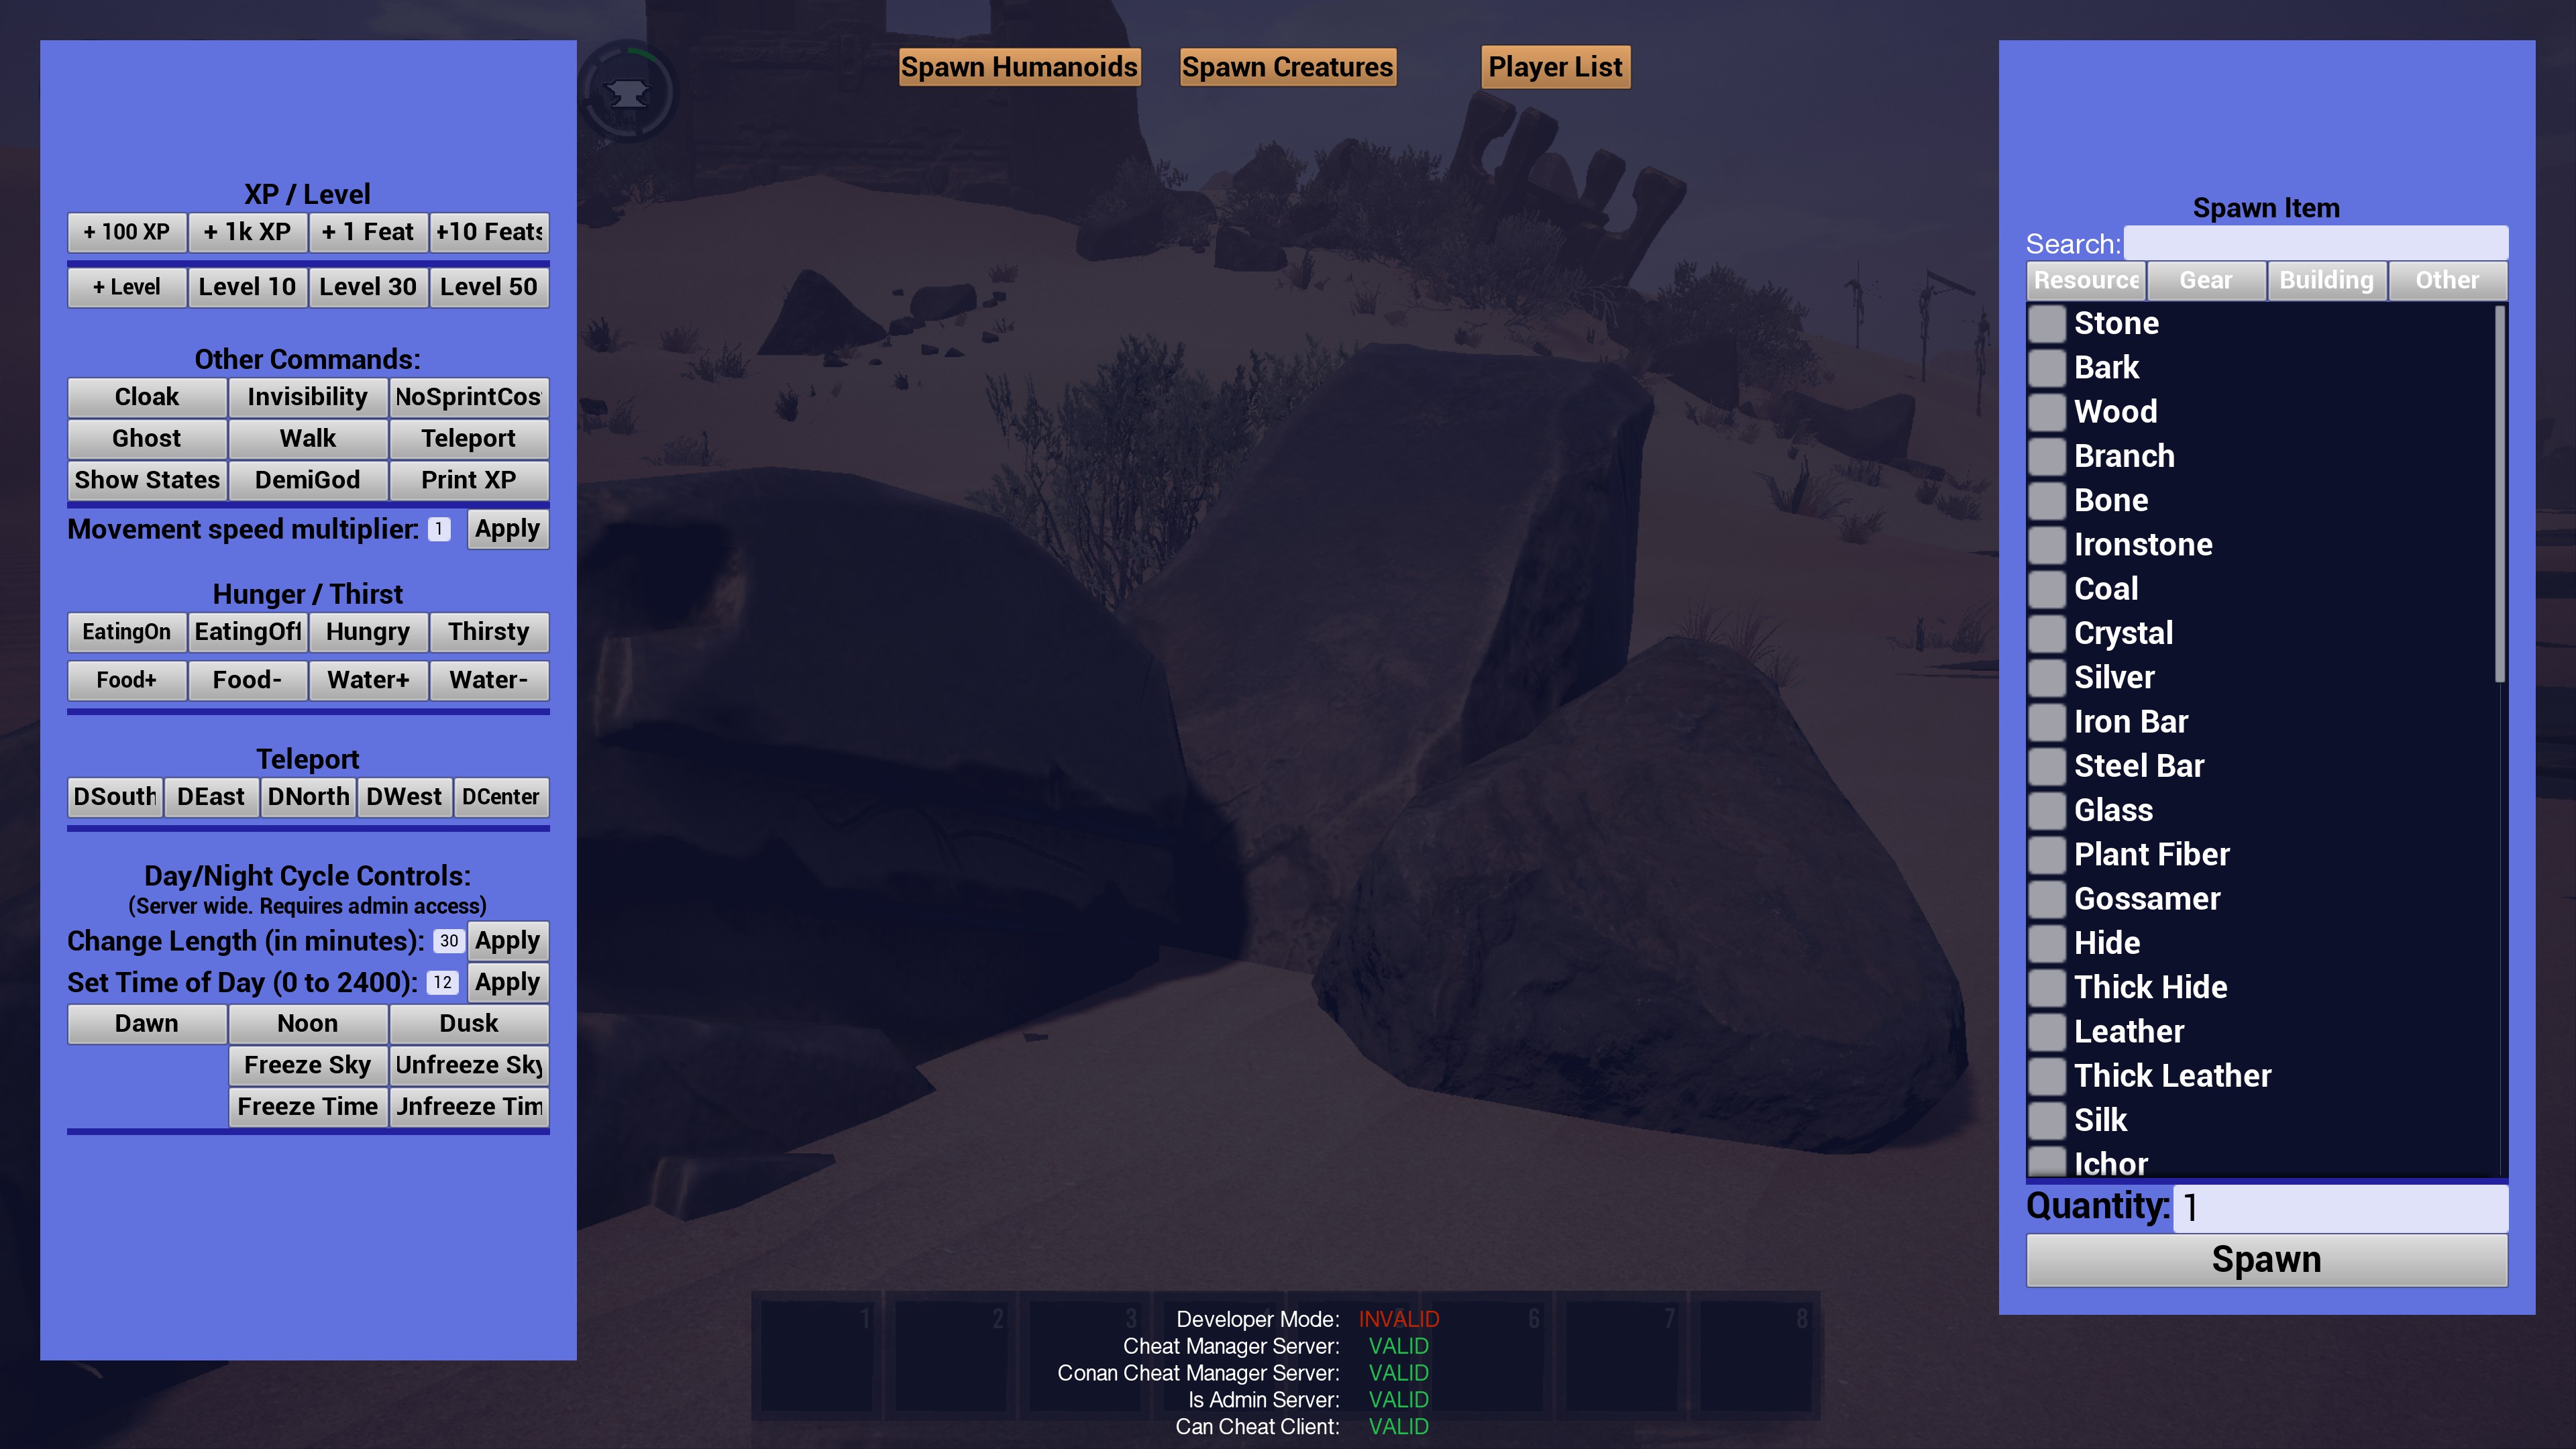
At the Top
Spawn Humanoids: Instantly spawn the selected humanoids
Spawn Creatures: Instantly spawn the non-human creatures
Player List: View a list of players connected to the server
When viewing the player list, you’ll see the name of everybody connected to the server. You can then take administrative action. If you ban someone, they’ll appear at the bottom of the screen, where you can keep track, or to unban in the future.
On the Left
XP/Level
+100 XP/+1k XP: Give yourself 100 or 1000 XP points
+1 Feat/+10 Feats: These are the upgrade points; give yourself one or ten.
+Level: Immediately gain one level
Level 10/30/50: Immediately jump to level 10, 30 or 50, with the appropriate XP tally and reward points
Other Commands:
Cloak: Toggle on to make you invisible to enemies.
Invisibility: You’ll be invisible to everything.
NoSprintCost: Sprint for an unlimited amount of time.
Ghost: You can fly and ignore all ground constraints.
Walk: Turn off ghost mode.
Teleport: Instantly move to where you’re looking.
Show States: Show the different AI states (hostile, dead, etc.)
DemiGod: Most things will not hurt you.
Print XP: Show XP gains.
Movement speed multiplier: Change how fast you run. Does not apply to Ghost mode.
Hunger/Thirst
EatingOn: Turn on eating, which is the default.
EatingOff: Turn off eating, meaning you’ll never have to eat to keep your hunger up.
Hungry: Instantly become hungry as if you haven’t eaten anything.
Thirsty: Instantly become thirsty as if you haven’t drank anything.
Food+: Add 25% to your hunger meter (four clicks will fill it completely)
Food-: Remove 25% from your hunger meter (four clicks will make you hungry)
Water+: Add 25% to your thirst meter (four clicks will fit it completely)
Water-: Remove 25% from your thirst meter (four clicks will make you thirsty)
Teleport
DSouth: Teleport south.
DEast: Teleport east.
DNorth: Teleport north.
DWest: Teleport west.
DCenter: Teleport to the center’ish portion.
Day/Night Cycle Controls
Change Length (in minutes): Change how long a cycle lasts, in real minutes.
Set Time of Day (0 to 2400): Using the 24 hour clock, set the time in the world.
Dawn: Set the time to dawn.
Noon: Set the time to noon.
Dusk: Set the time to dusk.
Freeze Sky: Freeze the sky in its current state.
Unfreeze Sky: Return the sky to normal.
Freeze Time: Freeze the current time.
Unfreeze Time: Return time to normal.
On the Right
Spawn Item
You can use these boxes to spawn pretty much whatever you want. Tick a box, enter the amount and click Spawn. You can do multiple items, but you can only select one amount for multiple. So if you want 100 Stone and 50 Wood, you’ll need to tick Stone, set 100, spawn, untick Stone, tick Wood, set 50, then spawn. However, if you want 100 Stone and 100 Wood, you can tick both Stone and Wood, then spawn, and you’ll have 100 of each.
Crimes
When creating a character, you are given three randomized crimes as to why you’ve been crucified and left for dead. This is a fun little section that has no actual value, but simply lists all the crimes that you can be found guilty of. New ones will be added as I see them, or feel free to let me know what some are and I’ll add them. Be sure to include a name so I can credit you. These will be listed alphabetically.
Assassinating a Merchant
Banditry
Blackmail
Breaking An Oath
Breaking the Fourth Wall
Bribing a Watchman
Cheating At Dice
Corrupting the Youth
Crude Language
Cultural Appropriation
Debauchery
Decapitation of a Priest
Defecating On a Statue
Defiling a Temple
Destruction of Property
Disobedience of a Priest
Drunken Brawling
Fixing Gladitorial Matches
Fornicating with Low Beasts
Freeing Slaves
Impersonating a Priestess
Inciting a Riot
Killing a Sacred Serpent
Lecherous Behavior
Mutilation of a Guardsmen
Pickpocketing
Punching a Camel
Singing Bawdy Ballads
Skullduggery and Buggery
Strangling a Money Lender
Sullying a Virgin
Swindling a Baron
Unauthorized Dismemberment
Villainy and Rascality
Game Performance
The following options work wonderfully for me with my current system.
At 1440p resolution, on a 4K monitor, I maintain a steady 60 FPS (I keep v-sync on). It drops when first entering water on a new server (I don’t know why the hell that happens), and if there’s a lot going on. I also haven’t yet built a sprawling town, so the settings could make my frames tank when that happens.
These are my 1440p settings.
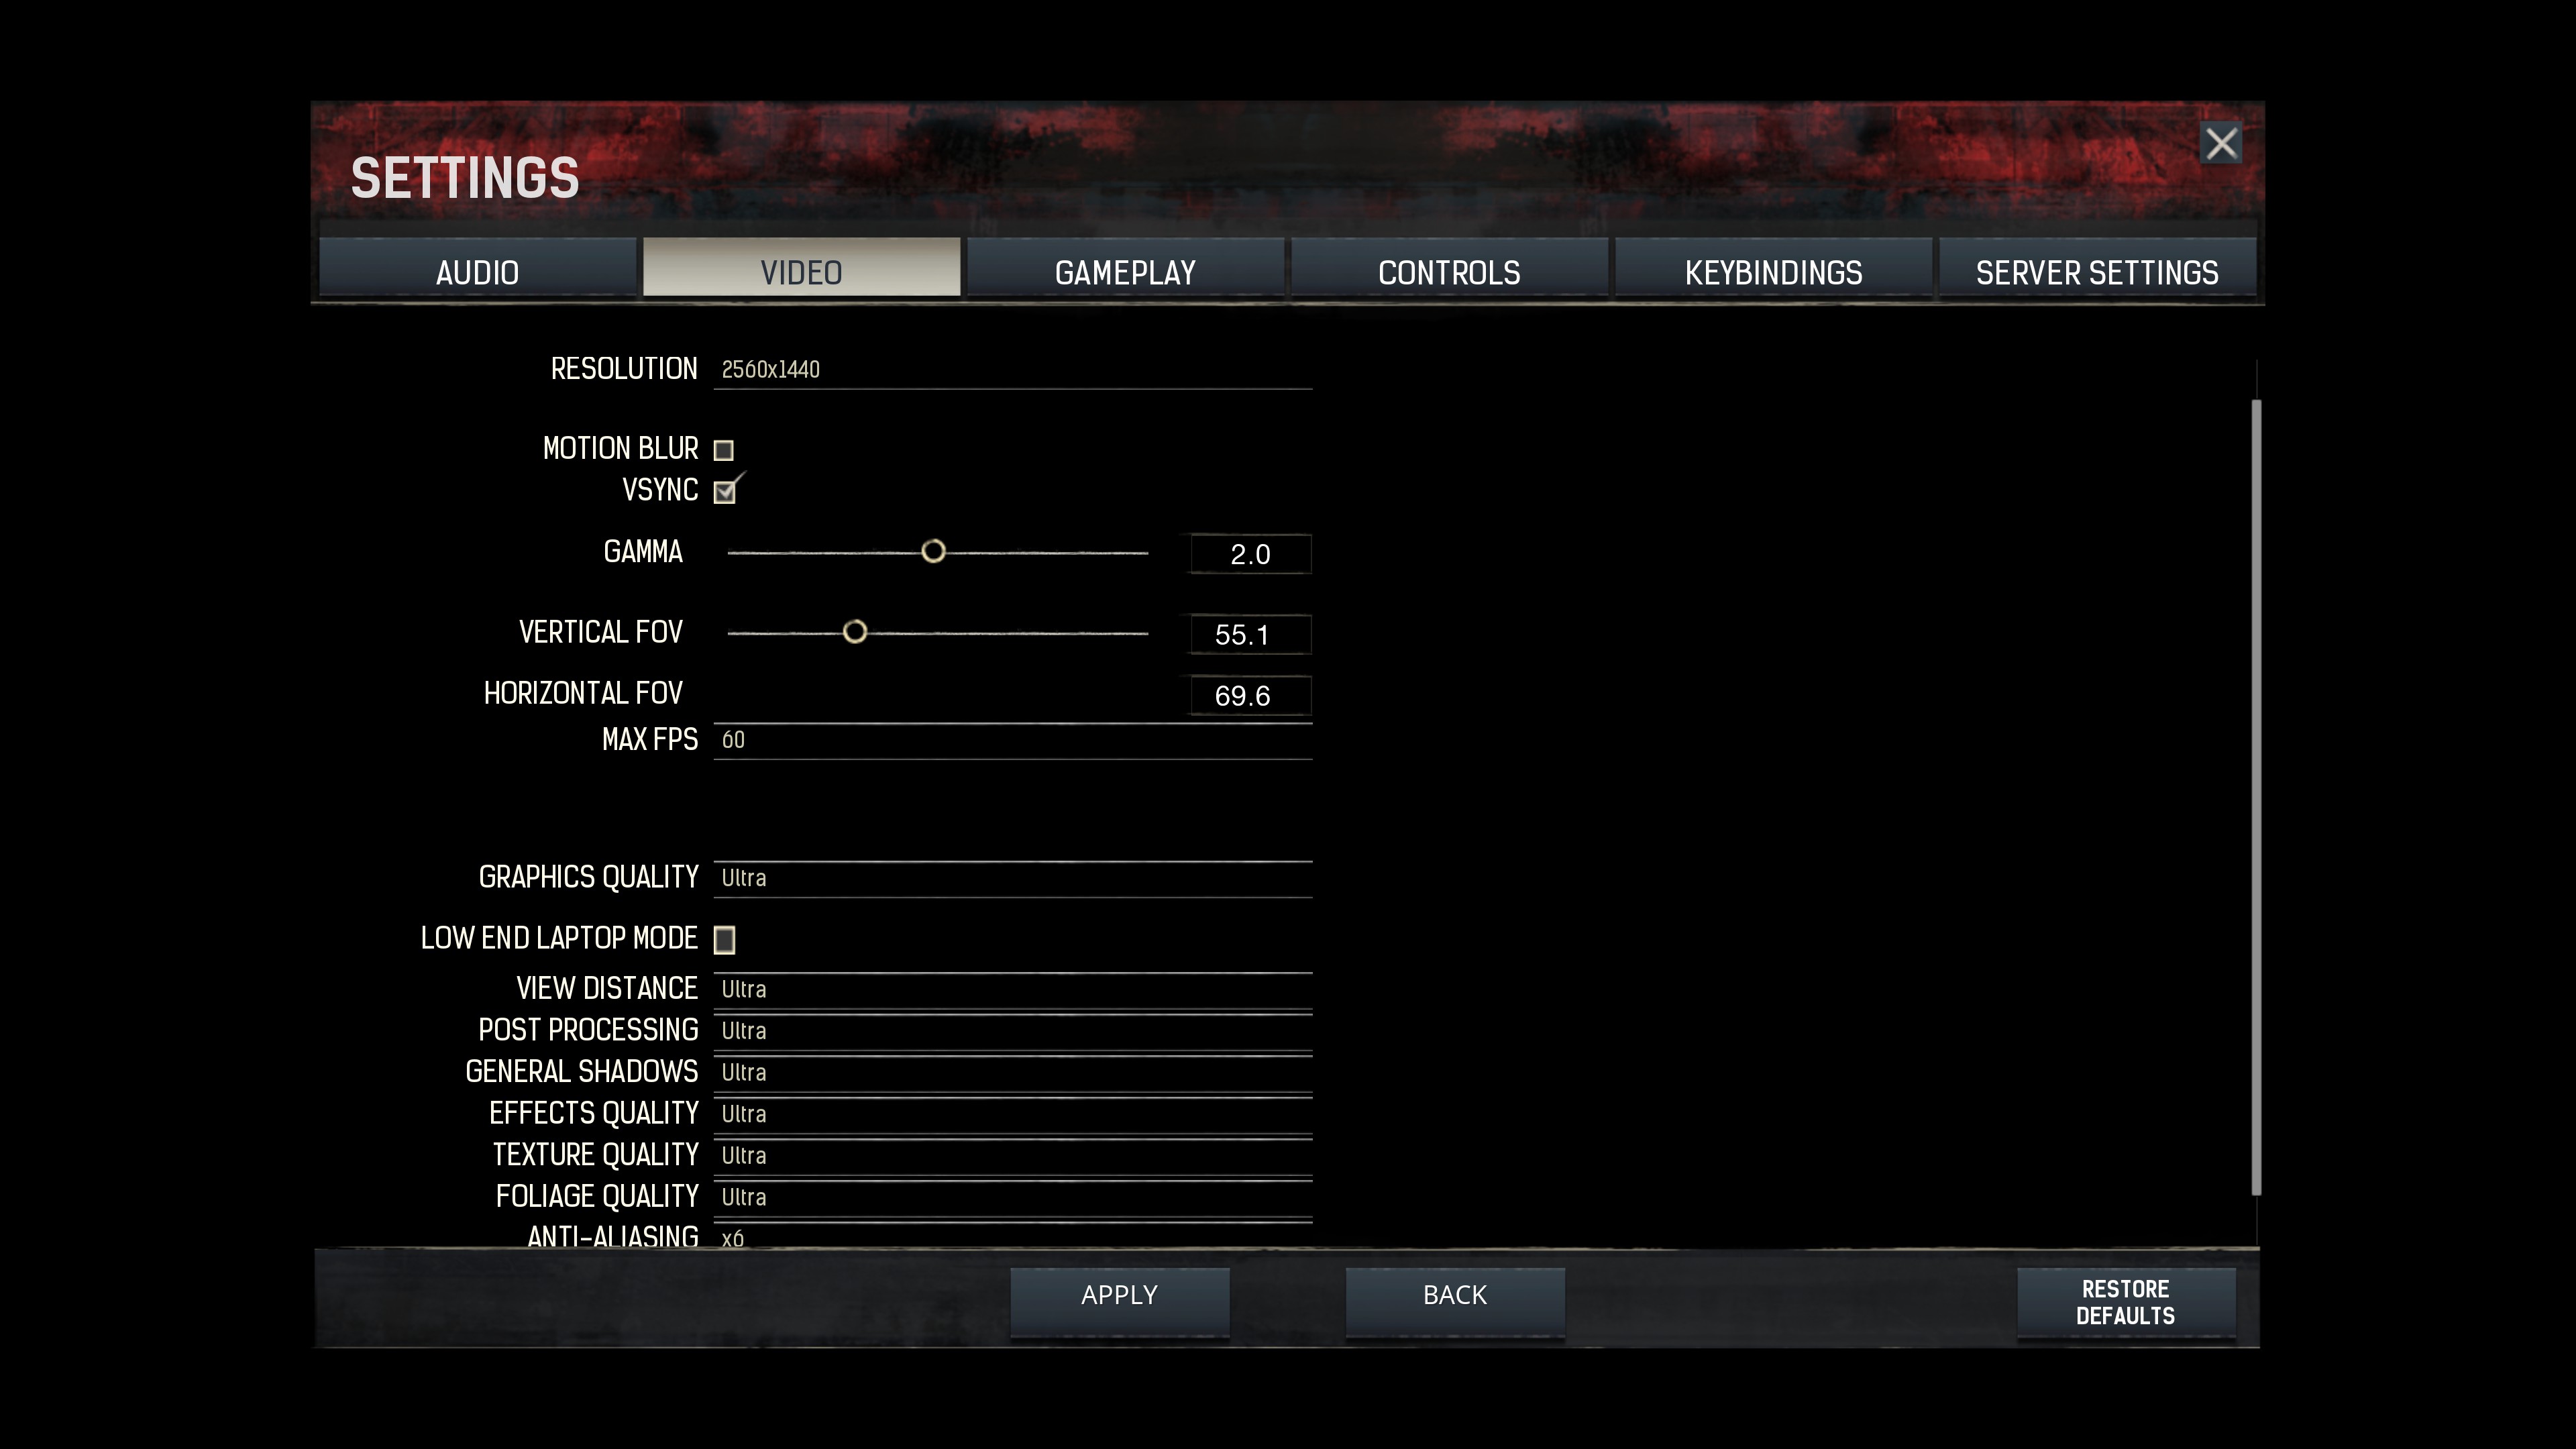
At 2560p resolution, I need to drop a few settings to maintain a playable frame rate. With the following settings, I can keep a steady 35 to 55, fluctuating depending on what’s going on around me. Shadows could be dropped lower, and view distance could likely be dropped, but there’s the occasional pop in already as it is, I don’t want to make it worse.

At 1080p resolution, I imagine it would run at ultra settings with absolutely zero issues.
My system’s main specs are:
MOBO: ASUS Z-97K
CPU: i7-4790 (not overclocked)
GPU: GTX 980 Ti 6GB (ASUS Strix)
MEM: 16GB DDR3 Kingston HyperX Fury 1866MHz CL10
Even with identical hardware, games can vary wildly in performance, so take this as an idea and not that having the same components will result in an identical experience.
Contact & Credits
Do you want to contribute to this guide? Hop into Discord and chat with me, or head to my website to get in touch. I don’t generally accept random friend requests on Steam, so these are your two best options. Thanks!
Join me in Coffee Chat on Discord: [link]
Follow my Steam curator for more goodness: Canuck Curator
Read more guides: My guides
Read my reviews: My reviews
Check me out on the web: [link]
Watch some videos on YouTube: https://youtube.com/canuckproductions
And, as always… thanks for reading!