Overview
This calculator will help you to figure how many vehicles you need for your fields for the maximum efficiency.
Intro
Ever been lost trying to figure the number of fields, tractors and harvesters for your farm?
This calculator will help you to figure the efficient ratios without doing a lot of math.
Note: If you wish to min-max your setups perfectly, please take a look at the Farms guide by kromgart for in-depth information.
This calculator is mostly for those who just alt+tabbed from the game to Google what they need for their farm setup.
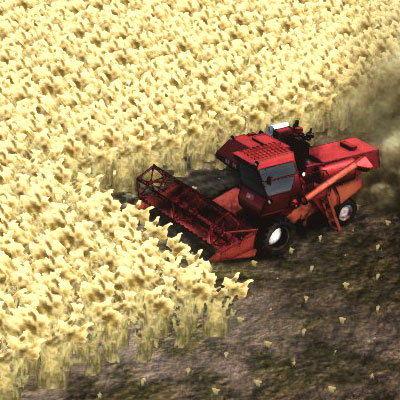
Calculation
Now that you’ve opened the sheet, let’s take a look at it:
Things you need to know about them:
- Bigger fields are most efficient, because your vehicles will spend more time working than traveling between fields.
- Once a vehicle with almost empty fuel tank entered a field, it will go the gas station only after the job is done, so bigger fields save you some fuel and travel time spent on refueling.
- Smaller fields are needed when you don’t have a lot of space, or there is not enough big fields to keep all sowers and harvesters occupied.
- All fields should be spread around your farm and the gas station for maximum efficiency.
Now put your field counts in the Count column.

If you are using modded fields, replace the values in the Area column. You can find the various field sizes in the reference columns to the right.
They are ordered from the worst to the best in terms of work speed. This is the most important attribute for you. Choose better ones, if you have access to them.

The calculator will ask you to put the numbers. Add your best sower and a couple of your best harvesters in the Count column for now.
Remove all auto-assigned fields from your farm.
Vehicles work on the fields in an order they are listed in the farm window. Imagine the most efficient path (the shortest path and with minimal distances between every field in the sequence) to cover all fields and assign all fields manually along this path.
Harvesters spend almost full fuel tank on a big field, so if it can drive to the next field in the sequence before reaching the refueling threshold, you may half the amount of fuel needed for the harvesters on the farm and even reduce the number of harvesters by 1.
Now roughly estimate the length of this path and put the number into the “Traveling distance per cycle (m)” box. Use this icon to get the general idea:


Now we need to tweak the counts of fields and vehicles to find the ratio.
Fields/sowers ratio and Fields/harvesters ratio tell how many fields you have per vehicle. Usually you need it to be 2-3 if you use big fields, and more if you use smaller ones. Keeping this ratio in green will make sure that you always have work for your vehicles. If the value is too high, you should consider adding more vehicles or replacing the fields with bigger ones.

Sowers and Harvesters total spare times say how much time your vehicles have for idling.
When they’re equal, this means that your sowers and harvesters need exactly the same time to cover all fields, and sowers will not wait when the fields will be harvested and vise versa.
When the value is positive, it means that vehicles will spend this time doing nothing.
When the value is negative, it means that fields will stay idle waiting for the vehicles.
Try to keep these numbers close to 0 to make sure that all vehicles and fields are working at full potential.
The calculation somewhat considers traveling and refueling time, but you may need to play with the numbers a bit if you want to find the best spot.
Expected crops yield (tons/day) says how much crops we will get when the system is warmed up and running. You will usually get 90-95% of that number when the ratios are right.
You can find more information about your setup in the Computed column. These values are used for the intermediate calculations.

Example
Let’s say that I need about 7 tons of crops per day to make food for my city. I know that 1 Ha yields 25 tons, so I need to harvest about 0.3 Ha per day for this.
I’ll get the cheapest sower for that, and a few harvesters to match his Ha/day work speed (shown in the Computed column).
Now I’ll get some fields (to have just more than 2 fields per harvester, because they harvest one field a bit faster than it grows), let’s say 8 big vanilla fields and connect them all with one road about 500m long with a farm in the middle (put that value to the Traveling distance per cycle).
But now I see that the spare times for all vehicles is negative, so there are too many fields, or to few vehicles.
I’ll try 7 big fields.
Now the spare times are in green and just over the 0.
This will make sure that every field is either growing or has a vehicle assigned to it at every moment.
And these settings promise me 7.9 tons per day at max, which is about 240 per month.
Let’s try this in the game. I’ll buy a couple of trucks to carry the harvest.

I’m getting around 225 which is about 7.5 tons per day.

Thank you!
Please let me know if you have any suggestions for the improvement or find an error in the formulas.
Happy farming!