Overview
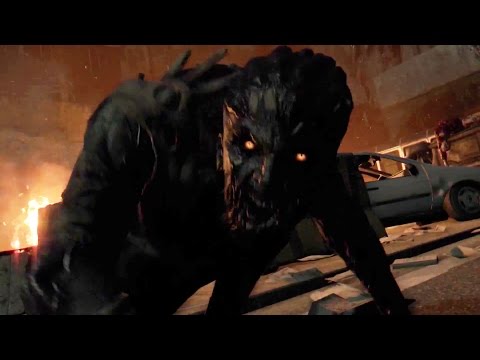
Sometimes, the survivor may find himself alone at night whilst being hunted by a tentacled humanoid monstrocity. This guide aims to provide the lone survivor with the necessary knowledge to combat this fiend of the night and triumphantly greet the dawn with fists full of mutated tissues.
Introduction
This game is still very young, so I don’t consider this guide to be complete, and I will try to update its contents if the game is patched in a noteworthy way.
What Not to Do
The people who believe the Hunter is too powerful to fight with anything less than a full team of four are people with no understanding of their enemy. They fail to realize that their enemy is of equal intelligence to them, and will not fight like the standard set of zombies.
The easiest way to avoid all of his altogether is to drop from the session. Assuming you weren’t already trying to quit, or you were trying to join someone else, I don’t understand why you’d do this. A Night Hunter invasion is an opportunity for intense PvP and materials to make the better-at-everything booster (which requires no skills, and the blueprint unlocks automatically). If you, possibly with your team, were already half-way through a usual co-op session, you should be ready for an invasion and seize the chance to loot Volatile nests for the materials to make that super-man juice. Additionally, the Hunter gets XP for winning the match if you drop out, so he’ll just re-appear later with new abilities, or harass other players with new abilities that you indirectly gave him.
The easiest way to be killed by a fast pounce is to turn your back to the Hunter. Breaking into a mad dash, whether you’re fleeing from him or rushing to the nests, will get you killed. Only do this if you’re sprinting toward the Hunter or if he’s too low on energy to be able to pounce on you. A capable player as the Hunter will always move in on the survivor who doesn’t pay enough attention to defend himself from a pounce.
While the Hunter does favor dashing about overtop of buildings, it’s not a good idea to take cover from him. His howling will expose your location, and he can easily grapple to an open door, window, or hole in the roof and ground-pound you into a corner before sticking a spit bomb to your face. If he summons the horde, you’ll be forced to run away, giving him a potential opening for a kill, and if he uses the UV Suppressor, you won’t be able to interrupt his pounce, giving him a free kill. Additionally, hiding in a safe-house for too long will force you to forfeit.
Staying Alive
The Night Hunter is a creature of the night: swift, cunning, and deadly, but cowardly, frail, and especially afraid of getting a tan.
Awareness is essential. A good Hunter will use every opportunity to pounce on you. He’ll watch your movements, your positions, and your flashlights, and it should come as no surprise when the survivor is strangled and shredded by the Hunter as soon as his flashlight goes out.
a. Priorities
There aren’t as many zombies of any variety when the Hunter is around, so he should always be the center of attention. The Hunter wants you to shift your priority to anything else in the environment, as that would give him an opportunity, so stay focused on him, and don’t afraid to be obvious about it. A good Hunter won’t attack if he doesn’t think it’s safe enough, so, if he’s not moving, and there are no zombies around, emphasize the message by standing still and staring at his position.
b. The Survivor Sense
Remember that loot-sensor ability you had in the story that you probably didn’t really use, since loot tends to be pretty obvious? That’s your second-best friend. Mash the [Q] key (or whatever command you’ve bound to it). If he’s close enough, it will highlight the Hunter on-screen in bright orange and show you his position on the mini-map.
Preparation is the key to victory, and although it’s usually a bad idea to rely heavily on a single skill, tactic, or tool, UV flares and the UV flashlight will save you, time and again, from the Night Hunter’s lethal pounce attack. He may have his UV Shield ability, but he can’t pounce without cancelling it.
a. The UV flashlight
This is your real best friend and the central item to overcome the Night Hunter. It shines further than the effective range of any of his attacks, and, if you can react quickly enough, it’s guaranteed to save you or a teammate from his pounce. Unless you need to immediately use different equipment, leave the UV flashlight in the active slot.
b. UV flares
If the UV flashlight isn’t in your active slot, you’re throwing UV flares. When nobody’s watching your back, these will keep you safe from a surprise pounce. Use these to light the Volatile nests before you start hacking away at them. They’ll keep the Hunter at a distance, as he can’t pounce through the UV light, limiting him to his spits. If you’re not worrying about the pounce, you’ll be able to spot and evade his spits and switch to your UV flashlight if he puts the flare out with UV Suppressor. Be wary of your stock, though, as it’s pretty easy to abuse your flares and run out when you need them. When you’re running about Harran normally, be sure to craft enough flares before you build any new weapon mods that need the same materials.
The best areas to move through, regardless of how much time it will cost you, are areas with little variation in altitude. Among other things, the Hunter relies on superior positioning. He needs to hide from the shine of your UV flashlight as he stalks you, and his best angle of attack is from directly above. You can cling to the rooftops so long as you stay on your feet, since the Hunter can easily pounce on you when you’re climbing, or pull you out of the air when you’re jumping. The safest path is through wide or completely open areas, such as low villages, main streets, plazas, or the freeway. The coastline is particularly good terrain, since the Hunter can only attack from one side, he can’t do anything to you while you’re swimming, and the angle of the cliffs can act as cover from his spits. This doesn’t apply to the canals of Old Town, however, as you need to climb the walls to get out of those, in which case, the Hunter has a free opening for a pounce.
While good Hunters will use varied tactics and abilities to keep you on your toes and exploit group panic, a little levelling will let you do the same to him. Camouflage is a second-tier skill in the Survivor tree that unlocks at level 9, with the pre-requisite skill of Crafting Expertise. In normal gameplay, this skill allows you to hide from zombies, amongst the zombies, as a zombie. It even works on Volatile’s, but doing pretty much anything to annoy them will immediately tip them off. Nothing throws the Night Hunter through a loop quite like a human who’s invisible to his Howl ability. The Hunter’s mini-map will show a static interrogative mark (“?”) at your last known location, and he’ll have to decide whether to track you down or camp on the targeted nest. If he spots you, he’ll see with a distinctive dark-red glow that won’t show through cover. Cramped streets and tight alleys can actually be a blessing with this ability, as they will give you cover from the Hunter’s gaze.
Active Tactics
It’s usually best to keep the Night Hunter away from you, but, if you can kill the creature, it will buy you a large amount of time to move through the environment and destroy its nests.
Dodge the spits. They’re the Hunter’s first line for offense, and they aren’t worth much if they miss, but things get complicated quickly if you’re hit.
a. UV Suppressor
The most a missed shot from UV Suppressor can do is block UV flares for a short time, but it won’t stop you from using your UV flashlight if you aren’t caught in the blast radius. If you are hit, quickly move out of the blast zone and throw a UV flare.
b. Horde Summoner
This ability is completely worthless if it misses, but it’s very dangerous if it connects. Avoid it like the plague. The Hunter normally uses this to break groups apart, since it forces them to move, or, similarly, as a diversion so that he can predict your movements and attack at the right instant. When summoned, the Horde zombies are likely to detonate prematurely, and you should be somewhat safe from them if you can quickly advance to higher ground. Quickness is emphatic if you happen to be hit by this spit, since the Horde spawn farely close and will kill you instantaneously. If you’re alone and you’re hit by this spit in tight quarters, you won’t have many options for escape, and the Hunter will likely wait for you to run from the Horde before pouncing on you, or tackling you (see next few sections), assuming that they haven’t already bursted in your face. If the Hunter exposes himself so that he can land a clear shot on you, your best bet is to pursue him, and if you can quickly kill him, you’ll be able to work around his diversion with ease.
It’s not likely that you’ll enter this scenario against an experienced Hunter, but it’s always good to come prepared. The Hunter is very weak, and will need to land about four or five regular strikes on you to kill you. Any Hunter who attempts this kind of attack deserves to have the spleen beaten out of him.
a. The Ground-pound
Ground-pounds are considerably more effective, and a desperate Hunter may anticipate your attacks, use the ground-pound in defense, and continue to use the attack repeatedly until you die, if he doesn’t use the opening to flee. This generally only works against solo survivors or small groups in very tight quarters. If the Hunter looks to have a ground-pound ready, quickly back away, shine the UV flashlight on him, and, if possible, shoot him with firearms until he runs away or dies. If he releases the ground-pound without hitting you, he’ll be vulnerable for a short period, so take this opportunity to cut, beat, slash, and bludgeon him to pieces.
N.B. Firearms are generally ill-advised against the Hunter. Considering how easy it would be, in thought, to kill the Hunter with guns, their damage against him is consequently very low. They are best used to kill a wounded Hunter attempting to flee or, as already described, against a Hunter with a ready ground-pound.
b. The Tackle
You probably won’t find as many Hunters with this ability, as it isn’t as immediately useful as some of the others, but those who can use it properly are to be feared. When on the same ground as a survivor, an experienced Hunter will likely use this ability following a Horde Summoner spit, as he’ll expect the survivor to immediately climb a building or flee, leaving his flank open for a tackle. This situation can induce panic very quickly, but if you can keep calm, the counter-attack for this ability is actually very simple. Jump over him. If his tackle launches and fails, he’ll hit the ground with a hard landing, leaving him open for a drop-attack, assuming your timing is late enough or you can get high enough. You’ll certainly feel like a bad-ass when you’re hit by a Horde Summoner spit, flee from the Hunter, predict his tackle by watching him on the mini-map, jump over it, and score a drop-attack from the same jump.
Making note of his far superior mobility, it’s not advisable to chase the Hunter when he isn’t immediately vulnerable. Even though he can cross the map in the time you can clear a block, he probably won’t run too far from you, and if he does, he’ll come right back.
a. Overview of tactics
If you’ve had a chance to shine the UV flashlight on the Hunter and deplete some of his energy, you can take a few risks climbing buildings and leaping gaps to keep the heat on him. When alone, this will give you a chance to claim higher ground and, thereby, protection from overhead attacks and opportunities to perform drop-attacks on the Hunter. When in a group, one survivor can harass the Hunter with his UV flashlight and, if available, thrown weapons or guns, while the other attacks Volatile nests. Act with caution, however, as the Hunter should be expected to use any of the aforementioned tactics in his defense.
a. Counter-intelligence, part 2
A whole new set of options becomes available when one or more survivors has unlocked the Camouflage skill. In a team, it’s surprisingly effective to split up, with one or more survivors breaking forward on an obvious path to the nests, while the other lays low with Camouflage in dense cover. The Hunter will likely intercept the first survivor(s), and if they can hold a stalemate for long enough, the second survivor can flank the Hunter, at which point the first survivor(s) should rush to lock the Hunter in a pincer. Depending on the circumstances, it may be best to just keep the Hunter distracted so that the Camouflage survivor can attack the nests. This is most effective with more survivors in the open and fewer with Camouflage, as the Hunter will be less keen to notice the one sneaking around him.
Closing Comments
I hope this guide gave the necessary knowledge to oppose this creature of the night, and the incentive not to fear-quit or rage-quit when fighting it alone. If my guide doesn’t seem thorough enough, give me your critique and any tested strategic notes, if you like. I’ll try to update this guide when new material is available.