
Overview
This Guide will contain a way to get all achievements in 1¼ runs. The Guide isn’t fully done yet. I’m on my 100% run right now and update it every now and then.
Some words first!
This Guide is a walkthrough for Final Fantasy VIII + all the Achievements. I gonna write down which junctions at what time would work well for you, where you have to play Triple Triad and against who for which card etc etc etc.
So you’ll get a lot of informations out of this Guide and so this Guide will take a lot of time until it’s finished. Also there will be a lot of text about the different parts of the game. I will not tell you stuff like “this boss is weak against this and that and bla” if it isn’t necessary to beat it fast.
This Guide will also aim for the Level 7 Achievement so if you want to get it you should try to follow it as straight as possible. If you don’t aim for this achievement you can use it as a Pathfinder showing you the way through it while you decide what you aim for and what you aren’t aiming for.
So first things first:
1. Your main Team
You’r Mainteam will be Squall, Irvine and Zell. They have the highest DMG potential. Both over time and fast pace.
Highstes DMG fast paced
Irvine
Squall
Zell
Irvine got his Pulse Ammo and after a specific point at Part 3 you’ll be able to gain a lot of it. Then he should be capable of dealing 6k-9999 DMG with every shot of his Limit. So he’ll deal like 24k-50k DMG in a few seconds.
Squall got the second spot because of the animation of his Limits. They are dealing a nice amount of DMG and will be the most used DMG Source through the Game.
Zell got the third place because he can deal the most DMG of all characters. If he got 180+ STR his Limit is unbeatable. If you’re fast with your fingers you’ll be able to deal 3 Blows before his Limit Timer decreases by 1 Second. So if you get 6 Seconds on your timer (highest I got was 12 seconds) you’ll be able to deal 18 hits.
If you do the math. Squalls Lionheart deals 17 hits + 4-7 Depends on the Enemy. Makes a total of 21-24 Hits. Zell can reach a total of way beyond 40 Hits.
So if you go for the “Highest DMG over Time” rankings just turn the list arounds.
Zell
Squall
Irvine
2. Level 7 Run? Are you ♥♥♥♥♥ kidding me?
No I’m not kidding. You can beat the whole game with Level 7. Ok yeah, you got to make some hard decisions first but you’re able to do so.
How you ask? Easy.
EXP in this game is relevant, same goes for the Level. The Level of your Team decides the Level of your Enemy. So if you’re on low level but got a high STR Junction you’ll deal like 3-6k DMG while your Enemys got just like 145-40k HP. Means Squall can rip appart EVERY ONE in this game.
Now comes the downside. You’re not allowed to KILL any Enemy besides bosses until you reach a specific point of Part 3. But that’s not that much of a problem. There are three ways to get around gaining any EXP.
1. Card Ability
2. Break Spell
3. Kill Squall
We will make use of all three because at a point in this run you MIGHT be confused or you MIGHT get beserk on squall and he’ll just start killing stuff.
So how this works is pretty easy. First I’ll explain how EXP works in this game.
Exp is given by the % of DMG you deal to the HP of a Monster and if you kill it or someone else does. Most important is the first thing!
So if a Monster got 100 HP and would give you 100 Exp and you hit it for 20 DMG before you run away you’ll be granted 20 EXP to all the charakters of your party.
Card stops this. If you transform a Monster into a Card it gives 0 EXP no matter how close to death it is. But if you kill it while you’re taking it to low HP… You’ll get EXP and maybe to much.
Break instead just stops the Enemy. If it got DMG before you’ll still get EXP but if you use Break on every Enemy it’ll just end the fight with you just gaining AP and Items. Same thing would happen with all Monsters transformed into Cards.
The last option would be killing Squall before you end the fight. That is just an option if Squall just needs a few more Exp until he’d reach Level 8. For my first Level 7 run it was 2 Exp left until he reaches Level 8 since the Dollet Mission… It was ANNOYING! Trust me you don’t want that to happen. Specially because some Boss Monsters will return as normal Monster while you’re unable to Card them but they WILL give Exp then. There are also fights against normal Monsters where you can’t transform them into Cards like against Galbadian Soldiers or Esther Soldiers. In those moments you’ll use Break.
So here are the main Rules for the Run:
1. If you meet an “Ex”-Boss try to Card it right away. Not working? Try to use Break on it! Immune? Draw anything you want, kill Squall and kill the Monster.
2. If you meet any Human Enemy try to use Break on it! Working on a few but not on all? Kill Squall and take down the Enemys.
3. You don’t have either Card or Break? You’re not done with Dollet yet right? Squall should still have enough time before hitting Level 7 but still… KILL HIM! You need those “few” Exp for later…
4. The first spot to really get Break from? So at the end of part 1 you’ll fight 2 Iguion. At their Low Level (1-10) you’re able to draw Break from them. So what you’re basicly going to do is:
Getting Irvine and Squall ready with both reaching 2,5k HP+ by HP-J Curaga to them. Then you’ll draw Carbuncle from the first one, kill it and start to draw 100 Break for Irvine and Squall from the second one.
With 200 Break you should have no problems reaching Part 4 of the Game.
3. What are the most needed Abilities for this run?
So actually there are just a few REALLY good Abilities for this run.
1. Enc-Half
2. Enc-None
3. Card
4. … Oh that was it already…
You might ask now if I’m for real but yeah I am.
You’ll aim the Card Command just to get done with all the fights until you get Enc-Half and Enc-None. Then you start to avoid every random Fight by using Enc-None. If you have to fight you’ll either be in a Boss-Fight (NO EXP no matter what), you can Card the Enemy you NEED to fight (No Exp either), you can use Break on the Enemy you NEED to fight (No Exp either), or you have to kill Squall.
Killing Squall will become necessary at around End Part 2 ~ Start Part 3.
4. I have to play Triple Triad right? <.<
Yes you have to. Don’t be a chicken! Joking…
Triple Triad is just hard in the first like 10-50 rounds if you don’t know the rules. There are acutally just 3 Rules which can break your neck.
1. Random
2. Same/Plus
3. Open (if it’s not there)
Random makes the Game choose what you’ll use as a Deck. most the time it’ll either use a whole Set of Crapcards, or a whole Set of Crapcards + 1 Limited Card. So when ever you have to play against someone with the Random Rule… Save!
Same Plus is actually a really nice Rule for yourself but might catch you offguard sometimes. Happened to me a lot of times. I thought like yeah cool gonna win this and just didin’t watch his last card and dam dam… He turned around like 3-4 Cards at once. You want to know how Same and Plus work? It’s easy.
Same
We’ll use ABC for the vertical line and 123 for the horizontal line.
Like:
A1|A2|A3
B1|B2|B3
C1|C2|C3
There are Cards on A2 and B1 so you can use a card at the middle of the field (B2) to turn them around. But you got nothing to beat them. What you can do now is take a look if you have a Card which got the same notes that they got. Like
_4_
1_3
_1_ < on A2
_6_
2_1
_1_ < on B1
Now you see that the Card on A2 is pointing with a 1 to the B2 and same goes for the Card at B1.
If you got a Card now like
_1_
1_3
_4_
You’ll match both cards. Makes you turning them around.
Now comes the neckbreaking part. If those cards are strong enough to turn around another card beside them they’ll go ahead an do it!
Now to the Plus Rule!
Plus is the same as same. Just that you have to do some math. This time it doesn’t need to be the SAME amound of Points to turn them around. This time you need to get the sum to match.
So if A2 points down with a 4 and B1 points right with a 7 you need to have the exact opposite on your Card.
A2 =4 Points downward
B1 =7 Points towards right
B2 = 4 Points towards left and 7 upward.
This will make you match both Cards in the sum
4+7 = 11 on both sides.
Again if those Cards are turned they’re able to turn around other cards.
I hope I was able to explain the Same and Plus Rule properly.
Fire, Ice and Thunder!
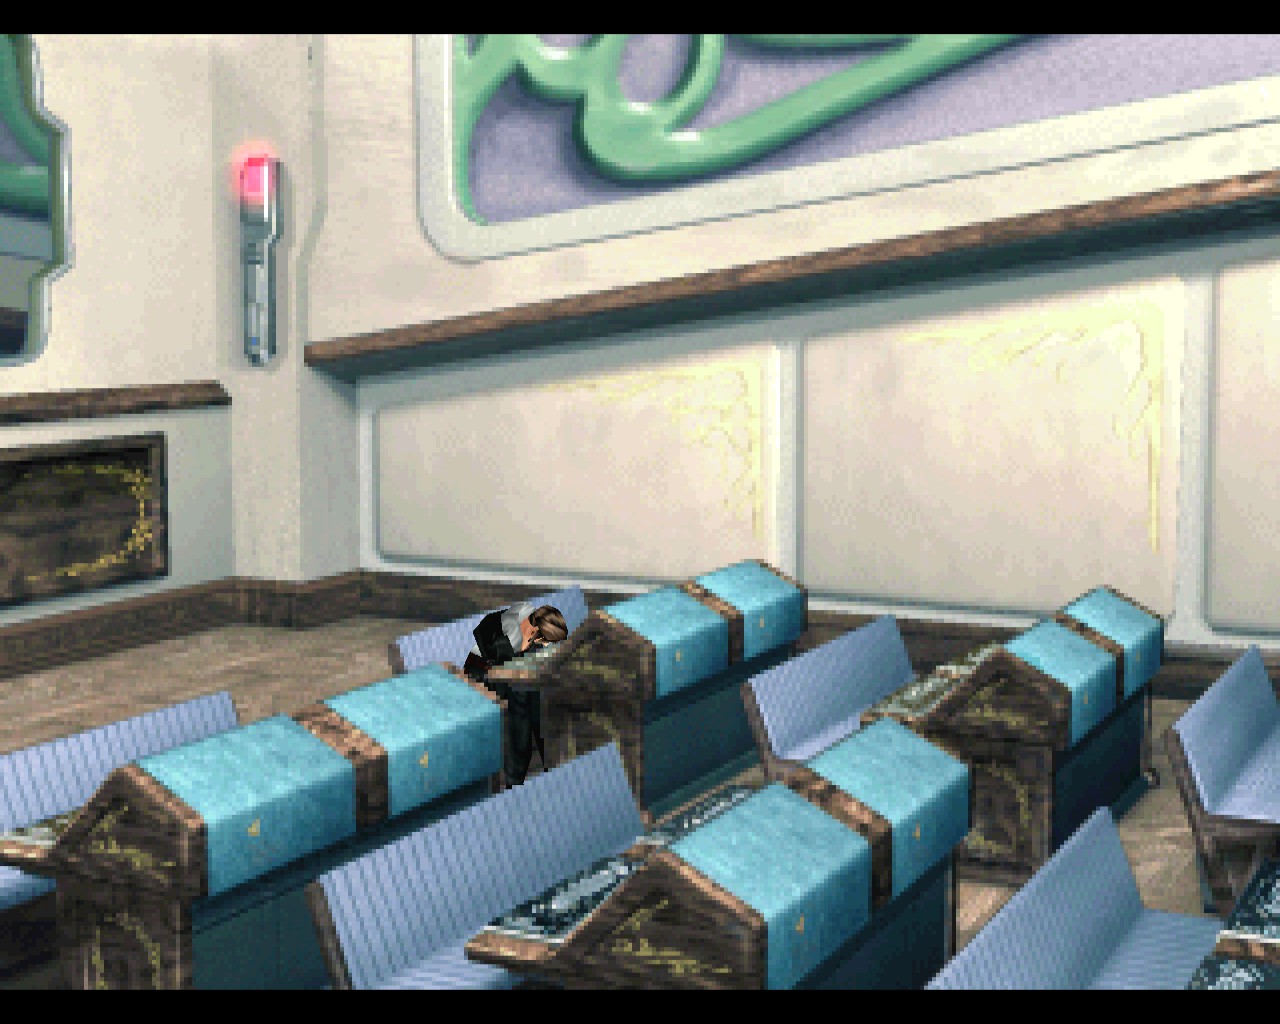
After Quistis took you to the classroom and a short dialog you’ll get control over Squall again. But instead of going to Quistis you’ll go to your computer and select the tutorial.
This will give you your first two G.F. Quezacotl and Shiva. After that you can leave the computer and go to Quistis. She’ll tell you to leave the garden to start your test. After you leave the classroom you’ll run into a girl.

She’ll ask you if you could show her the garden because she’s new. If you say yes it’ll just waste a lot of time so go with a no and leave her.

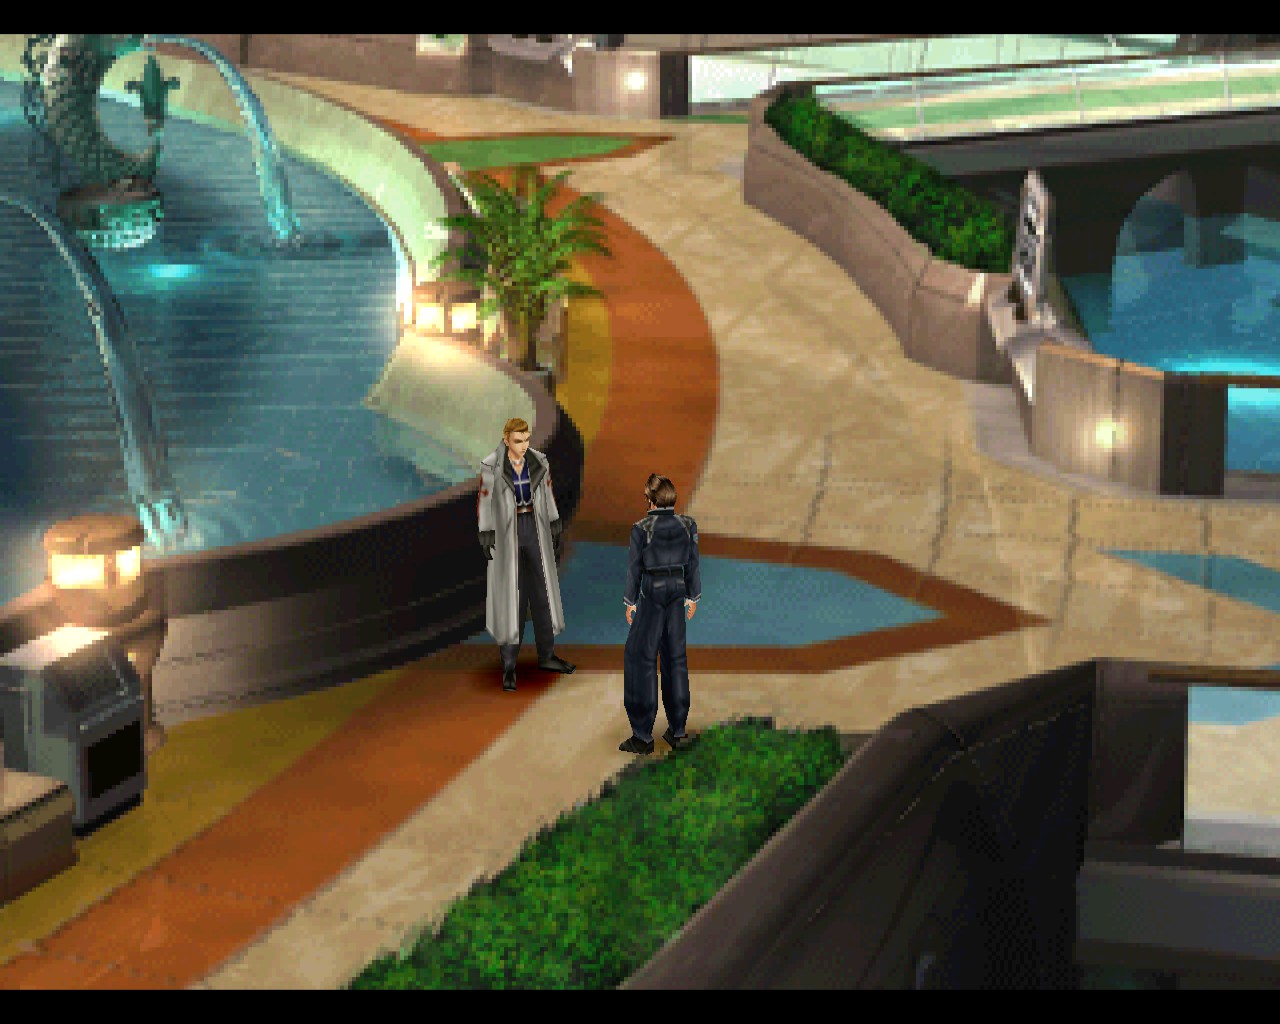
Leave the screen and talk to the guy on the bridge. He’ll give you your first 7 Triple Triad Cards. You need those to start playing Triple Triad.

Now you’ll take the elevator and move to the big board downstairs. It’s a map of the garden and you can use it to move around the garden.

Go to the library and search at the bookshelf for the Occult Fan I.
After you took the Occult Fan I leave the garden. Quistis will talk to you about junctions. Now you should go for it and stick your G.F. to your characters. At this moment it doesn’t matter who get’s which G.F. but I’d go for it like this:
Reason why is that you’ll fight Ifrit soon and Shiva deals more DMG to Ifrit then Quezacotl besides Squall should use his limit against Ifrit. Now set the abilities to:
Last but not least you should set up the abilities your G.F. should learn. That would be Card for Quezacotl and I Mag-RF for Shiva. You ask why Card? It’s easy. There are two reasons why. First you can use the Card Ability to transform a monster into a Card if it’s low on HP. The formula is something like:
Chance = [ (1 + Enemy’s Max HP – Enemy’s HP) / Enemy’s Max HP ] * 100%
So the less HP the enemy got the higher the chance to transform it into a card. Now you’ll ask me why you should transform it into a card, right? If you transform a monster into a card you’ll not get EXP but AP, Items and Cards. You are not allowed to gain a single Level Up with Squall so you’ll aim for more power without gaining EXP. This is the key! Besides the nice fact of gaining AP, Items and Card without gaining EXP, you also unlock the ability Card Mod which can transform Cards into Items. You won’t transform Cards you only got once because we want the Achievement for getting all Cards, but still you can transform all the other cards. But always have an eye on how many cards you need to transform them into Item X. Sometimes you need 2-6 or even more Cards for a specific Item.
Enough explanations for now go ahead and leave the garden. Now head to the east towards a cave and go inside. Quistis will again start a tutorial. Skip it and go ahead. Now you’ll run into two people from the garden. They’ll talk to you about the test and ask you how much time you want for the test. No matter how much time you take the rating for your test is always the same! So no matter if you take 10, 20, 30 or 40 Minutes as long as you take down Ifrit with less than 15 minutes on the timer you’ll get more and more points. The Pointshard would be as following:

Again enough explanations let’s go inside the cave and just flee from every fight. You might ask why again. You don’t have the Card Ability yet. So you can’t transform monsters into cards and that means taking them down would gain you EXP which you don’t want to get! So just flee from every fight and run through the cave. Just follow the way until you run into Ifrit. Now start to hit Squall with Quistis and himself until his HP is yellow. Now call Shiva with Quistis and start Squalls Limit every time you can choose a move with him.

Try to always hit the Right ShoulderButton (Gamepad) or G (Keyboard) when Squall hit’s a target/ the light of his limit bar hit’s the small box (flashing on the screenshot) at the end of the bar. This will make him deal way more DMG than usual! After you called Shiva 2x and used Squalls limit 2-3x Ifrit should give up and join your team.
Now leave the Cave and go back to the garden. Quistis will leave your party and tell you to go to your room getting your uniform for the SeeD-Test!

Your room can be found pretty easy by using the Board with the Garden-Map.
SeeD-Exam! Dollet’s so scary…
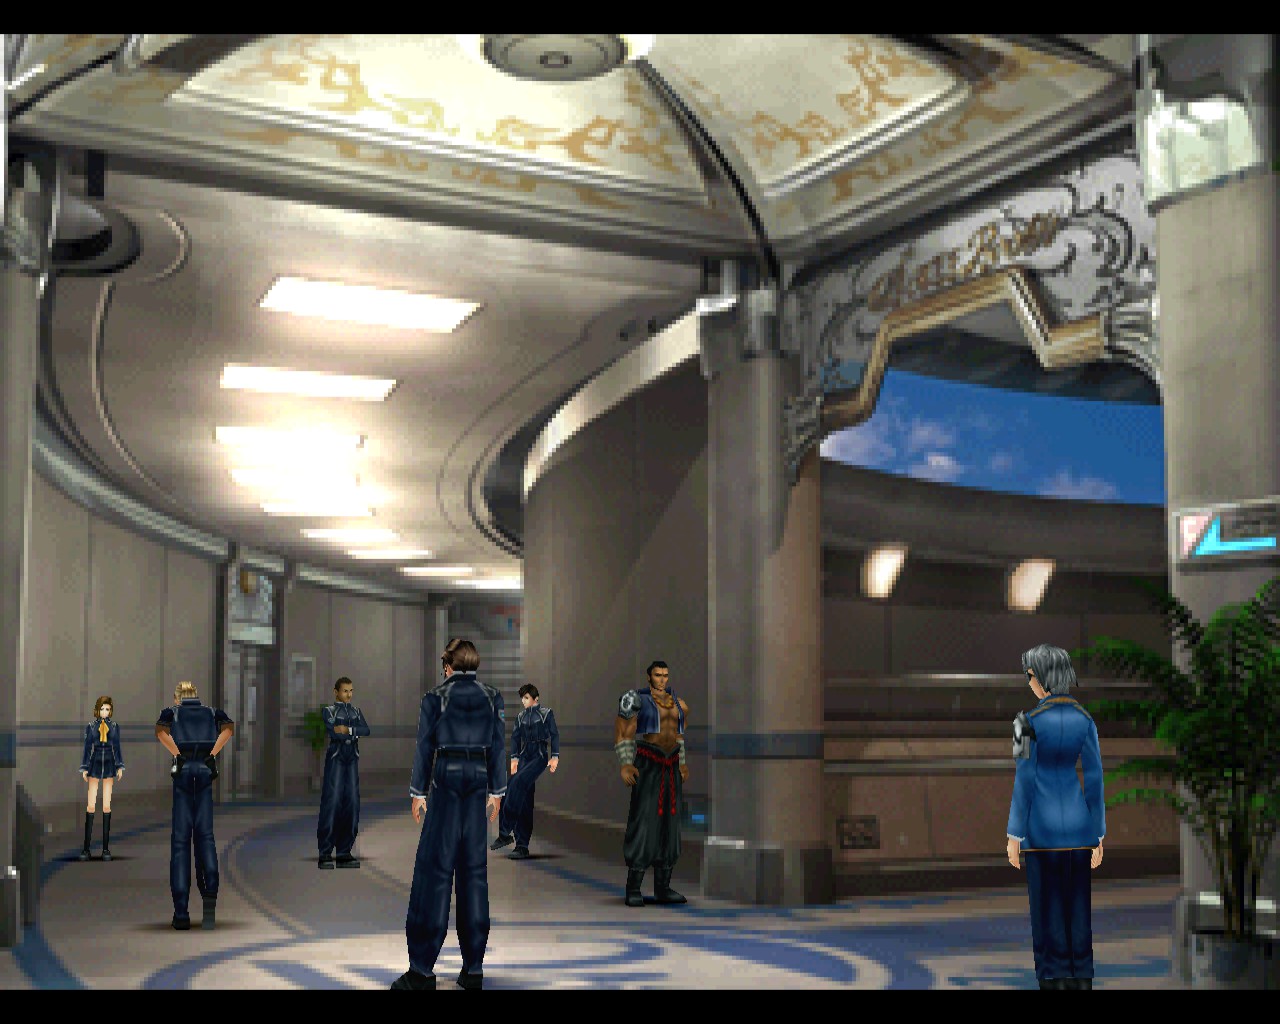
So after you changed your clothers and left your room you’ll go back to the hallway. There you’ll be intruduced to your team and your teamleader. A new face meets the party. It’s Zell Dincht a guy with less in his head but more in his fists. His limit takes a lot of time but can deal the most DMG without giving the enemy a chance to do anything. Your teamleader will be your rival Seifer. After that you’ll get a few words of Cid the Director of the Garden. After his very interesting words you’ll head to a car and take a drive to Balamb.
Now you have to drive the car. Just drive straight to Balamb. Arrived in Balamb you have no Time to waste and take your way to the boat. Inside the boat you’ll have a few minutes of dialogs until Seifer will tell you to go outside and check the situation. After you agreed his order you can relax and watch a short Cutscene.
After this Cutscene your Mission begins!

Run towards the savepoint and set your party up. The next few fights will give Exp so this is the first time that you’ll kill Squall. But you still want his GF to gain AP. So what you’re basicly doing is:
You’ll give Shive and Ifrit to Zell and Quezacotl to Seifer. This way you’ll be able to train all three of them together.
Also you’ll set up Ifrits learning Ability to HP-J
Ability Junction on the Characters are as following:
Even so you gave both of them the Draw Ability, you don’t need to use it yet. Later in this mission we’ll start drawing Magic, but not yet.
Now move towards Seifer and start your first fight. Kill Squall right away and afterwards take out those Soldiers. After this fight you just need to follow Seifer. He’ll lead you towards a few fights. After the third fight Seifer will tell you to scout the area for Enemies.

Just go ahead. Move a bit to the left and you’ll see some cars. Behind those cars are your last Enemies for the moment.
Go back to Seifer, talk to him. After a few seconds something will happen…. After Seifer is finished with talking the camera will change position. Now you’ll have to talk to Seifer and Zell. A few seconds after that some Galbadian-Soldiers will sneak through the place. They’ll head towards the Dollet Tower. Seifer will change your Goal for the Mission. You’ll follow those Soldiers!
While you’re running over the bridge you’ll engage some fights. No need to run away. Squall is dead so you can fight the Enemies you encounter. Just don’t forget to change the Abilities your GFs should learn if they finish one. For me Shiva finished I Mag-RF so I change the Ability she should learn to STR-J.

After you reached the end of the bridge you’ll move towards some stairs. As soon as you reach half of the way upstairs a small szene will start leading you into a fight. Prepare yourself. The Enemy isn’t that hard but might get you on low HP. So if something bad happens try to heal yourself with Seifer while Zell is using that Snake as a punshing ball.
If Shiva didn’t finish her I Mag-RF until this fight then she finished it right now! So if this is what happened for you it’s time to change her learning Ability to STR-J.
Follow Seifer upstairs and keep going. You’ll end up in another dialog again. You’ll be watching some Galbadian-Soldiers and Seifer just can’t stand still. He needs to rush towards them. This is the time. He leaves your party and suddenly… The girl appeares that bumped into you next to your classroom.

She’s looking for Seifer and will join your Party. Follow her down the cliff and talk to her. Now she’s in your party and you need to work on your Junctions again.
You’ll set your Junctions up as following:
Squall is revived so heal him with 2 Potions and run into the Tower. On the way you have to flee from every fight again because we don’t want EXP on Squall. While you reach the Door some Guards are going to run out of it. Seifer was going on a rampage inside there. Move into the Tower head towards the Savepoint, Save and take the Elevator.
Prepare yourself. The next Boss-Fight is coming and your first missable G.F. Siren. You’re able to get her once again at the end of the Game but we want her right away!
At the Top of the Tower you’ll meet Biggs and Wedge two Galbadian Soldiers. They’ll have a Dialog and as soon as you reach the Top a Cutscene will start. After that Cutscene they’ll recognize you and tries to run away. Seifer will stop him and the fight begins.
Your first Enemy is Biggs, after a few hits Wedge will join the fight. You just need to give them a few more hits and then the real Boss will appear. The first thing you’ll do is drawing Siren!
After that try to keep your HP over ~160 because he got an AoE that deals a really nice amount of DMG. While you do so try to take him down with Squall and Zell. If your HP reaches the yellow mark or comes near it try to kick off some Limits to speed up the fight but don’t forget to heal yourself afterwards. Don’t take the risk of dieing to often if you’re not that good at RPGs.
After the fight another Dialog will start, you’ll take the elevator to leave the Tower and in a short szene Biggs will activate your next Enemy!
30 Minutes. The Deathrace…
You got 30 Minutes from now on until you reach the beach. We’ll take it the easy way because on this Level and with our Spells it’s close to impossible in the time we got for it.
But first things first. Rush towards the Savepoint and set up your Junctions. Quezacotl should have learned Card now so set his learning Ability up to HP-J and afterwards set the Ability for Siren towards L Mag-RF.
Junctions should be as following!
Now heal your party (Keep Squall on low HP ~130 for his Limit Break to speed up the fights), save your game, take a deep breath and let’s get going. From now on if you leave the game running for a moment without doing anything pause the Game directly. If you don’t do it the Countdown will keep running!
So leave the tower, a gigantic Mechanic-Crab will jump down to you. This is your next Boss! For the fights there is just one Rule! Knock it down until it starts to regenerate itself and then RUN AWAY!
After you knocked it down the first time run towards the rightside of the screen. After you reached the next screen the Boss will start chasing you. Just keep running until you reach the next screen. Now try to move towards the leftside of the screen without running into any obstacles. In the next screen try to walk instead of running. If you run a small earthquake will stop you and the boss will engage a fight with you. After this fight rush towards the bridge. Now comes the last needed fight. Run straight over the bridge. The Boss will jump over you and rush towards you then. Knock it down, run away and now just keep running. In the next Screen mash your dialog Button and run towards the dog. This way you save it for a later Sidequest (not needed for an Achievement but still). Keep running towards the beach and when you finally reach it take your seat and enjoy the Cutscene.
Time to become a SeeD.
After that nice Cutscene you’ll be back in Balamb. After a short Dialog you get control over your party again and you’ll move down. Suprise suprise… Seifer takes the care and leaves you behind. Time for you to walk back to the garden. But that’s not a problem. You’ll just flee from every fight or walk on the street to avoid random encounters.

After you reached the garden Selphie and Zell will leave the party for a while. Take your way to the hallway. You’ll meet Director Cid and Quistis there. After a short dialog you can leave the screen and move towards the right side of the hallway.
Seifer is waiting there. Talk to him and a long dialog will start.

Now leave the Screen to the left again and move towards the staris. A Dialog will pop up and tell you to move towards your classroom.
There you have just to wait for a few seconds up to a minute or so and you’ll be summond to the Director.
After your audience at Director Cid you’re on the way back to your classroom. There are some people also Seifer and who would have imentioned that Seifer would give you a round of applause for becoming a SeeD!
Next Step is your Seed-Score. You’ll get a list of scores deciding which SeeD-Level you shall have. That doesn’t matter much yet and we won’t do the SeeD-Tests at the Tutorial Menu yet. We’ll save them for the End-Game.
After your scoring you’ll be at your room. Selphie will tell you to change into your SeeD Uniform and to move to the party. Change your clothers, talk to her and the Party will start.
Here you have just a bunch of dialogs and Selphie will ask you if you help her with the Garden Festival. You can either say yes or no. I don’t think it changes anything besides the dialogs.

After Selphie asked you about the Festival you’ll meet a Girl. She’ll talk to you and at the end she just takes you to the dancefloor. You can’t even dance but how ever… wait…. a Cutscene starts wohoooo….
Oh yeah… you can’t dance…. but…. What’s that all of a sudden? Now you can do it? Holy….
The Girl will leave you on the dancefloor because she saw someone. In the next moment you’re getting some fresh air and Quistis walks towards you. After a few seconds of a dialog she’ll tell you to meet her at the Training Grounds but first you need to change into your private dress.
The “Date” Mission
After you changed your clothers head to the Training Grounds. Quistis will give you another tutorial there. As soon as you’re through the tutorial it’s time to set up your Junctions.


Usually people teach Shiva Boost first for exactly the moment that’s right infront of you but you actually don’t really need it. Again we’ll run from every fight specially if you encounter a T-Rex. For now we’ll go into the Training Grounds. Just run the left way and follow the Map until you reach a Save-Point. There you can go upwards to leave the screen to the Secret Place.
As soon as the Dialog is finished you should save the game. When you try to leave the Training Grounds you’ll encounter the next Boss. The fight is actually very easy. If Squall isn’t wounded yet get him to Yellow HP, use your Renzoukuken on Granaldo and use Shiva with Quistis to kill its Adds and itself. There is nothing you need to draw yet. Just keep calm. You’ll get your first spells soon.
Leave the Training Grounds after you’ve beaten Granaldo. Quistis will leave your party and you have to go back to your room. Zell is waiting for you and tells you that you have got a new room. Take a nap and at the next day your Life as a SeeD will start for real.
Diabolos and the Cards

After you wake up go to the Table in your room. You’ll see a magazine on it. Take it and then leave your room.
There for we’ll go back into the Garden and take the Save-Point near the Board at the Hallway. Reason for this is that we have to get 3 Cards inside of the Garden before we leave.
So set up your Junctions like this:
The fight isn’t easy but also it isn’t that hard. Diablos uses the Spell Demi very often. It’s a spell that deals DMG based on your current HP. So don’t panic if he uses it. The real thing you need to panic about are his meele attacks. He deals pretty nice DMG so try to heal yourself with Selphie while Squall and Zell try to get their Limitbreaks off as often as they can. No matter what happens. No matter how often you die. Get him down now! You need his Card and his Abilities.
Before you start the fight it would be smart to go into your menu and to set your Battlespeed to low. That makes it a lot easier to act before Diablos starts to finish you off.
Diabolos got 2 Spells you can use. Cure and Demi. Use Selphie to cast Cure if it’s needed and if not try to get her to cast Demi. Spells you use while you’re drawing them can fail. The possibility to fail is higher the stronger the Spell is. That means Demi might fail very often. But if you’re able to cast it 2-3 times it’s a decent amount of DMG. As soon as Diablos gets down to low HP he’ll cast an upgraded Version of Demi. It’ll take you down to yellow HP no matter what you do. So try to heal yourself fast after Diablos used it. If you don’t do it he can one shot every of your party members. Last but not least you should try to survive with every of your party member. You need every bit of AP you can get.
After the Fight you’ll get a few Items and 20 AP. Also you’ll get the Card of Diablos. You’ll need this Card to increase your Triple Triad success chances.
Abilities that should have been learned after this fight:
Also you should set up your Junctions again.

Now it’s time to save again. After you did this try to find a Boy at the hallway near the Board with the Garden-Map. He is running across the screen. He got the MiniMog Card. If he isn’t there yet just leave the screen and go back. He’ll be there for sure.
Good Cards for the start are Ifrit, Diablos, Funguar, Red Bat and Gayla. Try to win with these. Try to get stronger Cards and also new Cards with every Game you play.
New Cards = Blue Name
Cards you had but lost = Yellow Name
Cards you have = White Name

As soon as you won the card go to the Save-Point and save your game. Afterwards go to the Board and into the Cafeteria and leave the screen to the right. A lot of Garden Member are there. Go to the table at the right side and ask them for a Cardgame. You can decide which one you want to duel. Take the guy in the back.
He got the Quistis Card and a lot other nice cards. Try to collect some while you try to get the Quistis Card.
After you got the Quistis Card head back to the Save-Point at the Hallway. Save your Game and go to the Elevator. Go to Director Cid on 3F. He got the Seifer Card so go and get it!

You got the Seifer Card? Ok then like before go back to the Safe-Point and after you saved your Game you take your way to Balamb. There yo go to the mother of Zell. She got his Card so take it away from her. She won’t play cards with you until you leave the room first. Go back to her and ask her now. Now she’ll play with you.

You got the Zell Card? Ok then let’s head to the Balamb Motel. It’s near the port. Just go upstairs and you’ll find a Timber Maniacs on the table next to the Save-Point. (I did read it already at the screenshot that’s why you can’t see it but you see where I stand and it would be right infront of me.)
Now it’s time for you to start your first Mission.
Don’t forget the tents for your journey.
The next stop is next to the Station of Balamb. Go to the Balamb Shop and buy 5 Tents. You should have 8k Gil yet. So it’s fine.
You need those Tents for Curaga the highest Version of the Cure Spell. It’s used to push your HP on Squall up to over 2k. That’s not just good if it comes to survivability. It’s also good because you can manipulate your HP now right before every Boss fight. Means if you are close to a Boss you just take Curaga off of your HP-J, accept the reduced HP after the Game asks you if it’s ok and then place Curaga on HP-J again. This’ll either get you directly to yellow HP or close to it.
Next go to the Station Staff upstairs and pay 3k Gil for the train ticket and then take the train. I don’t think I need to Guide you for the next few Minutes. You’ll have some Dialogs and you’ll receive the Pet Pals Vol.1. A bit later you’ll pass out and get control over 3 Galbadian-Soldiers.
Just run through the Forest with them and even if Squall isn’t in your party flee from every fight. The Character named Laguna takes Squalls spot. Laguna and Squall have the exact same Exp+Level. So if Squall has a Level Up Laguna is getting one too. Same goes for every bit of EXP they get.

The Characters Kiros and Ward are replacements for your Partymembers. This time they are Selphie and Zell. Later they’ll be Selphie and Quistis and so on. They change every time.
After you get to a car activate it and you get out of the Forest. You’ll find yourself in Deling City. Go to the motel. You’ll find it if you leave this screen and the next one to the right side. Talk to the Woman standing near the Stage. Take your seat at the bar and you’ll get some Dialogs again.

After a few minutes and after Laguna failed to talk to Julia she’ll ask him if he wants to meet her at her room. Go to the Guy upstairs and tell him that you want to go to Julia. You’ll have a long conversation until Kiros and Ward are calling you…
Squall, Zell and Selphie will wake up now and their dialog leads them to the point that they figure out… All of them had the exact same dream… Weird…
I like trains! (& Cards of Dogs)

After you arrived in Timber you gonna try to walk down the stairs but a weird guy starts talking to you. Answere him with But the Owls are still around and there you are. He is one of the group that you are working for now. Follow him and he’ll lead you to another train. Your next mission will sorta start right inside this train and you’ll run into someone you met on the SeeD-Party.
After the first dialogs with Zone and Watts go upstairs, to the Save-Point to save your game and then back to Watts. Play Cards with him until you gain the Angelo Card. From now on your Card-Game will be bit more difficult then before. Now you can get new rules like the Same Rule you’ll get while playing with Watts. I explained the improtant Rules at the start of the Guide.
Like allways after you get a Rare-Card. Go and safe your game. You don’t want to lose one or anything like that. Then keep following the train and leave the screen upwards. Go into the room and there she is. The girl from the Party. After the Dialog go back to Zell and Selphie. Now is the moment that you finally get to know your Mission. So again… a hella load of Dialogs…
After the Dialogs go to the Save-Point, save your game and afterwards talk to Watts. Talk to him and the Mission will start. Do the things Rinoa told you and everything will be fine but…

Before you go to President Deling go back to Rinoas Room. On her couch will be a Magazine. It’s the Pet Pals Vol.2. (I was a bit fast with the Button mashing so I accidently closed the dialogbox showing the “Obtained Pet Pals Vol.2”. But it would be right infront of me.)
You’ll have to set up your Junctions again so go for the following Setup:
As soon as you go to President Deling you’ll realize that it isn’t himself. You was traped. Give him some hits with Squalls Limit and he’ll show himself in his real appearance. If you want you can use an Elixir on him after he transformed. He’s undead so he’d be dead in one shot or you can save your Elixir and just beat him up with Squall.
Timber. Galbadia Soldiers and the Maniacs.
After you have beaten up the Boss you’ll end up in a bunch of Dialogs again. Talk to Rinoa and the Dialogs will keep going.
At the end of the Dialogs you need to Setup your Team again. This time Rinoa will be in the Party so get Zell into the Party too and do a Junction Exchange between Rinoa and Selphie. The Junction Exchange is pretty nice because it doesn’t just exchange Junctions. It also exchanges all the Spells the Characters got. This way you just need to get Spells for 3 Characters and you also just need to set up your G.F. for 3 Characters. You can always exchange your Junctions between every character.
Before you keep going for now you should check the Abilities of your G.F.s. Normaly Quezacotl should have learned HP-J now. So teach him Vit-J next.
Go to the Save-Point in the train, save your game and then go to Watts. Talk to him and you’ll get out of the train. On your way to the TV Station you’ll encounter Galbadian Soldiers. Flee from every random fight.

After you left the train leave the screen to the right. Not to the bottom! On the next screen you’ll have the Timber Maniacs right infront of you. Go inside the building and chack the second stack of magazines from the right side to find a Girl Next Door Magazine. Don’t ever sell it. If you do so you’ll never get the Shiva Card!!!

Next go into the last room which you’re looking at if you enter the building. You’ll find a Timber Maniacs Magazine there.
Now leave the building and leave the screen towards the right side. Then take the stairs at the upper side of the screen to get down to a bar. 2 Galbadian Soldiers will attack you right away. This is the first time Squall will gain Exp. After the fight Squall should still be above ~300 Exp until he’d hit the next Level. (for me it’s 327) You’ll get a Buel Card. Now go into the bar. A drunken Guy jerking around because he isn’t satisfied with his life. Go talk to him and give him his Card. He’ll tell you that you can keep it + he’ll give you a Tonberry Card. Besides those two Cards you can pass him now and finally you’ll reach the TV Station.
Let’s go to Galbadia Garden!
After you’re done inside the TV-Station just leave and go back to the bar. On the way there will be a few Dialogs. Leave the bar and go towards the Timber Maniacs building. Next to it on the righthand side is another building. When you arrive at the screen you’ll see Rinoa running inside the house so follow her.
Upstairs talk to Quistis twice. After the dialogs go downstairs and try to leave the house. Quistis will start talking to you again and you’ll decide to go to the Galbadia Garden. Next you’ll need to setup your team. Because you’ll take a “nap” soon again you’ll set your Team up for exactly this situation. Just do a Junction Exchange twice.
1. Quistis and Zell
2. Selphie and Rinoa
This way you should end up with the following Junctions. Check them and then go on.
Leave the house and move to the right. Zone will give you some train tickets. You’ll take them and leave the screen to the right again. Go over the small bridge and then downward to the next screen to find the train.
Inside of the train some dialogs are waiting for you again. Talk to Rinoa and you can choose between 2 options. I don’t know if it does matter which one you take but just choose the first one. Afterwards leave the leave the screen towards the top and go back to Zell directly. Talk to him and choose the first Option. The screen will fade to black and the story goes on.
After you reached the East Academy Station leave the train and run towards the forest but don’t enter it yet! Open up your menu right infront of it and take Squalls G.F. away from him. Put them towards Quistis or Selphie. It doesn’t matter. Reason for this is that you’ll have to kill him again as soon as you pass out again.
Inside the Dream World you’ll encounter many fights you can’t flee from and you don’t want that much EXP. Still if you got some random encounters you have to flee from them. You could use them to train your G.F. but you might end up on an higher Level and this would make your Enemies harder too.
As soon as you get Control over Laguna just follow the way. After a few steps some Esthar Soldiers will start a fight with you. Take down Laguna and defeat your Enemies afterwards.
After you’re done with fighting you can go on walking. Take the way to the right and at the end of the way you have to climb down the ladder. Then follow the way until you can decide to keep following the way or to turn right to the upper side of the screen. You’ll turn right. On the next screen you can decide again and you’ll turn right again. Now follow the way until you reach a Save-Point. Save and leave the screen to the upper side.
You’ll end up in a bunch of fights. After those fights you’ll have a few Dialogs and after those Squall, Selphie and Quistis will wake up again.
It should be time to change the learning Abilities of your G.F.s again so set them up like this:
Also you should exchange your Junctions + you should equip the Ability Enc-Half with Zell. So go for a Junction Exchange between Quistis and Zell, then take Ifrit and Siren from Zell and stick them to Squall. Also stick Curaga to HP-J for Squall. It should be as shown here:
Now go to the Galbadia Garden!
Galbadia Garden… Mission… Cards…? We’ll do both.

At the Garden just go towards the Hallway first. Then go to the Save-Point at the Hallway and move towards the middle of it. There is a bright light. In the middle of that light is a Draw-Point for the Spell Haste. Draw it with Squall.
For now leave the Hallway to the top-left side, follow the way until you see some stairs to the right side. Go upstairs and go into the room at the bottom of the Screen.

After a lot of dialogs (again) leave the Room and go back to the Hallway. Rai-Jin and Fu-Jin will run towards you. Again you get a Dialog and after it you’re ordered to go to the Garden Entrance but first you Save your Game and leave the Hallway to the right side. Go into the room at the right side. There should be a girl with two guys. Play Cards with the girl until you have all Level 6 Cards.

After you’ve done it go to the Hallway, save your game, go to the Garden Entrance. Talk to Quistis while leaving the Hallway and talk to Rinoa at the Garden Entrance to activate the next scene.
Now you have your main Team completed. Irvine, Squall and Zell the powerhorses of Final Fantasy VIII.
Deling City. The City that never sleeps.
First talk to Irvine, then to Rinoa. While the Dialog is running Irvine will come up with his very own Teamcomp but we’ll go for our own. Place Irvine and Zell in your Party and do a Junction Exchange between Irvine and Selphie. After that do a Junction Exchange between Zell and Irvine. Your Party+Junctions should look like this:
Now leave the Garden and move west (If you don’t have the minimap up you can open it up by pressing J) to the Station and take the train to Deling City. After you entered the train try to leave it again and Selphie, Rinoa and Quistis will enter the train too. Irvine will follow Selphie and so do you. After you interupted his flirt he’ll go back to Rinoa and Quistis. As before you’ll follow him and after some Dialogs you’ll finally arive in Deling City.
Move towards the bottom of the screen and take the escalator down to leave the Station. Then take the escalator upwards to enter Deling City. Talk to Irvine and move straight forwards then. Now leave the screen to the left side, the next screen you leave to the bottom-left side and then you follow the way straight out of the city.
Tomb of the Unknown King. Bro getcha Draws up!
Our next Goal are some ancient ruins. They are to the north-east from Deling City so go straight to them.
As soon as you enter the Area two girls will run out of the Tomb shouting “F-Float”. It’s a spell but that doesn’t matter. We’ll follow the way and go to the Save-Point. Next we’ll enter the Tomb and from now on the camera will always be at the same spot. No matter if you leave a screen to the left or the right. It’ll always be at the spot from which you enter the screen. You’ll get what I mean as soon as you enter the Tomb. Because of this navigation inside of the Tomb might be sorta difficult so I hope for yourself that you do EXACTLY what I tell you now!
I’ll write down the Way just by telling you
Right
Left
Up
Down
and if there is anything you should do in this room. So here we go.
This room just got one way. So just move straight UP.
This room got a sword on the ground. Take a look at it and write down the Student ID No. written down on it. This number is random generated so write it down and never look at this sword again! Now move RIGHT.
This room got just one way. UP.
This room you’ll go RIGHT.
This room got just one way. UP.
This room you’ll go RIGHT.
This room got just one way. UP.
Now you should be in this room:

If you’re not in this room then you did something wrong!
Now comes the first time that you’ll take a lot of time to draw Spells from an Enemy. Best would be if you’d go into your Menu -> Config -> Cursor -> Memory. This will speed things up because you can just hold down X or the Button on the Gamepad until you need to heal yourself.
So now go towards the Statue and talk to it. It isn’t a Statue…
This whole act can take up to an hour. So prepare yourself.
First cast Protect (2nd Spell) on all three of your Partymember through Draw. Then draw Protect until all three of your Partymember can’t draw it anymore. While you’re doing this keep track on your Protect-Status. As soon as it isn’t active anymore you have to recast it.
After you’re done with drawing Protect start to draw Berserk (3rd Spell).
After this one you start drawing Life which is the 4th Spell.
After you’re done you’ll use Squalls Limitbreak to take the Boss down.
After this fight Shiva should have finished learning Vit-J so select Elem-Atk-J next. Also now it’s time to set up your Junctions a little bit.
Now we’ll keept going through the Tomb. So leave the Room.
This room you’ll go UP.
This room you’ll go RIGHT.
This room you’ll go UP.
This room you’ll go UP.
This room you’ll go UP.
This room you’ll go UP.
This room you’ll go UP.
This room you’ll go RIGHT.
This room you’ll go UP.
You should end up in this room:
Take the cog wheel out of the wall to reactive the other cog wheels. No leave the Room.
This room you’ll go UP.
This room you’ll go LEFT.
This room you’ll go UP.
This room you’ll go LEFT.
This room you’ll go UP.
You should end up in this room:

Activate the chain from my position on the screenshot and leave the room afterwards.
This room you’ll go UP.
This room you’ll go RIGHT.
This room you’ll go UP.
This room you’ll go UP.
This room you’ll go UP.
This room you’ll go UP.
This room you’ll go UP.
This room you’ll go LEFT.
This room you’ll go UP.
You should end up in this room:

Now just go ahead towards the next Boss fight.
First cast Protect on yourself again by drawing it from Sacred (the big one). Then give all you’ve got to take him out. After Sacred is down, take his big brother down. While you do this have always an eye on your Protect-Status.
After the fight you’ll gain 40 AP, the Minotaur Card, the Sacred Card and some of your G.F. should have finished some Abilities.
Also it’s you need to stick the G.F. Brothers to someone and this someone is Zell. So your Junctions should look like this now:
Now it’s time to leave this Tomb. Just leave the room and go UP all the time until you are out of the Tomb.
And the Mission goes on.
After you left the Tomb go straight to the Save-Point and save your game. Next go back to Deling City.

Once back to Deling City we’ll first go to the hotel. There for we leave the first screen to the top-right side, on the 2nd screen to the right side, same goes for the 3rd screen. Now we leave the screen to the top and go right into the hotel. You’ll take a room and find a Timber Maniacs under a bed.
Now we leave the hotel and go back to the 2nd screen but this time we leave this screen to the top-left side. Now you should be at this screen:

Talk to the Galbadian Soldier and select Ready to answere. Now you have to tell him the Number from the Sword you found. You’ll from right to left so units, tens, hundreds. If the answere was right (and it should be…) the Guard will let you pass. Run to the Save-Point and then go into the Building. Your Party will be in the Room of General Caraway. Go and talk to Rinoa to lead the game into the next scene. She’ll leave the room and a few seconds later the General will enter. A long Dialog and a lot of walking is waiting for you. So lean back, drink something, read the dialogs (or not) and follow the General through Deling City while he explains the Plan. If you know the game already you might try to move into the next screen before General Caraway does. This makes him pop up in the next screen if he wasn’t to far away from the exit of the screen before. This can save some time.
After the explanation of the Plan go back to the House of the General. You’ll get into his room again and he’ll explain some more. Also you are going to decide (automaticly) who is going to lead the second Squad.
Squall, Irvine and General Caraway are leaving the room now. You get control over Quistis and start to follow them but the moment you want to leave the room you’ll be stoped by Rinoa. A short but not that nice dialog between the Party and Rinoa will start and you’ll continue your way to your position – the Gate. As soon as Quistis, Zell and Selphie left the room you’re getting control over Squall again. Again you are going to follow General Caraway.
As soon as General Caraway is going back to his resident Quistis starts to think about how she was talking to Rinoa. She wants to tell her that she’s sorry about it and you get control of her again. So you’ll go back to the resident too. After your Party enters the room they’ll be locked inside.
After a moment of dialogs you’ll get control over Rinoa. You’re ment to climb the boxes up to reach the witch but you’ll go into the sewers first to get the last magazine of Part 1. There for we save at the savepoint first because it would be a waste of time to junction your GF to Rinoa for such a small way and we don’t want to replay all the stuff we did after the last save. Then move to the hole to the right. A Dialog will pop up. Choose Maybe I should check? and move down.


Press Down to climb down the ladder. If you encounter any Enemy just run away. Now move to the left. Take the Weapons Monthly, May Issue and leave the Sewers again. Now climb up the boxes and go to the witch.
Edea will cast a spell on Rinoa and she’ll follow her towards the desk. The Witch starts to talk to the people. She’s just insulting everyone but all are happy. Deling wants to stop her but she just pierces his chest with her bare hands. Afterwards she uses another spell and puts some life into two statues. Those statues are Iguions and our way to get the Break Spell early.
The first fight with the Witch!
You’ll get controll over Quistis again. Now it’s time to find a way out of it. Go to the window and jump… Nah I’m just jking. Near the door are some glasses. Take one and move upwards. There is a statue. Put the glass into it’s hands and a secret pass will be opened.


Follow the Secret Pass into the Sewers. Run to the Savepoint in the next screen and save your game. No need to change anything on your Junctions yet. Now go down to the ladder and climb it down.
Go on to the small “bridge” besides the waterwheel and turn towards the waterwheel. Try to activate it to make your party use it to reach the upper level of the sewers. Now follow the way and the ceremony will start. Also you’ll gain back controll over Squall.
Move to the right for the current and the next screen. Then move to the left (camera just turned. It’s still the same direction) and move towards the building. You’ll reach a point you should remember. Run to the Savepoint and set your junctions up for the next fight. That for we need to get Irvines HP to 2k+ too because the Iguions can hurt a lot. We remove Quezacotl and Brothers from Zell and stick them tu Irvine. This way he get’s a HP-J. Now we stick Life to HP-J and he’ll be at around 1.8k HP. If we now also stick the Ability HP+20% to him he’ll be at around 2.2k HP.
In the end the Setup should be:
Now save the Game and climb the boxes up. Go into the room where Rinoa tried to use the necklace on the Witch. The Iguions will stand there right infront of Rinoa. As soon as the fight starts Draw the G.F. Carbuncle from one of them and take out one of them. You don’t want to fight both while you’re going to draw Break from them.
Their Spells are very nice set up for our tactic. They got:
1. Cure
2. Esuna (cures break from us if they use it)
3. Break
Break is one of those spells that like to fail while you draw them. So this might take a long time again. Like when we were drawing Life before. So prepare yourself. Try to atleast get 100 Breaks. 200 Breaks would be WAY better because Break CAN fail if the Enemy got resistance against it. I’ll go with 100 Breaks on Irvine and something around 15 on Squall cause my Squall is trolling me.
After you got 100-200 Breaks take down the second Iguions and go a screen back. Open the “door” on the right and go downward.
Then go to the gun take it and you’ll find yourself in a dialog once again. After the dialog you’ll get controll over Quistis again. It’s time to exchange some Junctions and set Zell’s junctions back up.
First of all we’ll set up Carbuncles next Ability to learn to ST-Def-J. Then we remove Quezacotl and Brothers from Irvine and stick them back to Zell. Also we’ll stick Carbuncle to Zell. You might ask why. Carbuncle got Abilityx3 (needed by Squall and Zell) but it also got ST-Def-J and Squall got one already. So this G.F. goes to Zell.
In the end the Setup for Zell should be:
After that we gonna exchange the Junctions of Quistis and Irvine. Reason for that is the Enc-Half. We don’t want to waste our time with the enemies in the sewers.
Now we move on. We’ll follow the way upward through the door, move over the small bridge and through the next door and follow the way to the left. We gonna skip the ladder and keep following the path. Going upstairs, opening the doors and keep following the path. Like before open doors, follow the path, open the next door and follow the path to the right. You’ll reach a room with waterwheels again. Take the left waterwheel to reach the upper level, then go to the right and take the waterwheel to go down again. Now follow the path to the bottom way of the screen and follow it. You’ll reach the next room with waterwheels and again you’ll take the right one to reach to lower level. Leave the screen to the bottom again and repeat what you did before. Right side waterwheel to reach the lower level and leaving the screen to the bottom side (third time now).You’ll reach the very first room. Activate the ladder but don’t pass it. Leave the screen to the right and take the first waterwheel to reach the upper level again. Follow the path to the upperside of the screen and you’ll reach a ladder and a Savepoint. Save the game and climb up the ladder. After you reached the upper room, go to the ladder again and choose Go Up to reach the very top of the building. Go to the window and a scene will start. After the short scene run to the panel and get the gate down to trap Edea.
Now it’s the time. Irvine needs to shoot her… But she’ll block the bullet. Now it’s time for Squall to rush inside and take her down! But as Squall mentioned earlier he needs to fight Cifer first. But before we go for it we’ll set up our junctions. We’ll just exchange the Junctions between:
Zell -> Rinoa
Quistis -> Irvine
Now we’ll start the fight! Just strike Cifer with Squall. He’ll not be able to deal with you no matter what. After that fight the real fight starts. Like we did with Cifer, we’ll do the same with Edea. Edea got some nice spells but we’ll just take her down. If one of your teammates dies just draw Life from Edea and cast it.
Congratulation you reached Part 2 of Final Fantasy VIII!
Part 2: Laguna on the hunt!
You’ll get control over Laguna and start with a dialog. Next thing you might want to do is save the game again. Sure it’s just a short dialog but still. Afterwards we’ll go downstairs and talk to Ellone. Then we’ll leave the house and run to the next building to the left. At the moment we try to enter it we’ll tell Ellone to come over. As soon as she is inside we’ll go inside, too.
We’ll find us in a dialog again but we’ll also find an old friend of Laguna. It’s Kiros. After the dialog we go to him and gonna start the next dialog. While the dialog is running you’ll be able to choose between some options of questions. If you want you can ask him everything or just skip through it, select the last option and move on. When you (finally?) decided to move on we’ll go on the hunt with Laguna and Kiros. Actually we should check for monsters and deal with them but… We’ll just stick .Diablos. to Laguna, sticking the ability .Enc-None. to him and that way we’ll not even see a single monster. No Table this time because the junction is more or less not needed at all besides the Diablos Enc-None. Also we’ll give Diablos a new ability to learn. It’s HP-J.
Now we’ll leave the house and move downwards to the bridge the leave the screen. On the next two screens we’ll just do the same. We’ll be leaving them through the bottom of the screen. On the next and last screen we’ll run to the bottom of the screen and a dialog will pop up telling us that the patrol is done. We’ll go back to the house again.
Finally arrived at the house we’ll go upstairs to report to Raine what happened on our patrol but we’ll run into some Girl-Talk. We’ll hide and listen for a while. After a short moment we’ll show ourselves and go talk to Raine. Next thing we’ll do is go into our room to save the game and then to take a nap.
Prison Break Part 1!
We’ll get control over Zell and be in a prison cell with Selphie, Rinoa and Quistis. It seems like Zell was Ward while he was in the Dreamworld and as it seems Ward was cleaning up this prison. If that comes handy I don’t know what would come handy. I don’t know in which order you have to talk to the girls but just talk to all of them twice and the story will go on.
After the dialog we’ll finally see that Squall is still alive and we’ll end up in a scene with him on the screen. But just a few seconds later we’ll be back to Zell and the Girls again. Some Galbadians are coming over to take Rinoa with them but before that they’ll beat up Zell who isn’t able to go against them because he doesn’t want to make them shoot the girls. Actually he is the only one of the four that got some weapons right in place. Sometimes it comes handy to be a Martial Arts Fighter.
The Galbadians will leave with Rinoa and in the same second Seifer will enter Squalls prison cell. He didn’t come to have a nice chitchat with him. All he wants is informations and if Squall won’t cooperate with him he’ll go with force!
Back at Zell’s place he’ll be healed by Selphie atleast she’s trying. Seems like there’s somewhat of a anti-magic field around the prison cells.

It’s time to do something against that situation don’t you think so too? Yes? Fine, Zell thinks so too. So when the Galbadian is coming in to kick the Moomba you’ll decide to stop him!
After that we’ll see Squall again. Seifer is still not satisfied. An Galbadian will come up and talk to Seifer about some Missiles afterwards Seifer will tell Squall that they are going to destroy Balamb and that their goal is to hunt down the SeeDs. Afterwards he’ll leave the “room” and the Warden will take over Seifer’s job and won’t be nicer to Squall. Squall will come up with two possible answeres for him. It doesn’t matter which one you take, you’ll be punished for it.
As soon as that scene ends you’ll be back in the prison cell of Zell and the Girls. Talk to Quistis and you’ll come up with a plan. So as soon as the Guard comes in his time is already over… It’s a little smack and he sinks to the floor like a stone in a lake.
We’ll make a Junction Exchange between Squall and Zell and afterwards we’ll stick ALL G.F. to Zell. He’s the only one we got for now (for one fight) and we want all G.F. to gain AP.

Next step is to move down to Floor 6 to save the game.
After that we’ll go back up to Floor 7 and then to Floor 8. And what do we see there, our weapons in the hands of some Galbadian-Soldiers. Time to get them back! As soon as we’re done with that we’ll see some Moomba unchaining Squall. In the next scene Zell will be back in the prison cell to return the Weapons to Quistis and Selphie. Time to wreck some… ah nah, we got Enc-None. So it’s just time to run through the prison.
So it’s time for some Junctions! First we’ll remove all G.F. but Ifrit and Siren from Zell to return Squalls Setup. Then we gonna Junction Exchange between Zell and Quistis and then we exchange between Zell and Rinoa because she still got Zell’s Spells. Now we stick Quezacotl, Brothers and Carbuncle to Zell. Then we’ll stick Diablos and Shiva to Selphie. In the end all Junctions should look like this:
After we’re done with it we’ll encounter Biggs and Wedge again and this time they a very nice spell we want to draw from them. It’s Haste! This might take some minutes but shouldn’t take too long because we gonna use it on us while we are drawing it. Haste makes us much faster so this whole drawing part get’s sped up a lot. Just cast Protect on everyone and cast Haste on everyone. Biggs got it on the 2nd Draw slot.
After you got your 300 Hastes finish them up. At the end of the fight Brothers should have learned STR-J so it’s time to change the learning ability for them again. Now we’ll set them up with HP+40%.
Also we can finally junction an Spell to STR for Zell. It’ll be Berserk! So his Junction should look like this now:
As soon as you leave the prison cell the alarm will start. We’ll go down to Floor 6 first and then we’ll save the game and try to reach the top of the prison. So we’ll go back to Floor 7 and keep going upstairs.
Prison Break Part 2!
After we leave Floor 12 we’ll finally reach the top. Leave the screen to the bottom and then move to the right side of the screen to find Squall. We’ll also get control over Squall again so we’ll leave the screen to the bottom now again. After a short dialog we’ll go into the “crane” and activate it to reach the bottom of the prison.

Now we go to the right and open the Door. Problem is it’ll fill the room with Sand. Means we can’t exit through that way.
Suddenly we’re hearing gunfire. It’s Time to move back to Zell who is actually already running from the Galbadians. Try to avoid as many fights as possible (I got into one fight). Sure you might gain some AP but you’ll also gain EXP. Even so it’s just Zell you don’t want to level up to much. Try to run clockwise. Suddenly a Dialog pops up and a Guardian will try to shoot Zell but Squall will save him. Selphie and Quistis will run towards the two and talk to Squall about doing everything by himself and again guns are firing at the party. But wait… What’s that? Mr. Sharpshooter is back. Irvine and Rinoa are walking downstairs while Irvine is shooting the Galbadians to help the party.
It’s time for another Junction Exchange. So we’ll Junction exchange between Selphie & Rinoa and between Squall & Quistis. Also we’ll take Zell with us. Junctions should look like this in the end:
Time to go to the top again! Thanks to Enc-None we won’t encounter any enemy. As soon as we reach the Top we’ll get control over Irvine, Selphie and Quistis again. This time we’ll just exchange between Rinoa and Irvine so that we got Enc-None. With this group we’ll run down to Floor 2. As soon as we get control over Squall again we’ll exchange between Irvine and Rinoa again. We’ll leave the screen to the bottom and go upstairs then. On that screen we’ll go upward and follow the stairs upstairs and leave the room to the right. We’re finally outside but we’re not out of the prison yet. We’re very far above the ground so we have to find a way to the ground first… But before we can look for that specific way we’ll have to knock out some enemies! Just take them out with Squall and Zell. I usually don’t attack with Rinoa because her Attack animation takes far too long also Squall should be near to yellow HP so you should be able to get a few Limits off.
After that fight we’ll go back inside automatically and have a dialog. After that dialog we go back outside and run over the bridge. At the end of the bridge the prison will start to move underground so the bridge is starting to remove itself and Squall needs to climb towards Zell and Rinoa. Just climb towards the right and everything is fine.
We’ll end up with two cars and the full party leaving the prison. Our party will start a dialog and we’ll go talk to Selphie to keep the Dialog rolling. While they talk they see some missiles being launched. Again we’re talking to Selphie to keep the Dialog rolling. She’ll decide to split up to save the garden and to solve the missile problem. Because of that we’re going to set up two groups. One that goes back to Balamb with Squall and one that goes with Selphie. We’ll set the Groups up like that:
Zell
Squall
Rinoa
&
Quistis
Selphie
Irvine
After we have decided that both teams will start with their job.

First we’ll take control over Squall and move towards the train.
Then we gonna leave the screen to the left and enter the train.
Now we take control over Selphie. We gonna leave the car and save the game. Next step is to get into the Galbadian Base to stop the Missiles!
Galbadian Missile Base
Now we’ll get back into the car and drive to the Galbadian Missile Base. As soon as we enter it an Galbadian Soldier will talk to us and let us through the gate. That was pretty easy… However our party will leave the car wearing the uniform of the Galbadian Soldiers. After a short dialog we’ll start moving to the left side of the screen and we’ll enter the Building.
Go to the Savepoint, save the game and start to exchange the junctions between your characters. We’ll exchange between Squall & Selphie, Zell & Quistis and Rinoa & Irvine. Now we’ll go to the left door and try to open it but it’s locked. We’ll take a look a bit more to the right. There’s a light that becomes brighter and tries to get our attention. Selphie thinks we don’t have a ID Card but Irvine found one in the car.
Time to get the sabotage going. Just follow the way for the first two screens. When you meet the first Galbadian Soldier a Dialog will pop up and Selphie panics because of him. You have to decide how the party should act. Just pick Act casual and keep going. It doesn’t matter what you pick. When you pass him he’ll tell you that you shouldn’t run inside the base and you can keep going.
When you reach the screen with the second Savepoint just leave the stairs turn left and then leave the screen through the bottom. Two Galbadian Soldiers are working there but seem pretty busy. They’ll tell you to ask someone else to do their second job. So we’ll go back to the screen with the second Savepoint and leave the screen through the door on the top of the screen.

We’ll talk to the Galbadian Soldier near the light at the top of the screen and tell him to go ahead. He’ll explain us that he’s busy too. So we’ll go back to the other two Soldiers and gonna tell them about it. What are they going to say now?
They come up with the nice idea of letting us do the job. So let’s get things starting! We’ll go back to the screen on which the Galbadian Soldier told us to not run inside the Base. As soon as we want to enter Selphie starts to explain that we’re there to do the job. We go inside and smash the keyboard until the lights go out!
As soon as we’re done with it we’ll leave the room. Two Soldiers will run into our arms. We can decide to fight or to try to fool them but no matter what you choose you’ll fight in the end so we’ll just start with that option and take them down. Now we go to the screen with the second Savepoint to save the game and to leave the screen to the right. We gonna run into a group of Soldiers. Take those down too and start to investigate the consoles.
After that we’ll go to the room at the top. Now you have to decide if you want a fast fight or a slow and risky fight. If you want to end the upcoming fight fast and without many risks you need to junction exchange between Selphie and Irvine. That way he gets enough HP to reach his Limitbreaks without being near death. So I’d say go with it. I’ll do it! Now go to the console on the left and choose a time between 10 and 20 Minutes. That way the door for the fast escape is open (door on the right side of the screen). Now we’ll run all the way back to the second Savepoint through the left door.
Now talk to the Galbadian Soldier on the right side and he’ll give you his ID Card + the Password for the Console on the top of the screen. It’s EDEA. Use the Password and sabotage the Missiles accuracy! There for we’ll choose Target then Error Ratio and gonna increase the error ratio by holding right until it’s filled completely. Now we select Data upload and choose YES! After everything is done we’ll leave the console and the building. As soon as we leave the building all the Soldiers are running away. We’ll move to the right and the Missiles are launching. Now we just have to hope that everything went right and to move to the right side. We’ll encounter our next boss fight. We’ll just take it down with Irvines Limitbreak! Nice and fast! But take care it can deal a lot of DMG. If you don’t have any more ammo for Irvine try to keep all of your party member over 500 HP and if it comes to the very bad point of you having no Phoenix Dawns left use the Life Spell. That might decrease your stats but however. Still try to not waste too much of it.
After the fight we’ll move as far to the left and to the right as we can and back to the middle of the screen again. A Dialog will start and after it the Base will explode!
Pro Cid or Pro Master?
We’ll get control over Squall again so we need to go for a Junction Exchange again!
If you exchanged between Selphie and Irvine before the Boss Fight:
Irvine -> Squall
Quistis -> Zell
Selphie -> Rinoa
If you didn’t exchange between Selphie and Irvine before the Boss Fight:
Selphie -> Squall
Quistis -> Zell
Irvine -> Rinoa
So let’s get going. As soon as we leave the first screen to the top/left someone of the Garden Faculty is shouting around like hell. We’ll keep going towards the Building. On the fourth screen someone of the Garden Faculty will ask us if we are Pro Cid or Pro Master. We’ll go with it for the moment and choose the first option.
We’ll run into Rai-Jin and Fu-Jin at the board in the Hallway. After a few words we’ll start to look for Director Cid. We’ll go first to the Training-Area. After we entered it we’ll listen to a short dialog and leave the Training-Area then again. It’s time to go to the library. We’ll talk to the Garden Faculty and chose Enough of this pretending. This will start a fight which we’ll end by just using the spell Break Go into the library and after the dialog leave it again. Now we go to Dr. Kadowaki. We’ll see two groups going to fight each other. Choose Let them handle it and relax. Dr. Kadowaki will tell us that Cid isn’t there so we go back to the board at the Hallway and we’ll see Xu running to the elevator. Follow her!
After we reached the second Floor we’ll follow the way until we run into Xu. We’ll tell her about the missiles and follow her to the headmaster. Go to the elevator and then to director Cid. After the dialog cid will go to his knees. Talk to him again. A new dialog will pop up and after it we’ll go to the elevator.

A short cutscene will be shown and then we’ll be in the elevator. The elevator will stop and we have to find a way out. There for we gonna try to find something on the console. Nothing happens… Hm ok we’ll just take the exit to our feet!
We’ll climb down the ladder and we’ll jump into a small way just before the elevator hits us. Now we’ll go to the bottom of the screen and open the door to get deeper. A dialog will pop up and the party wants to explain us the Elemental Junction. We’ll just answerer with the second Option and keep going. Follow the way and climb down the ladder. Then move to the bottom left and go through the door towards the valve and try to move it. After it’s done we’ll leave the room and climb down another ladder. Follow the way and after you got into the next screen just leave it to the left. You’ll reach a screen with a ladder right in front of you and a dialog will start. Yeah yeah yeah… Ladder ladder ladder… Zell is pissed already too. As soon as you have to make a decision pick the second option and check it out yourself. Go to the ladder and climb it up. Near the top you’ll get surprised. The ladder will break and you’ll fall with the ladder directly into a control room. Go to the right of the room and activate the consol. Afterwards leave the room over the ladder. You’ll see a green light flashing on the bottom of the screen. Go to it and try to move the gate. Afterwards climb down the ladder and save the game at the Savepoint.
… To be continued. (Tomorrow or next weekend – 01.03.2014)
More coming soon!
I’m on my 100% run at the moment, too. So I’ll add stuff to this guide every now and then. I guess this guide will be done at around january. I hope I still can help people with the things already inside the guide.
Best regards,
Jyntax
Edit 23th 2 2014:
Starting to work on Part 2 now. Gonna write it in MS Word first and save it on my Computer and upload it as soon as I’m able too.