
Overview
Full game walkthrough with focus on picking up all steam achievements for the game.
Gameplay
You need to remain focused on avoiding EXP for Squall wherever possible, yet still be able to get through a significant amount of challenging content. This means you will be getting a bunch of AP without the EXP which normally comes with it to upgrade your GFs. It also means you will be relying on magic junctions to provide you with the stats that you aren’t getting through level increases. This leads to some adjustments in play style, as you cannot simply charge through the game killing every enemy you encounter as one normally would.
Some things to keep in mind while playing:
- If Squall is dead at the end of a battle, he receives no EXP.
- You gain partial EXP but no AP for damage dealt prior to fleeing a battle. If you expect you might flee a fight, avoid doing any damage at all unless you actually want the EXP.
- Using petrify or break on an enemy is equivalent to fleeing from it with partial EXP but no AP rewarded for damage done prior to petrification. Casting break on enemies is a great way to get out of a fight you cannot flee from.
- You gain AP but no EXP for enemies you card.
- If your weapons risk killing an enemy, but you want to lower its HP further for better chance of carding it, use gravity attacks such as Demi or Quistis’ Micro Missiles.
- Bosses and human soldiers are not likely to be cardable.
- Save often!!! If you unexpectedly have to flee a fight after dealing out a ton of damage, or if you discover that you cannot card an enemy after knocking its health down, you may be forced to take EXP. Obviously on such occasions, you will want to restore a recent saved game and continue with a cleaner record.
- Don’t lose Triple Triad by accident! If you intend to win a game of Triple Triad (cards) and lose, your opponent will take one of your rare/unique cards. Reload your game if this happens.
- There is such a thing as too much magic. Each character only gets 8 pages for Magic spells, and when they are full the character can no longer draw. Unnecessary magics you pick up at draw points, as well as magics which you once had junctioned but no longer need, may have to be exchanged, cast, or otherwise cleared out to keep your characters able to draw when necessary.
- If your health is low, but you are not given the option of using a limit break, you can cycle turns with B1/B/Circle for another chance. You can repeat this process until you do get the option to use a limit break. This allows you, if necessary, to deal out pure limit breaks without any normal physical attacks.
- Keep an eye out for Malboro Cards when you win Triple Triad, as you will need probably 30+ of these just for converting into Malboro Tentacles.
- When a card game, or random chance doesn’t go the desired way, it’s alleged that soft-reset (hold down Ctrl+R) will allow the random number sequence to continue rather than resetting it to the same point with every game load. It seemed to help me get Queen of Cards to go to Dollet instead of Galbadia. Also, it’s just faster.
Note that, as Steam user gamemaster10122 has tested and reported in comments of this guide, you may choose to use Hyne to edit your save game and set Squall’s level back to 7 on a save game just before you win the game. If you are willing to use Hyne to claim the Contrived Victory achievement, then you may spare yourself the hassles of avoiding exp (fleeing, carding, breaking, letting Squall die).
Disc 1
This marks the start of disc 1 of the game.
1. Balamb Garden
After the opening cutscenes, when the doctor asks you a question, answer it however you like.
Name your character, who is, by default, and in this walkthrough, known as Squall.
If you are a new player, read everything to learn about Final Fantasy VIII gameplay aspects such as battle commands, junctions, command abilities, etc.. After you have read what you want to, navigate back out of the menus and choose “I’m done.”
Open the menu and configure Quezacotl to learn Card. Configure Shiva to learn Str-J. Junction both GFs to Squall. Give Squall the Magic, Draw, and Item abilities. Later, when Quezacotl learns Card, have him learn Card Mod. Other than that, generally attempt to have your GFs learn attribute/elemental/status junctions before learning other skills.
Approach Quistis at the front of the room, and she’ll tell you what she has planned for you. Follow her out the door.
Head down toward the junction until Sophie runs into you. Ask “Are you ok?” Offer to take her on a tour. Exit to the right. Talk to the man on the bridge before the elevator. He gives you 7 cards. Enter the elevator.
Exit the elevator area and you get a peek at the directory. There is a save spot just left/down from the directory, take advantage of it.
Head right into the next area. Here, take your first right to head to the library and continue a couple screens until you are in the main section of the library. Approach the top shelf on the right. Inspect it to get “Occult Fan I.” Move up until the view changes, then use the draw point to grab a bunch of Esuna.


Exit the library to the left, and a couple screens later, at the main hub of the garden, head up and take the next path to the right, heading into the Training Center. Go through the hallway and out into the open, where you will eventually come across a fork with a gate/door going up/right and one going up/left. Charge through the up/right one.

Exit the Training Center and head back to the main hub, circling around to the bottom of the loop where the garden directory is. Oh look, it’s that save spot again! Head down to the front entrance of the garden. Continue for a few screens and you will find a Cure draw point. Use it.
On the screen after the draw point, you find Quistis. Speak to her, and she pulls out her handy tutorial on junctioning GFs. When she finishes talking, open the menu and move the Shiva GF from Squall to Quistis, then grant her the Magic, Draw, and GF abilities. You can finally exit the garden to the world map.
2. Fire Cavern
You can now run into random encounters. Note that you want to flee every random encounter for now so you can avoid picking up EXP.

Once you are stocked up on Cure, Scan, and Blizzard spells, save your game and head into the fire cavern.
At the entrance, Quistis whips out her tutorial on junctioning magic. When she finishes, approach the garden faculty and speak with them. Indicate that you are ready. Select the 10 minute limit.
Follow the straightforward path, continuing to flee from every random encounter you hit. A couple screens in is a short path to the right ending at a Fire draw point. Continue along the path until you run into the Ifrit.
Use a combination of the Cure, Scan, and Blizzard spells along with Shiva GF to put Ifrit in his place. For the best SeeD rank, you don’t want to defeat ifrit with too much time left. You should be able to let the timer continue to run down on the screen where you name Ifrit, if you defeated him with a lot of time remaining.
Have Ifrit learn something useful like HP-J and toss him on Squall, then backtrack out of the Fire Cavern back to Balamb Garden.
4. Before the Exam
Once you arrive back at Balamb Garden, Quistis pulls out yet another tutorial, this time about GF levels and abilities. She leaves you with instructions on where to show up for your exam.
Walk up to the next screen and, if you aren’t still maxed out on Cures, use the draw point to stock up.
A few screens later, you are back at the garden directory. Oh, hey, that save point! Use it!
Now comes a bit of tedious fun. Since you’ve obtained the Ifrit card, you now stand a much better chance of actually winning some card games. So let’s grab a couple rare cards and further strengthen your deck in the process.
Note that if/when you lose, you should go so far as allowing the opponent to claim your best card (Ifrit), snagging you the “Loser” Steam achievement for losing a rare card.
Eventually (it took me about 6 tries) when he does plays MiniMog and you win, claim that card, save your game again, and pat yourself on the back.

When you finally win the Quistis Card, exit down. Speak to the cafeteria lady on the left. Choose “I’ll lend an ear…” and then when given the option, choose “I’ll lend an ear…” again. Return to the garden directory. Use the save point again.
5. SeeD Examination
Use the directory to warp to the Dormitory and walk up to the next screen. Look, a save point! (Okay, maybe I’m a bit obsessive about them) Continue through the door on the upper right. Approach the bed and choose to get changed. Rest if you need to. Exit the room. Consider that save point! Exit downward, and proceed through the hall. Storyline takes over your navigation at this point. When you can control Squall again, exit down to progress the story.
You are given control of a car/truck thing. Just drive it down the road and ram it into the town at the end of the road. Storyline will take over again.
Upon getting out of the vehicle at the dock, when you regain control of Squall, do not speak to anybody or do anything other than getting onto the vessel. Once on the vessel, when given the option, do not speak with Quistis, but choose to “Do Nothing” instead. When asked to check outside, choose “ok” and proceed down and to the right to head into another cutscene.
Give Ifrit to Seifer and Quezacotl and Shiva to Zell. Grant GF, Magic, and Draw to both of them. At this point, there are fights which cannot be avoided. For this, we will be letting Squall die and having Zell and Seifer pick up the EXP and AP (which is why they have the GFs).
Walk away from the beach to the next screen. Continue not speaking to anybody you see. Head up the stairs, and save your game at the save point.
A few steps beyond the save point, two guards attack you. Have Zell and Seifer draw 100 Cures each. Then have your own party help to kill off Squall before moving on to kill the enemies. Zell and Seifer will gain EXP and the GFs will gain AP.
Save your game again since the save point is right there and you just spent the time drawing all those cures!
Now that Squall is dead, you should be able to slash through both the unavoidable fights and the random encounters as you make your way through the city. Follow the straightforward path with Seifer, and when you come to a fountain where he asks you to scout, head up to the road at the top of the screen near what looks like a wrecked jeep to trigger a battle with the last soldier.
Talk to Seifer. Then talk to him again. The scene changes. Approach Seifer to progress the story.
Follow Seifer to the next screen. Cross the bridge. On the next screen, do not speak to the wounded soldiers. When you approach Seifer, brief scene is triggered resulting in a battle with a creature significantly tougher than the soldiers you’ve been fighting. If you beat it down with just your weapons, you may have to use a few cures in the process, which you can conveniently draw from the creature.
A couple screens up the path, you get to see more story play out. Seifer leaves and Selphie shows up.
Squall’s health has been restored to 1HP. Since the boss is coming up, implement a change of strategy: heal Squall and Zell up and flee all random encounters from this point. Take Shiva off of Zell and give her to Squall. Grant Squall Magic, Draw, and GF commands. Do not follow Selphie over the cliff. Instead, head to the right to walk around the “safe” way. Follow the path a couple screens, fleeing all random encounters, until you catch up with Selphie. When asked, choose “Yeah, I guess so.” Give Selphie the Ifrit GF, and grant her Magic, Draw, and GF commands.
Approach the communications tower door. Proceed through it when you can, and save at the save point next to the elevator. The draw point has Blinds in it. Take the elevator when you are ready to initiate cutscenes leading into a long boss fight in which you will spend a good amount of time drawing magic..

Start drawing Esunas from Biggs. Shortly into the fight, Wedge joins him. Continue drawing Esunas. You can draw Cures from Wedge to avoid eating into your own precious supply. When all three characters are fully stocked with Esuna, beat Biggs and Wedge out of the fight. Elvolet takes over for them. Draw Siren immediately, then proceed to draw 100 Doubles for each character. Bust out your GFs to help put Elvolet down.
A timer begins after the fight. Immediately Junction Siren to Selphie. Do not talk to Biggs. Take the elevator down, and save your game.
Exit the communications tower to head back to the beach. You get interrupted along the way, five times, by a giant robot named X-ATM092 that keeps jumping you every screen or two. This guy is something of a pain with the timer running, throw Quezacotl, Ifrit, and Shiva at it to put it down in just a few turns. You can tip toe around to avoid it (by checking another guide), but it’s not necessary, and you should get some AP for fighting it. Each time you beat it down until it collapses, flee the battle and resume your run for the beach. When you get back to the town square, save the dog from certain doom by talking to it before fleeing to the next screen yourself. Do not stop at the Cafe when you run by it. Just run straight to the beach as quick as you can until you are thrown into a cutscene of the beach escape.
6. After the Exam
As you leave the docks, Seifer takes the car. He’s a nice guy.
Exit down to the next screen and enter the hotel. Go up the stairs to the left. On the table in the rear, to the right of the save point, is an issue of Timber Maniacs. Read it. Save at the save point. Exit the hotel.
Walk left along the path from the hotel to the next screen. Take the first door on the right to find Zell’s home, and mother. Talk to Zell’s mother. Walk right into the next screen and inspect along the bottom of the screen to be distracted by a fake magazine. Exit left. Talk to Zell’s mother. Exit Zell’s house. Return to the hotel and save your game. Return to Zell’s house and challenge Zell’s mother to a card game. Your goal is to win the Zell card. As usual, load your game and try again if you lose, challenge again on a draw, and go back to the hotel and save if you win a different card to strengthen your deck, then return and re-challenge her.
After winning the Zell card, exit left out of Zell’s house, then walk up along the road to the next screen. Continue past the gas station to exit the town. Save your game.
At this point, Quezacotl probably has finished learning the Card skill, which opens up the door for farming AP, however that isn’t necessary just yet.
Head back up the road to Balamb Garden. If you stay on the road, you won’t trigger random encounters. You can flee from anything you run into. Enter Balamb Garden.
7. Graduation
After the scene, proceed ahead to the garden’s directory. When they finish talking among themselves, talk to Xu, then Quistis, then Cid. Respond with “Felt good” when Cid asks. Then walk right into the next area and talk to Seifer to trigger a brief scene. Return to the directory to trigger an announcement. Oh look the save spot is available!
Take the elevator to the second floor. Cross the bridge to the next screen. Speak with Raijin, then Fujin, then Zell, and finally one of the guys in the background to move the story forward.
After Cid dismisses you, speak with him! He gives you the battle meter which cannot be gotten later without some careful planning.
Walk down to exit Cid’s “office.” Cross the 2nd floor bridge and go left onto the next screen. Another scene is triggered which transitions into your exam score, which should have been about 5.
Use the save point, enter your room, get changed, leave your room, and talk to Selphie. Off to the party!
While mingling, when Selphie asks, choose “Yeah, I guess so” to make her happy. Enjoy the cutscene, and the conversation with Quistis afterwards, then exit the area.
Back at the dorm, change clothes (again) and give serious thought to saving your game again as well. Head to the Training Center.
Speak with Quistis. She runs you through the status-junction tutorial.
Junction Ifrit and Siren to Squall and Shiva and Quezacotl to Quistis. Have Quistis enable the Card/Magic/Draw and Squall enabled GF/Magic/Draw, and junction Blind to Squall’s status attacks.
Proceed into the Training Center. Go either left or right at the fork and continue to the screen with the save point on it.
If you run into Grats, you can have Squall hit them once, but a second hit might take them out,and pick up EXP, so try not to lose control with your blade. After Squall hits a Grat once, just have Quistis spam Card on it she succeeds. And you’re finally farming AP without the EXP hit.
Stick around long enough to farm the Shumi Tribe Card which you can Card off a Grat here.

When you reach the save point, save your game and proceed through the doorway to the “secret area” where the other couples are getting their romance on. After the scene, you can save again for good measure, Then attempt to head back out of the Training Center. You are interrupted on the way out, and dragged into a fight to save another student.

Have both characters draw until you have 100 of everything from the Raldos. Put granaldo to sleep, or leverage Protect to reduce incoming damage. If your health gets low enough, use limit breaks to take out two of the three Raldos. When each character has 100 of each spell from these guys, finish them off.
After the fight, head back to the dormitory, speaking briefly with Quistis and Zell on the way. After you wake up, check your desk for the April issue of Weapons Monthly, then save your game.
8. First SeeD Assignment
Make your way to the font gate of Balamb Garden. After the scene, be sure to talk to Cid to get the Magic Lamp. Exit Balamb Garden.
Put Siren and Ifrit on Squall, Shiva on Zell, and Quezacotl on Selphie. Make sure you give Selphie the Card command. Junction Squall’s ST-Atk to Blind. Now head to the beach.

Quezacotl: HP-J, Mag-J, T Mag-RF, Card, Card Mod
Shiva: Str-J, Vit-J, Spr-J, I Mag-RF
Ifrit: HP-J, Str-J, Str+20%, F Mag-RF
Siren: Mag-J, ST-Atk-J, ST-Def-J, Move-Find, L Mag-RF, ST Med-RF
When Shiva has Str-J and I Mag-RF learned, you can start converting the Fish Fins you get from these battles into Water magics. Convert enough fish fins to give all three characters 100 water magics. You may need to farm some more Fastitocalons to get enough Fish Fins to do the job.
When everybody has 100 water magics, junction them to Str on Squall and Zell.
Save your game! The following fight may result in Game Over and require you to make another attempt. After saving, use the Magic Lamp.

Have Squall do nothing but Attack until Diablos is blinded. That, if all goes well, takes out the only attack he can kill you with. With the other characters, draw some Demi into stock from Diablos for a turn or two and then start casting the stocked Demi back at him. After Squall blinds Diablos, have him start drawing Demi to stock and then casting it back on Diablos as well. If he stays blinded, you shouldn’t have to worry about your health at all. Just keep casting Demi on him and drawing more to stock when necessary, until it only does 100 or so damage. Then finish him off with weapons, limits, whatever you like.
After the fight, junction Diablos onto Zell and farm more Fastitocalons until Diablos learns HP-J, ST Mag-RF, and Time Mag-RF.
Find a Glacial Eye in the grassy area between Balamb Garden and Balamb. Zell and Selphie can load up on Scan and Blizzard, and everybody can top off their Cure magic. Card the Glacial Eye if you like, or flee.
9. Grinding Card Games
Now for another way to procrastinate on that first SeeD mission. Since we are avoiding EXP, you must now play Triple Triad until you are sick of it, and then play it some more, in order to strengthen your characters.
Save your game and head back to Balamb Garden.
Head through the city to the headmaster’s office, saving your game at the save spot along the way. Challenge Cid to a game of cards, using the usual methods to win yourself, among other things, the Seifer card.
Leave Balamb Garden. Don’t forget to save! Follow the road and enter Balamb.

When you have 15 Dino Bones, refine them with Time Mag-RF into 100 Quake each for Squall, Zell, and Selphie.

When you have 30 Mystery Fluids, refine them with ST Mag-RF into 100 Meltdown each for Squall, Zell, and Selphie.
You should have gotten a bunch of Malboro cards from Zell’s mom. Card Mod 4 of them into a Malboro Tentacle and use it to teach Quistis the Bad Breath skill.
You should also have some Gesper cards. Card Mod one of them into a Black Hole, and use it to teach Quistis the Degenerator skill.

From the street in front of Zell’s house, exit to the left to find the shop. Wasn’t it nice of SeeD to keep paying you your salary while you ran around town and played cards? After the hours of playing Triple Triad, you should probably have near 30k Gil. If you got lucky with the card drops you may want to play some more cards until you have over 26k Gil.
Buy 20 Tents. Yup, there went 20k Gil. Use L Mag-RF to refine the Tents into 100 Curaga each for Squall and Zell. Setup Auto/Atk junctions for Squall, Zell, and Selphie. You should see that the Curagas give Squall and Zell a HP boost, the Quakes give Selphie an HP boost and Squall and Zell Str boosts, and the Meltdown is the Vit boost. Squall, Zell, and Selphie should now have 2500-3000 or so HP each.
Hurray, that’s enough grinding on upgrades for now!
Visit the hotel and stay there to fill up your health. Save your game. Head back toward the shop where you bought the Tents, and continue past it to the train station. Buy a train ticket and hop aboard.
10. Train to Timber
On the train, follow your group up through the door. Then follow Zell left into the cabin. Zell looks rather excited. Approach him. Answer “Not too much.”
Oh what fun, an out of body experience. Run away from all battles in this dream world. Head up along the path to the next screen. The draw point probably can’t be used as you should be full of cure already. Exit upwards again.
Cross the stream and continue left to the next screen. Exit left once again. The draw point has Water, which you are probably already full on. Approach the vehicle and press the action/talk button to get in.
Once in the city, exit to the right. Follow the road up to the next screen, where you see the Galbadia Hotel. Enter the hotel. You can save your game here. Take the staircase to the right.
Talk to the waitress. Choose the third grey option. Speak with her again. Choose “Let’s take a load off.” When you are free, approach the piano. When free again, return to your table. And when finally free again, head back up the stairs. Oooh, save point! Talk to the receptionist and ask “Which is Julia’s room?” Once in her room, every time you are free to move you need to re-approach and talk to her again.
Eventually the scene ends and you are back to your normal bodies.
11. Timber Mission
As soon as you walk down the stairs, you are pestered. Answer “But the Owls are still around.” Follow the man down to the next screen, then follow him onto another train.
When you are free, go up to the next screen, then enter the first room on your left and use the save point. Return down to the room you were just in and challenge Watts to card games until you win his Angelo card. Go up to the next screen and save your game again for good measure. Exit upward and find the sleeping “princess” in bed in the room to your left. When you are free, speak to her again to finish up the scene.
Go down two screens to the first train car again. Follow Zell and the others. Sit through the briefing and practice entering codes. Indicate you understand the plan.
Check out the Anarchist Monthly clipping on the board at the top right of the room. Exit down, then move right and exit up to where the save point is. Exit up again, and see Rinoa’s bed is now folded into a couch. Inspect it to get Pet Pals vol 2. Exit down.
Zell and Selphie probably lost their GFs somewhere in all that drama. Re-equip Shiva and Diablos to Zell and Quezacotl to Selphie, using Auto/Atk for each. Use a tent, then save your game.
Exit down again. Talk to Watts. Answer “Yeah.”
Approach Rinoa. Follow her left across a couple cars, until it is time to decouple. When you go down, keep an eye out for Zell/Selphie’s calls for the guards. Go back up when the guards come, then drop back down to finish the job. Follow the others to the right, and repeat the process, but this time it’s 5 codes instead of 3, and you don’t have Zell and Selphie watching for the guards. Use R1/RightBumper to slide the view to the right after each code so you can see when the guards are approaching. Pull yourself up when they do, then drop back down and finish the job.
Hopefully in the aftermath, your seed rank increases. Go up and save your game. Then return and speak to Rinoa. Answer “Yeah.”
When you are free, talk to Rinoa. Create a party with Rinoa, Squall, and Zell. Use the Junction Exchange menu option to switch Selphie’s GF and Magic junctions onto Rinoa.
You should have a number of Cockatrice cards from the gaming earlier. Refine three of these into Cockatrice Pinions using Card Mod. Then refine the Pinions into 20 Breaks for each character. These breaks should help dodge EXP when you get dragged into unavoidable fights.
Exit down. Go up the stairs and exit up. Use a tent. Save your game. Exit down. Talk to Watts. Answer “Yeah.”
You can now run into random encounters in town. Run away from all of them.
Exit up. Enter the Pet Shop. Buy Pet Pals Vol 3 and 4. Exit down. Exit down again. On the overpass, walk right to the next screen. Approach the guards and talk to them. In the fight, have Squall and Rinoa spam Break until it doesn’t miss, then have them do it again on the other guard to end the fight without gaining EXP. Exit up, then left, then continue left across the overpass.
Back at the train station, exit right. Enter the Timber Maniacs building in front of you. Examine the stacks of magazines to find Girl Next Door. Walk up through the door into the next room. On the right side, on the floor, is an issue of Timber Maniacs. Exit the Timber Maniacs building and enter the building to the right of it. Talk to the old woman at the sink, then leave the building.
Exit to the right. Then continue right again onto the next screen. Go up the stairs and enter the house. Talk to the old man. Answer “Yeah, kind of.” Drink from the faucet to refill your health. Check the cupboard twice, then bang on it, then look closer, to finally get some Gil. Leave the house.
Go back down the stairs and exit left, the way you came from. Go down the stairs to the left near the top of the screen to trigger a scene with some soldiers. In the fight, use Break until it lands on each of them to escape without any EXP. Yay, a Buel card. Walk up and enter the pub.
Approach the drunk and talk to him. Choose “Tell him about the card.” Now that he is out of the way, proceed up through the door into the alley. Save your game. Exit left.
Make your way up the stairs. When prompted, choose any response you want.
After the scene, go up across the catwalk to join Quistis in the studio. Follow Quistis to the left. After more scene/story, make your way back down the stairs. Back in the alley, save your game head back into the pub. Leave the pub by the front door. Head up the stairs. Then walk left to the next screen. Walk up into the first house (the old lady’s house). Upstairs, talk to Selphie, Rinoa, Zell, and then twice with Quistis. Go downstairs. Leave the house.
Speak with the guard outside. Choose “Ok (I have my orders)” when asked. Exit to the right. After getting your tickets, follow the others to the right. Go up the stairs across the bridge. Exit down. Approach Quistis and choose “Get on.”
Talk to Zell. Talk to Rinoa. Choose “It’s nothing important, but…” Follow Selphie through the door. Talk to Selphie. Return and talk to Zell again. Choose “(Leave him alone)” when given the choice.
Choose to skip East Academy and continue on to Dollet. Once back on the world map, use the menu to swap to a group of Squall, Quistis, and Selphie. Be sure Shiva/Diablos are on Quistis and Quezacotl is on Selphie. Save your game.
12. Dollet
Follow the road to the coast and enter the town of Dollet. On the screen with the car rentals, take the stairs on the bottom left. Enter the hotel. Pay 100 Gil to spend the night. Get the Timber Maniacs magazine from the table on the right. Exit the hotel.
Approach the soldier guarding the path to the left twice. Choose “Force your way in.” At this point, run away from any random encounters. Cross the bridge to the left and follow the path until you come to another soldier. Choose “Yeah…and we’re gonna take you on.” Enjoy the lols. Return the way you came, back across the bridge to Dollet’s town square in front of the hotel. You can probably have Quistis draw Silence from the draw point here. Enter the hotel again and save your game. Leave the hotel.
Exit down and left. On the next screen, continue down again. Go under the bridge and enter the Shining Bomber pub on the left. Take the stairs to the second floor. Read the Timber Maniacs issue on the table.

Having saved our new rules, return to the second floor of the pub and challenge the man again. This time we’re going to win some cards from him. After you win some cards, he invites you to his private room. Follow him across the bridge, approach the table and talk to him. Challenge him to more card games until he plays the Siren card and you win it from him.
Examine the stack of magazines near the door repeatedly until you receive three real items. Then leave and return, and repeat until you receive Occult Fan II. Leave the pub. Leave Dollet. Save your game.
13. Obel Lake
You may as well continue to run away from any encounters, as it’s a hassle to card monsters without killing them and you can focus on that later.

Make your way around the lake toward the Timber side so you can walk up the peninsula. Stand in the middle of the tip of it, and press the action/talk button.
Choose “Try Humming.” Then “Try Humming Again.” Press talk/action button again, then choose “What is it?”
Use the action/talk button and “Try Humming.” How nice of you to share Mr. Monkey’s whereabouts. Now if you Try Humming, the shadow gives you clues about various things in the game. You can step away and approach again to hit talk/action button and choose to throw a rock. Keep throwing rocks now until you see a message that “The rock skipped many many times.” This may take a lot of throws.
Return to the forest by Dollet and throw rocks at Mr. Monkey until he throws one back at you, providing Obel Lake clue 1/4: U R H A E O.
Save your game and head for Timber.
14. Timber Loose Ends
In Timber, exit upwards, then left, then left again over the overpass. Finally exit right to get to the Timber Maniacs building.
Talk to the man next to the Timber Maniacs doorway. Tell him “No way.”
Exit down. Then exit down again. Then cross the overpass to the right. Enter the hotel. Spend the night. Read the issue of Timber Maniacs on the table.
You’ve got some unavoidable battles coming up, so if you don’t have a bunch of Cockatrice cards to refine into Cockatrice Pinions to refine into Breaks, you may want to buy some Softs while you are here in town. Make sure each character has 15 or so Breaks just for some peace of mind.
Leave Timber and save your game. Head back to the East Academy train stop.
15. Centra Ruins
Ensure everyone has 15 Breaks or so. Remember, your group should consist of Squall, Quistis, and Selphie.
Now head into the forest. Watch the scene. Then the other scene. You’re Laguna and his crew again. Respond “Naw, just my imagination.” Check your gear when you get the chance. Looks like one of the guys may have no magic/GF. I had to equip Quezacotl but have no magic to junction on the guy.
Run away from random encounters. Walk up to the next screen.
Draw Sleep from the draw point, and continue onward to trigger some dialogue and two scripted battles which you cannot avoid. Use Breaks to escape them without any EXP gain. Walk up, taking a right at the fork, then take the ladder down. At the bottom of the ladder, move forward to the next screen. Then exit to the left.
Near where you entered is a heap of junk. Examine the area with talk/action button and pick up what you find to get the Old Key. Exit left, then continue left again.

If you can draw from the Sleep draw point again, do so. Then walk forward, taking the left fork this time and continue to the next screen. Follow the path straight until you reach another ladder. Take it down.

Backtrack all the way back and over to the other side of the hatch room again, and this time examine the hatch on the right and attempt to tamper with it. Head right 2 screens to where you found the first Old Key. Then head up two screens.
Approach the detonator. Press the red switch. Approach the detonator again. This time press the blue switch. Head up the stairs to the next room, then follow the walkway to exit left. Examine the boulder on the left side of this area. If you can draw cure from the draw point, so so. Head up to the next screen.
Save your game! Then walk up to the next screen. Continue walking up to trigger dialogue and another scripted battle. This battle gives no EXP, so use physical attacks to quickly take down the guards and collect your 2 AP.
Enjoy the scenes, then you find yourself back on the world map. Yay. Save your game.
16. Galbadia Garden
You are right next to Galbadia Garden. Make your way to it and enter.
Walk up to the next screen. Then walk up to the screen after that. After the dialogue, exit up again.

Talk to Zell. Then talk to Rinoa. Then talk to Quistis. Then talk to Zell again. Finally talk to Selphie. Squall then gets super emo and storms out.
Go downstairs. Exit down. Then attempt to exit down again. After the dialogue, exit to the bottom right. Talk to Quistis. Then continue downward two screens to the front gate. Talk to Rinoa. After the dialogue, speak to Quistis.
On the world map, steal Irvine’s idea, but take Rinoa and Quistis instead. Junction exchange so that Quistis has Shiva and Diablos, and Rinoa has Quezacotl.
Save your game.
17. Deling City
Head to the nearby train station. Paid the 3000 Gil and hop aboard. Attempt to leave. Then follow Irvine. Then follow Irvine again.
Once off the train, exit down. Then exit down again. Talk to Quistis, then Rinoa. Exit up.
When the bus arrives, talk to the conductor and catch a ride. Get off at Caraway’s Mansion. Talk to the guard on the right. Leave him alone and get back on the bus. Take it past the Presidential Residence and the Shopping Arcade, and get off at the Galbadia Hotel. Pay 100 Gil to spend the night. Inspect between the farthest two beds for another Timber Maniacs issue.
Leave the Hotel. Ride two stops to Caraway Mansion. Have the guard escort you out of town. Exit down.
Save your game!
18. Tomb of the Unknown King

Examine the gunblade. SAVE THE NUMBER IT SHOWS YOU!!!
Exit right. Then exit left. Then exit right. Then exit left. Then exit right. Then exit up.
Approach the statue to trigger a warmup battle with the upcoming boss. Beat on him with physical attacks until he runs away.
Exit down. Then exit up. Then exit right. Then exit left. Then exit right. Then exit left. Then exit rigtht. Then exit up.
Float draw point on the left!!! Draw from it, then, examine the lever on the right to let the water in.
Exit down. Then exit up. Then exit right. Then exit left. Then exit right. Then exit left. Then exit right. Then exit up. Examine the machinery on the left to make something happen.
Exit down. Then exit up. Then exit right. Then exit left. Then exit right. Then exit left. Then exit right. Then exit up. Save your game at the save point. Then exit up back into the tomb.
Go up four screens. Approach Sacred for the boss fight.

Walk down 2 screens. Then walk up 3 screens. Draw Protects from the draw point, then exit to the world map.
Have a peek at your GF’s abilities. Have Brothers learn Str-J.
At this point in the game, these are the states of my GFs:
Quezacotl
- Completed: Card, Card Mod, HP-J, Vit-J, Mag-J, and T-Mag RF
- Learning: Elem-Def-J (0/100)
- Next: Mid-Mag RF, Mag+20%
Shiva
- Completed: Str-J, Vit-J, Spr-J, I Mag-RF
- Learning: Elem-Atk-J (148/160)
- Next: Vit+20%, Spr+20%
Ifrit
- Completed: HP-J, Str-J, Elem-Atk-J, Elem-Def-J, Str+20%, F Mag-RF
- Learning: Str+40% (42/120)
- Next: Elem-Defx2
Siren
- Completed: Mag-J, ST-Atk-J, ST-Def-J, ST-Def-Jx2, Move-Find, L Mag-RF, ST Med-RF, Tool-RF
- Learning: Mag+20% (0/60)
- Next: ?
Brothers
- Completed: HP-J, HP+20%
- Learning: Str-J (0/50)
- Next: Spr-J, Cover
Diablos
- Completed: HP-J, Mag-J, Abilityx3, Enc-Half, Time Mag-RF, ST Mag-RF
- Learning: Enc-None (0/100)
- Next: HP+20%, Mug, Hit-J, Darkside?
Junction Brothers to Rinoa. After setting Auto/Atk magic junction, be sure to set HP+20% as one of her passive abilities.
Go to Squall’s Abilities and set his Str+20% as one of his passive abilities. Move-find might/should also be available, you may as well set it as his other passive.
Go to Quistis’ Abilities and, if Half-Enc is available yet, set it to reduce the number of random encounters you will need to flee from.
Save your game.
19. Assassination Mission
Return to Deling City.
From the screen with the car rental, follow the road up into the city. On the next screen, walk up and to the left to get back to Caraway’s Mansion. Talk to the guard again and tell him you are ready to answer. Note that he will ask for the number as 3 digits, with the ones first and the hundreds last. Provide the ID code you saved from the Tomb of the Unknown King. Then exit to the right.
Approach the save point. After the dialogue, use the save point! Enter the mansion.
Talk to Rinoa. When you are required to form a group, throw Selphie in. Follow Caraway around town. When you end up under the gateway, talk to him. Afterwards, exit up. Then exit down. Then exit right. Then exit down. Take the path to the right to get back to the mansion. Approach the mansion. Enter Calaway’s Mansion.
As Quistis, try to leave through the door. As Squall, follow Caraway through the city again.. Under the gateway again, talk to him again. Then follow him again.
As Quistis, head back to Caraway’s Mansion again. Enter the mansion.
As Rinoa, go around the car and choose “Maybe I should check?” to go down the manhole. Walk left 3 screens. Grab Weapons Monthly off the ground. Go right 3 screens and back up through the manhole. Climb the boxes (using the action button) onto the car and over to the ledge. Continue left to the next screen.

As Quistis, look at the shelves of glasses near the locked door. Take the glass to the top left corner of the room. Examine the statue to open the secret passage. Go downstairs. Take the ladder. Examine the waterwheel to ride it over. Then open the gate and exit up. Walk north to trigger a cutscene.
As Squall, walk right to trigger a brief scene. Then walk right again to trigger another. Save your game. Take the boxes over the car and head left along the edge to the next screen. Go up the ladder, then climb onto the roof, a bit higher than Rinoa had to climb, to get the the place with the president’s corpse. Go up the stairs next to the corpse, into the red-carpeted hallway, exiting down to the next screen for a boss fight.

Equip Carbuncle to Squall.
Preferred Learning Order for Carbuncle: HP-J, ST-Def-J, etc…
Junction Squall’s magic Auto/Atk again.
Exit down to the red carpet room. Examine the hatch on the floor to the right to get to the clock tower. Get the sniper rifle from the bottom of the screen.
As Quistis, walk up to the next screen. Examine the gate to the left. Exit left. Knock the ladder over. Exit left again. Examine the upward gate. Exit up. Exit up again. Examine the right gate. Go right two screens. Examine the left waterwheel, then the right waterwheel. Examine the downward gate and exit down.
Examine the gate. Examine the right waterwheel. Examine the downward gate. Exit down. Again, examine the gate, examine the right waterwheel, examine the downward gate, exit down. Exit down again. Examine the gate. Knock the ladder over. Examine the right gate. Go right two screens.
Examine the waterwheel. Examine the upward gate. Exit up. Exit up again.
Save your game at the save point.
Climb the ladder. On the next screen, get back on the ladder and continue up. Have a peek at the excitement, and when Zell tells you to, push the switch on the left.
When given the opportunity, use Junction Exchange on Quistis and Irvine so that your party has all our GFs and magic junctions. Do not worry about healing.

When fighting Edea, stock up 100 Curas and 100 Dispels on each character. Draw-to-cast Cura as necessary. Then take her down in the usual manner (physical attacks and limit breaks).
Disc 2
This marks the start of disc 2 of the game.
20. Winhill
You are back in control of Laguna.
Check what your GFs are learning, in case any leveled during those boss fights. Make sure they are chasing useful Junctions, Refinements, Stat Boosts, or Skills.
Go downstairs. Talk to Ellone, then leave the house.
The town has random encounters. Since they can die fairly easily, it’s easiest to just run away or use Enc-None rather than trying to card them.
Just below Laguna’s house is the pub. Approach, then enter the pub.
Speak with Kiros. Choose “What’s Ward up to?” Then “…tell me about Julia.” Then “…where am i?” And finally “Let’s talk later…” Leave the pub.
Exit down. Have Laguna draw Drain from the draw point. Exit down again. Exit down again.

Return to Laguna’s house. Go upstairs. Save at the save point, then examine the bed and “Rest.”
21. Galbadia D-District Prison
Talk to Selphie, Quistis, and then Rinoa twice to trigger some scenes. When you can, choose “I’ll stop him!” Then when you get the chance, choose “…Just let me die.”
Talk to Selphie. Then talk to Quistis.
Now your main sets of magic are on Squall, Irvine, and Rinoa. But the GFs have been removed from Irvine and Rinoa. So some cleaning up is in order. For now, just Junction Exchange Squall and Zell, and you will have Zell all set to go.
Head up the stairs to your left. On Floor 8, walk left a couple steps to get around the stairs, then down to approach the guards for dialogue. Approach them again for a scripted fight. Use Breaks to get through it without any EXP gain.
After everyone shows off their weapons, the menu opens. This is your one chance to finish fixing up the junctions, so do not exit the menu until they are sorted out. First, Junction Exchange Quistis and Irvine. Then Junction Exchange Selphie and Rinoa. Now your party of Zell, Quistis, and Selphie should each have their hard-earned sets of 100 Meltdowns, Quakes, Curagas, etc.. At this point, we can Junction Shiva and Diablos to Quistis, then give Quezacotl and Brothers to Selphie. Junction everybody’s magic Auto/Atk, and go through their abilities re-setting Magic/Draw/Item (Card for Selphie) and suitable passives like HP+20% for Selphie and Enc-Half/Enc-None for Quistis. When you are ready to rock, exit the menu.
Exit down. Take the stairs down to Floor 6 and save your game at the save point.
If you redo your Auto/Atk magic junctions, you see HP-J Curaga is replaced by Regen, yay.
Exit right, circle the room, and go down the stairs. Repeat this until you reach Floor 1. Exit right, then walk up into the cell. Combat King 001 is on the floor for you to take. Leave the cell, then exit left. You can go up into the cell here to save your game. Leave the cell and go up the stairs to the left to Floor 2.
Exit down and to the right. Walk up into the cell and get the Strength Up from the box. Leave the cell and exit left. Walk up into the cell and get the Pet Nametag from the box. Leave the cell and walk up the stairs on your left to reach Floor 3.
Exit down and to the right. Walk up into the cell and get the Pet House from the box. Leave the cell and exit left. Take the stairs on your left to reach Floor 4.
Exit down and to the right. Then walk up and exit left. Walk up into the cell and get the Tent. Leave the cell and take the stairs on your left up to Floor 5.
You can ignore all the cells now while making your way up to Floor 10. There is a shop in the left cell on Floor 8, but you probably don’t need it.
On Floor 10, exit down and to the right. Then walk up around and exit to the left. Walk up into the cell and save your game. Leave the cell, then exit to the right. Walk up into the cell here and talk to the occupant. Challenge him to a game of cards. Our goal here is to win the Character Report. You should have no problem beating him. Allegedly the character report upgrades the battle meter. Leave the cell, then exit left. Walk up into the cell and save your game again. Leave the cell and go up the stairs to your left.
On Floor 11, you have the option to try to win Rosetta Stones from the card player in the left cell. Games are 200 Gil each, and the chances of winning the Rosetta Stone is extremely rare, but if you really love Triple Triad and are in no rush to get through the game, you can see if you get lucky and snag 3 of them before running out of cash. Rosetta Stones can be used to teach GF’s the 4xAbility ability. When your Triple Triad itch has been scratched, or you have 3 x Rosetta Stone, or you are out of money, continue upward until you reach Floor 13.
On Floor 13, exit down, then proceed to the right to get to the torture chamber.
Press the red button as instructed. Exit to the right. Approach the door in front of you and inspect it.
As Zell, run clockwise around the room, trying to escape the guard. If he catches you, use Break to end it without EXP gain. Exit left at the bottom of the screen for more scenes.
You are required to reform your group. Take Squall, Rinoa, and Quistis. Junction Exchange Zell with Squall and Selphie with Rinoa.
On Floor 9, run Squall’s group all the way up to Floor 13. Don’t forget to take advantage of any shortcuts the moombas made for you.
As Irvine, head down to Floor 3. You can save along the way on Floor 6.
As Squall, talk to the Moombas to receive a Cottage and a Rename Card. Walk down to exit out the bottom fo the screen. Take the stairs up. Step left of the stairs and walk up to see another set of stairs near the top of the screen. Take it. Walk down into the room a little so you can exit to the right.

After the fight, then the dialogue, exit right and proceed across the bridge for a better view of your surroundings. Continue to walk up across the bridge for more nice cutscene. When Rinoa calls to you, you must move right to scoot Squall over to safety before he gets buried.
22. Stop the Missile Attack
Draw Aero from the draw point. Talk to Selphie. Then talk to Selphie again. Choose Squall/Zell/Rinoa in one party, with Irvine/Quistis/Selphie in the other. Junction Exchange Squall with Irvine and Rinoa with Selphie so that Irvine’s group has all the GF/Magic junctions.
As Squall, exit to the left. Climb into the locomotive to make your getaway.
As Selphie, now that you are on the world map, save your game!
Drive to Deling City for a gaming pit stop. Visit Caraway Mansion. Challenge Caraway to a game of Triple Triad, and play 4 crappy cards and your Ifrit card. Lose the game and let him take your Ifrit card. Challenge him again. Play your good cards and win his Rinoa card from him. Leave Deling City.

Save your game at the save point!
Try the door on the left. It’s locked. Examine the glowing light next to the door to unlock it. Go through the left door. Proceed upward, and when prompted, choose “Walk by quietly.” Exit to the right. Continue up and to the right, and go down the stairs. At the bottom of the stairs, step to the left of them and walk down to the next screen.
Draw Blind from the draw point on the left, then talk to the workers on the right. Exit up. Exit up through the guarded door.
Draw Full-Life from the draw point. Talk to the worker in front of the glowing red light on the floor. Tell him “…To go on ahead.” Exit down. Then walk to the left and exit down again (left of the stairs). Talk to the workers again.
Exit up. Walk up a bit, step to the right, then walk down to go up the stairs. At the top of the stairs, make your way left and down to the next screen. Talk to the soldier guarding the door, then enter the door. You can draw Blizzara from the draw point here. Examine the control panels and choose “Aah, just hit whatever!” Then choose “Just press whatever!”
Exit to the right. Choose “…Try to talk my way out.” Then choose “We were just about to go call on you.” Now you can head back toward the missile room, so exit right. Then head up and right and go down the stairs.
Approach the entrance to the missile room. Try to walk through the door. Choose “Play it cool.” Then choose “Help out.” Talk to the worker standing around doing nothing. Then get on the left side of the launcher with the other workers and examine it to get into position. You end up spamming B3 (Square on a PS controller, X on Xinput controller) to push the launcher into place. Talk to the lazy maintenance soldier again. Leave the room.
Examine the control panel to the right of the missile room door. Choose “Target.” Then “Set Error Ratio.” Next choose “Data Upload.” Then “Yes.” Finally choose “Exit” twice.
Exit left. Save your game at the save point.

Check what your GFs are learning and make adjustments as necessary.
Check the panel on the left, the panel on the right, the panel on the top wall, and then proceed up through the door. Check all the panels here until you find the self destruct controls.
Set the timer for 10 minutes. Having set for only 10 minutes, the door to your right is now unlocked. Take it for the shortcut to the exit. Then walk down and to the left to exit the building. Outdoors, walk to the right. Continue to the right until you run into the Captain.
Take down the machine with physical attacks and limit breaks, then repeat on the soldiers. Another easy fight. You win, among other things, an issue of Weapons Monthly out of it.
Walk the perimeter of the area until your group realizes they are locked in.
As Squall, exit down to get to the world map.
Use Junction Exchange to swap Irvine/Squall, Quistis/Zell, and Selphie/Rinoa.
Save your game!
23. Balamb Garden in Chaos
Head south to the beach. Walk along the beach while spamming the action/examine button to trigger messages indicating that you found a piece of rock by your foot. Usually it’s a useless rock, but keep doing it until you see “It looks man-made and has some carving on it…”
Obel Lake clue 2 of 4: S T S L R M
If your Brothers GF has learned Str-J already, un-junction Rinoa’s strength.. You will be fighting some unavoidable cardable monsters coming up, and they are a lot easier to card if you can have her smack them first without the risk of killing them. At 60-some damage, she can smack most of the enemies coming up twice without worry of killing them even if she crits both hits. At that point, Card should succeed within a few tries. Random encounters in Balamb Garden can also be carded to pick up even more AP.

Talk to the wounded man twice for a Mega-Potion. Walk down several screens and exit Balamb Garden. Save your game. Re-enter Balamb Garden and walk up to the next screen. Talk to the garden faculty member. This time it’s two bombs. Have Rinoa attack each one twice and then spam Card until you have two new Bomb cards and the fight is over.
Proceed upward for four screens. Approach the directory where Raijin and Fujin are waiting. Walk away from the directory and exit left to start making your way around the garden. It’s time to clean this place up.

The doctor approves of your choice to assist in the fight, and invites you to help out in the Infirmary, where you are transported to. Talk to the doctor for an Elixer. Exit out the door on the right. Talk to the seed at the bottom of the hall. Exit right again.
At this point, you can either use a couple Phoenix Downs and Cure magics, or just leave Balamb Garden, use a Tent, save your game, and return back to this screen.
Continue clockwise (up) and take the next exit to the left to head for the Quad. As you head left and down, a garden faculty member comes running by. Intercept him and card his critters (a Bomb and a Glacial Eye). Then exit left, approach the stage. Choose “I’m with the headmaster’s faction.” Then talk to the middle SeeD for an X-Potion. Exit upward, then head up and right to get back to the main hall.

Follow the ring clockwise and take the next exit up, to the Dormitory. Approach and speak to the garden faculty member. Have Rinoa hit his Caterchipillar twice, then card it. Exit up. Rest in the bed. Save your game. Walk down two screens to get back to the main hall.
Follow the ring clockwise (right) and take the next exit, up and to the right, to the Parking Lot. Approach and talk to the garden faculty member. He leaves you a Grendel, a beast with over 3400 health. Have everybody attack him for two or three rounds. I hit him for 3 rounds, and he was at just under 800 health afterward, but if your guys crit, they may have to stop after a couple rounds of attacks. At any rate he should now be a piece of cake to Card. Do so. Exit up. Talk to the student on the left for a Tent. Go back down two screens to return to the main hall.
Follow the ring clockwise (right) to the next screen. Take the exit up and to the right to reach the Training Center. Continue up through the hall to the next screen. Walk up some more for a scene. Choose to “Help them.” The T-Rexaur has 13,900 health. Attack it for 5 rounds or so, then scan it. Then scan it and beat it down to under 3000 health, at which point you can have Rinoa spam card on it until the fight ends. Note Squall can do 700-1100 damage or so due to how he is junctioned. Be very careful not to kill the T-Rexaur without carding it. After the fight, speak to the SeeD member for a Remedy. Walk down for two screens to return to the main hall.

Feel free to rest and save again at the Dormitory.
24. Secrets of Balamb Garden

Take the elevator up to the second floor. Walk across the bridge and exit left. Walk up along the hallway to the next screen.
Follow Xu back to the elevator. Take the elevator up to the third floor.
Walk up and enter Cid’s office. When Cid falls to one knee, talk to him.

Climb down the ladder, and on the next screen continue climbing down until you end up in a hallway. Walk down and inspect the hatch on the floor to drop down.
Squall starts babbling about junctions. Choose “Yeah, we do.” and then “I remember how.” At this point, for me, Brothers did not have Elem-Atk-J yet, so Rinoa gets no boost (she lacks Str junction anyway for her carding).

Walk up and to the right to get to the next screen. Approach and climb down the ladder. Then go through the door on the bottom left of the room. Examine the valve. Spam the button (B3 / X on Xinput / Square on PS Controller), probably fail, repeat the process with Zell helping, hopefully succeed. Exit up through the door by which you entered. Climb down the ladder. At the bottom of the ladder, proceed down the stairs to the next screen.
Draw Full-Life from the draw point. Walk left past the big pillar, to the next screen where Squall complains about it being a dead end. Choose “I’ll go check it out.” Climb up the ladder. When you land, check the control panels on the right side of the room to open the floor in the previous room. Then examine the ladder you rode in on and choose “Climb down now.” Then answer “No.”

Save your game at the save point!
Pull the lever to the right of the save point to open the door on the right of the area. Walk to the right toward the door to trigger a boss fight.
If you haven’t checked what your GFs are learning recently, it might be worth it.

Check what your GFs are learning and update accordingly. Save your game again at the save point. Then attempt to get to the door on the right side of the area again. Take the ladder down, then go left along the walkway to the next screen. Approach the console and examine it twice to trigger a scene.

After the scene, head back inside. Walk down to trigger more events.
25. Meet the CC Group
When you have control of Squall again, save your game. Then head to the main hall, where the directory is. You are told by garden faculty that the garden master wants to see you. Ignore it for now, and avoid the elevator.
Look for a SeeD in the main lobby there who talks about CC Group. His name is Jack. You want him to challenge you, but he won’t do so until you’ve won 15+ card games in Balamb Garden, excluding games played in the Library, Cafeteria, and Classroom. If you haven’t played enough Triple Triad in Balamb Garden, pester passing SeeDs until you find one willing to play cards, and earn your 15 wins. Then consider saving back at your Dormitory before moving on.


So play Jack at cards and win.


Afterwards, you may as well save at the Dormitory since it is so close.

You should, at this point, have every level 1-7 card except for one level 5 card, the PuPu card.
Swing by the Infirmary and win a game against Dr. Kadowaki.
Save your game once more, we’re done playing cards for now!
26. The Garden Master
Prior to drowning your sorrows in sad binge of Triple Triad, you had been summoned to the Garden Master. At this point, you’ve kept him waiting long enough. Head to the main elevator and take it down to B1.
You get the honor of witnessing a little domestic dispute between Cid and the garden faculty. Afterwards, approach and speak with Cid. When the dialogue is over, double check that Squall, Rinoa, and Zell all have their junctions (a glance at their HP should be a good enough indicator).
Exit to the left. Enjoy some more dialogue.

NORG is in his pod at first (NORG Pod). Beat it with physical attacks until it breaks and reveals NORG. Draw Leviathan from NORG immediately. Then finish him off with physical attacks and limit breaks.
Now that you have Leviathan, you probably want him to learn things in a priority like: Supt Mag-RF, GF Med-RF, Spr+20%, Spr+40%, Spr Bonus,
Junction Leviathan onto Squall, since he’s the only party member without Spr-J. Redo his magic junctions with Auto/Atk. At this point, you may as well re-junction Rinoa and Zell’s magic to Auto/Atk as well. If Rinoa didn’t have Str-J prior to arriving at Balamb Garden for the chaos, she probably has it now after farming all that AP. Now that you’ve rejunctioned her, keep her boosted strength in mind and don’t try to attack any low level creatures you run into.
Once your GFs’ skills being learned and your characters’ junctions are all set, exit to the right. Climb up the little staircast and enter the elevator. On the first floor, make your way to the Infirmary.
Speak with Dr. Kadowaki. Respond “Yes, now.” Walk up to enter area where Cid is. Speak with Cid. Choose “I want to make a report.” Speak with him again. Choose “The real meaning of SeeD.” Speak with him again. Choose “About Sorceress Edea.” Speak with him again. Choose “About Master NORG.” Speak with him again. Choose “About what to do next.”
Head back to the main lobby with the Directory. After some dialogue with Xu, head to the elevator and take it to the second floor (2F). Cross the bridge to the hallway. Then go up along the hall to the end and go through the door to the balcony.
After some dialogue, head right to leave the balcony. Head back to the elevator, go to the first floor, and make your way to the Library. walk to the right until you get to the next screen.
After scenes, Rinoa shows up in your room (would be Zell if Rinoa weren’t in your group). Tell her “I’ll play along.”
Save your game at the save point.
27. Fisherman’s Horizon
Exit the Dormitory. Continue walking down, and you will get an announcement by Cid followed by a cutscene.
After Cid dismisses you, use the examine button on the bridge elevator to take it down to the third floor. After the talking, exit down. Then use the main elevator to get down to the second floor (2F).

Then cross the bridge. Follow the hallway up. Take the door at the end of the hallway to get out to the balcony.
Follow the path to the right. After the scene, exit to the right again.


As you walk to the right, you come across a stealthy ladder which you can, and should, climb down. At the bottom of the ladder, walk to the left, and climb up the smaller ladder. Then continue further to the left and walk up another small ladder. Exit to the left.
Speak with the Master Fisherman and respond with “I’m sorry… It’s our fault.” For your good manners, you receive a copy of Occult Fan III. Speak with the Master Fisherman again, and he will ask you to find a pupil of his at the docks.
Exit to the right, then backtrack through the three ladders again to get back to the catwalk above. Proceed to the right to trigger dialogue, and answer “Yes” when prompted.
At the bottom of the lift, exit to the right. Follow the rails to the right until you reach the next screen with the save point. Then exit to the right, along the bottom track.

Leave the dock (back to the left) and then follow the tracks up to the next screen. Enter the house on the top right. Inspect the Moomba. Then read the old issue of Timber Maniacs lying on the floor. Leave the house.
Exit down. Follow the tracks down and left to the next screen with the save point. Save your game! Exit left.
Exit up. Follow the path to the right until you reach the next screen, with the mayor’s house. Exit to the right again. Challenge Martine to win back the Ifrit card! Exit left. You may wish to go back and save again, as you have another card game coming up. Enter the mayor’s house. Take the stairs to the second floor.
After the dialogue, challenge the mayor to a card games and keep beating him until he plays and loses the Quezacotl card.

Junction the Enc-None ability onto Zell, since the area is about to get filled with Galbadian soldiers.
Then exit to the bottom left. Continue walking left along the path until you reach the next screen with the train tracks. Exit to the right.
Save your game at the save point. Then follow the bottom track to the right to get to the next screen. Enter the house on the left, just past the drunk on the curb. Go upstairs and read the issue of Timber Maniacs on the floor near the cabinets at the end of the bed. Leave the house.
Continue along the tracks up to the next screen for a scene. Choose “Go help.” Walk left to approach the mayor and the soldier.
The first battle is a scripted non-boss battle, so you need to use Breaks to end it without picking up EXP.
As soon as the battle is over, you get into another battle with:

Talk to Rinoa. Answer however you like.
Talk to Mayor Dobe. Choose “I want him to understand us.” Then choose “Try to continue.”
Walk to the right to get back on the tracks, and exit down. Then walk up back to the screen you just left. Walk left to where you faught the boss a few minutes ago.

Talk to the man by the stairs. Answer “Yes.” Walk right back to the tracks, then exit down.
Walk down a bit til you reach the dock on the right, then exit right along the dock.
Talk to the boy in the boat again. Exit left. Then exit left again. Save at the save point. Exit left once more. Then exit down, back toward the way we came into town from. Speak with Familiar Face #2 at the lift and answer “Yes” to catch a ride up.
Approach Irvine to chat and have him join you. Continue to the ladder on your left. Use the three ladders to get back to the Master Fisherman. Speak with the Master Fisherman.
Go back through the three ladders to the upper catwalk again. Walk to the right and talk to Familiar Face. Answer “Yes” to go down. At the bottom, exit to the right. Then take the tracks to exit right again. Save your game at the save point? Follow the lower track right to the next screen.
Enter the hotel on the left, just past the drunk on the curb. Go up the stairs to the second floor. Choose “Why not…?” Follow the Master Fisherman out of the hotel, across the tracks, and along the dock. Talk to the shopkeeper. Choose “I think you’re right.” Talk to the shopkeeper again. Choose “No, it’s all right.” Receive Megalixer.
Exit to the left. Walk left to the tracks and then up along the tracks to the next screen. Enter the house on the top right (Grease Monkey’s house!). Talk to the Galbadian soldier. Then leave the house. Then re-enter the house. Talk to Grease Monkey. Receive Megaphoenix (because you brought Squall and Irvine).
28. Putting on a Show
Head back to Balamb Garden and make your way to the Quad. Continue to the stage, and talk to Selphie. Choose “Cheer her up.”
You will need to pick one of these two combinations of instruments:
- flute, violin, guitar, tap (Irish Jig)
- electric guitar, sax, piano, bass guitar (Slow Dance)
First, you get to choose Zell’s instrument. As Zell is playing, have Irvine exit to the left (we are now down in front of the Mayor’s house in Fisherman’s Horizon again). Make your way around to Grease Monkey’s house again. The Galbadian soldier is back, harrassing Grease Monkey again. Speak with the soldier, leave the house, then enter the house again. Speak with Grease Monkey. Receive Phoenix Down. Inspect the beat up Galbadian soldier for 15 x Fast Ammo, 10 x AP Ammo, and 5 x Pulse Ammo. Return to where you left your band in front of the mayor’s house.
As Squall, leave your Dormitory room. Speak with Rinoa. Respond with “…I don’t know”.
Speak with Irvine twice. Proceed toward the mayor’s house until you reach the stage. Exit to the right. Check the magazine on the ground.


Back in Balamb Garden, head for the bridge.
Talk to Nida, and choose “Yes” to launch.
You are required to form a party. Pick Squall, Zell, and Rinoa, since they should still have all the Magic you use for junctioning.
Balamb Garden is finally functionally mobile!
29. CC Group King and Queen
Use the menu button to return to the bridge of Balamb Garden.
Talk to Xu. Turns out she’s CC Group Queen. Challenge her and win. Continue until you win the Carbuncle card from her.
Talk to Nida. Then head down to the Infirmary. Challenge Dr. Kadowaki and instead of playing she just tells you about how she used to be CC Group King.
Head to the Dormitory. Save your game.
Rest in your bed until the current CC Group King makes an appearance. Win. You need the Gilgamesh card from the King, so if you don’t win it the first game, then save at the save point and head to the bridge to keep playing until you win the card.
Speak with Nida and respond “Yes.”
30. Odin and Tonberry King
There is a long bridge crossing the ocean which you cannot go under, so head west toward land, use the beach to get onto the land and then head south of the bridge to get back into the ocean. Your goal is the continent south of Fisherman’s Horizon.

Setup your GF and Magic Junctions again, using Auto/Atk Magic junctions. Something like this:
- Zell
- GFs
- Shiva
- Diablos
- Abilities
- Magic
- Draw
- Item
- Passive Abilities
- Enc-None
- Vit+20%
- GFs
- Squall
- GFs
- Ifrit
- Siren
- Carbuncle
- Leviathan
- Abilities
- Magic
- Draw
- Item
- Passive Abilities
- Str+20%
- Str+40%
- Mag+40%
- GFs
- Rinoa
- GFs
- Quezacotl
- Brothers
- Abilities
- Magic
- Draw
- Card
- Passive Abilities
- HP+20%
- Mag+20%
- GFs
At this point, I had somehow gotten Squall too much Magic and he could not draw anymore. You may wish to clear out some room as you will be drawing from Odin. Things you have drawn from draw points, but not gotten 100 of because you aren’t junctioning it, can, for the most part, go, such as Aero, Thundara, Drain. Other Magics which you junctioned way back before better choices were available can also go, such as: Blizzard, Thunder, and Fire. Remember to save Breaks, Scans, and Cures, Hastes, etc., even though you don’t junction these, for actual casting. Just exchange the unneeded ones off to characters not in your party (Irvine, Quistis, Selphie).
Once you’re sorted, you might as well save your game again. Then head into the ruins.
You get a 20 minute timer. Exit up to the next screen. Then climb the stairs to the next screen. Then another staircase to the next screen.
Walk up and enter the structure. Step on the elevator block for a lift. Climb the ladder on the left, then climb another ladder until you arrive at a doorway. Enter and examine the control panel. Go back outside and climb down both ladders. Examine the blue orb on the altar. Exit right via the new staircase. Continue up the stairs to the right, past the ladder you used previously and on to the next screen.
This room has a ladder up on the left and a staircase up on the right. Take the ladder up to the landing. Examine the statue and remove its left eye. Climb back down the ladder and up the staircase on the right to reach the next screen.
Take the ladder up the dome to the rooftop. Examine the statue and insert the left eye. Write down the code you receive!!! Then remove both eyes.
Climb back down the ladder. The back down the stairs at the bottom of the screen to reach the area with the first statues you robbed of its eye. Climb the ladder on the left and insert both eyes into the statue.
Enter the code from the statue above that you wrote down. Enter the number, from top to bottom, using the directional pad/stick to cycle numbers and switch digits. After entring the correct number, hit triangle/Y/B2 to unlock the door below. Take the door to fight Odin.

For winning, you receive, among other things, Odin’s card.
Redo your Magic junctions to Auto/Atk again and see Triple bringing you to new heights of damage dealing.
Check and update your GFs learning abilities as necessary.
Leave the Centra Ruins by the way you came in and save your game on the world map.
Re-enter the ruins. Exit upwards. Then go up the stairs to the next screen.
Remove the Enc-None and run around getting into fights with Tonberries. They have a ton of health, but give 0 EXP and 1 AP when killed, so just beat them down with physical attacks and limit breaks. Squall probably hits for 2k+ damage or so when you time the trigger right, but you can use Cures to keep your characters at 650-900 health or so and just use limit breaks to get the job done quicker. If you stick to purely limit breaks, you can usually take them down without any damage to your own party.
You may wish to save on the world map every 5 kills or so.
After about 20 or so Tonberries, the Tonberry King shows up, presumably to dish out some justice for your crimes upon his people.
Just kill him with limit breaks, and then hit him with more limit breaks. A couple rounds of Squall’s Renzokuken limit breaks with Zell and Rinoa helping out with their own ought to put the Tonberry King in his place.
Have the Tonberry GF learn things in roughly this order: Initiative, Haggle, Sell-High, Familiar, Call Shop, etc.. Junction him to Squall.
Enable Enc-None on Zell again, and double check the skills your other GFs are learning.
Leave the Centra Ruins and save your game back on the world map.
31. Shumi Village
From Cetra, take advantage of one of Final Fantasy’s world map oddities by traveling south until you get from the far south of the map to the far north.


Work your way around the eastern side to curl around to the south-facing beach. Pilot Balamb Garden over to Shumi Village. Hop out of the Garden and enter Shumi Village.
Walk up to the dome structure. Enter up through the door.
Walk up and enter the elevator. Exit the elevator.
Walk to the left and up into the first house. Leave the house.
Walk left along the path to the next screen. Continue left to the next screen. Enter the house on the left.
Walk up to approach the statue of Laguna. Respond with “Ok.” Have Rinoa or somebody draw Firagas from the draw point behind the statue. Leave the building.
Enter the house on the right. Read the Timber Maniacs issue on the bed. Leave the house.
Walk down to the main path and exit to the right. Have Rinoa or someone draw Blizaga and then enter the Elders’ house.
Try to leave the elders’ house. Then leave the elders’ house.
Exit to the left. Re-enter the house on the left. Approach Laguna’s statue. Speak with the Sculptor. Respond with “Alright.”

Exit to the right. Exit to the right again. Approach the bluish-gray rock between the two buildings. Squall says “Hmm” so go ahead and examine them to claim the wind stone. Return to the Sculptor and speak with him. Leave the building.
Exit to the right. On the right side of the screen, approach the tree roots. Squall says “…..?” Examine them to climb up and get the life stone. Return to the Sculptor and speak with him. Have Rinoa draw Firaga from the draw point again if you are able. Leave the building.

Enter the building on the right. Examine the kitchen sink for the water stone. Return to the Sculptor and speak with him. Draw Firaga from the draw point again if you can. Leave the building.
Exit to the right. Enter the elders’ house. Try to leave the building. Receive a Phoenix Pinion. Choose “Explain what it all meant.”
Return to the statue of Laguna and speak with the Sculptor. Draw Firaga from the draw point. Leave the building.
Enter the house on the right. Speak with Artisan several times until he starts repeating himself. Leave the building.
Exit to the world map.
Re-enter the village. Return to the statue of Laguna. Speak with the Attendant on the left.
Return to the Elder’s house and speak with him.
Leave the building. Speak with the Moomba.
Return to the statue of Laguna. Draw Firaga from the draw point. Speak with the Attendant.
Return to the Elder’s house and speak with him again.
Return to the statue of Laguna and speak with the Attendant again.
Leave the building. Enter Artisan’s house on the right. Talk to Artisan.
Return to the Elder’s house and speak with him again.
Leave Shumi Village, hop on your mobile garden, and head back to Fisherman’s Horizon.
Go to and enter Grease Monkey’s house. After the snippet of dialogue, approach and speak with Grease Monkey for more dialogue.
Yay you have an invisible pet Moomba.
Leave Fisherman’s Horizon and return to Artisan’s house in Shumi Village. The Moomba Doll starts to pester poor Artisan.
Leave the building and approach Master Fisherman for dialogue. Talk to the Master Fisherman, and he goes running away.
Exit to the right. Draw Blizzaga from the draw point, and enter the Elder’s house. Speak to the Elder. Receive Status Guard.
Return to the world map and save your game.
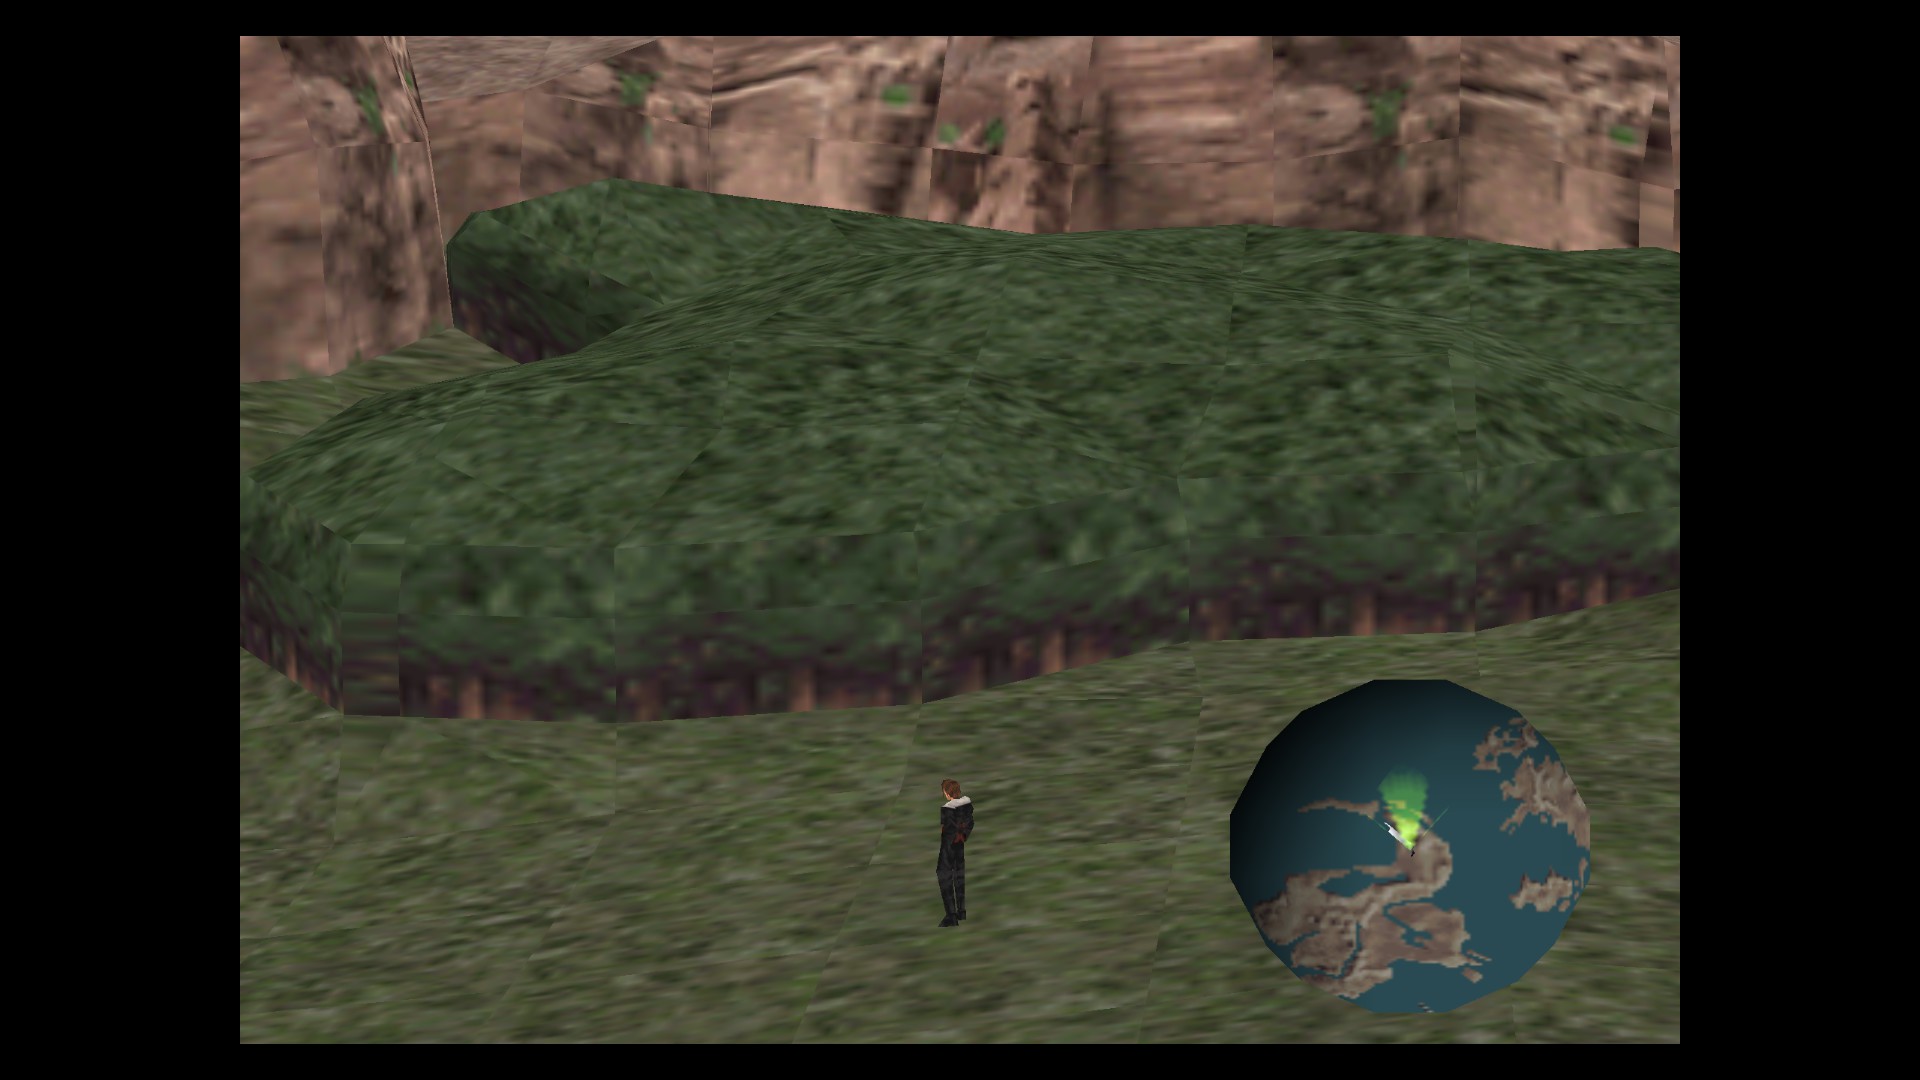
32. Chocobo Forests

Enter the forest.
Speak with the boy. Respond “Yes.” Then “Is it going to cost me…” or something like that. Then “…Pay it” for the lesson.
X/Square/B3 swaps whistles (Sonar vs Ziner). Y/Triangle uses the selected whistle.
- X/Square/B3 lets you switch from Sonar to Ziner and back
- Y/Triangle/B4 lets you use the selected whistle, just hold the button down to check the readings in a spot.
- Using the Ziner with no Chicobos around will result in losing the Ziner and needing to purchase a new one.
- In each forest, once you are down to one single visible Chicobo, speak with it.
- The visual sonar bar only works when you are holding the whistle button.


A bit above and to the right of the boy, the sonar will go crazy and you can use the Ziner to get the Chicobo to drop. Approach the Chicobo and speak with it to get big mama bird to appear. Switch back to the Sonar. Walk to the right a bit, spamming the whistle button to find a suitable spot for mama chocobo to dig. When you find it, use Ziner again to dig up the Aura Stone.
Examine the big Chocobo. Choose “I guess I’ll ride the chocobo outta here.”
Drive the mobile garden to the Trabia continent south of the one with Shumi Village, using the beach on the west coast to get ashore. Here you can find Chocobo Forest: The Basics Snowfield. Enter the forest. Use the screenshots below to help guide your usage of the Ziner.


Drive the mobile garden east around some mountains to find Chocobo Forest: The Roaming Forest. It’s not far from the wrecked Trabia Garden.


After you’ve gotten the chocobo to dig up your items, you’re done with this forest as well! Leave, save, hop back into your garden.
The ledge you take to reach the forest is too narrow for the garden, and will cause it to slide into the water. Park the garden next to the mountains and then just run around them to the forest.
The sensor area for this Chicobo is very tiny, you may even pass over it a few times before nailing it down. When you do finally get solidly on the spot where the Sonar is going crazy (see screenshot below), use the Ziner.
Choco Boy is covering the treasure spot. Challenge him to cards, then tell him to “Forget it, just move.” He moves a couple times to get out of the way.

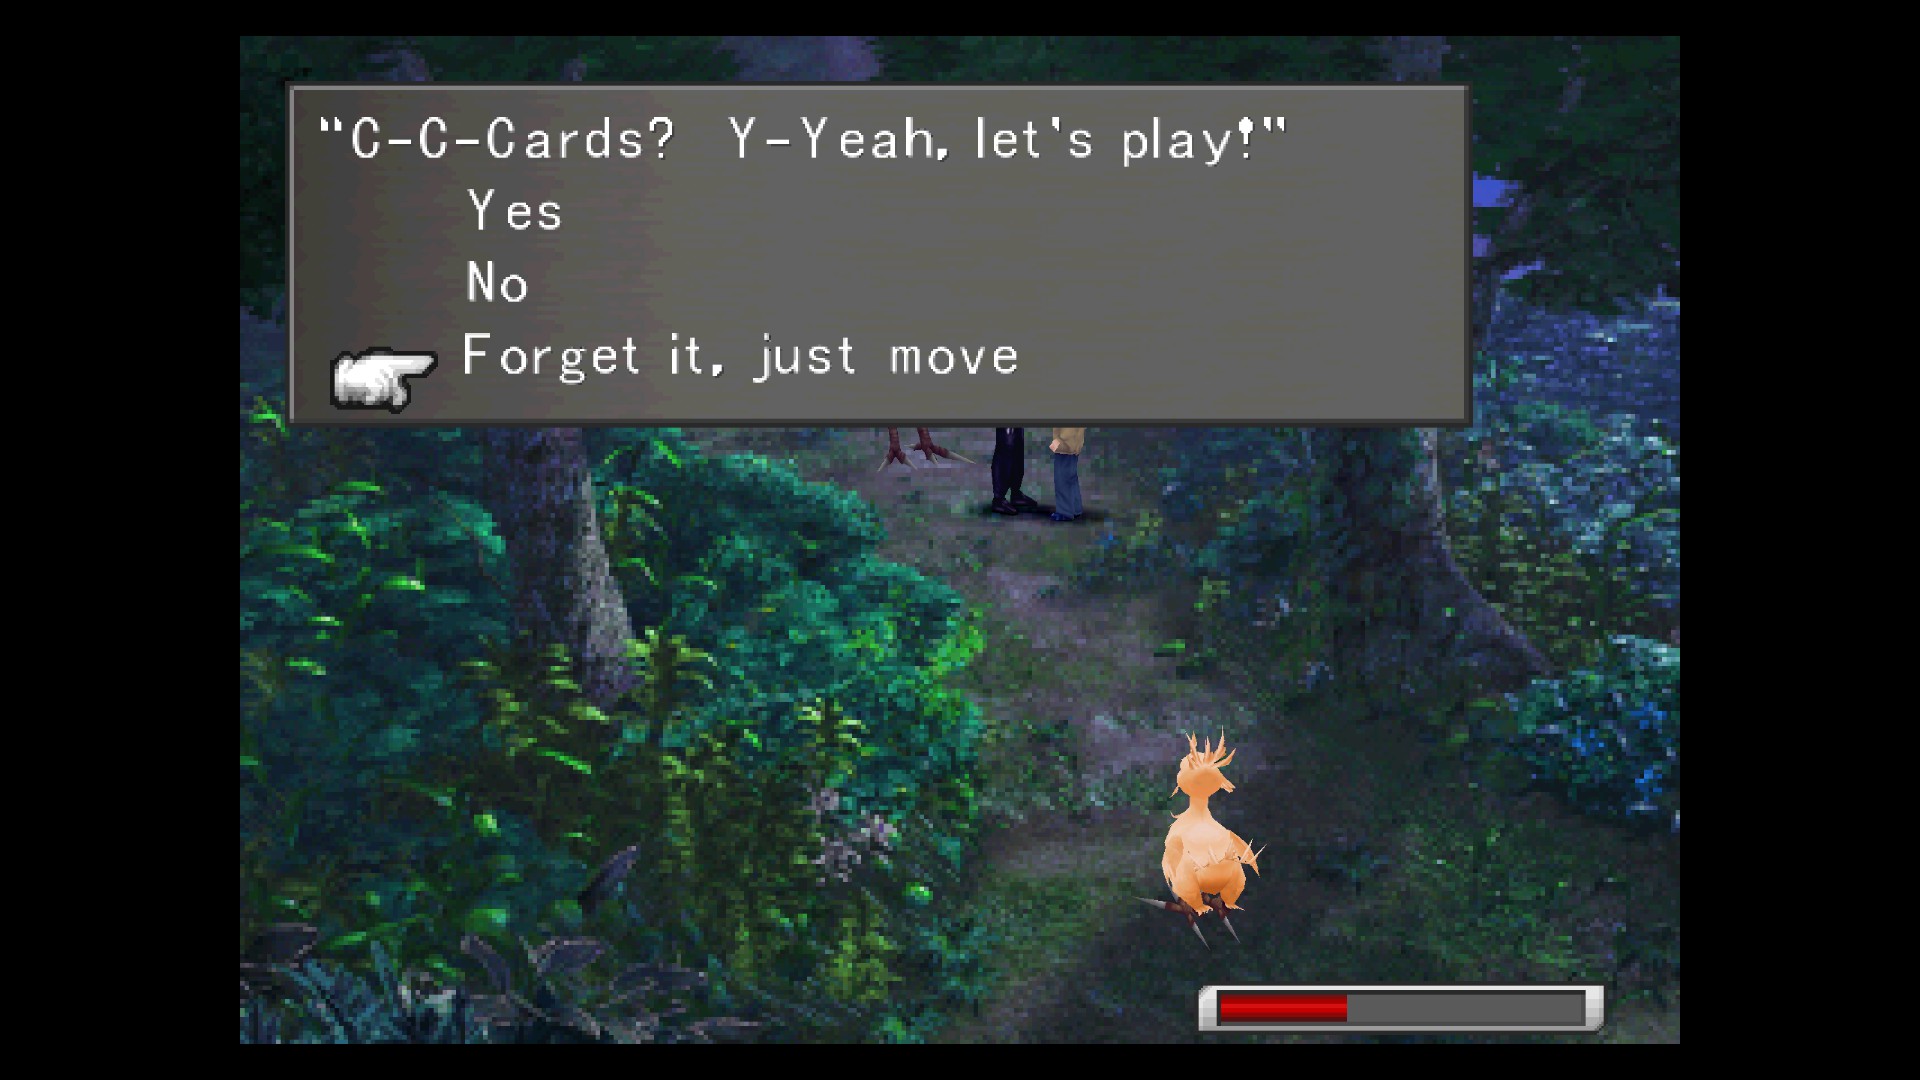
Seems you can’t change from Sonar to Ziner while standing on the treasure spot? Get a good feel for it, step away, switch to Ziner, step back, get your treasures: Protect Stone and Meteor Stone.
Walk around to your mobile garden, and head for the southwestern tip of the Centra continent. Here you will find Chocobo Forest: Forest of Fun.
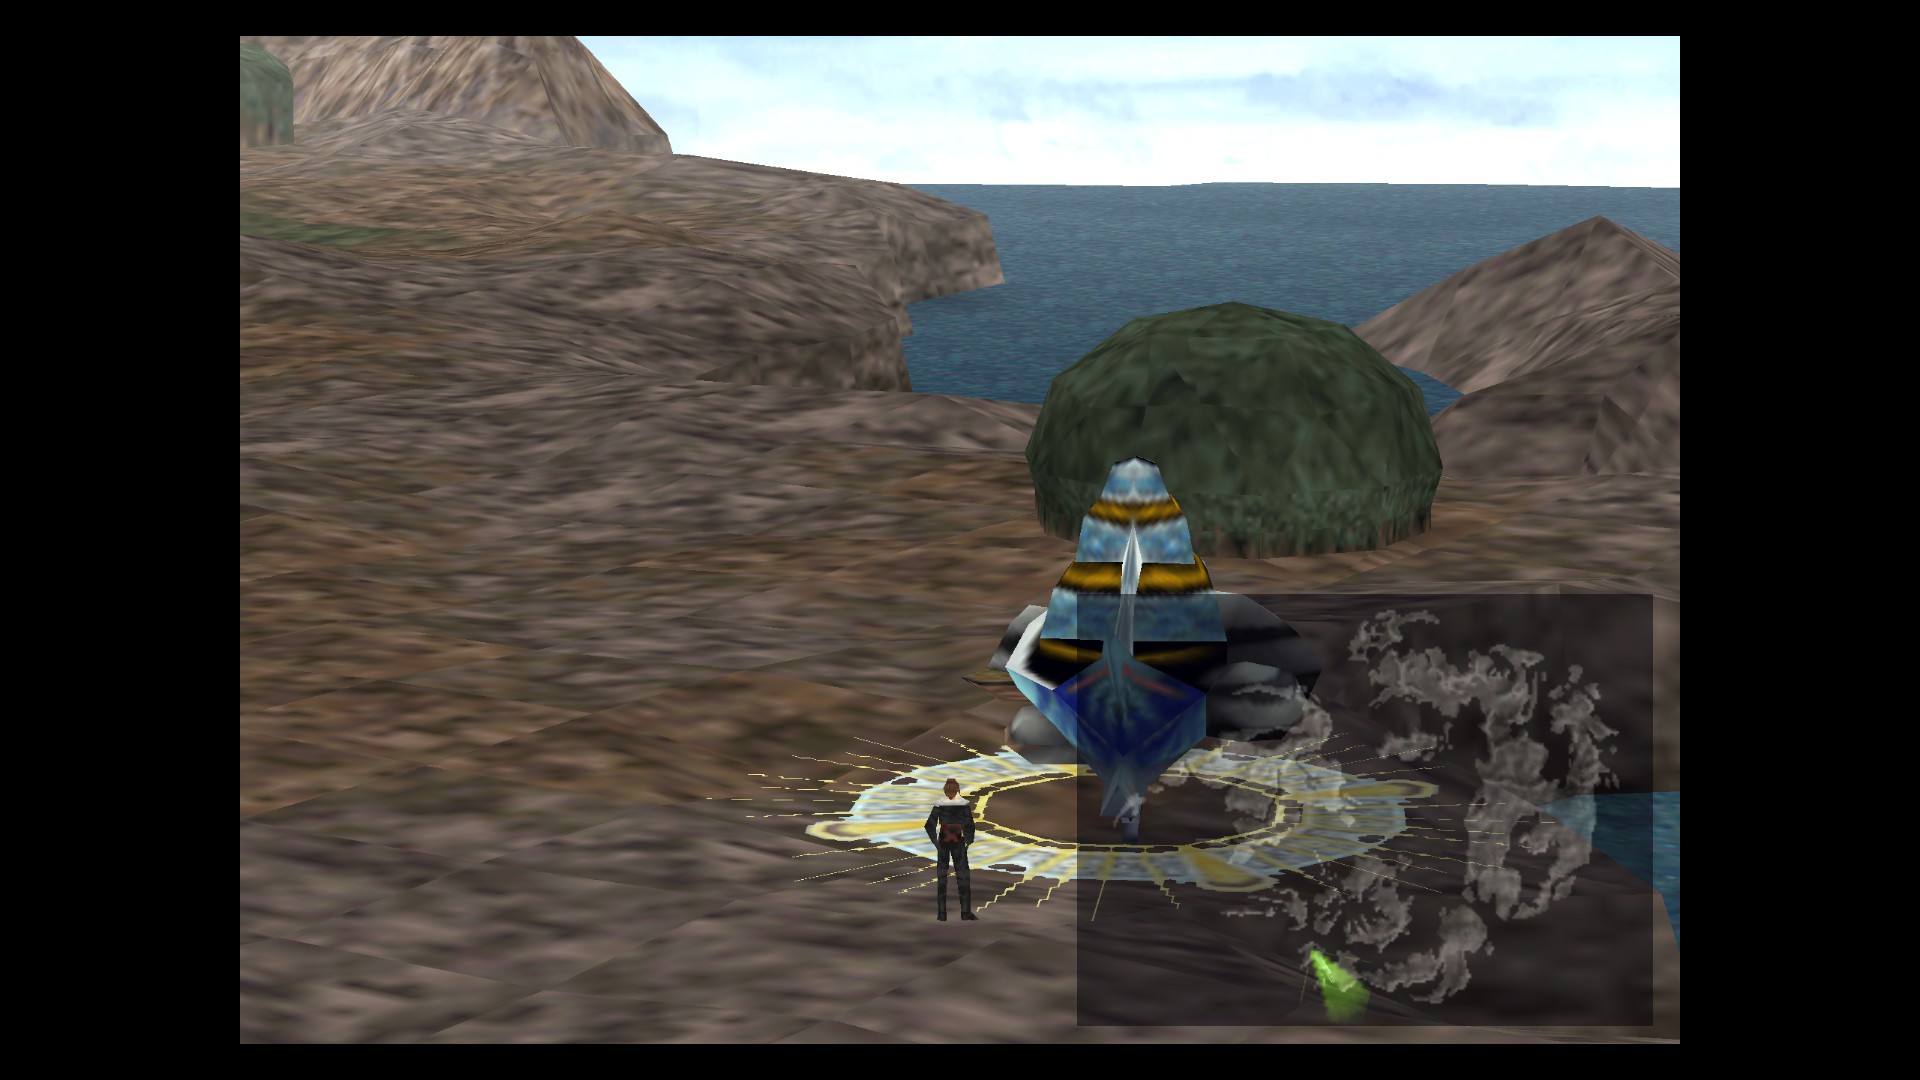


Go to the southeast part of the Centra continent. There is a strip of beach on the eastern side of the island where you can leave the garden. Walk the narrow path between the mountains on foot and head south to find Chocobo Forest: The Secluded Forest.


Enter Chocobo Sanctuary. Walk up and approach the Chocobos for a dance. Approach the Chicobo and talk to it. Receive Chicobo Card. Speak to Chicobo again to get Geyshal greens and be robbed of 600 Gil.
Leave and re-enter the forest to pick up a big Chocobo to ride back to your mobile garden.
You can start Chocobo World (see “59. Chocobo World” section later in this guide), or do it later.
33. UFOs
Time to get some UFO sightings out of the way.
You can (and probably should) leave Enc-None on, and will still be drawn into scripted battles in which you will not be required to fight.
Head to Mandy Beach, just east of Timber. Walk around on the beach until your have your UFO encounter. The UFO is stealing a statue.


Obel Lake Clue 3/4: R E A I D R
Now go to Kashkabald Desert, on the southern end of Esthar continent. To get there, take the beach on the west coast of the Centra continent, and drive your mobile garden as far east as you can. Park it and walk through the narrow path between the mountains on foot. Walk into the desert. Spot the UFO over near the western part of the desert. The UFO is stealing a pyramid.


Finally, make your way to Winhill Bluffs, near Winhill. You can find the UFO just east/southeast of the village near the path. The UFO is stealing a cow.


Save your game.
34. Winhill Vase Quest
Switch Zell for Quistis for a bit, but don’t bother exchanging their junctions.
Enter the town of Winhill, from the east side (along the road).
Walk up and enter the mansion. Speak to the owner on the stairs.
Examine the armor on the first floor of the mansion for a brief scene. Pick up the broken vase piece that has landed on the floor.

Leave the mansion and enter Raine’s house on the left. Head upstairs and speak with the woman there until she mentions the smell of flowers. You can speak with the cat.
Go downstairs and examine the bottom right table to see a ghostly image of Raine. Trying to talk to the ghost only results in it turning into a cat. Talk to the cat to get a piece of the vase. Leave the house.


Exit down. Draw Drain from the draw point.
Enter the florist’s house. Speak with the woman. Inspect the flowers in the foreground, and answer “Yes.” Examine the flowers again for another piece of the vase.

Leave the house.
Exit down. Stand in the Chicobo’s path and [presumably spam talk/examine?] kick the Chicobo once for the vase piece to fall from him and drift to the ground where you should be sure to collect it.

Then kick the Chicobo another couple times for Gysahl Greens and a Phoenix Down.
Return upward two screens to town square then go up into the mansion. Speak to the owner on the stairs a couple times. Receive a Holy Stone.
Leave Winhill. Switch Quistis back out for Zell. Save your game.
35. Doomtrain Dependencies
While tying up loose ends, you may as well make sure you have everything you need to get the Doomtrain GF in a bit.
You need:

- 6 x Malboro Tentacle
- 6 x Steel Pipe
- 6 x Remedy+
The Malboro Tentacles will require you to Card Mod 24 Malboro Cards if you don’t already have Tentacles. If you need to, play some cards against players who play the cards to win some.
The Steel Pipes are easier. as you only need to Card Mod 6 Elastoid Cards to get your 6 Steel Pipes.

If you either enter Winhill from the west side, or walk down a few screens from the town square, you will find the Hotel and Item shop screen. Here you can buy yourself the 60+ Remedies you will need.
Save your game.
36. Return to Balamb
Time to continue the storyline. Take the mobile garden back to the town of Balamb. Enter Balamb.
Walk down a few steps to trigger dialogue. Talk to Zell. Then talk to the Galbadian soldier by the gas pump. Then talk to the two civillians on the screen. Try approaching the Galbadian soldier.
Choose to keep a group with Squall, Zell, and Rinoa. Walk downinto the town.
Draw Thunder from the draw point unless you already completed the relevant achievement.
Enter Zell’s house. Walk into the room on the right. Leave Zell’s house.
Go to the Hotel. Talk to the guards.
Return to Zell’s house. Attempt to go up the stairs. Go up the stairs.
You can rest and save here while stuck in Balamb. Consider saving your game in a new slot, as you are stuck in the town until you either complete this chunk of storyline, or go through an optional sidequest to get back out.
Leave Zell’s house.
Exit down, then continue past the hotel and exit up to the docks area. Walk up past the guard to the next screen, even more docks!

Return to Zell’s house. Speak to Ma Dincht a couple times. Leave Zell’s house.
Return to the dog at the docks. Speak with the dog. Follow the dog through town.
Consider saving your game at Zell’s house, as a boss fight is coming up. Also ensure your characters do not have too much magic to draw more.
Head to the hotel for some action.

These guys are super weak, so you can use physical attacks to end the fight in just a few quick attacks.
After the right, there will be some brief scene/dialogue, before you are thrown into another boss fight.

They are both super weak and will happily fall down super easily for you. Kill them with physical attacks and limit breaks.
After the scenes, speak with Nida and choose “Yes.” Choose Squall, Zell, and Rinoa again.
Land the mobile garden so you are on foot.
Junction Pandemona to Squall.
Check and update what your GFs are learning if necessary…
Recommended Pandemona Learning Order: Spd-J, Spd+??%, Str+??%
Save your game.
37. Queen of Cards Introduction
Head into Balamb and make your way to the train station. Challenge the Card Queen to a game of Triple Triad.
- If she does not use All or Diff trading rule, say no and try again.
- Play MiniMog, Chicobo, Sacred, and two low level cards.
- Be sure to LOSE in such a way that Card Queen takes MiniMog, Chicobo, and Sacred. If she doesn’t, soft-reset and try again.
- Talk to her afterwards, and she declares where she will move to. If she says anything other than Dollet, soft-reset and try again.

Go to Dollet. Save your game.
Enter Dollet. Exit down, along the stairs to the left of the road.Draw Silence from the draw point. Make your way down two more screens to reach the Shining Bomber pub. Enter the pub and go up the stairs.
Talk to the Card Queen. Ask “About your artist father.” She tells you that he created the Irvine, Kiros, and Chubby Chocobo cards.
Leave the pub. Walk down to the next screen and approach the boy. Follow him into the house on the right.
Challenge the boy to cards. Consider soft-reset and try again (don’t forget to talk to Card Queen again) if sudden death rule spreads.
Win back Sacred, MiniMog, and Chicobo.
Leave Dollet.

Go to the Shopping Arcade.
There is a guy in a dark outfit on the left sidewalk.
He has the Kiros Card. Win it from him.
Leave Deling City.
Go to Fisherman’s Horizon.
Visit the Mayor’s house. Go up to the second floor.
Challenge Flo to a game of Triple Triad and win the Irvine Card from her.
Return to Balamb Garden.
Visit the Dormitory and save your game.

Challenge him to a game of Triple Triad and win the Chubby Chocobo Card from him.
Save again at the Dormitory.
Head to the garden’s bridge/cockpit. Talk to Nida and say “Yes” to take off in the garden.
Take the garden back to the town of Balamb.

Draw Thunder from the draw point on your way to the Hotel.
In front of the Hotel you will find the Hotel Owner. Beat him at Triple Triad until you win the Pandemona Card from him.
Leave Balamb. Save your game.
38. Trabia Garden
Fly the mobile garden to Trabia Garden.
Enter Trabia Garden. Examine the green net.

At the bottom of the screen, just to your right as you enter, is an issue of Weapons Monthly (August).
Draw Thundaga from the draw point.
Talk to Selphie’s friend. Choose to “Just play along with it.”
Walk up a little and exit to the right to get to the cemetary.

Above and to the left of the draw point is an invisible issue of Timber Maniacs (see screenshot below). You can just keep spamming the examine button while walking around to find it.
Exit down to get back to the main square. If you can draw Thundaga again, go for it. Then exit left to reach the Garage.
Exit right to reach the classroom, where there is a save point. Approach the computer terminal. Examine the terminal.
Head left back to the garage. Talk to the girl by Selphie.
Return to the Cemetary. Approach Selphie.
When she is done talking, return to the Garage.
From the Garage, exit left to find the wrecked Stage. Then exit left again to get to the basketball court. Attempt to leave to trigger some scenes.
As Squall, trapped in Irvine’s flashback, follow Irvine up through the door out of the orphanage. Talk to the little kid outside. Then walk left and up to exit toward the beach.
Walk down the stairs and approach your party members for more scenes.
Follow Irvine out of the room.
Talk to Irvine, then Quistis, then Selphie.
Approach Rinoa. Make a party of the usual already-junctioned Squall, Zell, and Rinoa. Poof, you are back in control of your mobile garden.
Park the garden and save your game.

Draw Thundaga from the draw point again if you can.
Challenge Selphie’s friend to a game of Triple Triad.
Win the Selphie Card from her.
Leave Trabia Garden. Save your game.
39. Garden Battle
Double check your junctions and GF skills.

Choose “Prepare for the attack.” Then “Prepare our defense.” Then “Take care of the junior classmen.” Then “No orders/End.”
Take the bridge elevator down. Talk to Quistis. Have Quistis and Selphie come along with Squall, but don’t bother doing any Junction Exchanges for now.
On the second floor, talk to everybody to send them about their business. Proceed left to the next screen and send the pair here to their duties as well.

Head to the first floor and make your way to the Quad. You can save at the save point along the way, on the screen just left of the main lobby.
In the Quad, head down and left to the next screen, where you find Zell organizing the troops.
Talk to Zell. Talk to Rinoa. Try to leave.

Then exit left for a scene.
Go to the front gate.
After some dialogue with Squall, choose Selphie and Quistis. Exit up.
Junction Exchange Zell/Quistis and Selphie/Rinoa. Your party should now be at full strength and rocking Enc-None.

After the fight, walk down and to the right to find a SeeD girl comforting a couple kids. Talk to her.
Head back to the bridge for some dialogue and scenes.
Take the elevator down to the second floor. Exit left and you might see the boy running up to the next screen. Exit up to the end of the hallway to find the boy. Talk to him.
A paratrooper barges in and knocks you down a couple of times. Do not move. Hit the talk/examine button. Choose “Look around for another option.” Then press talk/examine again and choose “Press the button for the emergency exit.”
You are thrown into a fight in the air with the paratrooper. Block a bunch and sneak in some hits. If you lose you get to try again.

Choose “Rinoa, Let’s Go.”
There is a hidden Aura draw point at the top of the screen among the trees.
Enter Galbadia Garden via the giant doorway on the left.
After the dialogue, you can restore Squall/Zell/Rinoa party and Junction Exchange Quistis/Zell and Selphie/Rinoa again to bring the party up to full strength.
You can save at the save point, but with Enc-None, not much happens and you come by it again.
Exit to the right. Then exit right again. Go up the stairs. Talk to Fujin and Raijin.
Exit to the left. Then exit right. Talk to the student to receive a Card Key 1,
Head back to the save point (down, down, downstairs, down, down).
Again, you can save but should not need to yet.
Exit to the left. Unlock the door on the left and take it to the ice rink. Walk up, across the rink, and go up through the door to the right. Exit to the right. Talk to the student to get Card Key 2.
Exit left back to the hallway. Walk down to unlock the door. Exit down.. Then exit down again.
Save at the save point.
Exit right. Then exit right again. Go up the stairs. Go up the stairs again. Unlock the door and exit through it.

Exit to the left. Then exit down. Then exit down again. Then exit down once more.
Walk around the room (avoiding the monster in the middle) to the save point.
Use a Tent and save your game before inspecting the GF in the center of the room.

Cerberus has nothing fun to Draw, so just beat him down with physical attacks and limit breaks.
For your trouble, you receive the Cerberus GF and the Cerberus Card.
Junction Cerberus to Zell. Recommended learning order something like Spd-J, Spd+20%, Spd+40%, etc..
Double check what skills your other GFs are learning.
Save your game.
Exit down and to the left. Then enter the door on the left. Talk to the student for Card Key 3.
Exit right back to the hallway. Exit up.
From the room where you beat Cerberus, take the top left exit. Then exit up. Take the stairs to the second floor. Exit to the left. Enter the elevator.
Save at the save point, then approach Seifer.

Draw Haste if you can and you want to, or just crush him with a few attacks.
After the fight, check which skills your GFs are learning, then save your game.
Take the elevator back down. Exit down from the elevator area, and then past the stairs you came up and exit to the right. Go around the room and exit through the door on the right.
Approach the middle of the room to trigger scenes and more battle.

You must kill Seifer first, and he’s still fairly easy. Just use physical attacks until he falls.
Make sure to draw Alexander GF from Edea!!!
You should have no problem finishing her off with physical attacks as well.
END OF DISC 2 — SAVE YOUR GAME
Disc 3
This marks the start of disc 3 of the game.
To recap, here are some things you should probably have by this point. If you are missing something, it is worth investigating whether you can complete it on discs 3/4, or whether you need to load an older save to pick up something you missed.


11/11
Funguar
Bite Bug
Red Bat
Blobra
Gayla
Gesper
Fastitocalon-F
Blood Soul
Caterchipillar
Cockatrice
11/11
Buel
Mesmerize
Glacial Eye
Belhelmel
Thrustaevis
Anacondaur
Creeps
Grendel
Jelleye
Grand Mantis
11/11
Armadodo
Tri-Face
Fastitocalon
Snow Lion
Ochu
SAM08G
Death Claw
Cactuar
Tonberry
Abyss Worm
11/11
Vysage
T-Rexaur
Bomb
Blitz
Wendigo
Torama
Imp
Blue Dragon
Adamantoise
Hexadragon
10/11
Behemoth
Chimera
Elastoid
GIM47N
Malboro
Ruby Dragon
Elnoyle
Tonberry King
Wedge, Biggs
11/11
Elvoret
X-ATM092
Granaldo
Gerogero
Iguion
Abadon
Trauma
Oilboyle
Shumi Tribe
Krysta
11/11
Jumbo Cactuar
Tri-Point
Gargantua
Mobile Type 8
Sphinxara
Tiamat
BGH251F2
Red Giant
Catoblepas
Ultima Weapon
10/11
Angelo
Gilgamesh
MiniMog
Chicobo
Quezacotl
Ifrit
Siren
Sacred
Minotaur
6/11
Diablos
Leviathan
Odin
Pandemona
Cerberus
7/11
Selphie
Quistis
Irvine
Zell
Rinoa
Seifer
* Weapons Monthly: March
* Weapons Monthly: April
* Weapons Monthly: May
* Weapons Monthly: June
* Weapons Monthly: August
* Combat King 001
* Combat King 002
* Pet Pals Vol. 1
* Pet Pals Vol. 2
* Pet Pals Vol. 3
* Pet Pals Vol. 4
* Occult Fan I
* Occult Fan II
* Occult Fan III
40. Visiting Edea’s House
Junction Alexander to Squall.
Recommended learning order: Med Data, Med LV Up, High Mag-RF, Revive, etc..
Make your way to the bridge and take control of the mobile garden. Choose Zell and Quistis, making sure to Junction Exchange Quistis and Rinoa so you your party is at full strength.
Drive the mobile garden to Edea’s house, oh look you are already there!
Park the garden. Enter Edea’s house.
Exit up into the building. Read the Timber Maniacs magazine on the floor to the right. Walk further into the room, and talk to Cid.
Exit right. Talk to Edea four times. Try to leave.
Take control of the mobile garden again (may as well pick Zell and Quistis again) and park it again.
Save your game.

Save your game. Head to the town of Timber.

Make your way through the town of Timber to the screen with the Timber Maniacs building.
The would-be journalist you met earlier is wandering around to the right of the door. Talk to him.
Receive Pet Nametag.
Return to mobile Balamb Garden.

Take the left path.
You will find a magazine on the ground, Weapons Monthly (July).
Save your game at the Dormitory. Then head to the Infirmary. Approach the bed where Rinoa is.
You are back in control of Laguna and need to pick somebody’s junctions for Kiros. Choose Quistis.
Using Square/X to block and Triangle/Y to attack in the mini-game battle. If you lose, choose “Not yet” to try again.
Choose “H-Hold on a sec…” to retreat.
You can get into random encounters here, so be sure to either flee, break, or card the enemies.
Kiros has no GFs, so give him Quezacotl and Brothers and junction his magic with Auto/Atk. Give him Magic, Draw, and Card skills and passive Mag+20%, Mag+40%.
Set Laguna’s abilities to LV Up, LV Down, and Draw with passives Mag+20%, Mag+40%, Luck+50%.
Kiros should have not much less than 100 Cures stocked.
Save your game at the save point.
Exit left, then approach the ruby dragon for a real battle.
Use LV Up on the dragon 3 or so times until you can draw Flare and Meteor from it.
Kiros has an easy time of it, pulling large numbers of spells to stock, so have him stop and cast cure on himself and Laguna whenever their health drops under 2k or so. Kiros will finish both spells long before Laguna finishes drawing the first, but try to stick with it if you can tolerate the patience it requires.


Get the ruby dragon down to level 1 by using LV Down on it until its level is reduced by 0. Then kill it for a small few EXP and cry over Squall’s first EXP gain, or if you really care, you can probably have Kiros kill Laguna before killing the ruby dragon to take all the EXP for himself and leave Squall at initial EXP level. It shouldn’t matter.
As Squall once more, head to the bridge and take the garden back to Edea’s house. Park the garden.
Junction poor naked Zell with Cerberus, Diablos, and Shiva again, Auto/Atk, abilities magic, draw, item, passives HP+40%, HP+20%, Enc-None.
Fix Squall’s abilities back to Magic, Draw, Item abilities as well, with reasonable passives like HP+% and Str+%.
And fix Quistis’ passives back to HP+40%, HP+20%.
Save your game.
Enter Edea’s house.
Inside the house, take the door on the top left for the Curaga draw point again, Quistis can probably draw from it. Then return through the house out to the beach and speak with Edea.
Return to the world map.
41. White SeeD Ship

The white SeeD ship should be in an inlet on the island north of Edea’s house. Find it.
Approach the white SeeD ship.
After the dialogue, exit up and to the right toward the other end of the ship.
After more dialogue, follow Zone upstairs.

Talk to Zone three times. Give him the Girl Next Door magazine for free. Receive Rename Card and Shiva Card.
Go back down the stairs. Then go down the stairs on the bottom right and through the door.
After handing over the letter, draw Holy from the draw point.
Talk to the leader.
Take control of your mobile garden and head for Timber.
Enter the town of Timber.
Make your way through town past the train station, past timber maniacs a couple screens until you reach the area with more train tracks. Save the girl.


After the scene shifts to the Hotel, examine the train on the left for a news flash about how great you are.
Leave Timber.
Take your mobile garden to the town of Balamb.

Continue into town. Draw Thunder from the draw point if you can.
Enter Zell’s house. Talk to Zell’s mom.
Head to the Hotel. Stay the night.
Go downstairs. Approach Zell. Receive Combat King 003.
Leave Balamb.
Save your game.
42. Travel to Esthar
Take your mobile garden to Fisherman’s Horizon.
Keep walking right to trigger a bunch of Squall’s internal monologue.
Examine Rinoa to trigger more dialogue.
Talk to Edea. Choose “Yeah, I remember.”
Attempt to walk up, or anywhere really, to be interrupted by more dialogue.
Choose your usual party of Zell and Quistis who already have their junctions setup. Edea may be pretty, but is a higher level and would affect the level of the monsters and bosses you fight.
Exit up to the world map.
Rejunction your characters Auto/Atk. Flare and Meteor are now taken advantage of for Squall and Quistis who have them.
Also make sure your characters have room to draw new spells, exchange non-junctioned magic you picked up from draw points, or old stuff like Fire, Thunder, Water, Holy, etc., to inactive characters so there is room in their 8 spell pages for more.
Save your game.
Just east of you is the Great Salt Lake. Enter it.
After the dialogue, exit up. Then exit up again. Then exit right. Then exit up. Then exit left. And finally attempt to go up.

Abadon is undead, which makes this fight rather quick.
Just have Squall or Quistis cast one or two Curagas on him and he will crumble to dust.
Check the skills your GFs are learning and update accordingly.
Exit up and to the right.

Continue up along the walkway to the next screen.
Examine the green panel. Use all the options, then exit the test.
Exit up to approach the elevator. Enter the elevator.
Ride the elevator, attempt to talk to your party members, arrive at your destination.
Attempt to exit up. After Quistis’ has finished interrupting, exit up.
Back in Laguna’s head for the last time, you need to choose junctions. Give Kiros Quistis’ junctions and give Ward Zell’s junctions. Annoyingly the GFs are unjunctioned again.
Approach the soldier by the elevator to the right. Then approach the soldier by the top left exit.
Examine the Moomba twice. Talk to the guy in the green shirt. Examine the Moomba again.
Use Break to win the scripted battle against the soldier.
When Kiros and Ward arrive, choose “Better check…”
The fights are so easy we haven’t been mixing up GFs much (later when they have more stuff learned maybe), but as a reminder:
Kiros: Quezacotl/Brothers, Magic/Draw/Card, HP+40%/HP+20%.
Ward: Shiva/Diablos/Cerberus, Magic/Draw/Item, HP+40%/Vit+40%/Enc-None
Also be sure to set Laguna’s abilities to LV Down/Magic/Draw.
Exit the menu and choose “Perfect…!” to start a scripted battle. The center soldier cannot be petrified, so use Break on the Gesper and the other soldier, then LV Down the main soldier until he is level 1 before killing him.


After the fight, get on the elevator to the right.
Walk down past Dr. Odine to eavesdrop on a chunk of his conversation. Repeat this process four times until Laguna goes running out of the room.
After a lot of dialogue, you can draw Death from the draw point.

Re-enter the building.
On the floor on the bottom left is Weapons Monthly (First Issue),
Be sure to pick it up.
Walk up and enter the elevator.
Approach Dr. Odine for another scripted battle.
It’s the same two soldiers, Break works on one and not the other.

You will need to LV Down the other Soldier and Elastoid to level 1 before killing them.
After the battle, take the elevator back up. Follow Dr. Odine to the right.
After a bunch of Dialogue, you are transported to Dr. Odine’s Laboratory.
Here you are faced with two more soldiers. Use Break on both of them.
After the fight, examine the round chair in the middle of the room.
Choose “Sit down.”

This time you cannot use break on either of the two Soldiers.
Use LV Down to bring them to level 1 before killing them.
After the fight, walk up and approach the glass.

Then examine just slightly to the right of the same console to get “Unlocked” message.
Exit down.
Take the chair/elevator down.
Exit up.
43. Exploring Esthar
After much dialogue, exit down. Then exit right.
Take the elevator to leave the palace.
Exit down. Draw Blizzard from the draw point on the left.
Exit left. Then exit left again. Then exit down and to the left. There are two people here. Talk to the man. He is the Presidential Aide, taking a break.
Exit down. Save your game.
Return to the palace (up, up, up, right, up, take elevator).
When the elevator delivers you into the castle, exit left.
Talk to the Presidential Secretary to the left of the doors. After they leave, examine the stack of books for Occult Fan IV.


Exit up.
Challenge Dr. Odine to Triple Triad, but keep saying no until he stops asking you to mix rules. Then play him until you win the Ward card.
Leave the palace again.

Talk to the soldier. He says “Oh yeah. That’s right.” This is a prerequisite for the Combat King 004 magazine to be available later
Exit right. Then exit right again. Have Quistis draw Curagas from the draw point. Exit down and right. Walk down past the elevator and exit to the right to reach the shopping arcade.
Approach a storefront like the one immediately on your left. You are asked if you want to shop. Choose yes for a store directory.
You should still have plenty of Elastoid cards. Mod one into a Steel Pipe (so you now have 7 steel pipes).
Cheryl’s store is always closed, but keep trying it (might take 50+ tries) to get a Rosetta Stone.
The other stores, if closed, can be tried again and again until they let you in.
Keep entering Cloud’s Shop (Esthar Shop) for Hi-Potion and X-Potion gifts. Be sure to actually get into the shop menu to get credit for visiting the shop.
Keep entering Johnny’s Shop (Esthar Shop!!!) for Hi-Potion and Mega-Potion gifts. Be sure to actually get into the shop menu to get credit for visiting the shop.
Keep entering Karen’s Shop (Esthar Book Store) for High Potion and Mega-Phoenix gifts. Be sure to actually get into the shop menu to get credit for visiting the shop.
Buy Pet Pals volumes 5 and 6 at the Rinrin’s Store (Esthar Pet Shop).
Visit the Don Juan’s Shop (Junk Shop) and upgrade Squall’s weapon to Shear Trigger to unlock the handyman achievement.
At this point you should have been inside every shop except Cheryl’s which is closed. Exit the shop interface/menu thing.
Exit down. Exit down again. Use the elevator to return to the world map. If you expand your minimap, you can see, among other places on this continent, Tear’s Point. Make your way there.
Enter Tear’s Point. Exit up. Exit up again. Then exit up once more. Approach the statue.

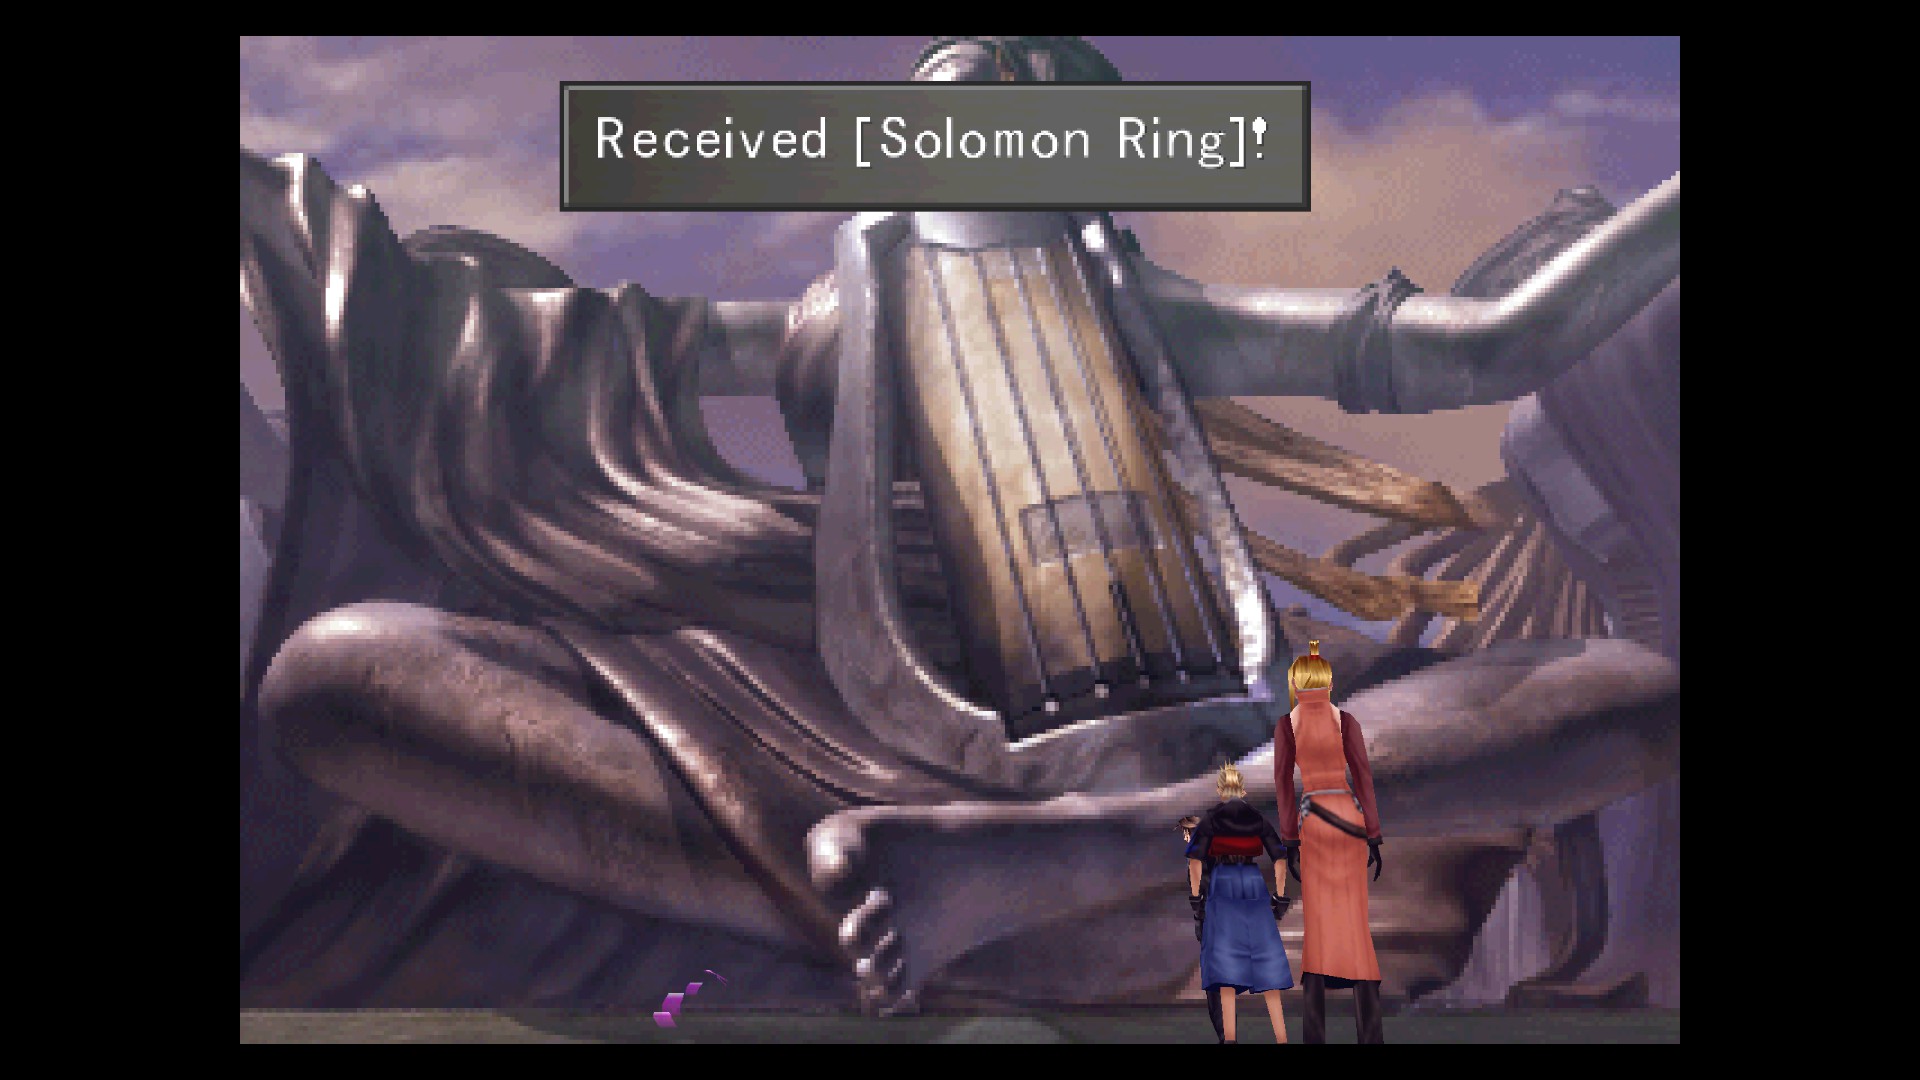
Pick up Solomon’s Ring from the right side of the statue’s feet.
Zell can probably draw Reflect from the draw point on the left of the feet.
Exit down a few screens to return the the world map.
Consider saving your game for no reason other than peace of mind.
Head to the Lunar Gate.
Enter Lunar Gate.
Enter the large structure on the left. A staff member will then lead you to the next room.
Walk left, approaching the Lunar Gate Staff guy to trigger dialogue.
Choose “…I’ll do whatever it takes.” Then “…Trust Zell.”
You must choose one extra party member. Bring Selphie. Don’t worry about junctions.
Choose “…Yeah” to confirm and get going. Then walk into the capsule/elevator/tube thing.
In charge of Zell now, attempt to leave to the right. Then do exit right.
You must choose someone to join Zell and Edea. Bring Quistis (Zell and Quistis should already be junctioned).
Exit down to the world map.
Junction Exchange Squall and Edea so your party is at full strength.
Consider saving your game.
Return to Esthar City.
When you arrive off the elevator, inside the city, exit left. Then exit left a second time. Then exit left a third time. Then exit down and left to get to Dr. Odine’s Laboratory.
Talk to the assistant. Choose “Yes.” Enter the building.
Ride the chair elevator. Then exit up.
Talk to Dr. Odine.
44. Infiltrating Lunatic Pandora
Dr. Odine describes where you can encounter the Lunatic Pandora for an attempt to enter the thing as it passes through the Esthar City.
You can talk to Dr. Odine for contact point information again, or to get more information on Lunatic Pandora.
Leave Dr. Odine’s Laboratory to trigger the timer.
Once the timer starts, exit right. Then exit left. Then exit up. Then exit up again. Then exit right. Then exit right again.
Talk to the Soldier twice to receive Combat King 004.
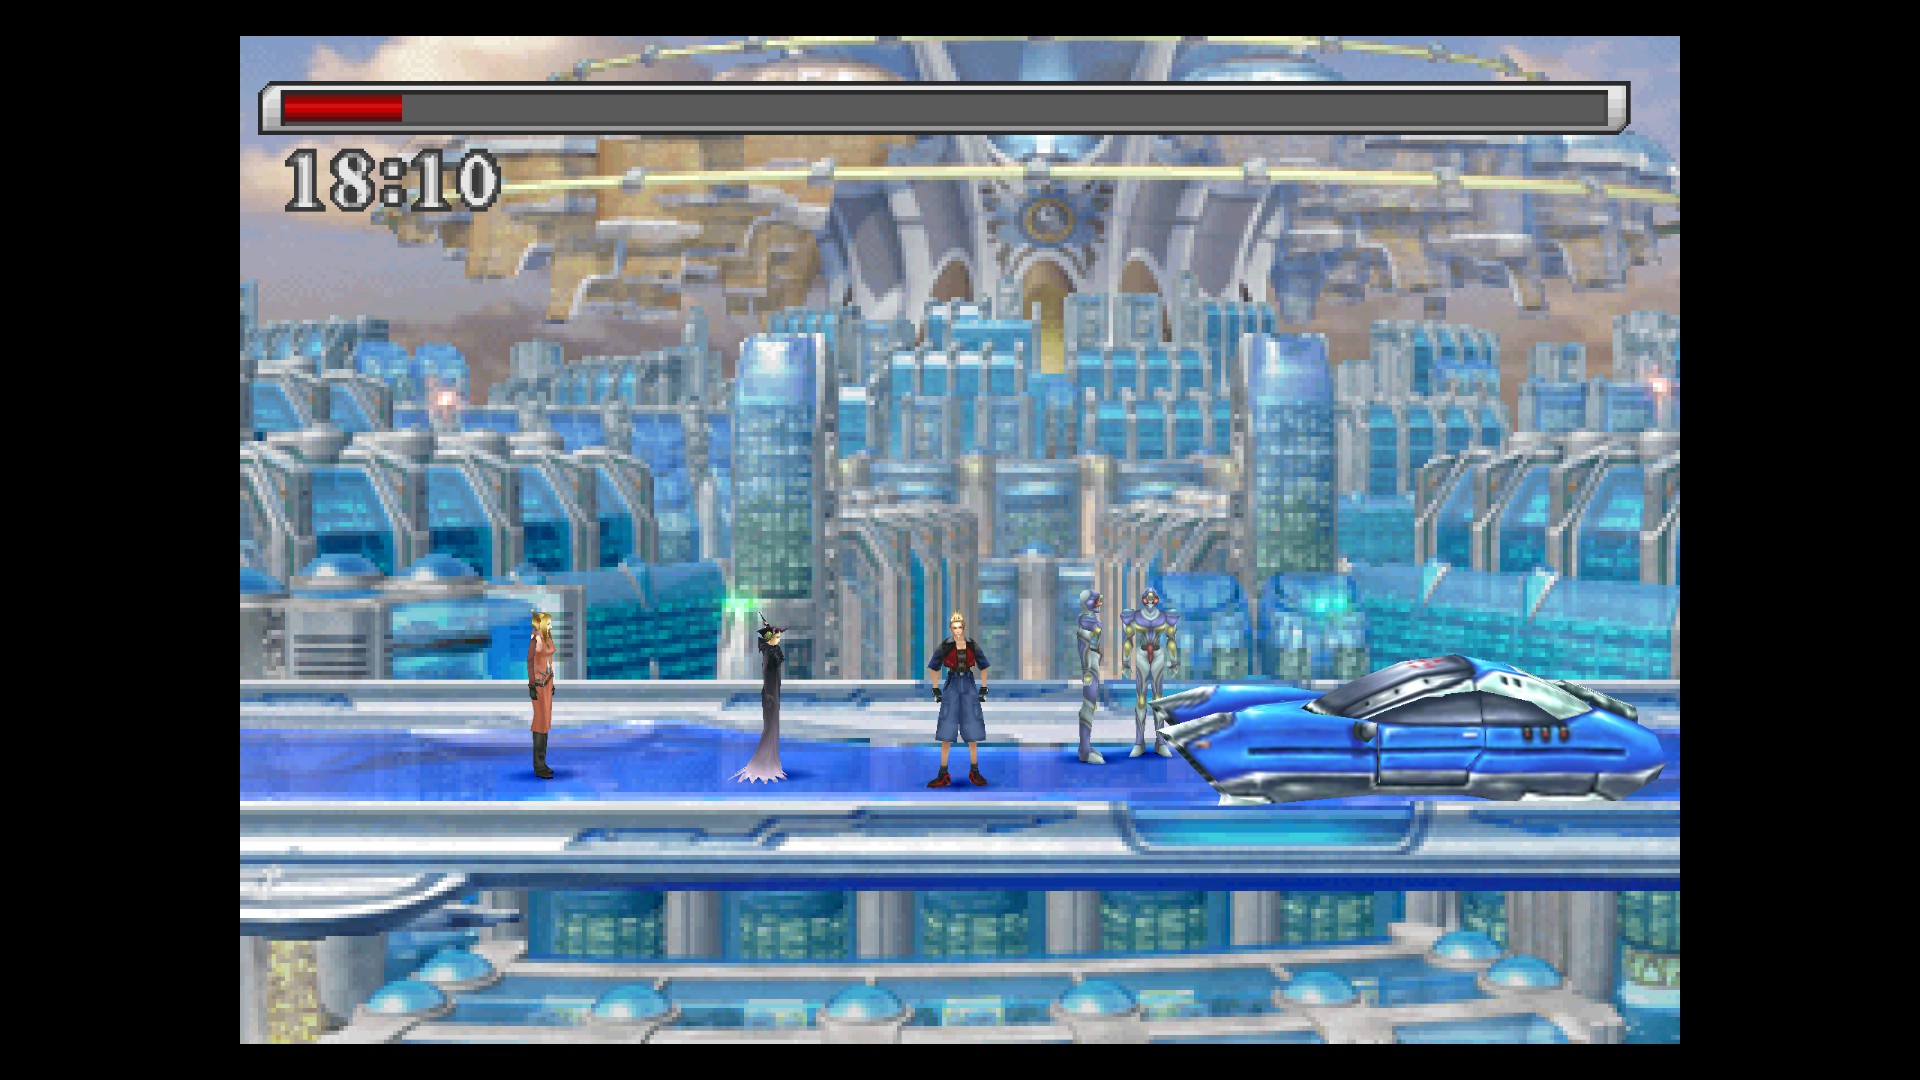
If you missed contact point 1 (which you should have arrived at with minutes to spare), then exit right, then down and right, then left, then left, then up (not the tube), then right for contact point 2. At contact point 2, you can board Lunatic Pandora from the lower blue path.
If you missed contact point 2, then you have to exit right, then down and right to get to contact point 3.
If you missed contact point 3, reset the game because you missed your chance.
Since Zell has Enc-None, you really should catch it at contact point 1.
When you finally encounter Lunatic Pandora, you get into a scripted battle with a G-Soldier and Elite Soldier. You can (and should) use Break on both of them to end the fight without EXP.
Immediately inside Lunatic Pandora is a Meteor draw point. Since you only had two characters when farming Flare/Meteor, Zell should be able to draw Meteors here.
Go up the stairs to the next screen. Quistis should be able to draw Curaga from the draw point here.
Take elevator #3.
On the bottom of the right side of the area is a barely visible top of a staircase. Exit down and right via these stairs. Then climb down the ladder. Edea can probably draw Confuse from the draw point here.

Exit to the left. Then exit left again.
The three doors here contain goodies.
Examine inside the right door for a Power Generator. Examine inside the middle door for a Silence draw point. Examine the left door for a Phoenix Pinion.


Exit left.

Exit down. Exit right. Exit right again.
Climb the ladder.
Take elevator #3 back to the main hall.
You might be able to draw Curagas from the draw point again.

Draw Holy from the draw point.
Check the hole on the left of the tunnel further up for a Spd-J Scroll.
Exit up. Then exit up again.
Your adventure through Lunatic Pandora is complete.
45. Lunar Base
Talk to Piet (in white) then go left to where Rinoa fell to pick her up.
Follow Piet through the door on the left.
Exit up through the door.
Exit down. Save your game at the save point.
Exit right. Then exit up. Then exit up again.
Approach the monitor next to Selphie to check it out.
Go back (down, down, left) and save your game.

You can make the games simpler by abolishing Plus instead, however I tried and then went through many games and quite a few wins without Piet even playing the Alexander card, and when you randomly get a bunch of low level cards it makes it very hard to win even with Plus disabled. With Random abolished, you still have to watch out for sneaky Plus situation, but at least you can bring your powerful cards to the table and seems more likely that Piet will bring out the Alexander Card. You can actually see what appear to be worthless plays made by your opponent which set him up for the Plus, keep an eye out for them and stick one of your cards into the spot where one of their cards can land a Plus to ruin their setup.
Go back and save your game (down, down, left).
From the save point, exit right. Then exit up. Go up the stairs and continue down to the next screen. The view here is upside down, but just press the stick down (your down, not Squall’s down) and exit “down” to the next room.
Challenge Ellone to Triple Triad and win the Laguna Card from her. Same annoying rules as Piet.
You may wish to make a quick run to the save point once more after you win the Laguna Card, because replaying those games due to a power outage would be lame.
Afterwards, speak with Ellone. Then head back toward the Med Lab (where the save point is) to be interrupted with a bit of chaos. Continue alone to the entrance to the Med Lab. Approach Rinoa to get knocked back.
Follow her up a couple screens to the Control Room. Yes, she is horribly slow.
In the Control Room, approach Rinoa to get knocked back. Then approach the monitor next to your other party member to find further reason for panic. Exit down. Go upstairs to the next room.
After watching the Lunar Cry scene, go through the door on the top right near the unconscious person.


Walk left and approach the window to see Rinoa head out. Examine the lockers at the top of the screen to find a space suit. Examine it to put it on.
Enter the little area where Rinoa was and exit left.
Press up on the analog stick to move away from the camera toward the door, as three astronauts come in the opposite direction. Eventually Squall says “I can’t get out. Looks like I’ll have to go back.” Then press the analog stick down to return to the base.
Exit right back to the hallway. Then exit up. Then exit up again to return to the Control Room.
Talk to Piet. After the scene, talk to Ellone. Follow her right to the next sceen. Get on the elevator.
Save your game at the save point!
Exit right. Talk to Ellone. Get into the empty capsule between your other party member and Ellone. After the flashbacks, talk to Ellone again.
With a timer counting down, you need to adjust yourself so that Rinoa is in the exact middle of the screen when the timer runs out. Hold triangle/Y button for faster movement.


46. Ragnarok
Save at the save point!
Approach the left wall to close the hatch and get some air and gravity.
Exit up. Then exit up again.
Perform a Junction Exchange from Squall to Edea and from Rinoa to Zell.
You need to kill the Propagators here in pairs by color, otherwise they get revived. They are treated like “boss” fights, in that you earn no EXP.
Walk over the bridge, then to the right and down the stairs. Defeat the purple Propagator.
Exit up through the large door in the center of the hallway, then run for the left exit before the red Propagator catches you. Kill the purple Propagator.

Go right, and down the stairs again. Then go up through the main door in the center of the hallway again. Kill the red Propagator.
Exit down. Then exit up through the smaller door to the right. Kill the green Propagator.
Exit down. Then go up the stairs. Then exit up through the door. Kill the green Propagator.
Exit down. Exit down again. Kill the yellow Propagator.
Exit up. Then exit up again. Then exit up through the door on the left. The yellow Propagator pushes you back into the previous room and engages you in battle, so kill it.
Take the elevator (between the two doors).
Lots of dialogue.
When Squall is left alone, re-enter the ship. Exit left through the door. Then exit up through the door on the left.
After the dialogue, attempt to exit the room. Then exit down and take the elevator to the cockpit.
You now have a nice airship.
Fly the Ragnarok to the Sorceress Memorial and park.
Enter the Sorceress Memorial.
Go up the stairs. Approach the guards. Enter the building.

Exit down.
Fly Ragnarok to Edea’s house.
Enter Edea’s house. Follow Angelo to exit left (instead of entering the building). Talk to Angelo. Talk to Rinoa. Attempt to return to the world map. Do return to the world map.
You should be able to Junction Exchange Zell with Quistis to return your party to full Magic/GFs.
Save your game.

Exit down. Then walk to the right a little bit to exit up. Then exit up again. Then exit right. Draw from the Draw point. Then exit up. Enter the palace.
Exit left. Then exit left again. Then exit left a third time. Now exit up.
Approach Laguna’s desk. Talk to Laguna repeatedly to ask questions. Ask “Where’s Ellone?”, then “Tell me about Raine.”, then “What are you doing here?” followed by “Let’s hear it.”, then “Explain the mission to defeat Ultimecia.” followed by “Yes”, then “Yes.”
At this point, AVOID LUNATIC PANDORA. There is a bunch to do before triggering that part of the storyline.
Park Ragnarok somewhere on the world map and save your game.
Board the Ragnarok and press the circle/B button to switch to the bridge of the airship.
Examine the door at the back of the cockpit to head down the elevator. Then exit up through the door on the left to reach teh Passenger’s Cabin.
Challenge Laguna to Triple Triad. DO NOT MIX RULES (lunar rules are terrible, just keep saying no until he stops asking to mix rules). Win the Squall card from him, which is refreshingly easy after the Lunar Base games.
Return to the cockpit and talk to Irvine. Say “Yes” to take control of Ragnarok. Park and save your game.
47. Cactuar Island
To the east of Kashkabald Desert is a desert island known as Cactuar Island. Go there.
There is a big (little?) green cactuar popping up here and there on the island. Run into him for a battle.

This guy’s thousand needles attack does 10k damage, killing party members it hits, so you have to beat him down before he gets to it. Unless you used used a Tent/Hotel recently, you should already be low (from junctioning HP up then not healing, and Propagator fights). I killed Jumbo Cactuar with something like 3 rounds of Renzokuken and a couple rounds of Rinoa’s Angelo and Zell’s Duels.
For your efforts, you receive the Cactuar GF and some nice loots and a bunch of AP.
Junction Cactuar to Squall. Preferred learning order something like Luck-J, Eva-J, Luck+50%, Initiative, Kamikaze, Defend, etc..
Check the skills your other GFs are learning and correct as appropriate.
I used Gaia’s Ring (gives GF HP+80% skill) on ifrit, since Squall is the only one who lacks a HP+80% GF, but Carbuncle
Might as well save your game.
Now it’s time to farm some AP. Remove Enc-None and run around the island fighting Cactuars. They give 4 EXP and 20 AP each. This will hurt watching Squall pick up so much EXP, but thanks to careful avoidance of it thus far, you can afford it. If you use HP+80% and HP+40%/HP+20% on your characters, or Auto/Def junction their magic, they should have high enough HP that you can keep them a bit over the 1000 HP (damage caused by thousand needles) and still have them in low health so they can use limit breaks (which don’t miss like regular attacks).
* Set the combat speed to slowest so the Cactuars take longer to run away while you are cycling the battle menu trying to trigger limit breaks.
* Don’t have Squall kill the cactuars, as it increases his EXP gain. Rinoa’s Angelo does a nice job of taking down all Cactuars. Give her a Spd+% ability to help her out. Have Zell use his Duel limit if he gets an opportunity as well.
* You want Cerberus Spd-J, Spd+20%, Spd+40%, Auto-Haste.
* You need to learn Alexander’s Med Data in order to unlock Med LV Up, which you need to create Remedy+ items required to summon Doomtrain.
* You want Tonberry’s Haggle/Sell-High/Familiar/Call Shop skills learned.
* You will want Diablos’ Mug and Hit-J skills learned.
* When Zell can use HP+80%, you should be able to combine it with HP+40% and an Auto/Def magic junctioning (junctions Meteor to HP) to reach 9999 HP and get the Maximum HP achievement.
* Get Initiative with any GFs that can use it.
* Get the various stat Bonus skills for use later when you are leveling up.

Ignore useless skills like GFHP+%, SumMag+%, Boost, redundant stat-J and stat+%’s, etc..
Squall should pick up roughly 150 EXP by the time you wrap this stuff up.
Now it’s time to add another GF to the collection.
Use the Med LV Up ability to convert 60 Remedies into 6 Remedy+s. You should still have 6 Steel Pipes and 6 Malboro Tentacles.
Use the Solomon Ring. No battle, how very boring.
While in the Items menu, you may as well use the Spd-J Scroll you have in your item list on the Brothers GF, since Zell is the only person without a the ability to junction his Speed stat.
Junction Doomtrain to Squall. Set him to learn Forbid Med-RF.
Re-junction Zell’s magic Auto/Atk to populate Speed junction suitably. Re-junction Squall’s magic Auto/Atk as well if he needs to populate Eva and Luck junctions.
Re-enable the Enc-None ability on Rinoa.
Save your game. That’s it for Cactuar Island!
48. PuPu
East of Trabia is a peninsula with a small island next to it.


Land on the island and run around until you encounter a UFO sneaking by.
Save your game and hop back into Ragnarok.

Run around until you encounter the UFO again. This time you get to fight it. It’s an easy fight, throw a limit break at it and watch it crash. Receive Aegis Amulet.
You should probably have 6 Elixers in your inventory. If you have less than 5, then you can use the menu, abilities, Call Shop, Esthar Shop!!! to buy what you need.

Run around near the crater to trigger an encounter with the alien (PuPu). DO NOT KILL HIM!
Give PuPu 5 Elixers. Receive PuPu card. PuPu side quest completed.
Save your game.
49. Bahamut

Land the Ragnarok on the Deep Sea Research Centre to enter the facility.
Walk down to trigger dialogue. Choose “Let’s hear it.”
Enter the building through the door on the right.
When the blue light is pulsating, DO NOT WALK. When it stops pulsating, work toward the core. If you walk while the light is pulsing, you are forced into a battle.
If you do get forced into battle by walking when you shouldn’t, you might be able to use break magic if you are lucky.
Walk to the right a bit so that you approach the core from below. There is a vine/root in your way in the middle that you probably have to step to the right of to get close enough to trigger some “dialogue”.
When asked “So you wish to challenge me…”, choose “It’s not our will to fight.” to pick a fight with a Ruby Dragon. Use LV Down to bring it to level 1 before killing it.
When asked “Begging me for mercy?” choose “Never.” for a fight with another ruby dragon. Again, bring it to level 1 before killing it.
When asked “Damned imbecile. Why do you wish to fight?”, choose the invisible third option “(It’s our nature…)” to launch a boss fight.


Immediately heal yourself up, by drawing Curaga from him to cast. Bahamut has a Mega Flare attack that causes around 3000 damage. You want to draw from Bahamut until all characters are fully stocked on Flare and Full-Life. Then beat him down with physical attacks.
Receive Bahamut GF and Card.
Junction Bahamut to Squall. Preferred learning order whatever. Allegedly Rare Item increases your chances of getting a second item, but decreases your overall chance of getting rare items.
Rejunction everyone’s magic with Auto/Atk.
For now, ignore Ultima weapon who is also in this facility. Killing him removes some useful stuff from the game, so it should be saved for near the very end.
Exit left. Leave the facility.
Fly to land, park Ragnarok, save your game.
Get yourself some Gil. Use the Call Shop ability in the menu to visit “Esthar Shop!!!”
* Buy as many Cottages as you can. If you have more money, also buy as many Tents as you can.
* Use the Recov Med-RF ability to refine the tents and cottages into Mega-Potions. 100 Cottages nets 50 Mega-Potions, and 100 Tents gets you another 25 Mega-Potions.
* Sell the Mega-Potions for profit.
* Repeat.
15 minutes or so of this should get you somewhere near 10 million Gil, but you shouldn’t need that much yet. The maximum is 99,999,999, however you should pick up a bunch of Gil later on when you start leveling, so don’t waste hours chasing the max gil achievement yet, just get a couple million so that money is no concern.
With your newfound wealth, stock up on some things:
* tons of x-potions
* tons of ammo for irvine
* some phoenix downs
* anything else you want
You should also distribute your GFs more evenly now that their skills have been fleshed out.
Try this:
Squall: Ifrit, Siren, Carbuncle, Leviathan, Bahamut
Rinoa: Shiva, Diablos, Pandemona, Alexander, Tonberry
Zell: Quezacotl, Brothers, Cerberus, Doomtrain, Cactuar
Redo magic junctions with Auto/Atk. Set abilities Magic, Draw, and Item (Card for Zell). Use Enc-None, HP+80%, Initiative, and whatever other passives feel good.
50. Queen of Cards Conclusion
Note: If the Card Queen ever offers you Direct or All trade rule, you should probably just Quit instead of Play and challenge her again to get Diff or One (since All degenerates into Direct which is the most annoying trade rule).
You left the Card Queen in Dollet, so she should presumably still be there.
Take Ragnarok to Dollet, park.
Enter Dollet and get to the Hotel. Save your game at the save point.
Head to the Shining Bomber pub (along the way, you can draw Silence at the draw point) and go upstairs to find the Card Queen.
Challenge her to a game of Triple Triad. DO NOT MIX RULES, just keep saying no until she stops asking. When she stops asking, consider saving your game before playing her to avoid the hassle of answering “No” for another 5 minutes if you have to load your game.

Save your game again.
Head to one screen down past the Shining Bomber pub, then enter the building on the right. Play the Card Queen’s son to win back the Alexander Card.
Leave Dollet and head to Timber.
Save your game.

Leave Timber.
Fly Ragnarok to the town of Balamb.
Save your game.
Enter Balamb. Head to the Train Station where the Card Queen hangs out when she’s in town (you can draw Thunder from the draw point along the way).
Challenge the Card Queen to Triple Triad, and DO NOT MIX RULES. Play Doomtrain and four low level cards you don’t want, then LOSE THE CARD GAME.
Talk to her to see where she is going. If it is not Dollet, reload your game and try again. (Thank you to Steam users Nibelung and Wedge for pointing out this critical correction to the walkthrough!!!)
Leave Balamb.
Fly back to Dollet.
Save your game.
Enter Dollet.
Speak with the queen again about her father. (thanks to the many readers who commented that I’d overlooked this crucial step which is required before you can win Doomtrain back)
Visit the Card Queen’s son again. As usual, DON’T MIX RULES. Win the Doomtrain Card back from him.
Leave Dollet.
Save your game.
Fly to Esthar City Airstation and park.
Make your way to the Presidential Palace (From the Airstation, exit down, then walk right and exit up, exit up again, then exit right, then up once more, and take the elevator).

Challenge the Presidential Aide (DON’T MIX RULES and win the Phoenix Card from him.
Leave Esthar City (back to the Airstation!).
Park the Ragnarok on land somewhere and save your game.
You’re done with the Card Queen quest!
51. Obel Lake Conclusion
Give
The fourth and final Obel Lake clue stone can be found on the Galbadia continent in an area known as the Monterosa Plateau, near a cavern with a river flowing out of it.


When you walk around spamming the examine button, you get a message that a bird is warming some eggs, and get to fight 2 x Thrustaevis. Use Break magic to win the fight without any EXP gain. Recieve:
Obel Lake Clue 4/4: E A S N P D
Now make your way to Esthar continent. North of Esthar, betwen mountains to its north and mountains to its south, is Mordred Plains.
Walk around pressing the examine button. You can’t see the rocks, but they are there and will speak as you examine the area.
* Blue rocks state the truth about the rocks, but don’t mention the treasure.
* White rocks babble nonsense
* Black rocks repeat the last thing they heard.
* Red rocks lie about everything, but are the ones who tell you where the treasure is.

Red rocks can give more than one direction, so you can try to get at least two directions out of it which the treasure is *not* to help guide you better.
When they tell you the treasure is not here, well, obviously you’re there. Examine again to receive Three Stars, which lets a GF use only 1 spell from stock instead of 3 when you use Triple.
Return to Obel Lake. Try humming to the shadow again until he suggests you take some time off at Eldbeak Peninsula.
Find Eldbeak Peninsula, on the southwest corner of the Trabia continent. Examine around the tip of the peninsula to find the next clue: TRETIMEASUREATMINOFFISLE.


Now head for Minde Isle, southwest of Esthar. Again, use the examine/action button to search while walking around the area. The treasure should be somewhere near the middle of the island, a Luck-J Scroll.
Congratulations, you have completed the Obel Lake sidequest.
Save your game.
52. Magical Islands
Exchange or discard to non-party members unnecessary spells.
Spells to keep for casting:
* Haste
* Cure/Cura/Curaga
* Scan
* Break
* Aura
Spells worth holding onto for junctioning:
* HP: Full-Life
* Str: Ultima
* Vit: Meltdown
* Mag: Meteor (Flare/Holy if you don’t have it yet)
* Spr: Reflect
* Spd: Triple
* Eva: Stop (prefer Tornado if you bothered refining it, which I didn’t)
* Hit: Aura
* Luck: Death
I had not farmed Tornado magic, and auto-Junction, for chars with Eva-J, kept sticking Meteor to Evade and Flare/Holy to Magic.
If you are lazy like me you should be able to get away with auto-J and not bothering to move Meteor from Eva to Mag. If you are less lazy you manually toss Stop on Evade and Meteor on Magic. If you are even less lazy, you can probably farm some Tornado magic (refining Abyss Worm cards into Windmills into Tornado) so that auto-junction uses Tornado on Evade, leaving Meteor for Magic.
So toss things like Water, Dispel, and other low level magics. Hold on to handy status effect ones though.
Use Auto/Mag and Mag+??% passive abilities to max out your characters’ magic stats for better drawing performance.

Land Ragnarok and walk around the island hitting the examine button to find draw points for Ultima, Flare, Holy, Full-Life, Meteor, and Aura, among others.
You only need 100 Ultimas on two of your characters, as you will get another 100 Ultima magic refined soon.
Your main goal is:
* Aura: 100 x 3 characters
* Ultima: 100 x 3 characters (2 chars is okay, you can refine more later)
* Meteor: 100 x 3 characters (you should already have 100 x 2 though)
You should already have, and top off if necessary:
* Flare: 100 x 3 characters
* Triple: 100 x 3 characters
* Quake: 100 x 3 characters
* Full-Life: 100 x 3 characters
Not so important:
* Holy: somewhat less common, not worth the time to max here
* Tornado: much less common, not worth the time to max here
This may take up to an hour or more to farm what you need.
After drawing magic for 5-10 minutes, you should feel you have mostly picked the island clean.

Go back and forth between the two islands until you have all the magic you need.
You should darn well earn your Magic Miner achievement in the process, if you haven’t already.
After loading up everything (except possibly Holy and Tornado), it’s time to junction suitably for combat.

* Rinoa: HP+80%, Spd+40%, Enc-None
* Squall: HP+80%, Vit+40%, Str+60%, Str+40%
* Zell: HP+80%, Spd+40%, Auto-Haste
Use the Call Shop ability to buy 100 tents, because you probably have none left after converting them for money earlier.
Use a tent.
Save your game.
Hop back aboard the Ragnarok.
53. Ultima Weapon
Time to take care of some unfinished business at the Deep Sea Research Center. Head back there.
Before you land, switch to the Ragnarok cockpit and talk to the people there who you are able to talk to (zell/quistis/rinoa?). Then take control of Ragnarok again and land on the Deep Sea Research Center to enter the facility.
Exit right to get back to the room where you defeated Bahamut. There is now a save point and a bunch of roots or vines you can climb down. Save if you like, then approach the tree/roots/vines/whatever going through the hole in the middle of the room to climb onto them. Once you grab hold of it, climb down to the room below you.
Talk to your party members to trigger Squall finding a terminal in the rubble. Choose “Yes” to explain the situation. At the end of the explanation, 4 steam units are used to open the way to level 2.
Go down the now-open hatch to reach level 2 (you must approach this openingfrom the left to go down).
Examine the terminal and expend 2 steam units to open the hatch to level 3. Have 14 steam units remaining. Go down to level 3.
Examine the terminal on the left, which will use 4 steam units to open the door to the steam room. Have 10 steam units remaining. Exit left to the steam room.
Approach the terminal to reclaim 7 steam units. Have 17 steam units remaining. Exit right back to the main room of level 3.
Examine the terminal on the right and expend 1 steam unit to open the hatch to level 4. Have 16 steam units remaining. Go down to level 4.
Examine the terminal on the right and expend 1 steam unit to open the hatch to level 5. Have 15 steam units remaining. Go down to level 5.
Examine the terminal on the right and expend 1 steam unit to open the hatch to level 6. Have 14 steam units remaining. Go down to level 6.
Where the hatch would be is actually an elevator. Ignore the broken terminal and just take the elevator down.
Examine the terminal on the bottom center of the screen and expend 4 steam units to unlock the way to the ocean deposit. Have 10 steam units remaining. Exit through the door on the upper left.
Make your way down the path of stairways to the next screen.
Continue clockwise down the stairs spiral to the next screen.
On the far right of the screen is another set of stairs going down in the direction of the bottom of the screen. Take them down to the next screen.
Continue down along the path down the sets of stairs to the next screen.

Enable Squall’s Move-Find ability to see the save point to the left of the terminal.
Save your game.
You can then switch back to whatever you were using prior to Move-Find.
Examine the console and use the last 10 steam units to resume excavation and trigger a battle.

You should have received the Collector achievement. If not, you missed a card somewhere and should do some research to determine which one and whether you can still get it.
Junction Eden to Squall, helping fill out his junctionable stats. Redo his magic junctions with Auto/Atk. Have Eden learn GFAbl Med-RF.
Save your game (you may need to re-enable Move-Find to see the save point again).
Retrace your steps back up through the tower (you can skip the steam room on level 3) to return to the Ragnarok.
Head back to the Islands closes to Heaven/Hell and top off your Full-Life, Triple, and Aura stocks.
54. Assaulting Lunatic Pandora
Finally done with all sidequest content, it’s time to move on with the story!
This is something of a point of no return, as you are about to chase the storyline into disc 4. If you missed anything prior to this point, now is the time to take care of it before it’s too late. You might want to leave the last save game slot as is and make future saves in other slots instead of overwriting this one.
Head to Esthar continent, and find Lunatic Pandora at Tears’ Point. Bump into it with Ragnarok to trigger the fun.
Exit up (to take the elevator down from the cockpit). Then exit up through the door on the right. Then exit up again to leave Ragnarok.
Walk down a bit, away from Ragnarok, to trigger a fight.

After the fight, exit to the bottom left.
Walk up all the way, then walk left a few steps to exit to the next screen.
Talk to Biggs and Wedge.
You may save at the save point, but there is another save point up ahead.
Exit left. Then exit to the bottom left.
Take elevator #2. Then take elevator #1. Walk left from the elevator along the path and exit up.
Save at the save point.
Exit up.

He will counter with a 500+ damage attack every time you hit him, but it doesn’t compare to the damage you (especially Squall) are dishing out, and you should probably have 6000+ health remaining when the fight is over.
After the fight, exit down (the way you came from).
Save your game again at the save point.
This really is the point of no return for anything you need to do on disc 3. You can backtrack to the Ragnarok and talk to the pilot to go do anything you missed.
Exit up again to where you fought the Mobile Type 8. Then exit up through the door Fujin and Raijin had fled through.
After some dialogue…

There is some fun GF storyline at both the beginning and end of the battle.
At this point, Odin is gone, replaced with Gilgamesh.
You are required to form a party now that Rinoa has left. Have Quistis take her place and perform a Junction Exchange between Quistis and Rinoa.
END OF DISC 3 — SAVE YOUR GAME
Disc 4
This marks the start of disc 4 of the game.
To recap, here are acievements you should probably have at this point. If you are missing something, it is worth investigating whether you can complete it on discs 4, or whether you need to load an older save to pick up something you missed.


55. Time Compression
Exit down.

Enable Move-Find on Squall. Start to cross the bridge, and the screen will change to zoom in on the end of the bridge.
Stand on the save point. In the menu, switch Move-Find back to whatever you had before. Then use a tent to heal everybody, especially Quistis, to full health. Finally, save your game!
Continue up through the doorway.


After the scenes, approach the save point. The scene shfits and more save points appear. Just open the menu and save your game.
Exit up.
A scripted battle begins with a series of sorceresses. The last one is the only one that is any challenge. She counters with an attack that does up to 1500 or so damage to your party members. Use Aura on Squall (and optionally Zell) and take her down with the resulting limit breaks.
After the fight, you are back at Edea’s house.
Exit right. Then exit up. Walk up to trigger some dialogue.
Walk left past the dead SeeD bodies, then up to the next screen. Continue past more corpses and exit up again.
Walk up the chain until you see three portals on your left. Line yourself up next to the middle portal and use the examine/action button to jump to it. Exit through the middle portal to arrive on the Centra Continent.

Enter the Chocobo Forest and ride the Chocobo out.
Make your way back past the portal, continuing south.
When you reach the beach just past the Centra ruins, cross the shallow water west to reach a beach on the southern part of the Centra continent.


Run the chocobo east along the southern part of the Centra continent to sneak through the crack in the mountains and reach the Kashkabald Desert.
Notice Ragnarok sitting north of the desert waiting to serve you.
On the northwest corner of the desert is another portal like the one you took to get to the Centra continent.
Hop off your chocobo.
Switch out Quistis for Rinoa, and perform a Junction Exchange between them so that your party of Squall, Zell, and Rinoa are at full strength. Use a tent to heal them up.
Save your game! Consider this your point of no return save (do not save over it!) prior to hitting the last dungeon. Go through the portal.
A new fourth portal is now available to access from the chain to Ultimecia Castle.
Jump to the chain and walk up to the next screen.
56. Ultimecia Castle
Approach the stairs to trigger dialogue.
You are forced to split your party. You should be able to leave Squall, Zell, and Rinoa together and at full health.
Inside the castle, you are unable to use Item, Magic, GF, Draw, Command Ability, Limit Break, Resurrection, and Save abilities.
Climb up the stairs. A fight is waiting at the top.

After you win, unlock Limit Break.
Exit down the stairs you came from. Then exit down again to leave the castle.
Use the Call Shop ability to visit Esthar Pet Shop. Buy 10 x Power Wrist. Use Tool-RF ability to refine them into 100 x Aura Stone. No more wasting Aura magic! Yes, I should have probably told you that earlier.
Save your game.
Go up into the castle again. Then go up the stairs. Exit up through the door.
Walk up onto the chandalier and attempt to cross it to make it fall.
Examine the hatch on the floor. Open it to go down to the next screen.
Perform a Junction Exchange between Squall and Irvine twice, so Squall is junctioned, but low health.
Follow the stairs down to your next battle.

After you win, choose to unlock Magic.
Go back up the stairs. Stand in the green circle on the right for a second until a message appears, “The lever has been depressed.” Choose “Switch to the other party.” and then Junction Exchange Squall/Irvine, Zell/Quistis, and Rinoa/Selphie.
Use Cure magics to heal your party members up to 6000 or more HP.
Go up the stairs and through the door to the chandalier room. Cross the chandalier.
Exit up through the door to find your next fight.

After the fight, choose to unlock Resurrection.
Use Cure magics to heal yourself back up over 1000 HP, leaving yourself able to use limit breaks.
Exit down to the chandalier room. Then exit down again. Exit right. Then walk down the stairs and exit right through the door.
Go around the balcony, down the stairs, and exit up through the door to arrive at an art gallery.
Check all the pictures on the walls except for the large one to the left. You should find Vividarium, Intervigilium, and Viator. After checking the ones on this screen, go up the stairs on the right and around both directions to the right to check the rest. When you have found all three that you are looking for, return to the first floor and examine the large painting on the left. Choose Vividarium, then Intervigilium, then Viator.
Time for another fight.

After you win, unlock the Item ability.
Use Cure magics to heal your party up to at least 5000 HP.
Exit up through the door. Continue straight up to exit down a flight of stairs to get to a creepy place that looks like a dungeon. Exit up through the door slightly to the left.
Swipe the Prison Key, from the statue or corpse’s hand.
Your next battle is here.

After you win, unlock the Save ability.
Exit up through the door by which you entered. Then exit left up the stairs.
Stand in the green circle and switch parties/junctions.
Exit up through the door. Exit up again through another door. Then exit up by climbing up the stairs.
Walk across the bridge until you see a white thing fall from it.
Switch directions and exit down the way you came. Then exit down again. Stand on the green circle and switch parties/junctions.
Use Cure magics to heal yourself up to at least 5000 HP.
Exit up, back down the stairwell.
Cross the tiny bridge to the upper right area of the screen and pick up the shining thing from the water, which turns out to be the Armory Key.
Exit up through the door right above where you found the key.

Either use Zombie then an Elixer to kill it,or just beat him down with physical attacks. Note his counter attack which does 300-400 damage or so.
After you win, choose to unlock the Command Ability ability.
Exit down. Then take the stairs to exit left.
Stand on the green circle and switch parties/junctions.
Again, your will switch back before the next fight so don’t bother healing.
Exit down to the chandalier room. Then exit left through the door.
Walk down and exit through the door on the right. Go up the stairs. At the top of the stairs, exit left. Then exit left through the door.
Walk aound the room and down the stairs. Exit up through the door. Follow the hallway to exit up again.
Stand on the green circle and switch parties/junctions.
Don’t bother healing.
Go up the stairs on the left and exit left through the door.
Continue walking left to find a save point. Use it to save your game!
Exit left to arrive in the same room as your other party.
Stand on the green circle. Sadly Irvine’s party is not heavy enough to lift Squall’s, so they need to swap places. Switch parties/junctions.
As Squall, step off the elevator to lower Irvine’s team.
Stand on the elevator again and switch party/junctions.
Walk Irvine’s team over onto the left platform with Squall’s team and switch party/junctions once more.
Get Squall’s party up on the balcony by going back around like this: Exit down. Exit down again. Go upstairs and exit right. Exit right to top of main stairs. Exit right again. Walk down the stairs and exit right. Go down the stairs and exit up. Exit up again. Go up the stairs and exit left.
Save your game at the save point!
Due to guide section length limits, I’m declaring this the intermission. Continue working your way through Ultimecia Castle in the next section.
57. Ultimecia Castle, Continued
Exit left from the save point.
Stand on the green circle and watch how Squall is heavy enough to lift the other team up. Switch parties/junctions.
Exit left. Pick up the shiny Floodgate Key from the ground. Then exit right.
Stand on the green circle and switch party/junctions to control Squall again.
Exit down. Exit down again. Go upstairs and exit right. Exit right to top of main stairs. Exit right again. Walk down the stairs and exit right. Go down the stairs and exit up. Exit up again. Exit up down the stairs.
Inspect the lever by the upper left door twice to unlock and then use it.
Exit left up the stairs. Then exit down. Then exit down again. Go up the stairs and exit left. Walk up the stairs and exit left again. Exit up through the door. Try to cross the chandalier for a ride back to the first floor. Exit up through the door.
The Treasure Vault key is now shining in the fountain. Grab it.
Stand in the green circle and switch parties/junctions.
Use Cure magics to heal your party up to 4000+ HP.
Exit down. About halfway down the hall you will find the door to the Treasure Vault on the left. Exit left into the treasure vault.
Examine the first, then second, then third, and finally fourth box to get all four open.

After you win, unlock the GF ability.
Exit down. Then exit down again. Go up the stairs and exit right. Exit right to get to the top of the main hall stairs. Then exit right yet again. Walk down the stairs and exit right through the door. Walk down the stairs.
Stand on the green circle and switch parties/junctions.
Exit up through the door into the church-like building.
Go up the stairs to the next screen. Cross the bridge and exit up through the door.
Enable Squall’s Move-Find ability to see the save point. Stand on the save point.
Replace Move-Find with what you had before. Junction Flare and Protect to elemental defense. Use a tent. Save your game!
Go up the stairs, across the pillar, and up more stairs to reach the next screen. Then continue up the stairs to the next screen.
Here there is a swinging pendulum. Climb the stairs to get near it from the bottom left, and use the action button to jump to it when it’s close and swing across. Exit through the door next to where you landed.
Ultimecia’s last “guardian” is here.

After you win, unlock Draw. You finally have access to all your commands/abilities again!
Return the way you came, making your way down the tower to the bottom where the save point is. Use Move-Find again to see it and save your game.
Exit left. Cross the bridge and exit down. Exit down again.
Stand in the green circle and switch party/junctions.
Since you have the Collector achievement already, you no longer need to have all your Triple Triad cards. Card Mod the Gilgamesh Card into 10 x Holy War.
Walk up to the hanging rope and examine it to start ringing a bell (and trigger a 1 minute timer).
Quickly get back in the green circle and change party/junctions again.
Exit up through the door back into the church-like building to find your next challenge:

After you win, head back up the stairs to the right. Cross the bridge and exit up through the door.
Use Move-Find to see the save point again. Save your game!
Head back up the stairs for a couple screens again, but this time skip the swinging pendulum and just keep going up the ramp. Exit top right, above the door you took to find Tiamat.
Exit down. Climb across the clock hands to reach a ladder. Climb down the ladder. At the bottom, walk right a little to another ladder and climb down that one to the next screen. Walk up to have the screen zoom on the end of the bridge. Save at the save point, in a new spot if you wish to save a few minutes later on. Use a tent to heal your party.
Walk up and knock on the door. Choose “Get it over with. Fight her now.”


You start the fight with random party members. Since you only want Squall, Zell, and Rinoa, just kill any other party members who are with you in the fight. They should be absorbed and replaced with other party members. Once you have your party, use an Aura Stone on Squall and cast Triple+Shell on the party. Then end her first form with Squall’s limit break.
One of Squall’s limit breaks will end Griever as well. Shell will help defend you from his Shockwave Pulsar attack.


Again, use limit breaks to end Ultimecia-junctioned-with-Griever. One of Squall’s should be plenty.
Ultimecia’s final form can cast Hell’s Judgement on you to bring your health to 1 HP. If she does, recover quickly with a megalixer. A round or two of Squall’s limit break should get her to start talking. At that point, just hit her with physical attacks to prompt her to speak her lines until the fight is over.
Congratulations, you have won Final Fantasy 8 without gaining a level!
Enjoy the ending scenes and credits. You’ve earned it!
Postgame
Now that you have won the game, there are a few achievements still in need of wrapping up.
To recap, you should now have 36 of the 45 achievements.
You still need:
* Top Rank – Reach SeeD rank A
* Top level – Reach level 100
* Chocobo Loot – Acquired an item from Chocobo World
* Blue Magic Master – Learn all of Quistis’ limit breaks
* Dog Trainer – Learn all of Rinoa’s limit breaks
* 1000 Kills – Kill 1000 enemies
* Maximum Gil – Reach maximum Gil (99,999,999)
* Top Level Boko – Reach level 100 with Boko
* 10000 kills – Kill 10000 enemies
58. Limit Breaks
Reset the game and load from after you killed Omega Weapon (Clock Tower is a shorter walk than Master Room).
Leave the Castle like this: From the save point at the bottom of the Clock Tower, exit left. Cross the bridge and exit down. Exit down again to the area with the fountain. Exit down yet again. Exit left. Walk down and exit right. Exit down to leave the castle.
Exit down onto the chain. Jump to the portal on the right and exit through it.
Ragnarok is within sight, north of the desert. Approach it.
Have Rinoa drop Enc-None for something else like Str+40%. Also give her LV Up and LV Down abilities. Have Squall use Str Bonus, and give Zell HP Bonus and Str Bonus. You can finally start slaughtering every monster you run into!
Use a tent and save your game.
Sort your items. Read all 6 Pet Pals magazines. Go to Status menu, select Rinoa, then hit the action button a couple times to pull up her list of limit breaks.
You will need to set an unlearned limit break to train Angelo. Just pick one.
As you walk around the limit will become learned. When it is complete, a there will be a chiming noise, at which point you can go back into her limits menu and switch to an another unlearned one. Learn all 8 of her limit breaks as you work your way through the rest of this guide.
Now for Quistis’ limit breaks!
Quistis’ limit breaks come from using items on her. Many of these items you either already have, or can quickly obtain by using Card Mod on one of your numerous lower level cards. A few must be obtained either as Drops or Muggable items from certain creatures, and the chances of having the desired item Mugged or Dropped often depends on which level the creature is. The estimated chance of getting the item you need is indicated below. Use LV Up or LV Down skills on your enemies to get the best chances of having the item you need dropped. In cases where there are many places to get the item, I have listed ones with higher chances. So first see what you already have. Then see what cards you can mod. Then finally go hunt down whatever monsters you need to. NOTE THAT YOU SHOULD NOT MUG A MONSTER IF YOU WANT IT TO DROP SOMETHING.
Note that since most of these items were obtained already, or can be modded from cards, I have not verified all of the monster locations listed below. Credit for digging up the listed locations rests entirely with the Final Fantasy VIII Shrine by Dragon Tear, referenced in the Aknowledgements section at the end of this document.
* Drop: LV30+ Wendigo – 10.5% – Obel Lake Forest (Timber), Great Plains of Galbadia
* Mug: Malboro – 100% – Islands Closest to Heaven/Hell
* Drop: Malboro – 69.5%
* Mug: Caterchipillar – 100% – Plains Forest (Balamb), Grandidi Forest (Esthar), Winhill Village
* Drop: LV30+ Caterchipillar – 89.5%
* Drop: LV1-29 Caterchipillar – 69.5%
* Drop: LV1-19 Cockatrice – 69.5% – Grandidi Forest, Nortes Mountains (Esthar), Roshfall Forest, Vaulny Canyon Forest (Timber)
* Drop: LV20-29 Cockatrice – 20%
* Mug: Tri-Face – 100% – Deep Sea Research Center
* Drop: LV30+ Forbidden – 75.3% – Centra ruins, Tomb of the Unknown King, Grandidi Forest and Nortes mountains (Esthar)
* Drop: LV1-29 Malboro – 30.5% – Islands Closest to Heaven/Hell
* Card Mod: Fastitocalon-F
* Mug: Fastitocalon – 100% – Winter Island Beach (Trabia)
* Drop: LV1-19 Chimera – 89.5% – Kashkabald Desert (Esthar), Island Closest to Heaven
* Drop: LV20+ Chimera – 69.5%
* Drop: LV30+ Grand Mantis – 30.5% –
* Mug: Gayla – 100% – Bika Snowfield forest, Trabia Canyon, Thor Peninsula (Trabia)
* Drop: LV30+ Iron Giant – 69.5% – Deep Sea Research Facility, Tear’s Point
* Mug: Ruby Dragon – 100% – Trabia Canyon, Island Closest to Heaven, Deep Sea Research Facility, Esthar (Northes Mountains), Centra Serengeti Plains
* Drop: LV1-34 Ruby Dragon – 89.5%
* Drop: Belhelmel – 4.7% – Monterosa Plateau, Lallapalooza Canyon (Galbadia)
* Mug: Behemoth – 100% – Deep Sea Research Facility
After using the available items in my inventory, then using Card Mod to get whatever others I could, I was left having to hunt down the following:
* Missle, the rare mug item from Death Claws in the forests of Centra’s Lenown Plains.
* Whisper, guaranteed mug off first Adamantoise I found on the beach near Dollet after using LV Down on it
* Curse Spikes, farming 100 from Tri-Faces in the deep sea research center
Completing Quistis’ limit break set nets you the Blue Magic Master achievement.
Save your game, then quit or alt-tab out of the main game if you haven’t yet done Chocobo World.
59. Chocobo World
Time for some Chocobo World!
Outside of the Final Fantasy game, in the game launcher, there are buttons “Play”, “Achievements”, “Magic Booster”, “Settings”, and “Chocobo World”. Here you can choose Chocobo World to bring up a popup with instructions, then select “Play” to fire up the game. In the Chocobo World game, you can press the Ctrl key to see the map, and up/down/left/right arrows to change Boko’s direction. The blinking dot on the map represents Boko’s current position. The solid dots represent events, such as a battle to fight, or cactuar dropping by with an item for you, etc.. Boko may change direction to steer toward one to the side as he passes, but you can help guide him with the arrow keys as well. Every now and then he will stop to enjoy watching TV, sitting at a campfire, building sand castles, or napping to restore health. From the map/menu, you can use the left/right arrows to switch screens and see various stats, including Chicobo’s level. Note Boko’s weapon shows 4 digits of damage, not a single 4-digit number. Each time he attacks, one of the four digits is randomly selected as the damage done.
* Loot an item for Choco Loot achievement. You can obtain the items you’ve looted when you are out of Chocobo World and back in the main Final Fantasy 8 game.
* Kill until Boko reaches level 100 for the Top Level Boko achievement
The easiest way to get Boko to level 100 is to cheat using Hyne (see section “Cheating With Hyne” near the end of this guide).
Another easy but more time-consuming way to grind Boko to level 100 is to cycle through the menu and set “Move” to 6 and “Event Wait” to “off”. This limits your ability to manage things like weapon upgrades, heading for the closest events, and waking Boko up from naps in a timely manner, however you will gain the freedom to ignore the game and go surf the web or watch a movie while Boko does his thing. It might be best to just leave it going overnight, or while you are at work/school.
At some point, even with event wait off, some special events occur that wait for you to hit ctrl anyway.
* You find Mog. You can put him in standby, but will likely lose him again and have AFK grinding interrupted when you find him again. I left him in sleep mode. You can change the setting by cycling through the menu.
* Some girl chocobo shows up and there are some little animated hearts. This occurs three times and triggers a GF upgrades.
* Demon King: at level 100, Koko, the girl Chocobo, gets kidnapped and Boko gets to save her.
The entire process will probably take 2-3 days of leaving Chocobo World running while you live your life and occasionally check whether one of the specific events occurred which requries you to press the Ctrl key.
You can continue back to the main game to grind out the next section, though it may result in annoying audio overlap unless you are using Windows 8 which lets you set separate volume levels for each application.
When Boko reaches level 100, close the Chocobo World window. Return to your main Final Fantasy 8 game. In the Save menu, select “Chocobo World”, then select “Home” to recieve Top Level Boko and Choco Loot achievements. Keep hitting the select button to get through the list of items Boko picked up.
May as well save your game.
60. Grinding to Completion
Back to the main Final Fantasy 8 game again, to grind out the last of your achievements.
Take your party to the Island closest to Heaven.
Remove any Elemental Attack junctions you have like Quake, Water, etc., as there are some monsters here which are likely either immune to, or actually healed by them.
Use Amnesia Greens on Shiva to have her forget GFHP+10%. Then use a Status Guard on shiva to teach her ST-Defx4.
If you have an extra Status Guard, set Squall up by using Amnesia Greens on Leviathan to forget GFHP+10%, then use your remaining Status Guard to teach Leviathan ST-Defx4.
Have everyone junction Confuse, Sleep, Berserk, and Break to ST-Def. If Squall is stuck with just 2 ST-Def slots, have him junction Confuse and Sleep.
If you need:
* Confuse: ST Mag-RF Betrayal Swords, which you can Card Mod from Forbidden Cards
* Sleep: ST Mag-RF Sleep Powders, which you can Mug from Funguar
* Break: ST Med-RF Softs, which you can buy from the store.
* Berserk: ST Mag-RF Steel Pipes, which you can Card Mod from Elastoid Cards.
You should be somewhat protected from nasty Malboros now!
Save your game.
Kill lots of monsters. Then kill some more. Then when you get tired, take a break, and return later to keep on killing.
Note that Malboros and Chimeras have absurd health. Toss Squall an Aura Stone and use his limit break for a couple rounds to end these fights in a timely manner. You can use Tool-RF to refine more Aura Stones from Steel Pipes (1:1), Fury Fragments (1:2), Power Wrists (1:10), Hypno Crowns (1:10).
Use tents often.
It should not take too long for you to snag the Top level achievement by hitting level 100 with one of your characters.
Once you reach level 100 and get your Top level achievement, EXP is no longer a concern. Save up and head over to the Fire Cavern near Balamb, where the monsters are all level 5 and you can kill them with a single hit. Charge through these as quickly as you can to grind out some more lingering achievements:
* Dog Trainer – walking between battles wraps this up
* 1000 kills – just keep killing
At this point, you have probably killed 300-500 monsters or more in the fire caverns, and the strategy for the rest of this does not change: Kill as many monsters as you can as fast as you can.
Admittedly the remaining achievements (10000 kills, Top Rank, and Maximum Gil) are lame. Nothing changes at this point, as you will either grind the moneymaking process or grind fire cavern kills until you are finished.
So if you feel you’ve played the game thoroughly enough, and got in enough killing to make up for the lack of killing prior to snagging Contrived Victory, and you are sure you are ready to stick a fork in it, you have the option to cheat your way to completion. See section “Cheating With Hyne” near the end of this guide for details.
If you have too much integrity to respond to a cheap insulting achievement by cheating your way to it, you can just keep killing the same easy monsters, you will get there eventually!
* Top Rank – your invisible SeeD experience determining your SeeD rank goes up by 1 for each monster you kill, and down by 10 each time you get your SeeD salary. Each rank level requires 100 points more than the previous one, and range from 1 to 30, followed by A at 3100 SeeD experience. So, just keep killing!
* 10000 kills – just keep killing
Finally, wrap up Maximum Gil achievement by going through the same process you used earlier:
* Buy 100 Tents and 100 Cottages
* Refine into 75 Mega-Potions with Recov Med-RF
* Sell Mega-Potions for profit
* Repeat until you hit Maximum Gil.
Congratulations, you should now have all Steam achievements for Final Fantasy 8!

Cheating With Hyne
There is a tool called Hyne which can modify your Final Fantasy 8 save games. It can be used for significantly more than mentioned here, and you can get creative to make the game even easier than it already is, but for the purposes of this guide, we’ll cover post-victory grinding tasks through unchanging content for an absurd amount of time which nobody should have to suffer through.
You do not need to use this tool, however it may save you dozens of hours or more.
So if you feel you’ve played the game thoroughly enough, and got in enough killing to make up for the lack of killing prior to snagging Contrived Victory, and you are sure you are ready to stick a fork in it, you have the option to cheat your way to completion.
* [link]
* Download the Hyne program and unzip the folder somewhere you want to run the app from.
* Save & Quit Final Fantasy 8
* Launch Hyne.exe
* Select your save game slot, then your save game to modify
Achievements: 10000 kills and Top Rank:
* Click “Characters” on the left nav menu
* Select Squall on top and give him 9999 kills
Achievement: Maximum Gil:
* Click “Miscellaneous” on the left nav menu
* Enter 99999999 in the Gil field
Achievement: Top Level Boko:
* Boko should be in FF8, (“Home”), rather than Chocobo World (“World”) on the save game
* Click “Chocobo World” on the left nav menu
* Set Boko’s level to 100
* Consider setting Boko’s weapon to 7777 and max health to 99
Save Changes:
* Click the “OK” button on the bottom left
* In the File menu, select “Save”
* Quit Hyne.
* Start Final Fantasy 8 and load your game
* Get one kill to trigger 10000 kills achievement.
* Run around (enc-none!) until you get your SeeD salary to trigger Top Rank achievement
* Send Boko to Chocobo World and back.
Acknowledgements
The following walkthroughs, guides, etc., were used in researching the solutions documented in this guide:
- Final Fantasy VIII: FAQ/Walkthrough by Split Infinity[www.gamefaqs.com]
- This was one of three walkthroughs I was using to double check everything on my way through the game. It is extremely thorough and verbose.
- Final Fantasy VIII: FAQ/Walkthrough by Absolute Steve[www.gamefaqs.com]
- This was another of three walkthroughs I used to double check everything on my way through the game. It is also extremely thorough and almost as verbose as the one above.
- Final Fantasy VIII: No Level Up FAQ/Walkthrough by Edman[www.gamefaqs.com]
- This walkthrough was the third of three walkthroughs I used to double check every step of the way through the game. It is not as thorough as the other two, nor as verbose, however it provided the strategies throughout the game on maintaining Squall’s initial level for the contrived victory achievement.
- Final Fantasy VIII Shrine: Monsters by Dragon Tear[shrines.rpgclassics.com]
- This “shrine” has, among other things, a handy database of monsters which I used to dig up locations of the creatures needed to get Quistis’ limit breaks for the Blue Magic Master. I mostly copy/pasted the monster locations from this site, only adjusting for areas inaccessible in disc 4.
- Steam users Nibelung and Wedge
- Nibelung and Wedge provided critical corrections to a part of the Card Queen quest which, otherwise, ran a risk of players not being able to win Doomtrain Card back from the Card Queen’s son. Thanks!!!