Overview
It all began when I saw this achievement. At least, it looked like one. I couldn’t say for sure.
Disclaimer
Don’t skip any cutscene or dialogue, doing that will affect negatively your total percentage.
This is just a note so you know how to use the guide:
The guide is now complete, you should get 100% in your first playthrough. Follow each mission and bolded part for percentages. (Thanks Jeffoy for confirmation)
If you finished the game and didn’t get 100%, you can use this tool to find out what you missed: [link]
So follow the guide while maintaining your public relations, or PR. Your first visit to the Calm Lands will explain PR. You should start PR in Chapter 1, and you can be over 400 points by Chapter 2 and never worry about it again. If you start in Chapter 2, that’s fine and you’ll finish in Chapter 3 and maybe a little bit of 4. If you start it AFTER Chapter 2, then you’ve missed it.
There are other missable achievements, but if you follow the order of the guide, we will take care of those as they become available marking them off your list. So worry not.
As for the Bestiary, none of the enemies are missable if you follow the guide, Only boss enemies are missable should you not have done the missions; however, all of these missions are covered in the walkthrough. Chocobo Eater @ Mi’ihen Highroad in Chapter 2. Anything Eater @ Ruins Depths in Chapter 5. Anything Eater is missable if you didn’t complete Clasko’s quest and moved him into the Monster Arena in the Calm Lands. King VERMIN! @ Fiend Colony is missable if you don’t have a chocobo farm to use. Azi Dahaka @ Farplane Abyss if you disable the barriers before crossing them.
Once you reach the Farplane Abyss, which is the last area, the guide will force you to encounter Azi Dahaka, then have you come back out to do achievement clean-up. If you’ve followed the guide, you will have everything required for the rest of the achievements.
Also Via Infinito is required to get 100% completion (Defeat Trema) so make sure to do this before finishing the game.
Prologue – Celcius
+ At the second intersection you’ll see someone dressed up as a moogle, interact with him.
+ Speak to Paine
+ Speak to Rikku
+ Al Bhed Primer (Speak with Buddy)

+ Al Bhed Primer x3 (Speak with Brother)

Festivalist Dressphere (Same as above)

Vanguard Garment Grid (Speak with Shinra about “Using Garment Grinds”)


+Speak with Barkeep then rest in the Cabin

+ Watch “Journey’s Start” Treasure Sphere by speaking to Shinra
+ Reach the top of the mountain within the time limit.
Completion: 6%
Ch1 Luca – Mushroom Rock
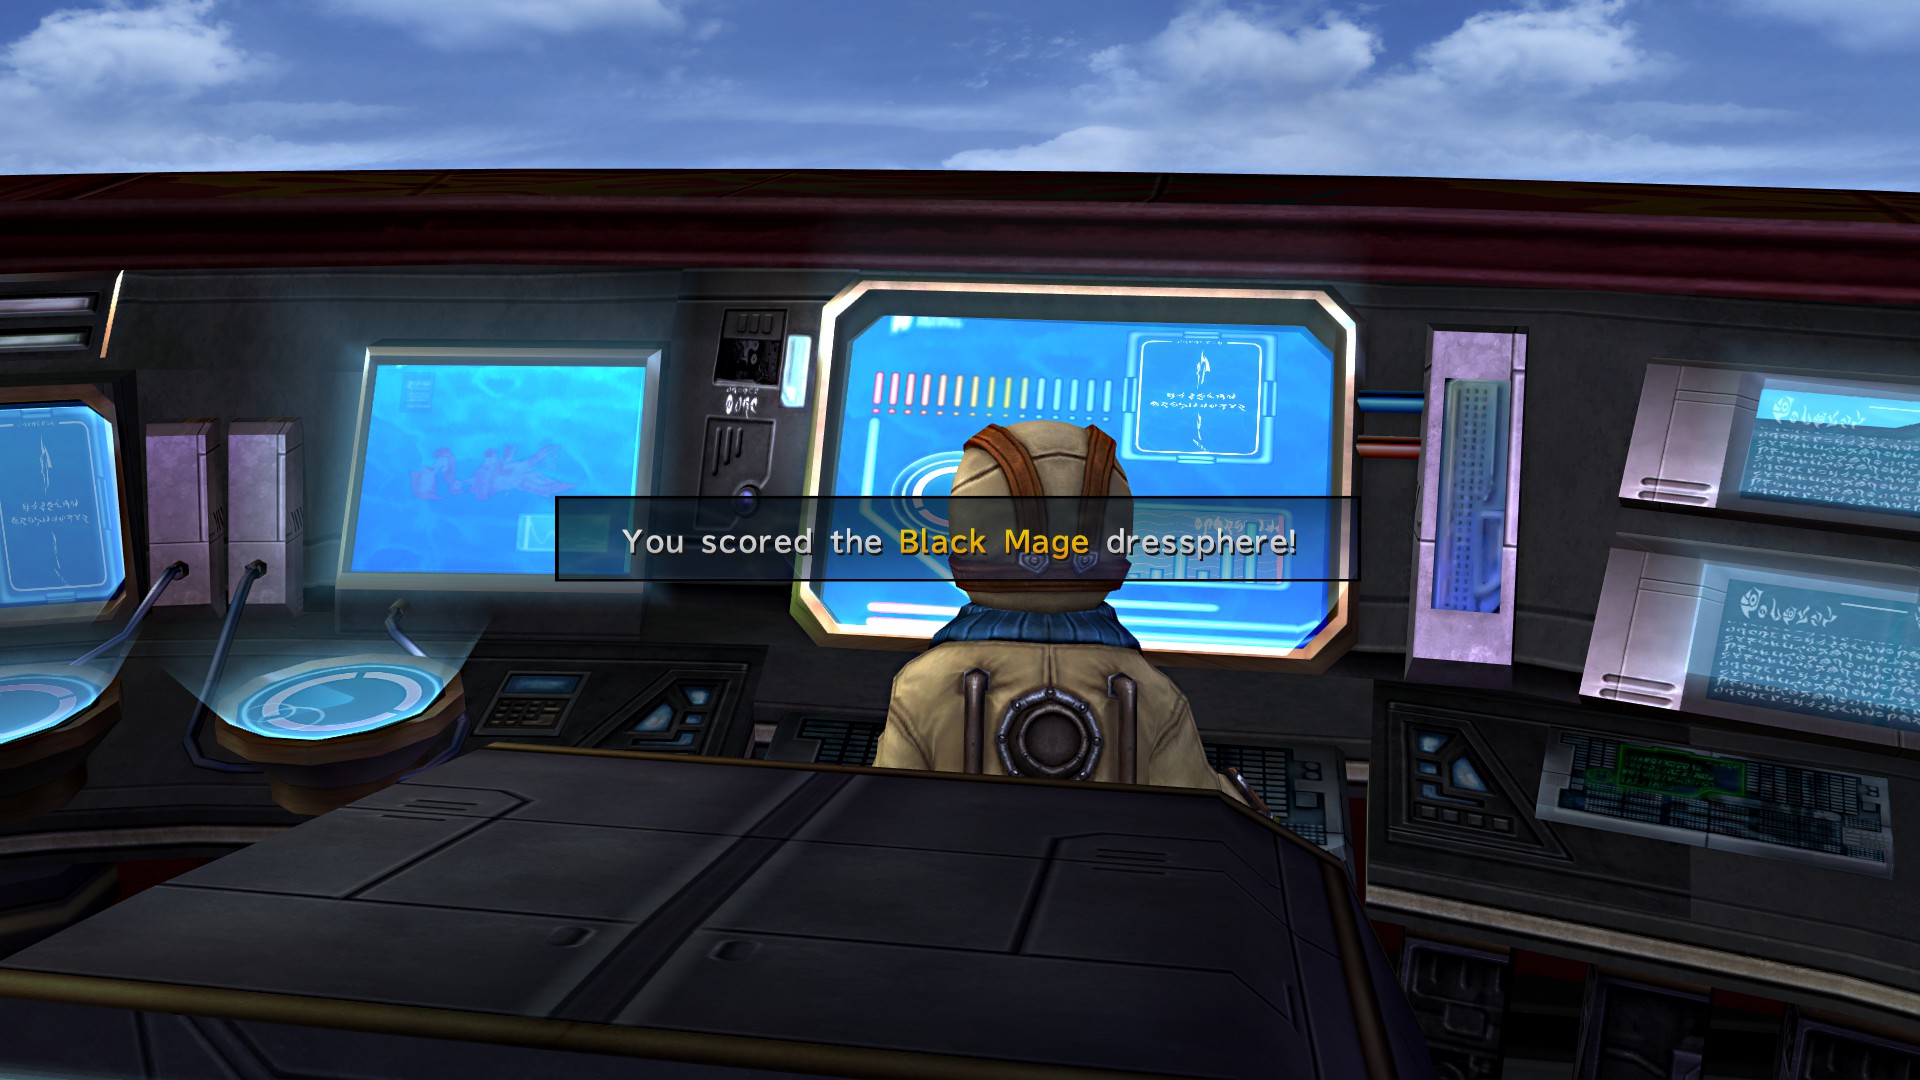
+ Speak with brother and choose “Comfort him”

Black Mage Dressphere (Automatically received after speaking to Shinra)
+ Rest in the cabin
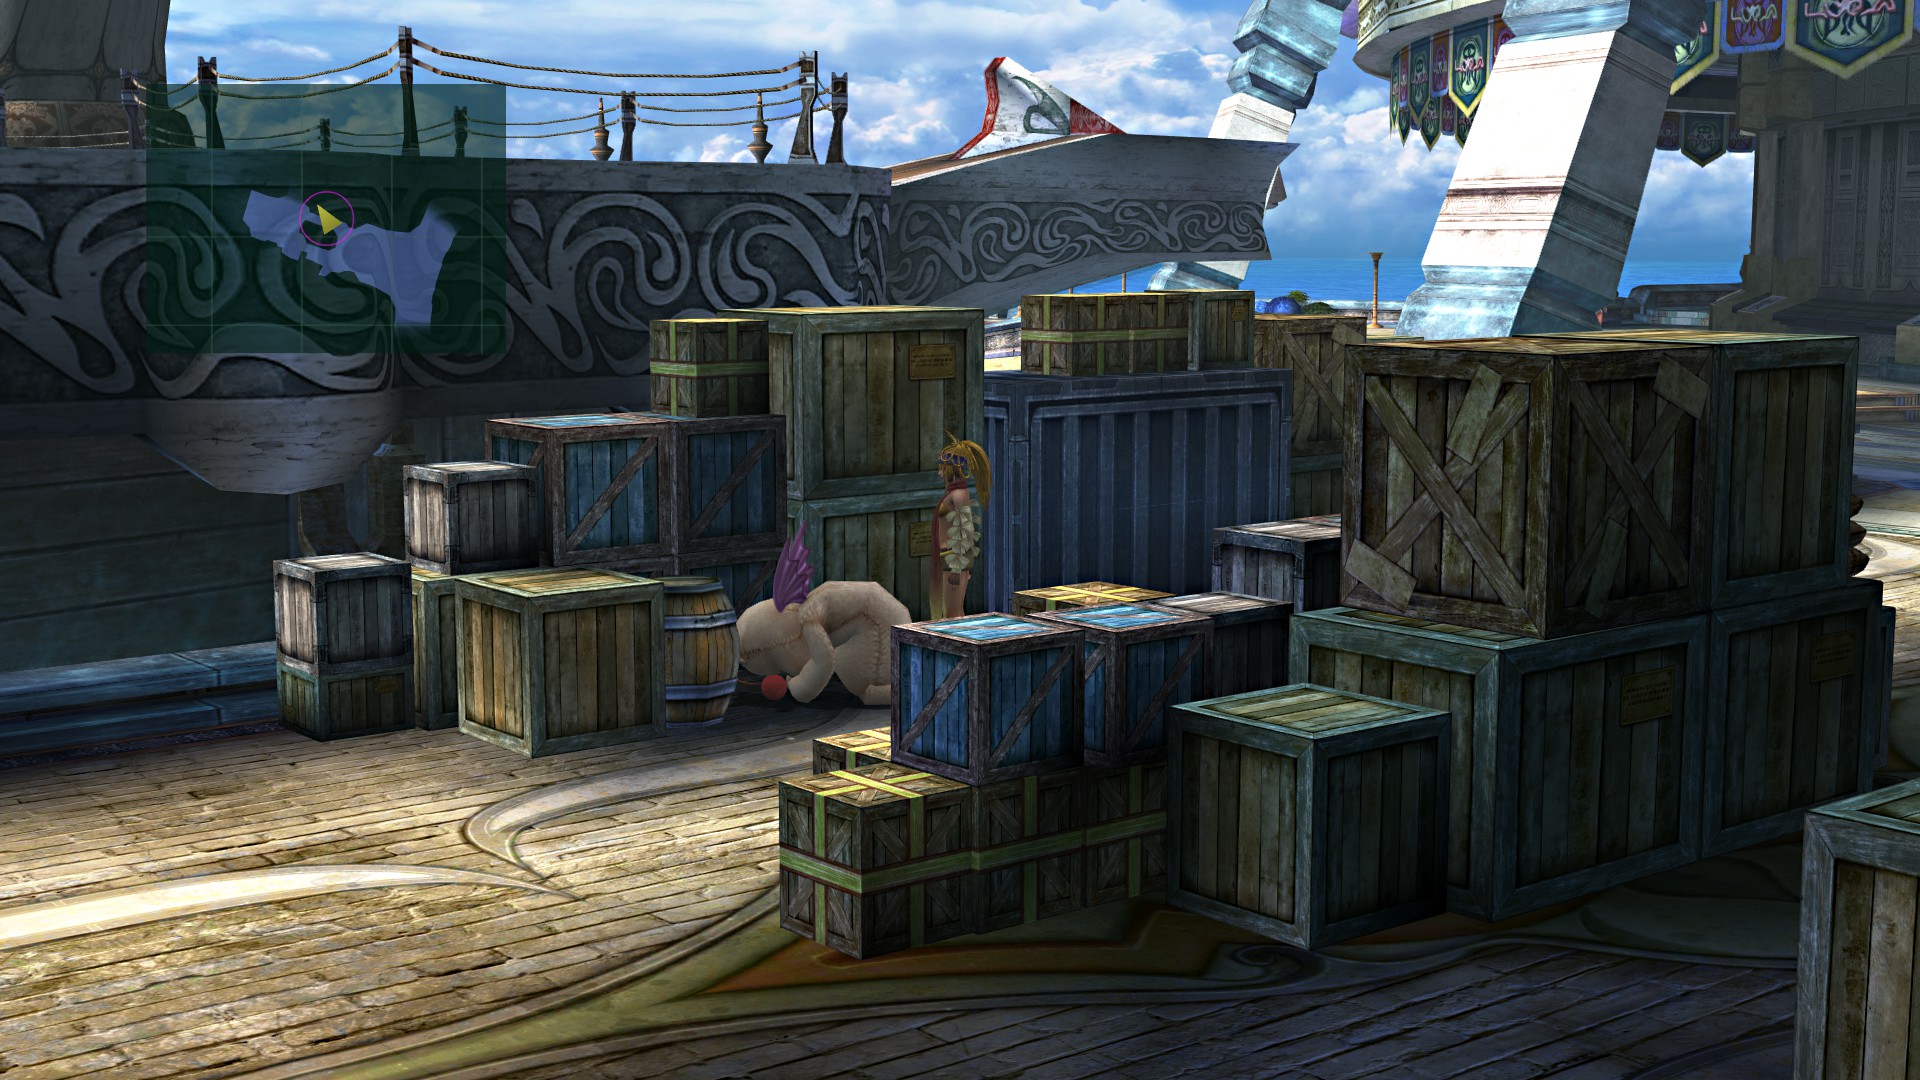
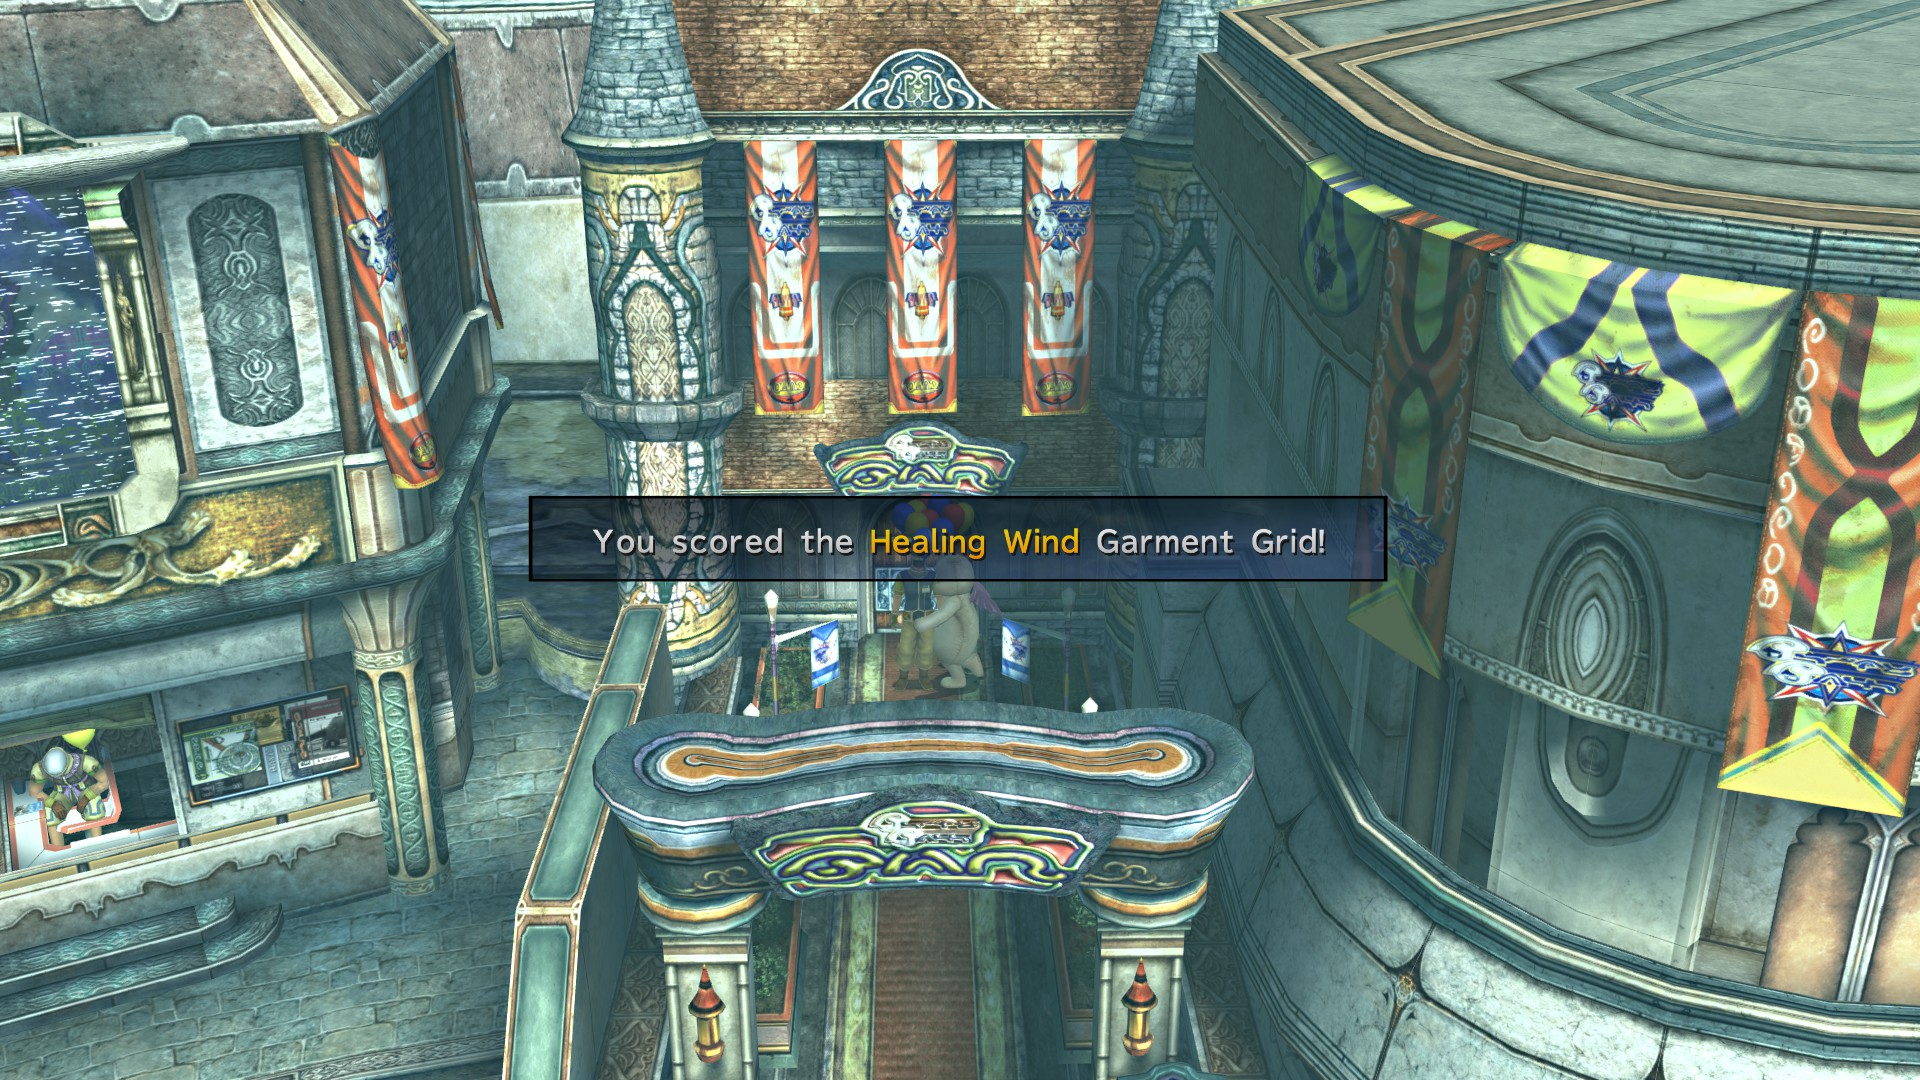
+ Ballon Drive! Sidequest:
Complete this easy side-quest to earn Healing Wind Garment Grid!
Reenter Luca after completing the mission.
Thunder Spawn Garment Grid – Dock 5

+ Al Bhed – After speaking with Rin in Basement A (Northeast)

+ Just enter this area to earn another 0.2% in completion.
+ Accept Yaibal’s mission.
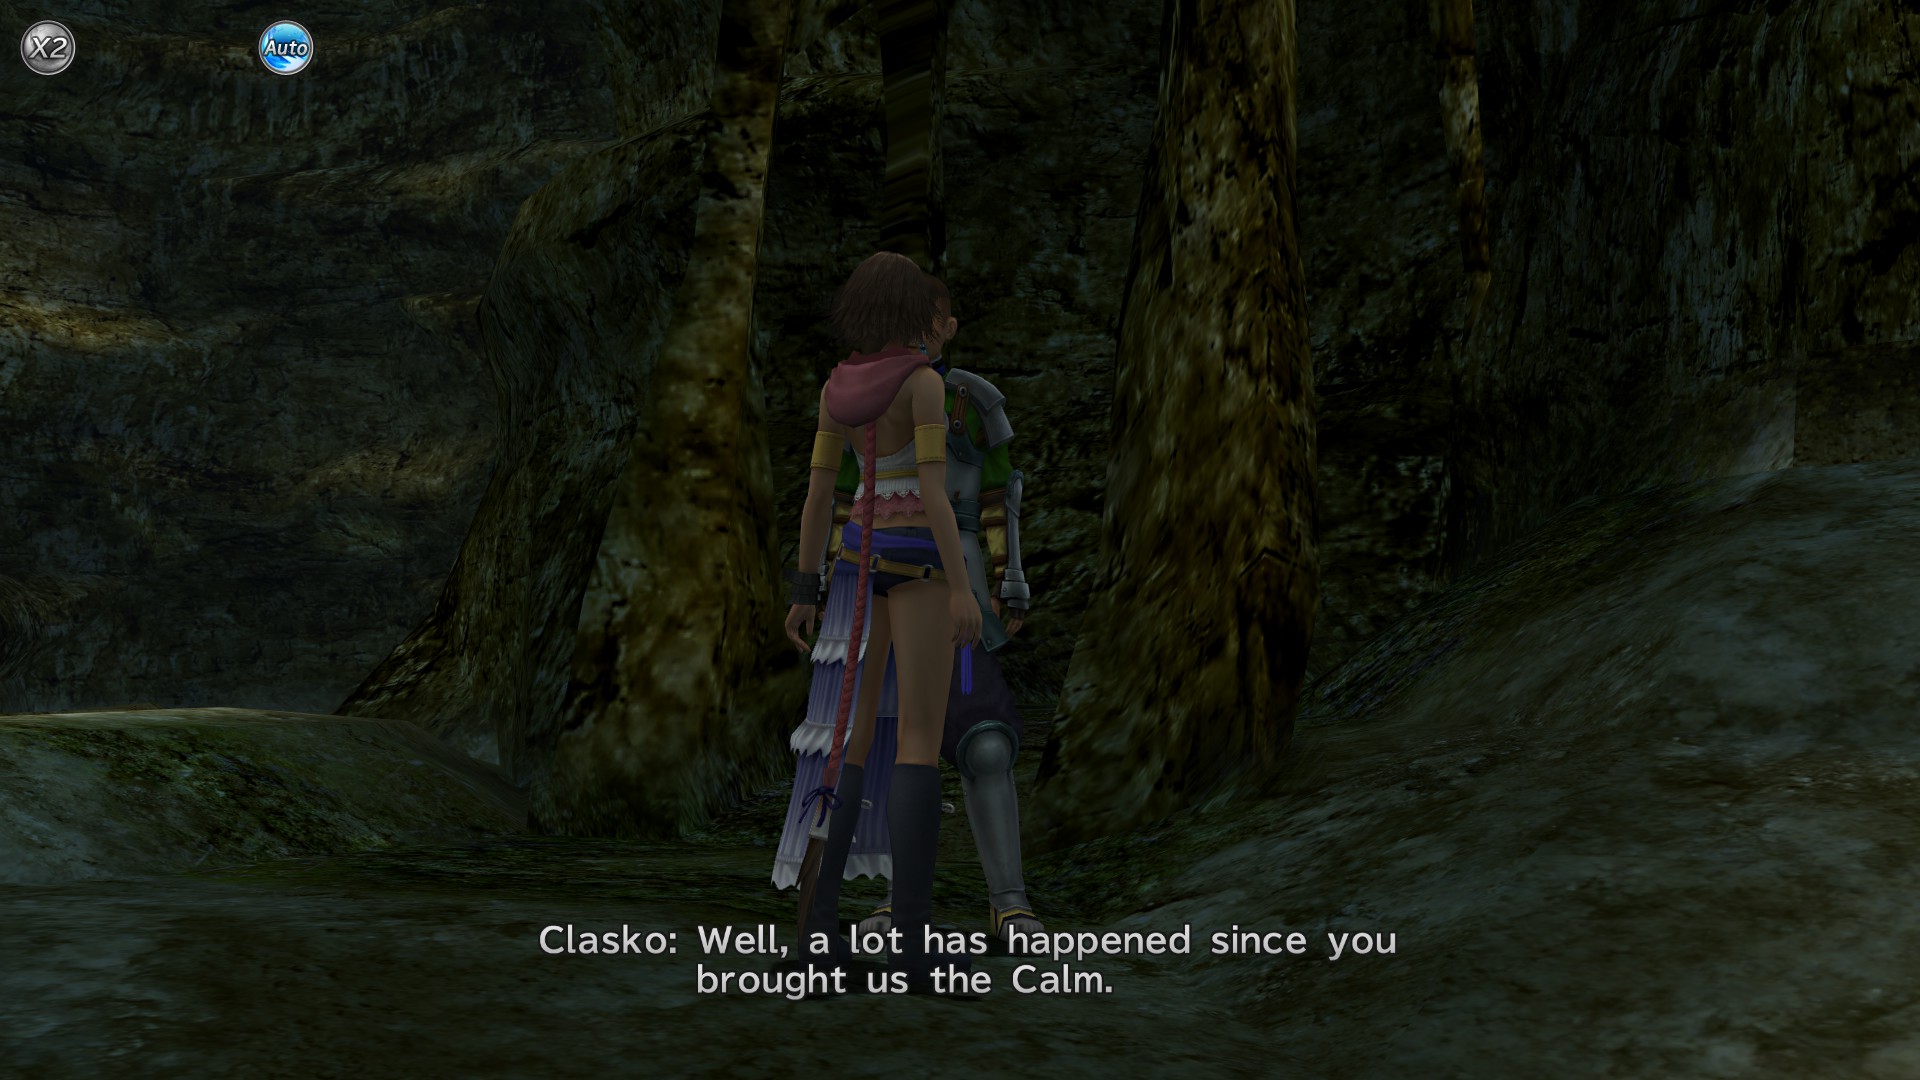
+ Speak to Clasko before attempting the mission
+ Crimson Sphere #9
Follow Ormi and Logos through the valley until you reach a Cave.

Heart of Flame Garment Grid (Received automatically after completing this mission)
Restless Sleep Garment Grid

+ Speak to Lucil twice at the entrance of the Youth League Headquarters.

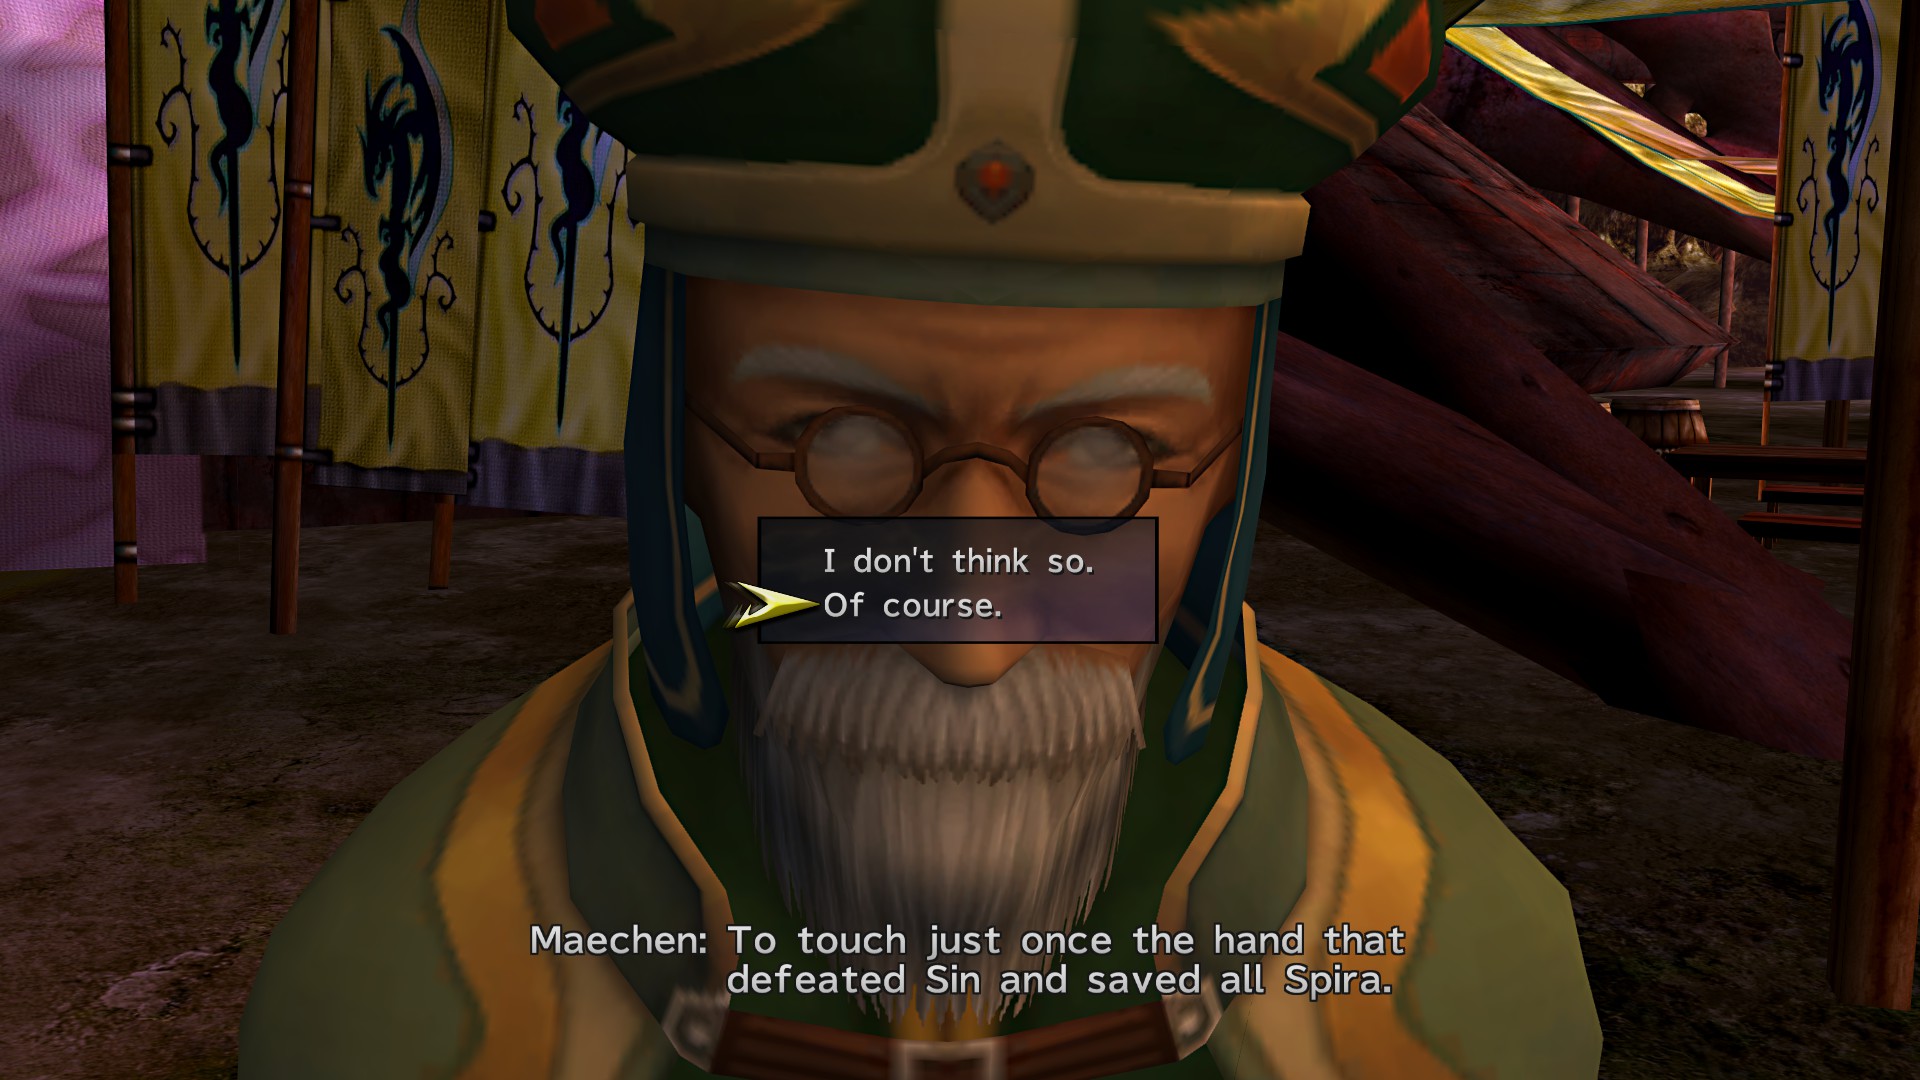
+ Speak with Maechen without CHOOSING any of the options and wait until he ends. when asked to shake his hand or not, ACCEPT.

+ Make your way back through Mushroom Rock to the entrance and speak to Clasko, agree to let him come aboard the Celsius.
+ Watch “Crimson Record #1” Treasure Sphere by speaking to Shinra
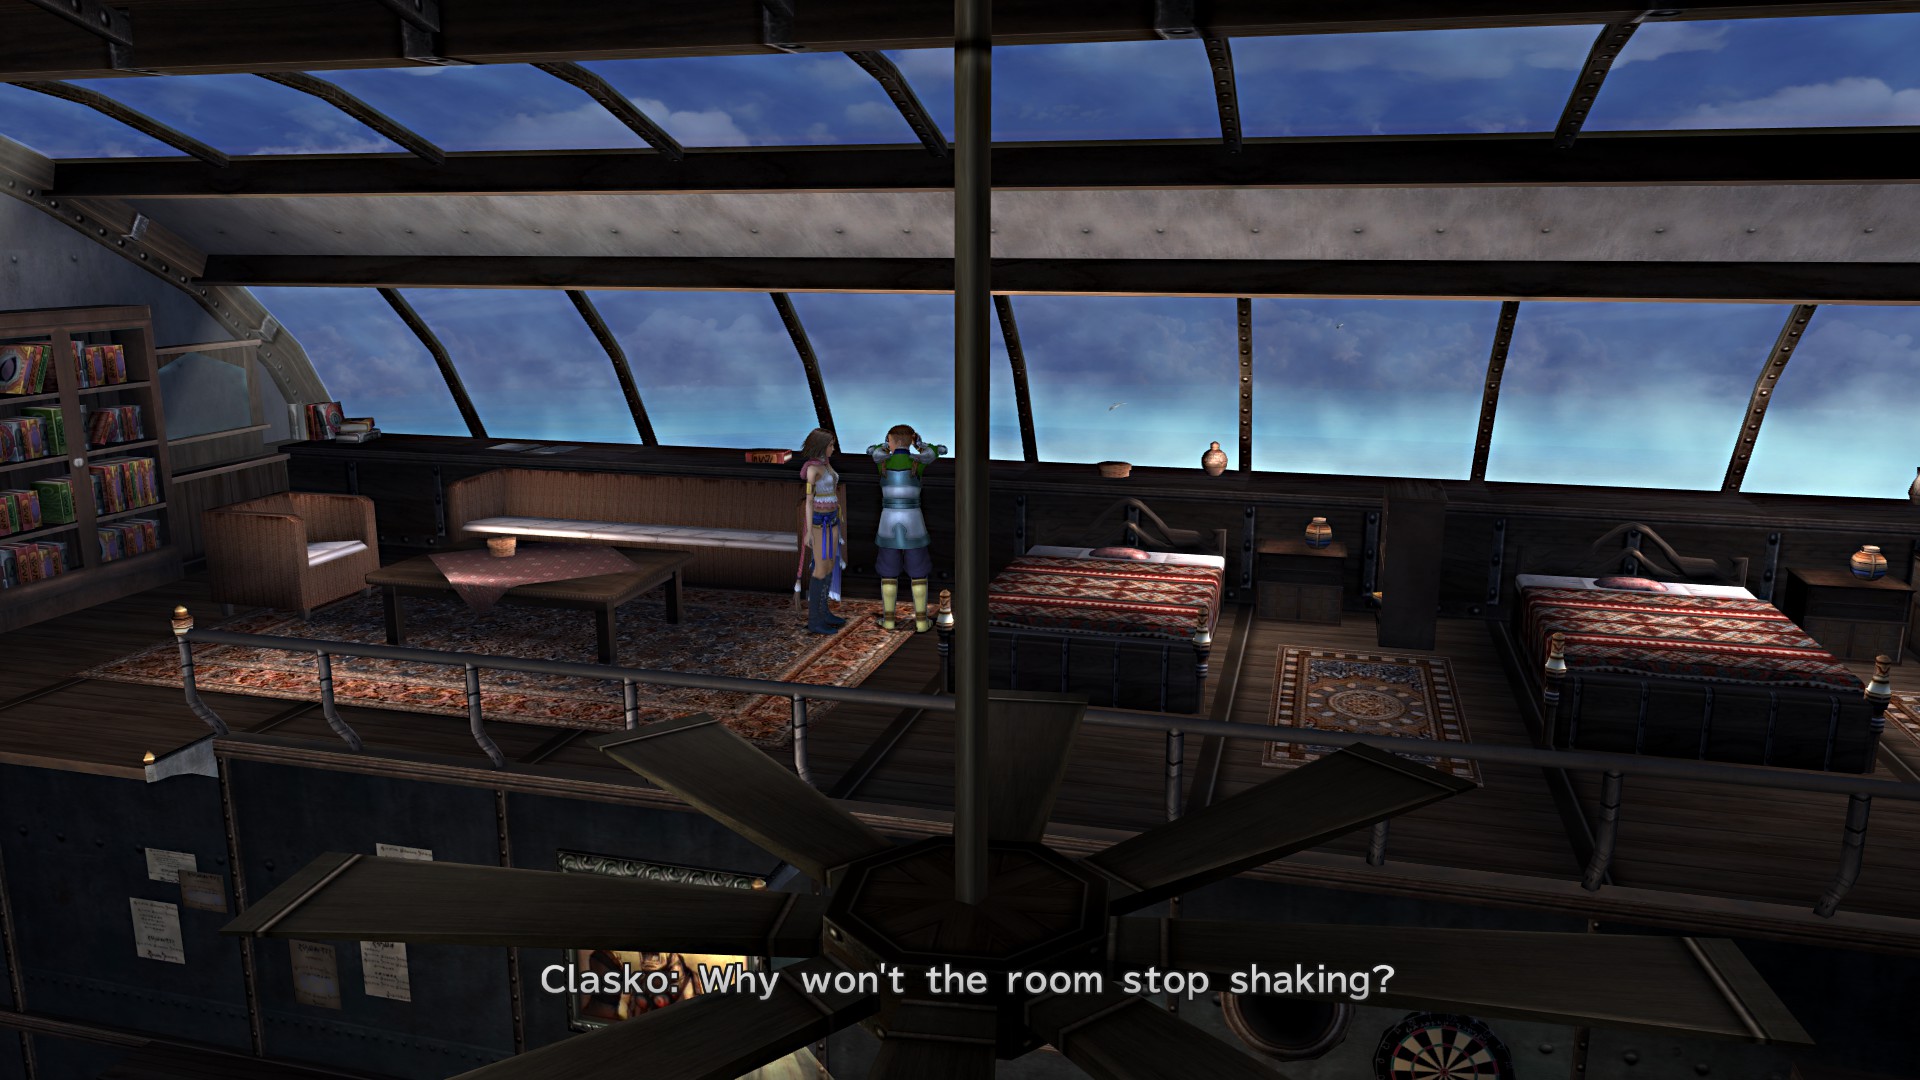
+ Speak to Clasko in the Cabin
Completion: 13%
Ch1 Djose – Bikanel
Wait until the line at the tent to the right depletes,when that happens, run in to the tent.

You’ll be told to go to the temple because Gippal is gonna interview you, head there and after the scene head back out.
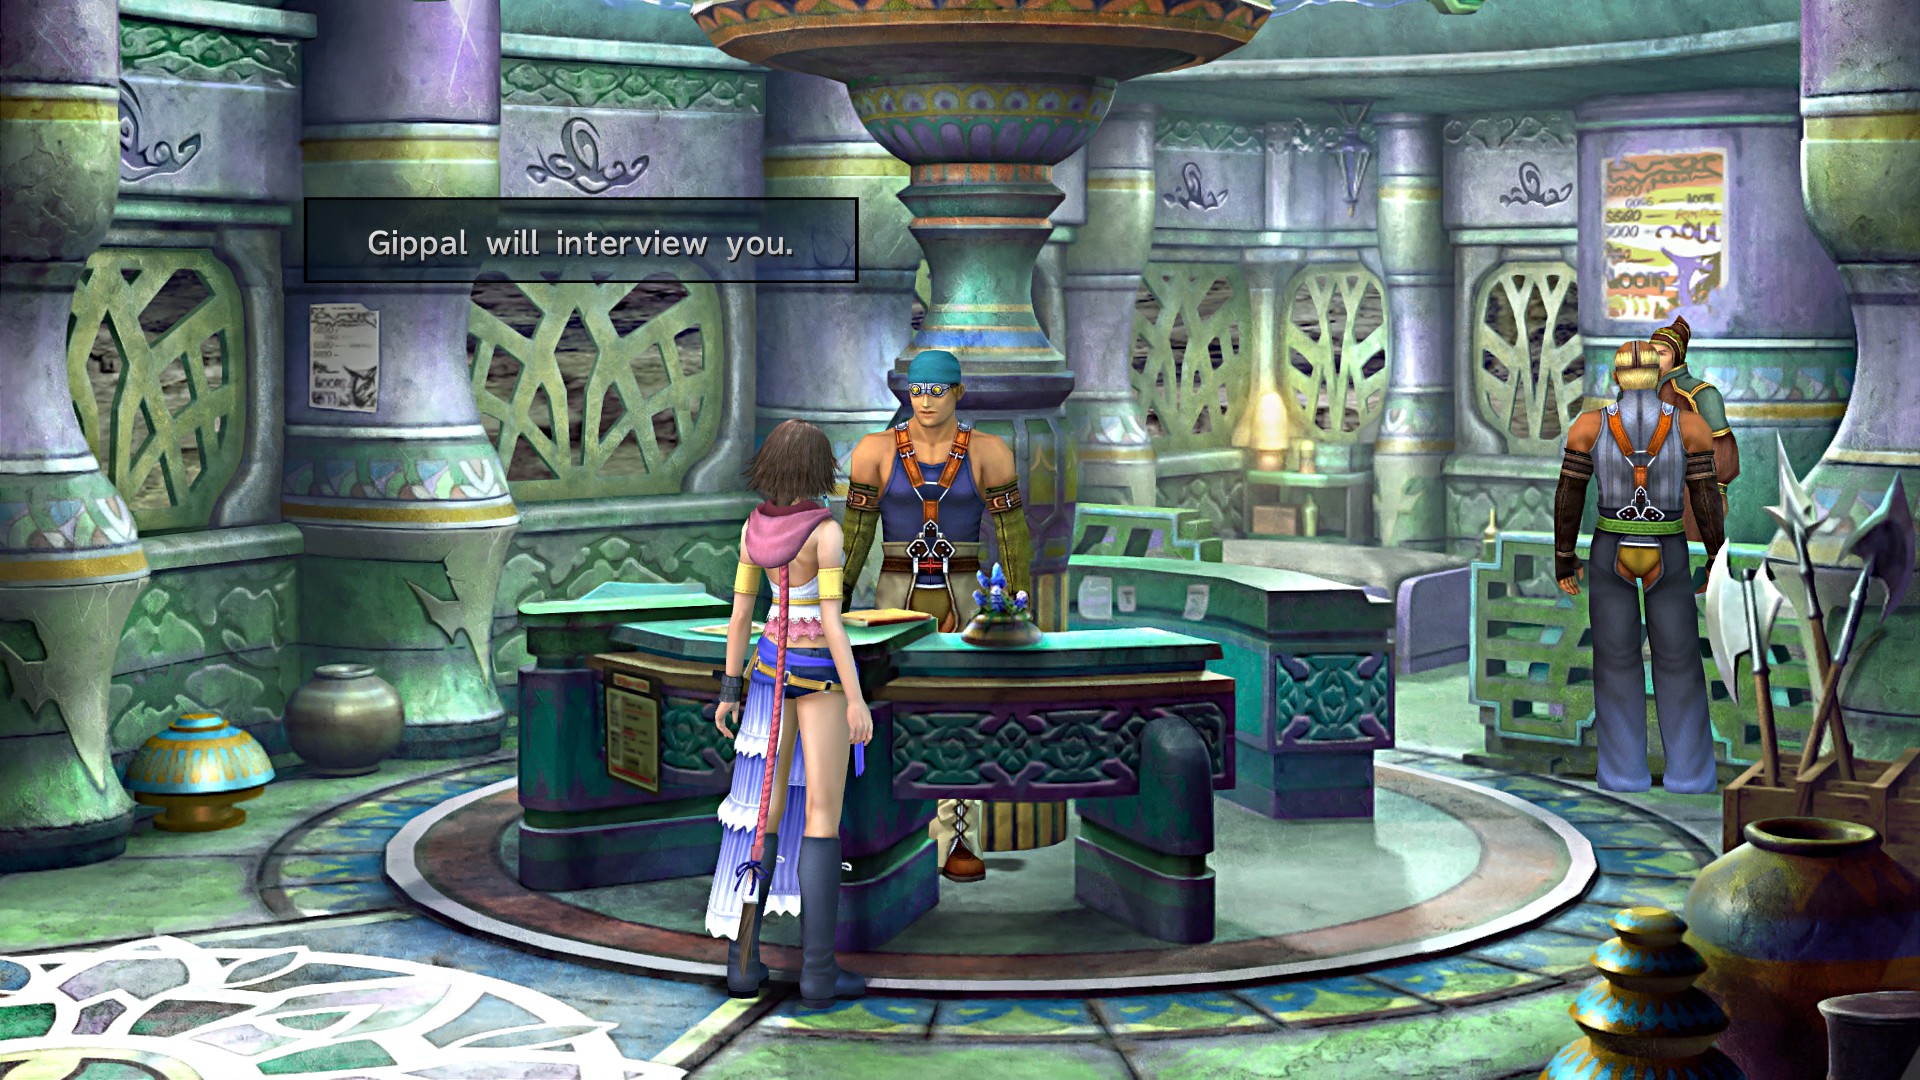
+ Al Bhed Primer automatically received here
+ Follow Gippal south, after a scene you’ll receive the “Letter of Introduction” Key Item.

Completion: 14%
Accept Tobli’s mission at the first area.
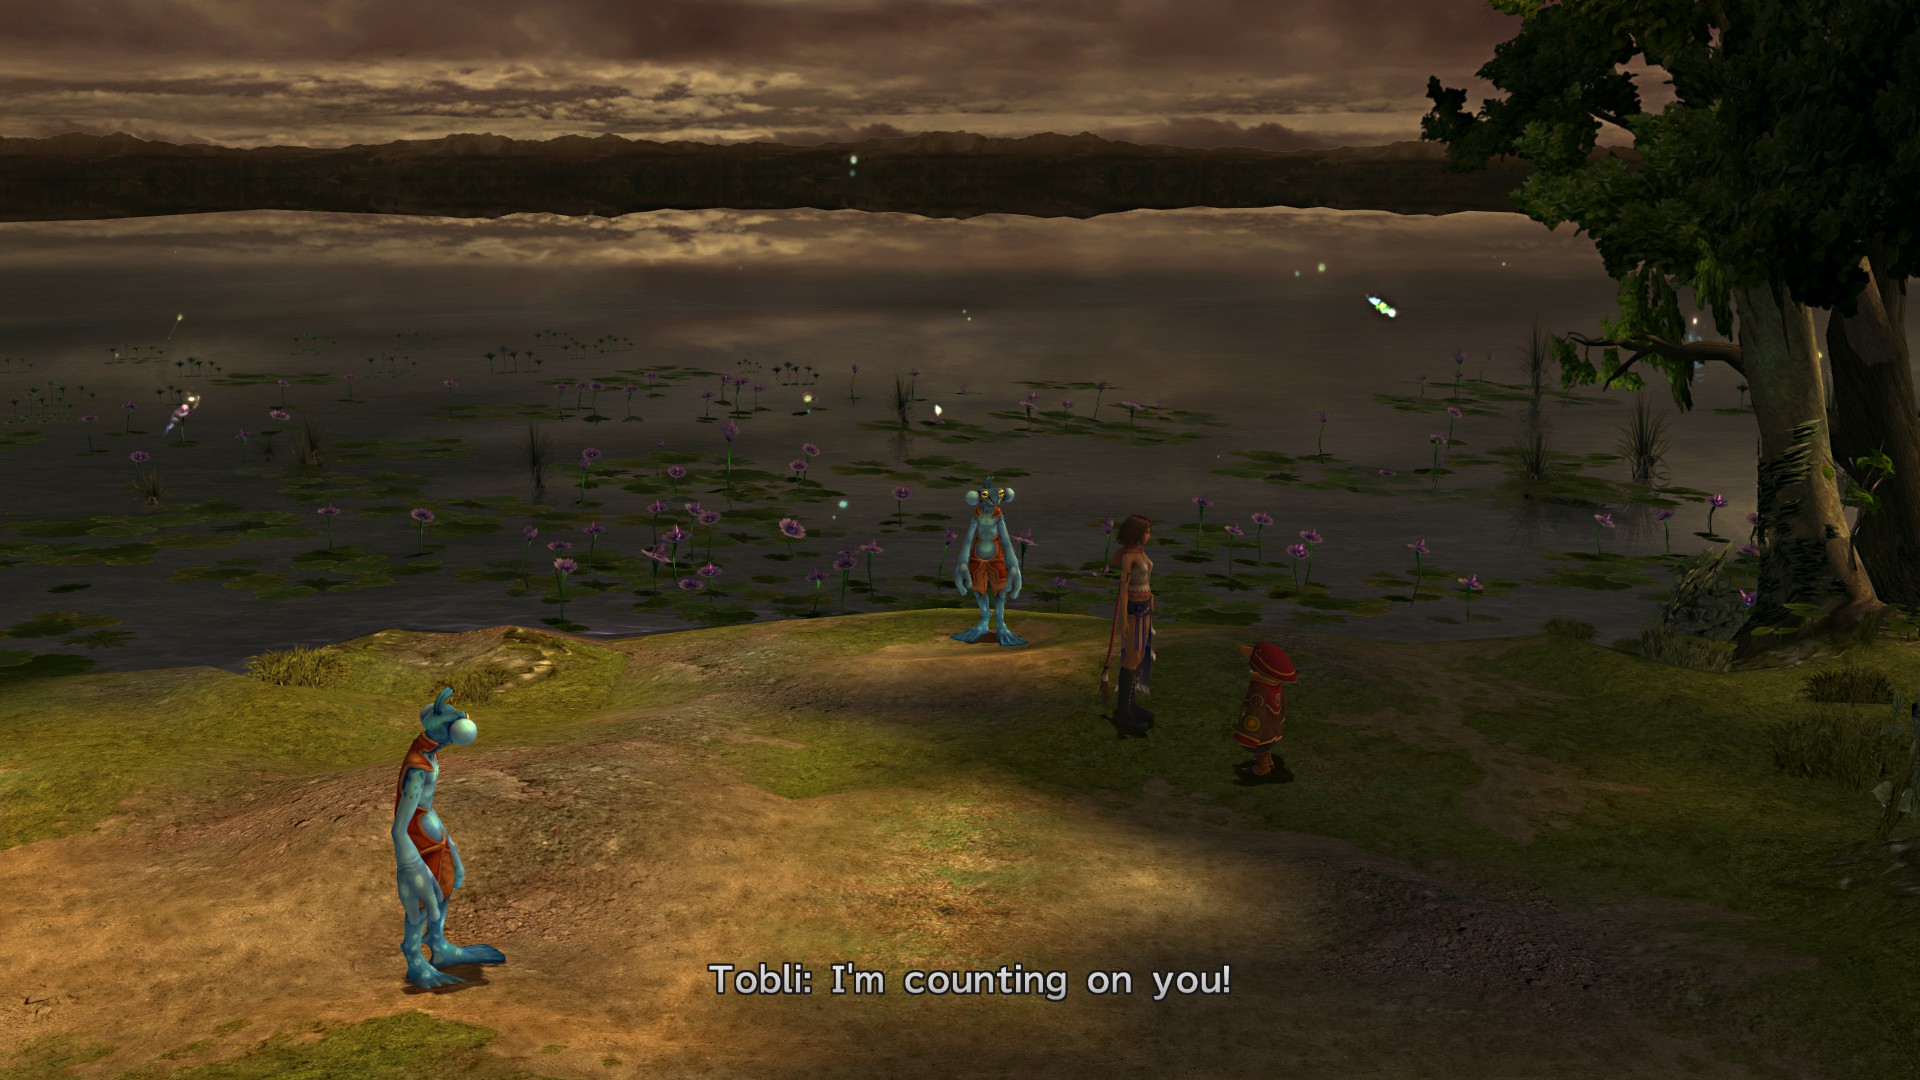
Head south until you reach a Hypello by a wagon.

Guide him to the north without losing any packages

+ If completed correctly you’ll receive the Gun Mage Dressphere, a Circlet and Helios Guard Garment Grid

Run toward the entrance of the Farplane and watch the small scene.

Completion: 15%
+ Just enter this area to get another 0.2% in completion.
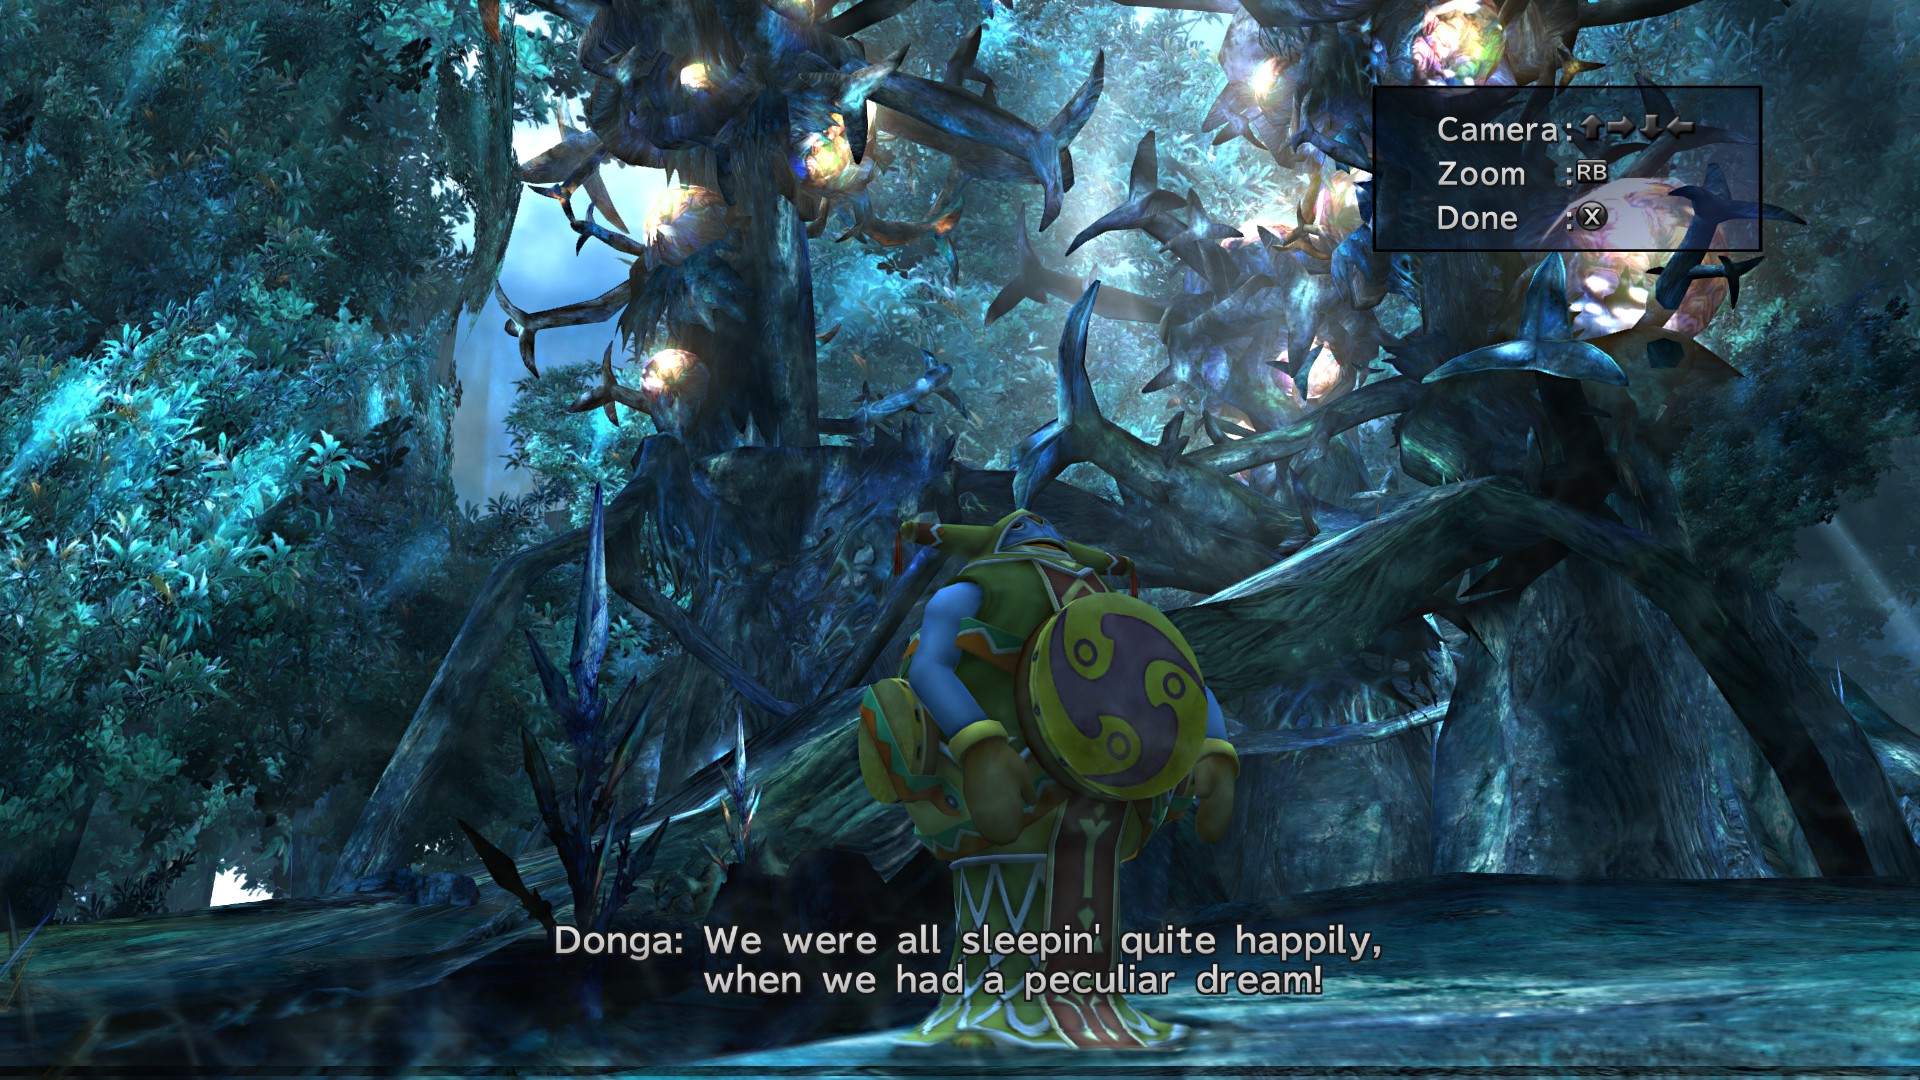
+ Head east twice from the entrance, then south at the intersection to speak to Donga.
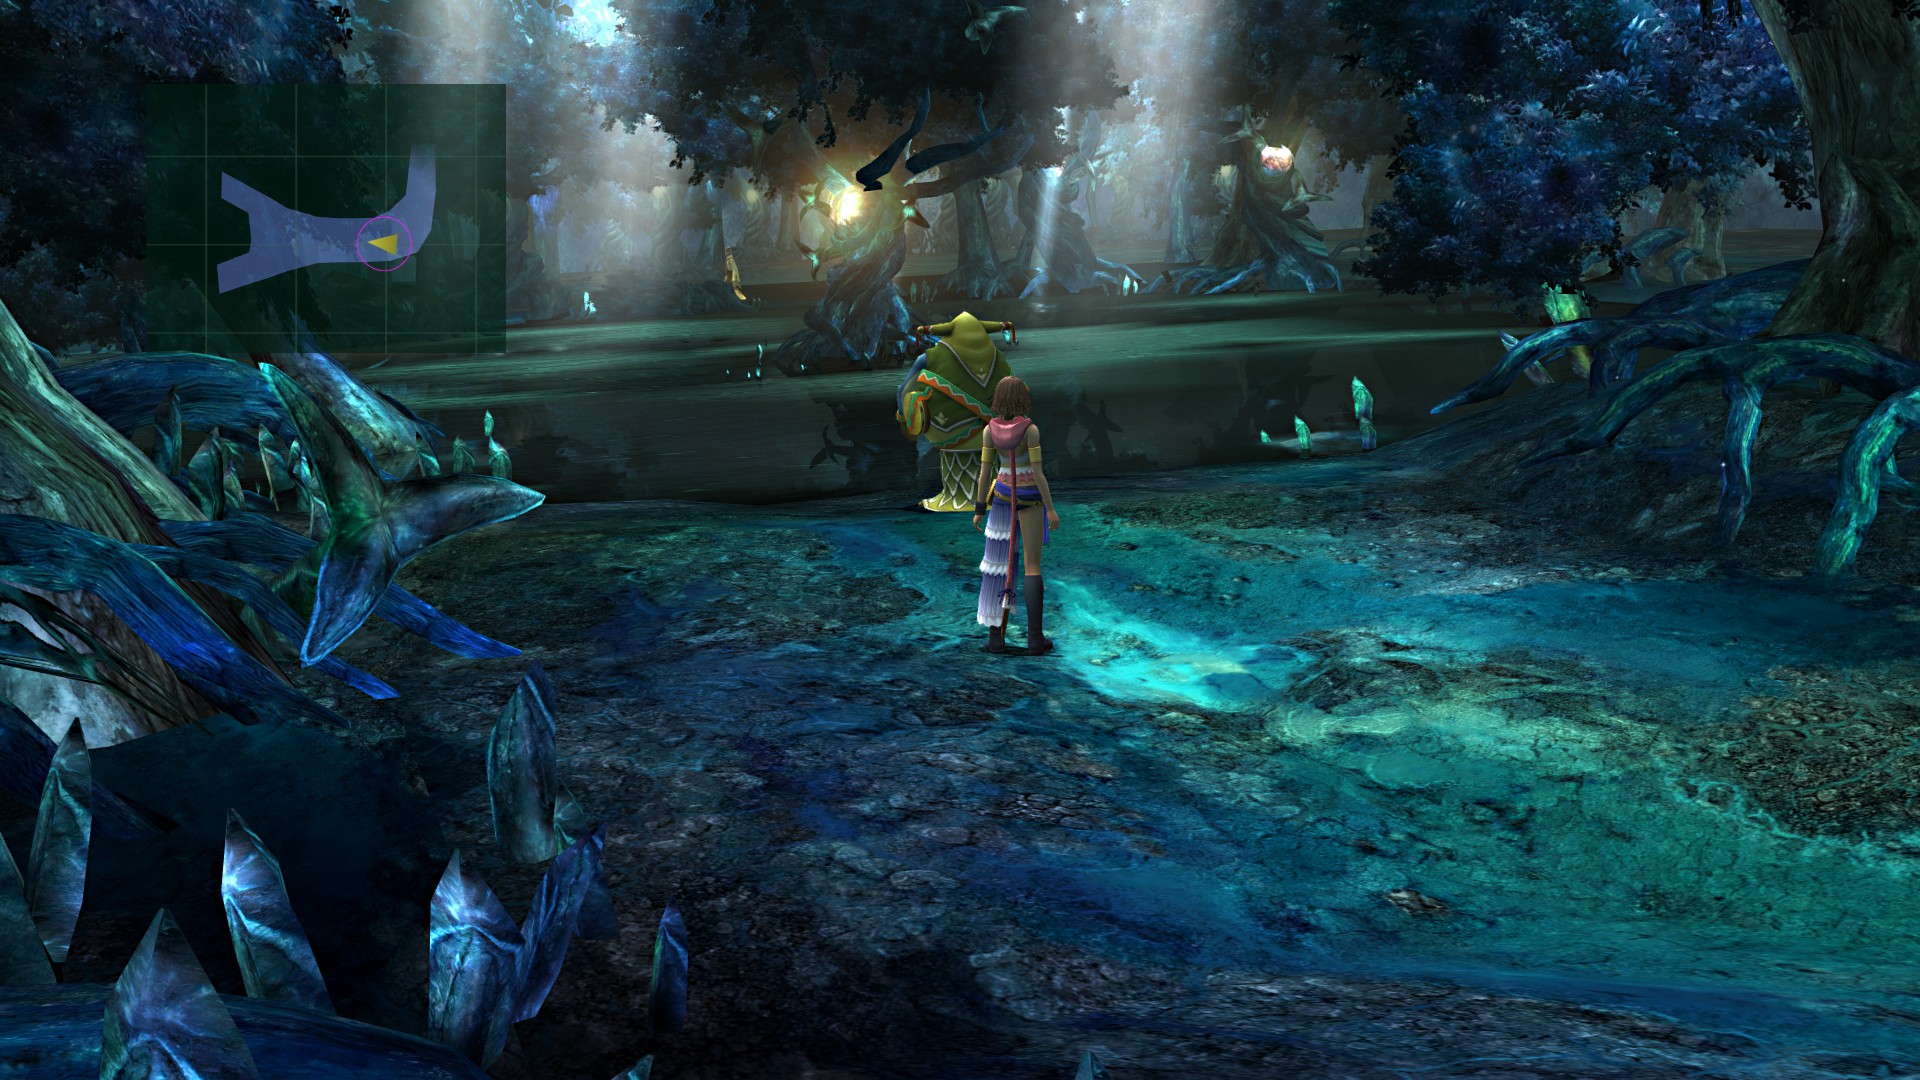
+ Head into the woods until you find Pukutak, she’s around halfway the forest.

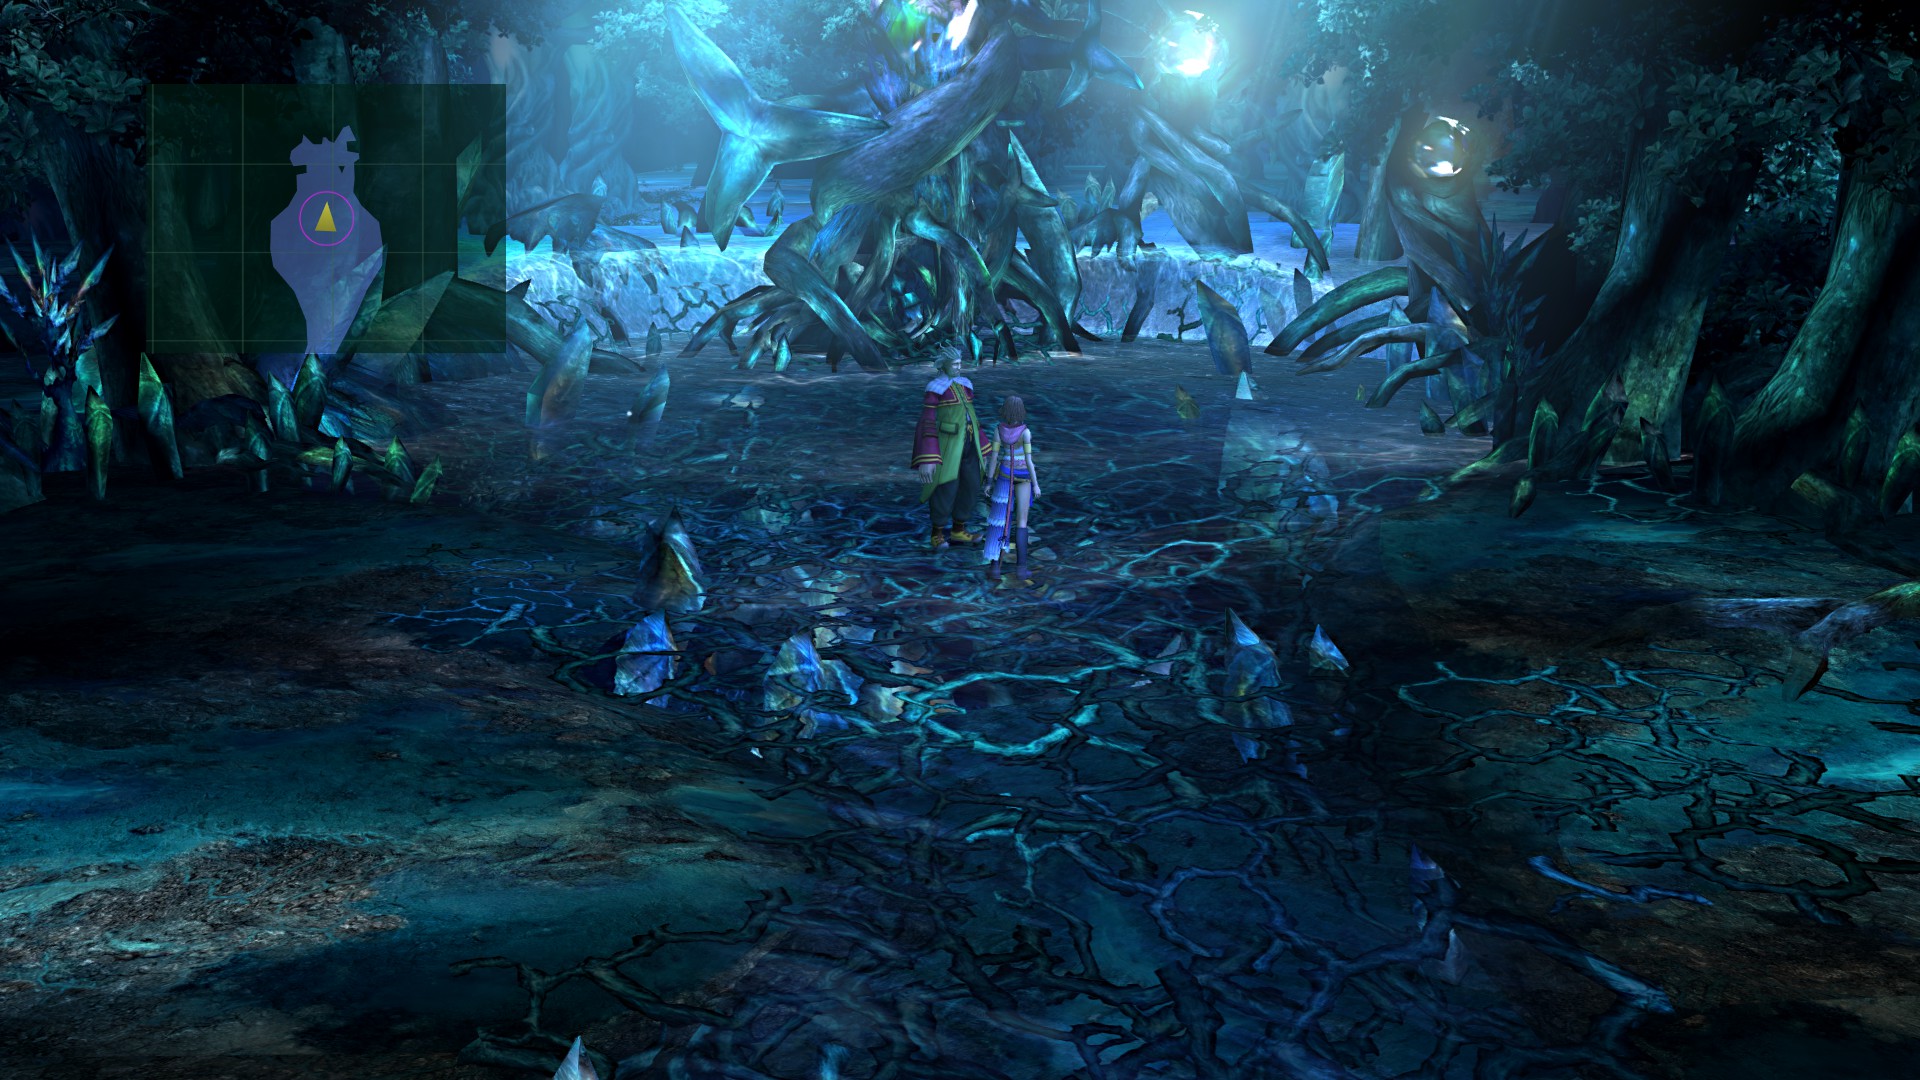
Continue your way into the forest until you reach a four-way divide, take the northeastern path

+ Once here, speak to Tromell FOUR TIMES, you’ll receive the special dressphere “Full Throttle” as well as the Unerring Path Garment Grid
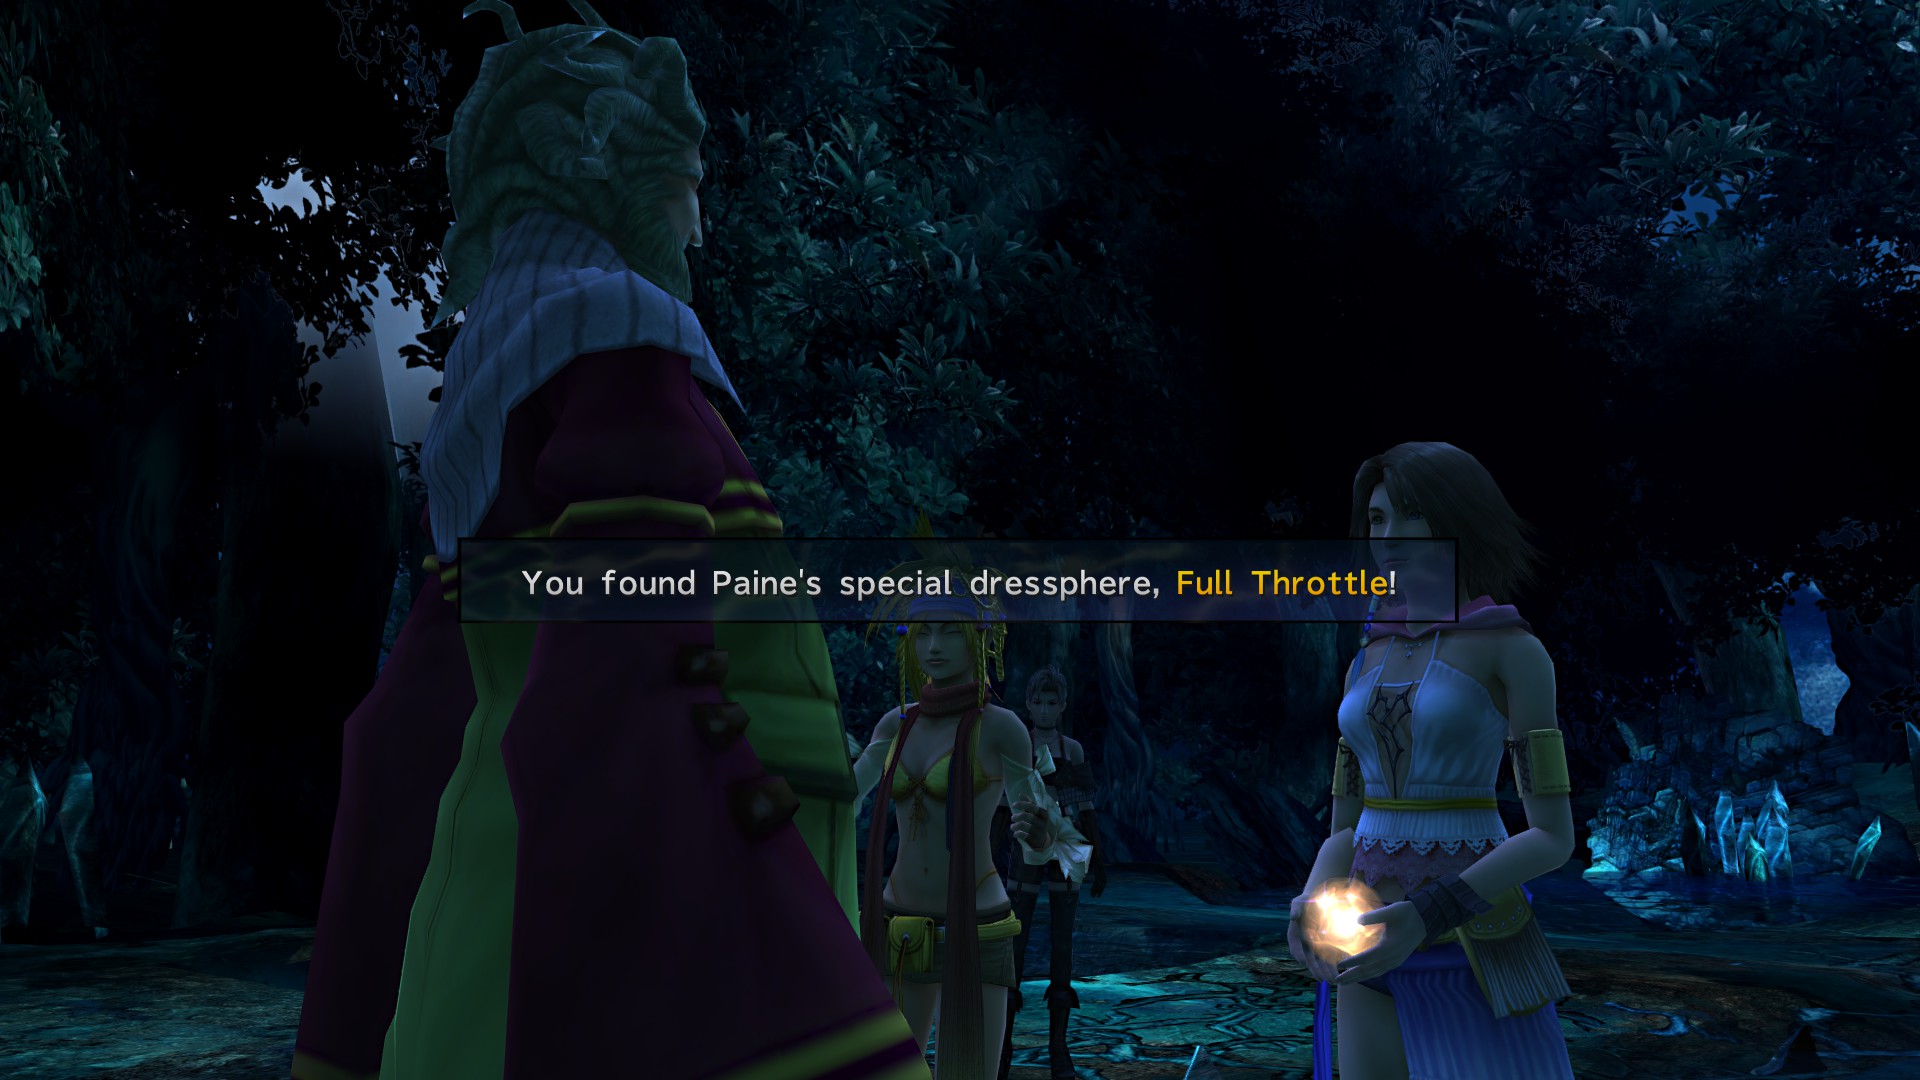
The following achievement should unlock:

Obtain one special dress
Return to the four-way divide and take the north path this time.
Al Bhed Primer automatically received here.

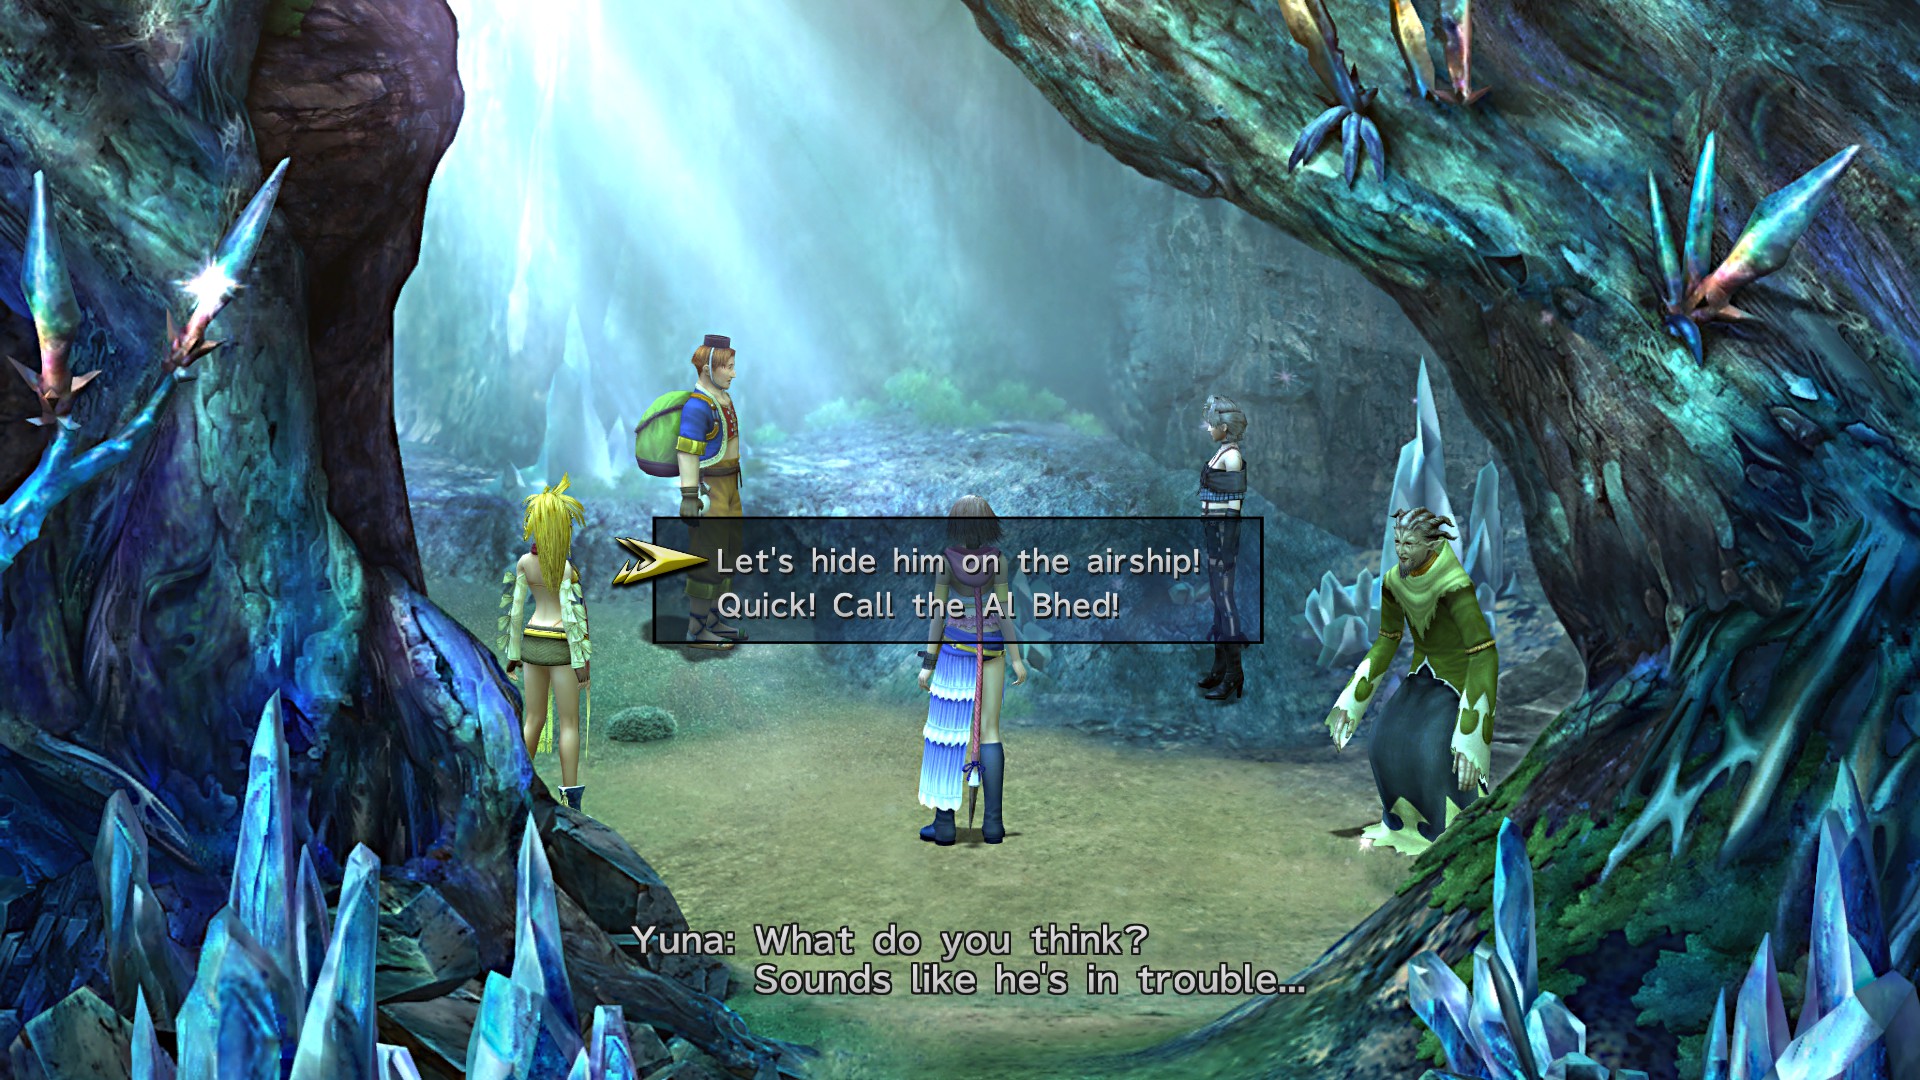
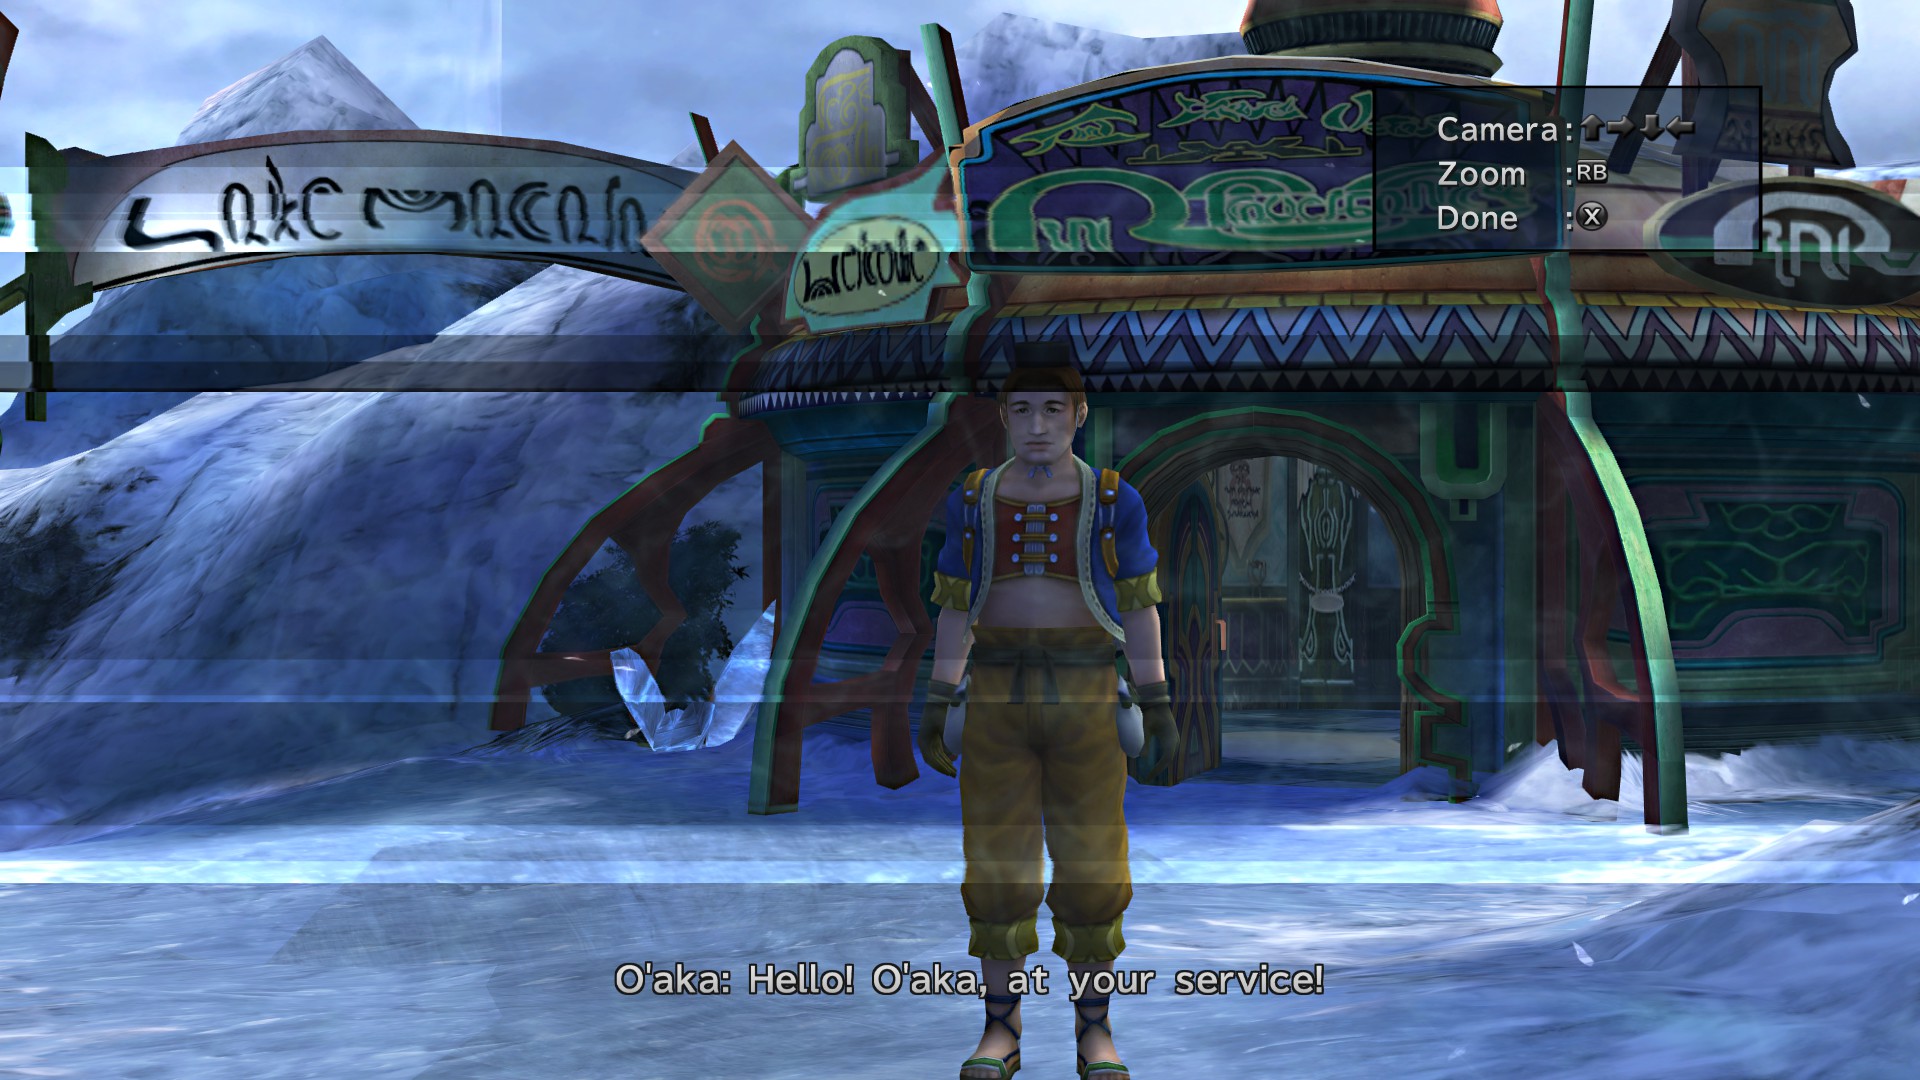
You’ll see O’aka running away, return to the four-way divide and a new mission will start, take the southeastern path.

Make your way to the entrance of the woods and head into the intersection where you spoke to Donga, but take the north path this time.
O’aka will be hiding up in a tree, when prompted, allow O’aka to board the Celsius.
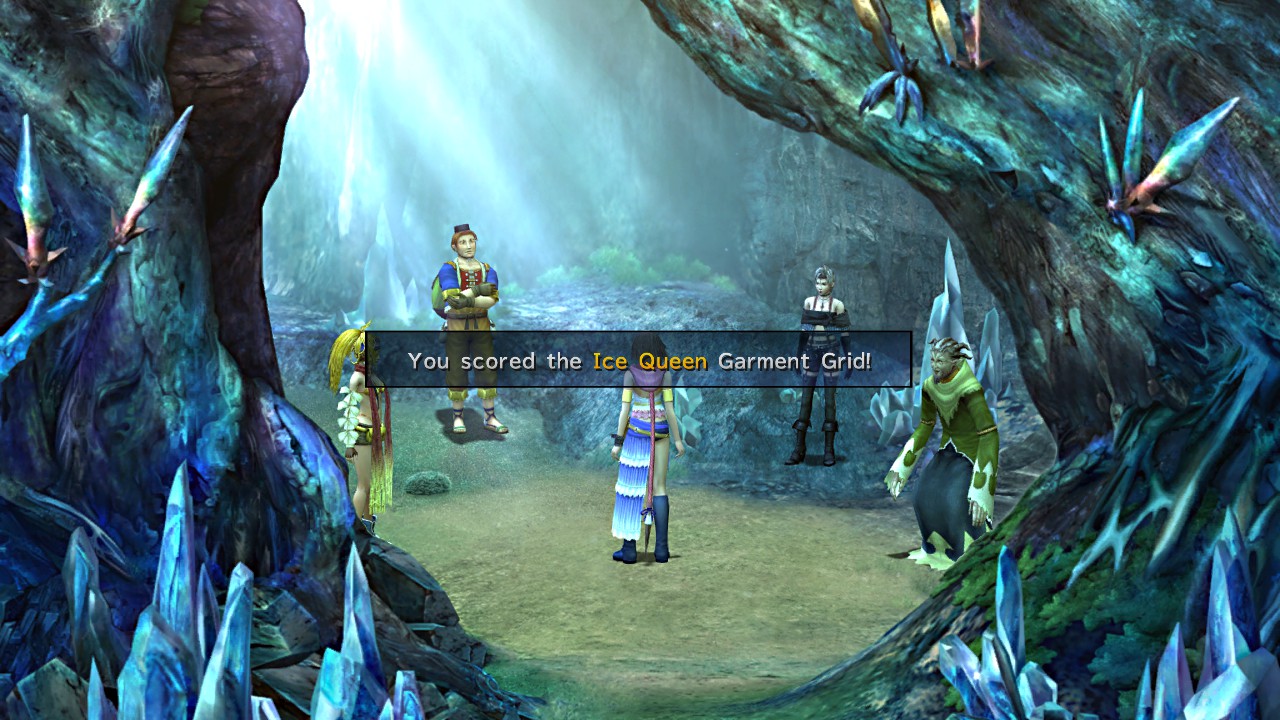
+ This will end the mission rewarding you with the Ice Queen Garment Grid.
+ Board the Celcius and speak to O’aka in the Cabin
Al Bhed Primer

I highly recommend digging only once to complete the mission or you might lose the 100%.
+ Still of Night Garment Grid as a reward for completing the mission

Completion: 18%
Ch1 Bevelle – Besaid
+ Walk up to the temple and meet Baralai at the entrance.
+ Just entering here should grant you 0.2%
Note. Also start publicizing for a company since you’ll need 400 points by the Chapter 5, just speak to one of the two people at any game stand and choose “Publicity menu”.

Completion: 19%
+ Just enter this area and watch the entrance scene to get you another 0.4% in completion.
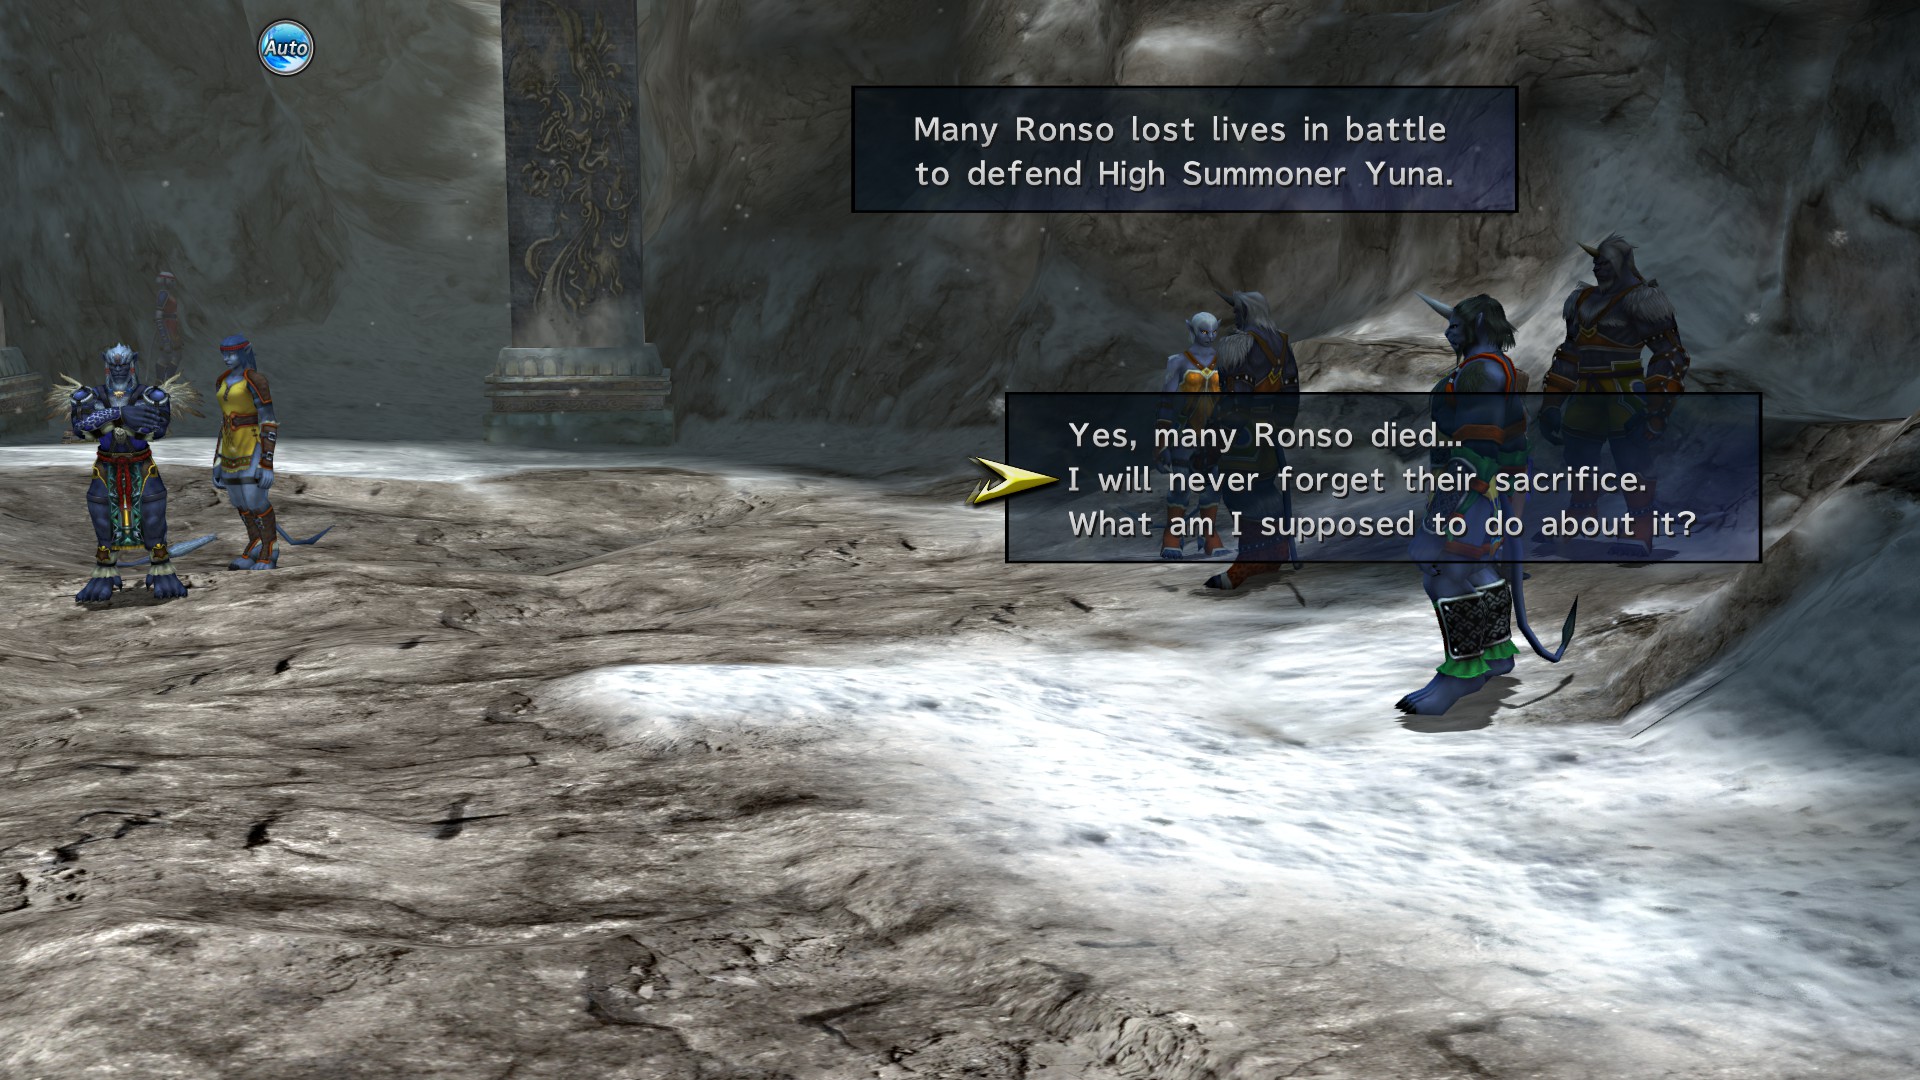
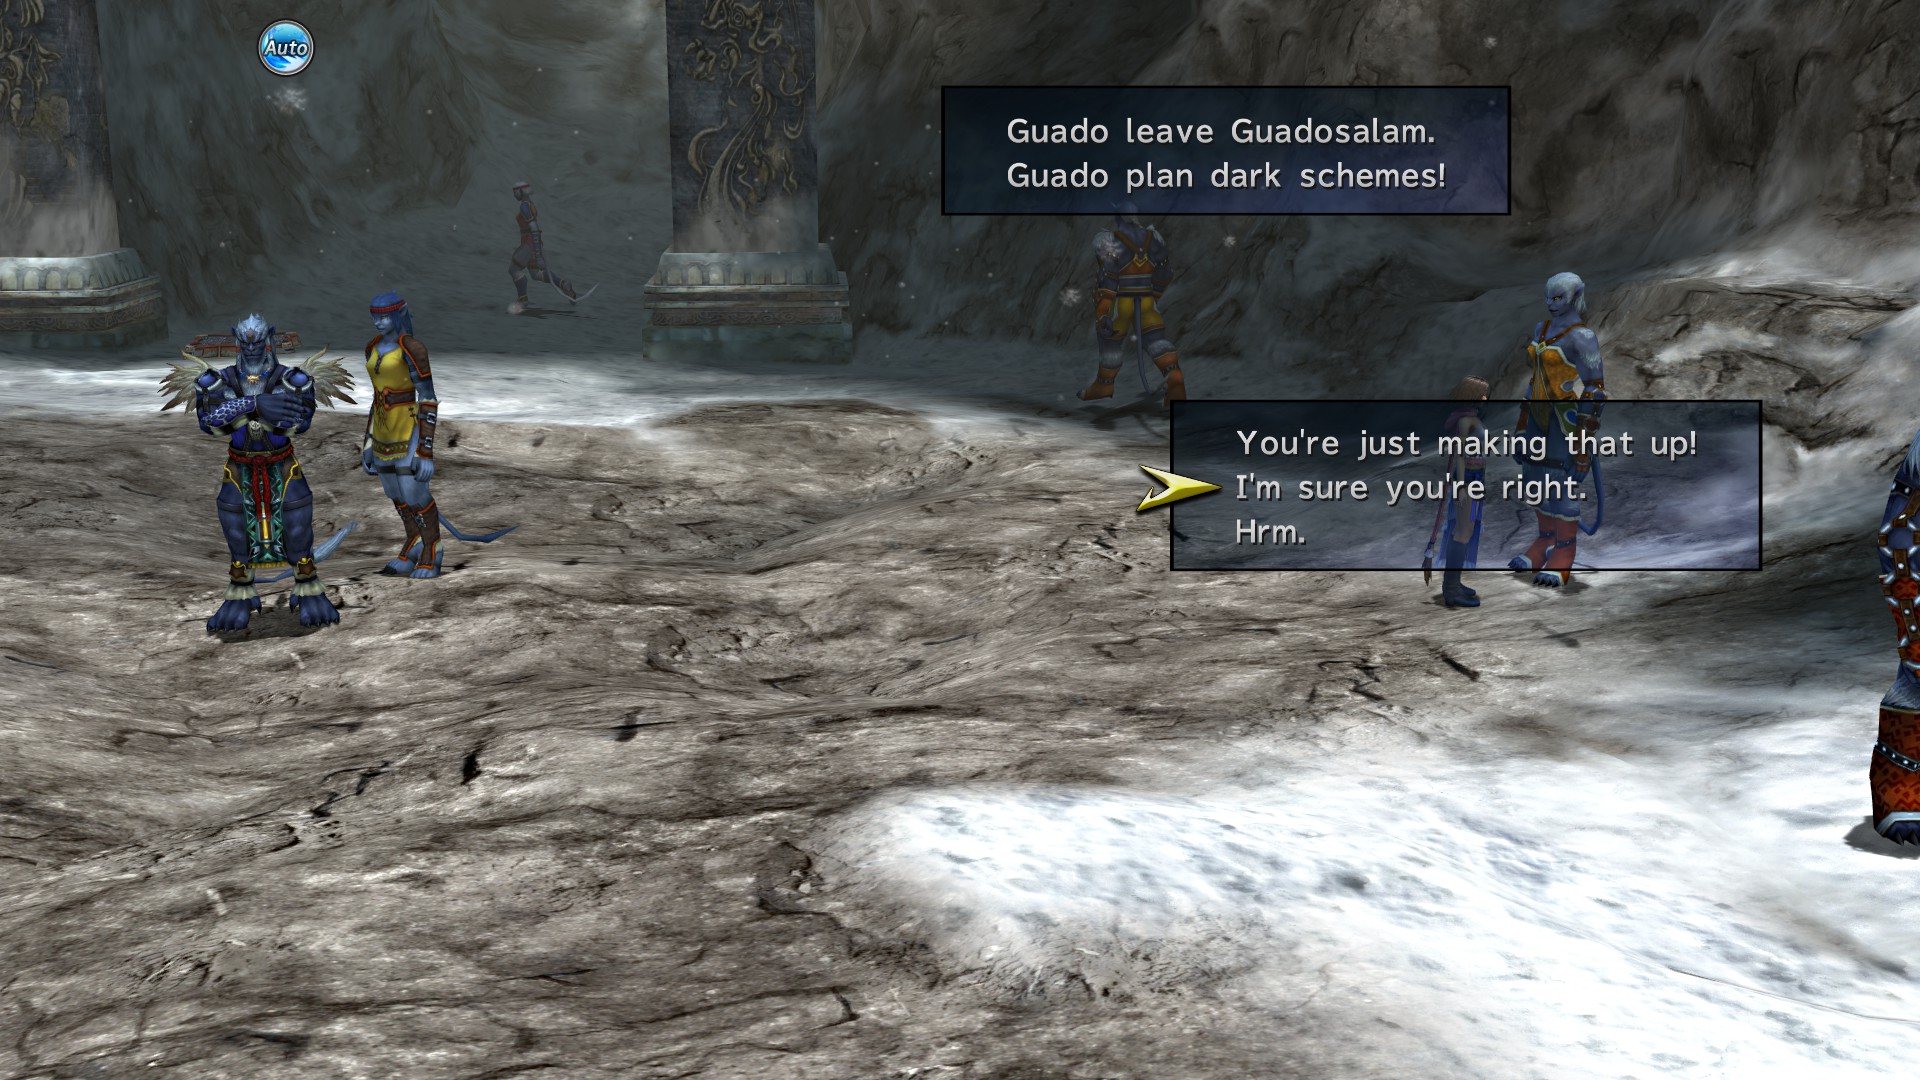
Speak to everyone here and Choose the following options:
Entrance

“You have to learn to deal with these things!”

“Leave it to the Gullwings!”

“I can imagine how you must feel…”

“I will never forget their sacrifice.”
“I’m sure you’re right.”
“I wouldn’t forgive them either.”

“A change for the better, I hope.” – Fayth Scar

Doing so you’ll get a Dressphere in Chapter 3.
+ Enter the village and watch the scene with Wakka.
Enter Lulu’s hut and speak to her, after the scene rest in her hut.

Exit the hut and speak to Lulu, accept the mission.
You’ll have to find 4 cipher numbers, they’re randomized but I’ll show you the location of them.
#1 Cipher – Promontory

#4 Cipher – Ancient Road (Climb the pillar)

#2 Cipher – Beach (Climb up the ledge)

#3 Cipher – Beach

This code for my door would be 7007, but like I said, It’s random for each playthrough.
Open the door just before the Beach using the code and speak to Wakka.

Defeat the boss , you’ll be rewarded with “White Mage Dressphere”

+ Speak to Wakka again to complete this mission and receive a “Besaid Sphere” Key Item
After the scene you’ll get a “Protection Halo Garment Grid”
Ch1 Zanarkand – Kilika
+ Before entering the Fayth, make sure to choose the option. “You bet I do!” when talking to Cid

When you get asked, reply with “Is that you, Isaaru” to receive a Heart Reborn Garment Grid!

+ Completing the mission gives your a Sphere Fragment as well as an 1.8% of completion
Completion: 23%
In the second screen, second level tier, enter Dona’s hut and watch the scene.


In Kilika Temple, make sure you use the right password at each checkpoint and do not fight against any guards at the checkpoints.
1 Craven Monkey [4 Guards]
2 Carved Monkey [3 Guards]
3 Craven Monkey [2 Guards]
4 Carved Monkey (Twice) [3 Guards then 5 Guards]
Menace of the Deep Garment Grid is your reward


Defeat YSLS-Zero
Chapter 1 Complete!
Your completion should be: 25%
Ch2 Besaid – Moonflow
Al Bhed Primer (Automatically received)

+ Speak to Barkeep at the bar and choose to rest
+ After the nap, return to the Cabin’s hallway with the musicians and speak with the fat one.
Push them into the elevator to watch an scene.

Choose the Youth League over New Yevon in order to reach 100% completion
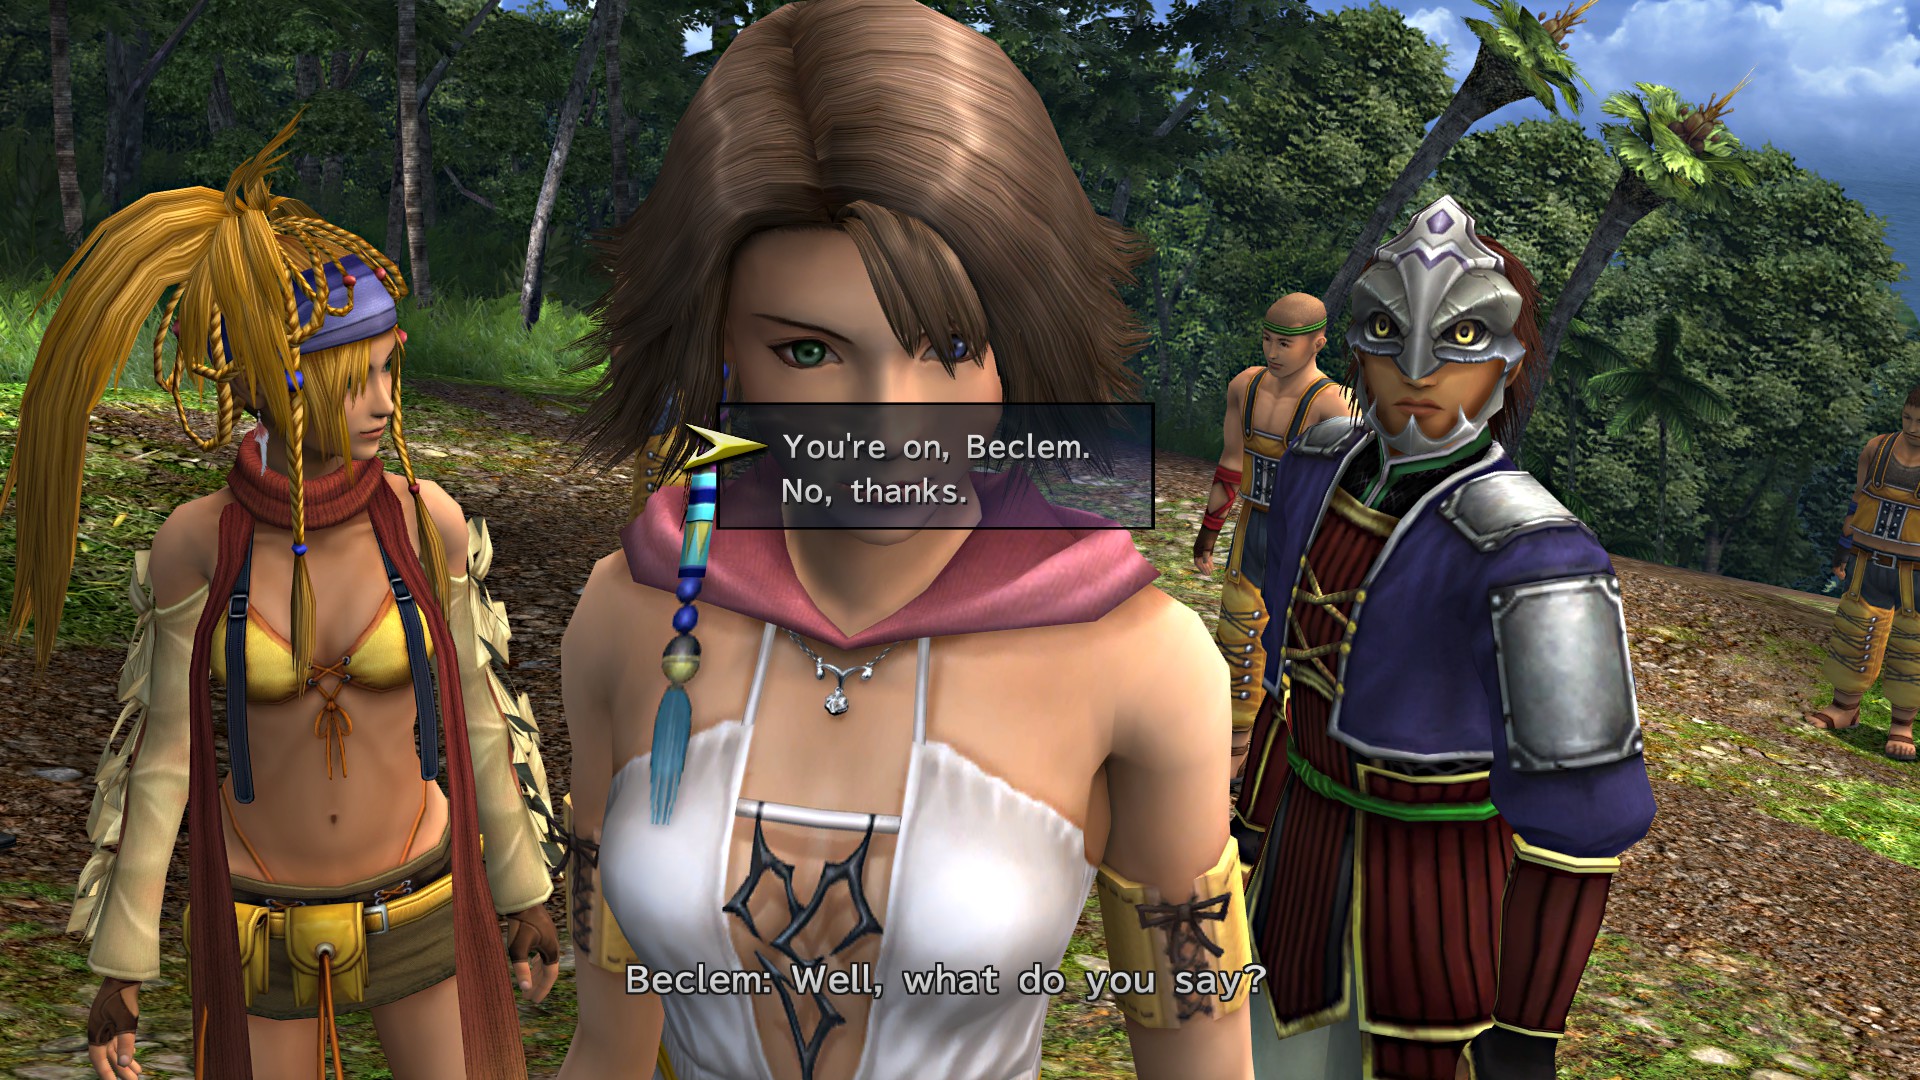
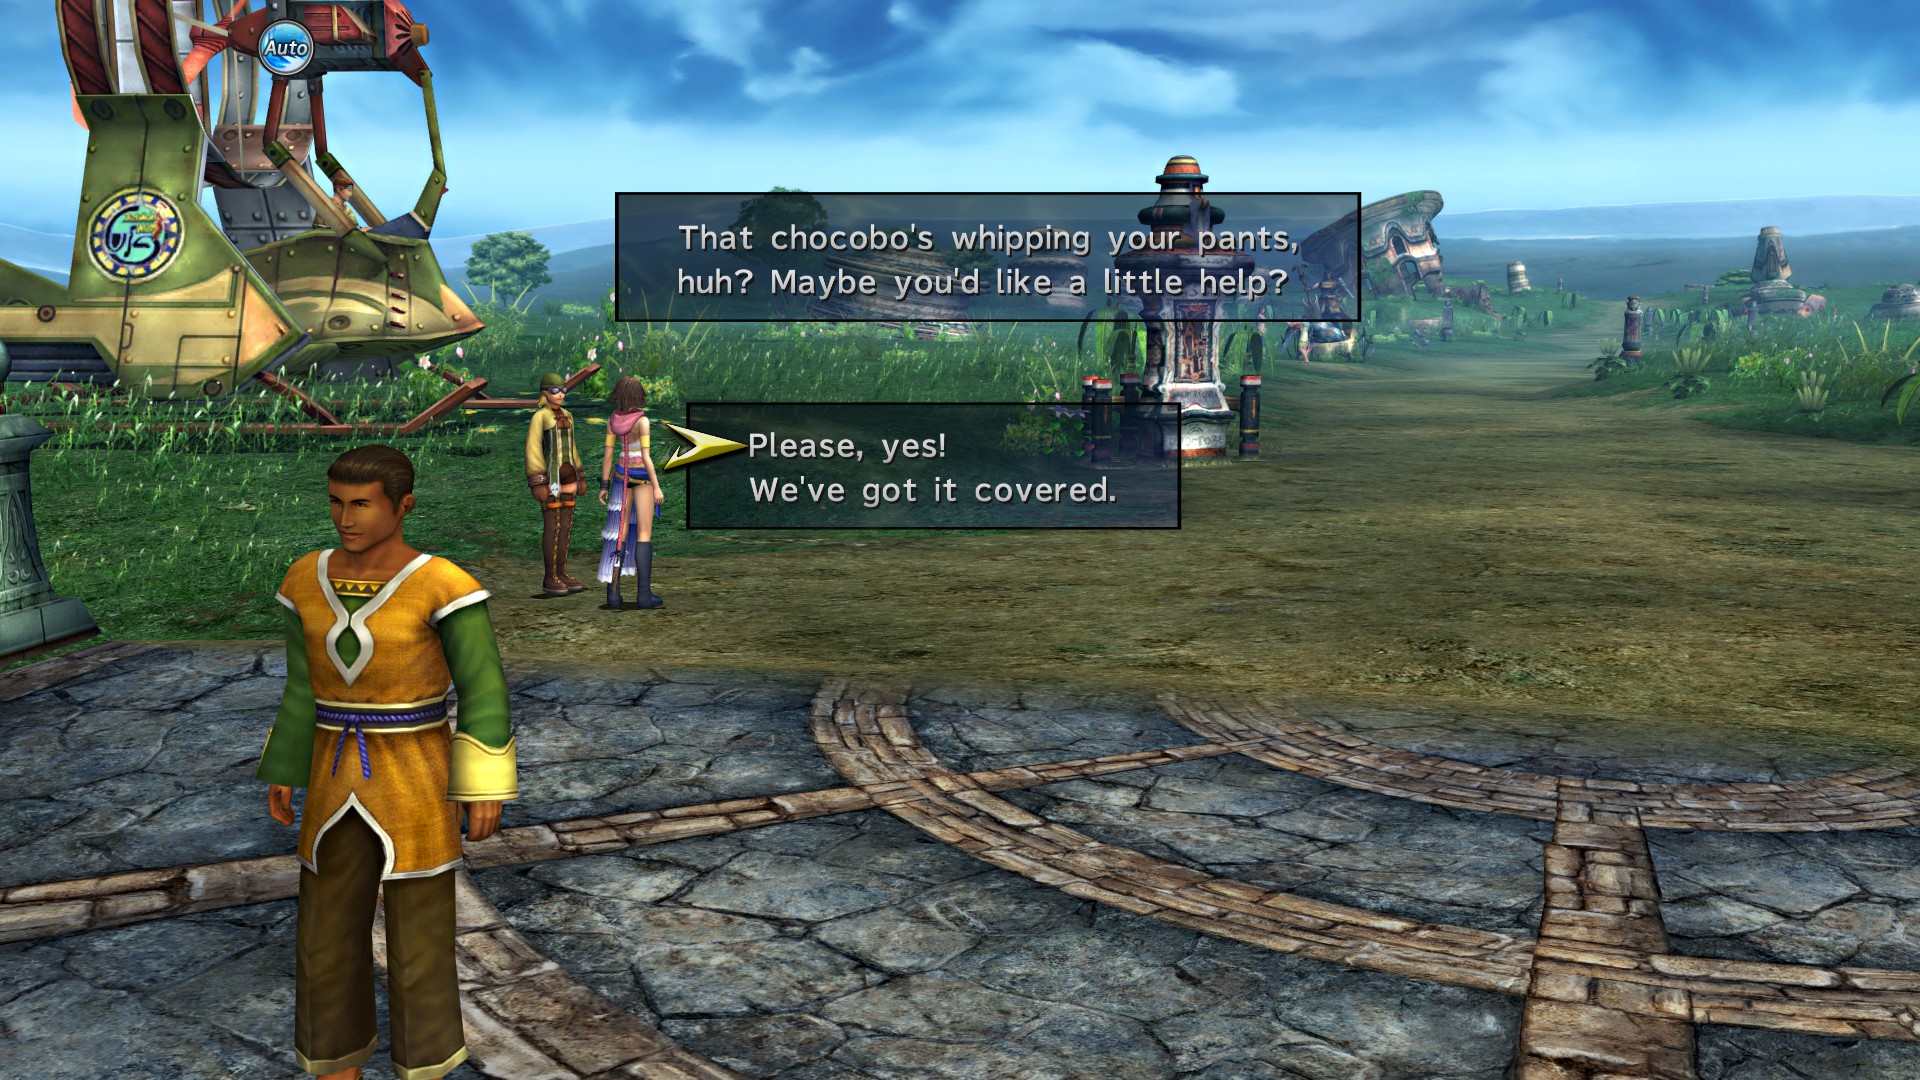
+ Speak to the group of villagers outside Besaid Village. During the scene a guy named Beclem will arrive, challenging you to beat his score in Gunner’s Gauntlet. Accept his offer and win (Reload your save if you lose)
You’ll get Enigma Plate Garment Grid as a reward for completing this mission.

Reach the highest level (LVMAX) in Gunner’s Gauntlet
Now keep replaying Gunner’s Gautlet until you reach MAX level (2800 points required), sounds like a tedious task but don’t worry, there’s a small glitch that can make the things very easier.
Before doing the below, get to level 6 in Gunner’s Gauntlet; Bicocette, the enemy you need to abuse, won’t spawn.
Get to the third screen and where the screenshot is showing. this is a blind point (Enemies will pass through without ever looking at you)
Once here, kill only the blue shelled fiend. He’ll drop Volley munition (Insta-kill everything within your range), so start targeting everything that pass near and only shoot when you see another blue shelled fiend, this way you’ll have unlimited Volley ammo. Repeat until you get 2800+ score.
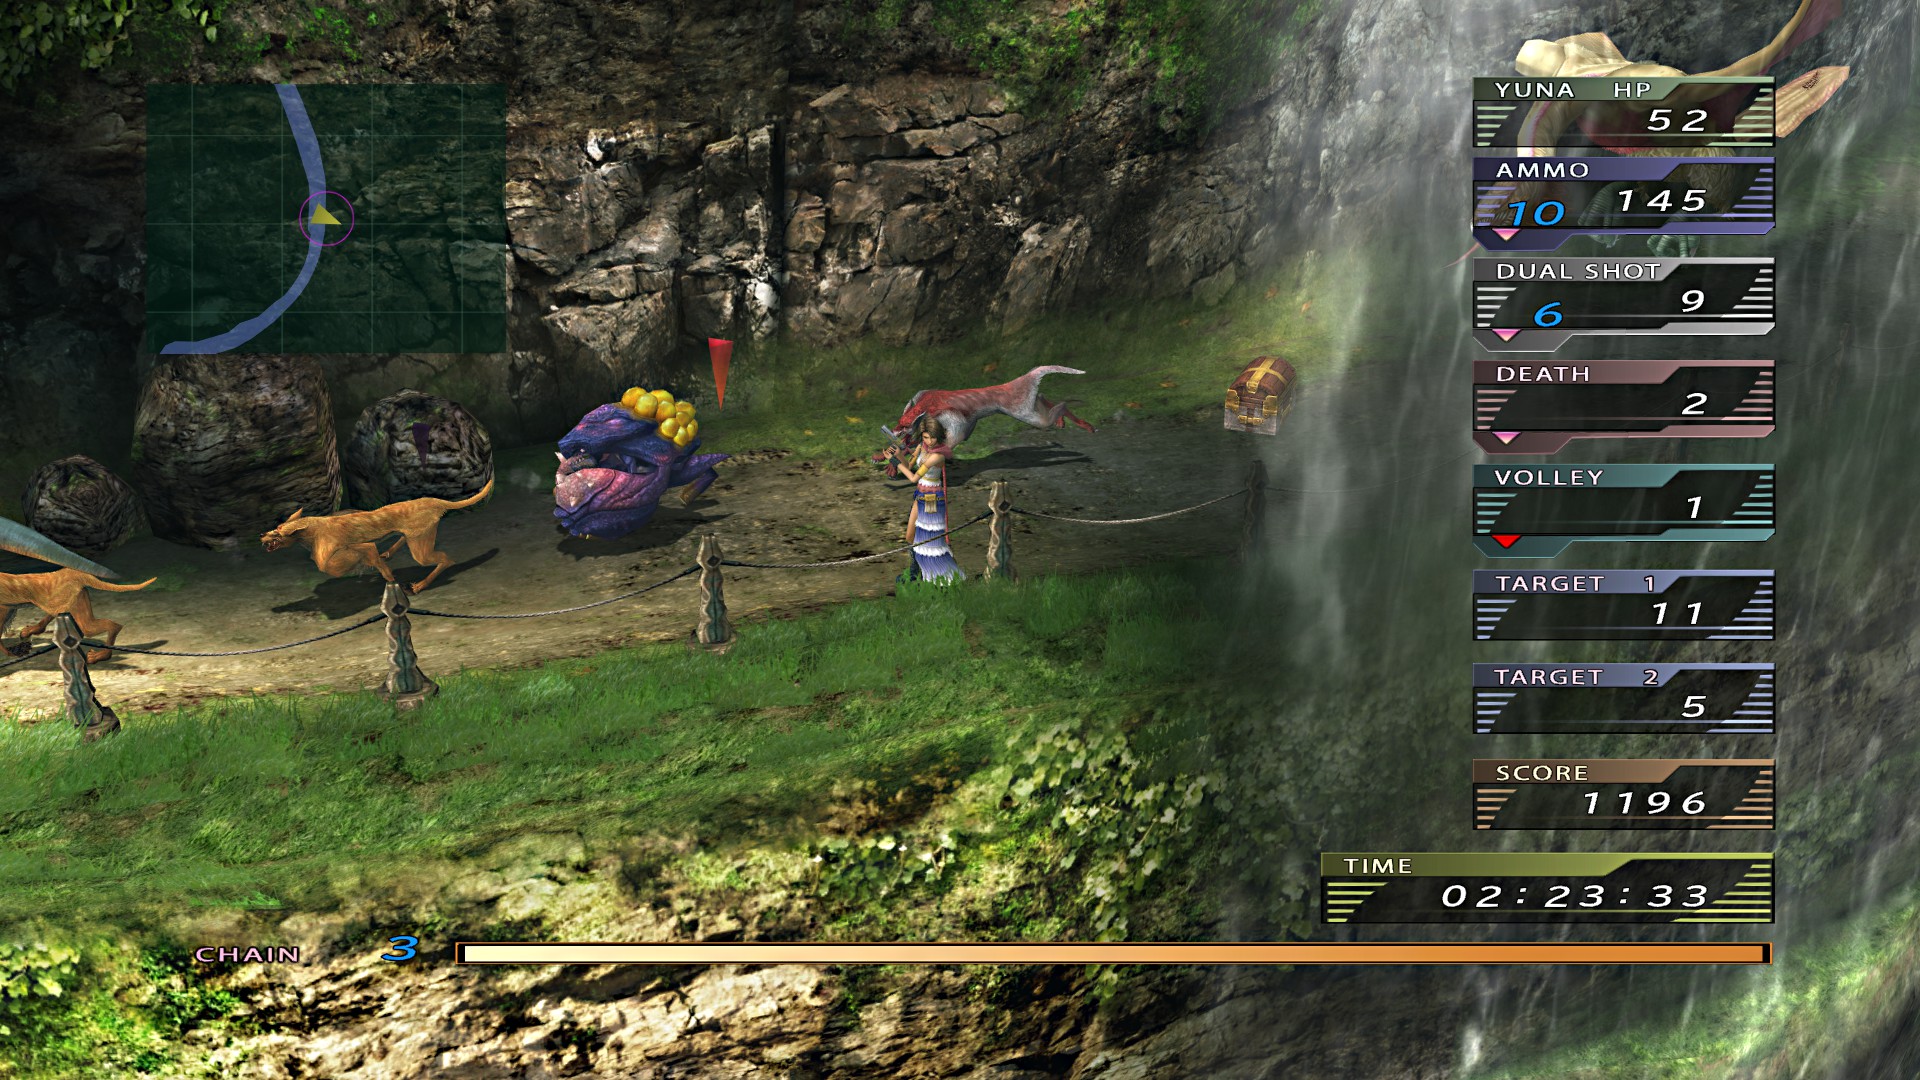
Note: You have to reach to the end in order to save your score and receive the achievement.
+ Arrive the village and watch the scene for another 0.2%
Completion: 30%
+ Make your way downstairs to the main square and watch the interview to Yuna. Do not skip dialog. You can pick any dialogue choices during the interview.
Covetous Garment Grid! received as a reward for the interview.

Note: For PR, the first four are safe. Everyone who appears AT the agency and after it (on the way to Mushroom Rock) will all be unavailable after the mission here.
Head to the agency.
After the scene speak to Calli using the following choices
“I think I remember” and “Of course”.
This will start a new mission

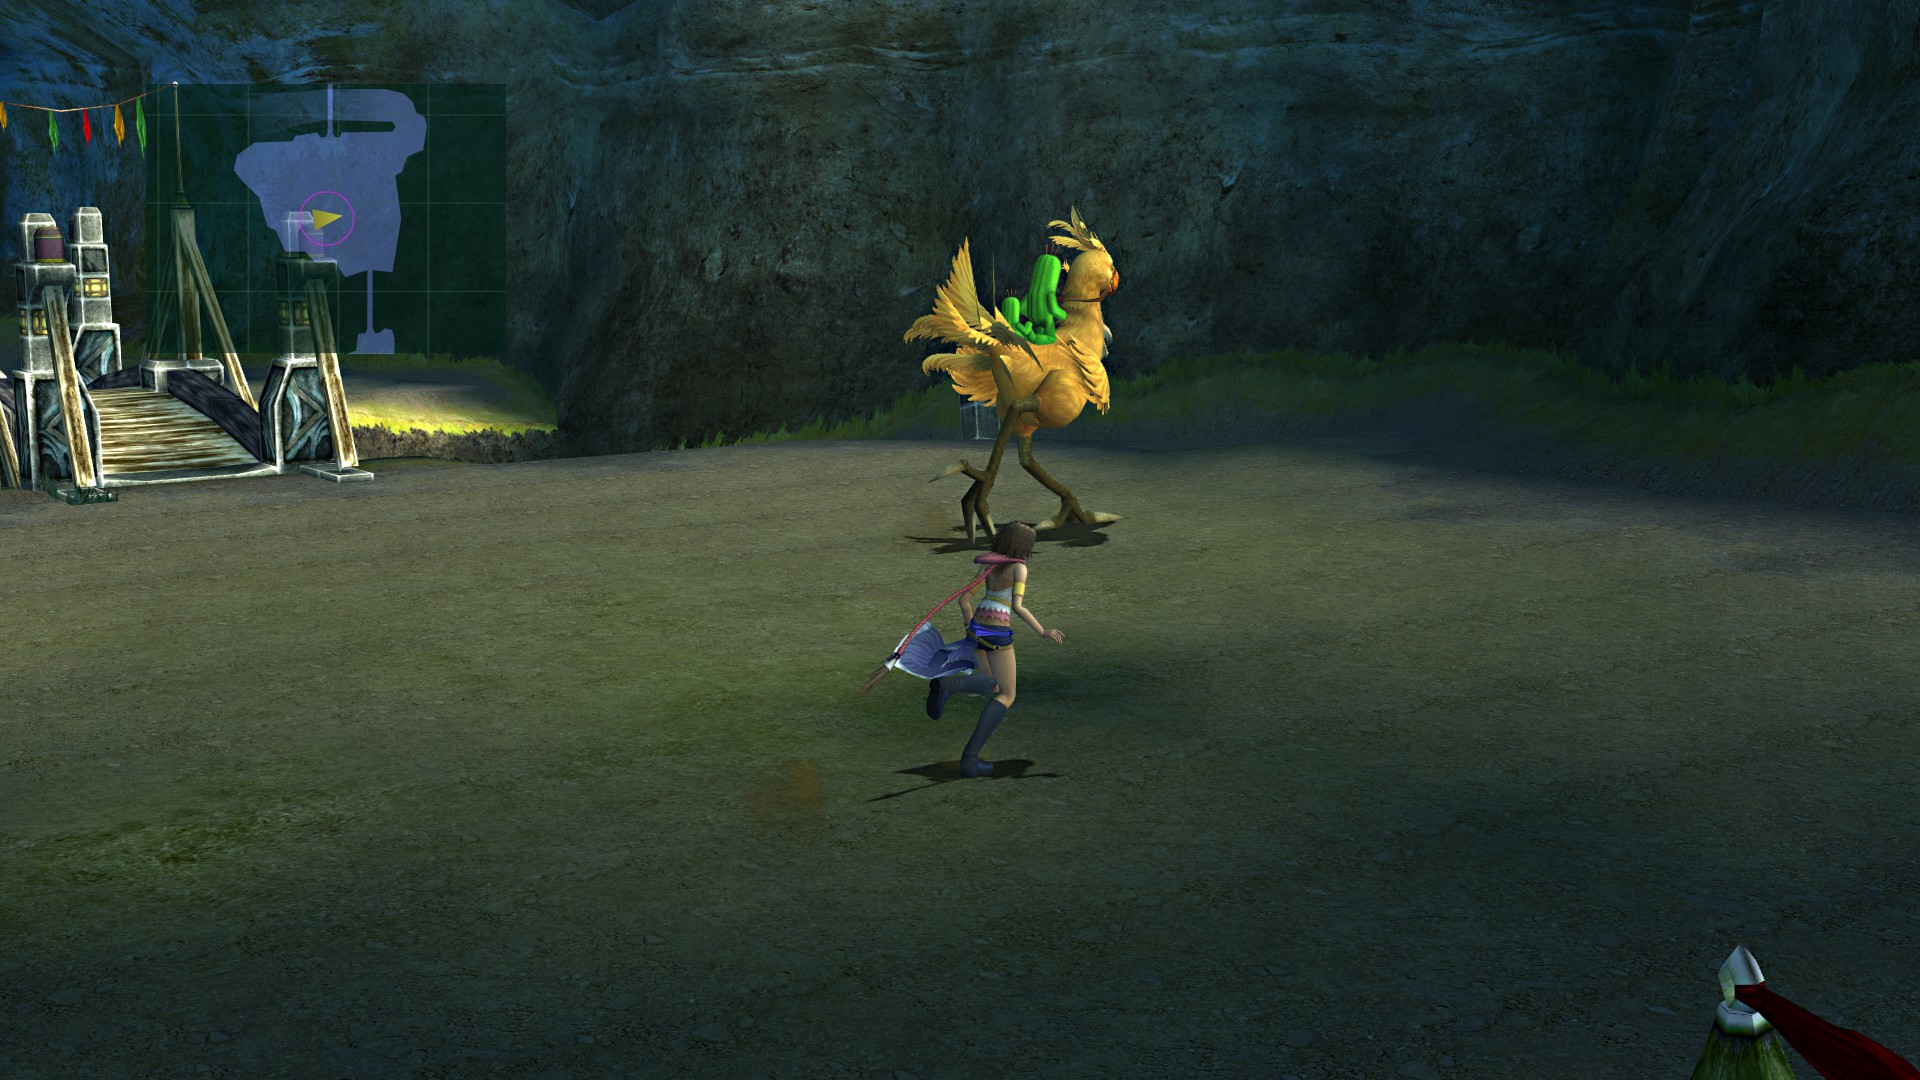
+ During the part where you have to catch the Chocobo, screw up a couple of times to unlock an event during Chapter 4 (3 times should be enough).
After missing enough, you’ll eventually get the information that the chocobo is losing concentration and that you can guess which direction it’s going simply by the direction it’s facing. Block it until it jumps over Rikku’s head.
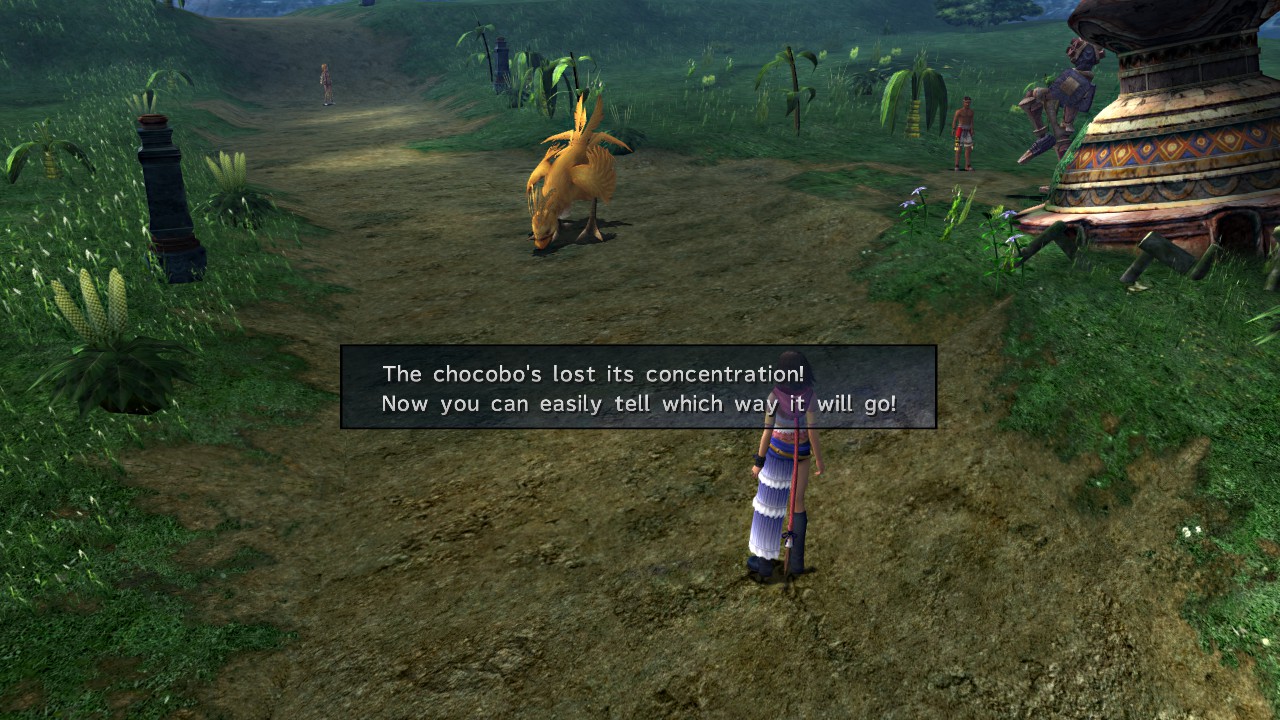

In the next area, Rikku will follow it some more. If you get this scene, then you did the previous stage of the chocobo catching correctly to unlock the event. She jumps on top of the ruin tower to look for the chocobo and finds it. If you failed enough, she falls like the SS. If you didn’t, then she lands on her feet.

Choose this option to finally catch the Chocobo.
+ Rescue Calli before timer runs out and the mission should be complete.
Selene Guard Garment Grid received as a reward.
Reenter Mi’ihen Highroad
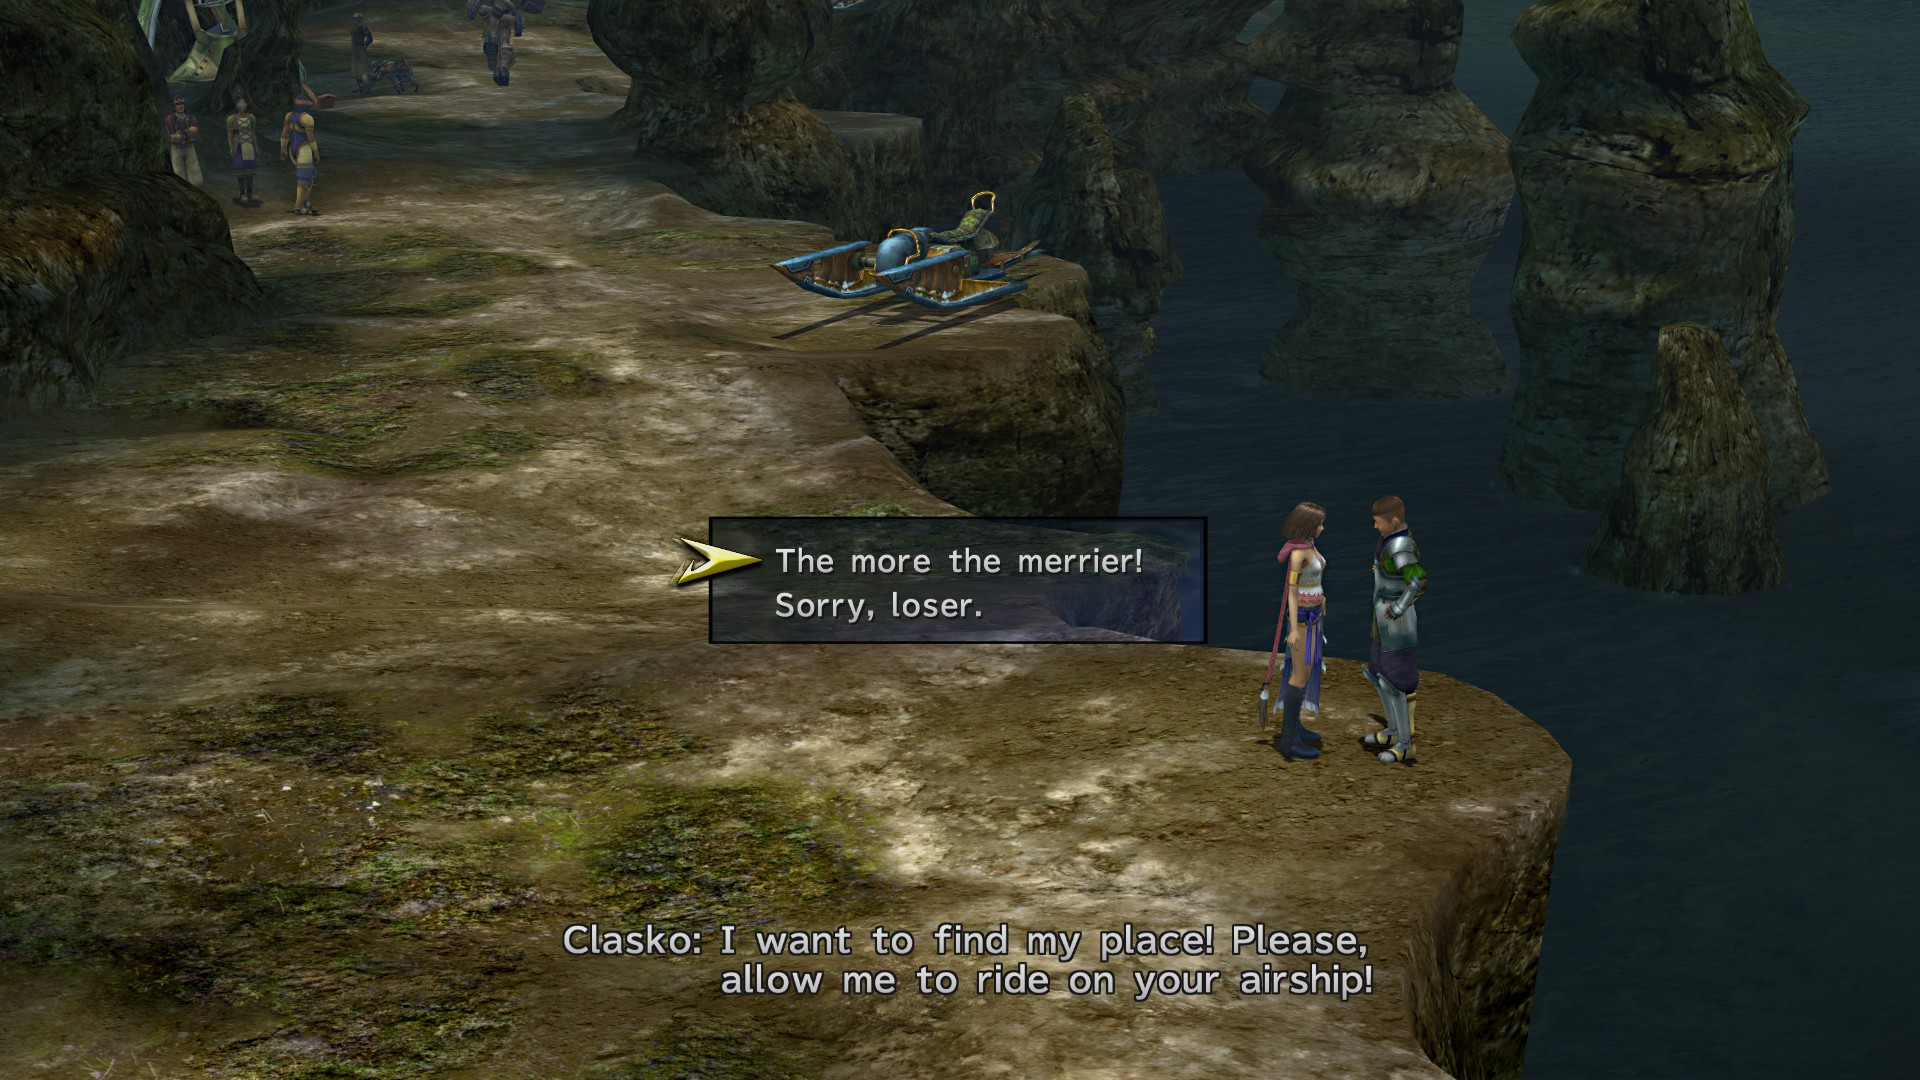
+ After completing the mission, speak to Clasko near the Travel Agency and allow them both to board the Celsius
+ Make your way through the ravine until you reach the Den of Woe and watch the scene.


+ Now head to the North Youth League HQ and speak to Elma and Lucil
+ Return to the Celcius and watch Crimson Record #7 with Shinra.
Speak with Tobli to start this sidequest
Here’s the max profit you can get for each ticket:
South Bank


South Wharf
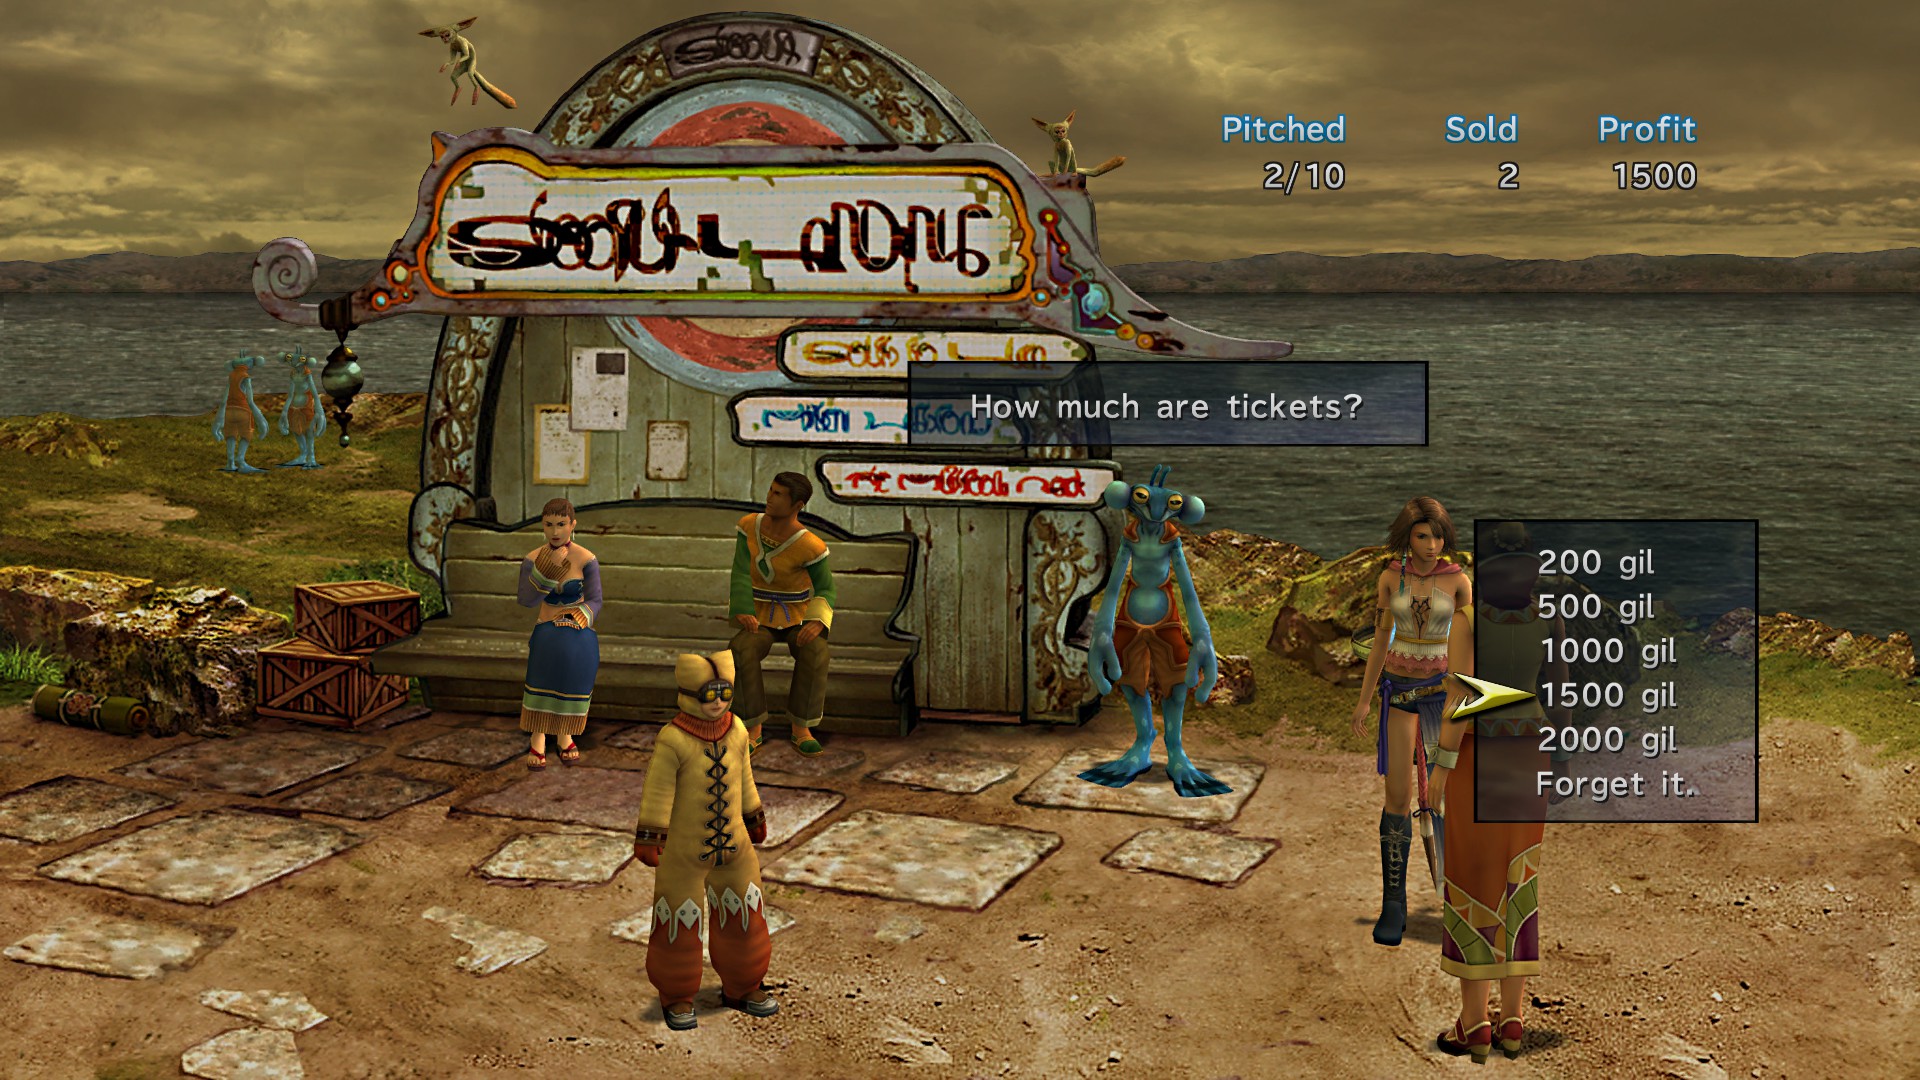


North Wharf


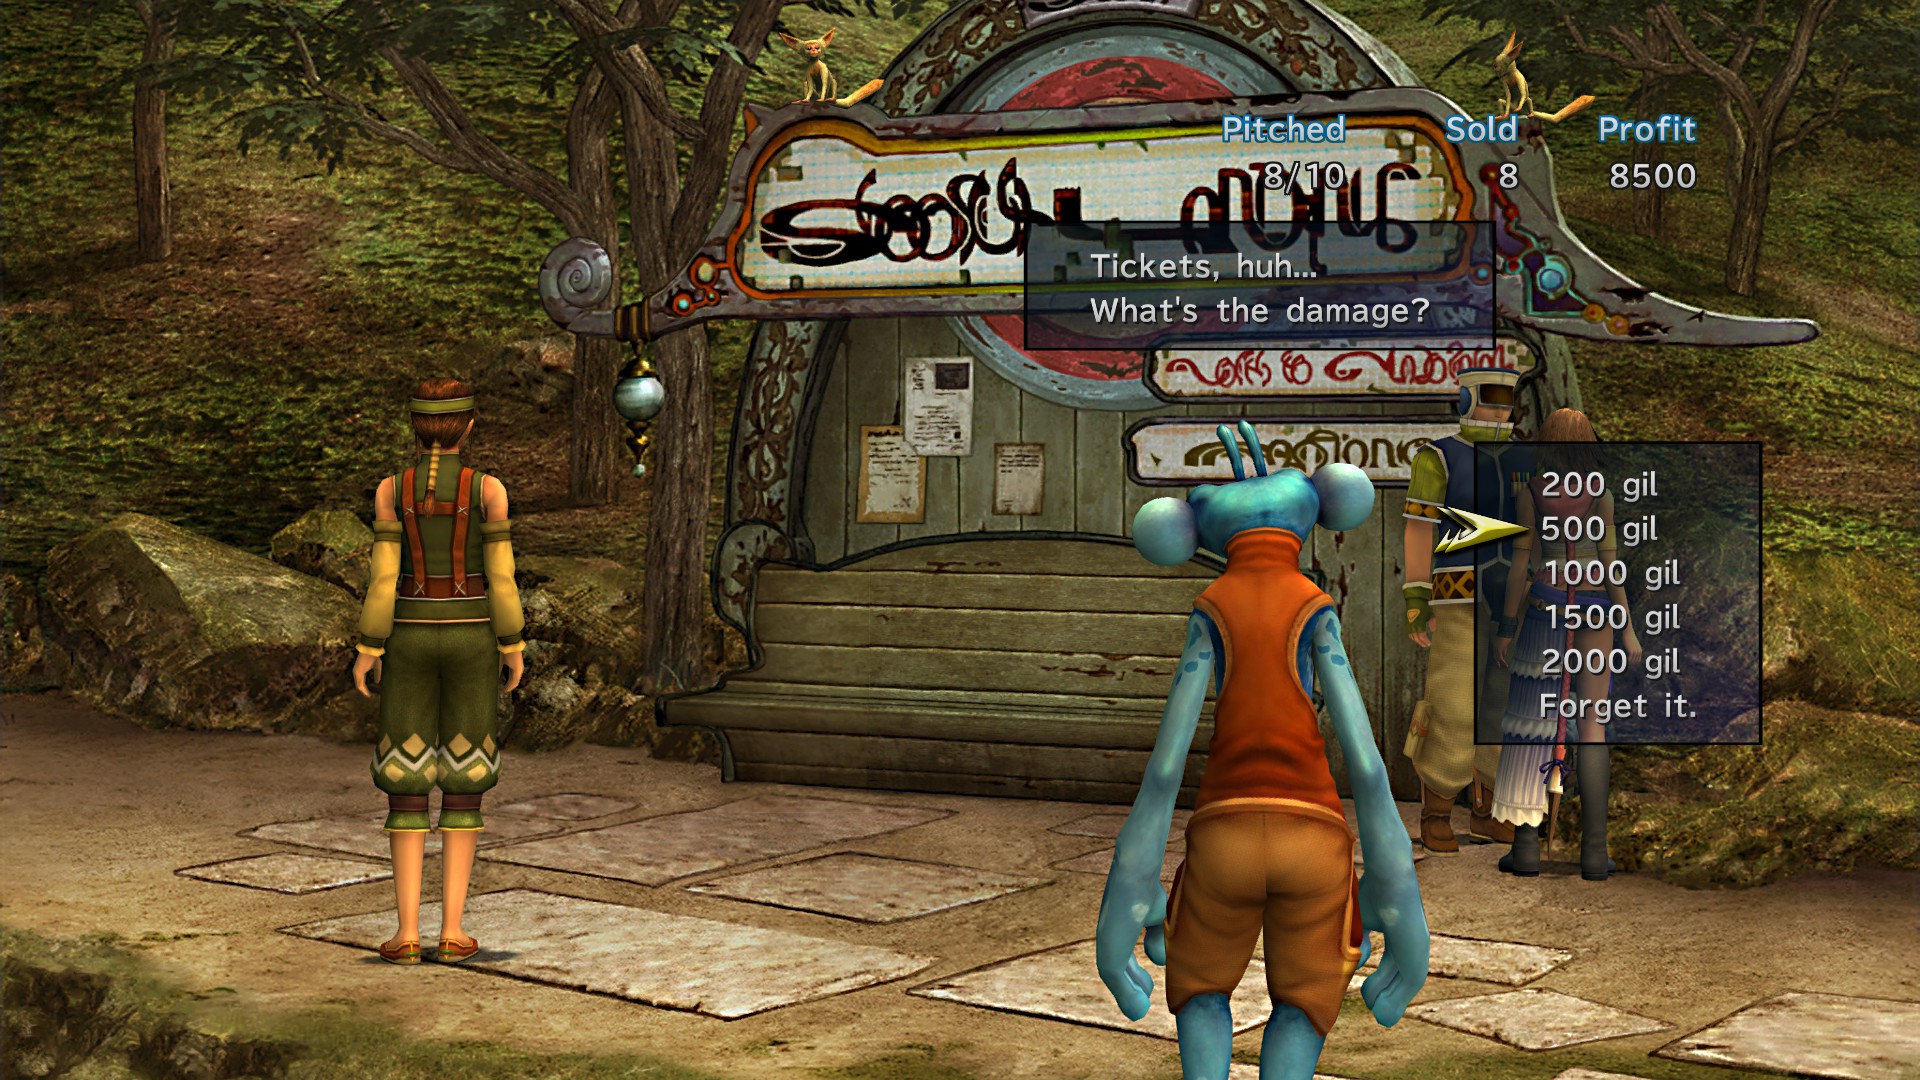

+ You’ll receive Seething Cauldron Garment Grid as a reward for completing this mission

Ch2 Guadosalam – Mt. Gagazet
+ Approach the LeBlanc Chateau for a scene to get another 0.2%
+ You’ll find Cid in the southern portion of Thunder Plains, Speak to him.

Completion: 34%
You need to approach the hypello who is Tobli’s assistant in order for Bayra to offer you the mission. He’s at the save sphere where you land when you teleport up the left non-crystal path.
Return to where you spoke to Tromell in Chapter 1 and meet Bayra, this will start a mission.

First musician location – Magical walkway intersection.

Second musician location – Spring

+ Speak to Bayra again after finding them to complete the mission.
Also return to the Hypello you spoke to near the start to receive another reward “Bitter Farewell Garment Grid”

As soon as you enter, you’ll see Clasko running away, follow him to begin the mission to clear out the Chocobo Ranch.
+ After clearing the area this mission should be complete, awarding with an Alchemist Dressphere and Highroad Winds Garment Grid.
Your next objective will be catching a Chocobo in Calm Lands.
Run around until you get into a battle with a Chocobo. Breed the Chocobo with a Gyshal Green, attack all the remaining enemies and then use another Gyshal Green to capture it.

This will get you the following achievement

Help Clasko catch a chocobo by the end of Chapter 3
+ Head to the travel Agency in the middle of the Calm Lands. once here speak to the two Ronso by the right of the Agency to get another percentage.
+ Speak to Isaaru in the Dome Area.

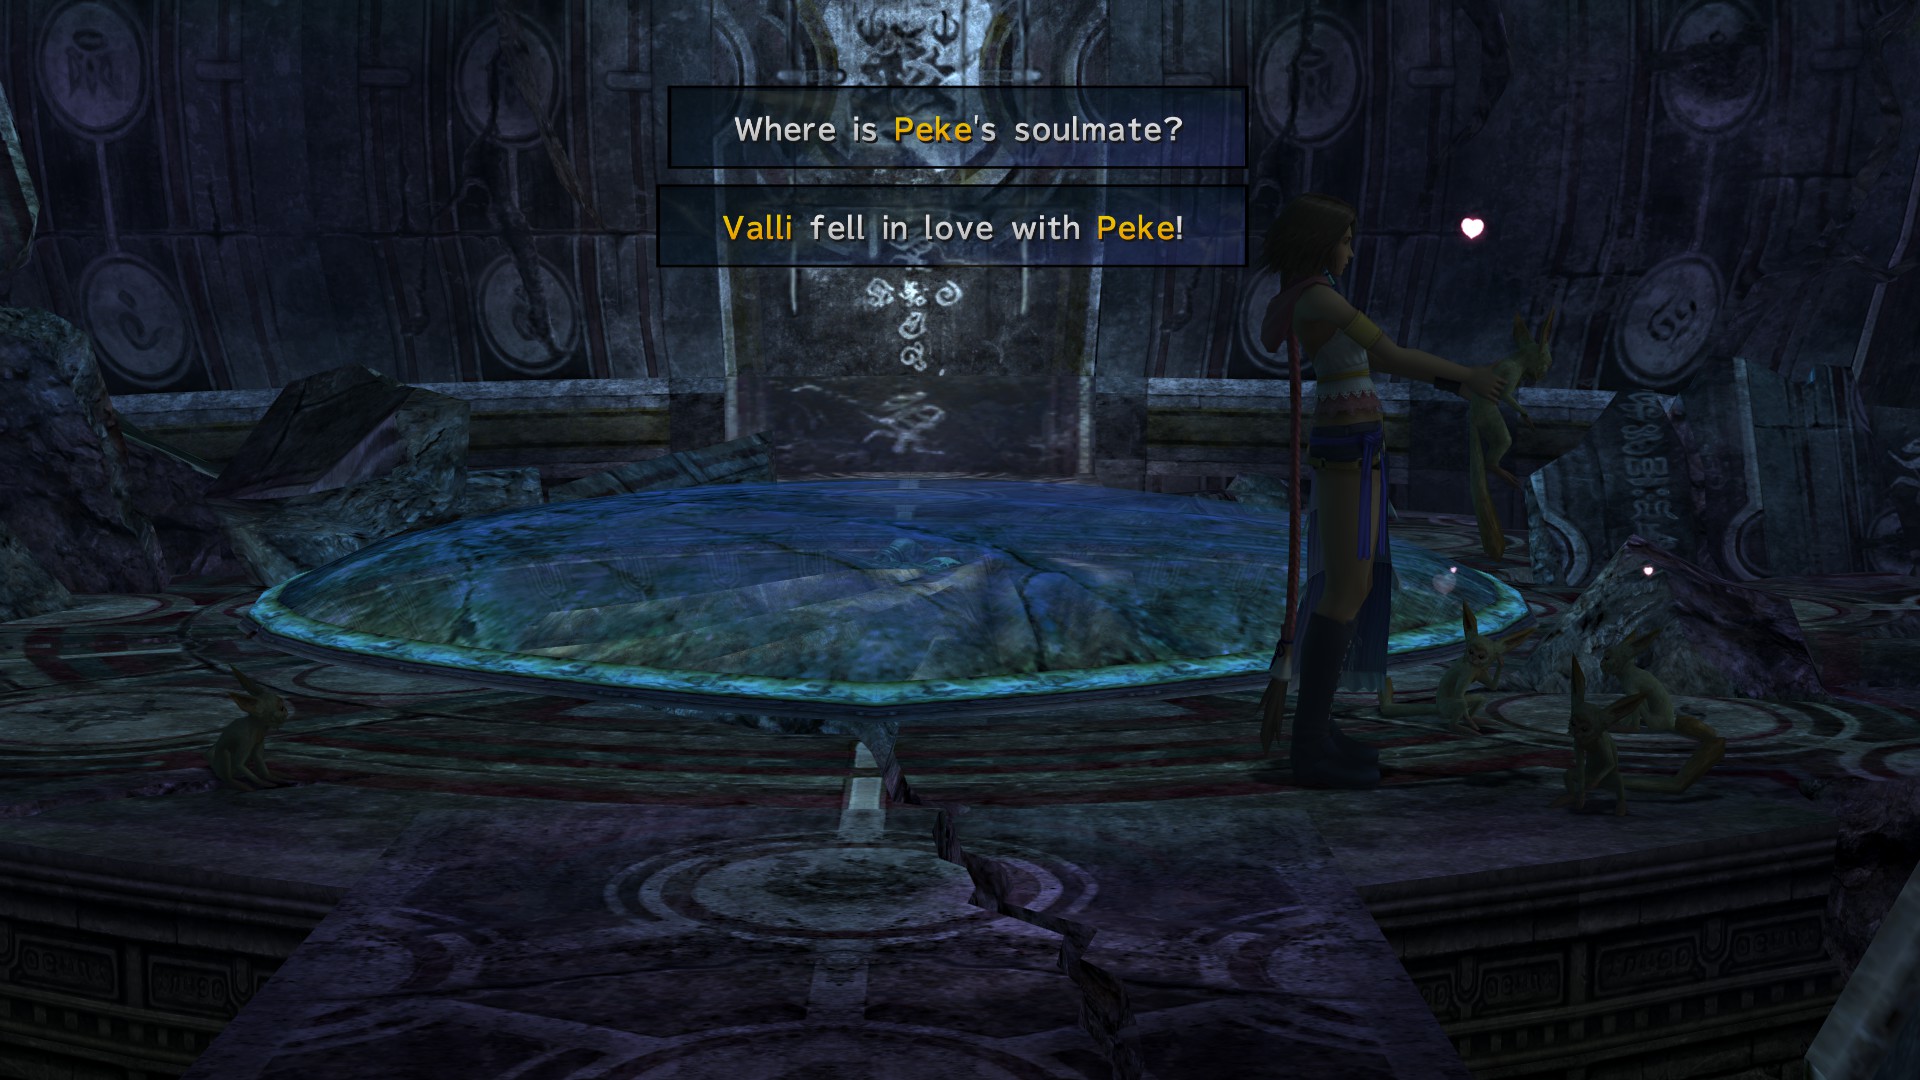
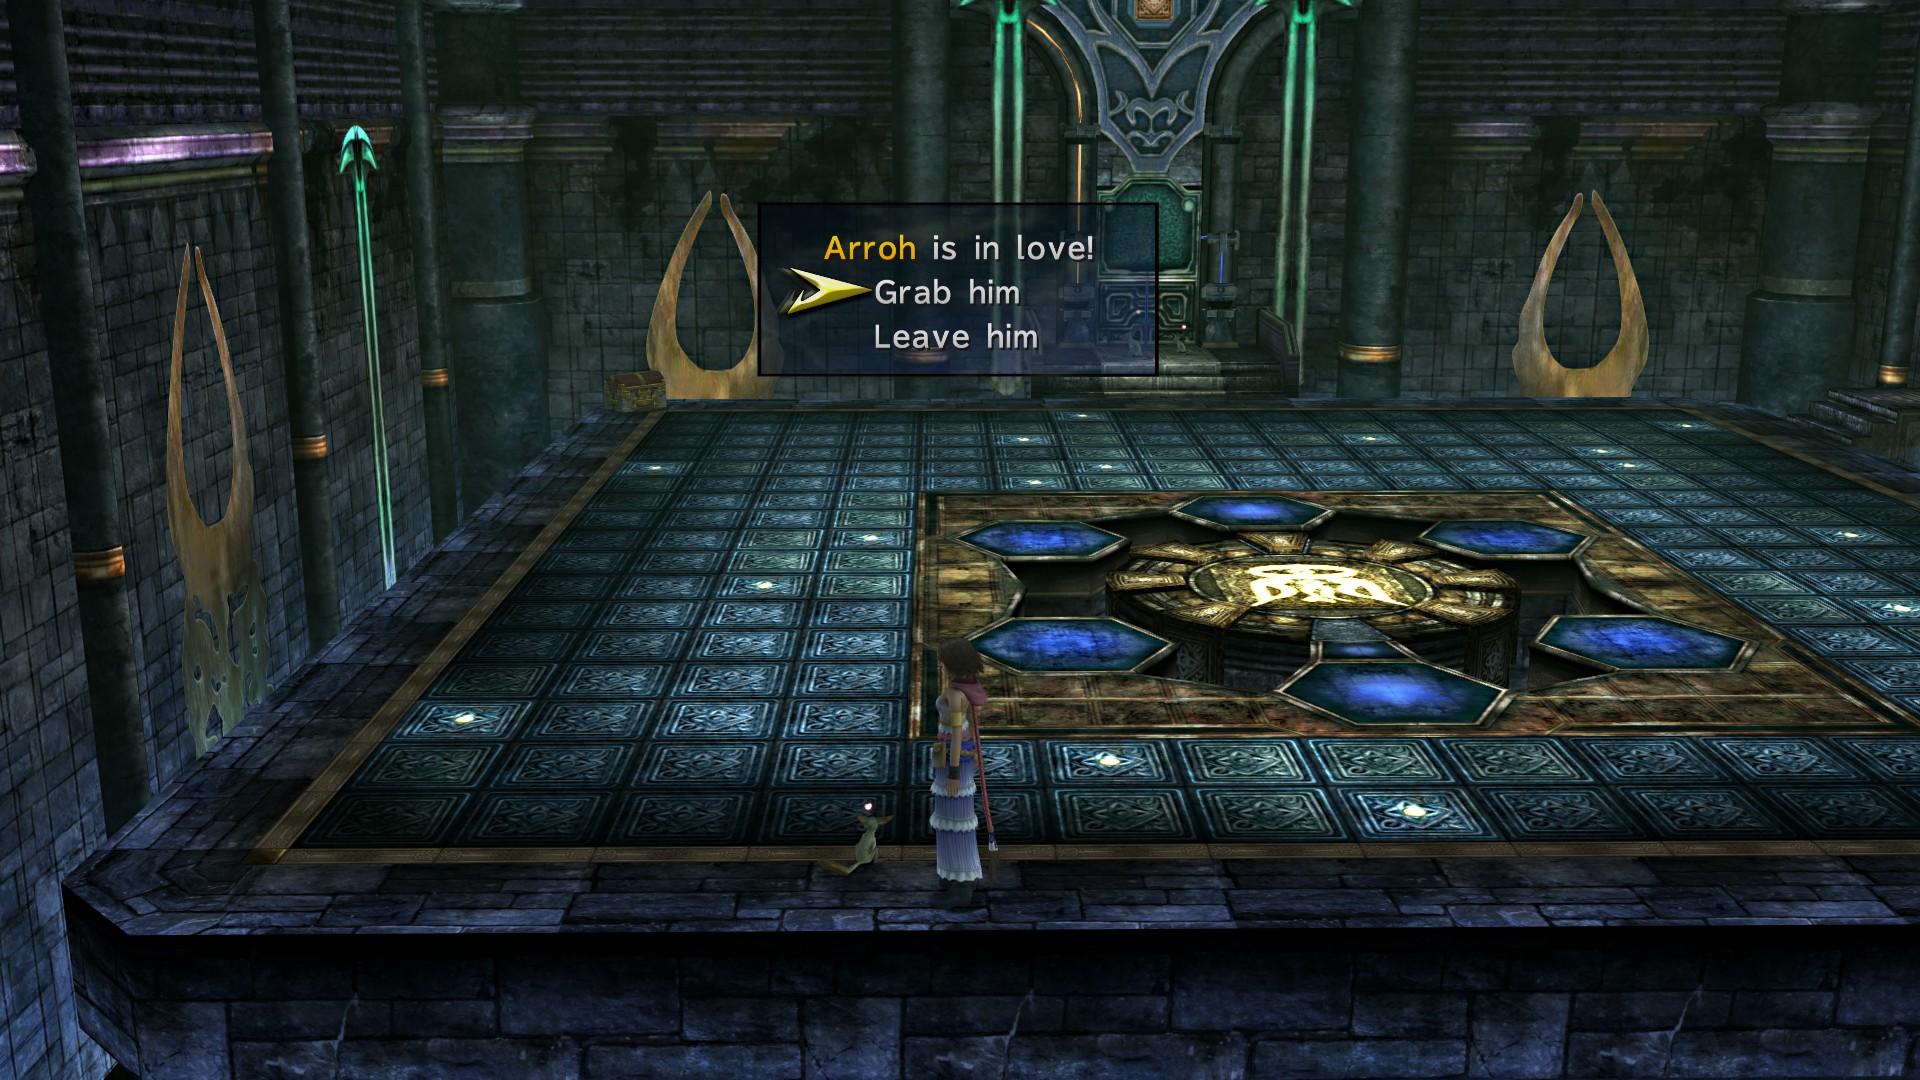
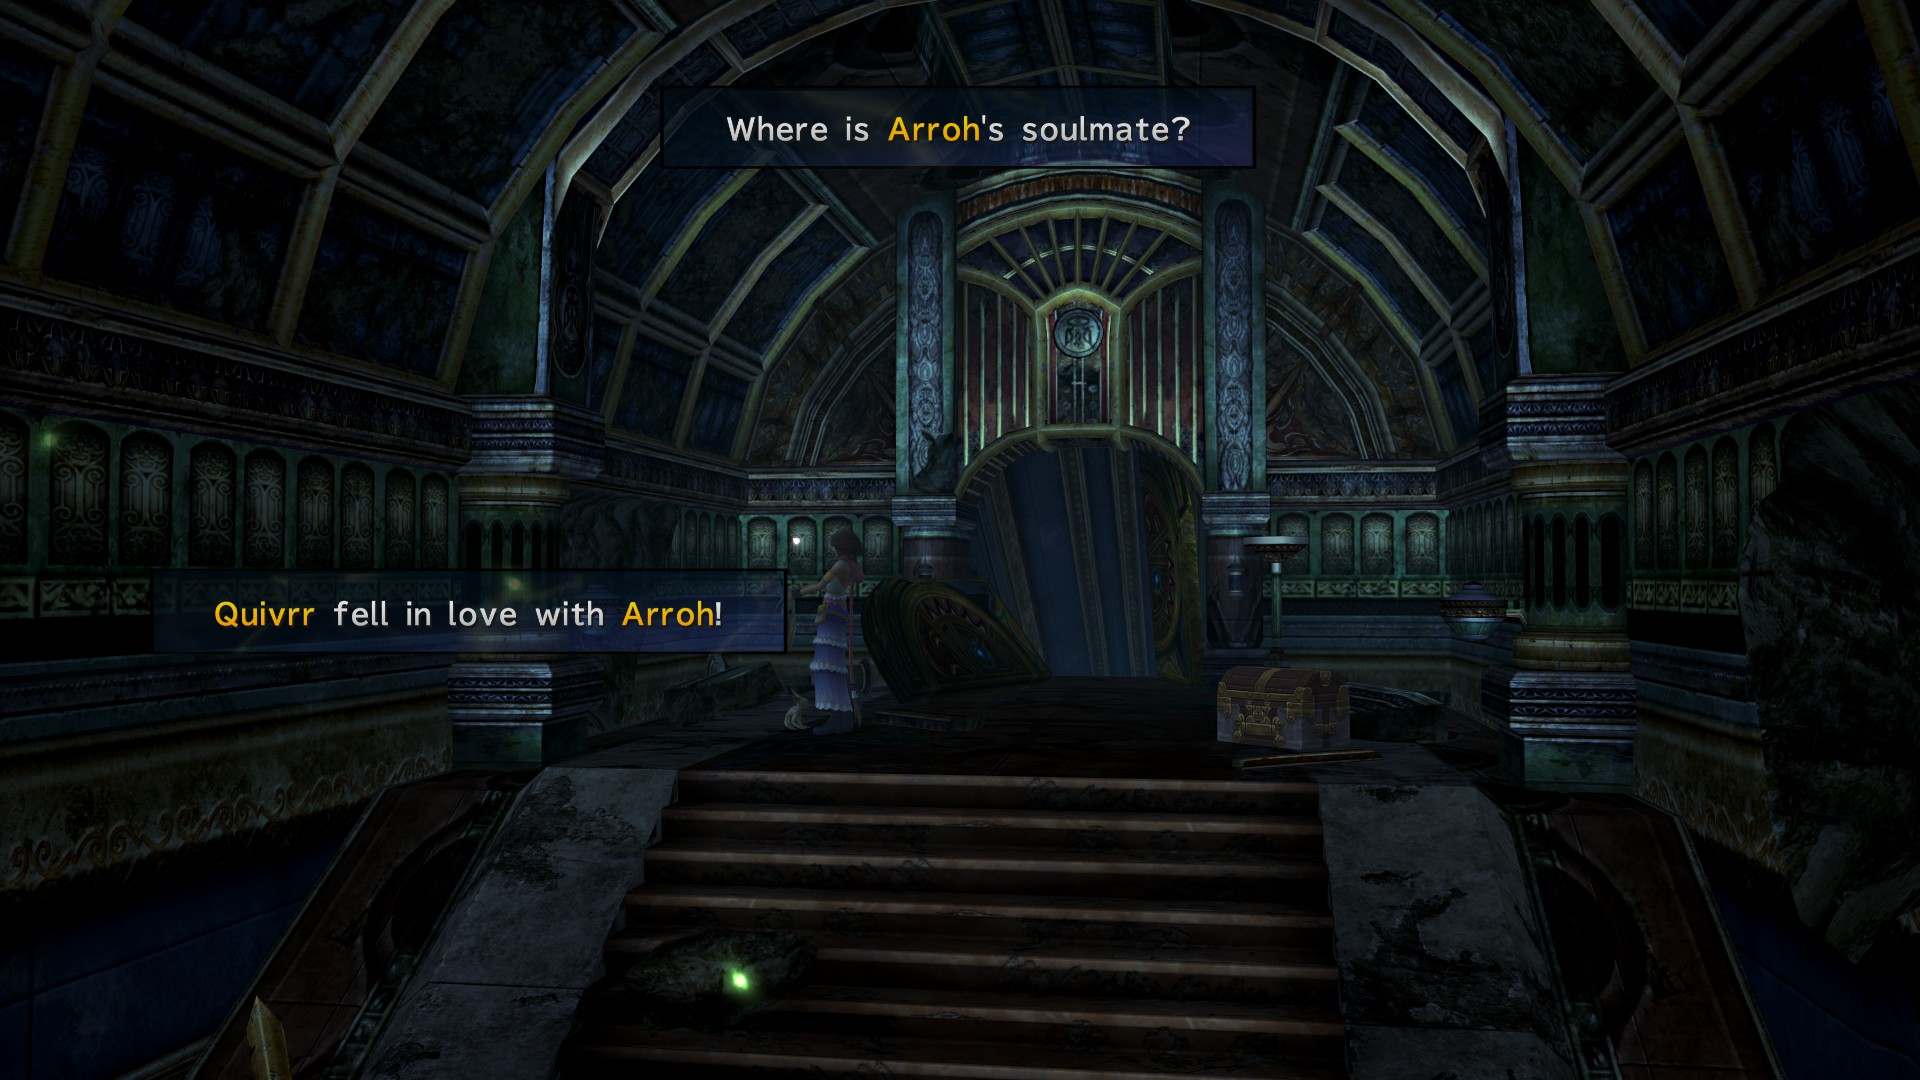
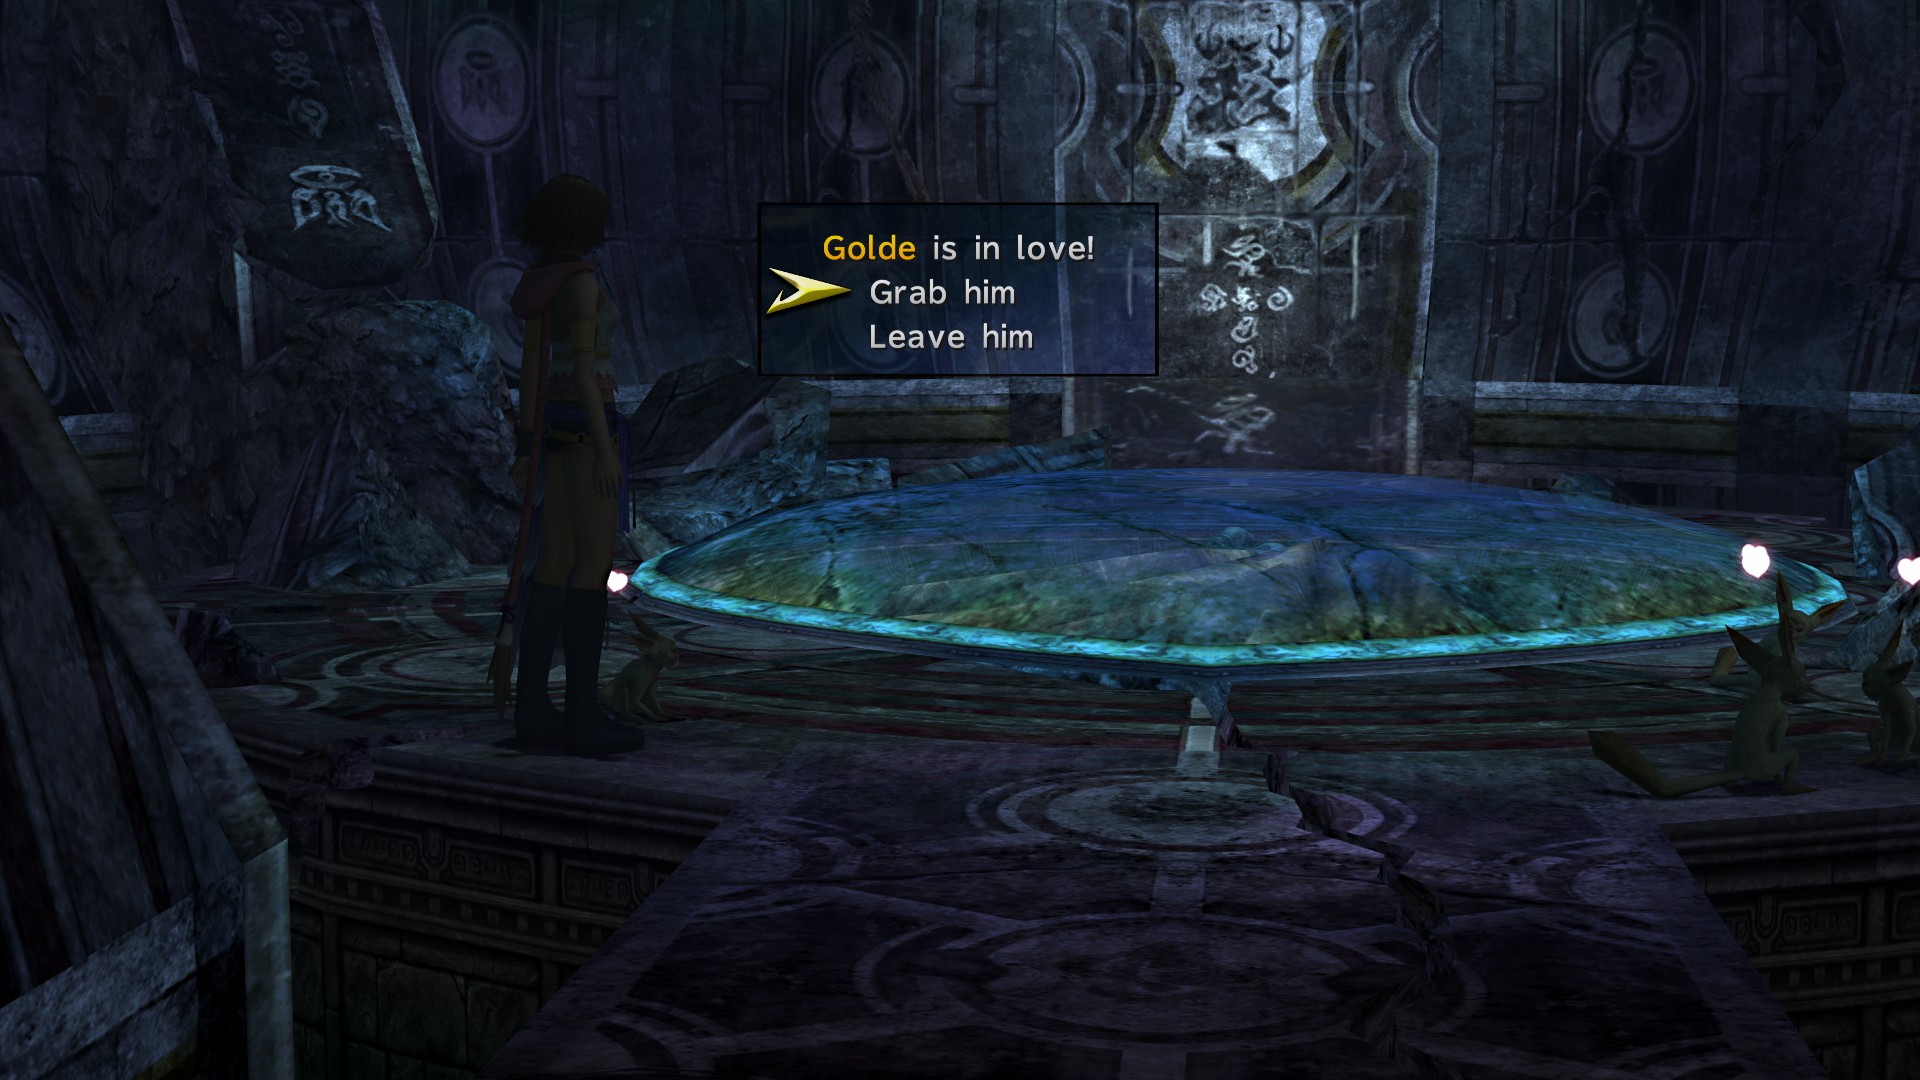
Operation Monkey! Sidequest
This is a simple minigame where you only have to pair a monkey with its soulmate:
#1 Birch (The Beyond) + Sequoia (Chamber)


#2 Spring (Great Hall) + Autumn (Small Cloister)


#3 Dusky (Corridor) + Dawne (The Beyond)


#4 Rosemary (Great Hall) + Thyme (Large Cloister)


#5 Terran (Large Cloister) + Skye (The Beyond)


#6 Minni (Great Hall) + Maxx (Large Cloister)


#7 Summer (Chamber) + Winter (Large Corridor)


#8 Peke (Large Cloister) + Valli (Chamber)

#9 Canis (Great Hall) + Felina (Corridor)


#10 Arroh (Large Cloister) + Quivrr (Corridor)
#11 Golde (Chamber) + Sylva (Corridor)

#12 Luna (Corridor) + Sol (Great Hall)


+ This will end the sidequest awarding you with Soul of Thamasa as well as completion percentage.
+ Head down to Djose Highroad and complete the mission to get “Floral Fallal Special Dressphere and Syndicate Uniform

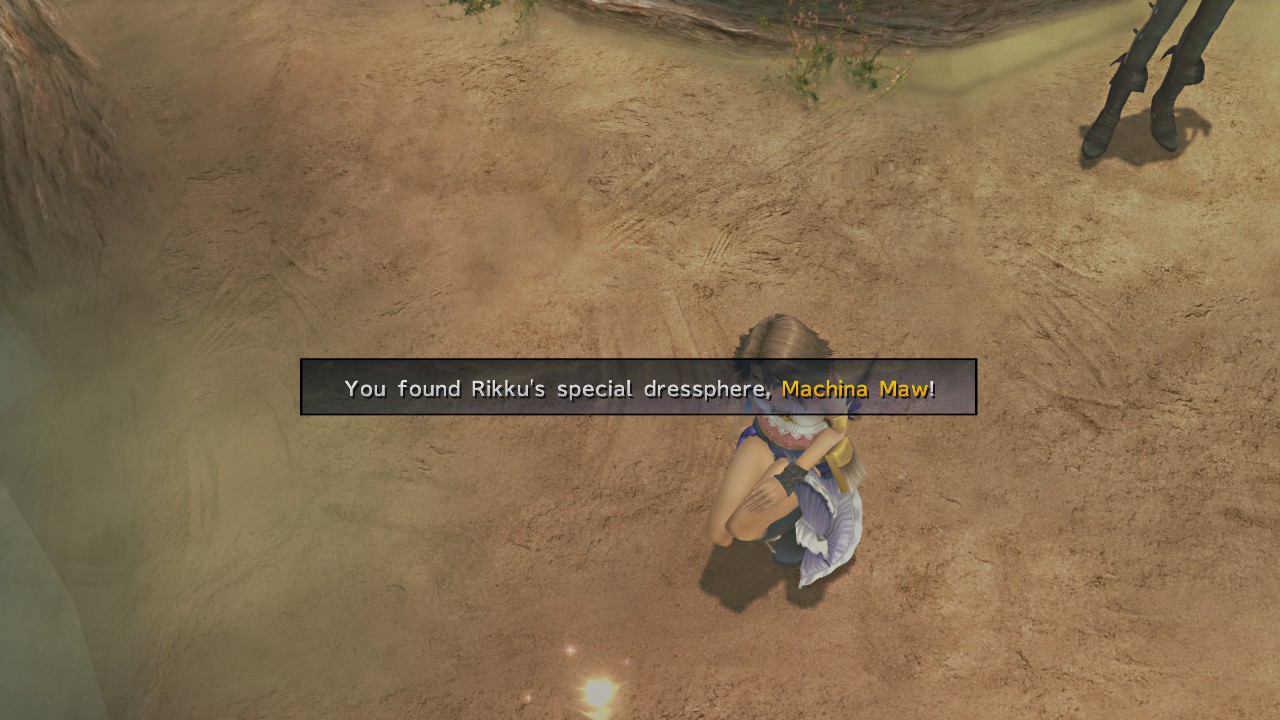
+ Another pretty straightforward mission, this time in the Oasis of Bikanel Desert. You’ll get Machina Maw Special Dressphere, Syndicate Uniform and Hour of Need Garment Grid
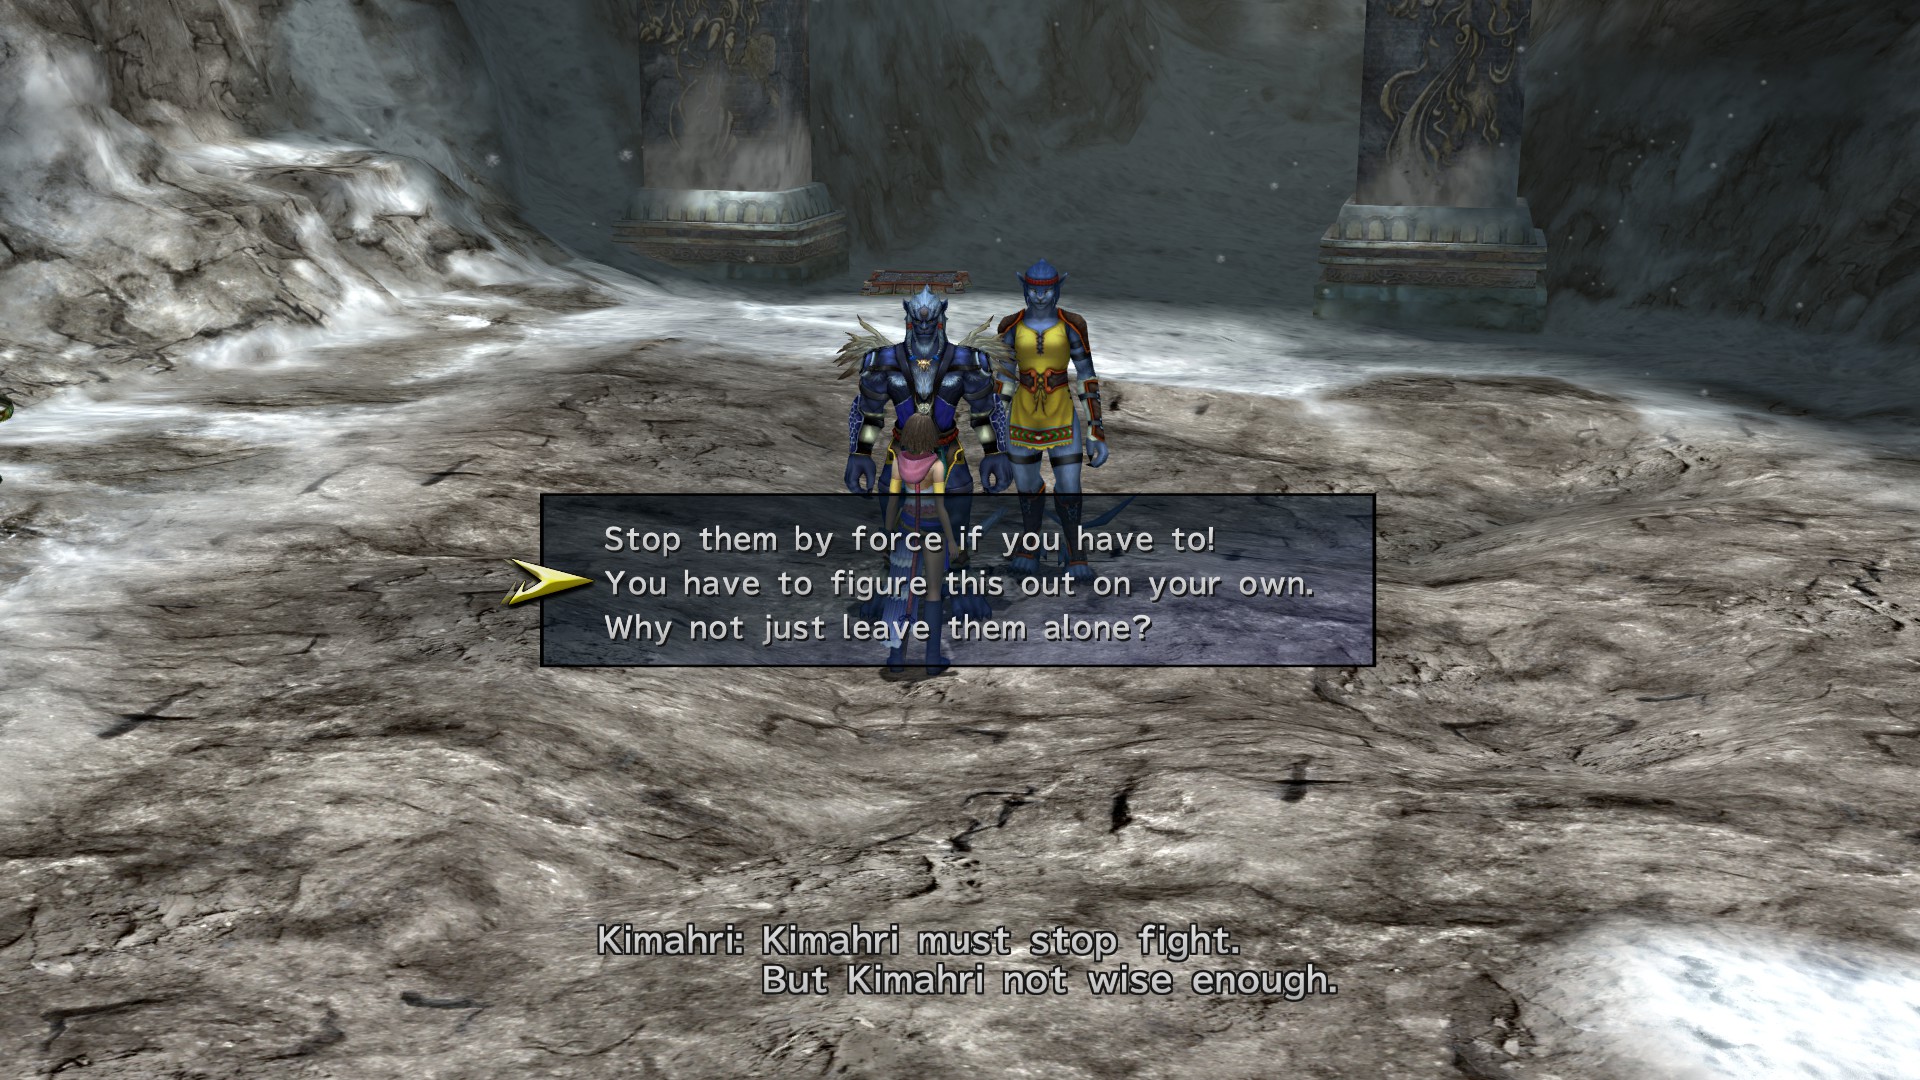
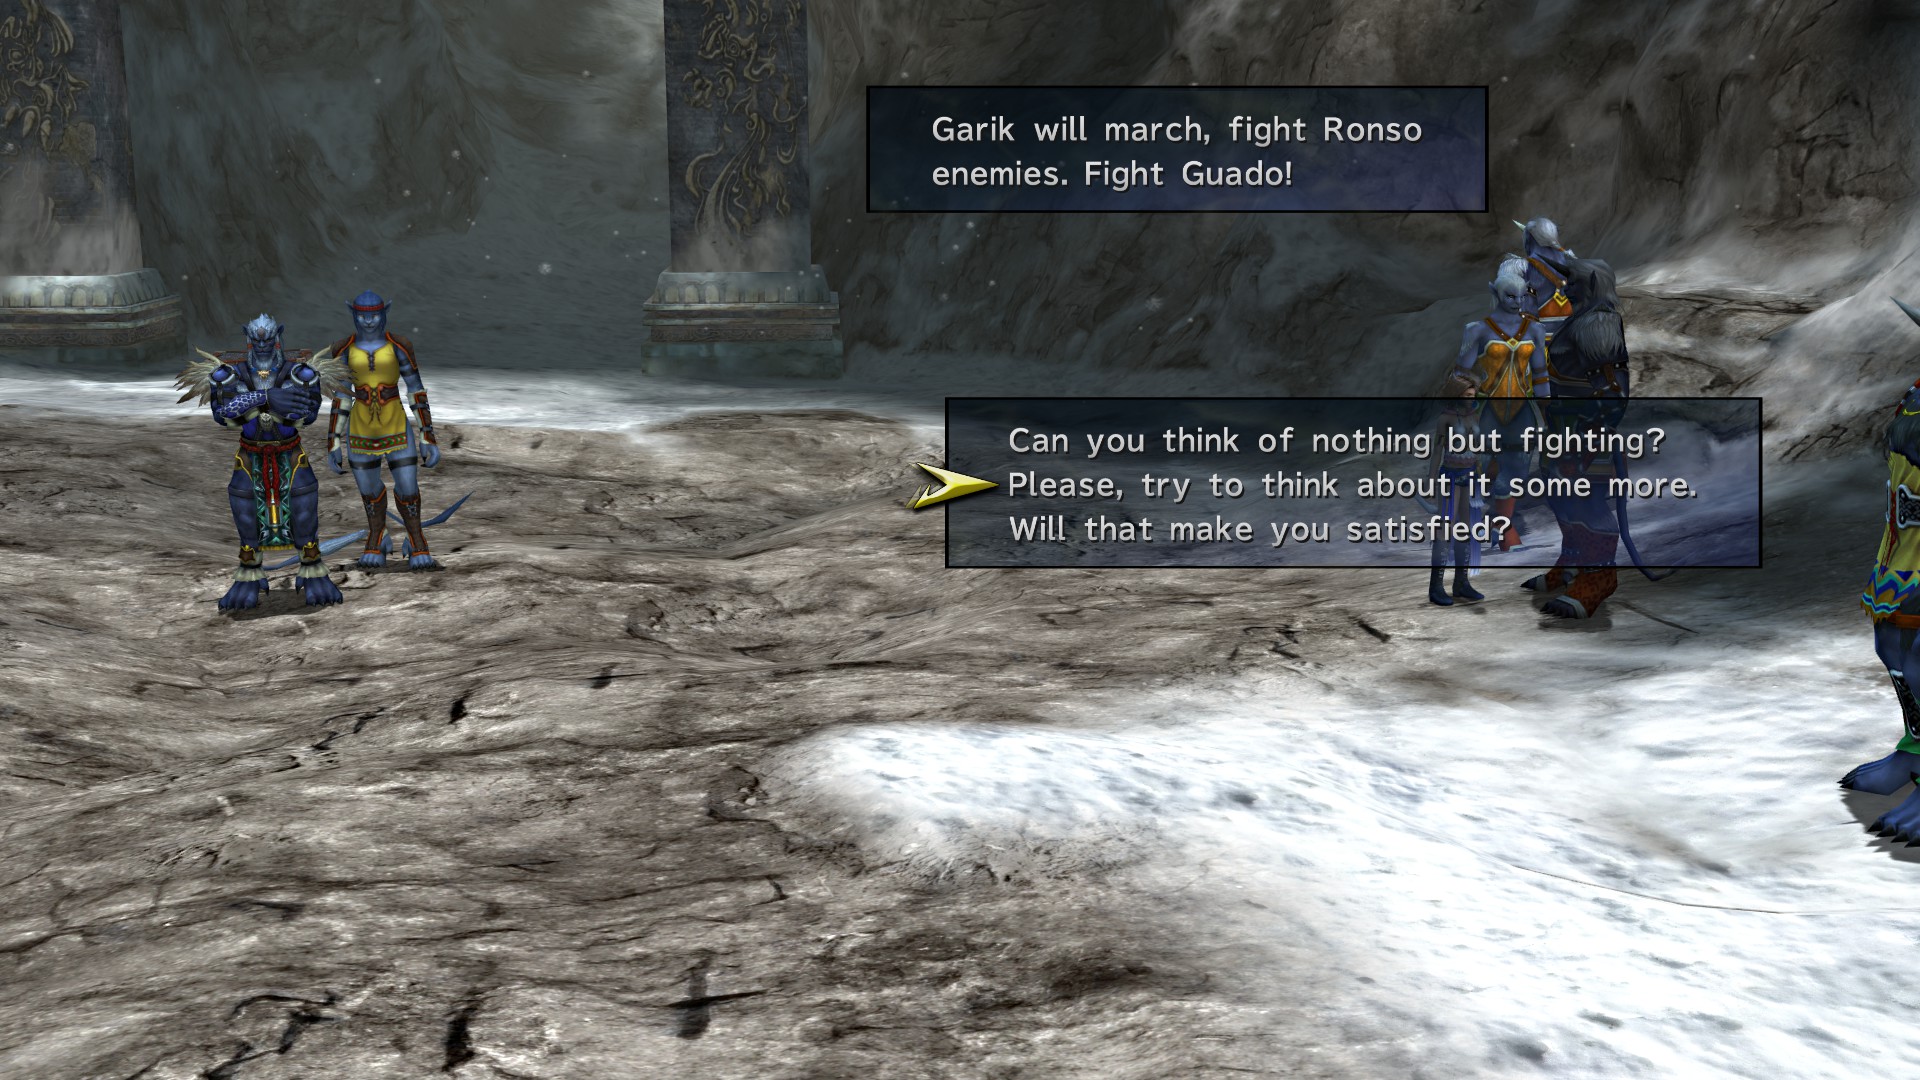
+ Speak to Kimahri TWICE and use the following choice when asked “You have to figure this out on your own.”
Now use the following choices with all the others:


After this head to the Fayth Scar to continue with the Mission
+ When following Leblanc’s Goons, do not follow them into the hot springs like you would normally do, instead keep going upwards to watch another scene

Bum Rush Garment Grid automatically received

Note: Before going to Guadosalam to continue the main story, return to Gagazet – Fayth Scar and use the following choice with this Ronso.

Completion: 38%
Ch2 Chateau – Bevelle
Crimson Sphere #10 (Automatically received during the storyline)
Healing Light Garment Grid as a reward for completing this mission.
You’ll see a tower after sliding down the chain, we’ll call this one “Tower 1” and the others 2,3,4,5 and 6 going clockwise.
Interact with tower 1, 3 and 5. Security system should be disabled. (If you are lost, top platform is tower 1)
Use this if you don’t get what I’m trying to say, this is the tower #1.

Don’t go down just yet.
Activate tower 2 once.
Activate tower 1 four times.
Activate tower 6 once.
Activate tower 1 twice.
Activate tower 4 once.
Activate tower 3 once.
The parth to collect the Ribbon should be in place.

Open the chest that includes the Ribbon in the Bevelle Underground
Downtrodden Garment Grid
Take the east path at the intersection.


After the machine puzzle, you’ll find 3 lifts. Take the left one.
Go south from the new room to fall down,you’ll return to the one where you started.
Here use the northern lift to get to the switch room, stand on the platform.
This will activate 2 pillars in a later room


Now return and take the right lift, you’ll be in the same room where you fell down. Take the left lift from here.
You’ll be back in the first room, tale the northern elevator to reach the second platform room, stand on it to activate the other 2 pillars.


Now that both pillars are up, you can continue and grab the Dressphere from the chest.
Dark Knight Dressphere


Defeat Bahamut
+ Chapter 2 complete!
Completion: 44%
Ch3 Djose – Zanarkand
Visit this as soon as possible (it turns into a hot zone later) and watch the scene to get an Al Bhed Primer
+ Like in every new chapter, speak to Barkeep at the Cabin and rest
A Sphere Break tournament is being held in Luca with a Dressphere as a prize. You have to defeat three opponents before qualifying to the final match vs Shinra, just make sure to read the rules and save after winning the second match so if you lose, you don’t have to start over again.
Break down of the game: Each player you face has a specific number of turns that you get and a specific number of coins (labeled as quota) that you must reach in order to beat that player. Each multiple you hit is 1 turn. Each Border (Silver) Coin you use, adds 1 to the quota.
Now using the most coins in a single turn is wrong because the coins will not regenerate fast enough for you to ever meet the quota as Entry (Gold) Coins do not count towards the quota. So the best way to reach quotas is by abusing the Echo Multiplier. If you use 2 coins in one turn, then 2 coins again in your NEXT turn, you will get 1+2 for your quota. If you do 2 coins again, it’s 1+2+3, etc. By building up your echo, you can build high quotas while using minimum amounts of coins.
Note: Once you pick an entry coin, you can’t go back.

+ After winning the tournament you’ll be rewarded with Lady Luck Dressphere

Also now that you know how this mini-game works, you can keep challenging the same enemy over and over again to get 10 victories.
He’s my recommended spot to grind this achievement since he’s pretty easy to defeat, quota is 30 in 15 turns.


Win 10 times at Sphere Break
As soon as your arrival, there will be a mission awaiting for you, make sure to accept it. It’s pretty straightforward and it requires you to kill more machina than your opponent.

+ You’ll be awarded with a 10,000 Gil and Undying Storm Garment Grid for completing it
+ Follow the destination marker to find out that the road is now closed. Watch the scene here to get your percentage.
+ Speak to Tobli twice to trigger a scene.
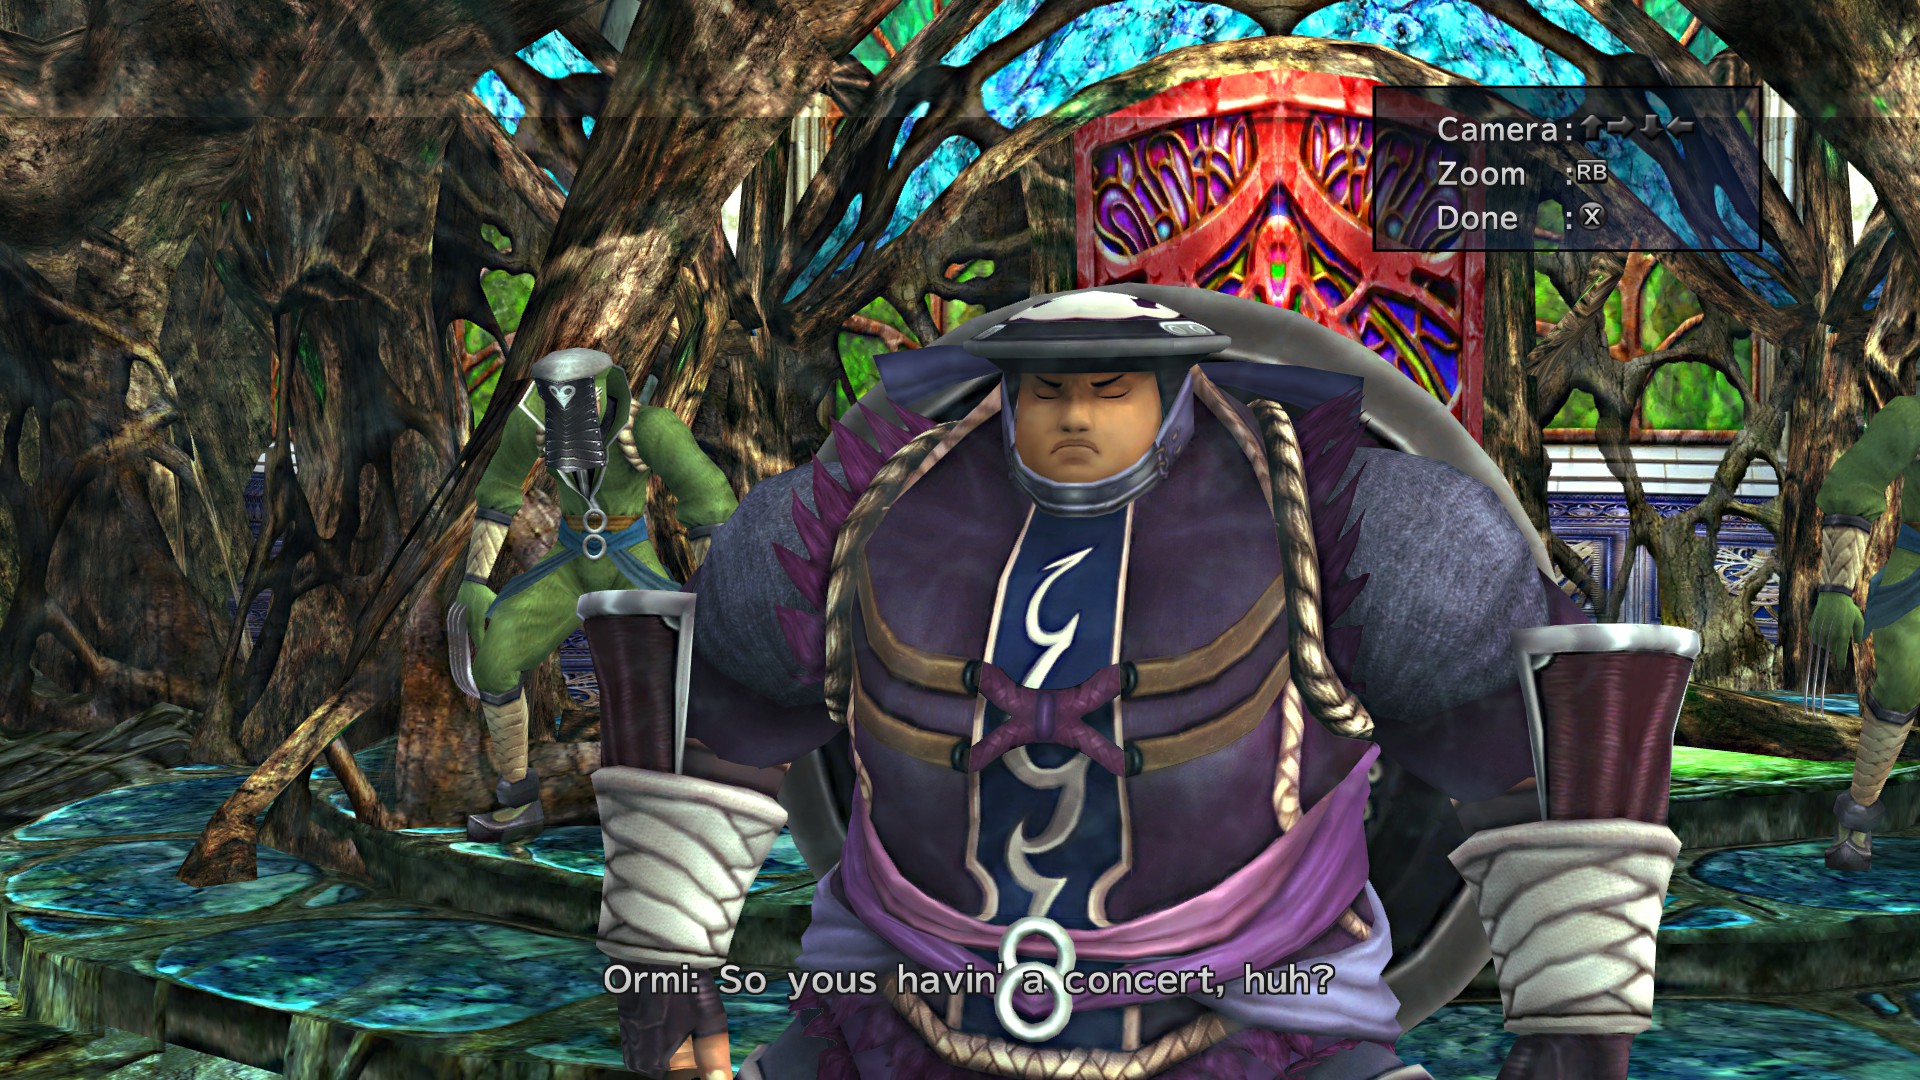
+ Enter the living room to trigger a scene with Logos and Ormi.
+ Speak to LeBlanc in her room.

+ Return to the living room and speak to Logos and Ormi after talking with LeBlanc.
You’ll notice that the hidden passage at the back of the living room will be now be open, enter here. Head to the room to the west of the Save Sphere, you’ll see a crescent moon shape around the room. Climb the boxes up and follow this path to find the Crimson Sphere #4.


+ Now make your way to the room where you fought Logos and Ormi back in the second chapter. After a small scene here you’ll receive Logos and Ormi Spheres.

+ Inspect the drawer by the bed, there’s a Sphere in here. You’ll get Gaol Sphere after another scene.
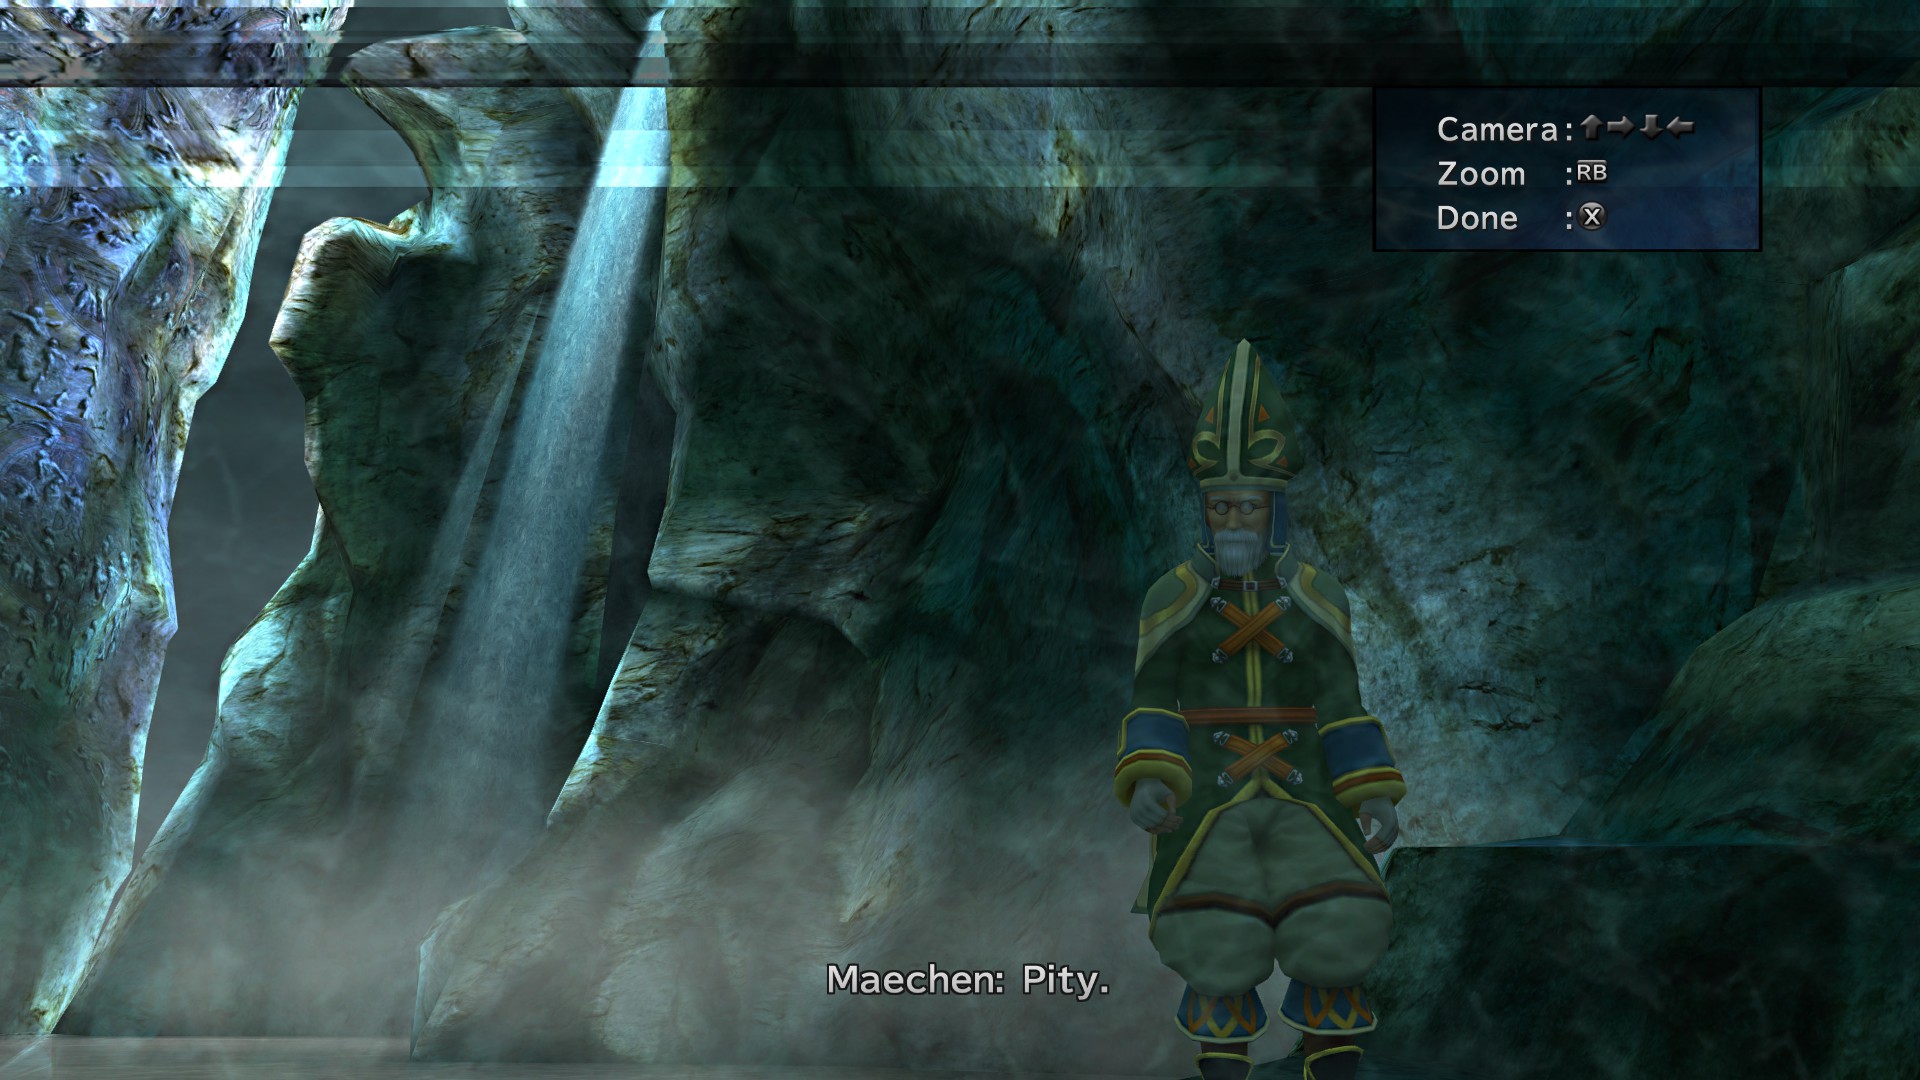
+ Here will occur your second encounter with Maechen, and like in the first one wait until he ends talking. (This time is shorter at least, phew)

You’re done with Guadosalam, return to the Celcius.
+ Speak to Shinra and watch the Crimson Record #4 to receive another 0.2%
Head to the northern area of Thunder Plains.
Once here speak to Lian and Ayde, when they ask to where they should go to fix elder’s horn, select Kilika.


Completion: 50%
Your completion should be exactly 50%, Halfway there!
Note: Make sure to pay O’aka’s debt before going to Macalania. This is requires for the next mission as well as the following achievement

Pay off O’aka’s debt
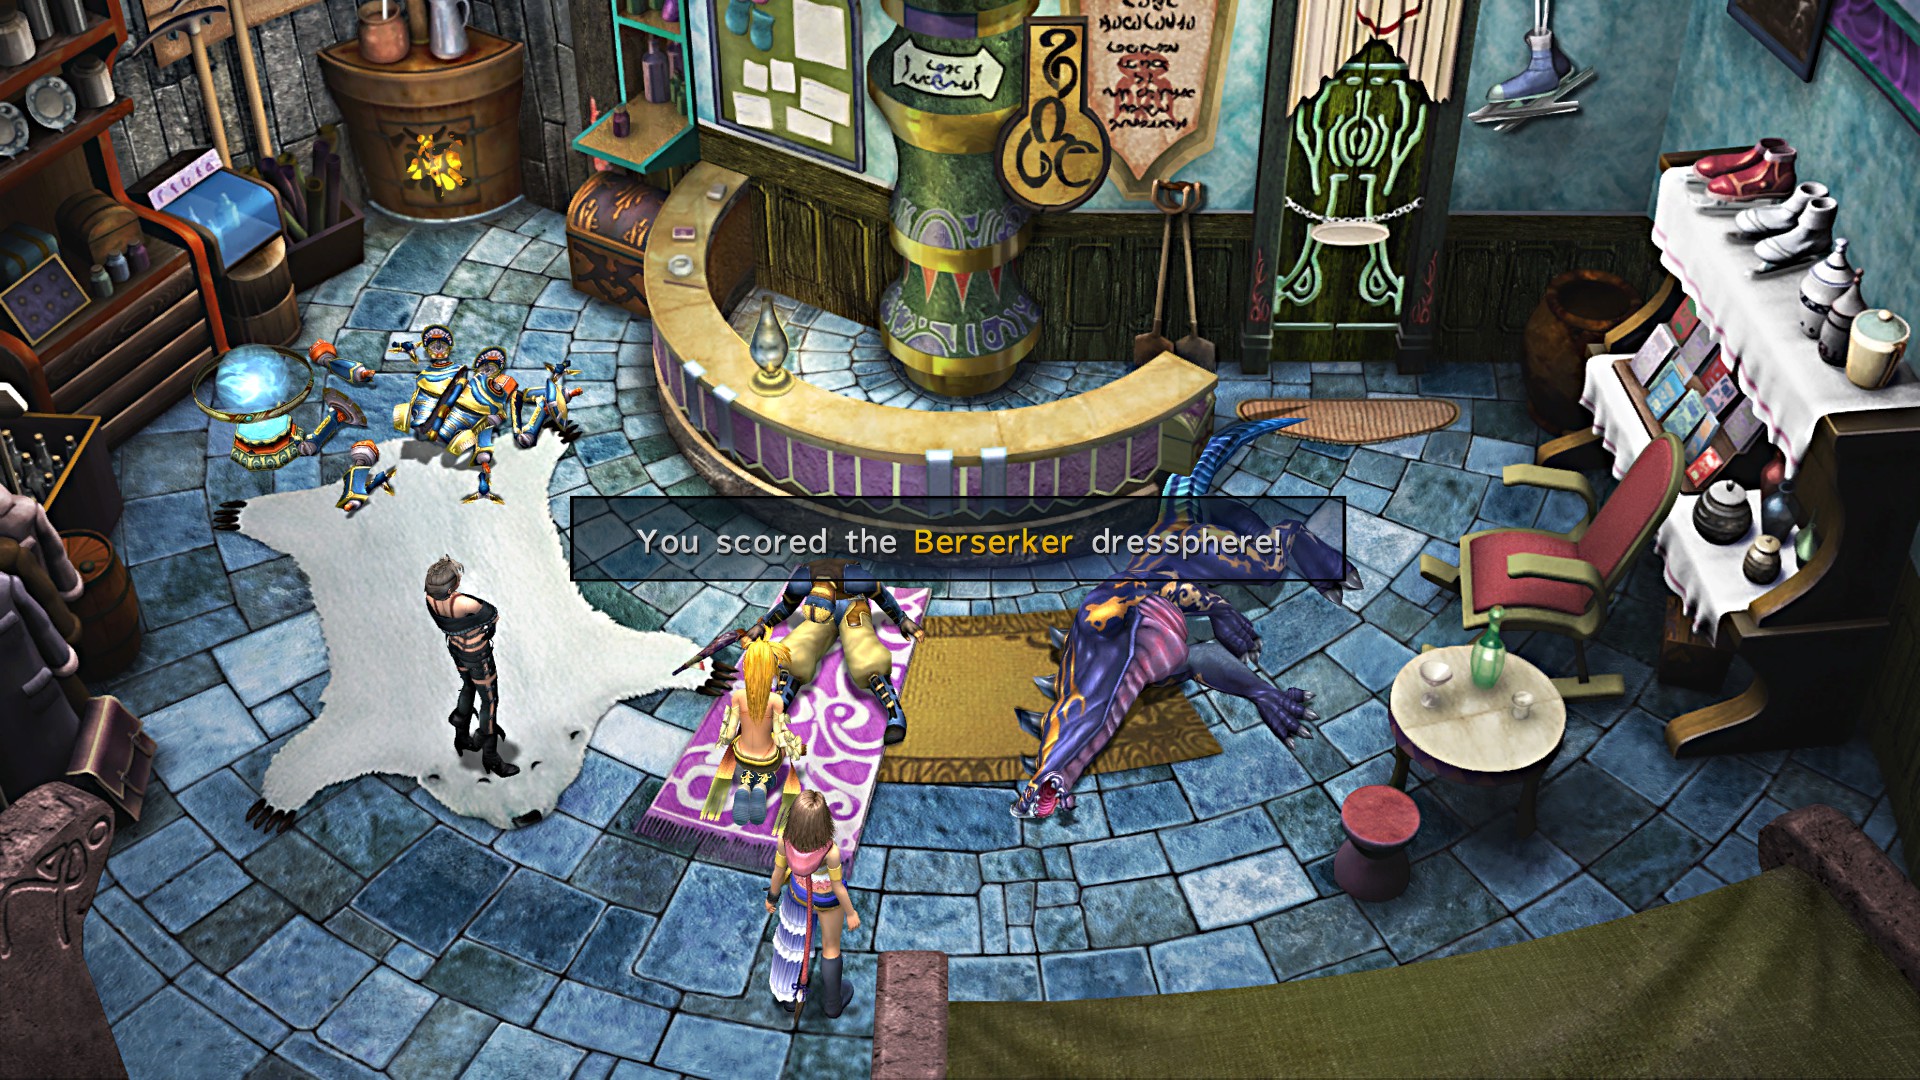
As soon as you arrival you’ll be surrounded by enemies, your objective? survive all 6 waves without ever fleeing.
+ After completing this mission, you’ll be rewarded with Berserker Dressphere, Al Bhed Primer and Pride of the Sword Grid Garment
Note: Visit the south entrance to let Shinra place a CommSphere.

After the introductory scene, head to the Cactus Nation.

Speak with the Cactuar and start its sidequest that involves findind ten Cactuars around the world of Spira.

We are done here, for now.
You’ll notice that you’ve spawned near the Cavern of the Stolen Fayth, here takes place a sidequest where you have to rescue a total of 15 tourists.
Besaid Key will be given by one of the tourists.
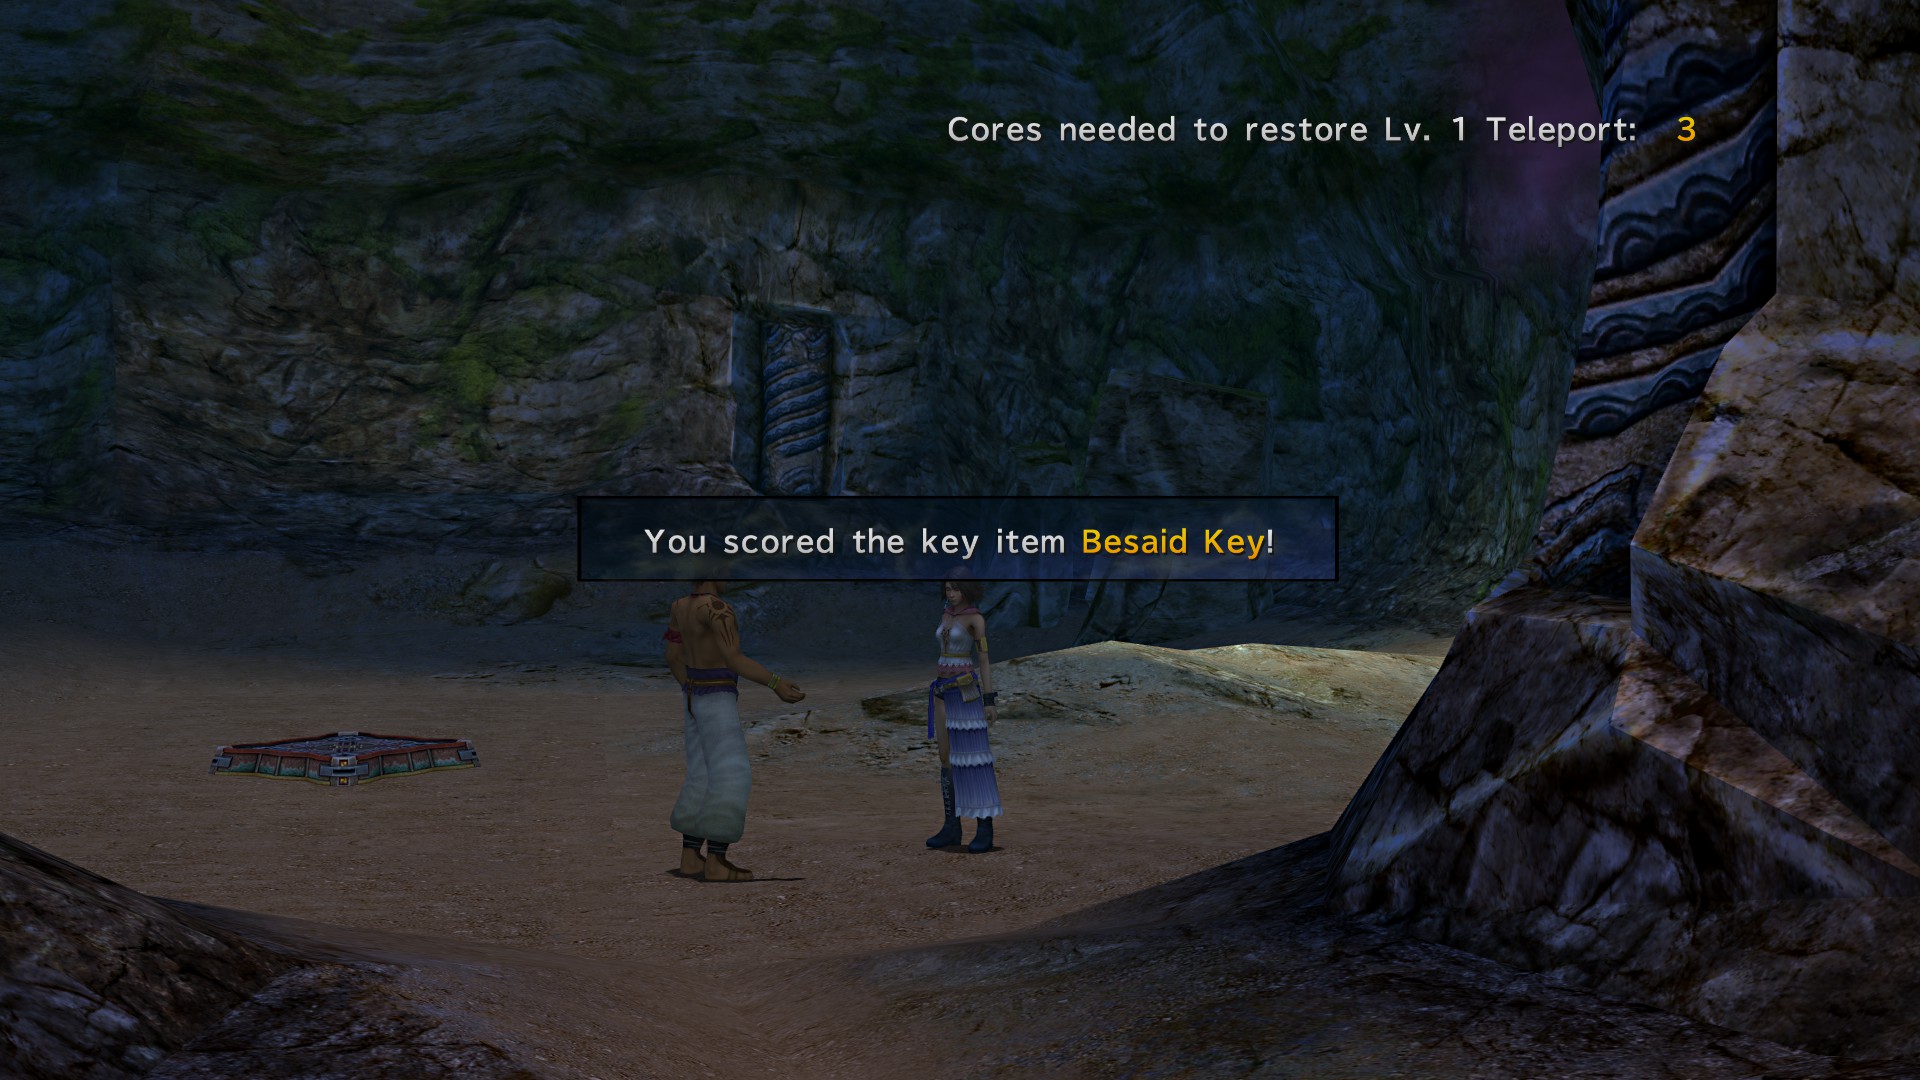
You’ll notice that there are still 2 tourist trapped. Leave the cavern and speak with one of the guys there, he’ll hand you the Energy Core 7 reactivating one of the teleports back in the cave.

+ Tetra Master Garment Grid rewarded for completing this mission.
Note: Visit the Travel Agency and the upper floor of the Chocobo Ranch to get CommSpheres installed by Shinra.
Short visit, enter and leave so Shinra can place a CommSphere.
If your choices were correct during the first and second chapter, Kimahri will give you the Trainer Dressphere.
Visit Hot Springs and ensure that the CommSphere is placed.
+ Climb to the summit and defeat Garik to finish this mission, Wishbringer Garment Grid will be your reward.
Speak to Isaaru in the corridor, Dome area.
Ch3 Besaid – Djose Temple
Do the storyline mission first.
Remember the Besaid Key you got in Cavern of the Stolen Fayth? It’s time to use it. Head to the Temple and enter the northeast room
Open the chest in here to receive a Search Sphere.

You can now hunt Cipher numbers, this set is also random like the first one.
#1 Cipher


#2 Cipher


#3 Cipher


#4 Cipher


With all 4 digits, enter Wakka’s cave again and turn to the right at the very entrance. Use the code here to open a path leading you to the “Raging Giant Garment Grid”


That’s all.
This is basically like the mission in Besaid Temple, clear the temple out of enemies and defeat a Dark Aeon afterwards.
Temple
Don’t forget to grab the Samurai Dressphere

+ There will a brief scene at your arrival.
Make your way to the temple and change the lift mode to reach Bevelle Underground like in the second chapter.
+ You’ll see another scene in the Antechamber

+ And a last scene will play at Bevelle Underground , same location where you fought Bahamut.
Pick up the Crimson Sphere #1 before leaving.

+ View the Crimson Report #1 at Shinra’s Station.
This is a point of no return, you won’t be able to explore Spira in a while so make sure that you got everything.
Al Bhed Primer

Unwavering Guard Garment Grid received after defeating Dark Ixion.
+ Crimson Sphere #2 and #3 automatically received.
+ After Yuna says “I’m all alone…” at Farplane Abyss, smash your action button until she is transported away. (you should whistle 4 times)

+ Chapter 3 Complete!
Ch4 Celcius – CommSphere Network
+ Speak to Paine at the Deck (Required to progress)
Al Bhed Primer, automatically received.
+ View Crimson Record 2 and 3 in Shinra’s station.
+ Rest in the Cabin

+ View Besaid Island CommSphere and speak to Wakka.
+ View Kilika Island Commsphere and speak to Dona.
+ View Mushroom Rock Commsphere and speak to Yaibal.
+ View Bevelle Commsphere and speak to Maroda. (Might take a while to appear)
+ Speak to Buddy at the Bridge (Required to progress)
+ Speak to Paine at the Bridge
Completion: 63%
Besaid
+ Enter and exit the CommSphere a few times (3 to be exact) and then stare at Wakka’s house for a while until he comes out. Wait until he stops talking.

+ View the CommSphere for a 6th time to see Beclem criticizing the Aurochs.

Kilika Temple
+ Watch Kilika port CommSphere 3 times. 1st time: nothing happens. 2nd time: Dona at the docks viewing a ballon rise. 3rd time: Dona in her house Sleeping, wait until she says “Barthello…” and “…apologize!”. (Thanks to apfel)
+ Try zooming at the entrance of the temple until Barthello comes out, you have to watch the whole scene until he destroys this CommSphere.

Luca
+ View this CommSphere for a third time and wait till the scene ends.

Mi’ihen Highroad
You’ll have to view a bunch of scenes here and call Rin when something happens.
Ruins – Machina footprints.

Newroad – Marks indicating that something fell into the ravine.

Hover Crash Site – Wounded man.

Travel Agency Front – Chocobo Eater chasing a gull.

Travel Agency Back – Machina is malfunctioning

Newroad – Chocobo Eater chasing a hover.

Travel Agency Front – Rin is talking to the hover driver.

Travel Agency Back – Man falls from roof.

+ A man will approach the sphere and after a short talk, he will give you an Al Bhed Primer.

+ Reenter this sphere a total of 5 times to get another scene and another Al Bhed Primer
(Thanks Hazatron and Jirkis for pointing it out)
+ Ormi comes from the Chateau and talks to you.

+ Zoom the camera to the right, you’ll see a Chocobo and new Shinra’s invention.

+ Woods Entrance – Scene with the musicians.
+ Travel Agency – Small talk with O’aka about how the store is going.
+ Excavation Camp – She will tell your about a new threat in the desert.

+ Chocobo Ranch – A scene where Clasko speak with the Chocobo, you might have to see this twice to make him talk to Yuna.

+ Mountain Gate – Speak with Kimahri about the concert.

Hot Springs
There are quite a few scenes in here, make sure you’ve seen them all.
Tobli
Buddy with Barkeep

O’aka

Isaaru, Madora and Pacce

Lucil and Elma

Maechen
Cid, Nhadala and Rin
Dona (This is the last one)

Ch4 Moonflow – The Concert
Storyline mission, nothing to consider here.
+ View Besaid Island twice, first for a scene with Beclem and a second time for a conversation with Lulu and Wakka


+ Port – View it three times for a scene with Dona.

+ Temple – After the scene with Dona, a new scene with Barthello will occur in the temble.

+ View this CommSphere twice to watch a scene with Lucil, and then another with Yaibal


+ View it twice , the first time you’ll have to focus in Hypello and Elma to trigger the conversation.

+ Just another scene with Ormi about the concert
+ Travel Agency – O’aka leaving the Agency for the concert

+ View it three times, first time will be a scene with Isaaru asking Yuna about the concert, second time Isaaru talking about Madora and the last one, Isaaru will be laying on the ground (Move the CommSphere to your left)


Storyline mission, defeat the Zalamander in the secret cave.

Defeat Zalamander
+ Speak with Rikku once
+ Speak with Brother several times until he starts to repeat his dialogs.
+ Do the same with Buddy
+ And Paine
+ Speak with Shinra
+ After speaking to everyone in there, speak with Rikku again to trigger a scene
+ Speak to Maechen on the Bridge and don’t interrupt until he is done.

+ Speak to LeBlanc in Engine room to get the Crimson Sphere #5

Completion: 75%
Ch5 Zanarkand – Moonflow
+ Watch “Crimson Record #5” by speaking to Shinra
+ Speak to Buddy at the Bridge
+ Rest in the Cabin one last time. Once you wake up, you’ll see a scene with Brother.
+ Speak with Buddy in the Engine Room
+ Watch the scene to finish this episode.
+ Episode Complete!

Complete an episode in Chapter 5
+ Speak to Maechen to hear his last story.

Listen to all of Maechen’s stories
After the scene with Wakka and his son, head to the Beach.
Once here, speak with Beclem, he will hand you the War Buddy Sphere.
Return with it to the Village, you’ll find Wakka halfway there.
Enter the Village to finish the episode.
+ Episode Complete!
Walk a few steps into the village.
Watch the scene.
Make your way to the Temple.
Watch the scene.
+ Episode Complete!
Tricks of the Trade Garment rewarded.
Approach the balcony to start a new mission.
Go down the stairs to the square area and interact with the Moogle.
Go south and repeat.
Now follow the Moogle to the docks, interact with it to end this mission.
+ Episode Complete!
You can now play Blitzball in the stadium.

Win a blitzball match in FINAL FANTASY X-2
This minigame is quite a bit different than X version. You can’t control your characters so It’s more like a management game.
Easiest team to defeat is Kilika Beasts.
Choose “Not at all” when asked

Watch the scenes and if you did everything right, Rikku will be the culprit, giving you one of the best accessories in the game “Ragnarok” and ending this episode.
+ Episode Complete!
When asked, accept to compete in the tournament.
+ Fight in the mini-tournament and win to complete this mission.
+ Now reenter Mushroom Rock and head to the Observation Deck at the Youth League Headquarters (Inside) and speak to Lucil to get Nooj’s Sphere.

+ Watch it in the Celcius. It’s tagged as “Deathseeker”
Now head Bevelle to get the last two Crimson Spheres.
Head to the temple and watch the scenes.
You’ll get “Scourgebane Garment Grid” as a reward.
+ Episode Complete!
Reenter Bevelle and head to the temple.
Once here take the right corridor the find the entrance of Via Infinito.
I highly recommend doing only 20 floors for now (To get the both missing spheres),since it becomes really hard later on.
Crimson Sphere #6 – Floor 0

Crimson Sphere #8 – Floor 20

Now with the last 2 spheres we can return to Mushroom Rock and finally open Den of Woe Door.
Make your way through the bottom ravine to reach the Den of Woe and head inside.


You’ll be in a very linear path, keep heading north until you start watching some scenes and a boss battle afterwards.
Note: This is your last chance to get Drill Shot from Baralai and Mortar from Gippal, make sure to get them if you’re collecting all the Blue Bullets, although they all aren’t required for any achievement.
Completing this will get you a Magical Dances Vol. 1 and the “Supreme Light Garment Grid”.
+ Episode Complete!
Enter the temple. You’ll be challenged to defeat an Experimental boss,accept.
You have to defeat it TWICE, once when its attack/special/defense levels are below level 5 and another time when they at 5 (Maxed)
+ Defeat it now while It’s low level.
That’s all for now, we’ll back here later.
Speak with Tobli (He’s in the same location as always) and after a scene opt to go onstage.


Stay there for a few seconds and then leave to finish this episode.
+ Episode Complete
Ch5 Guadosalam – Fiend Arena
Head towards the Chateau to watch a scene.
When you regain control, speak to Tromell.
+ Episode Complete!
Return to Guadosalam and head to the door that never opens (west side).
Speak with Tromell near it and you’ll be allowed inside.

Tempered Will Garment Grid automatically received.
+ Open the nearby chest to get Baralai’s Sphere.

+ Board the Celcius and view this sphere, tagged as “Yevon’s Secret”
Once arriving, it seems that Shinra’s ‘epic’ sphere screen as caught the allure of several fiends whom now sit at the base of each lightning rod tower. There are nine chimeras in total.
Five are on the south end of the plains. Four are on the north end of the plains. After defeating all of them, the lightning continues and you’ll get a map parking pointing to the west side of an area where there’s an isolated lightning tower across the waters. Here you’ll fight Humbaba.
Valiant Lustre Garment Grid automatically received.
Now once the fight ends with Humbaba, you’ll uncover a secret cave where the tower was with Humbaba. Once in the cave, you’ll see a marker that points to Cid. Make your way to him and talk to Cid and you’ll have a boss fight with Panzer.
+ Episode Complete!
Al Bhed Primer XXVI automatically received.
Talk to Cid on the Celcius’ Deck
Return to Bridge for an automatic scene with Cid
Head to the Lake Road but instead of entering here, take the northeast path to the Spring.

Speak to the person here and after a small scene return to the woods entrance.
Head east twice and south once, you’ll be in the second spring.

Watch the scene to finish this episode.
+ Episode Complete
Ray of Hope Garment Grid Automatically Received
Return to Macalania and head to the Agency in Lake Road.
Attempt to enter the Travel Agency and you’ll get another scene.
+ Episode Complete!
Note: Make sure to have 400 points with any of the companies before entering.
If you have them , you should watch a scene upon arriving, ending this episode.

+ Episode Complete!
Head south after arriving to watch a scene.
Speak to Kimahri.
Lastly head to the mountain trail to watch another scene, ending this episode.
“Sacred Beast Garment Grid” automatically received.
+ Episode Complete!
There’s still one thing to do in Mt. Gagazet. Return to where the Statue of Kimahri is, you should see the kids running around, speak to them to get another scene and the Conflagration Garment Grid.


Gatekeepers Sidequest.
This mission requires you to find all ten Cactuars scattered through Spira. I’ll list here their locations, but note that you must speak first with their mothers to make them appear.
Note: Winning the mini-game isn’t required to make them cooperate.
Lobivia – Bikanel Desert, Oasis.

Toumeya – Besaid Island, Beach.

Lobeira – Guadosalam Chateau, Ormi’s Room (Open the chest)

Areq & Arroja – Calm Lands, Gagazet Entrance.
Islaya – Thunder Plains, North.

Chiapa – Kilika Island, Forest.


Erio – Mt. Gagazet, Prominence.

Bartschella – Kilika Port, Dona’s House.

After you’ve gotten all but the last one, speak with Marnela to open the Cactuar Hollow door.
Frailea – Cactuar Hollow

Defeating the Jumbo Cactuar will finish this mission.
Head out the dungeon to watch a scene and receive another mission. This time you’ll have to defeat the Superboss “Angra Mainyu”, he has a total of 333,444 Hp and can deal ridiculous amounts of damage so don’t even try it if you’re not prepared yet.
Recommended level 50-60.

Once you manage to get this monster down, you’ll get the “Mercurial Strike Garment Grid” and this episode will be complete.
+ Return to Cactuar Nation and speak with Benzo to watch another scene.
+ Episode Complete
Ch5 Excavation – Fiend Colony
So, the goal of excavation is to collect assembly parts to upgrade the Experimental Boss. The Boss has 3 main stats: Attack, Defense, and Special.
When digging, you will see white X and yellow X. The yellow X are assembly parts. You’ll get a random assembly of Attack, Defense, or Special. Then you will get a tier that relates to the quality of the item. “Z”, “S’, “A”. A has a weight of 1 quality, S has a weight of 3 quality, and Z has a weight of 5 quality.

To get a stat to Level 5, you will need at least 38 total points in that stat from excavating.
Now, before you upgrade the excavator, you will have to repair it after you destroyed it the first time. Downstairs from the experiment boss, you will see a guy up top with a blue bandana, I assume this is Ropp. Talk to him and he will ask you for a password: MARNELA
After you give him the password, he will give you the manual to fix the experiment.

Once you get that, go back to the experiment and talk to the guy there and he’ll fix it up. Now talking to him will show you the progress of your excavation via levels.

Once all levels are at 5, challenge the experiment again.
Note: Make sure to get Annihilator Blue Bullet before defeating it, this is your only chance. (Not really required for an achievement cause there are way more than 5 but still nice to have)

Obtain Magical Dances, Vol. II
It will be automatically given once completing an episode in each area.

Win a Standard Cup in the Fiend Arena (Accessible through Shinra choosing Creator Creator/Fiend Arena)


That should be your last Dressphere

Obtain all dresspheres
Unlocking Ruin Depths
1 – Head to Kilika Forest and capture a few Chocobos. (10 should be enough)

2 – Go to the Chocobo Ranch and check their Max level. Release all of them whose maximum level is not 5, if you have fewer than four after that, return to Kilika forest and capture more.

3 – Assign the four chosen Chocobos to your runners.
4 – Send them to Calm Lands.
5 – Fight seven random battles.
6 – Return to the ranch and save, then speak to Clasko. If any Chocobos ran off, reload your save and speak to Clasko again until no one flees.

7 – Raise their level to 2. (You must feed them)
8 – Repeat step 4,5,6 and 7 until they hit level 5, only one level each time.
9 – Once they all are level 5, dispatch runners #1,#2 and #3 to the Calm Lands, ignore #4.
10 – Fight 7 more battles.
11 – Now dispatch runners #2,#3 and #4, ignore #1 this time.
12 -7 battles.
You’ll see a scene upon returning to the ranch.

Once you’ve done the above, you’ll gain access to the Ruins Depths, or easier labeled as the Chocobo Dungeon. The inside is a maze, so here’s a map recolored to make it easier on the eyes. We do not take credit for the map.
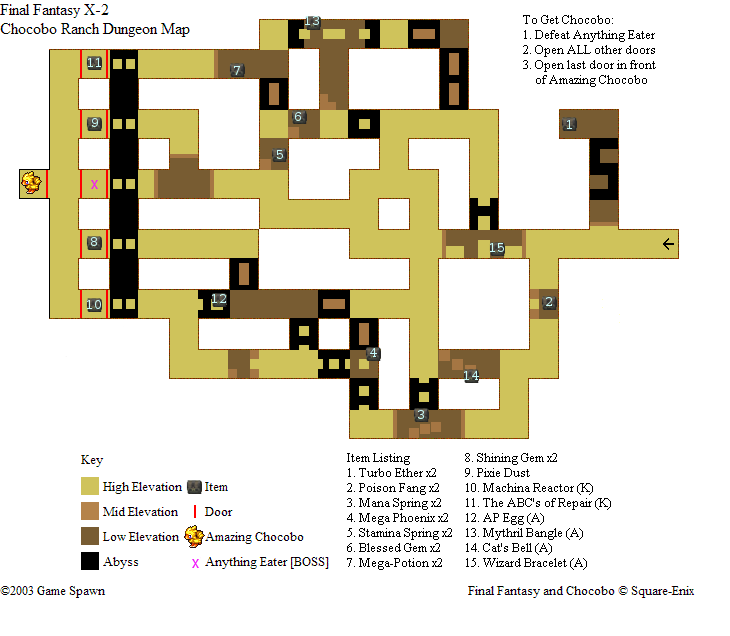
While any items you want to pick-up are available, the only goal of the dungeon is open up all 5 pairs of doors. This will also require you to defeat the boss, ‘Anything Eater’ whom lies behind the middle doorway. I say pair, because each of the 5 gates has two doors. You must open them in pairs, otherwise the other doors will NOT respond.
Using the map, most of the way is pretty straightforward. The only part I need you to warn you about is the that some of the ditches are one way. So if the area goes from Low to High, you won’t be able to go that way. You can however go High to Low, but won’t be able to go back.
After opening all the gates, simply go to the last gate to reveal the Amazing Chocobo.
You’ll get “Higher Power Garment Grid” as a reward. Note: This is a very powerful Garment Grid that lets you break the HP Limit and passing through all four gates during a battle will let you break the damage limit as well (9,999 to 99,999).

Catch the Amazing Chocobo
+ Episode Complete
Return to the ranch and dispatch a Chocobo to Mi’ihen Highroad, a new cavern will be discovered. The chocobo must be at least level 4. If you’ve done the above, then all your chocobos are level 5 anyways.

Your goal of this dungeon is to simply get to the letter ‘A’. Each pink wall can be broken with 5 small bombs. The rest, I’m not sure about, but keep bombing them until they break. More bombs are available from the enemies you fight here.
Once you get to the A, you’ll face the boss of the area, King Vermin which is a giant flaming vermin type. Dispatch of him. Your only goal here is to kill King Vermin so you can oversoul him for the bestiary.

“Font of Power” Garment
Ch5 – Finale
+ Defeat Trema in Via Infinito. See section below regarding it.
Talk to Brother and pick to go to the Farplane Abyss through Bevelle Underground
Climb down the spiraling rock path, and you’ll do battle with three Dark Aeons: Shiva, Magus Sisters, and Anima in that order.
+ Talk to Leblanc, Logos, and Ormi in the field of flowers before the portal.
Go inside. Time your passage through the left electrical gates that keep re-appearing. As for the lasers, use the cancel button to jump over them. Once you reach the first circular electrical barrier, you’ll fight Azi Dahaka by running into the barrier. Do not disable the barriers. This is required for Shinra’s Bestiary. Go backwards now.
Use the save to the right to go back to the airship.
+ Talk to Shinra on the Bridge
Rest at the Cabin.
+ Return to the bridge. Then go up to the Deck. (Requires 70% Story Completed)
Al Bhed Primer automatically received.
+ Go to the Cabin for a scene with Cid. (Requires 80% Story Completed)
Return to Farplane Abyss and go all the way where Leblanc is (you can use the shortcut). Now use the save sphere there and immediately return back to the Celsius.
+ Head to the Deck to see a scene between Rikku and Yuna (Requires 95% Story Completed)
Note: if the scene doesn’t trigger just go to the entrance of Via Infinito (Bevelle) and return to the Airship.
Completion: 96%
This is the last percentage checkpoint, if you don’t have 96% yet go back and check if you missed something. (Start with Via Infinito)
This place is non-missable. So simply do everything required to get to the end as well as fighting several boss fights.

Defeat Vegnagun
Once that’s done and you fight the final boss, you’ll get cutscenes and be sent into New Game Plus.
If everything was done correctly, you should get this achievement:

Complete 100% of the main story
If not, continue using New Game Plus to get your missing percentage.
New Game Plus
Note: Use this section only if you missed any percentage during your first playthrough.
You will be able to skip every single scene you come up to because you should have watched it already during the first playthrough, so they won’t count a second time.
Luca
Follow the impostor. Defeat her minions and her.
Celsius
Talk to everyone, watch Journey’s Start sphere through Shinra.
Mt. Gagazet
Nothing special here, get to the top, fight the boss.
Besaid
Walk into the village for a scene. Go into Lulu and Wakka’s house. Talk to Lulu, sleep overnight. Walk out, talk to Lulu for a mission. Complete mission.
#1 Cipher: At the statue at Promontory
#4 Cipher: On the pillar at Ancient Road (One map after Promontory)
#3 Cipher: On the left building at the entrance to the beach
#2 Cipher: On the back plateau of the beach
Zanarkand
Just run to the very end with Isaaru, then go down the back stairs to the dungeon with the sphere.
Kilika
Make it to the woods, and spy on the password. For quick reference it’s: Craven, Carved, Craven, Carved, Carved.
That ends Chapter 1.
Celsius
After talking about what to do with the sphere and whatnot, go to the Cabin. Talk to the barkeep to rest. Walk to the elevator and push all the musicians into the elevator. You’ll get a scene.
+ When Yuna wakes up later, head to the bridge and talk to Brother. We picked Youth League for our first playthrough. Pick New Yevon this time. When the scene STARTS, you should get the 100% completion achieve if you didn’t get it earlier.
Via Infinito and Monster Master achievement
An enemy will enter in Oversoul status after a certain number of the same type has been killed.
They’re separated by type, meaning you can kill 20 Flan Azul and your 21th encounter with them will be against an Oversouled one, this applies for all the other enemies in the “Flan” category.
You can easily abuse of this feature, for example killing 10 from the “Basilisk” family (like Gucumatz) will make enemies like Chac enter in Oversoul as long as It’s your 11th encounter.
Escaping from a battle doesn’t remove an Oversoul status, just killing does that.
Note: Only Oversoulable enemies listed.
Tonberry (Tonberry) – All floors but boss floors, randomly
Elder Drake (Drake) – 1-60, randomly / 81-99 as an encounter
Mega Tonberry (Tonberry) – 41-99, randomly – Cry in the Night Blue Bullet
Divebeak (Bird)
Coyote (Lupine)
Flan Azul (Flan)
Nashhorn (Ruminant)
Quadricorn (Ruminant)
Ahriman (Evil Eye)
Iron Giant (Iron Giant)
Boris (Arachnid)
Bomb (Bomb)
Gecko (Reptile)
Death Dauber (Wasp)
Purpurea (Plant)
Sahagin (Sahagin)
Ochu (Ochu)
Red Elemental (Elemental)
Yellow Elemental (Elemental)
Stalwart (Armor)
White Elemental (Elemental)
Takouba (Blade)
Sallet (Helm)
Behemoth (Behemoth)
Lesser Drake (Drake)
Guardian Beast (Sacred Beast)
Flame Dragon (Sacred Beast)
Coeurl (Coeurl) – Blaster Blue Bullet, White Wind Blue Bullet
Bicocette (Helm)
Wild Wolf (Lupine)
Flan Amarillo (Flan)
YSLS-Zero (Defender)
Gold Elemental (Elemental)
Hrimthurs (Ogre)
Fly Eye (Evil Eye)
Killer Hound (Lupine)
Xiphactinus (Dinofish)
Agama (Reptile)
Flan Palido (Flan)
Vertigo (Evil Eye)
Bully Cap (Fungus) – White Wind Blue Bullet
Shantak (Roc)
White Fang (Lupine)
Haizhe (Haizhe) – Absorb Blue Bullet, Mighty Guard Blue Bullet
Protochimera (Chimera)
Kukulcan (Basilisk) – Heaven’s Cataract Blue Bullet
Chocobo Eater (Eater) – Only available if killed during chapter 2 on Mi’ihen.
Aranea (Arachnid)
Assassin Bee (Wasp)
Peregrine (Bird)
Barbuta (Helm)
Skink (Reptile)
Flan Blanco (Flan)
Gemini (Iron Giant)
YSLS-99 (Defender)
Anole (Helm)
Deep Haizhe (Haizhe)
Sand Worm (Worm)
Malboro (Malboro)
Armet (Helm)
Leucophylla (Plant) – Seed Cannon Blue Bullet
Detonator (Bomb)
Bolt Drake (Drake)
Zu (Roc)
Shell Shocker (Hermit)
Amorphous Gel (Gel)
Drowsy Ochu (Ochu)
Queen Coeurl (Coeurl) – Blaster Blue Bullet, White Wind Blue Bullet
Cephalotus (Plant) – Seed Cannon Blue Bullet
Sahagin Prince (Sahagin)
Aculeate (Wasp)
Gigas (Ogre)
Ironside (Armor) – Storm Cannon Blue Bullet
Blue Elemental (Elemental)
Admantoise (Adamant)
Archaeothyris (Reptile)
Gucumatz (Basilisk) – Heaven’s Cataract Blue Bullet
Vespa (Wasp)
Flan Rojo (Flan)
Canis Major (Lupine)
Tentacles (Cephalopod)
Mycotoxin (Fungus) – White Wind Blue Bullet
Hambaba (Behemoth)
Spine Drake (Drake)
Black Elemental (Elemental)
Bascinet (Helm)
Balivarha (Ruminant) – Fire Breath Blue Bullet
Grim Gaze (Evil Eye)
Dinictus (Dinofish)
Rhyos (Chimera)
Zalamander (Dragon)
Aquila (Bird)
Lupus (Lupine)
Barong (Blade)
Greater Drake (Drake)
Flailing Ochu (Ochu)
Ultima Weapon (Weapon) – Supernova Blue Bullet
Cactuar (Cactuar) – 1000 Needles Blue Bullet
Sahagin Chief (Sahagin)
Wasp Queen (Wasp)
King Takouba (Blade)
Rukh (Roc)
Big Bully Cap (Fungus)
Heavy Sallet (Helm)
Jumbo Cactuar (Cactuar)
Concherer (Hermit) – Grind Shell Shockers in Moonflow – North Bank Road (7 required to Oversoul)
Tindalos (Lupine)
Dark Elemental (Elemental)
Claret Dragon (Dragon)
Flan Azabache (Flan) – Absorb Blue Bullet
Volcano (Bomb)
Earth Worm (Worm)
Hug Bug (Vermin)
King VERMIN! (Vermin) – Only available if killed at Fiend Colony (Mi’ihen)
Creeper (Vermin)
Hexapod (Vermin)
Adamantortoise (Adamant)
Great Malboro (Malboro) – Bad Breath Blue Bullet
Gug (Ogre)
Azi Dahaka (Sacred Beast) – Only available if killed at Farplane during chapter 5.
Protean Gel (Gel)
Anything Eater (Eater)
Omega Weapon (Weapon)
Chac (Basilisk) – Grind Gucumatz in Mushroom Rock (10 required to Oversoul) – Heaven’s Cataract Blue Bullet
Note: Check “Full Chain” achievement for tips.
Aranea (Arachnid)
Black Elemental (Elemental) – Absorb Blue Bullet
Chac (Basilisk)
Concherer (Hermit)
Lacerta (Reptile)
Mushroom Cloud (Fungus)
Elder Drake (Drake)
Insect Matriarch (Vermin)
Critical Bug (Vermin)
Paragon (Weapon) – Grind Ultima Weapon in Chocobo Ruins (10 required to Oversoul)
Trema (-)

Defeat Trema
Georapella (Geo) – Bevelle Underground.
Precepts Guard (Spirit Beast) – Bevelle Underground)


They are at the same location where you found the Ribbon. Take the first tower for Precepts Guard and the 5th one for Georapella. (Clockwise)

Complete Shinra’s Bestiary
Note: If you’re collecting all the Blue Bullets, you should be only missing one by now, and that is Stone Breath.
Learned from:
Epitaph (floor 75-79)
Tomb (floor 27-29)
Monster Master – Using the Fiend Arena
For the most part, encountering oversouled enemies in the Fiend Arena is a safe experience; however, there are a hand full of enemies that were improved within the arena itself and thus do not count towards the achievement while still counting towards the oversoul bestiary. So if you see the monster listed here, make sure you have it oversouled OUTSIDE of the arena.
It’s safe to use the fiend arena to specifically farm a type of enemy and thus triggering an oversoul; however, if listed below, you need to encounter its oversoul outside of the arena.
PR Mission – Chapter 1


Outskirts


Square


Stadium Entrance


Dock 3


South End


Central


Agency


Newroad, North

North End

Oldroad, North

Oldroad , South


Djose Temple


Djose – Pilgrimage Road


Moonflow – South Bank Road

Moonflow – South Wharf


Moonflow – North Wharf

Moonflow – North Bank Road


Macalania Woods – South

Macalania Woods – Campsite

Kilika – Dock


Kilika – Residential Area


PR Mission – Chapter 2
Outskirts
Square
Stadium Entrance
Dock 3
Like Chapter 1, you can do everyone. However, you must do them in a specific order. Any guys that appear AFTER the travel agency (coming from Luca), do them prior to the Chocobo Catching mission. The guy who sits right outside the Travel Agency, do him DURING the mission. The four that appear BEFORE the Travel Agency, do them AFTER the mission. Warp to Mushroom Rock then walk backwards:
Oldroad, South
Oldroad, North
North End
Newroad, North
After doing those, go to the Travel Agency.
Agency
Do this one before entering the travel agency.
Once you enter, you’ll see a scene with Calli and that’s when every single person prior to this one is missable.
After the mission, you can do the final four. You’ll have to come from Luca as there’s a blockade.
South End
Central
Djose Temple
Djose – Pilgrimage Road
Moonflow – South Wharf
Moonflow – North Wharf
Moonflow – North Bank Road
Macalania Woods – South
Macalania Woods – Campsite
PR Mission – Chapter 3
South End
Central
Agency
Newroad, North
North End – Must be done during the side quest here.

Oldroad, North
Oldroad , South
Moonflow – South Bank Road
Moonflow – South Wharf
Moonflow – North Wharf
Moonflow – North Bank Road
The hypello moved from the right to the left, same option though:

Macalania Woods – South
Macalania Woods – Campsite
Outskirts


Bridge


Stadium Entrance


Achievement Cleanup

Change dresspheres on Yuna, Rikku, and Paine in one battle
As the achievement suggests , just change Yuna’s, Rikku’s and Paine’s Dresspheres in the same battle. S it the default key if you’re using the keyboard.

View one complete fiend tale
This achievement should be done as soon as possible.
First, you have to trap an enemy using Pods in the Creature Creator (accessible through Shinra at the Celsius). Once that’s done stuck it in your party and level it up at least 5 times, this is why It’s better to caught it earlier since they will join with your party level.
Now you have to read the tale in the “Creature History” menu and release it.
The achievement should unlock after a short scene.


Use Mix 30 times
Mix is a command that can be used by the Alchemist Dressphere (obtained after completing Clean Sweep sidequest in Chapter 3). Simply combine any items 30 times to unlock this achievement.

Use Bribe 30 times
Bribe is a command that can be used by the Lady Luck Dressphere (Obtained for defeating Shinra in Sphere Break). Simply use this command 30 times.
Note: You can spend as much as you want since It doesn’t have to be successful for it to count towards this achievement.

Achieve a 99 chain attack
The best to use this is against Chac, the snake boss that appears on the 80th Floor of the Via Infinito. After your first fight, she will appear as a random encounter starting at the 71st Floor. When going into the fight, you’ll want all three of your teammates with the Thief dressphere. From there, auto-haste is welcomed, but not required. Using haste during the fight is NOT recommended.
Once the battle starts, space out their attacks so that they continually attack one after the other, interrupting Chac from attacking. Once the chain hits 99, you’ll get your achievement.

Deal 99999 damage with one attack
This is done easiest with the Samurai’s Spare Change Skill. Throwing millions of gil will easily net you 99,999 damage.
Then you’ll need a Break Damage Limit Garment Grid. There are two: The harder one is ‘The End’ Grid for completing Shinra’s Bestiary, but only requires you to pass through two gates. The easier one is Higher Power which you get from obtaining the Amazing Chocobo.
Go into any battle, change dresspheres until you pass through the gates required for Break Damage Limit, then throw 100 million gil and you’re guaranted to land 99,999 damage.
Alternatively, you’ll need to max out stats, go into a fight against a weak monster, lower its defense or magic defense depending on what moveset you want to try. Some of these may require a critical. If you’re having trouble with max strength or magic, I suggest killing Trema and using his Iron Duke accessory.
I’ll list a few skills to try:
Ultima: Max Magic, Magic +10, MDef -10
Supernova: Blue Bullet, Magic +10, MDef -10
Cry in the Night: Blue Bullet, Magic +10, MDef -10
Mortar: Blue Bullet
Annihilator: Blue Bullet
Sparkler: Bushido
Fireworks: Bushido
Mad Rush: Berserker
Note: If you’ve NEVER used Escape, then using “The End” Garment Grid and bypassing all four gates will trigger the ‘Finale’ Skill which does 99,999 damage – 1*(Escape Count). Meaning if you’ve never escaped, this move does 99,999 damage.

Roll the same number on all the Gambler’s Dice
After obtaining the Lady Luck dressphere, simply equip it. Then you can use either the Two Dice skill or the Four Dice skill. Obviously, using the 2 is easier. Use it until you land the same digits on both dice.

Learn 5 Blue Bullet skills
I’d check the Via Infinito section as you can learn nearly all of them there. But I’ll list five easy ones for that you can try to get. I’ll only list their Chapter 5 locations to prevent people from accidentally messing up their story completion.
Note: Mighty Guard and White Wind Blue Bullets, you have to confuse the enemy into using it on you. You cannot use a fiend with it and having it cast it onto you.
1. Seed Cannon | Every Fat Plant | Everywhere
2. 1000 Needles | Cactuar | Cactuar Hollow | Via Infinito F47-59
3. Blaster | Coeurl | Ruins | Via Infinito F27-29
4. Bad Breath | Malboro | Besaid & Thunder Plains | Via Infinito F24-26
5. Storm Cannon | Ironside | Kilika | Via Infinito F30-32
6. Heaven’s Cataract | Gucumatz | Thunder Plains & Zanarkand | Via Infinito F33-35

Complete the ability set for one dress
Continually use a dressphere performing actions with it until you’ve learned every skill that the dressphere has to offer. Dresspheres use AP to level up. AP is earned by attacking an enemy, killing an enemy, healing teammates if they’re damaged, using items that actually have an effect.
You can see the percentages by going into Abilities then selecting a character. The crown denotes 100%.
Note: Gun Mage does not need all the Blue Bullets. Songstress requires the Magical Dances from Chapter 5.

Obtain all available FINAL FANTASY X-2 achievements
*Includes The Last Mission achievements.
Last Mission
Last Mission is accessed through the main menu of the launcher.
A roguelike dungeon crawler using common Final Fantasy X-2 themes.
- The combat is still turn-based. Inventory is heavily limited.
- You cannot stack items, you can only find items stacked.
- The first dressphere you have equipped is your ACTIVE dressphere slot. You can use any skills from your other dresspheres, but your defense and health is based on your active slot.
- You must unequip dresspheres before fusing them.
- When fusing, the levels are added. So fusing a Level 3 Dark Knight and a Level 2 Dark Knight results in a Level 5 Dark Knight.
- Game auto-saves each time you reach the next floor, each time you enter different area: Secret Rooms and Shops are two examples.
- Game will let you save every 5 floors.
- Every 20th floor is a boss.
- Every 5th floor that does not have a boss has a special requirement to unlock the elevator. Each condition will be explained in the walkthrough.
- Your main dressphere will be the Dark Knight. Only level the Dark Knight. To level, you simply have to fuse two dark knight dresspheres together.
- The rest of your dressphere loadout should include the Samurai, Trainer, Mascot, and White Mage.
- The Samurai + Trainer + Dark Knight will give you Deathproof making you immune to Doom.
- White Mage is used to heal.
- The Mascot + White Mage + Trainer will give you regen every 3 turns.
- The Mascot + Samurai will give you protection from dropping Gil.
- If you continually level up the Dark Knight, your health will be ridiculously high.
- If you want to be cheap; however, simply give your gil and combine that with Gil Toss.
- No matter what you do, keep hold onto at least 2 Save Memos. Then you’ll need 3 Find Secret Room items. Do note that the Notebook item can make copies of these items. Save Memo items are uncommon throughout, Find Secret Room start showing up more often after Floor 50. You need them between Floor 61-76, so I’d start worrying about it once you reach Floor 40.
- If your dressphere gets the bomb effect, I’d Alt + F4 and load the autosave.
- Every 10th floor, you’ll get a cutscene and a chest. The chest has 3 random items. You cannot drop items when getting this chest, so make sure you make room for them if you want whatever is inside them.
- If you go with the White Mage, then don’t hold onto the health items. Hold onto mana items for your white mage for cure.
Pretty much when I describe the requirements to unlock an elevator, you’ll have to do something. Most of them are pretty obvious, but some are more obscure.
- Menu – PS: Triangle | Xbox: Y | PC: V
- Attack – PS: Circle | Xbox: B | PC: C
- Cancel – PS: X | Xbox: A | PC: X
- Skip Turn* – PS: X + Select | Xbox: A + Select | PC: Backspace + N
- Fake Attack – Use attack while an enemy is not in your attack range
- Drop Item – Go into your inventory and select an item then drop
- Throw Item – Select an item either in your inventory on the ground, select it (check if on the ground), then throw it
*To skip turn, they must be pressed in THAT order.
Note: For each elevator, you have to perform an action after doing the kills which means essentially doing anything besides movement. So pulling up menu, attacking air, etc.
Floor 5: Defeat 3 Enemies

Reach the 10th floor of Iutycyr Tower
Floor 10: Defeat 10 Enemies
Floor 15: Defeat 5 Enemies and Drop 2 Items

Reach the 20th floor of Iutycyr Tower and defeat the boss
Floor 25: Defeat 8 Enemies and Throw 2 Items
Floor 30: Defeat 8 Enemies and Drink 2 Items
Floor 35: Defeat 8 Enemies, Drop 3 Items, and Fake Attack 3 Times

Reach the 40th floor of Iutycyr Tower and defeat the boss
Floor 45: Defeat 8 Enemies, Read 2 books, and Fake Attack 3 Times
Floor 50: Defeat 10 Enemies, and Skip Turn 5 Times
Floor 55: Defeat 8 Enemies, Read 2 Books, Fake Attack 2 Times, and Skip Turn 5 Times

Reach the 60th floor of Iutycyr Tower and defeat the boss

Obtain treasure in the Tonberry area
Now this is probably the hardest achievement as it’s luck based. However, by saving up 2 Save Memos and 3 Find Secret Rooms, this will be do-able. This achievement can only be attempted after Floor 60.
It’s recommended that you only do this on Floor 61, 66, 71, or 76. If you have 3 Save Memos, then you can do any levels from 61-76. If you do not have these items, then I recommend doing Floors 61-65. If you do not get any good items, load your Floor 60 save and repeat until you do. Then repeat for 66-70 for more items.
Anywho, you need a save to fall back onto, so starting from a Hard Save, not an autosave. Use the ‘Find Secret Room’ item to generate an elevator. If the room has ROCKS, then you’ve succeeded. If not, reload and try again. First room is shown below. Rocks make a circle.

Break the rock in the middle, use the elevator and SAVE. New Slot is probably preferred.
Now you’ll be back at the SAME floor you left. Use your second ‘Find Secret Room’. If you get rocks again, then continue. Otherwise, reset. The second room is shown below. Rocks make an X.

Break the rock in the middle, use the elevator and SAVE.
Now for the third and final room. As usual, do it until you get a room with rocks. The third room is shown below. The rocks will make a Triangle.

Break the rock in the middle, DO NOT USE THE ELEVATOR. Go to the adjacent room. A second room will be opened. Note: There are several items in here. One from each room. 4x Dressmaker, 9x Restart Guide, and 2x Copy Technique.

Now go into the fourth room and you’ll arrive at the wrong neighborhood.

In this room, defeat the 4 Mega Tonberries (1200 health), and 1 Tonberry. Your best move is to simply use Doom on them 1 by 1 and let them die off that way. After the first Mega Tonberry, an elevator will appear. Do not use it. After killing all of the tonberries, go into the dark room they emerged from. There is an item on the ground. Pick it up for the achievement.
Floor 65: Have the Founder appear. Just skip turns/run around until something eerie approaches.
Floor 70: Transform into a Leblanc Goon. This can be achieved through the Founder, or by an item
Floor 75: Defeat 8 Enemies, Drop 3 Items, Throw 3 Items, Fake Attack 5 Times, and Skip Turns 5 Times
Once you reach Floor 79, just run around. There is no elevator in this room. Eventually the Founder will appear, turn you into a Leblanc Goon, and warp you to Floor 77. Run around until he comes back and he’ll move you to Floor 80.

Reach the 80th floor of Iutycyr Tower and defeat the boss
If you liked this guide
Consider following us to show your support and if you want more guides like this.