Firestorm Citadel Equipment Guide
What Is This Guide?
As I've said in the description, this guide will mainly focus on the equipment you can choose from in order to effectively fight through the Firestorm Citadel. However, rather than simply suggesting which weapons and armor to pick up, I've given each piece of gear several aspects or roles they fit in a lineup. Similar to how a team in DOTA or League has their different laners and junglers with archetypes such as mages or assassins, each piece of gear in Spiral Knights fits certain roles better than others.
For each item, I'll talk about the following points:
The first time a specific Role, Attribute, or Build is mentioned, it will include a description of what it means both parenthesized and in italics, (like so).
Also, please take note that this is a combination of my humble opinion with that of others with more experience. The suggested roles and builds are what I'd recommend, but are by no means absolute, and you are free to mix and match items and uses.
For each item, I'll talk about the following points:
- Obtaining: A key factor of any item is how easy it is to obtain. Some are relatively accessible, while others are grind-heavy or extremely rare.
- Damage/Defense Type: Of course, knowing the damage type an item deals or defends against is crucial if you want to survive.
- Status and Bonuses (if any): Some items in Spiral Knights defend or inflict certain status effects. You can read more about these effects on the wiki. There is another effect that isn't actually a status effect, but will occasionally be mentioned in the following point, and that is flinching. This section will also cover the bonuses given by certain weapons and armor, like charge time reduction.
- Roles and Attributes: This is the meat and bones of this guide. I'll give each weapon simple, easy-to-understand roles and attributes. For example, a weapon might be classified as Crowd Control (Freeze) since it uses the Freeze status to keep enemies in check, or perhaps Charge-Dependent, due to most people relying on its charge attack. A short explanation of why the weapon has this trait will also be included.
- Builds: This section will cover certain builds you might lean towards if you pick up this piece of equipment. For example, picking effective crowd control weapons would imply a Support-inclined build, while going for burst damage could be more effective in a Glass Cannon build.
The first time a specific Role, Attribute, or Build is mentioned, it will include a description of what it means both parenthesized and in italics, (like so).
Also, please take note that this is a combination of my humble opinion with that of others with more experience. The suggested roles and builds are what I'd recommend, but are by no means absolute, and you are free to mix and match items and uses.
Weapons: Shing~, Pew-pew, and Ka-BOOM!
Weapons are the bread and butter of Spiral Knights. Whether you main swords, guns, bombs, or perhaps run a mixture of the two or three, weapons are what get you through a level, and they are what will get you through the Firestorm Citadel.
It's fairly well-known among the SK community that the game places a premium on weapons. Helmets, armor, and shields, while possibly spelling the difference between life or death, don't mitigate the damage as much as in other games. Thus, the best defense is a good offense. After all, why worry about the hard-hitting Trojans or the swarms of Slags if they're already dead?
This section of the guide will be divided among the three weapon types: Swords, Guns, and Bombs.
I personally use swords and guns the most, so please forgive me if the Bomb section is somewhat lackluster.
It's fairly well-known among the SK community that the game places a premium on weapons. Helmets, armor, and shields, while possibly spelling the difference between life or death, don't mitigate the damage as much as in other games. Thus, the best defense is a good offense. After all, why worry about the hard-hitting Trojans or the swarms of Slags if they're already dead?
This section of the guide will be divided among the three weapon types: Swords, Guns, and Bombs.
I personally use swords and guns the most, so please forgive me if the Bomb section is somewhat lackluster.
Swords: Big Damage At Close Range
Swords are one of the easiest weapons to pick up, but are arguably the hardest to master in Spiral Knights. Putting that aside, let's look at some of the suggested swords for running Vana.
The Brandish Alchemy Line
The Brandish is a very simple, easy-to-use sword, and its alchemy lines are the go-to for those running Vana. It follows a basic 3-swing combo, with a devastating charge attack that sends out a line of shockwaves. There are 3 elemental Brandishes: the Combuster, the Glacius, and the Voltedge.
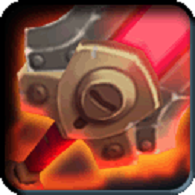 Combuster
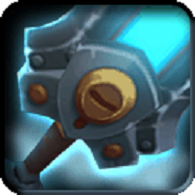 Glacius
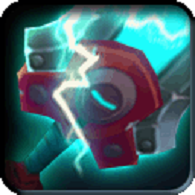 Voltedge
Heavy Swords
The following swords swing a bit slow, but hit really hard. With the proper equipment, they become a useful asset in clearing groups of enemies. These swords include the Divine Avenger and Warmaster Rocket Hammer
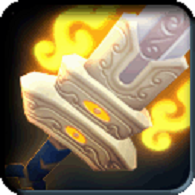 Divine Avenger
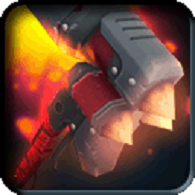 Warmaster Rocket Hammer
The Brandish Alchemy Line
The Brandish is a very simple, easy-to-use sword, and its alchemy lines are the go-to for those running Vana. It follows a basic 3-swing combo, with a devastating charge attack that sends out a line of shockwaves. There are 3 elemental Brandishes: the Combuster, the Glacius, and the Voltedge.
Combuster- Obtaining: Recipes available at Hall of Heroes
- Damage Type: Normal, Elemental
- Status and Bonuses: Fire
- Roles and Attributes:
- Slag Clearer (This weapon is able to eliminate Slag Walkers effectively) - In exchange for the inability to inflict status effects such as freeze or shock, the Combuster gains a reliable charge attack. Slag Walkers ride the chain of explosions, allowing the Combuster to deal maximum damage.
- Burst Damage (This weapon is capable of producing huge damage in a short timeframe) - The Combuster's charge attack can very easily drop enemies weak to elemental damage.
- Charge Dependent 1 (This weapon relies on its charge attack to deal heavy damage, but can stand well enough on its own) - The Combuster deals decent damage per swing, but the charge attack is much more powerful and efficient at destroying enemies. Normal attacks are good for hit-and-run tactics, but make sure to charge when the opportunity arises to deal the most damage.
- Slag Clearer (This weapon is able to eliminate Slag Walkers effectively) - In exchange for the inability to inflict status effects such as freeze or shock, the Combuster gains a reliable charge attack. Slag Walkers ride the chain of explosions, allowing the Combuster to deal maximum damage.
- Builds:
- Glass Cannon (Glass Cannons focus on dealing high damage, skirting around potentially lethal attacks)
- Juggernaut (Juggernauts focus on being able to tank attacks head-on with high defensive potential, unleashing slower, but high power attacks)
- Hybrid (Hybrids blend damage and survivability, staying alive while chipping away at enemies)
- Swordsman (Swordsmen use swords as their primary damage dealer)
- Glass Cannon (Glass Cannons focus on dealing high damage, skirting around potentially lethal attacks)
Glacius- Obtaining: Recipes available at Hall of Heroes
- Damage Type: Normal, Elemental
- Status and Bonuses: Freeze
- Roles and Attributes:
- Slag Clearer - Though less effective than its fiery cousin, the Glacius is a great weapon against Slag Walkers.
- Burst Damage - Glacius' charge attack is no joke. Though enemies may end up getting frozen, and thus not being able to ride the chain of explosions, it allows you to set up another charge attack into the frozen victims.
- Charge Dependent 1 - Glacius is more reliant on its charge attack than the Combuster, since its main value is now its freeze effect, which only occurs on charge attacks.
- Crowd Control (Freeze) (This weapon inflicts an effect which allows it to easily manipulate enemy movement and/or attack patterns) - The freeze from Glacius' charge attack is its selling point. It stops enemies from moving, allowing the set up of another attack, or simply a break to use health capsules.
- Slag Clearer - Though less effective than its fiery cousin, the Glacius is a great weapon against Slag Walkers.
- Builds:
- Glass Cannon
- Juggernaut
- Hybrid
- Swordsman
- Support
- Glass Cannon
Voltedge- Obtaining: Brandish Recipe available at Hall of Heroes, Further recipes bought using Krogmo Coins
- Damage Type: Normal, Elemental
- Status and Bonuses: Shock
- Roles and Attributes:
- Slag Clearer - The Voltedge is similar to the Glacius, being less effective than the Combuster, since its shock status interrupts the "wave-riding" effect.
- Burst Damage - Again, similar to the other Brandishes, Voltedge's charge attack tears through enemies weak to elemental damage.
- Charge Dependent 1 - Voltedge's value lies in its shock and charge damage, so make sure to charge an attack at any opportunity.
- Crowd Control (Shock) - The shock status inflicted by the Voltedge interrupts both movement and attack patterns of enemies. Enemies inflicted with shock tend to stay near their original location, making setting up another attack a breeze.
- Slag Clearer - The Voltedge is similar to the Glacius, being less effective than the Combuster, since its shock status interrupts the "wave-riding" effect.
- Builds:
- Glass Cannon
- Juggernaut
- Hybrid
- Swordsman
- Support
- Glass Cannon
Heavy Swords
The following swords swing a bit slow, but hit really hard. With the proper equipment, they become a useful asset in clearing groups of enemies. These swords include the Divine Avenger and Warmaster Rocket Hammer
Divine Avenger- Obtaining: Sealed Sword bought from Brinks using Jelly Gems, Further recipes available from Basil
- Damage Type: Normal, Elemental
- Status and Bonuses: None
- Roles and Attributes:
- Slag Clearer - Divine Avenger, often shortened to DA, hits really hard. Whether its the 2-swing combo or the devastating charge attack with its multi-hit sword projectiles, DA is amazing at clearing out hordes of Slag Walkers.
- Burst Damage - Both DA's normal and charge attack deal huge damage in exchange for a slower attack speed. The charge attack in particular launches 3 sword projectiles that can drive enemies back into themselves, sometimes instantly killing them.
- Slag Clearer - Divine Avenger, often shortened to DA, hits really hard. Whether its the 2-swing combo or the devastating charge attack with its multi-hit sword projectiles, DA is amazing at clearing out hordes of Slag Walkers.
- Builds:
- Glass Cannon
- Juggernaut
- Hybrid
- Swordsman
- Glass Cannon
Warmaster Rocket Hammer- Obtaining: Item rewarded upon completion of Operation Crimson Hammer DLC Tier 3, DLC available for 3200 Energy
- Damage Type: Elemental
- Status and Bonuses: None
- Roles and Attributes:
- Slag Clearer - This rare sword has a 3-swing combo that hits hard, but it also deals pure elemental damage. This means that any Slags hit really feel the damage, since it isn't hindered by a split elemental typing.
- Burst Damage - The Warmaster Rocket Hammer swings wide and charges straight into enemies, allowing it to deal massive damage to groups of enemies in a short span of time.
- Slag Clearer - This rare sword has a 3-swing combo that hits hard, but it also deals pure elemental damage. This means that any Slags hit really feel the damage, since it isn't hindered by a split elemental typing.
- Builds:
- Glass Cannon
- Juggernaut
- Hybrid
- Swordsman
- Glass Cannon
Guns: Extendable Swords, Part 1
Guns are possibly the most versatile weapon in Spiral Knights. They allow the wielder to fight at range, avoiding otherwise deadly attacks. In addition, they can trigger switches, hit healers hidden behind other enemies, etc. Personally, guns are my favorite weapon type, and I like thinking of guns as extendable swords, kind of like a rapier-type weapon but with a strictly thrusting attack and long reach. Here are a few which most people recommend for the Firestorm Citadel.
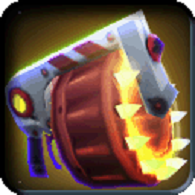 Blitz Needle
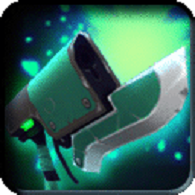 Arcana
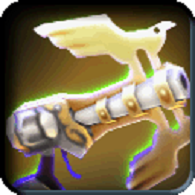 Argent Peacemaker
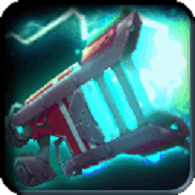 Polaris
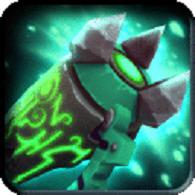 Omega Tortofist
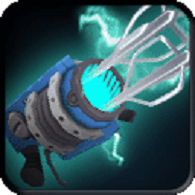 Overcharged Mixmaster
Blitz Needle- Obtaining: Recipes available at Hall of Heroes
- Damage Type: Piercing
- Status and Bonuses (if any): None
- Roles and Attributes:
- Burst Damage - The Blitz Needle is the epitome of burst damage. One charge attack lets loose 15 fast, high-power bullets. At range, this attack hits multiple enemies, spreading damage everywhere, but a close-range attack turns the Blitz into a shotgun, instantly deleting health bars.
- Tank Buster (This weapon shreds through tough enemies like Trojans and Vanaduke) - People recommend bringing in a Blitz Needle to handle Trojans and Vanaduke, who are both weak to piercing damage. One fully charged shot can instantly down a Trojan, and it only takes a few to knock down one phase of Vanaduke.
- Slag Clearer - Though less reliable than other weapons, the sheer damage output of a Blitz allows it to effectively clear Slags.
- Crowd Control (Flinch) - The amount of burst damage released by the Blitz allows it to reliably flinch multiple enemies at once, interrupting their attacks.
- Charge Dependent 2 (This weapon gets almost all of its utility from its charge attack, and normal attacks are not very effective in the long run) - You only really want a Blitz Needle for its charge attack. A full magazine of 2 6-round shots is less than the 15-shot charge, and the regular attacks are less reliable in their spread.
- Burst Damage - The Blitz Needle is the epitome of burst damage. One charge attack lets loose 15 fast, high-power bullets. At range, this attack hits multiple enemies, spreading damage everywhere, but a close-range attack turns the Blitz into a shotgun, instantly deleting health bars.
- Builds:
- Glass Cannon
- Hybrid
- Juggernaut
- Gunner (Gunners mainly focus on using handguns to battle from a safe distance)
- Glass Cannon
Arcana- Obtaining: Blaster given as mission reward, recipe available at Hall of Heroes, further recipes available from Basil
- Damage Type: Elemental
- Status and Bonuses (if any): None
- Roles and Attributes:
- Chip Damage (This weapon is able to deal a constant stream of damage, steadily taking out enemies) - The Arcana is a great chip damage weapon, able to fire consistently. Its 3-shot clip, combined with decent damage, fast bullets, and a decent splash area.
- Slag Clearer - All of the points that make it a good chip damage weapon, combined with elemental damage typing, make the Arcana great against Slags.
- Chip Damage (This weapon is able to deal a constant stream of damage, steadily taking out enemies) - The Arcana is a great chip damage weapon, able to fire consistently. Its 3-shot clip, combined with decent damage, fast bullets, and a decent splash area.
- Builds:
- Glass Cannon
- Hybrid
- Gunner
- Glass Cannon
Argent Peacemaker- Obtaining: Antigua bought from Brinks for Jelly Gems, further recipes available from Basil
- Damage Type: Elemental
- Status and Bonuses (if any): High DMG vs Undead
- Roles and Attributes:
- Chip Damage - The Argent Peacemaker differs a bit from the Arcana but fulfills a similar role. It has a fast bullet speed, but has a 6-shot clip with lower damage per shot.
- Slag Clearer - The Peacemaker deals elemental damage and has a built-in DMG bonus vs Undead, making it a good weapon against Slags.
- Charge Averse (This weapon's charge attack is either lackluster or vulnerable, making it not worth using) - Unfortunately, the Peacemaker's charge is lackluster. It fires 5 shots, followed by a multi-hit spectral gryphon. While dealing decent damage, it leaves the user vulnerable to attack.
- Chip Damage - The Argent Peacemaker differs a bit from the Arcana but fulfills a similar role. It has a fast bullet speed, but has a 6-shot clip with lower damage per shot.
- Builds:
- Glass Cannon
- Hybrid
- Gunner
- Glass Cannon
Polaris- Obtaining: Pulsar bought from Brinks using Bark Modules, further recipes available from Basil
- Damage Type: Elemental
- Status and Bonuses (if any): Shock
- Roles and Attributes:
- Slag Clearer - The Polaris deals explosive elemental damage with huge area-of-effect, making it great against swarms of zombies.
- Chip Damage - The Polaris acts similar to an Arcana, but with slower projectiles. That said, it allows the user to output a steady stream of bullets.
- Crowd Control (Shock, Flinch) - The Polaris is one of the best crowd control guns out there. The combination of shock status and flinch leaves opponents permanently stuck when done right.
- Charge Averse - Polaris' charge is just an expanded normal shot. It's good if enemies are too close, but at that point it's probably too late to charge an attack.
- Slag Clearer - The Polaris deals explosive elemental damage with huge area-of-effect, making it great against swarms of zombies.
- Builds:
- Hybrid
- Gunner
- Support
- Hybrid
Omega Tortofist- Obtaining: Prisma Alchemer recipe available in Hall of Heroes, further items crafted at Mysterious Alchemy Machine with no recipe required, requires March of the Tortodrones event-limited item, Ancient Shell, to craft
- Damage Type: Elemental
- Status and Bonuses (if any): None
- Roles and Attributes:
- Slag Clearer - Strong projectiles and elemental damage typing make the Omega Tortofist decent for clearing Slags.
- Burst Damage - The Omega Tortofist is a heavy gun, dealing large damage per shot, but the charge attack is unique, allowing it to bounce enemies inside the wall of crystals for big damage.
- Charge Dependent 1 - The Torto's charge is their most unique mechanic, and their main reason for use, being able to create a barrier of damaging crystals.
- Crowd Control (Flinch) - Enemies that come into contact with the crystals from a Torto charge often find themselves flinching due to the steady stream of damage, keeping them in place.
- Slag Clearer - Strong projectiles and elemental damage typing make the Omega Tortofist decent for clearing Slags.
- Builds:
- Support
- Juggnernaut
- Gunner
- Support
Overcharged Mixmaster- Obtaining: Found rarely in culinary-themed Prize Boxes, do not expect to ever obtain one
- Damage Type: Elemental
- Status and Bonuses (if any): Shock
- Roles and Attributes:
- Chip Damage - The Mixmaster focuses on releasing a steady stream of swirling bullets that return to sender if no contact is made, allowing for great chip damage.
- Slag Clearer - With the ability to boomerang projectiles and elemental typing, the Mixmaster is a reliable anti-zombie weapon
- Crowd Control (Shock) - The Mixmaster can reliably spread its shock status, given its fast boomerang projectiles with decent splash.
- Chip Damage - The Mixmaster focuses on releasing a steady stream of swirling bullets that return to sender if no contact is made, allowing for great chip damage.
- Builds:
- Glass Cannon
- Hybrid
- Gunner
- Glass Cannon
Guns: Extendable Swords, Part 2
It really says a lot about the weapon type when you need 2 parts to discuss the guns recommended for FSC. Anyway, let's continue on!
The Magnus Alchemy Line
Both the Callahan and Iron Slug are crafted from the Magnus, and share similar traits. Mainly, they focus on slow firing and reload speed, but with a massive damage output per shot. The 2-shot clip is good for sniping healers, but these guns shine in their huge charge attack, which bulldozes anyone caught by the giant bullet, applying stun status and flinching enemies.
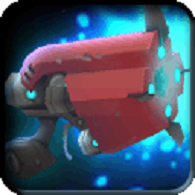 Callahan
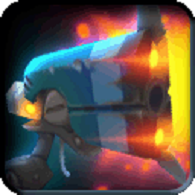 Iron Slug
The Alchemer Alchemy Line
The Alchemer family tree is one of the hardest weapons to master in the game, but allows the wielder to reap huge rewards. Shots ricochet to the left off of walls and enemies, allowing both damage and status effects to be distributed among a crowd. However, skilled gunners can aim so that the bullet ricochets inside enemies, dealing crazy burst damage. The charge attack amplifies the effects, granting greater damage and status potential. Unlike the Iron Slug and Callahan, which differ greatly due to damage typing, the three guns listed here are incredibly similar. Thus, the notes on the first and most basic, the Nova Driver, apply to all three.
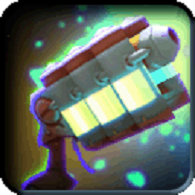 Nova Driver
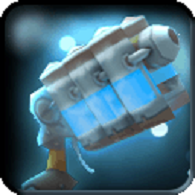 Hail Driver
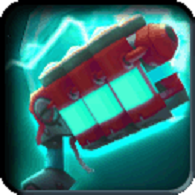 Storm Driver
The Magnus Alchemy Line
Both the Callahan and Iron Slug are crafted from the Magnus, and share similar traits. Mainly, they focus on slow firing and reload speed, but with a massive damage output per shot. The 2-shot clip is good for sniping healers, but these guns shine in their huge charge attack, which bulldozes anyone caught by the giant bullet, applying stun status and flinching enemies.
Callahan- Obtaining: Recipes available in Hall of Heroes
- Damage Type: Piercing
- Status and Bonuses (if any): Stun
- Roles and Attributes:
- Burst Damage - The Callahan only has a 2-shot clip, but each shot packs a punch. The charge attack is even better, driving enemies back into the bullet for even more damage.
- Tank Buster - Dealing piercing damage and having a massive charge attack makes the Callahan a valued tank destroyer.
- Slag Clearer - The Callahan's charge attack can plow through multiple enemies, clearing entire swarms of enemies.
- Charge Dependent 2 - The Magnus line suffers similar problems as the Blitz. The charge attack is so effective, normal attacks are almost not worth using.
- Crowd Control (Stun, Flinch) - Being able to deal multiple hits, along with high knockback and a chance to stun, Callahan can keep enemies in check.
- Burst Damage - The Callahan only has a 2-shot clip, but each shot packs a punch. The charge attack is even better, driving enemies back into the bullet for even more damage.
- Builds:
- Glass Cannon
- Hybrid
- Juggernaut
- Gunner
- Glass Cannon
Iron Slug- Obtaining: Recipes available in Hall of Heroes
- Damage Type: Normal
- Status and Bonuses (if any): Stun
- Roles and Attributes:
- Burst Damage - Iron Slug deals massive damage with its charged shot, plowing through enemies.
- Tank Buster - Though more universally effective, the Iron Slug lacks the piercing typing that Trojans and Vanaduke are weak to. However, that doesn't stop it from melting tanks like butter.
- Slag Clearer - One place the Iron Slug doesn't lag behind in is clearing hordes of zombies, with the same damage affinity as its cousin.
- Charge Dependent 2 - Again, the Iron Slug goes the way of the Callahan, with a charge far more useful than any normal attack.
- Crowd Control (Stun, Flinch) - Dealing normal damage certainly doesn't hinder the Iron Slug from keeping a crowd at bay, sharing the high flinch and stun chance of its cousin, the Callahan.
- Burst Damage - Iron Slug deals massive damage with its charged shot, plowing through enemies.
- Builds:
- Glass Cannon
- Hybrid
- Juggernaut
- Gunner
- Glass Cannon
The Alchemer Alchemy Line
The Alchemer family tree is one of the hardest weapons to master in the game, but allows the wielder to reap huge rewards. Shots ricochet to the left off of walls and enemies, allowing both damage and status effects to be distributed among a crowd. However, skilled gunners can aim so that the bullet ricochets inside enemies, dealing crazy burst damage. The charge attack amplifies the effects, granting greater damage and status potential. Unlike the Iron Slug and Callahan, which differ greatly due to damage typing, the three guns listed here are incredibly similar. Thus, the notes on the first and most basic, the Nova Driver, apply to all three.
Nova Driver- Obtaining: Recipes available in Hall of Heroes
- Damage Type: Elemental
- Status and Bonuses (if any): None
- Roles and Attributes:
- Chip Damage - The ricochets of the Alchemer family allow each shot to spread damage among a large crowd. Elemental typing and fast bullets make this gun great for chipping away health.
- Burst Damage - Experienced Alchemer users can bounce shots inside of enemies. This deals massive damage, with a charged shot having the ability to one-shot turrets and zombies.
- Slag Clearer - The ability to burst a single enemy down or spread the damage evenly in a group makes the Nova Driver, and all other elemental Alchemers, perfect for clearing out hordes of Slags.
- Charge Dependent 1 - Due to its 2-shot clip and the massive damage potential of a charged shot, the Alchemer family is reliant on its charge attack to deal massive damage. However, unlike other weapons, its normal attacks allow freedom of movement and decent damage output, so they aren't obsolete.
- Chip Damage - The ricochets of the Alchemer family allow each shot to spread damage among a large crowd. Elemental typing and fast bullets make this gun great for chipping away health.
- Builds:
- Glass Cannon
- Hybrid
- Juggernaut
- Gunner
- Glass Cannon
Hail Driver- Obtaining: Recipes available in Hall of Heroes
- Damage Type: Elemental
- Status and Bonuses (if any): Freeze
- Roles and Attributes:
- Chip Damage
- Burst Damage
- Slag Clearer
- Charge Dependent 1
- Crowd Control (Freeze) - The Hail Driver sacrifices raw damage for the ability to freeze foes, and it can be rather effective. Ricocheted shots bounce among crowds, spreading the status. Unfortunately, some ricochets do break the freeze on already frozen enemies, making it less effective than it seems on paper.
- Chip Damage
- Builds:
- Glass Cannon
- Hybrid
- Juggernaut
- Support
- Gunner
- Glass Cannon
Storm Driver- Obtaining: Recipes available in Hall of Heroes
- Damage Type: Elemental
- Status and Bonuses (if any): Shock
- Roles and Attributes:
- Chip Damage
- Burst Damage
- Slag Clearer
- Charge Dependent 1
- Crowd Control (Shock) - Unlike the Hail Driver, the Storm Driver does not suffer from its shock status being broken, making it a reliable source of movement and attack inhibition.
- Chip Damage
- Builds:
- Glass Cannon
- Hybrid
- Juggernaut
- Support
- Gunner
- Glass Cannon
Bombs: I Have The High Ground Now!
Bombs are an interesting weapon type. They can only be used via charge attacks, but they can hit a huge amount of enemies. Additionally, there are many different types of bombs, which fulfill different uses. In the Firestorm Citadel, bombs are placed before stepping onto a party button, granting you the upper hand as the fight begins. I've curated 4 different bombs of 3 different families which you may find useful.
 Deadly Crystal Bomb
The Haze Bomb Alchemy Line
Haze Bombs are primarily a supporting weapon. They release a cloud of gas over a wide area, inflicting various status effects, ranging anywhere from fire to freeze. Though they do little damage, their utility makes them an asset in almost any team.
 Shivermist Buster
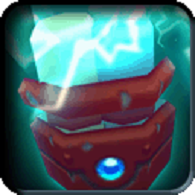 Voltaic Tempest
 Electron Vortex
Deadly Crystal Bomb- Obtaining: Recipes available in Hall of Heroes
- Damage Type: Elemental
- Status and Bonuses (if any): None
- Roles and Attributes:
- Burst Damage - No better source of burst damage than a bomb, am I right? The Deadly Crystal Bomb explodes into a cluster of 8 shards, which then detonate soon after, dealing high damage to anything caught by more than one blast.
- Slag Clearer - Having an elemental typing and several AOE explosions makes the Deadly Crystal Bomb a valuable asset in clearing out Slag swarms.
- Charge Only (This weapon can only be used as a charge attack) - Due to being a bomb, the Deadly Crystal Bomb can only be used as a charge attack, so be mindful of where and when you charge up.
- Burst Damage - No better source of burst damage than a bomb, am I right? The Deadly Crystal Bomb explodes into a cluster of 8 shards, which then detonate soon after, dealing high damage to anything caught by more than one blast.
- Builds:
- Glass Cannon
- Juggernaut
- Hybrid
- Bomber
- Glass Cannon
The Haze Bomb Alchemy Line
Haze Bombs are primarily a supporting weapon. They release a cloud of gas over a wide area, inflicting various status effects, ranging anywhere from fire to freeze. Though they do little damage, their utility makes them an asset in almost any team.
Shivermist Buster- Obtaining: Recipes available in Hall of Heroes
- Damage Type: Elemental
- Status and Bonuses (if any): Freeze
- Roles and Attributes:
- Charge Only
- Crowd Control (Freeze) - Shivermist Buster spreads a large cloud of freezing gas, reliably inflicting the status effect and giving you time and breathing room to escape or set up a massive attack. The Shivermist is highly valued for the ability to lock every enemy in place, even Vanaduke himself.
- Charge Only
- Builds:
- Support
- Bomber
- Support
Voltaic Tempest- Obtaining: Recipes available in Hall of Heroes, Plasma Capacitor recipe given as mission reward
- Damage Type: Elemental
- Status and Bonuses (if any): Shock
- Roles and Attributes:
- Charge Only
- Crowd Control (Shock) - Similar to the Shivermist, the Voltaic Tempest reliably inflicts a status effect, though in this case it sees less usage due to shock only affecting enemies in intervals.
- Charge Only
- Builds:
- Support
- Bomber
- Support
Electron Vortex- Obtaining: Recipes bought using Krogmo Coins
- Damage Type: Elemental
- Status and Bonuses (if any): Shock
- Roles and Attributes:
- Charge Only
- Burst Damage - Electron Vortex sucks enemies in then explodes, dealing a decent amount of damage to a large crowd.
- Crowd Control (Shock, Vortex) - The Electron Vortex drags enemies into the center of the vacuum and inflicts them with shock, keeping them in place when the blast happens. This allows players to launch powerful attacks into clusters of enemies.
- Charge Only
- Builds:
- Glass Cannon
- Hybrid
- Juggernaut
- Support
- Bomber
- Glass Cannon
Defense: Live to Fight Another Depth
Now we'll move on to the defensive side of things. I'll be talking about Helmets and Armor in one section, and Shields in another.
Since SK places a premium on weapons, what most people look for in an armor is the perks or bonuses it gives. However, if you have a tendency to be caught unaware, having good armor and shields can save your skin. Luckily, there are plenty of defensive options that mix buffs and defense.
Since SK places a premium on weapons, what most people look for in an armor is the perks or bonuses it gives. However, if you have a tendency to be caught unaware, having good armor and shields can save your skin. Luckily, there are plenty of defensive options that mix buffs and defense.
Helmets and Armor: What Doesn't Kill You Also Makes You Stronger, Part 1
Helmets and armor are somewhat underpowered on their own. At most, a strong defense will probably reduce the damage you take by a couple of bars. However, that doesn't mean you should neglect them, as having good gear can save your life. All the same, most people suggest gear that gives bonuses to your weapons. Here are several suggestions for what helmets and/or armor to bring.
 Black Kat Set
 Chaos Set
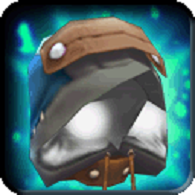 Grey Feather Set
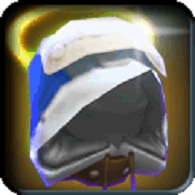 Divine Set
 Kat Claw / Eye / Hiss Set
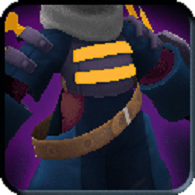 Sacred Firefly Shade / Ghost Set
 Shadowsun Set
 Deadshot Set
Black Kat Set- Obtaining: Cloak bought from Montague for Ancient Pages, a Kataclysmic Confrontation event-exclusive item, Further armors craftable at Mysterious Alchemy Station using Kat Tribe Fetishes, which are bought from Montague for Ancient Pages, Cowl drops for summoner upon Margrel's defeat, summoning uses Kataclysmic Confrontation event-exclusive item, Book of Dark Rituals
- Defense Type: Normal, Shadow
- Status and Bonuses: Weak to Poison, Fire, Shock, Curse, Resistance to Freeze, Low Movement Speed Increase, High Universal DMG Bonus
- Roles and Attributes:
- Damage Booster (This gear boosts your overall damage output)
- Anti-Slag 1 (This gear protects against Slags to some degree)
- Damage Booster (This gear boosts your overall damage output)
- Builds:
- Glass Cannon
Chaos Set- Obtaining: Recipes available in Hall of Heroes
- Defense Type: Normal, Elemental
- Status and Bonuses: Weakness to Poison, Shock, Fire, Freeze, Curse, Medium Universal Charge Time Reduction, Medium Universal DMG Bonus
- Roles and Attributes:
- Damage Booster
- Charge Booster (This gear boosts the effectiveness of charge-dependent and charge only weapons)
- Anti-Fire 1 (This gear protects against fire and Vanaduke to some degree) - Something to note about Vanaduke is that, unlike his undead minions, Vanaduke himself does not deal shadow damage. He deals elemental damage, and so does the molten fire around the Citadel.
- Damage Booster
- Builds:
- Glass Cannon
- Support
- Glass Cannon
Grey Feather Set- Obtaining: Recipes available in Hall of Heroes
- Defense Type: Normal, Elemental
- Status and Bonuses: Resistance to Fire, Shock
- Roles and Attributes:
- Anti-Fire 2 (This gear has multiple traits to protect against fire and Vanaduke)
- Anti-Slag 1
- Anti-Fire 2 (This gear has multiple traits to protect against fire and Vanaduke)
- Builds:
- Hybrid
- Juggernaut
- Hybrid
Divine Set- Obtaining: Recipes available in Hall of Heroes
- Defense Type: Elemental, Shadow
- Status and Bonuses: Resistance to Fire, Shock, Curse, Medium DMG Bonus vs Fiends (Helmet Only)
- Roles and Attributes:
- Anti-Fire 2
- Anti-Slag 2 (This gear has multiple traits to protect against Slags)
- Damage Booster (Helmet)
- Anti-Fire 2
- Builds:
- Hybrid
- Juggernaut
- Hybrid
Kat Claw / Eye / Hiss Set- Obtaining: Hood / Cloak bought from Montague for Ancient Pages, a Kataclysmic Confrontation event-exclusive item, Further items craftable at Mysterious Alchemy Machine using Kat Tribe Fetishes, which are bought from Montague for Ancient Pages
- Defense Type: Normal, Shadow
- Status and Bonuses: Weakness to Shock, Curse, Resistance to Freeze, Low DMG Bonus for Swords, Guns, or Bombs respectively, Low Attack Speed Increase for Swords, Guns, Low CTR for Bombs respectively
- Roles and Attributes:
- Anti-Slag 1
- Damage Booster
- Charge Booster (Hiss)
- Anti-Slag 1
- Builds:
- Glass Cannon
- Hybrid
- Swordsman / Gunner / Bomber
- Support (Hiss)
- Glass Cannon
Sacred Firefly Shade / Ghost Set- Obtaining: Padded Set available at the Bazaar, All recipes available from Basil
- Defense Type: Normal, Shadow
- Status and Bonuses: Weakness to Shock, Resistance to Fire, Low CTR and ASI for Guns, Low DMG Bonus for Guns or Medium DMG Bonus for Guns vs Undead Respectively
- Roles and Attributes:
- Anti-Slag 2
- Anti-Fire 1
- Damage Booster
- Charge Booster
- Anti-Slag 2
- Builds:
- Hybrid
- Gunner
- Hybrid
Shadowsun Set- Obtaining: Recipes available in Hall of Heroes
- Defense Type: Normal, Shadow
- Status and Bonuses: Resistance to Poison, Medium DMG Bonus for Guns
- Roles and Attributes:
- Anti-Slag 1
- Damage Booster
- Anti-Slag 1
- Builds:
- Hybrid
- Gunner
- Hybrid
Deadshot Set- Obtaining: Recipes available in Hall of Heroes
- Defense Type: Normal, Shadow
- Status and Bonuses: Resistance to Curse, Low ASI for Guns, Medium DMG Bonus vs Undead
- Roles and Attributes:
- Anti-Slag 1
- Builds:
- Hybrid
- Gunner
- Hybrid
Helmets and Armor: What Doesn't Kill You Also Makes You Stronger, Part 2
Looks like we need a Part 2 to discuss helmets and armor, even with little to no commentary! The reason for the limited commentary is that most of the attributes explain themselves, and the armor you pick has a more passive effect, rather than weapons and shields which you have to actively use.
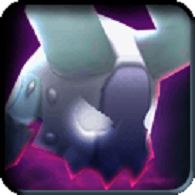 Dread Skelly Set
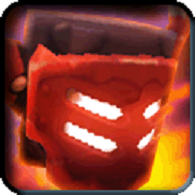 Volcanic Plate Set
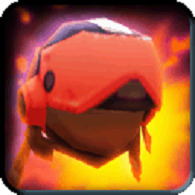 Volcanic Demo Set
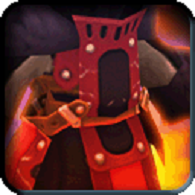 Vog Cub Set
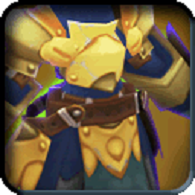 Radiant Silvermail
 Perfect Mask of Seerus
Dread Skelly Set- Obtaining: Recipes available in Hall of Heroes
- Defense Type: Normal, Shadow
- Status and Bonuses: Resistance to Poison, Freeze
- Roles and Attributes:
- Anti-Slag 1
- Builds:
- Hybrid
Volcanic Plate Set- Obtaining: Recipes available in Hall of Heroes
- Defense Type: Normal, Elemental
- Status and Bonuses: Weakness to Sleep, Resistance to Stun, Fire, Low Attack Speed Decrease
- Roles and Attributes:
- Anti-Slag 1
- Anti-Fire 2
- Anti-Buster (This gear has additional protection against the attacks of tanks like Trojans and Vanaduke)
- Anti-Slag 1
- Builds:
- Juggernaut
Volcanic Demo Set- Obtaining: Recipes available in Hall of Heroes
- Defense Type: Normal, Elemental
- Status and Bonuses: Resistance to Fire, Medium CTR for Bombs
- Roles and Attributes:
- Anti-Fire 2
- Anti-Slag 1
- Charge Booster
- Anti-Fire 2
- Builds:
- Hybrid
- Juggernaut
- Support
- Bomber
- Hybrid
Vog Cub Set- Obtaining: Recipes available in Hall of Heroes
- Defense Type: Normal, Elemental
- Status and Bonuses: Resistance to Fire, Medium ASI for Swords
- Roles and Attributes:
- Anti-Fire 2
- Anti-Slag 1
- Damage Booster
- Anti-Fire 2
- Builds:
- Glass Cannon
- Hybrid
- Juggernaut
- Swordsman
- Glass Cannon
Radiant Silvermail- Obtaining: Recipes available in Hall of Heroes
- Defense Type: Piercing, Shadow
- Status and Bonuses: Resistance to Poison, Curse, Medium DMG Bonus vs Undead
- Roles and Attributes:
- Anti-Slag 1
- Damage Booster
- Anti-Slag 1
- Builds:
- Glass Cannon
- Hybrid
- Glass Cannon
Perfect Mask of Seerus- Obtaining: Craftable using 3 Perfect Seerus Mask Fragments, Perfect Seerus Mask Fragments drop upon Seerus' defeat in Operation Crimson Hammer DLC, DLC bought for 3200 Energy
- Defense Type: Normal, Elemental
- Status and Bonuses: Weakness to Poison, Freeze, Resistance to Fire, Shock, Medium CTR for Guns, Low ASI for Guns
- Roles and Attributes:
- Anti-Fire 2
- Anti-Slag 1
- Damage Booster
- Charge Booster
- Anti-Fire 2
- Builds:
- Glass Cannon
- Hybrid
- Juggernaut
- Gunner
- Glass Cannon
Shields: Your Main Source of Survivability
Shields are one of the most important assets in your arsenal. They have the ability to completely stop attacks. In the Firestorm Citadel, your shield will be your main source of survivability, whether it be blocking a rolling wheel or the charge of a Trojan. Here are a few suggestions for what shield to take.
 Swiftstrike Buckler
 Crest of Almire
 Dread Skelly Shield
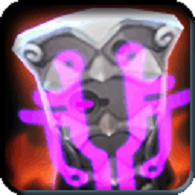 Volcanic Plate Shield
 Grey Owlite Shield
Swiftstrike Buckler- Obtaining: Recipe available in Hall of Heroes
- Defense Type: Normal
- Status and Bonuses: High Universal ASI
- Roles and Attributes:
- Damage Booster - The Swiftstrike provides little in the way of defense. It's an offensively oriented shield, serving to let you survive a blow or two so you can quickly kill the enemy that landed the blow.
- Builds:
- Glass Cannon
Crest of Almire- Obtaining:
- Defense Type: Normal, Shadow
- Status and Bonuses: Resistance to Fire, Shock
- Roles and Attributes:
- Anti-Fire 1
- Anti-Slag 2
- Anti-Fire 1
- Builds:
- Glass Cannon
- Hybrid
- Juggernaut
- Glass Cannon
Dread Skelly Shield- Obtaining:
- Defense Type: Normal, Shadow
- Status and Bonuses: Resistance to Poison, Freeze
- Roles and Attributes:
- Anti-Slag 1
- Builds:
- Glass Cannon
- Hybrid
- Juggernaut
- Glass Cannon
Volcanic Plate Shield- Obtaining:
- Defense Type: Normal
- Status and Bonuses: Resistance to Fire, Stun
- Roles and Attributes:
- Anti-Fire 1
- Anti-Buster
- Anti-Fire 1
- Builds:
- Hybrid
- Juggernaut
- Hybrid
Grey Owlite Shield- Obtaining:
- Defense Type: Normal, Elemental
- Status and Bonuses: Resistance to Fire, Shock
- Roles and Attributes:
- Anti-Fire 2
- Anti-Slag 1
- Anti-Fire 2
- Builds:
- Glass Cannon
- Hybrid
- Juggernaut
- Glass Cannon
Synergies: Wombo Combo
We've covered all the pieces of equipment, so now I'd like to highlight some of the great synergies that can make your runs a little easier.
Electron Vortex + (Burst Damage Slag Clearer)
Use the Electron Vortex to drag Slag Walkers in, then finish them all off using a charge attack. Brandish lines or Divine Avenger are great for this, having high-damage charge attacks that hit a group while also having a damage affinity against Slags.
Shivermist Buster + (Burst Damage Tank Buster)
Place down a Shivermist Buster to freeze Trojans and/or Vanaduke, then easily walk around to their vulnerable side and blast them with a Blitz Needle or Callahan charge attack, quickly eliminating them.
Items with Similar Damage Bonus or Attributes
Obviously, items which boost specific weapon types or damage types pair well with items dealing those damage types. For instance, pairing swords with a Vog Cub Coat will boost their power dramatically, especially with multiple swords. Another example would be wearing Radiant Silvermail and using a Slag Clearer weapon, since it would benefit from the Damage Bonus vs Undead. Lastly, bombs and other charge-dependent weapons receive huge benefits from the Chaos Cowl and Chaos Cloak, due to the CTR present on those armor sets.
Helmets, Armor, and Shields with Similar Defense Types or Status Resistances
Pairing gear with similar defense types or status resistances can mitigate most of the damage taken from a certain damage source. In fact, some sources mention that stacking enough of a status resistance can grant immunity to that status effect, though at that point trinkets may be necessary.
Electron Vortex + (Burst Damage Slag Clearer)
Use the Electron Vortex to drag Slag Walkers in, then finish them all off using a charge attack. Brandish lines or Divine Avenger are great for this, having high-damage charge attacks that hit a group while also having a damage affinity against Slags.
Shivermist Buster + (Burst Damage Tank Buster)
Place down a Shivermist Buster to freeze Trojans and/or Vanaduke, then easily walk around to their vulnerable side and blast them with a Blitz Needle or Callahan charge attack, quickly eliminating them.
Items with Similar Damage Bonus or Attributes
Obviously, items which boost specific weapon types or damage types pair well with items dealing those damage types. For instance, pairing swords with a Vog Cub Coat will boost their power dramatically, especially with multiple swords. Another example would be wearing Radiant Silvermail and using a Slag Clearer weapon, since it would benefit from the Damage Bonus vs Undead. Lastly, bombs and other charge-dependent weapons receive huge benefits from the Chaos Cowl and Chaos Cloak, due to the CTR present on those armor sets.
Helmets, Armor, and Shields with Similar Defense Types or Status Resistances
Pairing gear with similar defense types or status resistances can mitigate most of the damage taken from a certain damage source. In fact, some sources mention that stacking enough of a status resistance can grant immunity to that status effect, though at that point trinkets may be necessary.
In Conclusion....and a Note Regarding Parties vs Going Solo
In conclusion, the gear you bring into a Vana run, or any level for that matter, must accomplish certain goals. In doing so, your choices of weapons and armor become more effective.
Regarding the issue of joining a party vs going in solo, there are many differences between the two.
When you go in solo, monsters are easier to defeat due to having lower HP. However, some areas become slightly more difficult to complete on your own. You have to be your own team, meaning roles and builds often get mixed and matched. This isn't to say that its a bad thing, but it certainly limits your gear choice. If you feel like running solo, then I would personally suggest picking up gear that fits the following roles:
On the other hand, joining a party makes enemies tougher to deal with, especially when you split up. It also runs the risk of backfiring due to poor teamwork and lack of coordination. Despite that, a good team can run Vana faster and more effectively, due to the increased number of people and weapon slots. A well thought-out team can have members with individual roles, or even consist of only Glass Cannons. What really matters is not only the synergy between items, but also the synergy between teammates.
If you ask me, going solo is better than running with a poorly-planned party, but a coordinated effort executed properly will always be the most efficient. Joining up with random people isn't necessarily bad, but make sure everyone knows what the others are doing so they don't interfere or hinder the team.
Regarding the issue of joining a party vs going in solo, there are many differences between the two.
When you go in solo, monsters are easier to defeat due to having lower HP. However, some areas become slightly more difficult to complete on your own. You have to be your own team, meaning roles and builds often get mixed and matched. This isn't to say that its a bad thing, but it certainly limits your gear choice. If you feel like running solo, then I would personally suggest picking up gear that fits the following roles:
- Tank Buster
- Slag Clearer
- Crowd Control
- Any Form of Buff (DMG Buff, CTR Buff, ASI Buff, etc.)
- Anti-Fire
- Anti-Shadow
On the other hand, joining a party makes enemies tougher to deal with, especially when you split up. It also runs the risk of backfiring due to poor teamwork and lack of coordination. Despite that, a good team can run Vana faster and more effectively, due to the increased number of people and weapon slots. A well thought-out team can have members with individual roles, or even consist of only Glass Cannons. What really matters is not only the synergy between items, but also the synergy between teammates.
If you ask me, going solo is better than running with a poorly-planned party, but a coordinated effort executed properly will always be the most efficient. Joining up with random people isn't necessarily bad, but make sure everyone knows what the others are doing so they don't interfere or hinder the team.
More Spiral Knights guides
- Do not fear! Orb hunting tips are here!★ 5 (1.8k)27k views2.7k ♥5 minUpdated Jun 17
- Getting Cash - Ways To Make Money★ 5 (537)25k views561 ♥7 minUpdated Aug 1, 2013
- Spiral Knights - The Complete Guide!★ 5 (1.2k)21k views1.4k ♥106 minUpdated Mar 29, 2022
- Don't be a Derp: 10 things to know in Spiral Knights★ 5 (323)18k views304 ♥16 minUpdated Feb 4, 2025
- The Spiral Sallet★ 4 (171)14k views143 ♥7 minUpdated Dec 30, 2023
- Expert Guide on Maximizing Your Power --- Equipment Sets and More★ 5 (468)13k views622 ♥12 minUpdated Mar 11




This guide was created by its original author on the Steam Community. Are you the author and want it removed? Request removal.