![[For Modders] User Guide for Setting UpRear-View Mirrors for Player’s Cars and Positioning the Driver’s Head for City Car Driving](https://steamsolo.com/wp-content/uploads/2021/07/for-modders-user-guide-for-setting-uprear-view-mirrors-for-player-s-cars-and-positioning-the-driver-s-head-city-car-driving.jpg)
Overview
User Guide for Setting UpRear-View Mirrors for Player’s Cars and Positioning the Driver’s Head
Abstract
This document is a guide for setting up rear-view mirrors and positioning the driver’s head for cars created and added to the simulator using the Steam Workshop.
1. Introduction
For the image to be correctly rendered in rear-view mirrors, the following modifications need to be made in car models, namely, carLod0 and saloon:
- Detach side mirrors in carLod0. Detach side mirrors and the central rear-view mirror in saloon.
- «Patch up» holes left after the detachment.
- Attach mirrors back to the original object.
- Set new shaders for mirrors similar to original ones, but not to be visualized for mirror cameras.
- Add an object for correct head positioning to saloon.
2. Modifying the Model for Correct Rear-View Mirrors’ Functioning
- Open carLod0. Detach the mirror into a separate object.
- Patch up holes left after the detachment.
- Attach the mirror back to the original object.
- Open the material editor and choose the material applied to the object. In this example, the object has three materials — three IDs in Multi/Sub-Object.


Next:
- Add new Material ID.
- Enter the correct name and set Nebula2 as the material.
- Choose a shader that will not be visualized in mirror cameras. If the object originally had the “Car body color damageable” shader – for example, side mirrors, – apply “Car body color damageable (invisible in mirrors)” (in the .n2 file this shader is named “CarCoverDmgInvisibleInMirrors”). Similarly, if the object originally had the “Car body color saloon” shader – for example, the central rear-view mirror, – apply “Car body color saloon (invisible in mirrors)” (in the .n2 file this shader is named “body_color_saloon_invisible_in_mirrors”).
- Set the same textures as for the shader that was originally applied to the object.

Example of adding a shader in Multi/Sub-object:


Repeat the above in saloon. Add one more Material ID for the central mirror, which has the “Car body color saloon” shader; the new material will have the “Car body color saloon (invisible in mirrors)” shader.

3. Positioning the Driver’s Head
Add a sphere with a 0.1 radius and 10 segments in saloon, and name it “headPosition”. Place it in the intended position of the driver’s head. Do not apply any material to this sphere.

Set its pivot to the center of coordinates:

After export, .n2 files will have new lines with your shaders.
Example:
new nshapenode body_15
sel body_15
.setlocalbox -0.180511 0.464729 0.003055 0.114298 0.051918 0.060338
.settexture “DiffMap0” “textures:/cars/Hatchback/Hatchback_plastic_diff.tga”
.settexture “BumpMap0” “textures:/cars/Hatchback/Hatchback_plastic_bump.tga”
.settexture “DiffMap2” “textures:system/white.dds”
.settexture “DiffMap1” “textures:/cars/Hatchback/Hatchback_lmp.tga”
.settexture “EnvironmentMask” “textures:/cars/Hatchback/envmask_black.tga”
.setvector “MatSpecular” 0.500000 0.500000 0.500000 1.000000
.setfloat “MatSpecularPower” 32.000000
.setfloat “BumpScale” 1.000000
.setvector “DevicePanelFlagMask” 0.000000 0.000000 0.000000 0.000000
.setshader “body_color_saloon_invisible_in_mirrors”
.setmesh “home:export/meshes/cars/Hatchback/saloon.nvx2”
.setgroupindex 15
.setneedsvertexshader false
sel ..
new nshapenode body_16
sel body_16
.setlocalbox -0.174266 0.197846 -0.313226 0.992795 0.081444 0.111501
.settexture “DiffMap0” “textures:/cars/Hatchback/Hatchback_diff_x0.tga”
.settexture “DiffMap1” “textures:/cars/Hatchback/Hatchback_diffDamaged.tga”
.settexture “DiffMap2” “textures:/cars/Hatchback/Hatchback_parts.tga”
.settexture “BumpMap0” “textures:/cars/Hatchback/Hatchback_diff_x0.tga”
.settexture “BumpMap1” “textures:/cars/Hatchback/Hatchback_bumpDamaged.tga”
.setvector “MatSpecular” 0.500000 0.500000 0.500000 1.000000
.setfloat “MatSpecularPower” 32.000000
.setfloat “Intensity0” 0.500000
.setshader “CarCoverDmgInvisibleInMirrors”
.setmesh “home:export/meshes/cars/Hatchback/saloon.nvx2”
.setgroupindex 16
.setneedsvertexshader false
4. Correcting the View in Rear-View Mirrors
Before correcting the image in rear-view mirrors, reprogram cameras.xml in datagamedatacars<My_car_name> as follows:

Reprogram viewports.xml in datagamedatacars<My_car_name> as follows:

FovCorrectionFactor is the magnification factor without VR, and FovCorrectionFactorHMD is the magnification factor with VR.
4.1. Setting the Image Scale in Rear-View Mirrors
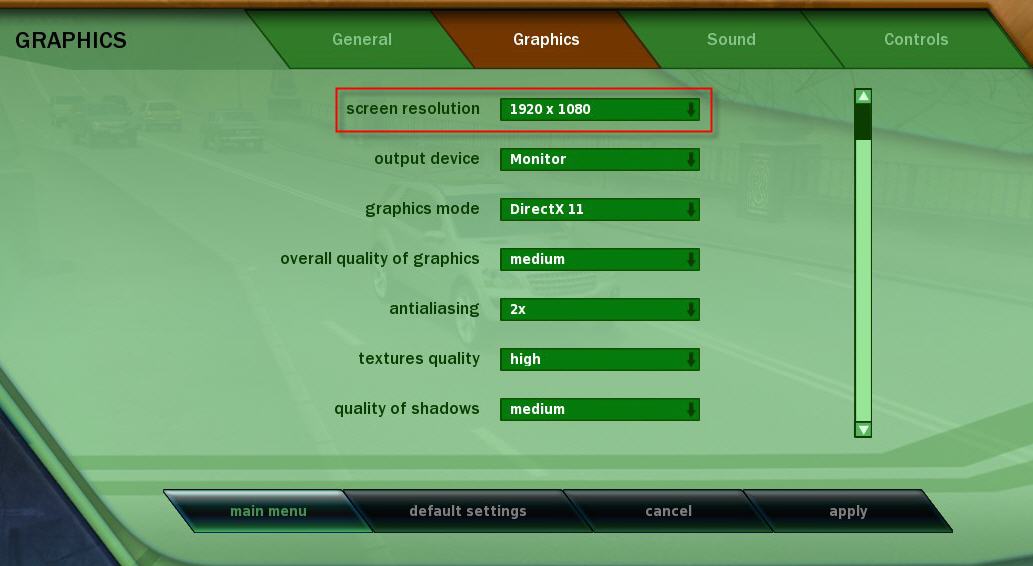
For correct setting of rear-view mirrors, set the screen resolution to 1920×1080 and tick «Start in the window».

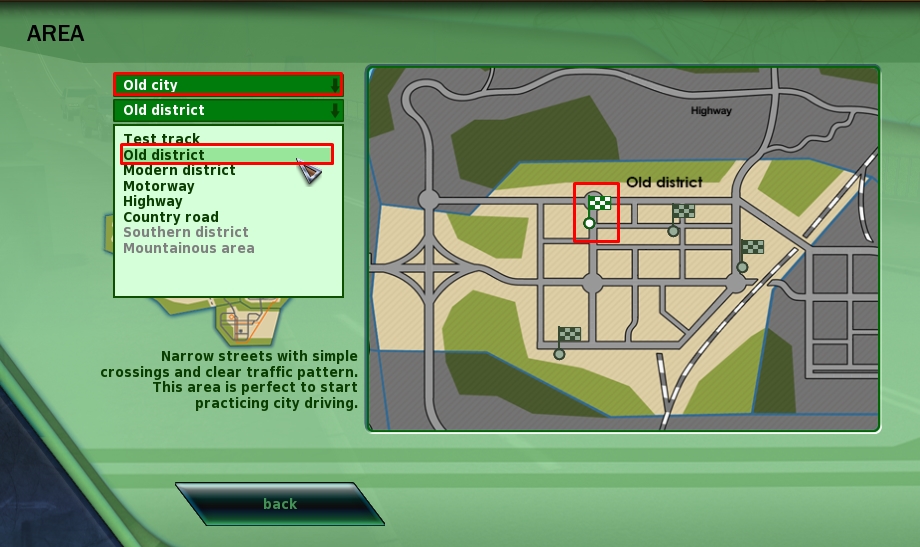
Then run free driving in the «Old District» of the «Old City» having chosen the car you want to set up.
Turn on virtual rear-view mirrors and check the size of rear-view cars in the parking lot.
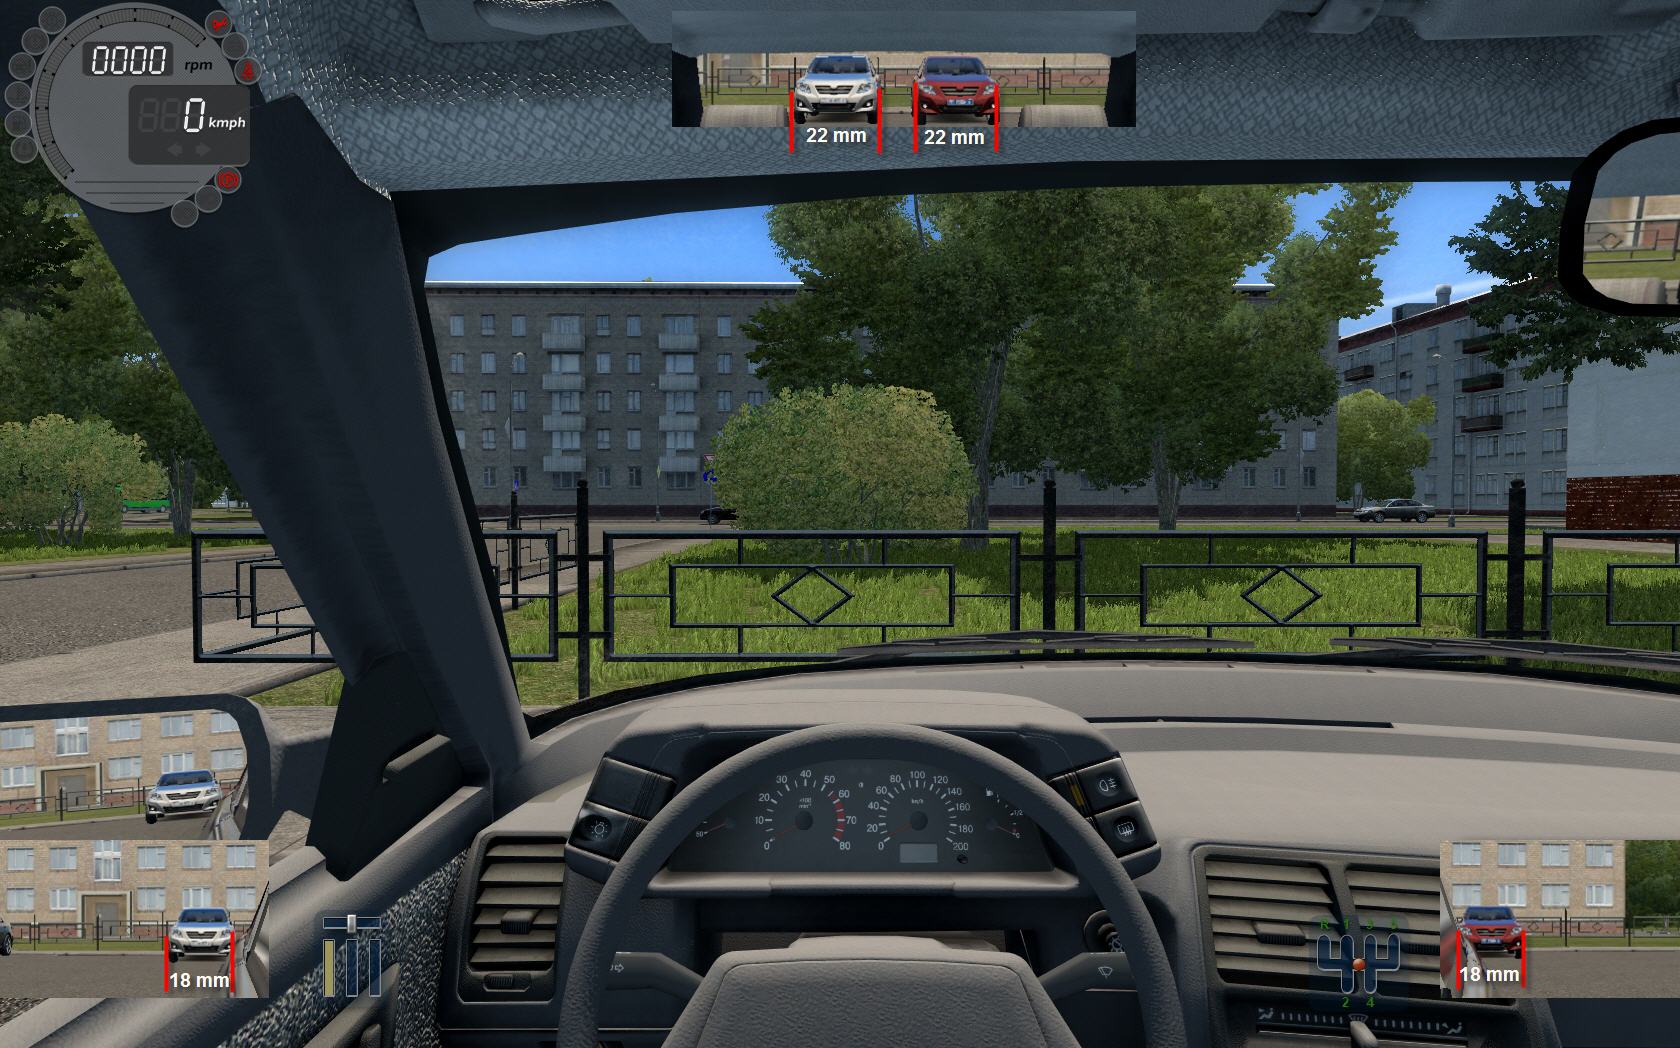
If their size does not match that shown in the screenshot above, change FovCorrectionFactor and FovCorrectionFactorHMD of the relevant rear-view mirror in the car’s viewports.xml file.

After changing the parameters, exit to the menu. Only then the changes will take effect.
4.2. Setting the Default Position of Rear-View Mirrors
After setting the scale in rear-view mirrors, their position can be adjusted. To do this, add lines to the [Mirrors] section in CarProperty.ini in datagamedatacars<My_car_name>.

These parameters set the rear-view mirror rectangle.
Set coordinates relative to the car’s pivot in X; Z; Y, where Z is the upward axis.
After changing the parameters, exit the project. Only then the changes will take effect.