
Overview
This is a complete Guide to Force of Nature. From humble beginnings at level 1 to battling fierce monsters and traversing expansive biomes to gather all 7 Force of Nature shards. This guide will include tips and tricks for building, crafting, and generally just staying alive. That is, of course, the whole point. This guide is still a Work in Progress but I am publishing it as I finish each level.I started this guide on 10/16/2017, check back for regular updates!
Force of Nature – An Introduction
Force of Nature is a somewhat difficult game to describe. It has a little bit of something for everyone. Building and crafting, combat, exploration, and plenty of resource gathering. Each new map you play is randomly generated, so your experience is never going to be the same thing twice. You won’t even experience the multiple separate biomes in the same order each playthrough. Perhaps the first time you play, the Sapphire Biome will be the first you encounter. On the next go round, it may be the Onyx Biome. You will encounter numerous monsters in each different biome as well. Everything from a sly little fox to a big scary yeti. All of this is in order to complete the ultimate goal. Find and gather all 7 Force of Nature shards.
Seems simple enough, right?
————————————————————————————————————————————-
This guide has been created for the sole purpose to provide a single source of information for this game. I have searched high and low for some kind of Wiki or how-to guide and found very little, so I have decided to put myself to task creating this guide with as much detail as possible for all the Force of Nature players of the world, few though we may be. All content in this guide was created by me, Wink. I basically started a new game and have documented my playthrough as I experienced it. We are going to be following the adventures of Carl, because that’s the first name that popped in my head and I may or may not have been watching The Walking Dead at the time.
I wanted to make a guide for an absolute beginner, so if you are more advanced in the game feel free to just skip ahead to the parts you may need help with. If you are completely new I encourage you to read through all the basics before getting started.
Anyway, I hope you enjoy this guide as much as I enjoyed creating it. Let’s get to it!
————————————————————————————————————————————–
This guide WILL contain spoilers. I will do my best to warn you ahead of time.
I will use spoiler tags very generously. If it has this bar over it, assume it’s information that is not relevant to the level you are currently but will become relevant very soon.
Also, I do not claim to be any kind of expert at this game. All tips and notes are just my personal observations that I have discovered make life a little easier.
Getting Started – Menu Options
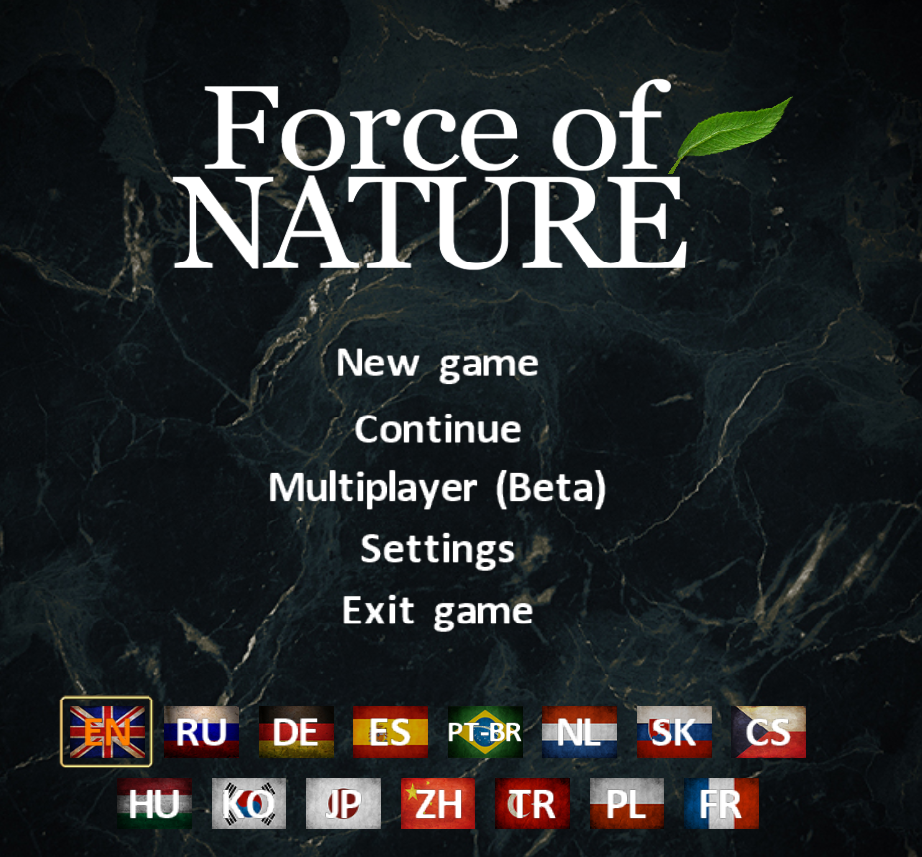
When you first launch Force of Nature, you will be presented with a very simple menu. Your options are:
– New Game
– Continue
– Multiplayer (Beta)
– Settings
– Exit Game
You will also be presented with several language options.
————————————————————————————————————————————
The Settings Menu is very basic and easy to understand. There you have the options of controling volume, camera angles, and even how your character will look. I would recommend taking a moment to look at the controls for the game and getting to know your hotkeys before you begin.
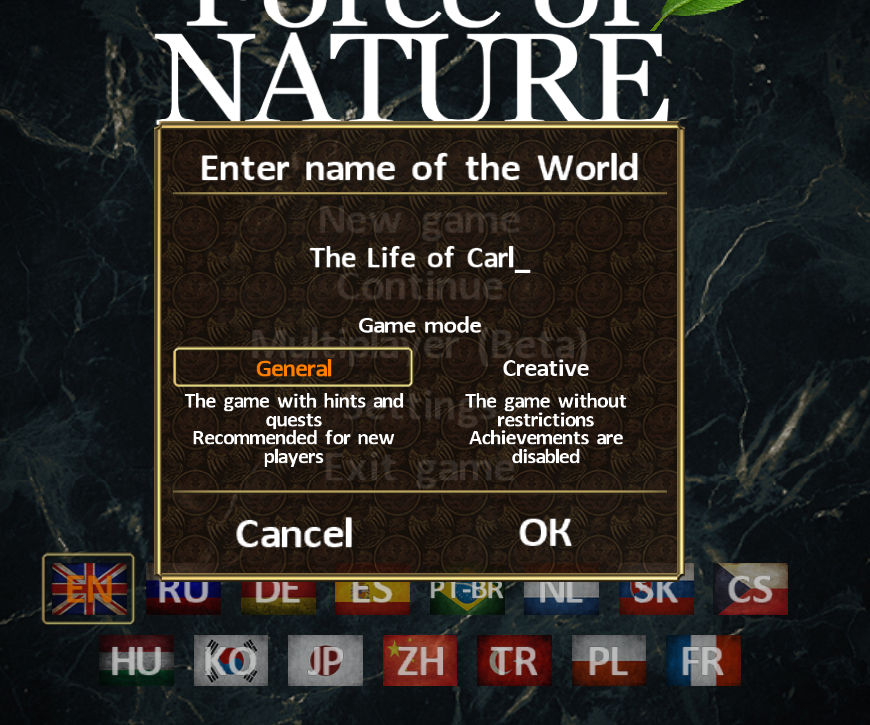
Upon clicking ‘New Game’ you will be asked to enter the name of your world, and to choose your game mode. General or Creative
– General Mode: This mode provides you with the basic playthrough. It has quests, achievements, and you unlock the ability to craft new structures and items as you level along.
– Creative Mode: This mode has no restrictions. You may build what you wish when you have the materials, regardless of your characters level. You will not be able to obtain achievements in this game mode and I would not recommend this mode for a beginner.
————————————————————————————————————————————
In-Game Menus
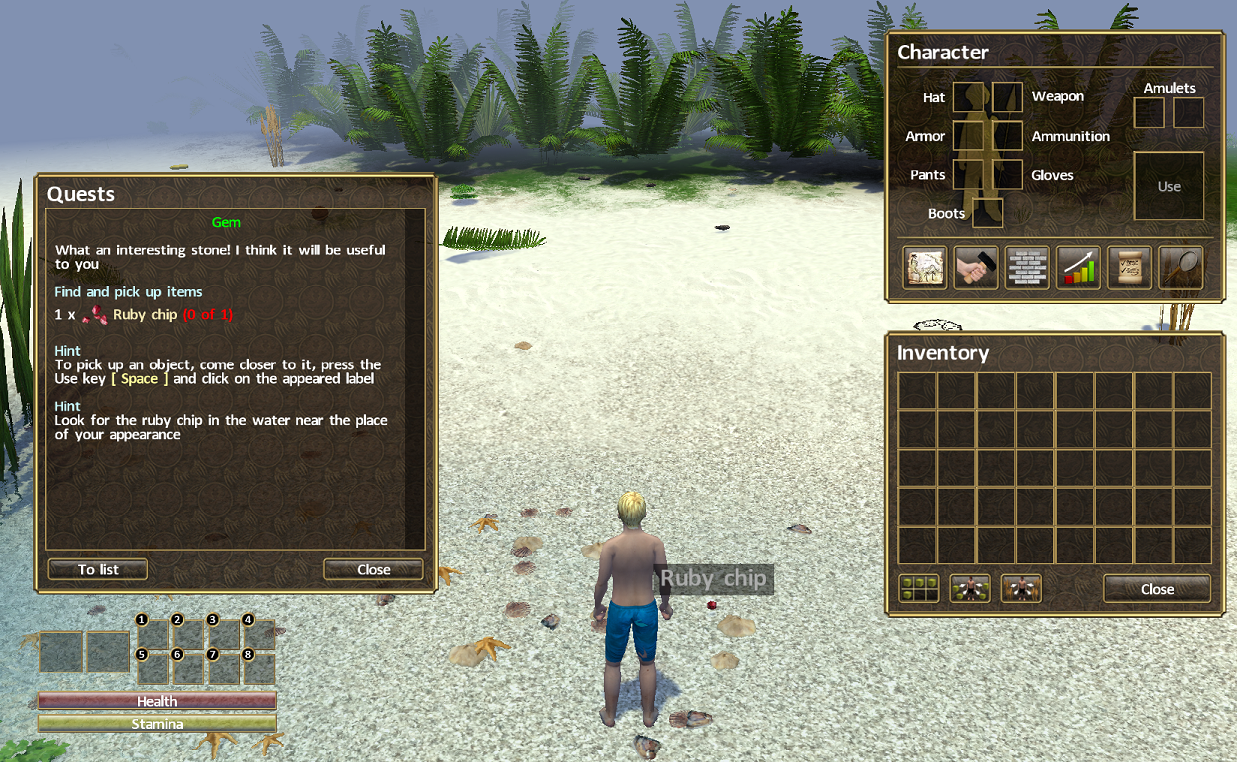
Something has happened that you have been stranded on a beach somewhere. Carl has little to say other than asking ‘Where am I?!?’. Personally, I would have more questions than that. Like, why are the rabbits here gigantic? Or, what happened in the moments leading up to this quite unfortunate stranding on said beach. For now, survival is the only thing you need to worry about though.
The first thing you are presented with as you wake from your stupor is a single quest. You will see a quest menu to the left, and your character stats, inventory, and equipement panel to the right. You will also see the names of any items near you.
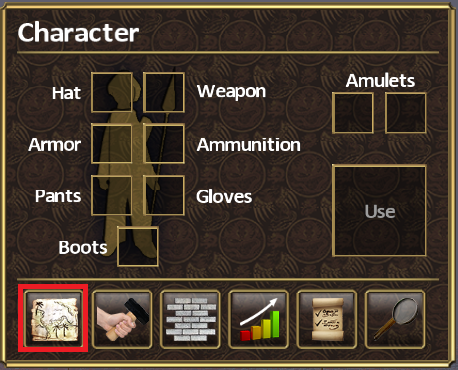
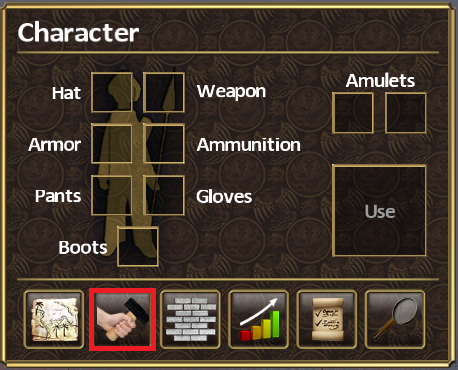
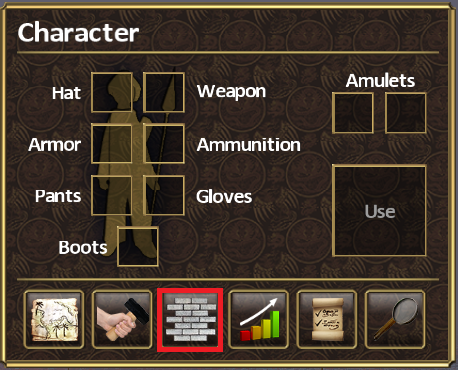
On your character panel you will have the following selections:
– Map (M)
– Craft (C)
– Build (B)
– Characteristics
– Quest (Q)
– Encyclopedia
———————————————————————————————————————————
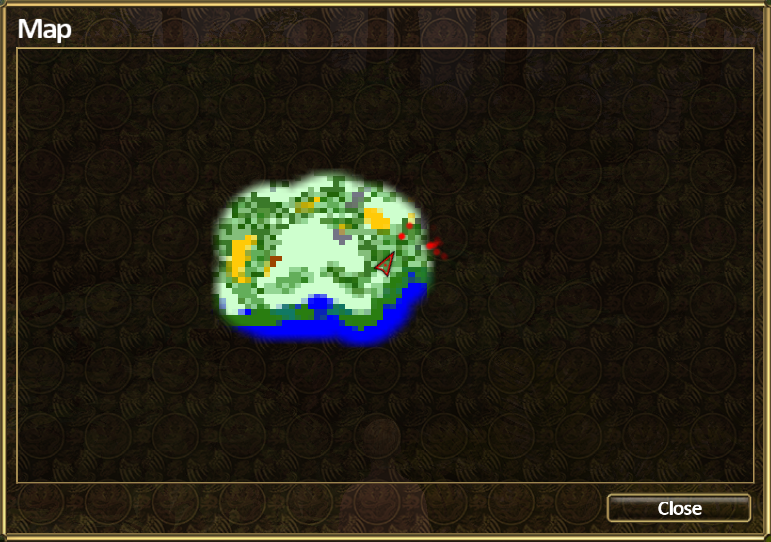
To open your Map you can either click the Map icon on your Character Panel.
Or simply hit the Hotkey M. This will bring up the following window:
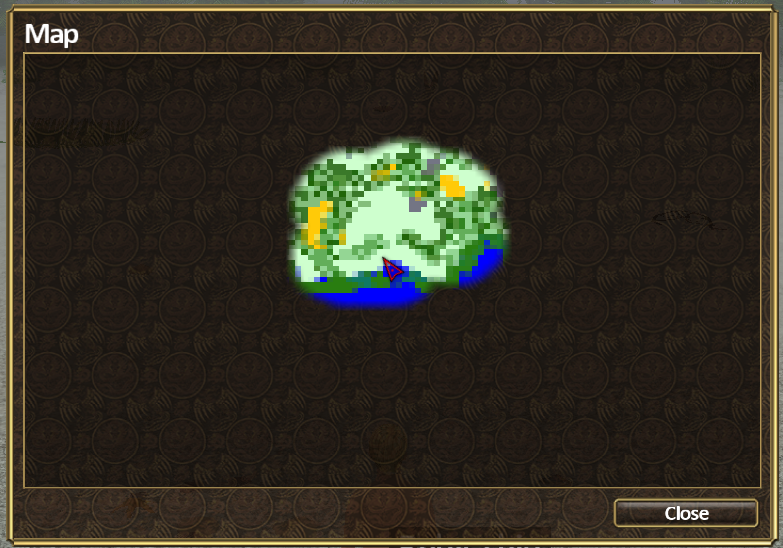
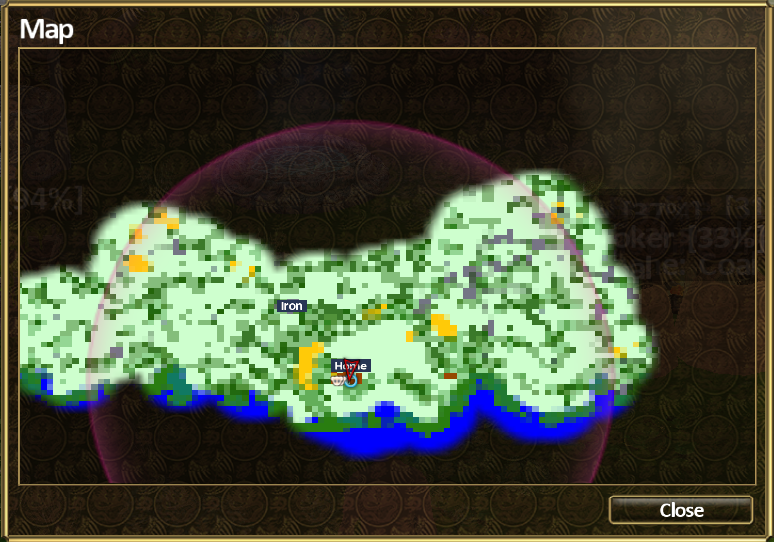
Different objects on your map show up as different colours. Stone and Ore nodes are grey, Sunflowers are yellow, water is blue, and basic trees and shrubs are various shades of green. As you build constructions they will show up on your map as well as a dark brown.
As you can see, Carl’s location shows up on the map as well, represented by an arrow pointed in the direction he is currently facing.
———————————————————————————————————————————–
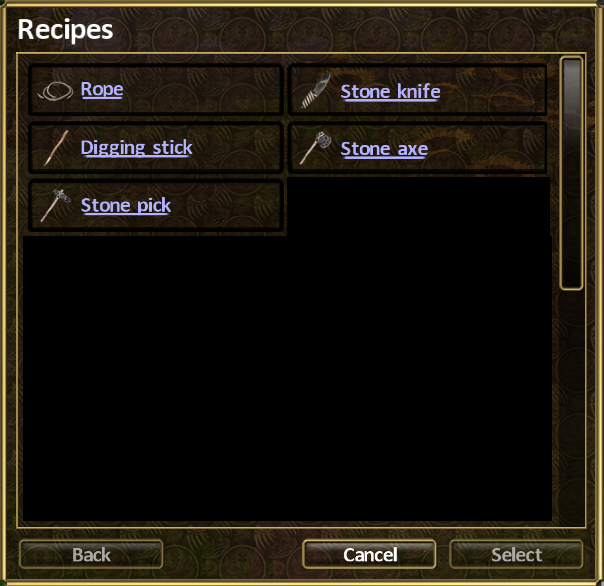
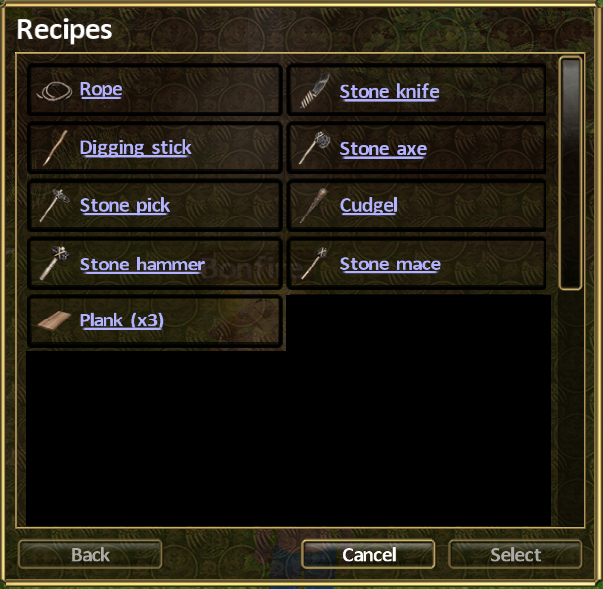
To open your Craft panel you can either click the Craft icon on your Character Panel.
Or simply press the Hotkey C. This will bring up the following window:
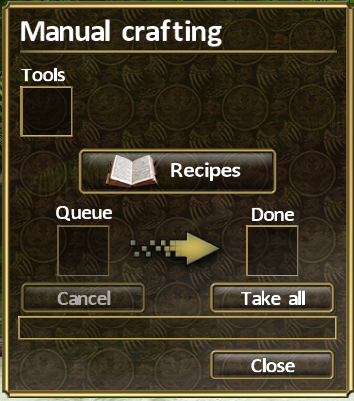
Upon pressing ‘Recipes’ you will be presented with a list of items you are able to craft. For the sake of avoiding spoilers, I have blacked out all items unable to be crafted at the current level, and I will continue to do this throught the rest of the guide. At Level 1, only Rope and a Stone Knife may be created.

———————————————————————————————————————————–
To open your Build panel you can either click the Build icon on your Character Panel.
Or simply press the Hotkey B. This will bring up the following window:
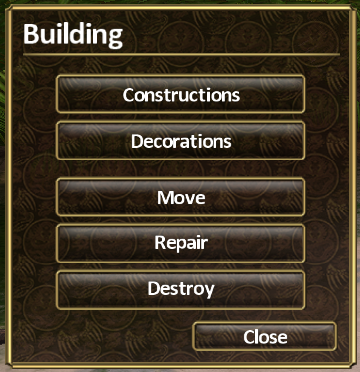
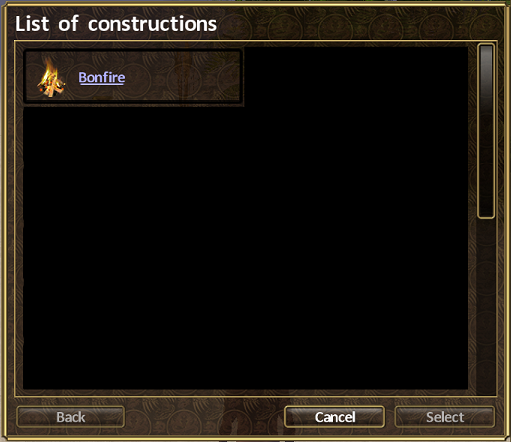
Upon pressing ‘Constructions’ you will be presented with a list of items you are able to build. At Level 1 only a Bonfire may be built.
You will also have the opion of creating decorative objects, by clicking ‘Decorations’ you would be presented with an identical menu as the Constructions menu. At Level 1, however, there are none available to you. Aside from that, you have the ability to Move, Repair, or Destroy existing Constructions or Decorations.
———————————————————————————————————————————–
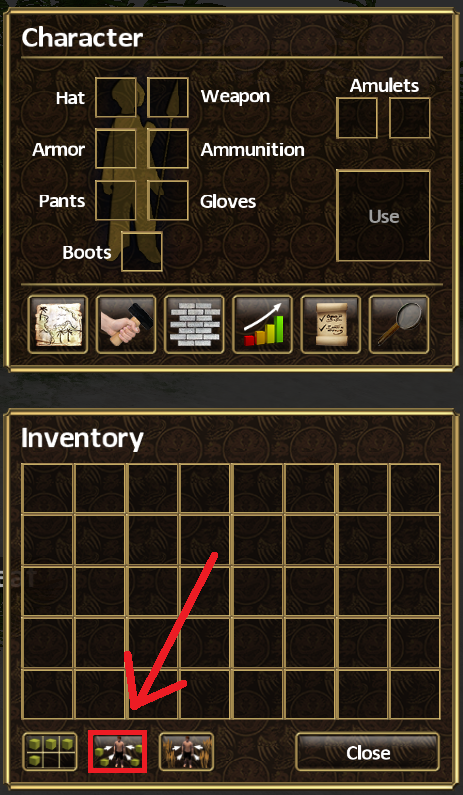
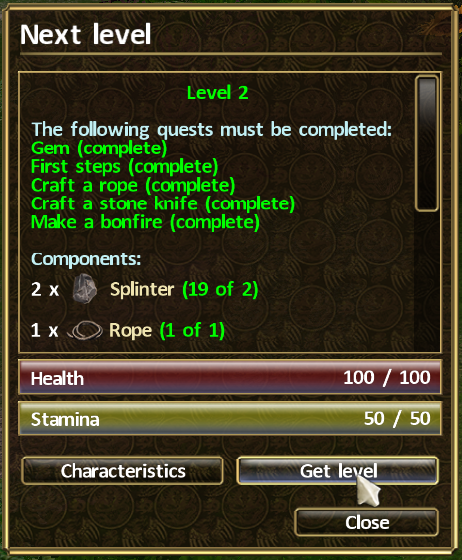
There is no Hotkey to specifically open your Characteristics Menu, but you can type I to open your inventory and then click on the following button:
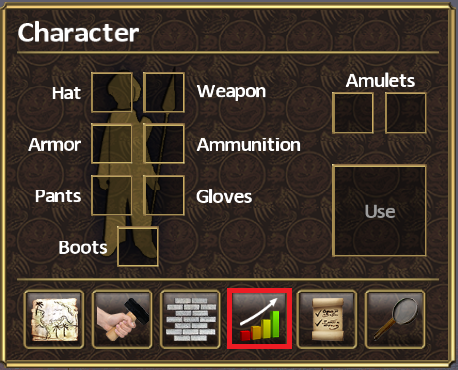
You will then open this Menu:
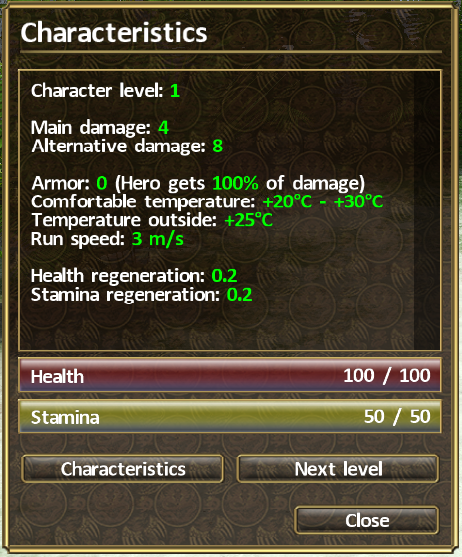
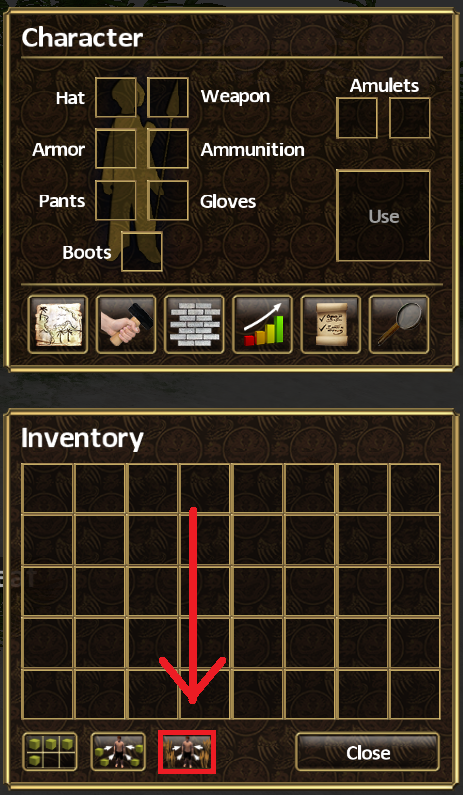
As you level and progress your stats will increase. You can also craft items that will increase certain stats and even run speed. Clicking the ‘Next Level’ button you will see a list of requirements needed to progress. This will involve the completion of a few quests and then require you to have certain items in your inventory in order to level up.
NOTE: When you level up, the items required to do so WILL BE CONSUMED.
———————————————————————————————————————————–
To open your Quest Page you can either click the Quest icon on your Character Panel.

Or simply press the Hotkey Q. This will bring up the following window:
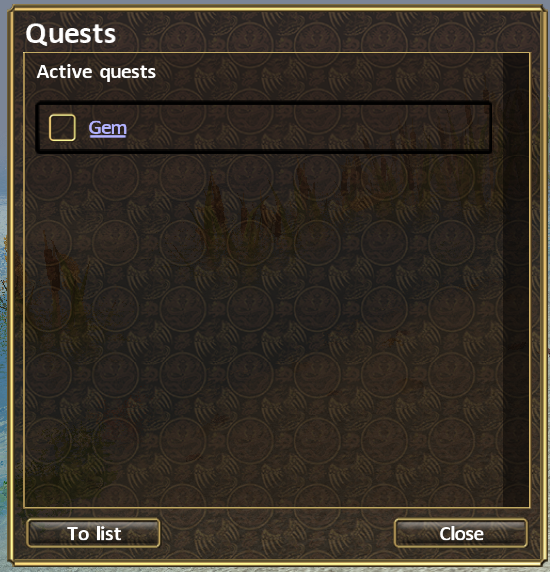
If you click on a specific quest, and Carl only has one right now, you will get a short description of the quest and a list of requirements. You will also get a few hints on where you may acquire the items needed.
———————————————————————————————————————————–
There is an in-game Encyclopedia that will give you a description of every item you can possibly encounter in game. However, it contains massive spoilers so I won’t be going into detail about it here. If you want to peek ahead to the items you can craft for each level go right ahead.

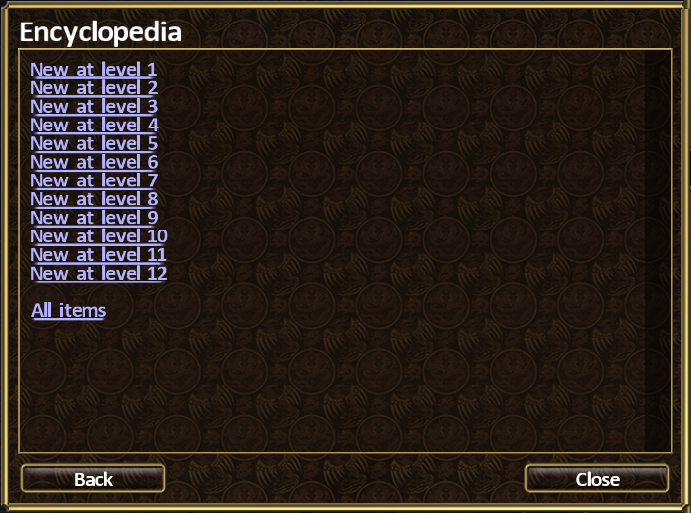
But Carl judges you.
———————————————————————————————————————————–
Alrighty! That’s pretty much the basics on how to navigate the Menus you will encounter in game.
Movement and Character Abilities
Now that you know the basic Menu navigation, it’s probably a good idea to go over basic movement. This game uses WASD to go forward, backwards, and strafe left and right, but in order to turn your character you must use your mouse movement. Take a moment to get used to it, it can feel odd at first if you haven’t played games like this before.
Your character has two ‘abilities’ at level 1. Punch and Kick. To punch click the left mouse button, to kick just click the right. You can continue to move while punching, but kicking will stop your character in his tracks.
You can try these moves out on a passing rabbit….if you can catch it that is. Those wascally wabbits!
Tips:
You cannot use your mouse to look around if you have any Menu or Craft Panel open, UNLESS you hold down space bar first.
You cannot attack (Kick/Punch/Weapons) at all if you have any Menu or Craft Panel open.
All attacks or actions use Stamina. You have a limited amount before your character cannot perform any actions. He will also slow to a walk rather than a run when his Stamina is low. You have to eat food that provides Stamina, or you can sit there and wait for it to regenerate on its own. The latter being quite slow, the former is difficult in early game due to lack of ways to get and utilize resources.
Later on, you will click your Left and Right Mouse buttons to use the weapon you have equipped. Some weapon types have different attacks based on whether you use the ‘Punch’ or ‘Kick’ button.
————————————————————————————————————————————
To pick items up off the ground, you can do one of two things. You can walk up to an item, hold down space bar, and then click the name of the item. Or you can click the ‘Take All Around’ button, which I prefer.
The ‘Take All Around’ button is pretty self explanitory. It will grab everything in your vicinity and place it in your inventory. The default Hotkey for ‘Take All Around’ is Left Ctrl, which I personally found clunky so I rebound it to a thumb button on my mouse. You can use whatever key you want that is easy to get to for you, but you’ll be using this one a lot.
The next button you need to know is the ‘Harvest All’ button. At first I thought this button seemed a tad superfluous but after playing the game for an extended amount of time, it certainly had a good purpose and I am glad it’s there. This button, as it is described, harvests all growables around you. You then do need to click the ‘Take All Around’ button in order to collect them. The defauly Hotkey for ‘Harvest All’ is Right Ctrl but again, I rebound mine to my mouse thumb.
Tips:
If you wish to drop an item out of your inventory you just click on it in your Inventory panel and drag it to the ground where you want to drop it.
Items never despawn from where you discard them. In the early game when inventory is a problem you can throw items onto the ground near your camp and leave them there until you have space to put them somewhere.
If you have to press your ‘Harvest All’ button to grab something, you can grow that item in a planter box in the future. This includes all ‘crop’ items, mushrooms, and flowers and herbs found in meadows.
Level 1: Humble Beginnings
Hopefully you’ve read the basic game mechanics up to this point, because Carl and I are going to assume you have.
————————————————————————————————————————————–
———-
Immediately upon ‘waking up’, you will obtain your first quest. All you have to do is pick up the Ruby Chip next to where you’ve awoken. It’s that simple.

When you have done so, the next quest will immediately activate.
———-
This quest encourages you to explore a bit and gather items that are scattered around.


———————————————————————————————————————————–
Tips:
Take this opportunity to explore the area. Run around and gather everything you see on the ground. Literally everything is useful, even in the late game.
There is a natural ‘barrier’ that protects your starting area from mosters, you will not be attacked so I suggest full exploration of your ‘borders’
BUT
On two rare occasions, the ‘natural barrier’ of the forest that separated my starting point from the rest of the island was so thin in some places that I was able to go past it immediately, without needing to progress to the point that was usually needed. On the off chance this happens do not try to confront any monsters past that point since you have no weapons as of yet.
Note: I have generated at least 100 maps out of curiosity about the differences they can have and have only had this happen twice, so I imagine it’s just a quirk of the coding that creates the initial barrier.
———————————————————————————————————————————–
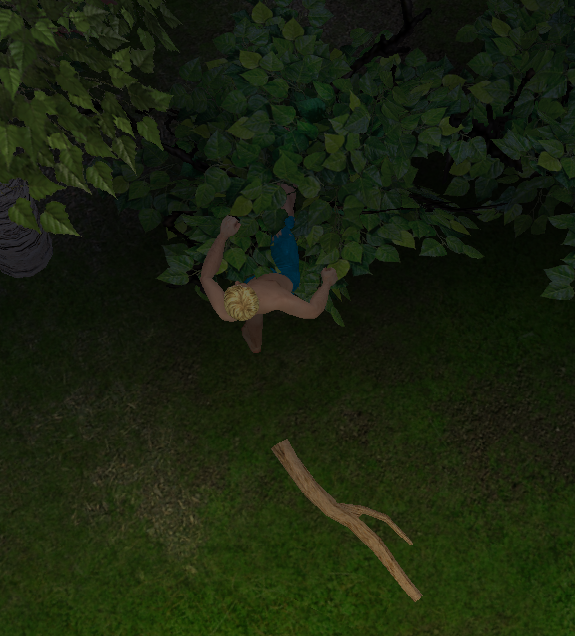
After Carl explored his new surrounds he came away with the following items in his inventory:
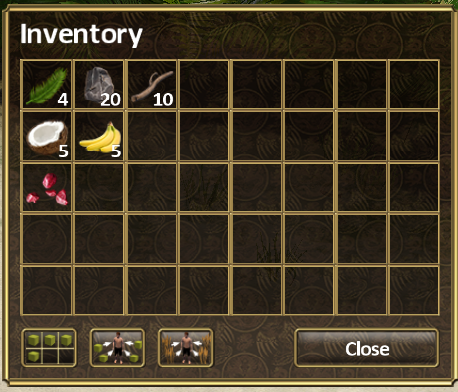
Palm Leaf x4
Splinter x20
Stick x10
Coconut x5
Banana x5
And our Ruby Chip.
———————————————————————————————————————————–
Tips:
I do not usually gather ‘growables’ in my initial exploration. At the very beginning inventory space can be tight and I just like to wait to grab these until I need them.
Those items you may encounter include:
– Wheat
– Coffee
– Strawberries
And the following Mushrooms
– Ceps
– Panther Caps
– Fly Agarics
– Russule
You will also encounter, in my opinion, the best early game source of stamina you can get hold of.
SUNFLOWERS!
You can’t cut them down quite yet, but you can soon! You can, however, kick them for a few seeds but the power of Sunflower Seeds is that you get quite a lot when you cut them down and in large numbers will spike your Stamina to max very quickly. Not worth it to kick just for two seeds though.
Srsly though, amazing stuff.
———————————————————————————————————————————–
The next quest you get upon completing ‘First Steps’ is an introduction into how crafting works.

Press C to open your crafting panel and select ‘Rope’

As you can see, it requires either a Splinter or any Knife to make a Rope. In order to make a rope you will need one of these tools in your tool slot. Going to your inventory, drag a Splinter into your Tools slot in your Craft Menu.
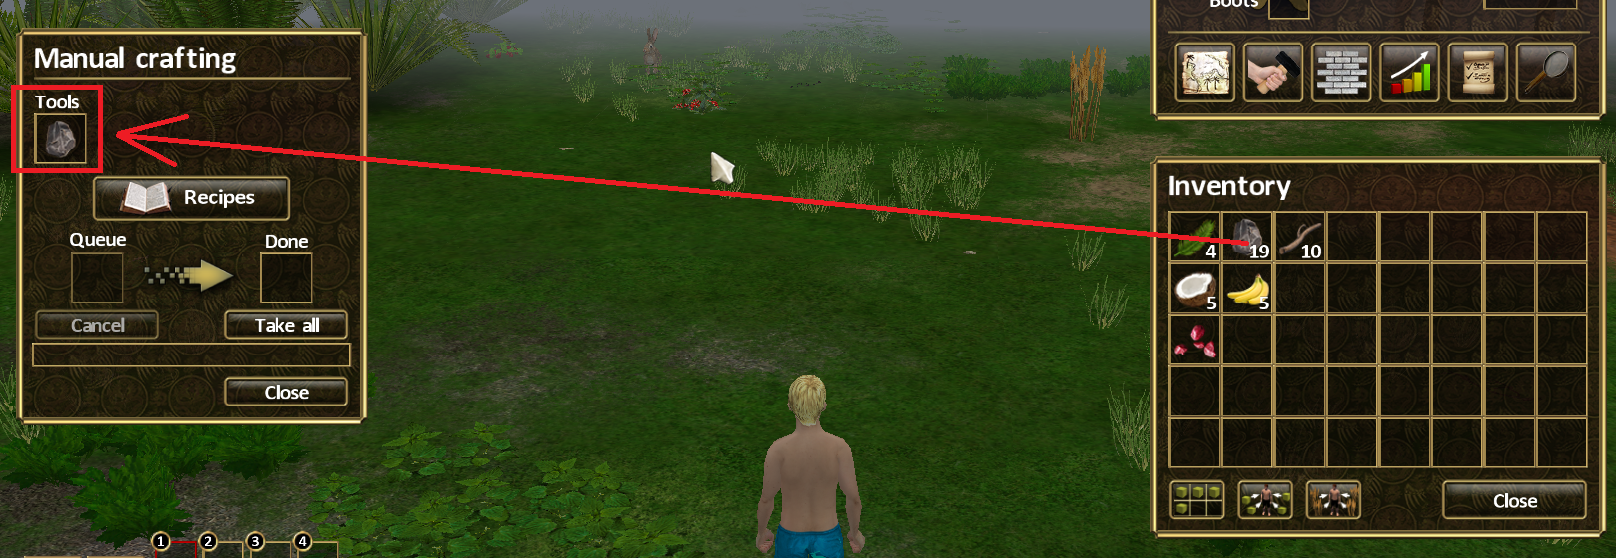
You’re going to need plenty of rope so make as many as you have Palm Leaf for. Carl had 4 Palm Leaf so he was able to make 2 Ropes.
———-
Next you will be asked to craft a Stone Knife. Open your crafting panel (C) and select Stone Knife from the list of recipes. You will need 1 Rope and 1 Splinter.
———-
Now you get to create your first structure. A Bonfire. Press B to open your Buildings Menu and select Bonfire.

After you select the Bonfire to be built you have to choose where to place it. You will then see this sort of ‘grid’ on your screen. Green means it is an acceptable place to be built and Red means that you cannot build there. You can rotate the item around using your mouse wheel.
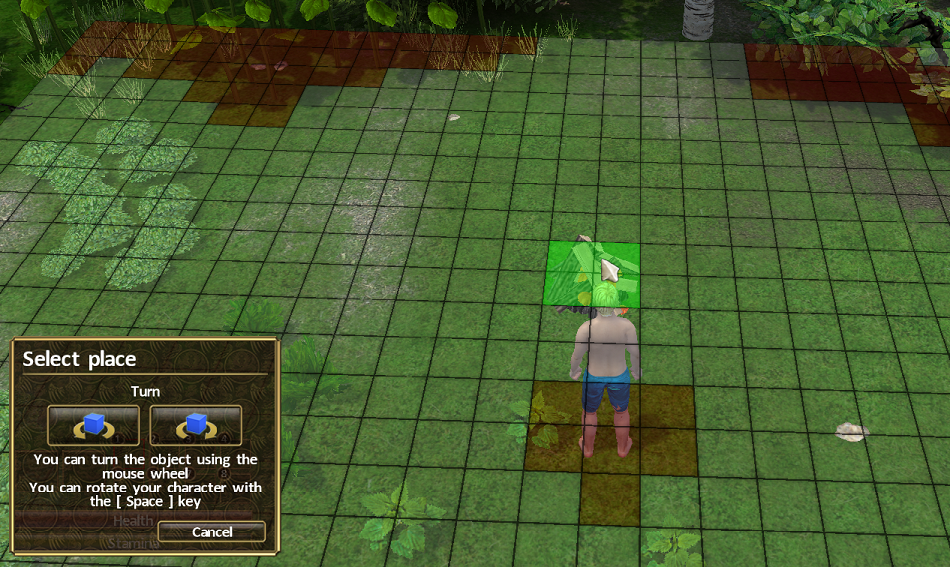
Carl has decided he wants his Bonfire right here! You can hold down Space to see how much longer your construction has left to be complete.

———-
Right here if you forgot where it was:
Click on the ‘Next Level’ button and you’ll see all the requirements you need to proceed to level 2.
As I said before, items required to obtain the next level are consumed on clicking the ‘Get Level’ button. You will need 1 Rope and 2 Splinters in your inventory.
———————————————————————————————————————————–
Crafting Tips:
You can drag the whole stack of Splinters or just an individual. It doesn’t matter how many are in your tool slot.
To separate a stack of items, right click the stack until you’re holding how many items you need to separate.
Items have different craft speeds. Some are fast, like the rope you just made. Others can take several minutes to make a single unit.
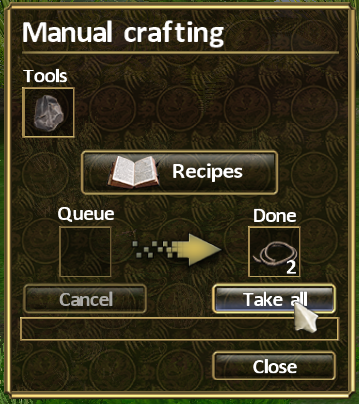
You MUST clear your crafting inventory (The ‘Take All’ slot) before crafting a different item or if you have a full stack in that slot. If you don’t, you will not be able to craft more items.
Building Tips:
All constructions are placed on the ‘grid’. There are some items that must be built inside other constructions.
Some constructions, like the Bonfire you just built, have their own crafting panels. These are used to create more specific items needed later. Walk up to your new Bonfire and hold down the space bar. Click the floating nameplate and see what you can use it for.
———————————————————————————————————————————–
———————————————————————————————————————————–
Level 2: Getting Settled
Now that you have reached Level 2, you are given three more quests that you can complete in any order you wish.
———-
To create Glowing Embers, walk up to your Bonfire you made and hold your space key down. Click on the floating nameplate that says ‘Bonfire’. You will get a new crafting panel and a list of items you are able to make using your Bonfire. As of right now you can only create two items with it.


Your Quest requires you to make 9 Glowing Ember so you will need at least 3 sticks. Carl has 5 so he’s doing alright so far!
These will take a little time to make so while they are crafting, let’s move on to the next quest.
———-
In order to craft a Digging Stick, you will need to open your basic Craft panel (C). You will have gotten three new items that you can now create at Level 2.
Select Digging Stick from the Recipe List and craft one. You should have enough sticks in your inventory still. If you do not you may need to kick a few scrub bushes in order to obtain more.
Once you craft your digging stick you can place it in one of your fast access boxes. As the name suggests, you can use these boxes to quickly select certain items that you use often. I put Carl’s Digging Stick in slot 5, so if I want to quickly access it, I can press my 5 key and Carl will equip his Digging Stick to be used. After that just use your ‘Punch’ or ‘Kick’ buttons to dig in the ground. It does not matter which you use.

What you are able to dig up involves a separate quest, so I will cover the rest of ‘Digging’ there.
———-
Tips:
Kicking objects such as scrub bushes will give you a few resources that destroying the object would normally give you.
Scrub Bushes give Sticks
Palm Bushes give Palm Leaf
Coconut Trees give Coconuts
Banana Trees give Bananas
Apple Trees give Apples
Non Pine Trees give Sticks
Sunflowers give Sunflower Seeds
Boulders and Pine Trees give nothing when kicked.
You cannot have any items equipped when attempting to Kick an object
———-
The last quest you are given at the beginning of Level 2 involves making a Stone Pick and a Stone Axe. You must also use those tools to gather their respective resources. Logs and Stone.
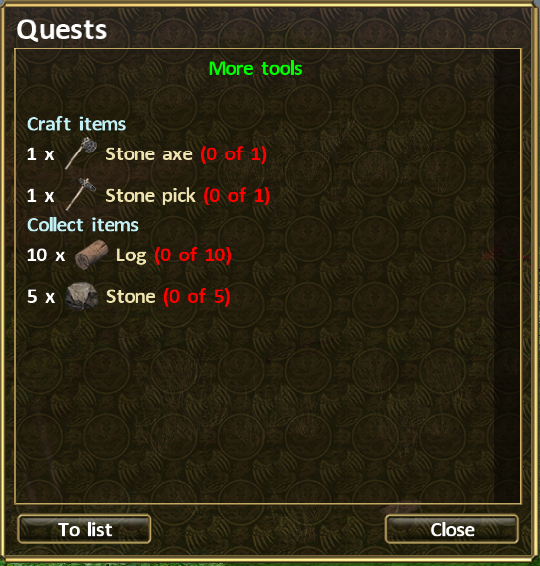
Each item requires the same resources to craft. 1 Stick, 1 Splinter, and 1 Rope. If, like Carl, you are out of Rope and Palm Leaves, go kick a few Palm Bushes and get some more and then make them into the Rope you need.
Tip: Put your Stone Knife in your crafting tool slot rather than a Splinter, you will craft your Ropes even faster, and your Axe and Pick too.
Once you have both of these tools finished you can place them in your Fast Access boxes along with your Digging Stick. Now you need to chop down some trees for Logs and mine up some Stone.
There are three basic kinds of trees. I don’t really know the technical terms for each so I just call them Fruit, Pine, and Branch. Fruit trees, as the name suggests, give fruit, Logs, and either Palm Leaves or Sticks depending on the type of fruit tree. Pine trees tend to give the most Logs and also give Pine Cones from time to time. Branch trees give a moderate amount of Logs and some Sticks.
There are four types of Boulders you can mine from. Basic Stone, Iron, Copper and Tin. You can tell the difference in what kind of boulders they are by the veining texture on them. Your starting area will have a small deposit of Iron Boulders that you can mine immediately. Iron has a dark brown veining, Copper has pinkish tan veining and Tin has silver veining. Regular Stone boulders have no veining. I will go into a bit more detail on boulders in the upcoming First Biome Chapter.

These are the Iron Boulders in Carl’s starting area.
———-
Tips:
At a certain point while you are mining and choppings trees you are going to run out of Stamina. If you have found Coconuts and Bananas, they should keep you going in order to finish your quests. If you don’t have enough, whelp, just sit there for a bit, your Stamina will refill on its own in time.
Boulders, Shrubs and Trees will be destroyed and do not grow back. We’ll talk about this more in detail in a little bit and how you can use natural barriers to keep your home base safe.
The number of times you can strike a boulder is determined by its size. The larger it is, the more times you can hit it before it shatters.
In general, kicking fruit trees or Sunflowers is largely a waste of Stamina, you will spend more getting a single piece of fruit than that piece of fruit will give you in return.
———-
Completing these three quests will give you a follow up.
Get that Digging Stick equipped, it’s time to start mining up different types of ground. For this quest, you will need to dig up 5 Sand, 5 Clay, and 5 Soil.
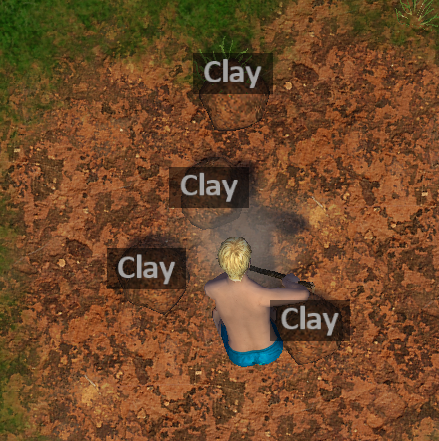


Tip: When digging for Soil you can also find Worms. You can use these for fishing later on.
———-
In order to reach Level 3, you will need the following items in your inventory.
– Glowing Ember x5
– Log x3
– Stone x1
– Sand x10
Once you have everything, click on the ‘Get Level’ button.
Tip: When you gain a new level your Stamina bar will fill completely. Take advantage of this by using all your Stamina to gather resources right before you obtain your next level.
———————————————————————————————————————————–
Level 3: Stretch your Legs
Welcome to Level 3!
You have two new quests! You also have some new Buildings you can construct, as well as some Decoration items!


Tip: Wooden signs, learn to love them
You can Craft some new items including a few Weapons!
You can also make a few new things in the Bonfire.

———-
In order to Build a Coal Smoker you will need the following:
– Log x5
– Clay x10
– Sand x15
The most convenient place to put this is right next to your Bonfire.

Strangely enough, the only thing the Coal Smoker is able to make is, you guessed it, Coal.
In order to create Coal per 1 you will need 1 Stick and 1 Glowing Ember, to make it per 5 will need 1 Log and 2 Glowing Ember.
Tip: You are going to need numerous amounts of Coal and Embers throughout your game. Make them to your heart’s content. I always have multiple Bonfires and Coal Smokers and I always have them producing.
To complete the Quest, you will need to make 20 Coal.
———-
When you complete your Coal quest you will recieve another Crafting Quest.
In order to Build a Blast Furnace you will need the following:
– Stone x15
– Clay x5
– Sand x5
Place this near your Bonfire and Coal Smoker.
Once it finishes building you are going to need some version of a Melting Pot in order to smelt an Iron Ingot. The only one you can create right now is made with 5 Clay from the Bonfire. Get one made and place it in the Tool Slot on your Blast Furnace.
You are now able to make Iron Ingots. You will need the following per Ingot:
– Iron x2
– Coal x5
– Glowing Ember x3
Tip: You only need 1 Ingot to complete your quest, but make as many as you have materials for, you will need them later. Carl was able to create 5 right away!
———-

Here’s what our little camp is looking like so far. I added a Torch for when it’s night time. It can get pretty dark in game, as I am sure you have come to find out already.
———-
Finally time for some action! Carl has been sitting around while I’ve been writing this guide, he’s ready to get going.

In this quest, you get your choice of making a Mace, or a Cudgel. The Cudgel allows you to move while attacking but the Mace does more damage.
Tip: I prefer the Mace. You aren’t going to be dodging anything any time soon. Your movement speed is entirely too low.
The Stone Mace requires the following materials:
– Stick x1
– Rope x1
– Stone x1
The Mace does 20 Damage and has an Attack Speed of 0.63, whatever that means.
———————————————————————————————————————————–
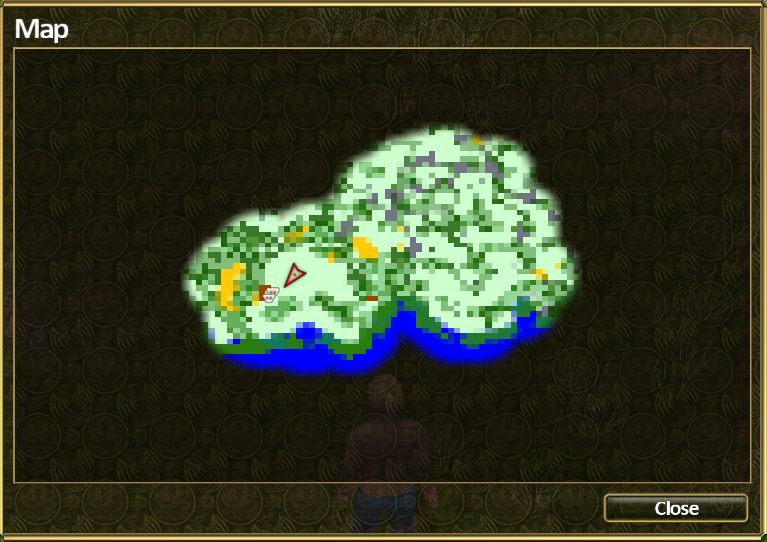
Now we have come to a very important part of keeping your Base safe. Where to ‘punch through’ your natural barrier. Monsters can attack and destroy your constructions, and you certainly do not want that. Personally, I only like to make one path out of my settlement. After my first few game attempts failed spectacularly because my buildings were constantly getting attacked and destroyed, I take time to plan where I am going to cut through and where I am going to build.
As you can see on my map here, I am choosing to cut through on the opposite end of where I am building my settlement. At that distance, anything that aggros you from the side where you are building will not be able to get to you due to not being able to navigate a path to where you cut through.
Your constructions appear on your map as the dark brown. Enemies are the small red dots.
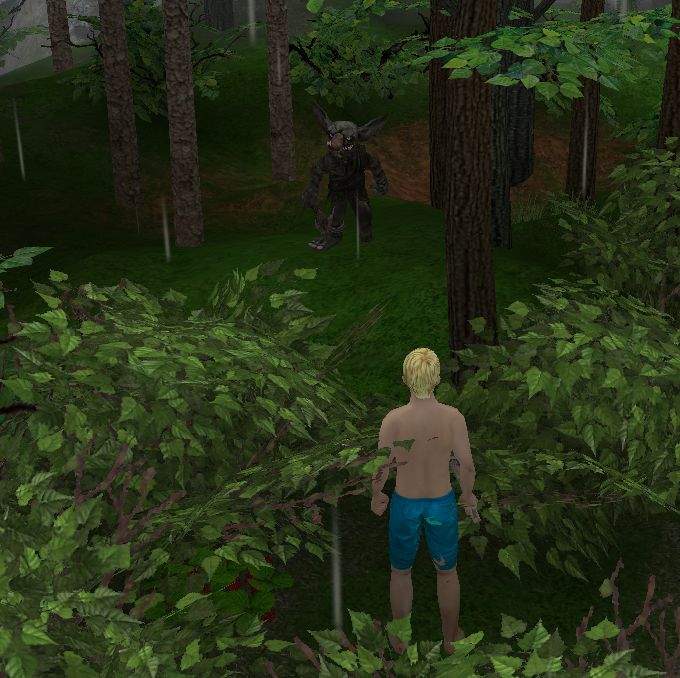

Carl has now fully cut a path through into the forest and killed his first Goblins. They drop the coins you need to complete ‘The First Battle’ Quest.
———————————————————————————————————————————–
In order to reach Level 4, you will need the following items in your inventory:
– Copper Coin x20
– Gold Coin x10
If you don’t have enough coins head back into the forest and kill a few more Goblins.
———-
Tips:
In the early game it is difficult to maintain your health pool when you are in combat so often. Keep on the lookout for two specific Mushrooms. Ceps and Russules. These two mushrooms give you 10+ Health over 10 Seconds. They are plentiful out in the forest so gather all of these two you find.
Ignore Fly Agaric and Panther Caps for now.
If you see patches of Sunflowers out in the forest, take the time to cut them down with your axe. They provide Sunflower Seeds and they are a fantastic source of early game Stamina. You do have to consume several but they are plentiful and your Stamina will shoot up very quickly.
You are unable to build constructions if enemies are too near. If you build your camp too close to the natural barrier in your starting area or if your barrier is thin you may run into this problem from time to time. If you do, head into the forest through the path you’ve cut and go clear them out.
———–
~ The First Biome: Monsters and Loot
Welcome to the Starting Forest. Monsters will not surpass level 4.
Monsters you will face:
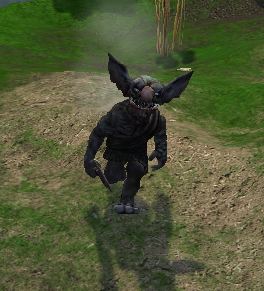


You will get various loot from these monsters. Goblins drop Gold or Copper coins. Usually between 1-3 coins each Goblin. Bears, Fox, and Boar will drop Pelt, Claw, Fang, and Meat. You can fry the meat up in your Bonfire to provide Fried Meat (+25 Health over 25 Seconds)
Tip: Foxes will pretty much always run away from you when they get low on health. Try to pin them against things to get that last swing in. Boar will run too, though not as much, as will Goblins on occasion.
Later, you can shoot them as they begin to run with your Bow
You can make basic clothing using the Pelts and Rope from your crafting menu (C) once you get Level 4.
The Fangs and Claws are needed at Level 6.
———————————————————————————————————————————–
When you’re out exploring you will run into these lovely little meadows.
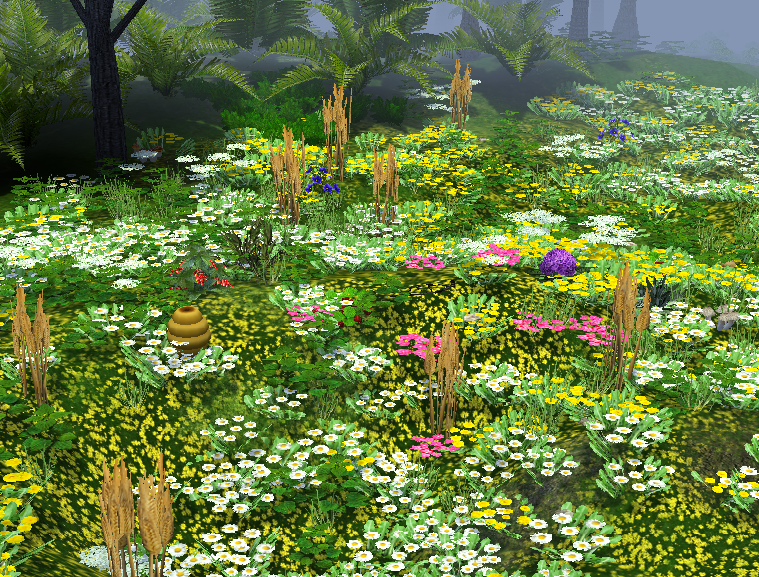
You will find many different herbs and flowers here.
Salvia
Rosemary
Lettuce
Violet
Hydrangea
You will also find Hives.
At Level 4 you will not need any of these items. You can leave them for now if you’d like.
———————————————————————————————————————————–
You will run into four different kinds of boulders. They are as followed:


Tip: There are no Gold deposits, but you are able to make Gold Bars by smelting coins you receive from Goblins. 15 Coins to 1 Gold Bar.
When I am out exploring, I like to place Wooden Signs near ore deposits so I know where to come back to if I need that specific type of ore. You can put a small description on a Wooden Sign and select to have it show up on your Map. Always carry Planks and Rope with you!
This is also useful when discovering new Biomes, you can indicate whether that specific Biome is either a Hot or Cold climate and that way, you know what clothing you need to be wearing when you begin to adventure there.
———————————————————————————————————————————–
———————————————————————————————————————————–
Level 4: Crafting Expansion
When you level up to Level 4, you will get two new quests initially.
You also have several new things that you are able to craft and build. Take a moment to look through all the new things you can make.
———————————————————————————————————————————–

For this Quest, you will need to construct an Anvil. The items you need to do so are as followed:
– Log x15
– Iron Ingot x2
In order to use your new Anvil you will need Tongs and a Hammer. You can create both of these in your manual crafting panel, (C)
Wooden Tongs:
– Stick x2
– Rope x1
Stone Hammer:
– Stick x1
– Rope x1
– Stone x1
Once you have both of these tools make, place them in your Anvil’s tool slots. You may now craft the 10 Nails required to complete your quest. You will require one Iron or Copper Ingot to make 10 Nails.
———-

Now you are going to need to build a Hut of Branches. This one has the most materials of anything you will have to have built thus far.
You will need:
– Log x20
– Stick x40
– Rope x 15
– Palm Leaf x50
As you can see, you are going to need quite a few things for this one, but once you get it built you may then craft your Craft Table.
You will need the following to build your Craft Table:
– Plank x20
– Nails x15
When you enter a construction like your Hut of Braches, the roof will disappear so you can see inside.

The Craft Table offers a new list of items that you can create. Some are the same as what you can craft by hand, but most are new.

———————————————————————————————————————————–
Tips:
The Craft Table has three tool slots. Make a new Stone Knife and Stone Hammer, place them in two of the tool slots.
Take the time to make a Fishing Pole. You can fry up fish in your Bonfire and they provide +20 Health over 25 Seconds. Excellent for exploring the forest at this level.
You will need Worms to go fishing. You can get them by digging in Soil, or from feeding a pig that you tame.
To use your Fishing Pole, place it in a Fast Access box. Drag whatever Worms you have to your ‘Use’ Box in your Character Panel.
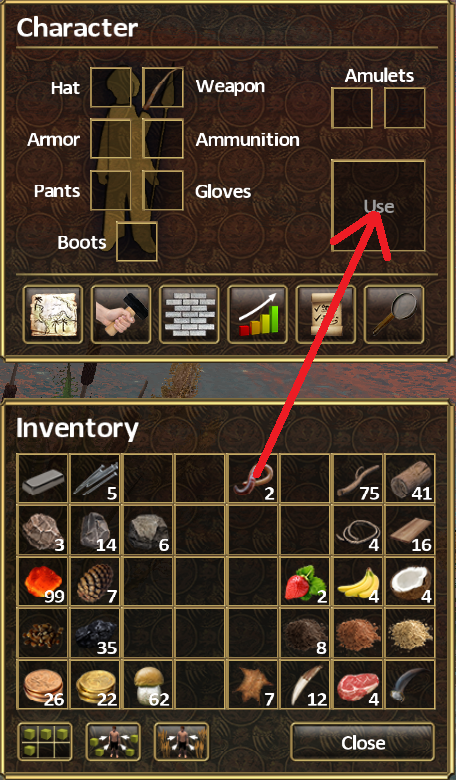
This will basically equip the Worms in your Ammunition slot. Now just walk up to the water on the beach and use your Fishing Pole. Either mouse button will work.
You will not catch a fish every cast. I find it’s roughly 1 in 3. You will also occasionally fish up Sticks.
Take whatever Fish you get over to your Bonfire and fry them up!
———————————————————————————————————————————–
———————————————————————————————————————————–
Level 4 Continued: Taming Animals
Welcome to my Trap crafting and Animal Taming Guide!
This is the next Quest you will get at Level 4.
———————————————————————————————————————————–

You will be creating traps on your Craft Table. You will need the following materials:
– Rope x2
– Stick x4
This will make 5 Traps, you will need 15 Traps to complete this Quest.
———————————————————————————————————————————–
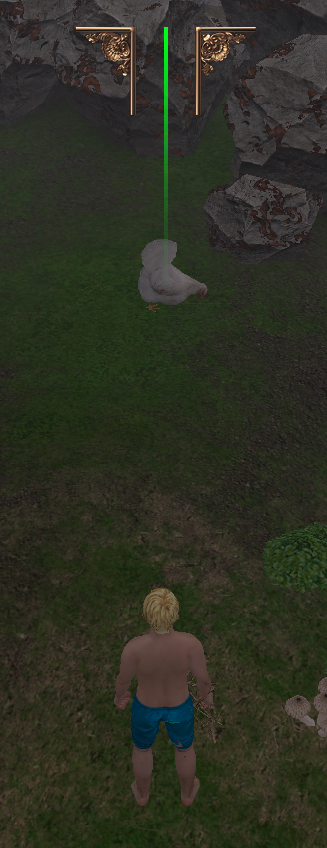
When you equip a Trap, you will see this green line on the top of your screen above your character.
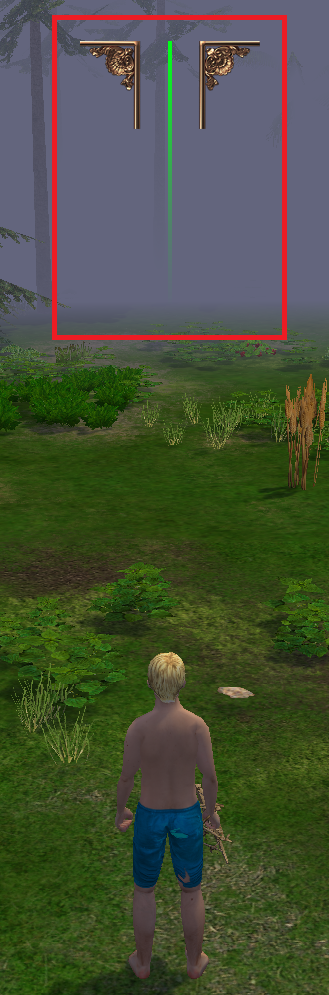
This is there to help you line up your accuracy when you throw a trap. The very top of the green line is your max range.
This targeting system applies to all ranged weapons as well. Throwing stones and Bows.
Time to head out into the forest and tame an animal. I would recommend grabbing a chicken first.
Once you find a chicken, get in as close as you can to it without spooking it. Line the chicken up with your targeting system, I like having it right where the green line starts to fade.
Tips:
In order to line your camera up this way you must have your camera setting set to ‘Free’. You can hit your ESC key and go to Settings – General – Camera.
Make sure to clear all aggressive monsters in the area you are trying to tame BEFORE you throw any traps. You won’t get a successful tame on the first throw and the animal will run away for a short time. Chasing it down is a lot safer if you’ve cleared the area first.
Let the animal run and follow behind closely. Not too close or it won’t stop running. When it stops throw a second trap. Throwing a trap while the animal is running is rather difficult. If you are confident in your accuracy you can go ahead, but you’ll waste more traps doing it this way.
The direction you are facing when you throw the trap is the direction the animal will usually run off in. Use this to your advantage to herd the animal in a safe direction.
When you get a successful capture you need to quickly run up and hold down your space bar and click ‘Tame’. You don’t have very long. If you run out of time the trap will fail and the animal will run off again.

Once you tame an animal, you will get a new window. You can tell your animal to follow, wait, or you can feed it to receive certain products.

———-
The following animals produce the following items:


———-
Tell your new animal to follow you and lead it back to your camp.
More Tips:
Animals that you have tamed will now show up on your Map (M).
Carl found a Rooster while he was on his way back with his new Chicken, so he tamed that too.
At some point soon you are going to want to contain your tamed animals in a fence. They tend to wander around a bit when left to their own devices. Fencing helps keep them from wandering off and getting killed by monsters, and it also keeps them in one spot so you can easily access them to make animal products.
Early on when you are low on metals to make nails, try to use natural barriers for parts of your ‘fencing’. You will have to make less pieces of fence and save on materials at this stage of the game.
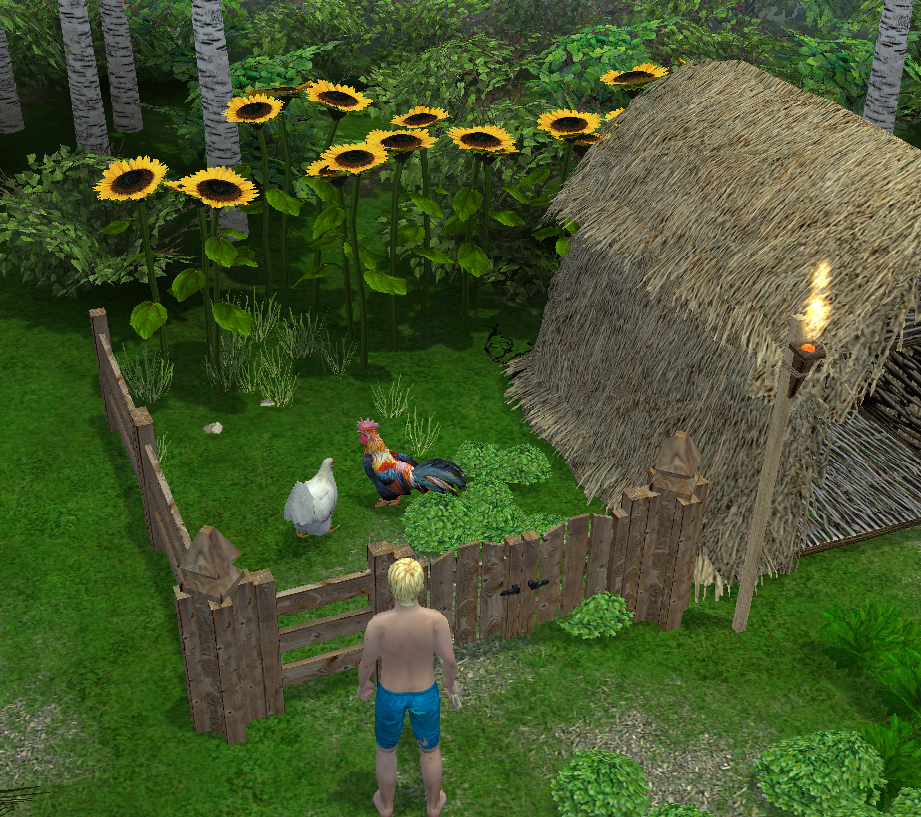
Carl used both his Hut of Branches and the Sunflowers behind it to gate in his Chicken and Rooster.
You can move fence pieces around as much as you want to make the corral larger or to move it. Press B and click ‘Move’. You can only move them a short distance though, so you have to sometimes move a piece to your max distance, then move it again.
You can’t feed your animals until the next level.
———————————————————————————————————————————–
In order to reach Level 5, you will need the following items in your inventory:
– Gold Coin x10
If you do not have enough, head back into the forest and kill a few more Goblins.
Tip: Don’t forget to use up your Stamina bar before you click ‘Get Level’.
Level 5: Farming and Cooking
Welcome to Level 5!
Poke around your various crafting stations and see what new objects you have avaliable to you.
Tips:
You can now build a Barrel. Unlike the previously available Small Chest you do not have to place this inside a building.
When placing items inside storage, if you already have items of a certain kind in there, say Stone for example, all you need to do is press E with the storage open and all the Stone in your inventory will be automatically placed inside the storage.
Obviously this will not work if the storage item is full.
Items do have certain stack sizes. For Stone, it stacks to 50. Most other items either stack to 50 or 100.
Now is usually when I start grabbing ‘growables’ such as wheat, coffee, and strawberries.
———————————————————————————————————————————–

The first thing you are going to need for this quest is a Well. You will need to gather the following materials:
– Stone x20
– Plank x 30
– Nails x 15
– Logs x5
– Rope x10
After your Well is created it will continuously gather water on its own. However, it can only hold 6 units at a time, so visit it often. You can press the E key to empty your Well without having to drag and drop the Water into your inventory or pressing the ‘Take All’ button.
You now need to build three 2×2 Seedbeds. Each Seedbed requires the following materials:
– Plank x10
– Soil x15
Tip: Your quest only requires you to have 3 of these Seedbeds but you can make up to 6 at the current level.
Once you have your Seedbeds built you can begin to grow crops. For now, you are asked to grow some Wheat. Clicking on a Seedbed will give you a new menu, click on the ‘Plant’ button.

You will need 1 Water and 1 Wheat Seeds per Seedbed. Once you select the crop you wish to grow in the first Seedbed, you can quickly plant the same crop in all the others by selecting them and pressing the E key.
Keep growing Wheat until you complete this quest.
Don’t forget to visit your Well often to gather Water.
———————————————————————————————————————————–
In order to complete this Quest you need to feed your Chicken.
(This is why I recommended getting a Chicken first)
(Don’t ask)
You will need 2 Eggs to complete this Quest. Walk up to your chicken and select it. You will need 2 Wheat Seeds and 1 Water in order to feed it properly and make it produce 1 Egg. Once you have your chicken selected, just press E to feed it.
Tip: You can feed your animals quickly by selecting each one and pressing E.
———————————————————————————————————————————–
You will need the following materials to build a Cooking Table:
– Stone x20
– Iron or Copper Ingot x5 (can be a mix of either)
– Plank x30
– Nails x15
– Jug x5
You can create the Jugs in your Bonfire, you will need 4 Clay per Jug.
Once you get your Cooking Table built you will get a new crafting list.

In order to make a Fried Egg you will need 1 Egg.
Tip: You are going to need a Clay Pan and a Mortar. Both can be made with 10 Clay each in your Bonfire. Get these made up and put them in your Tool Slots in your Cooking Table.
After you fry your egg up you are going to need to make 7 Flour. 2 are to make the Bread you need for this quest, the other 5 are required for you to get your next Level, so just go ahead and make them now.
Tip: 1 Flour takes 1 minute to craft, you probably dug up a lot of Worms while you were digging for the Soil for your Seedbeds, go fishing! Carl had 16 Worms and caught 9 Fish.
———————————————————————————————————————————–
In order to reach Level 6, you will need the following items in your inventory.
– Gold Coin x10
– Flour x5
– Water x5
Tip: As always, use up that Stamina bar before you hit ‘Get Level’
———————————————————————————————————————————–
Level 6: Gaining Momentum
Up to this point you have mostly just focused on survival. Now, the game has changed. You will be searching for the first piece of the Force of Nature. Level 6 is where things start to get real. This is the first time you start to realize that your character may not be a normal human being. Personally, I believe Carl is some kind of Wizard or Sorcerer. We’ll see why later, for now, lets jump into the four Quests you get upon reaching Level 6.
Tips:
You can now create a Shovel. Toss out that old Digging Stick and head to your Anvil and make one.
You can now also make an Iron Knife. This increases crafting speed by 20% to anything that requires a knife.
Make Coffee from your Cooking Table as soon as you can. This is my favourite go-to Stamina booster because of how easy the ingredients are to get. It gives +40 Stam over 15 Seconds, and only requires x5 Coffee Branch and x1 Water.
You can have up to 8 Seedbeds now and you can have two Wells.
———————————————————————————————————————————–
In order to craft your Bow you will need the following:
– Stick x10
– Rope x10
You will also need to craft at least 20 Stone Arrows in order to complete this quest. You will need:
– Stick x1
– Splinter x1
– Feather x1
This is per 5 Stone Arrows.
Tips:
You can get Feathers from Roosters. If you don’t have a Rooster you will need to head out into the Forest and trap one.
Roosters require 5 Wheat Seeds and 1 Water to feed.
Shooting your new Bow is the same as how you throw Traps, you equip the bow in your weapon slot. To use arrows, put them in your ammunition slot the same way you put worms in order to fish.
When using a Bow, you can Left Click to perform a Quick Shot, OR, you can Right Click and hold to line up a Power Shot. This does slightly more damage than a Quick Shot.
A Power Shot is an excellent way to pull Monsters from range.
You can craft Stone Arrows either on your Craft Table OR in your Manual Crafting. If you are about to head into the forest you can craft them in Manual Crafting so when they are done you will have them immediately rather than needing to run back home to get them.
All Arrows stack to 200.
———————————————————————————————————————————–
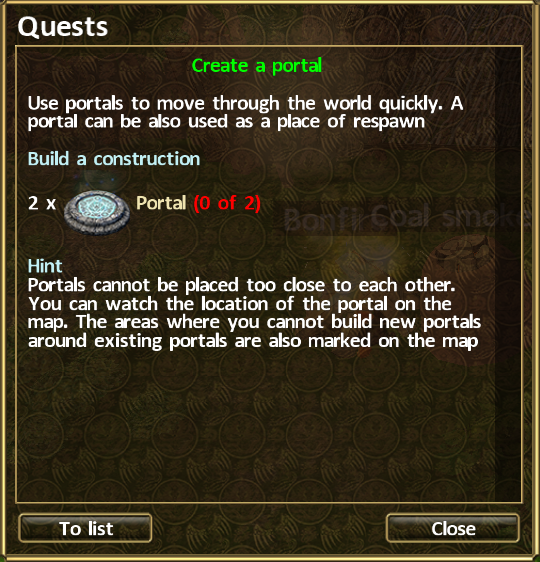
Portals are a fantastic thing in this game. They allow you to go from Point A to Point B in seconds. You have no limit to how many you can create, BUT, you cannot create a Portal within a certain distance of another Portal.
(The Purple/Pink ring now on your map indicates where you cannot place another portal. These rings CAN overlap, you just can’t place another Portal inside it.)
To create a Portal you will need the following:
– Stone x10
– Ash x5
– Clay x10
– Sand x10
To get Ash, you will need to go to your Craft Table and put a Mortar in one of the Tool Slots. Then you will need either Claws, Fangs, or Bones. You need 3 of any combination of these items to make 1 Ash. You should have plenty from your adventures in the Forest so far to make at least 10 and you will need 10 Ash to make the 2 Portals you need to complete this quest.
Tips:
You can choose any Portal you create to be where you start the game when you first load in. The best option for this is, of course, putting one in your Home Base and selecting that.
You can name Portals anything you wish. I always just name the Portal in my Home Base ‘Home’. Simple enough.
———————————————————————————————————————————–

In order to build a Straw Bed, you will need some kind of Building to put it in. I have had Carl construct a Dugout, which requires the following materials.
– Stone x15
– Log x15
– Nails x20
– Clay x50
– Palm Leaf x 40
Once you have that built you can put your Straw Bed inside. It requires the following:
– Plank x20
– Nails x10
– Palm Leaf x30
Using your Bed will not only regenerate up to 70% of lost Health and Stamina. It will also make you sleep through the current Day or Night cycle. If you sleep in the day, you will wake up at dusk, if you go to sleep at night you will wake up in the morning.
Sleeping will also respawn any monsters that you have killed in the world.
———————————————————————————————————————————–
Level 6: The First Shard

And here we have the main event. The whole reason you are working so hard, grinding long hours, battling oddly dead looking Goblins and suffering through the toils of surviving in an unknown world. The Force of Nature shards.
In order to locate these Shards, you are going to need to construct a Compass. In order to make a Compass, you will need to craft a Screwdriver. You only need 1 Stick and 1 Ingot (Iron or Copper). Place this Screwdriver in your Craft Table. You can take the Mortar out for now.
To make a Compass you will need:
– Tin Ingot x2
– Copper Ingot x2
– Gold Ingot x2
– Glass x4
You can smelt Glass in your Blast Furnace, using Sand instead of Ore.
Just like a certain Captain, your Compass doesn’t seem to point North. But you’re not trying to find North, are you?
(Unless of course the first Shard is directly North of your Camp, which Carl’s was, not always the case though.)
Either way, the First Shard will now appear on your Map as a Diamond looking Icon. Keep in mind that this Shard is the closest one. The world is about to get a lot bigger from here on out.

Now all you need to do is go to where the Diamond Icon is and collect the Shard. Much easier said than done, however.
———————————————————————————————————————————–

———————————————————————————————————————————–
ATTENTION:
There is a way to completely avoid death. I consider an exploit of sorts. If you want to know, read the spoiler. Some call it cheating, others just call it ‘clever use of game mechanics’. I personally do not do this.
Cheating Death:
If you wish to cheat death, when your character is about to die quickly hit your ESC key. You will bring up the Settings Menus. Click Save and Exit. Then from the Main Menu, just reload into your game. You will avoid the item loss penalty, but you will lose your progress in the world unless you have a Portal near where you would have died.
Also, all monsters in the world will respawn, as with any time you first load into the game.
———————————————————————————————————————————–
Carl has made more Coffee and has gotten to the clearing where the Compass has directed him. This area is going to be heavily guarded. Use your bow to pull as few enemies as you can at a time.

Once you get everything clear, you need to break this pillar open with your Pick.

When you do, a few precious treasures will pop out, including our first Force of Nature Shard!

———————————————————————————————————————————–
In order to reach Level 7, you will need the following items in your inventory:
– Pelt x10
– Claw x10
– Fang x10
– Gold Ingot x5
———————————————————————————————————————————–
Level 7: Pushing Forward (incomplete)
Now that you’ve gotten your first Shard, things are going to start getting more interesting. You will now be entering your first true Biome outside the Starting Forest.
You will need to craft clothing to help you tolerate either a hot or cold climate. Fortunately the first quest you get at Level 7 will help you do just that. However, I would suggest you discover what climate you need clothes for before you make the wrong ones. I may or may not have done that on my first playthrough.
I spent a bit of time between getting Level 7 and now just gathering up materials so I could make my Home Base a bit more ‘Homey’. I have several animals pens, and two Dugouts. One full of barrels, the other ready for my Tailoring Table. I also took the time to grab some more sheep and some other animals.
(Carl is a regular animal whisperer)


If you haven’t already, begin to gather the various flowers and herbs you find in meadows.
The first two quests you get at Level 7 are pretty straightforward.
———————————————————————————————————————————–

So, here’s that Tailoring Table I mentioned! Now you can be less naked, YAY! To make a Tailoring Table you will need the following materials:
– Plank x15
– Nails x10
– Iron Ingot x2
This table must be placed inside a structure. Fortunately I have an empty Dugout ready to go.
In order to use your Tailoring Table you will need to put a Needle and a pair of Scissors in the two Tool Slots. You can make both of these on your Anvil.
In scouting ahead, I have discovered that my first new Biome is the Ruby Biome. It’s quite lovely so I can’t wait to get started. The Ruby Biome is a Hot Climate, so I will need light cloth items to keep Carl cool.
———————————————————————————————————————————–

In order to Tame a Goblin, you must make Chain Traps. NOT REGULAR TRAPS. Animal traps WILL NOT work on Goblins. You can make the chain needed for the Chain Trap on your Anvil, you will need 1 Iron or Copper Ingot per 5 Chains and you will need 1 Chain per Chain Trap.
To make the 15 traps required for this quest you will need 3 Iron or Copper Ingots.
Taming a Goblin is actually easier than taming an animal. You will use a few more traps than needed for an animal, but Goblins won’t run away when you are throwing traps at them. Just don’t try to engage a Goblin to tame if your health is low. You will be hit a few times while you are throwing traps at it.
After being tamed, a Goblin can be commanded to Follow you around. They serve as a sort of combat companion, fighting by your side.
Tips:
Try to find the highest level Goblin you can find to tame. Where you got your first Force of Nature shard is a good place to look.
Goblins you have tamed can follow you through your Portals. Animals cannot.