Overview
Tips and tricks learnt to build a better and profitable franchise zoo
Introduction
First and foremost, this is not an absolute guide that everyone must follow in order to have a successful zoo but is based on my experiences of having go through several flopped franchise until I ended up with one that is really successful. What I meant by successful here is in terms of financially. It can be overwhelming at first where the first stage of building a zoo might seems successful in the first place as you earn big profits but I learnt that as soon as you start expanding, things can get out of control quickly if you’re not careful.
I started out with a zoo which was very profitable in the beginning (around +$50K) but towards the middle, I started to lose up to -$300K per month and as a result had to abandoned that zoo as it spirals into the abyss of bankruptcy.
My next few zoos were a bit smaller than the first and I thought by keeping and managing it small, it might help financially. Again, it was profitable in the first part and then starts to cripple financially as I expanded.

The following tips might seem lengthy but I think it’s worth a read.
PROBLEMS [PART 1]
To understand how to have a successful park, we need to first identify the problems that cause a zoo to fail in the first place and these are some of what I’ve experienced.
1. EXPANDING TOO RAPIDLY

2. NOT FOCUSING ON GUEST’S NEEDS
For some reason, Frontier has made guests in the game very-very picky to the point they’ll ask for refunds if they’re not happy of something even if it’s because of their faults (like not bringing a sweater to cold places). It’s pretty much the Karen version of the game. Both of my arctic and tropical zoo suffers because I failed to check on how is the guest is reacting to what I’ve built.
3. NOT PICKING THE RIGHT BIOME
One thing I realized is that despite all the biome’s available, they’re not going to give the same feedback to your guests. In my arctic zoo, I had guests complaining because of cold (again, I hate that they want a refund just because they don’t bring their own jacket). I could add heaters to places but then again aesthetically it would not look so nice since I want the snow to cover my zoos.
I also have guests complaining either because of rains or too hot weather. So yes, biome does provide it’s own challenges and I’ll talk on that later on.

4. NOT UTILIZING CUSTOM SCENERIES AS BARRIERS
Technically you can make a successful zoo using whatever’s the default barrier that’s provided by the game but I realized after several attempts that it’s not the very best case. My early zoo relied too much on the barrier’s that’s provided and as a result it needed regular maintenance in which my mechanics can’t cope with and I can’t hire any more staff as I was already in a financial crisis. This leads to a domino effect where barriers deteriorate and cause animals to escape and guests will be unhappy which leads to them asking for refunds. Since I don’t have enough staff and money, it only gets worse when I can’t quickly emergency capture them and instead have to spend time waiting for my vets to catch them.
5. TOO MANY ANIMALS IS NOT ALWAYS GOOD
I thought having a lot more animals in an exhibit is a good idea especially for those likes large groups but that’s not the case. I ended up having to pay more for food costs for my peacocks which was breeding so rapidly that it without realizing, it was clogging the exhibits and as time goes by, I didn’t realize the barrier wasn’t maintained and ended up my 20+ peacocks escaped. So yes. The start of my zoo crippling era is because of peacocks since I don’t have enough staff and money to capture them quickly.
6. HAVING EXPENSIVE ANIMALS
Rare or unique looking animals might seem more lucrative as they have higher ratings and can bring more guests but if you don’t have backups, they might also be the cause for financial drain. For example in one of my arctic zoo, I had a successful start until I started bringing in the polar bear. Turns out the upkeep for even 1 animal is very expensive than combination of some animals that I have.
For example below, 1 polar bear costs almost $6K in comparison to Reindeer which only costs $240 despite having 4 species. It initially had 3 polar bear which sums up to $18K but removed 2 after seeing that was my main reason of financial flop. Also the polar bear requires a significant amount of habitat space compared to other animals and that causes bigger habitat tax. So ended up this is the polar bear-gate for my zoo.
7. TRYING TO PUT ALL THE ANIMALS IN 1 ZOO
My early goal of building a zoo was to house all the animals available into 1 zoo. I soon realized this was a bad idea not only for the planning, but also to my system. Technically you can house all animals in 1 zoo but I wonder if there’s any system that can grind the simulation to a smooth experience. I’m already using an i9-9900KF, 32GB RAM and GTX1080 but I’m still getting around 20-30 fps when I started to expand my zoo. I thought it was because of the guests but I noticed objects being used is also a factor. For example in my tropical ‘Jurassic World’ zoo, my guests dip down to ~2000 guests but even so my framerate was not buttery 60 fps. I suspect it’s due to my 60+ species in the zoo and also the large number of objects.
Franchise enables creation of multiple zoos and transfer animals between them. So utilizing that feature is more important than trying to squeeze everything in 1 zoo. I think Frontier acknowledges the hardware limitation this game has so is recommending people to build multiple smaller zoos instead of 1 super large ones but off course they won’t limit that size thinking there’s people who wants to push the boundaries.

8. BAD OPTIMIZATION OF VIEWING AREA
Guests wants to see the animals and as such, their paths and exhibits must cater so that guests are able to see the animals instead of having limited viewing area. My early zoos had pretty much basic path and exhibits layout which is typically the path is just adjacent to the exhibits. I realized this is not quite the optimum as guests won’t be able to see much when they’re on the ground as compared to when they’re on a higher ground or has more paths leading to multiple angle of the exhibits.
Example here is my Gharial exhibit where the only viewing area is that underwater path there despite the exhibit being large. Even so the animals are not 100% underwater all the time which is not good for guests viewing experiences.
9. NO SHORTCUTS
Guests wants to be able to visit exhibits quickly and will complain if they are tired or want to go home. Having a long winding path in hope of giving them a tour like in IKEA is not an ideal move. Sometimes you need shortcuts so that guests who wants to leave can reach for the gate faster and helps bring in more newer guests.

10. MANAGING WORKZONE TOO LATE OR TOO BIG
Managing staff is the key to success and main point here is work zone. The rule is simple. If you get the work zone correct, your zoo will thrive. My main mistakes was managing the work zone too late in the game and with really big areas for staff to covered. I underestimated the laziness of the staff and thought it would be efficient to have fewer staff manned as much areas as possible. But in my initial situation, that’s not the case. Too large zones with little staff means caretaker especially can’t handle to clean your zoo quickly. Mechanics won’t be able to fix stuff quickly and same case for keepers. This is is all a good recipe to doomsday.

This point here I gotta put some blame to Frontier a bit because they came up with the most critical feature a bit late and that is the Security Cam Heatmap. In my initial zoo, I placed several cam but not that too many since I wasn’t sure what’s their actual radius and thought it would be big enough.
Only after the update for Security Cam Heatmap do I noticed the main problem.
Look at below. After the update only then I realized how low is my security coverage. No wonder this is causing lots of litters, thefts and vandalism. Not too mention added costs of hiring more securities when in actual, there’s no need to if you really get it done properly.

PROBLEMS [PART 2]
12. IGNORING VENDORS
Guests are grumpy especially when it comes to foods and drinks. They don’t like to wait very long, and asks for refunds whenever they’re unhappy because of their hunger or thirst.
So I guess it’s fair that part of my goal to achieve aesthetics doesn’t aligned with my guest’s goal.
For example, to achieve similar looks based on Jurassic World, I thought of placing shops around the center of the park. I realized it’s a bad idea. When guests enter park, their initial hunger and thirsts are not always full so they’ll always be seeking for nearby vendors to satisfy their stomach first before going to visit animals. I ended up with a lot of unhappy guests in between the center and entrance because they have to walk far just to grab a bite and only to be disappointed by some unmanned shops or long queue.
13. NEVER IGNORE VANDALIZED OBJECTS
Again, I blame this on Frontier for the late feature which is the ability to replace all vandalized objects at the same time. The feature came in too late when my zoo was already having no more money to recover. It would help significantly if it were there in the first place.
14. TRYING TO KEEP ANIMALS MORE HAPPY THAN GUESTS
As a zoo, off course it’s a priority to have the animals happy but then again, they’re not the one that’s holding the cash. In this case, your guests are the kings that you should care about more. My early problem was that I focused too much on getting 100% happiness for the animals instead of guests. This means providing them with the highest grade of food available as I expand. Turns out this is not a good idea especially when I didn’t keep an eye on the type of animals I’m feeding and also my financial status at that time. There are certain techniques to provide 100% to your animals as well as guests but prioritizing the animals first when your zoo is still in early stage is a bad idea.


15. BAD EXHIBIT LAYOUT
Efficiency is all about squeezing more productivity with lesser efforts. My early park was too big and some of the habitats that was assigned to my keeper is not well optimized as the distance between one another might be too far or the facilities are too far. This is definitely second main factor when it comes to reducing staff costs.
16. USING TRANSFORMERS
After intensive post-mortem analysis, I realized transformers are the bad ways to go. Turns out the upkeep for transformers are so expensive on the long run compared to solar or wind energy which is free but I opted for them in the first place in thinking the coverage radius is the biggest advantage. That’s not the case. Unfortunately it was too late since my zoo layout planning was already built around the transformer’s coverage. Swapping to renewable sources which have smaller radius means I need more space to build of which I’m lacking of.
17. OVERSIZED EXHIBITS
I didn’t realized until my 3rd franchise that there’s actually tax being applied on habitats based on their areas. Meaning the larger the habitat, the more tax needed to pay.
18. OBSESSED WITH POOLS
Having small lakes/ponds in exhibits even though the animal don’t require it might seem cool especially to see the animals swimming in it. But then again, having lakes/ponds means you need water treatment which also have upkeep costs.


TIPS & GUIDES
The following tips are based on sequences that you can follow but there’s no restrictions as different people might have different techniques and these are just based on my experiences to having a successful profitable zoo.
STAGE 1 : FOUNDATION
GOAL:
For the early stage, the goal is to achieve profits of at least $5K to be sustainable. In this part, aesthetics are not the main priority yet as well as guests. The only focus is to get the right animals in first.
1. START SMALL
The solution to any problem is usually the counterpart of the problem so in this case, the solution to the first problem is to think small first. Instead of rapidly expanding the zoo, focus on having at most 3 exhibits and try to squeeze as much profits from these 3 exhibits.
Reason is in early start, your power sources are being supplied by the main gate and since you don’t have the renewable energy researched first, it’s advisable to avoid transformers and use whatever’s power being provided freely.
For example, my first 3 exhibits are those highlighted below. Noticed how they’re arranged so that it covers enough for the entrance’s power radius.
2. USE NATURAL SCENERIES AS BARRIERS
I tried to avoid using the default barriers as much as possible to avoid maintenance and frequent breakouts. Only exceptions are glass barriers to house underwater viewing or for 1 way glass usage. It might costs a lot of money to build using sceneries but on the long run, it’s actually a very good investment.

3. PLAN FACILITIES BASED ON WORKZONES
Reduce the walk needed for the staff to get from one place to another. When planning the layout, I tried to keep the workzone planning in mind also. In this case for example, the 3 exhibits are laid so that this will cover 1 workzone. Off course once you expanded you can always opted to add more to the workzone if there’s opportunity but in early stage, I focused on these 3 exhibits first and getting the entrances as close as possible.

Efficient animals here refers to animals that don’t have too high upkeep but at the same time have high rating enough to attract guests to donate more. In my example, I had Bengal Tigers, Lemurs and Elephants which were brought from my previous doomed zoos.
You also want to avoid animals that require water since then you’ll need water treatment.
If you have other franchise zoos, make use of it to breed babies and transfer the animals to the new zoo so you don’t have to spend CC or cash on new ones.
5. ANIMAL DONATIONS & EXHIBITS
Before you can have guests enter, make sure to have enough donation box and exhibit signs covered first. These are the main source of income in the first stage.
6. SKIP DECORATIONS
There’s no need to emphasize on decorations yet in the early stage as you have limited funds and things might be changing later on so when it comes to the facilities placement and exhibits, don’t go too overboard when it comes to decorating unless you’re absolutely sure you want that location to be fixed.
I only started to decorate once I have all the themes unlocked and researched.
7. DON’T EXPAND PATHS YET
Try to keep guest’s paths small in early stage. This means keeping them to a small plaza surrounded by the habitats so they don’t wander off and also easier for staff maintenance later on.
STAGE 2 : EARLY MANAGEMENT
After the stage 1 of building at least 3 exhibits, the next stage would be to manage and ensure income is consistent for a period of time. It’s too identify that the basics are sustainable i.e. animals are not too expensive, exhibits placement is optimized.
1. HIRE ONLY 1 OF EACH STAFF CATEGORIES
There’s no need to binge on several staff in the first place especially keepers, vets and mechanics since they’re the most expensive. So I just started with at least 1 of each first. For keepers, as long as the exhibits location is close and there’s no complaint from animals, 1 keeper should be able to handle 3 exhibits properly. Some guides might say best way is to have 2 exhibits per keeper but I’d say it all depends on your placement & layout.
2. RESEARCH ANIMALS
It might be slow to have 1 vet to research 3 animals but early stage does require some patients. Researching animals is first priority since it’ll unlock new enrichments and also bring more values to guests which will encourage them to donate more. Happier animals == guests more happy == more money.
3. RESEARCH POWER
By now it should be safe to start and research for workshops. First and foremost, always research for power. This is fundamental steps before expanding.
4. AVOID LOAN
Being in debt is a no-no unless absolutely necessary. But for my case I never had the needs to take loan if I’m careful with the planning. If you don’t rush, things can co smoothly.
STAGE 3 : GUESTS FOCUS
By now, you should have at least a stable positive cash flow with no big fluctuations from month to month. Now it’s time to focus on the guests.
In early stage when the zoo is small, guests are usually happy and content enough. The only complaint they might have is that the zoo is small. But before it’s too late, we should try to get their basic needs settled first before expanding.
1. ALLOCATE A SPOT FOR SHOPS AND ALSO EXPANSIONS
After encountering several flops, I realized having shops near the entrance is the key to maintaining guests happiness since they’re the first impression guests have on coming to the zoo and also the last when leaving. So it’s important to prioritize shops near the entrance. Later on when the zoo gets bigger, you’ll start to see more unhappy guests concentrated around the entrance either when they arrived or about to leave.
Build a drink and food shop but also leave room for expansion.
For example below, I initially started with only 1 food/drink shop but as the queue built up, I had to expanded until there’s 4 of the same shops each.
2. BUILD TOILETS
This is pretty much obvious.

3. DO NOT INCREASE PRICE
Whatever the default’s pricing seems to be the optimal already. In my previous zoo I had guests unhappy because of the pricing and ended up losing profits because of that. Till my latest successful zoo, I never actually had to increase the price and yet the zoo is still making money. Don’t be greedy.
4. MORE BINS/BENCHES
As soon as you added shops, you immediately need bins and benches since these guests are immoral and will litter. My rule of thumb is to have at least a bin per 3-4 tiles. The frequency should be more when near shops, toilets or picnic tables.
4. SPREAD OUT CCTV
As we add bins/benches, there’s definitely going to be vandals. So first priority is to keep an eye on them. Turns out in my latest zoo, there’s no need to hire lots of guards if your security coverage is good.
In below example, my zoo has a very good CCTV coverage and I only have 1 guard which is a boomer from the early start of the zoo. And so far I’ve got a clean record from theft and even if there’s vandals sometimes, it’s usually replacing 2-3 in a long period of time compared to hundreds in my earlier zoos.
So yes. DEFINITELY DON’T SKIP CCTV. Litters are also minimal though I’m not sure whether it’s the factor from the bins or the CCTV as well. But never hurt to go crazy on CCTV.

STAGE 4 : EARLY EXPANSION
Having covered the basics needs for animals and also guests, it’s time to start expanding. But before that you’ll need to ensure you’re making profits at least $10K to be sustainable for next stage. If you’re seeing inconsistent income i.e. some months is negative, some is positive, it’s better to stop and reflect what is the cause of that fluctuations.
1. ADD MORE SHOPS
Observe on the queue of shops. If you’re starting to get complaints of long queue, it’s time to add new additions.
2. INVEST IN DEDICATED STAFF ROOM FOR VENDORS
Once you start to have more shops i.e. more vendors, a small staff room definitely is not enough to fit all your staff. So in this case it’s advisable to build a dedicated staff room just for vendors.
3. START ALLOCATING WORK ZONES
By now you should be starting to allocate work zones before you start expanding bigger so it’s easier to keep track of the area and they types of how you want to manage the work zones.
For work zones, one of the techniques that I emphasize is the smaller the number of work zones you have, the easier to manage. Some guides recommend for each staff type that you allocated a dedicated workzone. For my case, I don’t like that as it tends to pile up as your zoo gets bigger and it can be very confusing when it comes to assigning since the lists of work zone when you try to assign is not always in alphabetical order.
As a result, I ended up with 3 categories of workzone:
- CM : Which stands for Caretaker/Mechanics
- KV : Which stands for Keeper/Vets
- Vendor : Obviously for vendors.
These tag will follow by a dash and their zone name. For instance since your early zoo is concentrated around the entrance, you can rename it to Entrance or whatever you want. This labelling should be consistent to other categories of work zone as well so you don’t get confused.

In terms of what each zone contains, I’d carefully select what are the types of facilities that I want associated with it so I don’t have unnecessary facilities assigned to staff. For example:
Caretaker/Mechanics:
Assign only exhibits, toilets, power/water sources, ATMs, Workshop
Keeper/Vets:
Exhibits, Keeper Hut, Trade Center, Research Center, Vet Surgery, Quarantine
Vendors:
Shops
Off course there’s no restriction on what you can assign but there are some important moments which I find useful if assigned this way.
For example if I allocate vendor’s zone to only shops, I can see from the lists how many shops and required vendors are actually there judging based on the # of buildings it lists. This way I can estimate the number of vendors needed in that particular zone. Whereas if you assign other unnecessary buildings into it, you might not get a clear picture of how many of those are actually shops.
4. ASSIGN VENDORS TO ZONE
By default if we place a shop a vendor is automatically assigned to that shop, that doesn’t mean the vendor will return to the same shop after taking time off. I ended up with shops with missing staff and so I had to hire additional to cover. But as I hire more to replace, I soon lost track of how many I’ve actually hired or whether I’m over hiring.
So it’s important to assign vendors to a work zone so you can keep track how many are actually working or idling in a particular zone. This again goes back to previous point where if you assign a dedicated work zone for vendors, you can actually see whether that particular zone is understaffed or overstaffed.
Some other guide might recommend that per shop, there’s 2 vendors so that 1 can cover when the other is resting but I find that’s not the case as the staff don’t take rest at the same time. For example in 1 workzone, I have 13 buildings but there’s only 15 vendors assigned and yet the shops are always staffed. I keep the minimum to 2-3 extra vendors per zone and see how it goes from there first.
5. DEDICATE STAFF ROOM FOR VENDORS
Happy guests means better rating and no refund. Since guests will interact with vendors more, it’s important that the guests are well treated. This is where a dedicated staff room for vendors is important. Once there’s a staff room for vendors, you can start to add perks for that room which in this case is PR courses. This will make guests happier and vendors entertain them. This is something that you definitely want to focus on. As for the other staff room for other staff, that’s up to you. I myself prefer to set to Learning Courses so staff can train faster.
STAGE 5 : RESEARCH & OPTIMIZATION
Once you have a steadier flow of income, basic foundations of how you manage your staff and happier guests, it’s time to start think about expanding to next level.
But at this time, you will still have limited options as most of the items will be locked. So my main goal at this stage before going to full expansion is to unlock all the workshop researches.
1. PLACE ADDITIONAL WORKSHOPS & MECHANICS
To research workshop items faster, you’ll need more mechanics and workshops. It’s during this stage that you can go crazy on hiring but keep an eye on your income. I myself hired around 4 mechanics at this stage and placed 4 workshop and assigned them to research mainly on themes first since that’ll unlock most the building pieces which might cause some of the workshop blueprints to be locked.
2. BEAUTIFY EXISTING FACILITIES/HABITATS
While your mechanics are researching, you can start to think on how you want to decorate your zoo. You should have very positive cash flow during this stage. It’s advisable to only start beautifying once you have 100K.
3. EXPAND VIEWING PLATFORM
There’s no wrong of having guests viewing animals from the ground level but having a 360 degrees view would definitely wow guests even more. By this time, you should be able to look into your current exhibit plan and determine whether you want to change, expand or optimize the viewing for guests before adding new exhibits.
In my case, I set out with the goal to first optimize my initial habitats before expanding new habitats. This way it helps me to plan out where and how the next habitat should be connected.
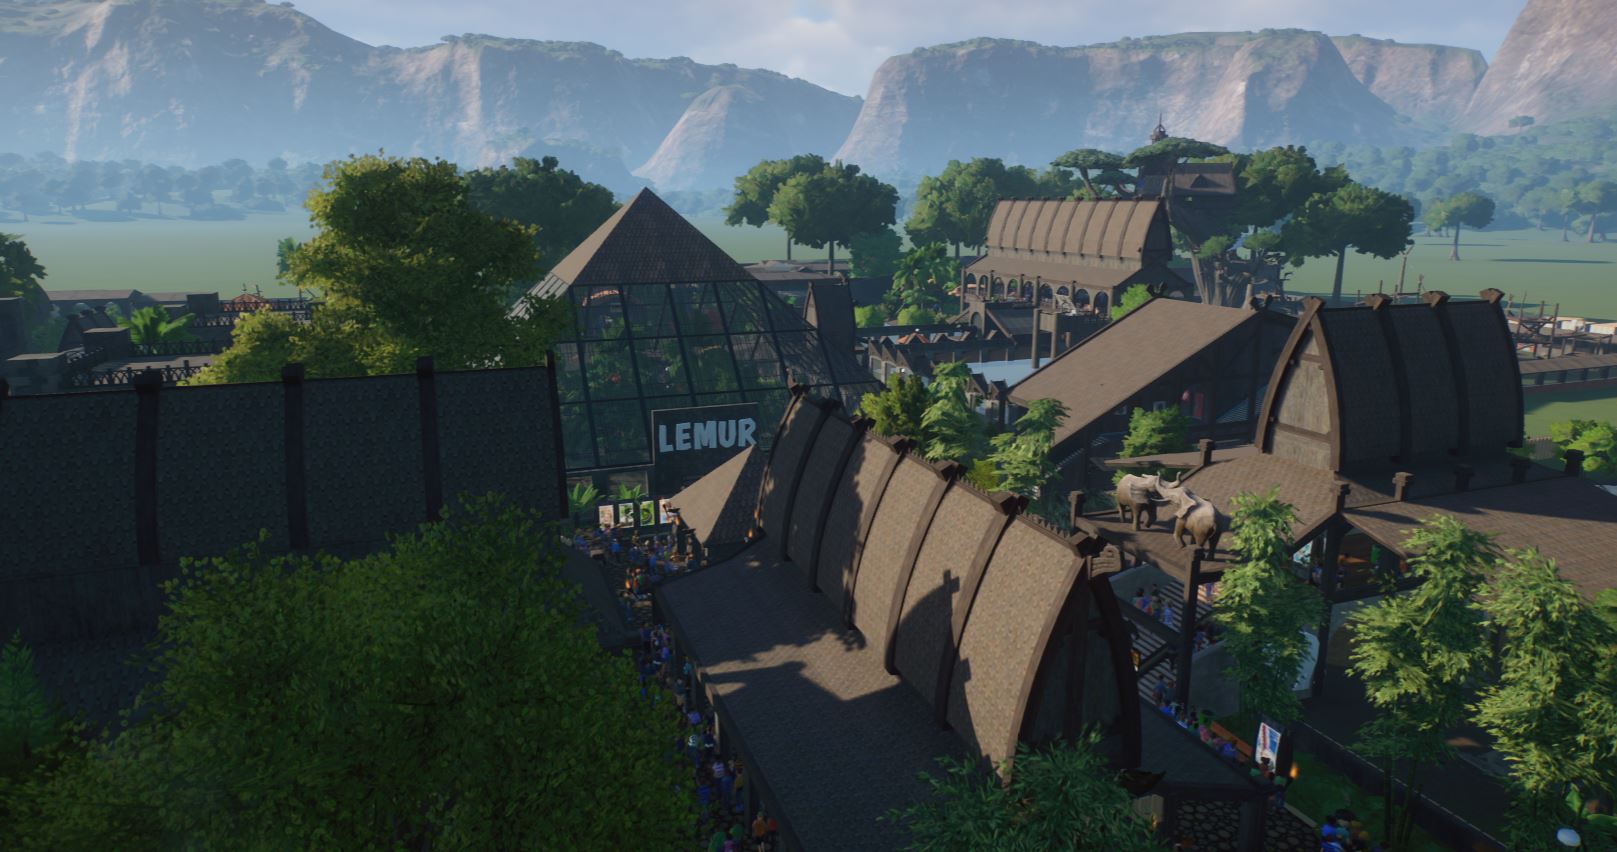
For example the lemur habitat was optimized to include guests entering walkway so this way it can be a shortcut to the next zone that I intend to expand. It was also designed pyramid shaped to be the iconic centerpiece.
By having paths that force guests going through the lemur exhibits before going to other exhibits, this will ensure guests don’t be picky and will always be attracted by something. It’ll also make them more likely to donate.
Another optimization that was done for example was on this elephant’s exhibit where a raised viewing platform was added. This gives guests even more viewing areas and increase happiness. Not to mention the raised platform can also bonus up as shelters for animals.
4. IMPROVE EDUCATION
Improving education of guests will improve the rating thus allowing you to increase price of the park entry as rating improves. One trick that I learnt was to place as many conservation boards as possible especially in choked or crowded areas. Since guests are moving slowly in crowded areas, they tend to have more time to look and read the boards.
I noticed guests education seems to be relative to size of park. I had a full 5 star education when I started placing the boards but when I expanded new areas, the rating decreases as the new area doesn’t accumulate enough education yet. So while your zoo is still small in this stage, it’s best to squeeze what you can get for education. This way you’ll know when you’ve hit the saturated points of ‘overstudying’ or not.


5. MARKETING
Only start to invest in marketing if you see you have enough profit margin to absorb it. I don’t like to invest in small marketing as it’ll usually give smaller ratings but prefer to go straight for the big apple. I always go for the $5K marketing as this automatically gives a 5 star rating to marketing.
Improving marketing rating helps improves overall zoo rating which in turn allows more guests and also allow you to increase park prices.

STAGE 6 : EXPANSION
When the foundation is solid and stable, only then you can start to expand. This is stage where you start to think how you want to shape the park.
At this point you should have plenty of money to build with extras to cover for any unexpected losses.
I myself prefer to only start expanding when I have at least $500K with positive income of $30K per year.
1. EXPAND TO EXISTING FACILITIES
When trying to expand, you want to be efficient as possible to cut costs. This means carefully planning out where the next habitats should be at.
For instance even though I mentioned the optimal number of habitats per keeper is 3, it doesn’t necessarily mean your work zone can be restricted to 3 habitats only as long as it’s easily accessible.
In this example, my front work zone actually covers 5 habitats and there’s 2 keepers assigned to this. The reason was the additional habitats was designed to be close to existing facilities. This way I don’t need to create new facilities yet and make full use of the current facilities I have.
2. BUILD RENEWABLE SOURCES
Important rule is to never use transformers. Once your expanding habitats or facilities are out of the entrance’s power radius, it’s time to add new ones. This is where you should plan where to place the power sources. Both wind and solar have it’s pros and cons.
WIND PROS:
- Wider radius
WIND CONS:
- Bigger negative impacts
SOLAR PROS:
- No negative impact if well maintained
SOLAR CONS:
- Negative impact only when it’s damaged
- Smaller radius
There’s no golden rule here as long as you keep those sources far from guests.
Even though solar panel have no direct impact to guests, they do once they start to deteriorate and I don’t recommend placing in places which have direct contact to guests unless you have a good coverage for maintenance.
I myself prefer to place power sources near staff facilities if I have the chance.
3. ADD MORE SHOPS
While you want to add more species to your zoo, you cannot forget about the guests also. Whenever there’s new habitat expansion or new area opened, always remember to fill the area with shops also to keep the balance between animal and guests happiness.
Do not just expand habitats and areas but neglect shops until the end.
Rule of thumb is to have at least a drink/food shops within 10-15 tiles of radius from one another.
This way they won’t complain too much on thirst/hunger.
4. INVEST IN EXHIBITS
If you have a large habitat that guests need to travel around, it’s best to have exhibits also to keep them occupied and not bored having to walk long way but only seeing one type of species.
For example I have this long gharials and saltwater crocodile habitat stretching for quite a distance.
Since guest needs to travel long and there’s only 2 species, it might not be enough to attract guests to the new area.
By adding exhibits, guests will have more to see while walking and also increases chances of donations since now there’s more than 2 species in this area.
5. PRACTICE STAGE 4 & 5
Once you expand, always remember to go back to stage 4 & 5 which is optimization and management. Building a zoo is pretty much a tick-tock process. Once you introduce new features which in this case is new area, you’ll need to spend time to optimize that new area first and make sure it’s still profitable before expanding further.


CONCLUSION
At the end of the day, this is just tips based on my experiences. Some players might have their own styles that is successful too but eventually the overall advice is the same. Don’t rush. Sometimes if you want to see if your strategy might work, try it out in sandbox and see how is the cash flow of your strategy.