
Overview
Want know all ins and outs of each character? Not sure how some of the game mechanics work? Which difficulty setting is the best for you? What those shields do? Or maybe you want a quick hint for defeating THAT ONE boss? This guide is basically a FAQ that will try to give you a helpful hand in fully understanding the game.
What is Freedom Planet?
Freedom Planet is a 2D sidescrolling platform game developed by the indie company GalaxyTrail. game sets you up against evil alien Lord Brevon, who crash landed on Avalice and tries to steal planet’s main source of energy – Kingdom Stone. Choose one of the three main characters: Lilac the Water Dragon, Carol the Wildcat or Milla Basset and go kick some alien butts!
Game looks pretty similar to Blue Blur’s adventures with his slopes and loop-the-loops but in reality Freedom Planet has far more inspirations in it. From Megaman X, Gunstar Heroes to Rocket Knight Adventures and more retro-greatness from the 90s. Sonic-like movement with Mega Man Zero’s style combat and bosses by Treasure? This is how this game really plays. This guide will help you track the basic features and all those little quirks about characters in the game. Each one of them have vastly different abilities and moves and not all of them are obvious on the first glance.
Check the Table of Contents for topic you are interested! If you are having problems with difficult boss, visit the Boss Fighting Helpline! section.
<Quick note: If you will find any vocabulary/grammar errors in this guide, PLEASE send me a tip!>

Controls and Sensitivity
Freedom Planet have fairly simple control scheme, that could easily fit on most classic controllers. You only need four directional buttons and three action buttons excluding Pause Button. Both controller and keyboard work well for this game, so choose which type of input you are most comfortable with.
You may wonder what those A, B, C buttons mean. I will use them in later in the guide so it’s important to know what does what. Rebind them as you see fit.
- A Button – Jump – Standard jump command.
- B Button – Attack – Each character has a basic attack of some form. Combination of ‘B’ with directional buttons may result in different attacks.
- C Button – Special – Your character’s special ability. Check the character section of this guide to learn more.
Known bug: You cannot set two commands to the single action. That means you cannot set up running for both analog stick and D-Pad at once. You are forced to choose only one input.
Known bug: The game works very well with controllers, but on the first boot-up your controller may not be recognized properly. Visiting the Controls screen or restarting the game usualy fixes this problem for good.
You can also set a Sensitivity in the main Options menu. This will affect your directional inputs. I prefer using a maximum setting, but you can easly find a value that fits you most.

Adventure or Classic Mode?
Before you will begin the game, you will be asked to choose between Adventure and Classic modes of the game. Where lies the difference?
- If my plot summary was enough and the voice-acting from the trailer did not impressed you, choose Classic Mode. In this setting you will avoid nearly all voice-acting and cutscenes in the game. Stage progression will be near instant. Finished Stage 2? Let’s go directly to Stage 3! Other than that there is no gameplay differences between the modes.
- If you think that cutscenes, voice-acting and the plot are cool for you, then choose the Adventure Mode. You will receive the full story with cutscenes between stages. If you don’t mind making a pause for some longer exposition, then this mode is for you.

Choosing the Difficulty Setting
Before you start the game, you can pick the difficulty setting on File Selection screen or in the Options menu. You can change this setting anytime you want, so if one boss makes you run for your money, nothing stops you from toning down the challenge a notch. No achievements or hidden content is tied to the difficulty so you don’t need to afraid of losing something important on lower settings.
- Casual – Those rainbow colors don’t lie. This difficulty setting is aimed mostly towards kids and/or really inexperienced players. Player character will receive only half of the damage from enemy attacks and on top of that there is a strong passive health bar regeneration. You need to actively try to die in this mode.
- Easy – This difficulty was added in one of the recent patches. Damage received is no longer halved. There still is some passive health regeneration, but it is slower than with Casual difficulty. Ideal for those who think they are not so skillful with platformers
- Normal – Standard damage received and no health regeneration. This is a default setting of the game and it is ideal for those experienced with platformer games. Game starts out fairly easy, but later bosses will require some pattern-recognizing to avoid their powerful attacks
- Hard – You receive double damage from enemies and some bosses are buffed in difficulty with more speed and/or randomized attack pattern. You will need 300 crystal shards to gain a extra live (200 on Normal) and each shield will block only one attack (instead of 2). This is your setting if you are a hardcore gamer. Still, I wouldn’t recommend this setting on your first playthough – Each boss in the game will become extremely difficult and will kill you in just a handful of attacks.

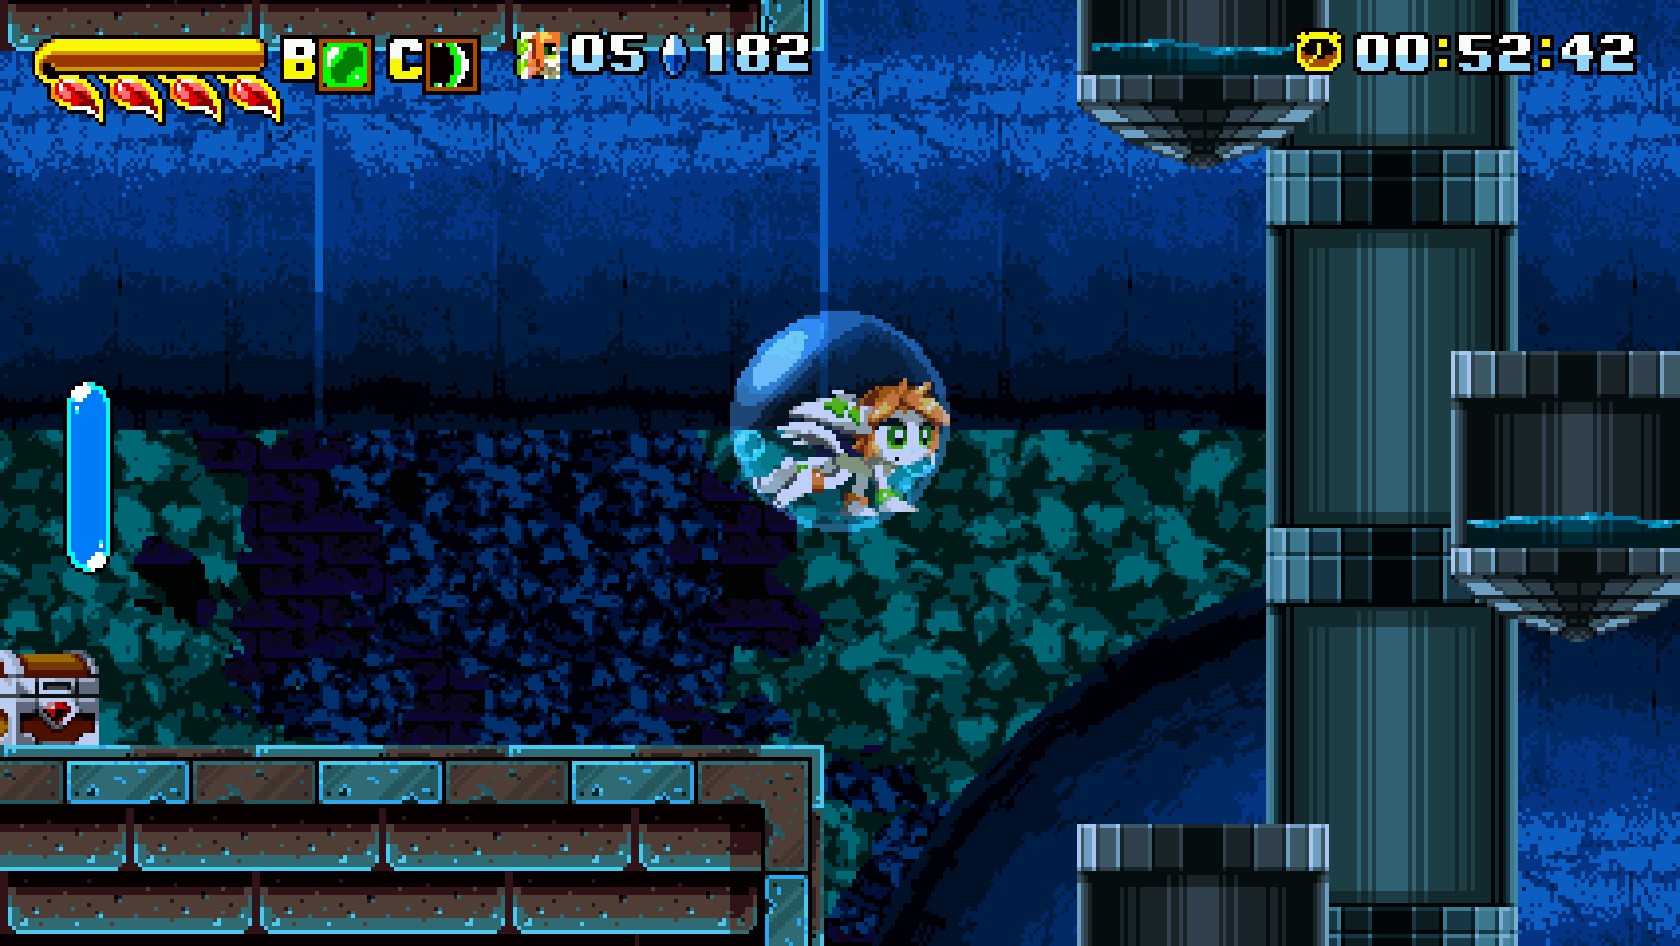
Quick HUD Overview

- It is your Energy Meter. Using certain attacks or abilities will deplete this bar. it slowly regenerates itself, but getting more Crystal Shards scattered thoughout the level will speed up with process
- Those flower petals represent your Health Bar. Find some flower petals on the stage if you are hurt too much. You are near death if the health bar is depleted and it start blinking red.
- You current amount of Extra Lives
- Crystal Shards Counter. On Normal difficulty this counter goes down from 200 each time you collect a crystal shard. If it reaches zero you will gain a extra live
- Stage Timer
Meet the Team! Character Overview
After pressing Start and watching some cutscenes you will come to choose one of two characters: Lilac or Carol. This decision will impact the rest of the game since you cannot switch between characters during the playthough (similar to Mega Man X4).
As for the third character – Milla – she will be unlocked after you finish 2nd level of the game – Relic Maze. She is fully playable, but only in Classic Mode (for now), so she doesn’t get her own story mode.
There are some minor differences in the story and some levels are exclusive to the particular character. The most important difference however is that each character plays very differently. In the next sections I will show all their abilities and strong sides.
Lilac the Water Dragon
“Nothing will slow the dragon down!”

She is more or less main character of the game and the pick for the first playthough of most players. She is the fastest character of all three and has heavily damaging and useful normal attacks. This is the most “Sonic-like” character in the game and her playthough will be mostly focused on zipping thought the stage in fast pace. Most of her attacks also have Invincibility Frames which will save you from receiving damage. Use those moves if you need to block an enemy attack or you want to run from the opponent’s range. Her special attack – Dragon Boost functions similarly to Sparkster’s dash from Rocket Knight Adventures and works both as a mobility tool and offensive option.
Health: 7 Flower Petals
Mobility options: Cyclone and Dragon Boost can help reach higher areas.
Abilities:
- Cyclone – Press ‘A’ while in air. This is double function move that not only can be used as a double jump but also damages your enemies in range. It’s pretty useful attack, but it has the downside that it uses your energy bar that could be used for performing a Dragon Boost. Spamming this move on later bosses can be fatal since this move is quite lengthy so it’s good to know that you can cancel this attack with Dive Kick and other moves. This is also a great move to use while using a spring. With right timing you will give massive upward momentum what could be used for reaching higher platforms or ledges.
- Hair Whip – Your neutral ‘B’ attack. Quick and powerful. it will kill most smaller enemies in one hit and it doesn’t slow you down too much.
- Ground Kick – Press ‘Down’ + ‘B’ while standing on the ground. It is a small short-range attack, but can be found useful at several situations.
- Rising Slash – ‘Up’ + ‘B’. This uppercut attack hit everything above you deals decent damage. Chains nicely into Cyclone or Dive Kick
- Dive Kick – In air press ‘Down’ + ‘B’. It is more useful move than you think. It doesn’t do much damage, but it cancels out other attacks and makes you drop in high speed to the ground which in addition to declining slopes gives you massive speed boost when landing correctly. It’s favorite move of speedrunners.
- Ground Cyclone – Press ‘Down’ + ‘B’ while running on the ground and Lilac will perform a damaging Cyclone on the ground.
Special:
- Dragon Boost – Press ‘C’ button + your desired direction on D-Pad. Lilac’s special attack is an excellent for gaining speed, reaching higher places and damaging enemies. It uses full energy meter when charging and makes you blast with high speed in one of 6 different directions (use D-Pad when charging to choose the direction of the boost). This it will also make your character invincible and you will bounce off the all incoming walls during the charge. If you are planning to use this move, be wary of your energy meter. Using Cyclone beforehand can block you off from performing it. Collect Crystal Shards to speed-up the energy regeneration process.
Carol the Wildcat
“Carol the Wildcat, at your service!”

Game’s secondary character and Lilac’s best friend. Carol is more combat oriented since she lacks some of Lilac’s natural speed. She plays very similarly to Zero from Mega Man X series. Rapid melee attacks and wall-climbing are her most basic abilities. She can also use special red jump-pads installed across the levels to transport herself into hidden goodies or alternative paths. Her special – invincible Wild Kick can be activated at any time as long as there is some energy left on the meter. It deals massive damage, but cannot be used at all times.
Carol really shines when you find a red Gas Canister hidden in the level. She will summon her motorcycle which boost her mobility, speed and damage. Motorcycle will blow itself up if damaged enough, but it’s still a extremely useful power-up, which expands her normal moveset.
Note: motorcycle’s health is not tied to Carol’s health. Receiving damage hurts both her and her bike
Health: 7 Flower Petals
Mobility options: Wall climbing and Motorcycle (allows for Double Jump and Wall Riding)
Abilities:
- Wall-climbing – You can stick to the any vertical wall and jump off it to gain more height. it is your main mobility tool for reaching higher platforms.
- Pounce – Press ‘A’ in air or use ‘Down’ + ‘A’ command on the ground. Pounce let’s you gain some horizontal momentum in choosen direction. This move is not very impressive and deals no damage, but it have a really recent follow-up in form of Wild Claw.
- Rolling – Press ‘Down’ while running and Carol will roll herself into a small ball of damage. Powerful move for flat and downhill areas!
- Claw Attack – Neutral ‘B’ attack. It’s not very damaging, but it’s much faster than Lilac’s hair attack. You can mash the ‘B’ button very effectively, but this move does not give you invincibility frames, so don’t use it if you are expecting an attack.
- Wild Claw – Press ‘B’ while doing the Pounce. This will transform the regular pounce into rather impressive claw attack. It packs a punch so you can use it frequently.
- Press ‘A’ in sequence while standing on red Jump Pads to transport yourself between them. Note that you can only use ‘flashing’ ones to begin jumping. Others cannot be used unless you have jumped from the previous one in the chain.
Special:
- Wild Kick – Press ‘C’ button. Chun-Li’s style kick than not only heavily damages your opponent but also gives you lots of invincibility frames to use, so you can block or avoid most of enemy’s attacks. It doesn’t last for long for the full bar of energy, but using it at specific moments with smart energy conservation is a key for winning more difficult boss fights as Carol
After getting the Motorcycle:
- Ramming – Gaining enough speed using the motorcycle will damage smaller, non-solid enemies on contact. It’s not extremely useful, but looks really badass
- Nitro Boost – Pressing ‘C’ on the ground will not activate normal Wild Kick. You will gain a ground speed boost instead, spending bit from your energy meter. Boost also will damage enemies. You can press ‘B’ as a follow-up to nitro to perform a Wild Claw on ground.
- Double Jump – Pressing ‘A’ in air will result in Carol doing a double jump which can be used for gaining additional height. This action deals damage to enemies too and uses a portion of your energy bar.
- You can jump off the motorcycle at any time, pressing ‘Down’ + ‘A’ while on the ground. You can leave your bike for the while and then come back, if you don’t want to risk losing it when fighting with stronger enemy
- Motorcycle can also climb up wall without jumping off it. Just stick to it and experience those wonderful physics!
Milla Basset
“I… I wanna go too!”

No less adorable than most famous internet kittens, Milla is unlocked in Classic Mode after finishing second stage of the game – Relic Maze. She is considered as one of the most difficult characters to play as. She is very fragile and slow. Her attacks not only work very differently in comparison to Lilac and Carol, but they also laking invincibility frames. However, after mastering all of her moves, some previously hard boss fights can become cakewalks. Milla’s main streight comes from the fact that most of her attacks are ranged and in pair with powerful deflector shield, she can avoid getting close and personal with most enemies, saving her from painful damage. Normal shields found on levels also are boosted in power, when Milla uses them – they will block three hits (instead of two) before vanishing.
She can also fly for short amount of time and she is considered a best character for those players who like exploration-based gameplay. Milla is also a great choice for Gem Hoarder achievement run. Thanks to her small health bar, transforming spare health petals into crystals is a easy task and good mobility allows her to get into most nooks and crannies. Milla is also the only character that doesn’t need energy bar for her attacks.
Health: 4 Flower Petals
Mobility options: Flutter Jump allows limited flight
Abilities:
- Flutter Jump – Hold ‘A’ while mid-air. Milla will fly for a short period of time. This is her main mobility tool and you will use it frequently. Be familiar with how long you can keep flying to correctly junge the save distance for hover over obsticles or enemies.
- Digging – Sometimes you can find a patch of dirt in the level. Try to examine it closely. Look for blinking ‘Down’ + ‘B’ sign near your health bar. Mash ‘B’ while holding ‘Down’ to dig out a hidden treasure!
- Phantom Block – Hold down ‘B’ until Milla will generate a green square block over her head. You can toss the block into enemies – this is Milla’s main form of ranged attack and it is pretty powerful. Be careful though – generating or holding the block will decrease your speed and lock you from using Flutter Jump, so don’t use this move under pressure, when enemy attack can easily hit you. Just try to keep healthty distance between you and enemies and don’t let them to stun lock you and drop the block. Interesting fact: Phantom Block has the same reflecting propeties as Deflector Shield, so you can block projecties traveling over your head and return them to sender.
Special:
- Deflector Shield – Press and hold ‘C’. Milla will stand immobile on the ground generating a deflector shield afront her. Shield doesn’t cover your character completely, so you need to use directional buttons to aim it propertly. Maybe it doesn’t look impressive, but if you see a projectile attack in the game, on 99% Milla can block it and reflect it towards her enemies. You can do this with even the most impressive energy shots and barrages and those reflected shots can hurt enemies too! Extremely good defensive move, try to get use to it as much as you can. Still, be wary that you are very vunerable against melee attacks when using it!
- Shield Burst – Release ‘C’ button and Milla will transform her shield into short-range spike attack which damages enemies. It’s range and damage is not impressive, but it’s quick enough to take care of swarms of weaker enemies like bats
- Super Shield Burst – First, generate the Phantom Block. Second, press and hold ‘C’ button to summon bigger, rectangual shield. Third, release ‘C’ and see your enemies annihilated. Damage of this attack depends on range but attacking by only tip of the burst will still bring noticable pain to enemies. On top of that the whole attack also has deflecting properties, which work extremely well against projectile-spamming enemies (ex. Spade). However, watch out for the recoil. Using this attack on small platforms can send you flying in undesired direction. You can use this recoil to reach even higher places.
General/Character Gameplay Tips
<This section will be expanded in the future>
- Don’t forget that collecting Crystal Shards can boost up your energy regeneration. Lines of those blue crystals also can hint you a way thought level or hidden goodies
- You won’t receive contact damage from most enemies, unlike many other platform games. This makes running away from enemies far easier. Not every fight you need to win, so don’t hassle if you don’t want or need to.
- Using you attacks while maintaining high speed deals more damage to enemies. Quick blows while running or jump-ins are way to go!
- Again, be wary of invincibility frames given by your abilites. Single blow to the rushing enemy at right time can save you from damage, example: those spinning enemies in Sky Battalion. Stay in one place and attack when it closes in at you.
- Once more, you can cancel Cyclone with other move, preferably Dive Kick. Saves your time and energy!
- Use Cyclone shortly after you bounce of the spring. Enjoy your flight!
- Ground Cyclone is an awesome move on flat or downhill areas!
- During some boss fights you can help yourself catch a breather by sticking to one of the walls. This is a great way to lower the tesion if you feel overwhelmed. Still, some bosses can perform attacks that will reach you so don’t lower your guard completely
- You may consider jumping off the motorcycle during some boss fights to conserve it for later use. For example, leave your bike on the one side of the Jade Creek’s mid-boss area, deal with the threat and then hop back on it after clearing the path for the next part of the level.
- Phantom Block has the same reflecting propeties as Deflector Shield, so you can block projecties traveling over your head and return them to sender.
- When generating a Phantom Block, you can run into many items scattered on stage like crates, treasure chests and bomb. You can use the latter to deal additional damage from the blast
<This section will be expanded in the future>
Elemental Shields and You

Pretty crystals, huh? Break one of these and your character will receive a corresponding elemental shield in one of 5 flavours. There are many questions regarding what exact benefits each type of shield gives you aside from blocking two (on Normal) stray attacks. Holding on a correct shield can help you out in some difficult sections of levels, so let’s check out their properties.
- Green/Pink – Wood Shield – This one attracts nearby Health Petals directly to you and gives you free one for each 20 crystal shards you collect while shield is on. You gain a resistance to “toxic” types of enemy attacks, most notably Gas Flowers found in Pangu Lagoon. Wood shield focuses on survival, so taking one at low health can be very smart move.
- Yellow – Earth Shield – Attract all nearby blue crystal shards and render you resistant to “crystal” type attacks for enemies like Yin-Yang Drone in Relic Maze or mid-boss of Trap Hideout. This is your go-to shield for Gem Hoarder achievement.
- Blue – Water Shield – Allows you breath underwater for infinite period of time and blocks ‘slime’ type attacks. It may seem not too useful, but… I won’t spoil it… Just don’t forget that it exists.
- Red – Fire Shield – Not only makes you immune to fire-based attacks but also deals contact damage to nearby enemies. Additional ‘hurt’ into a punch is always welcomed. Shield will dissapear if you will find yourself in pool of water.
- Silver – Metal Shield – Makes you immune to electrical attacks and spiked floors. Pretty self-explanatory. Take advantage of the fact that some stage end-bosses are almost exclusive electrical-based.
In addition, bonus Rainbow Gems will give you Sonic-esque Invincibility power-up in par with Freedom Planet theme song. It lasts for quite a bit and you are completely immune to everything except rare bottomless pits.
Fun Fact: Shield names and properties are inspired by the five elements in known traditional Chinese philosophy – Wood, Earth, Water, Fire and Metal.

Power Orbs, Tao Tokens and the Bonus Room
“Hey! Does colored orbs that I keep collecting do something?”
Yes, they do. Still, they seem useless for the first glance. The key to unlocking this secret is the other item that you can find, most times well hidden, in the level – Tao Tokens. Those rainbow ying-yang symbols are your ticket to the Bonus Room that waits after each main level of the game.
When you reach it, you gain an abillity to roll the dice that gives your one of several rewards: mostly shields and multiple 1-Ups. Each roll cost you 30 Power Orbs, or if you have less than 30, the all remaining ones. Hit the dice and hope for the best. You are also free to cheat and kick the already rolling dice if you want to get a specific item. Going thought exit to the right will continue the game as normal.


Boss Fighting Helpline!
Problem with a particular boss fight?
This maybe isn’t the most expansive guide about fighting bosses in Freedom Planet, but I will leave some useful tips and hints for defeating the most problematic ones. Watch out for SPOILERS though. I will not mention the boss’ names and I will refer to them as end or mid “boss of this particular level” for easier navigation in this section and maximum possible spoiler avoidance.
Nearly all bosses in the game have predictable and exploitable pattern. Learning it can help you in avoiding attacks and finding openings to attack. The secondary rule is: Don’t be greedy for hits. Attack only when you are sure that you won’t me smashed in the face with sudden boss counterattack.
“Help! That annoying serpent is annoying!”
His most dangerous attack is his purple laser barrage and it punishes you for jumping mindlessly. Don’t rush to hit him, just react to his actions. If he uses his blue laser shot – this is your moment to strike, since your normal attacks can parry his shots. After being hit, he will change position. React! Purple lasers or flamethrower? Avoid. Blue lasers? Attack.
“Help! This guy is a son of Quick Man or what?! He is so fast!”
This one is quite tricky to find right opening for you to strike. He’s got two attacks: ground and airborne card throw. You can avoid both of them by precision jumping or running away. Don’t run around him like an idiot and just wait for his move. Jump over him and his projectiles if he is on the ground and quickly hit him. You cannot do a similar thing if he uses his cards airborne – he will always dash after this. If you see him in air, avoid or run under him and strike when he is still busy throwing his cards.
“Help! I’m getting rekd’ by those ice-shots!”
This boss is quite difficult, but if you quit attacking mindlessly you will see that she has only two main attacks: wave that bounces off ways and ice shower after you damage her enough. Ask yourself: When and where I can attack her safely? Most of her offensive moves are casted directly afront her, while she is on the ground. Solution? She is vulnerable while she is jumping around. You can also get behind her and strike her safely when she lands! Just watch out for ricocheting waves.
“It’s him again!”
As Milla, he is non-issue: most of her abilities have deflecting properties, so he can hardly hit you. As Carol, this is a rough ride. The strategy for Lilac’s version as seen above in Sky Battalion section is still aplicable here, but her slower speed and no double jump without motorcycle can spice things a bit. You can also stick to one of the arena’s wall and lure him. Conserve gas canisters and use jump pads if you are feeling overwhelmed.
“I cannot dodge those! Dragon Boost charges sooo slow! “
The key for this fight is energy conservation. All of his attacks: particularly those Ghost Shots and laser are meant to be dodged using Dragon Boost. There are recharge rings on the arena for storiing an additional boost, but you need to use cyclone to reach it. Do this, but try to do it quickly, since improper use of Cyclone will waste your energy meter and you won’t be able to do a Dragon Boost to dodge incoming attack. Remember: You can cancel Cyclone with a Dive Kick to save your energy!. He’s got very easy pattern to spot, so you can predict when is a good time to recharge and when to attack. You need to hit most of his weakspots and then when his eye flashes yellow – hit it to finish the job.
“He is only a mid-boss?! Are you kidding me?”
This guy has two powerful attacks: ramming and the green laser spam. Know how to dodge it and you will be fine. If you see him preparing to ram you, use any means nessesary to gain as much air as you can. Use springs, walls, Dragon Boost, Flutter Jump… Everything to get away from him when those warning signs show up. As he lands (just jump prematurely to avoid his shockwave) he will shoot his green lasers. You know were you are perfectly save? Behind him. Just keep yourself in behind his firing cannon and move away further as he starts jumping. Pepper him with hits in pauses between barrages. He will occasionaly use a small blaster while hovering above the ground, but it is easier to just run away from him when he does it. Good Luck!
“Eeeeee…. How do I even…”
He is fast. He is powerful. But he is not invincible. Know his pattern: he will always dash one or two times, next he will briefly use other type of attack and then he will come back to dashing at you. Always be ready to avoid his dash attack! It’s all timing game. Time your dodges right – don’t jump to early, don’t jump to late. He will not spam it randomly – it’s always the same time intervals during most of the fight, until he will enter into Pitch Mode at around 20% of health. His attacks are faster then so adjust yourself. Strike him while dodging this attack, but be prepared for what he will do next. It is your best bet to avoid his beam spam and flamethrower altogether. Skilled players can get behind him and score massive hits but it is extremely risky and can cost you large amounts of health. He will initiate another dash near immediately after flamethrower or ground spark, so be ready. You can use sound effects to notice him attacking off-screen.
As Lilac, try to avoid using Dragon Boost recklessly, since you my find yourself heading to the bottomless pit below. Cyclone is your best bet for consistent damage against hit. As Carol, your mobility options are limited, so try to abuse Wild Kick as much as you can, while conserving energy. Try using fast Wild Claw as much as you can. You can also avoid most attacks, by sticking to the sidewalls. You can take a quick breath there, if you need. Playing ss Milla, using Phantom Blocks is possible, but you need to time it right or else fight will end with you killed and with no blocks summoned at all. Don’t forget to use your shield if boss wants to unleash a beam spam! Not only you will block those projectiles, but they will be reflected straight back to the sender damaging him in result!
Learn the pattern, keep your cool and you should take him down easly.
“$%#@#”
Ladies and gentlemen! The award for the Most Painful Attack in Video Games, Period comes to… THAT FRICKING KNIFE SLASH. DODGE IT BY ANY MEANS NESSESARY! IT HURTS SO MUCH!
He always starts the fight with this attack and it takes away WOOPING THREE FULL FLOWER PETALS. Now you know why your health reaches zero in no time.
Still, I have a great news for you. One, his attack pattern on Normal is very strict so after a bit of observation you can easly predict when to expect it. Two… JUMP. This attack covers a lot of space, but a high jump will be enough to dodge his strike. His other moves are still powerful, but they are menageable. Your best window of opportunity to attack is after he finishes his Green Swipe attack. He will always use it three times in that sequence: Up-Right to Down-Left, Up to Down and Up-Left to Down-Right of the screen. Then he will spawn directly above you – this is your time to strike.
Tip by Vorpal Soda: Gotta Go Reckless? Try to parry that knife slash with Ground Cyclone or Wild Kick while he dashes at you. If timed correctly you can use your invincibility frames and block the attack, while damaging the boss.
Don’t lose your cold blood and you will win this fight. Good Luck!
<Want to see other boss in this section? Write a comment! I can help!>
Closing Comments
- Saw inconsistency or vocabulary/grammar mistakes in this text? Please, leave in comments what I need to edit. I’m not native english speaker and probably there are tons of language errors here so I would be much greatful, if you wish to help me track those down!
- Wanna leave an extra hint for other players? Post in in the comments section and I will try to include it in this guide with credit to you!
Thank YOU very much for reading my guide. I hope you got all the information you need and you enjoy playing the game! Good Luck and Have Fun playing Freedom Planet!
