
Overview
A comprehensive and informative guide to purchasing Frigates – what to look for, what to avoid, and considerations for building fleets, and how to get the most out of your hard-earned units!
Foreword
When I first jumped into the world of buying frigates and sending them on expeditions, I didn’t really know what I was doing – only later I realized that I could have spent my money much better! After several days of trial and error punctuated by squinting at my spreadsheet, now it’s making sense. In hindsight, I probably wasted at least 20 million units on ships I probably wouldn’t have purchased knowing what I know now. In this guide, I hope to share some of my insights to help others avoid making similar costly mistakes!
Basic Considerations (Beginners Start Here!)
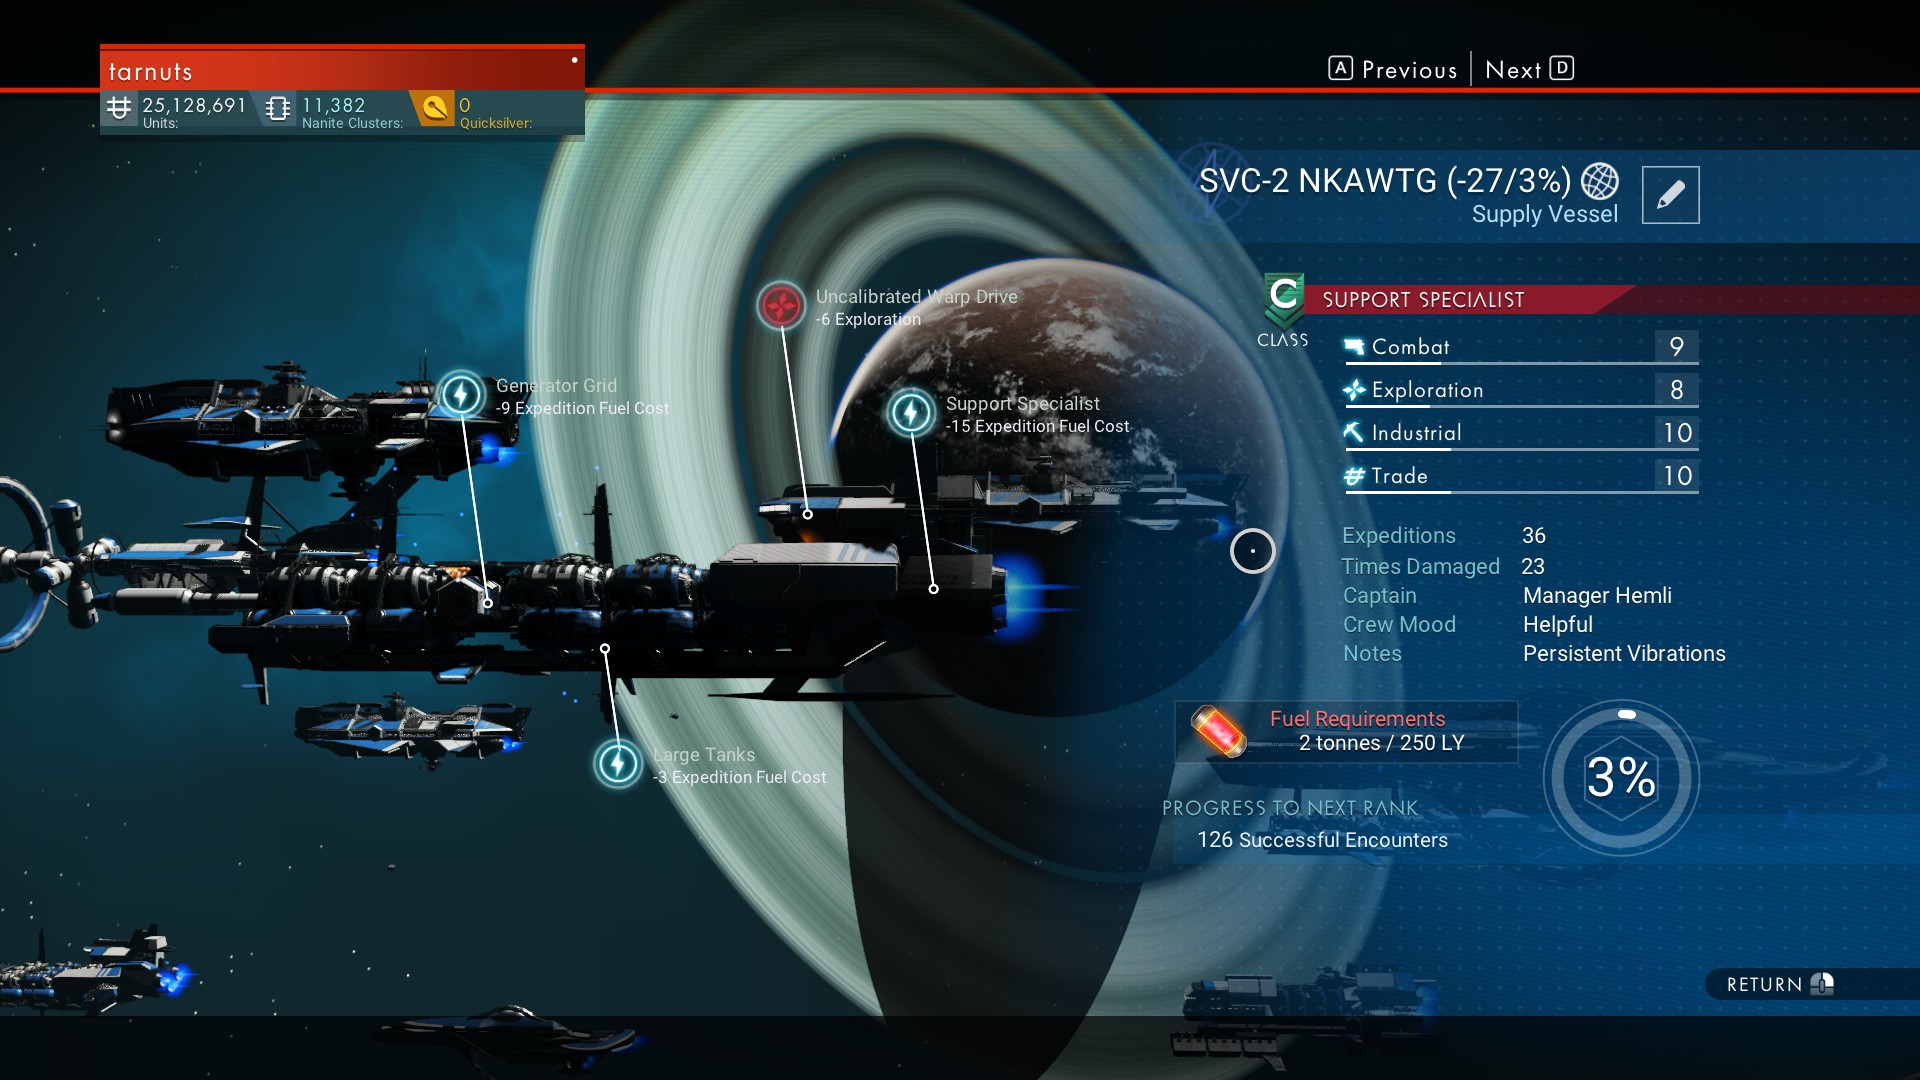
Frigates come in five types (Combat, Exploration, Industrial, Merchant, Support), and each has up to five slots for traits that either buff or debuff your ship’s stats and abilities. Frigates are deployed in groups of up to five ships, with 4 types of Specialty missions and “General” missions. Speciality missions should include 2-4 good ships of that specialty type and a Support ship (to reduce fuel costs), while General missions should include a mix of one of each of the four specialty types and one Support ship (again to reduce fuel costs).
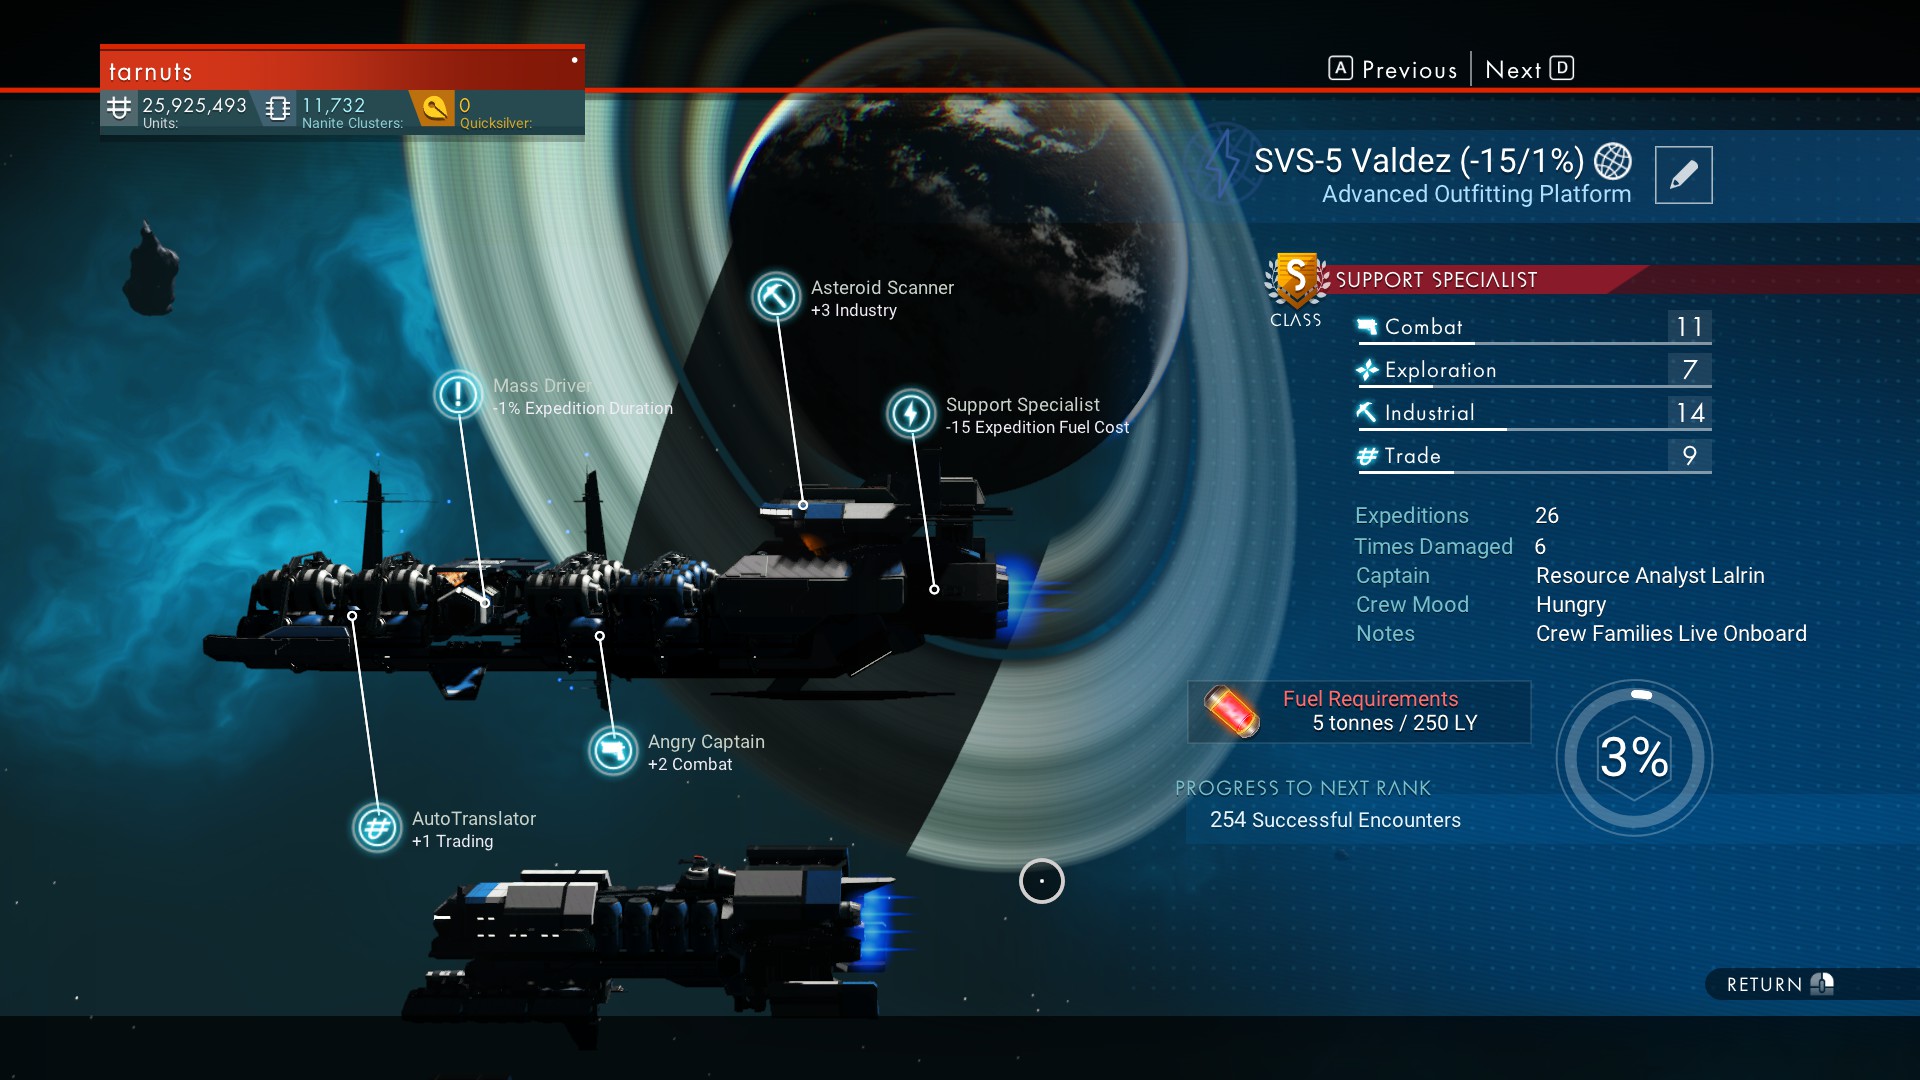
Each of the first four ship types has a specialty role, and always uses the first of their five avalable Trait slots to give a +15 boost to their primary role (Combat for Combat, Exploration for Exploration, etc). Support Frigates do not get a +15 boost to a specialty stat, but instead always start with a -15 expedition fuel cost (i.e. their “specialty role” is supporting other ships in their specialty roles by reducing their fuel costs!) More on Fuel Costs below…
You can have a maximum of 30 frigates in your fleet. To cover all possible mission types, you will want at least 4-5 of each specialty ship type (perhaps as many as 7 eventually) and 5-7 good support ships. Every 24 hours, 5 new missions will spawn, each of which you can assign up to five of your Frigates to attempt. Missions are rated in terms of difficulty with one to three stars, and also have a distance to be covered in light years (LY) and duration. Some missions last longer than 24 hours, so if you assign a fleet to a long-term mission, they may still be out of port when new missions spawn.
Dut to this potential long-term mission overlap, you will want to keep some vessels in reserve, either by filling up your fleet roster, or by assigning less than five frigates per mission. Careful planning and efficient scheduling will allow you to assign two or three specialty fleets of the same type if doubles or triples of that type are offered, or put together a diverse fleet for a General mission. You may also want to keep a spare Combat Frigate to escort your Freighter, as it will help you if you get attacked in your starship (at least while you’re in the system where your Freighter is, anyway).
Fuel & Expendables – What You Need to Know
Aside from the initial purchase price of your Frigates and potentially the material costs of repairs to ships damaged on missions, the main costs associated with running an expedition are time and fuel. With good preparation, fuel costs can be managed or minimized to reduce the amount of time you’ll need to spend mining asteroids and manufacturing fuel canisters for your hungry vessels!
Fuel Cost / 250 LY: Each frigate has a base fuel cost rating expressed in tons of fuel used per 250 LY traveled (this stat is not shown in the fleet management spreadsheet, but visible when purchasing / inspecting an individual ship). Most frigates have a base fuel rating of 8-12 per 250 LY; Support ships have a base fuel rating of 2-5 per 250 LY. All other stats being equal, frigates with lower (more efficient) base fuel ratings are more desirable, as it will take less time mining Tritium and Dihydrogen to fuel them.
The best strategy for managing your overall fuel costs is to limit your purchases to Frigates that have low base fuel costs (8 or 9 for Combat, Exploration, Industrial or Trading vessels, 2-3 for Support) and Support vessels that have large total fuel reduction bonuses (try to buy ones with a -9 Fuel Cost positive trait!). By avoiding purchasing “gas guzzlers”, and having excellent support ships, one can greatly reduce fuel costs, though all non-Support ships have a minimum mission fuel cost of 50, no matter how efficient you are (details on that are available in an Appendix at the end if you’re interested).
When assigning fleets to expeditions, up to three slots are available for expendable items for that particular mission. In these slots, you can install an item to give a +10 boost to the fleet’s total traits. These items can be crafted once you’ve acquired the Blueprint from a Manufacturing Facility or Operations Center. They also drop randomly when destroying pirate or Sentinel fighters in space (you’ll need to fly near the debris from the destroyed fighter to collect it).
A list of the types of expendables, the bonuses they provide, and their materials cost follows:
- Explosive Drones (+10 Combat) = Walker Brain + Gold (50)
- Fuel Oxidiser (-10 Fuel Cost) = Quad Servo (2) + Gold (50)
- Holographic Analyser (+10 Exploration) = Oxygen Filter [Oxygen (90) + Pure Ferrite (30)] + Gold (50)
- Mind Control Device (+10 Trade) = Sodium Diode [Sodium Nitrate (40) + Ferrite Dust (40)] + Gold (50)
- Mineral Compressor (+10 Industry) = Cobalt Mirror [Ionised Cobalt (50)] + Gold (50)
Each of these expendable items require Gold, which should be plentiful if you’ve been mining asteroids for Tritium for fuel (and Silver for upgrading your Freighter). However, while the Exploration, Trade and Industry items can be produced simply from gathered resources, the Combat and Fuel items require you to collect items from the blue cylindrical “combat supplies” dropped by destroyed Sentinel Quads and Walkers, respectively.
Fortunately, this is the only use for Quad Servos (so if you’ve been saving those wondering what they’re for, now you know). Likewise, Walker Brains are used for Conflict Scanners, which you’ll only need one of per Starship. You’ll have to generate three stars worth of Sentinel Aggro before Quads start showing up, and four or five for Walkers. Quads weak point is the glowing red button in the rear – if you’re having trouble with Walkers, you can take off in your Starship and strafe them with your cannons, then land and pick up the loot.
If you’re hunting Sentinels for parts for Frigate expendables, remember: if you generate enough stars of Sentinel aggro on the ground, when you fly to space, Sentinel fighters will attack you (and if you win, they’ll send reinforcements – and keep sending them if you keep winning…). If you want to avoid this, just run or hide somewhere on the planet’s surface and allow the Sentinel force to deactivate before launching to space.
Frigate Traits – The Good, the Bad, and the Useless
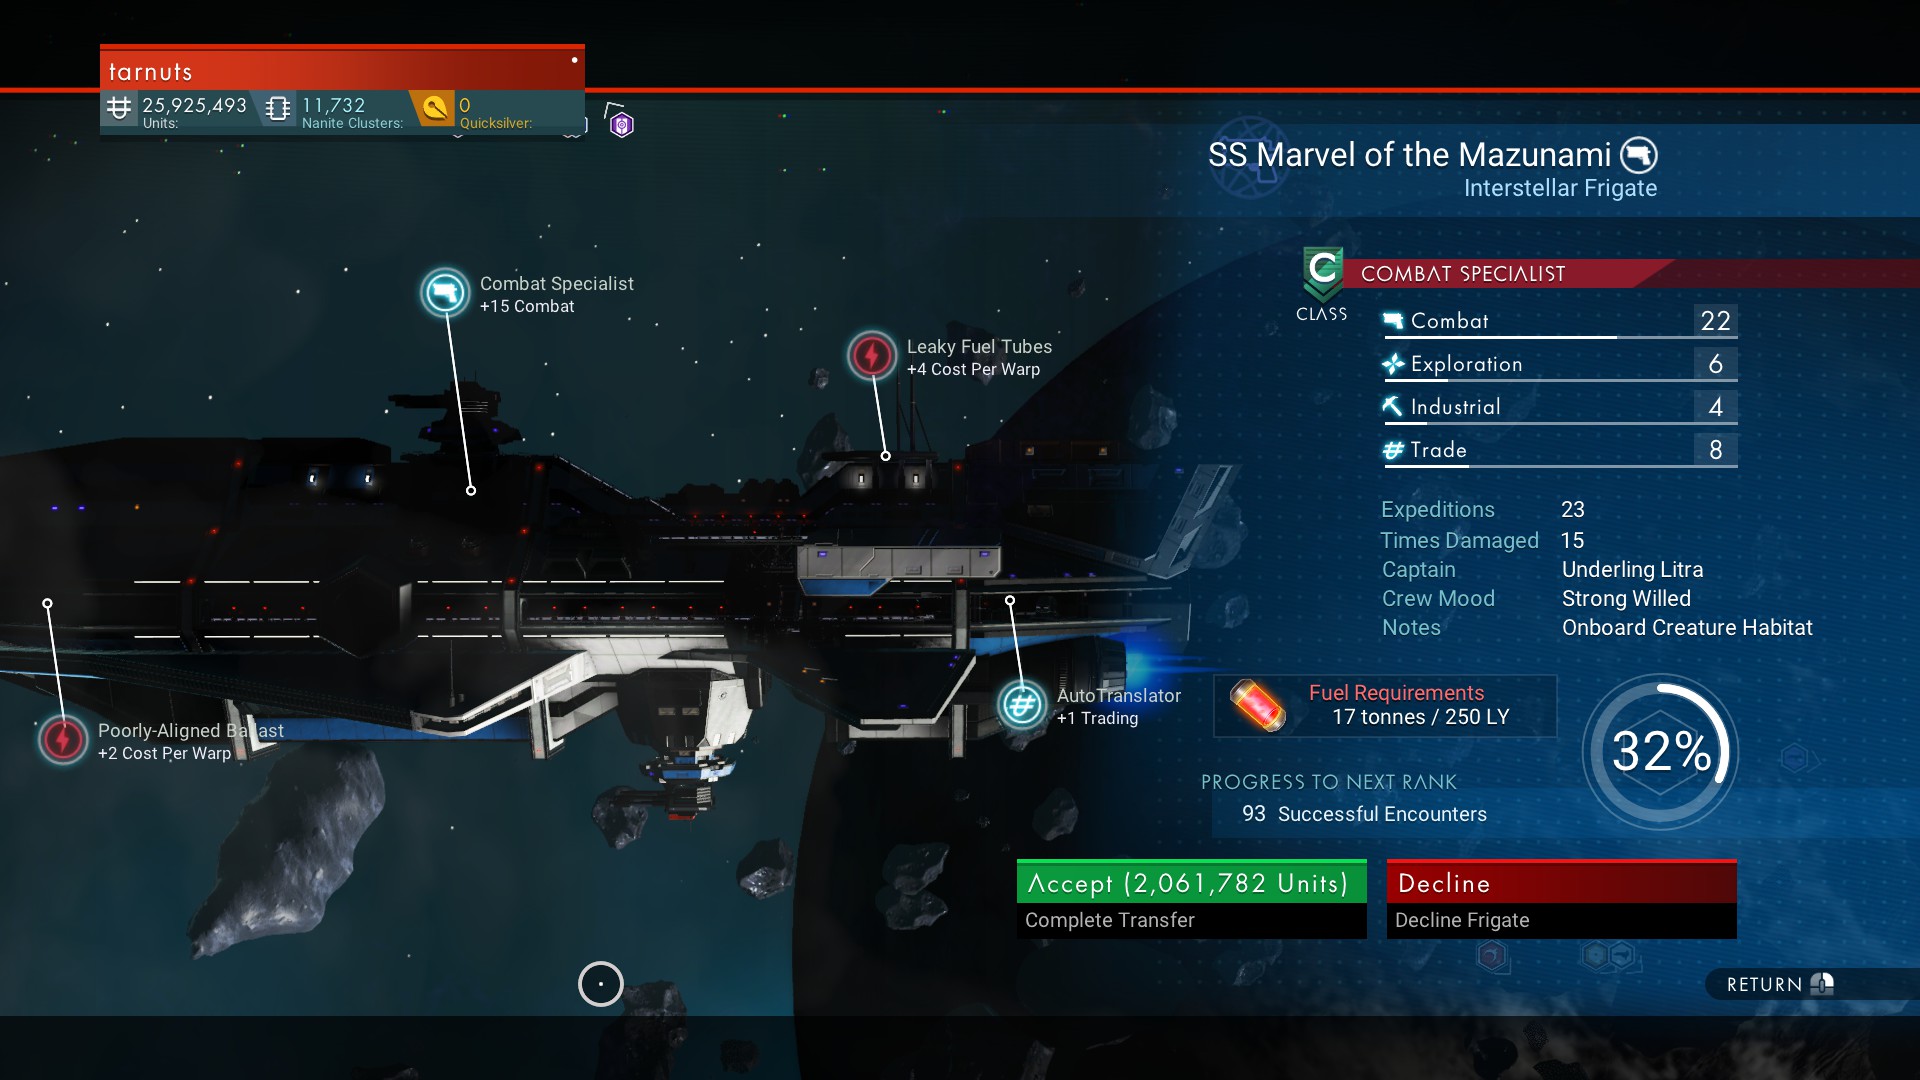
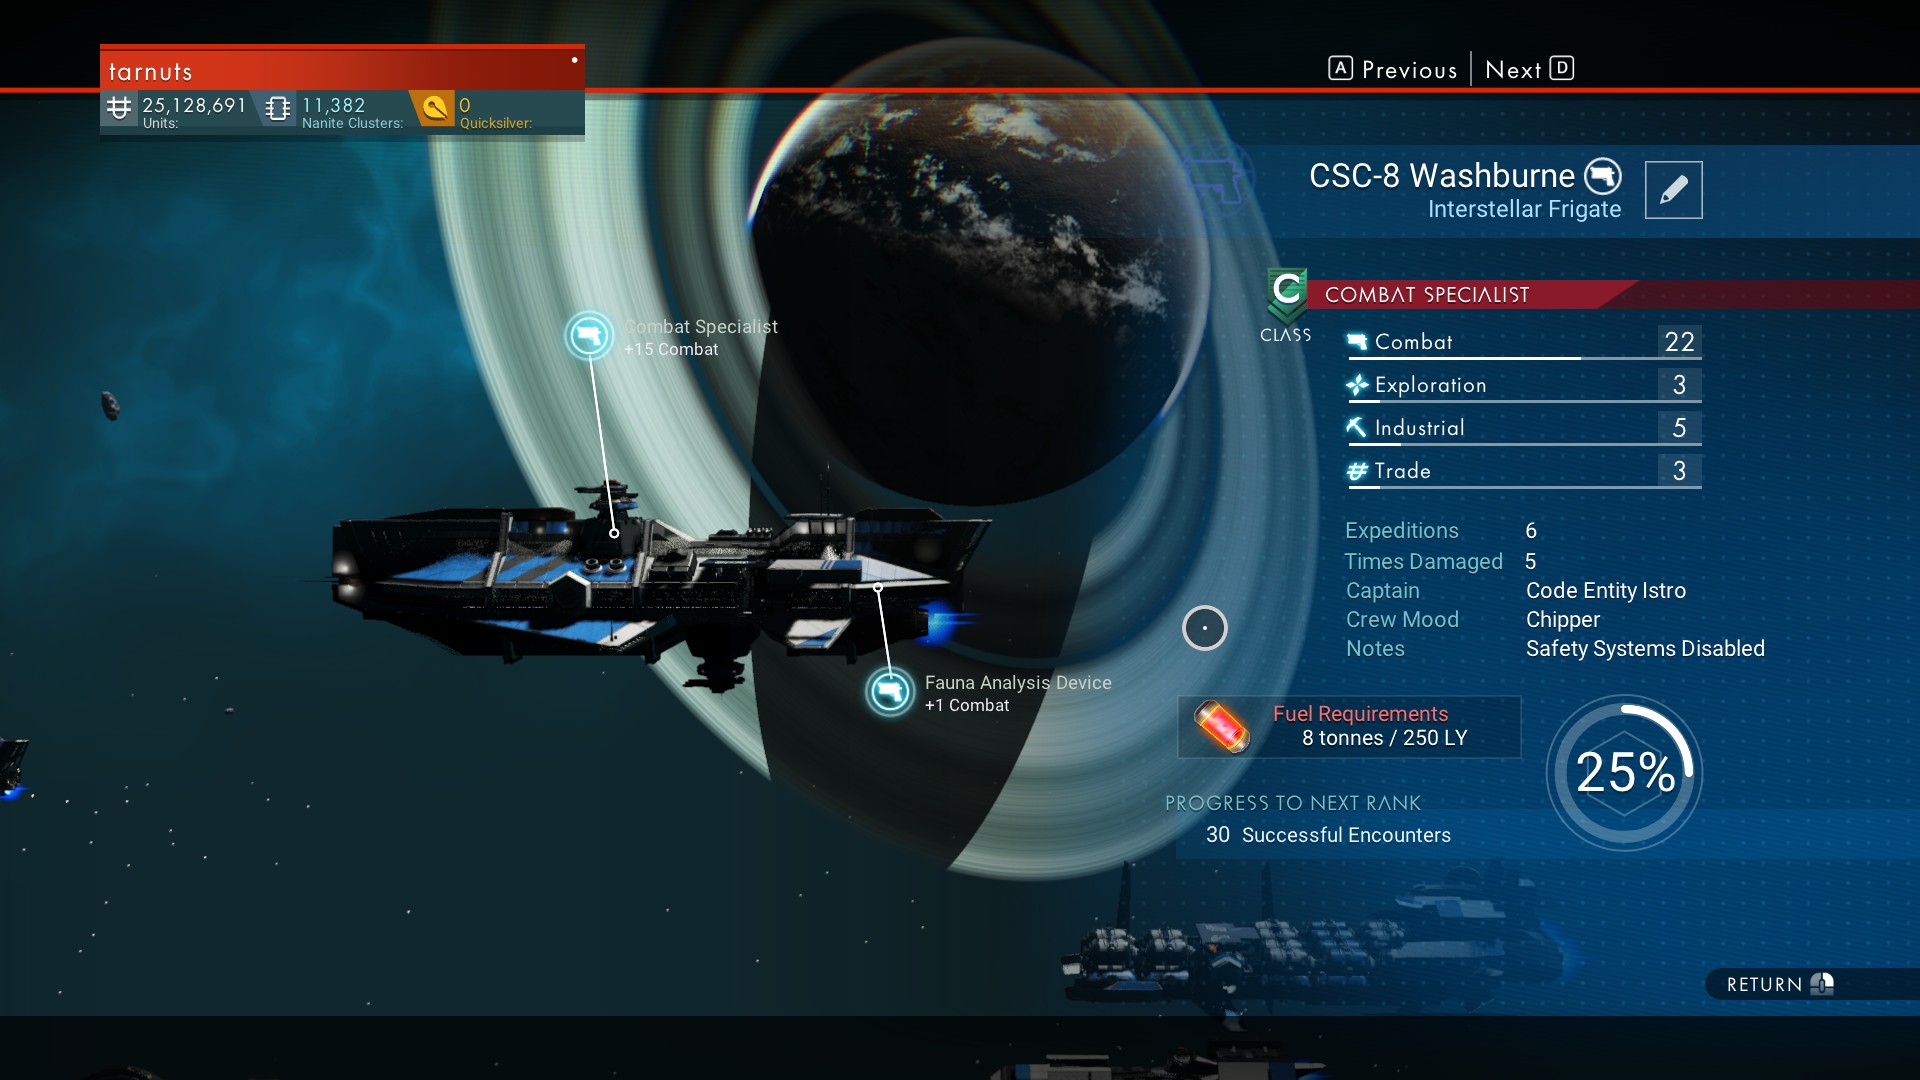
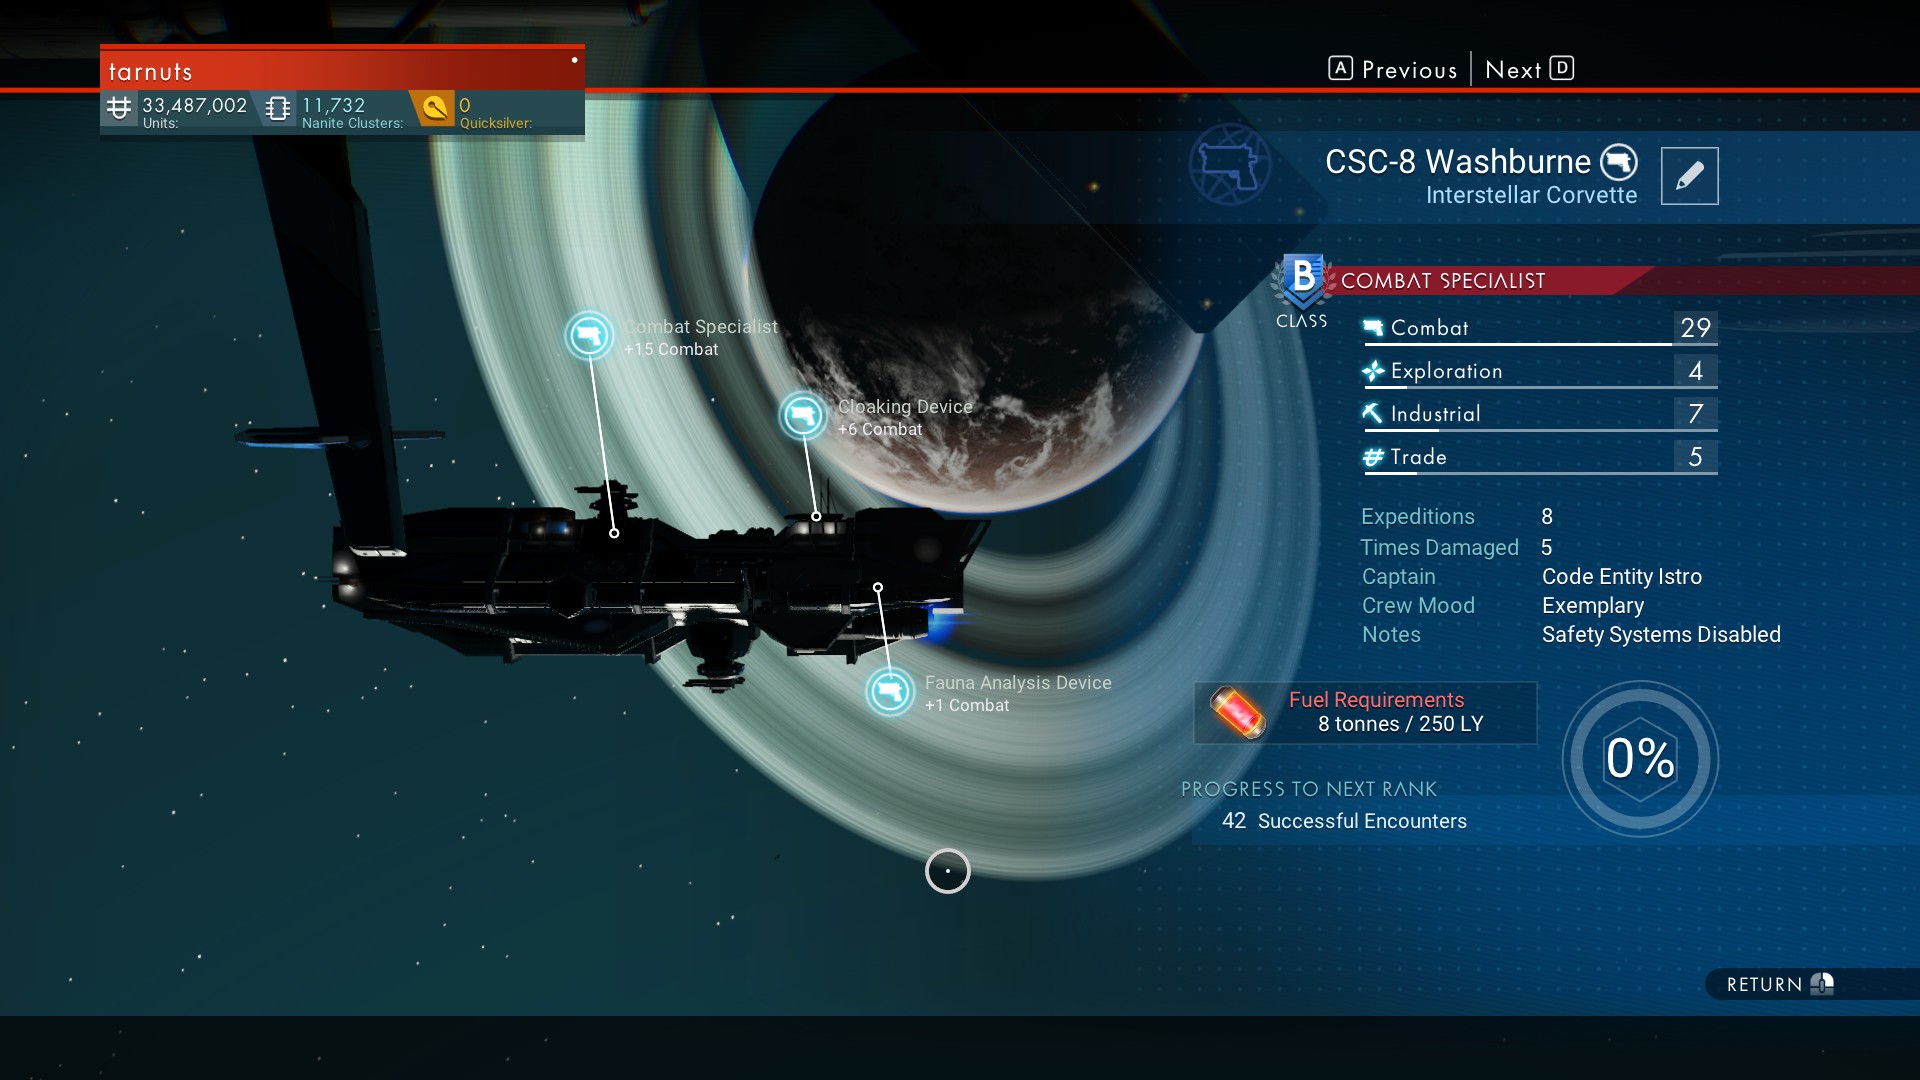
Exclusive Speciality Traits: Ships of the different types have access to different traits – importantly, specialty ships have access to high-powered traits exclusive to their specialty, that can give up to +6 towards their primary stat (there are also two exclusive +4 buffs and two +2 buffs available to specialty ships for their primary traits). For example, a Combat ship can have a Cloaking Device and/or Tremendous Cannons which each give a +6 to Combat, the highest possible stat bonus.
“Off-Class” Traits: Ships of a given specialty sometimes come with beneficial traits that buff “off-stats”: for example, a Combat Frigate might have Robot Butlers (+3 Trading). Interestingly, for Combat traits, the highest off-class buff a non-Combat ship can get is +4 (and each ship type only has access to one +4 Combat trait). Other off-class traits (Exploration, Industry, Trade) available to other ships max out at +3 each, but there are two traits available for each cross-class specialty (so a Combat Frigate could have Robot Butlers and a Well-Groomed Crew for two +3 Trading buffs, but no +4 Trading buff is available).
Off-Class traits can be acceptable if they’re high-end. They may appear on some of your favorite ships as they level up, or you may get a ship with one if you can’t afford to be choosy and it’s not otherwise a deal-breaker. Especially at higher levels, specialty ships with Off-Class buffs should be assigned to General missions; if their off-class stat is high enough, they can even “fill a hole” in an expedition of a different specialty by padding the total bonuses out to get an extra star on your fleet rating (thus being worth the extra fuel cost to send the ship and possibly prevent damage).
Beneficial Fuel Cost Traits: While all Support ships start with a base -15 Fuel Cost trait, these ships also get exclusive access to the best Fuel Cost traits (two each of -9, -6, and -3). Other types of Frigates can have traits that reduce fuel costs (-2, -4 or -6 per trait) as well, but IMO this is a waste of precious trait slots, and should be avoided in purchases. Ideally, you’ll want a Support ship to have low base fuel cost (ideally 2), and several high-value (-9 or -6) Fuel Cost traits (theoretical maximum = net fuel cost reduction of 43!).
Excellent Support ships are essential for keeping fuel costs low. A “perfect” S-class Support ship with both -9 and both -6 fuel economy traits for the maximum -43 fuel reduction buff can almost totally offset the fuel costs for even a fleet of four gas-guzzlers! A decent Support ship with at least a -24 to -27 rating can almost totally offset the costs for a fuel-miser fleet, or mostly offset the cost for a fleet of gas guzzlers. As you can see, solid Support ships are a great investment!
On the other hand… don’t let a positive fuel cost trait blind you to a “gas guzzler”! Remember to also compare any positive fuel cost traits versus the ship’s base fuel cost! A Support Frigate with a 5 base fuel cost and a -3 fuel efficiency trait is worse than one with a 2 base fuel cost and no additional fuel cost traits – the slot used for a weak trait to offset the poor “gas mileage” could be filled with a useful trait instead! Fuel economy traits on specialty ships are OK (especially if -6!), but honestly I’d prefer my other frigates to have primary stat buffs, speed buffs, off-class buffs, or damage resistance buffs (in that order) before fuel economy.
Utility Traits: Other than Fuel Cost, there are two general types of utility traits – Speed % and Damage Reduction). Speed % buffs run from 1-3% and are good for all ship types, but mostly useful for long-term voyages where they will be more effective! For example, a fleet with a total of 15% in speed buffs will shave 9 minutes off each hour of mission time, so a 10-hour mission will be reduced to 8.5 hours.
Damage Resistance Traits:Some ships have Traits that provide Damage Resistance which can apparently reduce the damage taken by a given ship – it’s uncertain how effective this protection is (more testing needed – comments much appreciated!). As it is possible to have more than one Trait that confers Damage Resistance to a ship of a given specialty, it is likely that a single Damage Resistance Trait will only mitigate damage vs. eliminating it entirely. Damage reduction is less important if you’re sending well-prepared expeditions (1-2 stars above mission rating), so you may not need it (and prefer other traits instead).
*note, I’m still testing mission speed buff traits: they seem to be bugged and not providing a bonus as of Sept 7 2018*
Negative Traits / Debuffs: A frigate can have four negative traits: these traits fill up one of a ship’s four trait slots, and are shown in red color (and indicated by a red bubble in the Fleet Management spreadsheet). They will eventually go away as a ship levels up, but should be avoided when selecting ships to recruit for your fleet. IMO, the worst negative traits are those that interfere with the ship’s primary stats or make it less fuel efficient!
Note: Since negative traits disappear after leveing, if you need a ship of a certain specialty to fill a hole in your ranks, and it has attractive traits and a low natural fuel cost, but has a minor (+2 – +4) bad fuel cost trait, it is probably a good idea to pick it up and put up with the extra fuel cost for a while. After all, once she grows up, she’ll lose the bad trait and show her natural efficiency, and may replace it with a nice trait besides, if you’re lucky!
Selecting & Recruiting Frigates
Recruiting Raw Talent: Most recruitable frigates you encounter will be C or maybe B-class, which will have perhaps 1 or 2 buff traits and 1 or 2 debuff traits (which will be eventually outgrown and replaced with buffs), with the other slots open. These ships generally will cost somewhere between 2 and 3 million Units, usually no more than 2.5 million.
An excellent and relatively inexpensive “diamond in the rough” would be a C-class ship with its first trait in a +6 for its primary role (or -9 Fuel Cost if a Support ship) and three empty slots to grow into (or perhaps a negative trait with a debuff that doesn’t matter to the class of the ship). Of course, a ship with two really good traits already locked in is even better…
How to Know if an A-or-S-class Frigate is Worth the Price: S-class Frigates can cost up to 9 million units apiece! To be worth the expense, an ideal S-class Combat, Exploration, Industrial, or Trading frigate should have its traits in high-end buffs for its specialty (preferably both +6’s), low base fuel cost, no buffs wasted on “off stats” (unless you’re looking for a rounded vessel), and possibly one or more good utility traits like Speed % or a -6 Fuel Cost.
Remember also: a high-class ship is “pre-leveled” – when a ship levels, it gains 1-2 points in each stat, and an S-Class frigate has eight “level ups” of stat points (A-Class = 7, B Class = 6, C-Class = 0-5). This means an S-Class frigate may have natural stats anywhere in the range of 8-16, usually somehere in the middle. While you’re shopping, try to keep an eye out for lucky ships with freakishly high stats!
Examples:
A perfect S-class Combat frigate would have base Fuel cost of 8, and +15/+6/+6 Combat stats (+27) added to its freakishy high 16 natural Combat stat points for a total Combat bonus of 43. Remaining two traits could be +3% Speed, -6 Fuel Cost (or a 2nd 3% Speed trait!) for efficiency, or dump both to +4 Combat traits to push the natural specialty rating of one ship to 51!
The same concepts apply to ships of other specialties (Exploration, Industrial, Trading) as well.
A perfect S-class Support frigate would have -15/-9/-9 Fuel Cost stats and two 3% Speed traits, and a base Fuel cost of 2. This would reduce a given fleet’s total fuel costs by -31 tons of fuel per 250 LY and speed up missions by 6%. Alternately, an all-fuel cost buff Support frigate could have -15/-9/-9/-6/-6 and 2 base fuel cost for a maximum possible total fleet fuel reduction of -43 per 250 LY!
Biting the Bullet: Sometimes, especially early on when you’re still scrounging to build your fleets, you may be tempted to buy a mediocre ship (high fuel cost rating, inconvenient negative trait, positive trait spent in an off-stat etc). Perhaps you’ve simply had bad luck finding recruitable ships of that class, period, and you want to fill an available mission that requires them. In such a case, you’ll have to go to space with the fleet you have, not the fleet you want.
If you’re actually using the ship, and are able to complete a task force and complete more missions because you have it, a 2-3 million expense is probably justified. After all, a mediocre ship will eventually pay for itself (and its eventual replacement) if it’s going out on missions, and with luck, as it levels up it may shed negative traits and gain (hopefully excellent and relevant) positive traits.
Avoiding Lemons: A “lemon” of a Frigate is a frigate that is already leveled up (B-to-S class) and has weak or useless buff traits paired with a high fuel cost. For example, a “Combat” ship with 12 base fuel cost, either no Combat traits after the initial +15 (or weak Combat traits), other traits wasted on off-stats like Trading or Industry, and possibly even debuffs (worst type = those undermining its primary role or adding fuel costs!!!). You should avoid wasting your money on ships with no more room to grow, especially if it already grew in the wrong direction!
This ship is a perfect example of what not to get: high fuel cost, traits wasted in off-stats (none of those juicy -9 Fuel Cost traits exclusive to Support Frigates!), and worst of all, I paid nearly 10 million units for this hunk of junk – I could have gotten 2 B-class frigates with good initial stats and room to grow for that price!
Managing Your Fleet
Initial Team Building for Taking On Expeditions: Once you know what you’re looking for in your various Specialty ships and Support ships (low fuel costs, traits spent in primary stats and good utilities), you have the know-how to buy the best ships you can for the money you have on hand. However, in the beginning you’ll want to get as much “bang for your buck” as you can, since you probably won’t have the units to afford a huge fleet right away.
To start with, try to get at least 3 decent C-class Specialty ships of each type, and 3-4 decent C-class Support ships to tag along with them – 12 Specialty ships and 4 Support ships will cost you somewhere in the range of 20-30 million Units. This will get your foot in the door for each of the specialty mission types, or you can run more than one General mission if they become available.
Assigning Ships to Early Expeditions: 3 decent Specialty ships and 1 Support ship will generally be sufficient to give a 3-star rating on early missions, which tend to be 1-3 star difficulty. Always try to send a fleet at least 1 star rating above the mission difficulty rating – preferably 2 stars above. It’s still possible to have ships damaged (and the mission be less successful) if you’re 1 star rating above the mission difficulty, but 2 stars above seems to prevent these mishaps entirely. To get a 5-star rating, a fleet must have at least 102 points in the required specialty.
As you build your fleet’s strength, you’ll eventually want to send less (and more powerful) ships with efficient fuel ratings to reduce the fuel cost of each expedition. If two ships can do the job of three and cost less fuel, so much the better – you can assign the other ships to other tasks. General missions are an excellent choice for ships that are passed over on other missions, but you’ll need to ensure that you have at least one of each of the four specialty types for the best results.
If you have plenty of fuel (or efficient ships), you can even “pad” a 3-or-4 ship expedition with an extra ship or two that’s not being used to give it a chance to get some additional experience! Support ships used this way add no additional minimum fuel cost, so this is a good way to level these ships up if you happen to have extras in reserve.
Misfit Mobilization Missions: Don’t be afraid to use idle ships with an “off-class specialty” to “pad” a specialty mission! Regardless of what ships are sent on the mission, if the mission rating is two stars above the difficulty rating (or “padding” with off-class ships can push the total there), no problem. For easier missions, you might even be able to send a fleet composed entirely of “misfits” to do the job (perhaps assisted with appropriate expendable items)!
Fueling Your Fleet (and Building Your Freighter): Fuel is manufactured from Tritium and Di-hydrogen. Tritium is mined from asteroids (which also yield Silver, Gold and Platinum, which you’ll need for building things on your Freighter) – Di-hydrogen can be mined from planetary surfaces from the clusters of blue crystals, or manufactured ex nihilo via a Large Refinery and Di-hydrogen Jelly (a much faster and more convenient method).
Since you’ll get plenty of Silver, Gold and some Platinum mining Tritium for fuel, you’ll want to use that to upgrade your Freighter with at least five (preferably eight) Command Rooms. You’ll also want to put at least one Large Freighter Room in there to allow room for a Large Refinery, and a Galactic Trade Terminal to sell your loot. I recommend exercising restraint when base building on your first Freighter – you won’t replace it for a while since really good Freighters are expensive, and disassembling and moving all that stuff over to a new boat will be inconvenient if you’ve gone whole-hog expanding your ship with huge farms and stuff.
Repairing Damage After Missions: If you’re sending your fleets out without a high rating to provide a safety margin vs. damage, it’s likely you’ll need to make repairs to your ships after they come back. Repairs cost materials, not units – usually things that can be mined in space, such as Platinum, Gold, and Silver. There’s also a hidden cost – encounters where your ships are damaged do not give rewards of Units or items!
If one of your Frigates is damaged, you’ll need to fly your starship to it, land on one of the damaged ship’s landing pads, and follow the waypoints to the affected terminals to repair the ship with various materials. At present this must be done manually vs. using a central station or speaking with an officer, but aside from time spent running around the ships, repairs are instantaneous and reasonably convenient.
Large-Scale Fleet Operations: After you’ve built a large enough fleet, you will likely find yourself with multiple missions underway at the same time. Some missions are relatively short-term (8-10 hours), while others can be longer term (20-30 hours). However, five new missions spawn once per 24 hours – since some of the previous day’s missions may not yet be completed, it’s possible to have expedtion fleets in space (and unavailable) when the new missions spawn.
First, this means you will want a few “extra” ships of various Specialty types hanging around to fill gaps in the schedule. Also, these unfinished expeditions will occupy one of the Command Rooms on your Freighter – therefore you’ll want more than 5 (preferably 7-8) Command Rooms to allow your leftover long-term missions to wrap up (and not have to wait).
Culling the Flock: As your ships level up, losing bad traits and gaining good ones (and as you acquire new ships), you’ll find that some are more useful than others, or even that some of your ships have grown up into “lemons”. Unfortunately, you can’t assign positive traits to be stripped out as if they were negative and “re-rolled” on level up for a random new trait which may be better. On PC, to dismiss a Frigate you no longer want, mouse over it in the Fleet Manager menu and hold the center mouse button down (same button as discarding junk from your inventory).
Since you’re limited to a maximum of 30 Frigates, if you wind up with a “Lemon” (either due to an unwise purchase or simple bad luck leveling up) that is already leveled up to S-Class, it’s stuck that way and its traits cannot be improved thereafter (though its stats will continue to slowly improve as normal, assuming it’s still going on missions and getting experience that is). If you have something better and/or you don’t ever use that frigate, get rid of it! All it’s doing is taking up one of the thirty slots in your roster and clogging up your spreadsheet of ships. Clean it out and save yourself the headache unless you think you might have a use for it.
OTOH, you may wish to keep an “extra” Combat Frigate around with your Freighter to provide some cover if you get jumped by pirates while in system with your Freighter. They’ll pop in and take care of some of the enemy fighters, leaving you with fewer attackers to deal with, and maybe send some fighters of their own to harass the enemy and keep them from focusing on you.
Building Freighters for Convenience
Your Freighter is your central base of operations for your Frigate fleet – you’ll need to build Fleet Command Rooms (you can have up to 10, at least 8 is recommended) to manage your Expeditions at the very least. You can also build almost everything you can put in a base on the ship (with the exception of all Portable technology except for the Portable Refinery).
Galactic Trade Terminal – Garbage In, Units Out: To be able to dump “vendor trash” (items whose only value is to sell for units, which cannot be used for other things), it’s very helpful to have a Galactic Trade Terminal installed on your ship (use the building menu like you would building a base). Ideally, place one near your Command Rooms, so you don’t have to go far to clear up inventory space between debriefings.
The Large Refinery – Don’t Leave Your Home System Without it: Another essential Freighter improvement to help you manage your loot is a Large Refinery. Try to place it near the Galactic Trade Terminal as well, or build another GTT near it). This can be used to refine some of the items you receive into high value alloys, some of which can be combined with other items received from missions to make items of much higher value (and also more compact) than the constituent parts. Even so, the plethora of different items required to produce the high-value stuff will likely challenge the limits of your inventories!
Definitely install a full set of 10 Storage units (0-9) on your ship – this will give you full access to your Storage inventory (and thus allow you to manage your Expedition loot more wisely). Try to keep track of your supply levels in terms of various high-end crafting ingredients, especially the Refined Gases (Enriched Carbon, Nitrogen Salt, Thermic Condensate), Lesser Alloys (Aronium, Dirty Bronze, Grantine, Herox, Lemmium, Magno-Gold) and Advanced Alloys (Geodesite & Iridescite). You may also want to keep some of the Condensed Resources (Carbon Crystals etc) around to refine down if you need additional resources and don’t feel like going out.
Finally, you will very likely wish to build a small Hydroponic Farm on your Freighter to conveniently produce some of the raw plant materials necessary to make products to combine with items gained from missions. Example: a Cryo-Pump (possible mission loot, or can be produced from Refined Gases gained in mission loot) will sell for about a million units… but a Cryogenic Chamber (Cryo-Pump + Living Glass) will sell for nearly five million!
Since the Living Glass can be produced from Gamma Root, Coprite and Frostwort in a farm with a four-hour growth cycle… who says “money doesn’t grow on trees?”
Work Smarter, Not Harder! Remember – you need to make hallways and rooms with Silver and Tritium to make room for your improvements (you’ll need a LOT of Silver – try mining the big potato-shaped asteroids or finding Silver deposits on planetary surfaces). It can be a really good idea to make a central hallway for all of your Fleet Command Rooms or Storage Containers, so you don’t have to go hunting around all over the ship to manage your fleets or inventory.
Likewise, you’ll want to build a large space (or three) for your farm(s). Again, if you don’t already own the Freighter you want long-term, be warned: you’re going to be making a lot of work for yourself to pack up your ship and move to another ship if you go hog-wild building massive farms etc! It can be much better to build your initial farms on your base(s) and just go teleport and visit them once a day or whatever.
Final Considerations re: Item Rewards from Missions: As mission rewards often include valuable trade commodities or precursors to the same, it can be a really good idea to make sure you’ve gotten all of the recipes from Manufacturing Facilities & Operations Centers before you start getting into Fleet management. You could just sell the low-end stuff they bring right away and skip the crafting, but you’ll be missing out on staggering profits!
[For more information on how to work the farming and crafting systems to maximize your income while dumping excess resources, check out A Packrat’s Guide to NEXT Inventory Management!
[link]The Payoff – Mission Rewards and Loot

Well Worth It: Spending Fuel to Train Idle Off-Class Ships: Often, especially if you have powerful enough ships to only need to send perhaps three (two specialists and a Support) to get a rating 2-stars over the limit, you may wish to have additional off-class ships that happen to be idle (and need experience) along with the expedition. If they have a decent stat in that class, so much the better: they can even pad the mission up to two stars over the limit.
This can be a good way to train up ships of a type that are being passed over repeatedly because their Specialty mission type just doesn’t happen to be spawning for you. This can greatly increase fuel costs by pushing over the limits of your Support ships, but ships only level if they go on missions, so it can be worth the additional effort to mine the fuel. After all, they’ll pay it back when their mission specialty spawns and they get to put their cross-training to good use!
Leveling Up S-Class Frigates: While an S-Class Frigate has removed all negative traits and is fully loaded with five positive traits (and thus has no more room for new traits), it can still gain experience and level up, gaining an additional 1-2 points in each of its stats. Therefore, while you may reserve your S-class ships if you’re leveling up weaker craft (so they can gain good traits and lose bad ones), it can still be good to assign them to missions so they can grow even more powerful! *Author’s Note: if anyone has any information re: Frigate level cap, if any, please comment!
Cash & Prizes – Mission Rewards: Mission rewards are random, but the longer the journey (time and distance), the more encounters (and loot) there will be. Items get placed into your Freighter’s inventory – therefore, unless you’ve got a lot of empty space in your hold, you may want to move some of that stuff out to your Starship, Exosuit or Storage inventories to make room for more loot before debriefing another expedition.
Appendix: Confirmed Item Rewards from Missions
Below is a list of items I’ve received (confirmed via screencaps) from various encounters. Rewards in terms of units are generally in the six-figure range (usually somewhere between 200K-400K) from each encounter. Cash reqwards usually total up to 1-2 million Units per successful mission. It’s worth noting that many of these items (or items that can be produced from them) are worth hundreds of thousands or millions of units when sold on the market!
Note this list is arranged in order of type and value:
Reputation Items
- Vy’keen Dagger
- Vy’keen Effigy
- Korvax Casing
- Korvax Convergence Cube
- Gek Relic
- GekNip
- NipNip Buds
“Junk” Items (probably just sell these):
- Vortex Cube
- Sac Venom
- Albumen Pearl
- Neural Duct
- High-Capacity Vector Compressor
- Superconducting Fibre
Resources:
- Magnetized Ferrite
- Chromatic Metal
- Activated Copper
- Activated Cadmium
- Activated Emeril
- Indium
- Activated Iridium
Refined / Concentrated Resources:
- Carbon Crystal
- Chloride Lattice
- Destabilized Sodium
- Rare Metal Element
- Superoxide Crystal
- TetraCobalt
Refined Atmospheric Gases / Alloys:
- Enriched Carbon
- Nitrogen Salt
- Thermic Condensate
- Aronium
- Dirty Bronze
- Grantine
- Herox
- Lemmium
- Magno-Gold
- Geodesite
- Iridesite
Products (Trade and Otherwise)
- Antimatter
- Semiconductor
- Superconductor
- Hot Ice
- Cryo-Pump
- Organic Catalyst
- Fusion Accelerant
Unearthed Treasures: These rare items normally are found in hidden chests buried in ruins, but can sometimes be recovered by missions.
“What, No Reward From a Successful Encounter?”: When Unearthed Treasures are recovered on Frigate Missions, while you’re reviewing the ship’s actions in the Debriefing screen, it does not list an item with Units received and resources in the debriefing screen. Instead, it leaves the reward part after the successful encounter blank. After completing the Debriefing, the treasure simply shows up in your inventory (an icon will show in your screen later after leaving the Debriefing screen in the normal manner indicating items received).
Here is a listing (and the value in Units) of Unearthed Treasures confirmed from Frigate Missions:
- Box of Radioactive Trophies (560,825)
- Collection of Undiscovered Spores (913,386)
- Crate of Radioactive Crowns (490,592)
- Engraved Punching Dauber (193,919)
- Glowing Buds (167,008)
- Healing Spores (105,986)
- Legendary Bullion (474,324)
- Musical Goblets (595,903)
- Parcel of Frozen Herbs (162,016)
- Rare Worms (1,857,034)
- Toxic Bulbs (1,139,651)
Appendix: Fuel Cost Mechanics
The basic fuel calculation is as follows:
- Add up the total fuel rating of each ship in the expedition, then subtract from that the total Fuel Reduction buffs from traits in the fleet to get your Base Fuel Cost
- Divide the mission distance in LY by 250, and round the result up to the nearest whole number to get your Mission Distance Factor.
- Multiply the Base Fuel Cost by the Mission Distance Factor, and round up the result to the nearest 50 for your Mission Fuel Cost.
- Multiply the number of non-Support class ships in your expedition by 50 to find your Minimum Fuel Cost.
- Whichever is higher (Mission Fuel Cost or Minimum Fuel Cost), that’s your Actual Fuel Cost.
Example of a Fuel-Miser Fleet With Good Support: If your ships all have a minimal basic Fuel Rating (8 for Specialty Ships, 2 for Support), a Support frigate with one -9 Fuel Cost trait (total = -24) will almost completely cover 3 ships, leaving you with a minimum fuel cost of 50 per non-Support ship (150 tons). Covering 4 ships with a remainder of 10 tons of fuel cost per 250 LY = 40 tons per 1000 LY, which won’t break the 200 minimum cost for 4 non-Support ships unless your journey is over 5000 LY. As you can see, an excellent Support ship with lots of beneficial Fuel Cost traits assigned to an efficient specialty fleet makes for inexpensive voyages!
Fully Covering a Fleet of “Gas-Guzzlers” With a Perfect Support Frigate: Let’s imagine you have a group of four ships that all have a 12 fuel rating (let’s hope they’re good at everything else they do!), and they’re all of the same specialty (or of different specialties, and you’re cramming them into a General fleet). Four such ships would cost a staggering 48 tons/250 LY, or nearly 200 tons per 1,000 LY! A perfect, maximum fuel reduction (-43) Support ship with a 2 Fuel Rating would be able to cut that down to 7 tons/250 LY, 28 per 1,000 – not enough to break the minimum fuel cost of 200 tons for an expedition with 4 non-Support frigates unless it’s over 6,000 LY!
A more realistic scenario might be 4 ships with an average fuel rating of 11 being sent with a good Support Frigate with a 3 fuel rating and a -27 (-15/-9 /-3) fuel economy: 44+3 = 47; 47-27 = 20 tons of fuel used per 250 LY, 80 tons per 1,000 LY. In this scenario, the fleet would break the 200 ton minimum if sent on a mission longer than 2,500 LY, but it would be MUCH less costly than if they were sent without the Support ship (44 tons / 250 LY = 176 tons / 1000 LY)!
In other words, even strong Support vessels and lots of Fuel Efficiency traits cannot reduce an expedition’s fuel cost below a certain minimum cost, at least if there are any non-Support ships in the expedition. An expedition fully done with Support Frigates will have a zero (represented by a “-“) fuel cost, as all Support ships have a -15 fuel reduction, 5 fuel cost or less, and add no minimum fuel cost.
Appendix: Naming / Prefix Conventions for Fleet Management
Why Have a Prefix and/or Naming Convention? Ships spawn with a random prefix (letters and numbers), but these are meaningless – it can thus be be very helpful to rename your ships using your own prefix and naming convention to help keep things organized. I like to use the prefix to give me info about the ship at a glance, give it a unique name to give it some character. I like to make the names themselves fit the roles of the ship – it’s neat to see a fleet of ships named after generals and famous warriors going on a Combat mission, for example.
Using Codes to Make Fleet Organization Easier: Since base fuel cost for each ship is not shown on the fleet management spreadsheet, you can put these numbers in a ship’s prefix by renaming the ship. Likewise, it can be useful to put total Fuel Cost reduction, Speed % traits and Damage Resistance (if any) in the name as well – I like to put the utility stuff in parentheses after the ship’s actual name (all ships have a type, class, and fuel cost – not every ship has utlity traits!).


Conclusion
In the final review, building a fleet is an excellent way to invest Units in an enterprise that will generate profits passively. All that is required is to visit, manage, repair and refuel your fleet on a regular basis, which can be very quick if you know how fleets work and have prepared wisely. In fact, I find that mining Dihydrogen cystals on planet surfaces and Tritium in space for raw materials to create Fuel takes longer than fleet management, and these can be worked into other tasks like exploring in your own ship, assuming you have inventory space to spare.
In any case, that’s all I have for now – this guide will be updated with new information as it becomes available. Best of luck recruiting your fleets, travelers!
PS: This post would not have been possible without the help of the folks at the No Man’s Sky Wiki – much respect!
[link]