Overview
Shooting for the Mun or further? You might want to give this a read.
Hold Up
Before reading any further, you need to make it into circular orbit around Kerbin with a decent amount of fuel to acomplish what this guide outlines.
To help you, you can refer to 2 of my other guides to help bring you up to speed.
[link]
[link]
A Ship Worthy Of Space Travel
All it takes to change orbits is enough fuel, so if you already have a ship that can get into orbit around Kerbin with a decent amount of fuel left, then your already good to move to the next section
If you are still struggling to get things down, no worries. All you need to do is refer to the orbitting guide I have linked in the first section and build the ship in that guide’s “A Simple Build For Beginners” Section (remove the wings), then move over to the other guide I have linked above on Asparagus Staging. Add Asparagus staging (6 rocket version) to the Orbiting guide’s “A Simple Build For Beginners” and you are fully capable of getting into orbit around Kerbin, moving to the Mun’s orbit, AND back again!
If you do this, your ship should look like this:

0) Vertical decoupler & LV-T45 engine (the one on the T800)
1) Horizontal decoupler x2
2) Horizontal decoupler x2
3) Horizontal decoupler x2
4) All engines besides the one on the T800 tank
With this ship, you are ready to move on to the next section.
Why Guess When You Can Use Maneuvers?
The absolute best way to make it to another orbit is to use what I see as an in game calculator called Maneuvers.
Sure, you can line yourself up about 55Degrees to left of the Mun and fire your engines and hit the Mun, but it’s incredibley uneffecient as far as fuel. So please pay attention, because this section is going to make you laugh at your self from the past while you are cruising to and from the Mun daily.
If you have been playing for awhile, you might have seen the option to add a maneuver appear when you hover over your trajectory arch, but as anyone would, you didn’t mess with it because you had no idea what it did, time to be enlightened.
Let’s open our orbit map now.
Adding a maneuver is no more than a calculation and a reminder for you to fire your engines in what direction to get into a trajectory that you want, with no guessing, no failure, and maximum fuel effeciency.
When you click on your arch to add a maneuver, 7 icons will appear, and two are recognizable as the Prograde and Retrograde markers. Seeing as that those are already something you’ve seen, lets only mess with those for now. If you click and hold the prograde marker, and drag, a dotted line will appear and morph as you pull the marker, this dotted line indicates what your trajectory will look like after using this calculation.
As practice and for understanding, get into orbit around Kerbin, create a maneuver and drag the prograde marker out for a couple seconds, we don’t want to go overboard with it, just pull it enough so that the dotted line is clearly seperated with your solid blue line.
Now let’s take a look at your navball, and the new bits that have been added to the right of the navball.
To change our trajectory to match the dotted line, the nav ball will calculate 3 things.
1. Which direction you need to fire your engines
2. How long until you fire your engines
3. How long you fire your engines for
These 3 things are displayed on, and around your navball.
If you follow those 3 calcualtions, your trajectory will now overlap the dotted line nearly perfectly.
You have just completed a maneuver!

Now we are gonna use maneuvers to get into trajectory for the Mun.
The Kerbin To Mun Orbit Change
Firstly, get into orbit around Kerbin so we can get this section going.
IMPORTANT: Make sure you got into Kerbin’s orbit traveling directly west, or this will not work!
So now that we are soaring around Kerbin, let’s put our maneuver knowledge to use!
Anywhere around the orbit circle viewed on the orbit map, click and add a maneuver. Now zoom out so that you can see the Mun’s Orbit ring. Drag the prograde marker on your maneuver till you have an arch that is nearly touching the Mun’s orbit circle.
If your lucky, a Mun encounter marker may have apeared, but you aren’t going to be able to recreate being lucky each time you want to go to the Mun, so delete your maneuver by right clicking on it, then hitting the X, and make a new maneuver somewhere else.
Now directly where you created your maneuver there is a marker that looks like a gray circle with 6 lines coming off of it, In between the other 6 markers. Click and drag this marker along you blue-line trajectory arch so that the dotted line moves around along with the movement of the white circle you are dragging. Adjust the position of this circle, the prograde, and retrograde markers until the dotted line changes color around the Mun orbit circle, and an orb appears on the Mun’s orbit circle. Let go of everything you are dragging, because you have just made a Mun encounter!
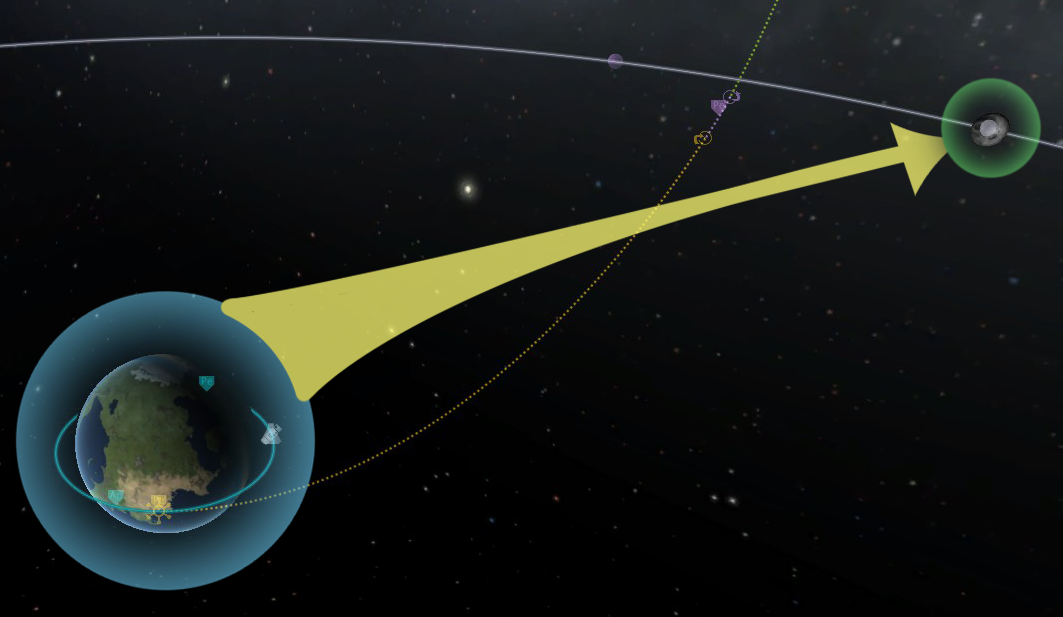
Below are a few screenshots of what you might be looking at, at this point
Please refer to the below image for a quick explaination of what you are looking at now
Once you have a maneuver that matches any of the 3 of the pictures shown, preferabley the “great” or “perfect” ones, otherwise you are going to use way more fuel than you need to, use the maneuver to line up your blue-line trajectory with the dotted line as close as you can. The important part is to get the Mun encounter to look as close to your maneuver-dotted-line. You can now delete the maneuver by right clicking on it, then hitting the X.


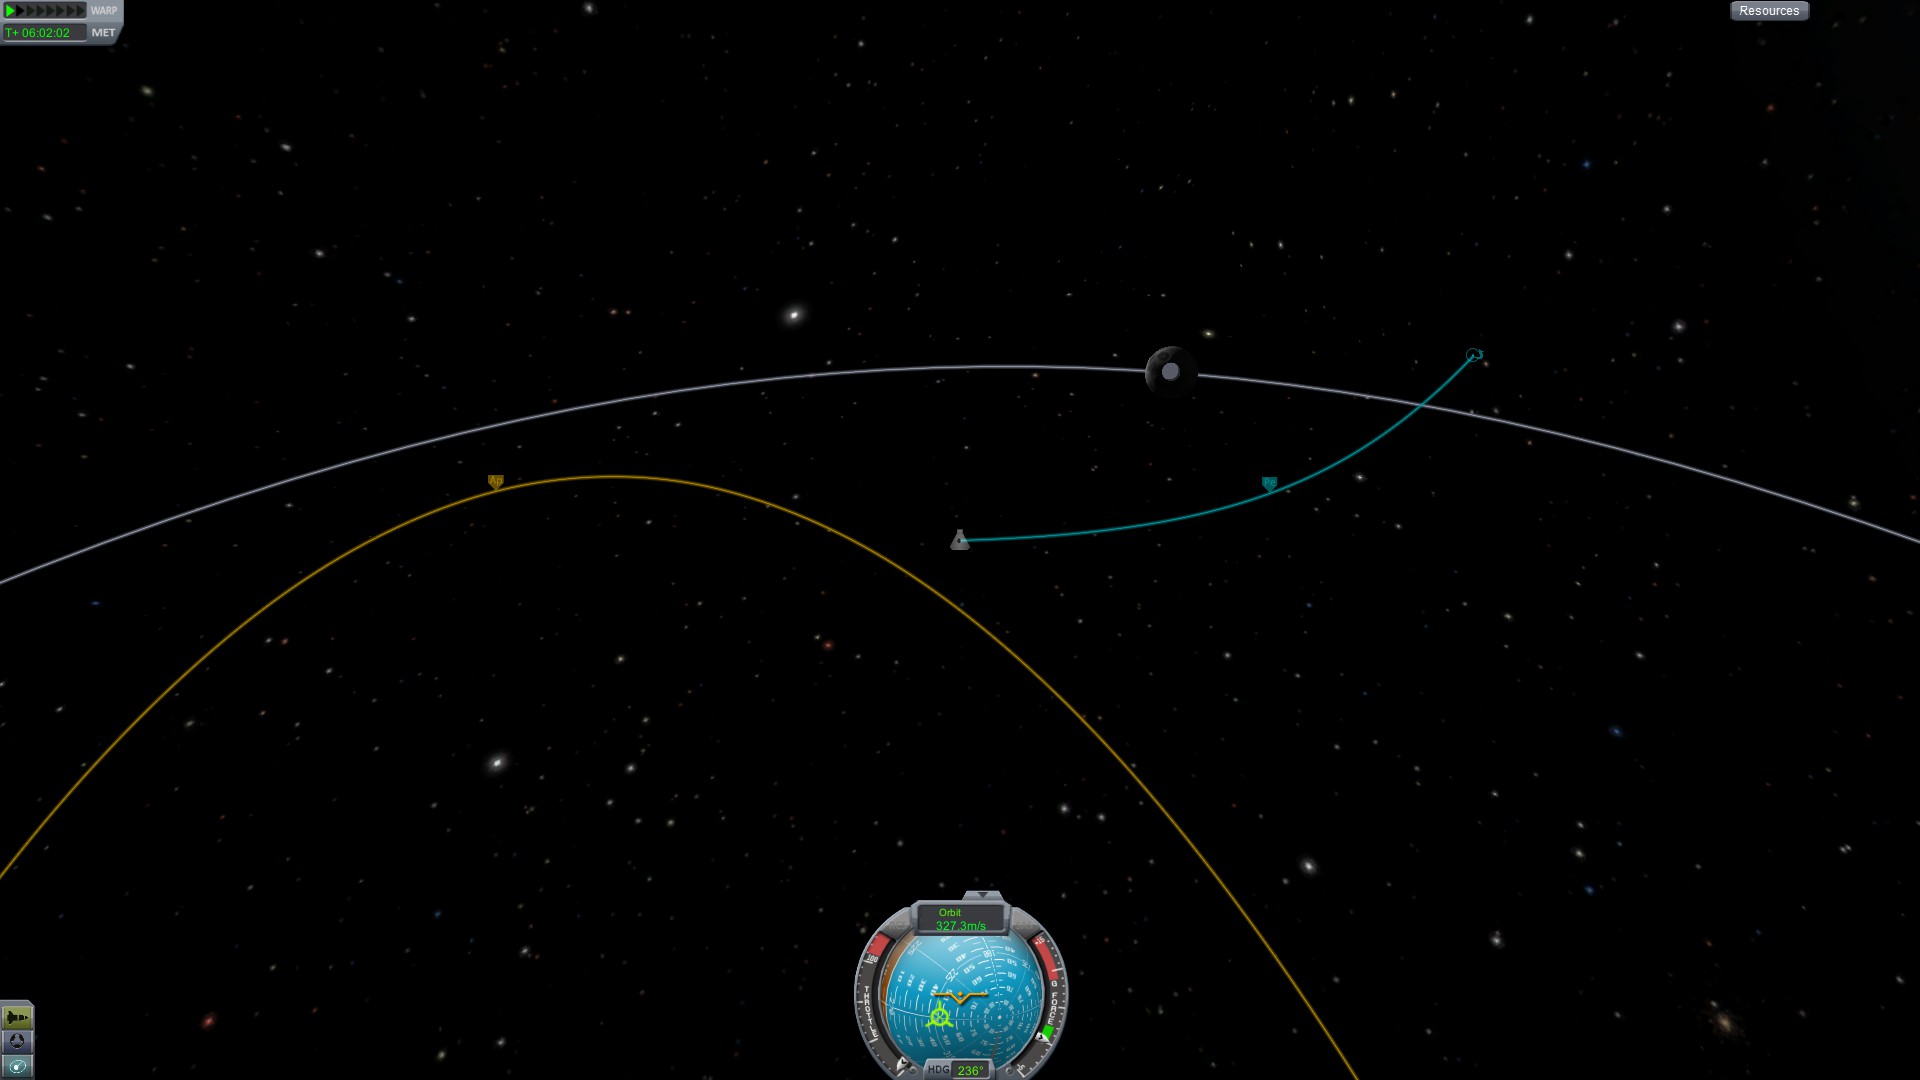
Now, speed up time until you reach the Mun encounter indicated by the yellow circle on your trajectory. Immediately slow time back to normal speed. You should now be looking at someting like this if you did the maneuver perfectly.
Time to seal the deal.
You are now looking at your trajectory while in the influence of the Mun, note that there is now a Periapsis marker.
Speed up time slightly and then return to normal speed when you are getting close to the Periapsis marker. Aim your ship directly retrograde now. Right when you hit the Periapsis marker, fire your engines at 1/3 power (if it’s your first time).
Open your orbit map and watch as your trajectory arch bends.


And Beyond…
If you are looking to return to Kerbin, it’s the exact same process, just leave the Mun’s orbit, then burn retrograde, and you will eventually come soaring back down to kerbin.
If you are looking to change orbits to Minmus, take into acount that Minmus is not level with the Mun’s orbit, so you will need to adjust your launch slightly.
Be looking for my next guide on landing coming soon!
Thanks For Reading, Don’t Forget To Rate, And Good Luck
Check out my other guides!
[link]
[link]
[link]
Building & Managing a Probe (coming later)