Overview
This is my 2021 Mod List, it contains a Stable Mod List of 176 mods, thats comes to 82 plugins, been checked in XEdit and all mods play very well together, the majority of the list is texture replacers used to make Fallout New Vegas look as good as it can in 2021, I give step by step instructions for every thing, I wrote up a mini tutorial on how to make patches for npcs and conflict resolution for your load order, how to use xLodGen and FNVLodGen, it all so contains a Beginners Tutorial for how to use Vortex Mod Manager and several other helpful videos and links
Don’t Forget to Rate The Guide
If you want to thank me for all the time I put into making this guide and keeping it up to date Please Rate it with a thumbs up, Bookmark it to your Favorites,and recommend it to others, a good rating will help it show up on the first pages of the Guide sections, so it does not get buried and others will find it easily
Gameplay Video
My Discord Server
People that use my guides have ask me a lot to make a discord server, so I finally got around to doing it [link] Link is only good for 7 days, I will come back and replace them, if someone posts in the comment section, it is not working, so if you need help, have questions, or just wanna be apart of a modding server and hang out with like minded people that adore these Bethesda games and modding, come join
Friend Requests
I get so many friend requests because of my guides, it is impossible for me to accept all of them, my steam friend list has a limit and as time goes on I would get confused as to who everybody is, so I just don’t accept any, it’s nothing personal against anybody, if you have questions or need help use the comment section of the guide, or join my Discord to reach me faster
First Things You Need To Do
A Clean Install
I recommend everyone do this, it will minimize any problems you may or may not have, Fallout New Vegas should not take very long to download, just take the time to do it right from the start and when modding your game you don’t want the game in your program files directory, if you have never modded the game before and you have the game in your Program Directory, just do the Clean Install
Before you start you need to delete all previous Fallout New Vegas folders, especially if you have ever used mods before, they can be left over files you are unaware of that can cause serious hiccups, first open file explorer and go to what ever drive you have your game installed on, go to steam/steamapps/common and delete the Fallout New Vegas folder.
Now go to Users/?Your User Name?/Documents/My Games and delete the Fallout New Vegas folder, Now go to Users/?Your User Name?/AppData/Local and delete the Fallout New Vegas folder, Now go to Steam and under your game library right click Fallout New Vegas, go to manage, then Uninstall
Now reinstall Fallout New Vegas and DO NOT put it in your Program Files Directory, once installed, boot the game one time and close it out, make sure and do this, you have to boot the game one time to establish the .ini files for the game
Do Not put the game in the Programs File Directory
When you are modding games you can not have those games installed into the Programs Files directory, when the game is installed here it will be under the control of the Windows User Account and Windows will block any outside programs from making any changes to any program in the Program Files Directory, so when you install a mod or any file that makes changes to the game.exe or any other file in that game, Windows will not allows this, some files might work fine, others will not work at all, it’s Modding 101, you don’t put your games here.
If you do not know how to set up another Steam Game Library Folder outside of Program Files Directory
Click Steam top left corner, then scroll down and click downloads, then at the top you will see Steam Library Folders, click it, then click Add Library Folder, add your Library Folder to another drive, then redownload Fallout New Vegas and direct it there, or right click Fallout New Vegas in your game library on the left, select properties, then Local Files, then Move install folder and direct it to your new game library folder
If you must use an ssd
if you are going to put it on your ssd then you must do the following to get Steam, out of the Program Files directory, Steam only allows one game folder per drive, so as long as Steam is installed in the Program Files Directory, you can not simply make another folder on your C Drive outside of Program Files you must move Steam out, and this is how.
First you have to exit Steam, not just close it out, Exit out from the top left corner, then go to
C-Drive/Program Files (x86)/Steam and Delete all of the files and folders except the SteamApps & Userdata folders and Steam.exe, now move that main Steam folder to your C-Drive, once it is done, boot Steam from the Steam.exe in the new folder, your desktop icons or start menu icons for steam will no longer be any good, you can make new ones, all so all of your desktop icons for games will disappear, to fix this before you delete all the old steam files out, save a folder inside titled steam/games, inside it you will see all of your desktop icons, back it up and drag it in afterwards, if not you will have to verify the contents of the games in order to get the desktop icon back, and if any of those games are modded you do not want to verify them, after you boot from the exe, let Steam update and then login in and you are good to go, to make a new desktop icon just go to that steam folder and right click the Steam.exe and select create shortcut then drag the shortcut to your desktop, while steam is open, right click it on your taskbar and select pin
[link]
Update your Drivers
Makesure all your drivers are up to date, I run a Nvidia/Intel sytem so i use these for my drivers For Intel- [link]
For Nvidia- use Nvidia’s App called GeForce Experience
For my audio drivers and other drivers I use device manager, just type in Device manager in the windows serach box
If you use AMD hardware and do not know how to update your drivers just google it
How to Use Vortex Mod Manager
Making a Nexus Mods account
Go here [link] and use your email to make an account, a Nexus account is free, just do not select any of the pay options when you make your account, just select create account, if you decide to pay on Nexus then you will get uncapped download speeds and no ads, its about $4 a month, for free accounts you only get to use capped slow downloads
Setting Up Vortex
Vortex Mod Manager- [link]
Download the first main file titled Vortex, click the Manual Download
After it is downloaded go to your downloads folder and double click the Vortex executable and let it run, then launch Vortex,at the top right corner click the account circle and then click log in on Website, then Authorize Vortex, now you can download mods. For Vortex to find a game you have to have it installed and booted the game at least one time, in Vortex open the Games tab on the left, at the top click scan and do a full scan, let the scan complete, your game should now be in the Unmanaged section, click on it to manage and after it is done you should get a notification in the top right corner on the bell icon, that mods can’t be deployed, select fix, select next, then select apply fix, then its going to bring you to the settings page at the mods tab, at the mod staging folder select suggest, then select apply. By default your mods archive folder will be on your C Drive where Vortex is installed, if you want to change this then in Vortex, open up settings, select the downloads tab at the top, under Download Folder select the folder icon and place it on another drive and create and name a new folder, I keep everything, Mod Archive Folder, Mod Staging Folder, Modding Tools Folder, and My Games on my D/Drive
this is a video showing you how to do everything i just told you, it might help you more to watch someone, in the video the games tab will look a little different don’t be alarmed, that is because the video is a year old and Vortex has been updated since
IF YOU DO NOT KNOW HOW TO USE VORTEX THEN TAKE THE TIME TO WATCH THESE THREE VIDEOS
How to install a mod
This is a link to Gopher’s Beginners guide to Vortex tutorial for the entire Playlist
Gopher’s Fallout New Vegas Modding Tutorial Playlist
If you are a beginner then this tutorial will help you, Gopher uses some of the mods I use and he will show you how to install each of the mods and goes in depth explanations, you may find it easier to watch someone do this, if it’s your first time, then after you watch him a bit and fill comfortable, you can come back over to the guide and start following my step by step instructions
Tools
Modding Tools Folder
Make a new folder and name it Modding Tools and place it somewhere save where you want forget and where you want ever have to move it
File Archiver
You are going to need a program to help you extract compressed files, i have used several and in my opinion this is the best one and it is free called Any Zip
[link]
Just go to the microsoft app store and type in Any Zip
If you want to use another or already use a diffrent one that is fine my second choice would be [link] 64bit
XEdit is an important tool, if you learn how to use it, it can solve a lot of problems for you, just because there not conflict rules in the mod manager, does not mean theres not conflicts between mods and you will never know, if you do not know how to use Xedit, you can also make patches and do all sorts of great things with it, if you want to get into modding The Elder Scrolls and Fallout games, it is a very essential tool to know how to use. Ill add a bunch of great video tutorials oo how to use it.
Here is the link to the manual, read up on it
[link]
XEdit
FNVEdit- [link]
Manual Download it, create a folder named Xedit, extract the download to that folder and after place that folder in your Modding Tools folder we created earlier
On Vortex with Fallout New Vegas activated, go to Dashboard and click add a tool, we are going to add the xedit exe here. Under Name put FNV Edit, then under target, click the file icon far right and go find the FNVEdit.exe, where ever you placed it, once you have it selected, click open, bottom right corner and the click Save on Vortex, now it is added to the dashboard, and anytime you use it launch it from here.
Do Not clean your DLC’s
Fallout New Vegas Mods expects ITMs and Deleted References to be there, Fallout 3 mods do to, so ignore the Loot messages on the plugins page in Vortex
Helpful Xedit Videos
-WARNING- READ ME
Modding Saved Games
You can only mod a saved game if it is a Vanilla save, or you are adding mods to it,if you have had mods on that save and removed then, it is not a good idea to put new mods on to the save or continue to play that save, When you remove mods from a save file, you always want to revert back to a previous save file that was made before you added the particular mod you are removing, if you do not listen it can cause some serious problems with the play through, those plugins are baked into the save and even removing it does not remove it from the save file and in most cases you may not notice any thing immediately and think you got away with it, but what you did was make your play through unstable, and you will see the effects much later, or you will see the effects immediately CTD or the save will be corrupt and not load at all, You can however safely remove mesh and texture replacement mods all you want, But never remove scripted mods from a play through without reverting back to a previous save file made before the removed mod was installed
Always use the manual save method, never use quick saves, and always make lots of saves all through your play through, and always make a save before you add a new mod
Before downloading any Mods
The first thing you need to do when you reach a mod page is read the description and the requirements for the mod, all so check out the comments, most of the time authors will pin instructions in the comment sections and sometime if users are having issues they will comment, but be careful, in more cases then none those comments are by incompetent users, I don’t know how many times I have seen newbies on there saying a mod is broke, when I know for 100% fact it works because I use it.
Always know exactly what the mod does that you add and never add a bunch of mods at one time, only add a few at a time and play for a while to see if any problems occur, what ever the mods change you added, go check that out specifically, it may take longer to get your game modded, but this is the safest way to insure nothing goes wrong
Updating Mods
If you have already started your play through with a load order, don’t update any of the mods if an update becomes available, if its a mesh or texture replacer then it will be fine, but if it is a scripted mod, then don’t update it, it could break your save depending on whats in the update, it’s always best to stick with the load order you have started the play through with, you can always update, and change mods the next time you start a new play through
How to know if a mod has scripts
While on the mod page in Vortex. click the gear clog, this represents settings, it is located in the top right corner beside Actions, once clicked check mark Content, now a new tab will show up on your mods page, underneath it, you will see icons out from your mods, hover your mouse over the different icons, it will tell you what they mean, if you see one that says scripts, then the mod has scripts in it and you can not remove this mod from your save, if you uninstall it you have to revert back to a previous save file made before the removed mod was installed or start a new game
How to view conflict rules in Vortex
While on the mod page in Vortex. click the gear clog, this represents settings, it is located in the top right corner beside Actions, once clicked check mark dependencies, now a new tab will show up on Vortex and mods that have conflict rules in place will have a lighting bolt beside them in this new tab, you can click the lighting bolt to view all conflict rules for that mod, make sure your rules for each mod match up with what I wrote for each mod, or you will have problems and your game will not look right
Manage Rules
Take your time, double check your rules, make sure they match up with what I wrote, i have provided all the conflict rules, all you have to do is do what I wrote, If you mess them up, your game will not look like mine, you might see Vortex notifications like mod rule cycle, or this mod is redundant, if you do, then you did something wrong, and will have to go back and find it, so take your time the first time and read what I say, double check you have it right before you move on to the next mod, Vortex will sometimes say a mod is redundant when you install a new mod until you set the conflict rules and deploy your mods this will go away
For Picking Mods out from my List
If you do not want the whole list, just pick out what you want, this is my list that i play with, you don’t have to install the whole list, just make sure and read description and the requirements for the mods you choose
Do not let your rules pile up, do each rule right after you install the mod, one mod at a time and come back and double check your rules match up with what I wrote
Once in game make sure and pause click settings and open the MCM and adjust those mods to your liking, also the audio mods, some have audio sliders in the normal audio settings
after you deploy mods always check your plugins page, make sure the plugins are enabled and see if you have any LOOT messages
when installing mods, sometimes it might give you a notification something is redundant, once you set the rules for what mod you installed and deploy your mods that will go away, if it doesn’t then you overwrote a mod and need to fix it
DO NOT DOWNLOAD A BUNCH OF MODS AT ONE TIME, only install a few mods at a time and boot your game and test them out
Before You Download Anything
These mods listed in my guide should be Endorsed, they all deserve it and an Endorsement shows some appreciation for all the hard work the Authors put in for FREE so we can play Fallout New Vegas looking Beautiful, so please hit that ENDORSE button, it cost you nothing, just a click of the mouse
Performance
Vanilla Fallout New Vegas has its issue, just playing vanilla no mods, I get lots of frame drops and stutters, occasional CTD, these stability mods fix that, I play on a Nvidia RTX 2070 Super and an Intel i7-9700f with 16gb ram on a 1080p monitor and maintain a constant 60fps and I mean it stays locked at 60, it rarely moves, its because of the Tick Fix and the 4gb Patcher mainly
The Tick Fix will allow you to play the game at very high frame rates but I would not recommend you try and play above 60fps, everything in the game is tied to framerate, all these Bethesda games are a like, the games are limited to 60fps because the physics engine limitation, and there may be fix mods out there like the tick fix that can fix this, what they can’t fix is that the game can only prepare scripts in so many milliseconds, for Skyrim I know its 1.2ms per 16.7ms frame, so when you raise the fps, this value will change and that will not leave a lot of time for the game to execute scripts, using Tick Fix to play at high frames will all so make the npcs jitter up and down, like there bouncing up and down in place
Nvidia Users
These are my settings I use and what I recommend
Open up Nvidia Control Panel, and select manage 3d settings, on the right side of the screen select the Program Settings Tab, then select the Add button, Then select Fallout New Vegas, and scroll down and enable the following
Max Frame Rate- 59fps
Power management mode- Prefer Maximum Performance
Triple Buffering- On
Vertical Sync- On
After make sure and select Apply at the bottom
On Steam, click Steam in the top left corner, then select settings, then select In-Game and disable the Steam Overlay and click ok at the bottom to apply, Steam Overlay is a know problem with Modded Fallout New Vegas, it creates memory leaks within the game, make sure and turn this off
Stability and Bug Fixes
Archive Invalidation
Before installing any mods we need to enable Archive Invalidation, on Vortex go to the Dashboard and you will see a orange box on the far right underneath Lets Get You Set Up, click it to Archive Invalidation Yes and go back to the mods tab and you will see a need mod installed titled Vortex Archive Invalidation, leave this enabled always
Before you start go to the Plugins page in Vortex and make sure all of your DLCs are enabled
Black Textures and Crashes
If you ever have problems with Black textures accompanied by crashes, it is due to Archive Invalidation not properly working, in Vortex toggle it off, then back on should fix the problem, and you shouldn’t have to ever do it again, as long as you are done installing texture mods
Several of these fix mods require a few things to run, I guarantee you already have this stuff, however since they are a hard requirement for the mods I must list them, but lets check and see if you have them, go to Control Panel, then go to Uninstall a Program, and look and see if these 4 things are there
Microsoft Visual C++ 2013 Redistributable (x64)
Microsoft Visual C++ 2013 Redistributable (x86)
Microsoft Visual C++ 2015-2019 Redistributable (x64)
Microsoft Visual C++ 2015-2019 Redistributable (x86)
If they are there, then you have them, if they are not there, then download the appropriate ones, run there executable’s, agree to all the prompts, let them install
Steam will all so have this stuff, Where ever you have the Steam program installed, you can go to this folder Steam/steamapps/common/Steamworks Shared/_Common Redist and inside you will see a Direct X folder and a vcredist folder, all this stuff should be inside
Visual C++ Redistributable Packages for Visual Studio 2013– [link]
Visual Studio 2015, 2017 and 2019– [link]
This next one is a older version of Direct X, and if you download and run it, it will more then likely say the following at the end (Direct X setup has determined that a newer or equivalent version of Direct X has been installed already, No installation is necessary)
DirectX End-User Runtime Web Installer– [link]
FNV 4GB Patcher– [link]
-Fallout New Vegas will only use 2gb of ram by default, this mod will patch the executable and allow the game to use 4gb of ram for better performance and stability
-Download the main file with a manual download, extract the download and place the FalloutNVpatch.exe into the main game folder steamapps/common/Fallout New Vegas, once its in there, double click it to run it, a window should pop up saying the game was patched, press any key to continue
-To makesure that it worked go to the main game folder steamapps/common/Fallout New Vegas and double click the FalloutNV.exe to run it, and if the game launches straight away with skipping the launcher menu, then it is working
New Vegas Script Extender (xNVSE)
-Vortex now comes with a script extender installer extension, it will be enabled by default, and when you launch Vortex for a game that has script extender and you don’t have it installed, Vortex will pop up a notification telling you that, so you click this notification, then click more and a pop up window will come up, select Download, then select Enable and it will deploy and you are done, Now go to the main game folder steamapps/common/Fallout New Vegas and right click the nvse_loader.exe and select create shortcut, then drag this shortcut to your desktop and for now on this is how you will boot the game
-Now boot the game from the script extender shortcut we put on the desktop and once it loads, press the tilde key, its the key to the left of the 1 key, once you press it, this opens up the console and it will now say xNVSE and your version number, use to you would have to type in getnvseversion then press enter, do both and if it tells you your version number then its working
If any of this is confusing here is a video showing what I just explained and how to install it manually
NVAC – New Vegas Anti Crash– [link]
Download the main file with a mod manager download, in Vortex install and enable
NVTF – New Vegas Tick Fix– [link]
Download the main file with a mod manager download, in Vortex install and enable, On the same mod page download the Optional file titled NVTF stability and performance ini with a manual download, after extract the download and copy/paste the new ini into this location steamapps/common/Fallout New Vegas/Data/NVSE/Plugins and select replace when prompted, after you should read that entire NVTF.ini, you may need to do additional things to suite your hardware, for me the ini the author created works perfect, I only changed one setting which is important, with the NVTF.ini open look for a setting titled iMaxFPSTolerance=300 and change that 300 to a 59, so it will look like this iMaxFPSTolerance=59, I changed this because I am capped at 60fps I all so have v-sync and triple buffering enabled through Nvidia Control panel, all so launch the normal game launcher and select options and put the game in windowed mode, or bModifyDirectXBehavior setting in the NVTF.ini will not work, after you will have to select your resolution again and next we will install one tweak which will enable alt tabbing out of the game and force windows borderless which looks exactly the same as fullscreen
OneTweak– [link]
Download the main file with a manual download, extract the download, open it up and go to SKSE/plugins, inside copy/paste both files OneTweak.dll and OneTweak.ini into this location steamapps/common/Fallout New Vegas/Data/NVSE/Plugins
JIP LN NVSE Plugin– [link]
Download the main file with a mod manager download, in Vortex install and enable
JohnnyGuitar NVSE– [link]
Download the main file with a mod manager download, in Vortex install and enable
FNV Mod Limit Fix– [link]
Download the main file with a mod manager download, in Vortex install and enable
Yukichigai Unofficial Patch – YUP- [link]
Download the main file with a mod manager download, in Vortex install and enable
The Mod Configuration Menu– [link]
Download the main file with a mod manager download, in Vortex install and enable
Unofficial Patch NVSE Plus– [link]
Download the main file with a mod manager download, in Vortex install and enable,
Update-7/4/21
You may not have to change the group anymore, first look at the plugins page and see where Unoffical Patch NVSE Plus.esp is loading, if it is close to the top, below YUP, then don’t change anything, Vortex now recognizes this plugin as a Fixes&Resources plugin and sorts it high in the load order
after go to the Plugins page in Vortex and double click Unoffical Patch NVSE Plus.esp and a box on the right side will pop up, underneath Groups there is a tab, it will say default in it, click this and change it to Add-ons & Expansions (Patches), after click the orange tab at the bottom with the white arrow in it to exit, then click Sort Now at the top, and this should move the patch plus plugin to the top of the load order, on default Loot will auto sort this patch to the bottom, and we need it high, loading directly after the YUP Patch
ENB
The enb binaries for fallout new vegas are not perfect and can have Transparency issues with the hair and eyebrows of npcs, what this means is you can look at an npc from a certain angle and a piece of there eyebrow or hair may appear bleach white, I have listed a fix for this below that appears to have completely fix the issue, I have not seen the issue since using it, but I give you no guarantees it may not happen, if it does its not a big deal and I still recommend using an Enb, enb will do more for your game graphically then anything else, the changes that Rudy’s Enb makes to the environment are astonishing, you will have to try it out and see, I have never used any other enb for New Vegas and wouldn’t ever consider doing so, but I’m a huge fan of Rudy, I love his taste and use all his stuff he makes for all the games he makes them for, other then the stability mods, if I could only use one thing it would be an enb
On the contrary of what you may read out there Tick Fix and Enb are 100% compatible together, I know I have used Tick Fix and Rudy Enb well over a thousand hours together and stayed locked at 60fps because of the stability mods, with no performance loss what so ever, and that was before the latest update, when it had the D3D9Ex included which was identify by some users as the alleged incompatible part of Tick Fix with Enb, but didn’t turn it off, it’s since been removed, if your on a low end PC you may experience performance loss, you will just have to test it out
– Turn off Anti-Aliasing as the ENB has its own, Rudy’s Enb injects SMAA Antialiasing into the game and the game Anti-Aliasing is not compatible with Enb and will cause graphical issues
– Using Steams Overlay with an Enb can cause graphical problems, this is a known issue, there is no fix, Steam Overlay all so causes a memory leak in Fallout New Vegas, Disable Steam Overlay
-hdr must be enabled in the game settings
Enb Binaries- [link]
At the bottom of the screen, click the arrow pointing down, to download, after extract the download, and go into the the folder titled WrapperVersion, and copy/paste only these 3 files into your main game folder steamapps/common/Fallout New Vegas
d3d9.dll
enbhost.exe
enblocal.ini
-Important-
You can install this now or come back and do it at the end, if you do it now, you need to be aware that they are 2 mods on this list that will overwrite Rudys star texture and his sunglare texture, its Mojave Nights – a moon and stars replacer and EXE – Effect teXtures Enhanced, I have provided instructions on how to fix this after those mods in the guide, I will all so paste them here.
-Mojave Nights
If you are using Rudys Enb and already have it installed, then you install this mod, it will overwrite Rudys star textures without even telling you, I only use this mod for the moon texture, I think Rudys stars are better, and look better with his Enb, thats why he was kind enough to provide them, to get Rudy’s star textures back after installing this mod you have to open up Rudys extracted enb and go inside this folder [ to Fallout New Vegas Folder ], then inside the Data/textures/sky and copy/paste the skystars.dds into this location steamapps/common/Fallout New Vegas/Data/textures/sky and select replace when prompted
-EXE
If you are using Rudys Enb and already installed earlier, this mod comes with its own sunglare texture and if Rudys Enb is already installed and you install EXE after, then it overwrites Rudys sunglare texture and doesn’t tell you and you do not want to use these, you must use Rudy’s for the enb to look correct, so open up Rudys extracted enb and go inside this folder [ to Fallout New Vegas Folder ], then inside the Data/textures/sky and copy/paste the nv_sunglare.dds into this location steamapps/common/Fallout New Vegas/Data/textures/sky and select replace when prompted
Rudy ENB for Fallout New Vegas– [link]
Download the main file with a manual download, after extract the download, and go into the Rudy ENB for Fallout New Vegas 0.451 folder, then into the [ to Fallout New Vegas Folder ] and copy all the contents of this folder into your main game folder steamapps/common/Fallout New Vegas, then go back in to the extracted download, back into the same to folders and you will see a folder titled
!!! enblocal.ini_You should adapt it to your own hardware, inside copy/paste that enblocal.ini into your main game folder steamapps/common/Fallout New Vegas and select replace when prompted, now go to Vortex and on the plugins page you will see a new esp that is disabled titled
WEATHER RUDY ENB.esp, enable it then go deploy your mods, this Weather Rudy Enb plugin is not compatible with other weather mods, in the extracted download Rudy has a Readme.txt,
read it
ENB AO Hair Transparency Fix– [link]
Download the main file with a manual download, drag the download into Vortex and drop it in the box at the bottom titled Drop Files, install and enable
During my playthrough at Camp Golf, inside the House Resort the walls were transparent, by going to my game folder and opening up the enblocal.ini and changing FixTransparencyBugs to false fixed it, so it would look like this FixTransparencyBugs=false.
If for some reason you do not want to use Enb, then I recommend this
Nevada Skies – Weather Effects– [link]
-OR-
Try out these 2, I have not tried them, they both are only a couple of weeks out, but if I was not using Enb, then I would certainly try them out
Altitude – A Vanilla Plus Weather Mod– [link]
Simple Interior Lighting Overhaul– [link]
This is a new enb and weather combo that is brand new, I have not tested it yet, you may want to
Supreme Weather And ENB– [link]
Mods
1.UIO – User Interface Organizer– [link]
Download the main file with a mod manager download, in Vortex install and enable
2.Darnified UI– [link]
Once here click the google drive link beside Download the file here: then take the downloaded file and drag it into Vortex on the mods page, into the box at the bottom titled drop files and then just install and enable, for the rules place this after the YUP Patch, download the next mod before testing this out, without the font for dummies the UI will not work without editing ini files
3.DarNified UI Font Dummies– [link]
[link]
Download the main file with a mod manager download, in Vortex install and enable, then go boot the game and look at the new UI, the font, make sure you like it and don’t worry about the font on the right of the screen once you load a save, we will be making that go away with the next mod MCM
4.The Mod Configuration Menu– [link]
Update-7/4/21
This mod was listed in the stability section because Vortex is saying it is required to run the Unofficial Patch NVSE Plus plugin, so you don’t download it again, just follow the instructions
Download the main file with a mod manager download, in Vortex install and enable, for the rules place this mod after Darnified UI, after you have to go here and download the Darnified UI patch- [link] once there scroll down and click the google drive link beside Optional file MCM matches HUD: , then take the downloaded file and drag it into Vortex on the mods page, into the box at the bottom titled drop files and then just install and enable, for the rules place this patch after MCM
-After go boot the game load a save, and pause the game and pull up the Mod Configuration Menu and open up the Darnified UI options, go down to Statistic Settings and on the top left side underneath General Settings Turn Off Statistics, then go to Meter Settings and turn all that stuff off, and now all that stuff is off your screen and back to normal, other then one Extra setting called Armor Condition which blends in nicely with the vanilla hud look, you can all so change the color of the hud as well here, if you want
5.UHD Fonts for Darnified UI– [link]
Pick thick or thin, download the one you choose with a mod manager download, in Vortex install and enable, for the rules place this after Darnified UI mod
6.Minimalistic Crosshairs– [link]
Download the main file with a mod manager download, in Vortex install and enable, for the rules place this after Darnified UI
7.One HUD – oHUD– [link]
Download the main file and the optional file, both with mod manager downloads, in Vortex install and enable the main file first, for the rules place it after Darnified UI, then install and enable the optional file One HUD (oHUD) TTW Darnified Patch, for the rules place it after everything it asks
-After boot the game and pull up the Mod Configuration Menu and you can set your hud up how you want, the I key toggles the hud off and on, you can resize and place things from the hud were you want them, you can lots of things, customize it the way you want it
8.New Vegas – Enhanced Camera– [link]
Download the main file with a mod manager download, in Vortex install and enable
9.Perk Every Level– [link]
Download the main file with a mod manager download, in Vortex install and enable
10.JIP Improved Recipe Menu– [link]
Download the main file with a mod manager download, in Vortex install and enable
11.JWH – Just Weapon Hweel– [link]
Download the main file with a mod manager download, in Vortex install and enable, once in game you hold the H key to bring the wheel up, to add a gun to the wheel, pull up your pipboy, go to weapons and equip what weapon you want to add, then hold the H key and drag your mouse cursor into one of the slots and its added
12.JVS – Just Vanilla Sprint– [link]
Download the Old file version 5.0 with a mod manager download, in Vortex install and enable, after boot the game, load a save and pull up the Mod Configuration Menu, it will show up as Just Mods, click it and you can change different values of the mod, from the sprint speed, to the AP drain from sprinting, if you crank the sprint speed value all the way to the max, then you will get ctd with this whole mod list and enb installed, best recommend setting is default, don’t mess with the settings, the default key is left-shift, you can rebind it if you want
-Controller Support
If you use a controller, to get this to work, plug your controller in, then you have to boot Steam into Big Picture mode, the icon is in the top right corner, click it, once there click the settings gear clog, then go down to controller settings, and check box Configuration Support for whatever controller type you are using, I tested this with an xbox one controller, it will detect your controller and tell you what kind it is, after exit big picture mode by clicking the power icon to the right of the gear clog, and select exit big picture mode, then steam will go back to normal, after click Fallout New Vegas on the left side in your library were it pulls its page up on the right side, now you will notice a new tab underneath the big green Play button, furthest to the right titled Controller Configuration, click it, now you can bind the shift key to your left analog, click the left analog picture, the click Click Action and then a virtual keyboard will pop up, click the left shift key on it and close it out, now when you want to sprint just click in your left analog, I only tested this with the left analog, I wouldn’t bind it any were else, because I believe the game uses all the other buttons, I use mouse and keyboard, I only did this as a courtesy, so if you bind it to other buttons you will probably have to remap everything from within the game, and when you play other steam games with your controller you are gonna go back and disable that checkbox in Steam Big Picture mode, just having Steam Controller support on can break controller support for some games, example is Call of Duty Black Ops 3, just turn it on and off when you play Fallout New Vegas
Double hands fix
When you use this mod with the Enhanced Camera mod, while you are sprinting, if you look down at your feet, it will look like you have double hands, the fix for this is pinned at the top of the comment section of Just Vanilla Sprint mod page, I didn’t do the fix, I don’t care about this, because I don’t look at my feet when I am sprinting, I look at whats in front of me, not the ground, but if you find it a problem, do exactly whats pinned in that comment section to fix it
13.Brighter Pipboy Light– [link]
Download the main file with a mod manager download, in Vortex install and enable
14.Uncut Wasteland– [link]
Download the top main file, with a mod manager download, in Vortex install and enable
-IMPORTANT- Note about Texture Packs
Charges Texture Packs
Charges Texture Packs are only used as a base the majority of these will be overwritten, it will cover very minimum things that there are no mods for, that way there not left low-res vanilla, DO NOT download the all in one pack that is offered here, it will tank your performance, I tested it out and it caused micro-shutters quite often, I generally stay away from most AI upscaled textures, because most the time they come out very ugly and pixelated, but the few packs I use are most defiantly a improvement over vanilla and since the majority of these are being overwritten it will not hurt your performance
NMC and OJO BUENO Texture Packs
I always have used NMC Large and OJO BUENO Ultra options, most people out there will tell you not to, and to download the lower quality versions, like the NMC Medium and the POCO BUENO Texture pack which is the performance version of OJO BUENO, because they have had problems out of the best quality versions of both, I can only speak from my experience of using both NMC Large and OJO BUENO Ultra and I have never had any performance issues what so so ever with the best quality versions and I have played well over a thousand hours with both along side couple hundred more mods, Rudy Enb and stayed locked at 60fps, because of the stability mods, so I recommend you test these out and draw your own conclusions on whats best for you and your setup, or if this worries you go with NMC Medium and the POCO BUENO
Load Order for NMC and OJO BUENO/POCO BUENO
For this playthrough I choose to load OJO BUENO after NMC, on my last playthrough before this one I loaded them the other way, I like them both, and I alternate the Load orders on different playthroughs to change things up, they both change a lot of the same things, but at the same time change different things the other left vanilla, so you can go with the way I am loading them or install them one at a time and test them out to decide which one you like better, you can however pick and choose which textures you want to load in the game from each pack, Using Vortex, with both texture packs installed, conflicts rules set, mods deployed, on the mod page under the dependencies tab, click the lightning bolt icon out from the mod, to view the conflicts, then example would be NMC part 1 and OBJO BUENO have 89 conflicting files, click on the 89 conflict files text and a new window pops up listing every conflicting file, scroll down to the very bottom and click Edit individual files, and now you can preview all the textures and compare them to decide which one you want to load in the game, it will take a long time to look at every single one, and I recommend you don’t do this, I just wanted to explain to you how it can be done
Textures
1.Charge’s FNV HD Texture Packs– [link]
-Under Optional files download Armors 2X, Clutter 2X, and Creatures 2X ,all with mod manager downloads, in Vortex install and enable Clutter and for the rules place all 3 after the YUP Patch, then install and enable Armor 2X, for the rules place it after YUP Patch and after Clutter 2X, then install and enable Creatures 2X
-From here on out, every mod you install from this guide will always be placed after these 3 Charges texture packs, even if I dont specify, if another mod conflicts with charges you put that mod after Charges textures always
2.Audleys Misc Textures– [link]
Click the download arrow in the top right corner, after drag the downloaded file into Vortex and drop it in the box at the bottom of the mods page titled Drop Files, then install and enable, for the rules place this mod after Charges Clutter 2X
3.Blackwolf24s HD Clutter pack– [link]
Download the main file with a mod manager download, in Vortex install and enable, for the rules place this mod after anything it asks
4.NMCs_Texture_Pack_For_New_Vegas– [link]
Download which version you want, I went with large, NMCs Textures NV LARGE Pack Part 1 of 3 FOR NMM, all 3 parts, in Vortex install and enable each part in order, for the rules place them after everything it asks, do the same if you go with medium or small
-On the same mod page download all 3 of the Update files, with mod manager download, in Vortex install and enable all 3 and for the rules place them after everything it asks
5.OJO BUENO Texture Pack– [link]
Download which version you want, I went with Ojo Bueno Texture Pack for FNV – ULTRA with a mod manager download, in Vortex install and enable, for the rules place this after everything it asks, then download the update file for which ever version you downloaded, with a mod manager download, in Vortex install and enable, for the rules place it after everything it asks
-OR-
If you want the low quality performance version, the instructions are the same as above
POCO BUENO Texture Pack– [link]
6.MGs Neat Clutter Retextures– [link]
Download the bottom main file titled MGs NCR Pack Ojo friendly 7 with a mod manager download, in Vortex install and enable, for the rules place it after everything it asks, then go download the 5 main files titled Ammo box, Beige Pack, Duct Tape,Fire hydrant, and Flat mop bucket, with mod manager downloads, in Vortex install and enable, for the rules on all these place them after anything it asks
7.Fallout Food Package Retexture Compilation– [link]
Pick one of the top main files, clean or dirty, then download it with a mod manager download, in Vortex install and enable, for the rules place this mod before Ojo Bueno mod and after Charges Clutter 2X, the go download the bottom main file titled Steakbox fix for 3 point Oh- for clean or dirty with a mod manager download, in Vortex install and enable, for the rules place this after the main Fallout Food mod
8.PM’s Med-Textures – HD Chems and Venoms– [link]
Download the main file and both optional files with a mod manager download, in Vortex install and enable the main file, for the rules place it after Charges Clutter 2X, then install and enable the optional normal maps file, for the rules place it after Charges Clutter 2X, then install and enable the hd med-x optional file and for the rules place it after anything it asks
9.Alcohol Re-Texture Pack– [link]
Download the main file with a mod manager download, in Vortex install and enable, for the rules place this after the YUP Patch, after Charges Clutter 2X and before PM med
10.Billboards of New Vegas– [link]
[link]
Download the main file with a mod manager download, in Vortex install and enable
11.High Res Vanilla Posters and Graffiti– [link]
Download the main file with a mod manager download, in Vortex install and enable, for the rules place this after Charges Clutter 2X, then download the Update File with a mod manager download, in Vortex install and enable
12.Magazine Retexture– [link]
Download the main file with a mod manager download, in Vortex install and enable, for the rules place this after Charges Clutter 2X
13.Lux Aeterna – The True Revival of Luxury– [link]
Download the main file with a mod manager download, in Vortex install and enable, for the rules place this after anything it asks, it lists Interior Lighting Overhaul mod as a requirement, but it’s not
14.The Town of Vice – A Gomorrah Overhaul– [link]
Download the main file with a mod manager download, in Vortex install and enable, for the rules place this after anything it asks
15.George’s Dead Money Retexture– [link]
[link]
Download the main file with a mod manager download, in Vortex install and enable, for the rules place this mod after anything it asks
16.HQ Metal Barrels– [link]
Pick what resolution you want, download with a mod manager download, in Vortex install and enable
17.PM’s HD Ammo Boxes– [link]
Download the main file with a mod manager download, in Vortex install and enable, for the rules place this after Charges Clutter 2X
18.Better HD Ammo Cans (NV)– [link]
Download the main file with a mod manager download, in Vortex install and enable, for the rules place it after anything it asks
19.New Sunset Sarsaparilla and Nuka Cola Bottles– [link]
Download the main file with a mod manager download, in Vortex install and enable, for the rules place this after anything it asks
20.High Res Vanilla Water Bottle Textures and Meshes– [link]
Download the main file with a mod manager download, in Vortex install and enable, for the rules place this after anything it asks
21.PipBoy 3000 HD Retexture– [link]
Download the main file with a mod manager download, in Vortex install and enable
22.Money Higher Quality Retex 1_2– [link]
Download the main file with a mod manager download, in Vortex install and enable, for the rules place this before MG neat clutter and after Charges Clutter 2X
23.Pre-War Money Retexture– [link]
Download the main file with a mod manager download, in Vortex install and enable, for the rules place this after Charges Clutter 2X
24.Casino Chips Retextured– [link]
Download the main file with a mod manager download, in Vortex install and enable
25.HD Playing Cards Remastered– [link]
Download the main file with a mod manager download, in Vortex install and enable, for the rules place this after Charges Clutter 2X
Environment
1.Natural Landscapes (Mojave Edition)– [link]
Download the main file titled Natural Landscapes (Standard) with a mod manager download, in Vortex install and enable, for the rules place this after everything it asks, then go download the optional file titled Terrain LOD with a mod manager download, in Vortex install and enable, for the rules place it after everything it asks
2.Mojave Nights – a moon and stars replacer– [link]
Download the top main file with a mod manager download in Vortex install and enable
-Important-
If you are using Rudys Enb and already have it installed, then you install this mod, it will overwrite Rudys star textures without even telling you, I only use this mod for the moon texture, I think Rudys stars are better, and look better with his Enb, thats why he was kind enough to provide them, to get Rudy’s star textures back after installing this mod you have to open up Rudys extracted enb and go inside this folder [ to Fallout New Vegas Folder ], then inside the Data/textures/sky and copy/paste the skystars.dds into this location steamapps/common/Fallout New Vegas/Data/textures/sky and select replace when prompted
3.Wasteland Flora and Terrain Overhaul– [link]
Download the top main file with a mod manager download, in Vortex install and enable, for the rules place this after everything it asks
4.Less Fertile Wasteland Flora Overhaul– [link]
Download the main file with a mod manager download, in Vortex install and enable, for the rules place this after Wasteland Flora
5.Vurt’s Improved Plants– [link]
Download the main file with a mod manager download, in Vortex install and enable
6.HQ Dust Storm FX– [link]
Download the main file with a mod manager download, in Vortex install and enable, then download the optional file titled Dust Storm Meshes with a mod manager download, in Vortex install and enable
7.Hectrol Tumbleweed Deluxe HighRes Retex– [link]
Download the main file with a mod manager download, in Vortex install and enable, for the rules place this mod after the YUP patch
8.Better Looking Broc Plant N Flowers– [link]
Download the main file with a mod manager download, in Vortex install and enable, for the rules place this after Charges Clutter 2X
9.WAY Better looking White Horsenettle– [link]
Download the main file with a mod manager download, in Vortex install and enable
Other Texture Replacers
1.Dufflebag Retexture Redux– [link]
Download the top main file Dufflebag Plain Retexture Redux with a mod manager download, in Vortex install and enable, for the rules place this after Charges Clutter 2X
2.Better Coffee Mug– [link]
Download the top main file Dufflebag Plain Retexture Redux with a mod manager download, in Vortex install and enable
3.Nuka Fridge HD– [link]
Download the main file with a mod manager download, in Vortex install and enable, for the rules place this after Charges Clutter 2X
4.HD Nuts– [link]
Download the main file with a mod manager download, in Vortex install and enable, for the rules place this after Charges Clutter 2X
5.High Resolution Buffalo Gourd Seed– [link]
Download the main file with a mod manager download, in Vortex install and enable
6.Seed Package Retexture– [link]
Download the main file with a mod manager download, in Vortex install and enable
7.Snowglobe Retexture– [link]
Download the main file with a mod manager download, in Vortex install and enable, for the rules place this after Charges Clutter 2X
8.Better Guitars– [link]
Download the main file with a mod manager download, in Vortex install and enable
9.High Resolution Potato– [link]
Download the main file with a mod manager download, in Vortex install and enable, for the rules place this after Charges Clutter 2X
10.Brahmin Steak Retexture– [link]
Download the main file with a mod manager download, in Vortex install and enable, for the rules place this after Charges Clutter 2X
11.High Resolution Iguana on a Stick– [link]
Download the main file with a mod manager download, in Vortex install and enable, for the rules place this after Charges Clutter 2X
12.Cherry Bomb HD retexture and remodel– [link]
Download the main file with a mod manager download, in Vortex install and enable, for the rules place this after Charges Clutter 2X
13.Old World Flag Retexture– [link]
Download the main file with a mod manager download, in Vortex install and enable, for the rules place this after Charges Clutter 2X
14.Old World Blues – Seedy Research Station– [link]
Download the main file with a mod manager download, in Vortex install and enable
15.Old World Blues – Toaster Of Doom– [link]
Download the main file with a mod manager download, in Vortex install and enable
16.Old World Blues – Sweet Switches– [link]
Pick which version you want, download with a mod manager download, in Vortex install and enable
17.Brainfungus Retexture– [link]
Pick which version you want, download with a mod manager download, in Vortex install and enable
18.Minimod – High Resolution Newspapers– [link]
Pick which version you want, download with a mod manager download, in Vortex install and enable, for the rules place this after Charges Clutter 2X
19.New Lunchbox Model– [link]
Pick what resolution you want, download with a mod manager download, in Vortex install and enable
20.Strip Wall Billboards– [link]
Download the main file with a mod manager download, in Vortex install and enable
21.Better Vanilla Barber Pole– [link]
Download the main file with a mod manager download, in Vortex install and enable
22.High-Res Hula Girl Retex and Resource– [link]
Download the main file with a mod manager download, in Vortex install and enable, for the rules place this after Charges Clutter 2X
Clothing and Armor
1.Wasteland Clothing HD– [link]
Click the download arrow in the top right corner, then select Download anyway, after drag the downloaded file into Vortex and drop it in the box at the bottom of the mods page titled Drop Files, then install and enable, for the rules place this after MG Clutter and Charges Armor 2X
2.ADAM Reborn– [link]
Download the main file with a mod manager download, in Vortex install and enable, on the install window select Complete Version, then pick which gloves you want, then pick which helmet, then select No to install the NCR trooper module, I have a much better one listed below, for the rules place this after the YUP Patch
3.Bornagain Combat Armor– [link]
Pick which main file you want, Download with a mod manager download, in Vortex install and enable, for the rules place this after Charges Armor 2X
4.PM’s HD Legion Overhaul– [link]
Pick what resolution you want, download with a mod manager download, in Vortex install and enable, for the rules place this after anything it asks
5.aMidianBorn NV Book Of Water– [link]
Download the second main file titled book of steel, with a mod manage download, in Vortex install and enable, for the rules place this after the YUP Patch and after Charges Armor 2X
6.T-45d Full Retexture– [link]
Pick your quality, download with a mod manager download, in Vortex install and enable, for the rules place this after book of steel
7.T-51b Full Retexture– [link]
Pick your quality, download with a mod manager download, in Vortex install and enable, for the rules place it after anything it asks
8.10 Year Anniversary Celebration Pack– [link]
Download the main file with a mod manager download, in Vortex install and enable, for the rules place this after anything it asks, then download the update file with a mod manager download, in Vortex install and enable, then go to the plugins page and at the top of the screen select Manage Rules and create this rule, after select Add then Close, at the top of screen select Sort Now and make sure the plugin for this mod comes after both of the Adam Reborn plugins
10yearpack.esp / must load after / adam complete.esp
Creatures
1.Critters Retexture Pack– [link]
Download the main file with a mod manager download, in Vortex install and enable, for the rules place this after Charges Creatures 2x
2.The Molerat Extravaganza – Molerat Retexture– [link]
Download the main file with a mod manager download, in Vortex install and enable, for the rules place this after Charges Creatures 2x
3.Bighorner Ultra High Resolution Texture– [link]
Download the main file with a mod manager download, in Vortex install and enable, for the rules place this after Charges Creatures 2x
4.RadRoach Coloring Retexture– [link]
Download the main file with a mod manager download, in Vortex install and enable, for the rules place this after Charges Creatures 2x
5.Nightstalker Retexture– [link]
Pick which version you want, download with a mod manager download, in Vortex install and enable, for the rules place this after Charges Creatures 2x
6.Super Mutants HD – 4k Retextures- [link]
Pick which version you want, download with a mod manager download, in Vortex install and enable, for the rules place this before weapon mesh improvement and after Charges Creatures 2x
7.Lakelurk High-Quality Replacer– [link]
Download the main file with a mod manager download, in Vortex install and enable
8.Its a Dogs World – Dog Texture Overhaul– [link]
Pick what quality you want, download with a mod manager download, in Vortex install and enable, for the rules place this after Charges Creatures 2x
9.Feral Ghoul HD–
[link]
Click the download arrow in the top right corner, then select Download anyway, after drag the downloaded file into Vortex and drop it in the box at the bottom of the mods page titled Drop Files, then install and enable, for the rules place this after Charges Creatures 2x
10.Improved Robots Textures– [link]
Download the second main file titled Improved Main Robots Textures, with a mod manager download, in Vortex install and enable, for the rules place this after anything it ask, then download the other 2 remaining main files with mod manager downloads, in Vortex install and enable both
11.Securitron Hires retexture– [link]
Click the download arrow in the top right corner, then select Download anyway, after drag the downloaded file into Vortex and drop it in the box at the bottom of the mods page titled Drop Files, then install and enable, for the rules place this after anything it asks
12.Healthier Yao Guai– [link]
Download the second main file titled Real Bears with a mod manager download, in Vortex install and enable, Now go to the plugins page, they will be 2 new plugins tilted Big Bears.esp and Skinny Bears.esp, disable one of them, they both won’t work together, its just 2 different versions of the same thing, I recommend Big Bears.esp, then disable the other one and go to steamapps/common/Fallout New Vegas/Data and delete the esp that you decided to not use, then go back to Vortex and deploy your mods, and click confirm to save changes if it asks
13.Old World Blues – Roboscorpion Retextures– [link]
Pick which version you want, download with a mod manager download, in Vortex install and enable, for the rules place this after improved robot textures
14.Old World Blues – Unique Think Tank Members– [link]
Download the main file with a mod manager download, in Vortex install and enable, for the rules place this after improved robot textures
15.Dead Money – Decayed Ghost People– [link]
Download the main file with a mod manager download, in Vortex install and enable
Weapons and Effects
1.Weapon Mesh Improvement Mod– [link]
Download the main file with a mod manager download, in Vortex install and enable, for the rules place this after the YUP Patch and before Super Mutants HD
2.Weapon Retexture Project – WRP– [link]
Download the main file with a mod manager download, in Vortex install and enable, for the rules place this mod after anything it asks, then download the update file with a mod manager download, in Vortex install and enable, for the rules place this after the main mod
3.WTH – Weapon Textures from Heaven– [link]
Pick which main file you want, download with a mod manager download, in Vortex install and enable, for the rules place this after anything it asks, then download the optional file titled WTH – WRP Patch, with a mod manager download, in Vortex install and enable, for the rules place this after everything it asks
4.Enhanced Dynamite– [link]
Download the main file with a mod manager download, in Vortex install and enable
5.Cleaver and Chopper Retexture– [link]
Download the main file with a mod manager download, in Vortex install and enable
6.Industrial Hand Retexture– [link]
Download the main file with a mod manager download, in Vortex install and enable
7.Bowie knife retexture– [link]
Download the main file with a mod manager download, in Vortex install and enable, for the rules place this after weapon mesh improvement mod
8.Hatchet retexture– [link]
Download the main file with a mod manager download, in Vortex install and enable
9.Combat and Chance’s knife Retexture– [link]
Download the main file with a mod manager download, in Vortex install and enable
10.Laser Weapon Iron Sights– [link]
Download the top main file with a mod manager download, in Vortex install and enable, for the rules place this after Weapon Mesh Improvements
11.Smooth True Iron Sights Camera– [link]
Download the top main file with a mod manager download, in Vortex install and enable
12.Immersive Recoil 2.0– [link]
Download the top main file with a mod manager download, in Vortex install and enable, once in game you can tweak the recoil value to your preference from the mod configuration menu
13.EXE – Effect teXtures Enhanced– [link]
Download the main file with a mod manager download, in Vortex install and enable, for the rules place this mod after everything it asks
-Important-
If you are using Rudys Enb and already installed earlier, this mod comes with its own sunglare texture and if Rudys Enb is already installed and you install EXE after, then it overwrites Rudys sunglare texture and doesn’t tell you and you do not want to use these, you must use Rudy’s for the enb to look correct, so open up Rudys extracted enb and go inside this folder [ to Fallout New Vegas Folder ], then inside the Data/textures/sky and copy/paste the nv_sunglare.dds into this location steamapps/common/Fallout New Vegas/Data/textures/sky and select replace when prompted
14.Enhanced Blood Textures for NV v2_22c– [link]
Download the top main file with a mod manager download, in Vortex install and enable, for the rules place this mod after everything it asks, there is an optional file on the mod page that contains a bunch of different plugins for different effect, to increase or decrease, I use only the one to remove screen blood, this is how you install that one and any of the other ones you might wanna use, download the optional file titled _Optional Plugins with a manual download, create a new folder and extract the download to it, then go into the Screen Blood folder and copy/paste
the dD-No Screen Blood.esp into this location steamapps/common/Fallout NewVegas/Data, then go deploy your mods and the check the plugins page, you will more then likely have to enable the plugin, if you try some of the optional plugins and want to remove them, then you just delete the plugin you added from that location, then go deploy your mods
-IMPORTANT- Note about NPC Mods
Do not mess with The Fallout Character Overhaul mod
I do not recommend anyone use the Fallout Character Overhaul mod, it does come with nice faces, but it makes the neck seams 100 times worse looking, and the install process is bugged, it will install with Vortex but it installs other plugins you did not ask for, it also creates a conflict with YUP Patch that makes all the Rangers Authority Classes to float beside there head, instead of being on there face like they are suppose to, you can fix this in Xedit pretty easily, but If you decide to uninstall it in Vortex, after you uninstall and delete the mod, you will notice on the plugins page they are still 2 plugins active for the mod after you have deleted it, and it leaves files in your game folder that you have to go and find and manually delete, it does not cover every npc in the game and I can not emphasize enough, to just stay away from this mod, don’t even test it, or you will end up having to do a clean wipe and start your whole load order over
DragBody Overhauls– [link]
These npc overhaul mods are some of the best I have ever seen for any game, there really good, and have no neck seams, but the mod author posted mediafire links to download on a websites forums called Gaming Underground Network instead of Nexus, he has mods on Nexus, so I figure he may have used assets from other mod authors that he did not have permission to use, I don’t see any other reason why he would not upload them to Nexus with all his other mods, either way they are amazing, however the last time I downloaded these was back in 2018 I believe, I downloaded his first one I think around 2016, I have had them for a long time and have had an account at that website as well, I revisted this website here in 2021 and the first page was fine, then I went to access his other mod links on different pages and Norton Anti-virus warned me that it was a known malicious address, so I figured it must be a false/positive and I disabled my Norton Web Browser Extensions to by pass this and I immediantly came under attack, Norton notified me that it had blocked multiple attacks on my PC and what types of attacks they were,so I have uploaded my copies of these mods on my personal google drive to share with anyone whom uses my guide, that way no one has to visit that website, all tho dragbodys mediafire links are 100% completely save, it appears the website he choose to post the links on is not
These Dragbody npc overhauls need to be installed on a brand new game, if you go to test them out on a vanilla save some of them can and will be messed up, like Trudy is missing the top part of her head, dragbody adds a hairband to her, I have seen this same exact thing in skyrim with the northbourne npcs, the females that he removed there headgear from appeared naked on a save file, but on a brand new game they appeared the way they were suppose to, thats because when you start a new game, the entire world is generated for that playthrough and making edits like that can cause wacky stuff to happen
Only if you are gonna use the Dragbody NPC overhauls or the Body Mods
You don’t have to do this with just Character Expansions Revised mod, but if you are gonna use the Dragbody Overhauls or the Body mods, then you have to make a quick ini file tweak, or the skin want appear right on some of them
-Go here Documents/My Games/FalloutNV and double click your fallout.prefs.ini, once its up right above the section [Display] there should be bLoadFaceGenHeadEGTFiles=0, change the 0 to a 1, so it looks like this bLoadFaceGenHeadEGTFiles=1, then click file in the top left corner and click save and exit. All so remember if you boot the normal game launcher it could reset your ini settings, so always boot from your script extender shortcut we put on the desktop, next in that same location double click fallout.ini and do the same thing change it to bLoadFaceGenHeadEGTFiles=1, then click file in the top left corner and click save and exit, then right click the fallout.ini and select properties and select Read Only, click apply, then go here steamapps/common/Fallout New Vegas and double click Fallout_default.ini and do the same thing bLoadFaceGenHeadEGTFiles=1, then click file in the top left corner and click save and exit, then right click the fallout.ini and select properties and select Read Only, click apply, doing this will fix some issues with the way the skin appears on the face of the Dragbody npc mods
Body Mods
During the testing phase if you have any issues with the way the body mods are displaying on the npcs, then go to the Vortex Dashboard and toggle Off Archive Invalidation and then go right click both body mods and select reinstall, then go back to the Vortex Dashboard and toggle Archive Invalidation back On, you may not have any issues, I did not until the third time I was installing my mod list following my own instructions, and doing this fixed it, so I moved the body mods to the bottom of the npc section to be installed last, just in case
NPCs
1.Character Expansions Revised– [link]
Download the main file with a mod manager download, in Vortex install and enable, then download the optional file titled Character Expansions Revised – YUP with a mod manager download, in Vortex install and enable, after in Vortex on the Plugins page select manage rules at the top and creat this rule, after select add, then close, then at the top select Sort Now and go deploy your mods
the true of luxary- an ultra lux overhaul.esp / must load after /
characters expansions revived- yup.esp
Loot should auto sort The Town of Vice- A Gomorrah Overhaul.esp after this, if not, you will need
to create a rule
2.Vanilla Hair Retextured NV– [link]
Download the main file with a mod manager download, in Vortex install and enable
3.Vanilla Hair – No Shine– [link]
Download the main file with a mod manager download, in Vortex install and enable, for the rules place this after Vanilla Hair Retexture
4.Natural eyes by zzjay– [link]
Download the main version titled 01 – Natural Eyes – No shadow with a mod manager download, in Vortex install and enable
5.HD Teeth and Natural Eyelashes and Eyebrows
[link]
Download 2 main files titled HD teeth 3.0 and HQ eyebrows both with a mod manager download, in Vortex install and enable, for the rules place eyebrows after anything it asks
All the Dragbody Overhauls
6.NPC Overhaul– [link]
Click the download arrow in the top right corner, then select Download anyway, after drag the downloaded file into Vortex and drop it in the box at the bottom of the mods page titled Drop Files, then install and enable, now pull up the plugins page and look for a plugin titled Russell.esp, it will have a missing masters red bell out from it, disable it, then go to this location steamapps/common/Fallout New Vegas/Data and scroll down until you see Russell.esp and delete it, then go back and deploy your mods and select confirm to keep changes
7.NCR Overhaul– [link]
Click the download arrow in the top right corner, then select Download anyway, after drag the downloaded file into Vortex and drop it in the box at the bottom of the mods page titled Drop Files, then install and enable, for the rules place this after anything it asks
8.NCR Overhaul Vanilla body patch– [link]
Click the download arrow in the top right corner, then select Download anyway, after drag the downloaded file into Vortex and drop it in the box at the bottom of the mods page titled Drop Files, then install and enable, for the rules place this after the main ncr overhaul mod
9.Legion Overhaul– [link]
Click the download arrow in the top right corner, then select Download anyway, after drag the downloaded file into Vortex and drop it in the box at the bottom of the mods page titled Drop Files, then install and enable, for the rules place this after anything it asks
10.Legion Overhaul Vanilla body patch– [link]
Click the download arrow in the top right corner, then select Download anyway, after drag the downloaded file into Vortex and drop it in the box at the bottom of the mods page titled Drop Files, then install and enable, for the rules place this after the main legion overhaul mod
11.Fiends and Raiders Overhaul– [link]
Click the download arrow in the top right corner, then select Download anyway, after drag the downloaded file into Vortex and drop it in the box at the bottom of the mods page titled Drop Files, then install and enable, for the rules place this after anything it asks
12.Powder Gangers Overhaul– [link]
Click the download arrow in the top right corner, then select Download anyway, after drag the downloaded file into Vortex and drop it in the box at the bottom of the mods page titled Drop Files, then install and enable, for the rules place this after anything it asks
13.Powder Gangers Vanilla body patch– [link]
Click the download arrow in the top right corner, then select Download anyway, after drag the downloaded file into Vortex and drop it in the box at the bottom of the mods page titled Drop Files, then install and enable, for the rules place this after the main powder ganger overhaul mod
14.Brotherhood– [link]
Click the download arrow in the top right corner, then select Download anyway, after drag the downloaded file into Vortex and drop it in the box at the bottom of the mods page titled Drop Files, then install and enable, for the rules place this after anything it asks
15.Boomers– [link]
Click the download arrow in the top right corner, then select Download anyway, after drag the downloaded file into Vortex and drop it in the box at the bottom of the mods page titled Drop Files, then install and enable, for the rules place this after the main powder ganger overhaul mod
16.Great Khans Overhaul– [link]
Click the download arrow in the top right corner, then select Download anyway, after drag the downloaded file into Vortex and drop it in the box at the bottom of the mods page titled Drop Files, then install and enable, for the rules place this after anything it asks
17.Great Khans Overhaul ESP replacer– [link]
Click the download arrow in the top right corner, then select Download anyway, after drag the downloaded file into Vortex and drop it in the box at the bottom of the mods page titled Drop Files, then install and enable
18.Raul as Danny Trejo Overhaul– [link]
This is a cool mod, you may not like it, it changes Raul into the popular actor that voiced his chracter, its also made by dragbody, except he put this one on Nexus
Download the main file with a mod manager download, in Vortex install and enable
Body Replacers
These next 2 are body mods, on the male body install window you can opt out from nudity, but for the female body, if you don’t like nudity in your game then there is a fix for that on the descriptions page, you have to rename a nif file, just read up on it, it doesn’t bother me, the main reason for both of these body mods is to improve the textures and shape of the humanoid models in the game and also both body mods get rid of the neckseam problem
19.Improved Vanilla Male Body – Seamless – 4k– [link]
Download the second main file titled 01 – Improved Male Body – FOMOD Installer, with a mod manager download, for the install window pick what you want, for the rules place this after the YUP Patch and before the brows mod
20.TYPE4 – Body and Armors– [link]
Download the main file with a mod manager download, in Vortex install and enable, for the rules place this after anything it asks
Audio
1.Brave New World– [link]
Download the main file with a mod manager download, in Vortex install and enable, for the install window, select Revoice Only, then next page is patches and it should already detect the mods you need patches for and have them check marked, with uncut wasteland, you need to uncheck it, it auto detects by version number and we are not using Uncut Wasteland plus,just in case, you need to check these YUP, Character Expansions Revised, and all the Dragbody’s mods listed, if for any reason you choose to skip installing these mods from my guide then the ones you don’t have, you dont checkmark, after go to the plugins page and at the top select Manage Rules and create all these rules, select Add after each one, when done select close, then select sort now at the top
bravenewworld-yup.esp / must load after / dragsnpcoverhaul.esp
bravenewworld-yup.esp / must load after / brotherhoodreforged.esp
bravenewworld-yup.esp / must load after / greatkhangreatoverhaul.esp
bravenewworld-yup.esp / must load after / wearelegion
2.Improved Sound FX v0821– [link]
Download the main file with a manual download, after drag the downloaded file into Vortex and drop it in the box at the bottom of the mods page titled Drop Files, then install and enable
Conflict Resolution
Launch Xedit from the Vortex dashboard, first window click ok, next window click ok, it will auto detect all your enabled plugins, so just click ok, on the left side, right click and select apply filter to show conflicts, once it loads in look to the left, there is all your plugins that have conflicts, the ones in Red are conflict losers, which means what ever conflict they are losing, you lose the changes that mod makes, in most cases this does not mean anything bad, remember we set a lot of conflict rules in Vortex, so we overwrote mods and thats ok, it’s the conflicts that do not have conflict rules in Vortex that you usually got to worry about, thats why its extremely important that you read all of the descriptions of mods and understand what it makes changes to, you can look at everything it does in Xedit, as you build a load order, constantly launch Xedit and check the mods you add for conflicts and errors, in most cases you don’t have to do anything, if you are aware of whats in your load order and you made them intentionally by overwriting a mod, in some cases you have to adjust the load order to resolve a conflict, and sometimes you may have to make a decision between to mods and uninstall and drop one of them, sometimes theres absolutely nothing you can do on here to make 2 mods get along, then theres times when you can make your own patch and forward changes from a conflict loser to a new plugin and load it after both mods to resolve the conflict
An Example
With Xedit open and the conflict filter applied, on the left side go down to WMIMNV.esp and click the box to the left of it to expand, this is the plugin for Weapon Mesh Improvement Mod, then you will see Sound is in Red, click the box beside it to expand, and you will see all these Red IDs for weapons, click any one of them to bring one up on the right side of the screen, on this side look to the top of the screen, you will notice they are we have 3 sections and 3 plugins, the one furthest to the right is Improved Sound FX.esp and its in Yellow and its the winner of this conflict, and we want it to win, we want the sounds from the Improved Sounds mod, and thats what I mean about all Red Conflicts are not a bad thing, every big load order will have them and it does not mean you have to take action, just remember, just because a mod looks really cool, doesn’t mean it is, and it want be cool when it breaks your game, so checking out every conflict in your load order is essential to having a stable load order.
Conflict Resolution for my Mod List and with some examples
You don’t have to do anything, all conflicts are mod overwrites that were made intentionally, theres only one conflict that could had be resolved and it comes down to personal preference, and that would be making a patch for YUP and all the Dragbody Npc overhauls, but the brave new world mod has already some of that, they forwarded what changes were possible without having to add YUP as a masters, lets take a look at an example of something you could forward, if Xedit is still open from above, close it, then relaunch it, first window click ok, next window click ok, it will auto detect all your enabled plugins, so just click ok, on the left go find [0F]YUP-NPC Fixes (Base Game + All DLC).esp, click the box to the left of it to expand, then click the box to the left of Non-Player Character to expand, now all the npcs that YUP Patch applies changes to are listed here, the ones listed in Red represent conflict losers, and thats because the Dragbody mods are overwriting those changes, sometimes if you do not know a mod authors intent, you have to make a decision yourself, and it’s probably best to leave it alone lets look at an easy example of something you can change, go down until you see 00E60EF/ RaulTejada/ Raul listed in Red want be hard to find, click it to view the conflicts on the right side, on the right side anywhere right click and select hide no conflicts and empty rows, now you can get a good look at whats going on, look at whats in Red, you will see its AI Data, then over to the right you will see Foolhardy, look to the top pane you see its YUP that is the conflict loser, so YUP changes Rauls Confidence to Foolhardy, then we overwrite that with Dragbodys Raul overhaul and it changes it back to Average, so from here you make a decision, are you ok with him having the vanilla average level of confidence or do you want to forward the changes YUP makes to him into an empty plugin and make a patch so you can retain the AI Data that YUP Patch implements
Creating a Patch
Go back to 00E60EF/ RaulTejada/ Raul, on the right side at the top pane right click RaulasDannyOverhaul.esp and select select copy as override into, select Yes to agree and on the new window that pops up, at the bottom checkbox the first <new file>.esp , not the bottom to that have ESM out from it, we just want a blank esp file, select it, click Ok and name it Raul Yup Patch, now in the top pane furthers to the right you see our new esp we created as the conflict winner,now click and hold the FoolHardy Red text from the Yup Patch and drag it over into the new esp we just created, level with the same slot you grabed it from and thats all there is to it, notice on the left Rauls name and ID is no longer listed in Red, Xedit is safe proof so when you make changes and exit out without saving, it will ask you, do you want to save the changes you made, so exit out click ok to save and go to Vortex, on the plugins page, you will see our new patch disable by default, enable it, and go deploy your mods
Nothing else to do here
The folks at the Brave New World mod were kind enough to patch some of the dragbody mods and Yup for us when it was possible to forward, that would had been the only conflict on this mod list that would had required action if you wanted to retain the changes that Yup makes with the dragbody overhauls, however you can’t forward every change, it’s just not possible on some, the Dragbody mods are not your typical npc overhaul, if you want to forward what you can, thats up to you, I left it alone, I don’t really care about those small changes, you will just do it the same way we did the Raul patch, create a new plugin and dump all your changes into it, every other conflict on this mod list is an intentional overwrite and requires no action what so ever
Don’t use Wrye Bash to make a bash patch
First off there is no need for it on my modlist, secondly Wrye Bash is a automated program that will attempt to solve things it sees as a conflict, but actually it is an intentional overwrite, where you might have installed a mod then overwrote it with another mod, in most cases there will be a conflict you would actually have to take action with and resolve and Wrye Bash would completely miss it, thats why its best to solve your own conflicts and do this this stuff yourself in Xedit, on top of that there is no reason to ever merge things unless you are trying to get under the plugin limit and if you have to, then you use Xedit to make a merged plugin, you don’t use a Bash Patch to do it, a Bash Patch will have to load last in your plugins and you could undo changes another plugin makes because of this
Lod Talk
For Fallout New Vegas, you have to use 2 different tools to generate a Lod, xLODGen beta 74 for terrain lod and FNVLODGen along with some other mods for an object lod, and even then its not gonna be perfect, you gotta take what you can get and be happy or just don’t do these next parts and use a vanilla lod, a generated lod with eat some performance, for me I went from my solid 60fps to the occasional frame drop and micro -shutter, I can share the settings I use, but they may not be good for you, this is something you have to figure out on your own, tho xLodGen does a great job with terrain lod, FNVLODGen want do so well with this mod list, it will generate a lod, but it will still have pop in and texture change, because FNVLODGen is not compatible with texture packs, those texture packs need the right lod files to work correctly, and we don’t have them and theres a bug in FNVLODGen with the tree lod, so you cant use it, pop in is gonna happen either way, this is an old game, with an old game engine that can only handle so much, for Uncut Wasteland mod, there is a way to get the lod files for the added objects, I did not do this, if you want them, read the pinned comments on the mod page from the Author, he explains how
Terrain Lod
This is used for terrain lod only, FNVLODGen is not capable of generating a terrain lod, use that one for objects lod only
xLODGen beta 74– [link]
As soon as you get there, on the top post you will see xLODGen beta 74 highlighted in blue, click it to download, then extract the download and move the new folder to your Modding Tools folder, inside this new folder rename the xLODGen64.exe to FNVLODGen64.exe, Then on the same drive as your Modding Tools, make a new folder and name it LodGenOutput, so mine is on my D-drive, so I click my D-drive and make a new standalone folder on the D-drive, I’m repeating this because, if you mess this part up it will generate the Lod files into your game folder/Data folder and you will have to do a clean wipe and start all over to fix it, you can’t just simply back your Data folder up, with hopes that if you mess up, you could drag that in, it want work, so with the folder set correctly In Vortex, go to the dashboard and select Add Tool, new and then on Target select the folder icon and direct it to the FNVLODGen.exe in the folder we just extract and moved to modding tools, after on command line, this is the part you don’t want to mess up, you have to direct it to that LodGenOutput folder using exactly each symbol I use, so if its not on your D-Drive then you change it to the appropriate letter for the drive, but you must add everything else correctly or it will generate the lod files into your game folder
command line looks like this
-o:”D:LodGenOutput”
After you will see it added as a Tool to your dashboard, with a Skyrim icon, click it to run it, after it loads up, only have Terrain LOD selected, No objects or tree lod, only terrain, on the left side for all the worldspaces right click in the box and select all, so they all are checked, underneath Terrain LOD are all the settings, you will see a tab that says LOD 4, that box is where you change lod sections, the game has 4 lod sections, Ill share the settings I used in the screenshots below, but this is one of those things you have to figure out for yourself, what works for me may not work for you, after you set up each Lod section, click generate and wait, it can take a while depending on the settings for texture size you select, for me it took 24mins, this is something you may want to do a few times until you find the right settings for you, when its done it will say LOD Generation Complete at the bottom
After its finished, go to your LodGenOutput folder, inside and create a new folder and name it Data, then move the meshes and textures folders you just created into this Data folder, then compress it with your Archive tool and name it Terrain Lod and drag it into Vortex, drop it in the box at the bottom titled Drop Files, then go back to that LodGenOutput folder and delete that textures and meshes folder, because we are gonna use that same folder for object generation
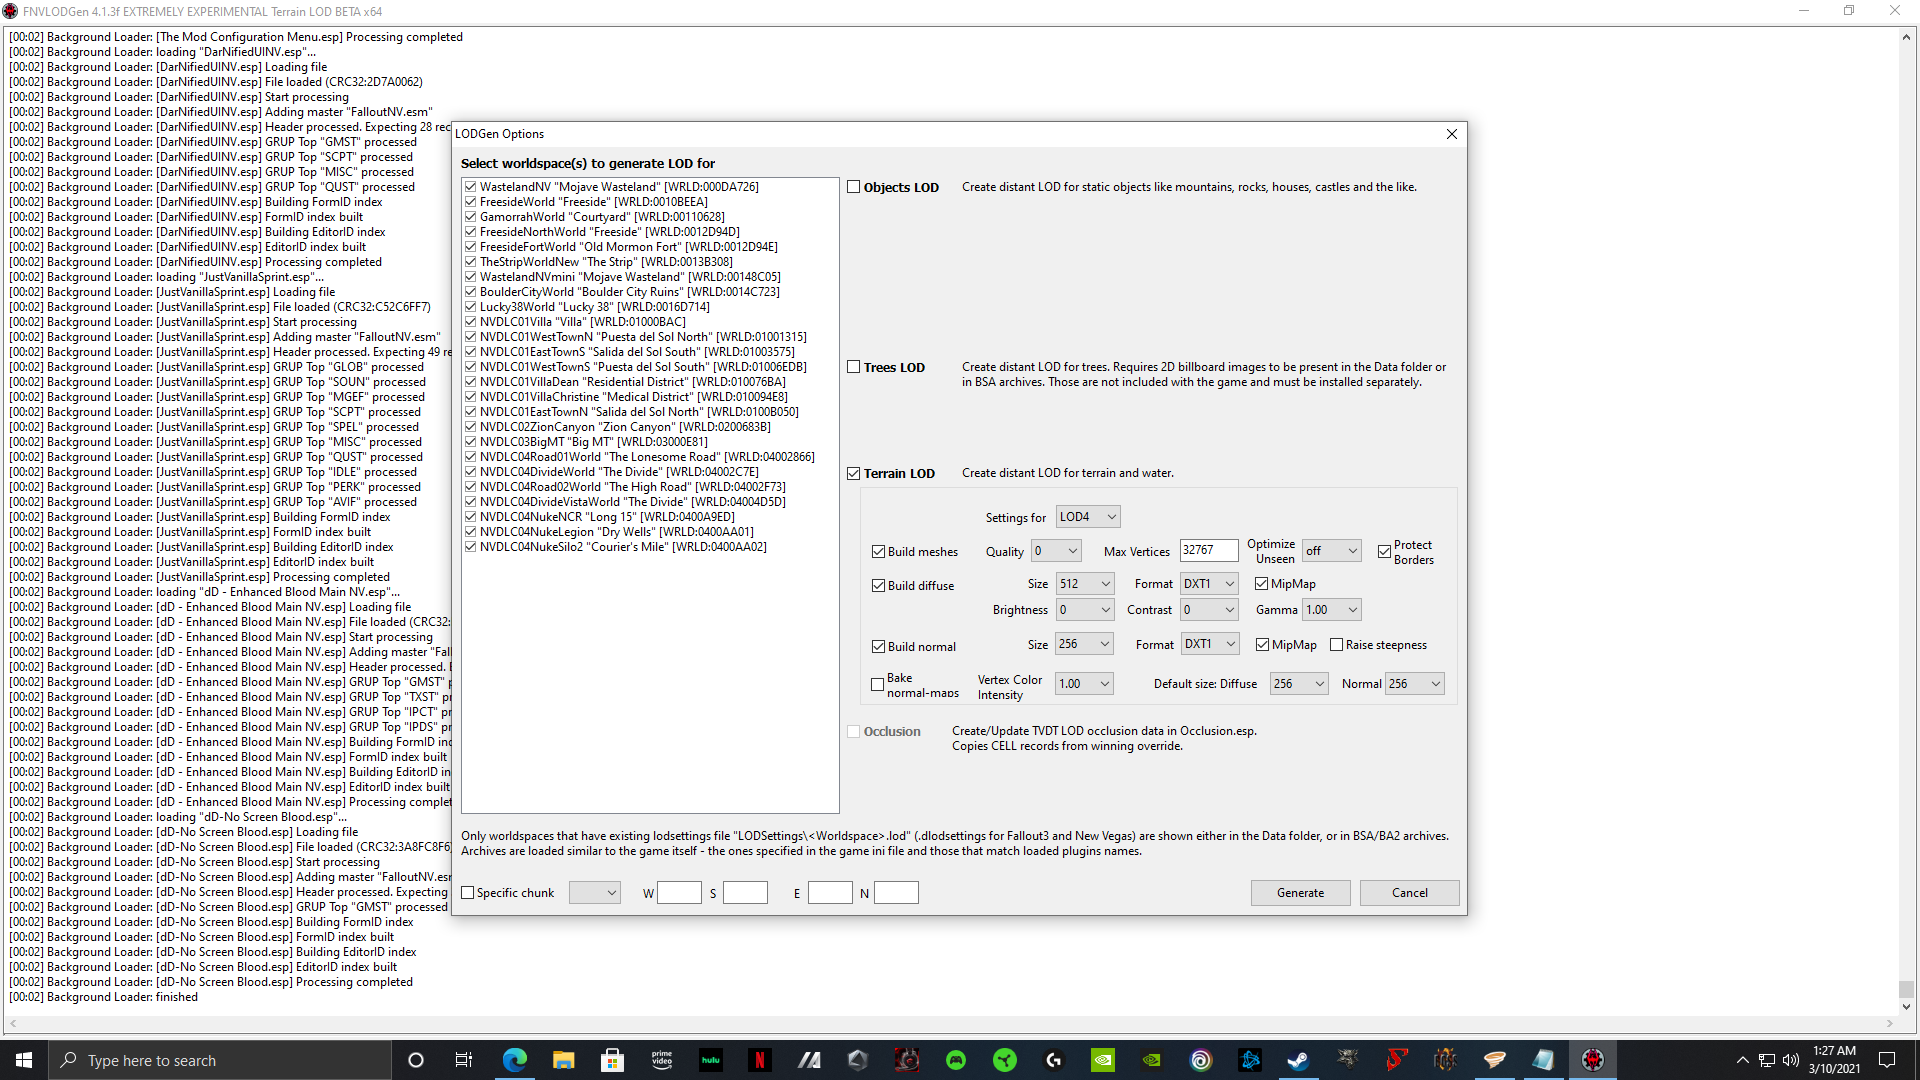
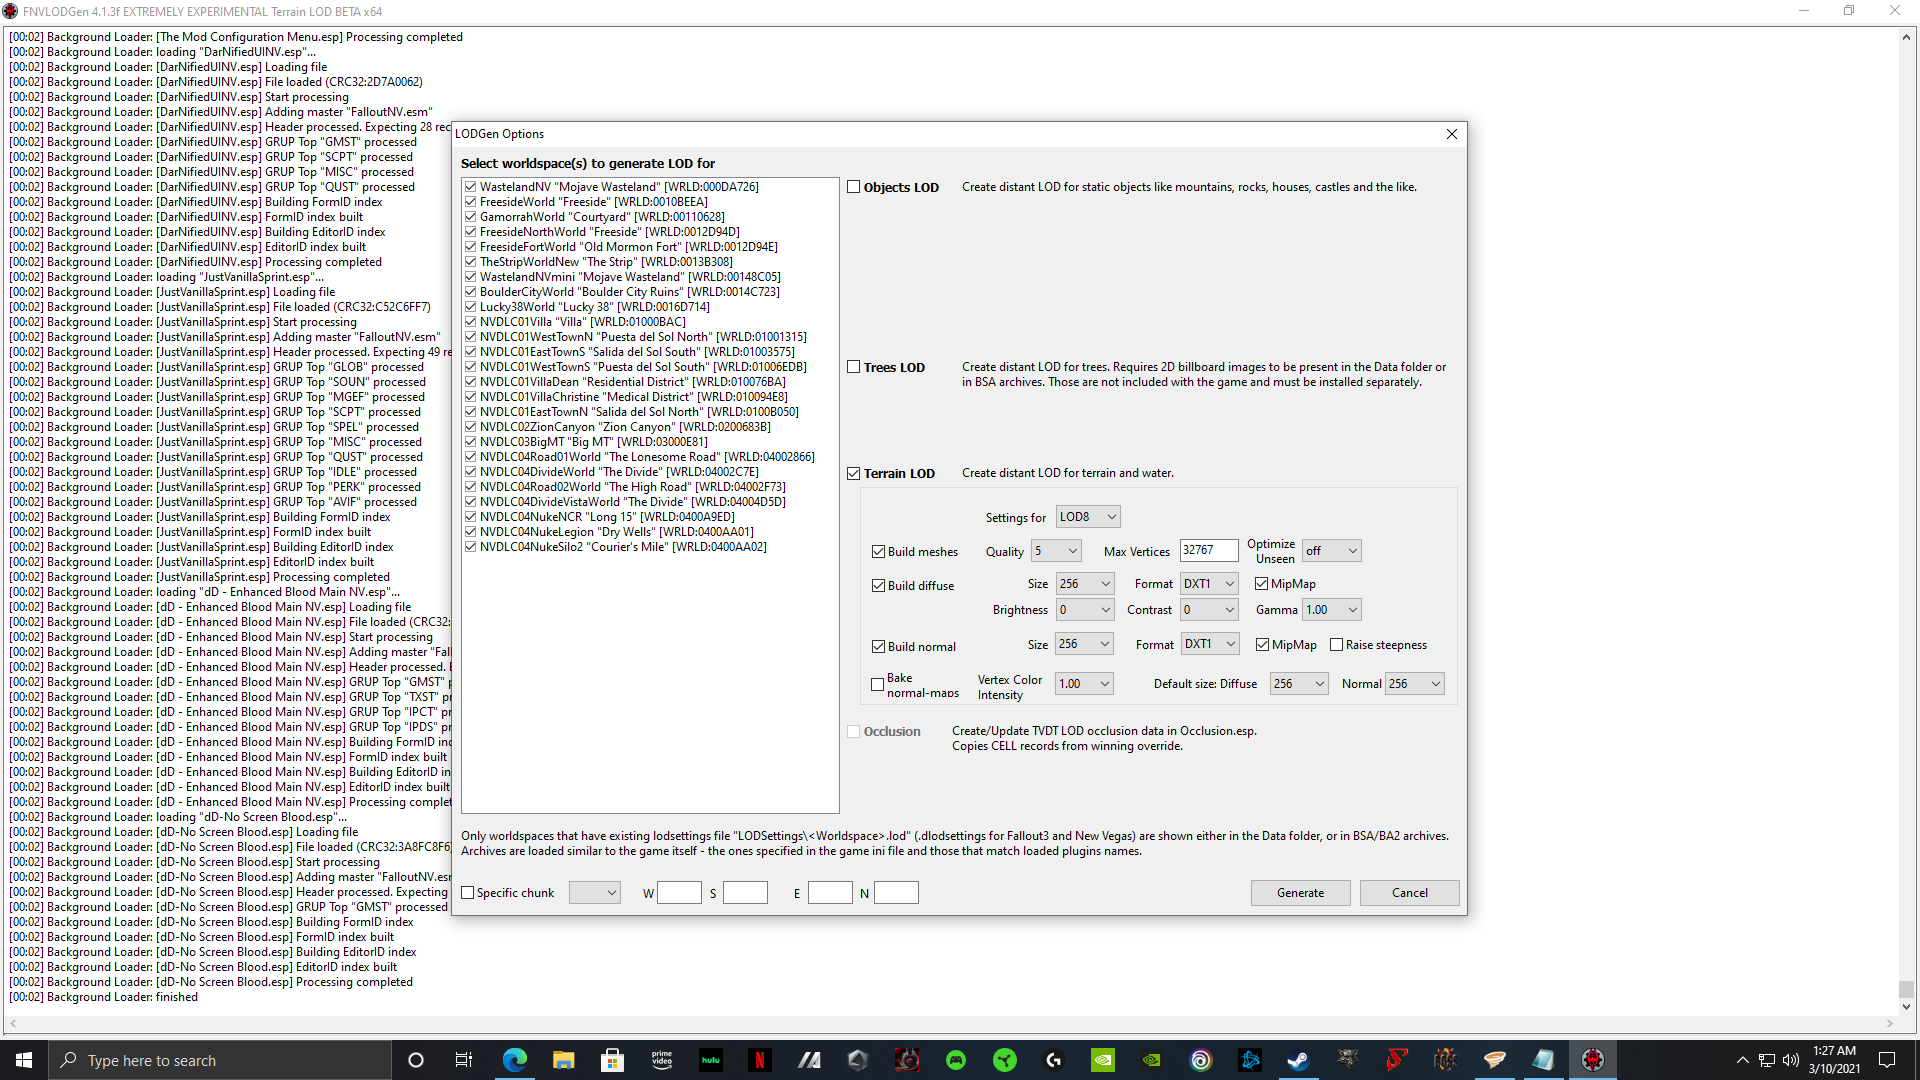


Objects Lod
FNVLODGen– [link]
Download the top main file with a manual download, then download the second main file, the resources with a mod manager download, in Vortex install and enable, for the rules place this before anything it asks, create a new folder and name it FONVLODGen and then extract the first file you download manually to this folder, then move that folder into your modding tools folder we created earlier. Then on the same drive as your Modding Tools, make a new folder and name it LodGenOutput, so mine is on my D-drive, so I click my D-drive and make a new standalone folder on the D-drive, I’m repeating this because, if you mess this part up it will generate the Lod files into your game folder/Data folder and you will have to do a clean wipe and start all over to fix it, you can’t just simply back your Data folder up, with hopes that if you mess up, you could drag that in, it want work, so with the folder set correctly, In Vortex, go to the dashboard and select Add Tool, new and then on Target select the folder icon and direct it to the FNVLODGen.exe in the folder we just extract and moved to modding tools, after on command line, this is the part you don’t want to mess up, you have to direct it to that LodGenOutput folder using exactly each symbol I use, so if its not on your D-Drive then you change it to the appropriate letter for the drive, but you must add everything else correctly or it will generate the lod files into your game folder
command line looks like this
-o:”D:LodGenOutput”
Much Needed LOD– [link]
Download the main file with a mod manager download, in Vortex install and enable, for the rules place this after everything it asks, except Natural Landscapes, it needs to come before landscape mod, then download the
TCM’s LOD Overhaul– [link]
Downlkoad the main file with a mod manager download, in Vortex install and enable, for the rules place this after anything it asks
FNV NMC-Beuno LOD Texture Patch– [link]
Download the main file NMC LOD Patch and the optional file titled FNV Poco LOD Texture Patch both with mod manager downloads, first install and enable the NMC LOD Patch, for the rules place it after anything it asks, then install and enable the FNV Poco LOD Texture Patch, for the rules place it after anything it asks
On the Vortex dashboard launch FNVLODGen, makesure you launch the right one, both have the same name, but remember the terrain lod gen will have the skyrim logo, once it loads everything up a new window will pop up, on the right side where it says selected worldspaces, right click in that window and select all, change both the atlas size to 8192×8192, thats all I done, heres a screen shot of my settings, then click generate and let it run
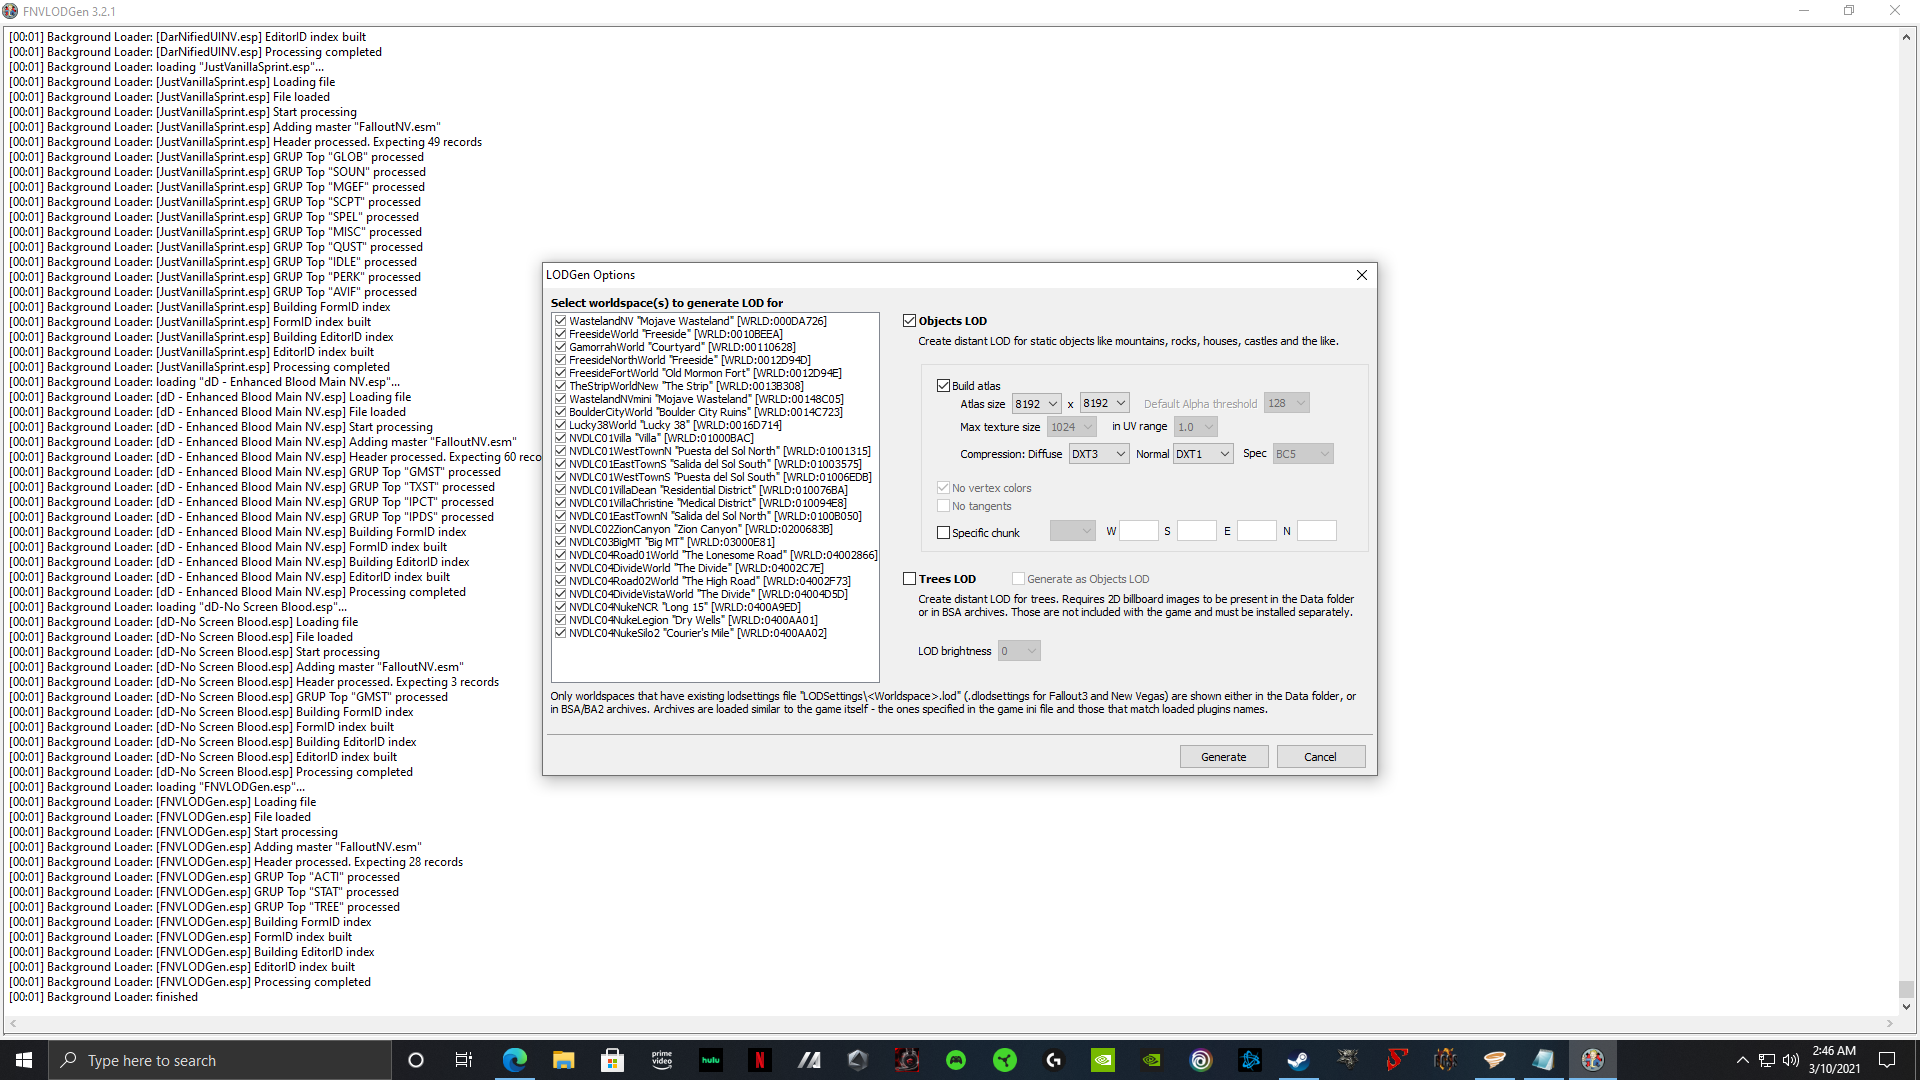
Now install and enable Objects Lod, for the rules place it after anything it asks
Then install and enable Terrain Lod and for the rules place it after anything it ask
And for better Lod Noise
Improved LOD Noise Texture- [link]
Download the main file with a mod manager download, in Vortex install and enable
A Final Reminder
The 2 things people forget to do the most and then experience issues and have to leave a comment about
Don’t forget to Turn off Anti-Aliasing, Anti-Aliasing is not compatible with Enb and will cause graphical issues, make sure Nvidia Control Panel is not forcing Anti-Aliasing on, have it on Application Controlled
If you experience Black Textures then toggle off Archive Invalidation and then toggle it back On from the Vortex Dashboard
My Other Modding Guides
Will be doing Fallout 3 eventually
[link]
[link]
[link]
[link]
[link]
[link]